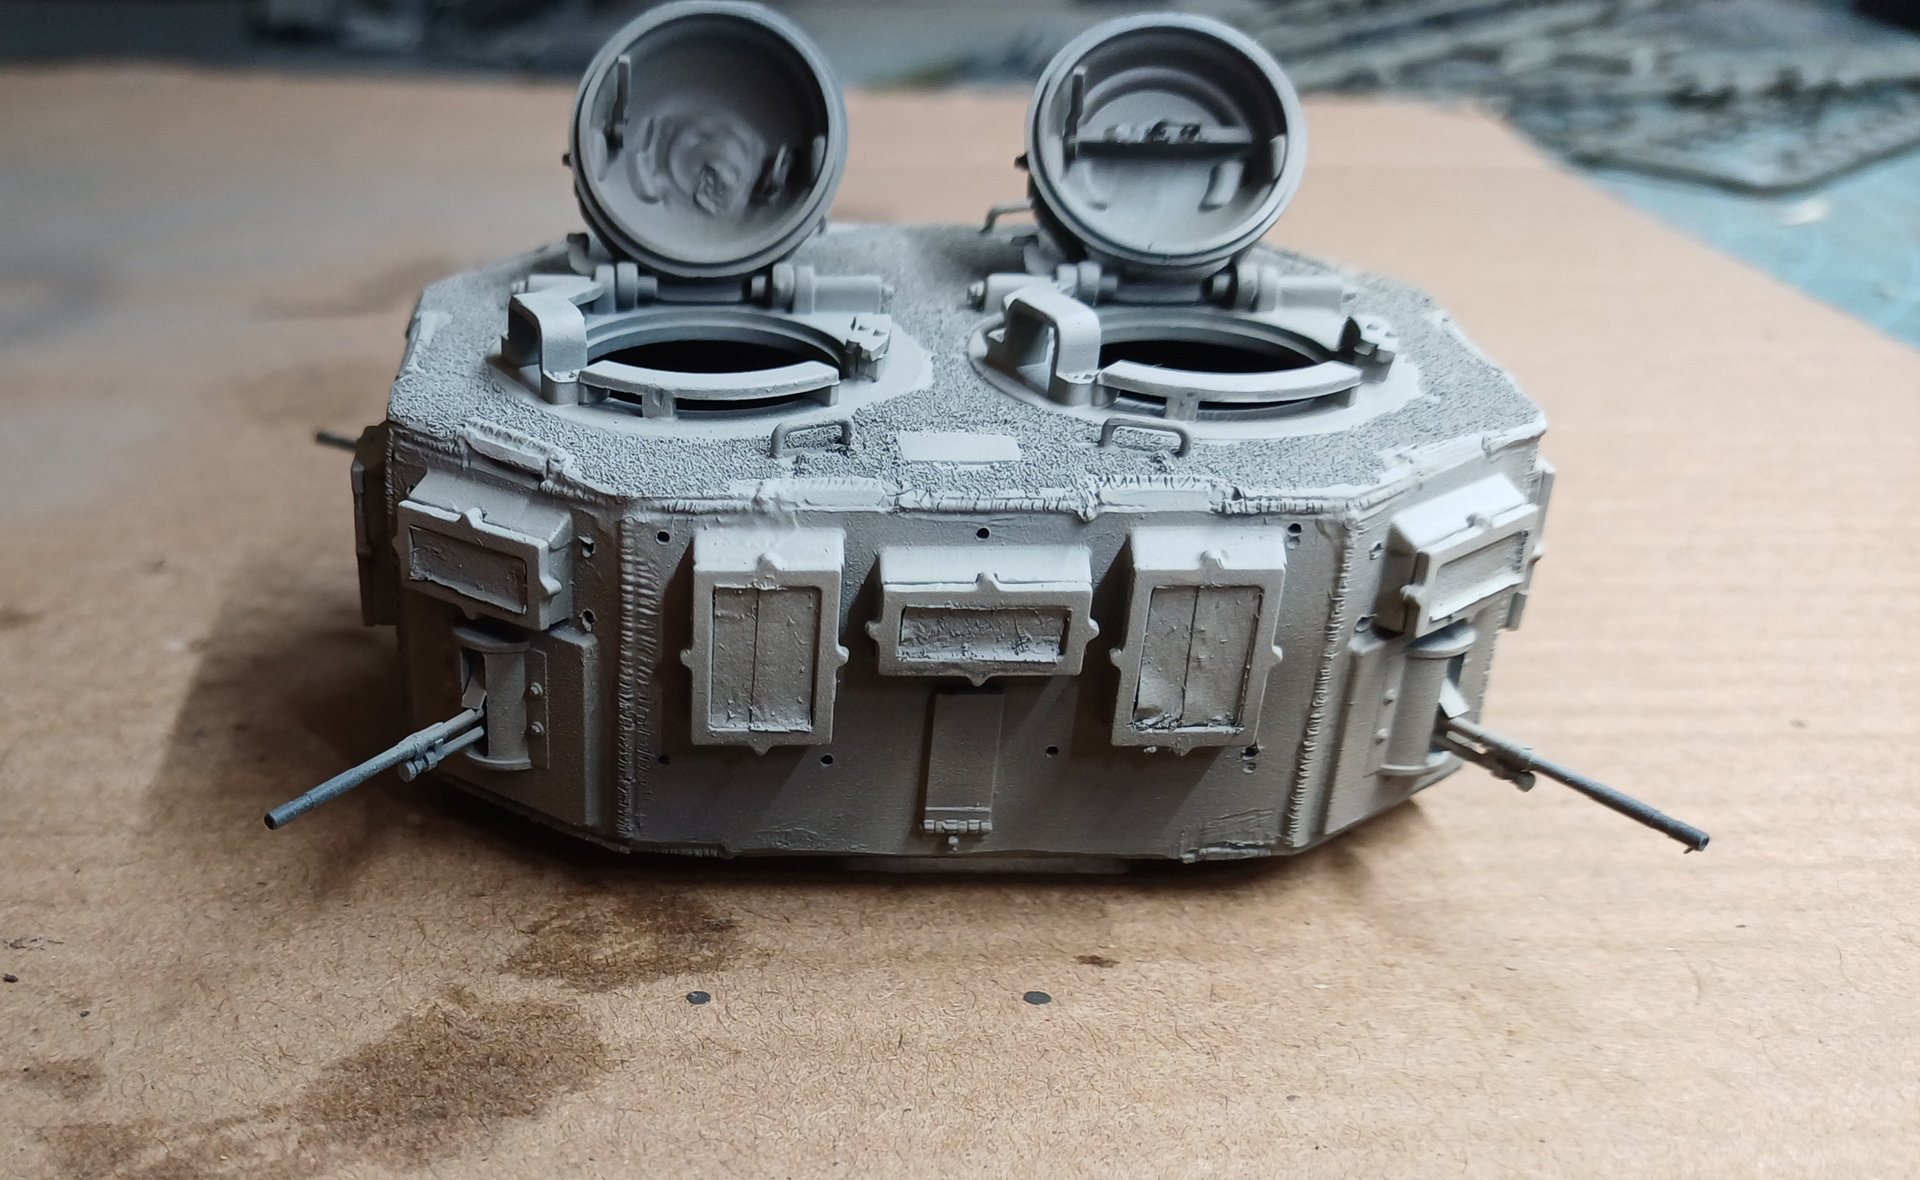
Great looking builds. Hope you can repair them all.
Thanks!
Repair will be fine, just gotta be done with friends and family visiting, it’s been a nonstop thing for weeks now, plus I fell off a ladder two weeks ago and really jacked up my wrist!
Starting Monday the craziness ends and I’ll have lots of time at the bench 
2 Likes
Wishing you a speedy recovery.
1 Like
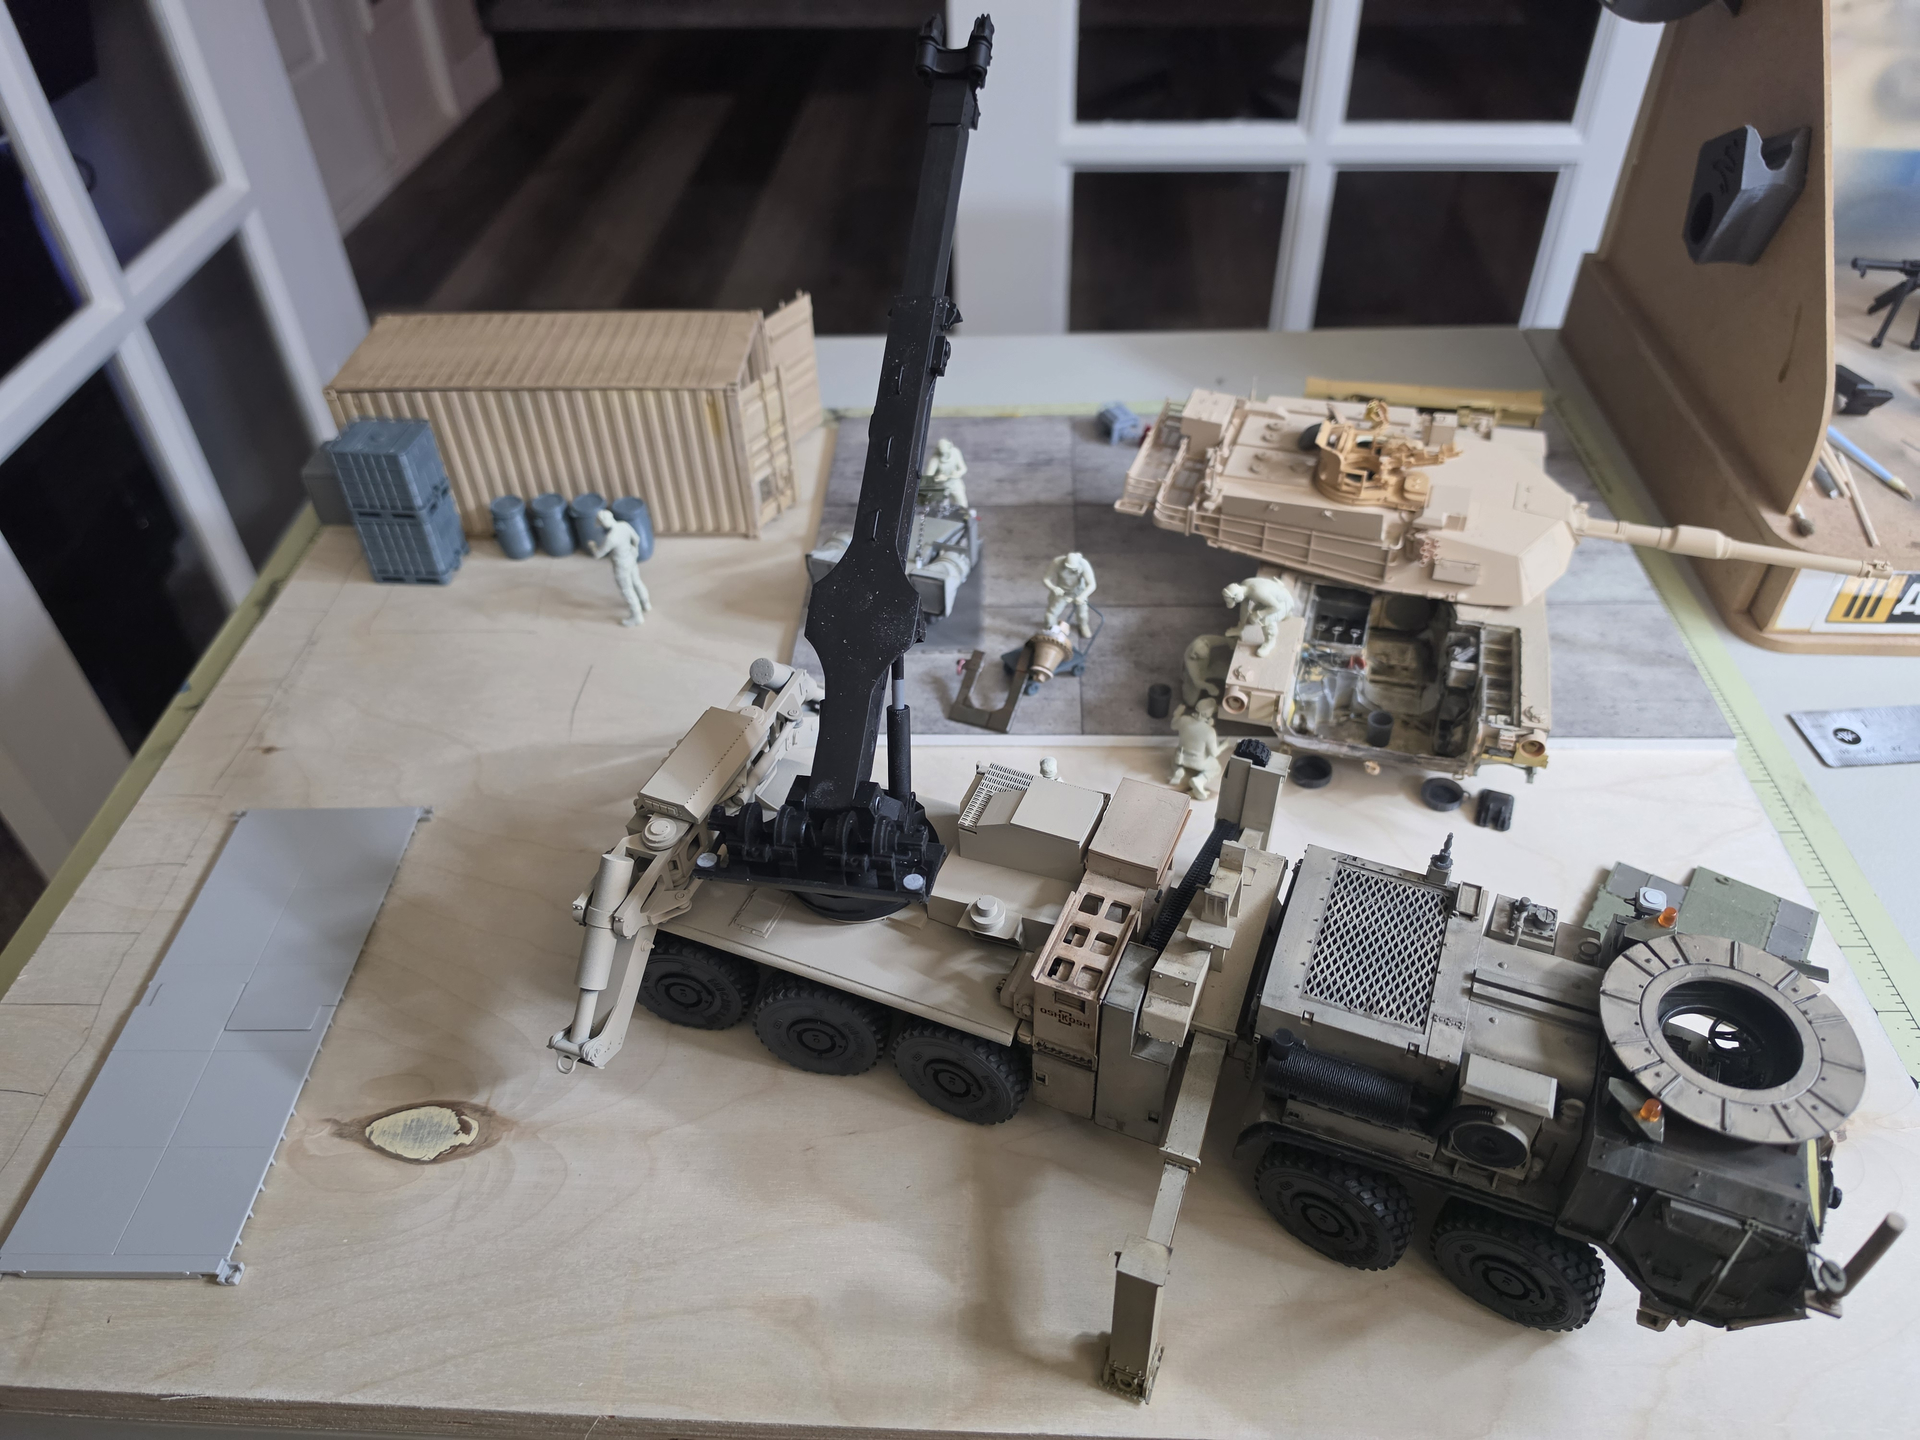
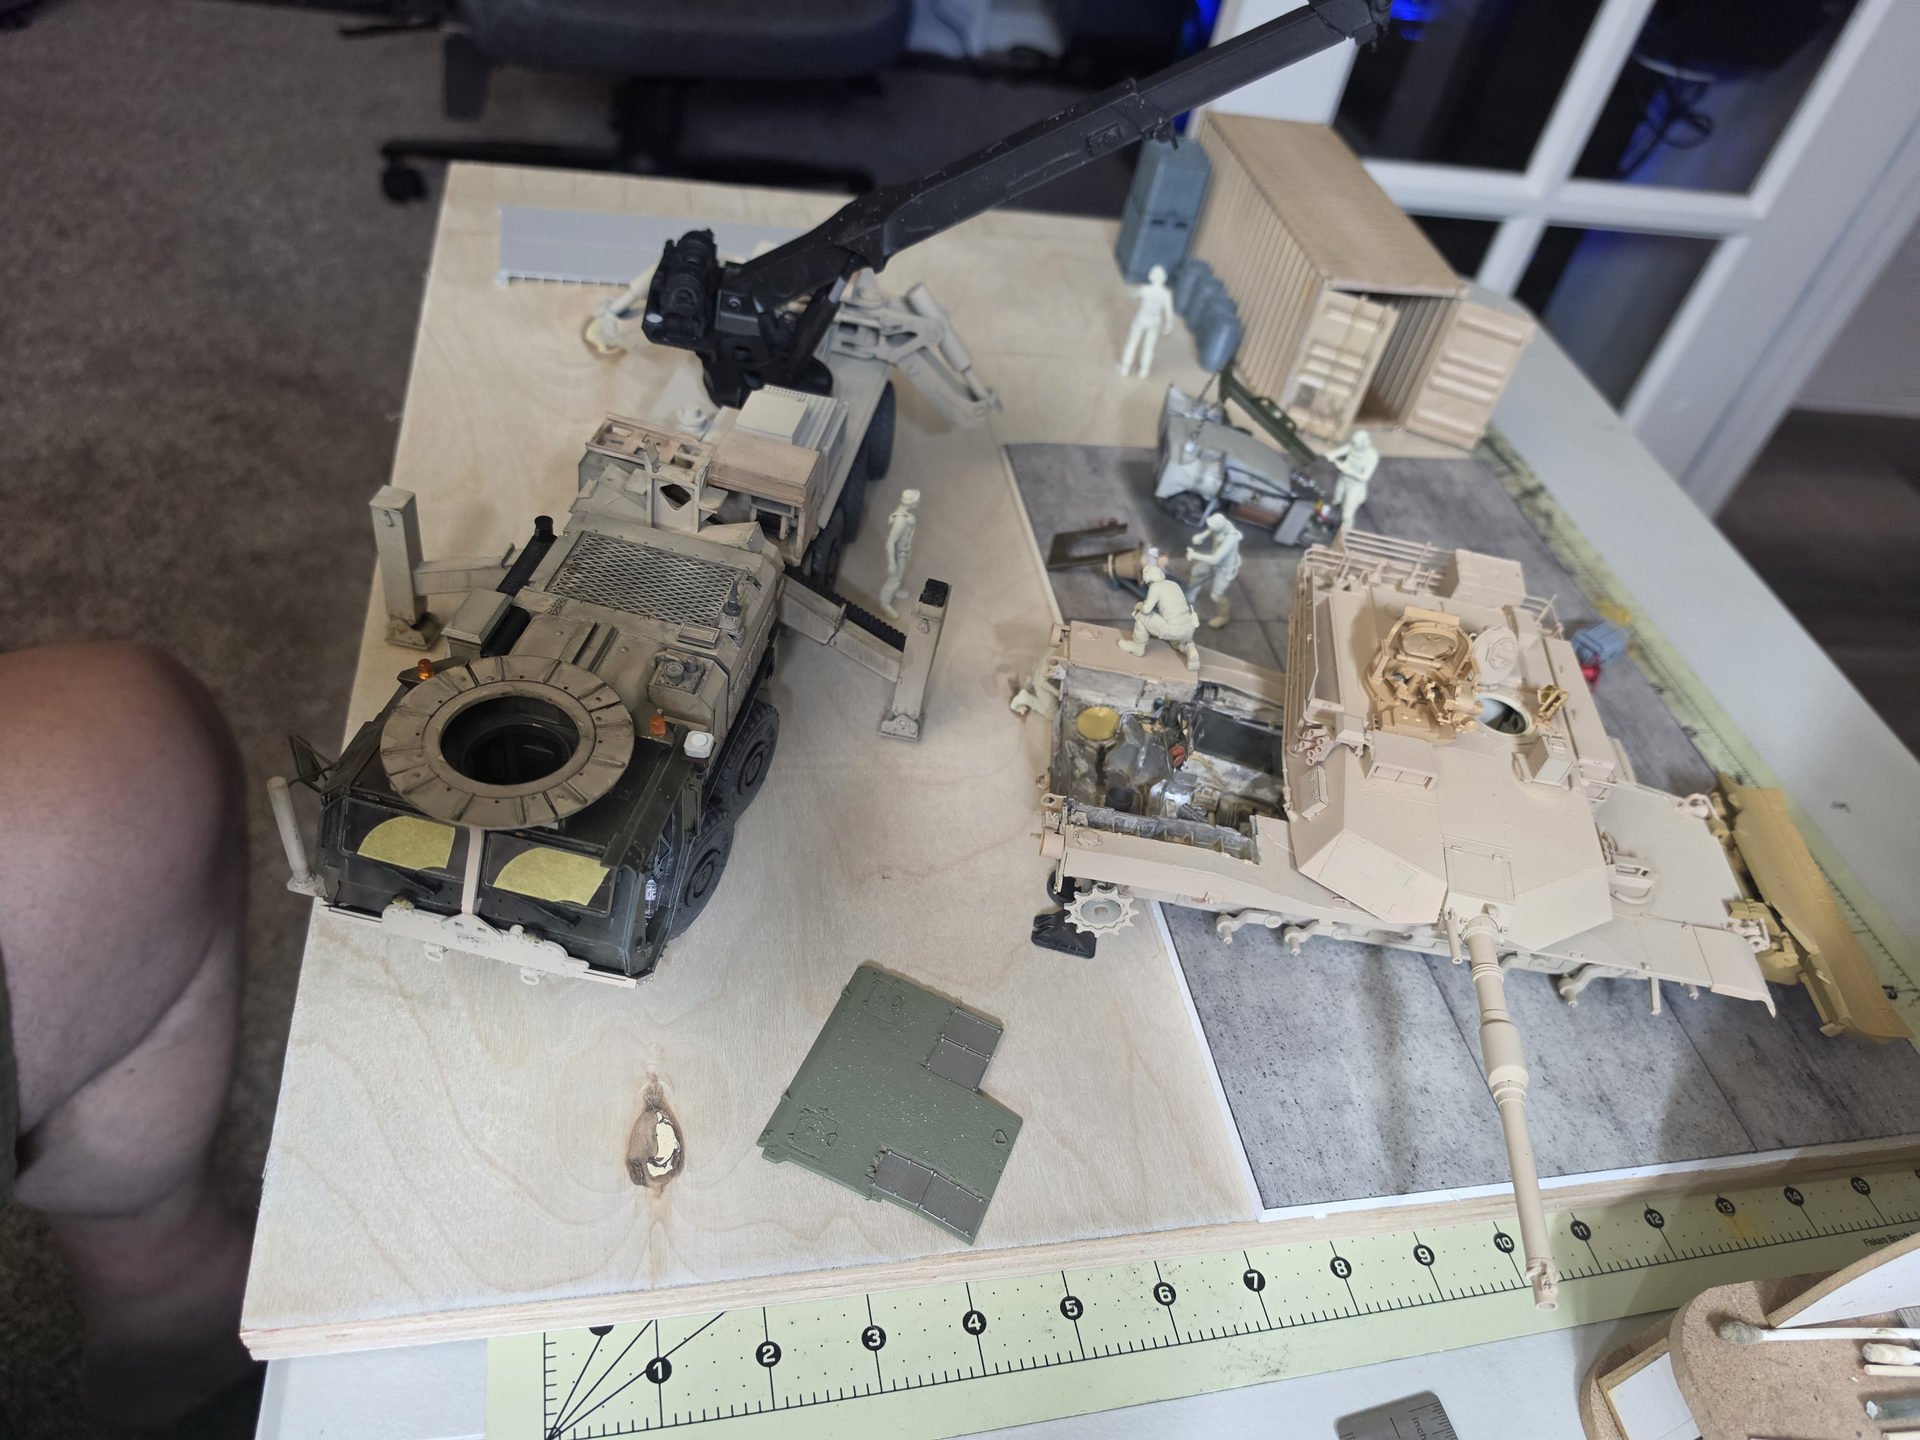
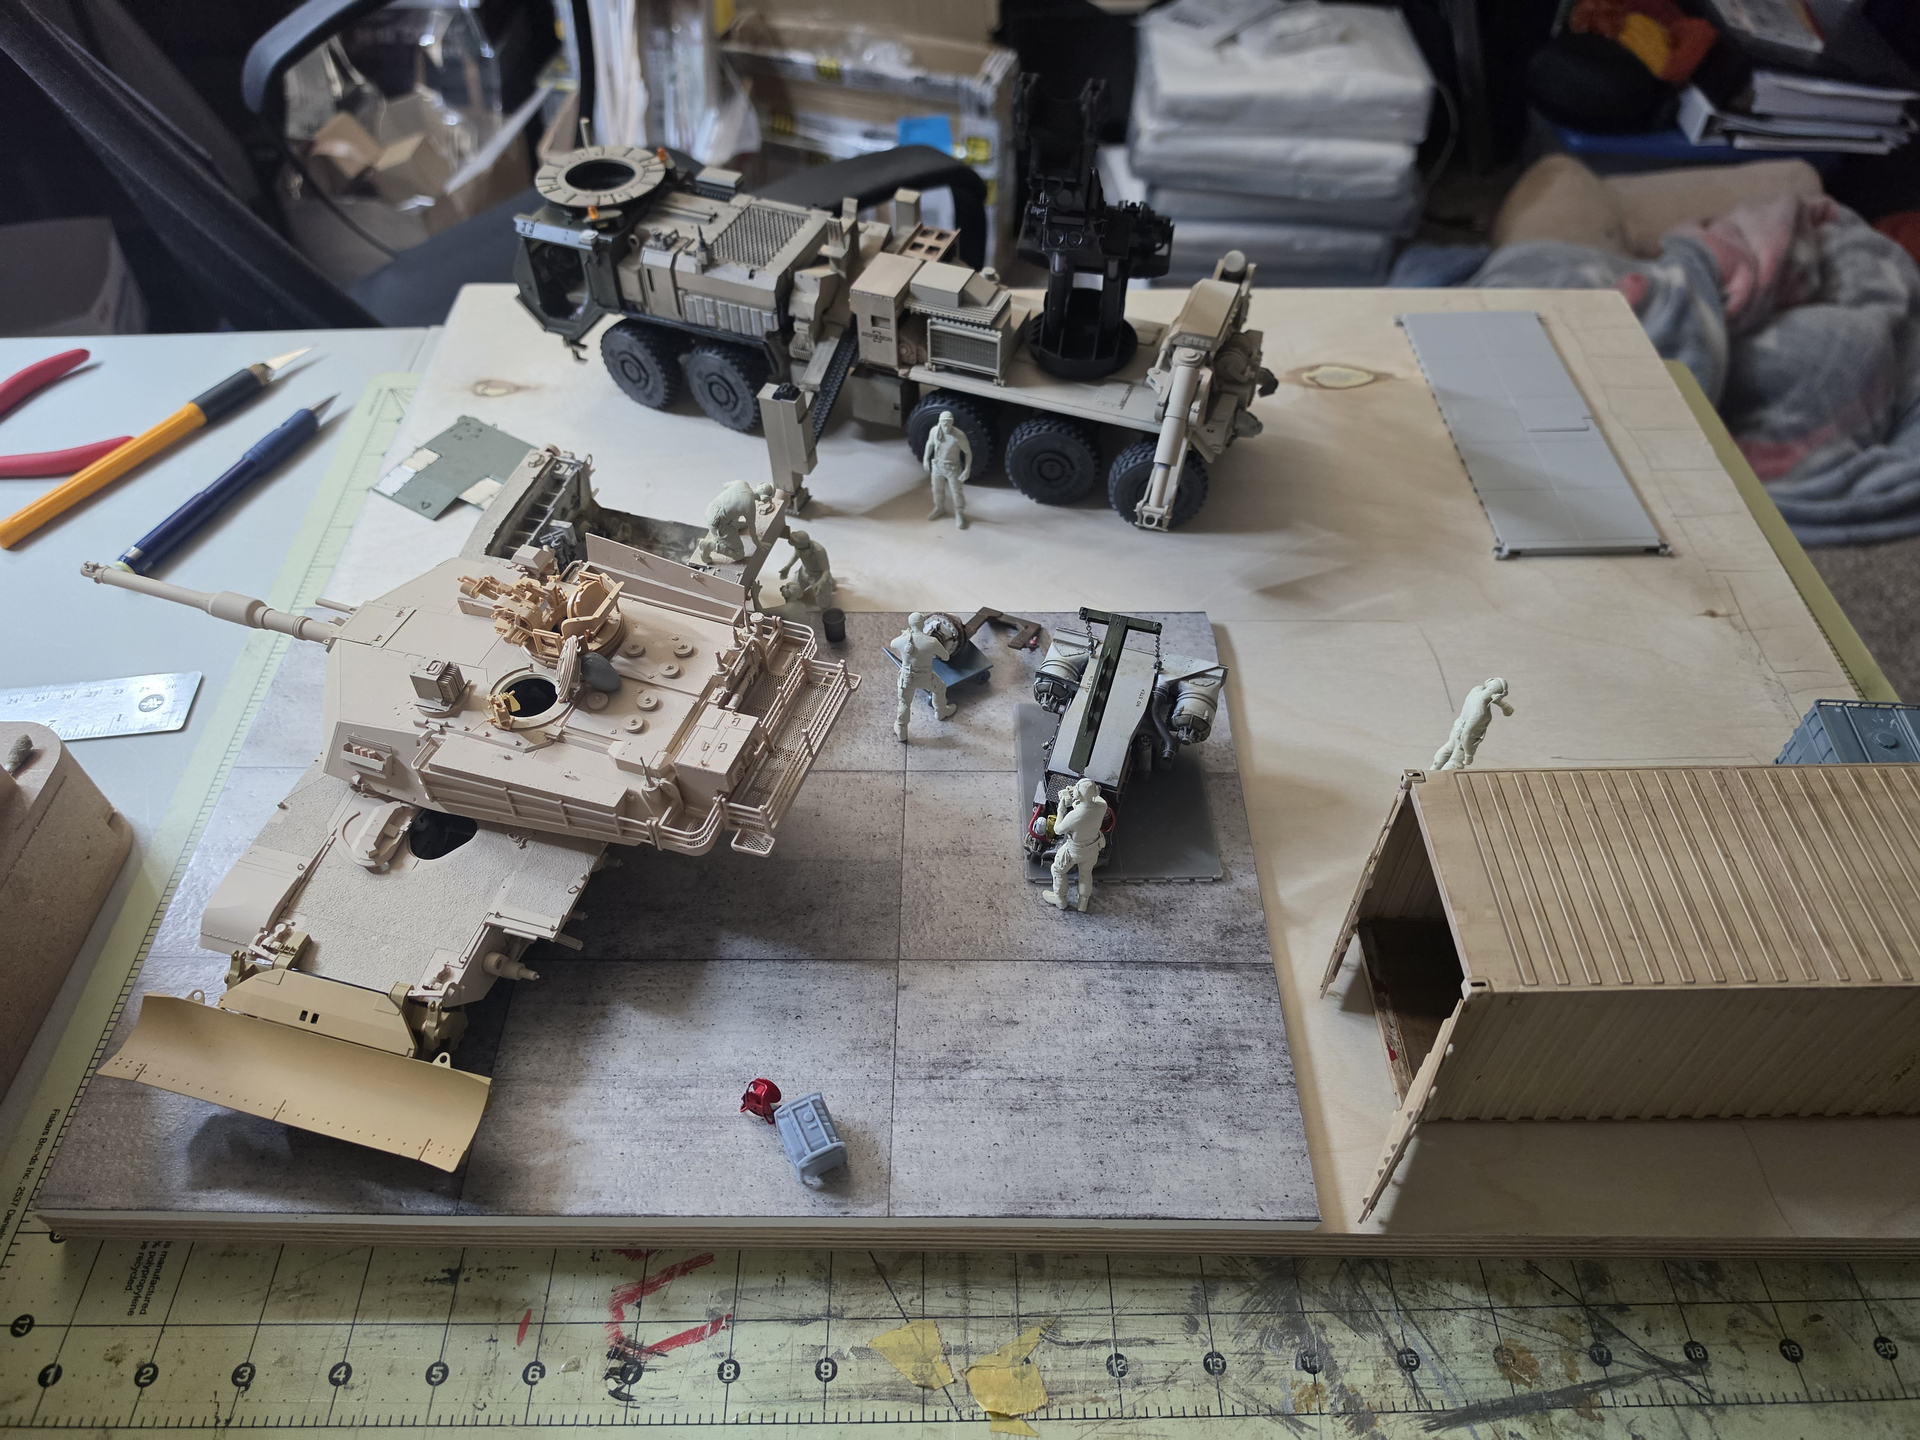
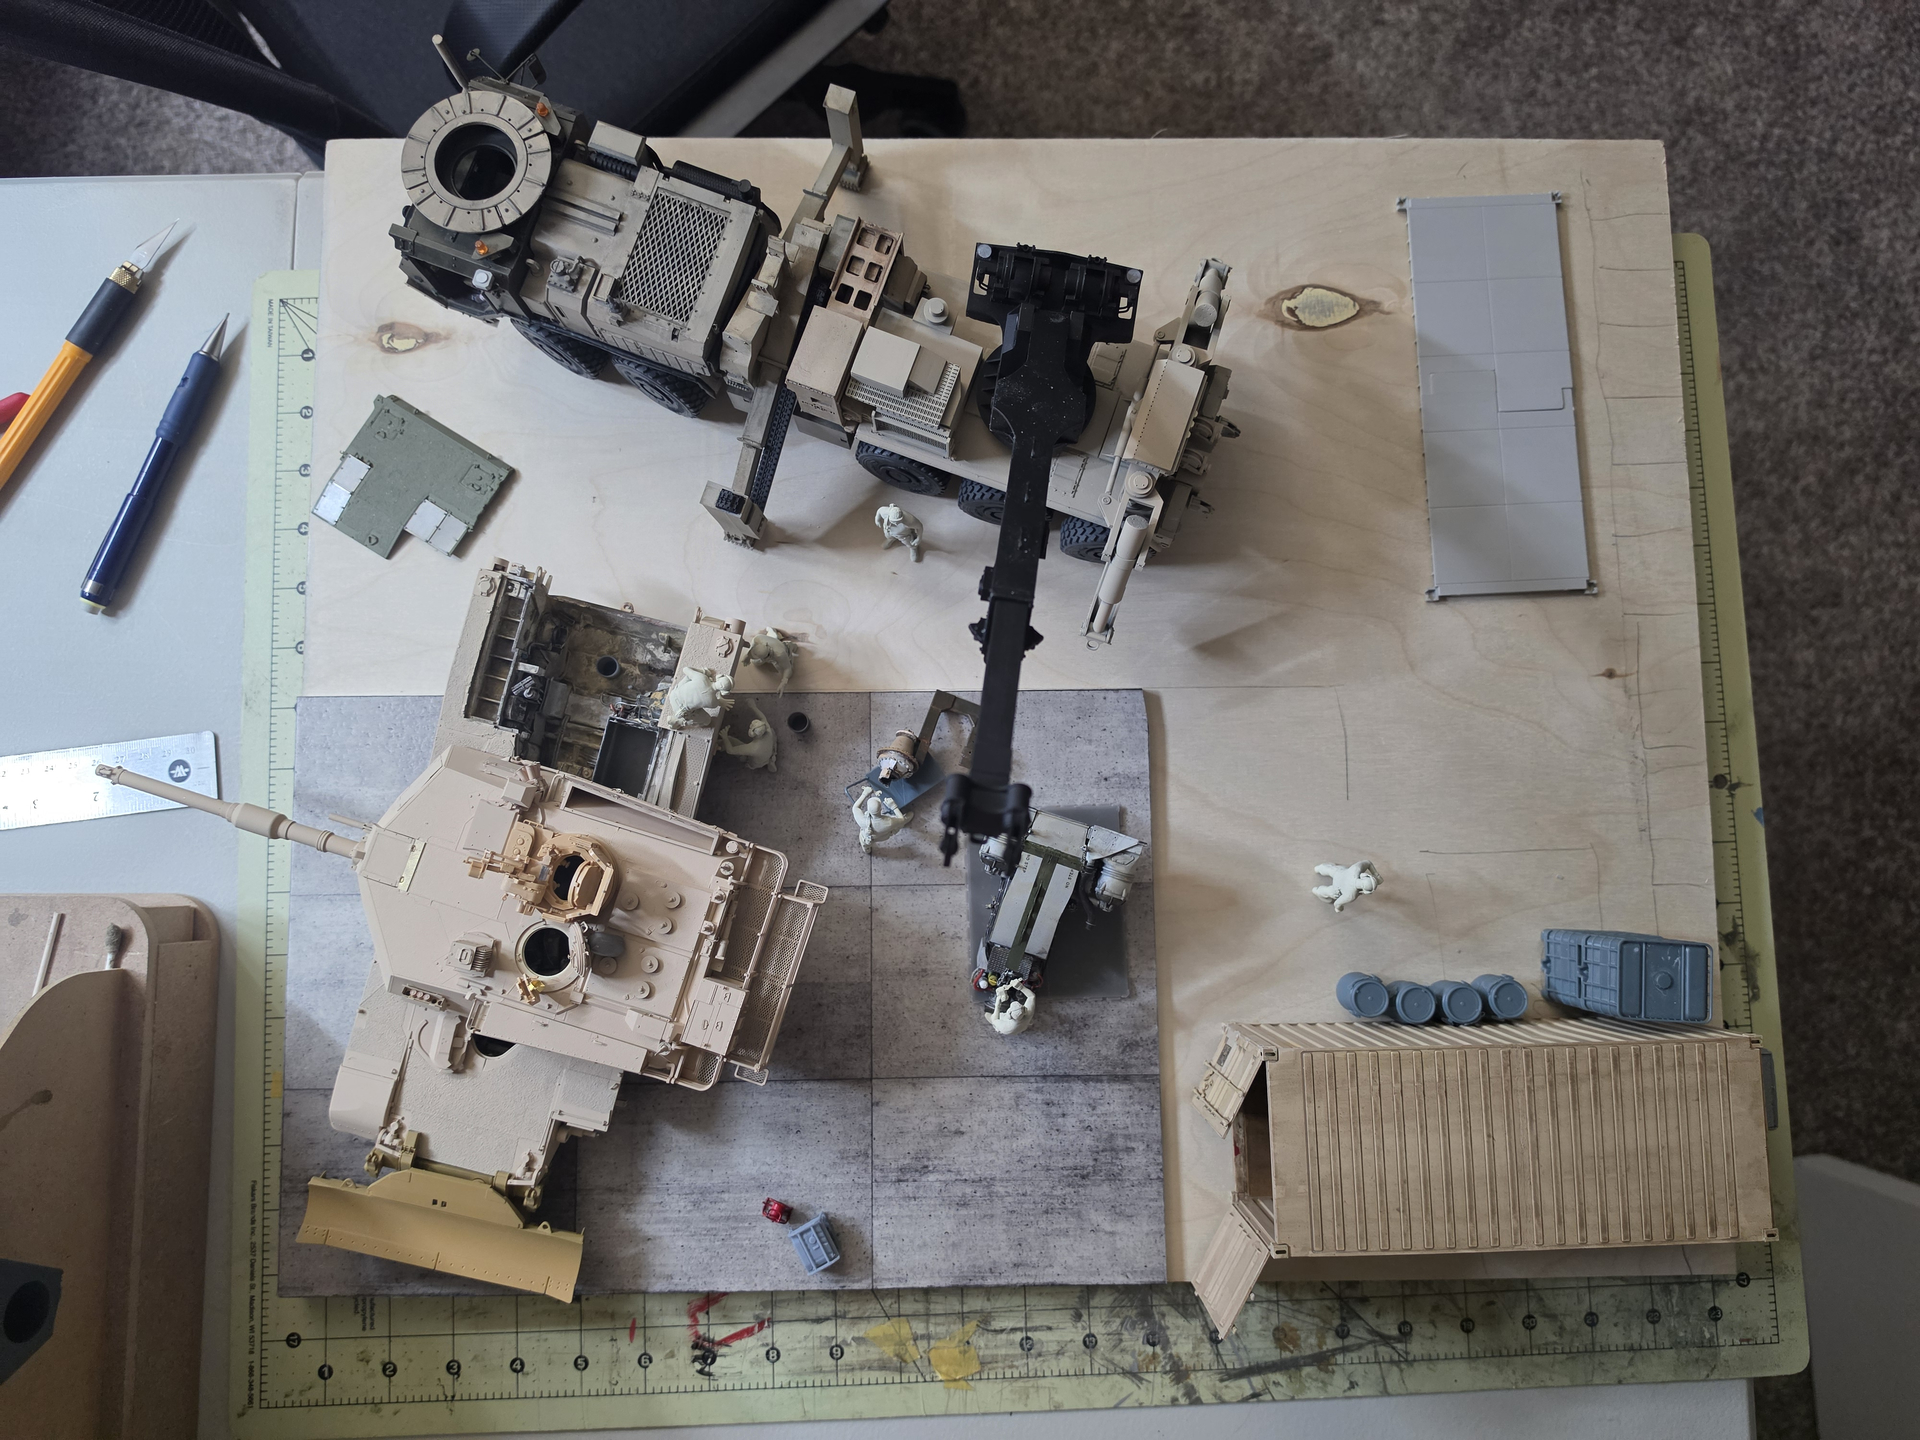
Today I took a little time to story board my planned diorama with the M1A1 and MMRS.
How does this look as a concept.
Keep in mind the final drive will be hanging from the crane and the mechanic will be placing the cart under it and removing the lifting jig.
The edge by the conex will be a combo of bremer wall and Hesco blocks.
There could be a camo shade net between the conex containers

21 Likes
Fortunately my ex would never be caught dead doing floors so I got custody of the huge bottle of Future Floor Wax in the divorce. Been holding onto it for years now to do all my decaling. I suspect it will last out the rest of my lifetime!
However i do appreciate you telling me what i can recommend to follow up the Future with. So how are you now diluting that new Floor Wax and how is it working out for you? I am very interested in how this turns out.
Please keep us (me] posted.
2 Likes
If you’re interested: Starship Modeler: Voyager Paint Scheme Reference. What you have looks great!
1 Like
I’ve only used it once or twice, but I diluted it with distilled water. About 4:1 ratio. I might be going back to to it as I’ve been using a testors lacquer rattle can, and there’s not much control with a can.
2 Likes
Bench time happened 
More work on the 1918 Model T Ford.
Painted spokes/rims/tires (tyres) …
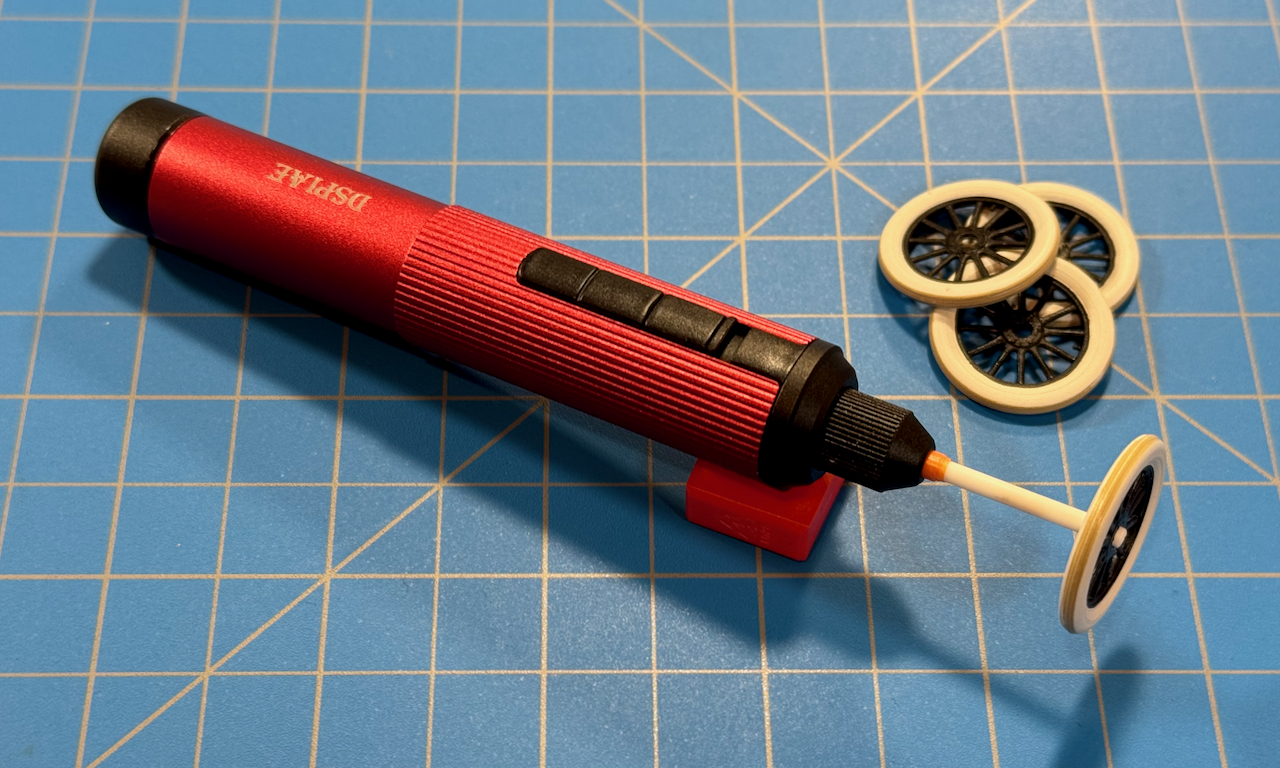
Spokes/Rims
• Vallejo Black (71.057)
• Vallejo Satin Varnish (70.522)
Tires (tyres)
• Vallejo White Grey (RAL9002) (71.119)
Road Wear (chicken strip)
• AK Interactive Real Colors Marker Dunkelgelb (RCM018)
• AK (AK 183) Ultra Matte Varnish
Body Assembly & Clear Parts
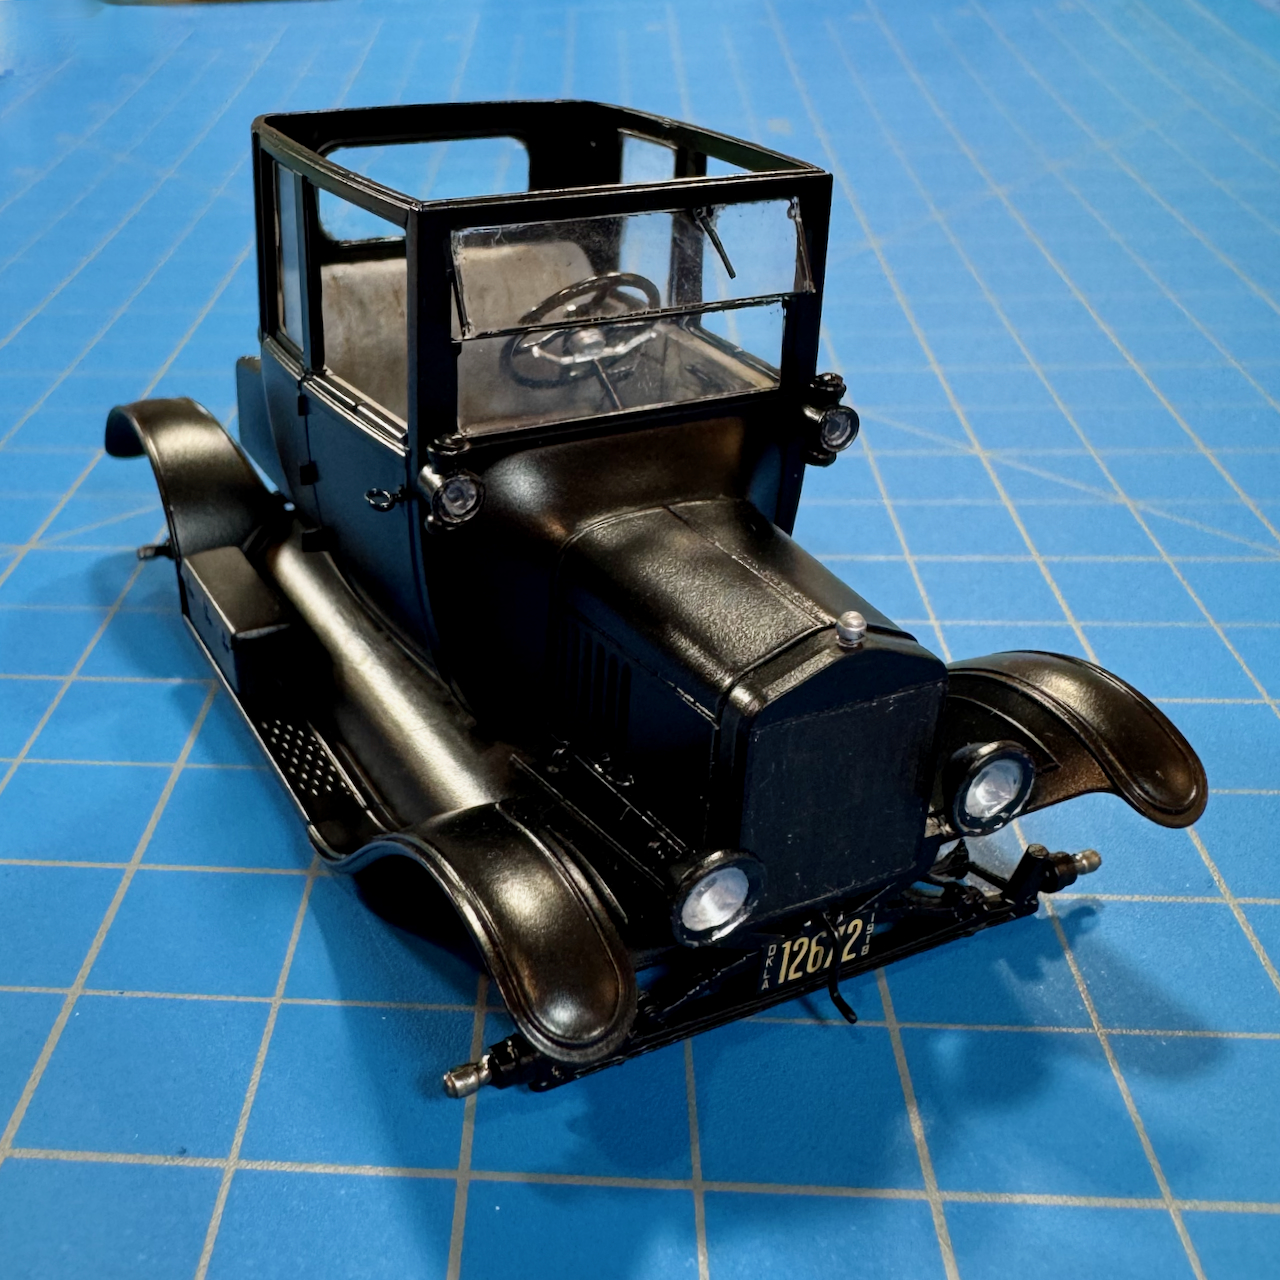
A look into the office.
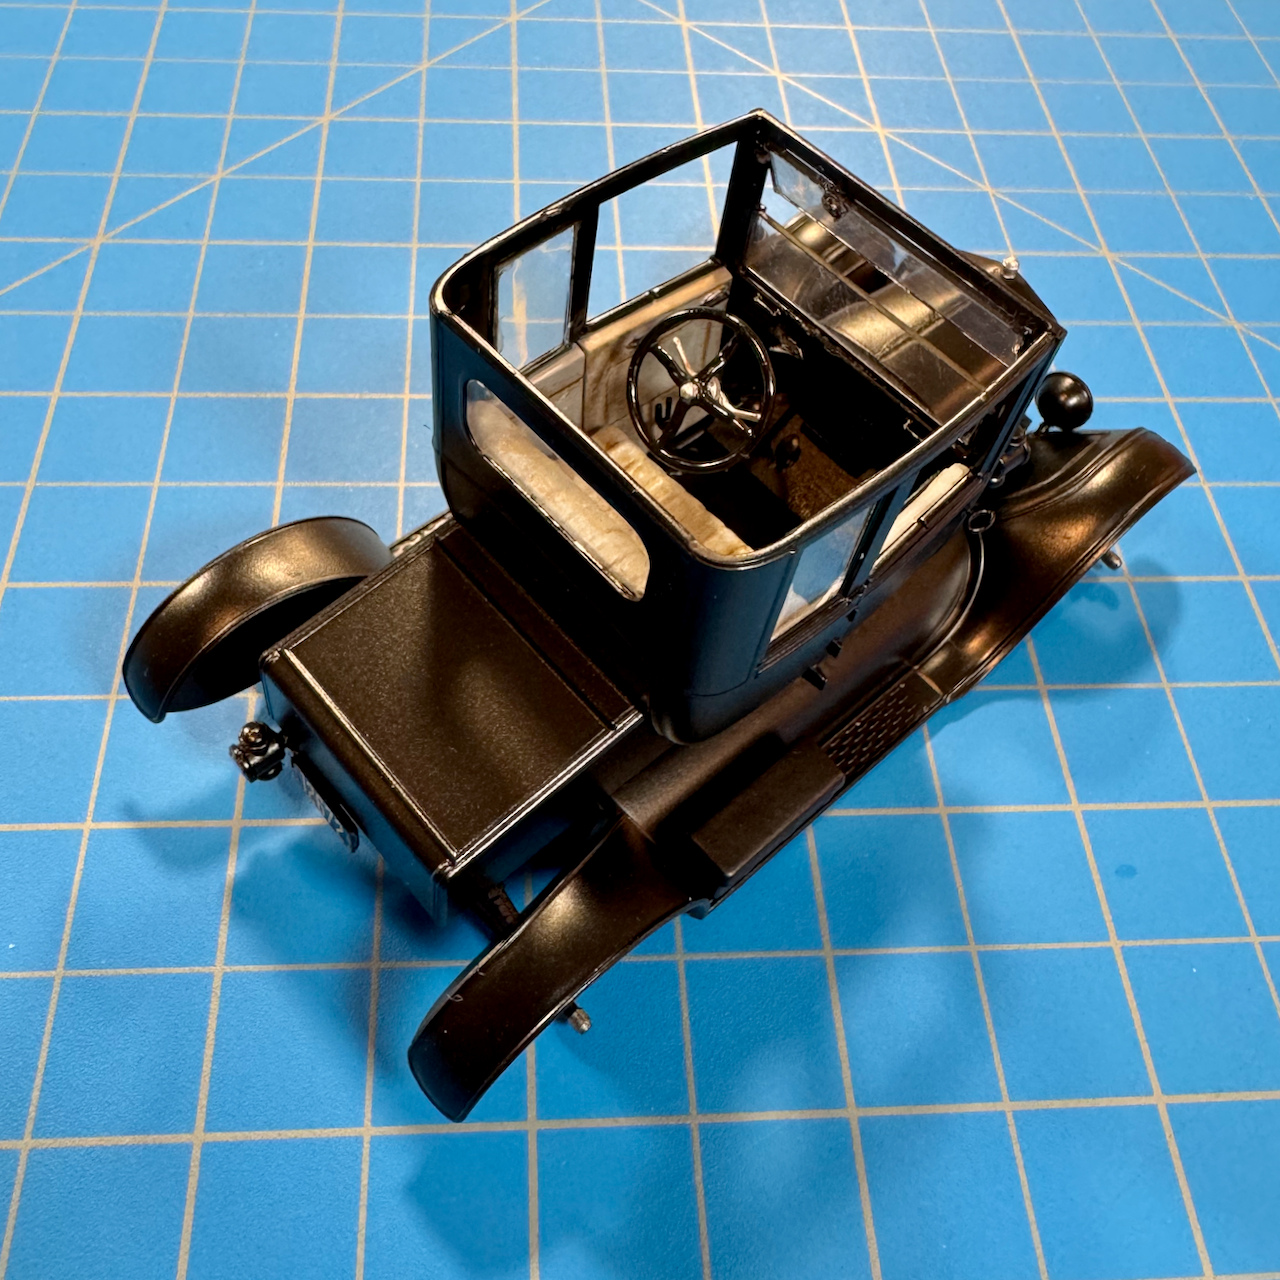
Happy with how the interior and steering wheel turned-out.
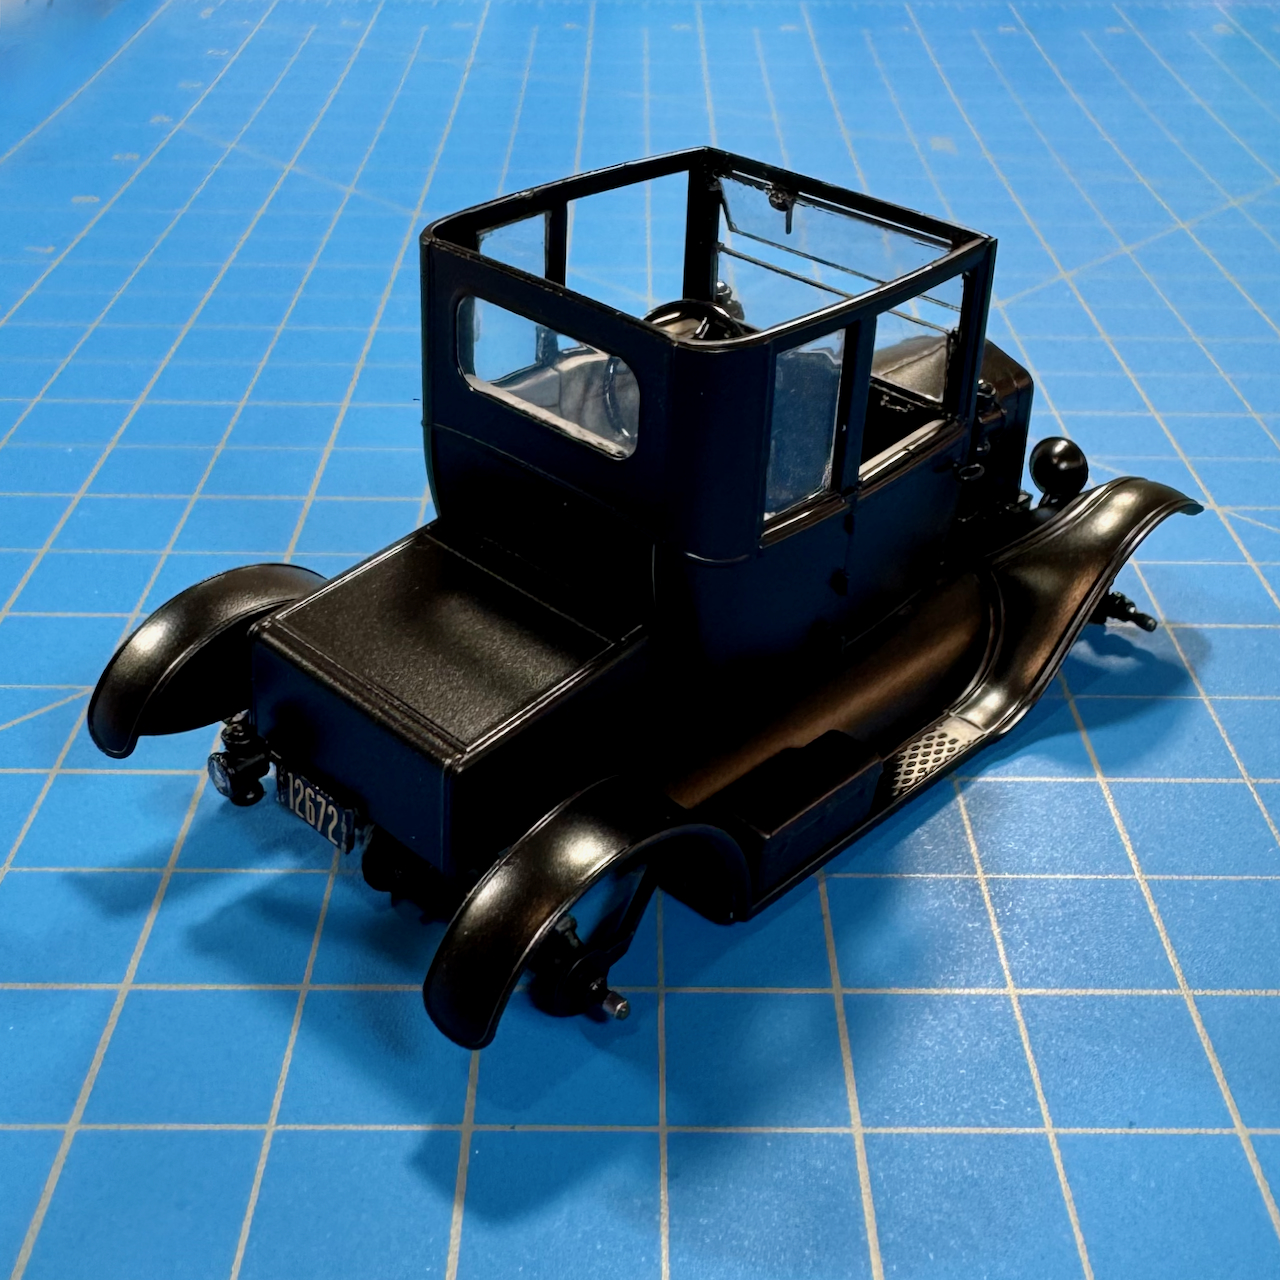
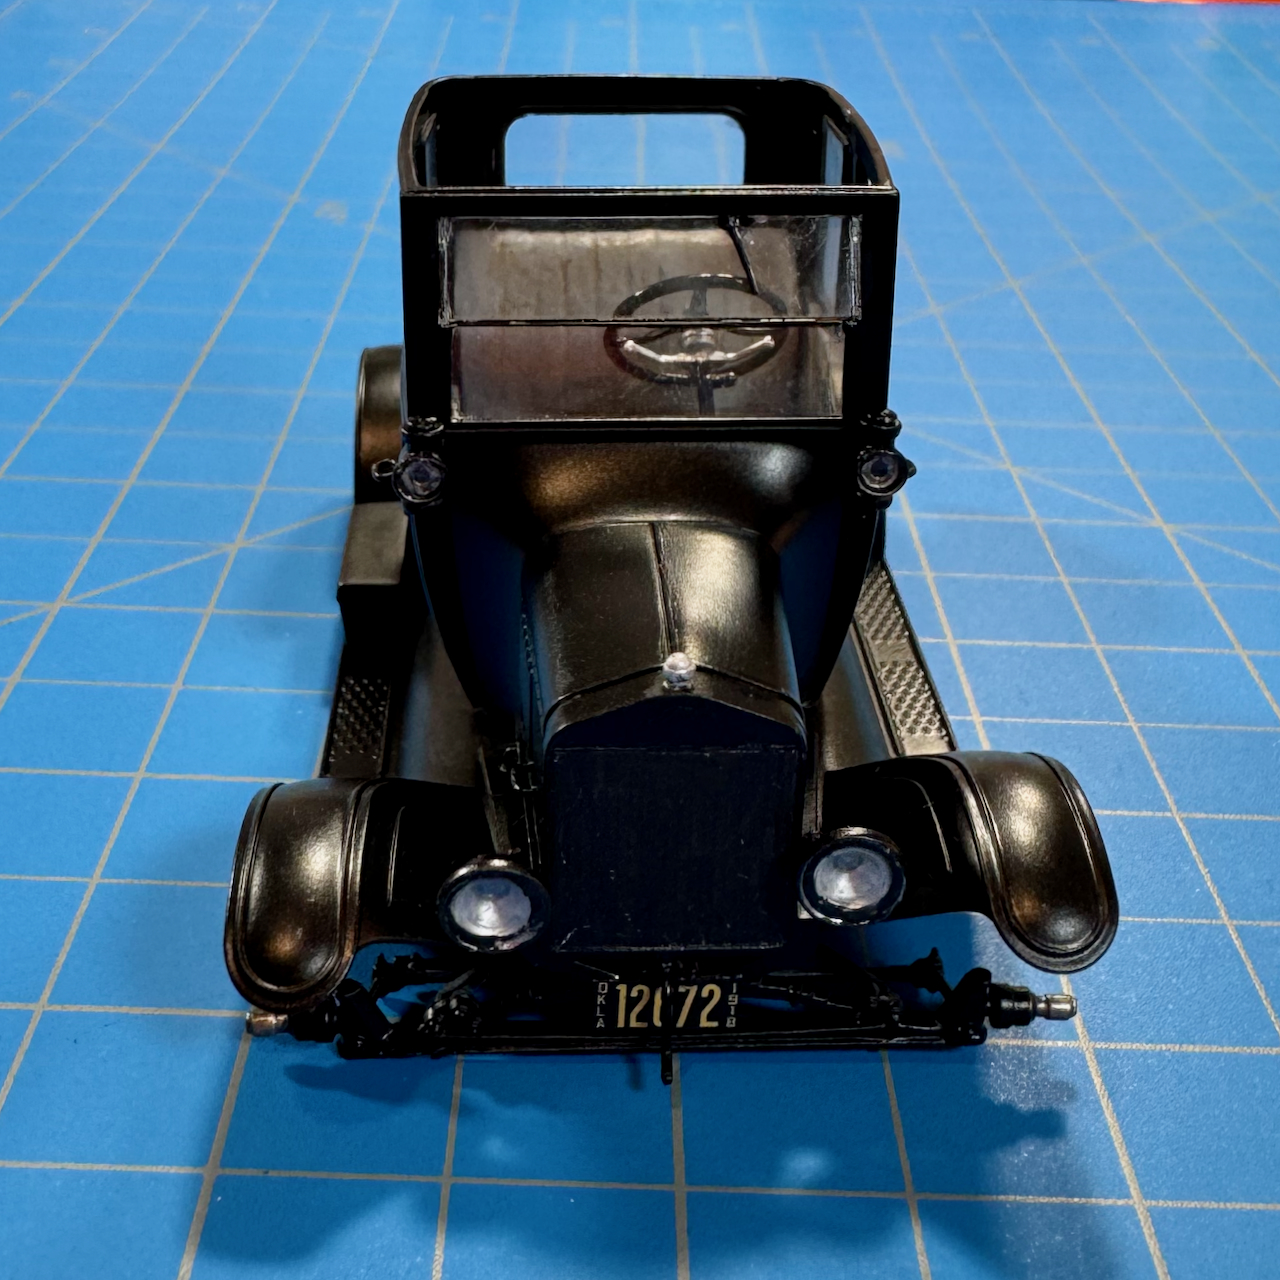
I went with “OKLA 1918” tags.
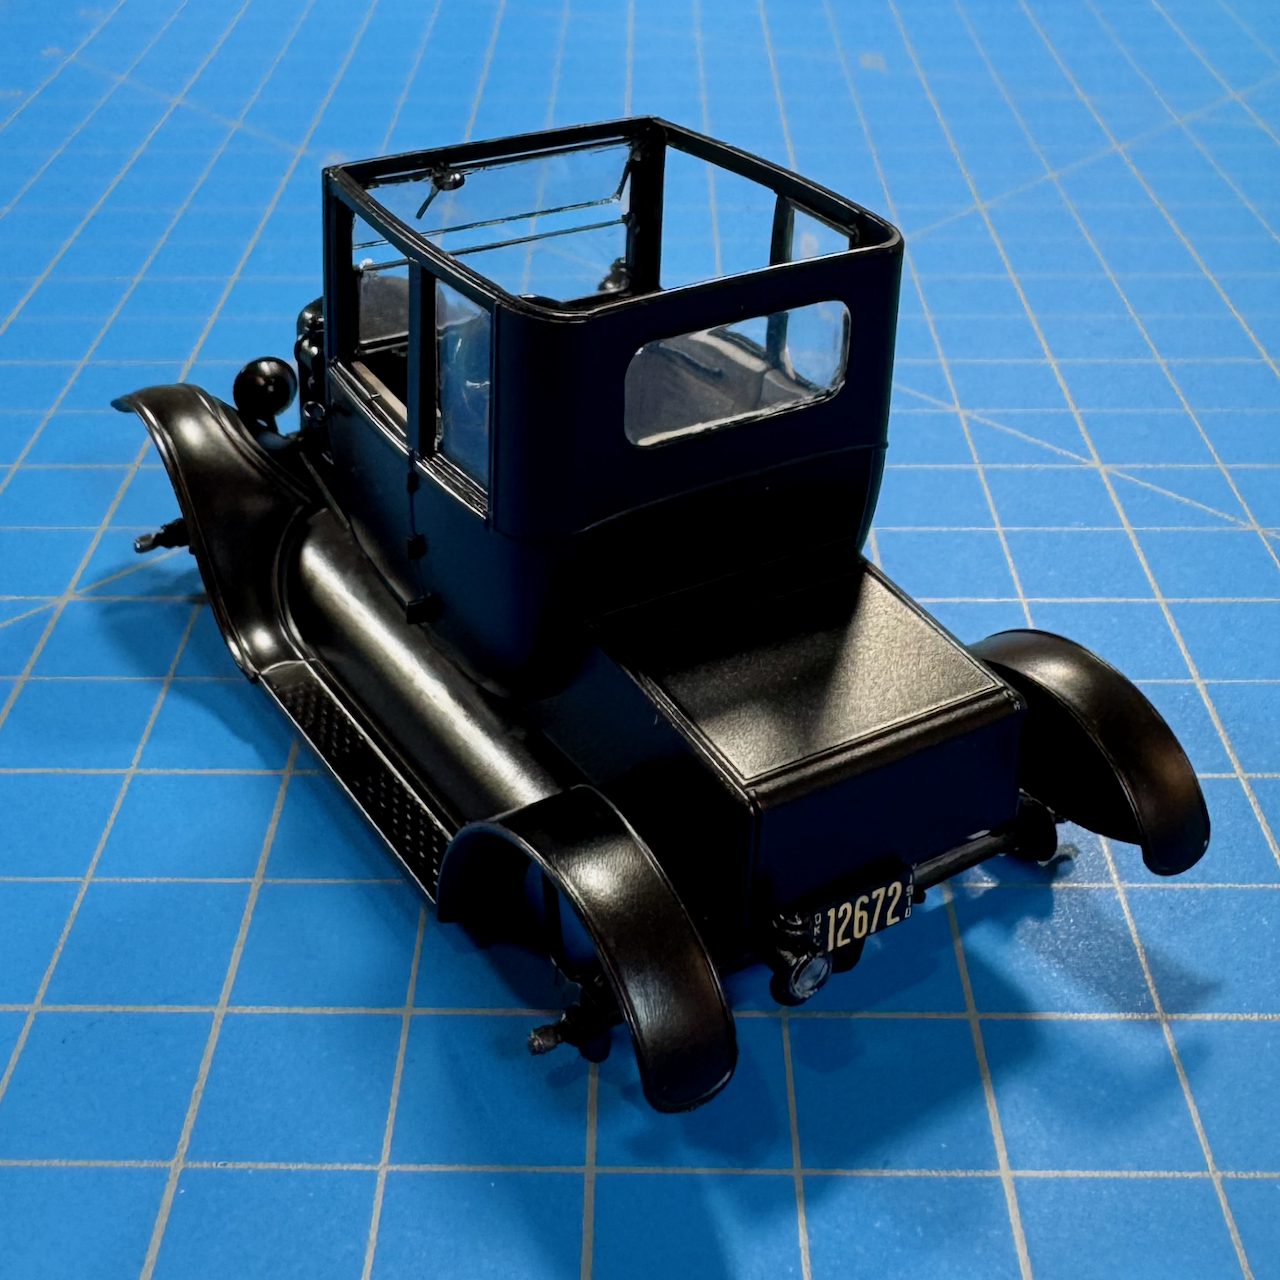
Decals went down nicely
• Micro Set
• Micro Sol
Final assembly to follow. … Pretty much downhill from here. 
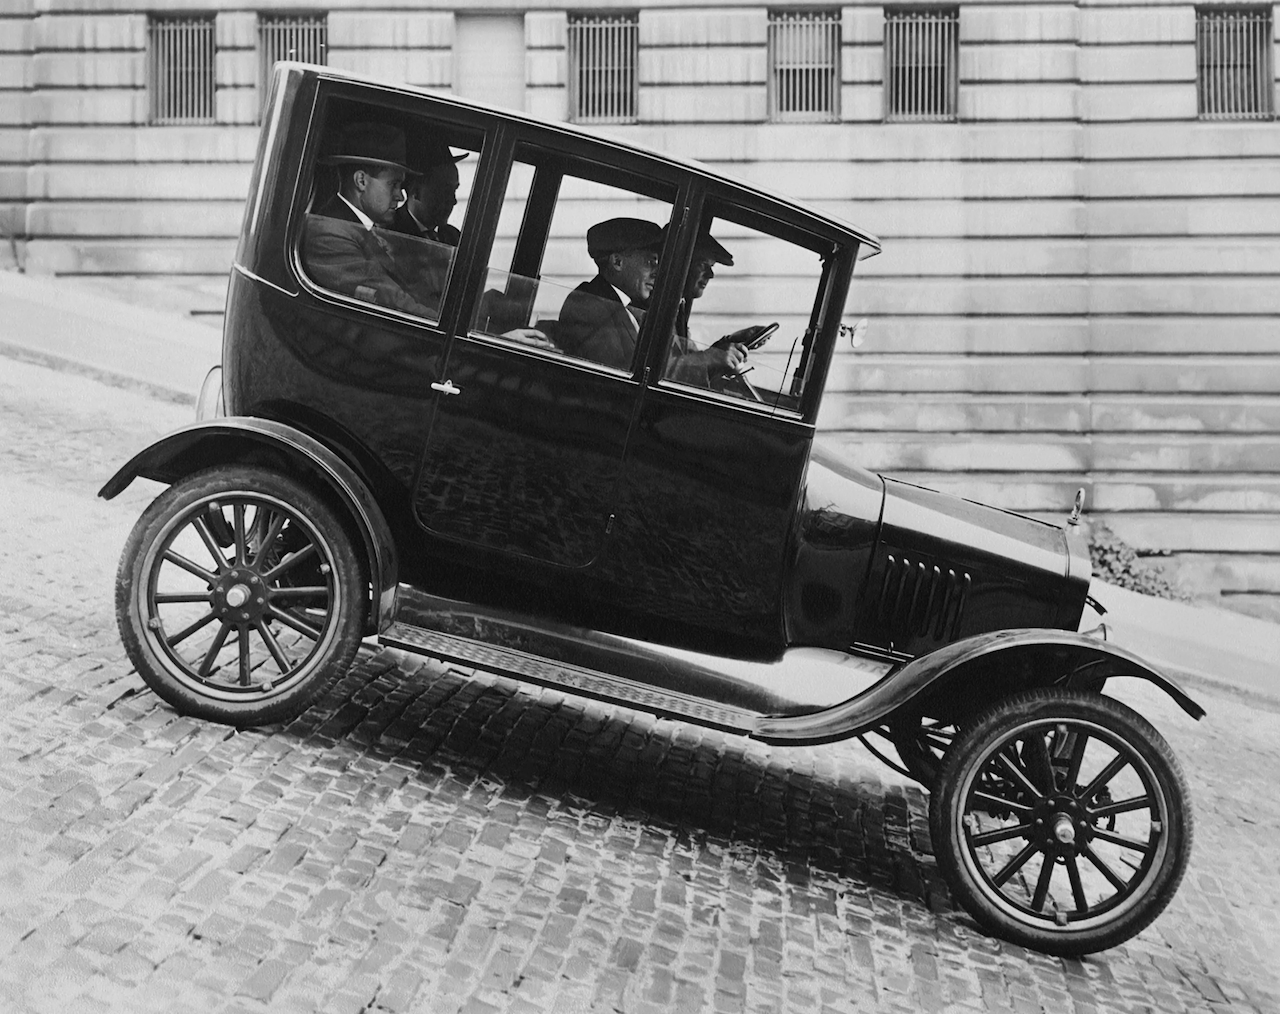
Thanks for having a look!
—mike
17 Likes
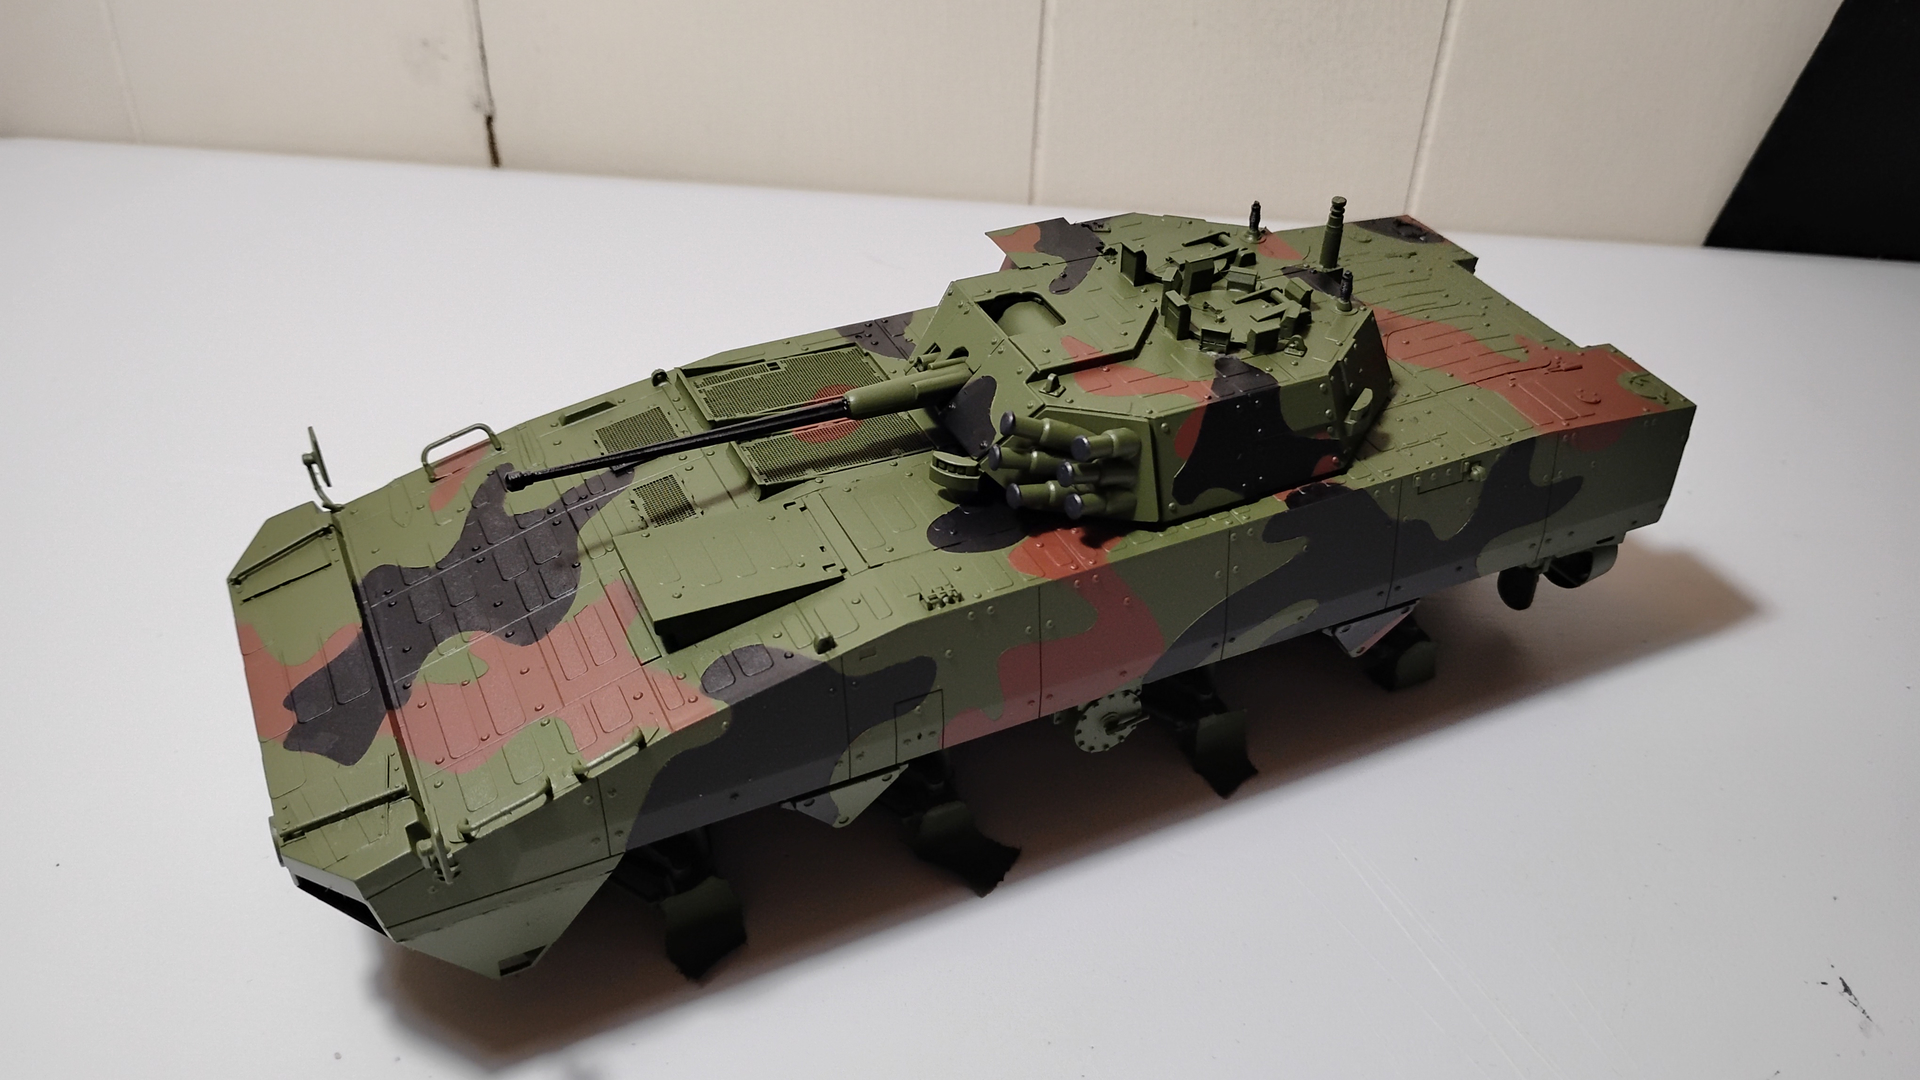
Might be getting colder outside but still getting spraying done. The WZ-701 being done as a whatever build just putting things on it that look good. The KTO Rosomak in nato tri color inspired by the instruction book but not accurate.

16 Likes
Drastic Times Call for Drastic Measures…
With all my dry-fitting, can’t believe I didn’t see this coming… a lowrider?! D’oh!
In particular, notice how the front right fender touches the wheel.
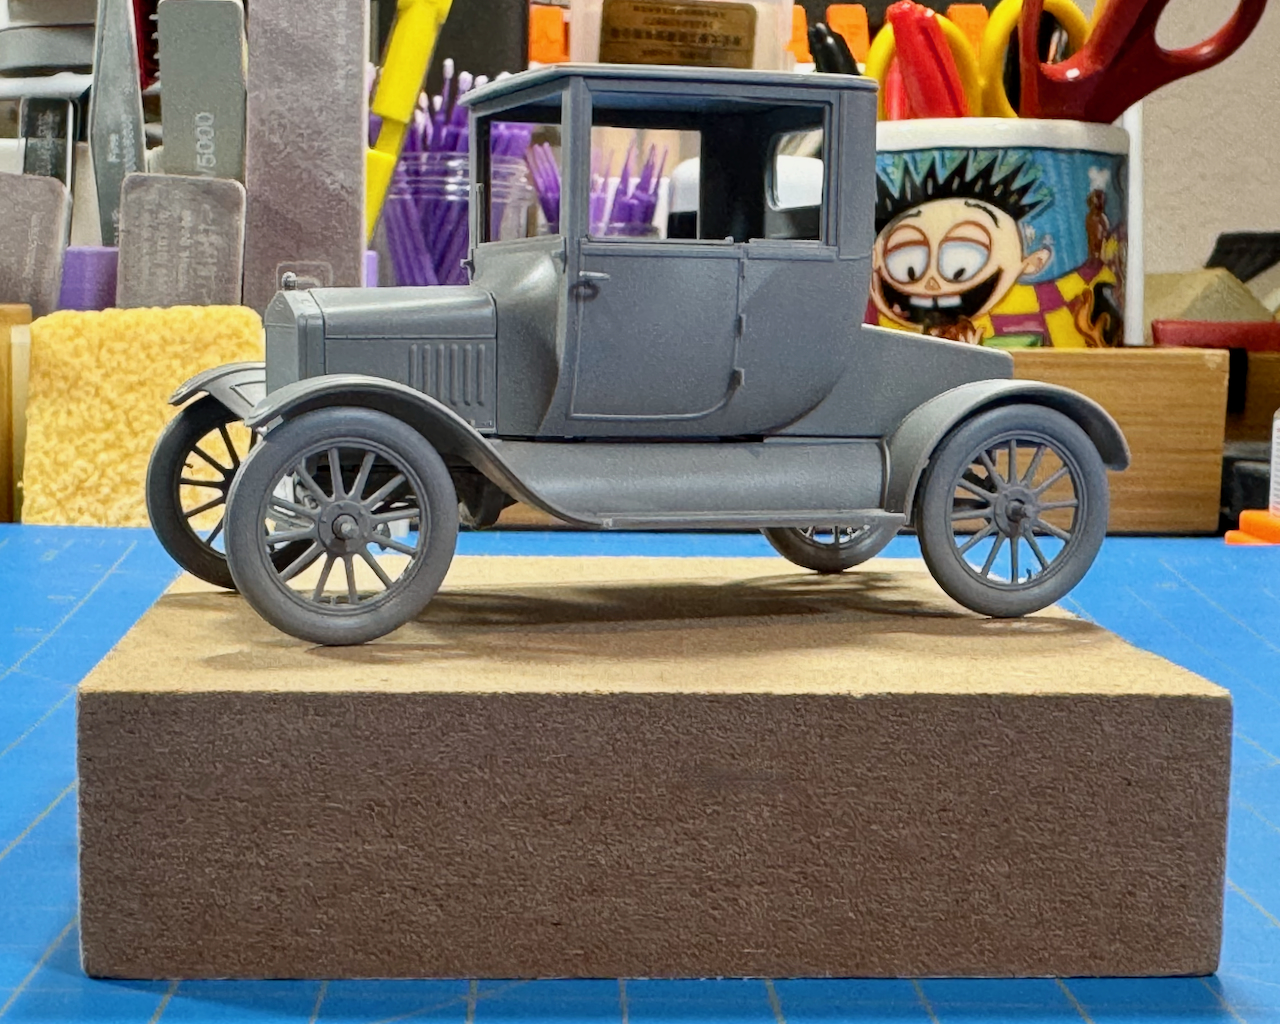
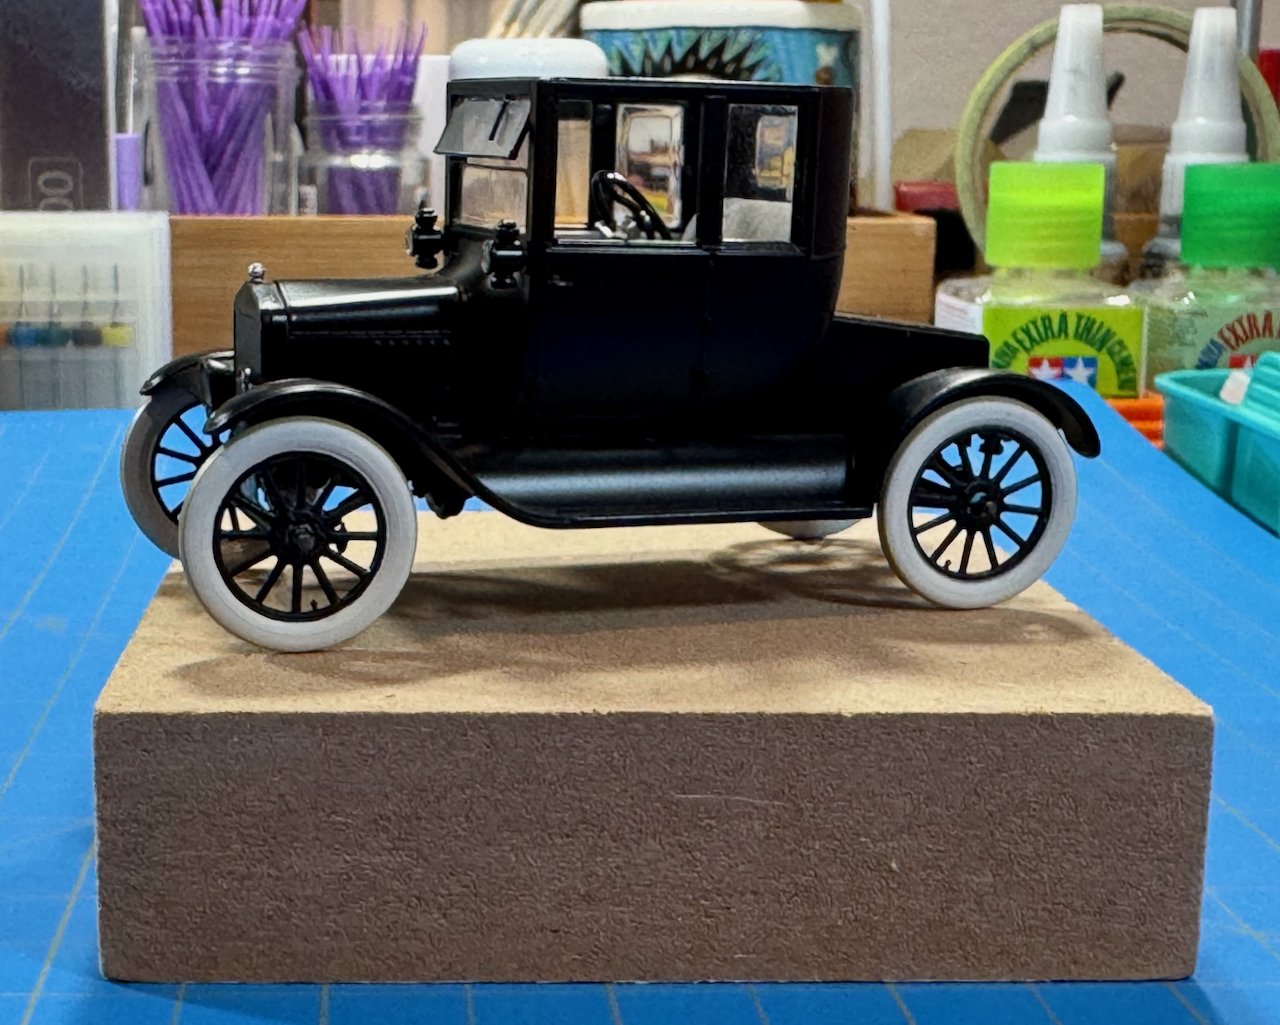
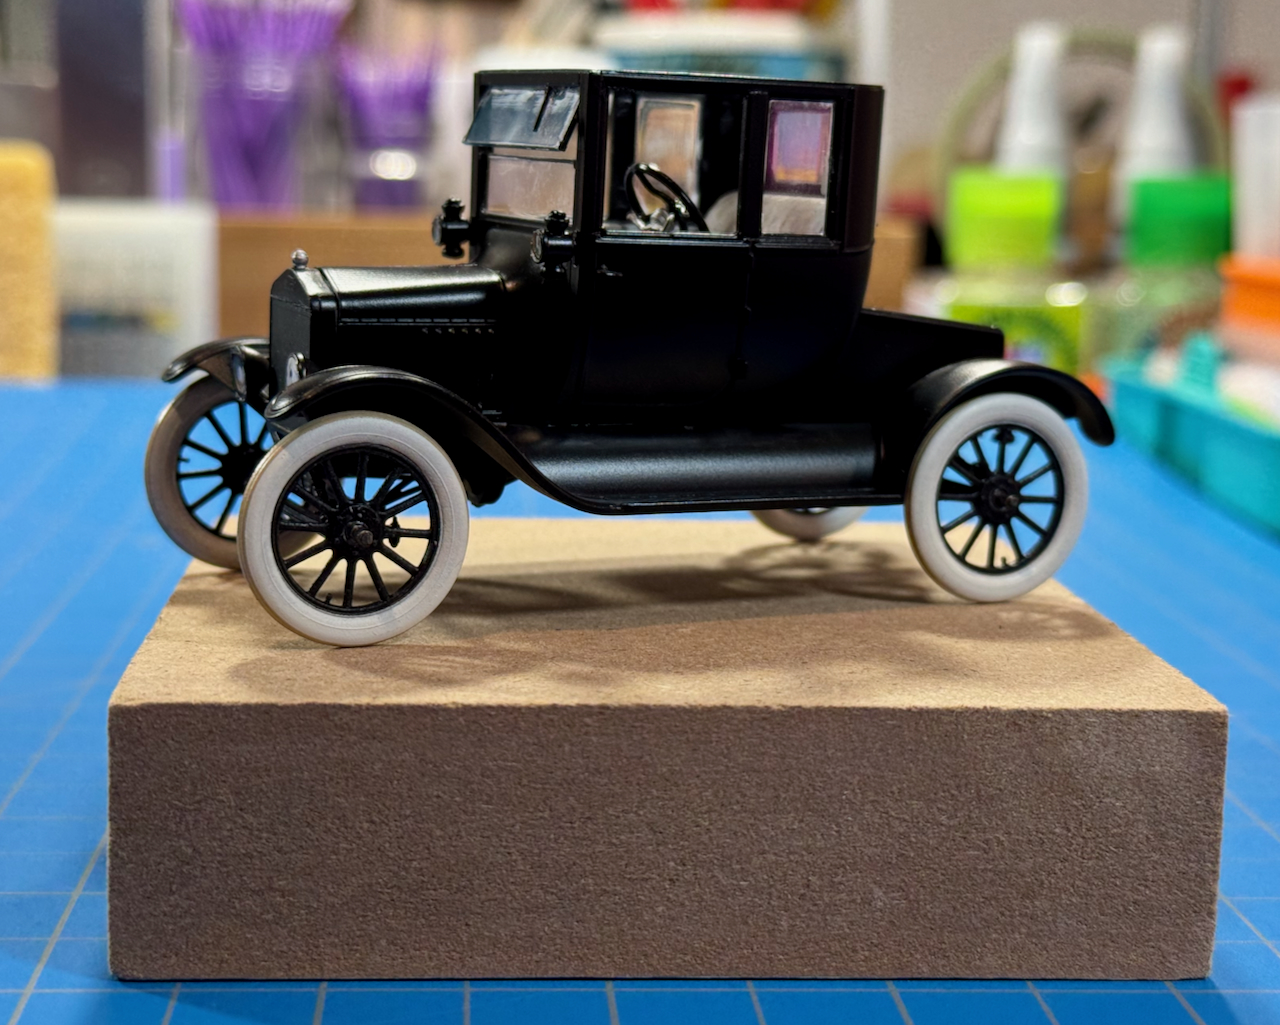

The hammer and 2x4 remedy. 
 De-glue… twist… shim… add a leaf to the front spring. Gently (or not so gently) coax the entire suspension to the brink of snapping.
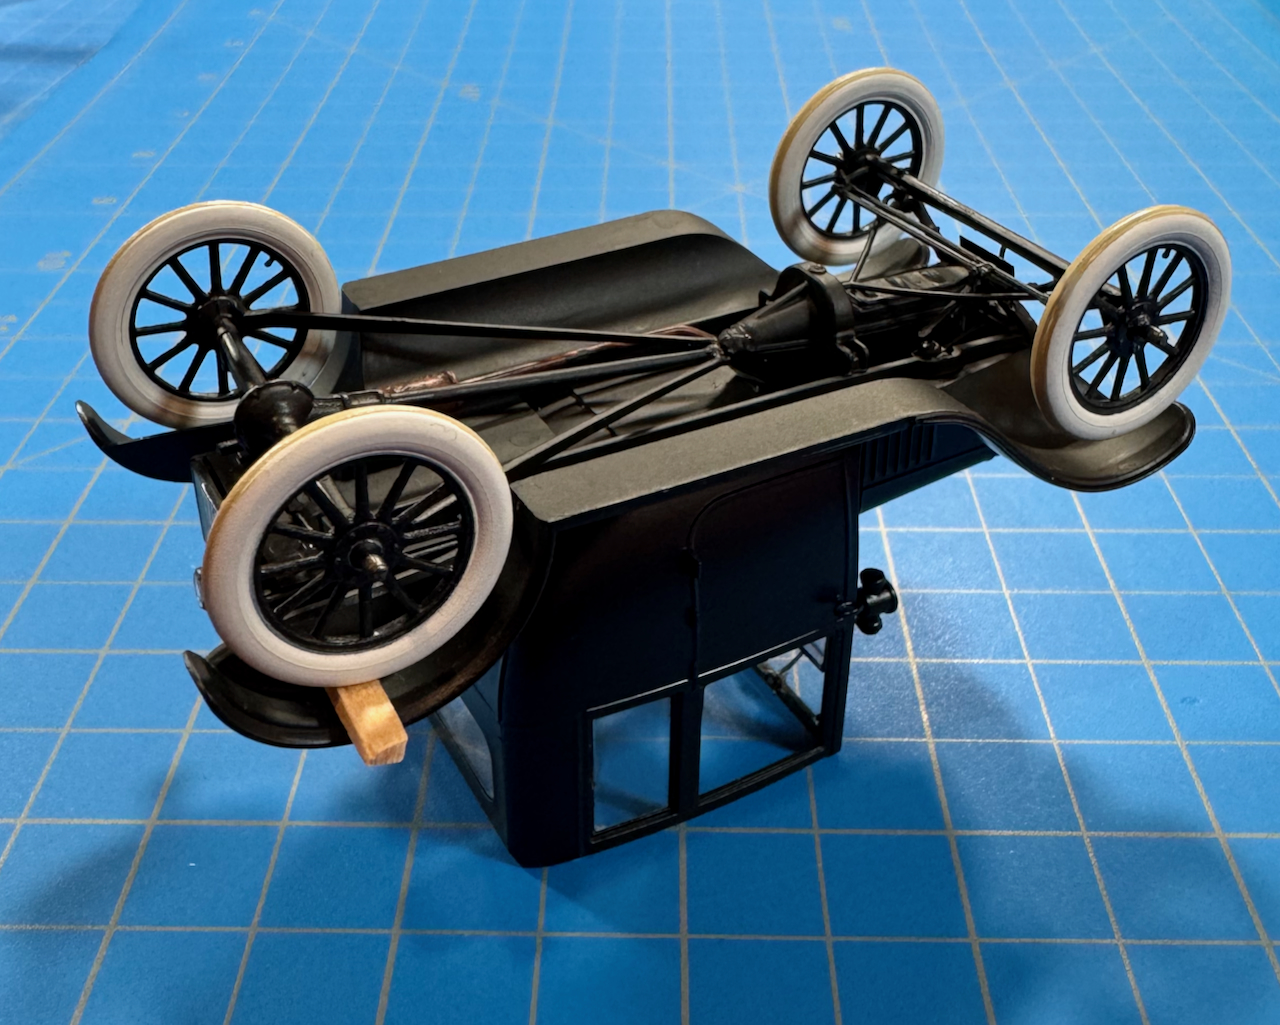
And here she is, sitting pretty.

Thanks for having a look!
—mike 

21 Likes

4 Likes
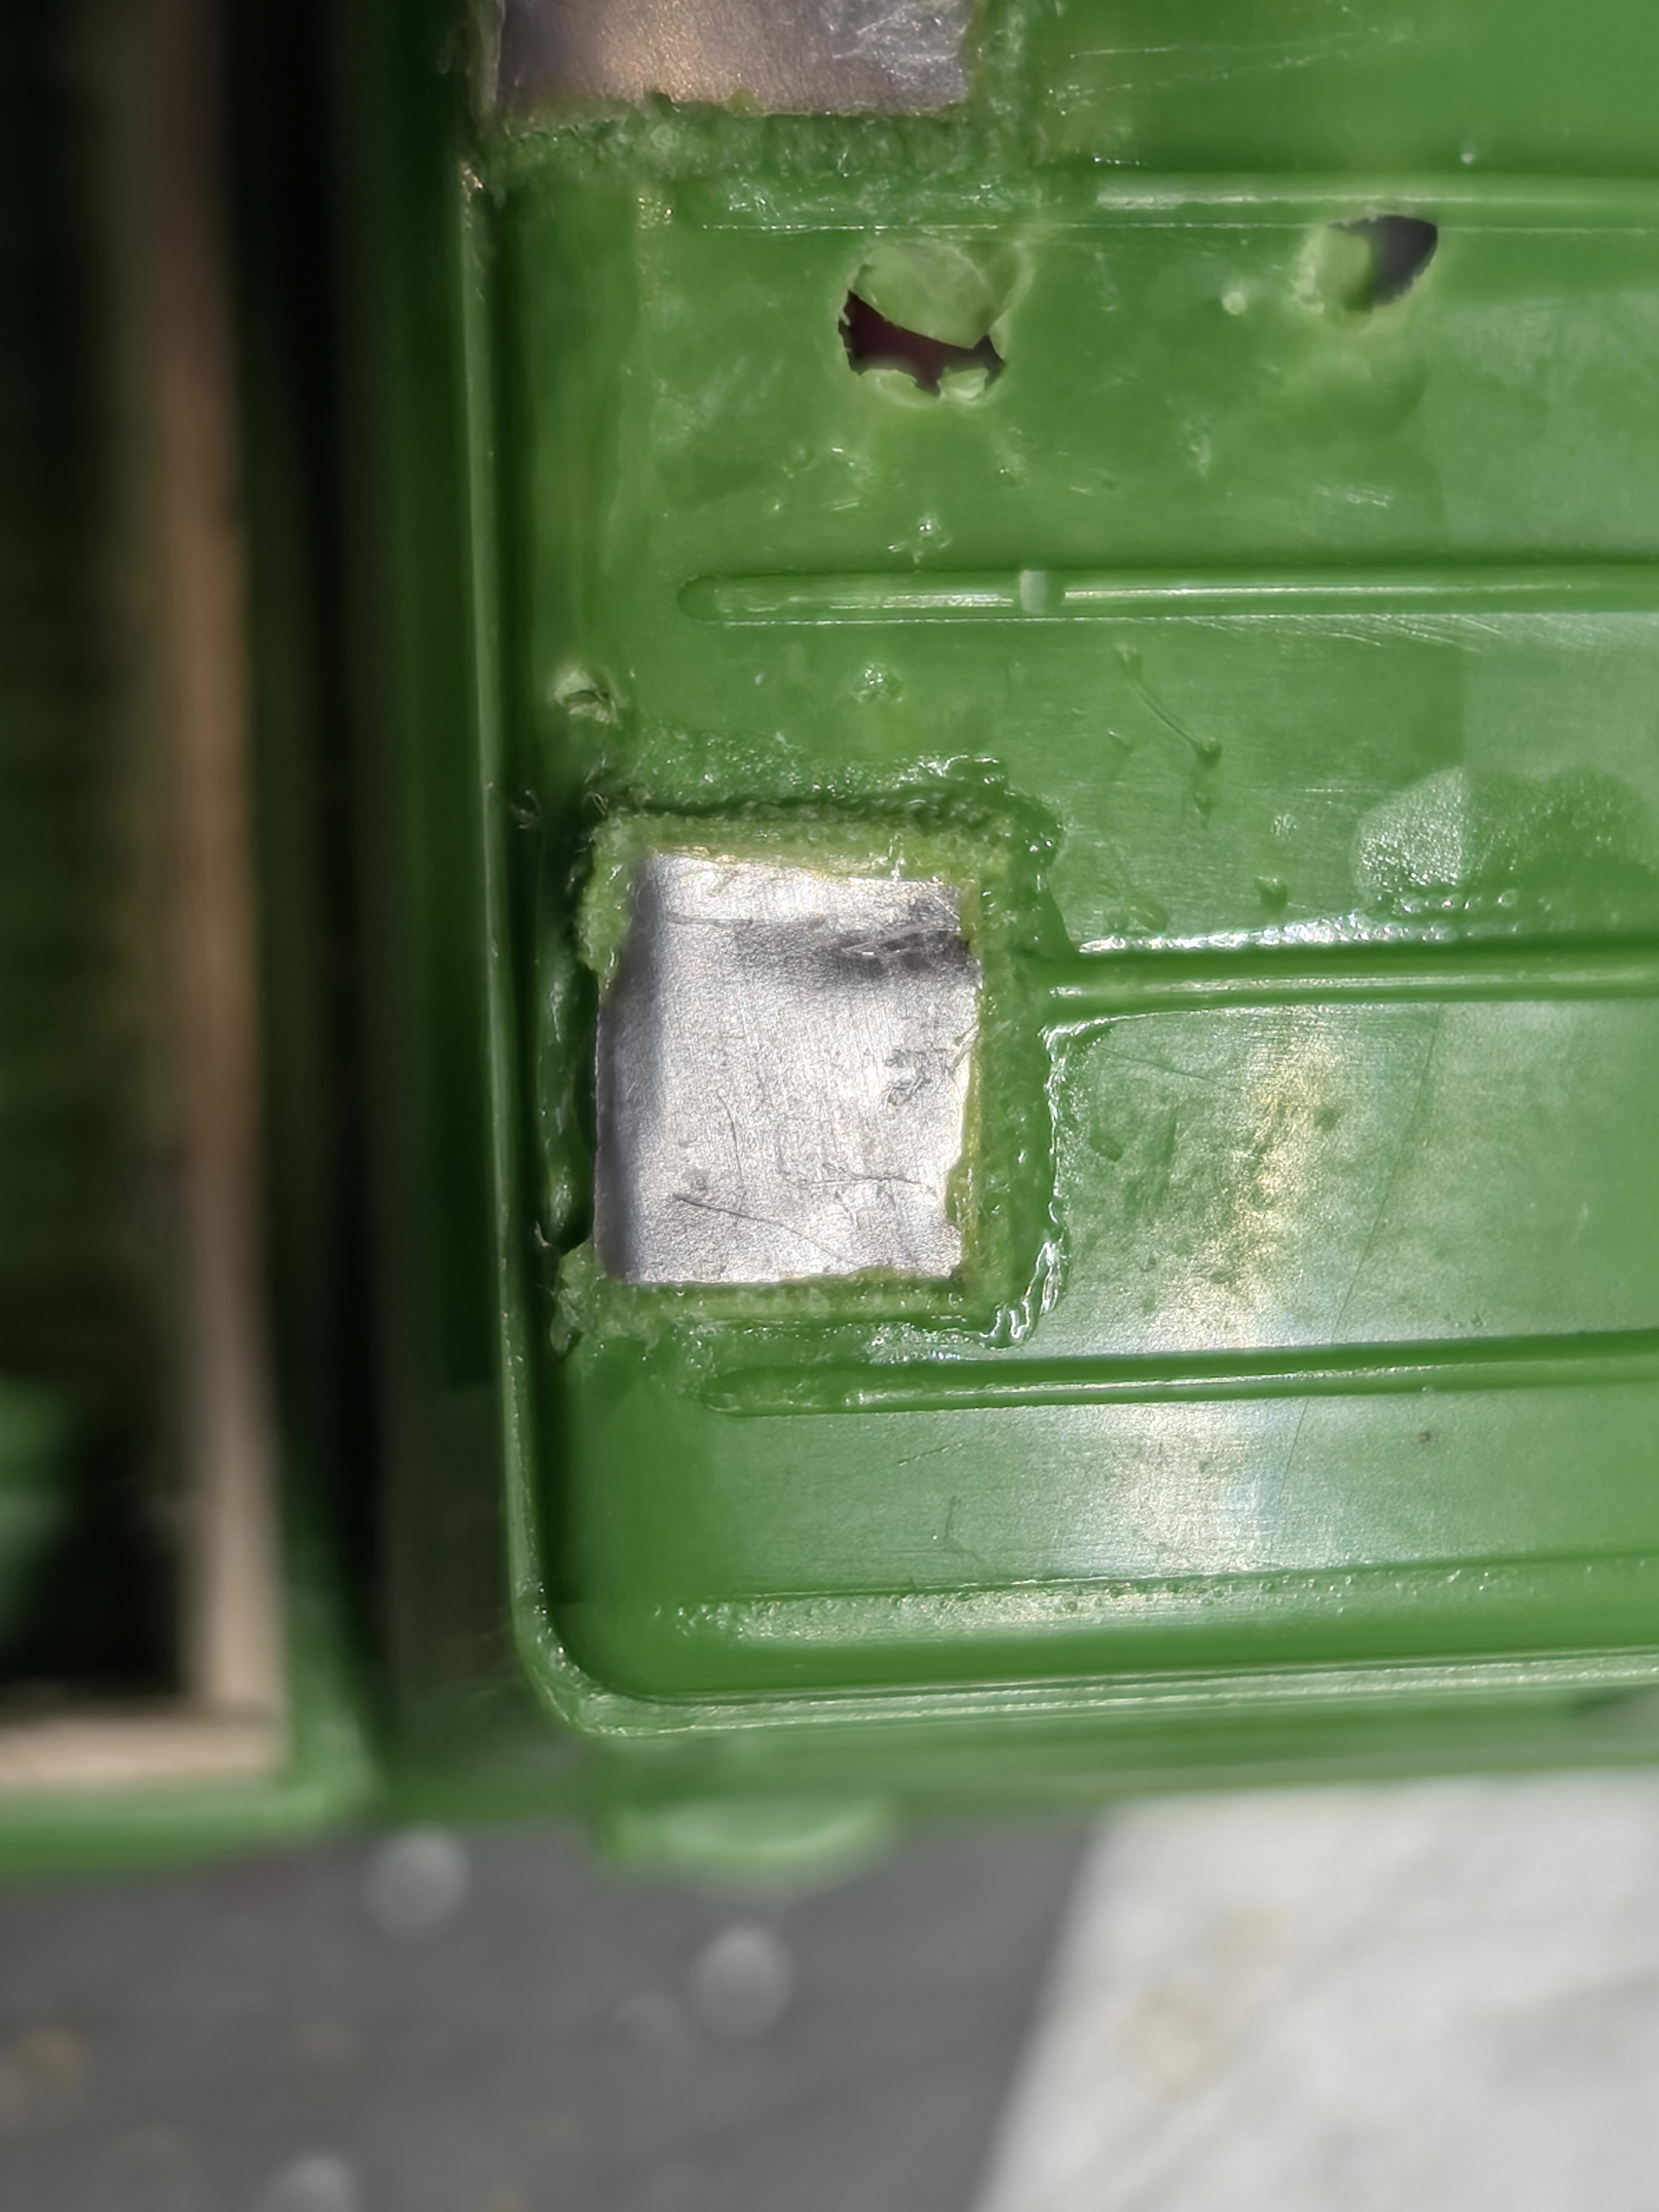
I’m experimenting creating welding seams with elongated sprue. Since the sprue comes from the model it’s applied to, it may be hard to see, but I find the result decent for a first.
8 Likes
Not bad, it does the job OK – but I also really like the heavy corrosion holes above it 
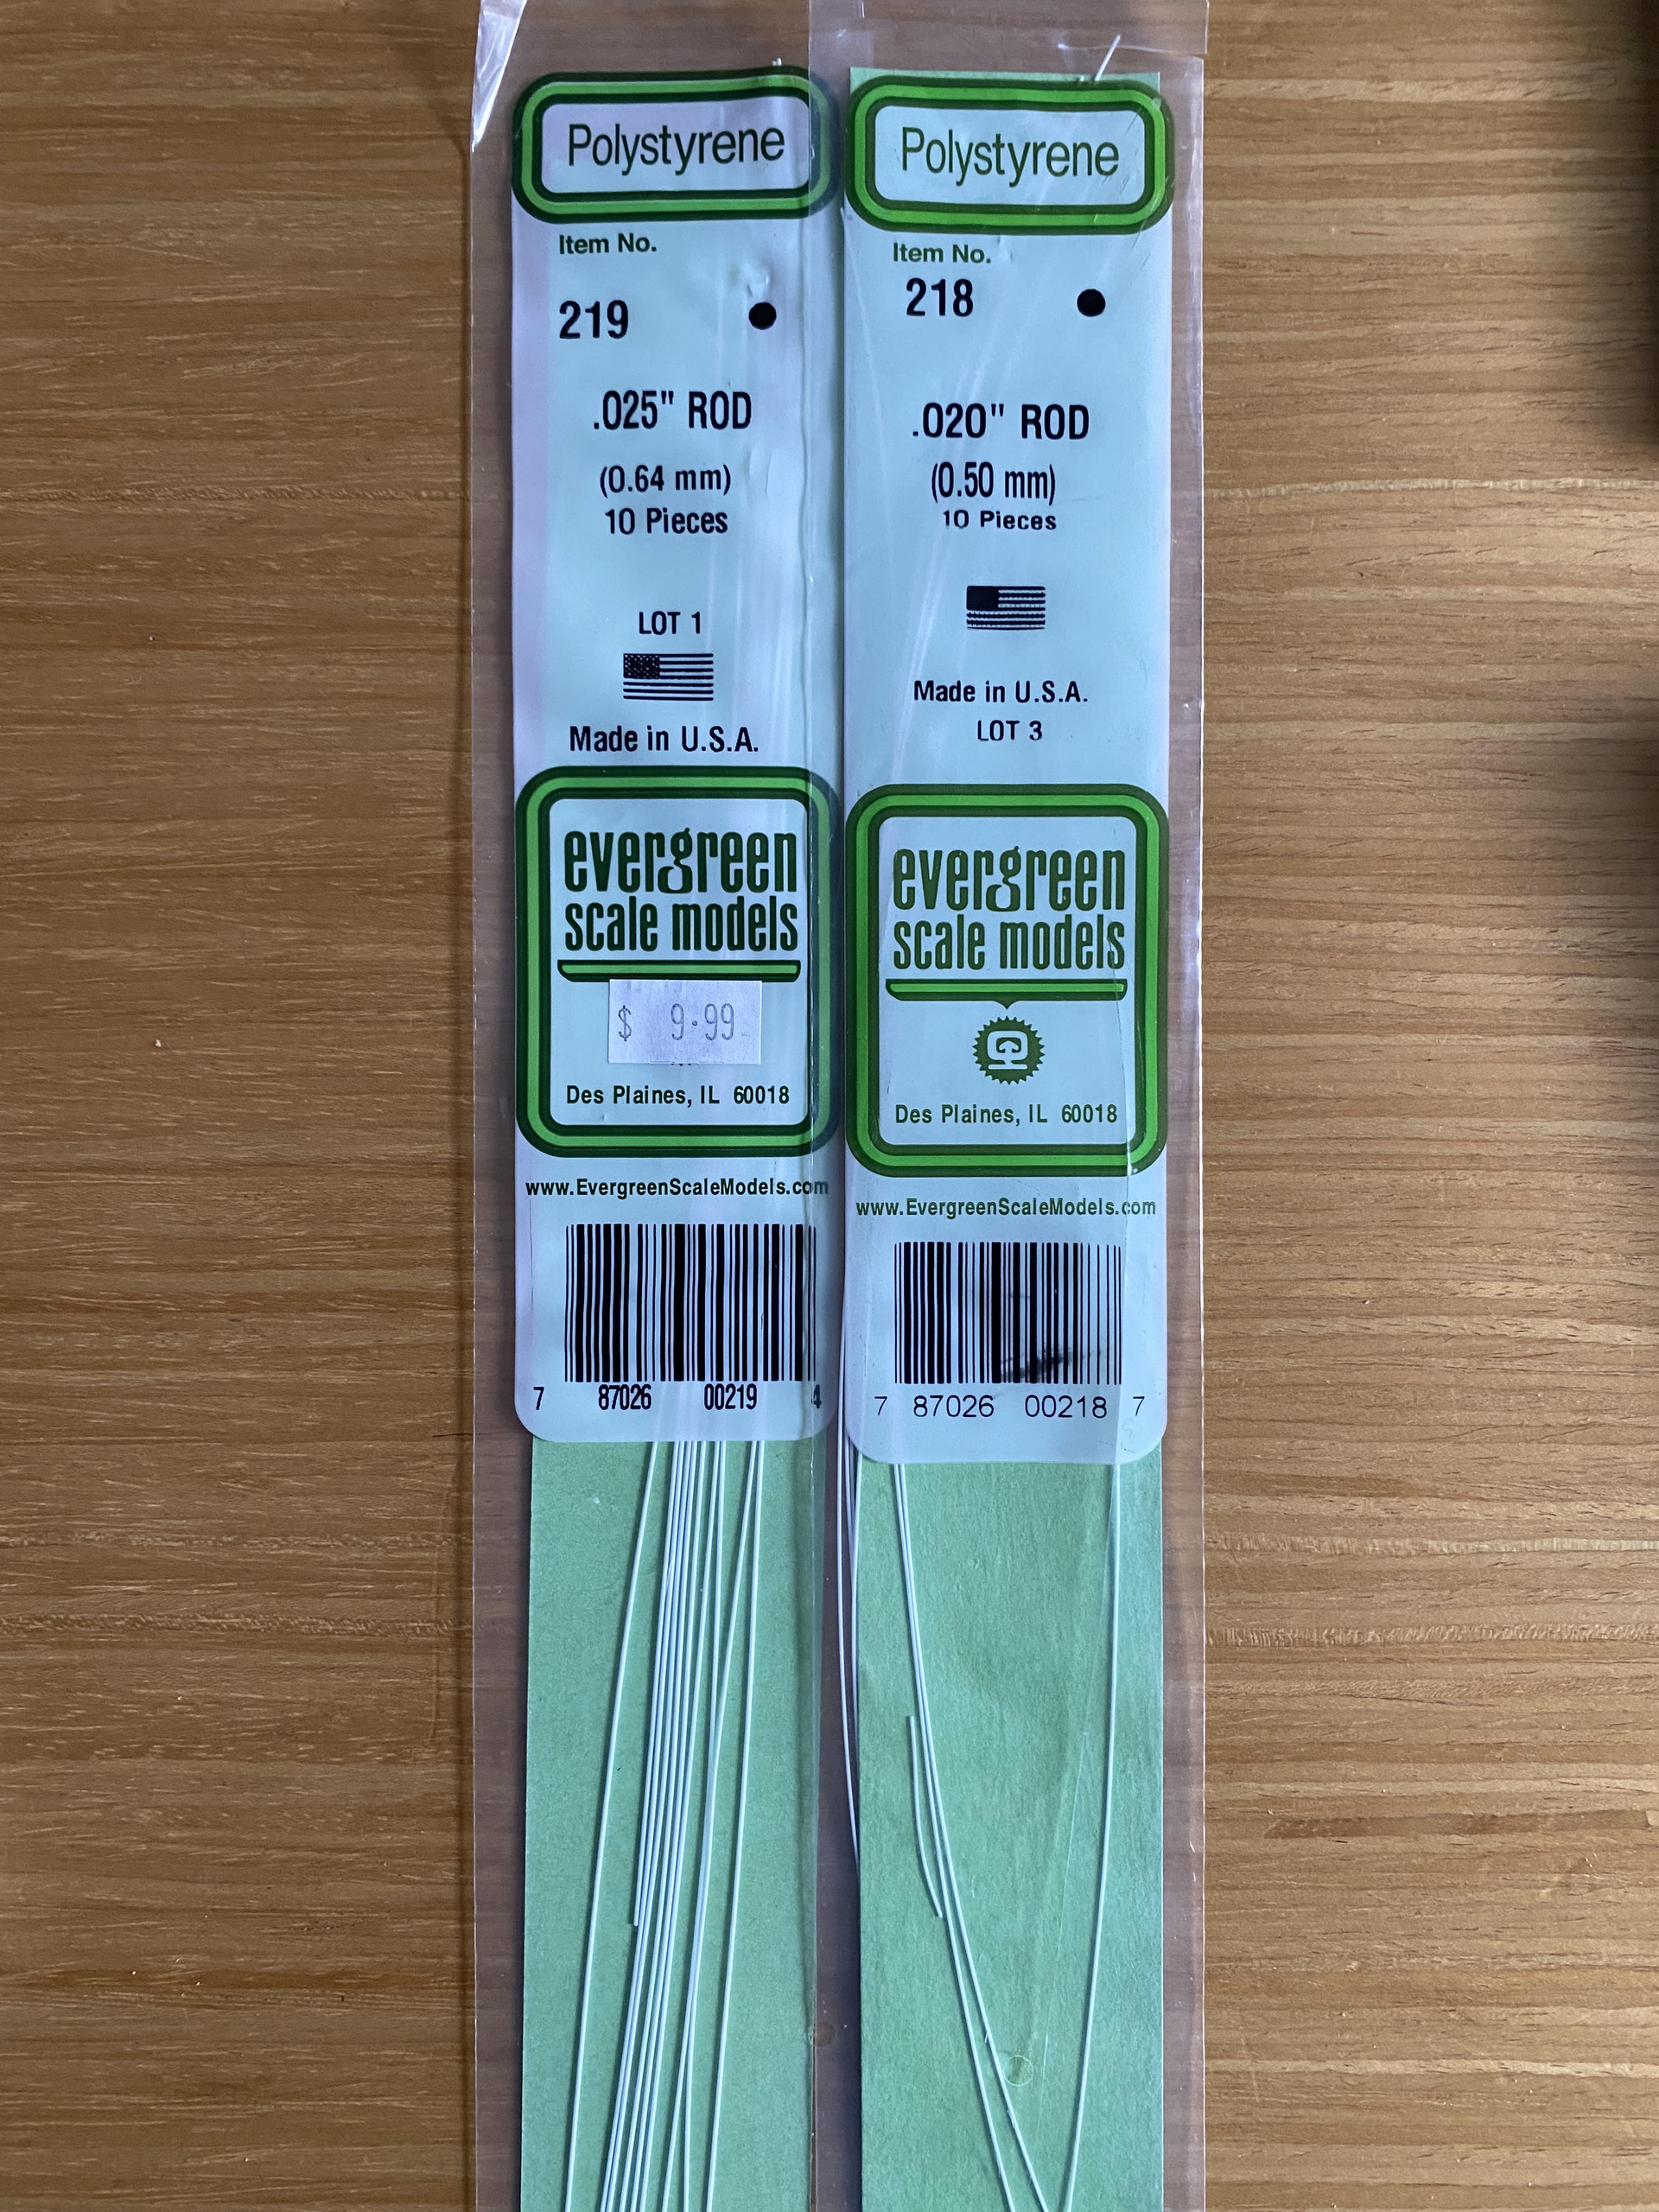
The alternative is one of these, unlike stretched sprue which inevitably tapers it’s uniform for a lot of weld-work…
6 Likes
Thanks Tim (not Martin ) ! I have the 0.5mm styrene rods but was afraid it would be to thick. Now that I’ve done once with sprue, I’ll do with the rod next time.
Like the corrosion? You gonna get served! This one model will be rusty.
1 Like
Er click my avatar, as the actress said to the oh never mind 
2 Likes
I’m sorry Tim! I did check, and have answered to you on many occasions using the right patronyme… but my fingers went to Martin…
2 Likes
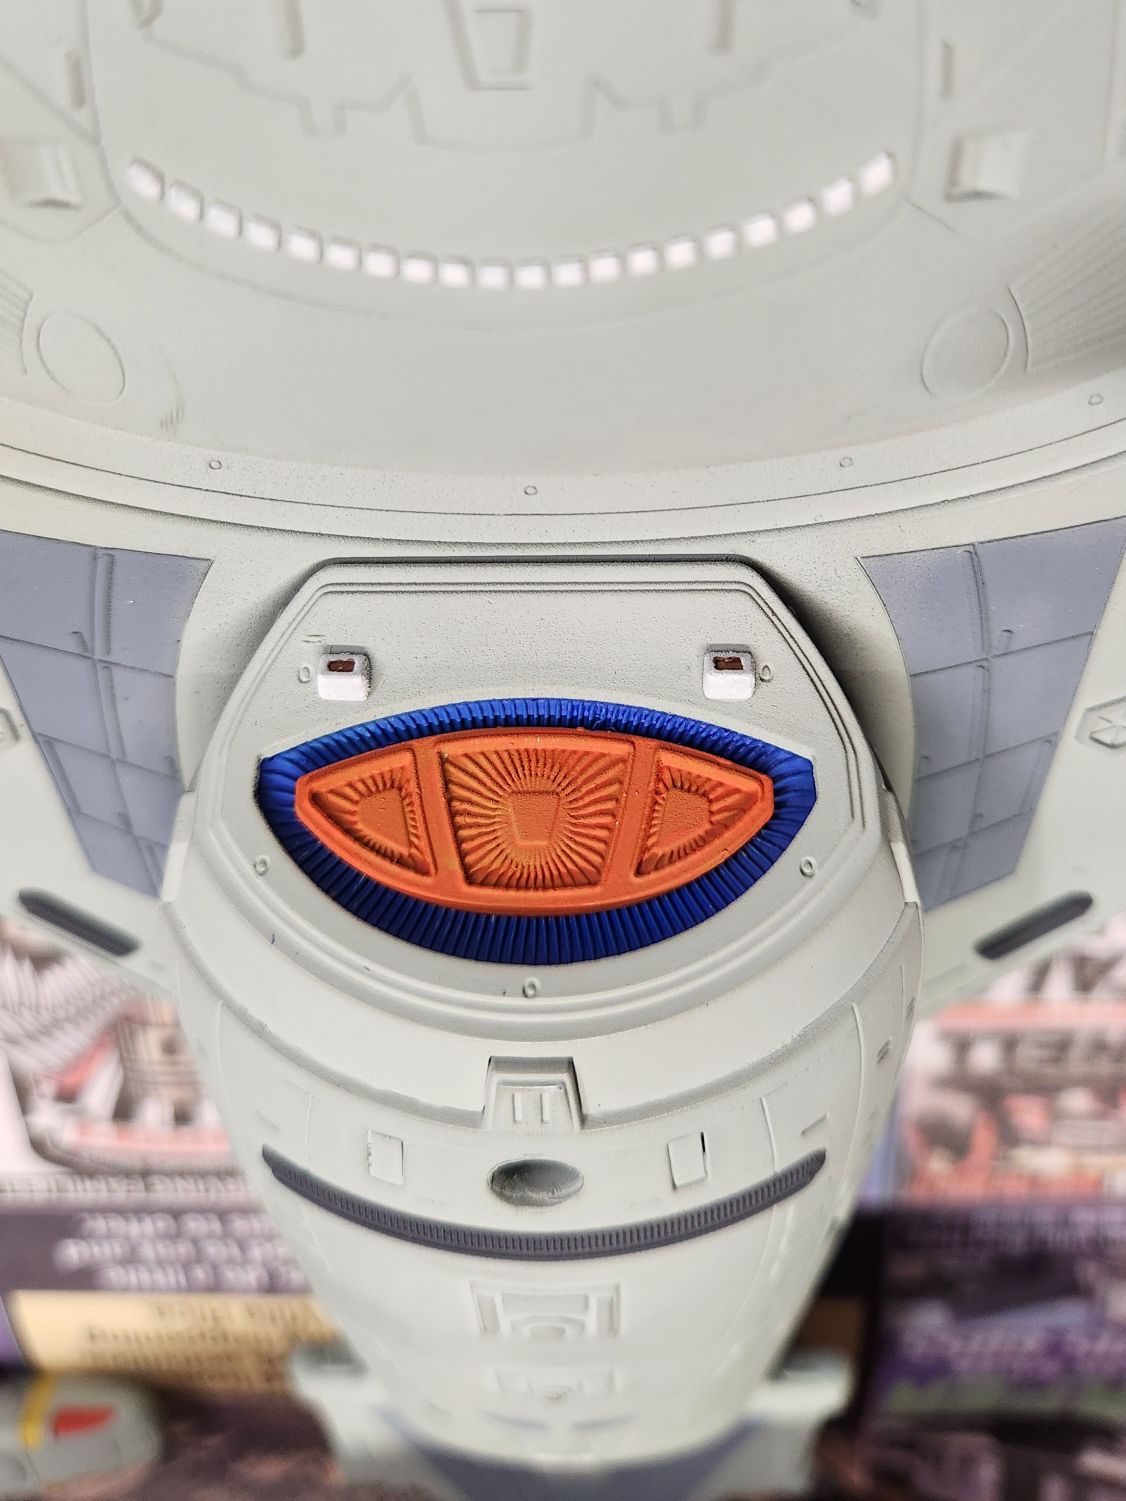
I think I have all the major paint work down, so after I check for any necessary touch-ups the next step is a gloss coat to prep for the numerous decals these kits carry.
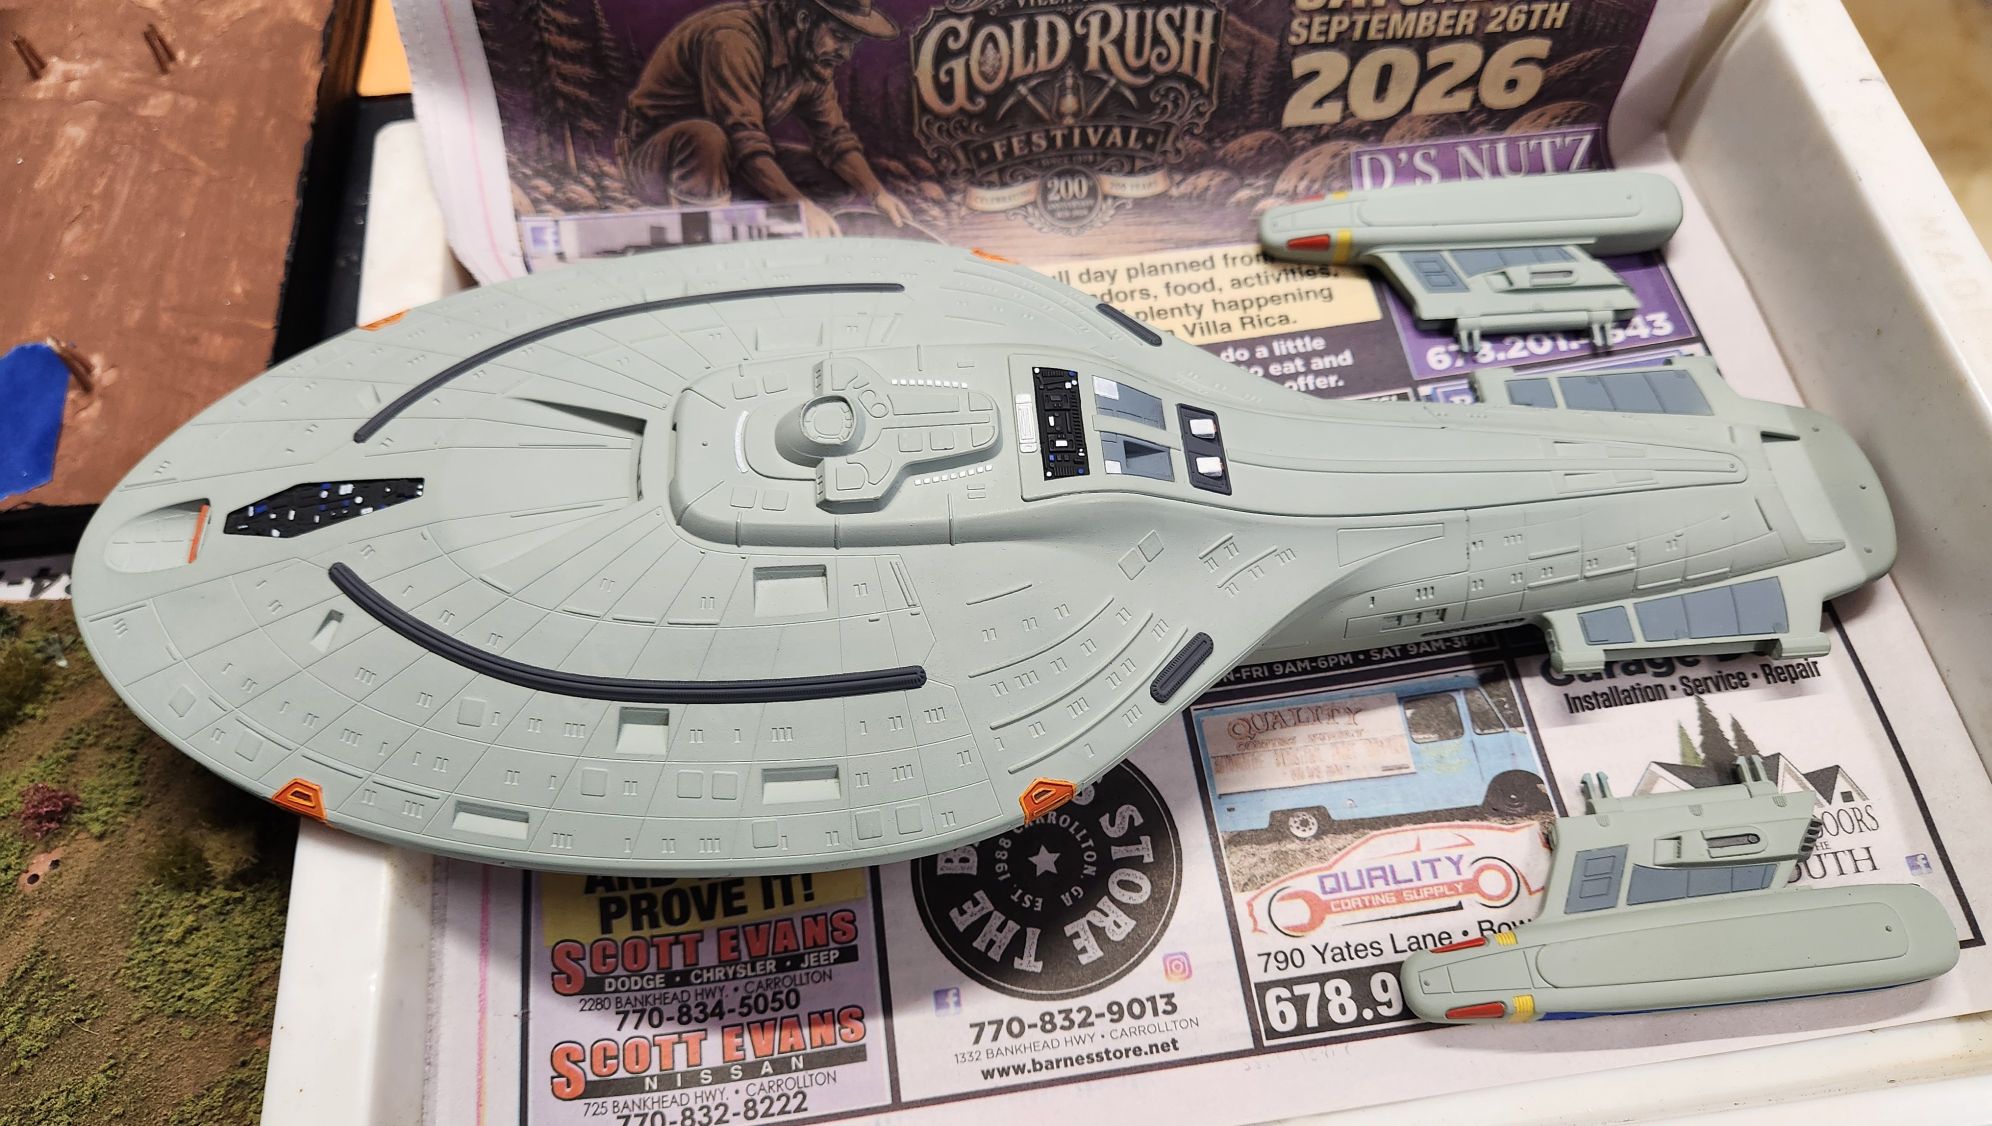
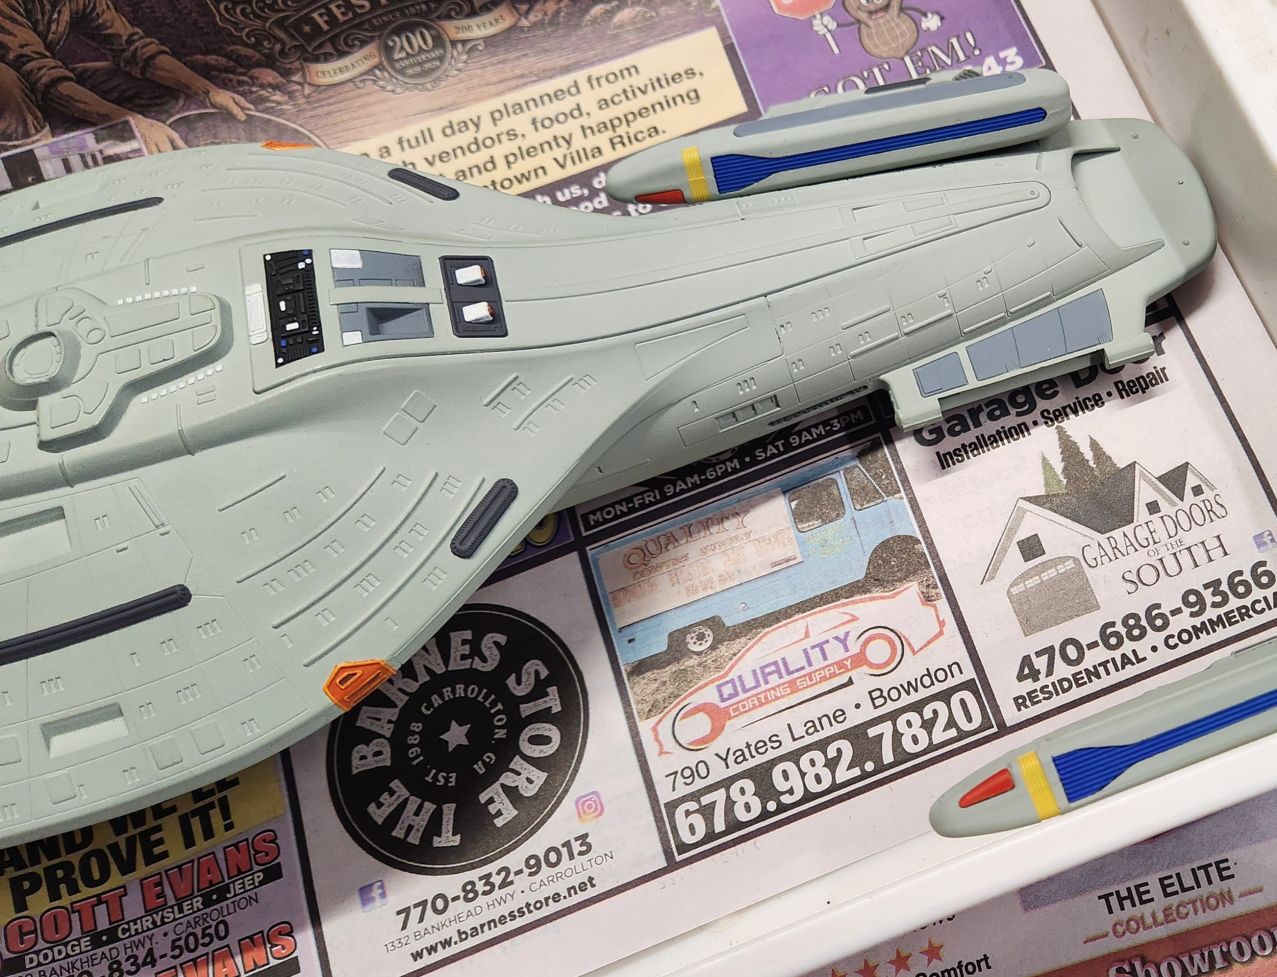
And what if I told you the orange was painted before the blue and both while on the ship? The orange sits atop the blue which is slightly recessed behind the gray hull. Probably should have gone blue first but I apparently like to challenge myself.
9 Likes
I finished weathering a model of a CAT D8K. It’s a conversion from the AMT D8H. There are a lot of changes, and it worked out pretty well. The old AMT kit is fine, if you’ve built a few kits, as the locating points are a bit weak, and many pieces pretty clunky. That said, it provides a pretty good base for bigger changes. Please take a look:
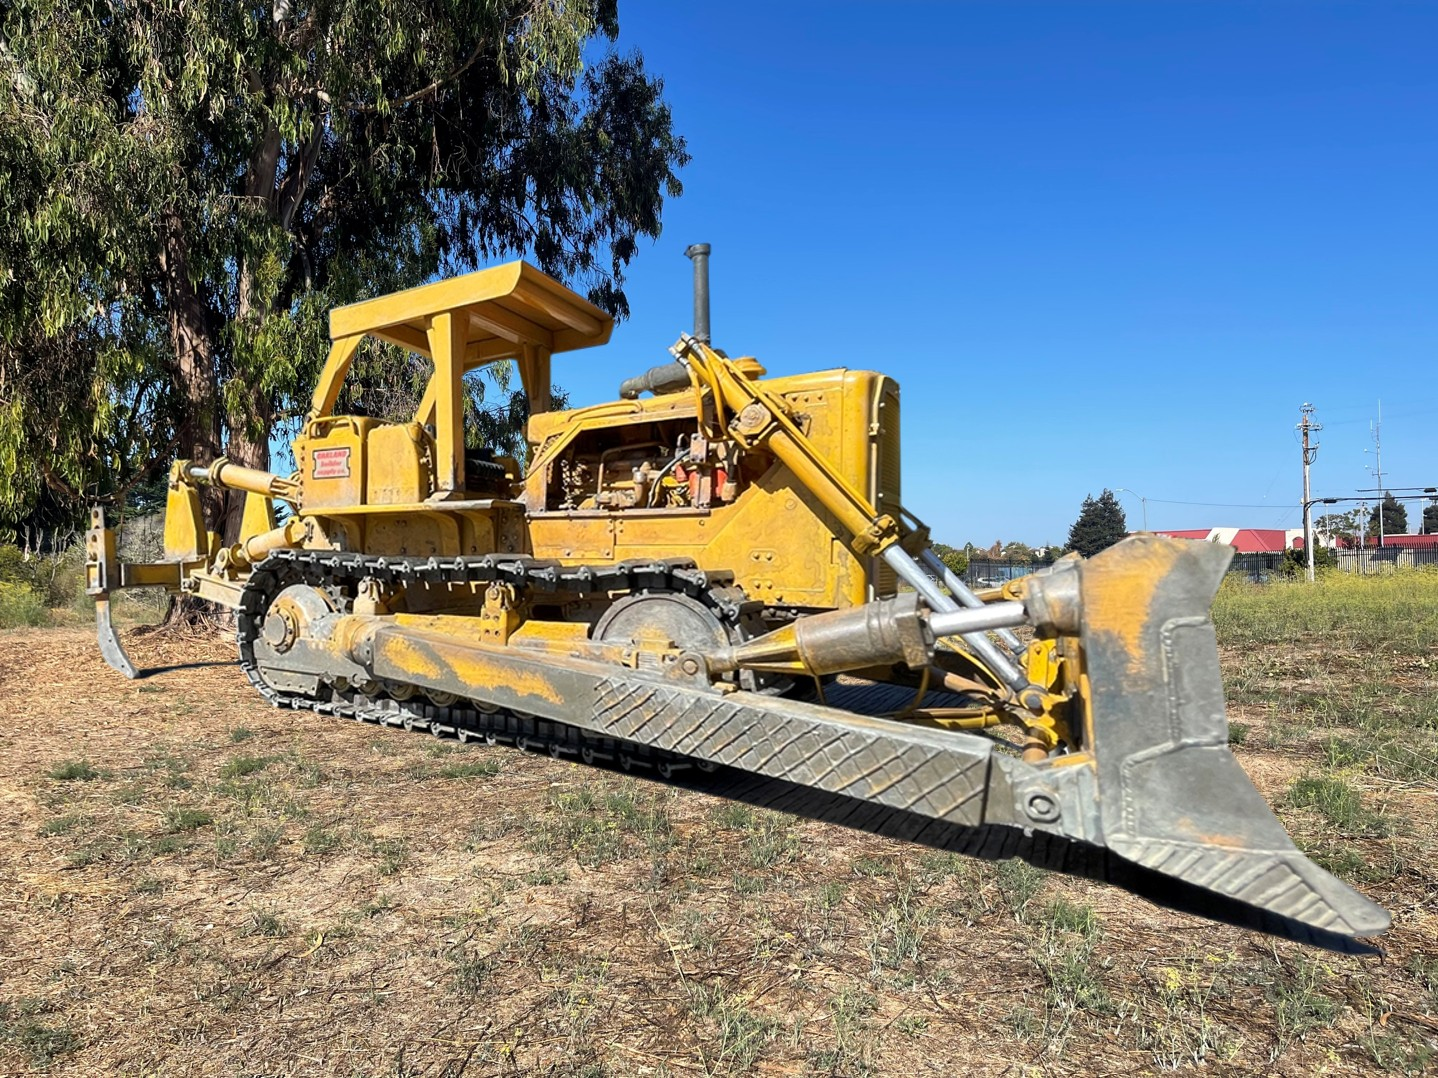
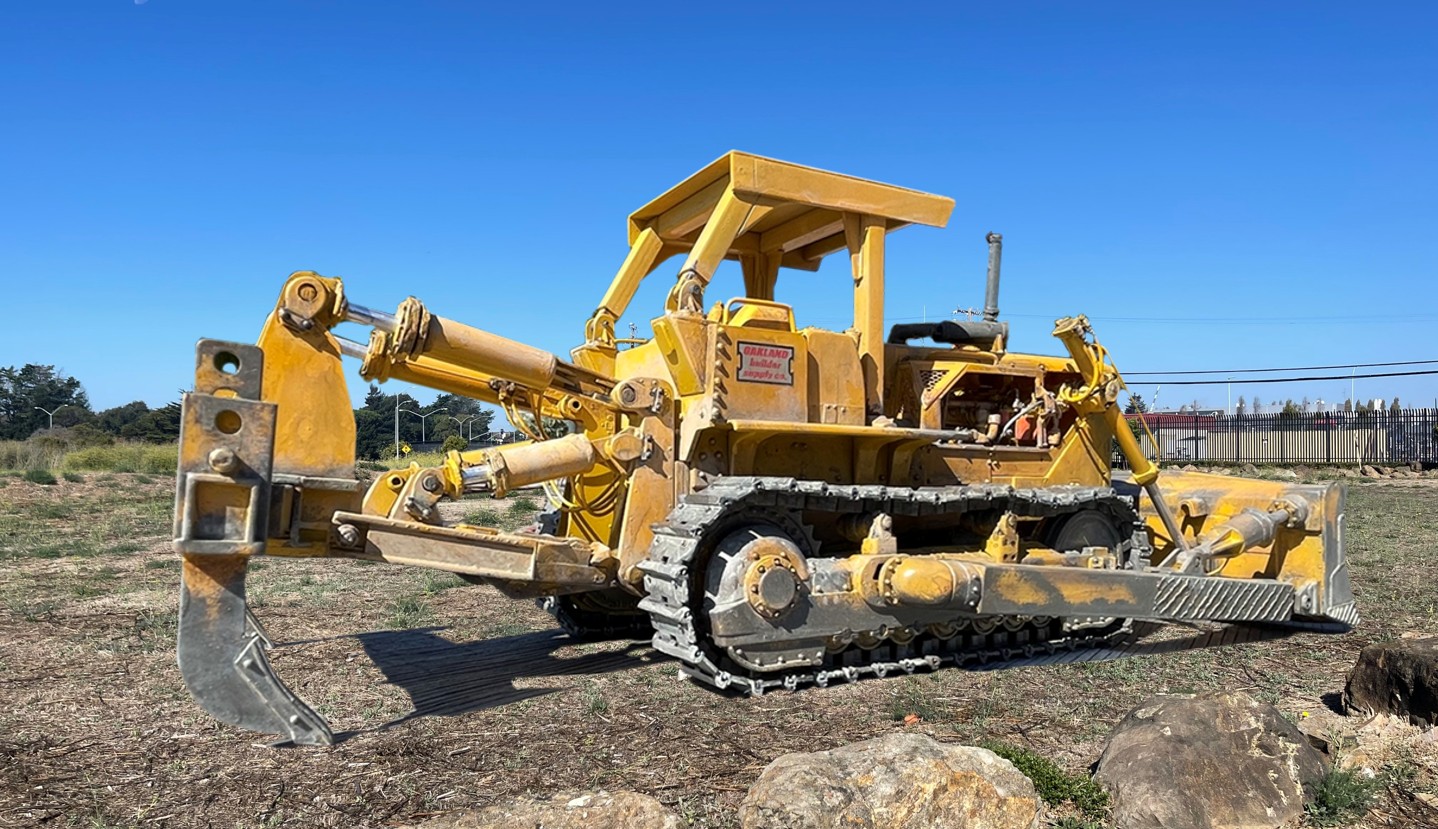
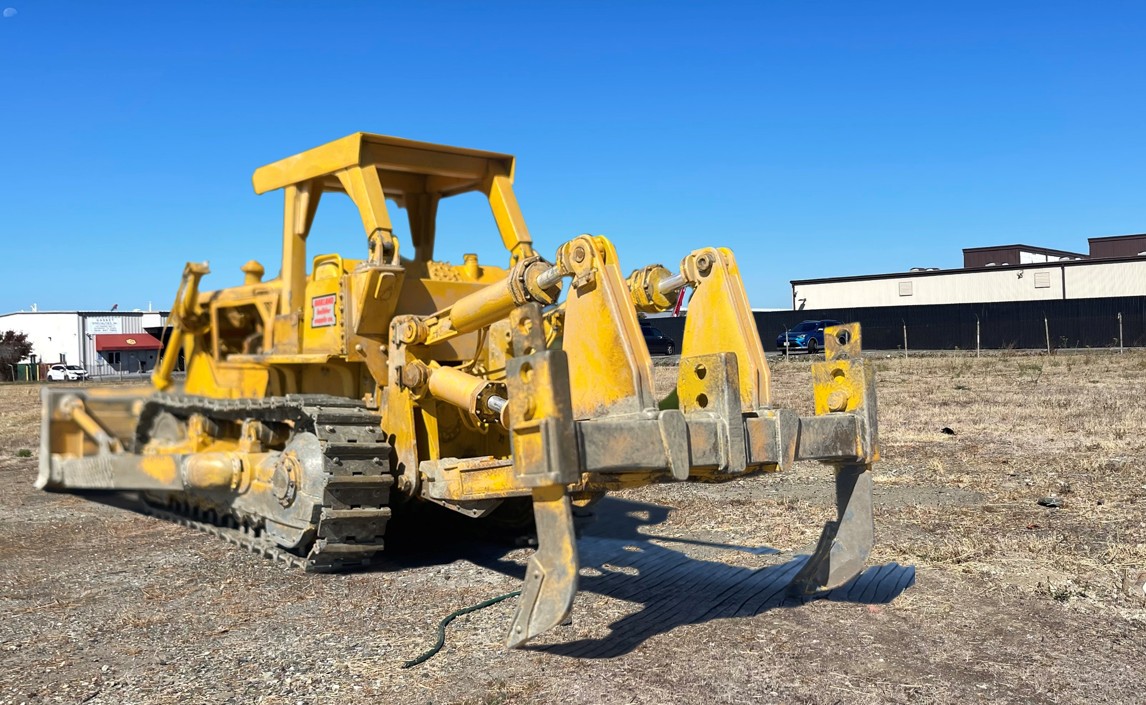
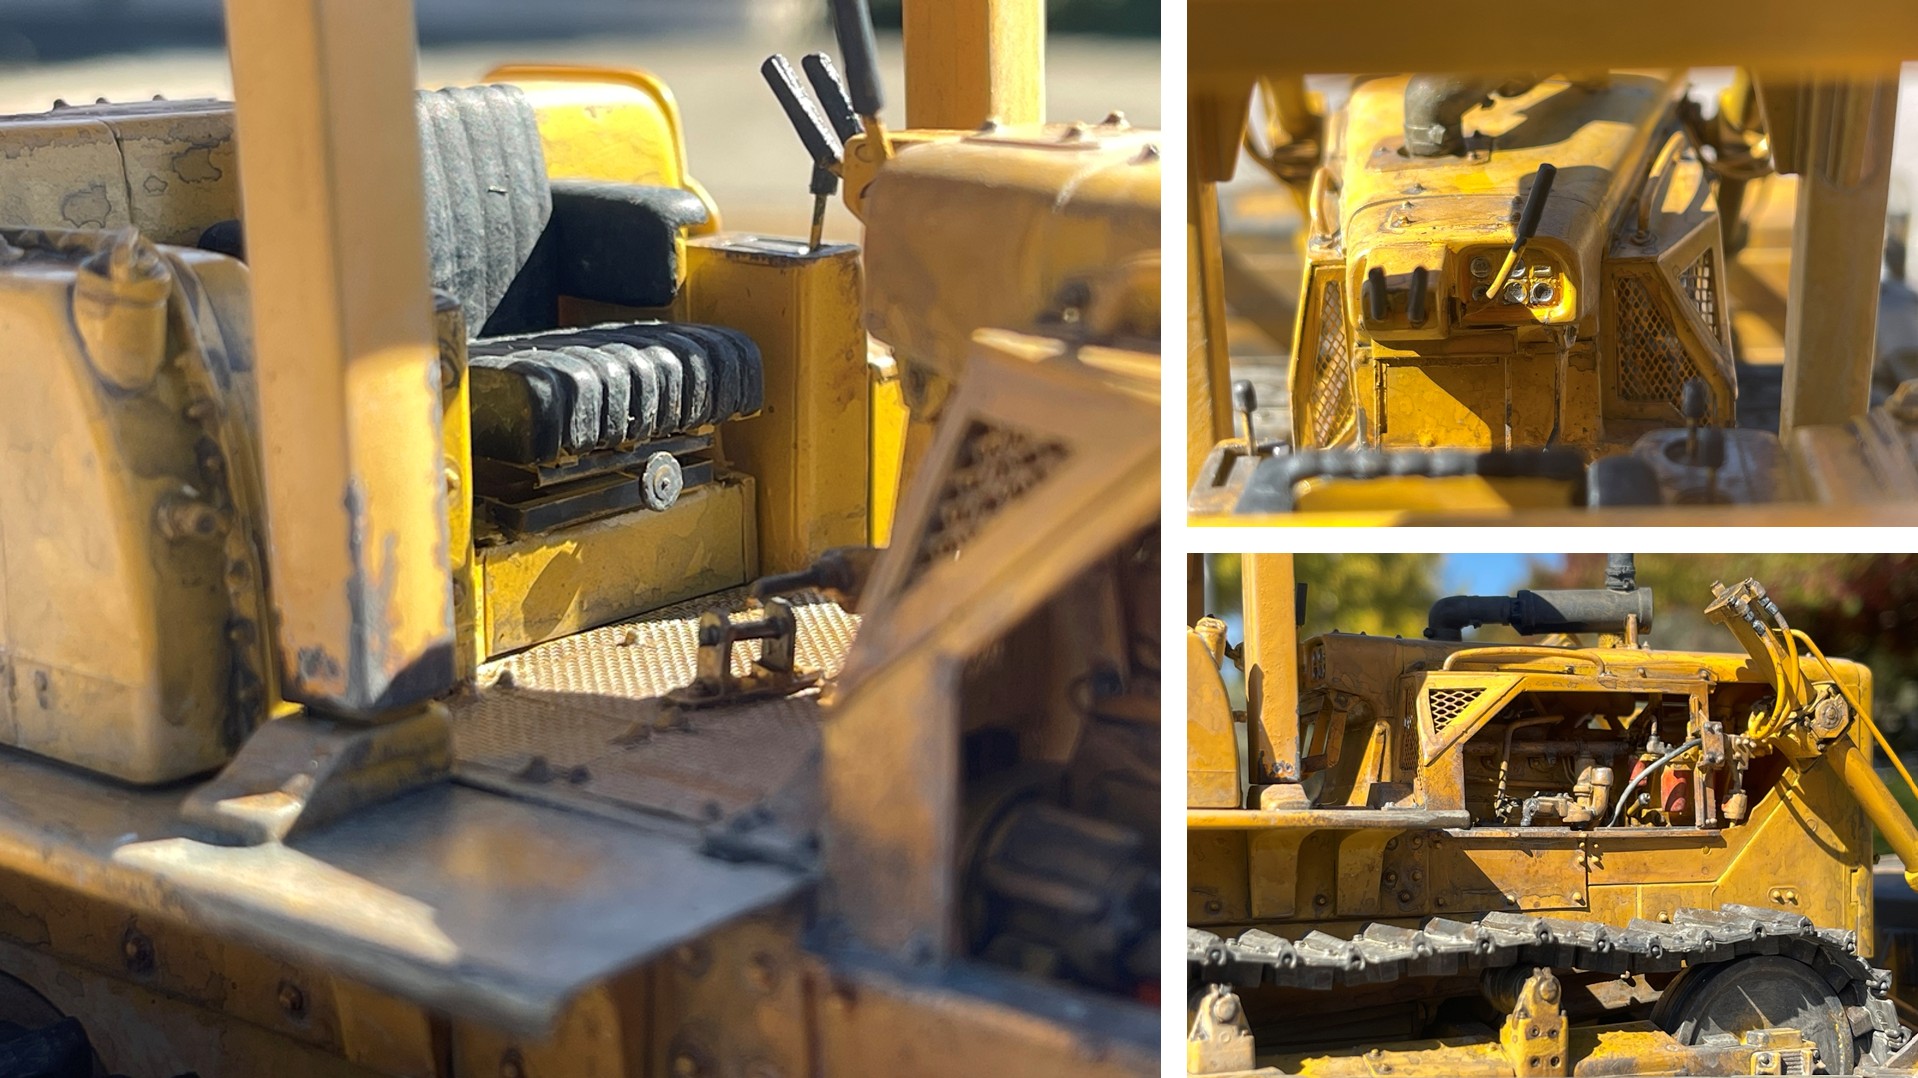
I built up new rippers, rollover protection, the cab, detailed the engine and so on - sort of a bummer it’s done - it was a fun build
Cheers
Nick 
24 Likes
OK Nick I’ve rumbled you this time - yet again you went out on one of your marathon bike rides and found a 1:1 version somewhere. Now show us your model
6 Likes