Hi Everyone,
Lots of really nice builds going on here! Though I must admit the flying side of things is a bit underrepresented, let’s remedy that. During my last update, I’d pretty much gotten most of the airframe together on the I-16. Since then quite a bit of progress has been made.
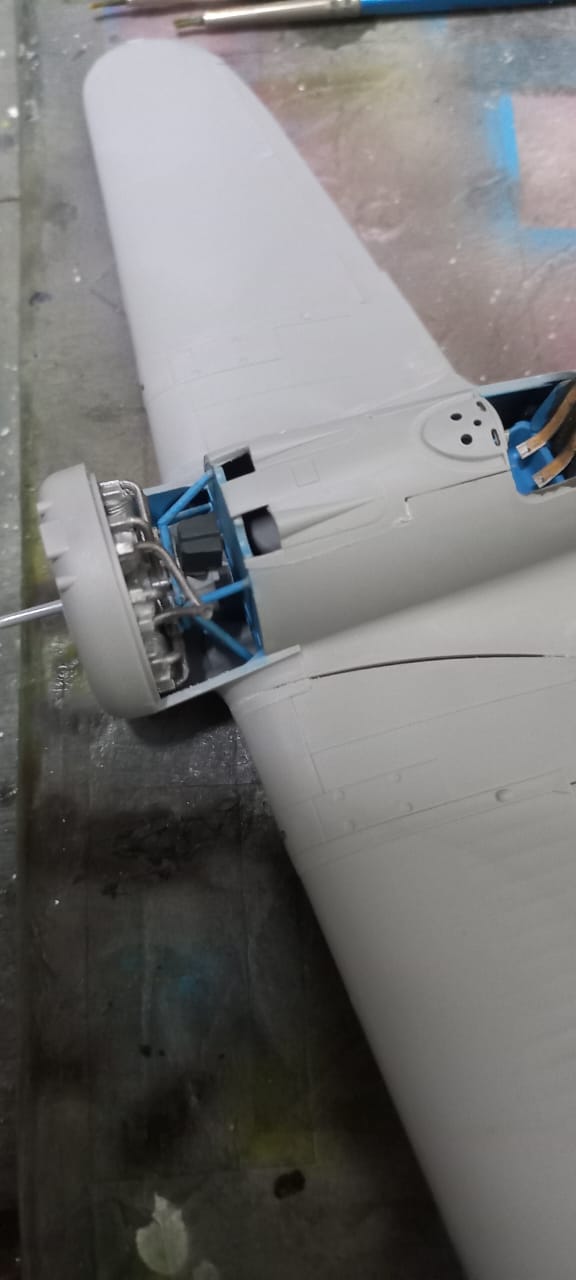
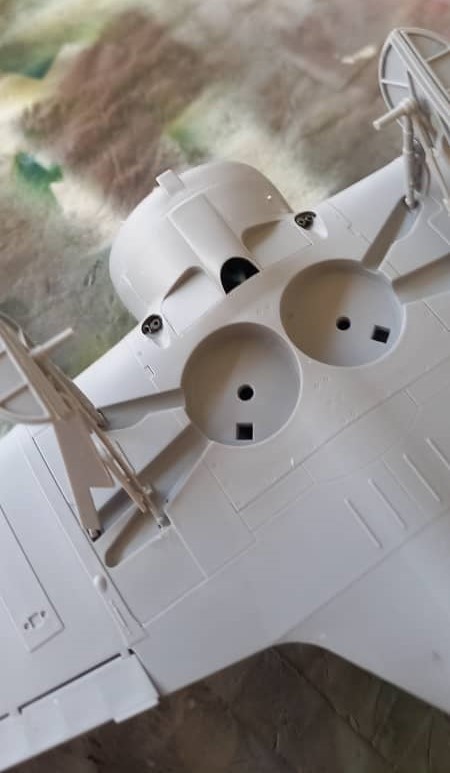
I was able to fenagle the engine and cowl onto the fuselage, however, in the process most of the flimsy exhausts became dislodged. It was at this point that getting these to fit properly with the cowling closed would be quite a feat. I figured that I’d deal with them a bit further down the build, and focused on getting things closed up.
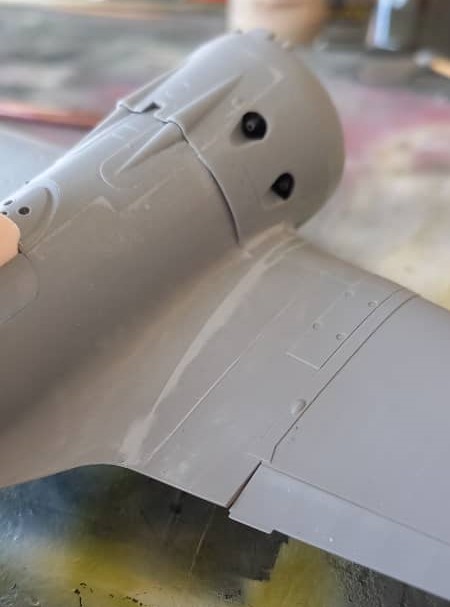
Once the cowling was assembled correctly, I added the stabilizers and the rudder. Then it was onto a few filling and sanding sessions.
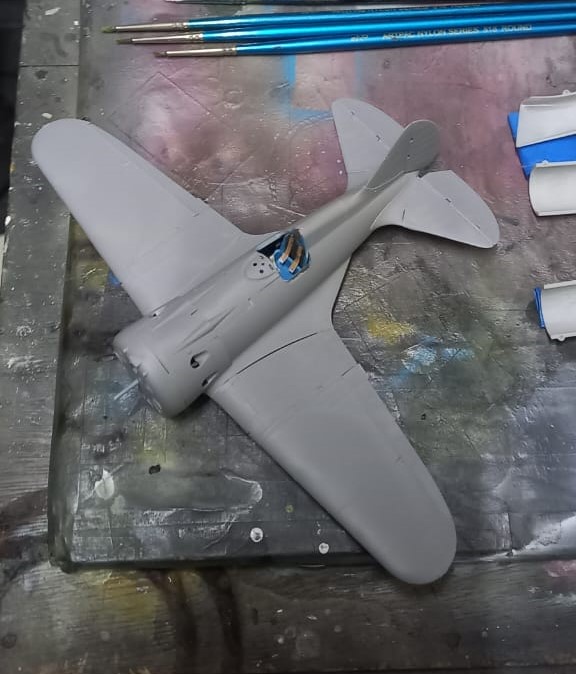
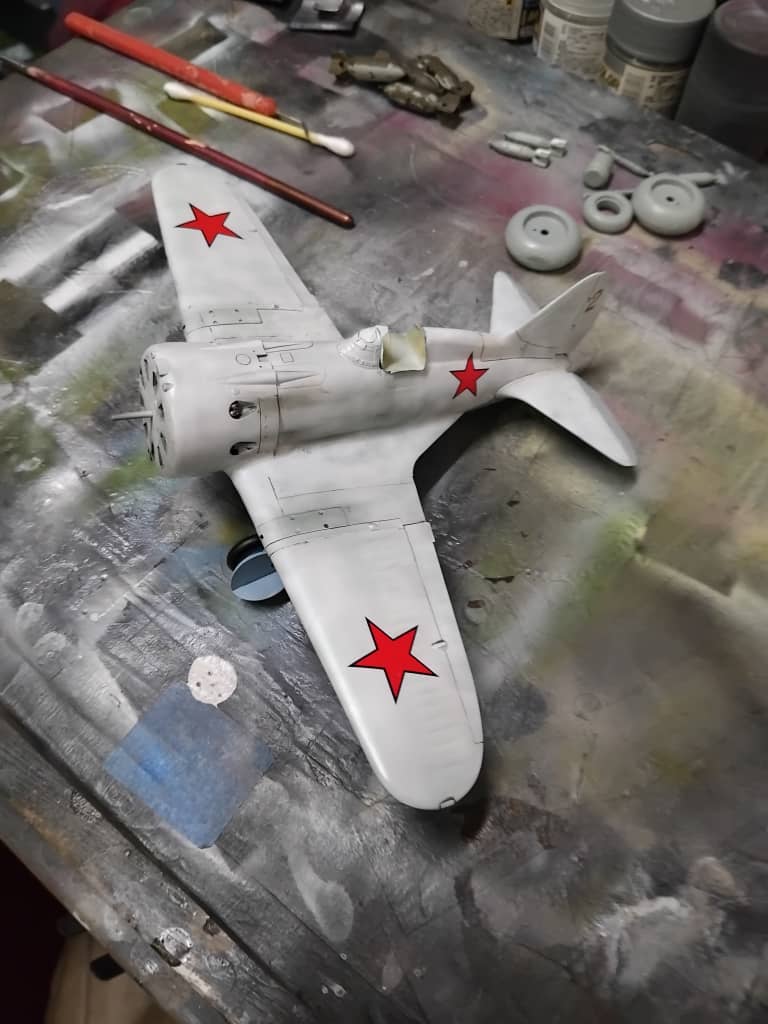
The worst of the gaps were at the wing/fuselage mating area. On this plane there was no mating seam, being constructed entirely of wood in this area. Using some 10 thousand stock strip cut down to fit into the gap and then using Mr. Surfacer 500 to fill the gap. This took four sessions, and the tail and underside fuselage wing mating area took three sessions. The cowling area took two. All in all it wasn’t as bad as it seemed, though I’d had higher hopes for a better fit. Oh well.
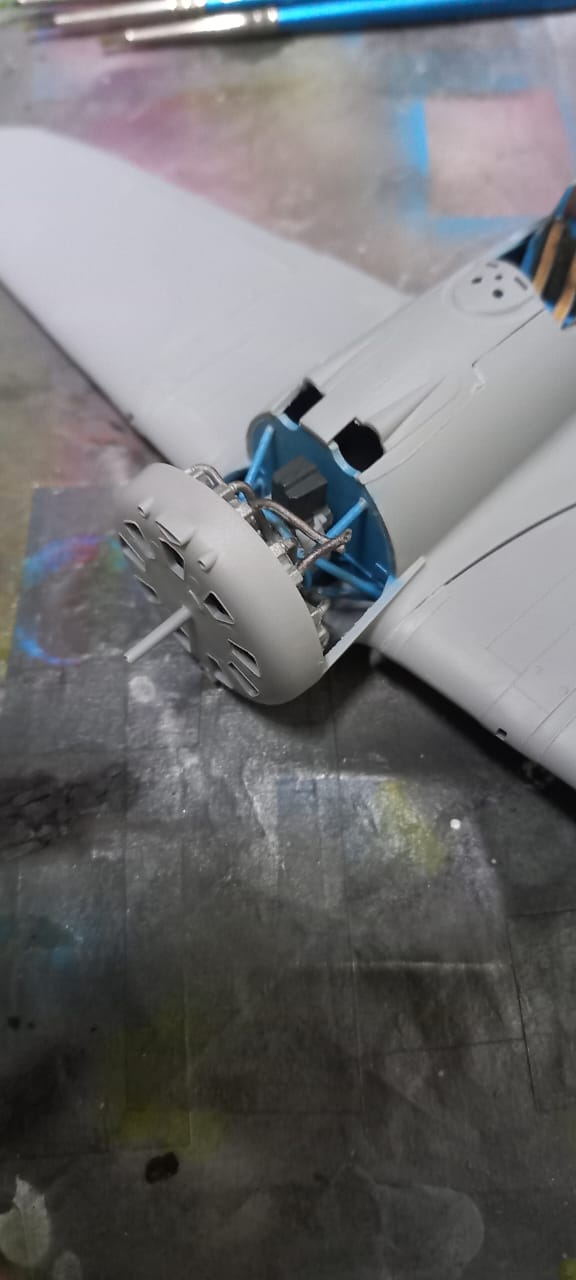
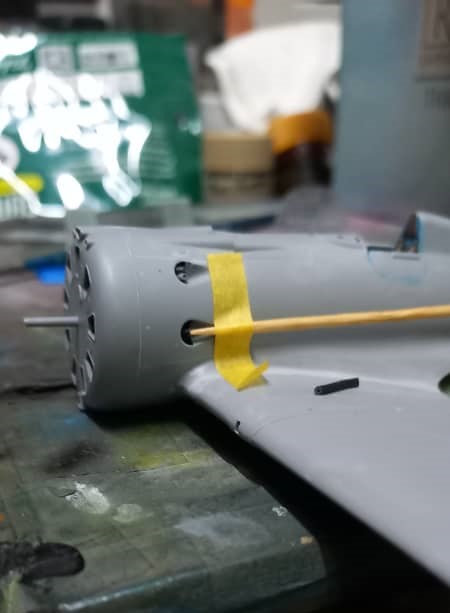
Following the airframe clean-up, the exhausts became a priority. Fortunately for me I like to walk the neighborhood, and on one of my walks I came across a piece of discarded wire. The wire turned out to be the exact diameter of the kits exhaust pipes. Lucky me! By cutting the wire to a suitable length I found that by pushing the wire forward I got a fairly believable looking exhaust. These were mounted up into the cowl, and using reference photos I was able to get the angles and appearance to look correct. Getting a couple of them to line up was tricky, until I opted to use a stabilizing bar (toothpick) to hold the wire in place until the superglue cured.

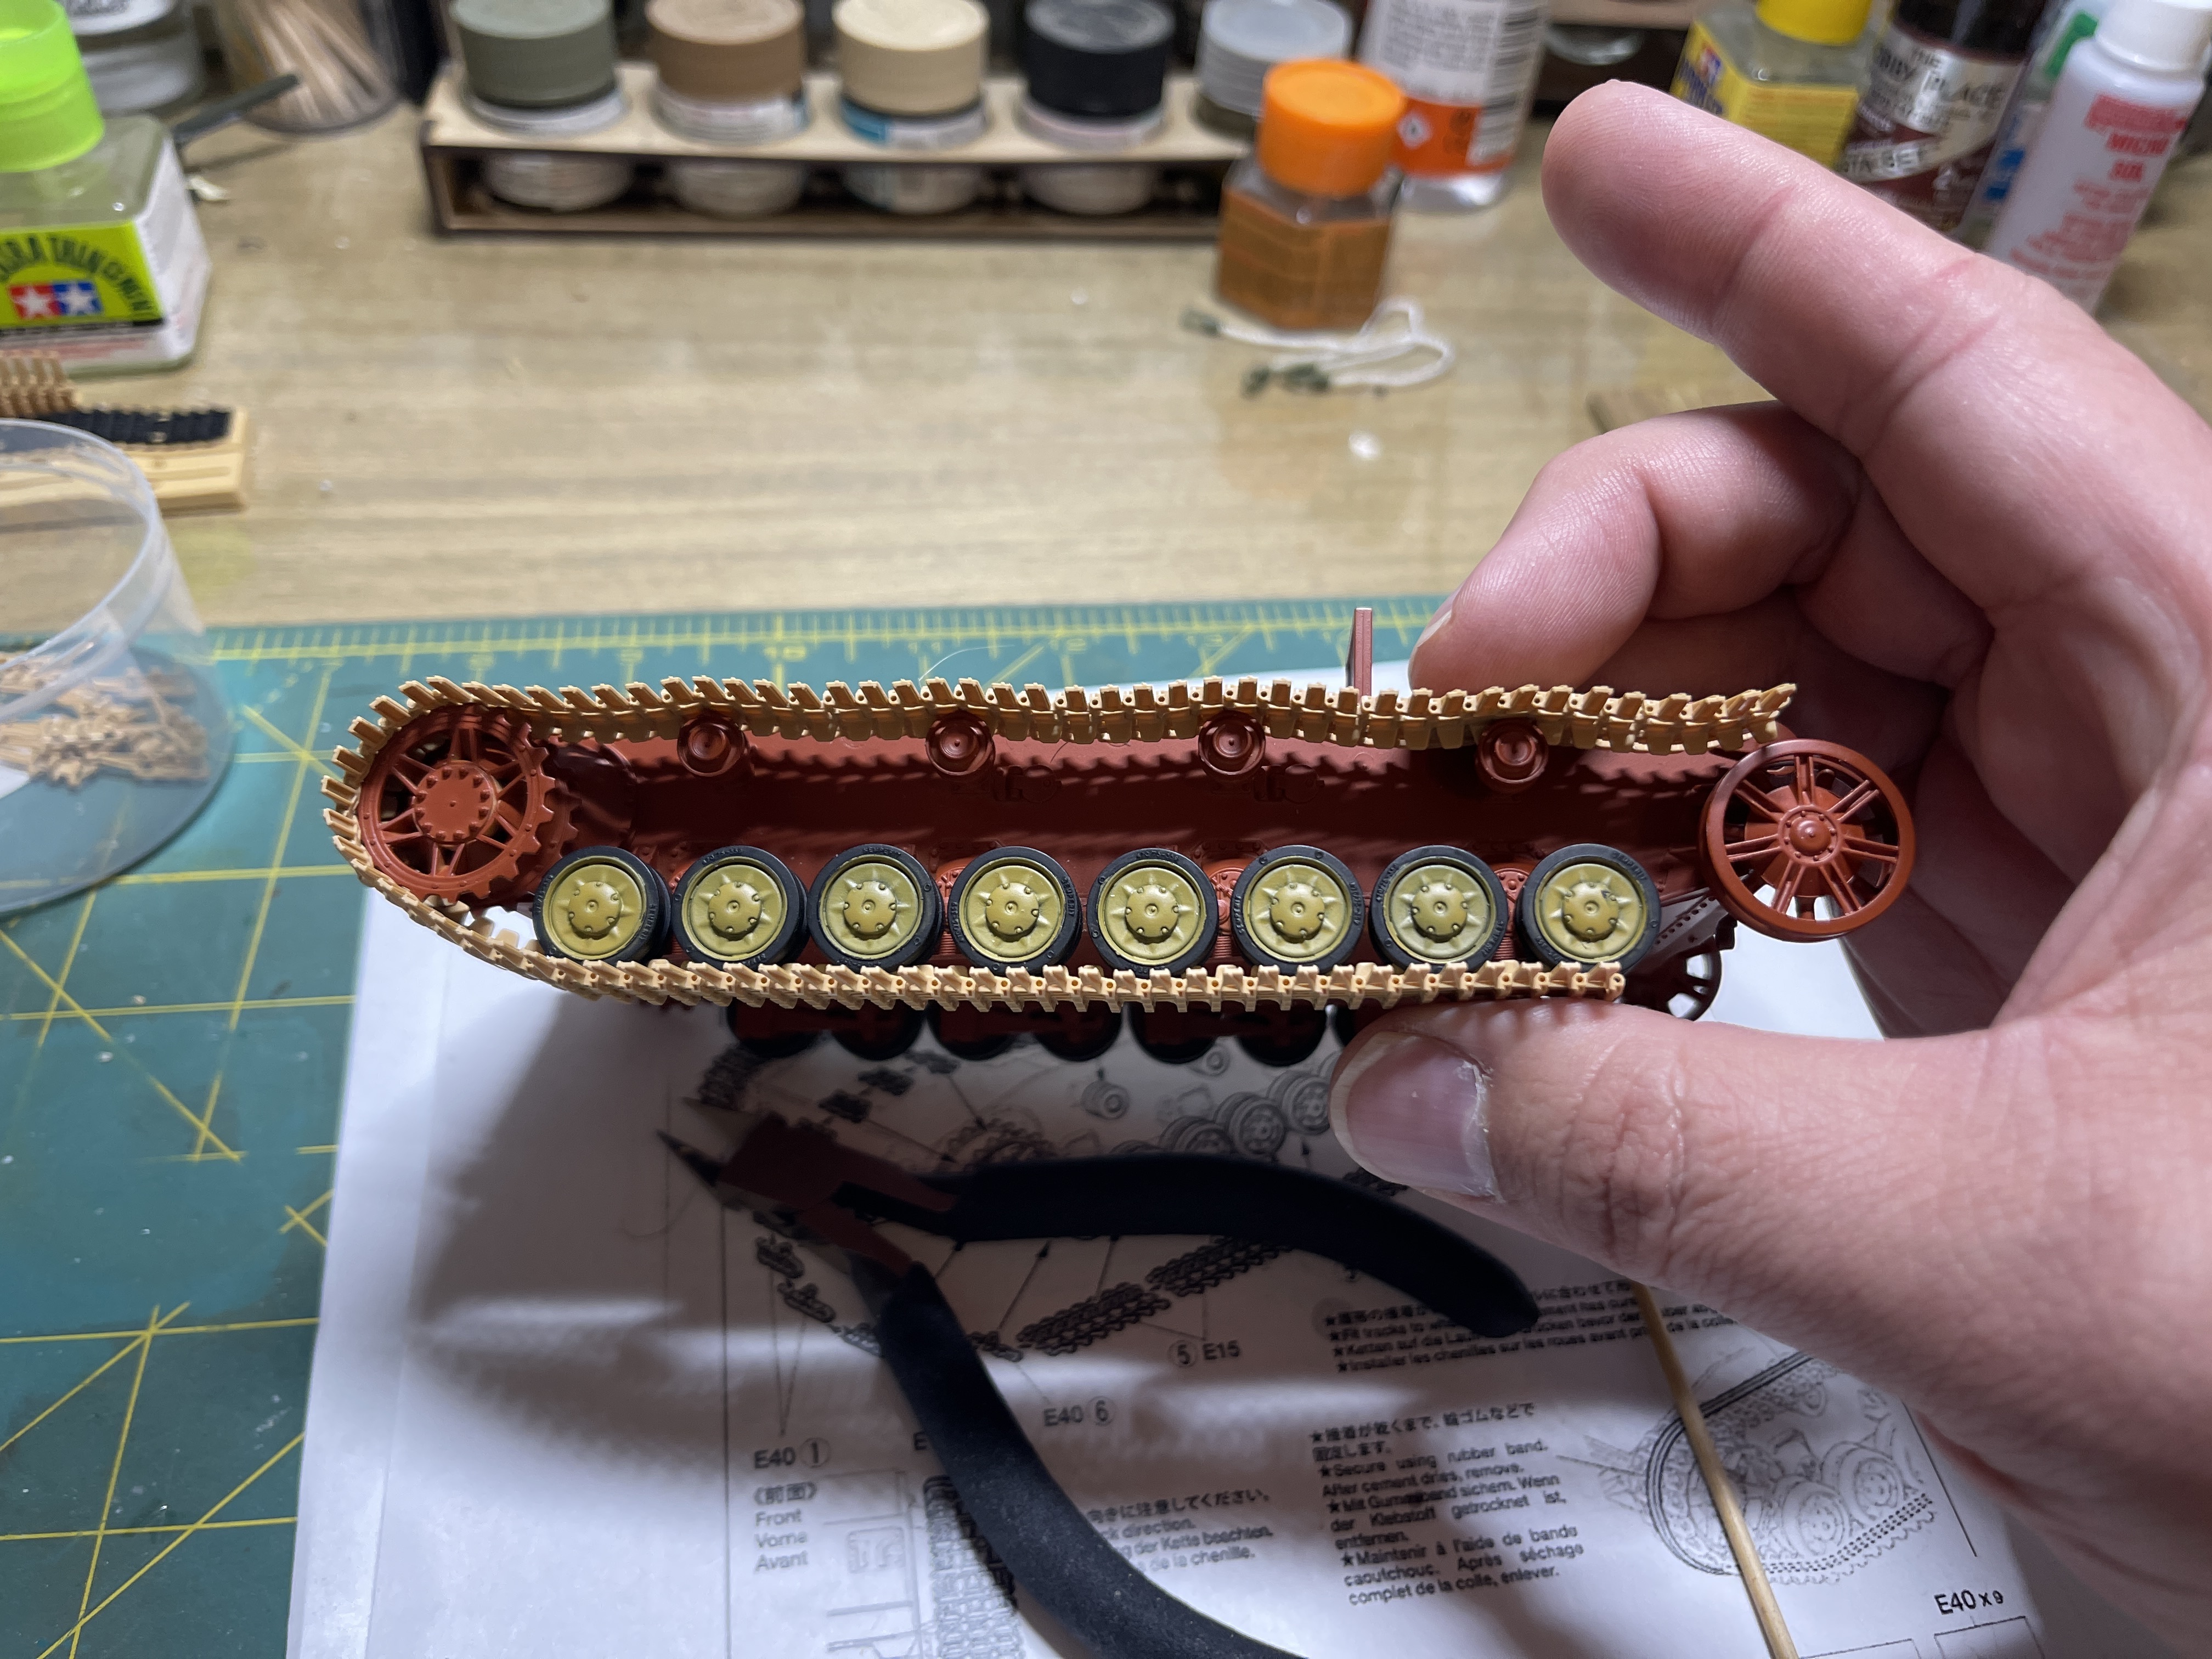
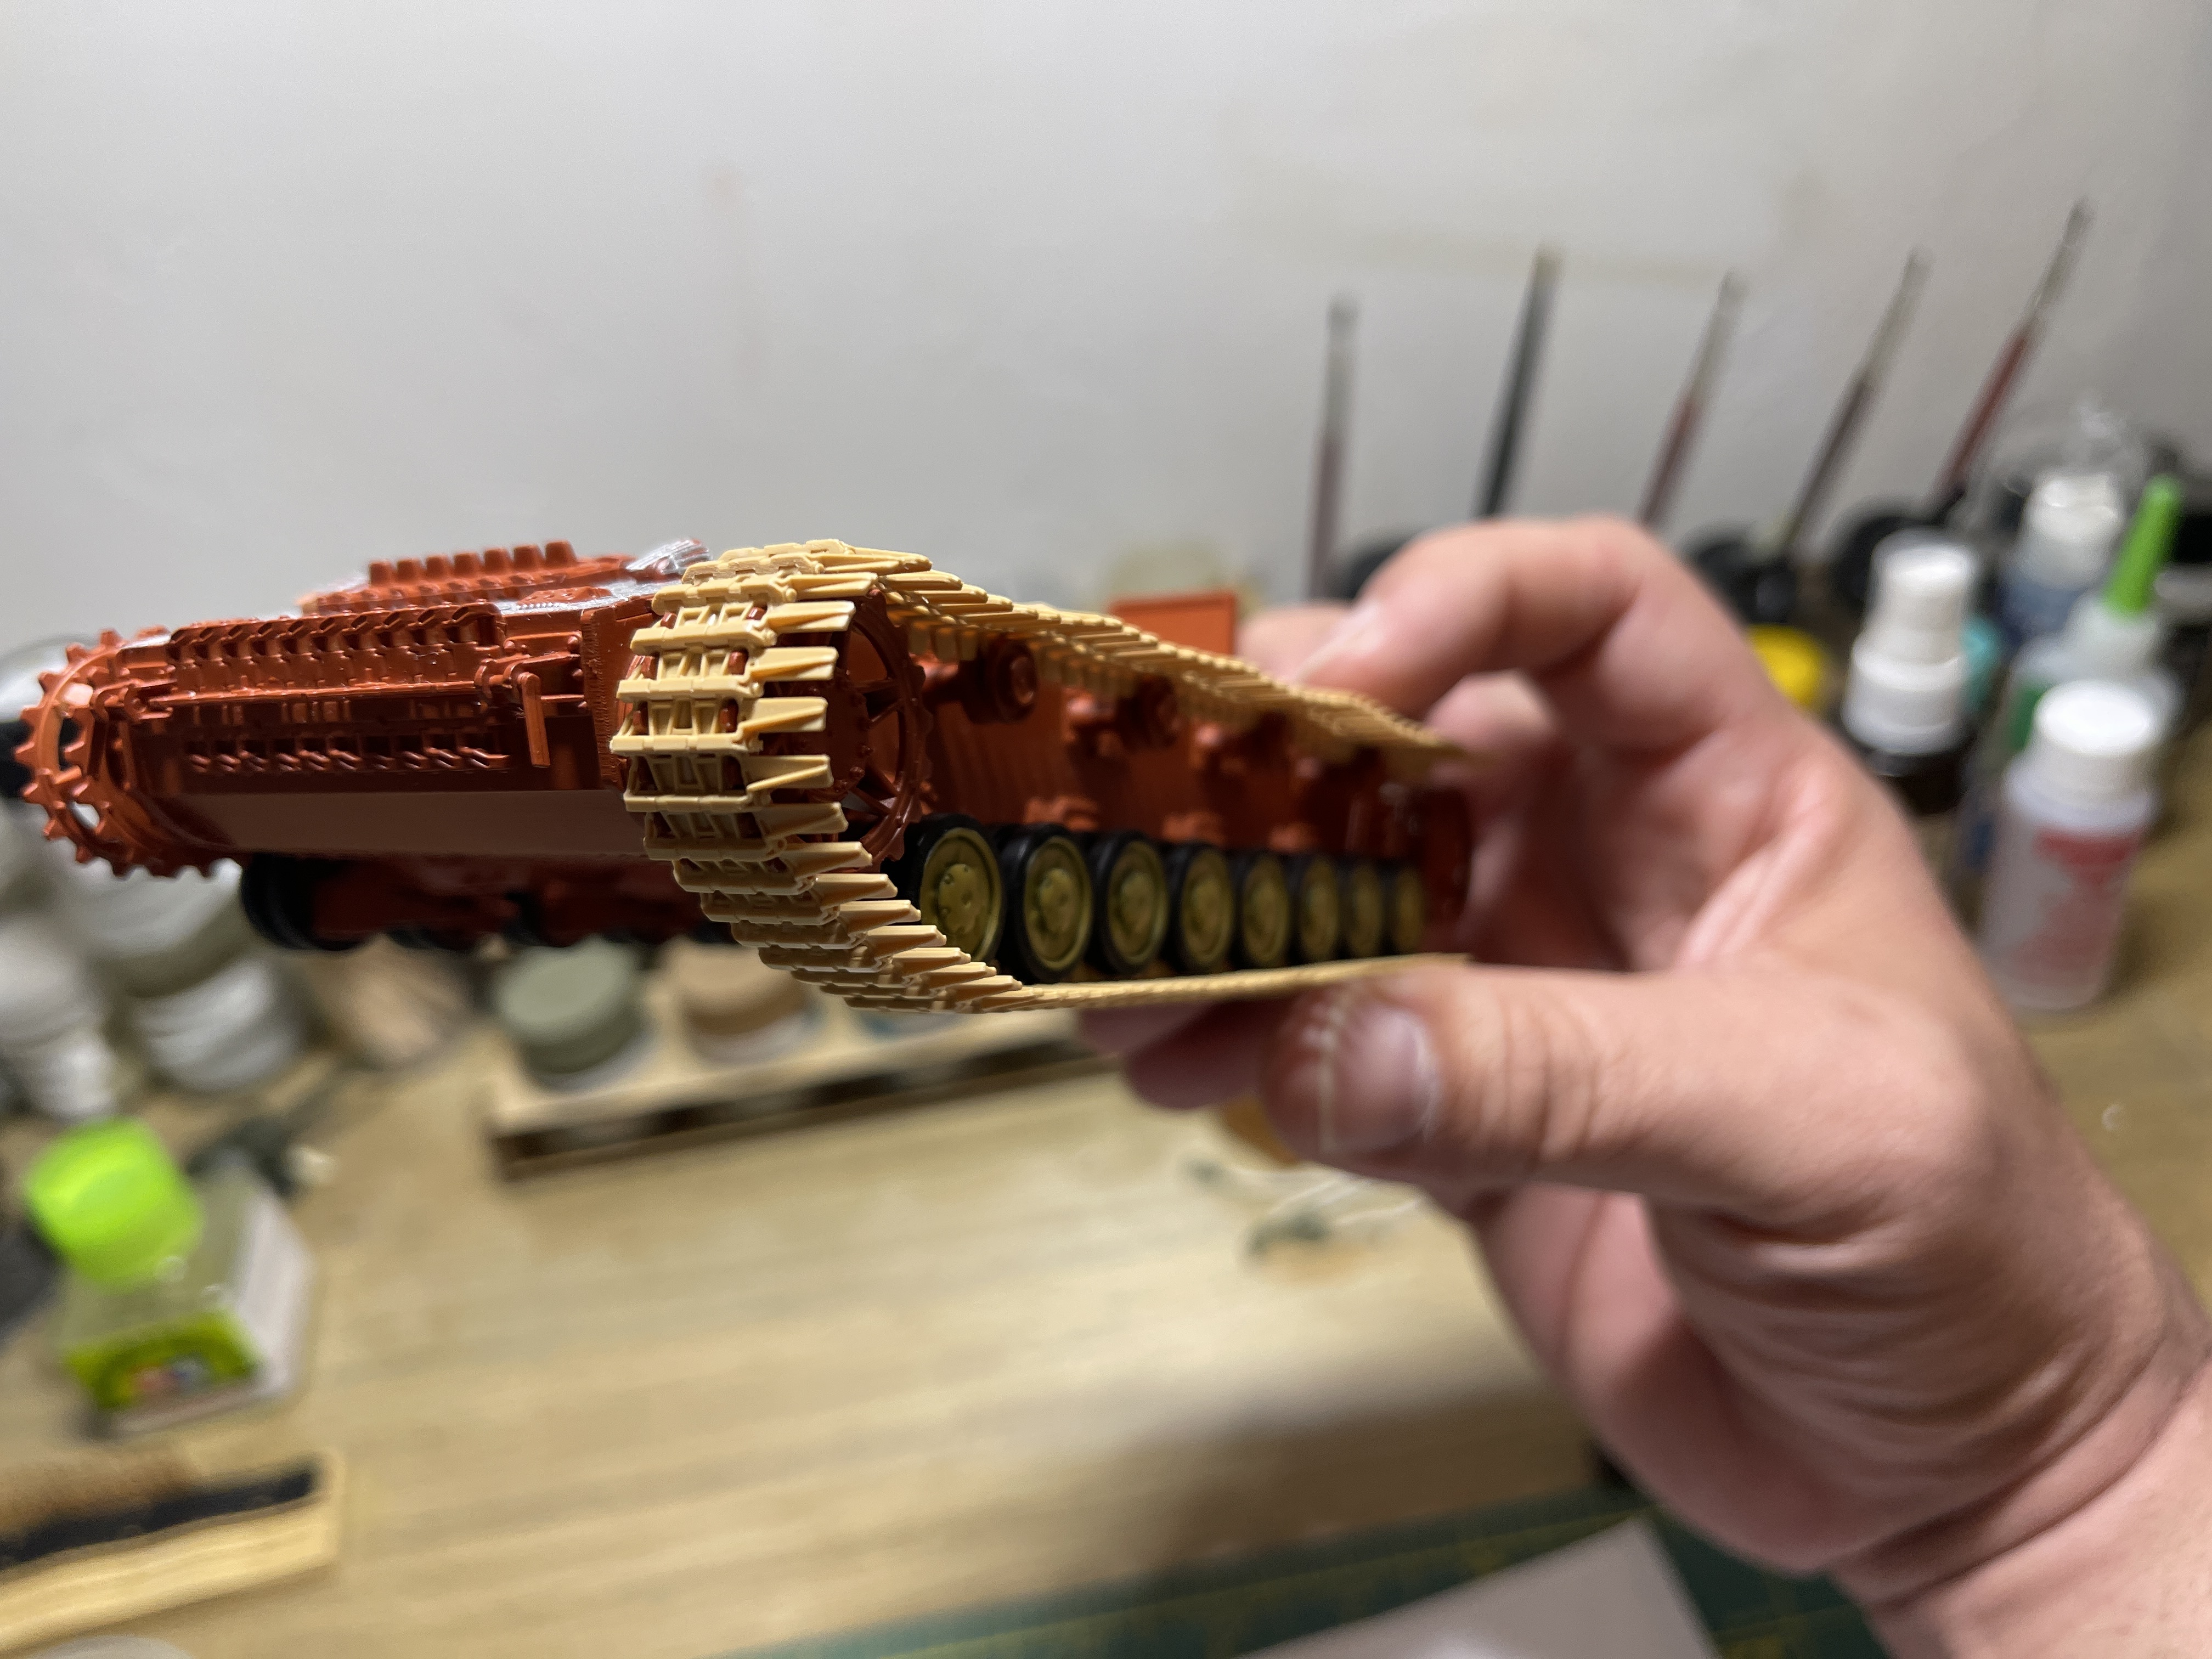
At this point I decided to construct the landing gear and attach it, since the underside would all be a light blue, I felt this would make life easy. Of all the construction on this kit, the landing gear is the most challenging. Primarily due to exceptionally thin and accurately scaled struts. These are very fragile and require lots of patience. At the end of the process your rewarded with accurate and fairly sturdy landing gear.
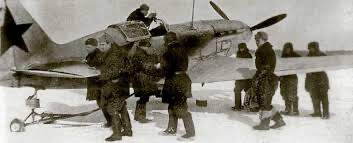
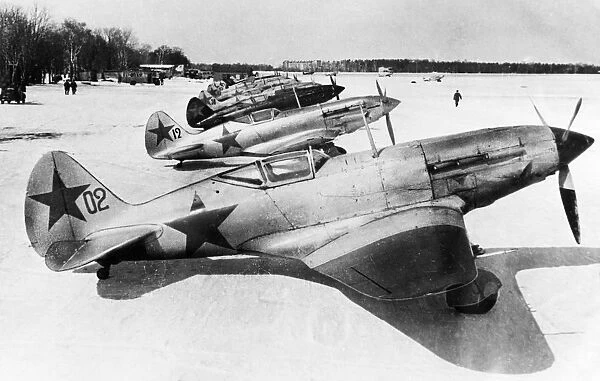
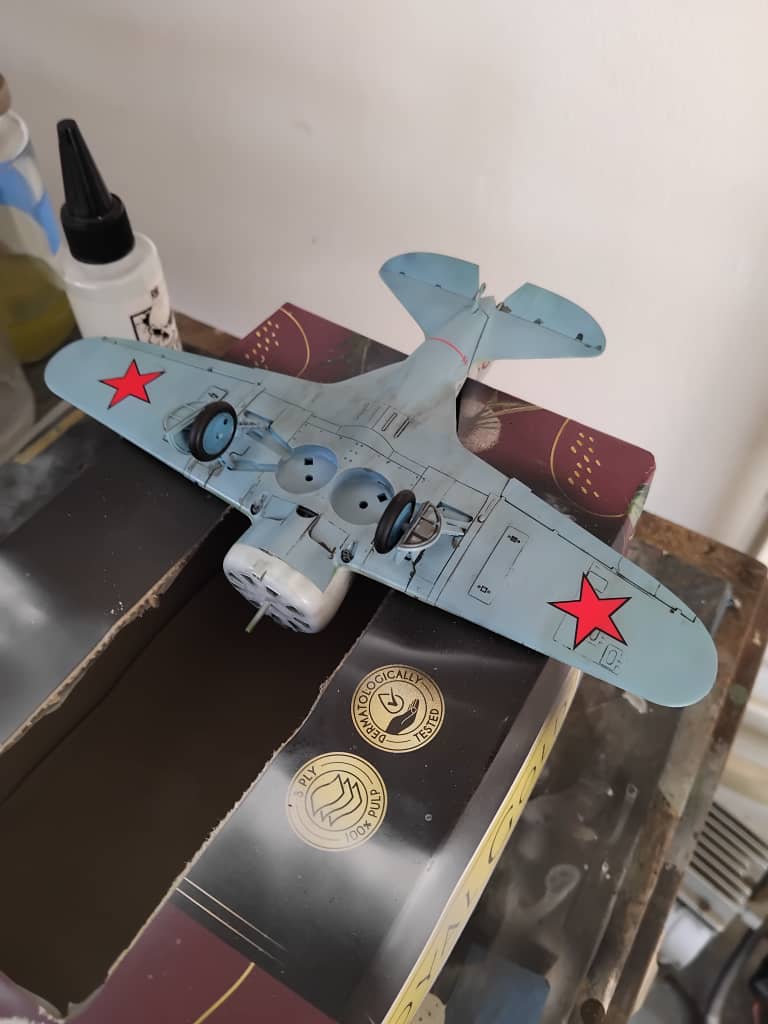
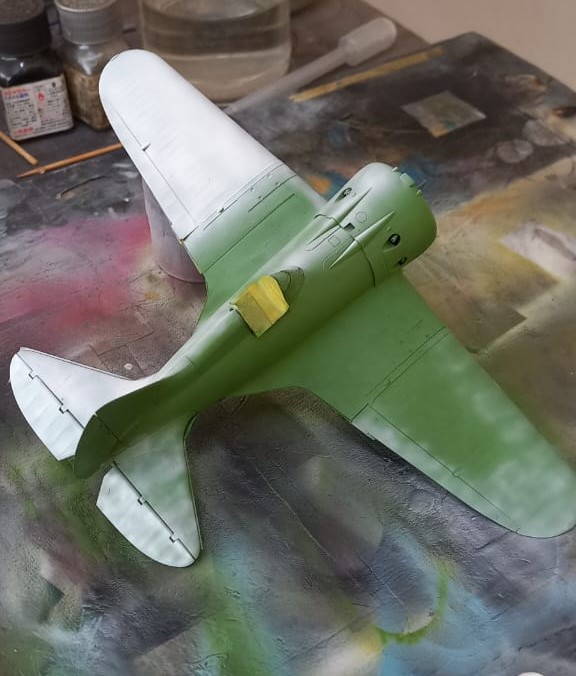
With a completed airframe it was time to paint! I started with the underside, and painted it using Air Superiority Blue, MC 74 diluted 1:4 with leveling thinner. It’s a nice light blue that after weathering will look the Soviet part. Next was to do the uppers in the Soviet green. Here I was a bit clueless and took a SWAG (scientific wild arse guess) and used Mr. Color 135 Russian Green (1) which is claimed to be for USSR tanks, early. Once painted it looked a bit too light, though I didn’t sweat it since I would be mimicking a whitewash and some pretty hard-core post weathering. Since everything would be whitewashed, I didn’t do all the black basing for the green, although I did mock the method, doing the squiggly green and then overcoating with the green. Then began the interesting part of the paintjob, the whitewashing.
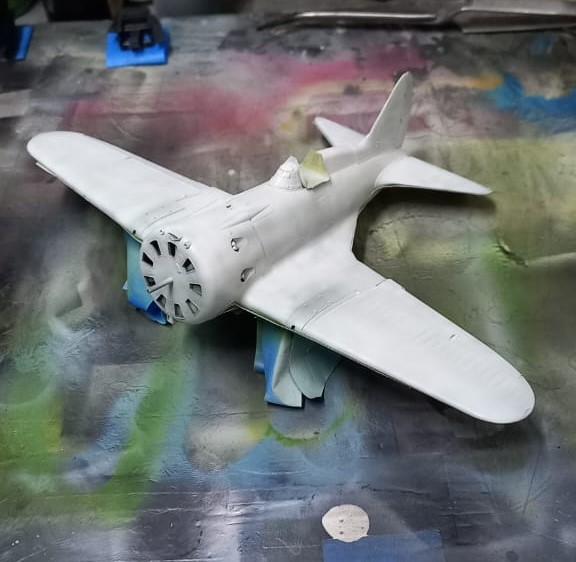
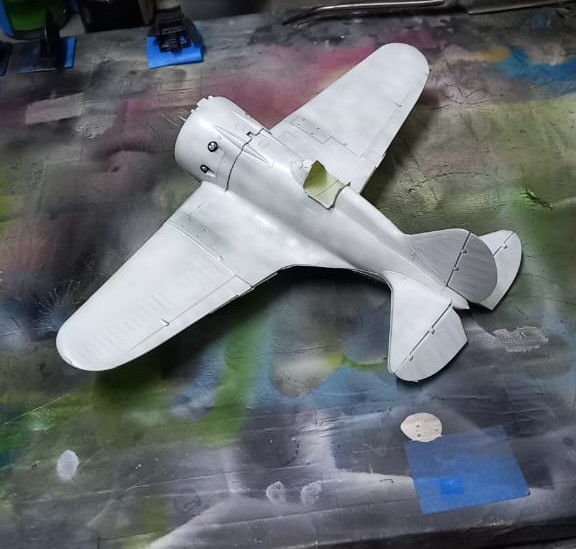
I intentionally went a bit light on the white, since there will be a lot of post weathering. I think up next will be some clear coats and the decals. So far, the big highlight of this build was the whitewashing, as it’s something that I’ve never attempted before. That said, there’s still pitfalls to watch out for, though I’m really enjoying the build!
Till next time, be safe, wash your hands and have fun!