Very nice build can’t wait to see the final color on it
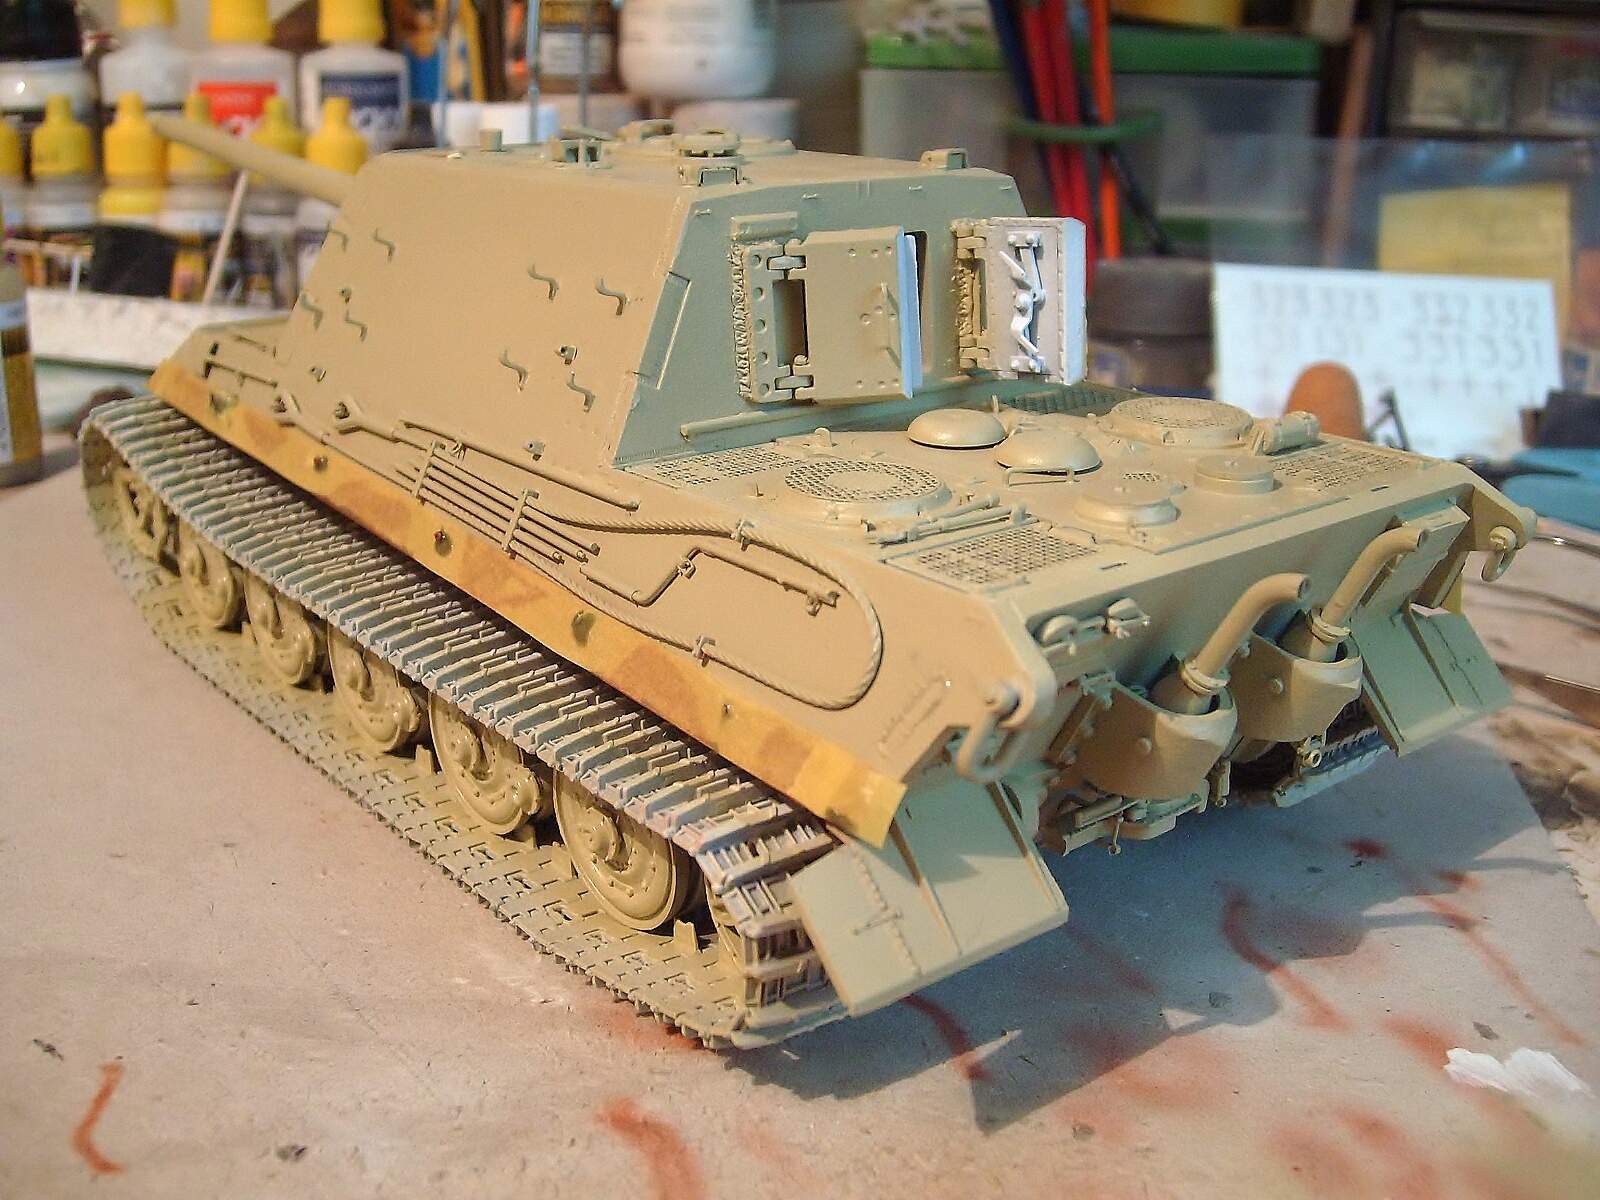
Thanks Bryan!. I have added some A.MIG-014 Rotbraun color thinned with A.Mig-2000 Thinner on the chassis, barrel mantlet and hull edges.


Regards!
Rodolfo
1 Like
GREAT JAGDTIGER!!! I have to admit that I really like the entire Tiger range. Excellent job so far!
Bill
Thanks William, yes, is a very nice armor!.
I applied Tamiya Masking tape and Pebeo Liquid Frisket to cover the Rotbraun application and then I applied A.MIG-011 Dunkelgelb Aus’44 color thinned with A.MIG-2000 Thinner.

Regards!
Rodolfo
2 Likes
Hello friends!
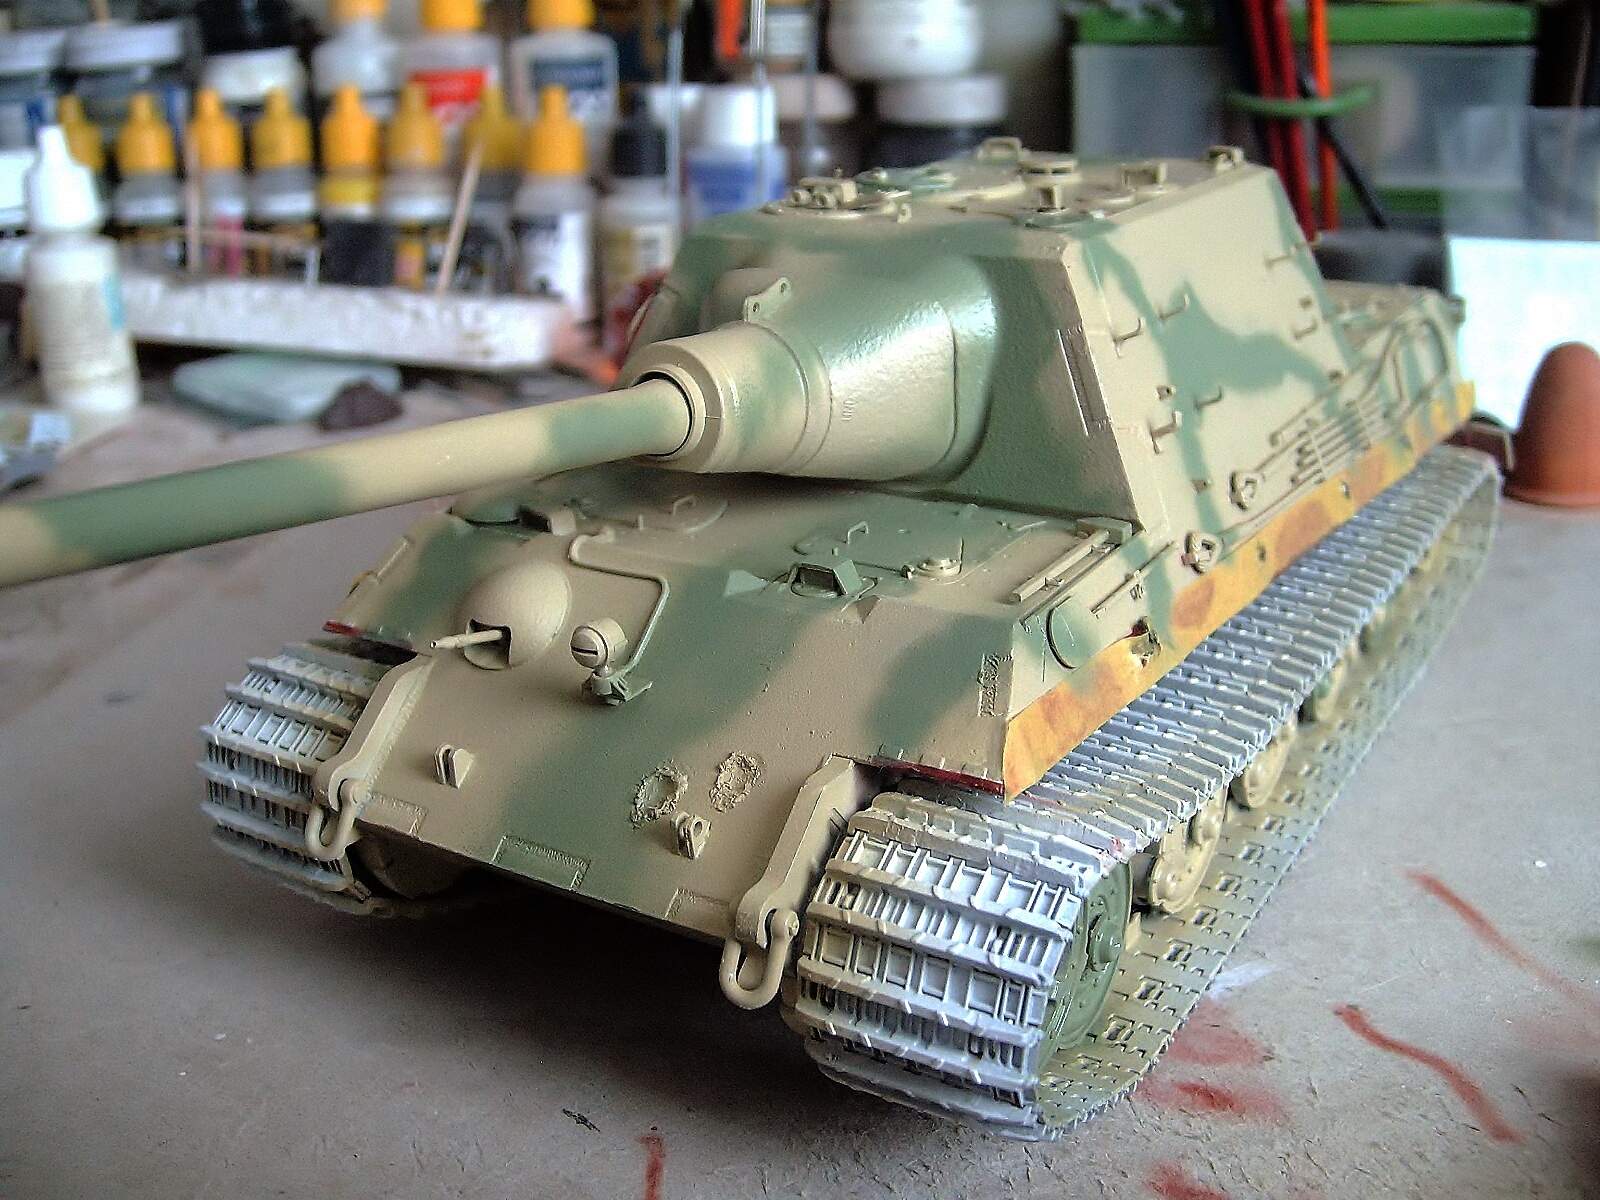
I added the 2nd. color throughout the armor including wheels with A.MIG-0003 Resenda Green diluted with A.MIG-2000 Thinner.
Regards!
Rodolfo
2 Likes
This just gets better and better . Now the camo . Are you following a pattern for a certain vehicle or is it more generic?
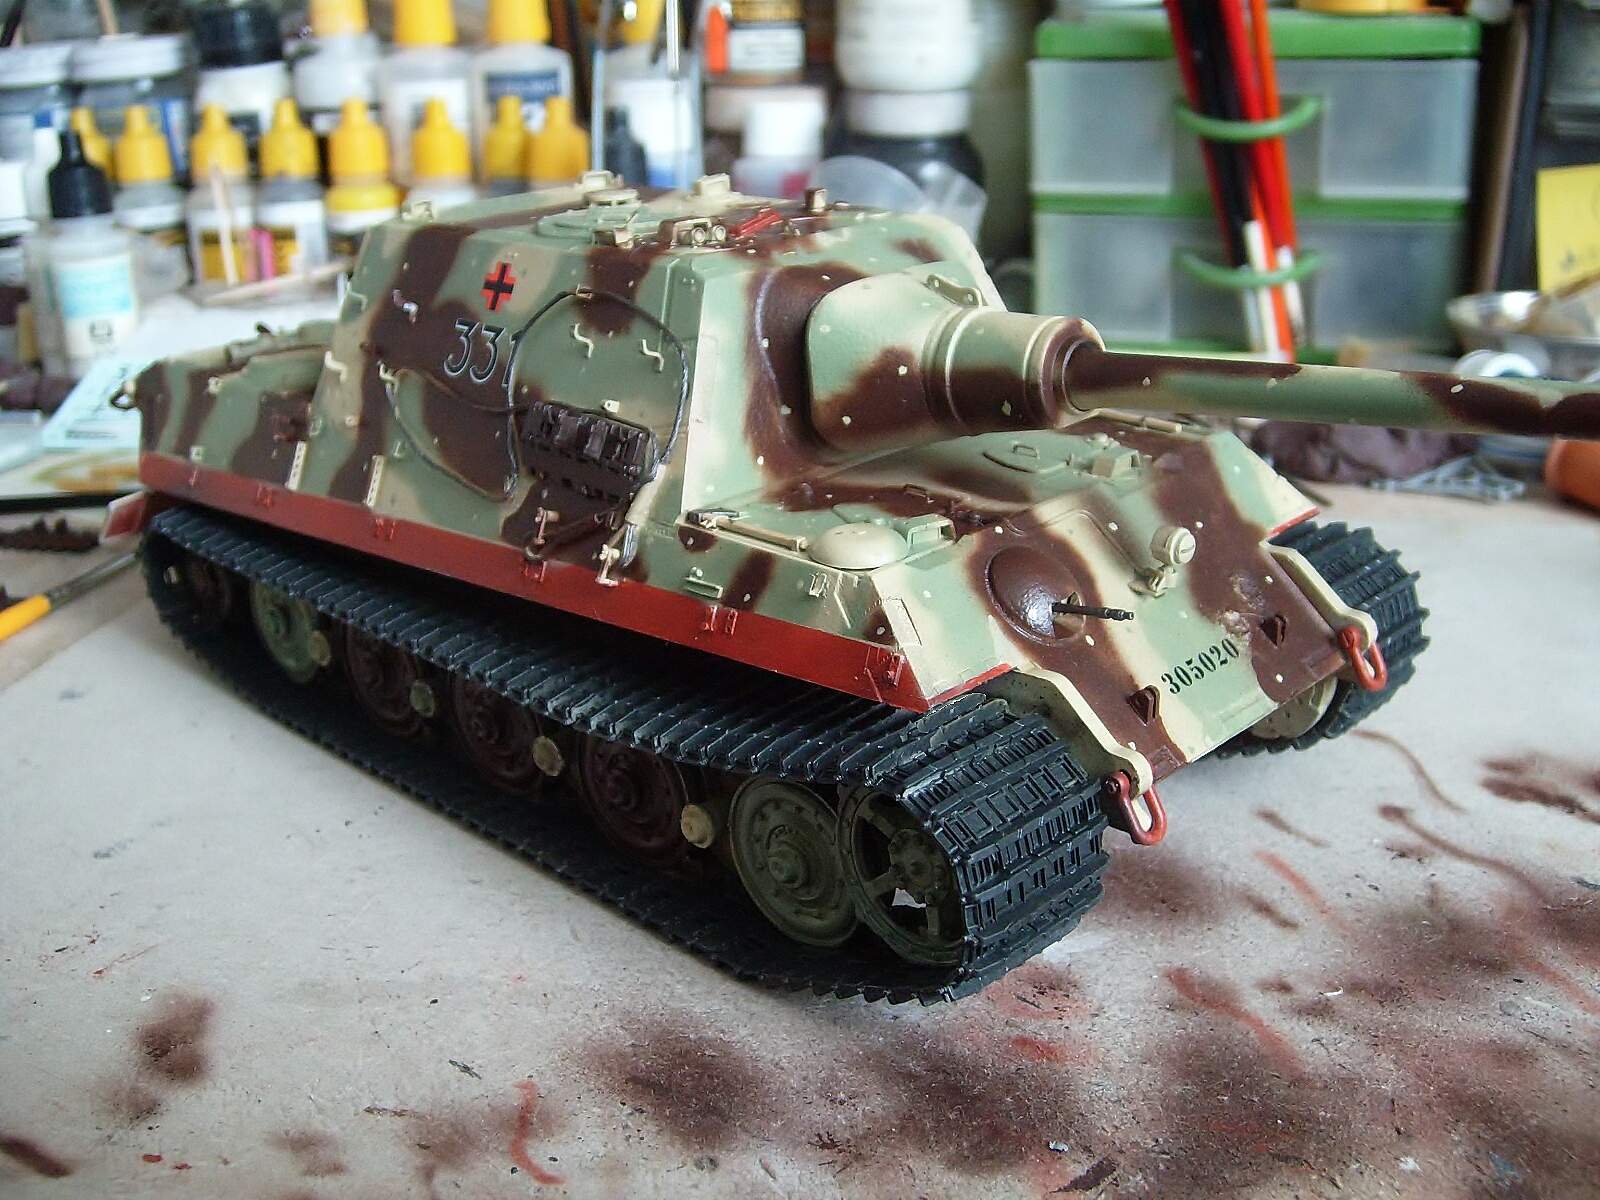
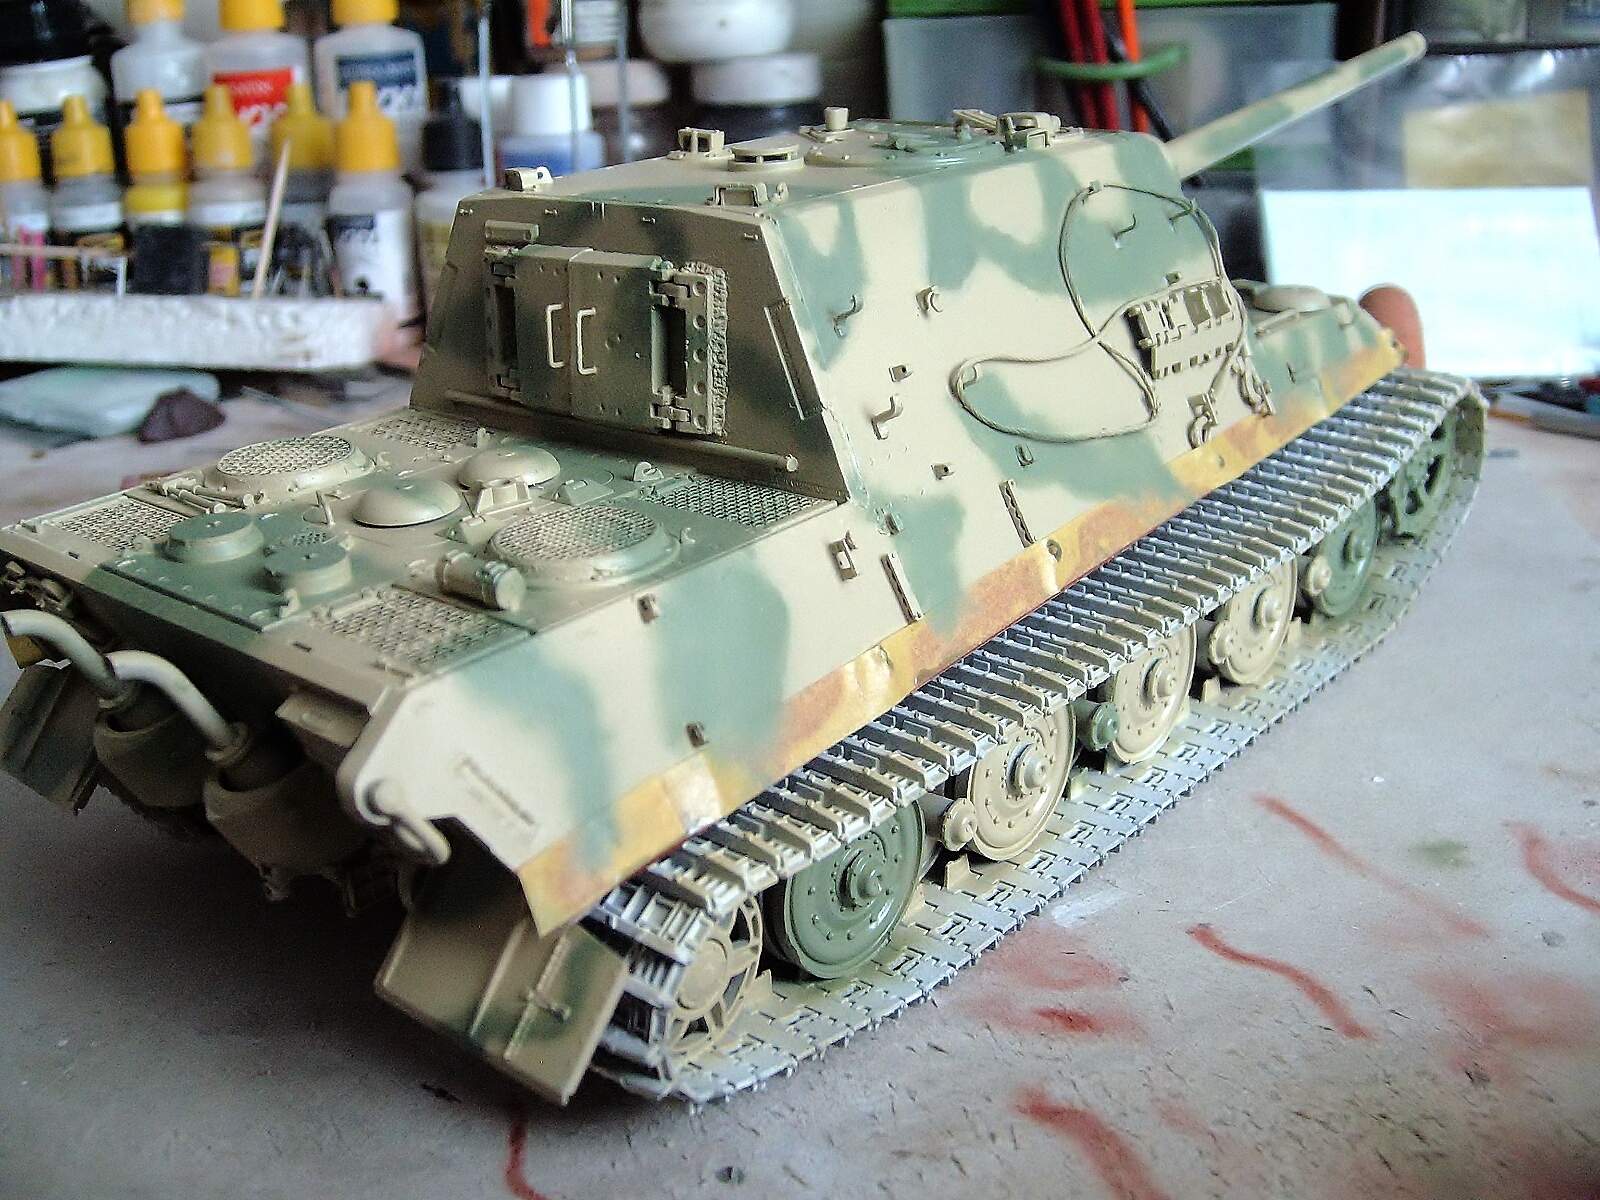
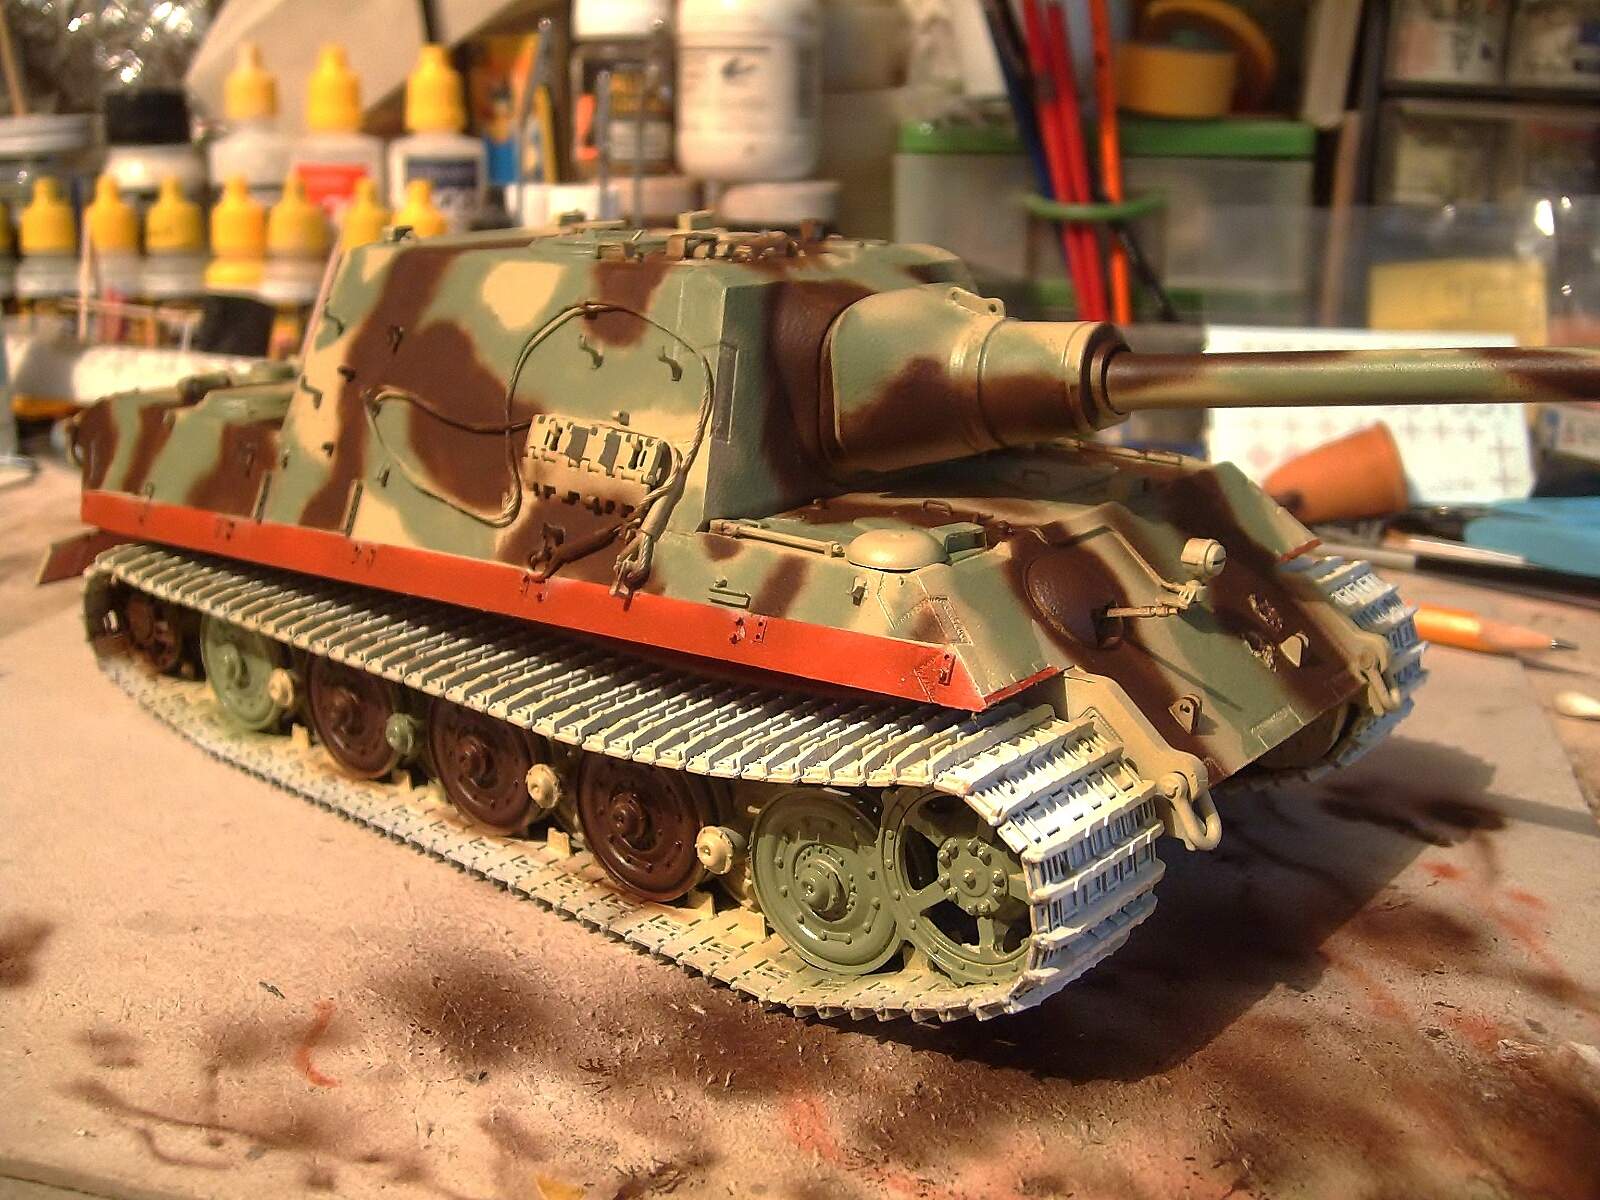
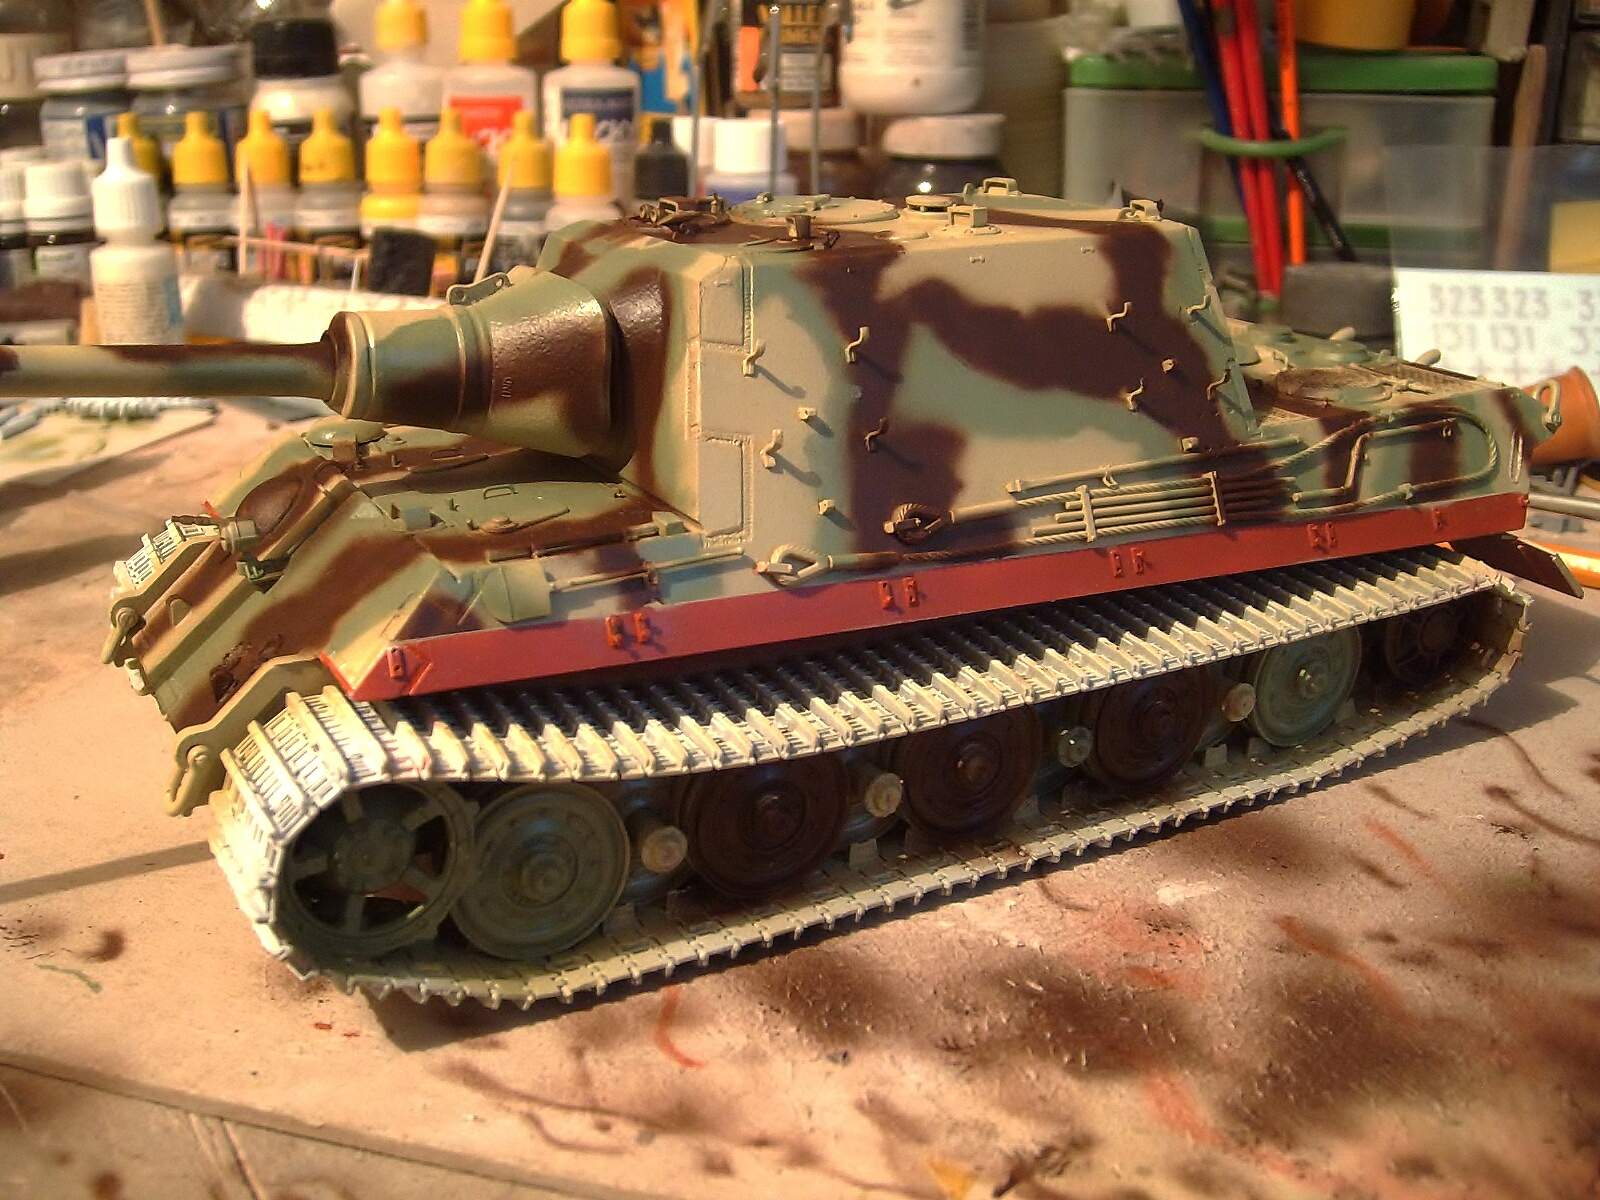
Thanks Chris!. The camouflage will be similar to that of the 311 found in Neustadt, Germany in March 1945. For this I applied the last color A.MIG-015 Schokobraun.

Regards!
Rodolfo
2 Likes
Very very nice. Great job with the cam. Looks very good indeed 
I got the kit and decided to turn it into a flamethrower jagdtiger (the flamethrower being in place of the gun since we don’t know what it looked like, it was just a idea). I don’t think the fit issue are that big of a problem since it’s rather easy to fix (just a bit of putty and sanding, nothing that scream “unnaceptable!” for me)
1 Like
Was the flamethrower up-sized to match the tank? Or am I picturing one of those nozzles on the PzKpfw III flammpanzer? That would be hilarious.
1 Like
We don’t know what the flamethrower looked like, so I’ve decided to give mine a fake gun/gun mantlet by modifying some of the kit part and the flamethrower will be done using a Q-tip (not sure about the english name for “coton tige”). It’ll be a easy modifiction since it just involve cutting the gun and putting the Q-tip in it
Thanks Johnny!.
Aurélien - Well, I never said fixing the piece was difficult, it was too easy for me to sand and add putty as I show it in this topic… When you open your topic I will take a look, it sounds interesting.
Now will start to detail the tools, tow cables, etc., soon I will add more pics!.
Regards!
Rodolfo
I said that in relation with some people saying these fit issue make it a bad kit compare to the dragon or tamiya jagdtiger or are unnaceptable. Personnaly, I prefer this one over the 2 because he’s cheaper than the rest, wich allow me for more 1/35 scale variant
1 Like
Wow . That is definitely one of the best german camo Ive seen in a while . The composition is nice and well thought out . The weathering will really bring it to life
Aurélien - I agree with you, although paying for a Dragon and Tamiya is worth it
Chris - Thanks for your kind comments!
I started to detail the pieces, here I added a light layer of A.MIG-014 Rotbraun before adding the final color, the tailgates will be like this, 2 shells used with A.MIG-197 brass, after I will to add the black one.

Regards!
Rodolfo
2 Likes
Hello!
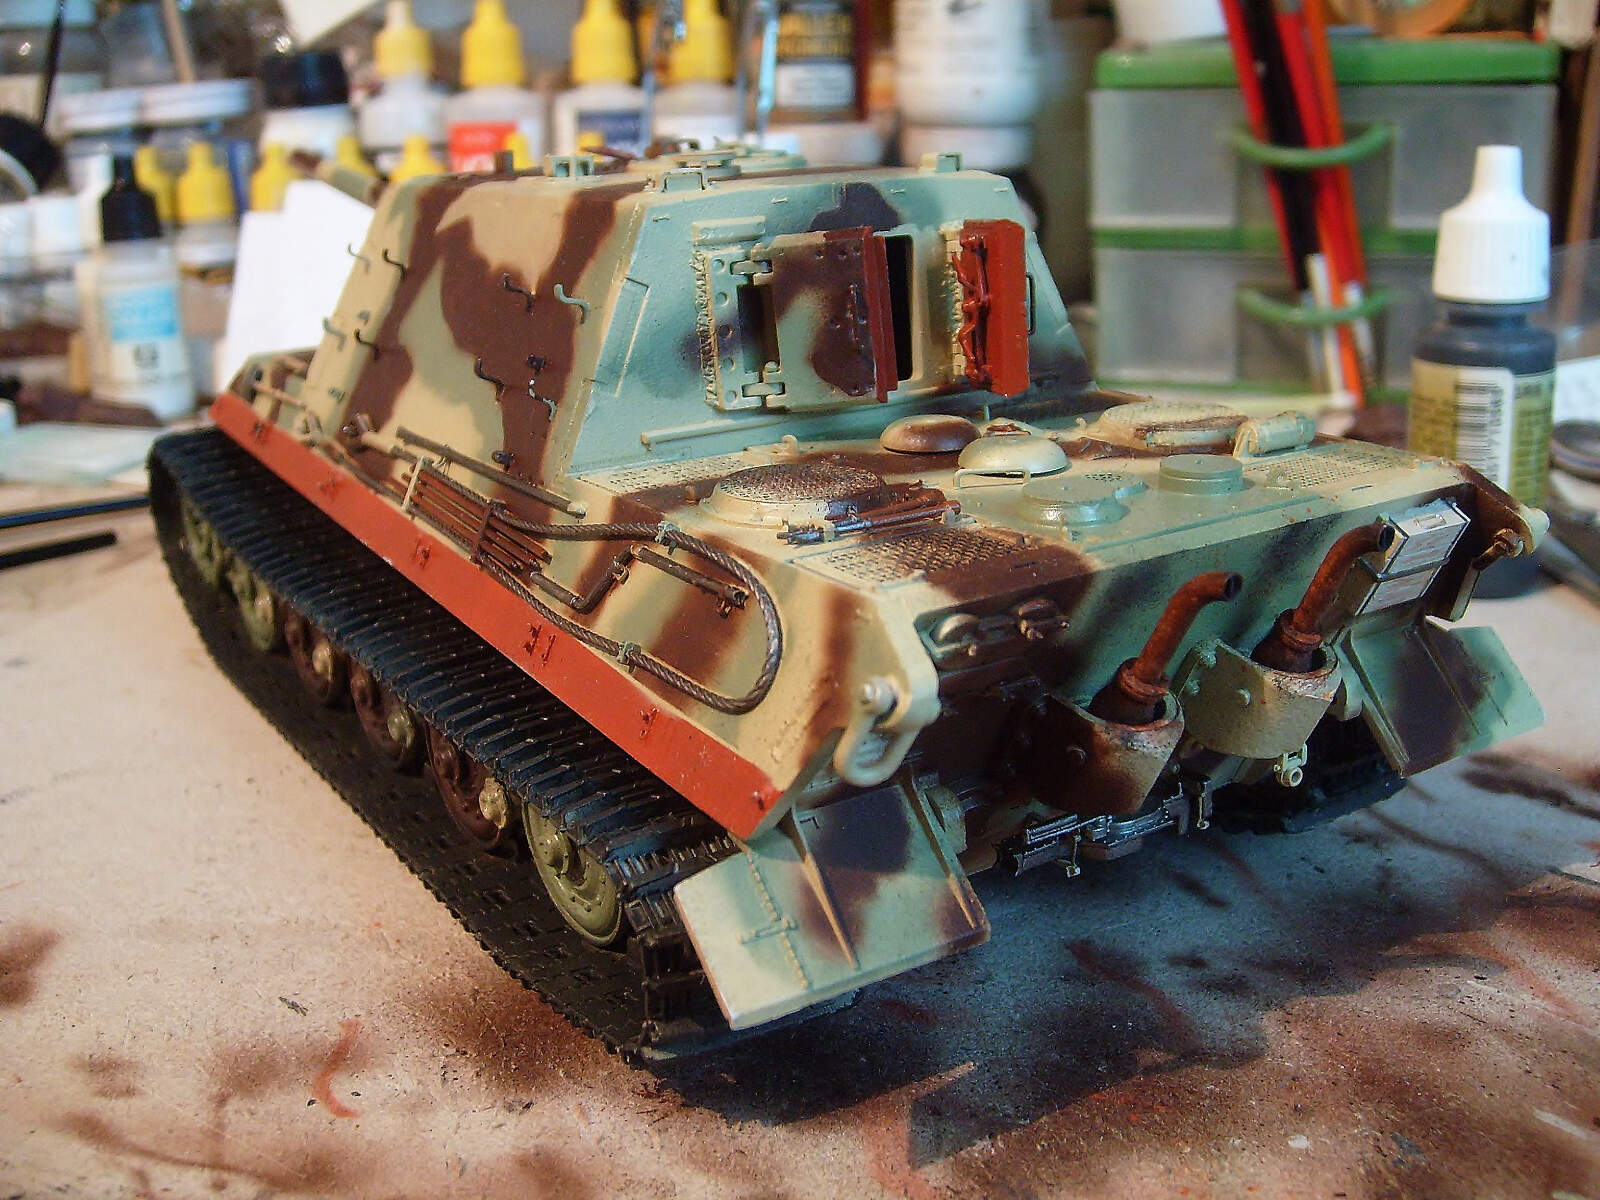
To detail the tools, cleaning rods, machine gun and tow cables I have used. A.MIG-0045 Gun-metal, A.MIG-043 Shadow rust, A.MIG-037 New wood and adding a mixture with A.MIG-913 Red brown base. I’ll continue with the rear box and the exhaust pipes.


Regards!
Rodolfo
4 Likes
Hello!
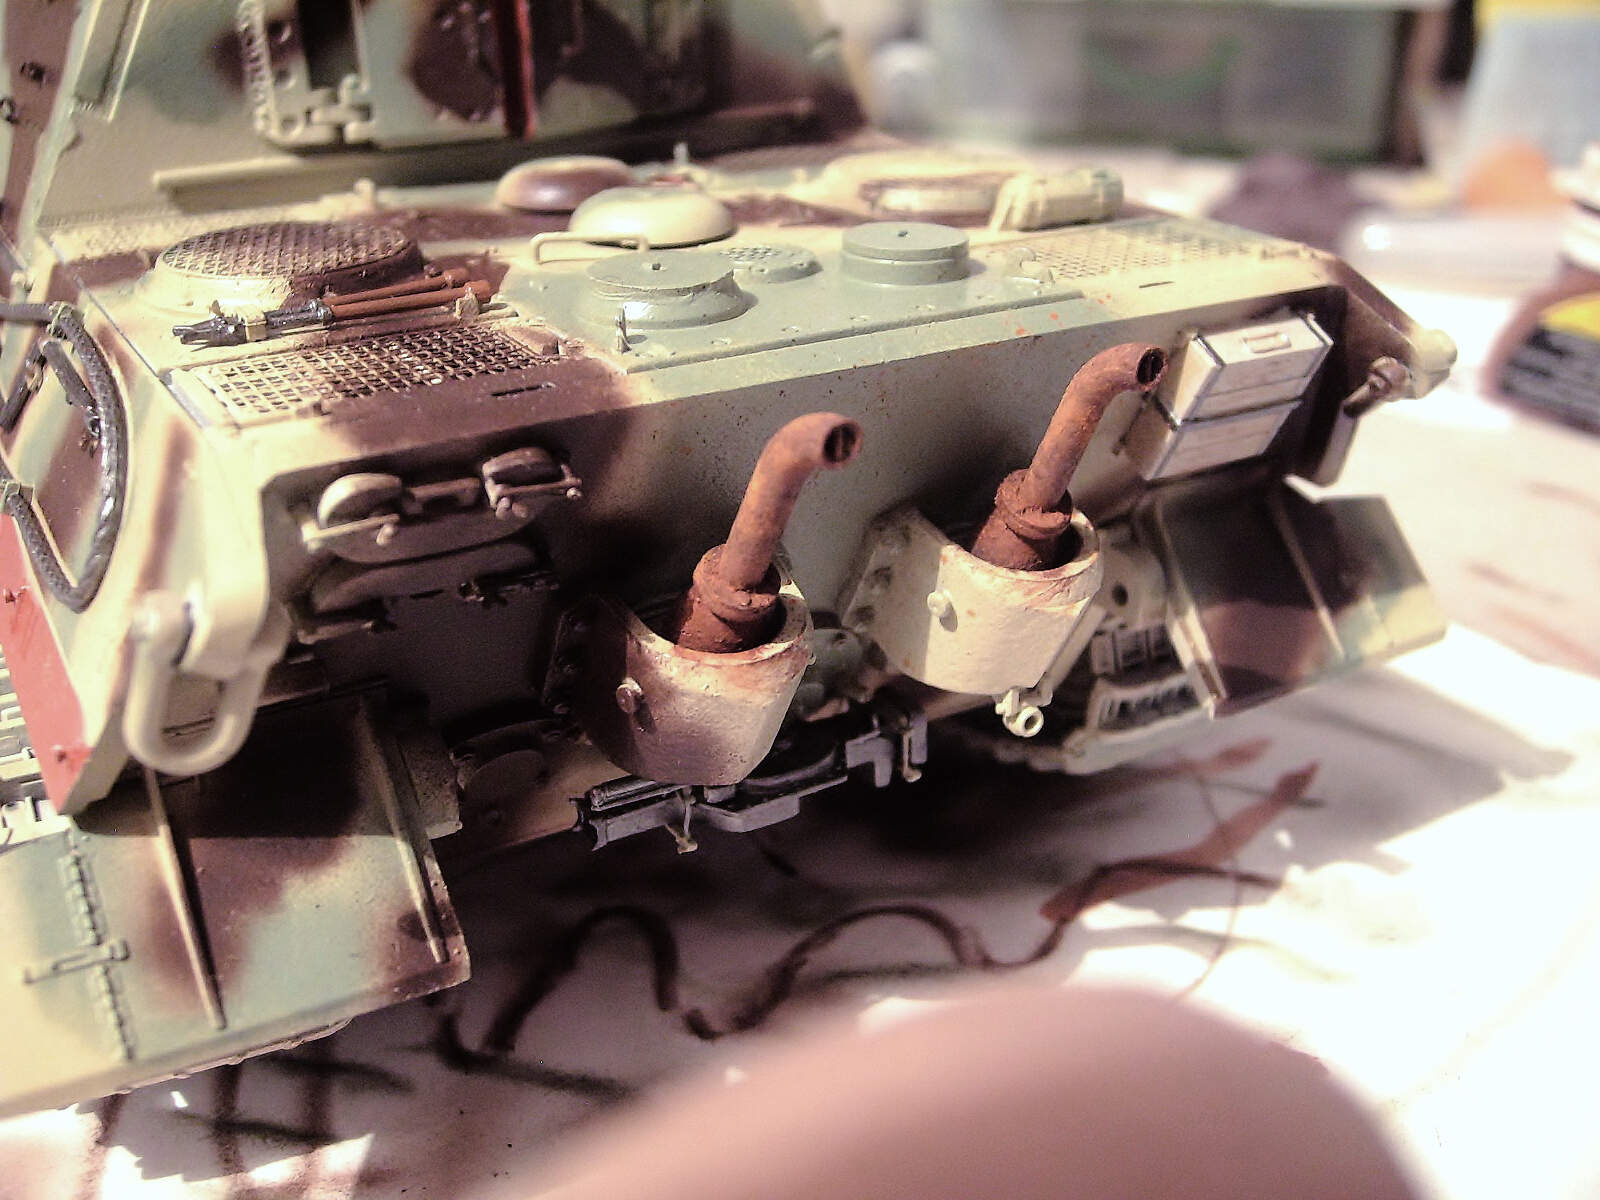
Weathering the exhaust pipes: first a pass of Oilbrush A.MIG-3525 Red tile and then a pass of MIG-P230old rust, then touches of MIG-P025 Standard rust and touches of MIG-P024 Light rust finishing with black pigment on the mouth of the tubes and some low areas.


Regards!
Rodolfo
4 Likes
I got the dragon porsche version since it provide the zimmerit (It’ll be a what if since if they hadn’t choose the henschl suspension, the jagdtiger would’ve kept the porsche one+they had to convert some hull because they already had the support for the porsche suspension). I don’t think thaht the takom jagdtiger is as bad as some made it out to be (for me it’s good kit, cheap and the 2 part that don’t fit well don’t make it a bad kit since it’s easy to correct)
Even with the little problem, for me it is a good kit. More of my work:
I have painted the tracks with acrylics Vallejo Air/Model #71056 Black Grey Panzer . You are ready for the general weathering. First I will apply the decals and then A.MIG Satin Lucky Varnish for protection.

Regards!
Rodolfo
2 Likes