WIP: Tamiya PZ IV Ausf F, North Africa Dio

Hi all, thought I’d share some pics of what I am working on at the moment.

Well.

It’s not my main project - that is the FAUN tank transporter, which rumbles on in the background very slowly in a manner very much befitting its subject matter. I got the trailer complete and needed a break so picked out a lovely palate cleanser from Tamiya to refresh the old mojo. Typically, it snowballed into a diorama in its own right but that’s just me.

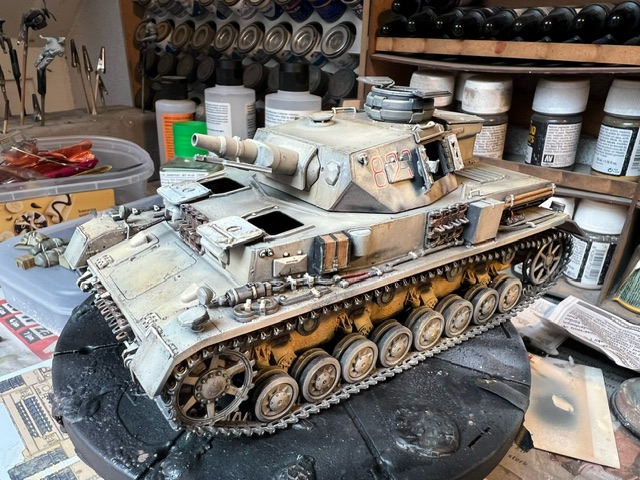
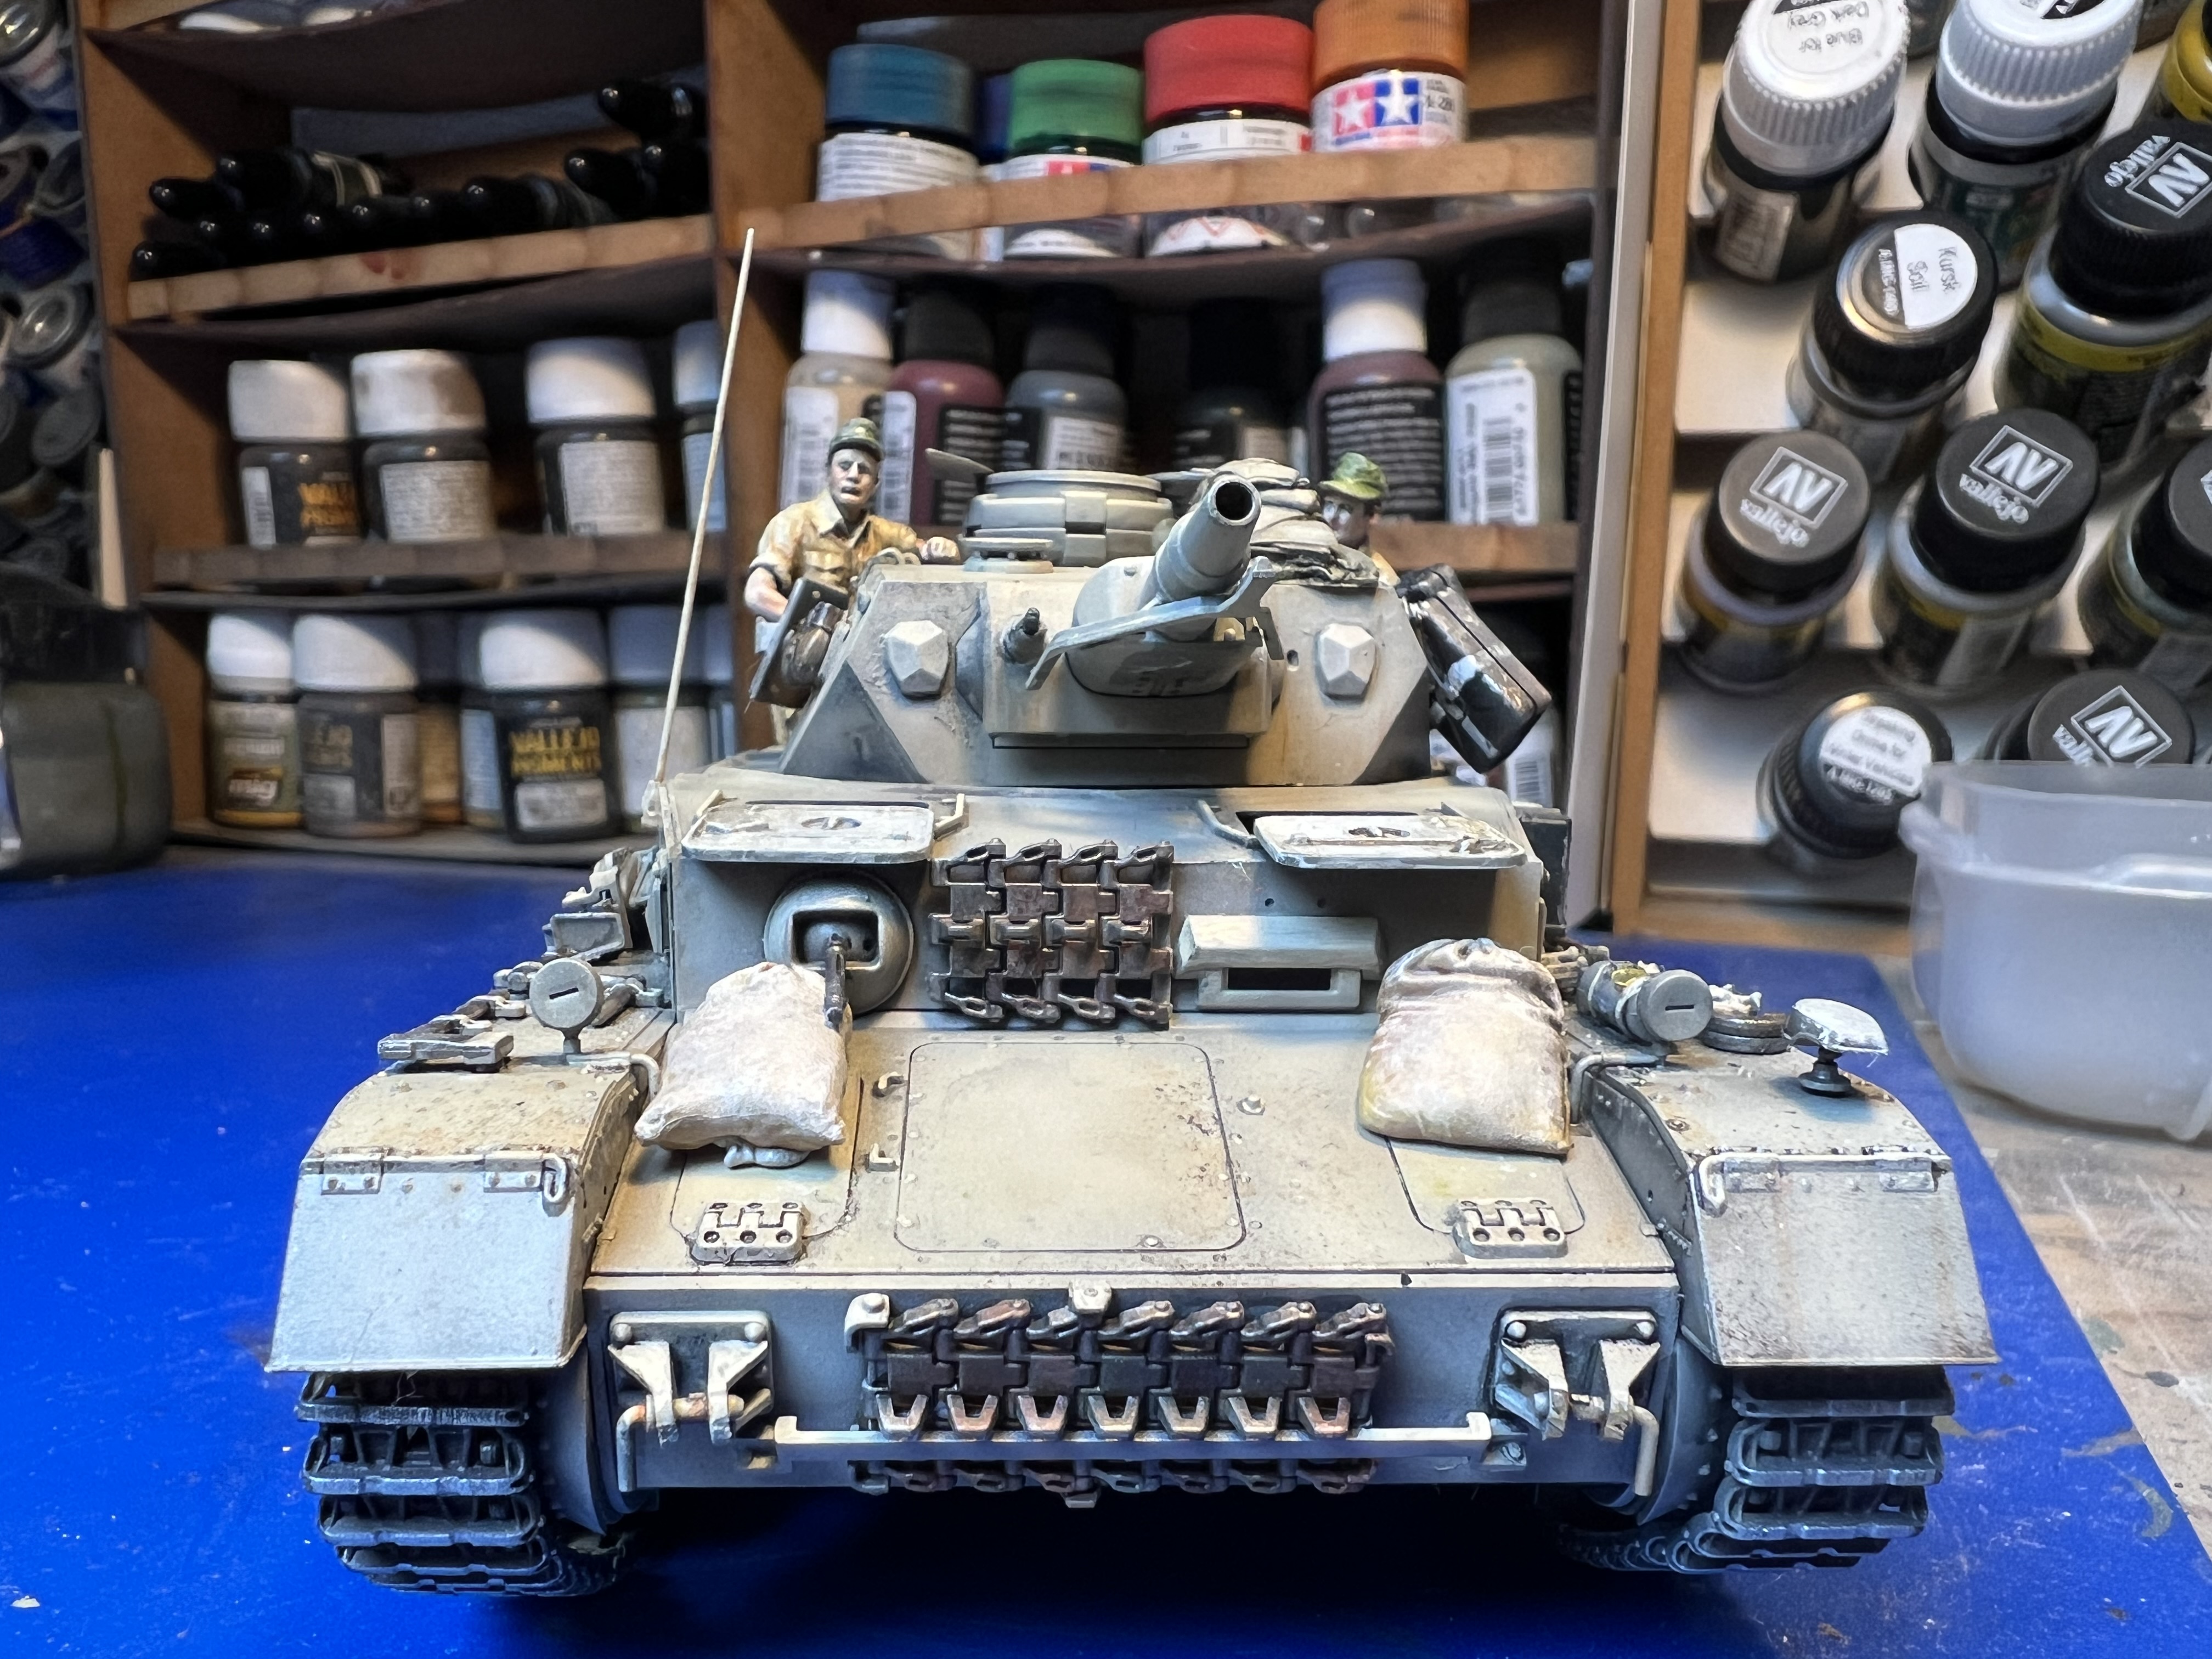
The theory was that I wanted a beaten up, really heavy weathered, knackered Panzer driving through a wadi with a tribesman/Arab type gentleman looking on wistfully under some palm trees. Those who follow my builds know I am careful with my weathering and try to keep it restrained wherever possible, but I do want this old warhorse to look pretty beaten up and dirty.

Build was all you ever want from a Tamiya. If it is possible to get a nice, healing hug from a piece of styrene and some glue, this was the kit. When was the last time you built a kit that was genuinely fun, that made you smile repeatedly during the assemble? That’s why I love Tamiya.

Primer was MiG OneShot from the airbrush, with some thinned red primer sprayed over the flat parts that catch the light. Then a semi gloss clear coat.


image1-2
image2-2
image3-2
image4-1

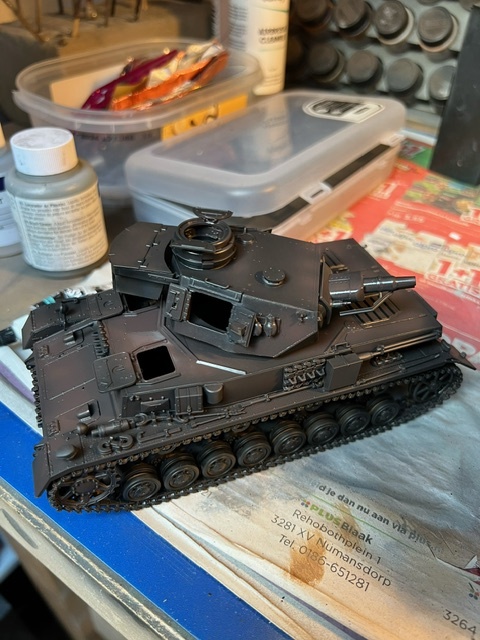
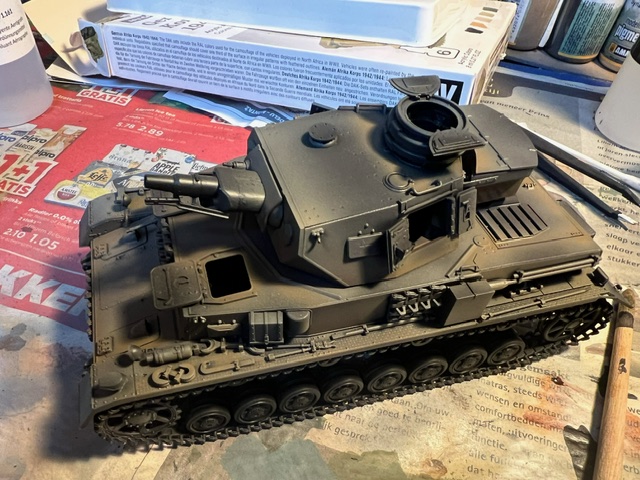
First base coat was a very thinned layer of Camo Brown, then I started on the main base layer which was a couple of coats of very, very thinned Sand Ivory.

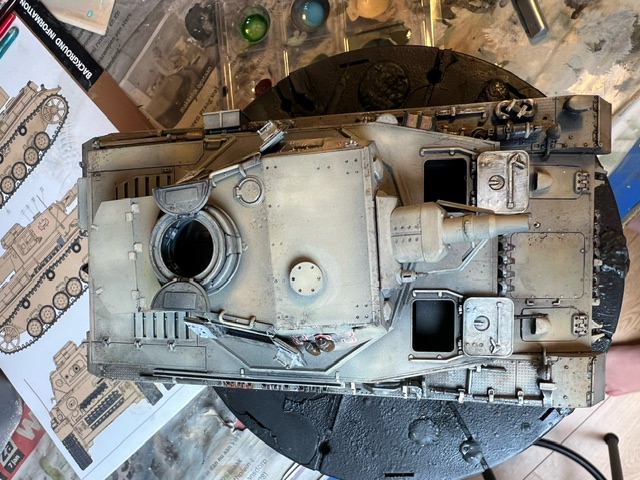
I did two highlight layers, lightening with White Grey before it started to get too light. I like the effect of the grey in the sand colour, makes it look sunbleached as if it has been out in the sun too long. I wanted to add some modulation so sprayed the first shadows on with a Clay coloured Shader which was a little more brown than I wanted but the effect was dramatic.

image6-1
image7-1


image10-1

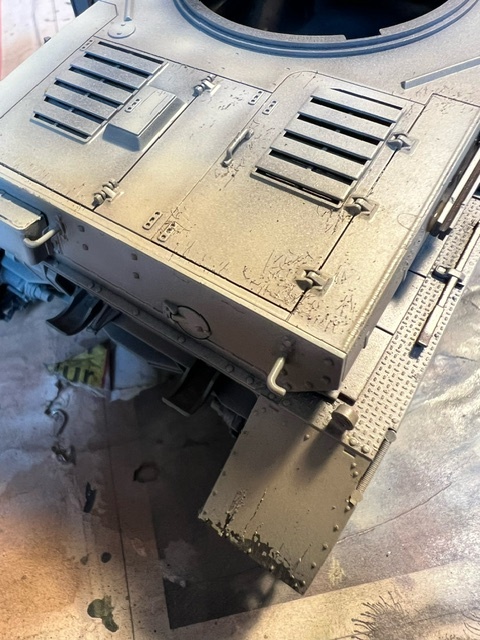
After that I gave it the first dust layer just to tie it together and did some chipping using a sponge on the mudguards and an old airbrush needle on the exposed areas. These wouldn’t be that stark on the real vehicle because of the layer of dust everywhere but do serve as markers on where to put the rust streaks later on, which was the next step.

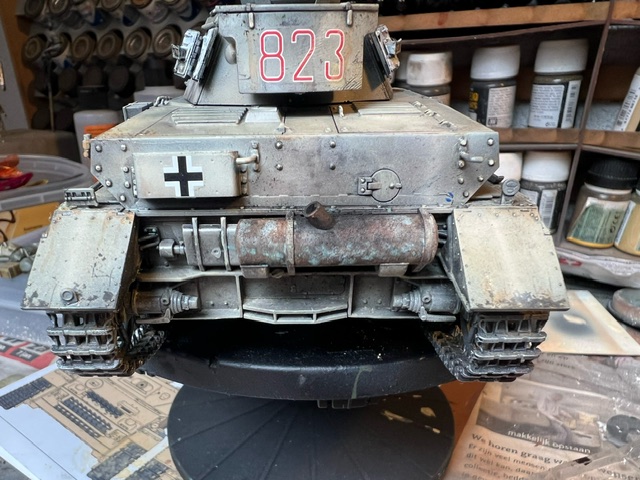
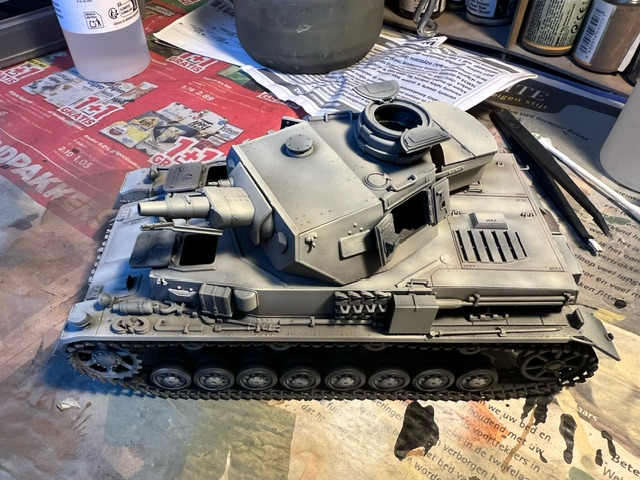
I did another clear coat and then a couple of washes using MiG tan and a dark grey. Nowhere near as stark as the overdone washes on my Cypriot T-80. My instinct is always to go heavier on the wash but I stopped myself this time!

image16-1


image23-1

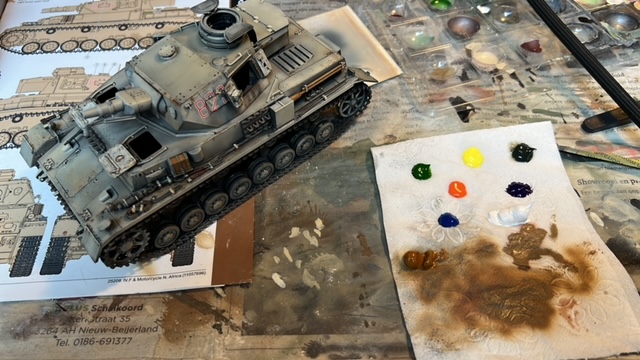
Next up after the decals was an oil dot filter using Abteilung 502 oils (which dry way too fast btw…) - I concentrated on adding fake shadows using the purple and the blue and differentiating parts of the exposed areas in yellows, oranges and greens. The result was some nice but restrained modulation.

I painted the muffler and did a brush highlight pass on the bolt heads and so on using my trusty Mission Models late dunkelgelb (because you can wipe it off using a wet cotton bud if you overdo it!) to make the details pop.

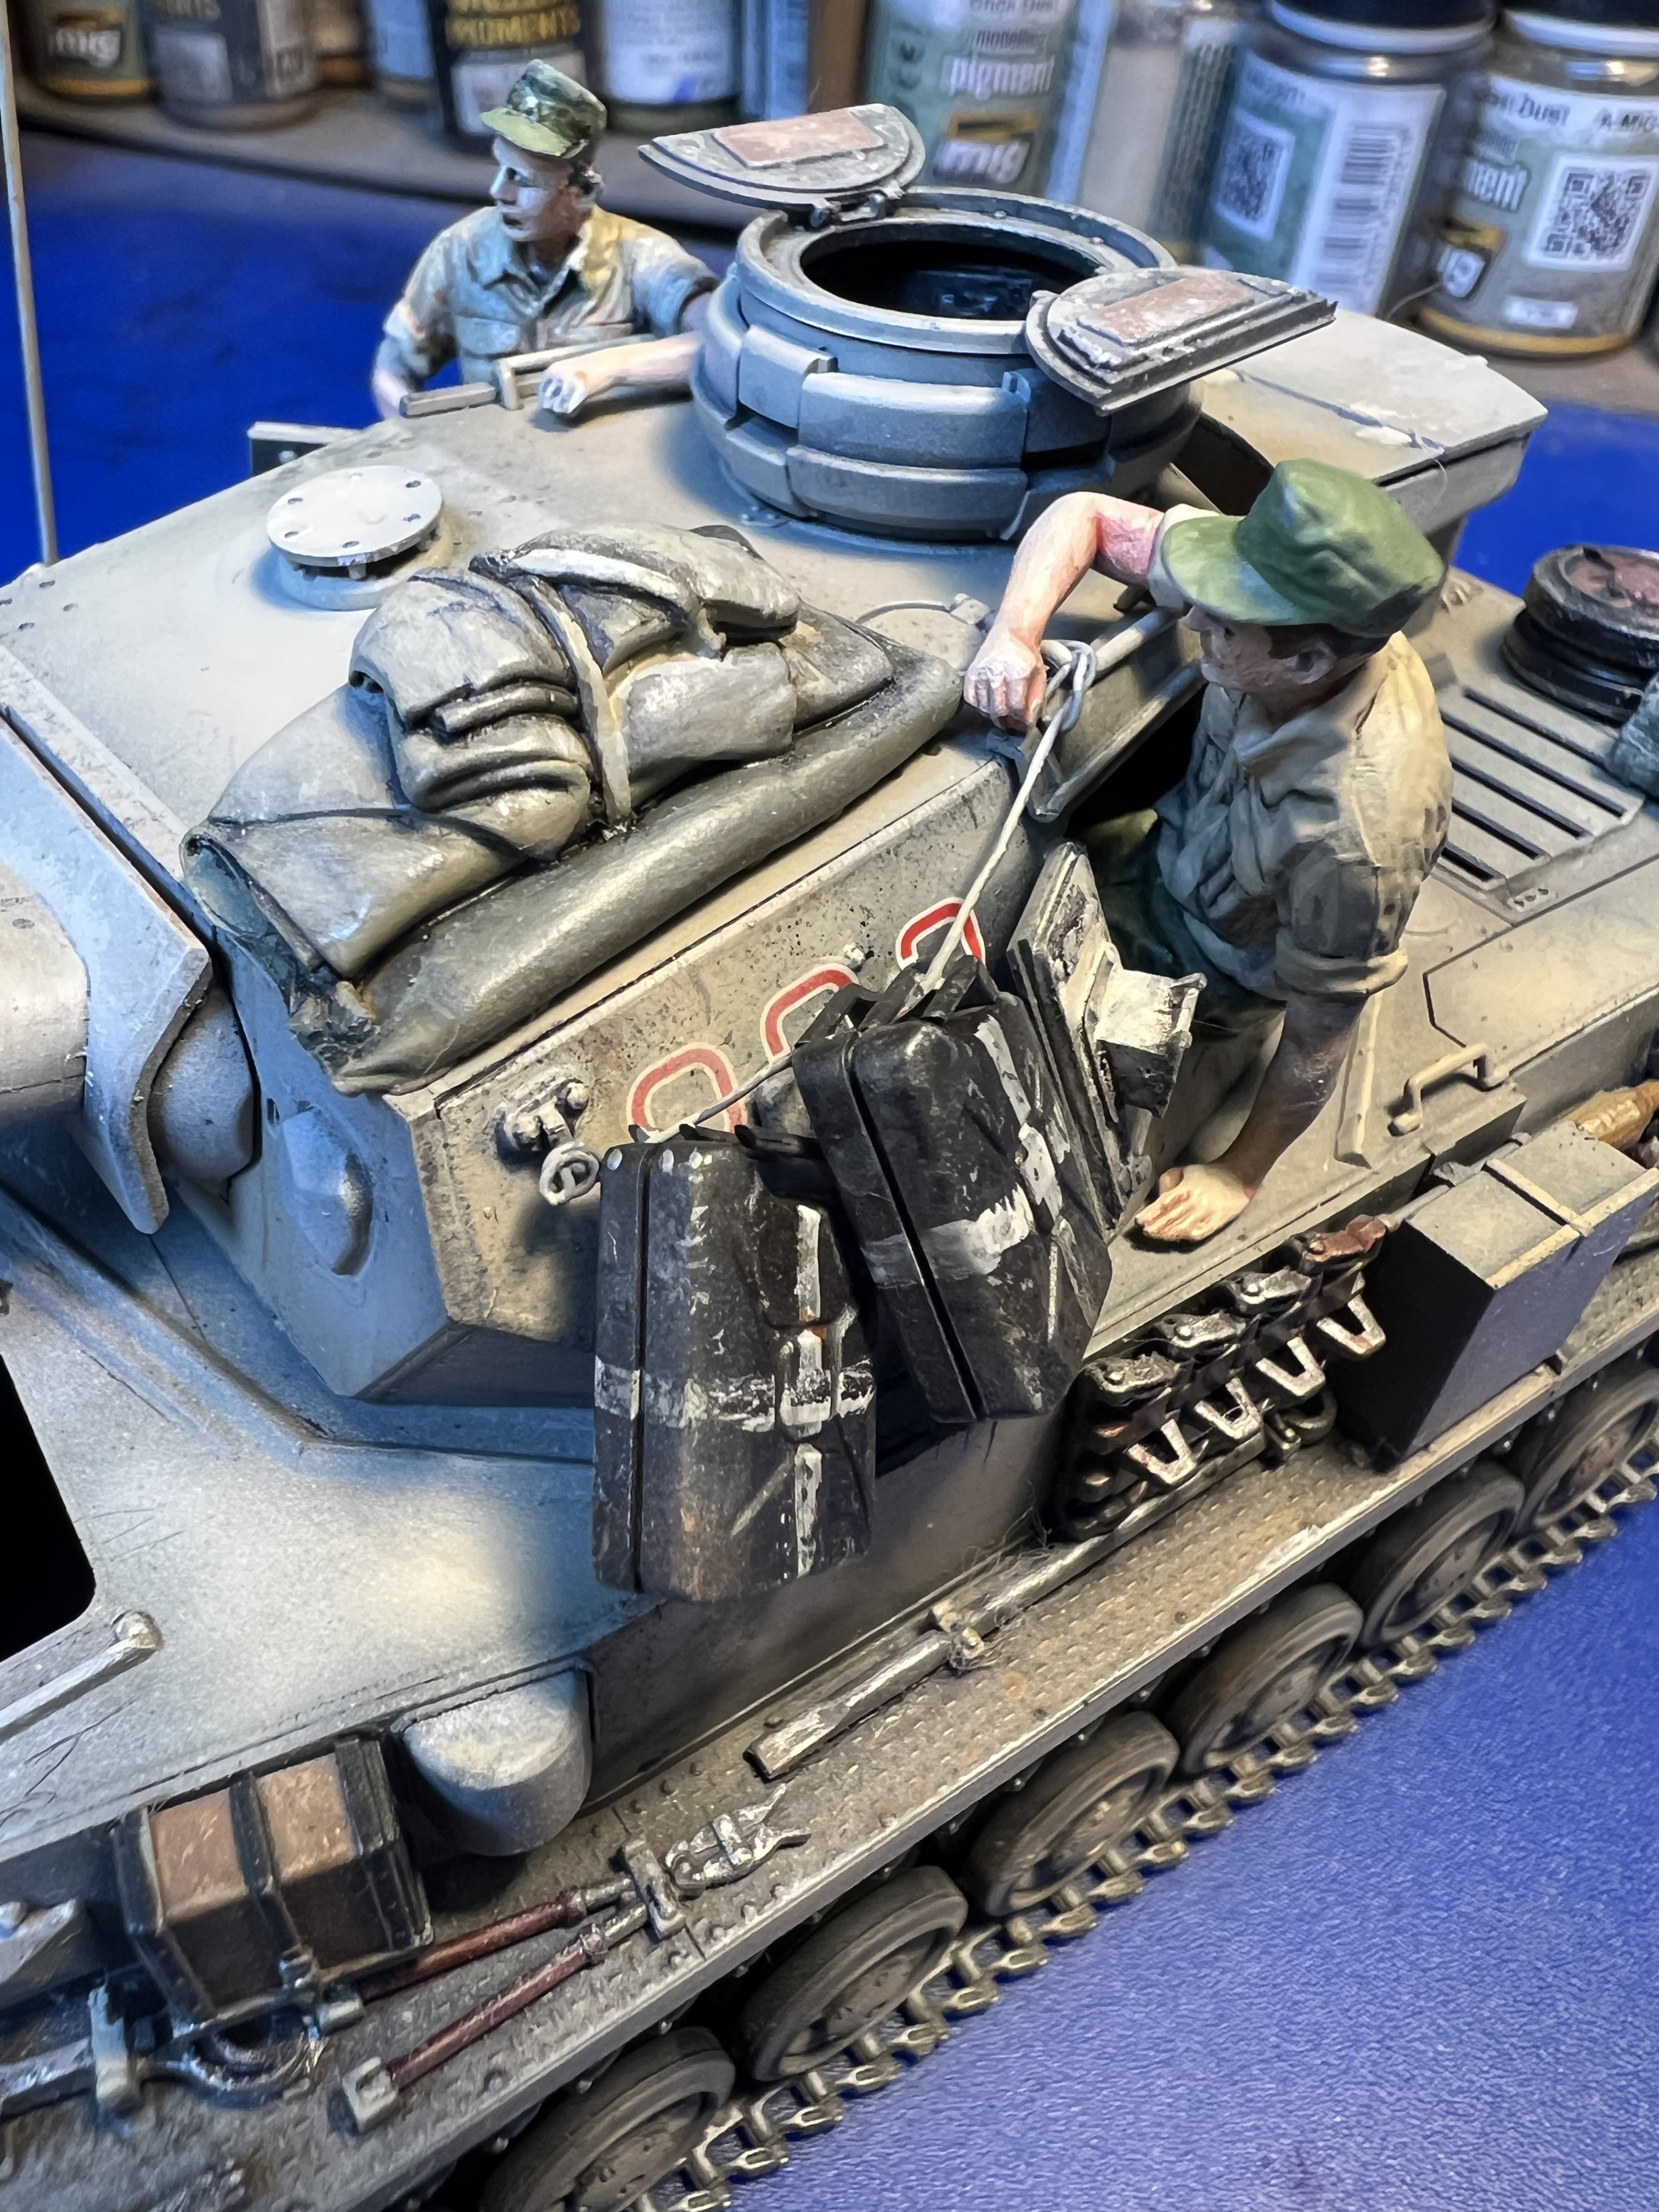
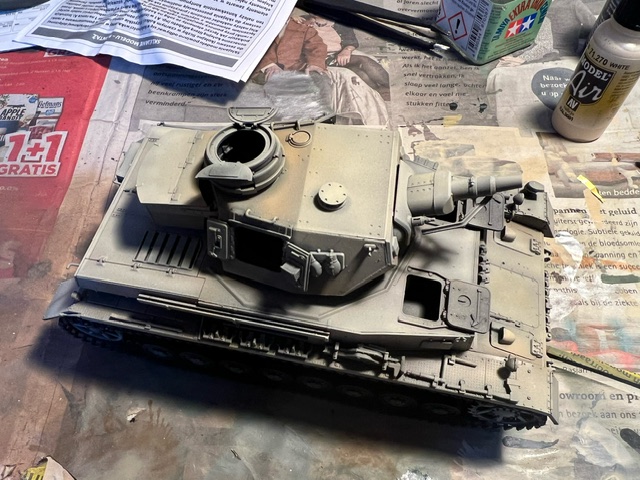
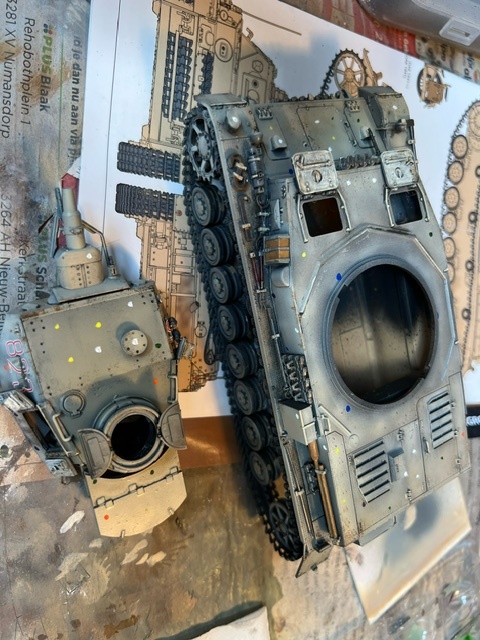
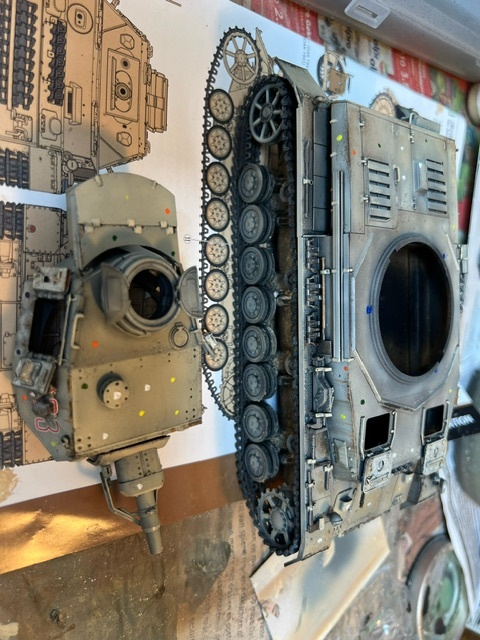
First texture layer on the sides went down using a mixture of AK muds and pigments, wet blended and left to dry. Will add streaks and washes later plus more raw pigments. I also painted the tracks, gave them a burnt umber oil wash and then dry brushed the exposed parts with steel, with every third or fourth track grip dulled with Tamiya black panel liner to make it look less uniform.

I also used black panel liner dabbed with a cotton bud and some localised NATO black sponge flecks (allowed to almost dry and then dabbed with a cotton bud) to look like grime and oil, general dirt etc on areas where this would build up, eg: around the turret hatches, sides, rear decking in places etc. Will do the same again with a more browny colour later after the dust effects to modulate the effects a little and add more visual interest.

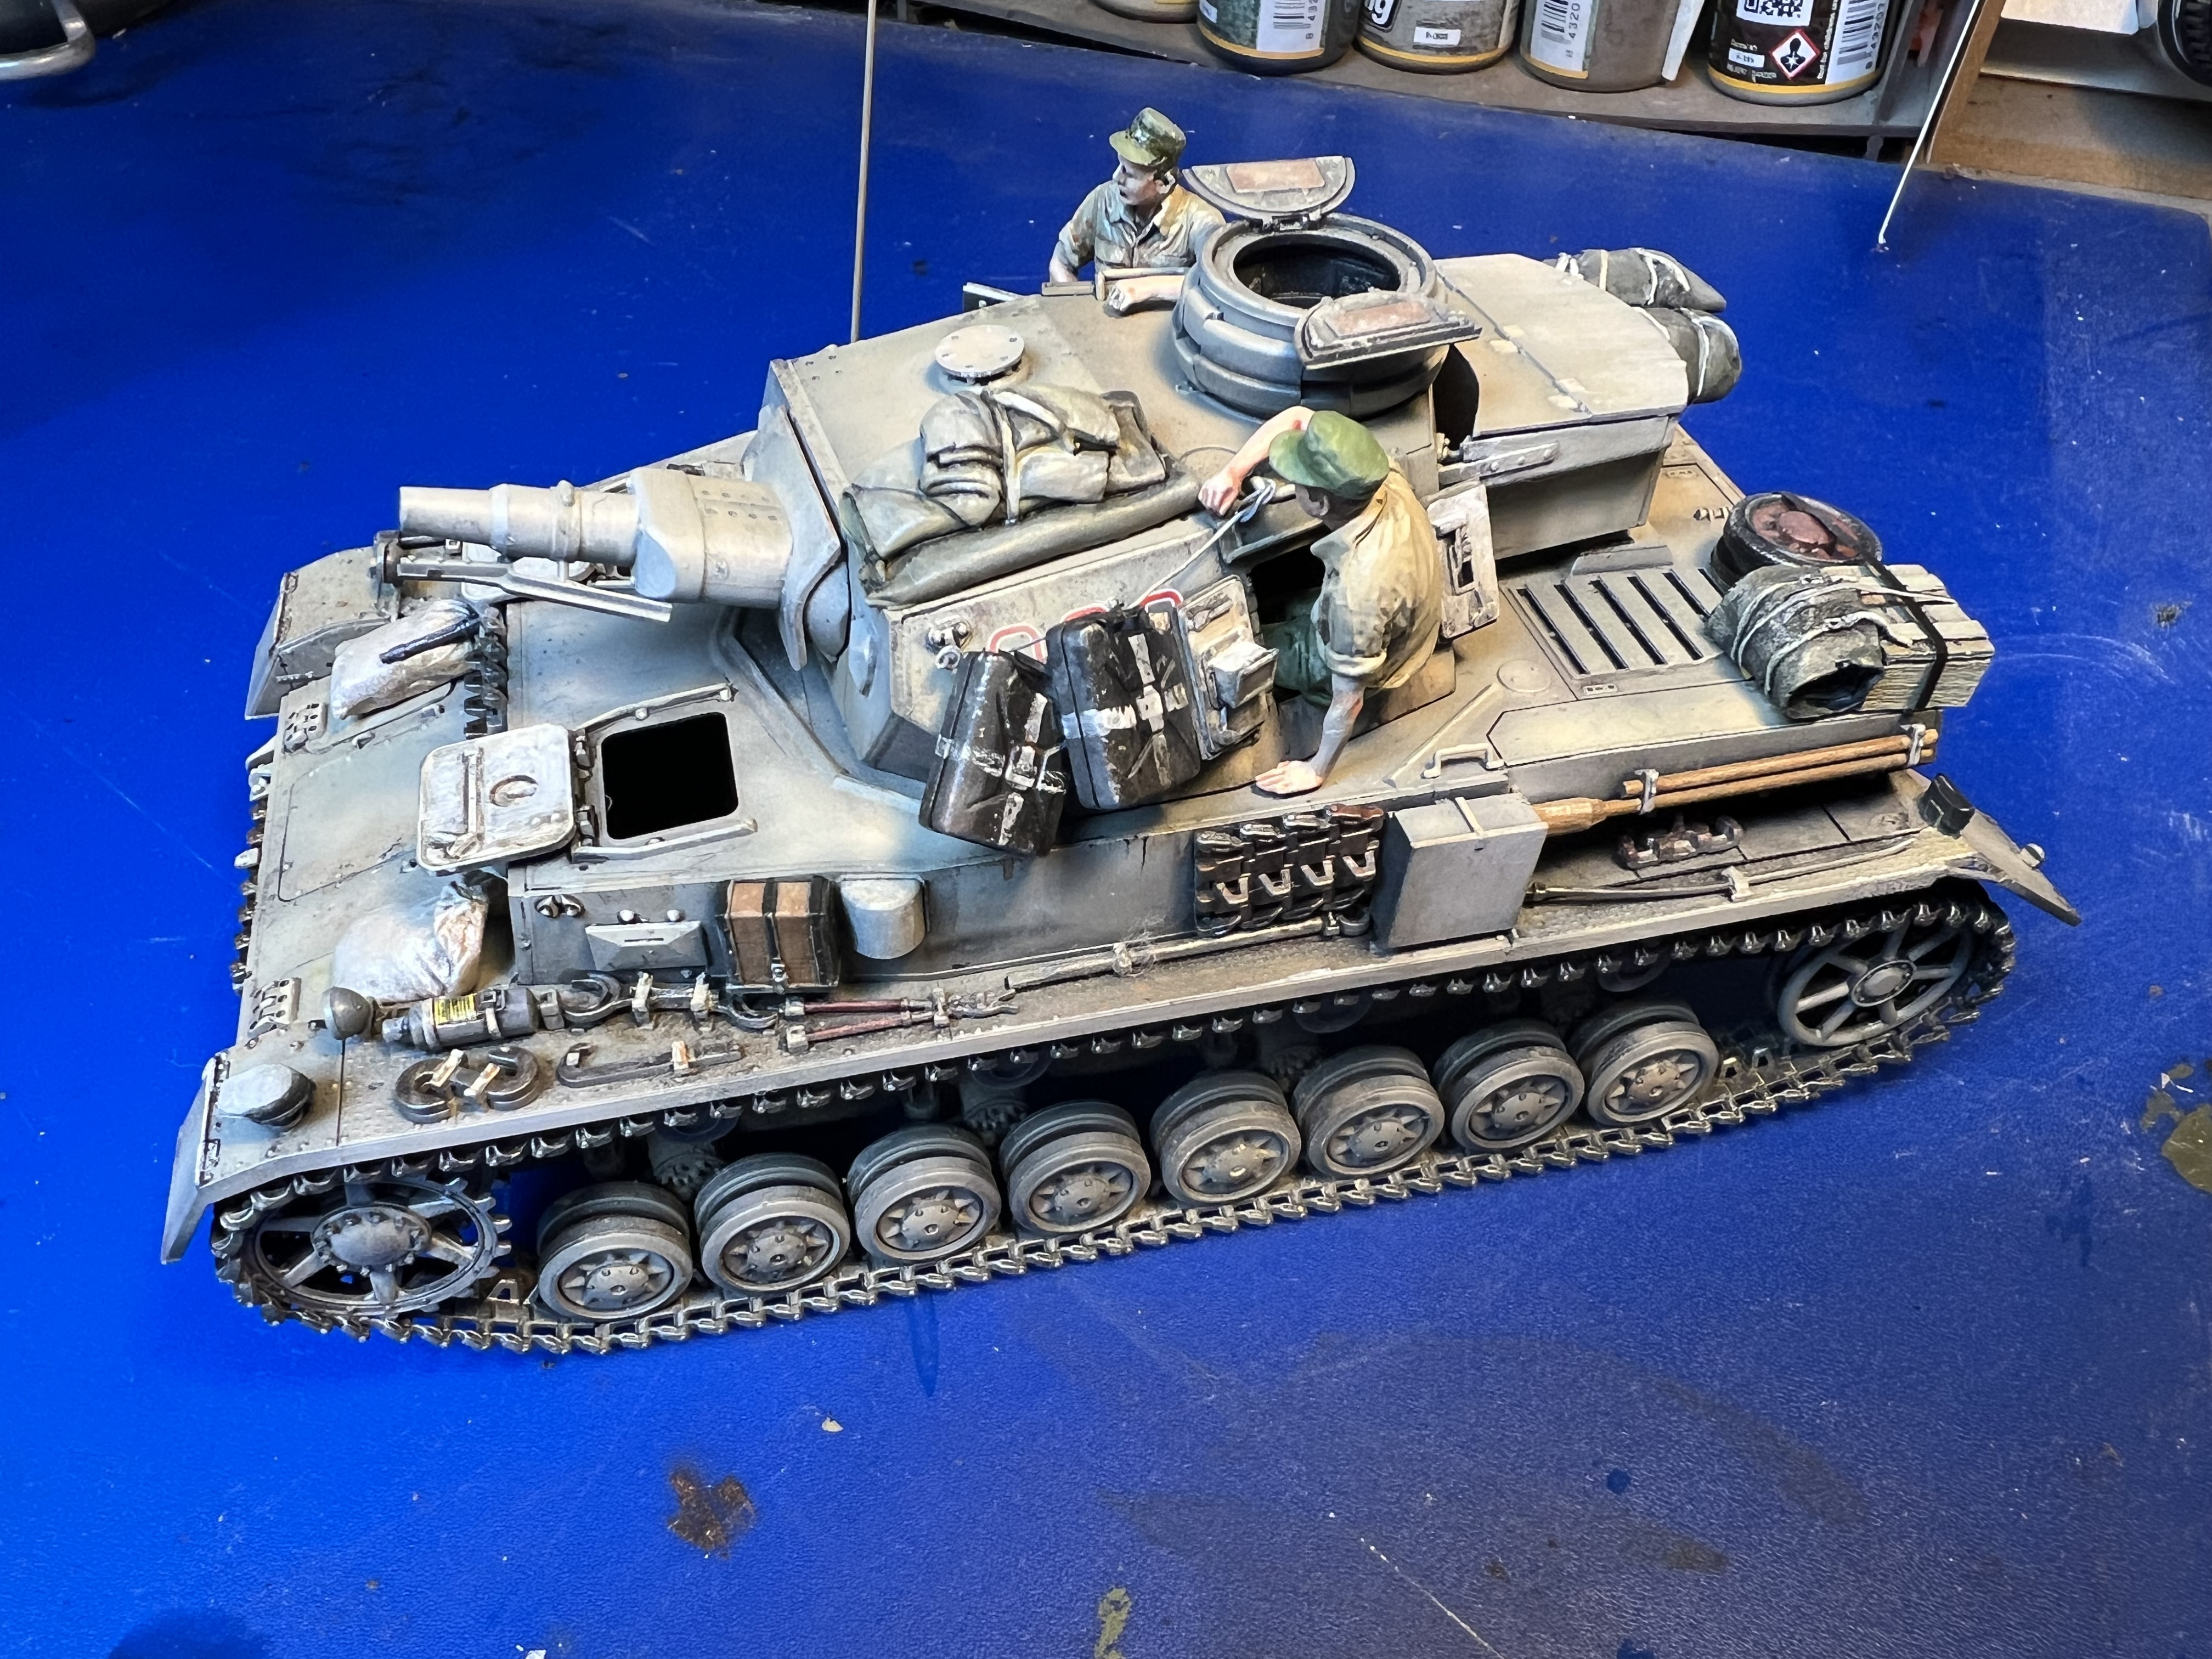
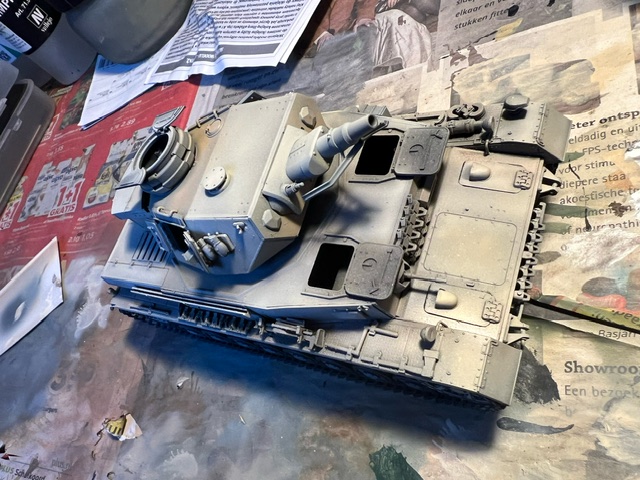
Lots more to come on this - stowage, crew, dust effects, more pigments and some limited drybrushing but you can see where this is going.

Reverting with more updates.

13 Likes

Update 2 -

More work on the muffler, first proper dust pass and some streaking effects. First base coat on the spare tracks down, will harmonise them a bit using 2B pencil but I like the effect of them all looking slightly different colours. Lots more work to be done on this, lots of tidying, but it is heading in a good direction I think.

image0-3
image3-3
image2-3
image1-3

14 Likes

Outstanding and inspirational!

4 Likes

Excellent work! :+1:t2:

:beer: :cowboy_hat_face:

3 Likes

Outstandingly sweet Pz IV, subscribed!

3 Likes

Chris, this is a beautiful model you’ve got going here! All of your combined techniques, products, and layering are blending to create a dazzling effect everywhere. This just looks outstanding.

5 Likes

Tank finished but now moving onto the crew. Three or four dust passes etc and it’s looking decent, I think.


Instead of drybrushing I tried using raw white oil paints and I love the effect. Will be doing more of that in future.

The bucket and the stowage were all from the spares box. The sandbags were from the Tamiya G which I’m not that happy with and might repaint.


The objective was a beaten up, heavily weathered Afrika Korps Panzer and I think I achieved that. I wanted to push my skillset and use as many techniques as possible and I’m quite pleased with the result, I’d like it to be neater and more precise but that will come with time. I sometimes give myself a hard time and I need to remember I have not even been doing this hobby four years yet, so chill.

Next up, more figures and a base!

9 Likes

Chris, give yourself a lot of credit, your model is spectacular. Your many techniques are very well done and the blending pulls it all together in a beautiful subtle way. Just an excellent looking model!

5 Likes

Chris, agreed! Your DAK Pz IV looks outstanding!

3 Likes

Looking fab, amazing skill level after such a short time scale modelling. I’m not sure, but it looks like the right side running gear is unpainted in the photos?? :thinking:

1 Like

Thanks mate, it is painted, trust me. Black rims, sand inners. Both sides are, it’s just there is a few dust layers, pigments and so on and it has been covered up!

Might go after the inners with a filter just so they don’t look unpainted…

3 Likes

The port to the driver’s left is upside down.

b6

David

3 Likes

PIece of art!! excellent job!! :+1: :slight_smile:

2 Likes

Often or usually there were Balkenkreuz on the hull sides, as well as the DAK palm and divisional signs on the front glacis and the Rommelkiste. This was part of their espirit du corps and recognition of their elite status, like the cuff title.

2 Likes

Ah thanks David, nice easy fix, much appreciated :slight_smile: owe you a pint

1 Like

Thanks mate :slight_smile:

2 Likes

Yeah, I thought that as well but the Tamiya decals only showed what is on there. I did think a nice Afrika Korps marking on the sides would really help break up the monotony and add visual interest but there weren’t any on this wagon.

It’s a pity actually as I think it might really help the aesthetic. This is the problem I find with all over light coloured models; you really struggle to add visual interest so do as I did and even up adding lots of stowage and crew and so on to help it. Doesn’t always work!

I might have a look in the spare decals tin to see if I have some AK markings to put on. Were they sprayed on black or dark green or did it vary, do you know?

Really appreciate your advice. This is why I love this website!

2 Likes

You’re welcome, my friend, I don’t reach your level even in my wildest dreams, I don’t get these techniques, I don’t master them, I don’t know the steps to follow, repeat great work indeed.

2 Likes

You are being very modest I’m sure. But thank you so much for saying so. I’m one of those modellers who really takes the advice and critique and feedback to heart so it means the world to me when people like my builds. :slight_smile:

2 Likes

Seriously, I’m not a great modeler, that’s why since I registered in this forum, barely 2 days ago, I have taken the advice and criticism of the other members very seriously, to improve, although I will search the forum more to see if I can find tutorials for dummies like me

3 Likes