Thanks for taking the time to have a look and I hope updates will come frequently. .It’s important to note that Sunward Hobbies very generously supplied the kit and the Tamiya lacquer paint to bring this project to life. Please consider visiting their Canadian and US websites and supporting a family owned and run hobby store. The sites are www.sunwardhobbies.ca and www.sunward1.com.
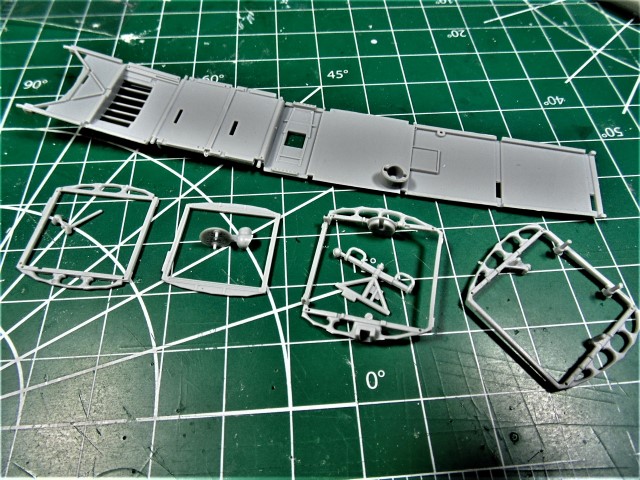
Here’s the link to the “Cracking the Box” article I did a few months back. AeroScale :: Wingnut Wings 1:32 Salmson 2-2A Review so I won’t get into the parts trees and such. This more about what I’m learning and how things are progressing.
All the parts of step one had the parting lines and flash removed. I was a bit surprised with how how much work was involved in sanding. Oh well, the detail is terrific and worth the effort.
Labelling the sprues, seriously, how many years have I been rummaging around in boxes trying to find the right one and not thought of the simplest little solution like this? This thread has just started and it’s already been a worthwhile visit for me.
Looking forward to this one H.G. I love following a WNW build.
Thanks you Reg and brace yourself there’s a whole lot more I’m imparting due to how incredibly generous Sunward Hobbies were in sending me this. Also there’s another blog on an IBG 1/32 Polish fighter I’m building at the same time.
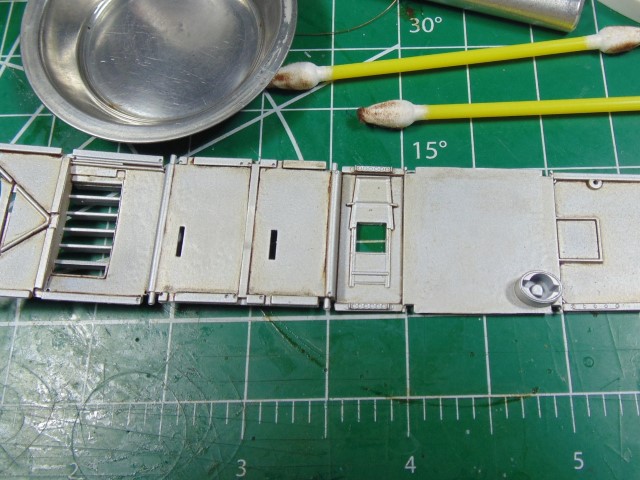
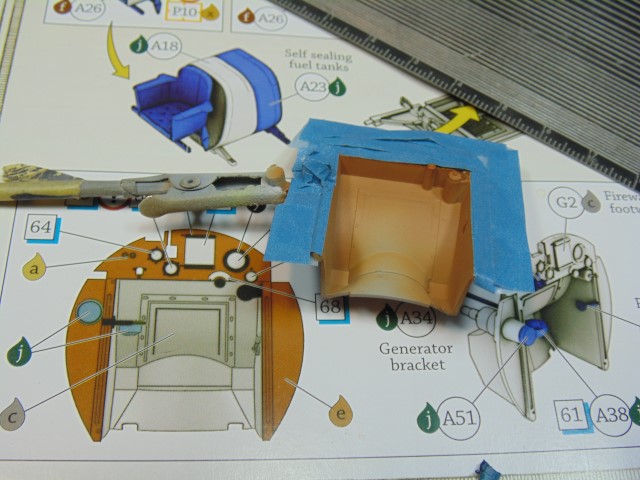
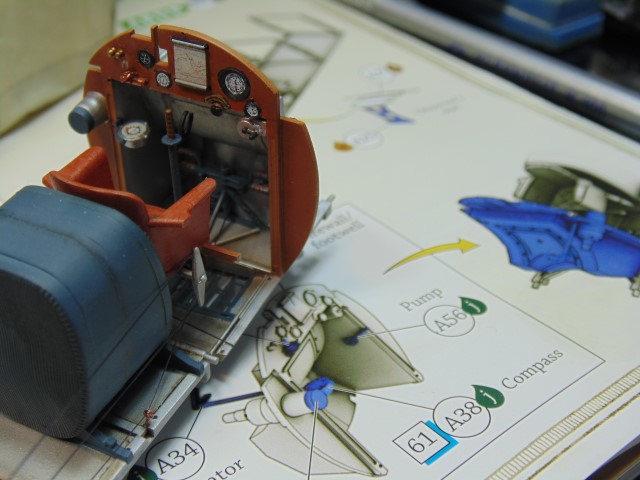
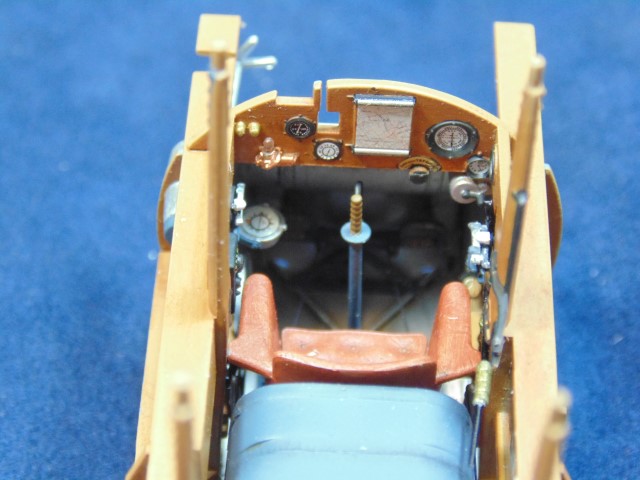
The floor is called out in dull silver but I wanted a worn and distressed look. Take some oil from your face and dab it on the surface before you prime. This will make the primer blotch up. After it fully dries sand it back to give the tampered metal look you want. Prime again then proceed as you normally would. Next I misted a few spots with dark aluminum for effect. It’s subtle but will be seen. After clear coating it Abteilung 502 brown wash went on.
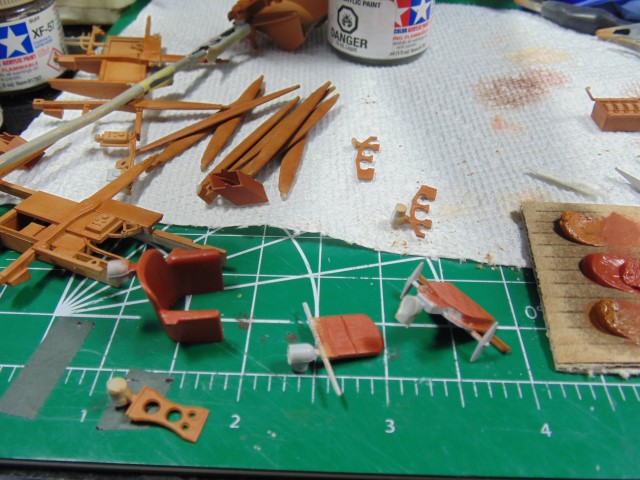
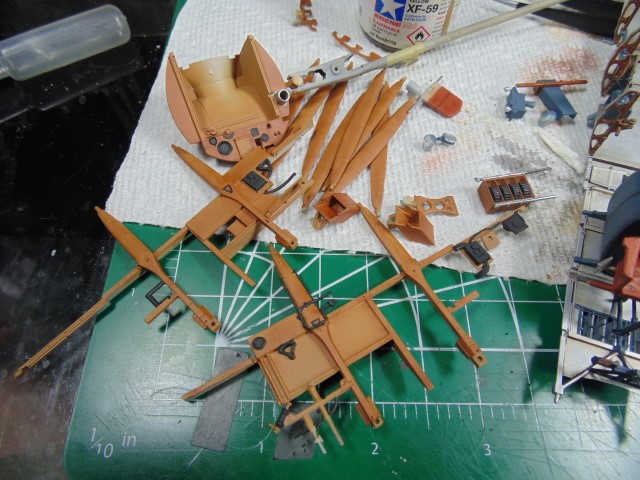
Parts were primed using Mr. Primer 1000 cut 50/50 with Mr. Color leveling thinner 400. The base for wood is Tamiya dessert yellow followed by a mixtures of earth tone oils. I did not clear coat these parts for fear of the oil would not sticking The oil was dabbed on the beginning of the part then dragged using a cheap camel hair brush with a course look to allow tiny grains to be left behind.
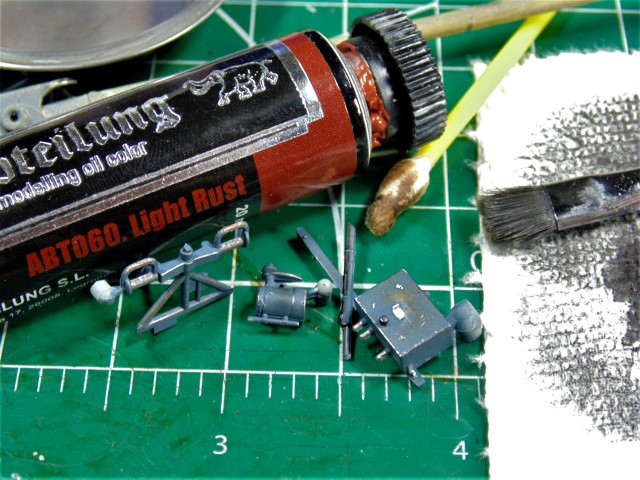
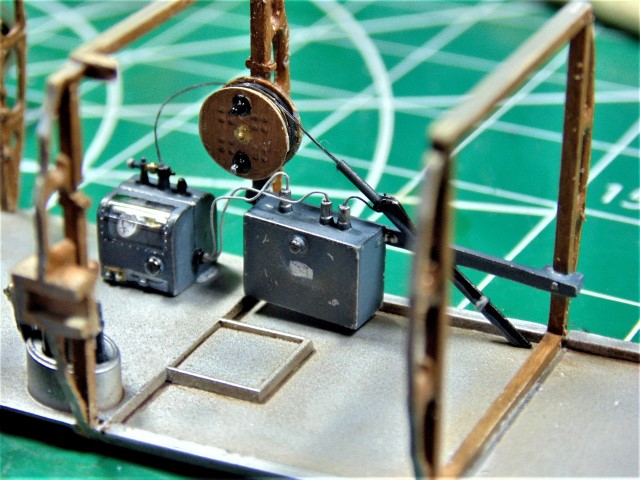
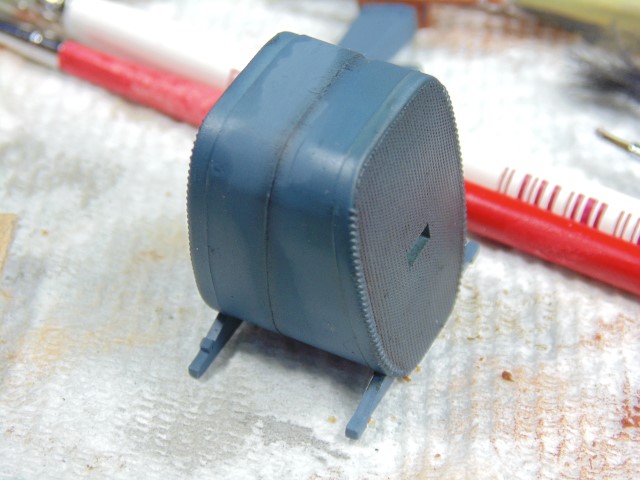
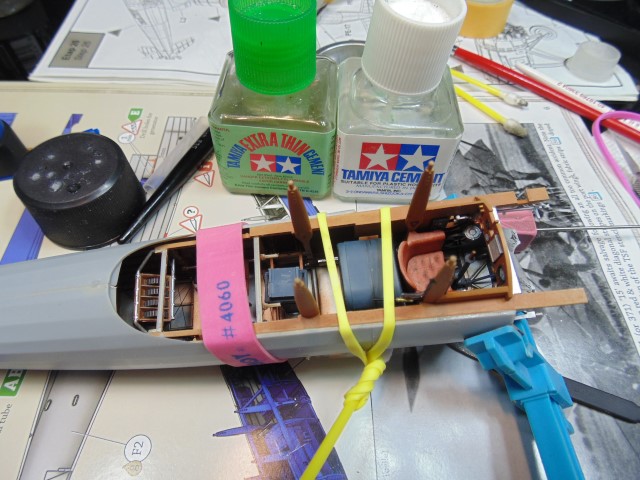
Most of the equipment parts are painted Tamiya medium blue. Then with a tiny brush and some silver made scratches and rubbed in some left over wash to grim things up. Finally Mr. Metalizer 214 was dry brushed to add a more worn 3D look.
The spool is the antenna cable slack. Here some ez-line came in handy and some wire for the radio and battery. The decal for the front of the radio is a nasty one but hardly seen. After painting a few brass fittings this area was done. Maybe some more fine tuning is needed so please leave a comment with your thoughts.
Huge thanks to Sunward Hobbies for sending over the kit and supplies for the build and as always to you folks for stopping by.
Now that some oils have dried more work can continue.
There will be four tones of wood with a slight grain in this model. The least expensive has already been completed in the aft fuselage. Now the eye candy comes out being it will be the most easily viewed.
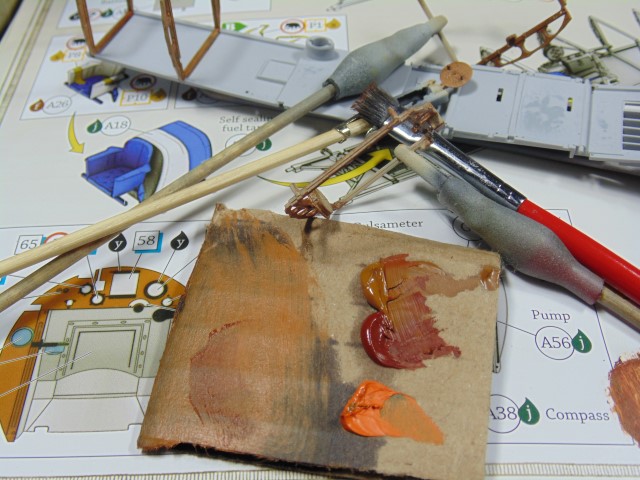
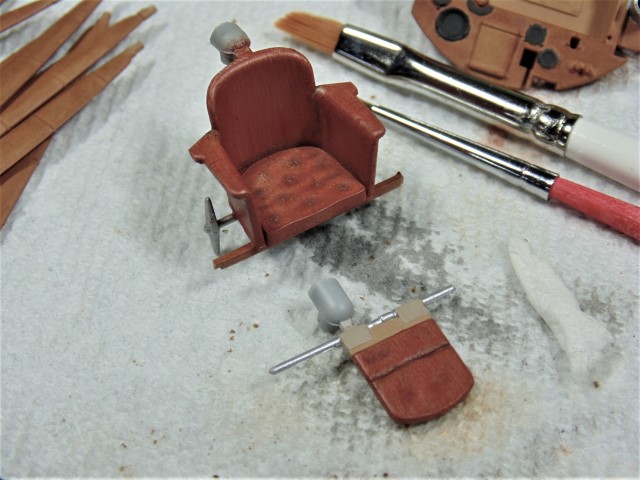
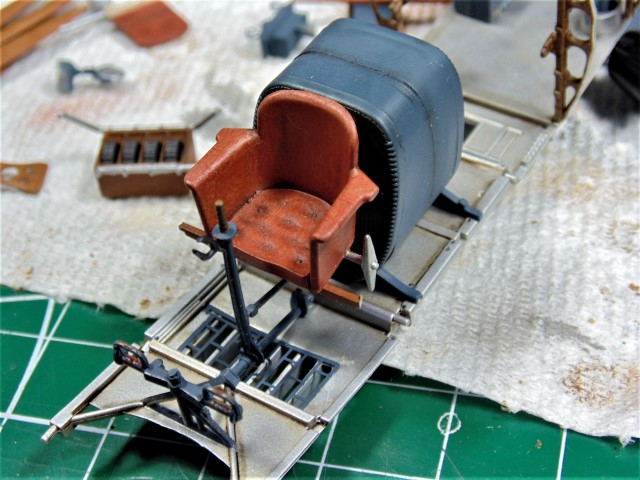
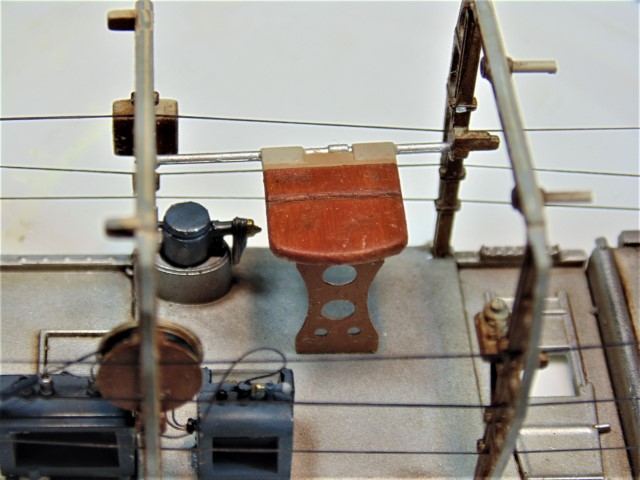
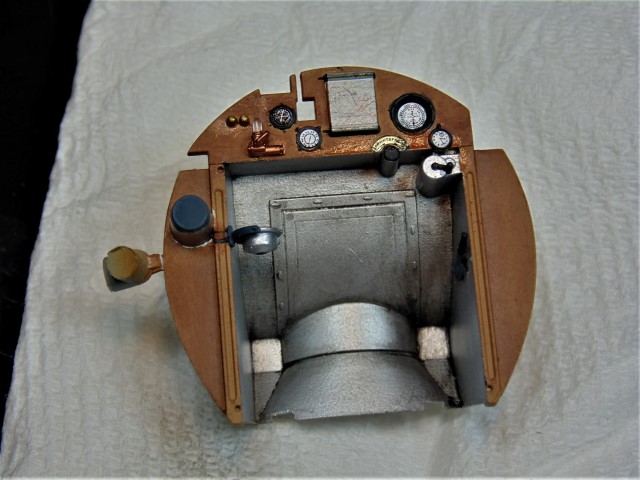
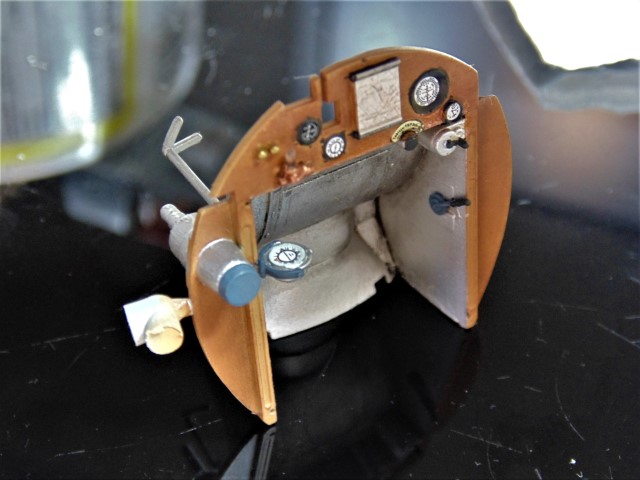
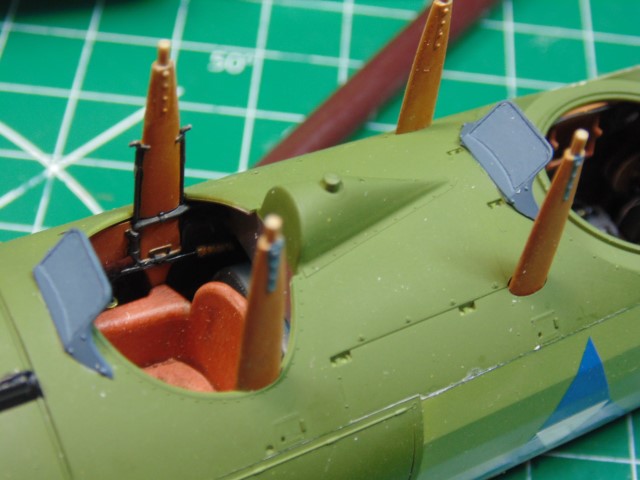
But first some leather cladding. Mixing three Abteilung 502 earth tones gave the rich leather look. The observer’s seat has hemp straps holding the base plate and shadowed with 502 smoke. The pilot’s chair is shadowed around the cushion, the buttons and arm rests with a wood support and metal control arm.
The oil staining is on purpose but not overdone. The Salmson had two self sealing tanks which I hope look separated enough here with a light shadow of engine grease. I put a dark wash on the fabric to liven it up a little. Much more will be done with this but no chipping.
With the brush strokes smoothed out of the leather the control stick and seat components went in. You really have to clean off the paint at the contact points or these parts will not fit. The stick and pedals were dry brushed with dark iron metalizer.
A lot more was done as you can see, but this has to dry before any further updates. Thanks for being patient since I know several of you are looking forward to progress. Please leave a comment if you have any thoughts.
Huge shout-out to Sunward Hobbies for supplying the kit and paint for the build and your enjoyment.
Quick update. Please leave any comments you wish, it’ll help me with the final result.
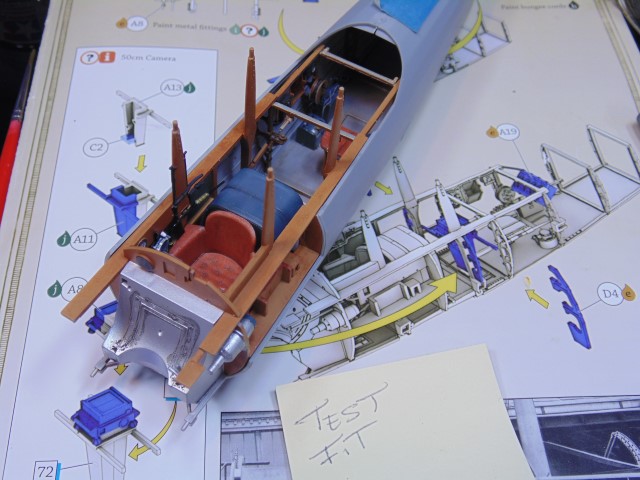
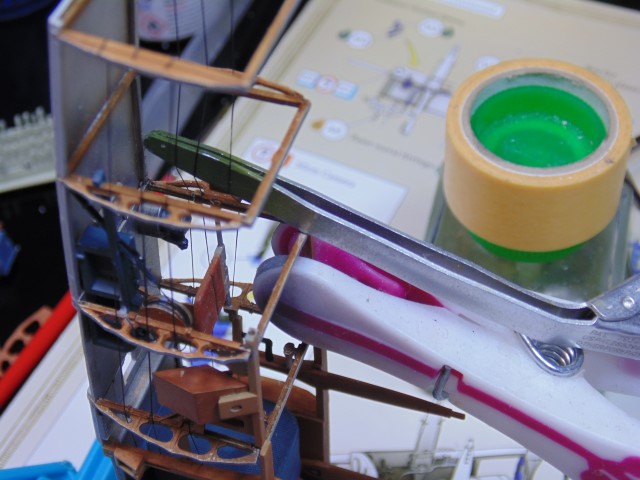
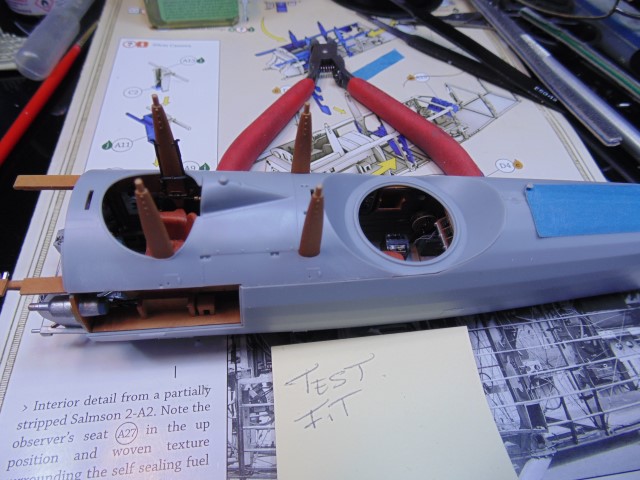
Plenty of test fits done.
All the connection points have to be free of paint, primer and flash. If not removed they won’t come together.
Even when they are bare plastic you’ll still need to take a little more away to have a good fit of the body.
Even then you’ll need to clamp in certain spots to ensure a proper alignment.
And again, test fit because this is a very complex bit of tooling.
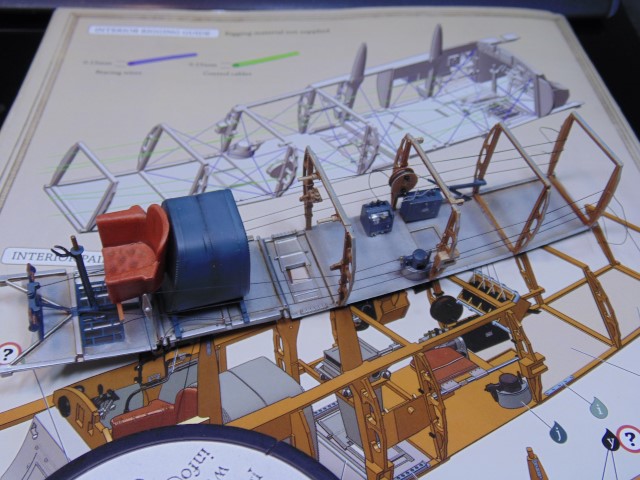
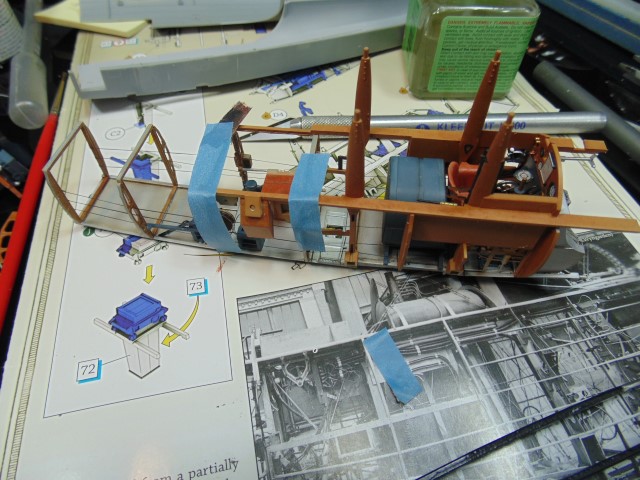
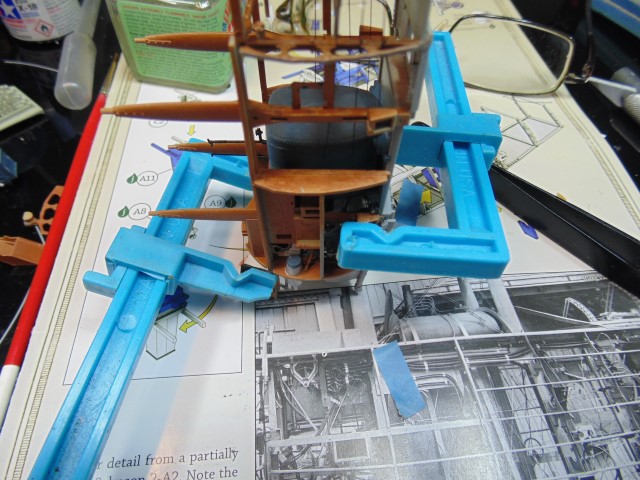
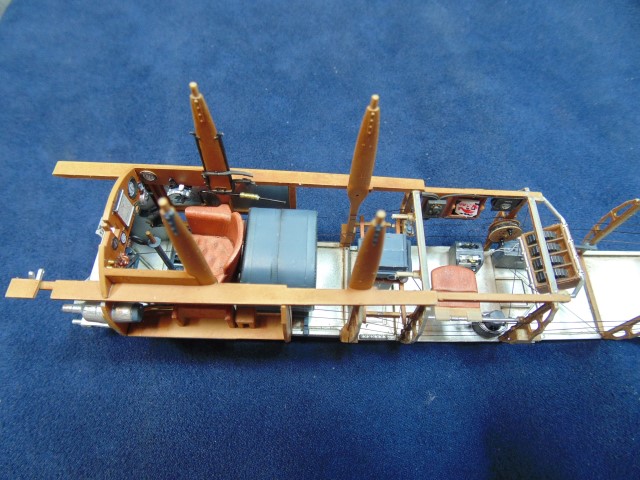
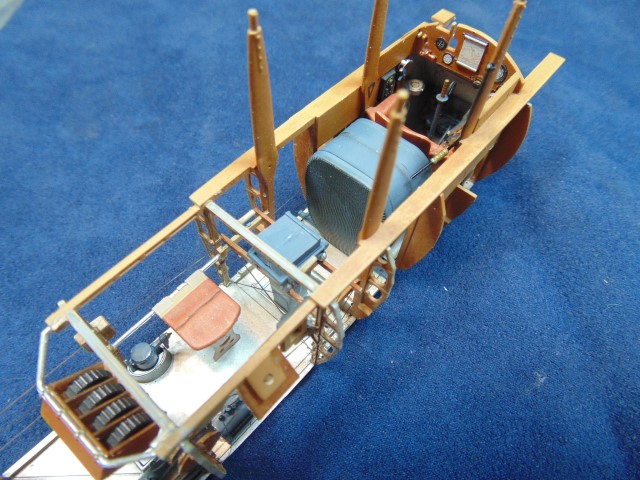
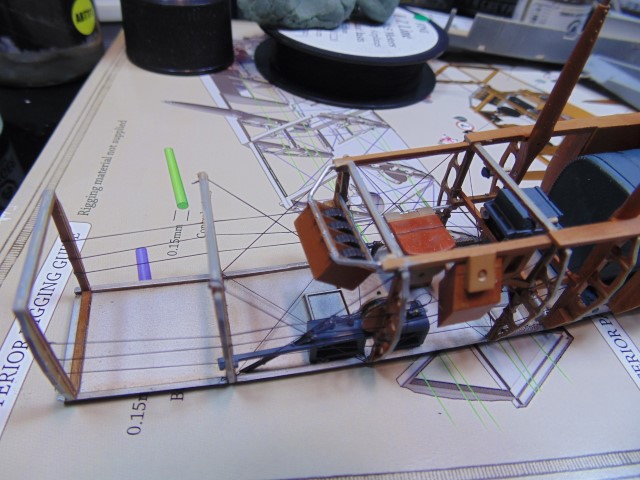
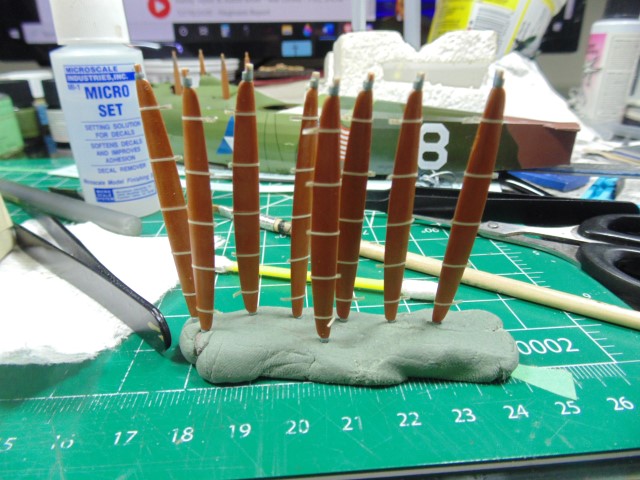
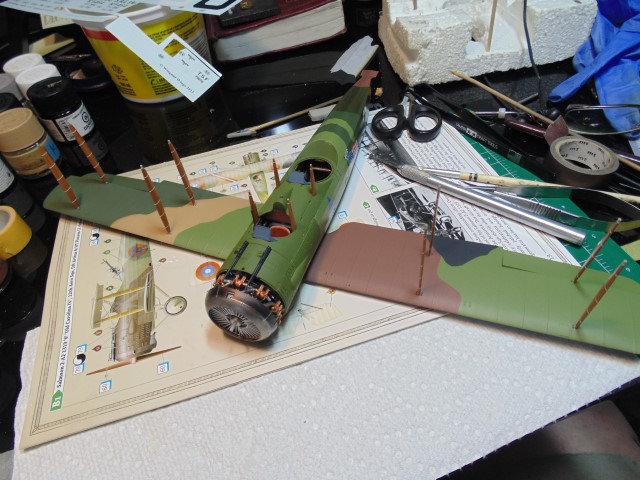
There’re plenty of tiny holes to insert your rigging material, but if I had it to do over the cables would have gone in first then added the accessory parts.
Still some “X” bracing to do and happy for that because you can easily see it. Great eye candy to see all the colors and components.
This took several hours and some patience but the key is to clean your contacts as you would with any model produced by the same company that meng use. 100% worth the time though.
Enormous thanks to Sunward Hobbies for suppling the kit and paint for the build and your entertainment. Please give their US or Canadian websites a visit and consider helping a family owned and run hobby store.
Thanks Everyone, next up is everybody’s second favorite… the engine!!!
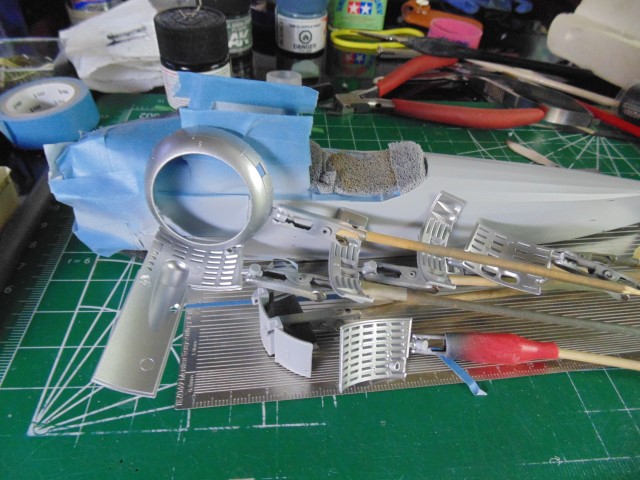
I know I said the engine was next but got a bit ahead of myself. Here’s page 4 with the assembly of the body.
“X” bracing all done and yes you most definitely see it.
The left side photographic plate box installed and holes for the generators drilled.
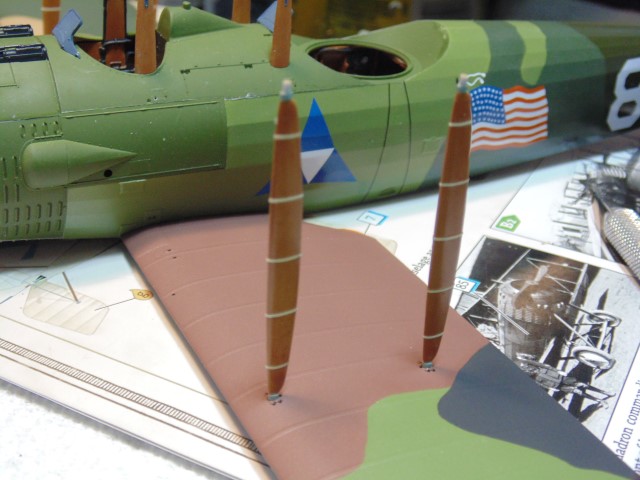
XF-57 Buff for the canvas dope look under 502 oil smoke wash then feathered out. I didn’t want it to be too dark, otherwise the cables would disappear.
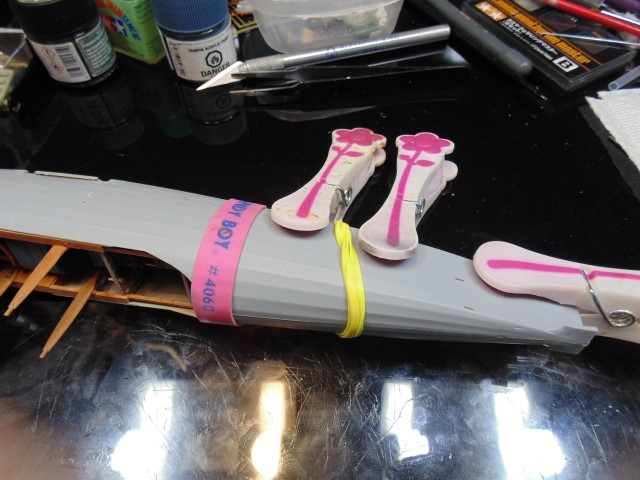
There are many connection points so a slow drying cement (white label) went on first then the extra thin when everything was in place. Call me the rubber band man. Ha, you’ll be humming that tune for hours now. There was a goodly amount warping in the plastic, hence the clamps and bands. Only when the interior was solidly affixed did I work on connecting the body halves.
Many thanks to Sunward Hobbies for supplying the kit and paint for the build and to you guys for dropping by. Next up… engine!
Yeah, there’s a bit of rigging needed here. There’s more double cabling at the pilot area but didn’t photograph that. Soon it’ll be wing time. Thanks for the kind words.
Finished off the body work and while it hardens prior to sanding the engine needed assembly.
Here we go helping the Dough Boys on the ground.
You can see the misalignment in the belly.
Simple enough really. Save your broccoli rubber bands HA HA.
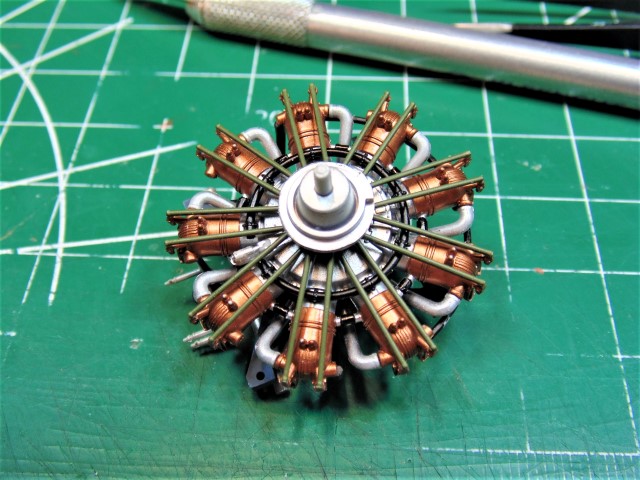
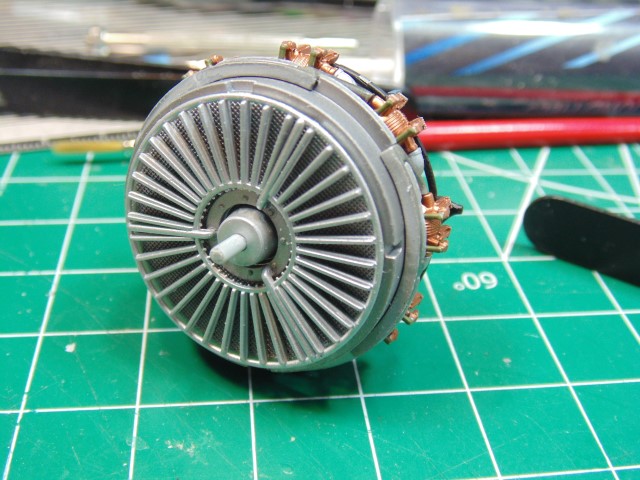
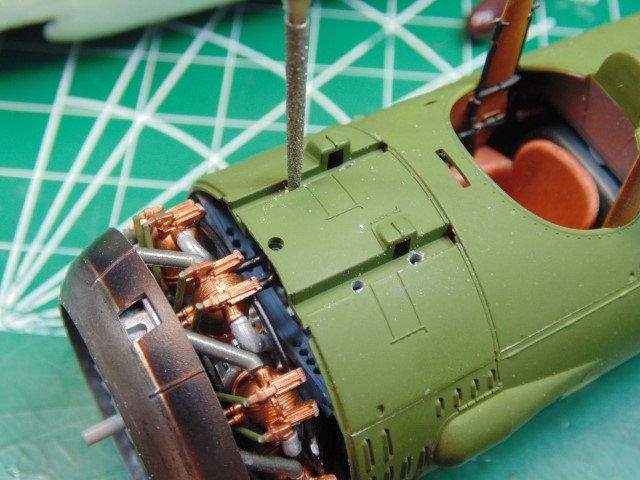
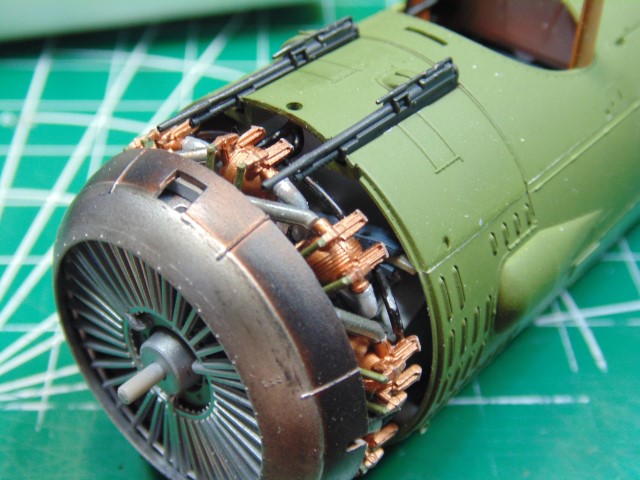
The engine halves do not fit flush. The cylinders bow out and need coaxing.
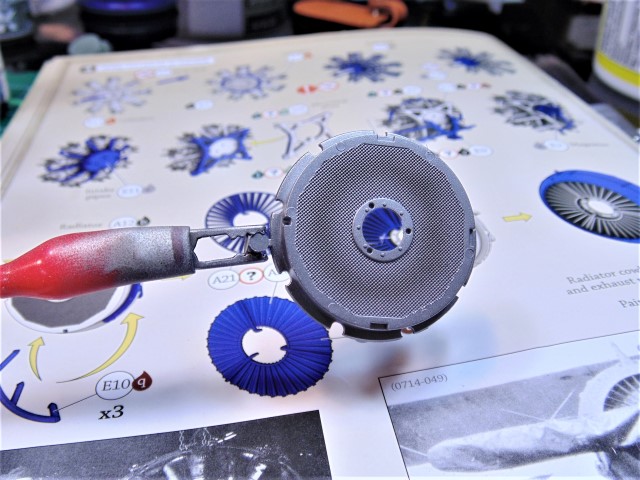
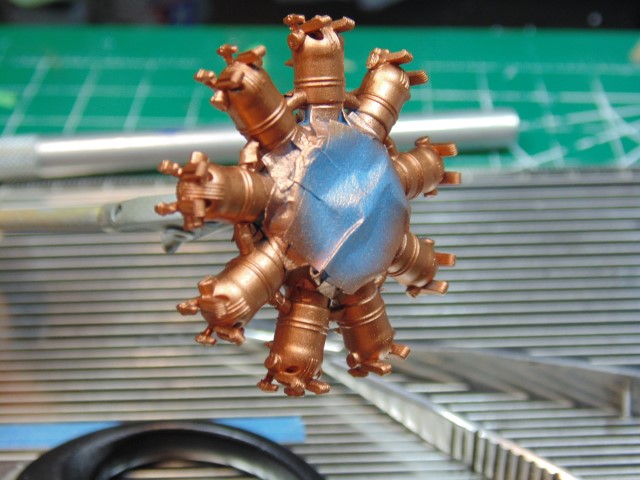
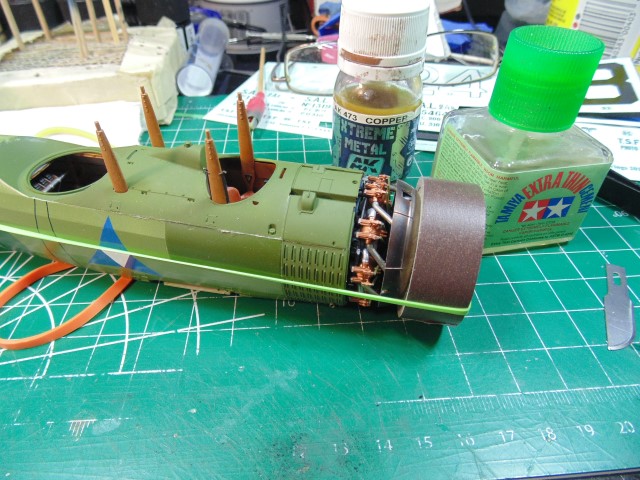
This is sprayed with AK Xtreme gun metal and then highlighted with AK burnt metal. I’ve decided to have the front vents open to see this radiator.
AK copper over the AK aluminum then obviously masked.
It took longer to mask for the copper then all other steps combined, including clean up!
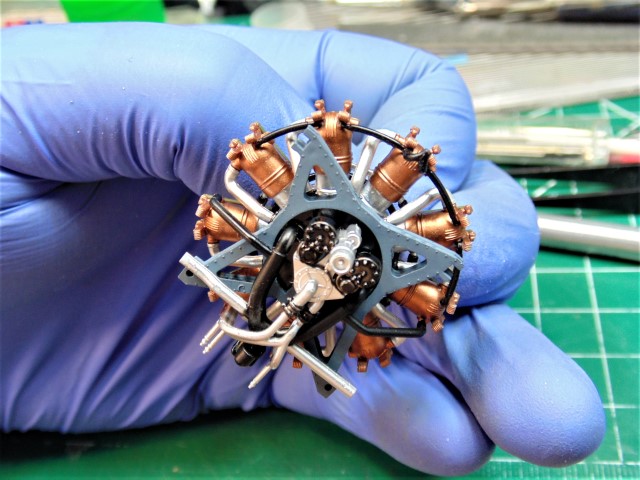
Still on the fence if I should put a wash on this since it’ll be behind cowls. This is also the reason there won’t be any extra wiring, it simply will not bee seen.
Please leave a comment about what you think. If I have an open cowl it will mean the entire back engine area will need to be scratch built.
My sincerest thanks to Sunward Hobbies for supplying the kit and finishing paint for this project and to all You for dropping by. Be safe guys and gals.
Primed and interior sprayed aluminum. I’ll get to the exhaust ring later.
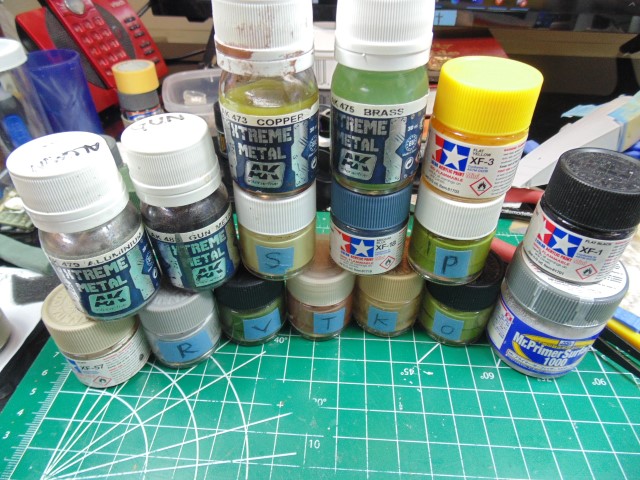
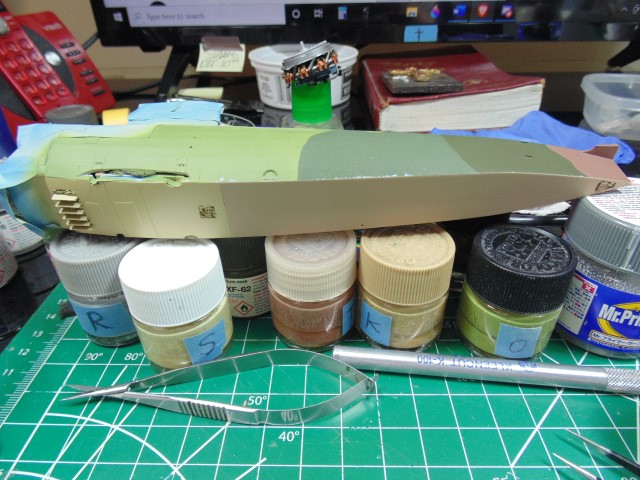
Here is a sample of some of the colors used. Obviously the lettered jars are the mixed paint for the exterior finish. Huge thanks to Sunward Hobbies for sending the kit and the paint to make the very complex camouflaged skin. Next up will be the painted fuselage, cowls and maybe the lower wings.
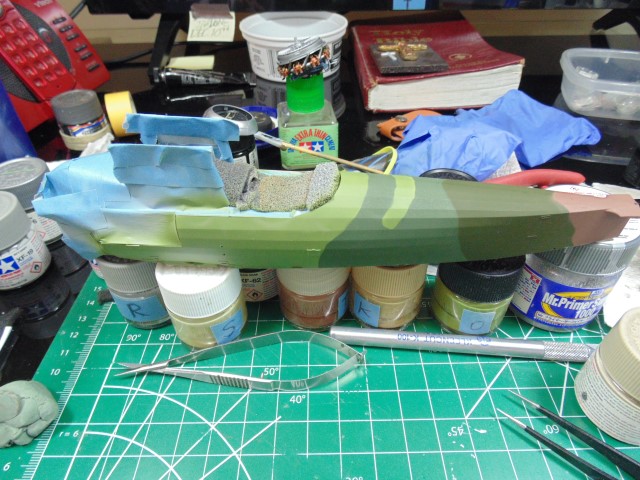
Taking a little break from the B-17 project to show you the paint on No. 8.
The instructions show colors much more on the brown or Khaki side, so naturally when I got this on the model it was a bit of a shock. It might look as if each color is solid, yet far from it. I sprayed as mottled as possible to help with the next stage of weathering.
Nope, not the colors I expected. Can’t turn back now though, especially after all that time mixing them up. Touch-ups were hand painted and blended well. The aluminum dope effect is tough to see but in real life looks very cool.
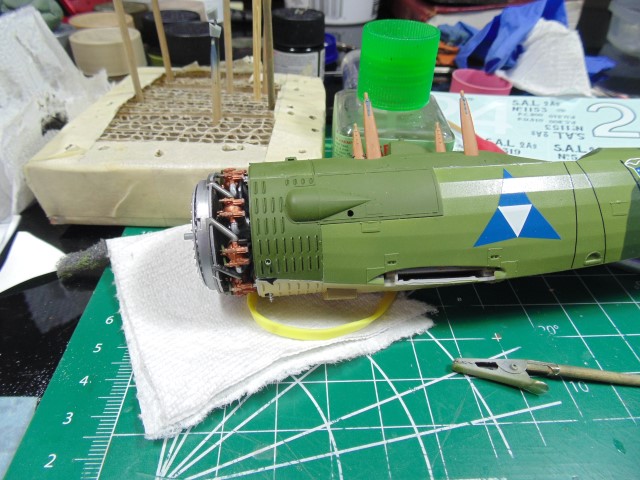
Clear coated with X-22 and let dry for 6 hours the Cartograf decals had nothing to struggle with. Next the front cowls went on as per instructions.
They do not fit brilliantly, but considering the reference photos having steps and some minor overlap I figured WNW factored that misalignment in.
The bezel and exhaust ring on No.8 look pretty well used in the pictures. A light coat of copper was rubbed with weathering pigment. It will have more color added later after all the man handling is done.
Making sure the bond is solid to the engine. There’s plenty more cleanup and touch-ups to do here but thankfully page 5 is almost done.
Huge thanks to Sunward Hobbies www.sunwardhobbies.ca and www.sunward1.com for supplying the kit and exterior paint for this project.
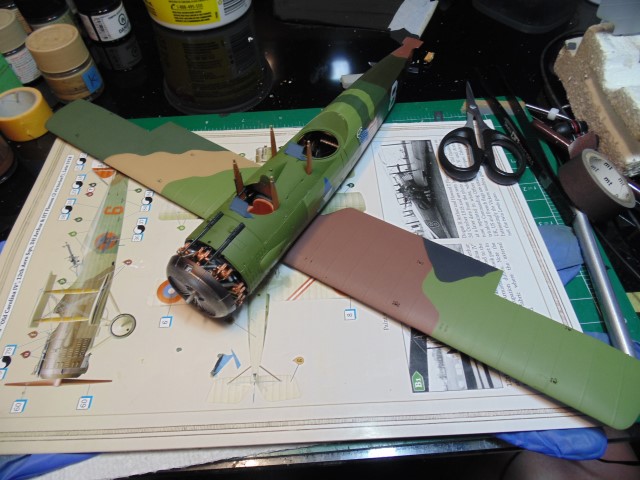
Here’s the latest. Section 6 is almost completed with only a dull coat and some light oil colors to weather it up. I figure it’s best to have this area fully ready for assembly otherwise adding oils when the wings are attached would not be fun.
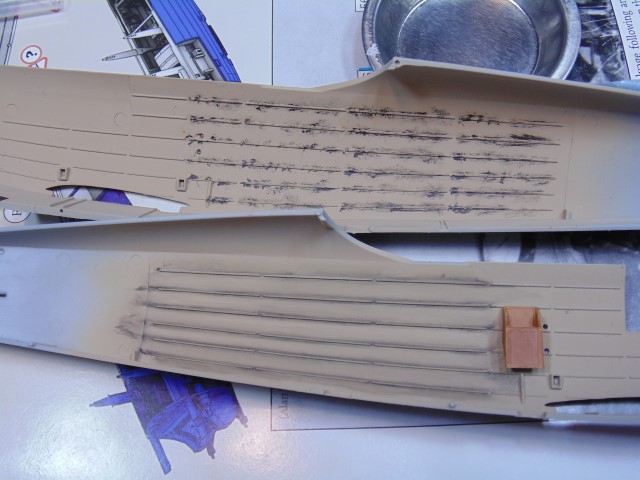
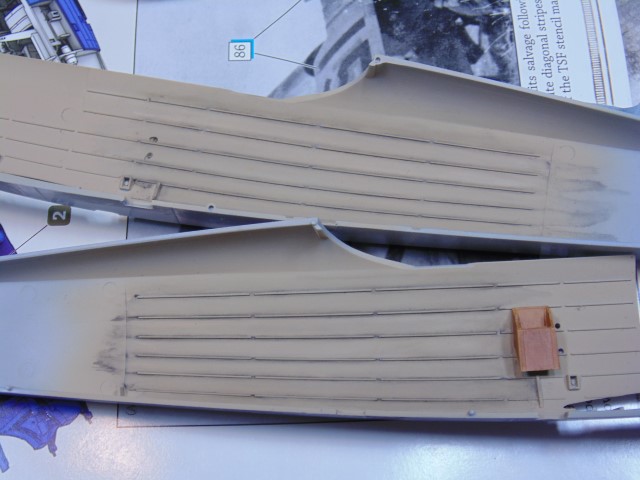
The supports have a banding which is painted a dope color. Just a few decals HA HA.
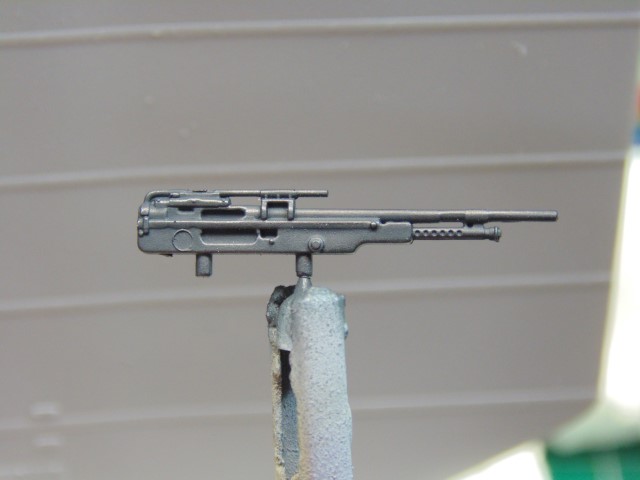
These were painted dark sea blue then dry-brushed with an iron metalizer. The barrels were hollowed out with a 0.4mm bit.
Ream the holes out and clean off the pins or they’ll never fit.
They look differently recessed but that is how they’re supposed to be to match up with the ammo feeds.
The masks will stay on until the model is fully complete. Still some touch-ups to do and just after this the rigging holes were drilled out. The gap at the observer’s station windscreen is gone.
The lower wing painting guide is found on the page for the B1 version.
The decals have bed down along with the ailerons painted. All fits well after the paint is scraped off the ends.
Slow going on this one with work on the B-17 taking precedent, yet still plugging away.
I really like the fine wood grain and stained oak look. It’s hard to tell from photos though if they were dull or gloss finished in real life. Will have to flip a coin or maybe you can comment if you know.
Kindest thanks to Sunward Hobbies for supplying the kit and paint for this build and thanks to all You for dropping by. Be safe everyone.
Looking really good, HG. I remember having the same fit situation with the Takom King Tiger I did. Plastic on plastic fit fine, but the tolerences were so close, paint had to be removed or things started getting out of whack.