WNW 1/32 Salmson 2-A2 USAS

Hi Gang,

The update you’ve all been waiting for is here :slight_smile: … well hopefully.

DSC00552 (Small)

Upper wing assembled, primed and test fitted. Holy cow this is a big model.

DSC00553 (Small)

Tamiya Buff used as the linen dope.

DSC00631 (Small)

Many small details to paint, such as these metal slip knuckles and cable horns.

DSC00640 (Small)

The detail is really good on the tires and the gear.

DSC00641 (Small)

Again, the paint and primer must be removed from the mating surfaces or you’ll risk bending or worse breaking parts.

DSC00642 (Small)

The “C” ring/clip has to be installed then the tri shaped strut pushed up closer to the wheel. If you don’t the wheel will be wobbly. Don’t cement the outer cap or “C” clip, yet wait until the model is completed. Then spin the weighted bulge to its proper place (if using the Persan tires).

Our sincerest thanks go to Sunward Hobbies for supplying the kit and the paint for the build. Please visit their Canadian and USA websites at www.sunwardhobbies.ca and www.sunward1.com and consider supporting a family owned and run hobby shop. They’re where I buy my supplies.

More soon and thanks for dropping by.

4 Likes

Hi All,

Time that the Salmson got some love. It might not look like much, yet this took hours.

DSC00801 (Small)

This helps complete section 6.

DSC00800 (Small)

And helps with section 7.

DSC00799 (Small)

The strips are 1mm and the type is MT masking tape that was bought at a local craft store.

DSC00798_LI (Small)

The 40 plus eye hooks are for the bottom wing only. There should be close to 100 front and back. That does not include the turnbuckles.

DSC00802 (Small)

Use a thin bit of strong wire and make a “J” hook. Slip that into a pin vise and spin the thinner. You’ll get quick uniform eyehooks with the twisted end gripping the super glue much better.

Huge thanks to Sunward Hobbies for sending over this kit. They did so well before WNW closed shop. Sunward Hobbies also sent the paint for the build and your enjoyment. Please have look at their USA and Canadian websites, www.sunward1.com and www.sunwardhobbies.ca.

Thanks Everyone.

3 Likes

Hi Folks,

Quick update.

DSC00803 (Small)

The optical illusion works!

DSC00804 (Small)

Yeah that celebration ended quickly when it came to me that decals needed to go down.

DSC00805 (Small)

The thing is, I’d never done this type of shading before on a bi-plane and was excited. Three more WW I are in my stash and this effects all of them.

I’ll just clear coat them then re-stripe and re-spray.

DSC00806 (Small)

The decals went on like a champ though. These dark circles are for the radio wire wing antenna. Next will be adding the turnbuckles… lots of them!

Huge thanks to Sunward Hobbies for sending the kit and paint for the build review. Be back soon, I hope.

4 Likes

Hello fellow Wingnuts,

DSC00828 (Small)

Bottom looks fine now.

DSC00829 (Small)

Some dark grey green mixed oil feathered on the ribs and will mottle more colors in between to add life.

DSC00830 (Small)

Picture says it all.

DSC00831 (Small)

Getting there.

DSC00837 (Small)

Please please please give me your comments on how this looks. Be it good, bad or indifferent… let em fly.

6 Likes

Hi HG - I like your paint effects - I think the shadowing on the rib tapes looks a little strong right now but it may tone down with subsequent coatings - flat coat , dust over etc. Getting this right is by far the most difficult thing for me in painting.
This is a subjective thing of course - what looks good to one may not look as good to another.
I tend to prefer subtlety but I am sometimes disappointed with the end result because I was too timid in the initial steps. All part of the challenge
( fun ?) of modelling !
I admire your work - please keep it coming !
Cheers - Richard

1 Like

Very nice! The oils added a lot to the overall appearance. I also really like the other weathering and wear. A stylistic preference, to be sure, but I certainly share it.

2 Likes

DSC00838 (Small)

Added some buff color to help with the shading effect, but more important I forgot to thank our KitMaker Network Aeroscale sponsor. So, huge thanks to Sunward Hobbies for supplying the kit and paint for the build.

Also, thanks to Richard and Michael for helping flip the switch and make a light go off!!!

Next up, chipping and turnbuckles with a twist. :wink:

3 Likes

Hi All,

Time for a few hours on the Sunward Hobbies WNW project. Once again, Sunward sent this kit over and the day it arrived WNW went into a tail spin. And while they only have a few kits left of that brand, still have a good selection of models. I hope you’ll consider having a look at their USA and Canadian web sites. Visit them at www.sunwardhobbies.ca and www.sunward1.com for Kits, supplies and lots of awesome hobby stuff.

DSC00839 (Small)

Oh the joy of seeing these wings go on.

DSC00840 (Small)

Before the upper wing goes on though there’s plenty to do. I made these eye hooks some time ago, but after looking at the reference pictures decided to shrink them to the smaller one you see on the right. A 0.4mm drill is just the right size to allow them to slip in and make room for the CA glue.

DSC00895 (Small)

Obviously, the upper and lower wings got fittings. After rigging they’ll be painted NATO black. The dark circles are for the radio wires.

DSC00900 (Small)

This looks like a step to me but that’s a guess. It is certainly though one of the last steps of section 6.

DSC00902 (Small)

The supports are cemented at the bottom with the upper wing fitted to make sure they stay in place.

DSC00903 (Small)

A very thin smoke wash went on then I adjusted it by removing the excess. I might pick around and remove some more, yet to me it matches the rest of the aircraft’s well used look. You tell me, take more off or let it stand?

I can’t thank Sunward Hobbies enough for sending this kit and the paint. These were expensive to begin with and now are price prohibitive for many of us. Add the paint on top of that and boy oh boy do I feel honored to do this build series for you fine people.

Thank you!

4 Likes

Nice!

I found that I could pre-color the rigging eyelets using a black, permanent marker (Sharpie). After I twisted the eyelets, but before cutting them to length, I held them by their shanks with tweezers on a thick fold of paper towel. I then daubed the marker on them (allowing the excess ink to soak as it wanted into the paper towel). I turned them over to do the other side, and the excess ink on the towel kept the first side black. I did this in batches, dropping the eyelets into a small plastic cup to dry.

Once colored, I then held the eyelets by their loops as I cut the shanks to length with a pair of micro flush-cut nippers (a.k.a. “fingernail clippers” LOL!).

I started off painting the eyelets after I installed them, but it was a real PITA, and for many, I had to go back and clear the paint out of their loops before I could lace them. It also seems like the permanent marker is thinner and maybe even a little more durable than the acrylic paint I was using (Vallejo).

In any event, your Salmson is really looking good!

1 Like

All great tips. And since I’ve got three more WWI AC in the build cue I will be happy to quote your help. Thanks a lot Brother. :slight_smile:

1 Like

Hi Fellow Wingnuts,

Time for some more awesome!

DSC01024 (Small)

A great number of parts were primed and I figured that the tail needed some work.

DSC01025 (Small)

Linen color put down and will be shaded to match the front. The top is a tan dope color.

DSC01026 (Small)

Well, if doing the back might as well finish the front to complete section 7.

DSC01027 (Small)

No clue why WNW didn’t make this one decal with the white. Oh well, it got painted.

DSC01028 (Small)

Thinly rolled blu-tac to separate the colors.

DSC01029 (Small)

Decals are next after a good time for the paint to flash off.

My sincerest thanks to Sunward Hobbies for sending the kit and paint for the review and build article. Please consider visiting their USA and Canadian websites at www.sunward1.com and www.sunwardhobbies.ca for kits, supplies and neat hobby stuff.

Best of health Everyone.

4 Likes

Hi Friends of Flight,

The Salmson got it’s time on the bench and here’s the result.

DSC01047 (Small)

Masks came off of the clear parts and the belts went on. Full disclosure… I nearly forgot!!! Yeah, that would have been a nightmare to do later… yikes!

DSC01113 (Small)

Work continues on the section 8 and the upper wing. Some touch-up paint needs doing, but decals first. I’d cut out the extra carrier film to eliminate any silvering.

DSC01114 (Small)

Unfortunately the roundels do not lineup with control surface part notches. I had to split the difference. The silver/dope look is an optical illusion but a very cool one. It’s the texture of the paint.

DSC01116 (Small)

Once my decals are burnished down and as much fluid removed a wet cotton swab wipes away the excess decal solutions and a soft paper towel dries the surface. Be sure to do your “water spots” as soon as possible or they are a pain to get rid of once fully dry.

Huge thanks to Sunward Hobbies for sending this kit and paint for the build.

Best of health Everyone.

4 Likes

Time for some Salmson :slight_smile:

DSC01196 (Small)

Clear coat has flashed, now let’s make “some” strips.

DSC01197 (Small)

The instructions say 1mm but that’s too wide… in my opinion. Went with 0.7mm. On that Voyager Model cutting board if you slice at an angle in the 0.5mm groves you can go from 0.5mm to 0.8mm. Great time savers any of these cutting mats are.

DSC01204 (Small)

Had to attach the ailerons out of build order so the shading would be uniform.

DSC01205 (Small)

With the tail ready I can now finish shading the wings… or maybe think about grabbing a shovel.

DSC01206 (Small)

What’s another foot of snow for Northern Canada anyway eh? Sigh…

Loud shout out to Sunward Hobbies for supplying the kit and paint for the build and article.

Thanks Everyone and be mindful of how quickly you remove your winter tires… UGH!!!

6 Likes

Crikey, HG… that kit is looking phenomenal! You are definitely going the extra mile… er, kilometer on this one. Very nice attention to detail.
I’ve got a couple of bi-plane projects in the que… they may hit the bench sooner than later thanks to your inspiration!

1 Like

Thanks my friend! Sure was a great re-learning process. Look forward to your builds on the YouTube channel.

Hey there hi flyers,

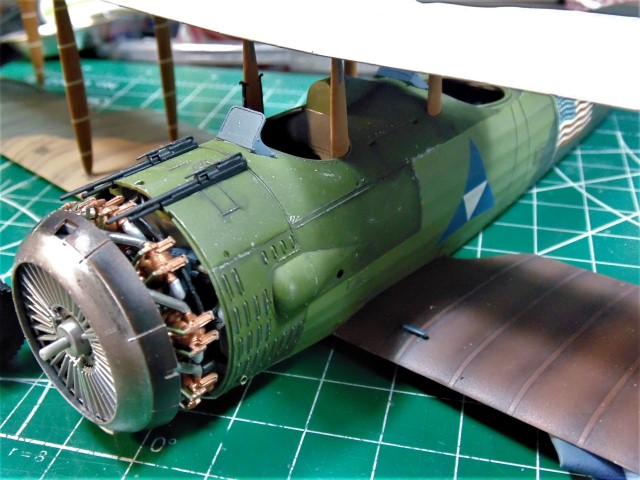
Been a bit since the Salmson got some love and I’ll admit to seeing a daunting task and saying, “I need to get a round to it.” You know one of those circular devices… never mind HA HA.

On with the show!

DSC01208 (Small)

Not daunting as in difficult, just a lot of it.

DSC01209 (Small)

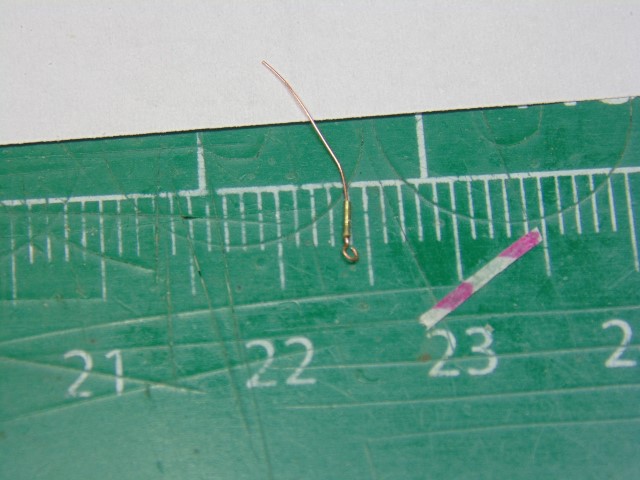
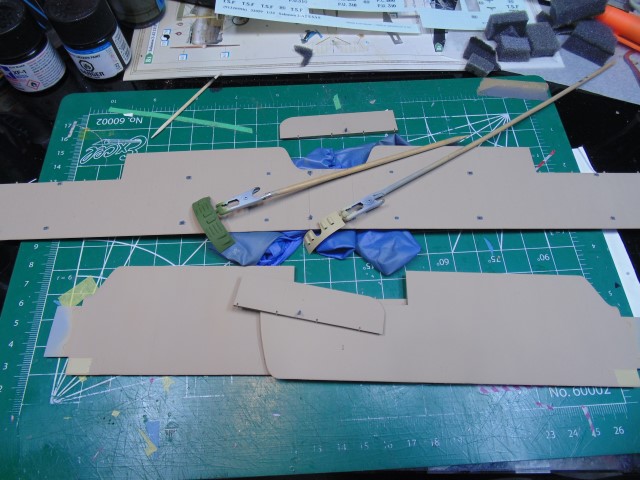
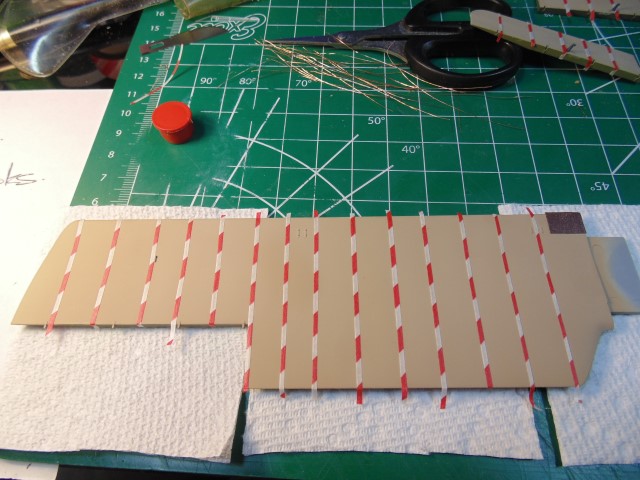
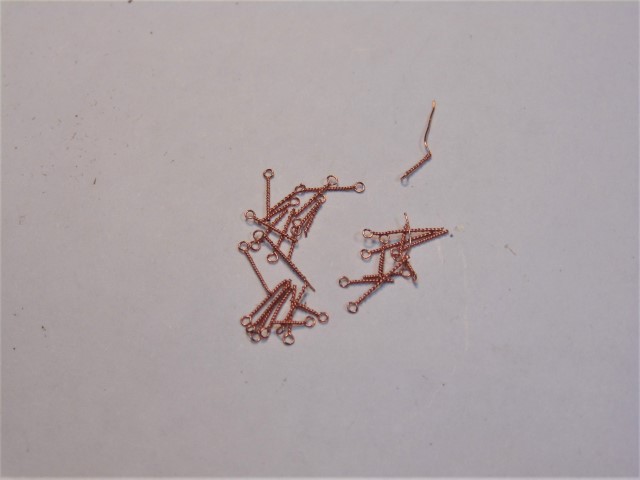
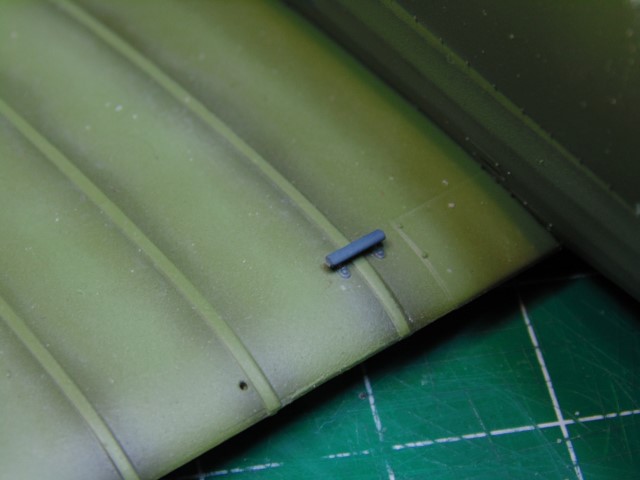
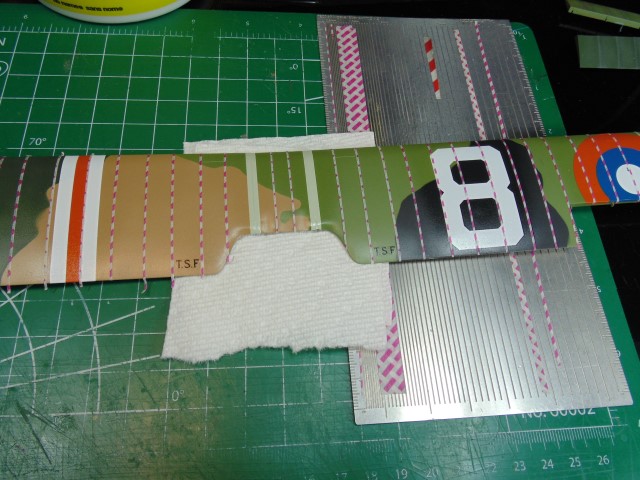
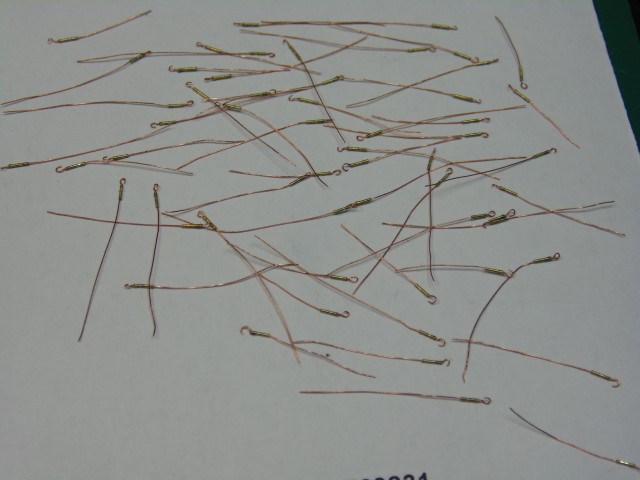
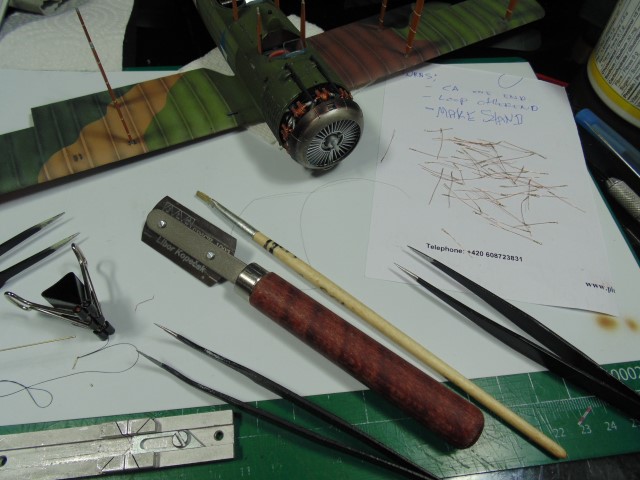
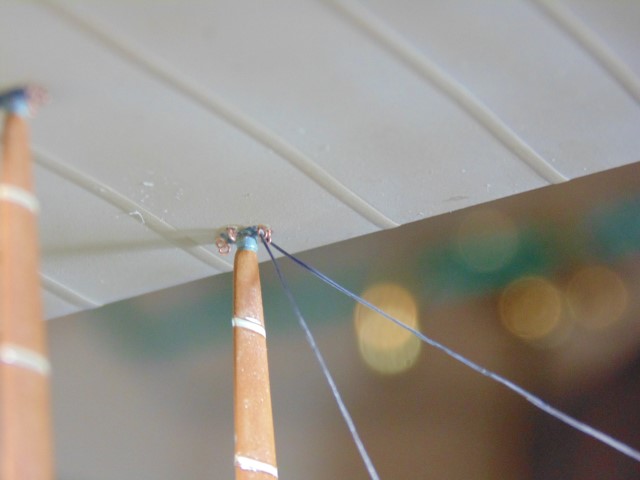
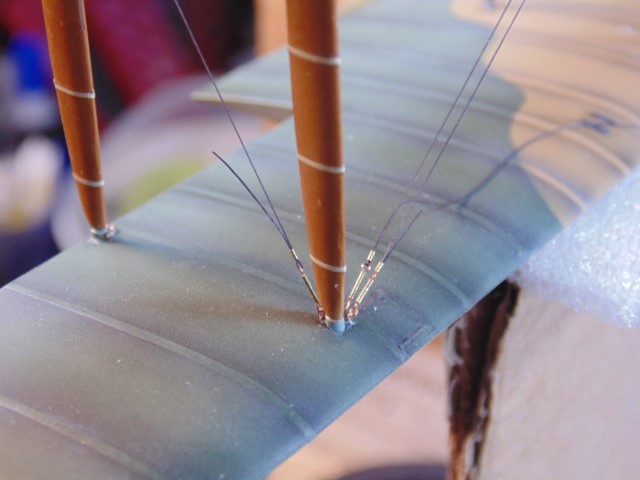
And each of these 0.4mm tubes are very time consuming.

DSC01210 (Small)

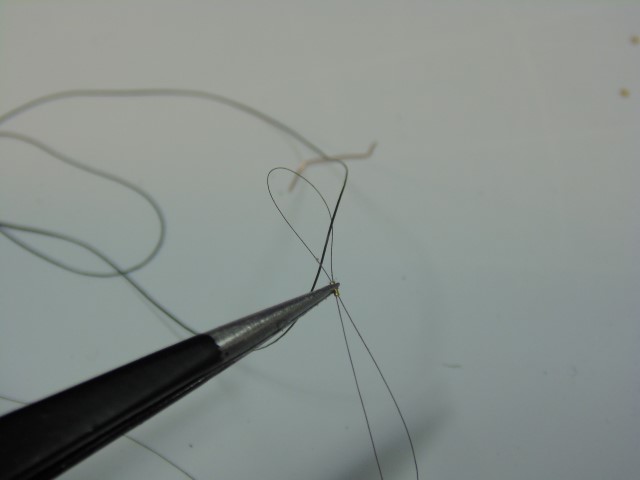
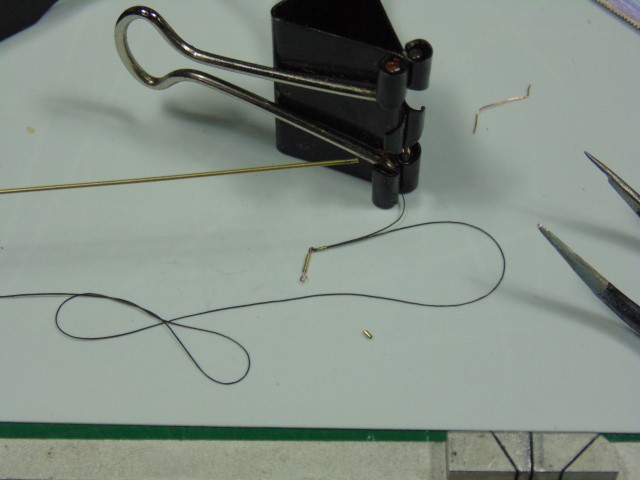
Even the fine EZ-line is a nightmare to thread back on itself. Too rubbery sadly yet oddly enough is the reason we all love it. HG’s solution? Use a follicle of hair to pull the line through the 0.2mm inside diameter.

DSC01211 (Small)

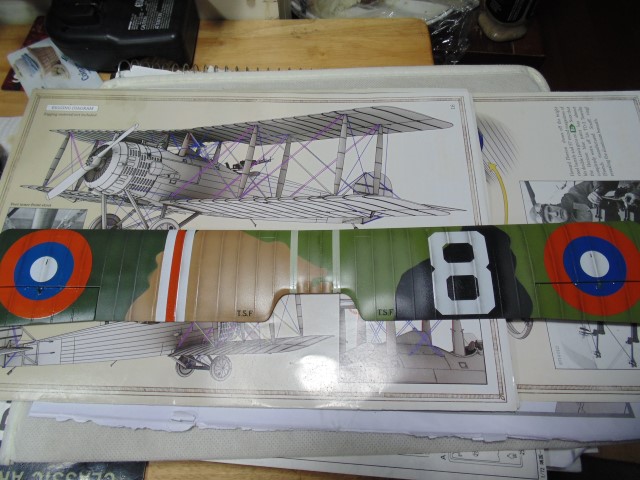
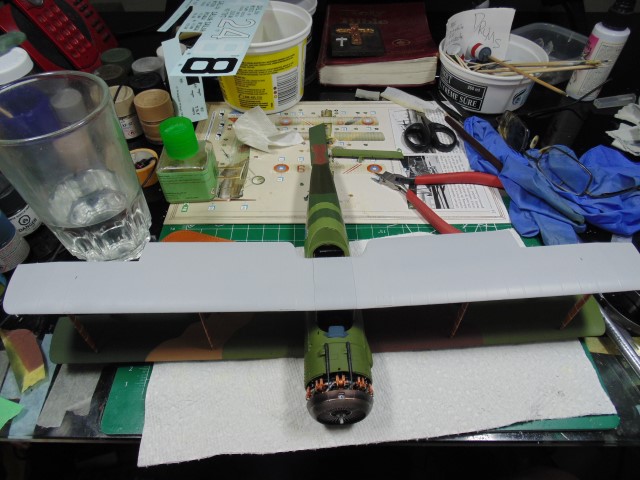
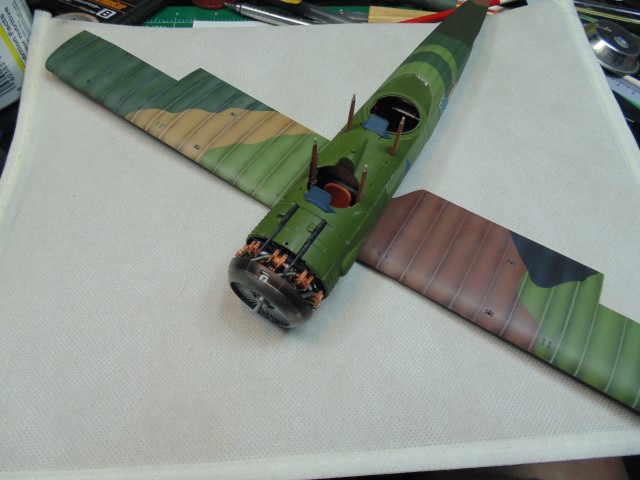
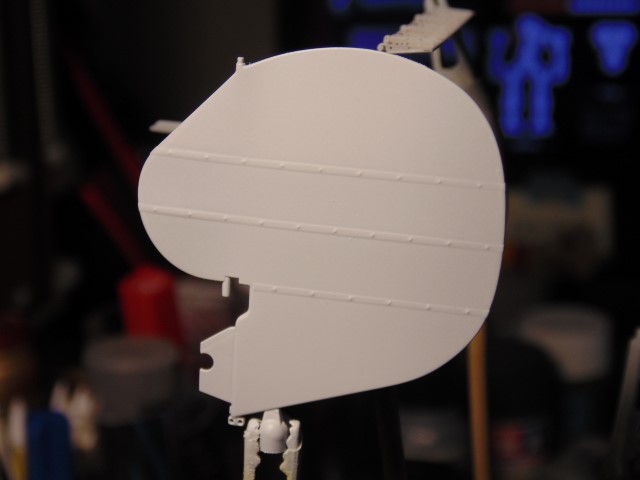
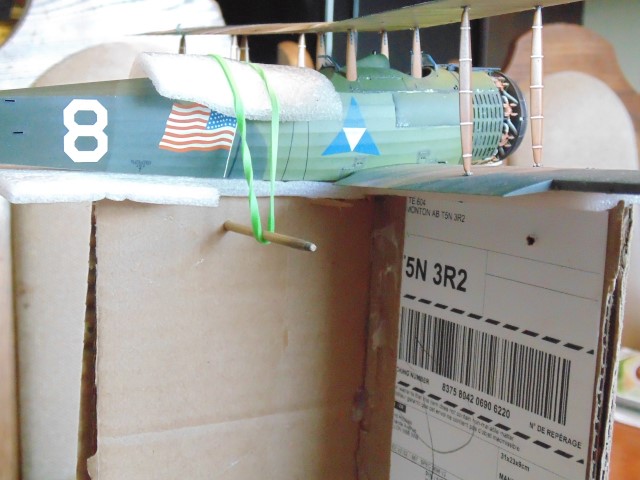
With that worked out I could decide if the upper wing was best left off and rigged or attached.

DSC01212 (Small)

It was an important decision because there would not be a lot of room to move around. I’m constantly thinking about ways to speed things up and increase the level of quality, thus the decision was made thanks to improving my techniques in rigging.

DSC01213 (Small)

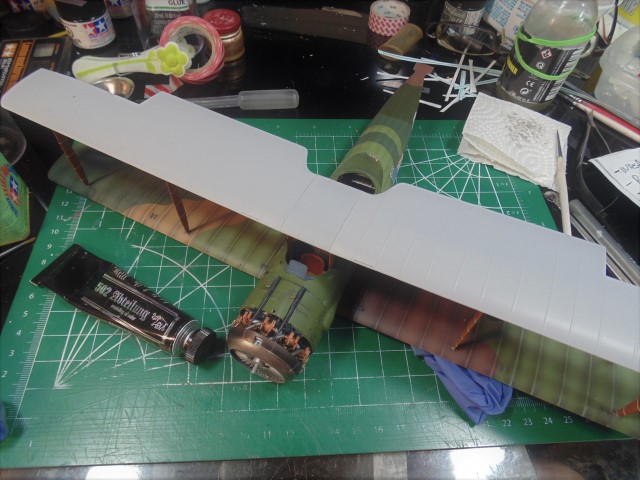
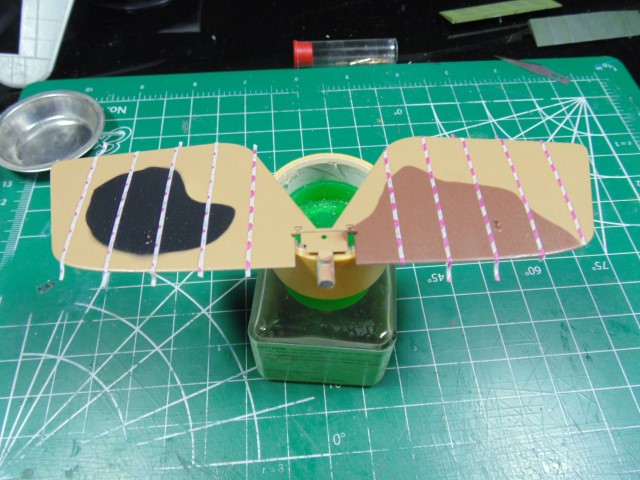
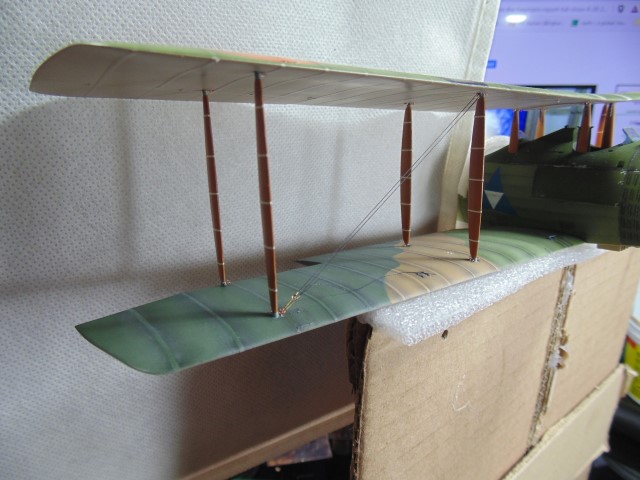
Everything was all set. Now all that was needed was a NIKE moment.

DSC01214 (Small)

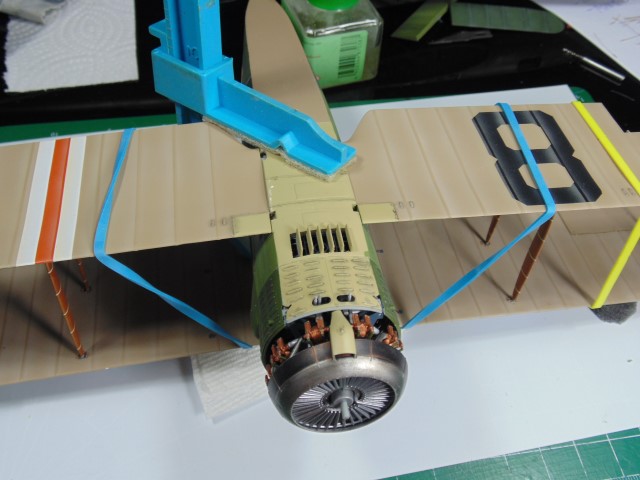
On it went. Probably one of the more satisficing modeling moments I’ve had over the past year.

DSC01215 (Small)

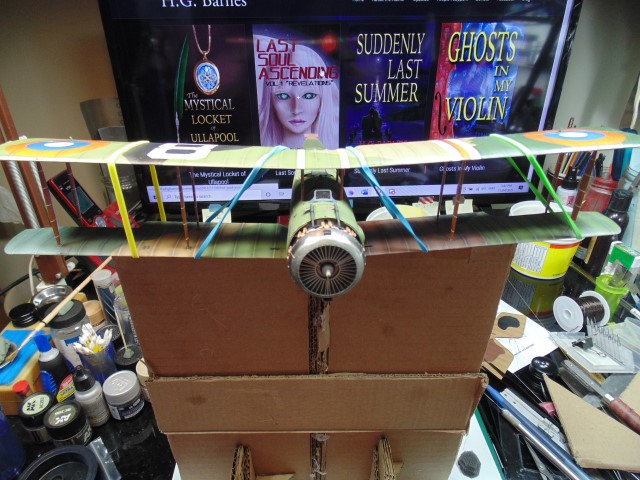
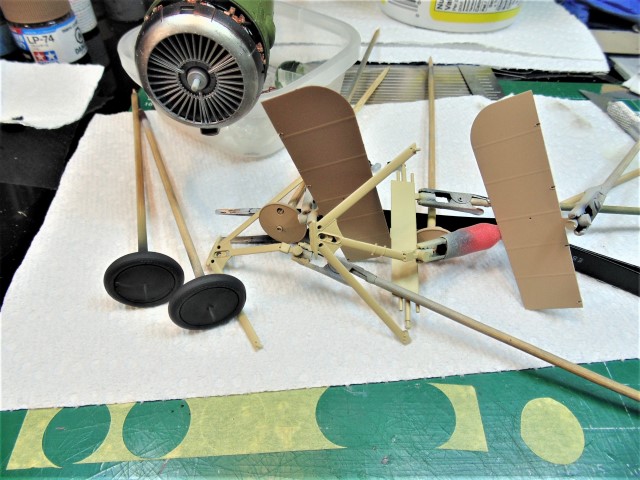
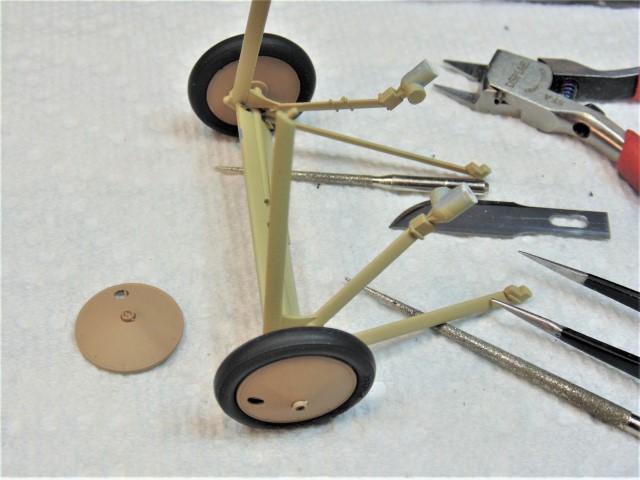
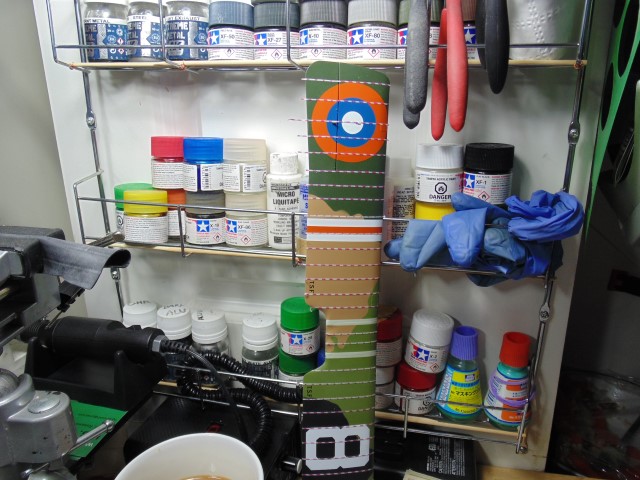
Now to make a booster so that the underside of the upper wing was just above eye level and easy to get at. It’s crude yet effective and super cheap :slight_smile:

DSC01217 (Small)

DSC01218 (Small)

DSC01219 (Small)

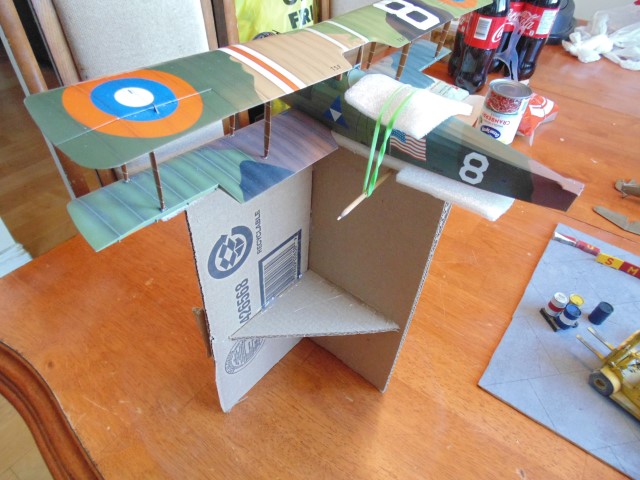
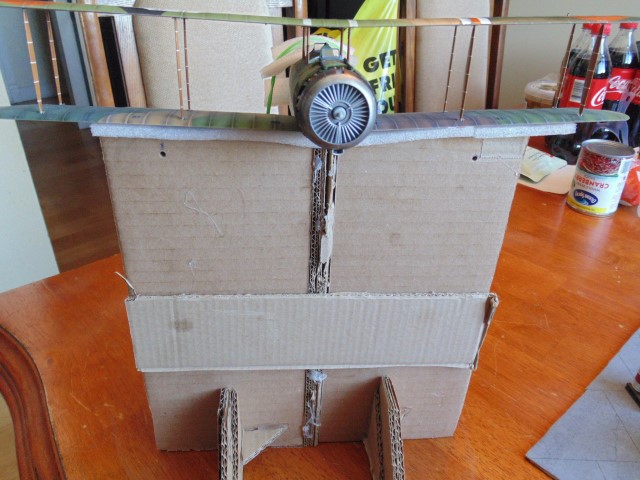
Now I can slip this in my bench vice and angle away to the desired spot.

DSC01367 (Small)

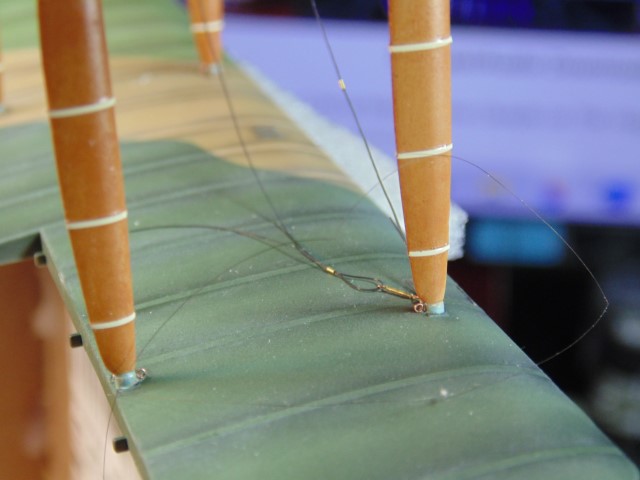
Here’s an example of the follicle slip loop being executed. Yeah I know… it’s a strand of hair dude.

DSC01368 (Small)

DSC01369 (Small)

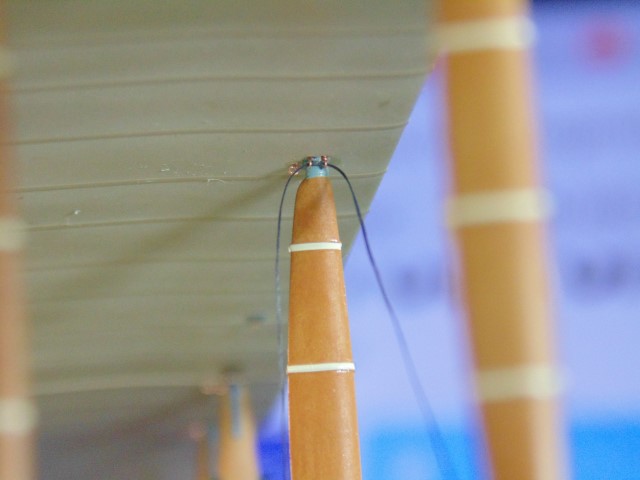
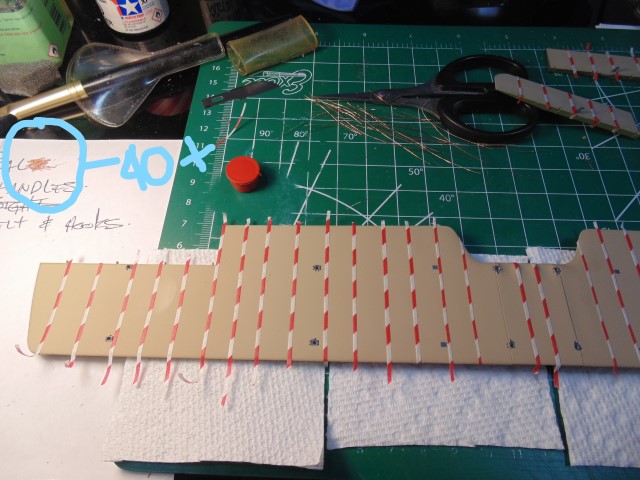
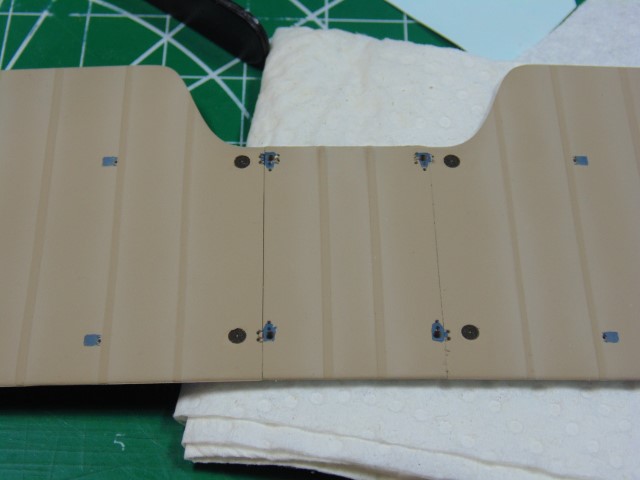
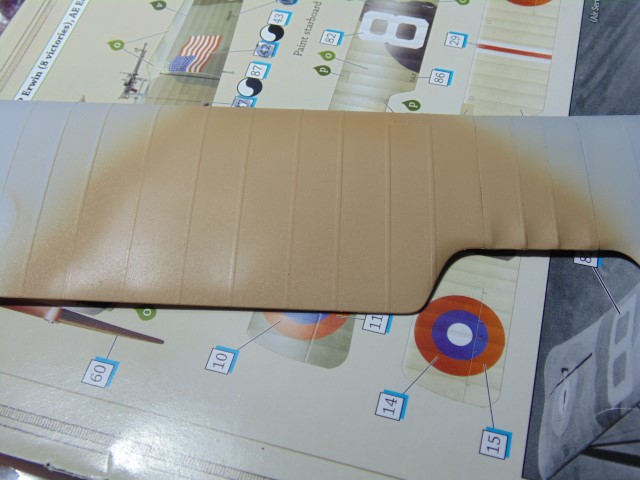
I’m cheating a bit here by not ending each one, but what difference would it actually make since there will be cable clamps anyway.

DSC01370 (Small)

I dare you to see the continuous line when the brass rod is up there.

DSC01371 (Small)

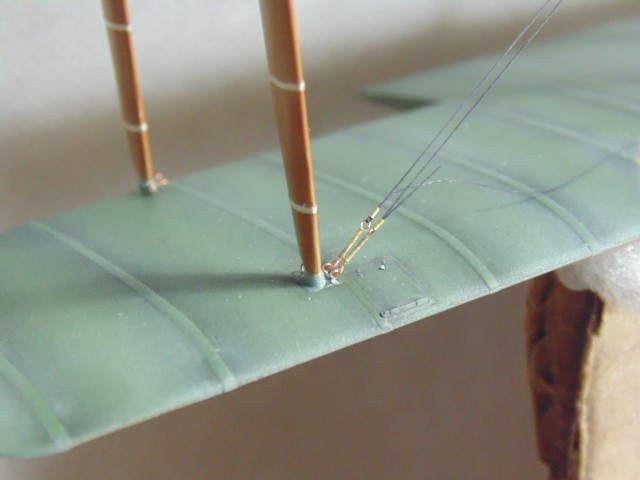
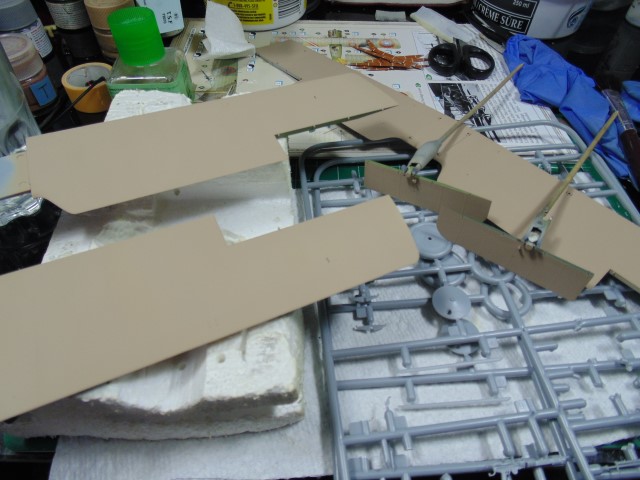
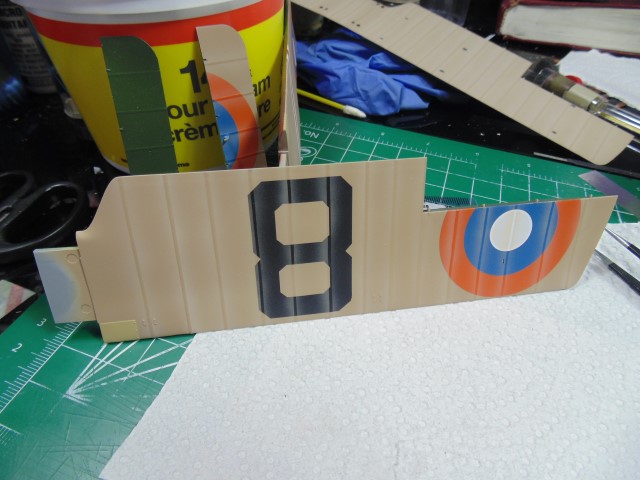
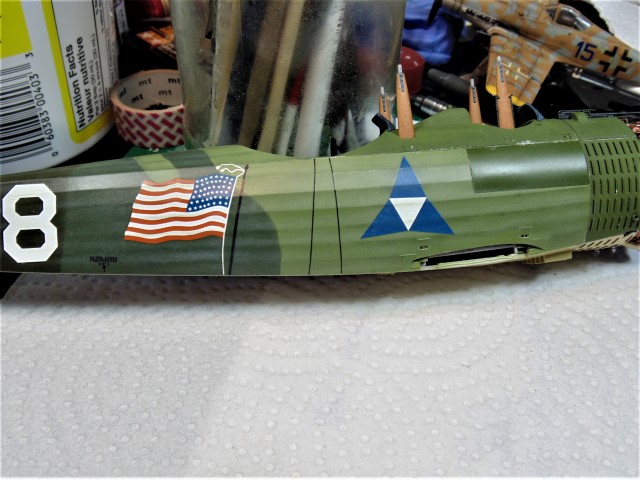
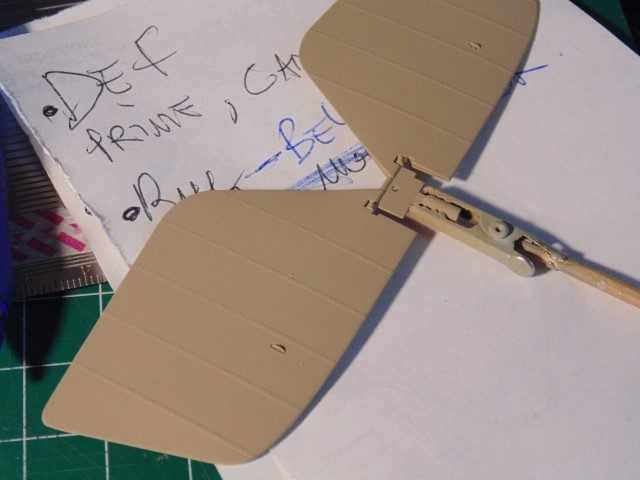
As for size/length of the turn buckles, I went by photos in the manual to gauge them. To me they look great and will look even better once painted.

DSC01372 (Small)

Just some snipping after the tubes/clamps are placed properly and glued. Things should speed up, now that the muscle memory is at my disposal.

Very special thanks to Sunward Hobbies for sending the kit and paint for review and build. Please visit them online at https://www.sunwardhobbies.ca/ where new items are constantly rolling in.

Thanks Everyone, stay healthy.

6 Likes

Four down :slight_smile:

DSC01373 (Small)

5 Likes

Another marvelous build HG :slightly_smiling_face:

1 Like

Wow, thank you!!!

1 Like

Flipping amazing! I wish I had the skills and patience to do turnbuckles like that!

1 Like