No, you don’t because there would be the constant search to make them even better. I’m going to hollow some out, I hope, to make them look like you can put the wrench in there( remember these are 0.4mm) and tighten. The ultimate aim is smaller and more detailed and easier for anyone to do. AND, if I can knock these out at this scale will be selling them for charity. Thanks for the kind words Brother!!
Hello Fellow Flyers,
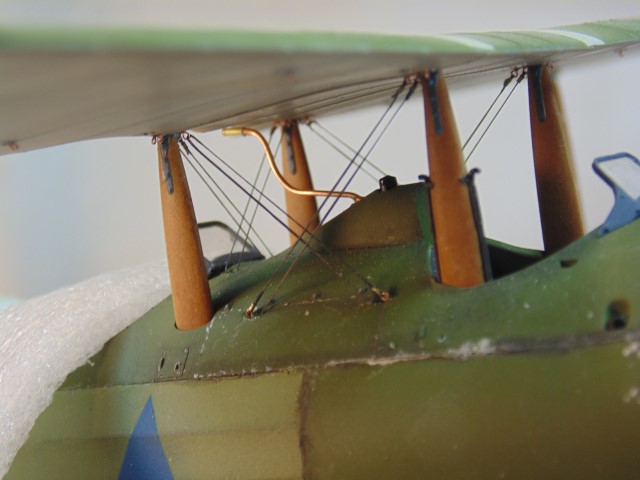
Still plugging away at the rigging. It’s very time consuming as you can imagine or know for yourself.
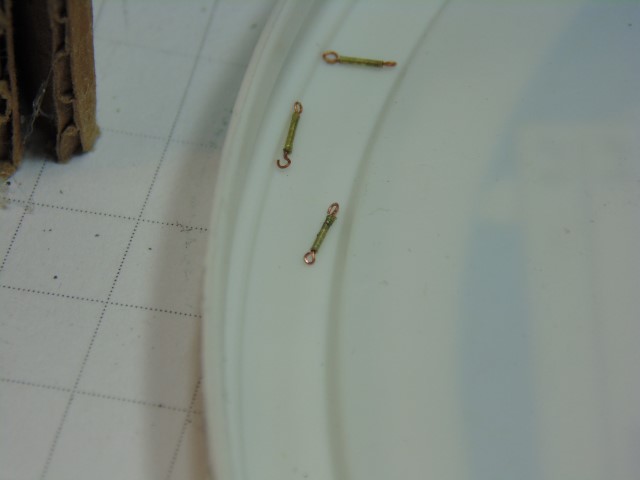
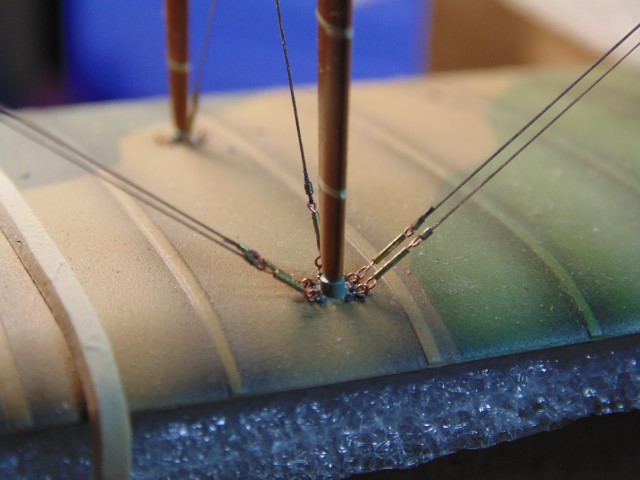
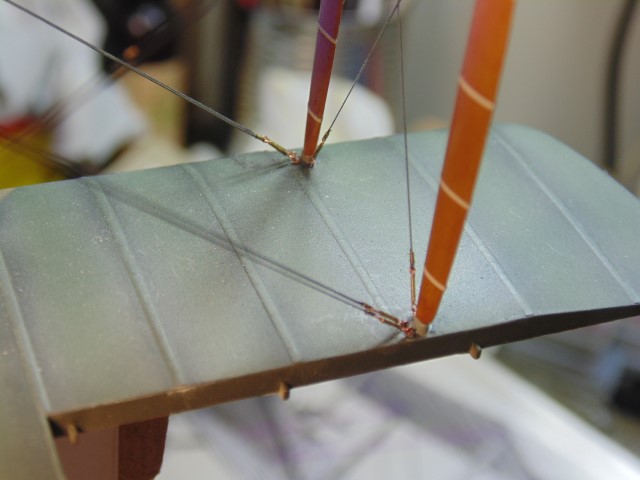
These turnbuckles are 0.4 mm tube with 0.2 wire. I use a UMM-USA mini saw guide to keep the lengths consistent.
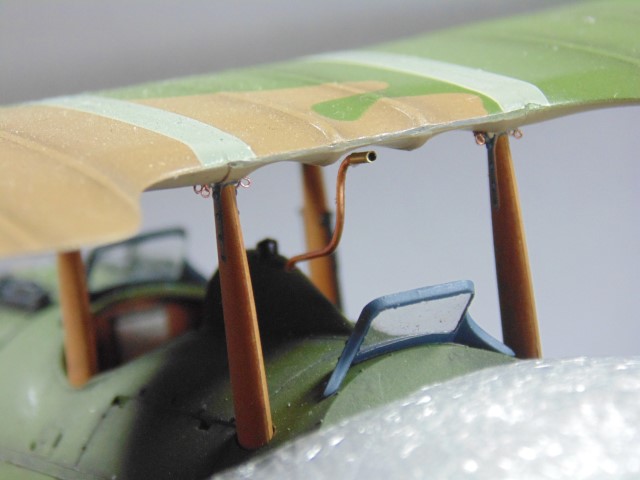
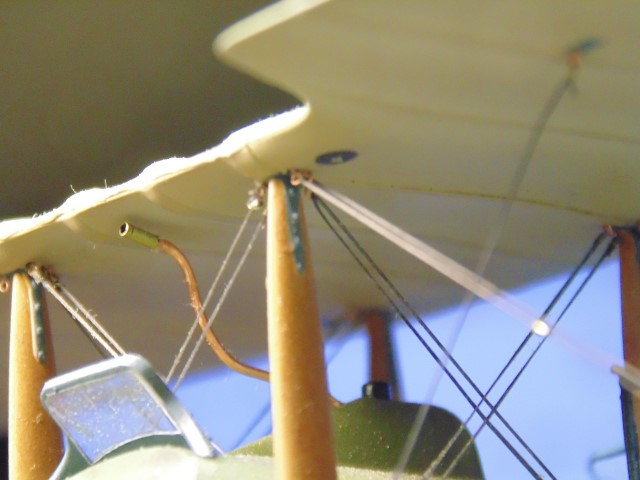
Gas tank breather tube. Yes it’s a bit on the large size, but it’s all I had to work with.
Should have installed the windscreens last to have more room to work and save an hour of fiddling time.
Looks ok though.

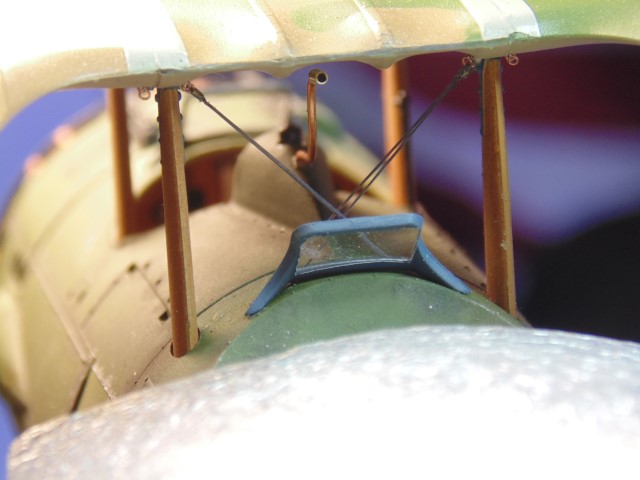
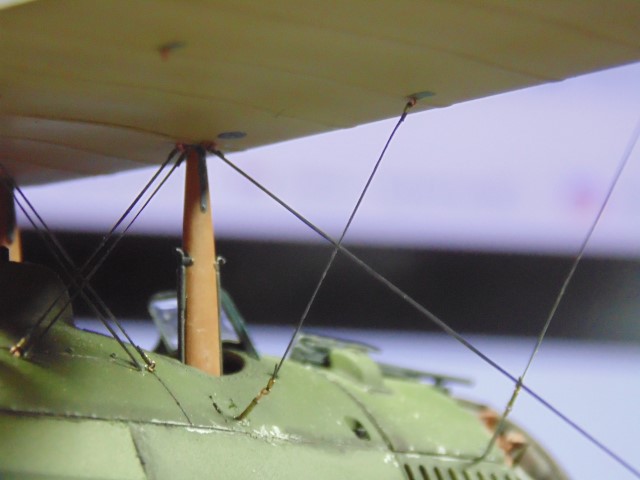
It’s better to install the inner wires because you won’t be working around other lines.
And the other side.
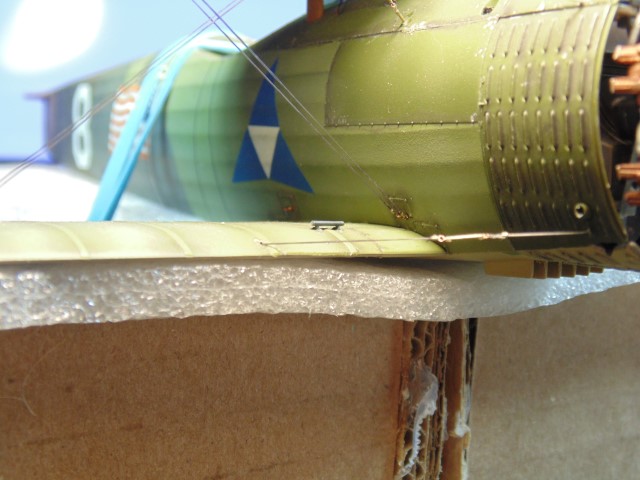
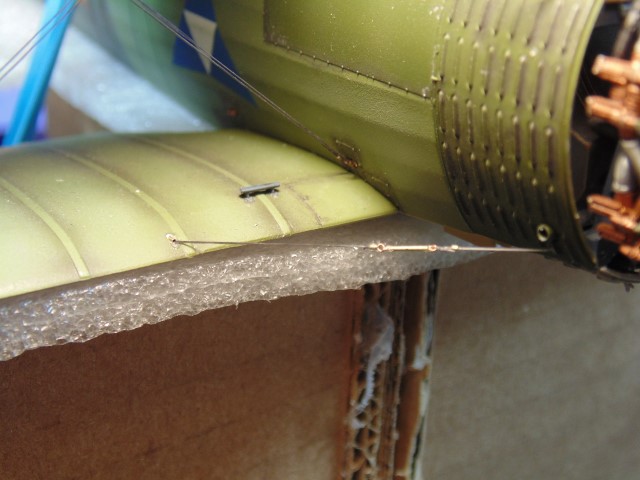
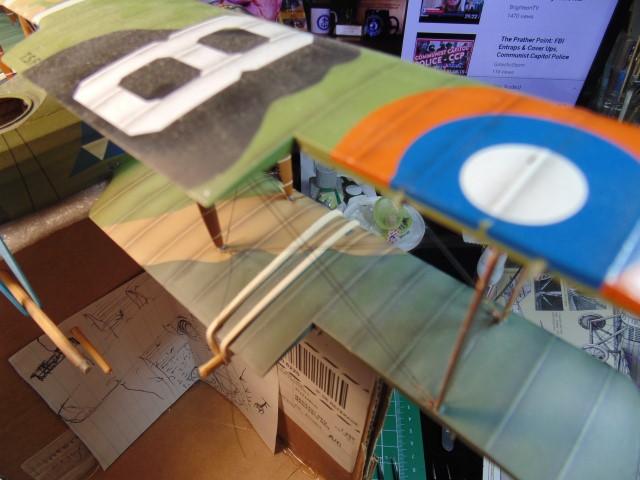
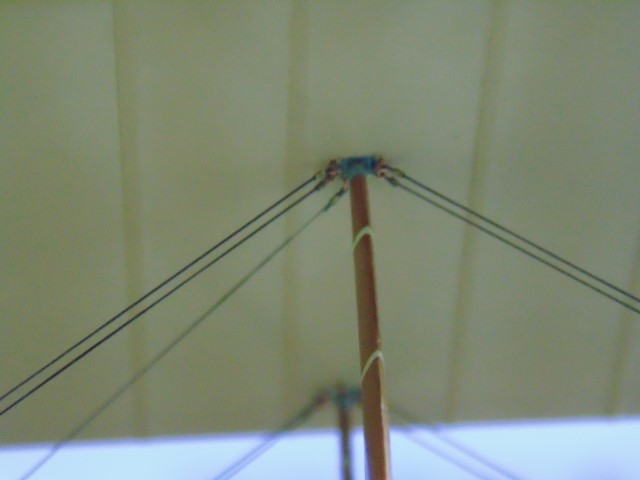
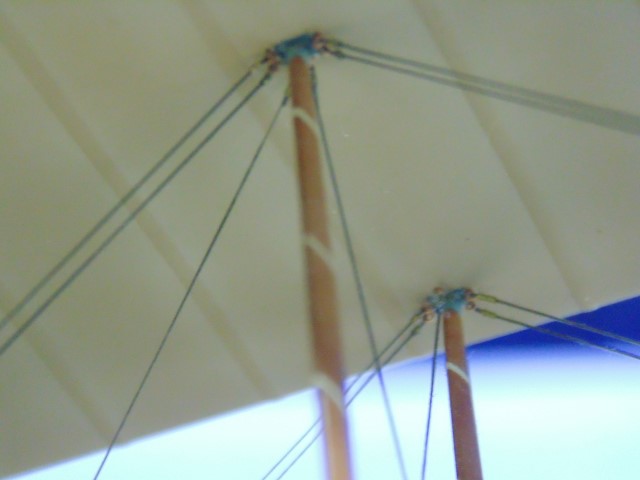
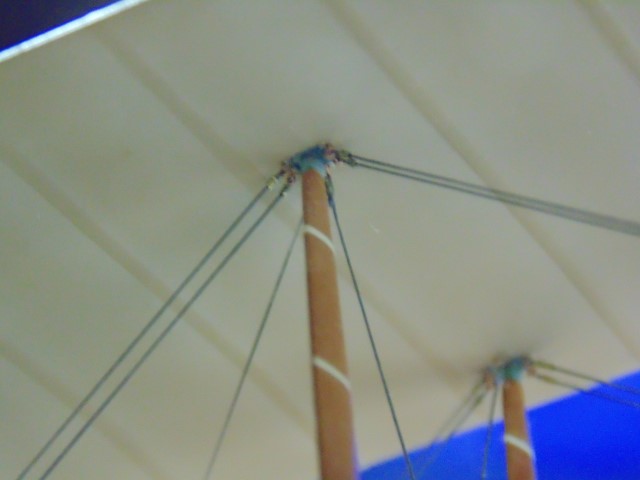
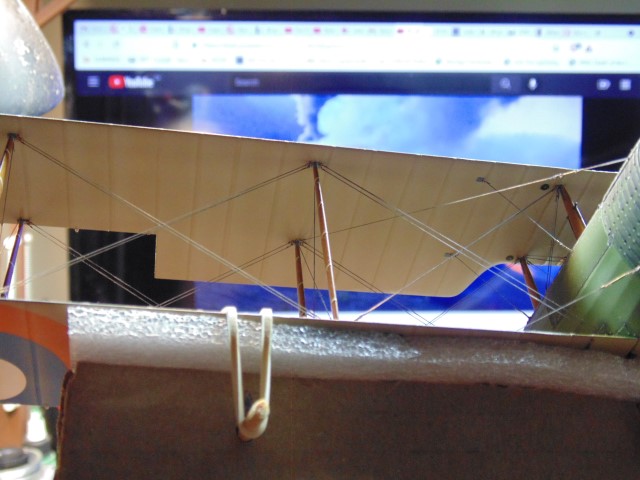
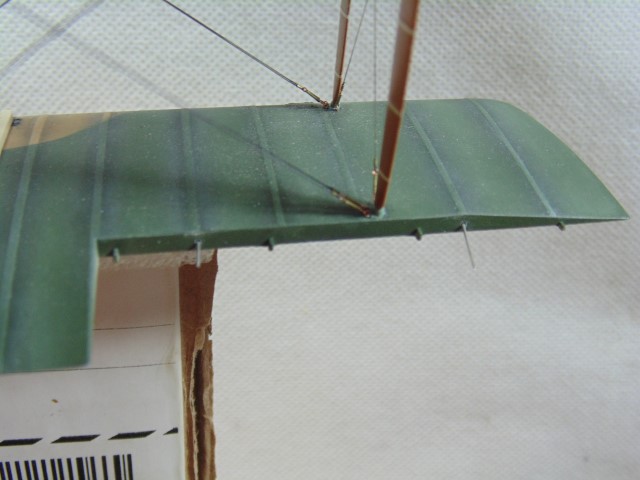
Plenty of wires come from the fuselage to the wings.
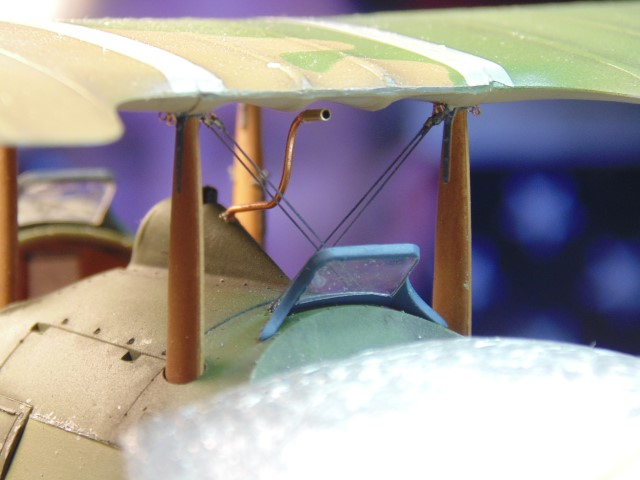
Inner braces cabled up… well mostly. ![]()
Huge thanks to Sunward Hobbies at https://www.sunwardhobbies.ca/ for sending the kit and paint for review and build.
Let me know if you have any questions. Thanks Everyone.
8 Likes
Hi Gang,
Just finished a repair and felt the poor Salmson needed some love.
SO in the spirit of rigging…
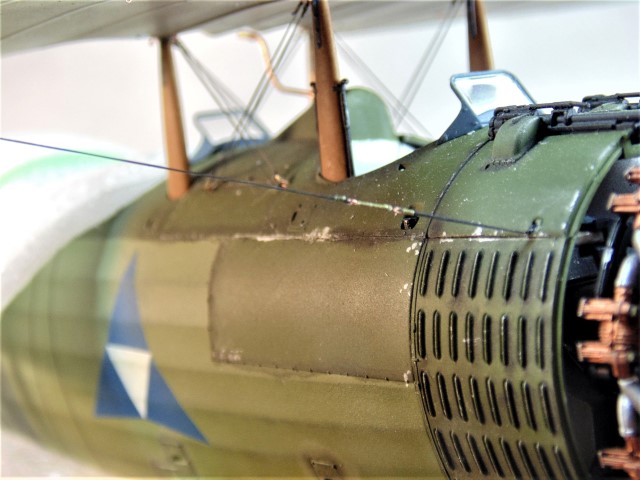
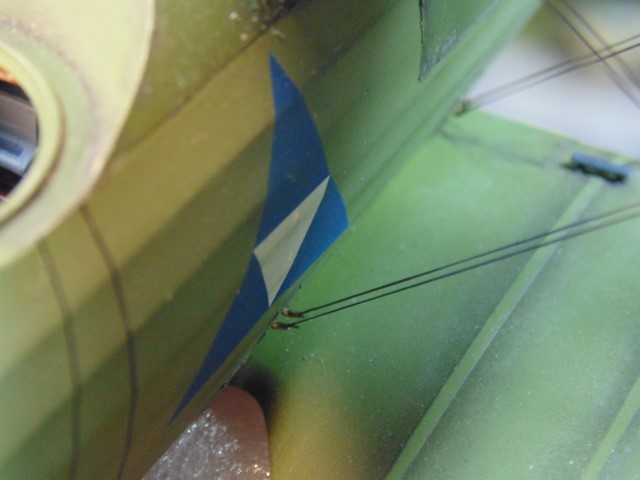
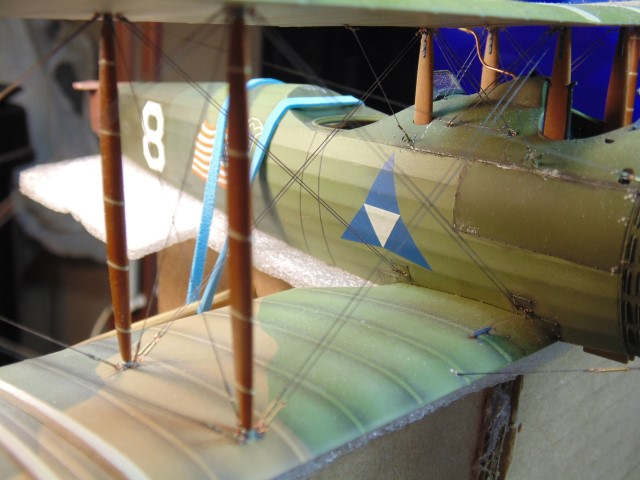
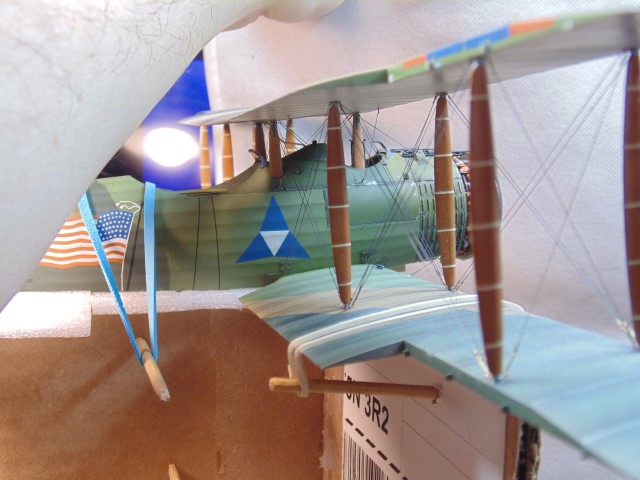
The two long wires go on either side of the one on the fuselage.
Tough to see but looks great.
Some painting left to do, but all in good time.
Bit of snipping left too. Totally worth the 3 hours!!!
Huge thanks to https://www.sunwardhobbies.ca/ for suppling the model and supplies for the build. Please visit their website as many new items keep coming in.
And Thank you for being patient awaiting updates on this build. Best of health and enjoy your hobby.
10 Likes
The detail is incredible! 
2 Likes
Looking good!
1 Like
Thanks Brother!
Just trying to do you proud. Thank you.
1 Like
The care, skill and attention to detail is stunning 
1 Like
Most kind Sir. Thank you.
I loath waiting for filler to dry…ugh! Redhand’s B-17 is looking awesome!
Anyway, the work goes on and I must stay busy. It is going to be a very unusual time ahead, even more so than what we are experiencing.
Having a day of picking apples helped. More on that later and yes I’ll tie it into modeling.
Here’s the fruit of some labors. It takes hours to do this.
I’m not a good photographer.
As frustrating as this process is I have to say when you get each step done the energy afterward is awesome.
Huge thanks to https://www.sunwardhobbies.ca/ for the kit and supplies to do this article and stretching my skills.
Now back to making apple butter. Hit me up if you want a jar. No kidding.
7 Likes
When the subject’s this good, one tends not to pick up on whether or not the photography is or not ![]()
3 Likes
So did you grow your hair specially for this amazing project? If so that’s commitment to the cause ![]()
1 Like
Commitment is real close committed. HA HA. Just used some critical thinking to solve a problem is all. Like you would do. 
Wow, thank you!
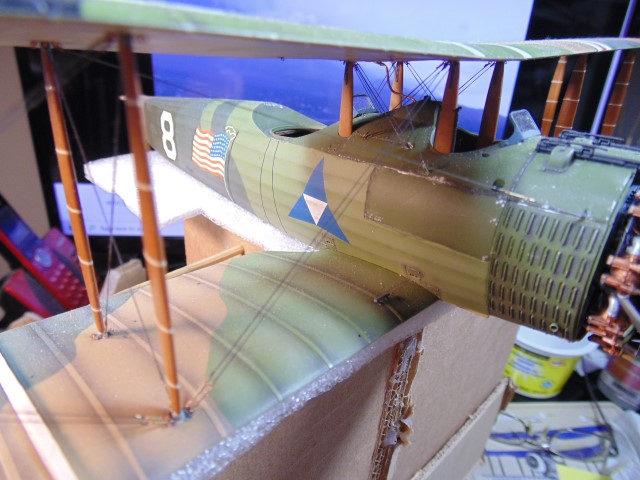
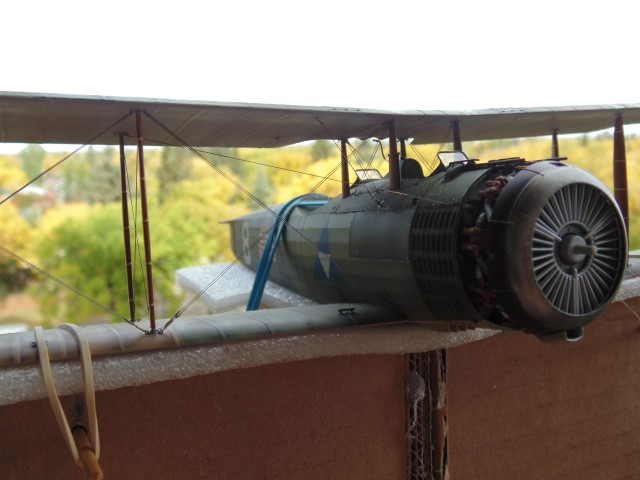
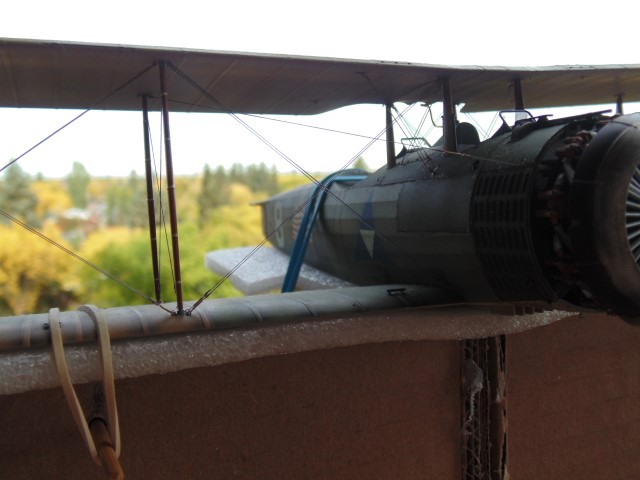
Hello Friends!
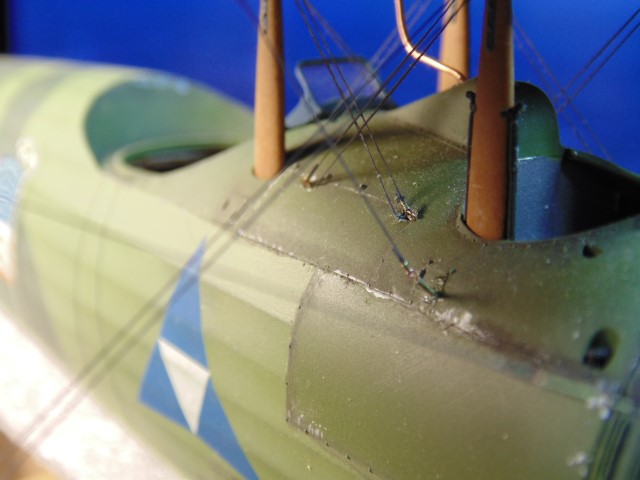
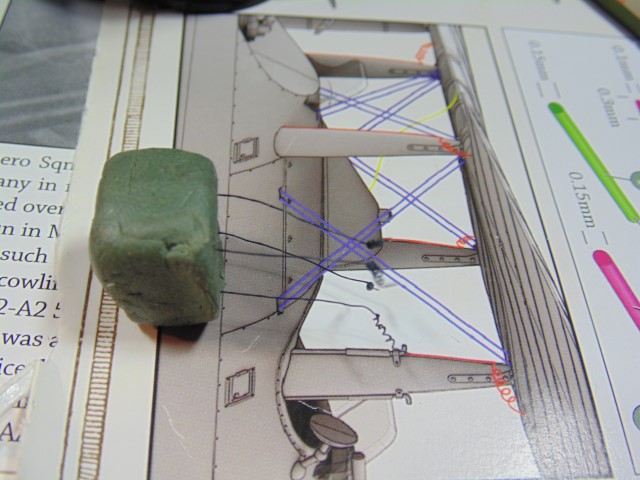
Salmson takes center stage for my evening. It’s one of those things where I have to be able to concentrate. Rigging isn’t hard it’s just very precise… almost surgical.
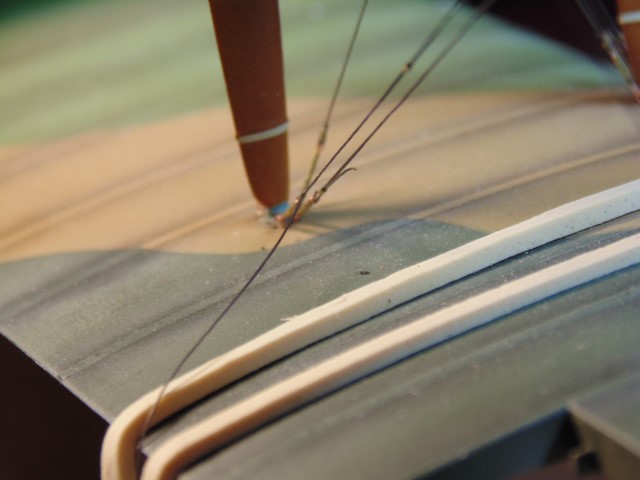
Always leave a goodly amount of extra line so you’re not fighting with a stubby end.
Same as usual, I’m simply running the line through the two loops.

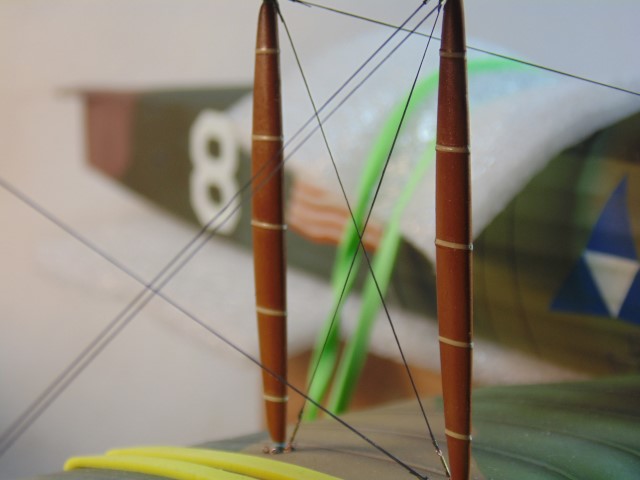
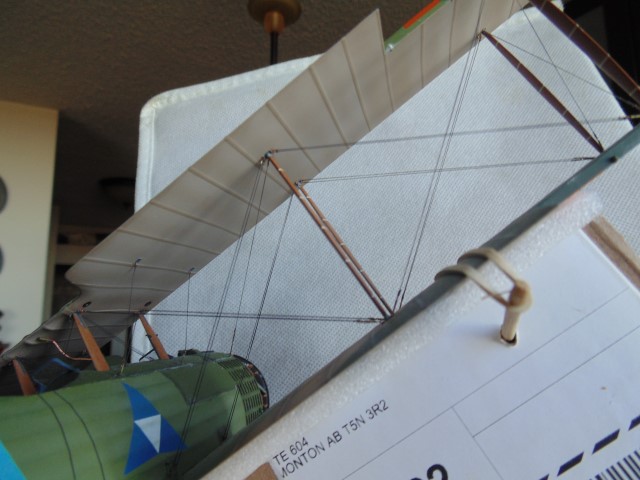
OH, can’t forget that I did the back lateral brace.
I may or may not trim these since the photos show some extra cable like this.
Even zoomed in it looks ok.
The amount of rigging on this would make a Schooner feel good, HA HA.
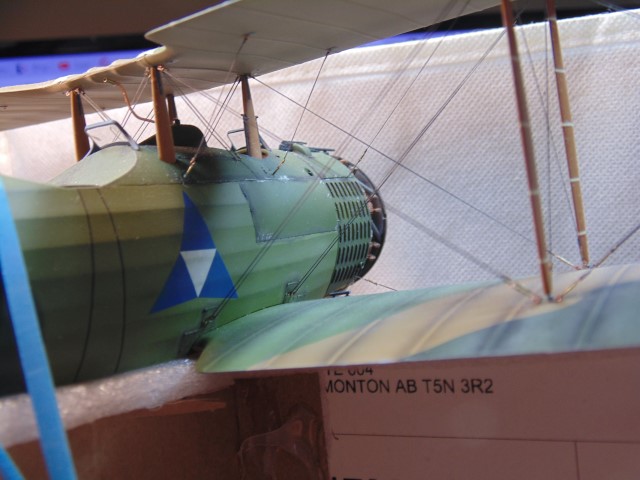
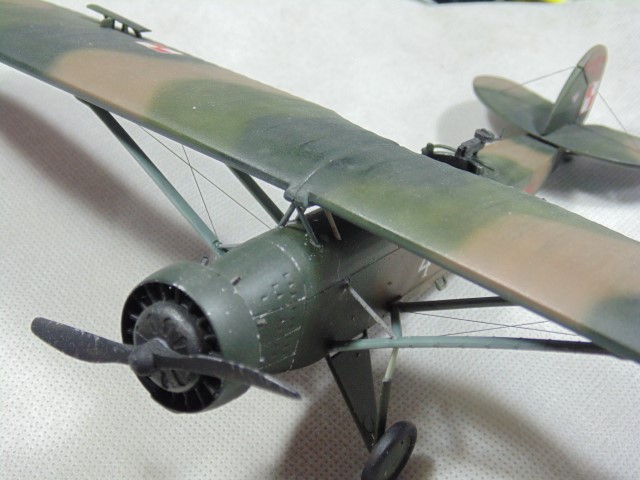
So good to see one side completed.
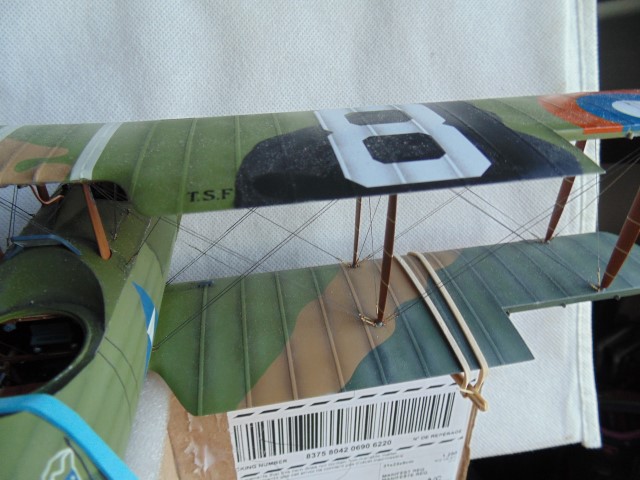
On the right are black dots which locate the radio antenna lines. That’s the next task.
Poor girl needs a dusting, but doesn’t that look nice?
Huge thanks to Sunward Hobbies for sending over the kit and paint for the build. Please visit them at https://www.sunwardhobbies.ca/ where new and very cool products arrive often.
Thanks Everyone.
8 Likes
Hello Fellows,
Moving from subject to subject on my bench and the Salmson needs more attention. There are many hours of rigging ahead but since it’s such an amazing model it warrants the time invested. Please tell me your thoughts in a reply.
Tightened up some lines and used natural light to take a few better pictures.
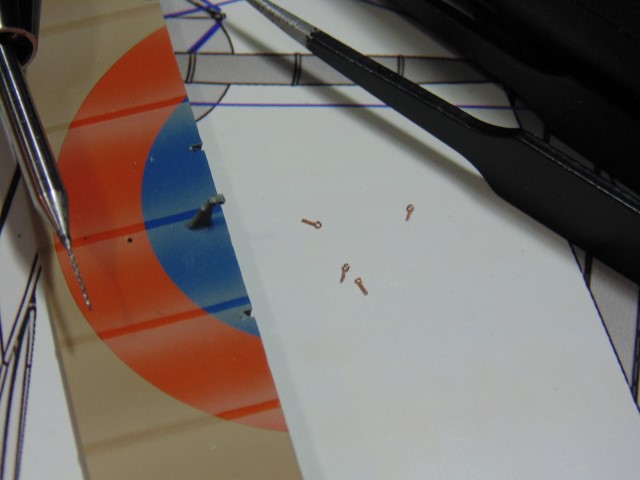
The ailerons need quite a few eyelets. These are for one of the lower.
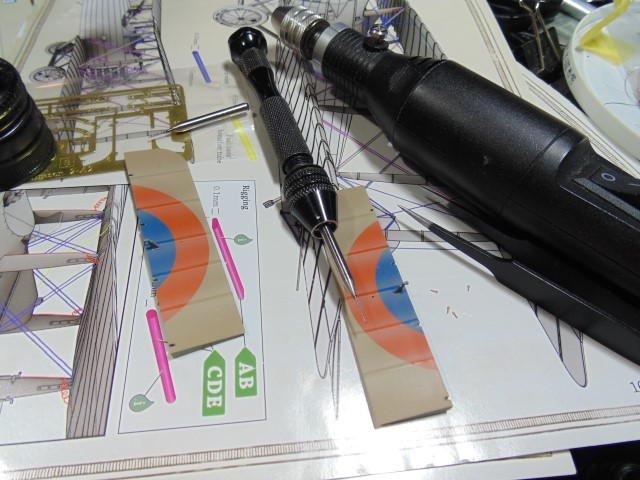
Using a 0.4mm drill for the holes and the control arms.
I don’t trust the plastic tabs to have any longevity and certainly less with pull from the Ez-line. There may be a middle pin added.
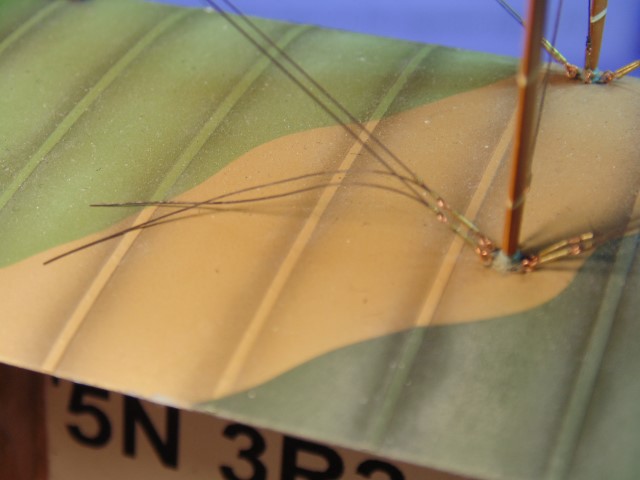
Then I’ll work on these curly antenna wires. That should be fun because it’ll be easy.
Huge thanks to Sunward Hobbies for supplying the kit and paint for this build article. Please visit their website at https://www.sunwardhobbies.ca/ where new products are constantly arriving.
8 Likes
HG, you’ve outdone yourself, again
1 Like
My friend, the encouragement really helps!!! Thank you.
1 Like
Wish I had your patience and steady hand, Outstanding work
2 Likes
Thanks Tim! Really appreciate it. More soon!