Thank you for pictures. Maybe she’ll go for it next time. I would so risk spraining a muscle to try and get in.
Thanks Tim, please remember that YOUR work is a definite inspiration.
Hee Hee, Thank you Mr. Hatton! Much more to come.
Hello Winged Warriors With Nutz,
Annnnnd the lame azz humor continues… as does the rigging. Figures that the first WNW aircraft I select is the one with one of the most intricate rigging… sigh. Oh well, makes for a decent blog, yes?
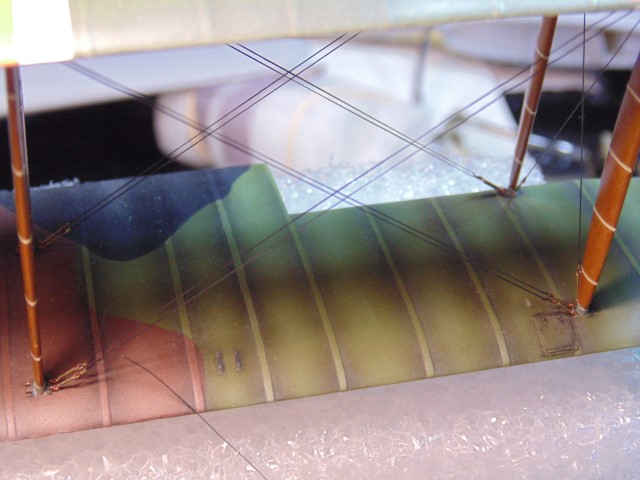
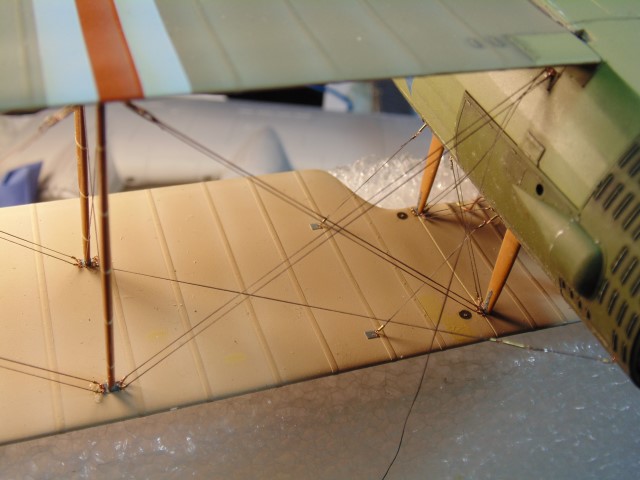
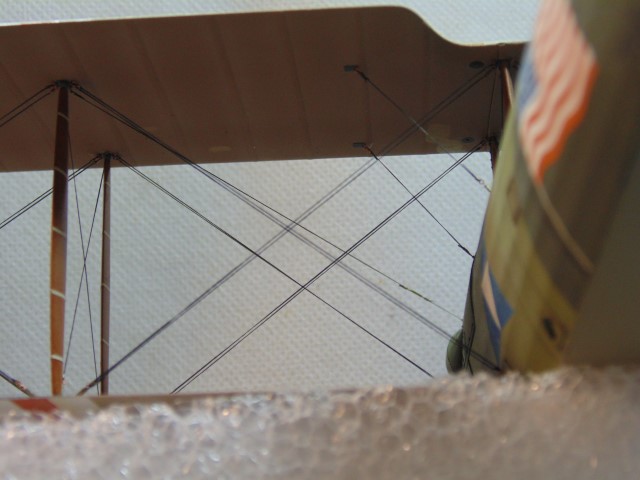
Time to finish the middle wing sections.
I flipped her over to run the underwing work. So much easier this way.
Then upright.
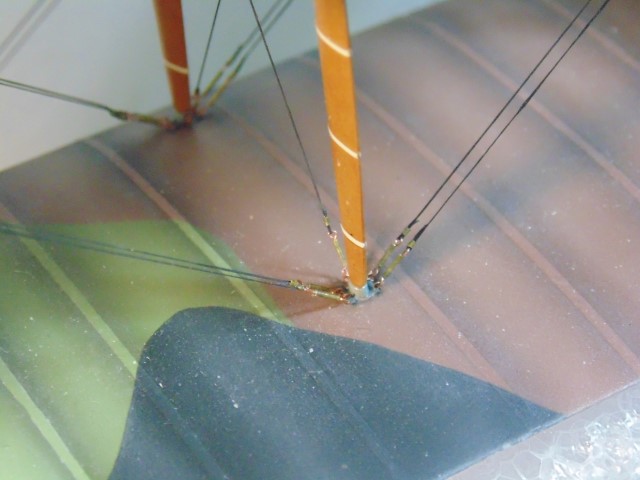
Most of the extra length gets used up.
Again, all this brass and copper will be painted NATO black.
Hour after hour it comes together.
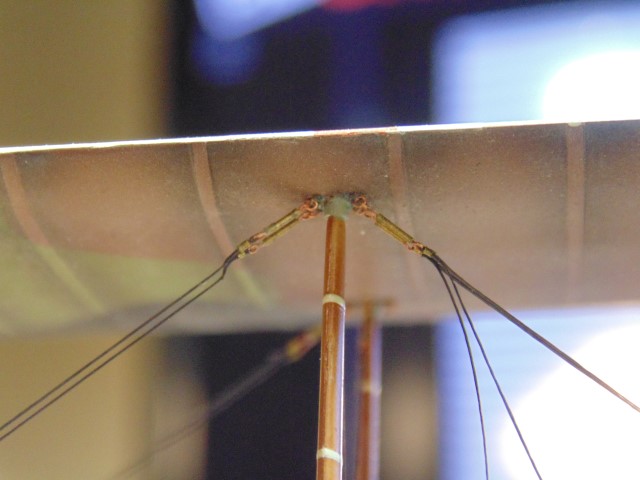
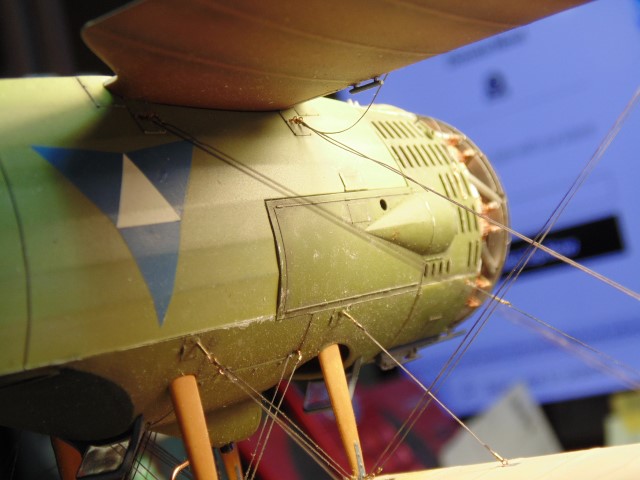
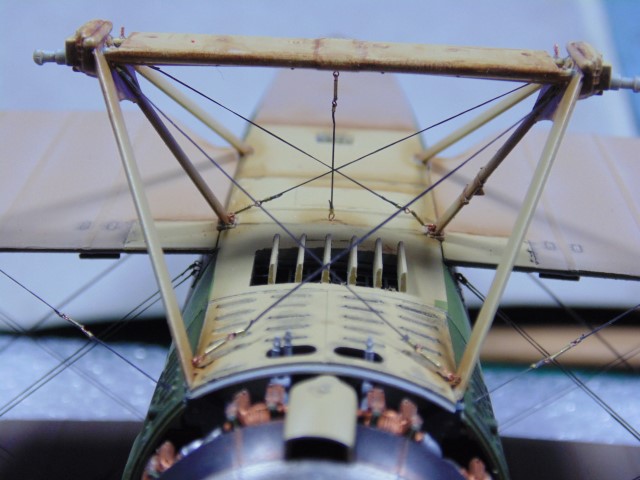
The black dots are for the antenna wires.
Front inner left.
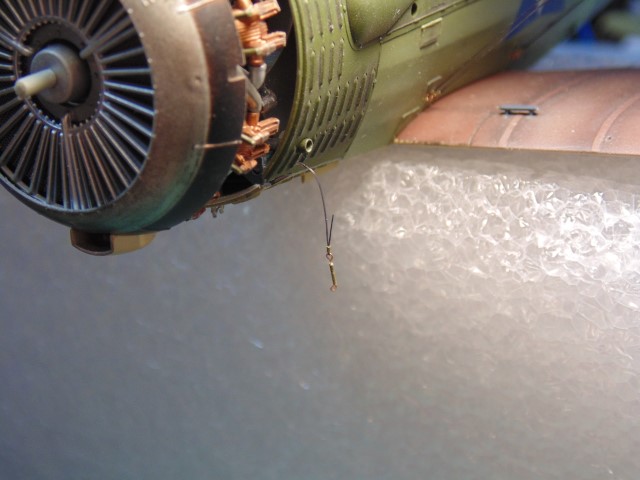
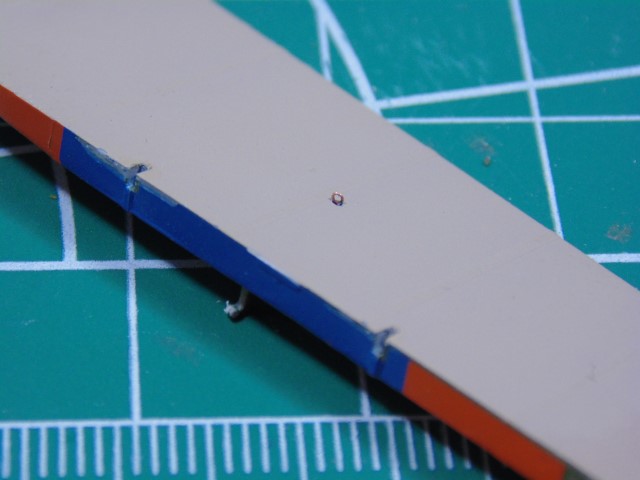
I used a 2mm tube with the cable glued then inserted it into the body.
And the same thing for the wing. It’s far more secure this way as opposed to just stuffing the line in a hole filled with CA. Hope this post wasn’t too long. Less wind and more wing ![]()
Huge thanks to Sunward Hobbies for sending over the kit and paint for the article. Please visit their website at https://www.sunwardhobbies.ca/ for kits, materials, supplies and where new items are constantly showing up.
BIG NEWS on this project coming soon!!! Thanks Everyone.
8 Likes
Well I am wired reading it. ![]()
![]()
Great job. ![]()
2 Likes
HA HA Clever man HA HA
2 Likes
Not really but even a broken clock is right twice a day. 
2 Likes
Greetings winged warriors and feathered freaks,
On the Homefront things have settled down a bit. Here is a bit of an update. I was disappointed by the lack of comments in the last one, so maybe this one will bring more.
Huge thanks to @Tank_1812 for posting.
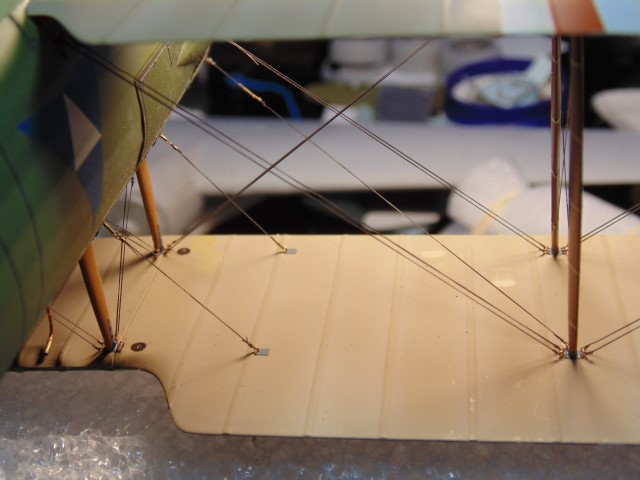
It was great to get this one done.
Now the in-betweens.
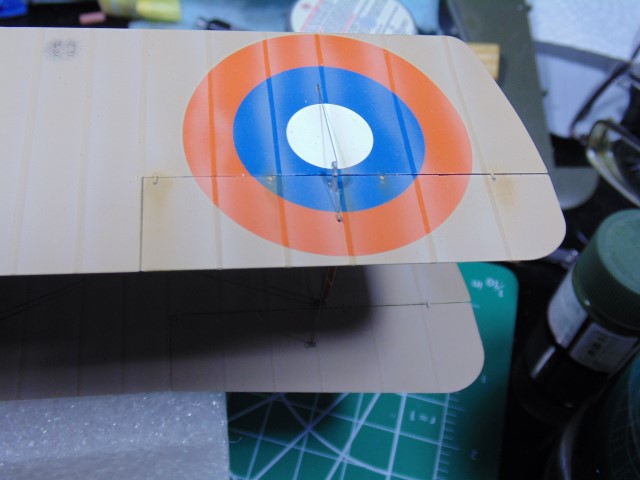
Yes, she needs a good dust off.
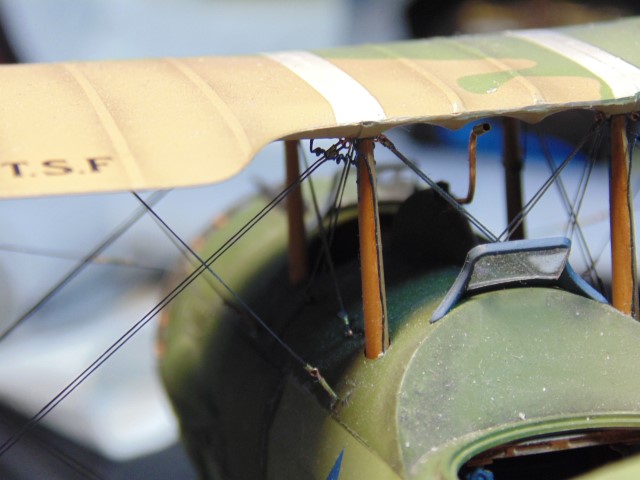
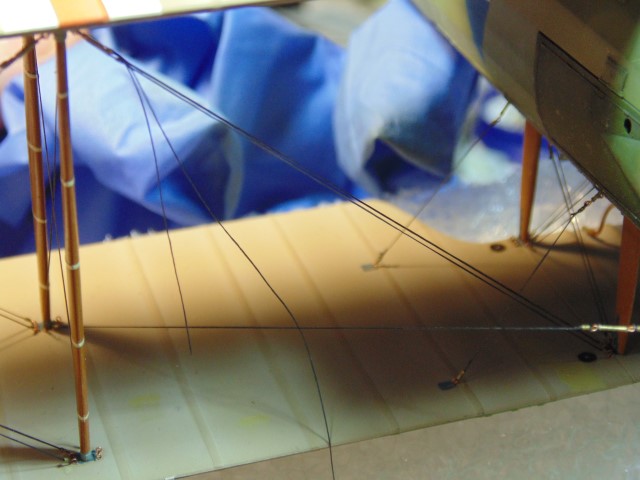
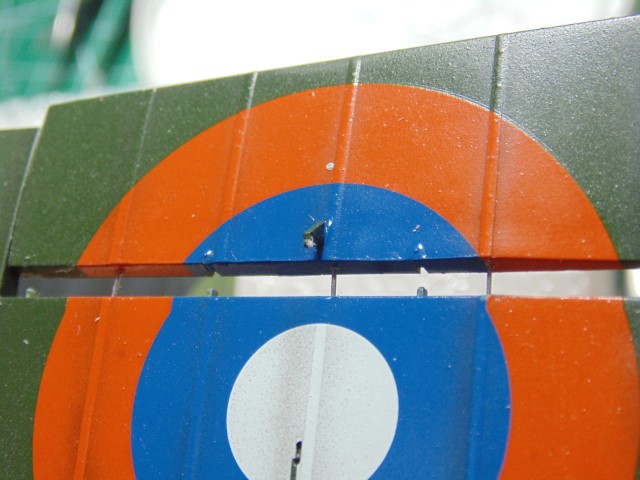
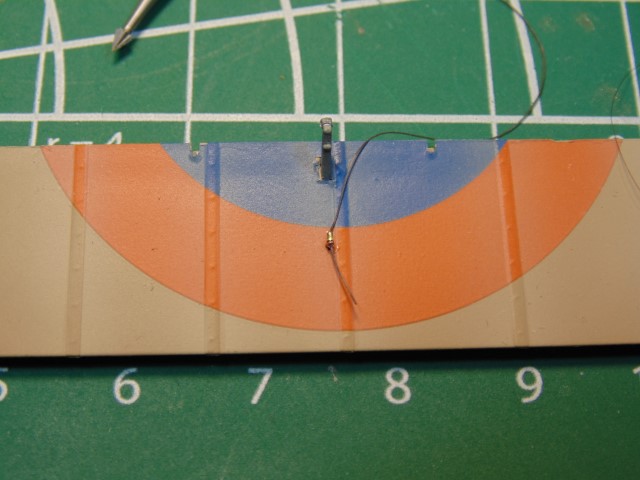
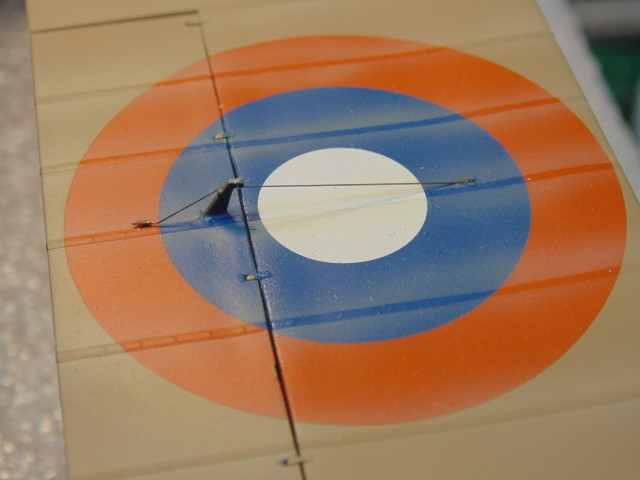
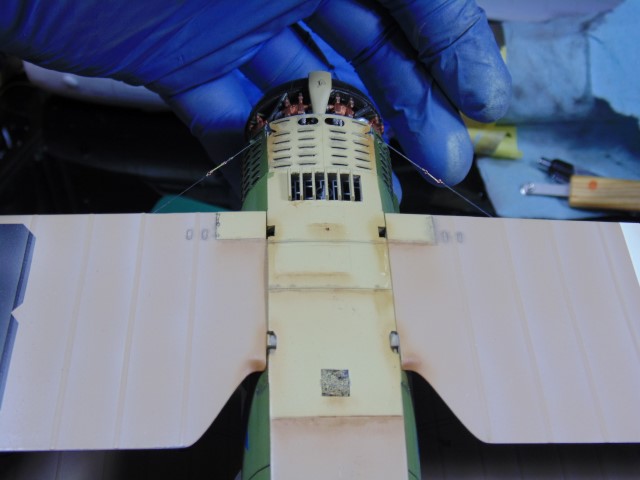
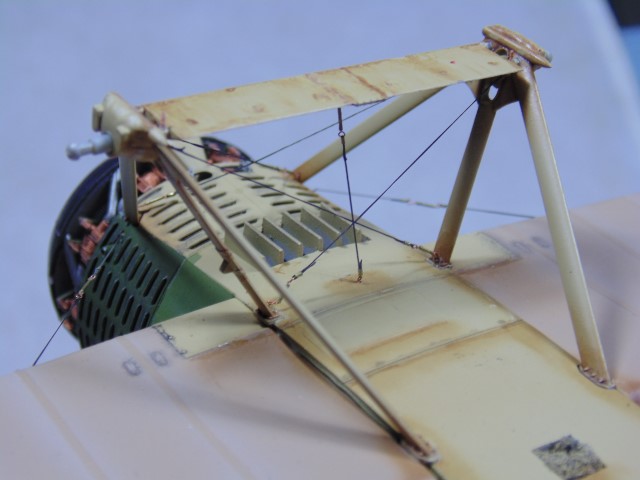
Those pesky radio wires. Pre-fit them.
Time for the flaps. Just a small gauge copper wire.
Then pin the parts. I drilled these pins in so they’re super secure.
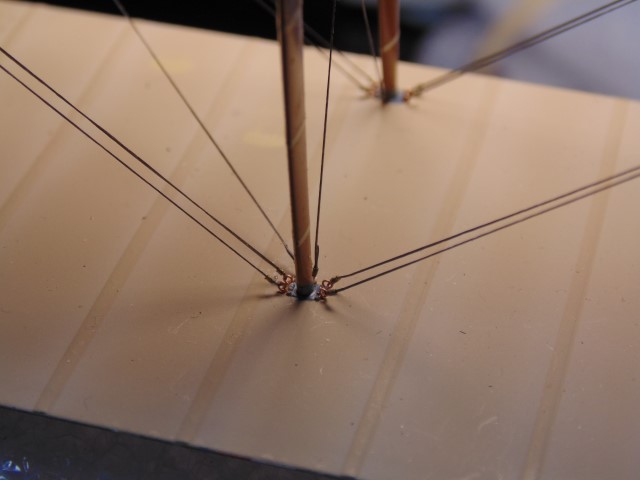
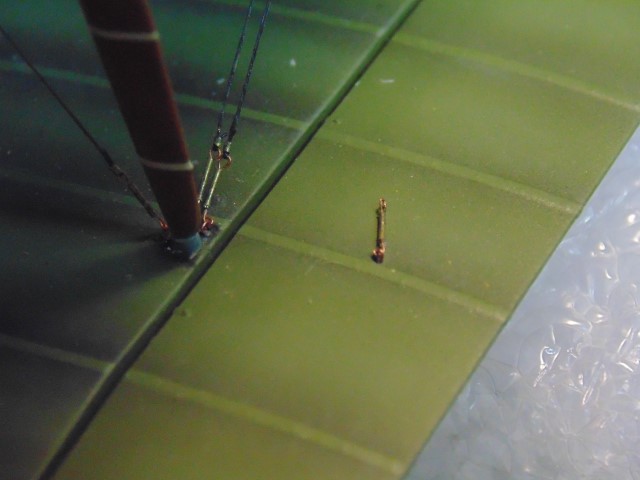
Sliced up 0.4 brass tube for the cable crimp.
There’s the turnbuckle. If anyone has a better option, please let me know.
UP and down installed.
Don’t forget the bottom though.
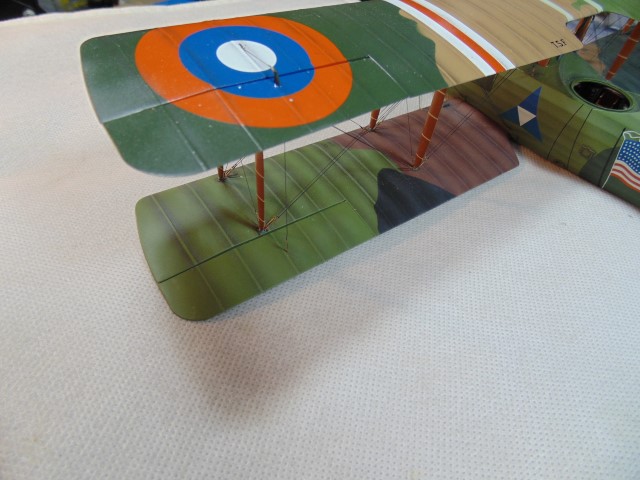
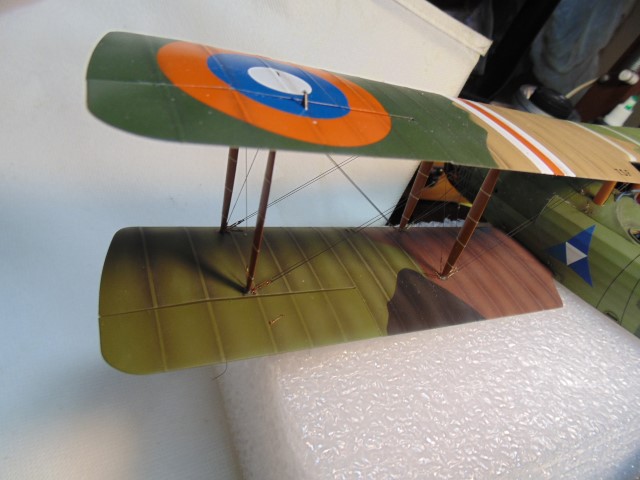
And the top… YAY! The wing rigging is done! Time for a scotch.
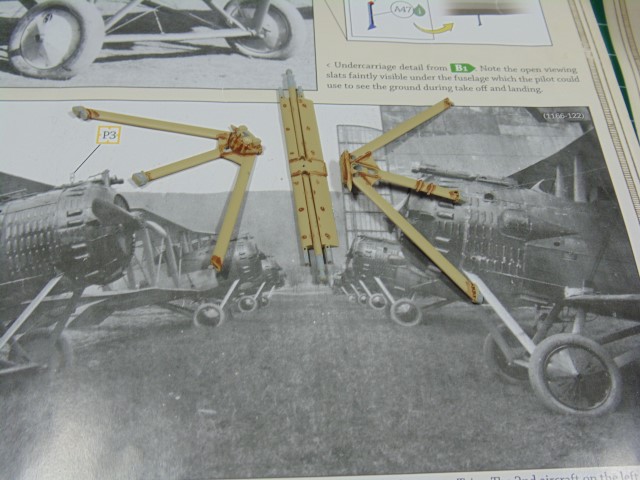
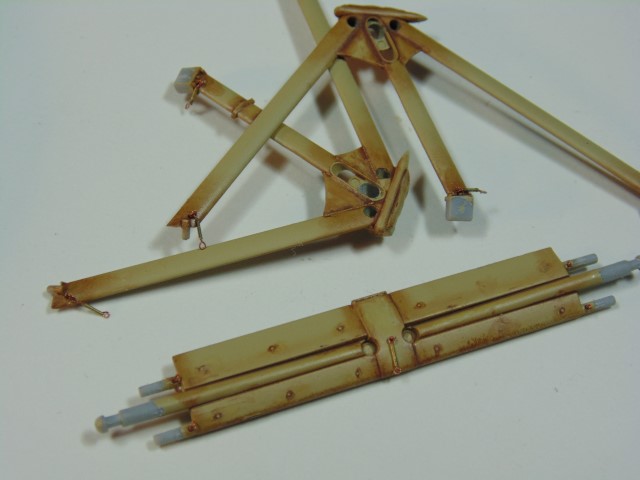
Now let’s dirty up the landing gear.
Silicon brush first.
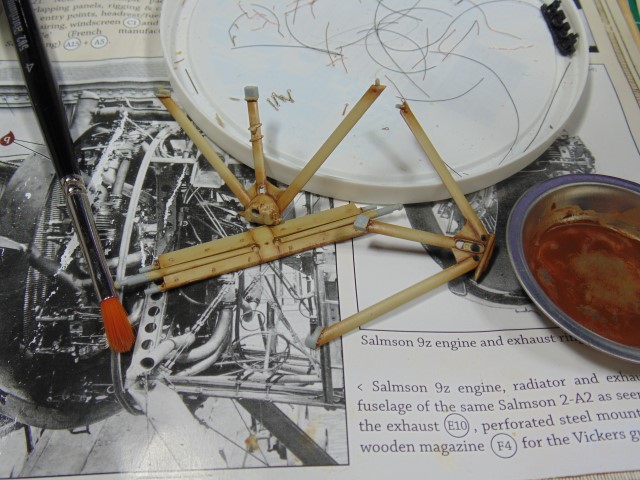
Then an Abteilung filbert to feather it out. I’ll probably lighten this up a bit.
I’ll rig this when the oils dry. A touch of black in the dark earth oil. Such a fun thing to do feathering/blending the colors.
Guys, I pay for most what you see in my articles. Please consider having a look at Sunward Hobbies website at https://www.sunwardhobbies.ca/ Great shipping, great prices and a family owed store.
6 Likes
Great work. Makes me not want to start the Albatros D.Va anytime soon.
1 Like
H.G.
Don’t take a lack of comments for a lack of interest, there’s just only so many times I can say that I stand in awe of the work you’re putting into this build.
Angelo defiantly picked the right person to review this kit.
3 Likes
Thanks Don!
Looking good, HG! 
The details you’ve added to your build are just incredible! 
PS… Still here watching, even if I don’t comment as much, as the countdown to Christmas gobbles up a good deal of my time now 
1 Like
Thanks Russ, and I hear you. Sure wish I could comment on more posts myself. Thank goodness for the heart/like button.
1 Like
Fortunately I don’t have biplanes in my stash. I know why I don’t do any rigging when I see this. My fingers would be just too clumsy for this, even if this build is 1/32. Your look for the detail is amazing, HG! 
1 Like
Thank you Torsten! Hey, your work stands in very good stead Sir.
1 Like
Yes still checking in HG and liking rather than commenting 
1 Like
Thanks a bunch Tim. Really keeps the mojo up.
I ![]() that!
that!
(See what i did there? ![]() )
)
2 Likes
Hi Folks,
I got some more rigging done. ![]()
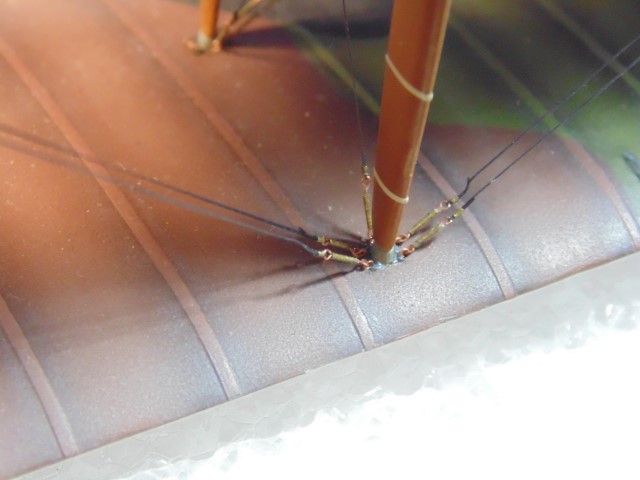
Start with the 5 turnbuckles.
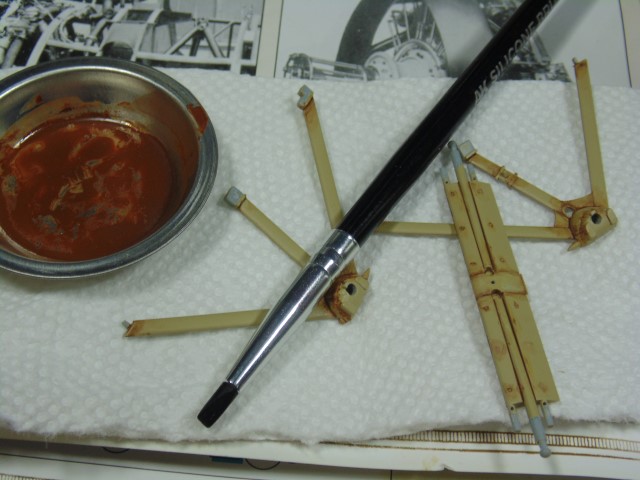
Oil up the bottom to match the posts with 70% Abteilung earth and 30% brown wash. Use a filbert for a nice feathering control.

Don’t forget the wings on this turkey.
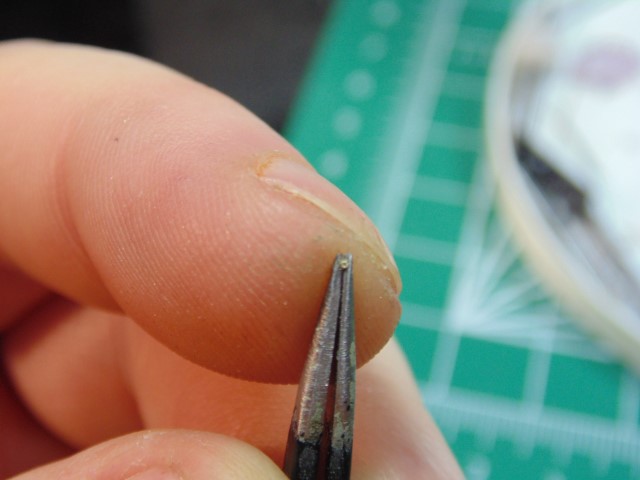
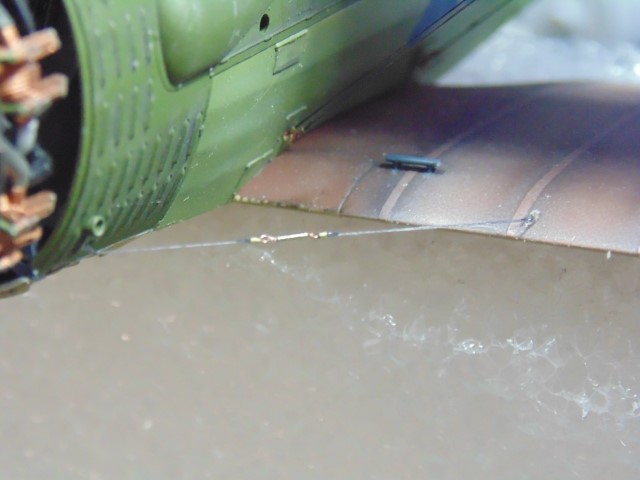
Each cable has a fastener/crimper (please comment with the proper term) which needs to be sanded/filed after it’s cut to remove the burr. Just a few light passes does the trick. There are over 140 of these little guys in this project.
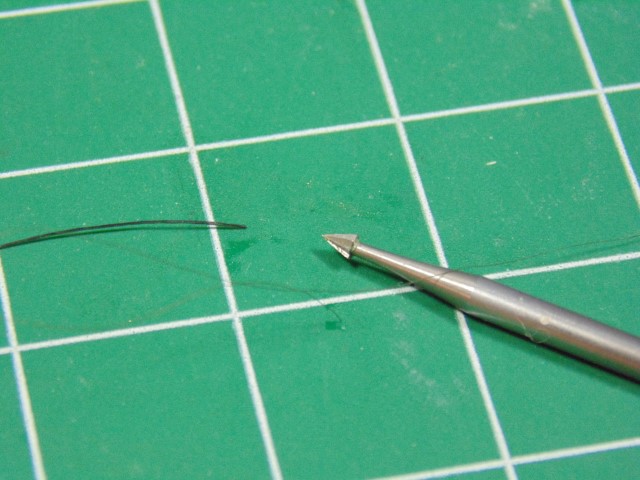
To allow the line an easy pass through the tube I use this dental tool to ream out the ends smoothly. Then slip a loop of hair to catch the ez-line and pull it through.
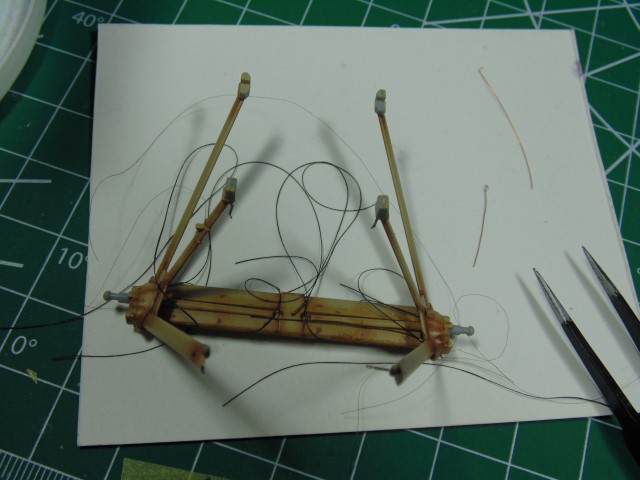
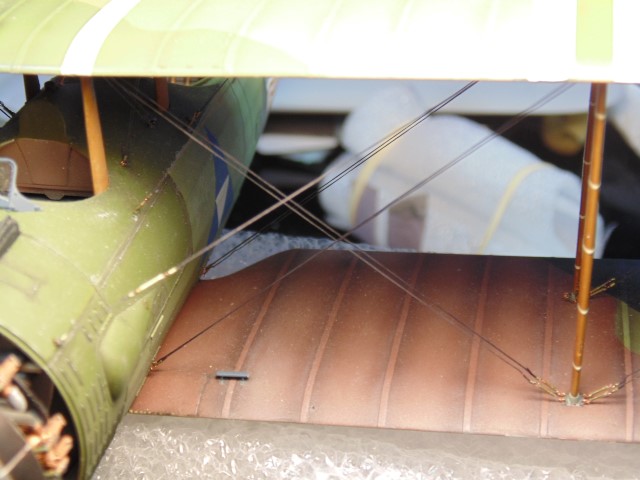
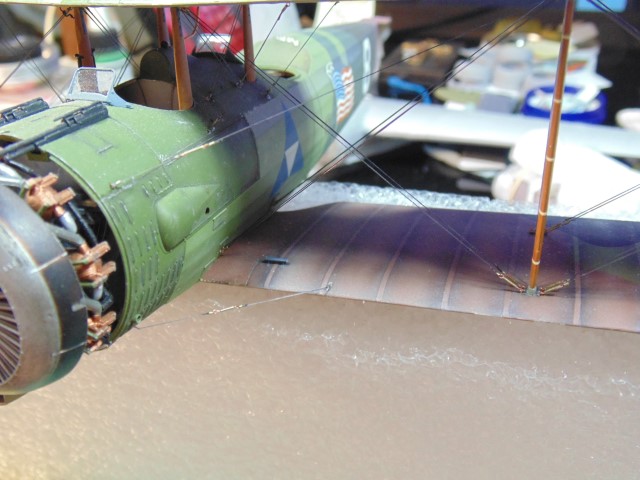
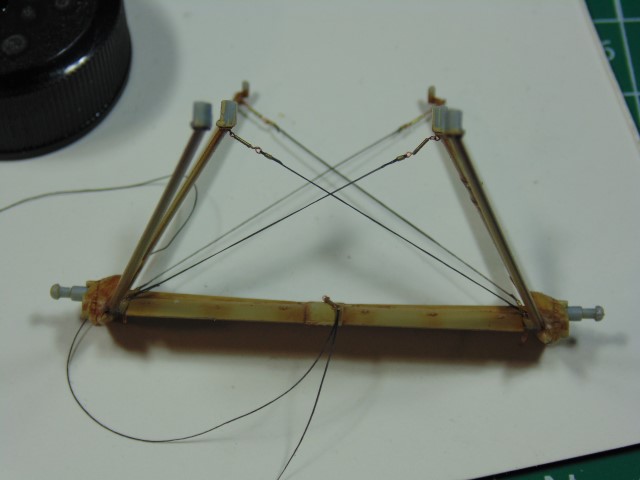
Here’s the bottom cables run and prepped for the upper.

The loose line attaches to the fuselage belly.

A few adjustments are needed but I’ll do that at painting stage.
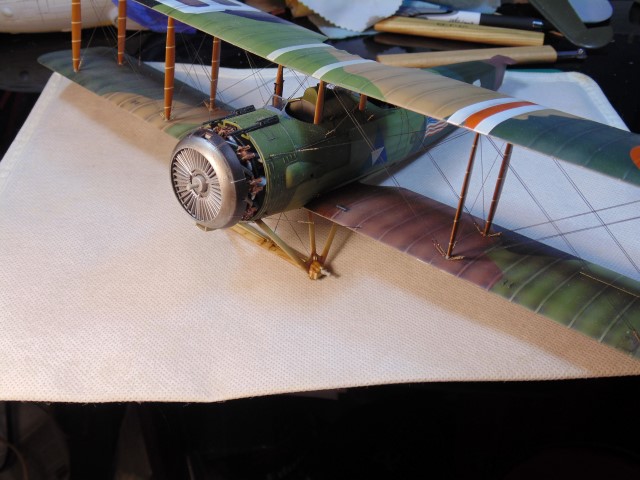
It’s great to see the Salmson upright and the majority of the rigging completed. 100% worth the time invested. Still a ways to go on this replica, yet the light is shinning ahead.
Huge thanks to Sunward Hobbies for sending this kits and the paint for the article. Please visit their website at https://www.sunwardhobbies.ca/ for kits, materials, supplies and to support a family owned and run hobby store.
Best of health Everyone.
10 Likes
I’ll bet Sunward Hobbies are pleased you’ve taken the time to create such a stunning model
1 Like