Great stuff HG, loving the details and learning every time you post here. I’ve got so much to absorb before I start my WnW Camel!
Cheers, D
Great stuff HG, loving the details and learning every time you post here. I’ve got so much to absorb before I start my WnW Camel!
Cheers, D
Thanks Damien! I’m sure you’ll get just as much, if not more, from Michael Roof. Either way “knowing removes the fear and ramps up the fun.” H.G. Barnes
Stay tuned for another post in a few hours. 
Howdy Wranglers,
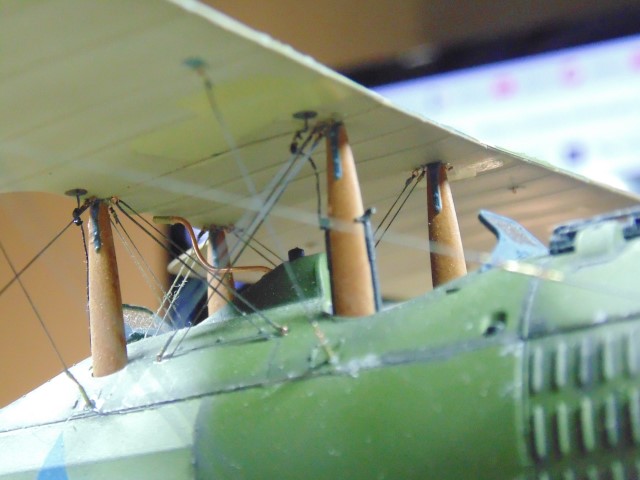
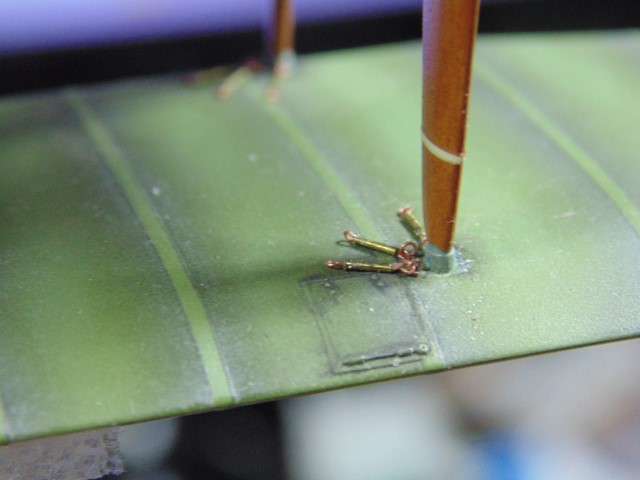
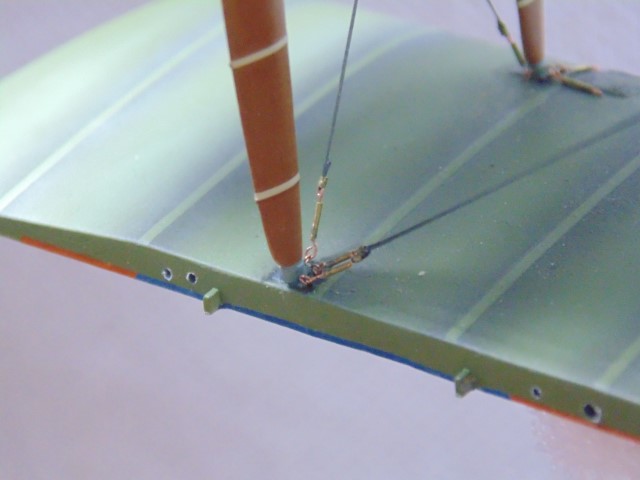
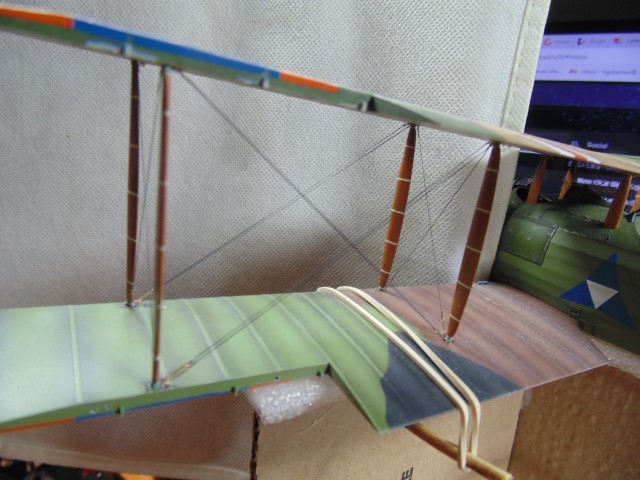
I can safely say this post wraps up the right side wing rigging.
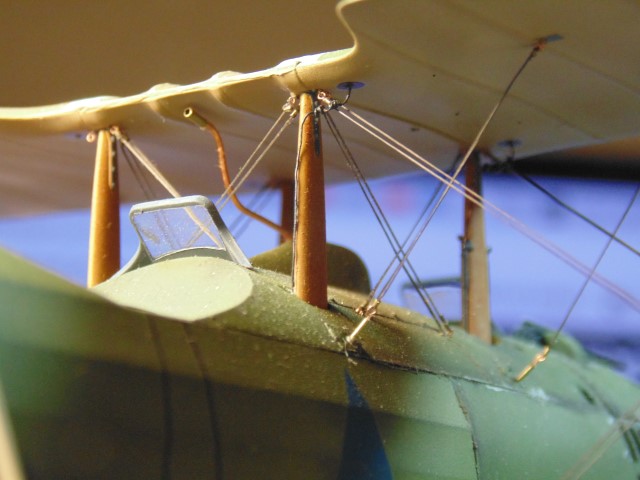
I ended up using 3 pins. The great part is there’s no cement. It will flex and not come off. The secret is to make them as long as possible. These went in 7mm on the aileron.
Another trick is to have all the rigging done before attaching the parts.
Having some custom tools really helps and are easy to make. These are for holding 0.3mm and up rod and tube.
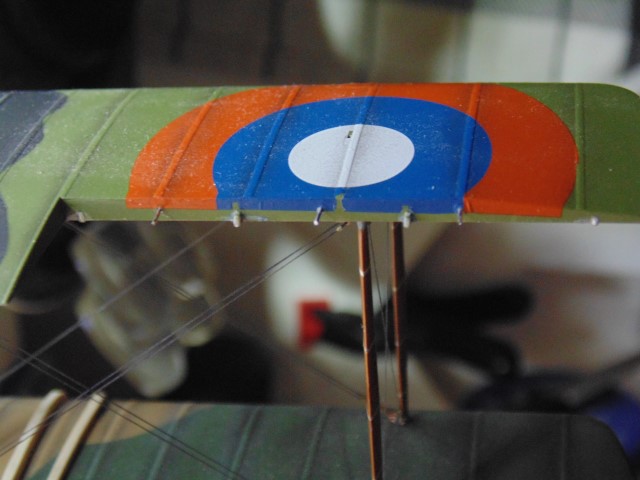
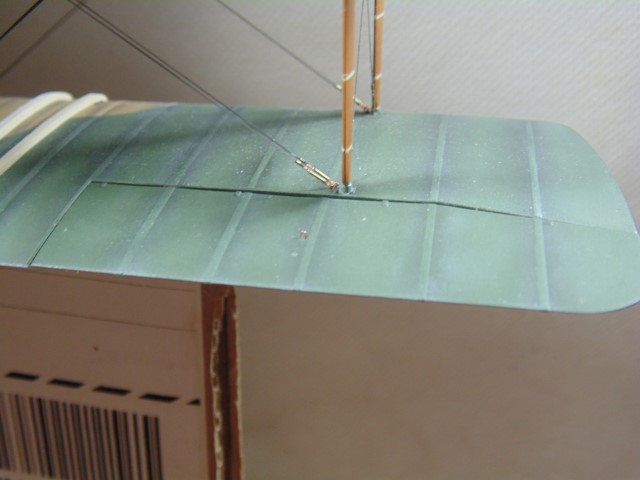
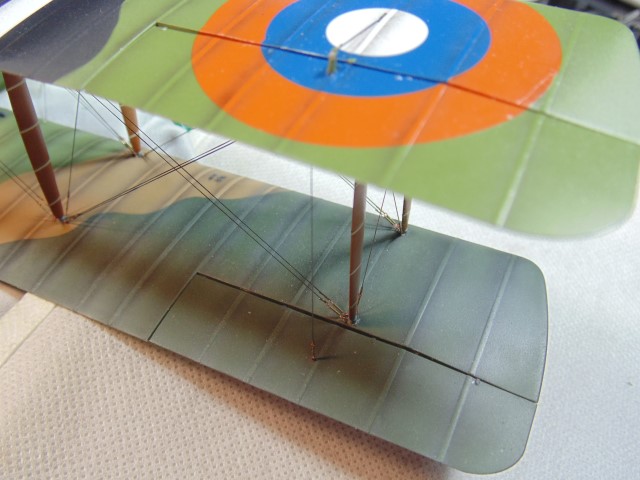
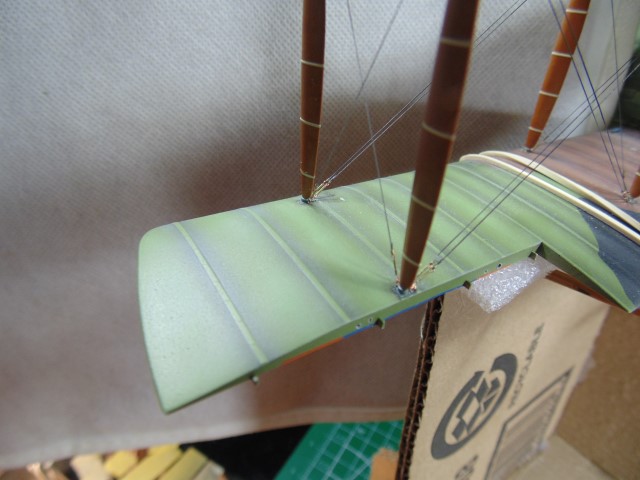
Upper wing gets similar 6mm pins.
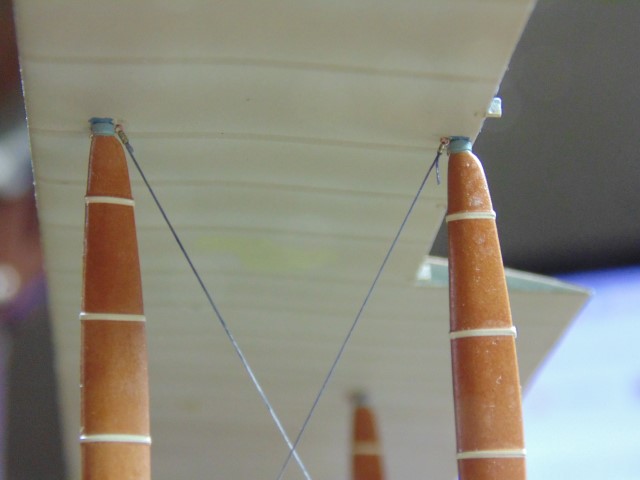
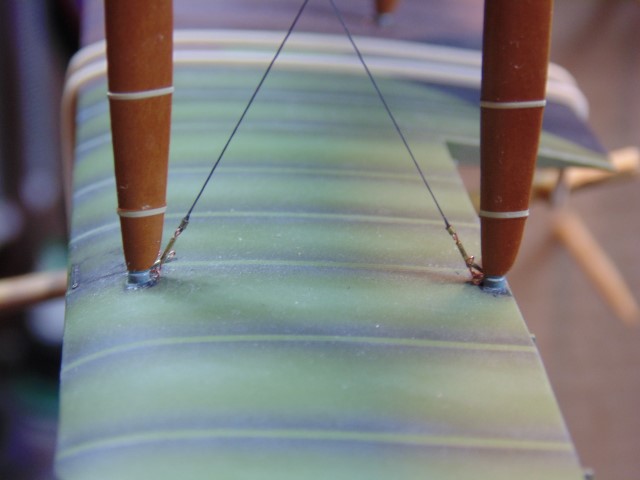
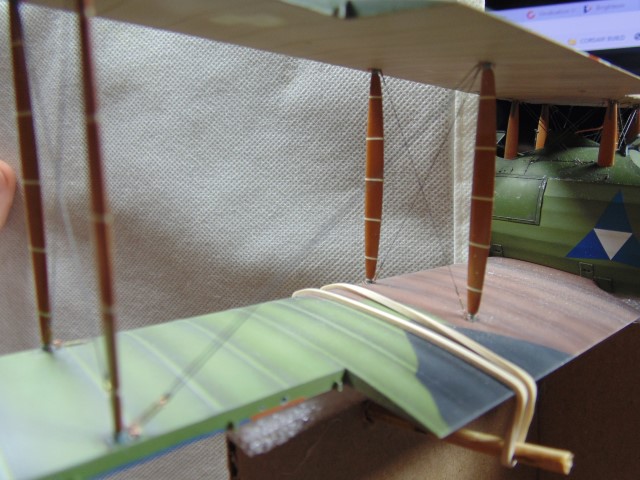
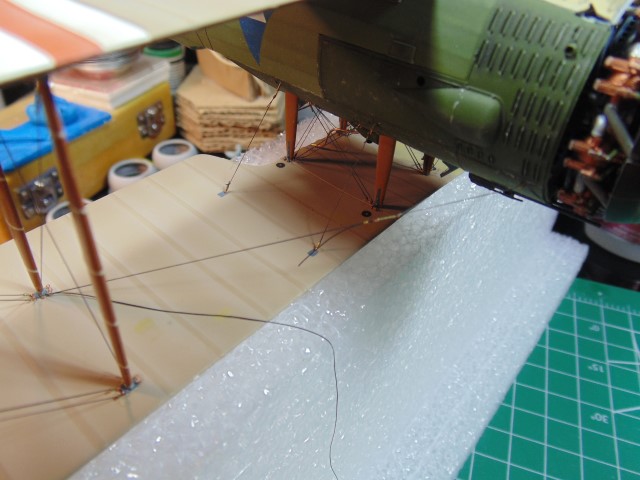
Underside of the lower wing. Rigging is ready to go.
Looks pretty good.
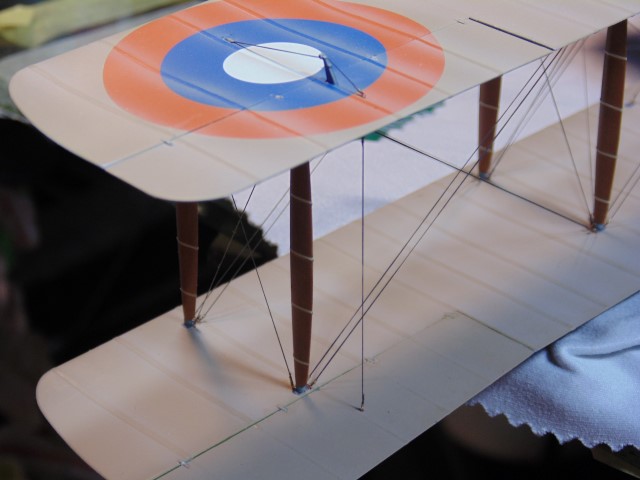
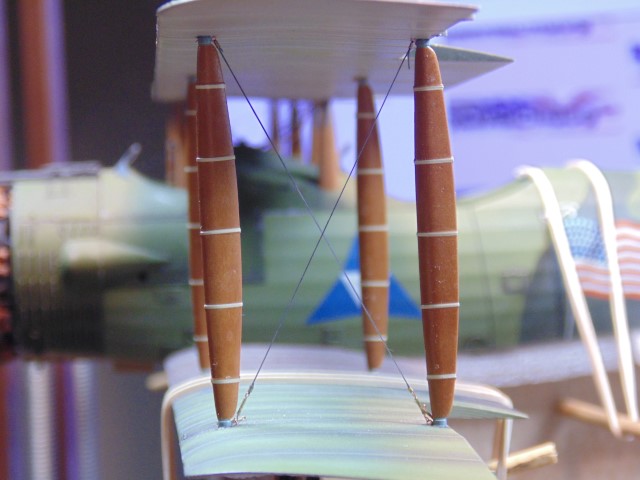
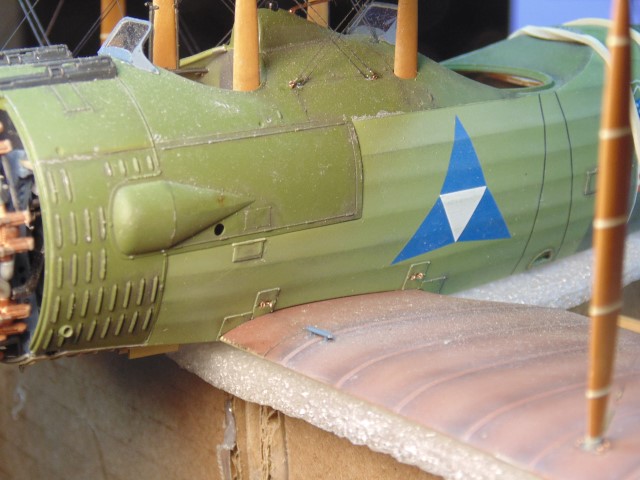
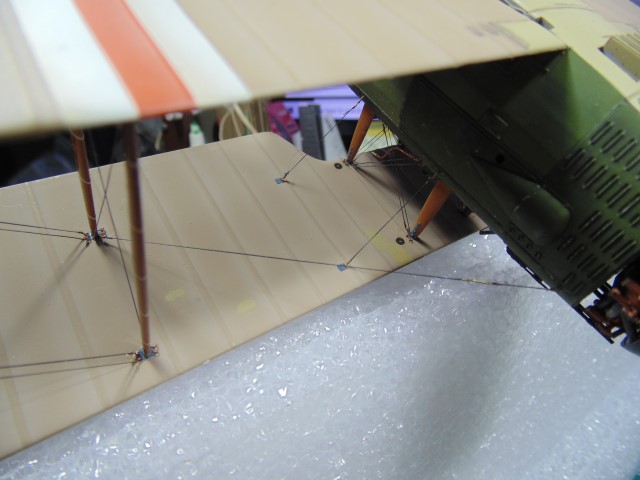
And the wide shot. Nice bit of detail here.
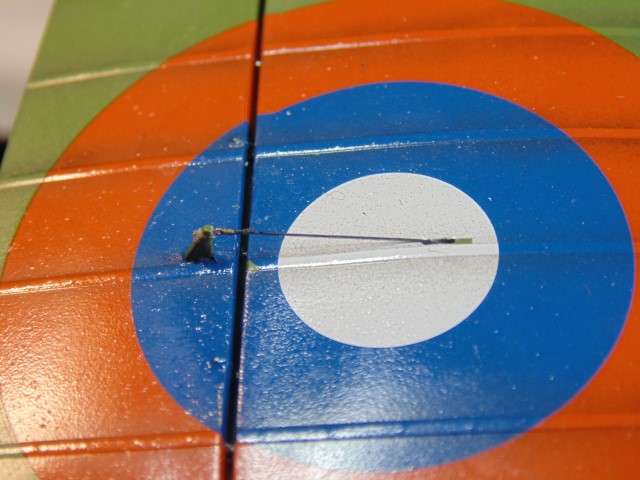
The little plastic eye hook broke off so it was replaced with some spun wire.
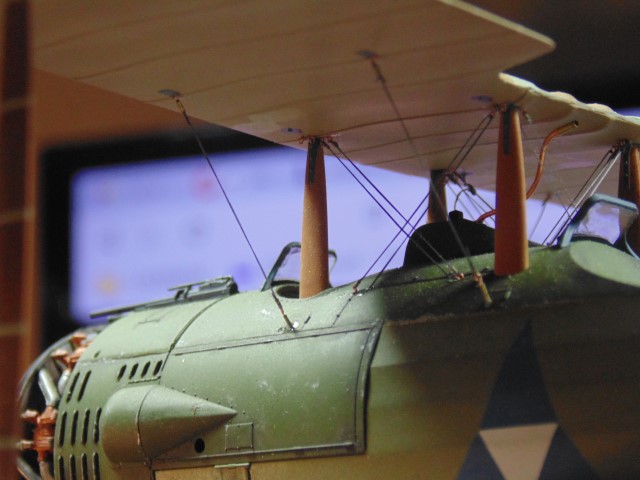
Time to source some more 0.4mm brass tube. Sure hope this will help you guys out.
Huge thanks to Sunward Hobbies for sending the kit and paint for this build article. Please visit them at https://www.sunwardhobbies.ca/ where new and cool products are constantly arriving.
Thanks Everyone… best of health and thanks to those who sent birthday wishes.
Outstanding work, HG! Top notch! 
Rigging is one reason why I don’t build bi-planes. Have only build one years ago without rigging, a Hs 123.
Blimey my eyes are aching 
Yeah, I feel the same way when I peal the magnifiers from skull! HA HA.
I hear you, HG! Feel the same after working an hour or so with the magnifiers on. Have to calibrate my eyes again then … 
HA HA. Yes, I feel like if I look in the mirror my eyes will be like Mary Feldman’s (70’s 80s comedian).
But that’s with all the brass work. Ez-line on its own is great. Torsten the instant it touches fresh CA there is a super strong bond. Worth a try. Thanks for the great comments and support.

Carry on sir!
Hi Yall,
Took just a few minutes… eh em… hours LOL to do this work while clear coat is drying on the B-17.
These are the curly radio wires I mentioned.
Not the easiest things to install, so I learned that pre bending them is best.
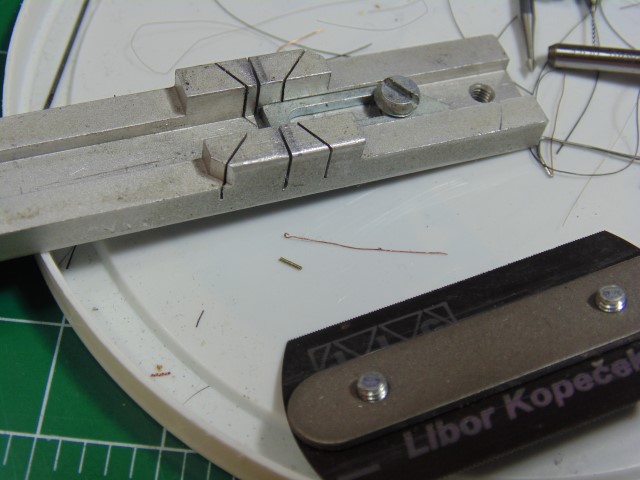
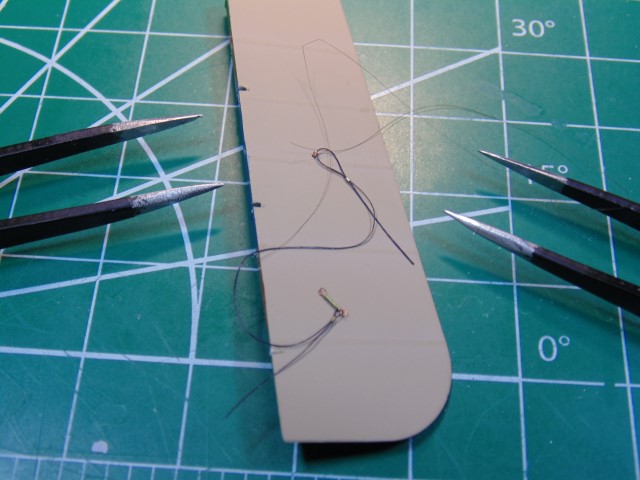
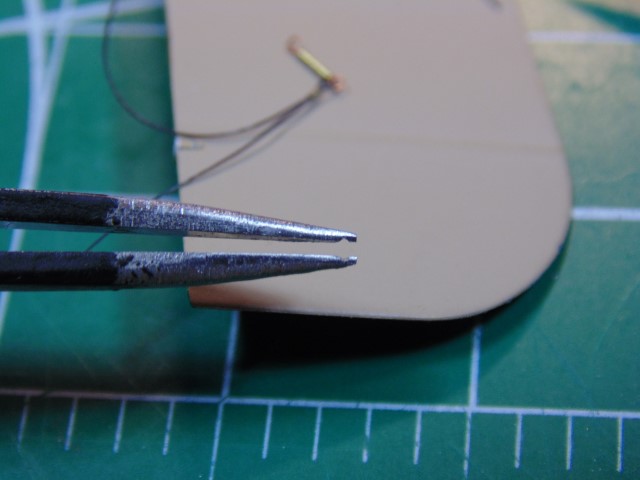
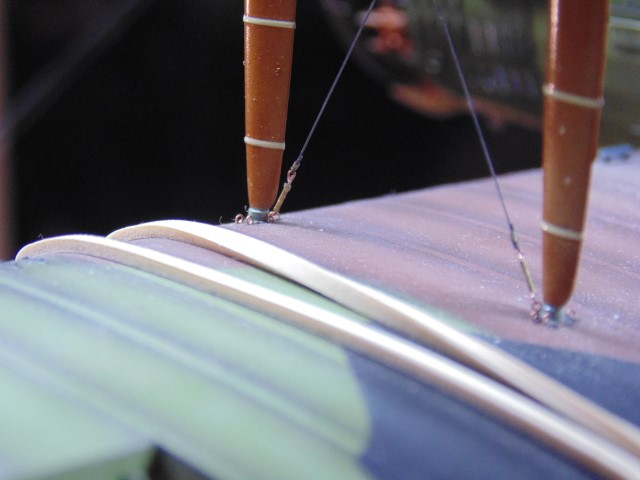
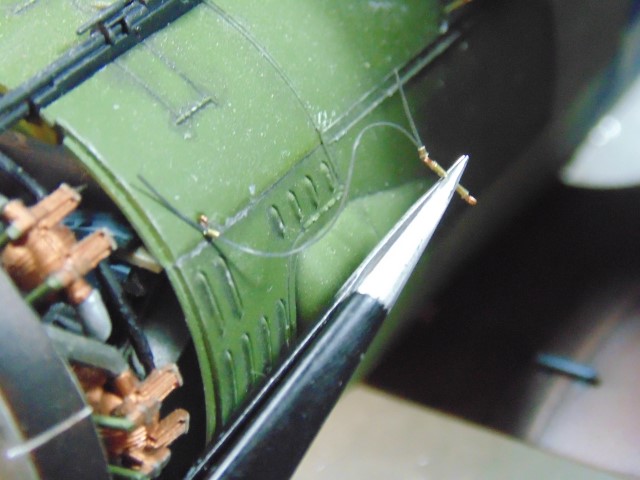
SO here’s how the turnbuckles are made. A length of 0.4mm tube with the loop wire.
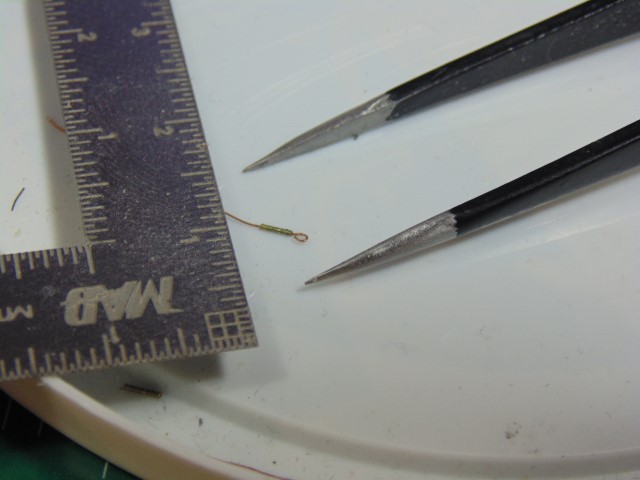
Wrap the wire around the tip of the tweezers then add a touch of CA.
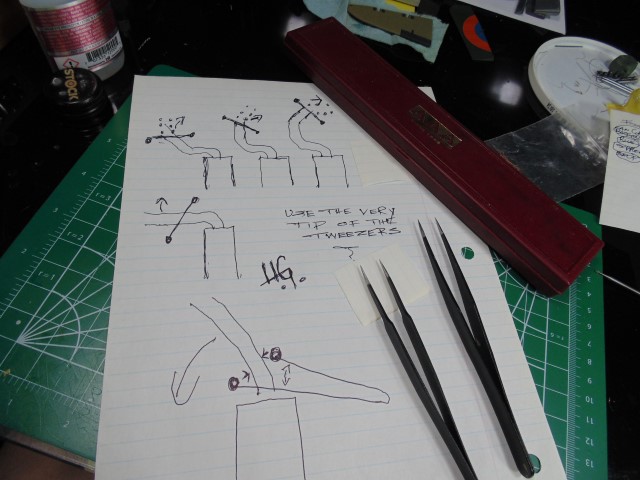
Hope the drawing makes sense about how to make a loop.

Leave one end open a hair then close it after hooked in the eyelet.
Not really that complicated, it just took me some time to work it out. Now you have the benefit of the time. If that was helpful then please leave a comment.

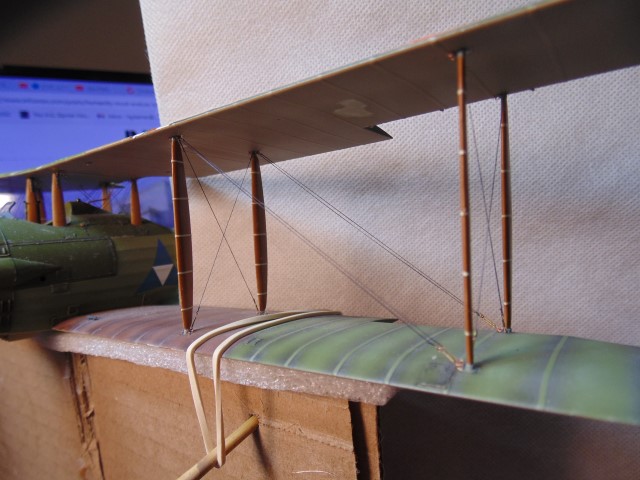
Now the tie downs, lots of them… and this isn’t nearly enough to finish the job!
Top and bottom look good.
And finally… deja vu! More of the same later.
Warmest thanks to Sunward Hobbies for sending the kit and paint for this blog article. Please visit them at https://www.sunwardhobbies.ca/ for a huge selection hobby needs and supplies.
Thanks Everyone, be safe.
Hi Friends,
If I was from Wichita they’d call me a lineman. Wow, that was some flimsy comedy.
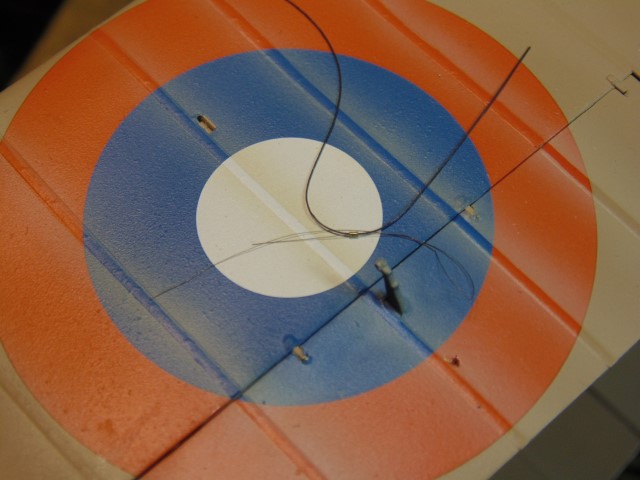
Locating pin holes and more cable.
It’s always better to do inside sections first. That way you’re not fighting around lines.
Sure glad the eyelets were installed before the wings went together.
There are a couple of 0.5mm clamps. Hard to see from any distance. Moving along at a steady pace on this one.
Warm thanks Sunward Hobbies for sending the kit and paint for this article. Please visit their website at https://www.sunwardhobbies.ca/ for great hobby supplies and excellent customer service.
Thanks Everyone, let me know if there’s something I missed explaining. ![]()
Geeze! I saw this… scared the bee-jesus out of me. But then it was BAHAHAHAHA. Thanks man. I needed that laugh.
Thanks to @Stooge for reading the posts.
Forestall Fellow Feathered Fanatics,
Don’t know if that made any sense but sounds good. ![]() Moving along with the cables…
Moving along with the cables…
Sure is going to be sad to have to paint all this bling.
A few more bits of 0.5mm tube. Tough to notice though, thank goodness.

Eyelets in.
Definitely do these before the longer runs. Boy she needs a dusting.
Kindest thanks to Sunward Hobbies for sending over the kit and paint to do this article and, of course, to you for following along. Please visit their website at https://www.sunwardhobbies.ca/ for kits, supplies and materials.
Be safe Everyone.
Hi Friends,
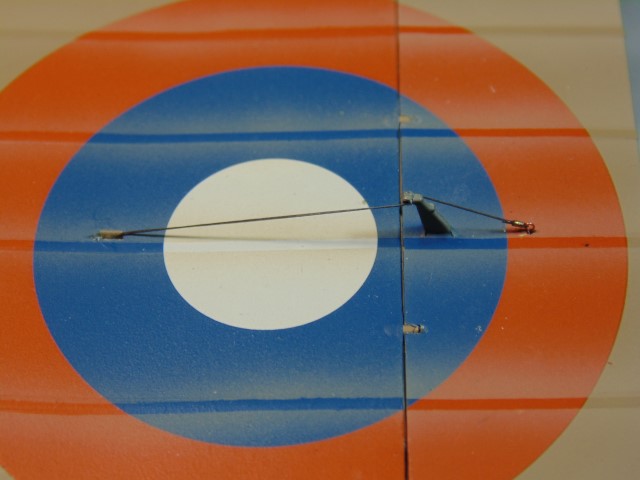
One of the most difficult cables to run on this model you are about to see. I made it easier, please donate to “I drank what?” foundation if this saved you some time.
Clamp your tweezers with a vise or 2nd hands.
Use extra length of line and do the forward section first.
I think it looks passable, but what do you guys think?
Huge thanks to Sunward Hobbies for sending the kit and paint for this article. Please visit them at https://www.sunwardhobbies.ca/ for great items to add to your stash.
Best of health Everyone.
First class HG in every aspect , just as we have all come to expect from your talented hands . Thanks for sharing the “ how to “ details as well . I always come away from your posts with new ideas .
Cheers - RT
Wow Richard those are mighty fine words Sir! If you really want to thank me though, let me sit in that model you’re standing in front of, please please please.
Kindly,
HG
That aircraft is an airworthy Hayabusa in the Ericsson Collection in Madras , Oregon . I believe it is one of two or three that were largely built new but it has P&W power and modified DC 3 engine cowling so a little larger than original . The canopy is also larger than original to make things a little more roomy for the pilot .
Cheers - RT
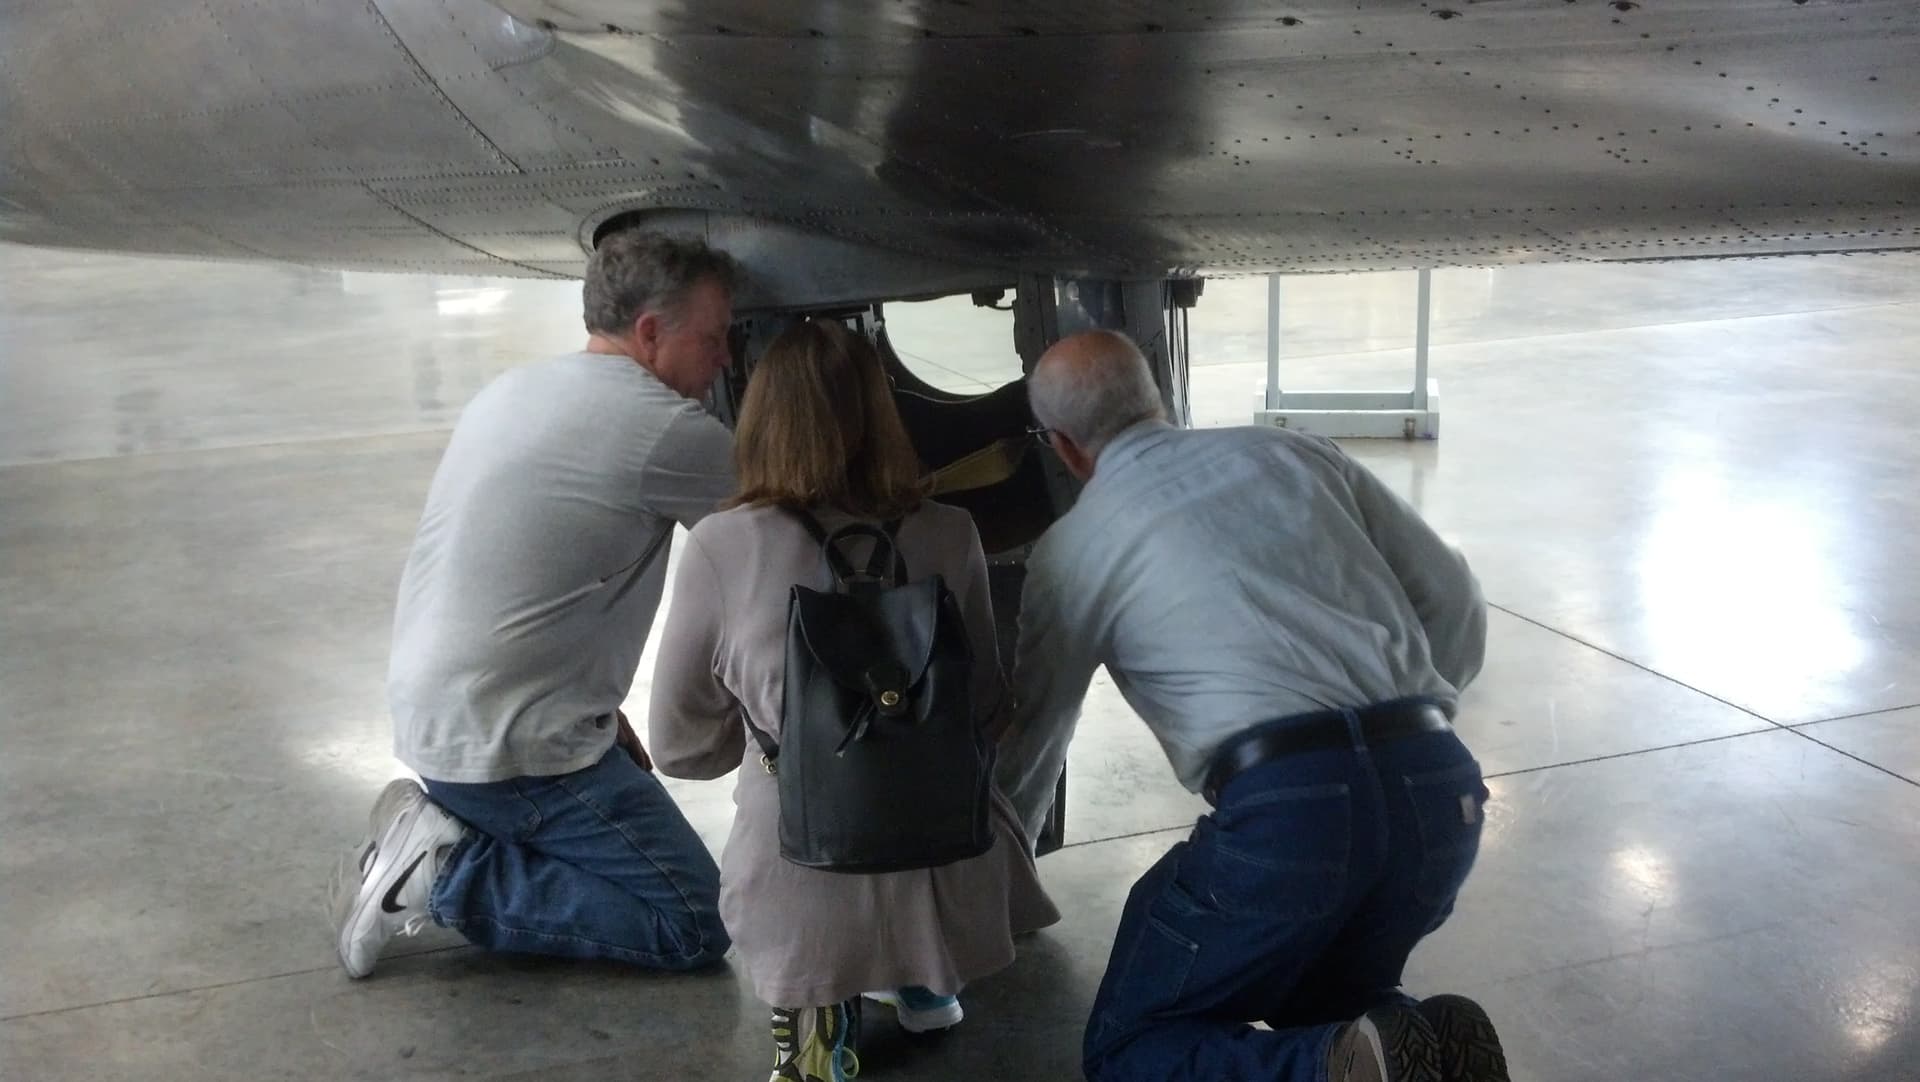
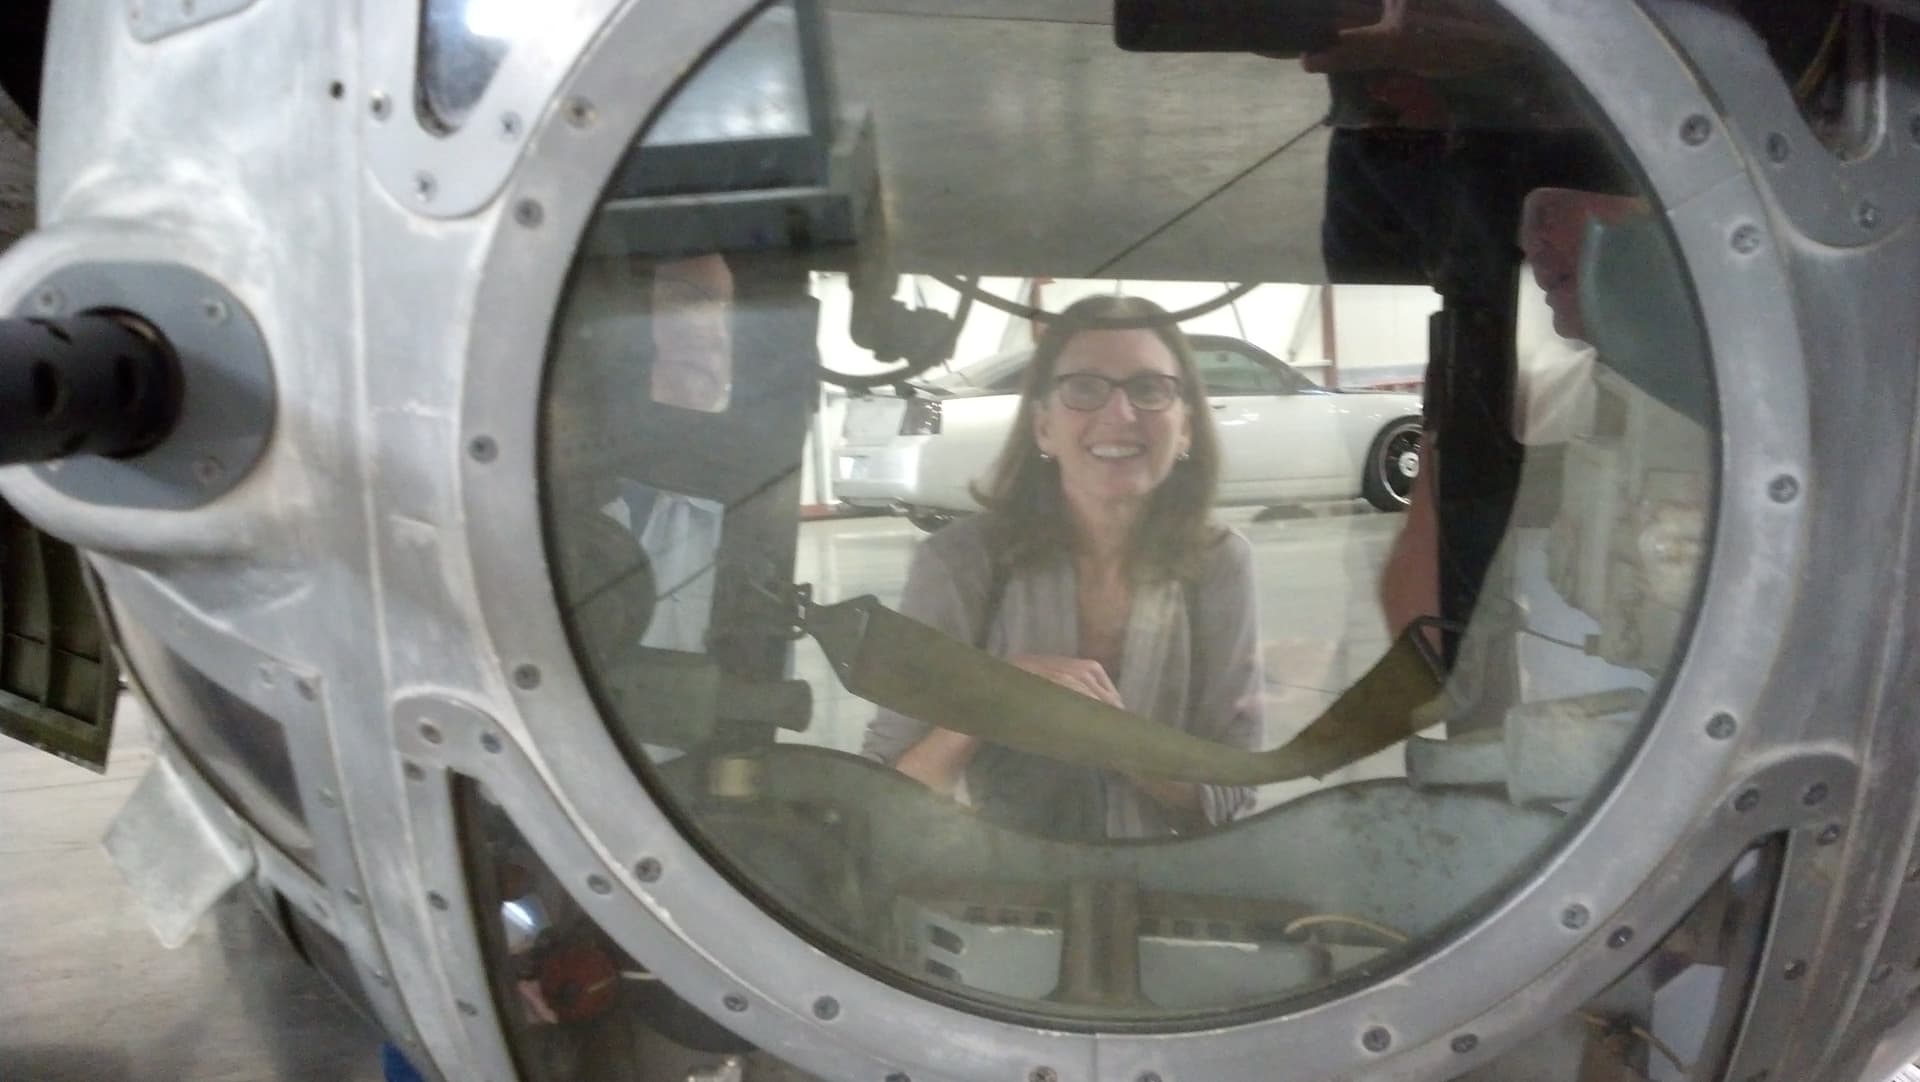
Edit - You might enjoy these shots as you are somewhat immersed in things B-17 these days . B-17 also in Ericsson collection . Trying to convince my wife to take a ride in the ball turret.
H.G., this is one absolutely STUNNING piece of work! I’ve been catching up on this build, my jaw dropping at every turn. My humble Martin-Handasyde currently in progress seems quite pale by comparison with your beautiful work. Just awesome, thanks for sharing with us!
I think HG your pretty close to obtaining the embroiders golden thread award