@Canmedic I repainted the glossy hair with Matt coat and it turned out MUCH better! Thank you! ![]()
2 Likes
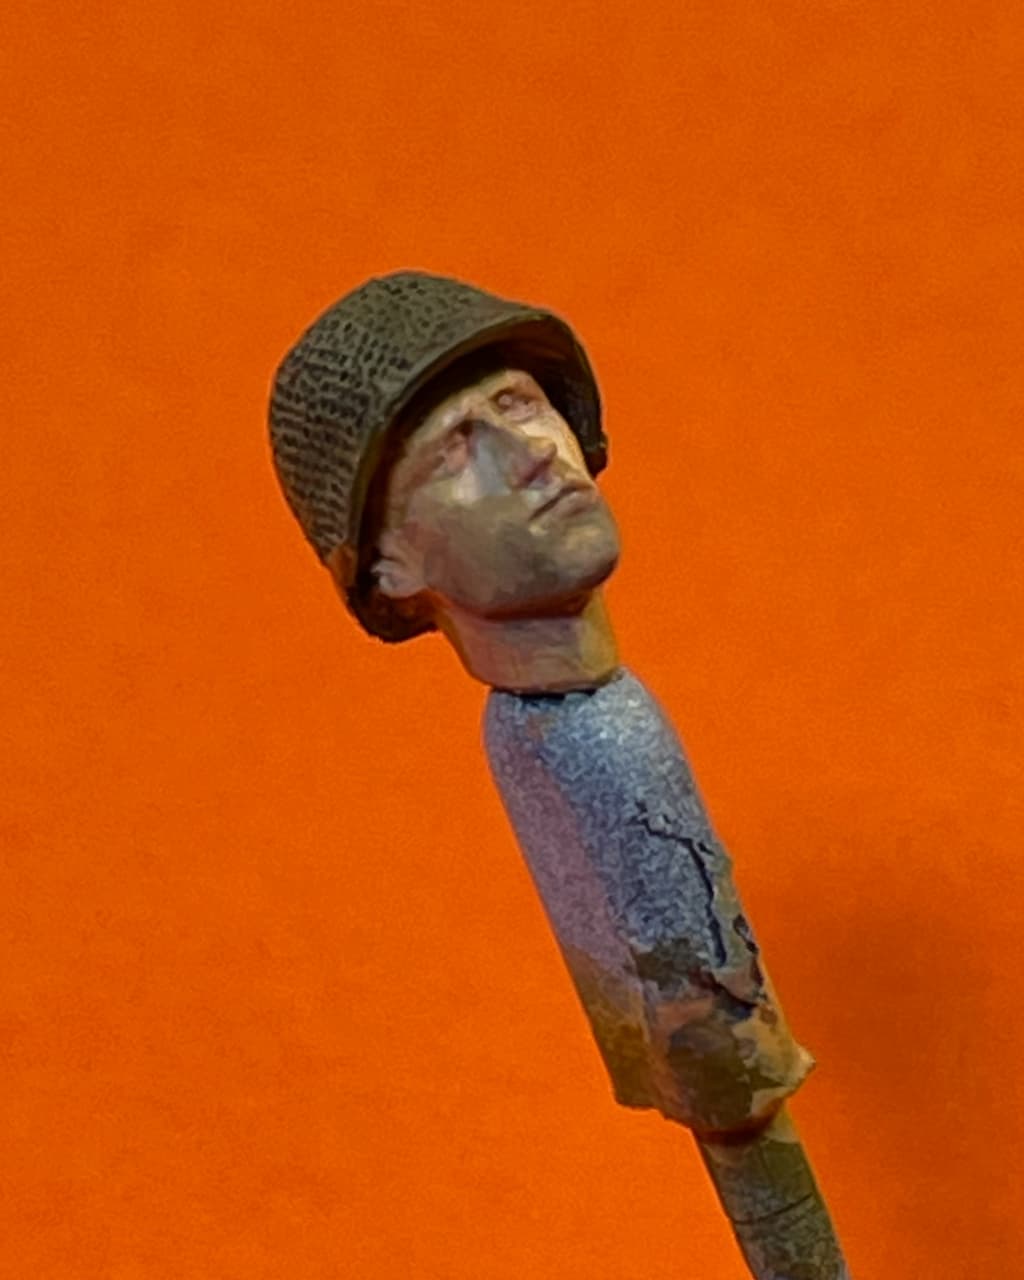
Face painting is hard to do. That strap detail adds a lot of realism
2 Likes
Thank’s! Glad you like that detail.
—mike
Well, the first one does resemble Pooh. However, the third one is a Swirly for sure! ![]()
![]()
3 Likes
Is that 24 colours for the face?![]()
G.
That figure is looking great, Mike. Love the sling detail. Going to be trying that soon.
G.
@ Lazarus. Well, if you count the wet palette pile-up, the colors on the head stick and three attempts on this face… yeah, probably just shy of 24 colors. ![]()
1 Like
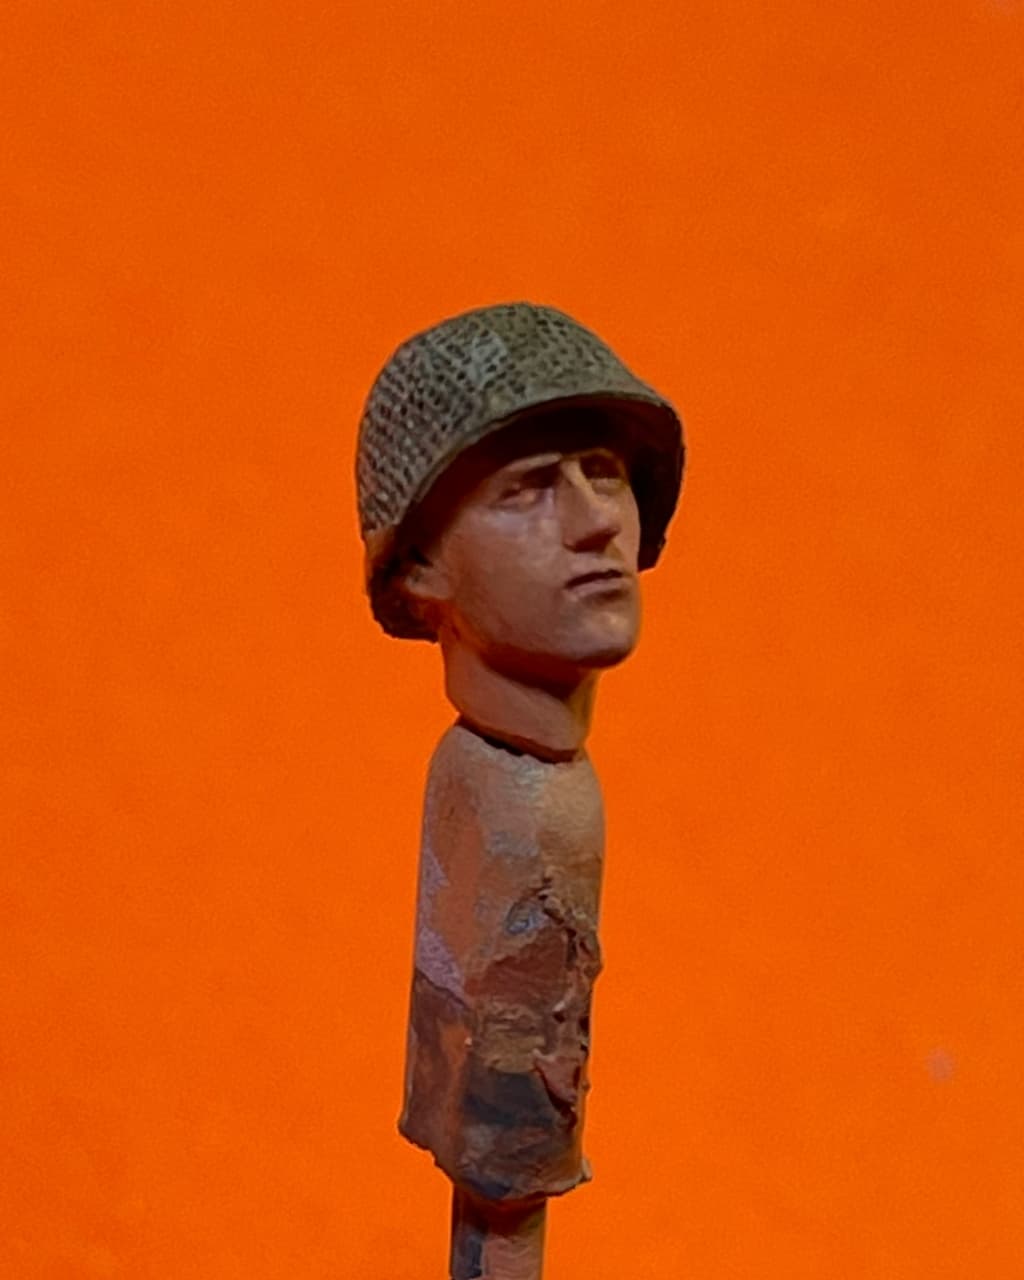
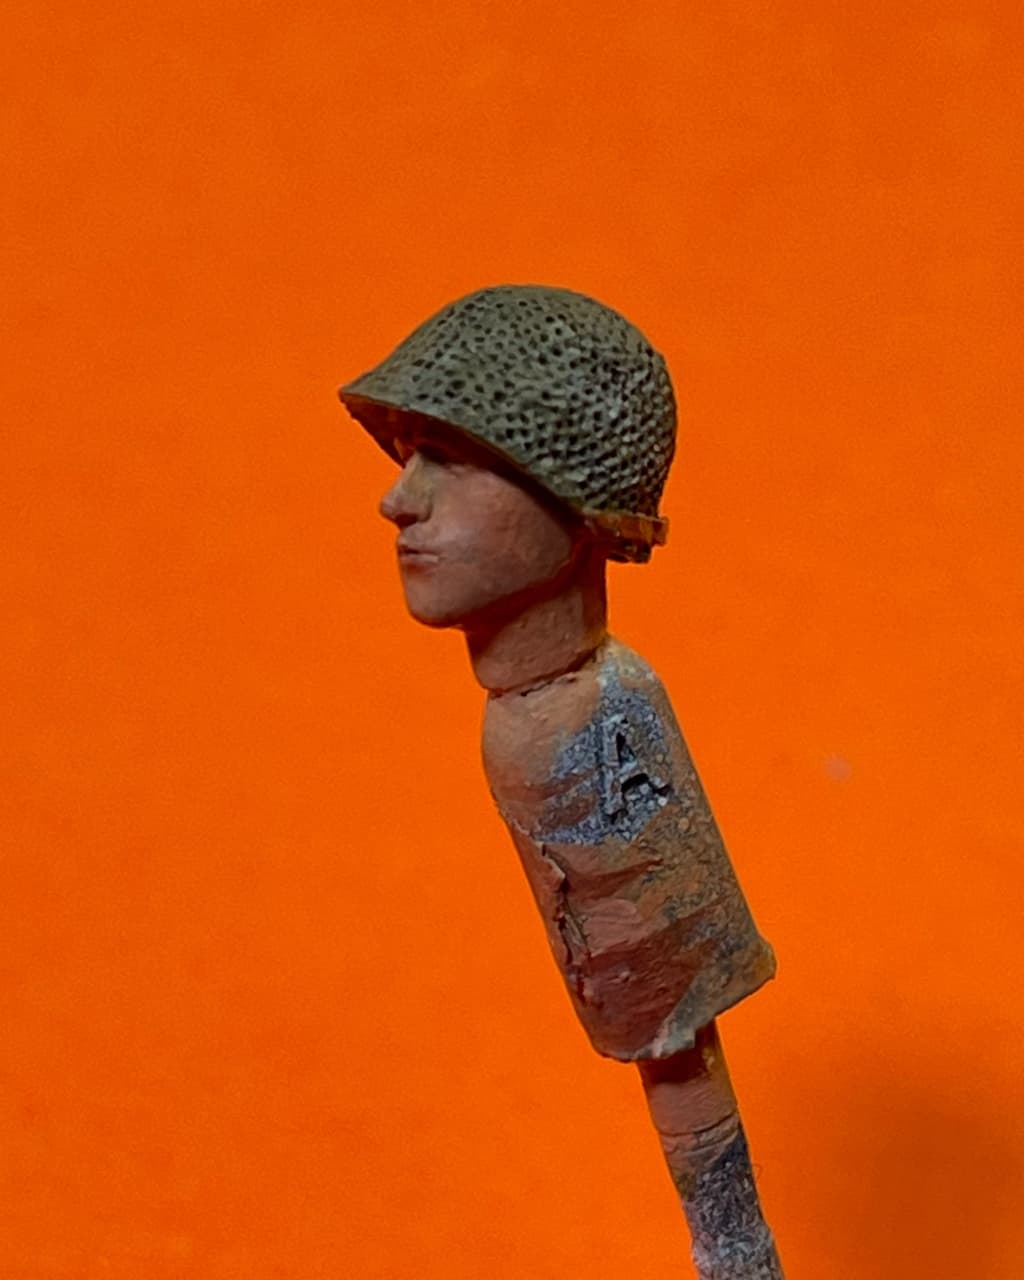
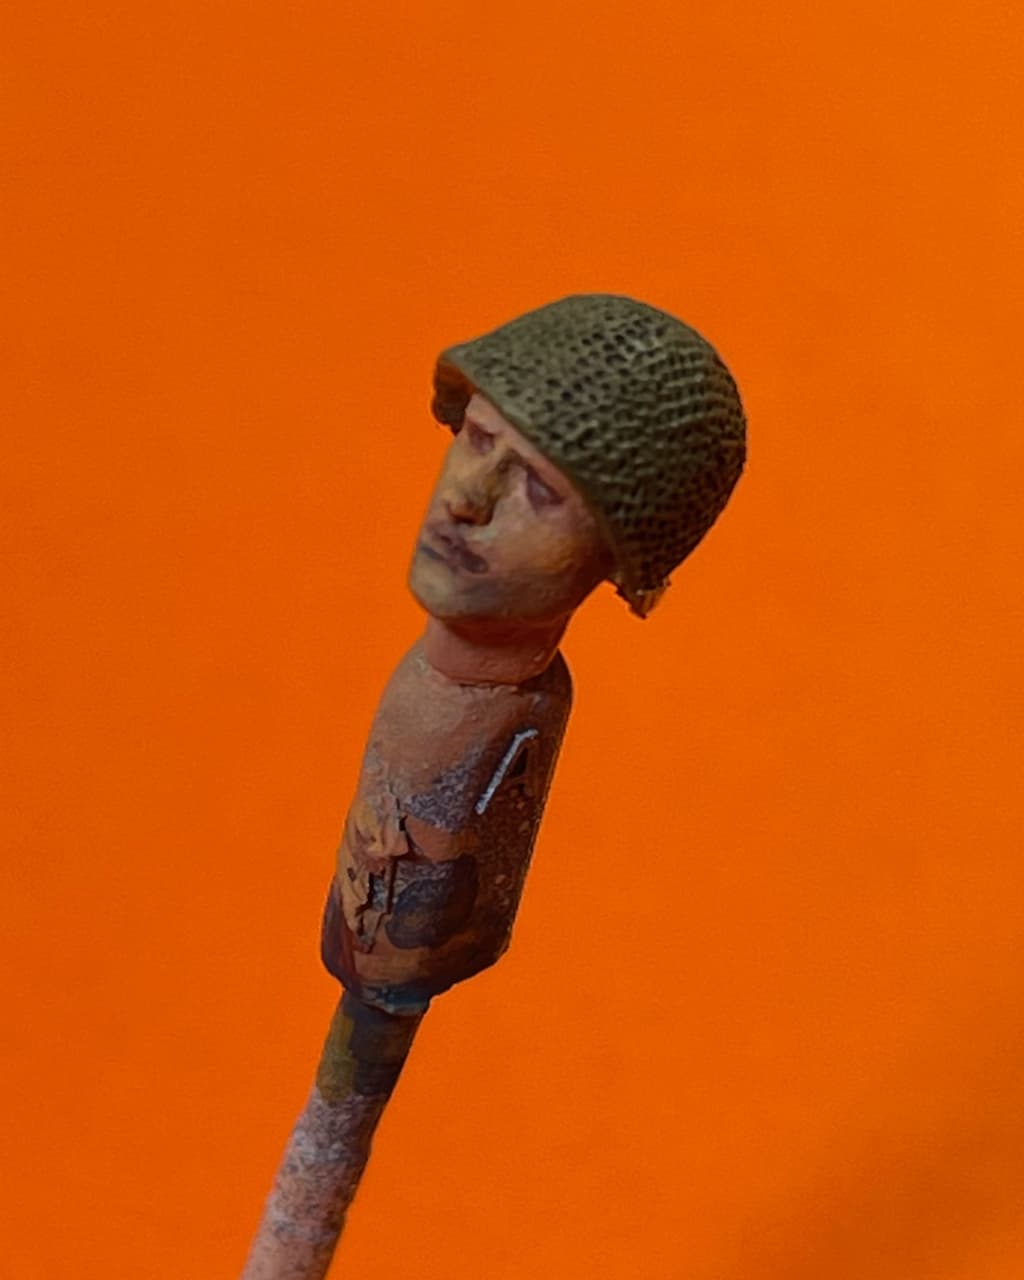
Alpine US GI Figure vs Me… ![]()
![]()
Rounds-1 & 2… ![]() Ding!
Ding!
Went back-and-forth testing colors, something like this:
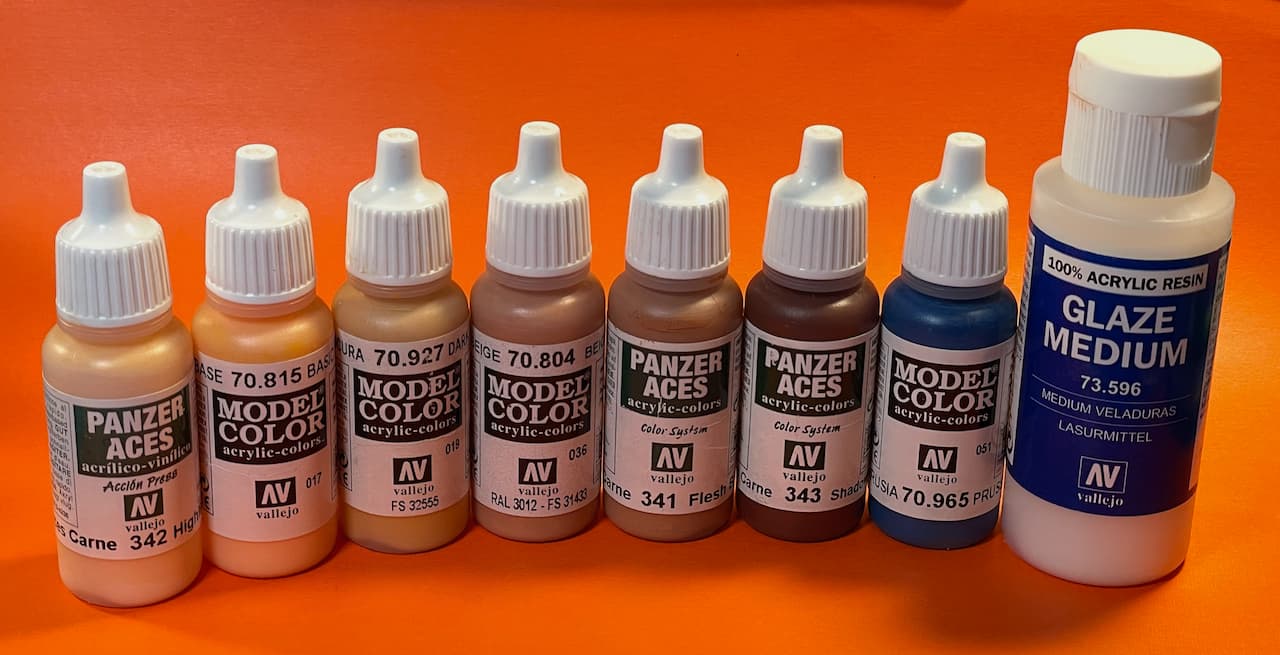
• Vallejo Highlights Flesh (70.342)
• Vallejo Basic Skintone (70.815)
• Vallejo Dark Flesh (70.927)
• Vallejo Beige Red (70.804)
• Vallejo Flesh Base (70.341)
• Vallejo Shadows Flesh (70.343)
• Vallejo Prussian Blue (70.965)
• Vallejo Glaze Medium (73.596)
Not EVEN gonna’ post those horrific shots.![]()
––––––––––––––––––––––––––––––––––––––––––––––––––––––––––––––––––––––––––––––––––
Round-3… ![]() Ding!
Ding!
Not perfect, but much better than my two earlier attempts. After those fails, I stripped most of the paint layers and went at it again. I think it boiled-down to blending the following colors in extremely translucent layers:
• Vallejo Dark Flesh (70.927)
• Vallejo Beige Red (70.804)
• Vallejo Flesh Base (70.341)
• Vallejo Prussian Blue (70.965)
So this is where we’re at… let’s call it a draw. ![]() Ding, ding, ding!
Ding, ding, ding!
Still needs some touch-up, but I’ve gotta’ stop before going a face too far… again. ![]()
![]()
![]()
Happy figuring!
—mike
4 Likes
I think your doing a great job Mike. ![]()
2 Likes
Looking good there, Mike. Still want to see the horror shots though…![]()
Seriously though mate, if you hold it at arms length and it looks ok, then that’s good enough!
Took me years to learn not to overdo it. Less is more, as they say. Still learning that lesson……
G.
Thank’s guys!
Okay, you asked for it. ![]()
Disclaimer: May not be suitable for small children.
.
"The horror… " ![]()
4 Likes
looks good from here
2 Likes
Great looking figures Bert, really like the way you’ve animated them around the exposed engine, ![]()
![]() .
.
G, ![]()
2 Likes
Really like the way you’ve got the figure holding the Thompson, and I especially like the drape of the sling, ![]()
![]() .
.
As an aside, I got to handle an inert Thompson at the IWM (Imperial War Museum) and was amazed at how heavy it was, ![]() .
.
G, ![]()
3 Likes
Thank’s G! Glad you like the sling. The Thompson is actually a nicely detailed part of the superb Alpine resin figure. … And yes, firearms in general are heavier than the way Hollywood tends to portray them… and louder too. ![]()
![]()
—mike
1 Like
I would like to make this figure for this campaign, and the arms and rifle are separate. First, how do I make sure that the arms are in the correct position? Second, should I add the rifle after painting, and if so, how would I add it into his hands?
2 Likes
@ RougePilot.
Assuming your figure is Styrene, here are some tips:
• BluTak is your friend. I generally dry-fit figures with a tiny bit of BluTak, especially with complex poses.
• Or just use small amounts of glue and the limbs can still be moved around before the glue sets.
• I’ve even broken/cut-apart assemblies after the fact and reset them until happy with a pose (see examples: ‘AT Gun Squad’ in this thread).
Fitting/painting rifles and gear:
• Depends on how well the hands and/or body are sculpted to each other.
• I used to paint gear off-figure, however, more often these days I paint after gluing the gear into position.
• If painting rifles before attachment, make certain to take paint tolerance (buildup) into account. You may need to scrape-away paint from inside of the hands in this case.
HTH. ![]()
—mike
2 Likes
Thanks. In the absence of blu tak (or similar product, which applies to me), could PVA glue be used to “dry fit” the pieces?
1 Like
Possibly, if it’s very thick, but getting parts to cooperate could be very frustrating. PVA could get messy as well — now you’ll need to clean off the PVA before final assembly — kinda’ defeats the purpose. But you never know… try it out on one part and see what happens.
—mike
2 Likes