YKW 1973 SA-2 Missile Truck & Sho't Kal Alef Diorama

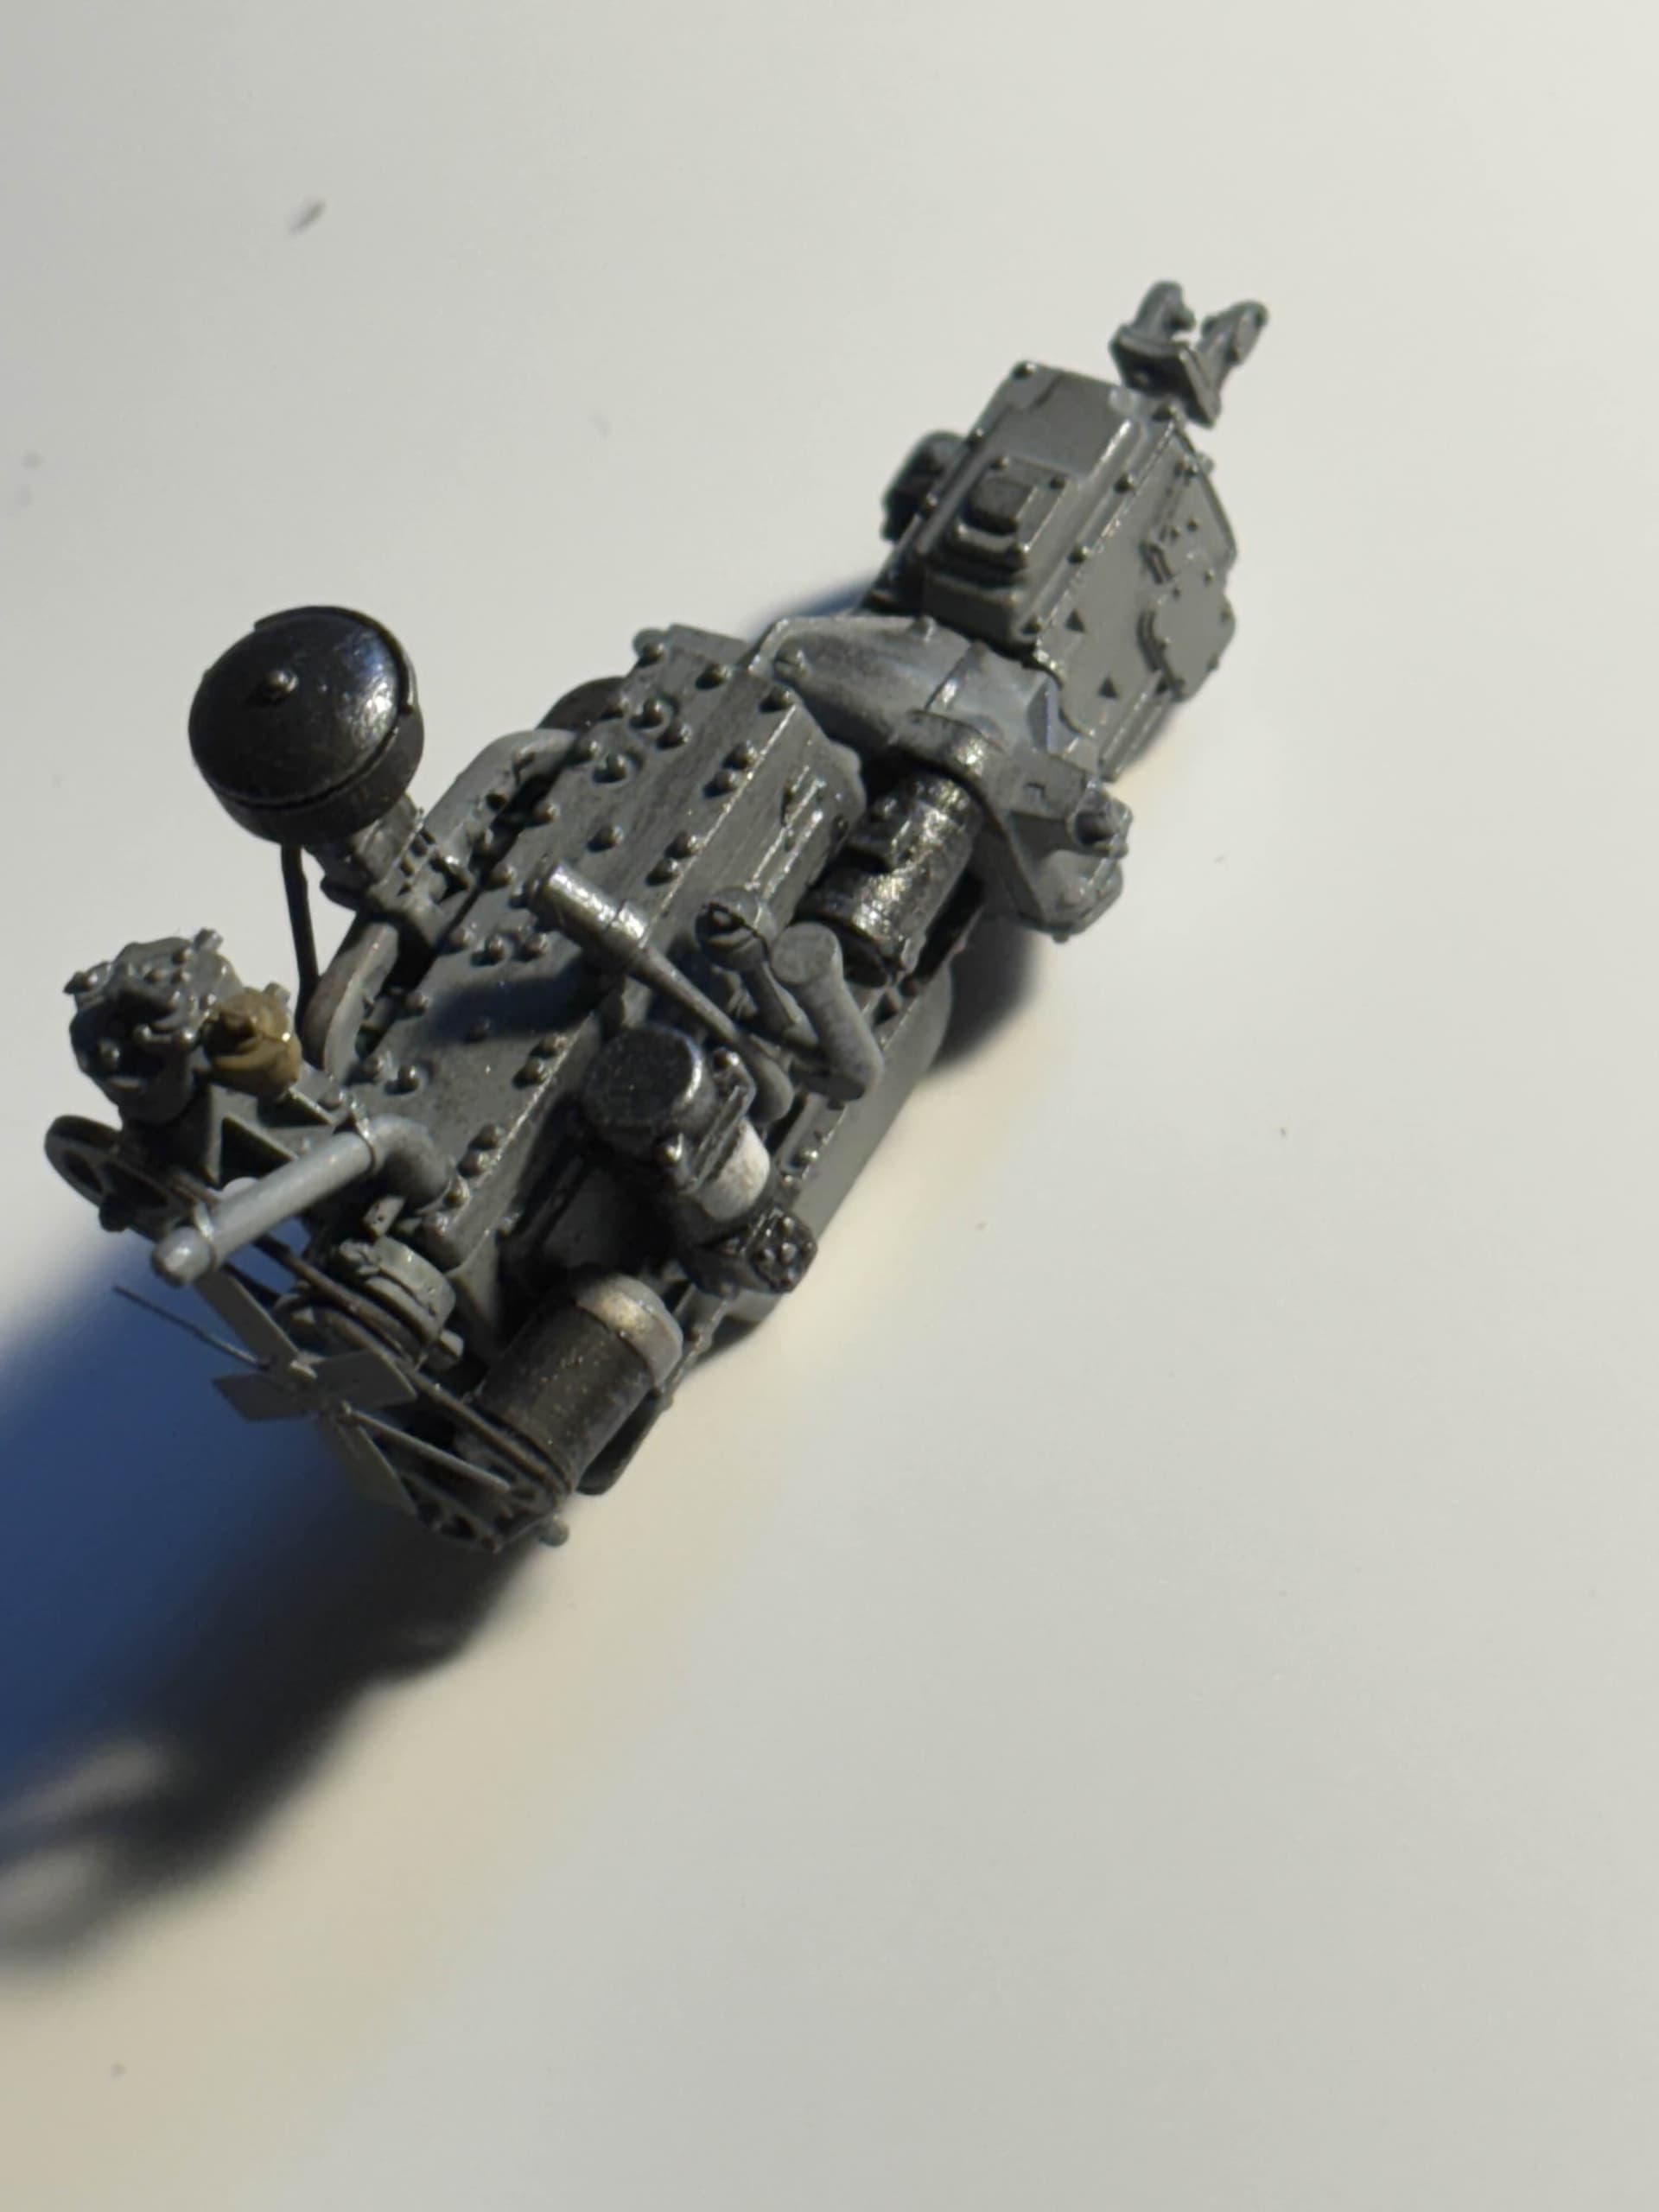
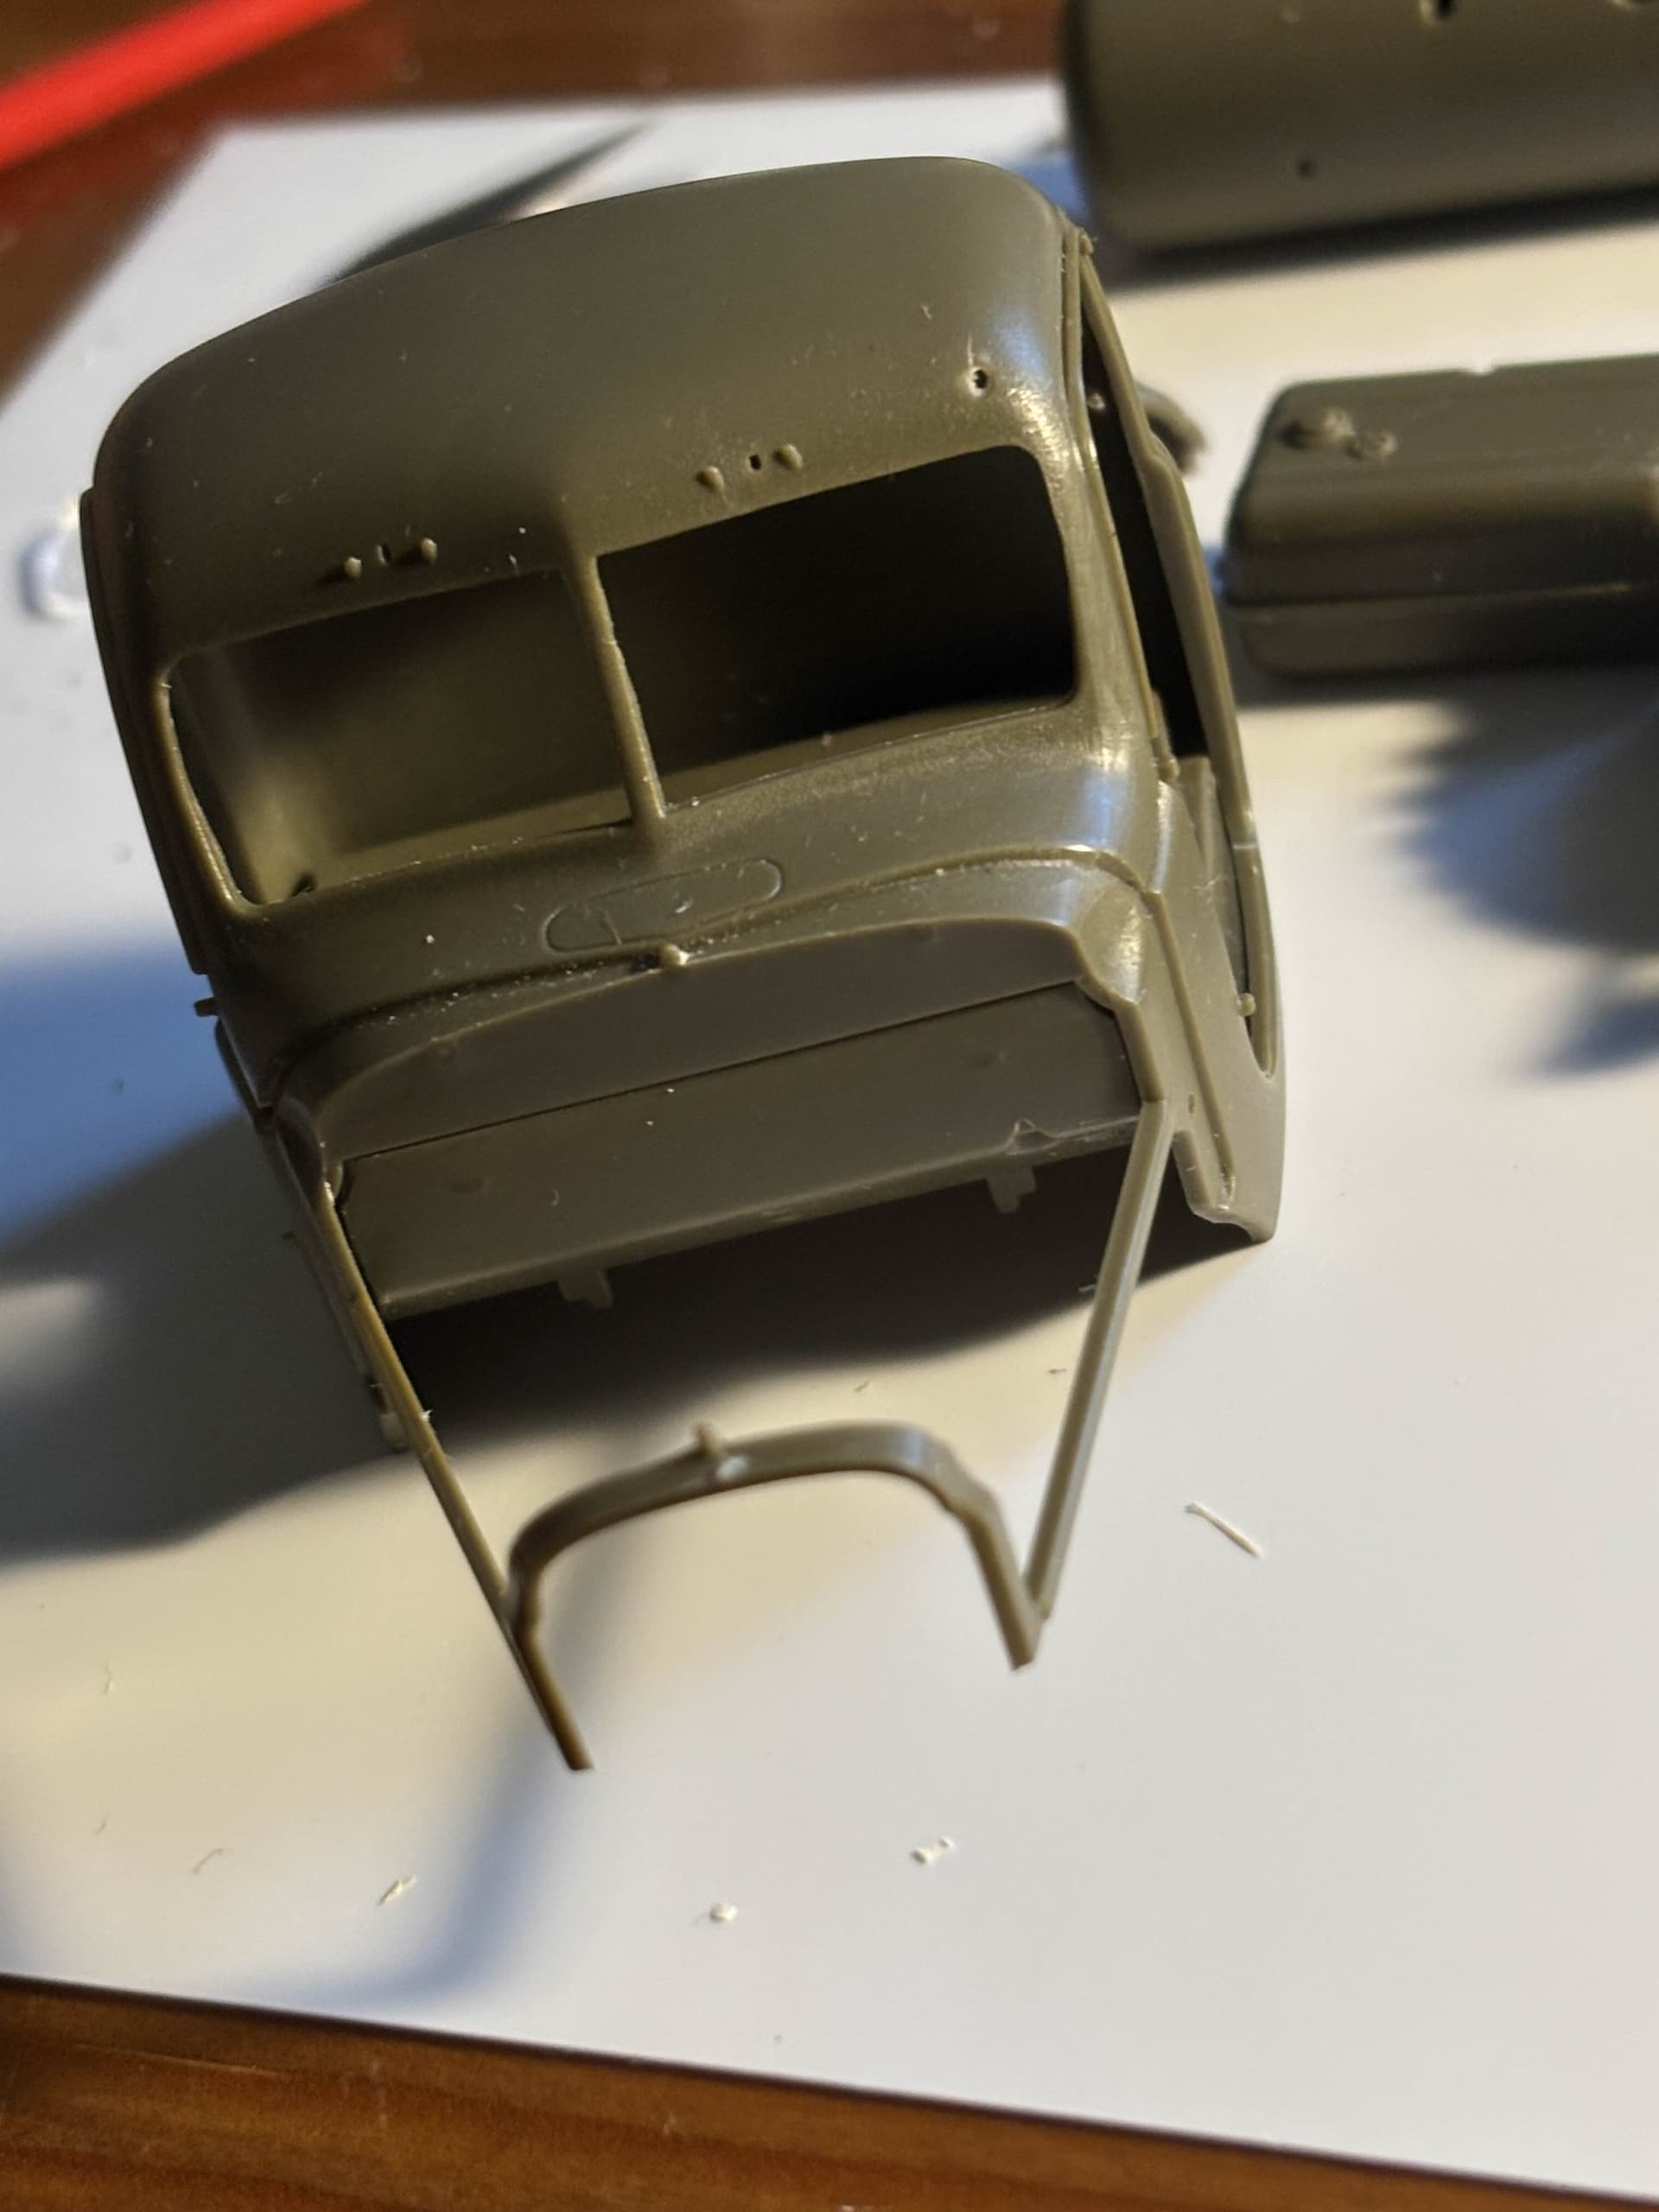
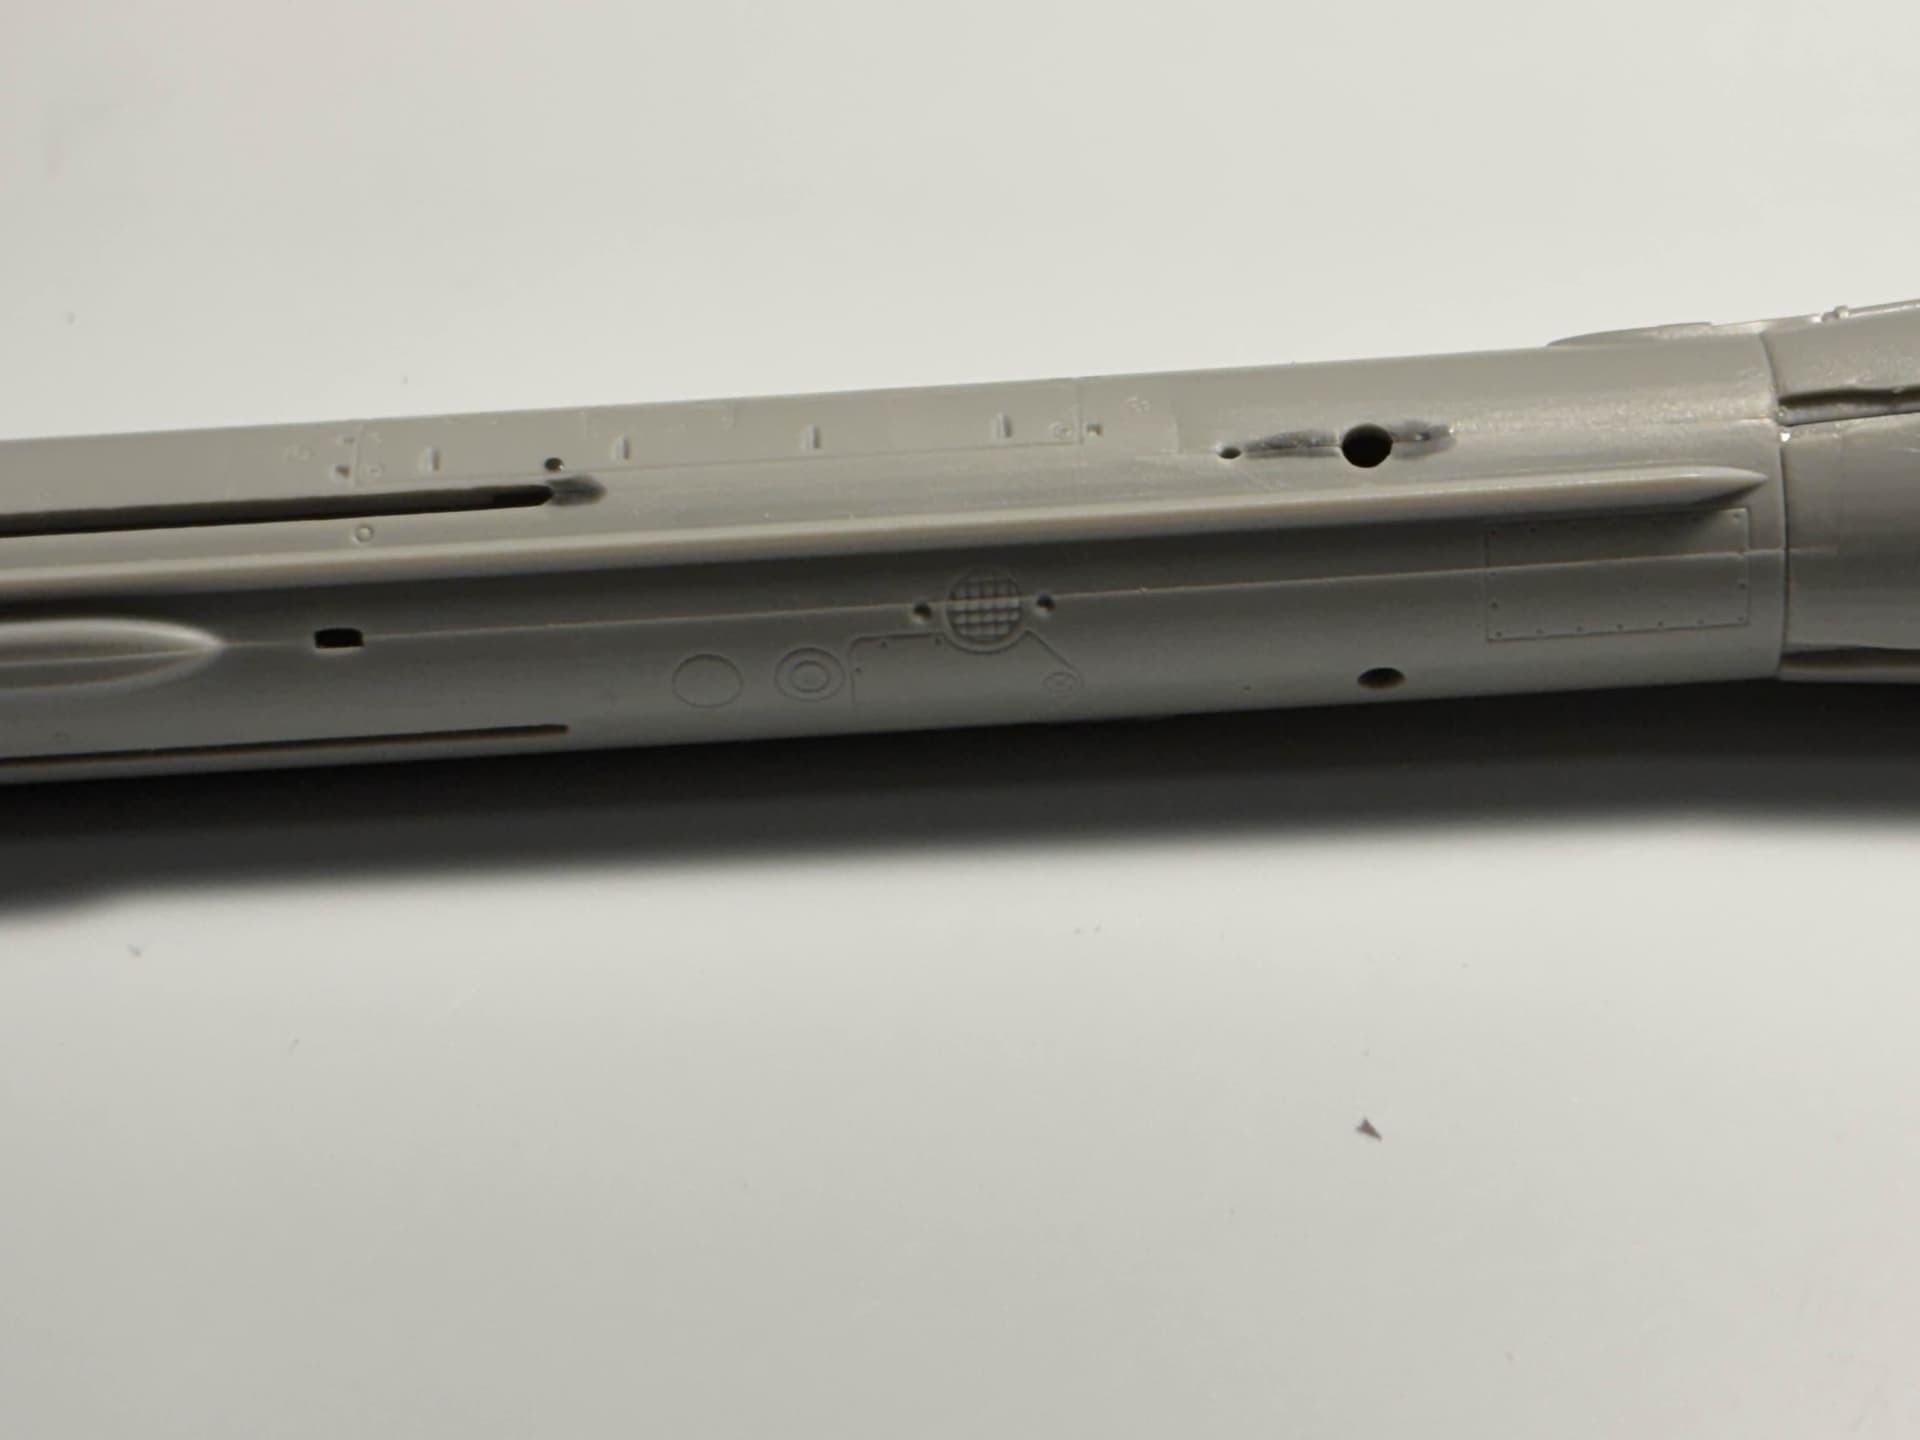
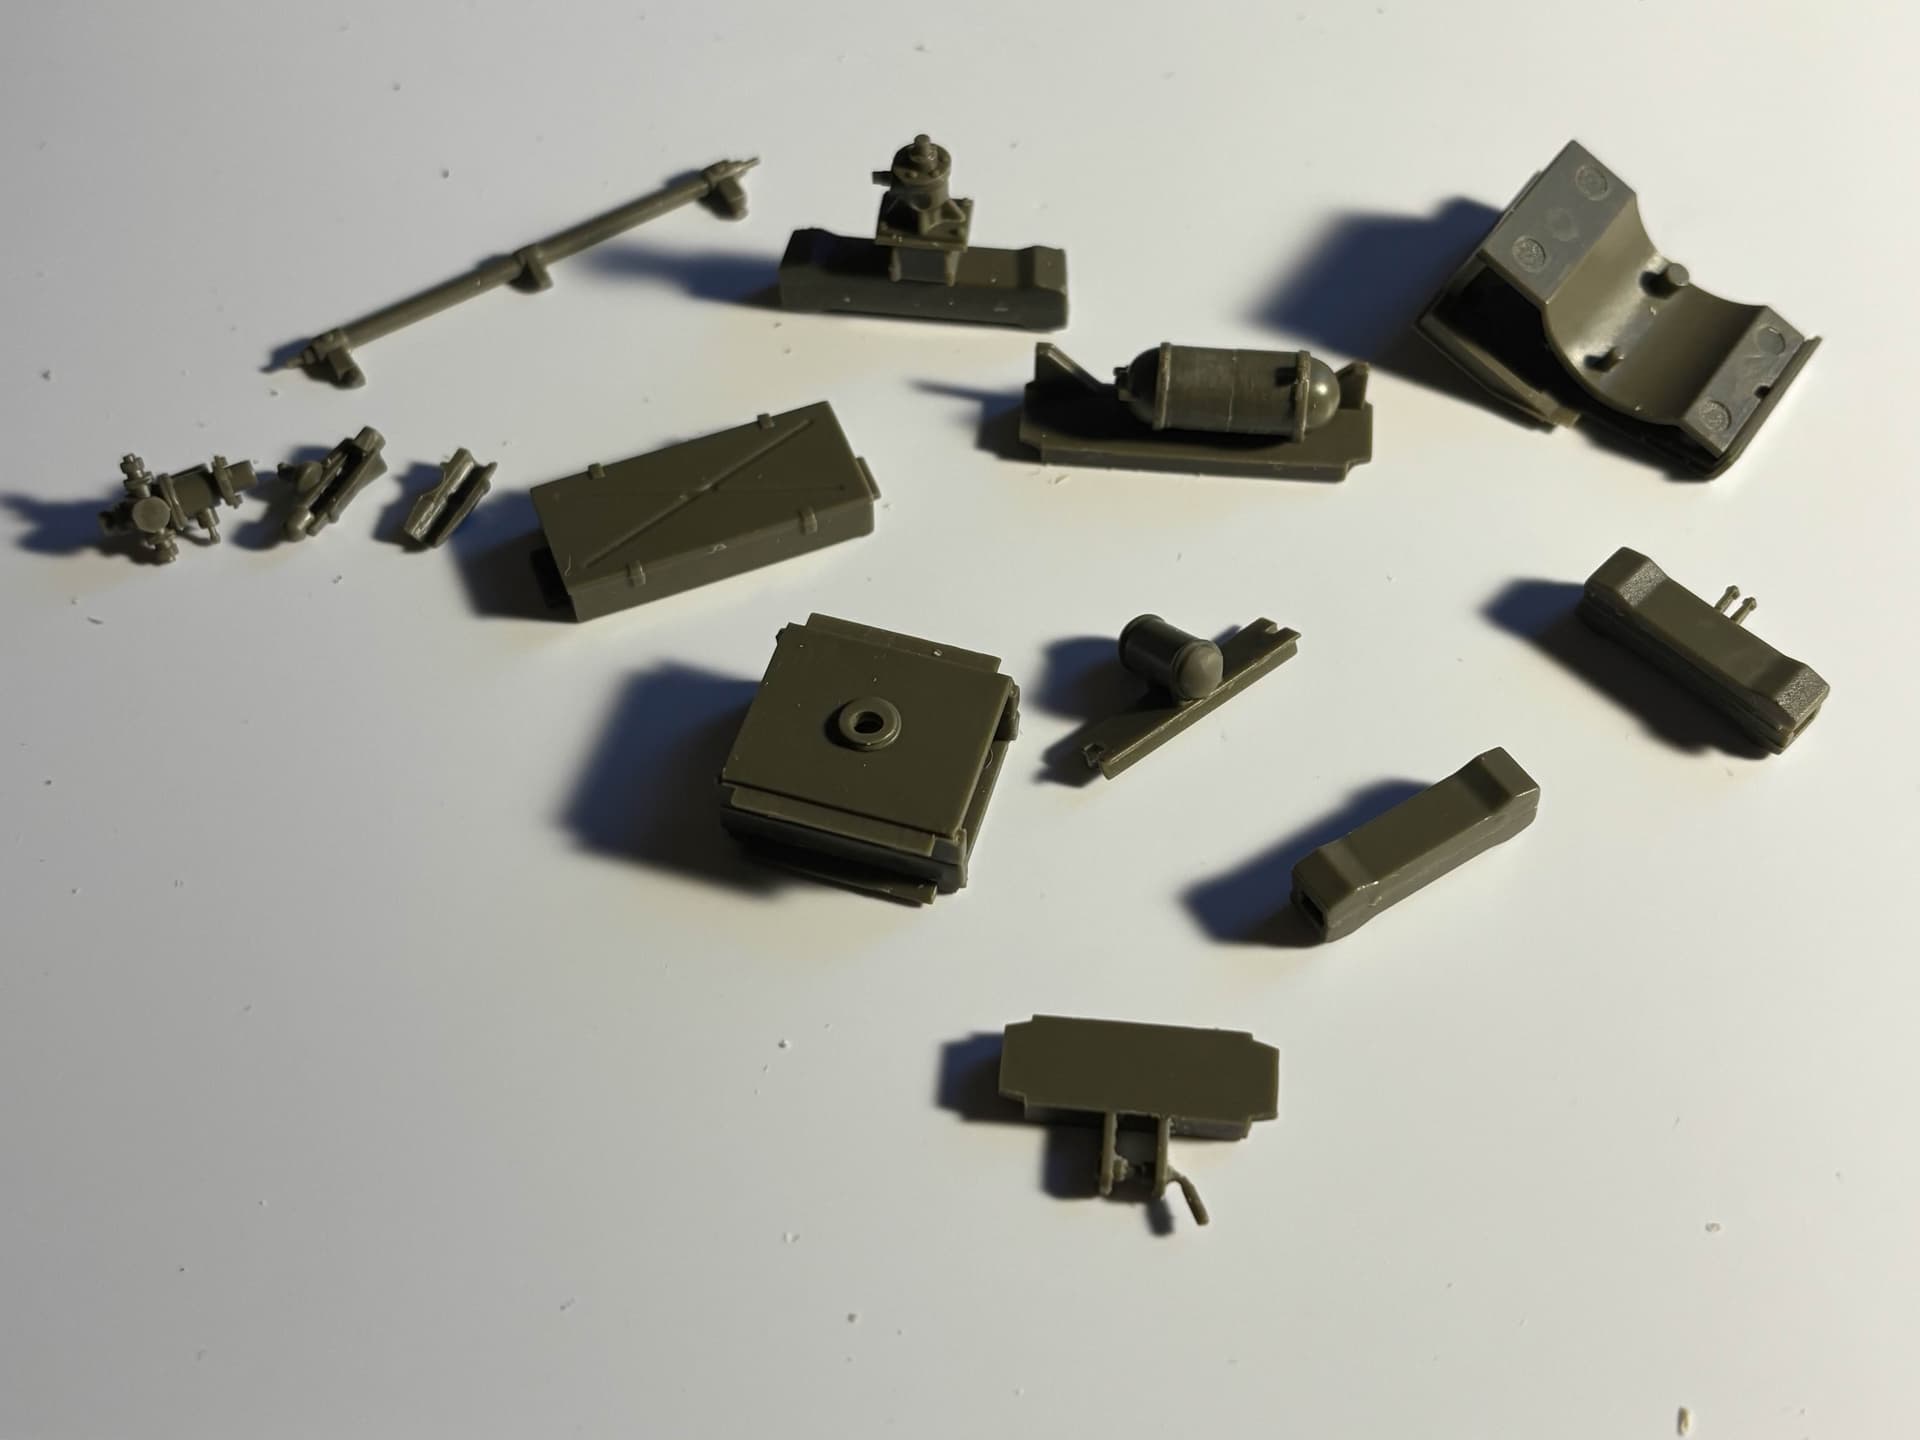
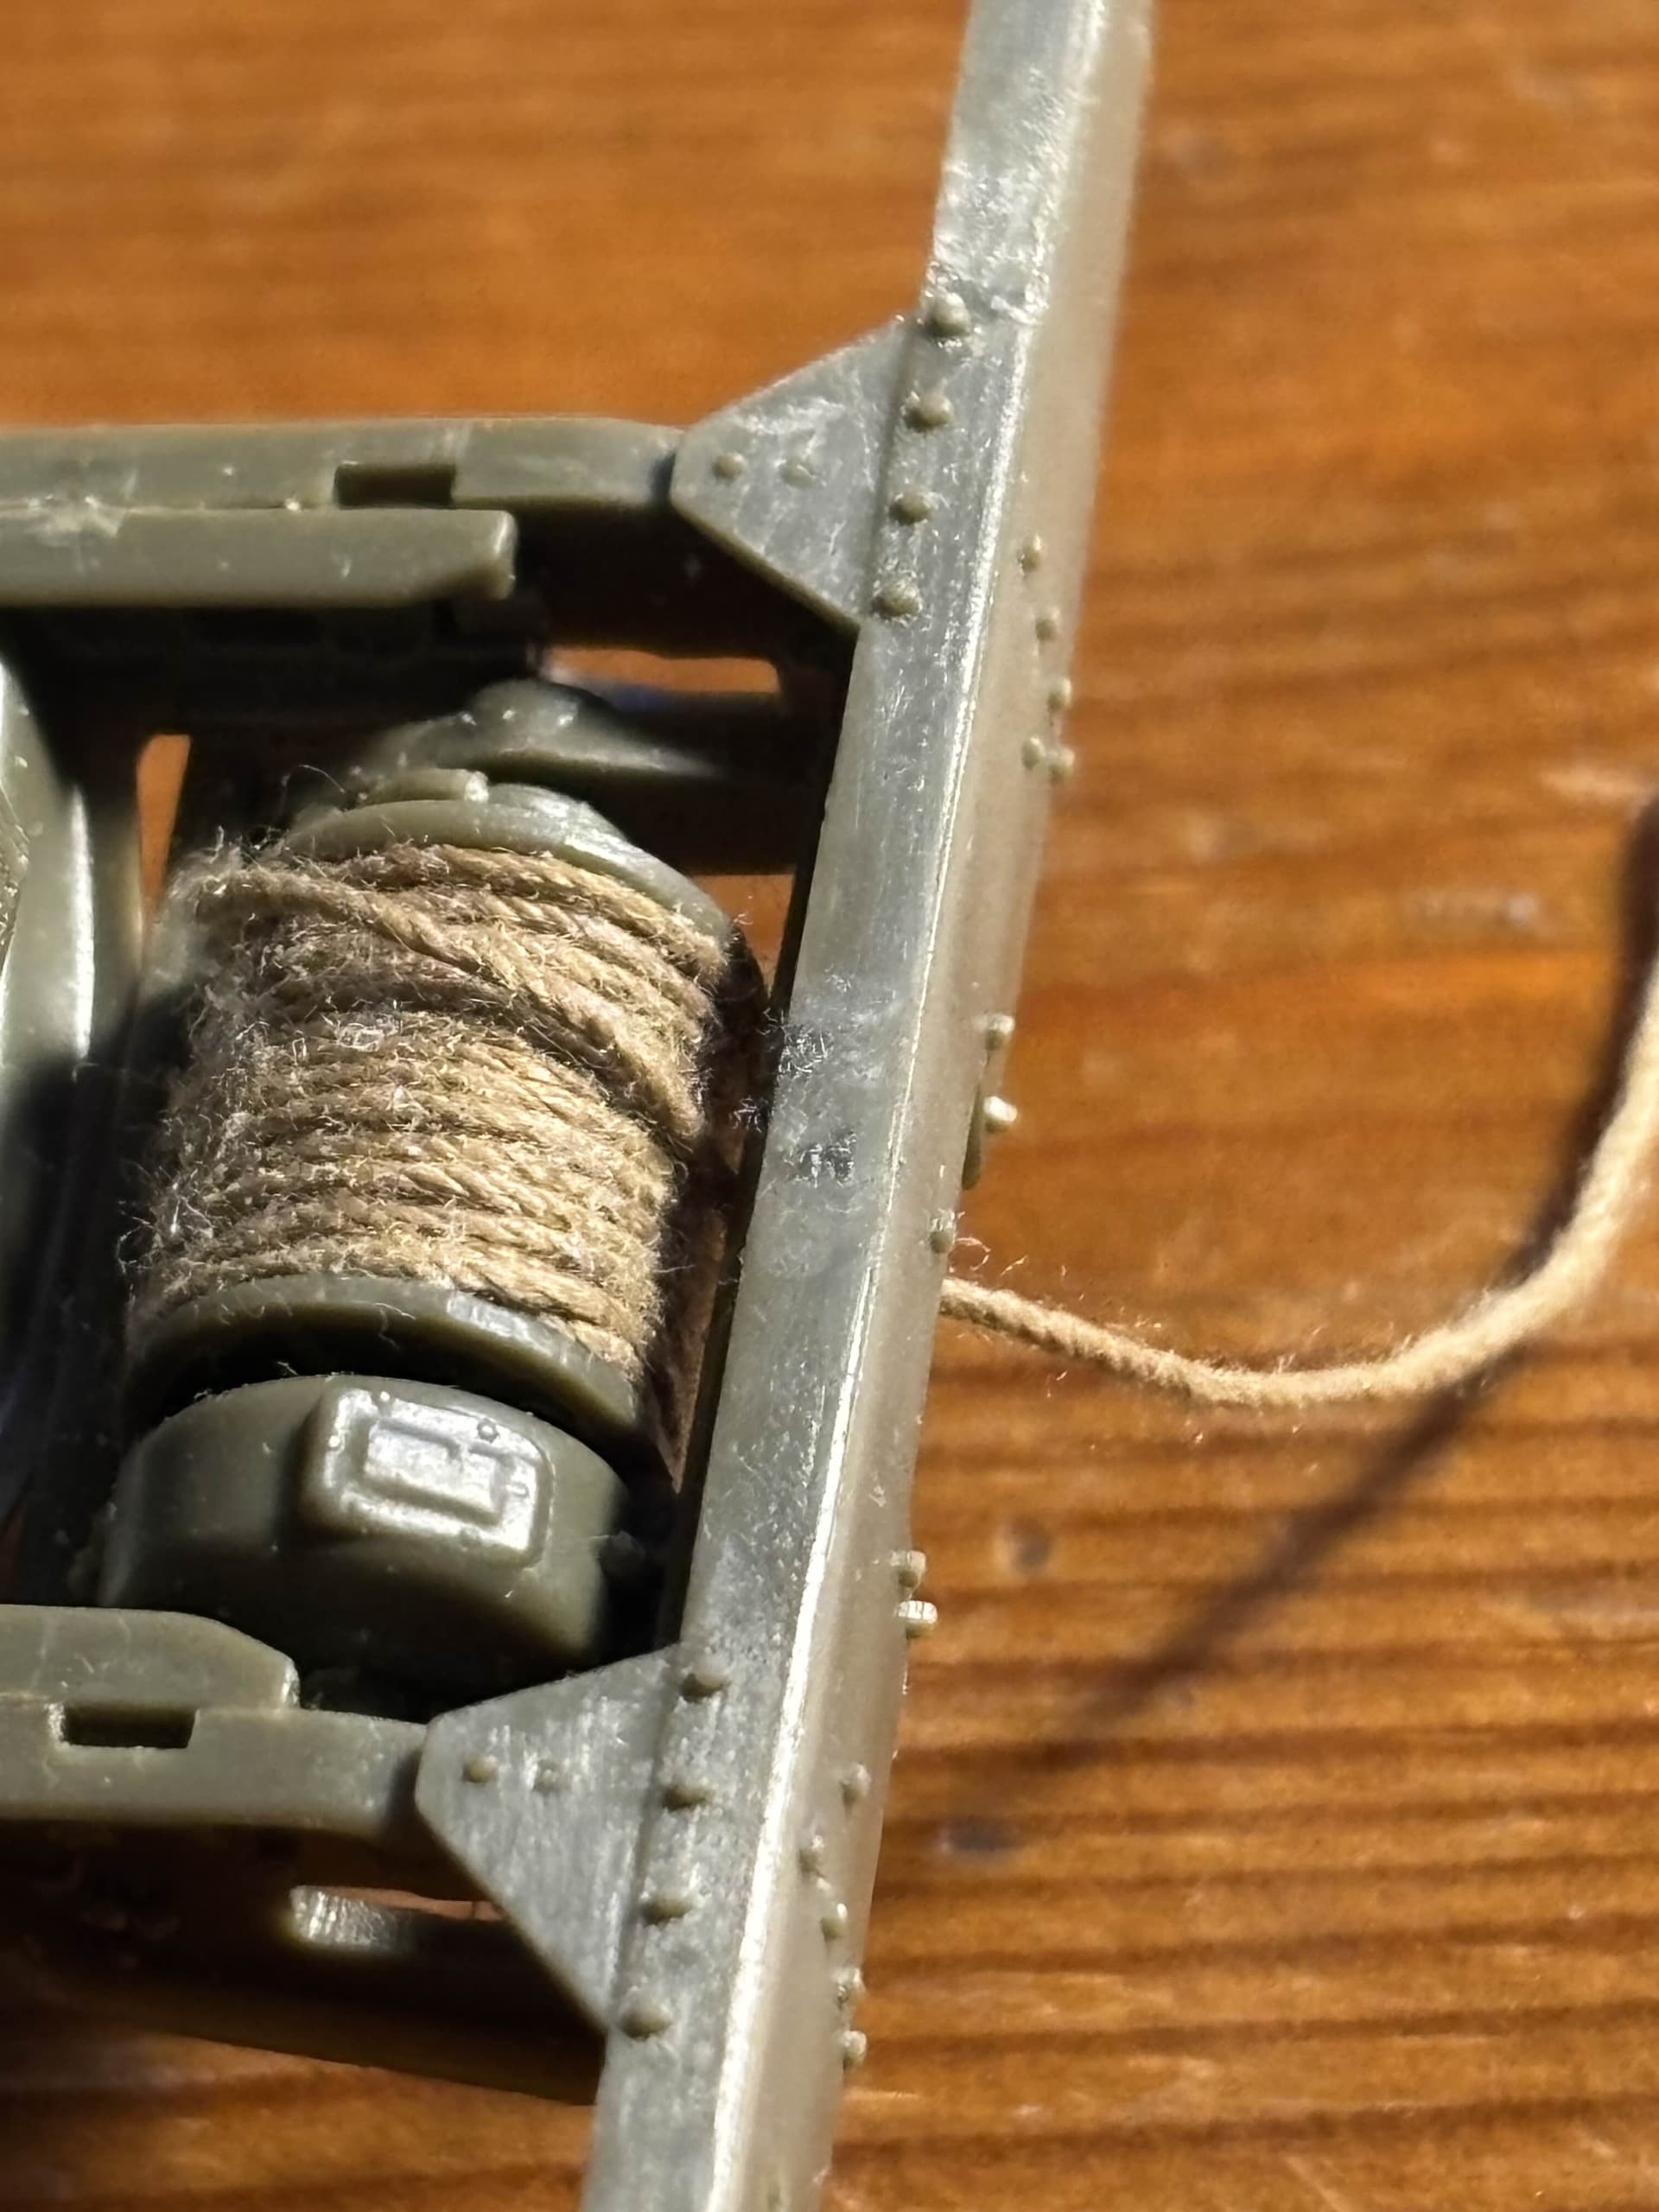
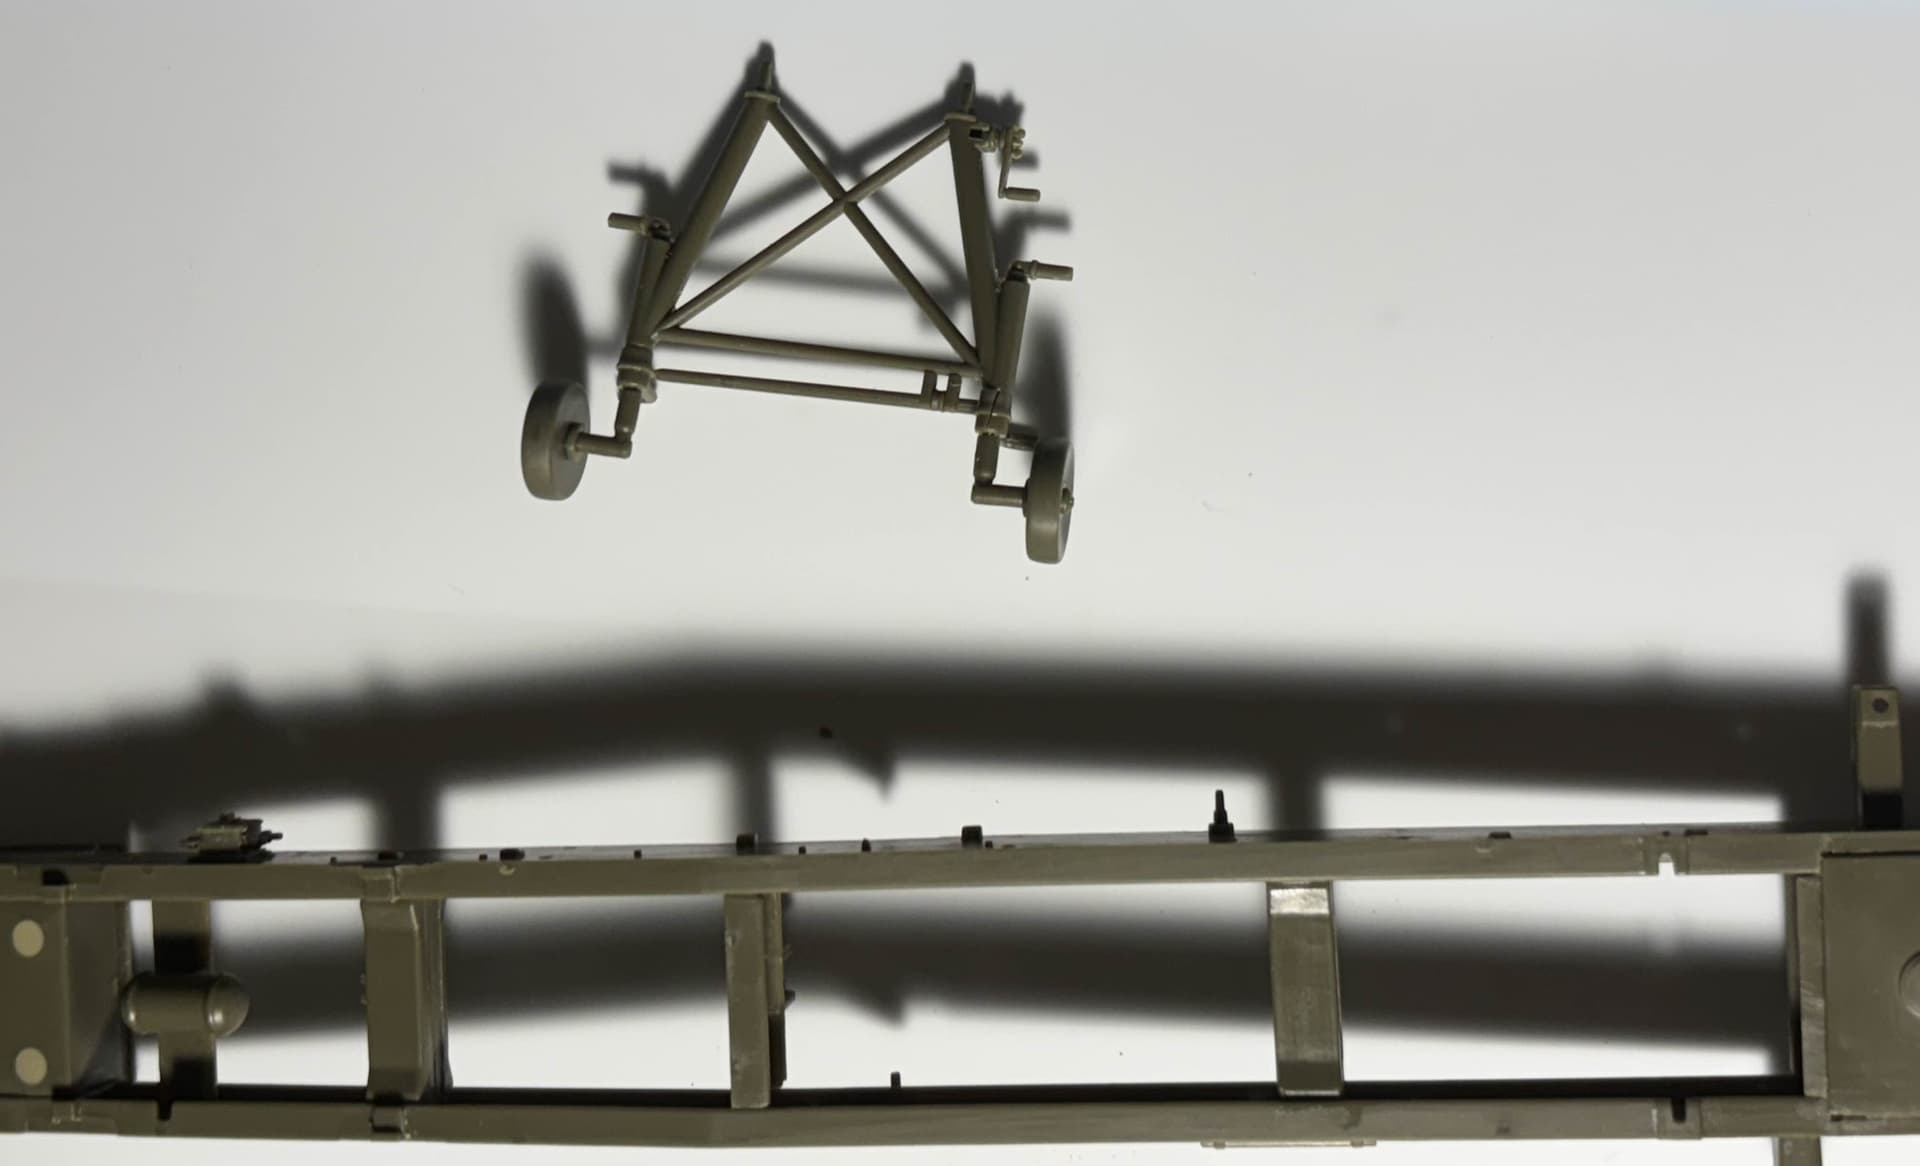
Hi! Quick tip for anyone building this or any Trumpeter Zil-157/151 or BM-13 kits, I didn’t exactly study the instructions like i probably should’ve and put on a part incorrectly. One of the crossbeam (circled below) requires to be put on in the correct side.

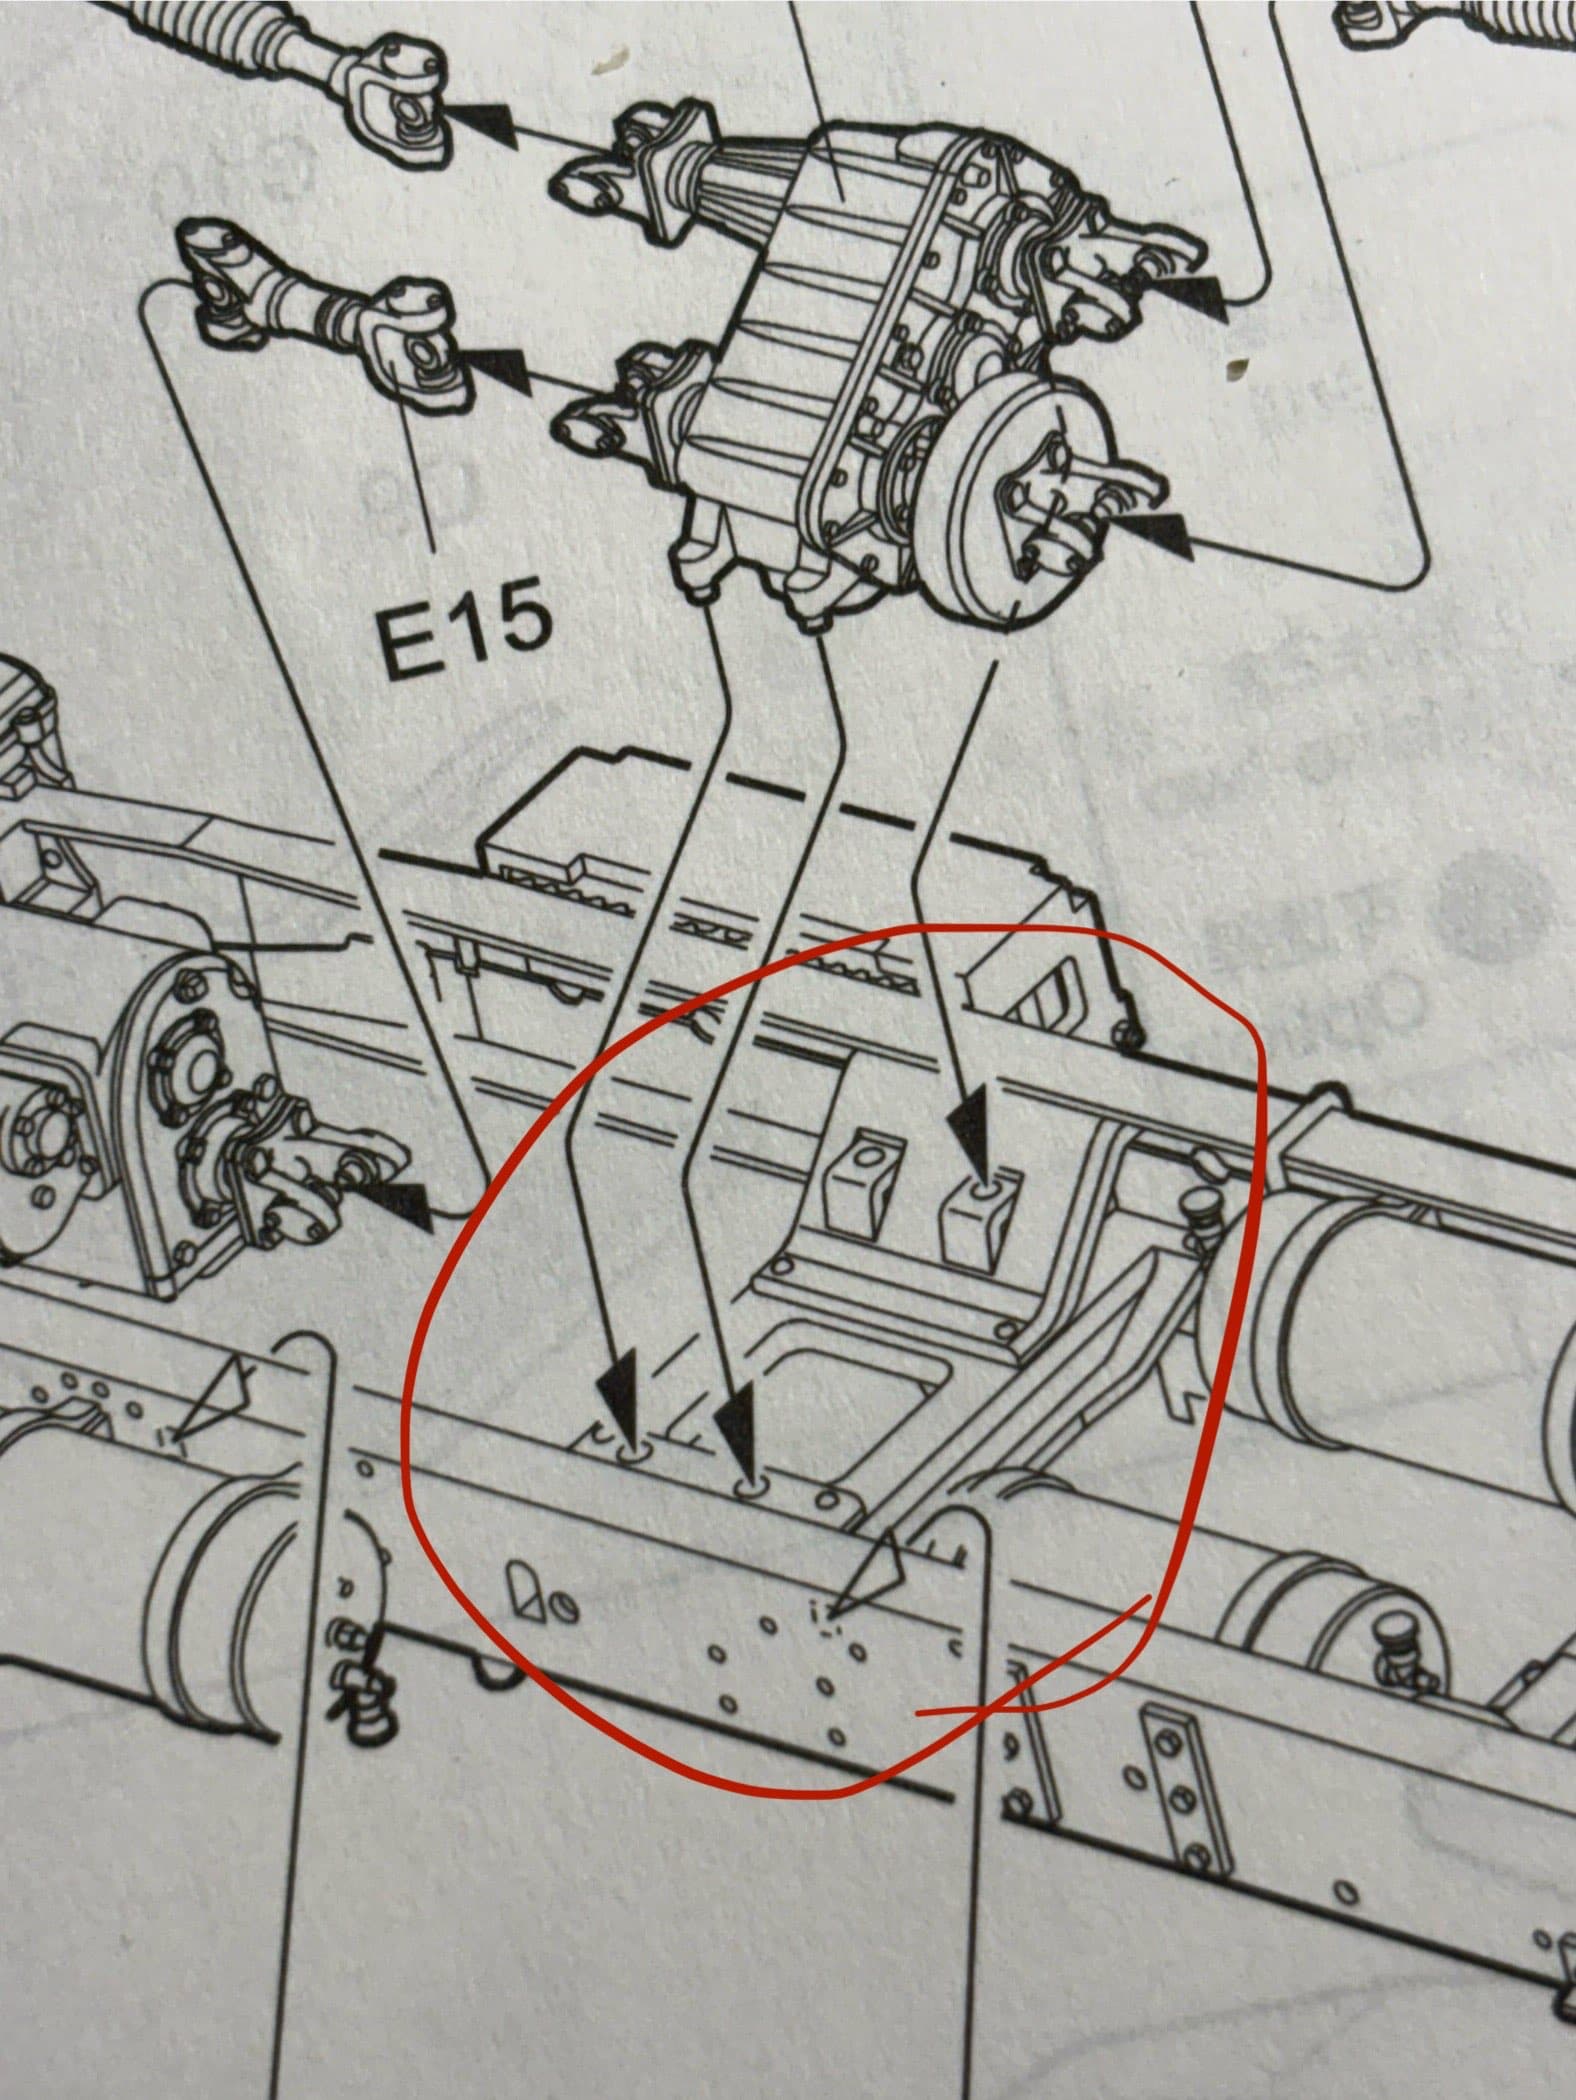
(Note the position of the square bits poking out of the angled plate)

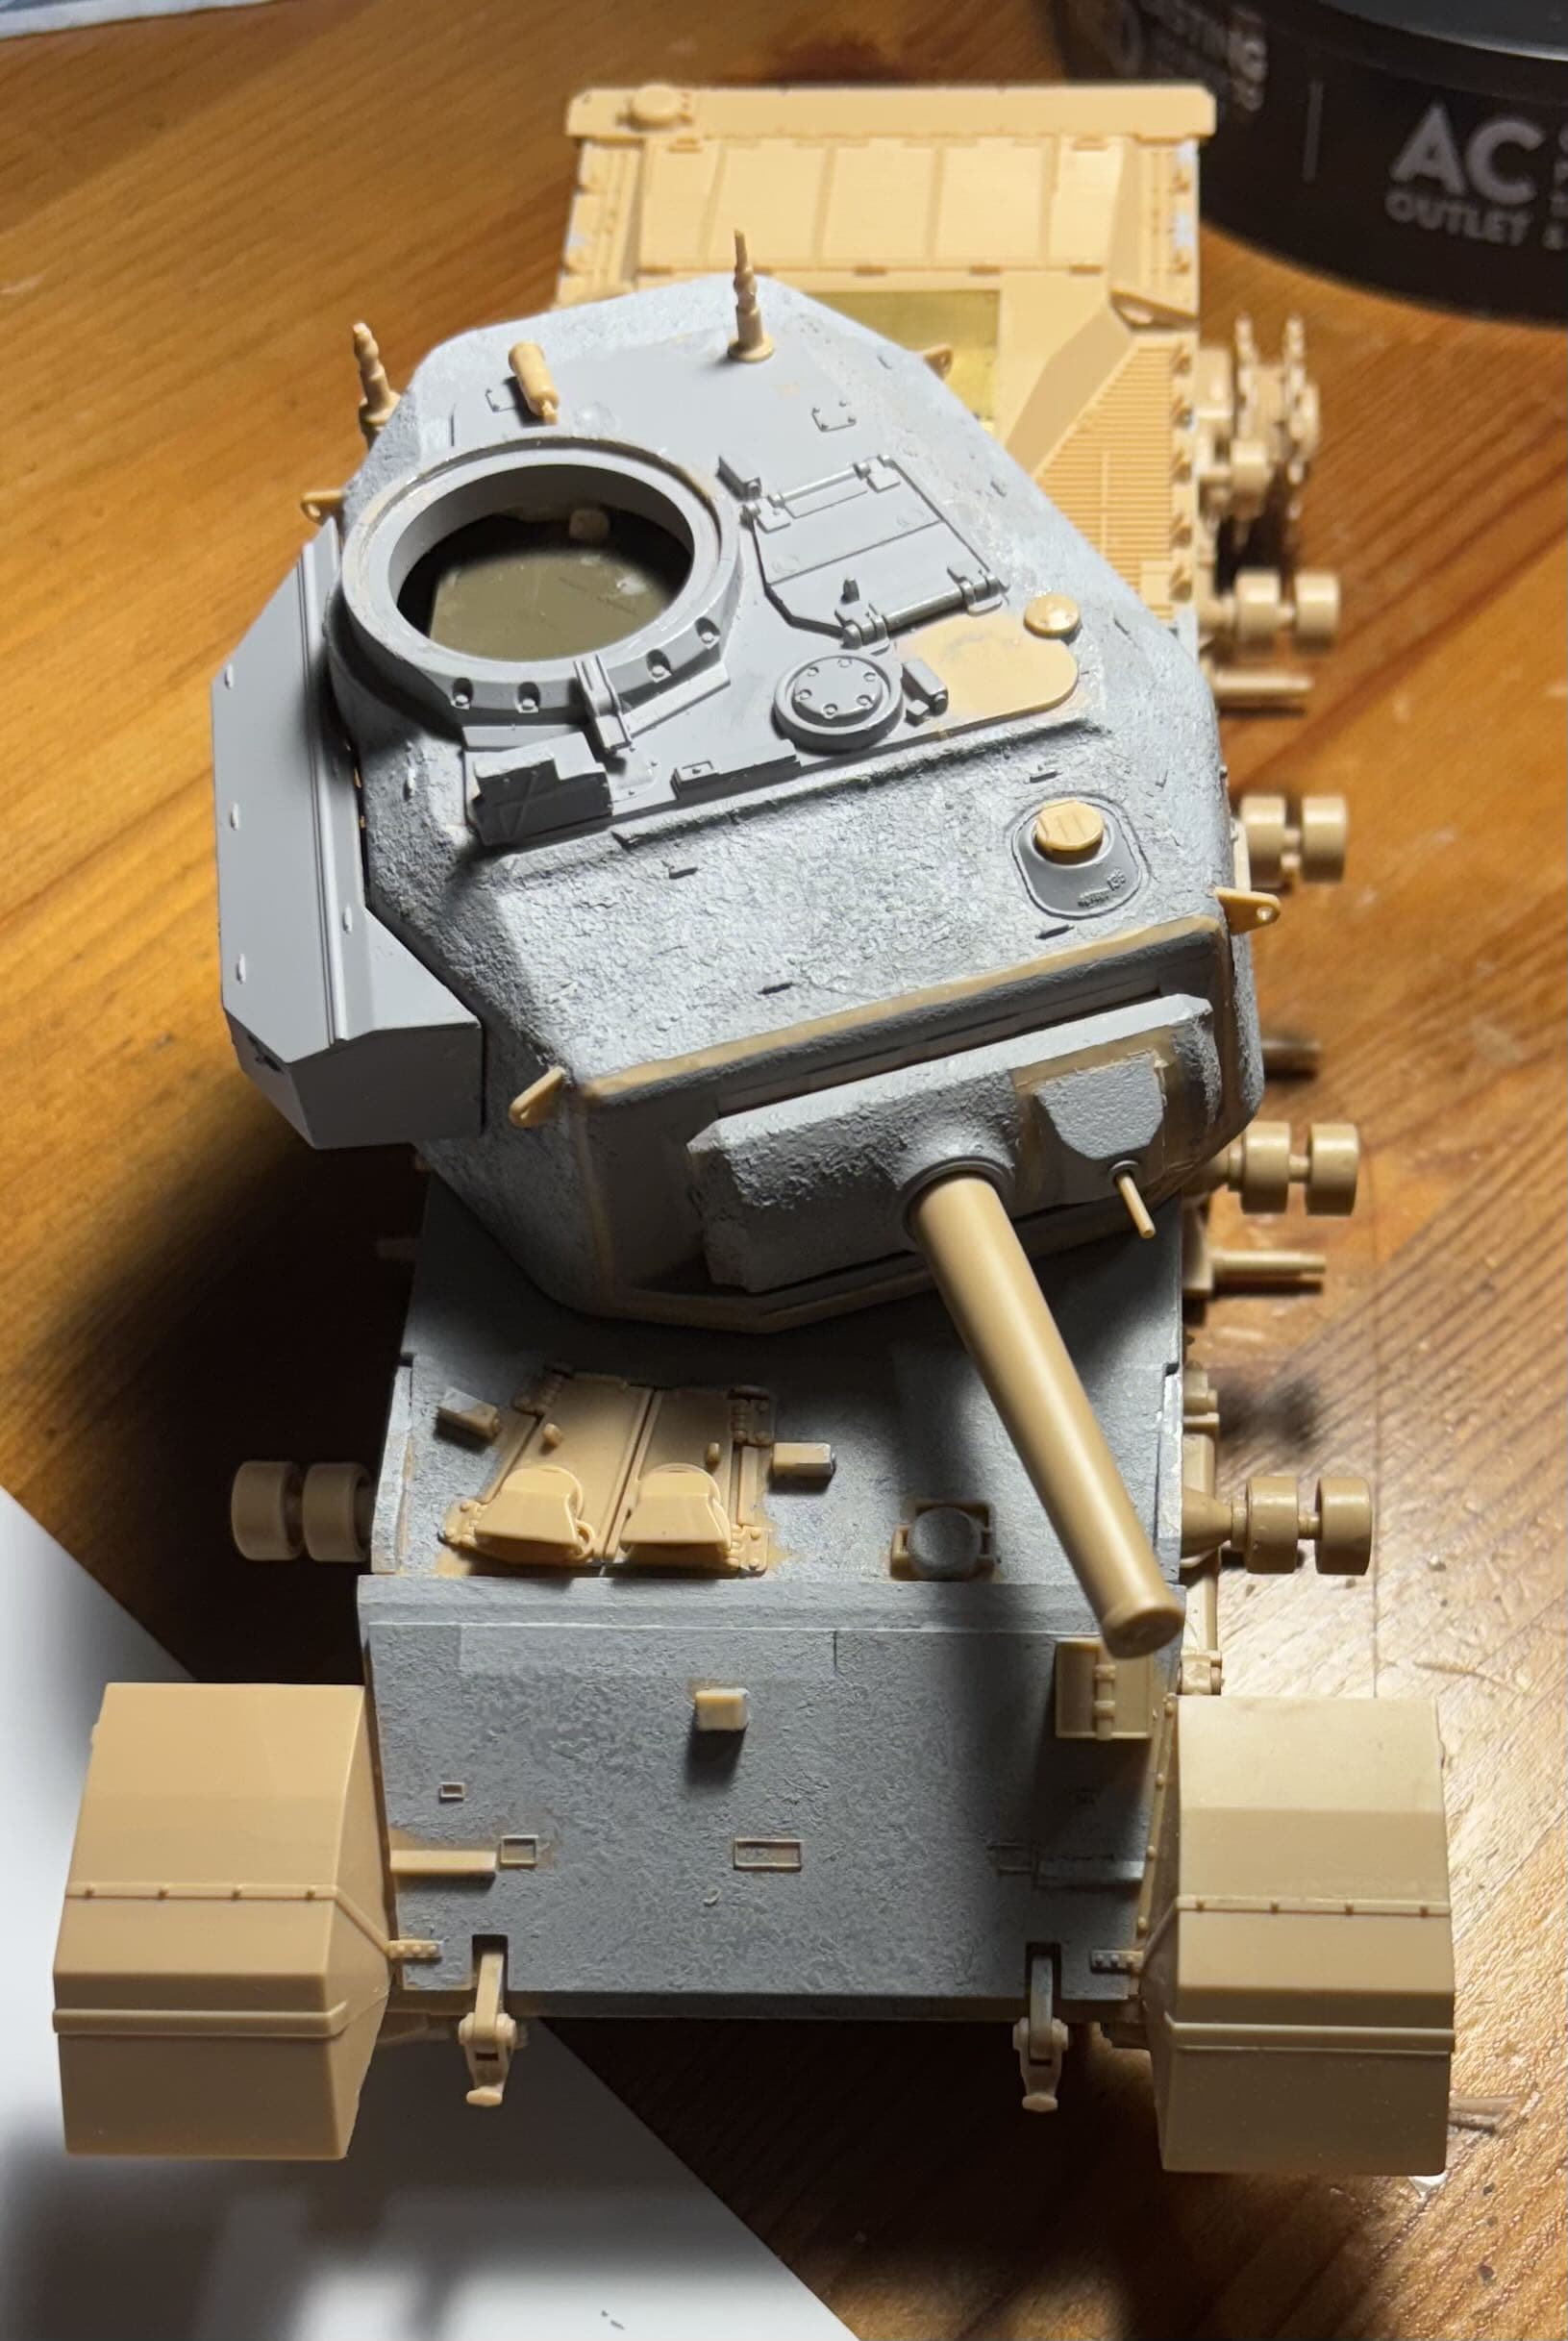
Here’s the way I applied this crossbeam:

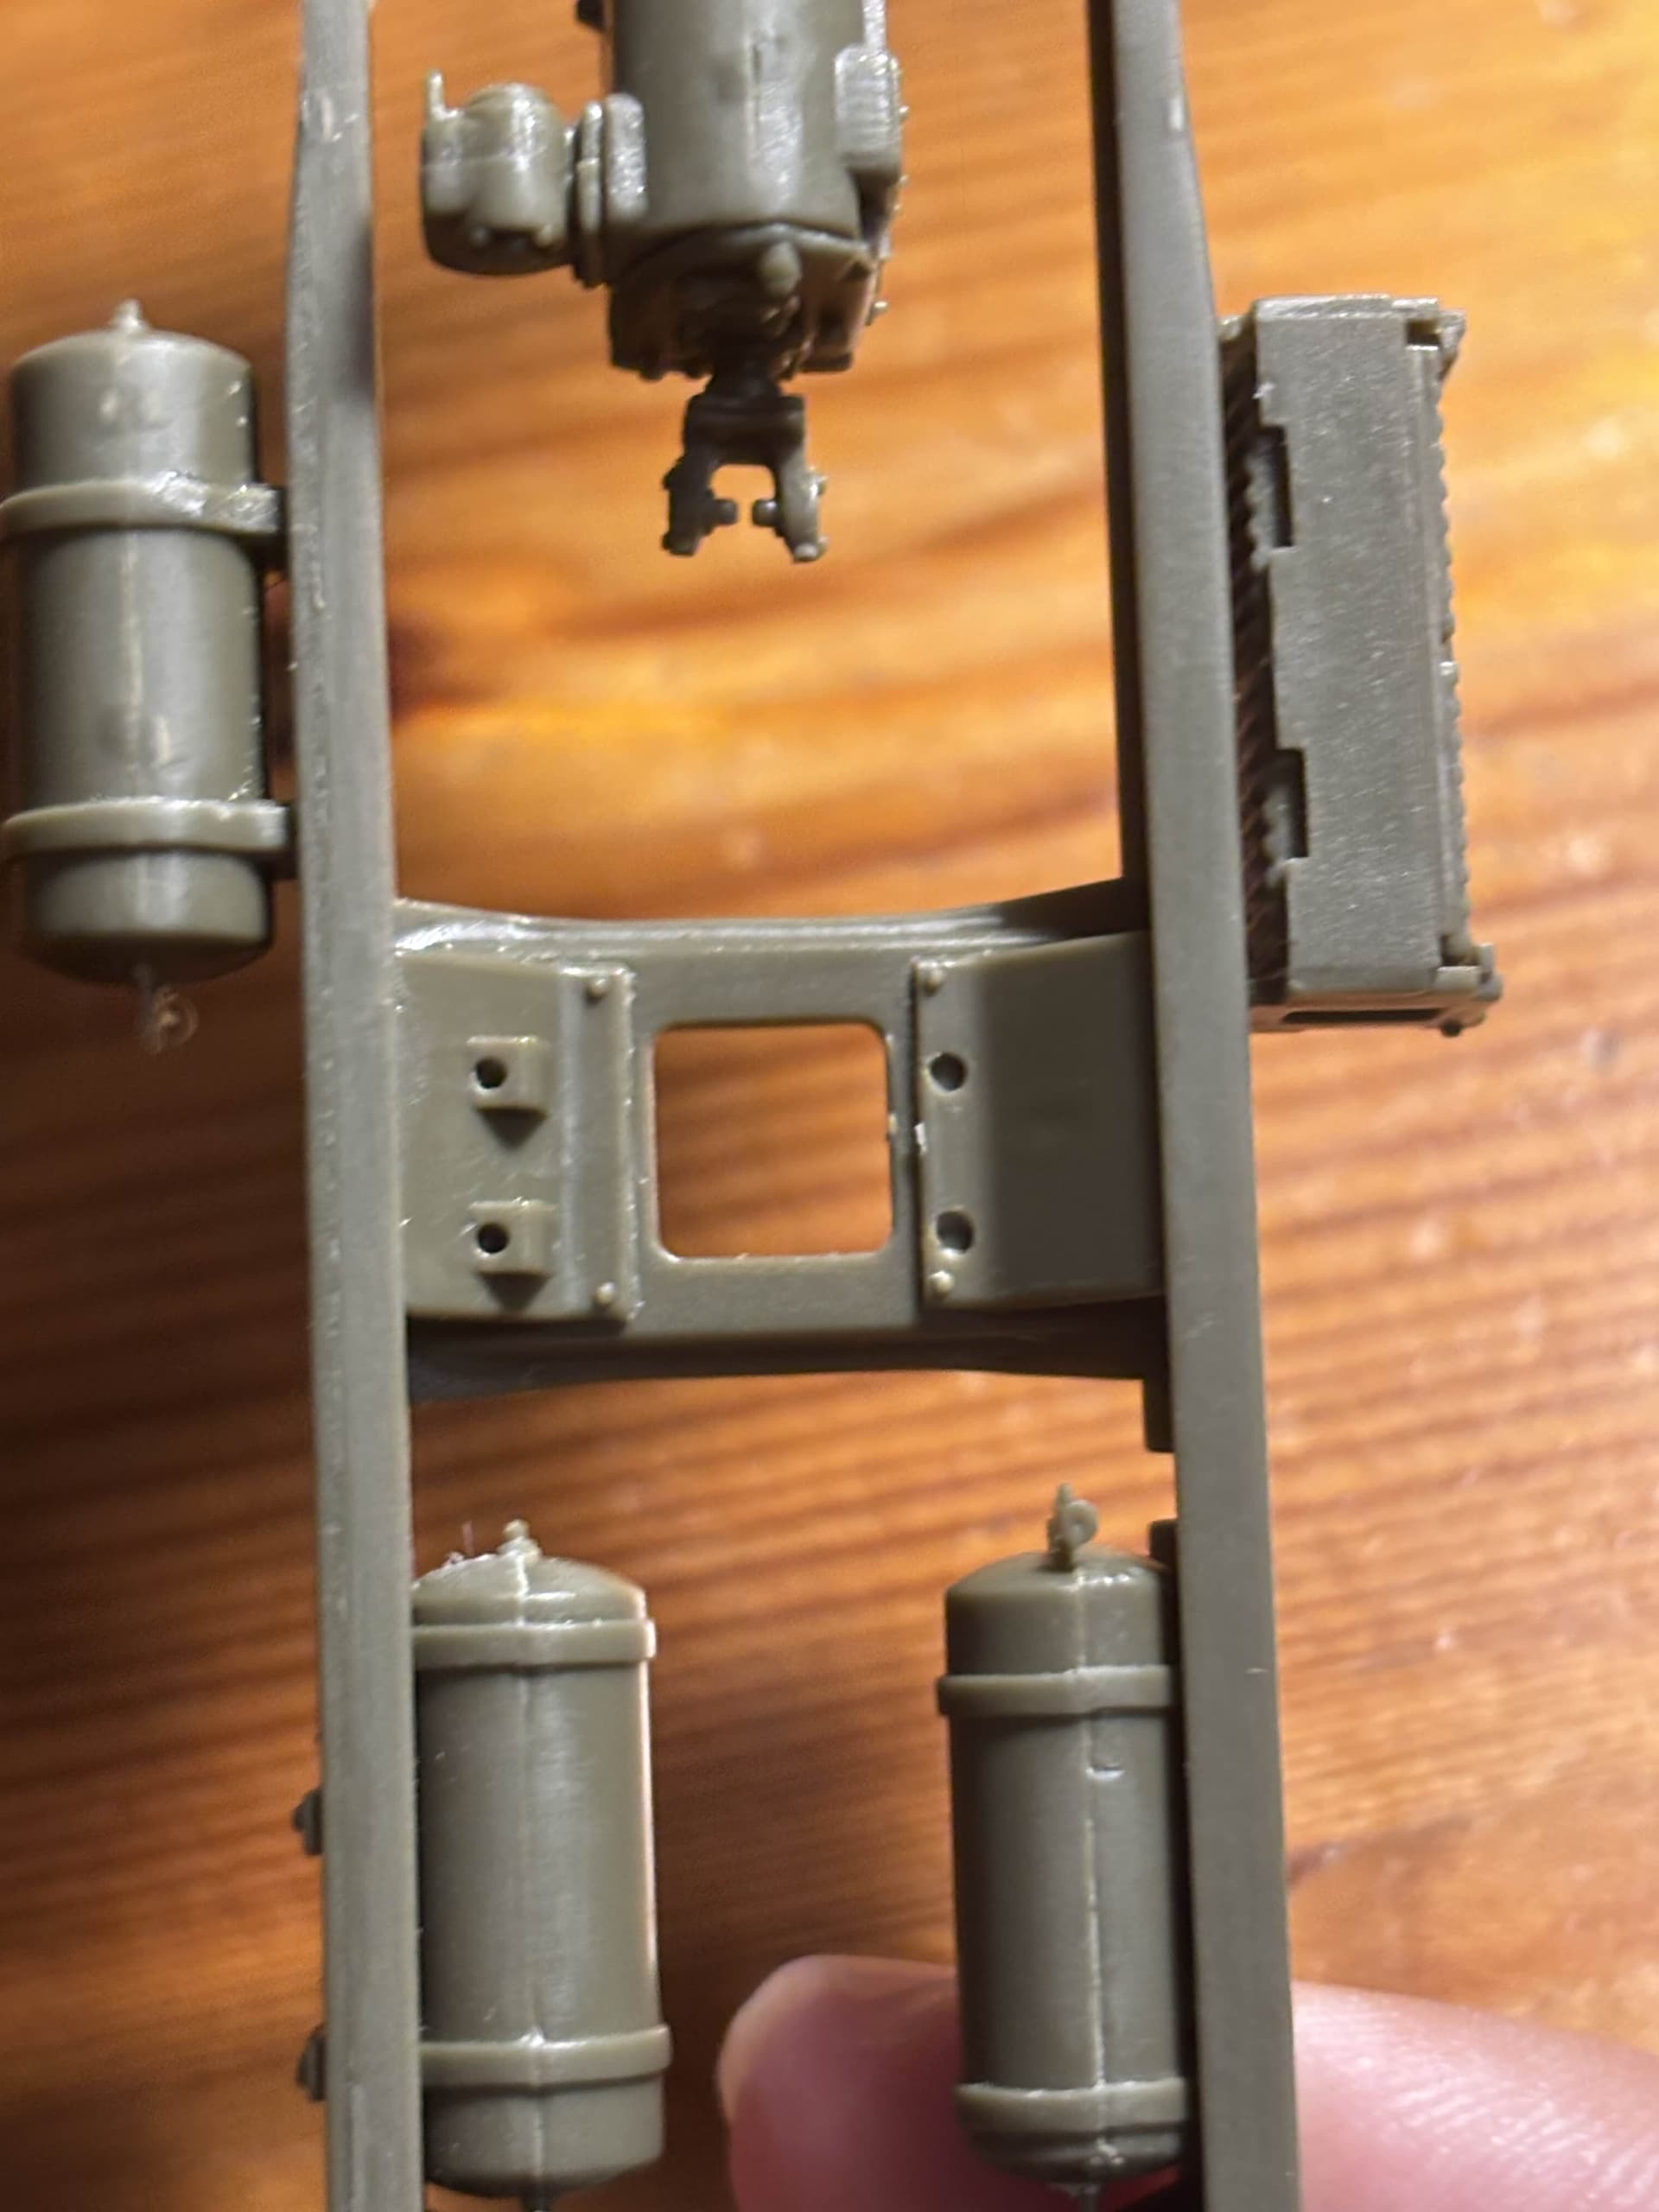
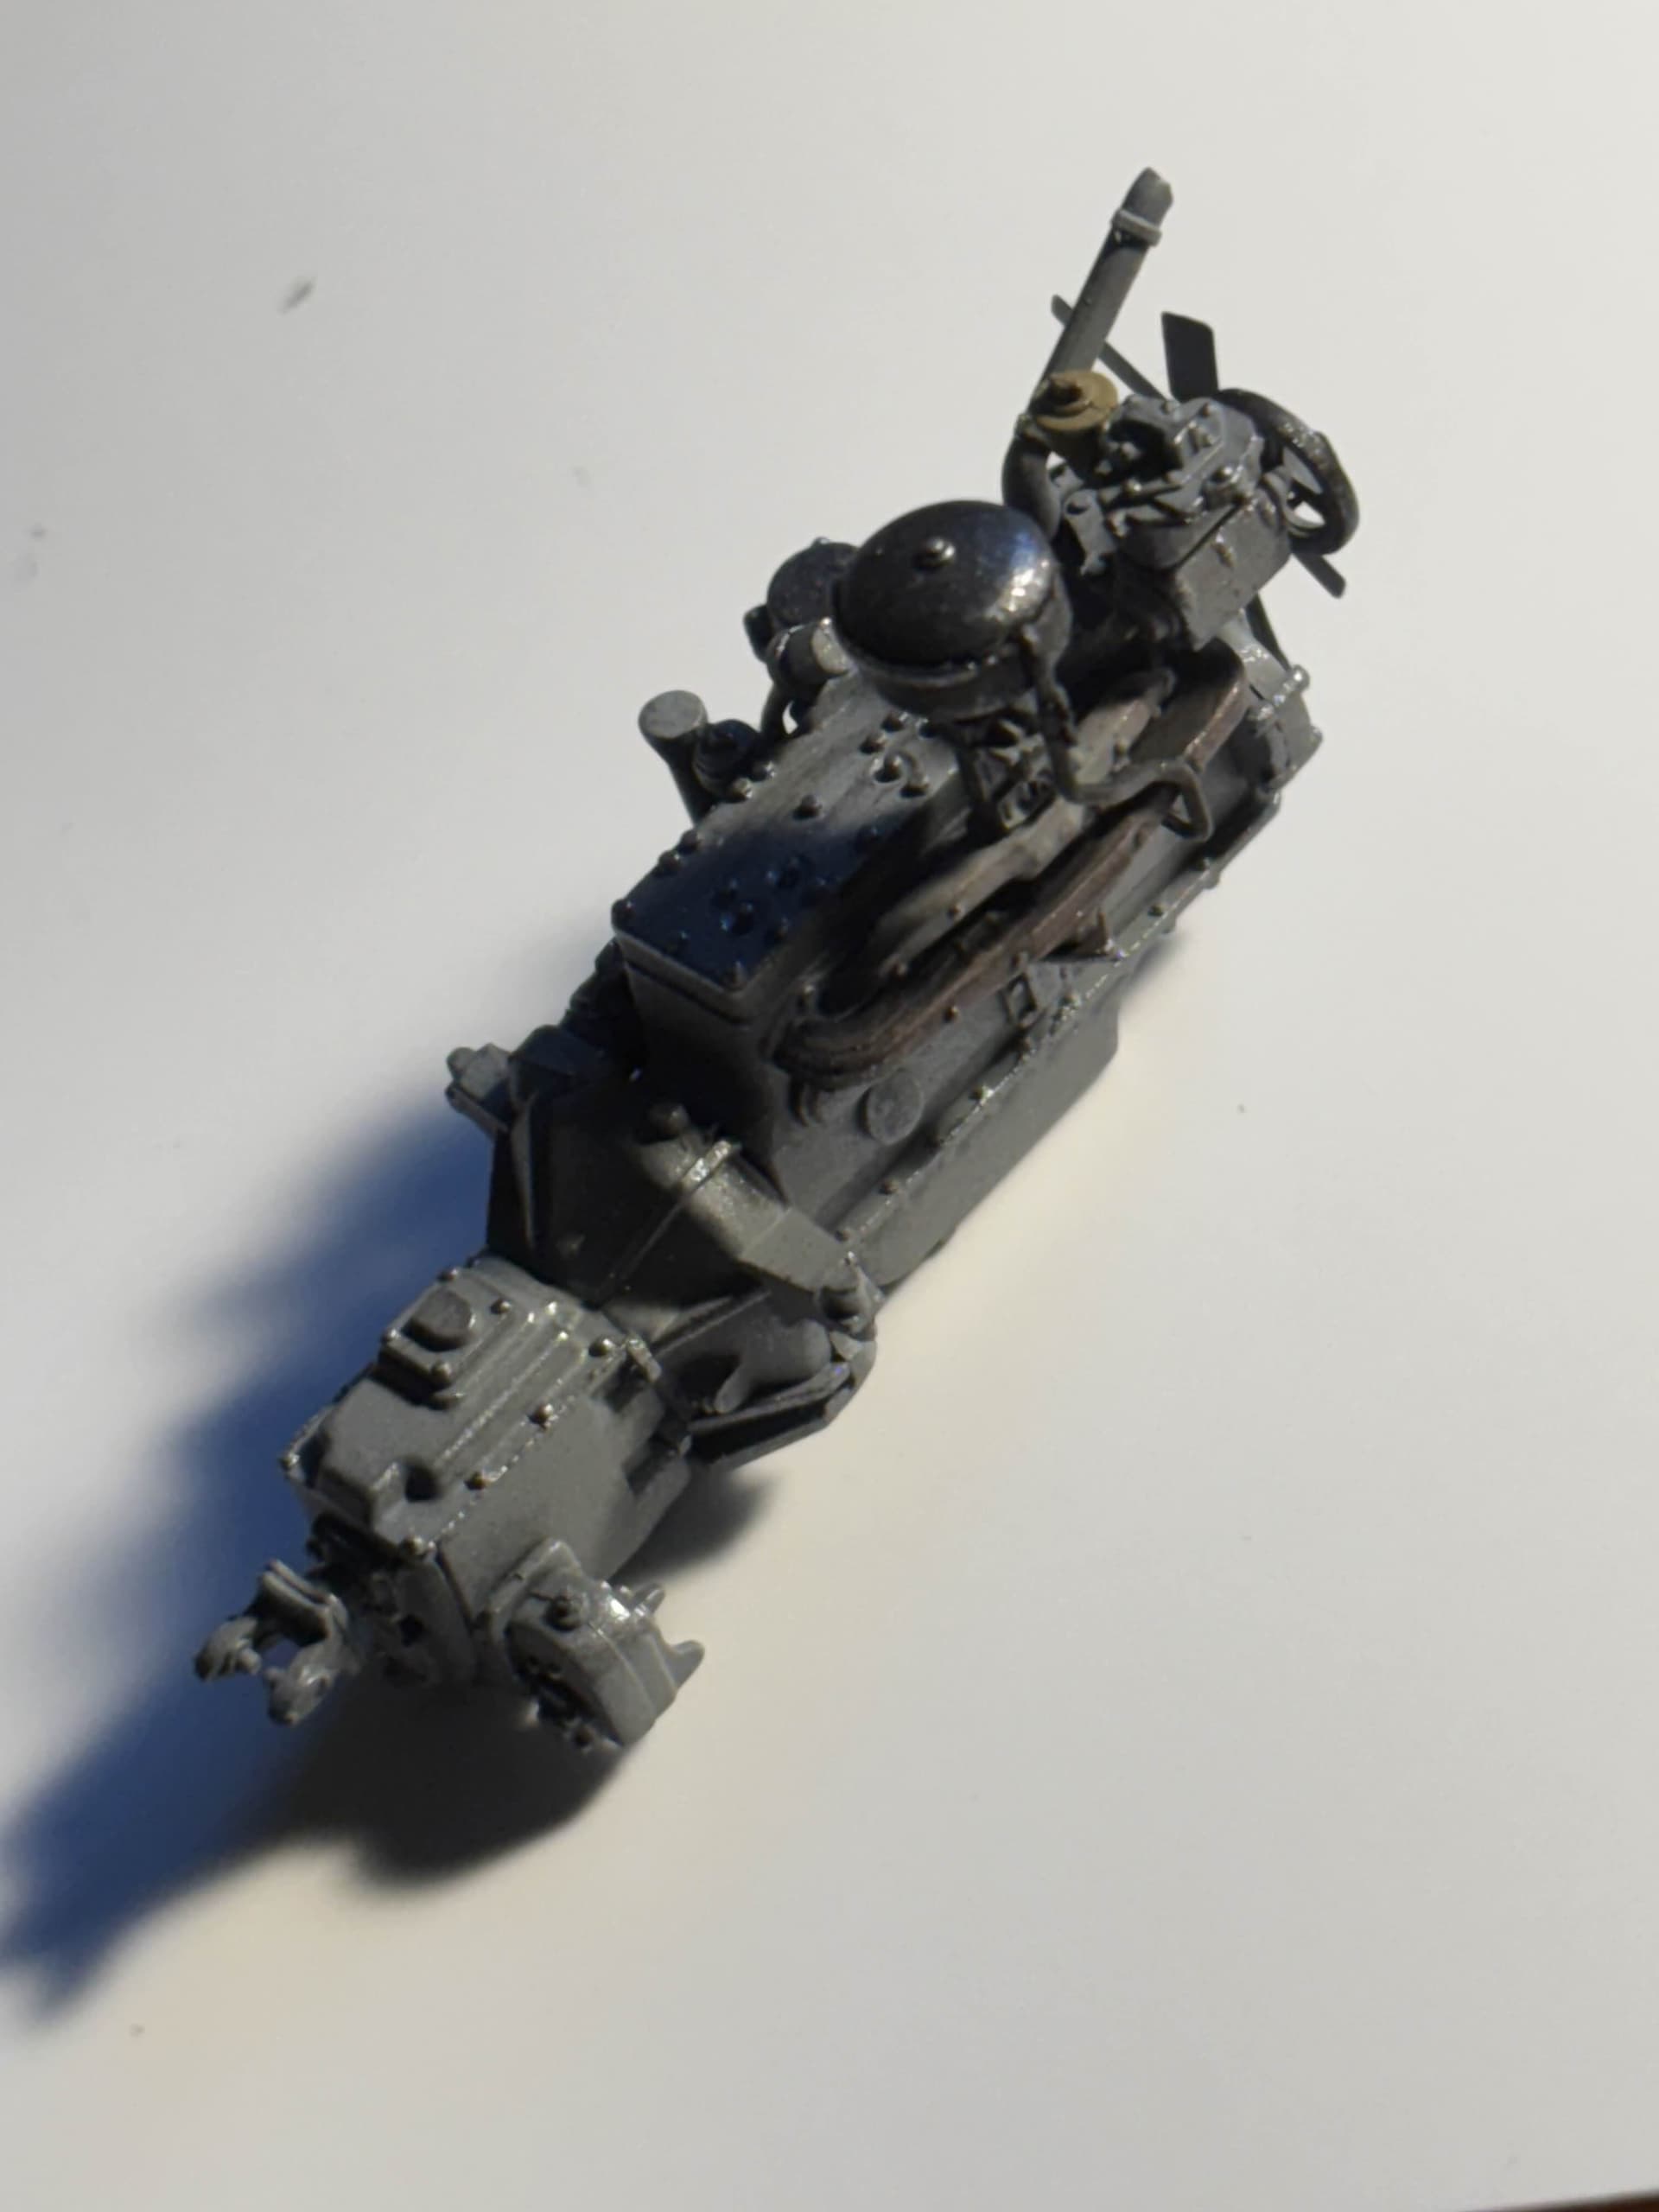
I unfortunately put this part on while it was flipped in the other direction, and it does come back to mess up construction later–so make sure to take note of this. If you’ve got some spare plastic rod or plastic to fix this this isn’t that much of a major problem I think, but its definitely worth it to be safe than sorry. I’ll just get some plastic rod and see how well I can work around this. :+1:

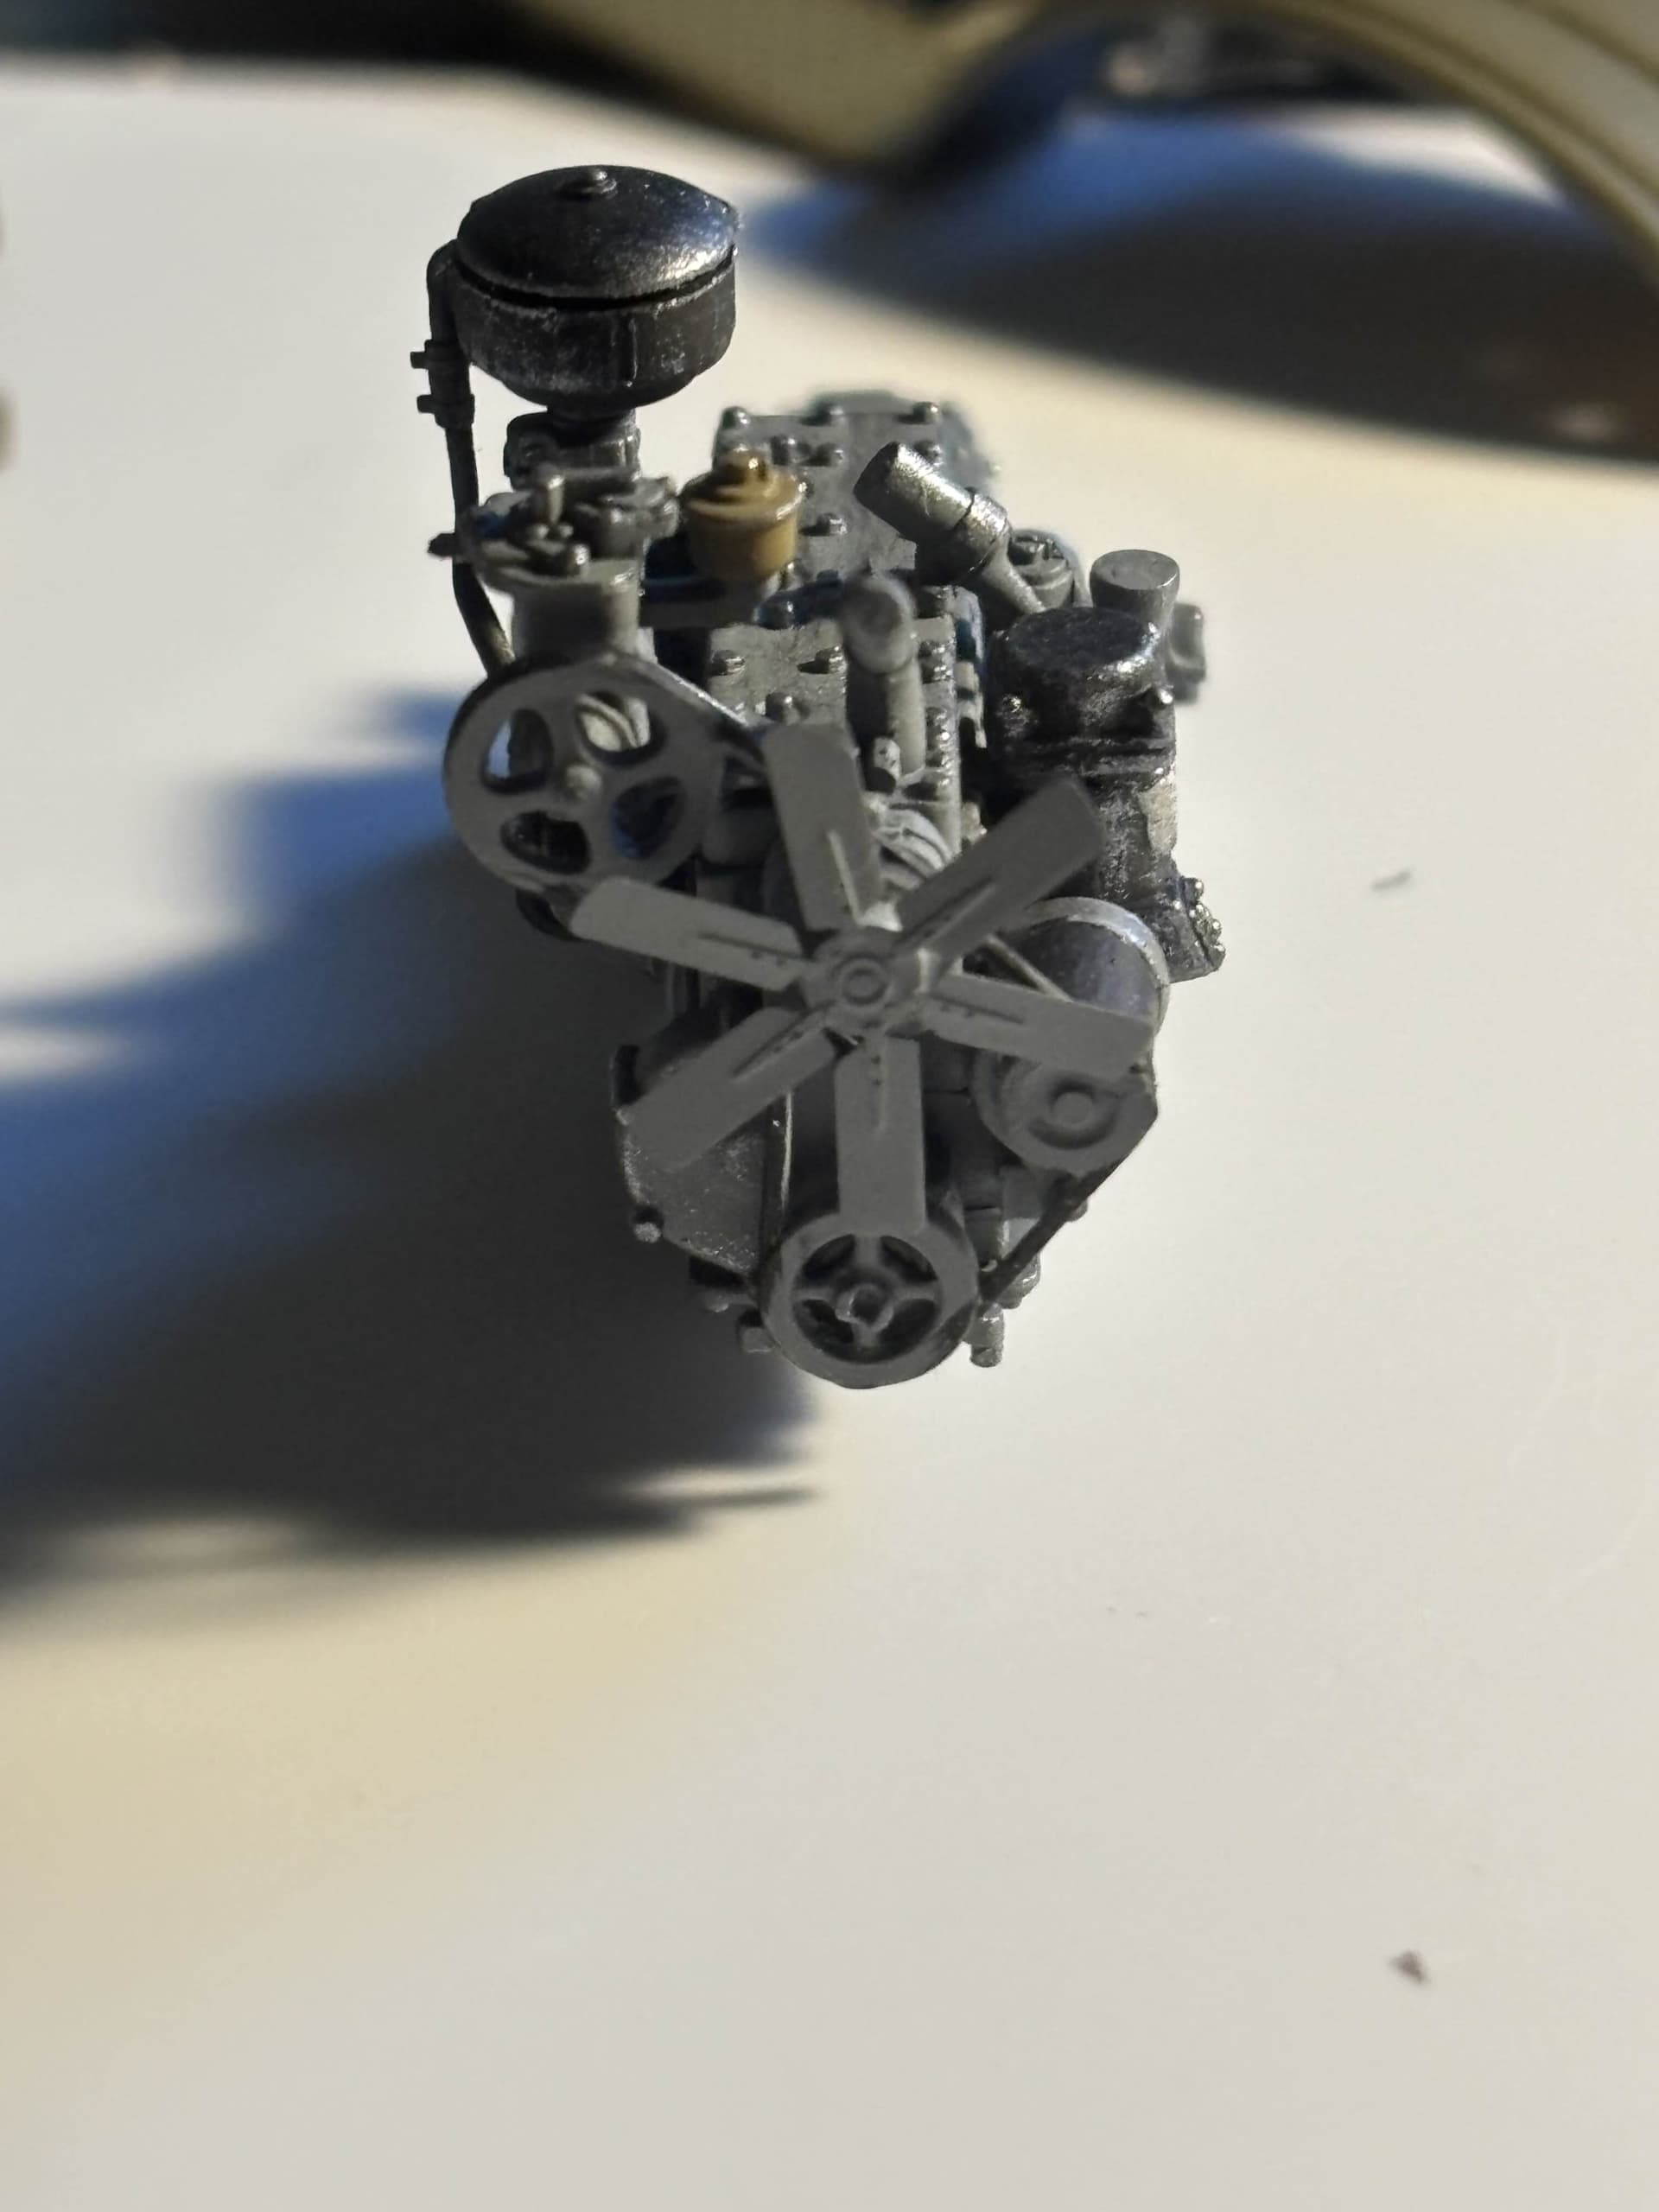
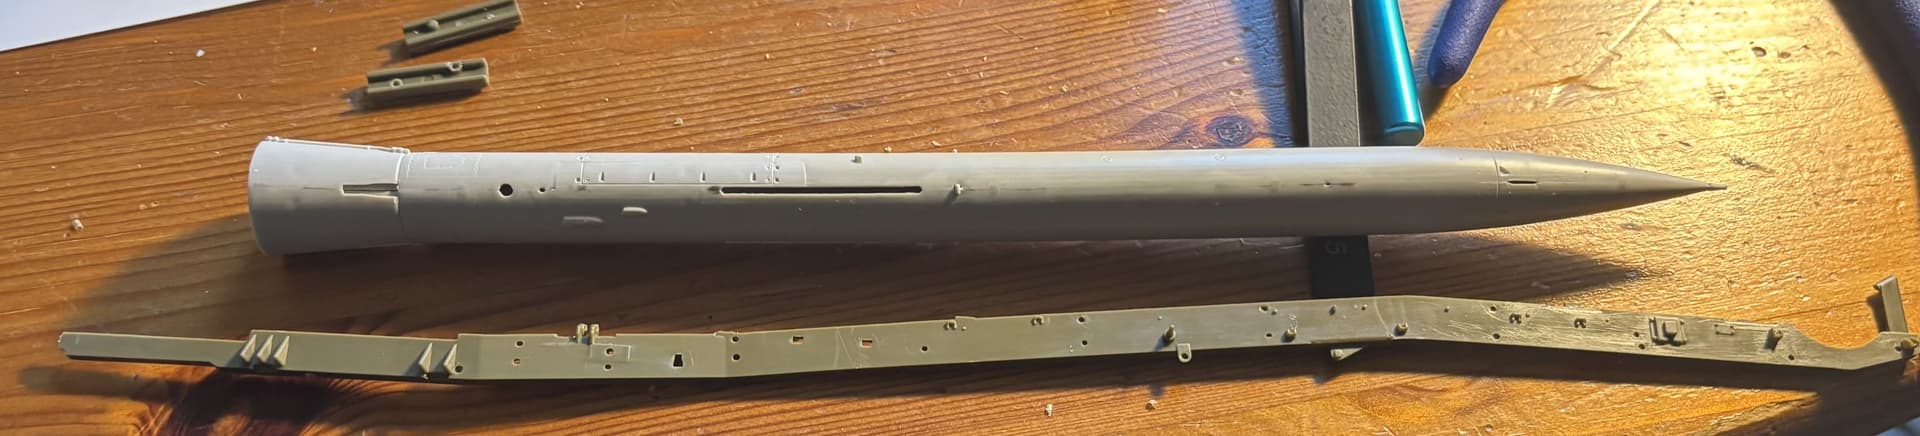
Also another note, the rear axle construction issues I’ve experienced has gotta be a user error, keep in mind to really dry fit this rear axle section before you glue it all together (I didn’t do so, so i had to force it into the chassis). Here’s some areas of note though:


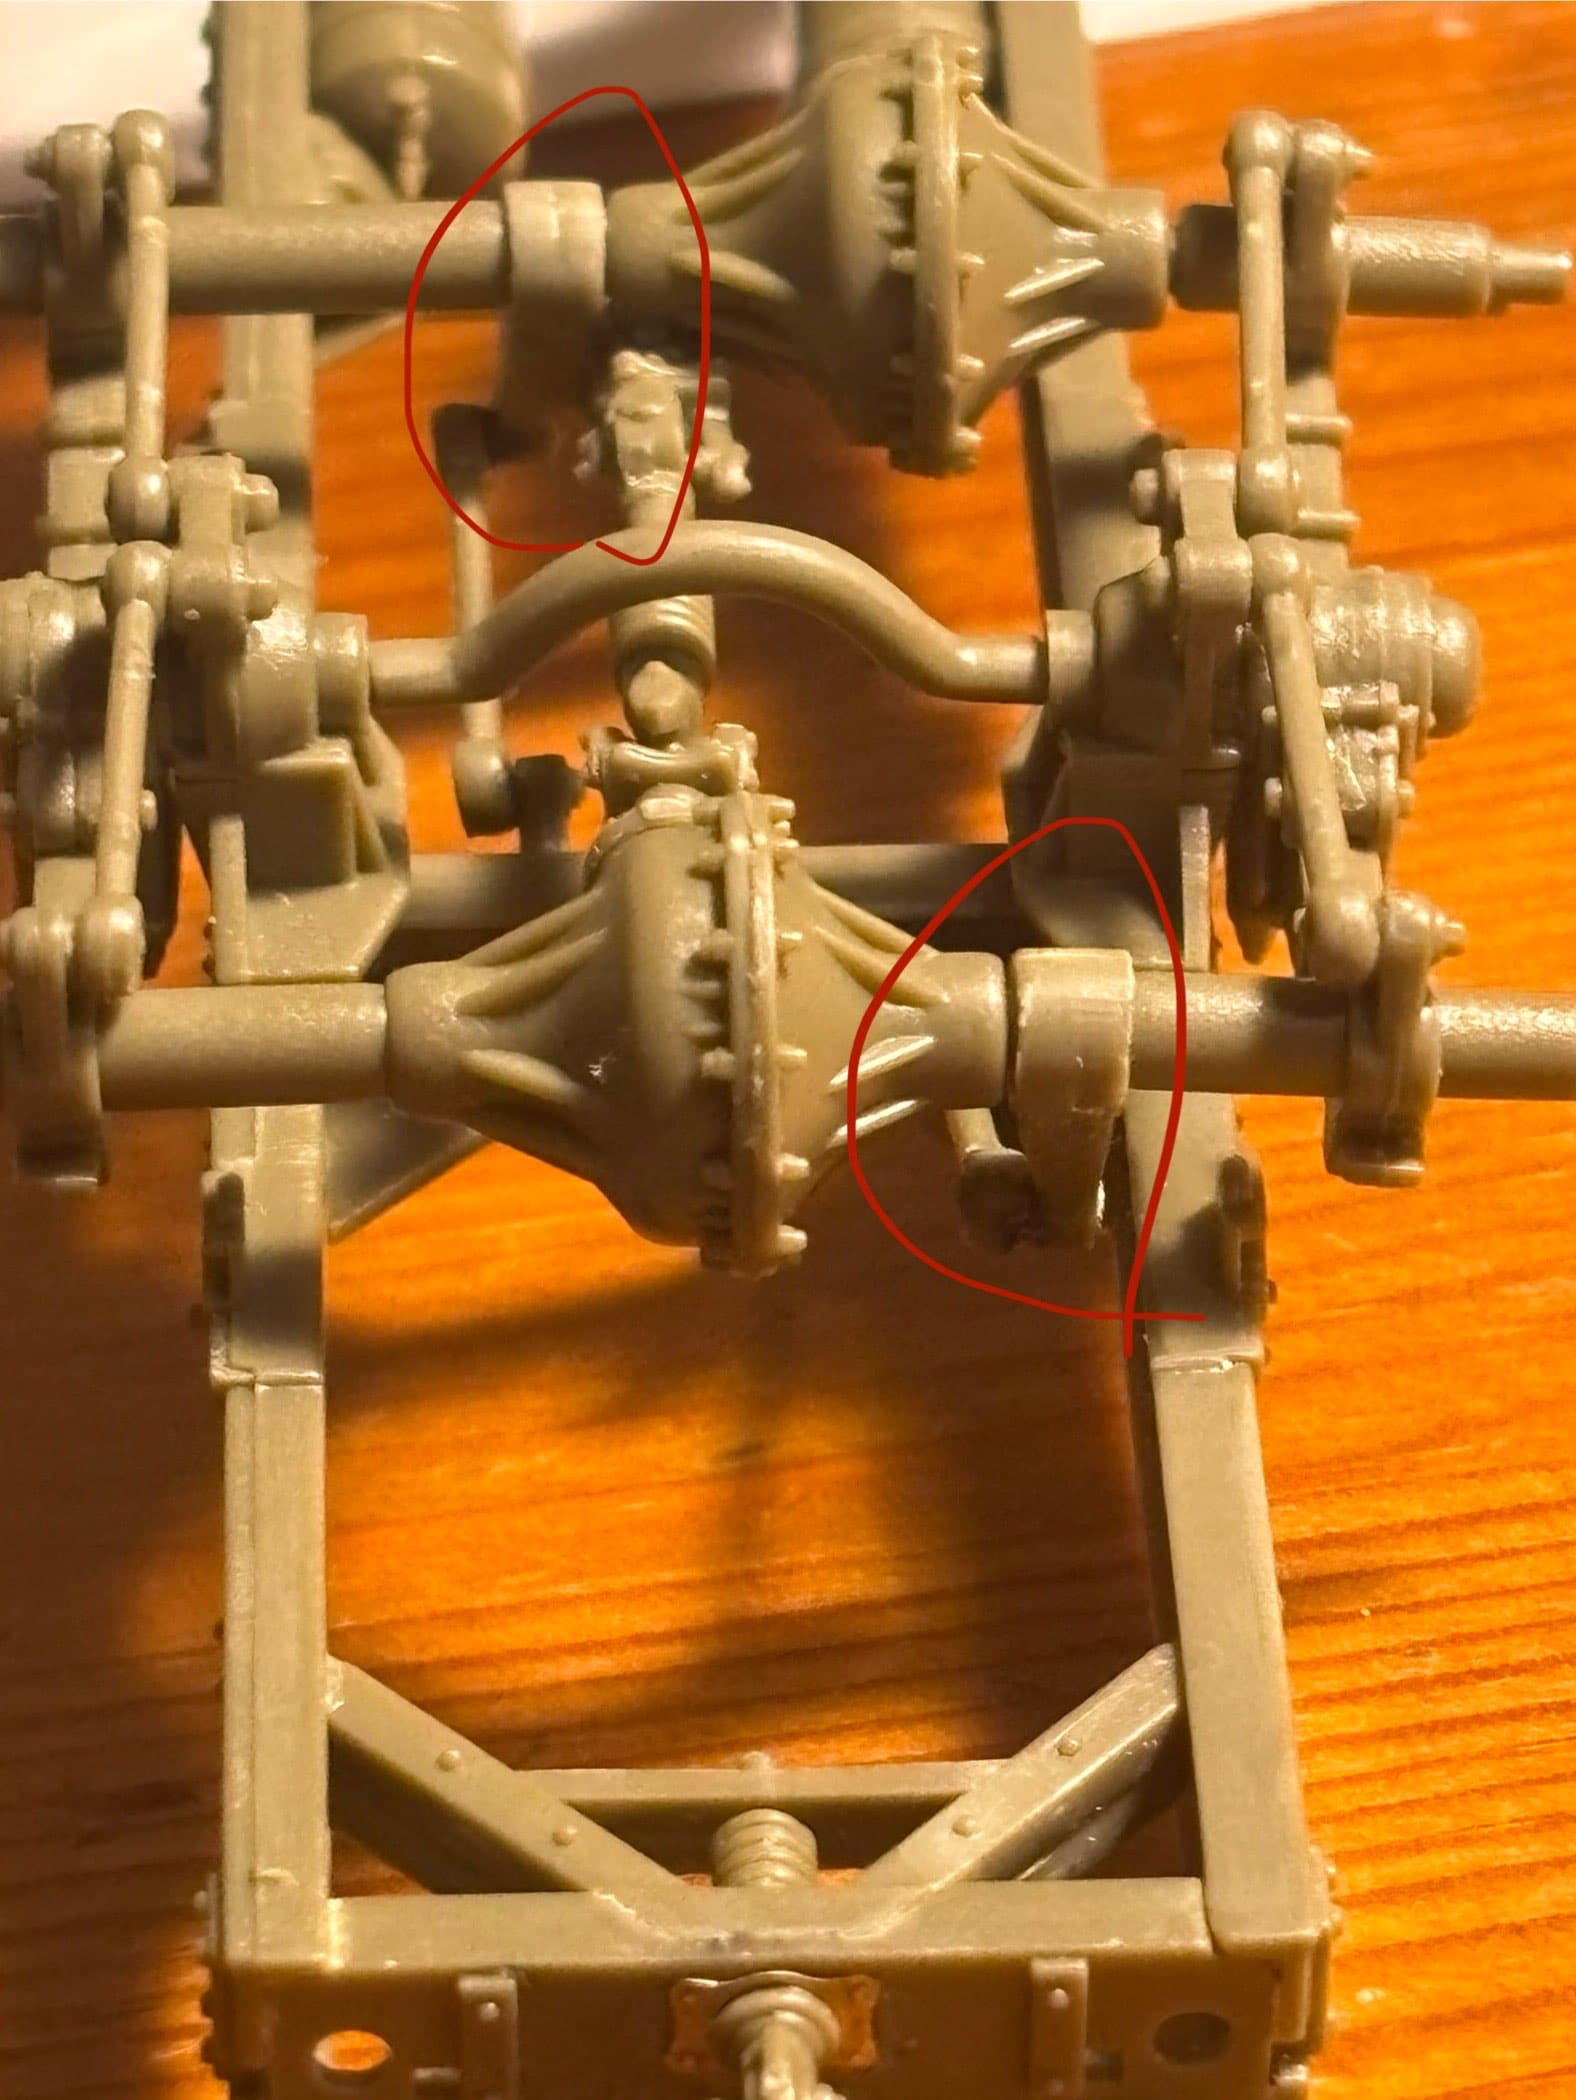
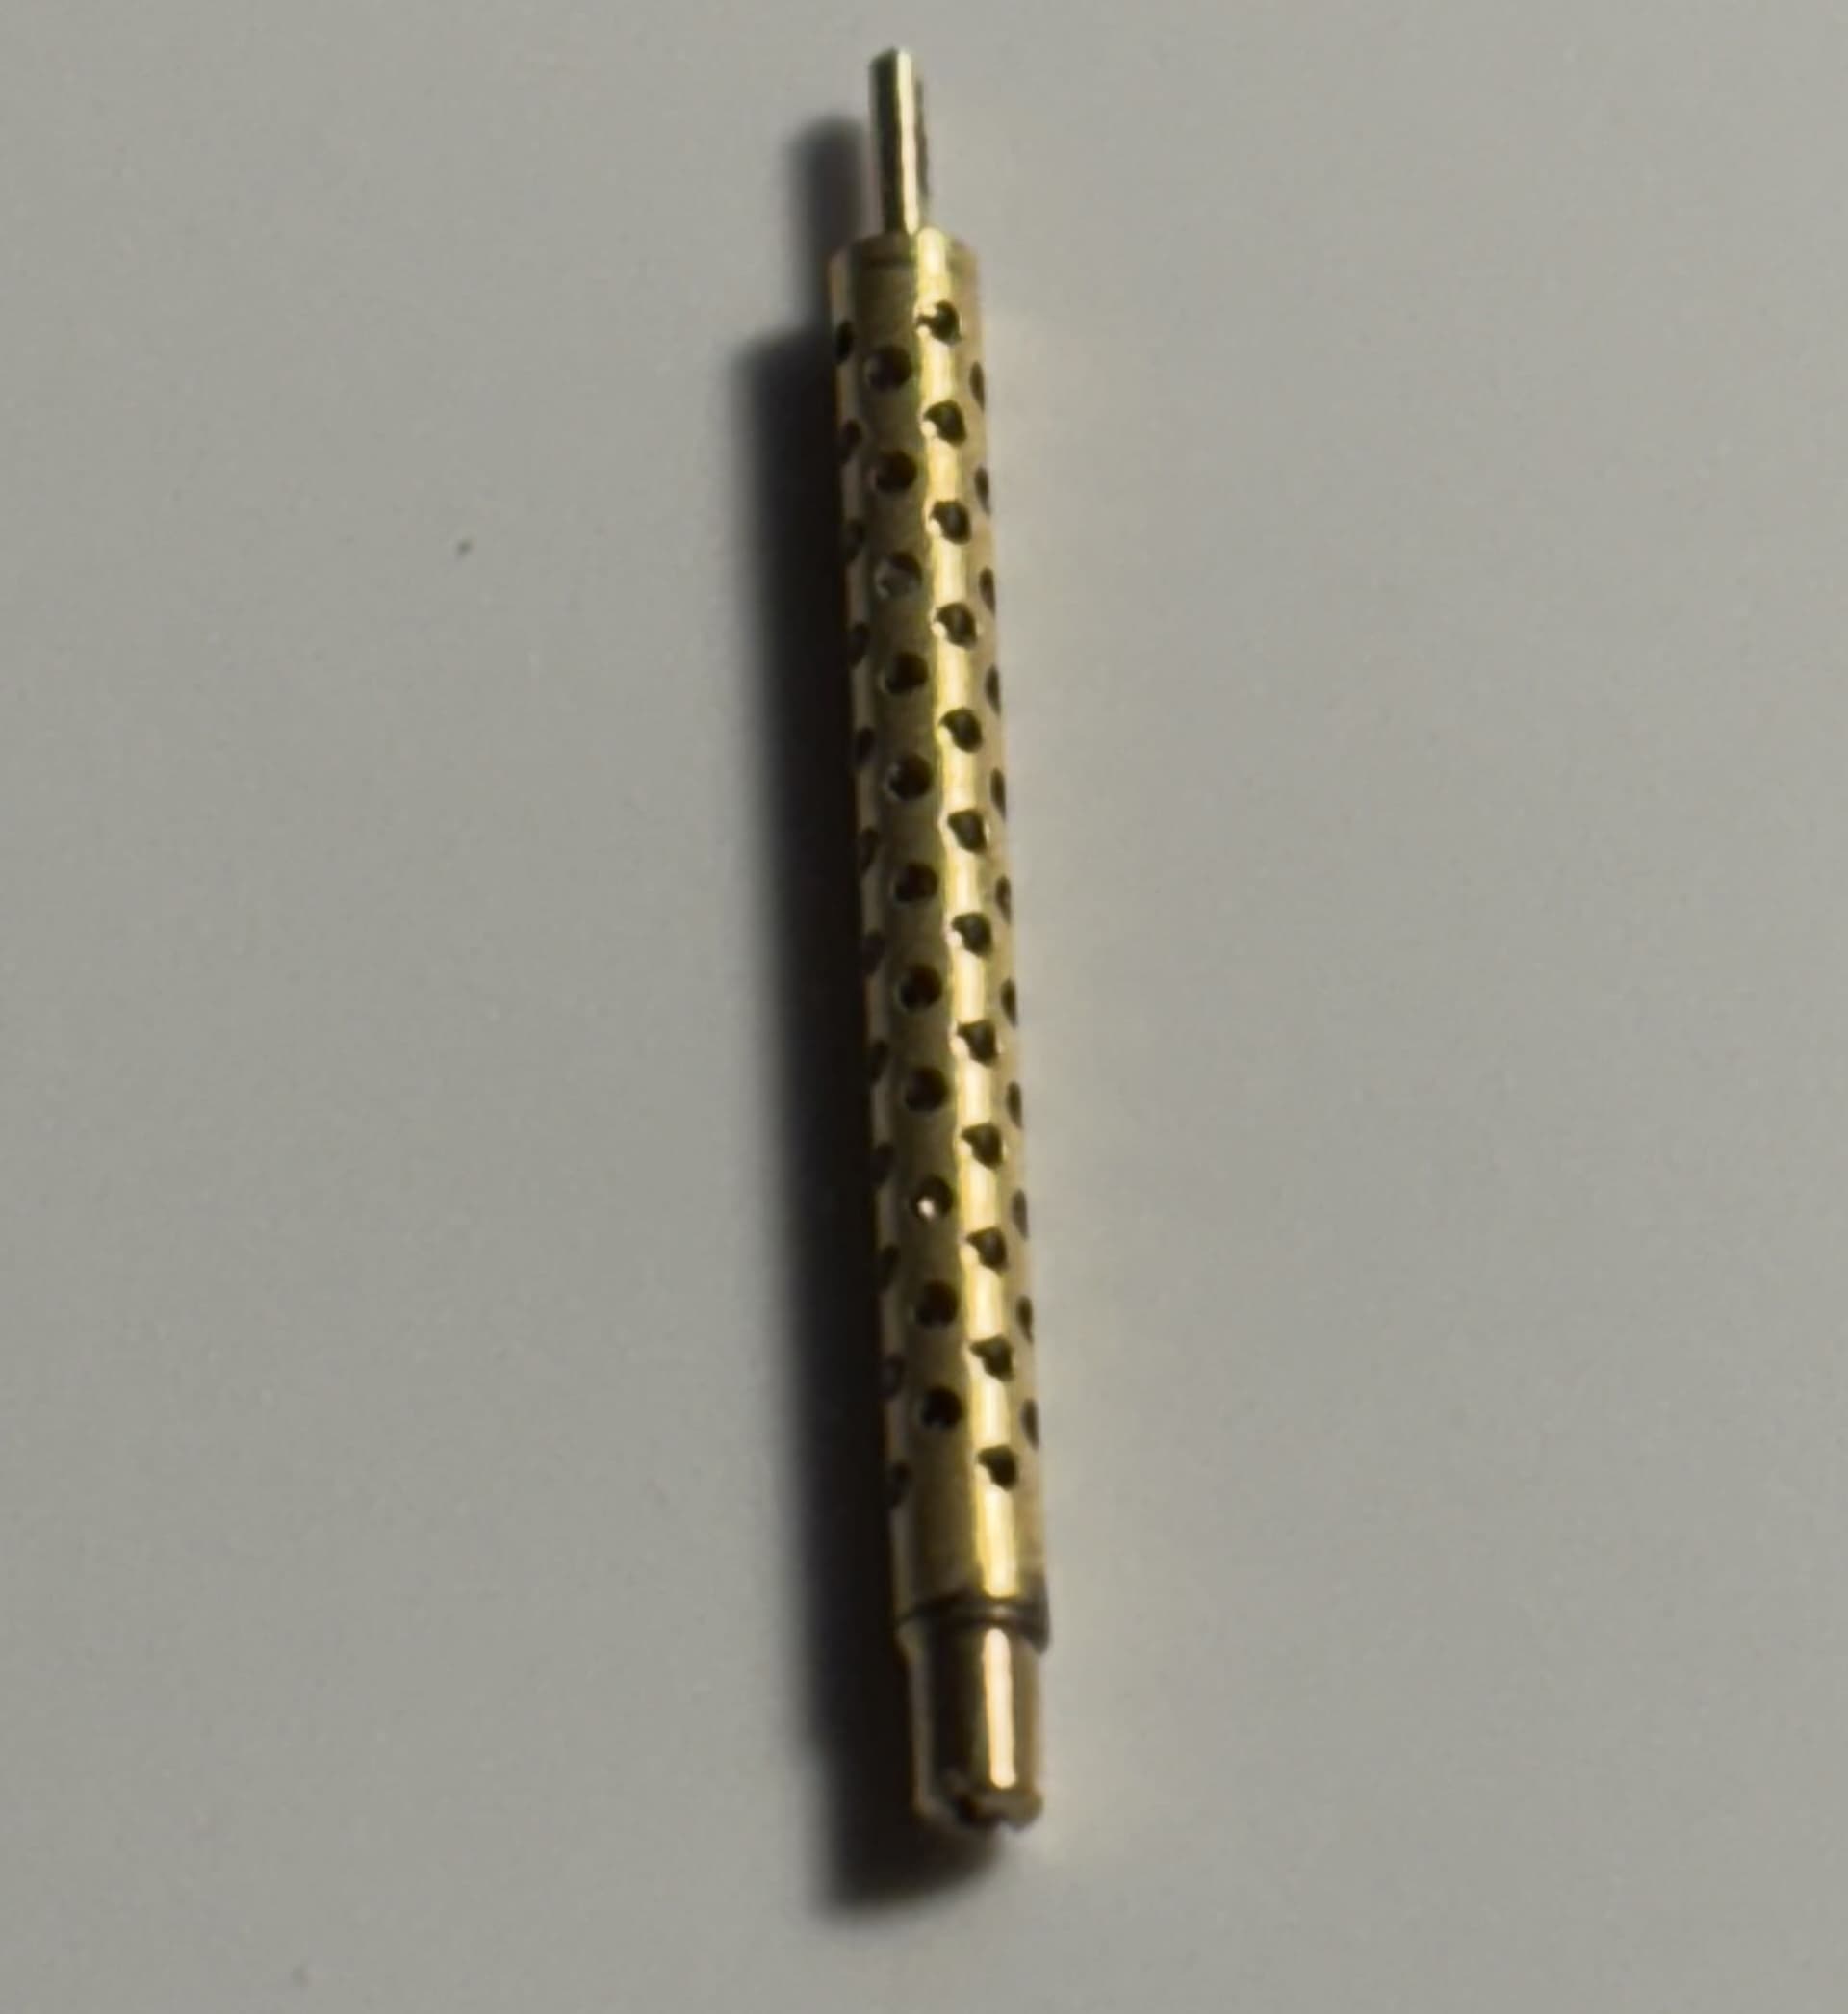
In the image above, the red circles point out these parts which slide into one of the axles’ slots. (circled in blue below)

These parts were honestly quite annoying, they’re one of those parts that fit TOO well (or not well enough if you look at it differently). These parts start to show stress marks in the plastic and they’re honestly a pain to slide into the axles, I tried to scrape some plastic off of these connecting points but if this happens in your kit then you should definitely scrape off more than I did.

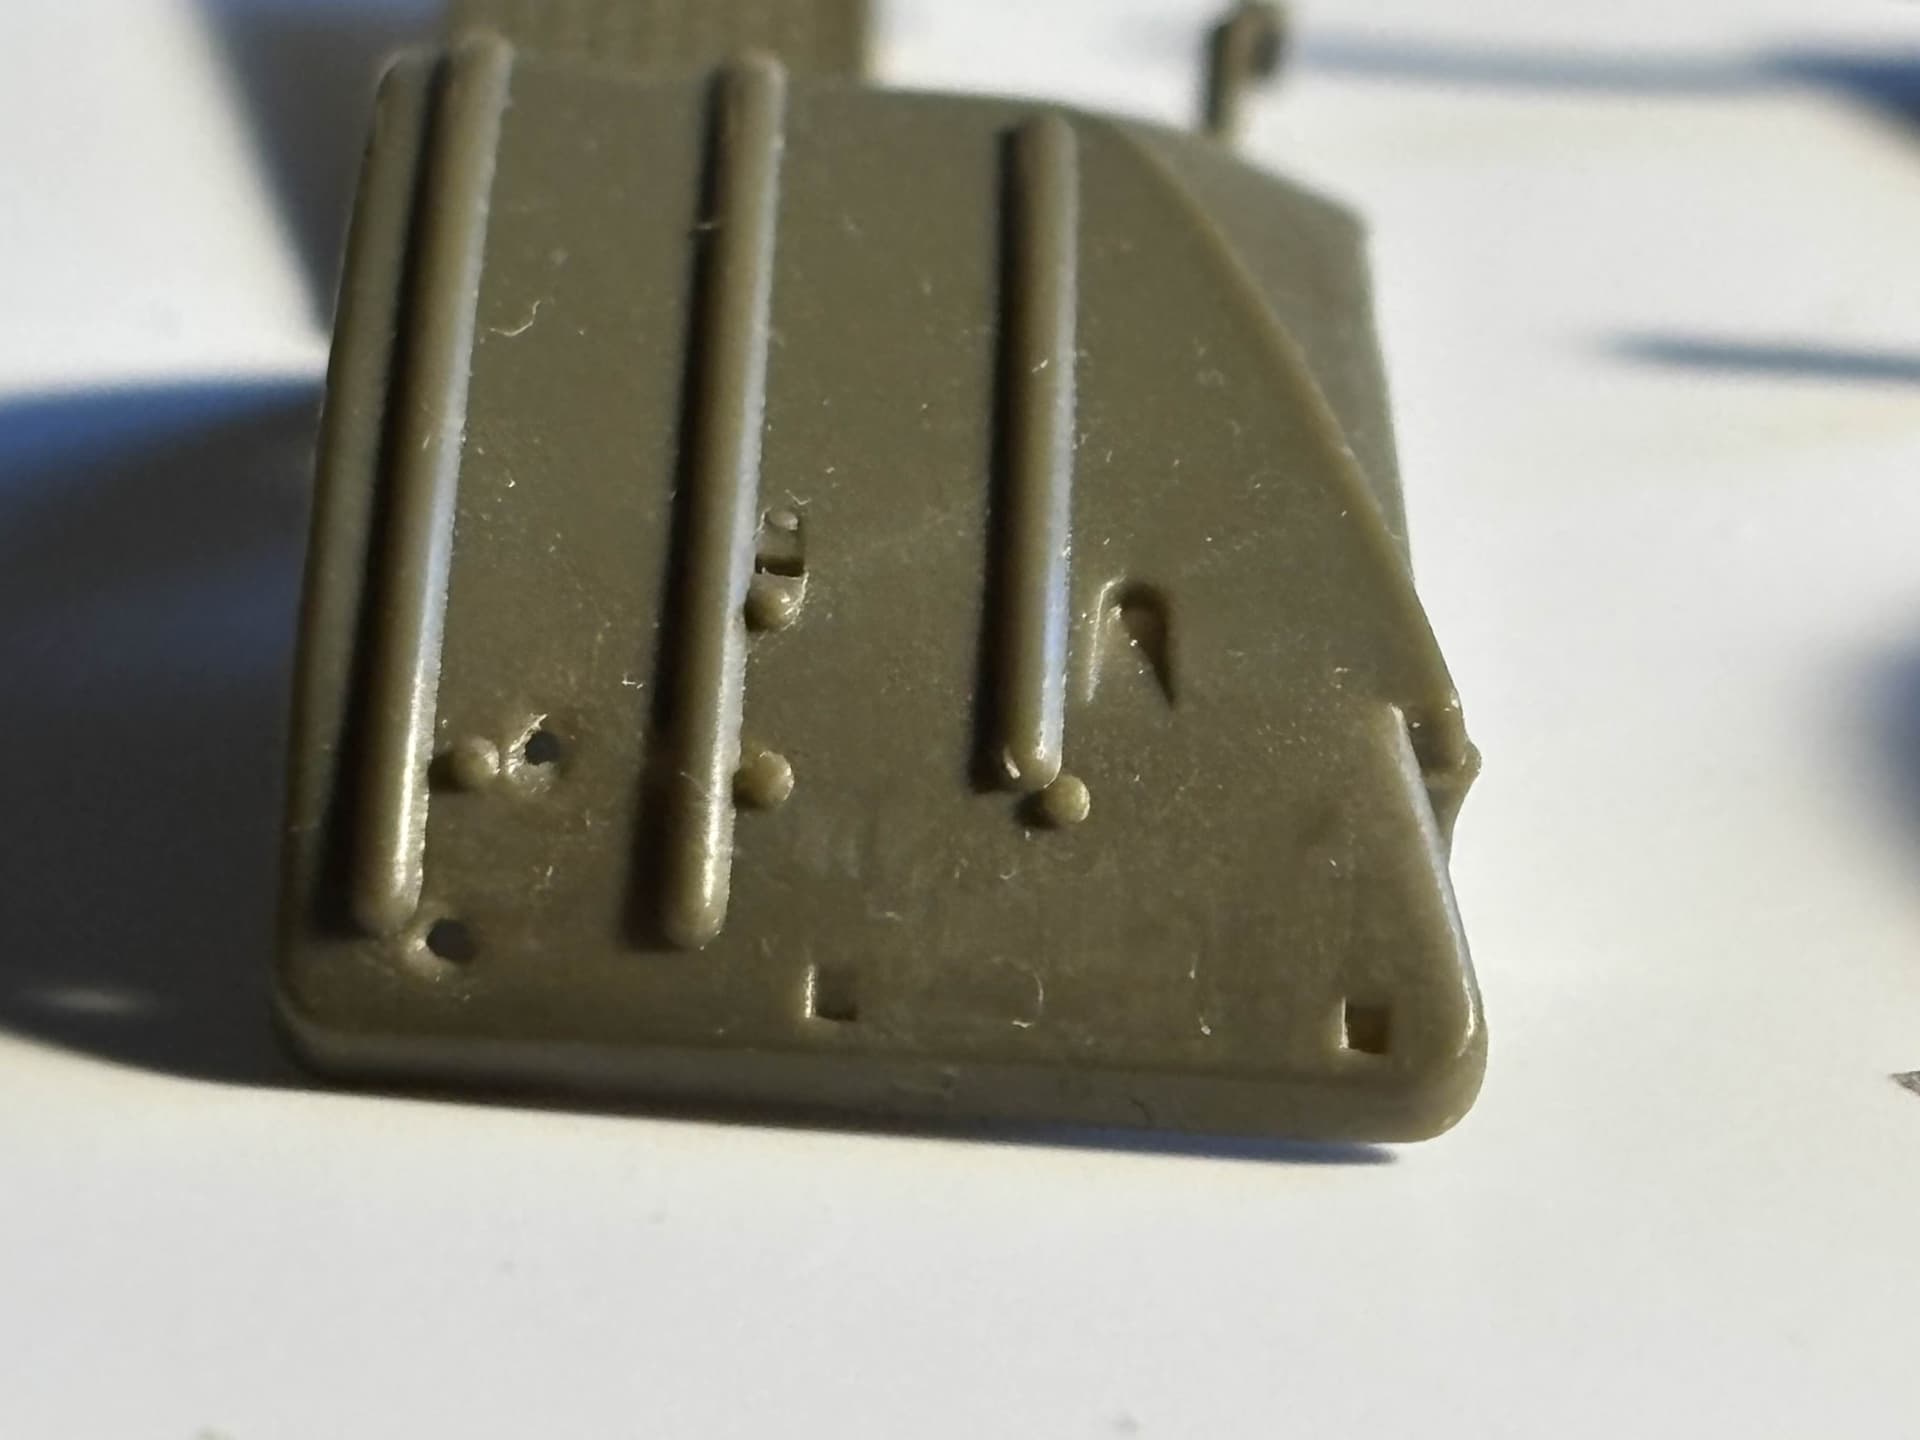
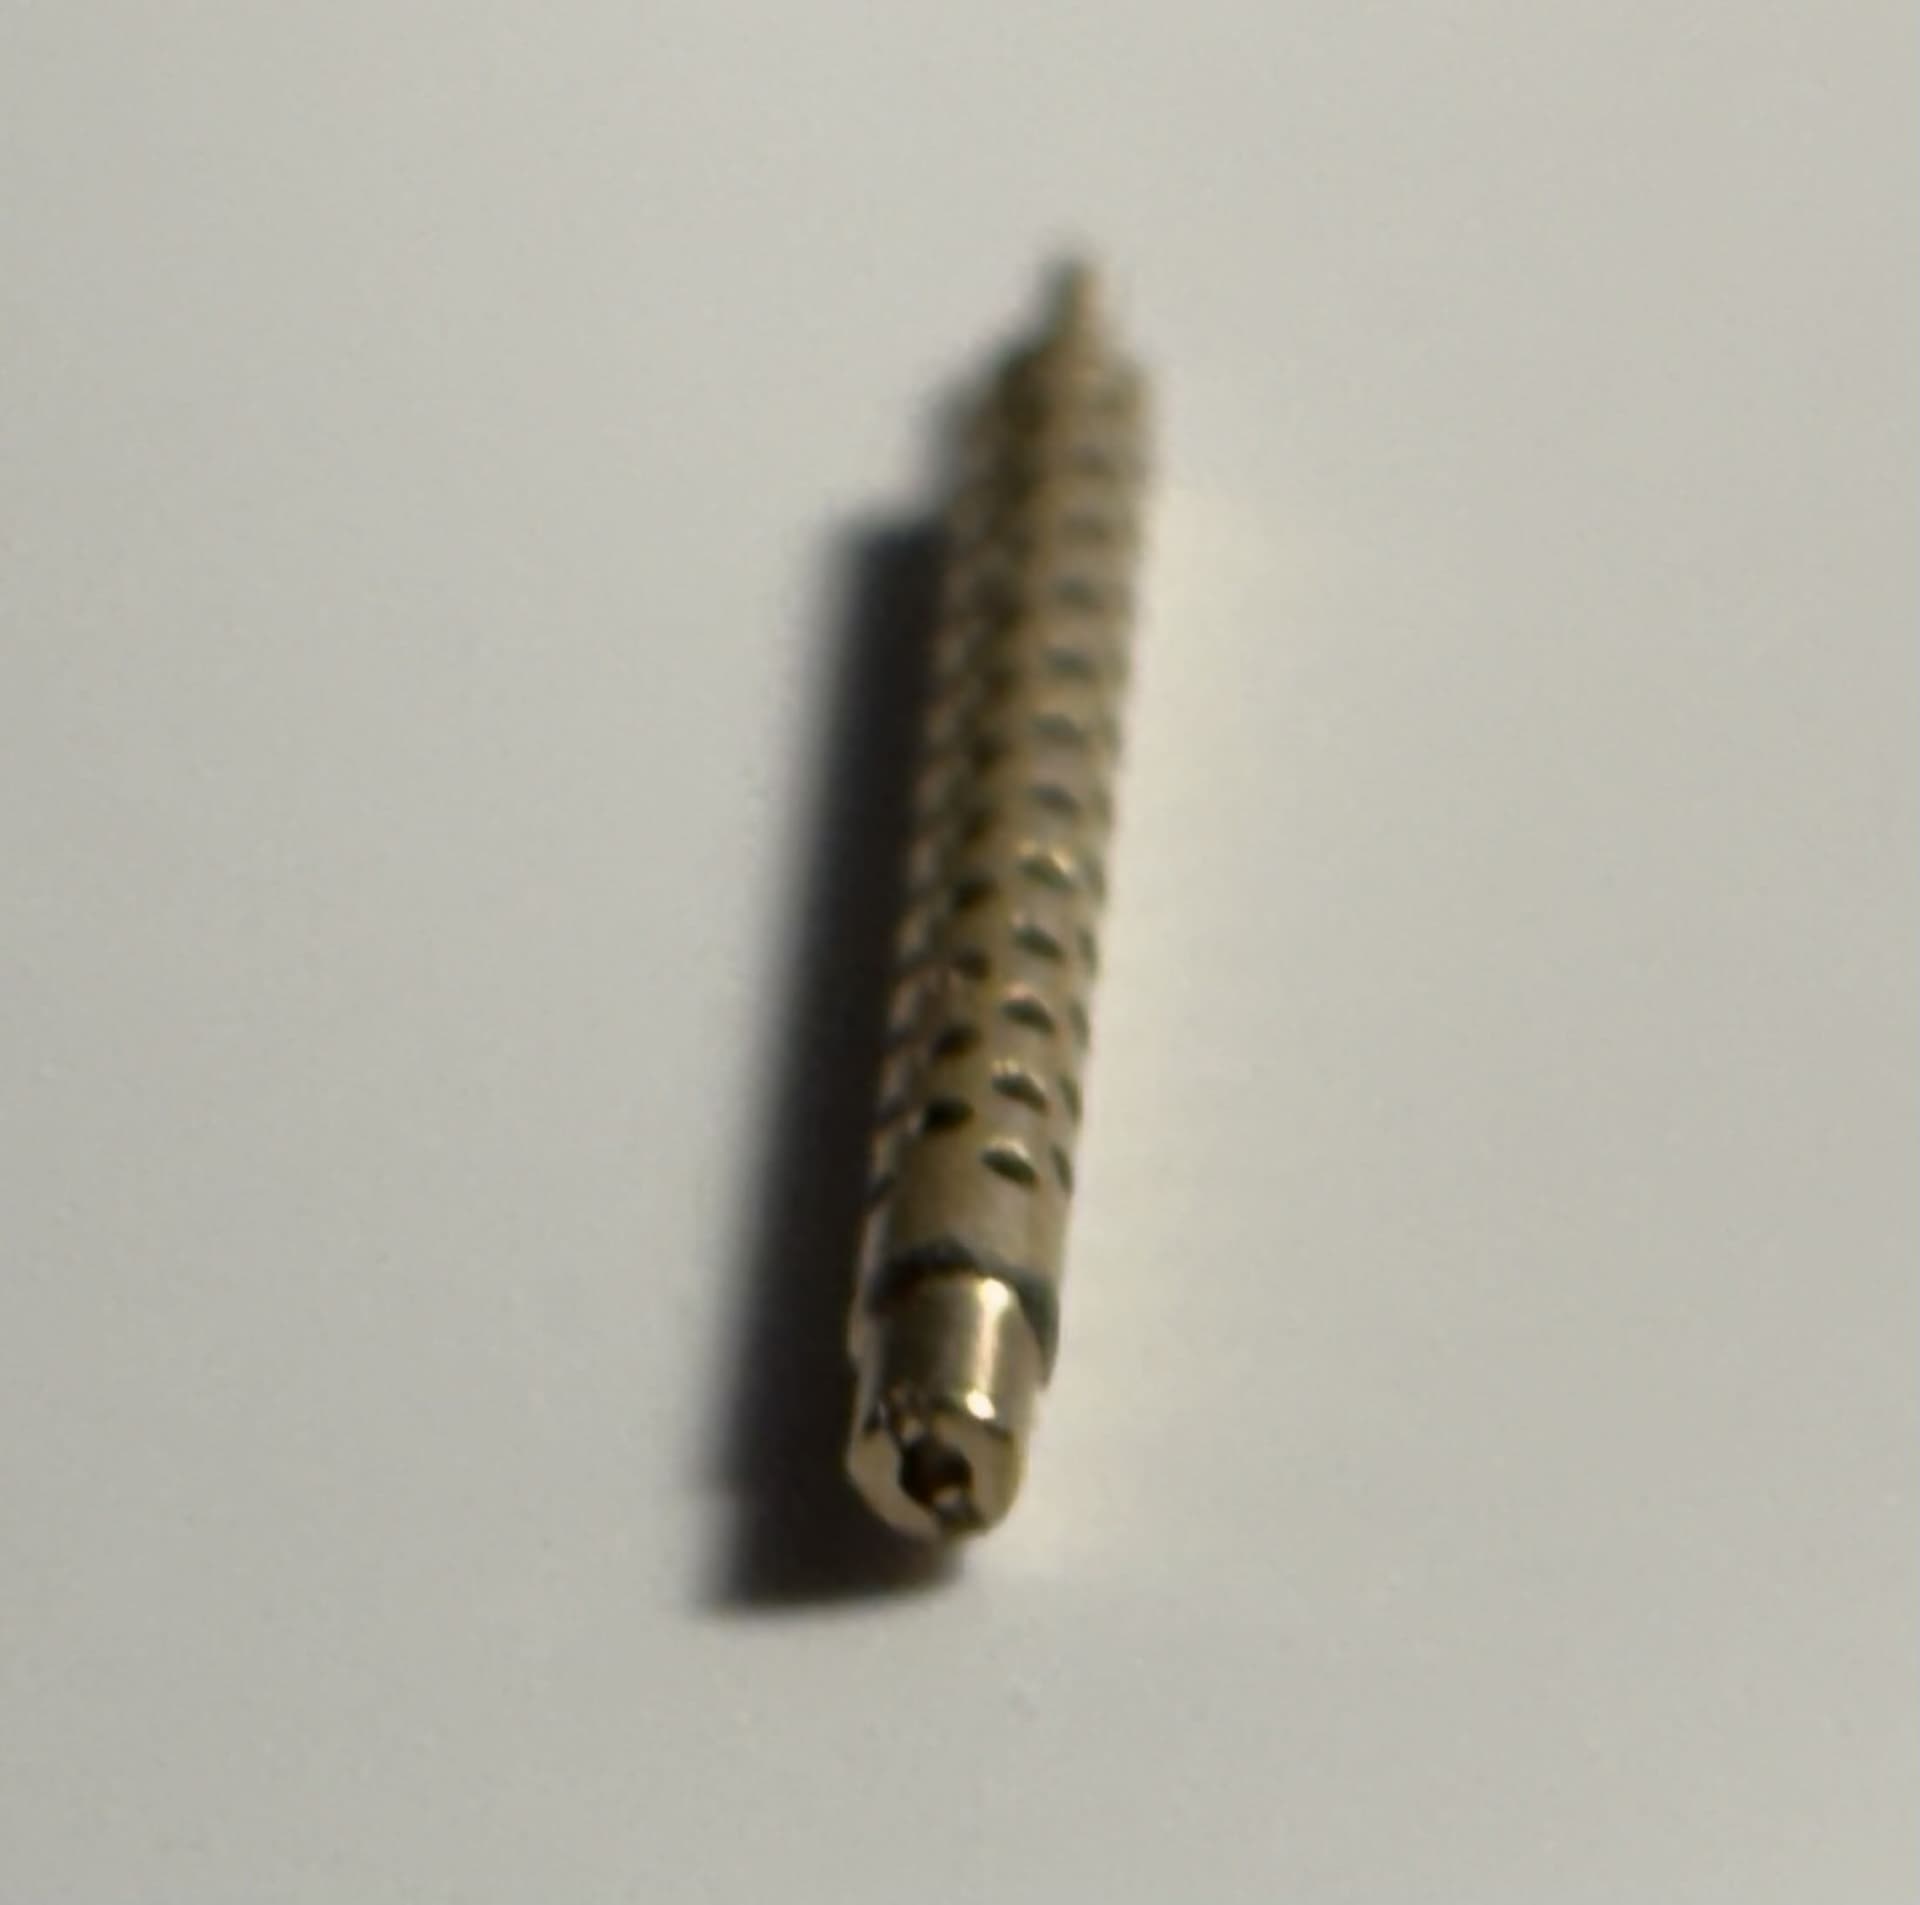
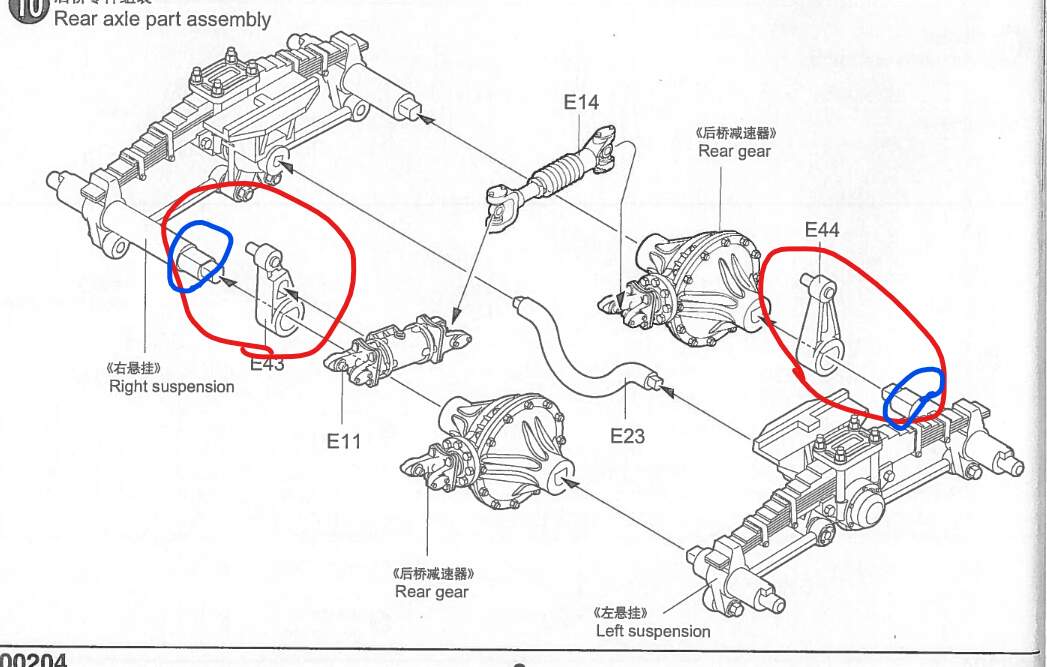
Also keep on the lookout for these suspension parts highlighted in red and take extra care for how you glue them together.


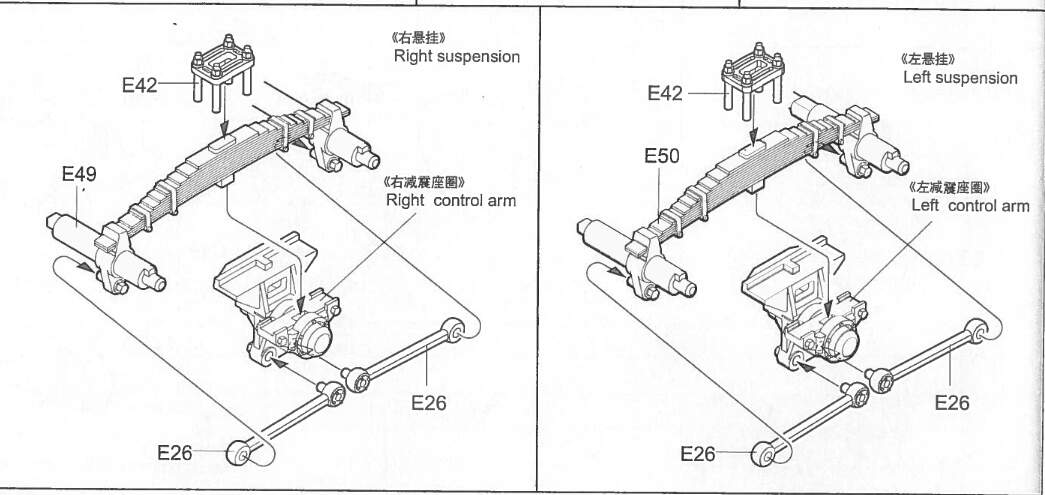
(Also side note, E42’s fit into E49 was way too snug, and might require some plastic scraping.)

I didn’t keep track of how these were assembled and it directly caused the fit issue between the back axle and the chassis due to these suspension assemblies being the contact points between the back axle and the chassis.

(Another side note, I did hopefully implement a fix to the back axle’s connection points! Powel pointed it out to me and although I didn’t have a metal rod to fix this I just connected these parts with more VMS ca glue.)
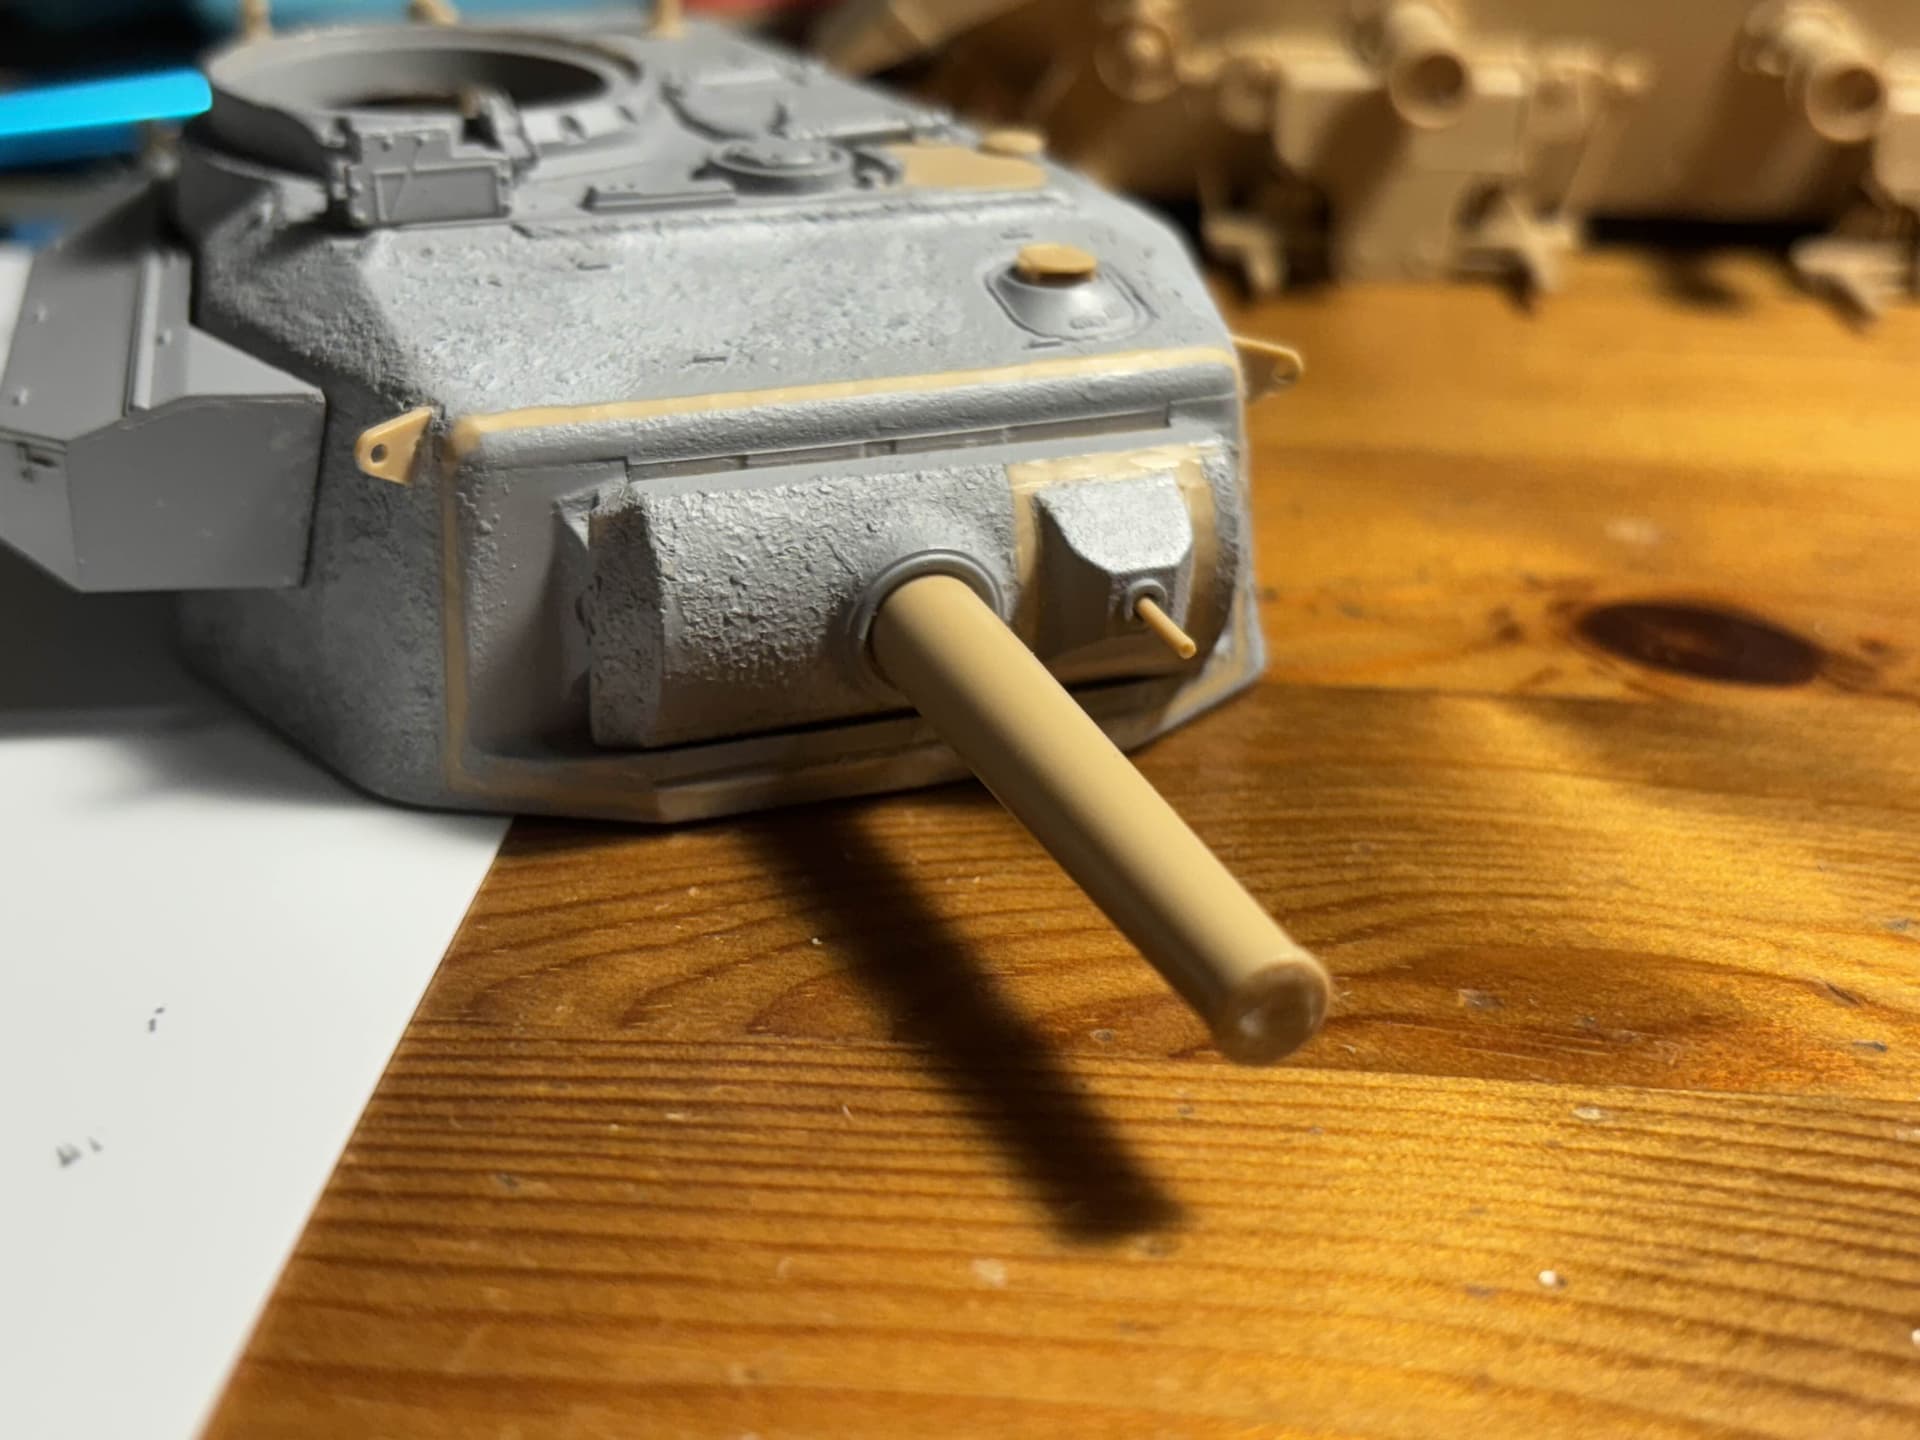
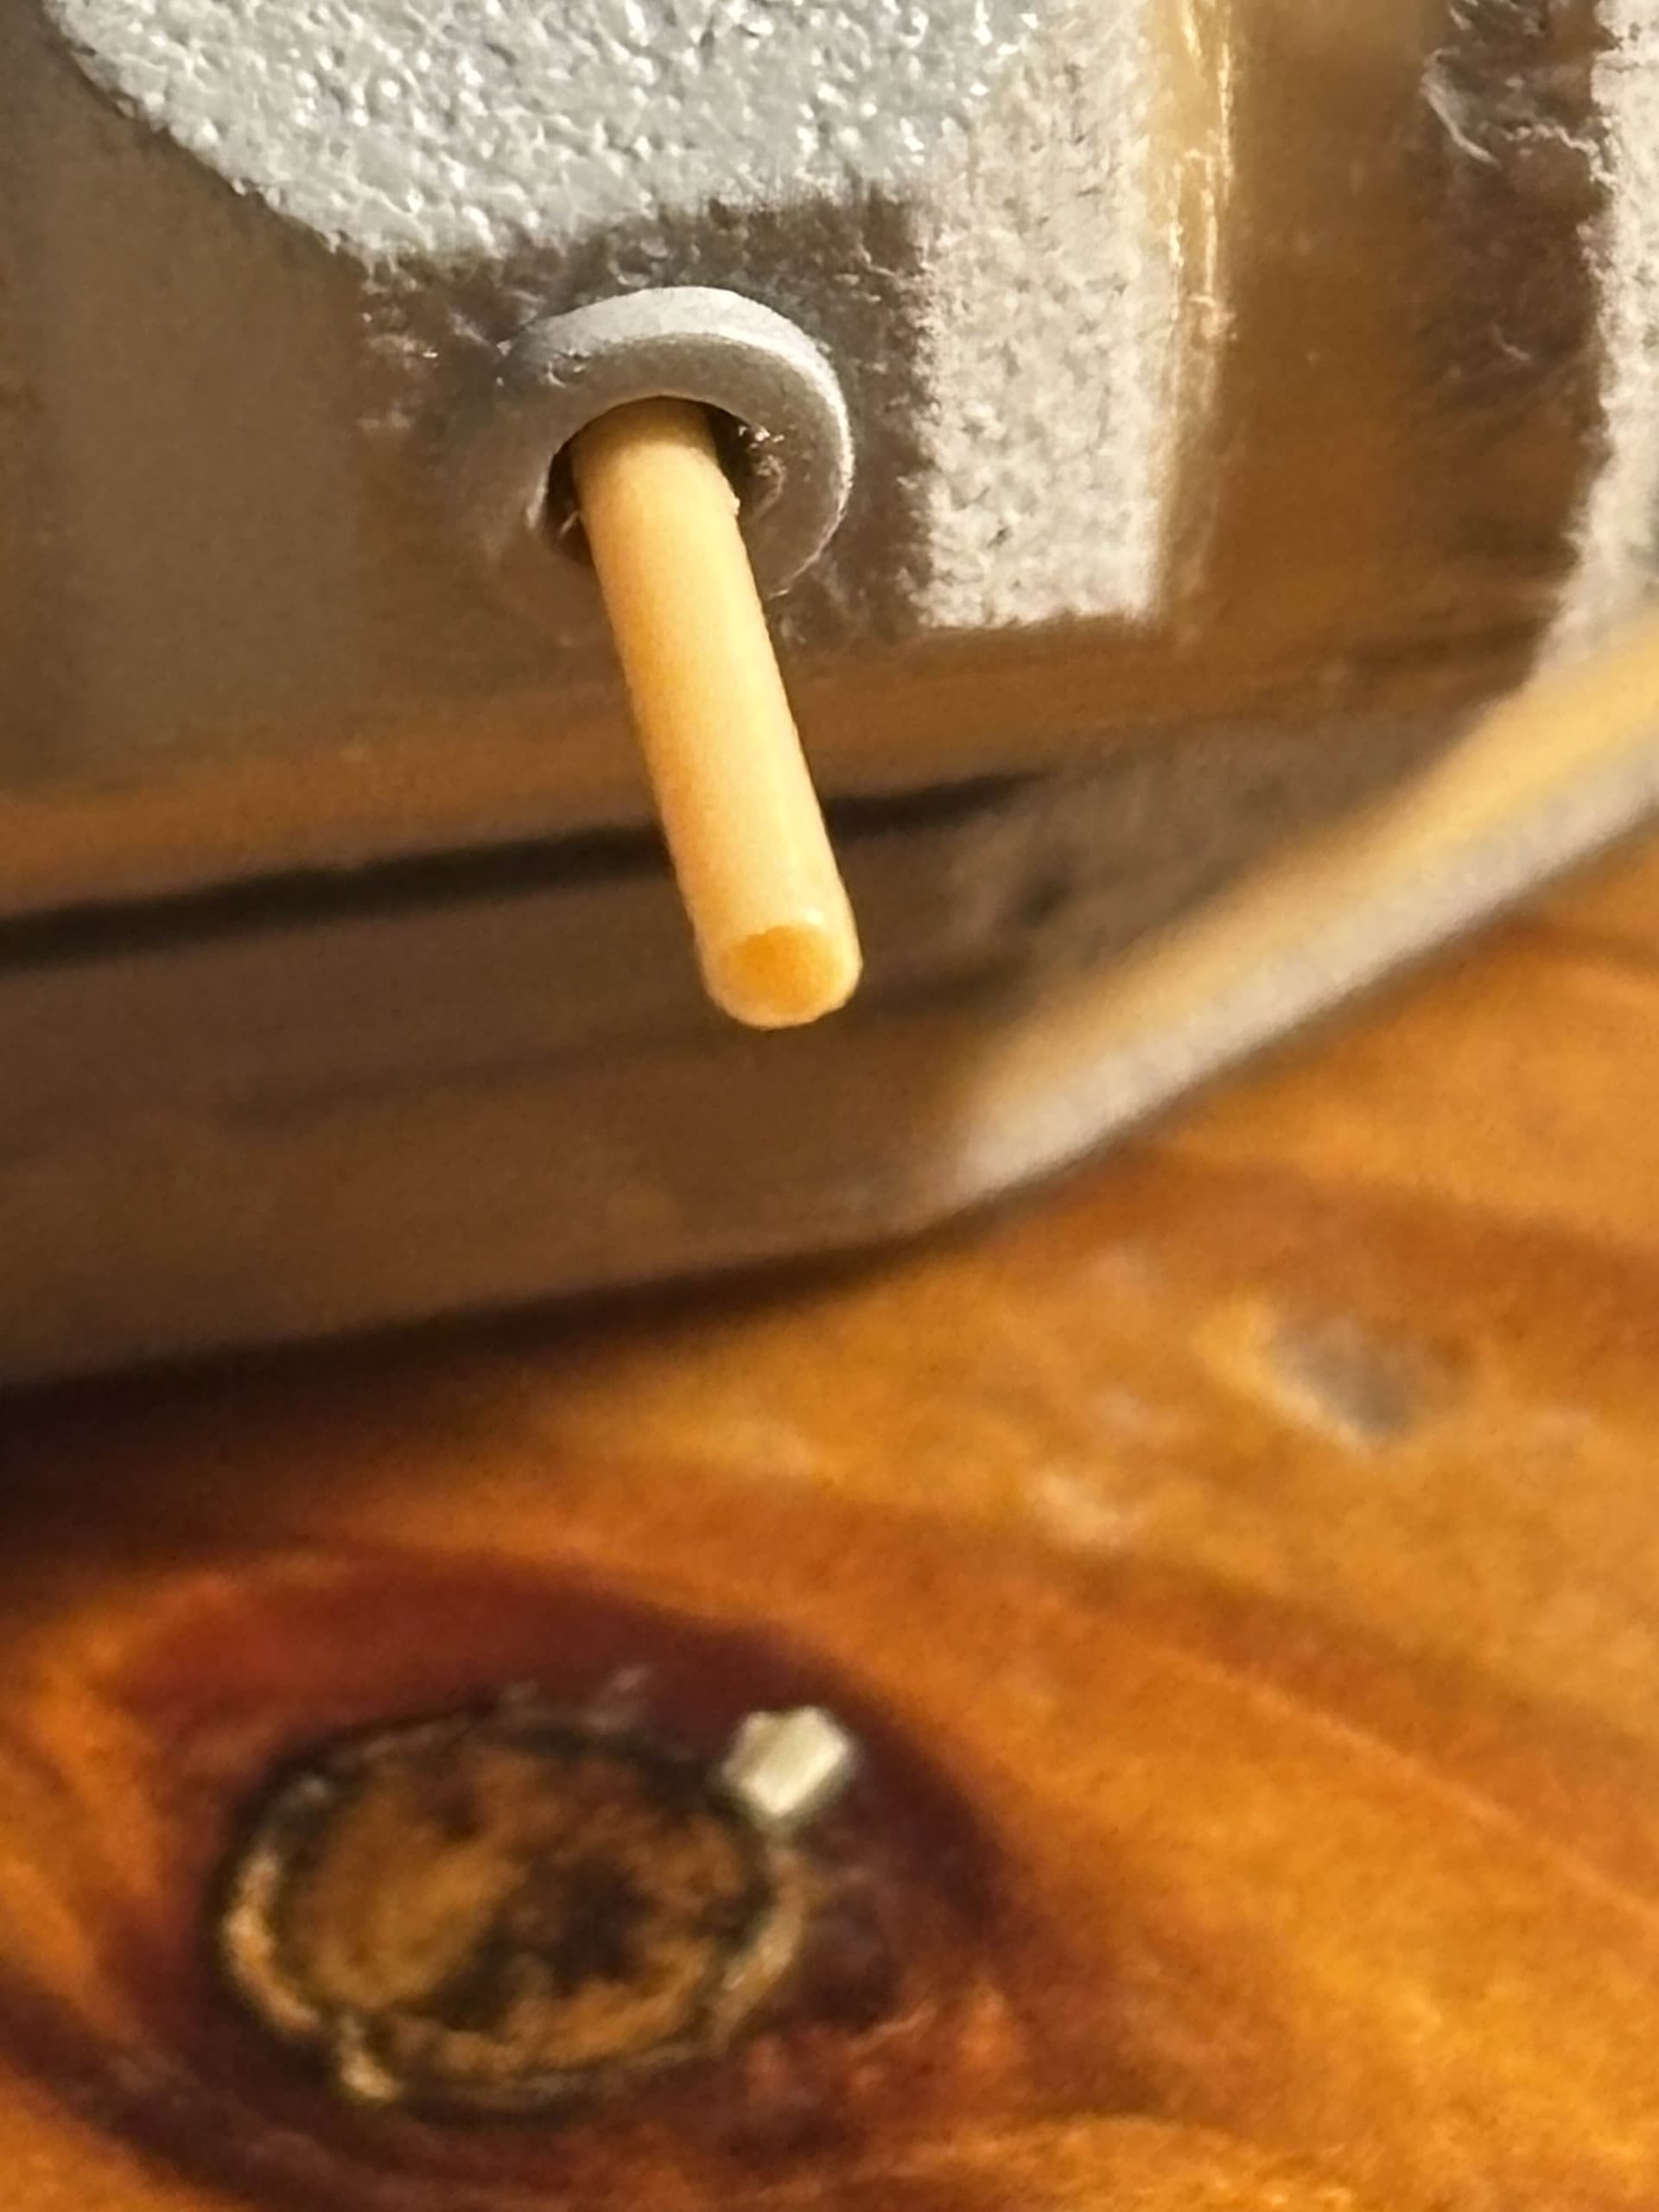
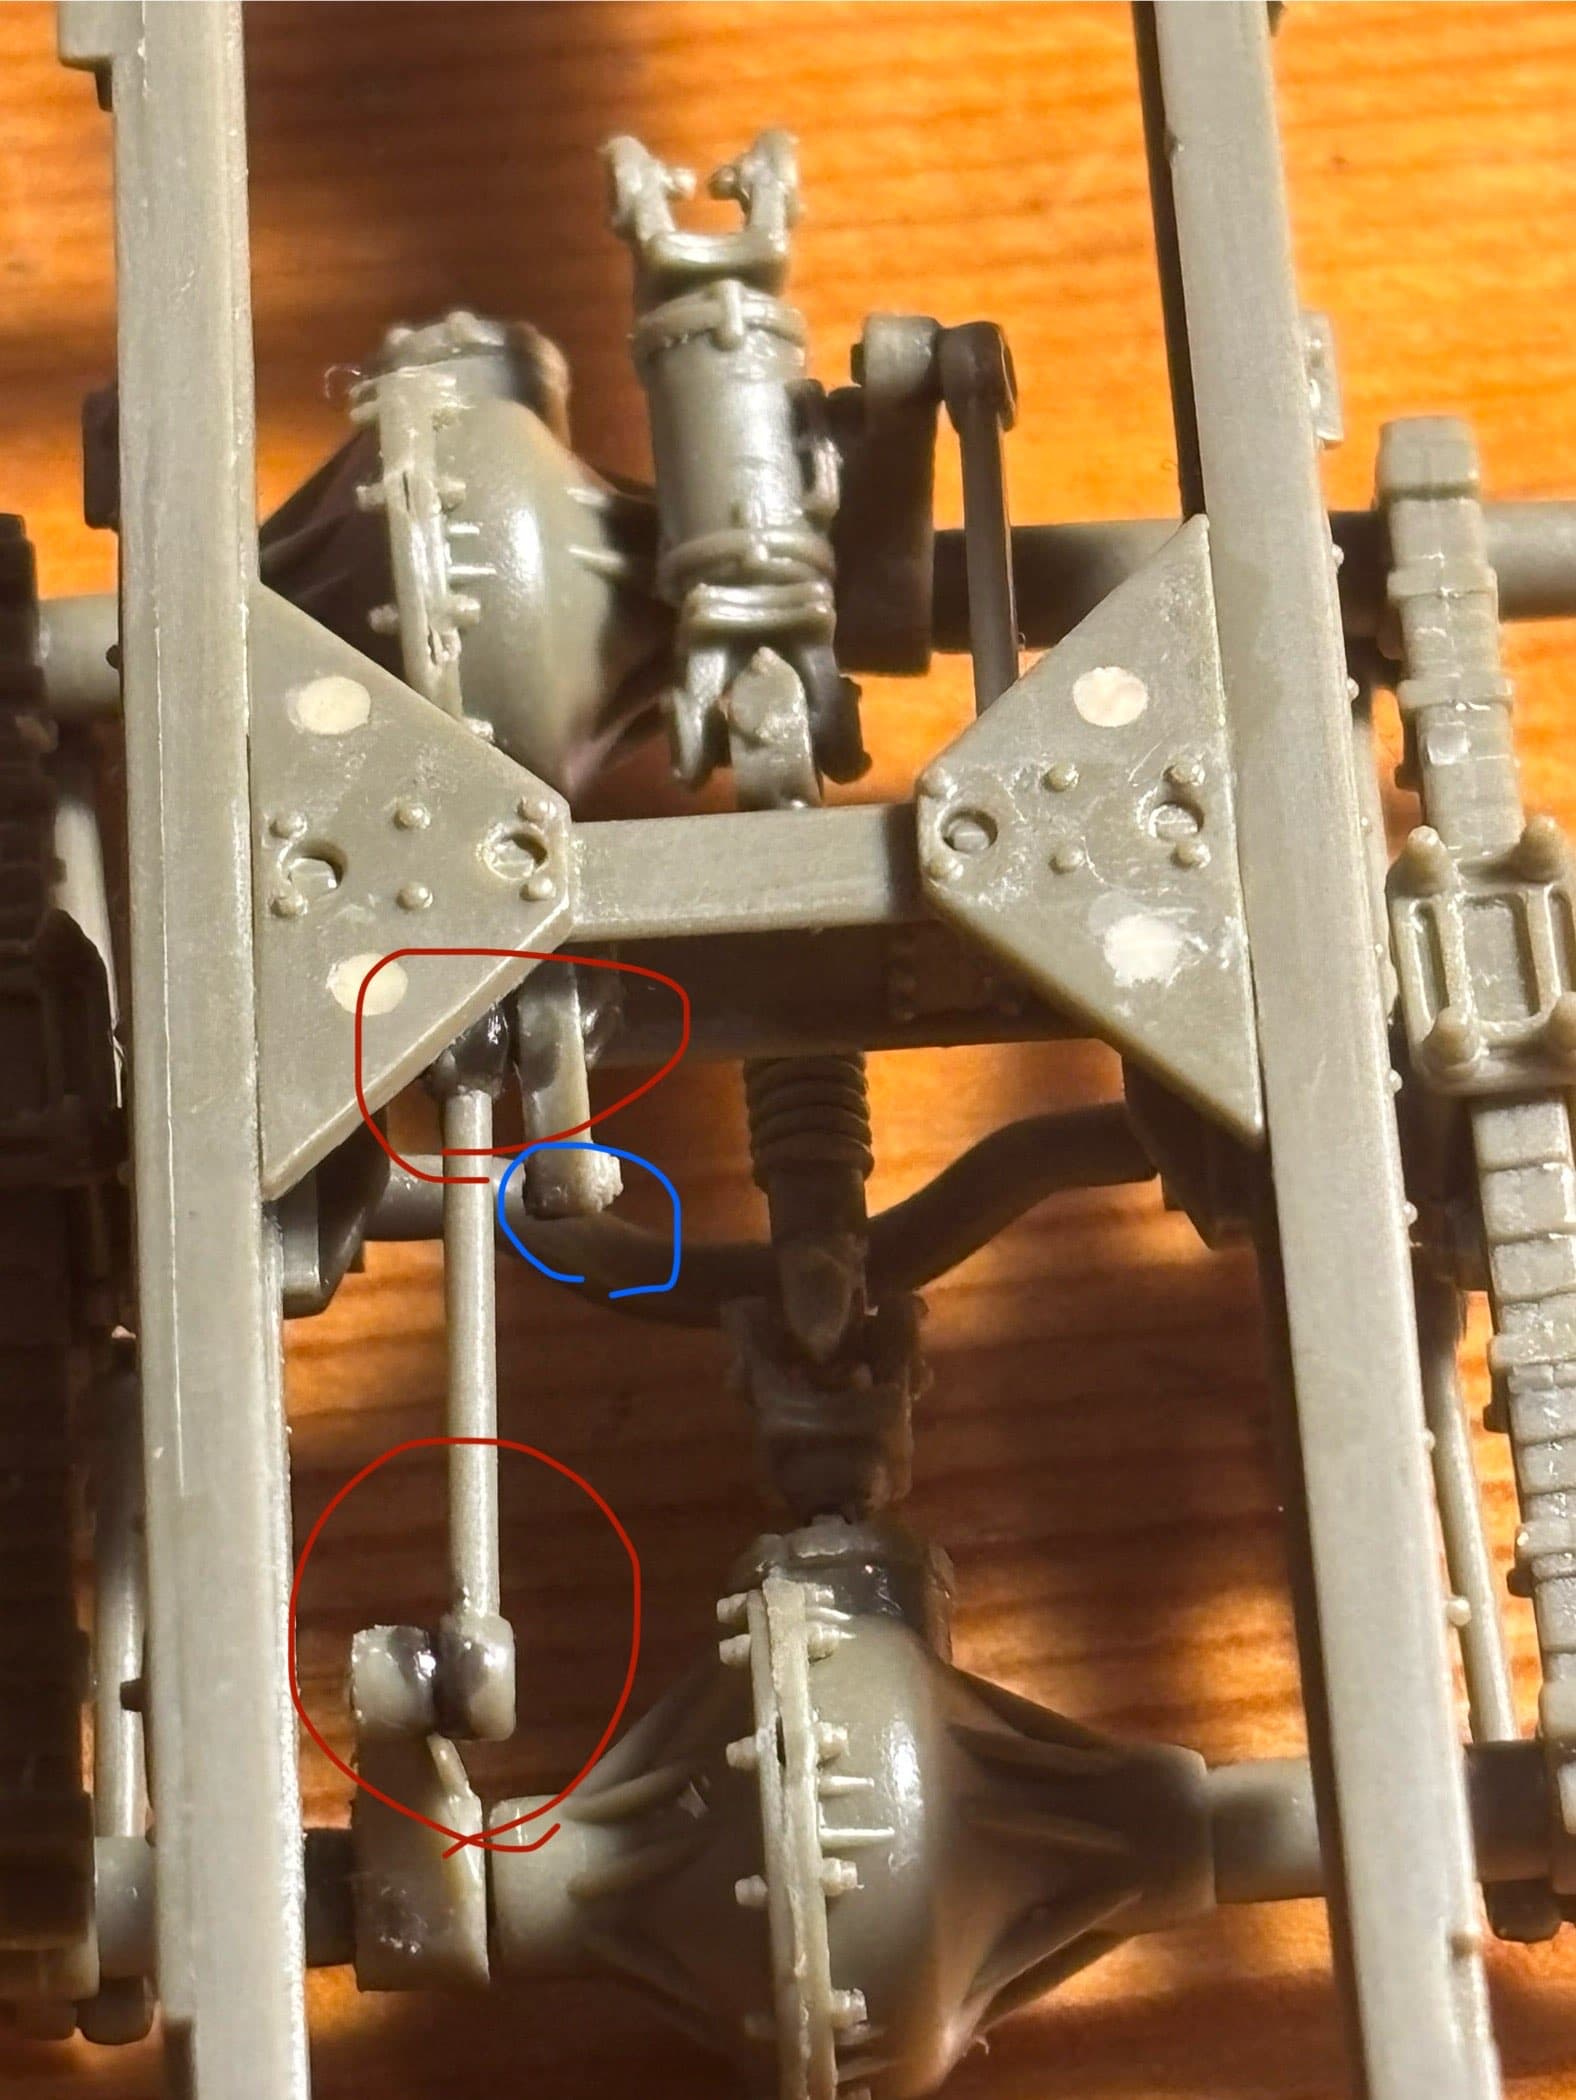
Finally, :face_exhaling: I’m pretty sure I either switched both E43 and E44 (the parts that fit TOO well) and it caused these arms/sticks? to be SIGNIFICANTLY misaligned.


(Gosh I’m a mess… :sweat_smile:)

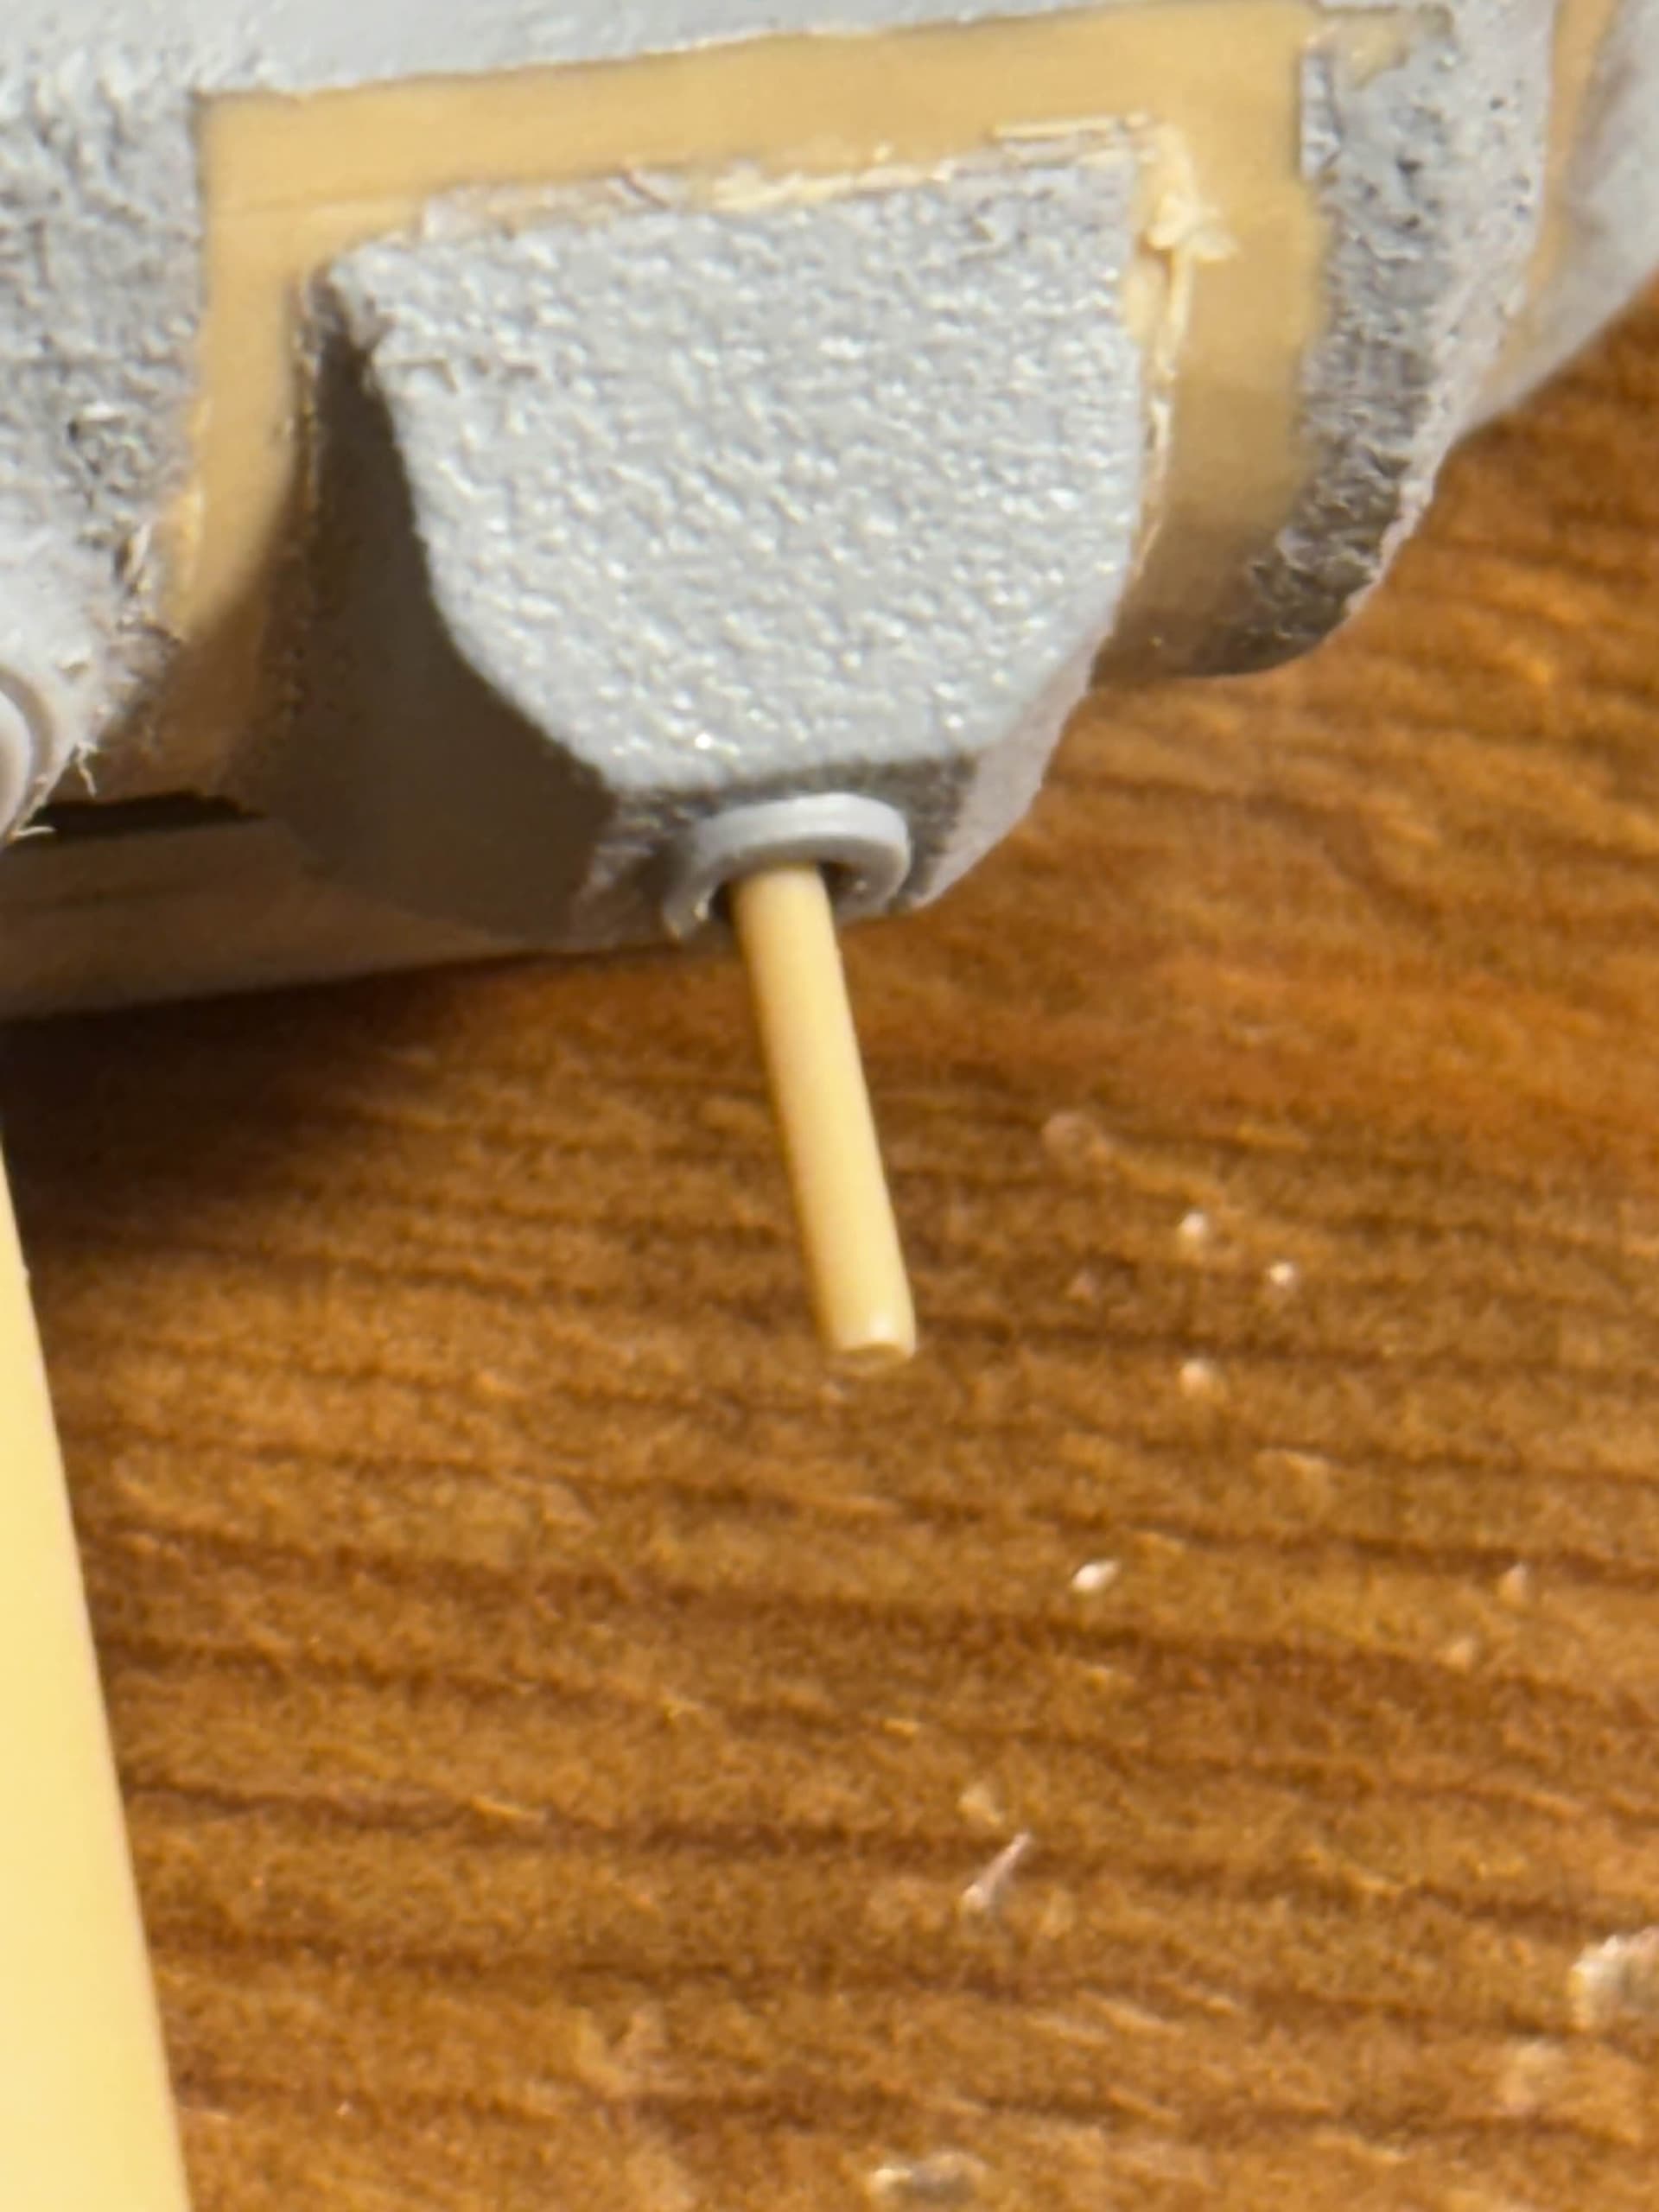
I ended up breaking the poles that these arms/stick things were meant to slide into, and just glued them onto whatever surface they ended up reaching with VMS ca glue. (the red circle marks the ends of the arm and the blue circle marks the area where the ends are supposed to make contact with)

Hope this will find its way to help out someone! :smile:

6 Likes

But unfortunately didn’t get much work done today, so no real daily update on my build. I was pretty busy but I visited my LHS and spent time with the misses. :smile:

I totally didn’t pick up a Dragon 1/35 king tiger since it wasn’t that expensive… (I totally DON’T have sixteen kits in the stash I still gotta finish :shushing_face:)

Also I got this AK diorama product, if anybody has any tips or notes on it or diorama making in general I’d really appreciate it!

Hope you’re all doing well!

4 Likes

Hi everyone!

Sorry for the weeklong inactivity, I’ve been pretty absent from the workbench recently but I’ve started some work again! I’ll be sure to give more updates within the following days!

2 Likes

Sooooo its been a bit again :sweat_smile:

I’ve been working more recently (again :joy:) I’ve done some work on the ZiL-157 and I did a bit of prep work on the Sho’t. So here’s some updates:

I managed to remove the engine from the chassis and I got it painted.


I’m honestly really happy with the way it’s turned out so far! I just need to get a red paint for the fan and the wheels behind it, and then weather the whole engine.

I’ve done a bunch of other work for the main body parts.


I’ve put some bullet holes in the cab, grills, and fenders, which I honestly think turned out pretty well.


I’ve also started work on the SA-2’s trailer, along with adding some PE parts from the eduard set.

Also, I’ve started to clean up the SA-2 missile itself!


But I’m honestly really stumped, the missile has multiple areas where the molding has like misaligned(?) and some areas are more recessed than the rest. I’d just sand the seams down but it passes through multiple details, does anybody know how to fix this?

And finally here’s some photos of my neglected Sho’t Kal! I’ve had it for a bit by now, it’s not in the best shape but I still think I can build it up into something nice.

I also removed all of the molded on mantlet cover rim details sine I’ll make my own with tamiya putty or green stuff putty, if anybody has any tips I’d greatly appreciate it! Along with adding a mantlet cover i’ll add a metal MG barrel since this is not a L3A1/M1919 whatsoever.

I’ll be sure to post frequent updates again tho, I hope you’ve all been doing well and I’d love to hear any feedback or tips about my work! :+1:

10 Likes

Awesome work keep it up

3 Likes

Great work, and as far as the missile is concerned, I guess it will come down to putty and a lot of sanding and rescribing….

3 Likes

That’s honestly what I was fearing, I’ll save the SA-2 as the last step in the build. Have you dealt with anything like this before?

1 Like

Update for the day!

I got a set of 2 master one piece muzzle M1919 barrels for the Sho’t kal, and they’re super pristine :+1:


They’re provided in two parts and they fit pretty well! The hole made into the barrel jacket wasn’t drilled out correctly though but it’s nothing a bit of force couldn’t fix. I’d honestly 100% recommend master brand mg barrel replacements over the rest I saw; the other options I saw were from aber and they provide the barrel jacket as a sheet of pe, and I wouldn’t even want to try to bend that into a cylinder :fearful:

But here’s a before and after pic of the Sho’t kal’s MG.

I saw some references and noticed that majority of the M1919’s barrel is actually out of view, which was kinda disappointing in a way.


(This isn’t exactly a Sho’t Kal Alef but the MG placement is still the same)

But honestly I think the improvement in accuracy is well worth it, and I’d highly recommend getting a new/spare M1919 barrel into the mg port. Just make sure to do this modification before you assemble the turret parts together, since doing it beforehand was a pain and honestly took me longer than I’d like to admit. :sweat_smile:

Also I’ve also started working on the SA-2’s trailer more, I got all the crossbeams and other pieces cut out and almost done:

And this one PE replacement I put on this part just randomly vanished :cry: So I can really only just hope that the carpet monster will bring it back to me :joy:

But finally here’s one the main chassis sides, this truck is going to be HUGE. :anguished_face:


(And I thought the missile was big)

I’ll be sure to really pick up work on this project though, I REALLY want to finish this in time for that IPMS show on November 8th, so wish me luck please :folded_hands:

Thanks a lot for reading!

8 Likes

Hi everyone!

I’ve been pretty absent from the workbench again, but I got some work done yesterday! I put some wheel sides together for the ZiL (and lost two parts to the carpet monster :crying_cat:) and did some work for the Sho’t Kal. I cleaned up the figures a bit and decided to add hair to the commander using some green stuff putty. I’ve seen photos of idf tankers during the YKW with hair and even some crazy beards, so I thought it would be appropriate.


(example photo)


I’m honestly REALLY happy with the results I got and honestly I didn’t even do much sculting work, the putty just came out like that while I was shaping it. (It might be a bit too long but its the 70s man :smile:)


Also here’s the turret as is with both figures, I was debating on giving the commander an uzi on a sling with the binos on his chest but I feel like that’d be a bit much. (If you think otherwise I’d appreciate the feedback) But I’ll add some shorter hair to the loader after I clean him up.

On another note I thought that adding bullet holes to one of the turret stowage baskets would be nice so I was going along with it until…

But I honestly moved on and adapted to it pretty quickly, I just instantly remembered the Egyptian use of AT-3 “Sagger” ATGMS on the Sinai front of the YKW, and decided to chalk it up to the crew getting EXTREMELY lucky.

(Photo of Sagger atgm impacts)


I honestly should re work the shrapnel damage since It might give the stowage basket an overly out of scale thick look, but I added a dried out piece of green stuff putty that I had from earlier into the basket to pretend that it’s stowage of some sort. (I honestly think It works quite nicely)

Also finally I’ve got a Panzer art barrel coming for this tank since the barrel the kit comes with isn’t the best, and the panzer art barrel comes with the accordion type of mantlet cover over the barrel (not all Sho’t Kal Alefs had this in the YKW based on the reference photos I’ve seen, but I’d still like to have it on mine)

I hope you’ve all been doing well, happy building! :+1:

10 Likes

Looks good. If you do a search for Ed Okun you may find some excellent examples of the hair and beards you’re talking about. He did great IDF figures.

4 Likes

Try this:

Ed Okun “Modeling Military History”

3 Likes

Very nice job on this project. I’m very interested in this conflict as well and hope to do something in the near future.

Those figures look great, what brand are they ?

2 Likes

AC models, very hard to find these days..

2 Likes

Thank you Bert but I meant the ones in the Centurion turret.

3 Likes

Thanks for the suggestion!

I’ve seen Ed Okun’s work before, he does really good Arab-Israeli war subjects. I’ve seen his post on his YKW m113 before which modified figures, I’ll look at it again for future reference next time!

2 Likes

Hi!

the figures are originally from Royal Model, but they’re both not cheap and not so easy to find. However you can find a billion different represses of them online but they’re missing the PE parts. I got my repressed one for like 0.99 USD one or two years ago, the quality was actually really good for being so cheap; but I don’t doubt its not as good as the original.

I can’t wait to see what you’ll do though! Just an FYI if you plan to make a Sho’t Kal Alef from the YKW, both AFV club and Amusing Hobby kits have their own issues. If you’d like I could go into more detail on it, but honestly I hope another retailer will make a better Sho’t Kal Alef for the YKW.

3 Likes

Hi everyone!

Here’s an update on what I’ve done. :+1:

I worked on the figures more and sculpted some hair onto the loader, and ended up giving the commander an uzi (ignore his broken right pinky :sweat_smile:)

I’m pretty happy with the way the loader’s hair came out! I thought of putting goggles on him but I don’t have any in my stash that fit, and sculpting my own scares me. :crying_cat:

I also got some red citadel color paint for the engine, and It went on perfectly! Normally when i use vallejo It doesn’t give me a smooth finish (Its probably my user error) but the citadel red was really nice.

The Sho’t Kal’s barrel also came in yesterday, It’s pretty nice but its got some flaws and holes I gotta figure out. It wasn’t cheap so that’s kind of disappointing but I’ll work around it.

But finally I got the main chassis for the SA-2’s trailer put together, It’s got a lot more parts to go but I’m honestly glad that I got that done.

I’ll keep on working on this build, but I’m getting worried due to my time constraint (Ive got an exact 30 days left) so I might skip out on some of the Eduard PE set details If they’re not too important.

Wish me luck and hope you’re all doing great!
Thanks for reading!

3 Likes

It’s all coming along quite well, but let me stop you before making a potential mistake.

I wouldn’t use the barrel you have pictured. As far as I can tell the accordion was not in use in ‘73.

I make this observation after decades of research. That’s how I build mine from that time period. Of course if someone want to dig up one with the accordion then I’ll gladly make one that way as well.

4 Likes

Hello!

Although the lack of an accordion on the barrel seemed to be pretty common, I’ve noticed that Sho’ts in the YKW can have the accordion. I’m not sure why only some of them had this, but I think the Sho’t still looks cool with or without this. Also I’m pretty sure the Sho’t kal Bet, Gimel, and Dalet all had these accordions (I’m not 100% certain though).


(All of these Sho’ts are in the Sinai, pretty sure this last one is in Egypt)

Thanks for the reply and advice!

3 Likes

Wow! I had not seen any of those photos. I guess I’ll have to add that to the ever growing list of Centurions to model.

3 Likes