Oh yes now I remember them, they did look familiar just couldn’t place them.
2 Likes
I have the AFV Club kit and heard it was excellent, there seems to be a lot of good reviews of the kit but I have not read specifics on any short comings yet.
2 Likes
The AFV club kit isn’t awful at all, The AM kit is practically just a carbon copy of it with some changes made. But from what I know both the AFV and the AM kits have issues, I’ll list some of them off.
-
both AFV and AM’s turret loaders hatch position is possibly wrong (From what I remember hearing)
-
Roadwheels are missing rib details (however both AFV and AM kits are) and have rubber tires
-
AFV and AM kits lack mantlet cover
-
AFV club kit comes with rubber band track, while the AM kit comes with clickable plastic tracks (which im pretty sure are a copy of the single link clickable AFV club centurion tracks which are sold separately)
-
AFV club kit comes with cloth net for the turret basket mesh, while AM kit comes with PE.
The AFV club does come with a metal barrel, IR light holder, crispier molding, and more better quality decals (the AM kit just comes with some chevrons and numbers for the side skirts and stripes for the barrel). The AM kit comes with better trackers, PE and roadwheels, but you need to backdate it by leaving a lot of included details off. Both of the kits have their own flaws though; it’s just up to which of their flaws is worse than the other in your opinion. But both kits can 100% build up into something nice!
3 Likes
Thanks for the detailed rundown.
My plan is to build a diorama of a pic I saw with an Egyptian T-34/122 on a trailer with a Centurion stopped nearby and Israeli troops examining it. I have all the models for the scene. Just gotta finish the projects I have my hands full with now!
2 Likes
I’ve heard that the loaders hatch is wrong as well and although I haven’t had a micrometer on either kit from looking at reference pics they appear to be correct to my eyes. Im thinking that whoever made the statement that there was a problem may not be aware that there are 2 different hatch positions, the early Mk3 and the later Mk5 onwards. I’ve seen at least one build log where someone used the now hard to find Lionmarc Mk3 turret to “correct” the hatch position on a Mk5 build. I’m not even sure that there aren’t some Centurions that were built as Mk5s that didn’t have the early hatch position. From what I have read the version change had more to do with sight repositioning, deleting the turret mortar and rear spent casing hatch and changing the MG’s from Bessa to Browning.
I haven’t built a n AM Centurion, but have built a AFV Sho’t Kal and the ‘67 Sho’t Meteor. I thought both were excellent kits and built up nicely. Only complaint I would have is the assembly of the turret makes work for filling seams.
P.S. I always include this in any Centurion build post because I didn’t know until someone told me, but the forward upper hull is one solid piece of steel actually bent to shape. So there should not be a seam between the two pieces directly behind the driver’s hatch, which both kits have ![]()
4 Likes
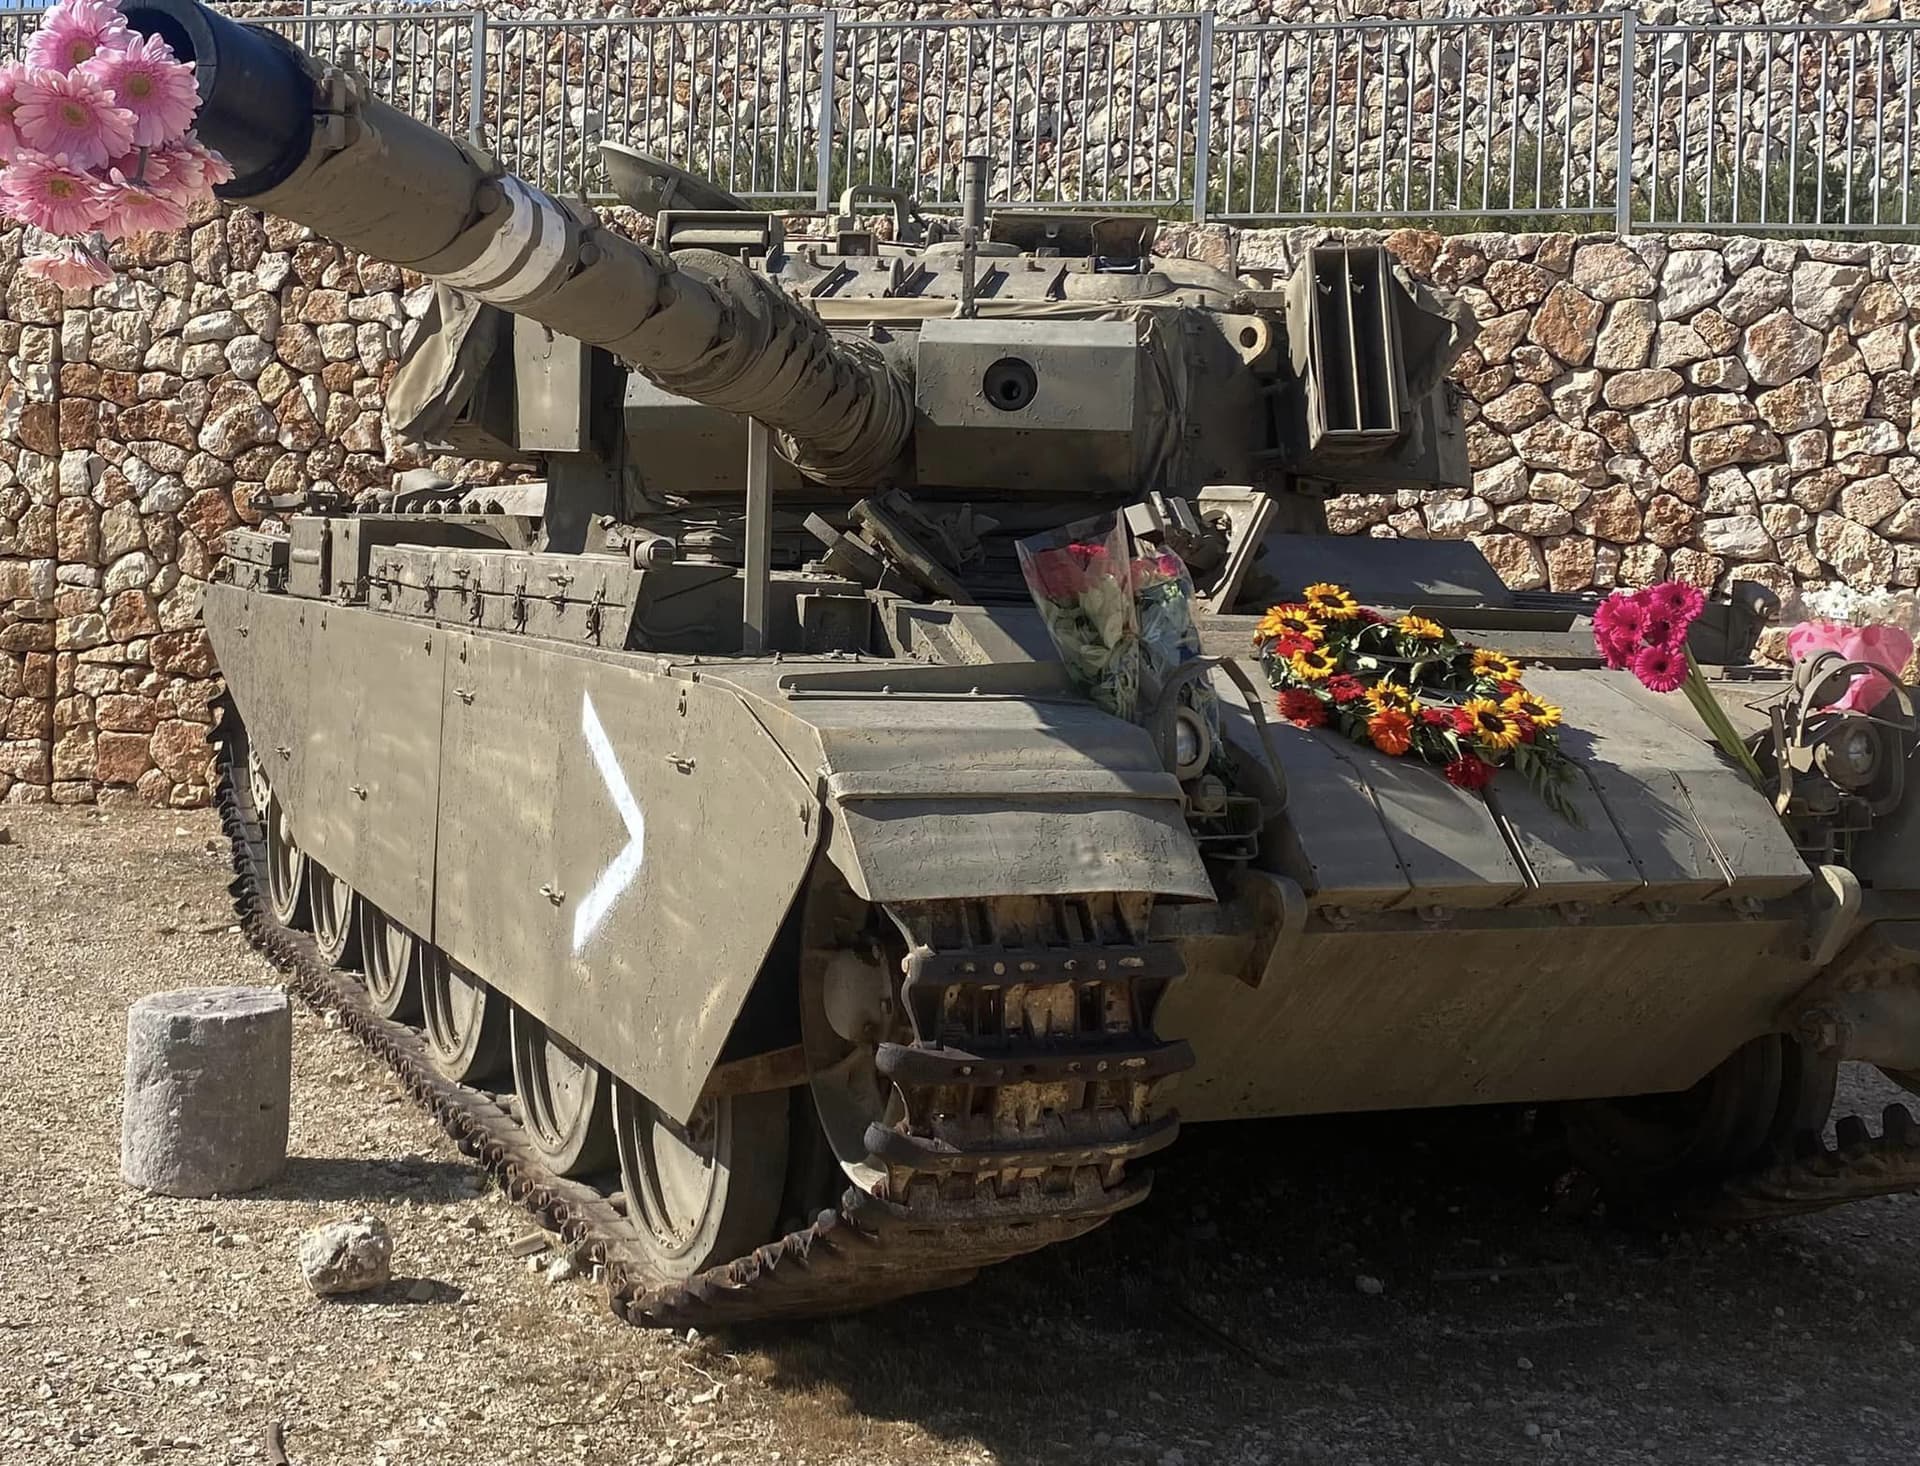
Here is a photo of a Shot Cal Gimel in 1983 with an accordion. Yes, even after they got the ERA some had it.

Shot Cal Dalet in Brigade 37 (179) memorial, still with it as well.
5 Likes
The ERA is when I first noticed it being used, so that’s not surprising. I hadn’t seen in ‘73 before. Of course, back when I was building lots of IDF Cents (mid 90’s) the internet wasn’t quite what it is today. All of the references I’d been using are from various books, including the old Born in Battle series, which were quite good.
Your assessment of the hatches is correct, along with the sight relocation, and the mortar. Sometimes the mortar opening was plated over. That rear hatch, which people used to erroneously call an escape hatch, was actually there to remove the 20 pounder. The switch to the L7 obviated the need for it as it was removed from the front.
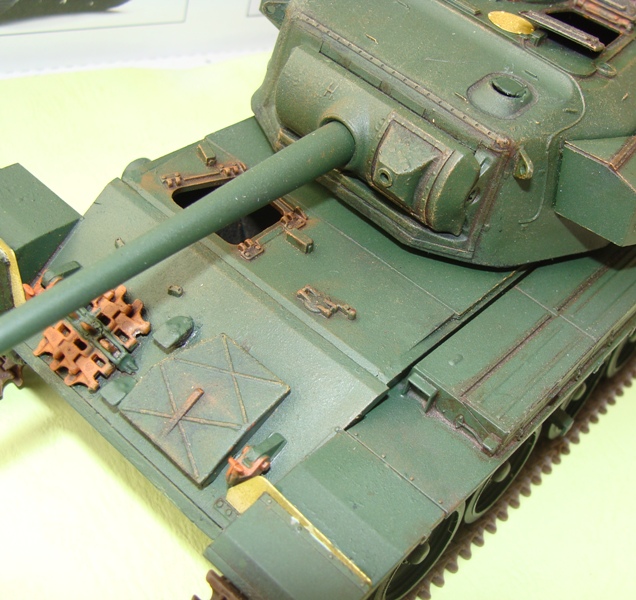
I did open the side spent casing hatch as you can see below.
There was a time when you had to change the orientation of the loader’s hatch the old fashioned way:
6 Likes
No problem!
I’ve seen a photo of your scene before though, I can’t wait to see how it’ll turn out! Also if this helps majority of the Sho’ts on the Sinai front have their side skirts on, obviously some of the sho’ts were beaten up but they didn’t frequently take them off like they did on the Golan front.
3 Likes
Thanks for the clarification! I honestly kind of suspected that the hatches might be related to different variants or early/late variants, I really appreciate your input! Also thanks for that tip about the forward upper hull, If I’m understanding it correctly I already fixed that issue unintentionally.
2 Likes
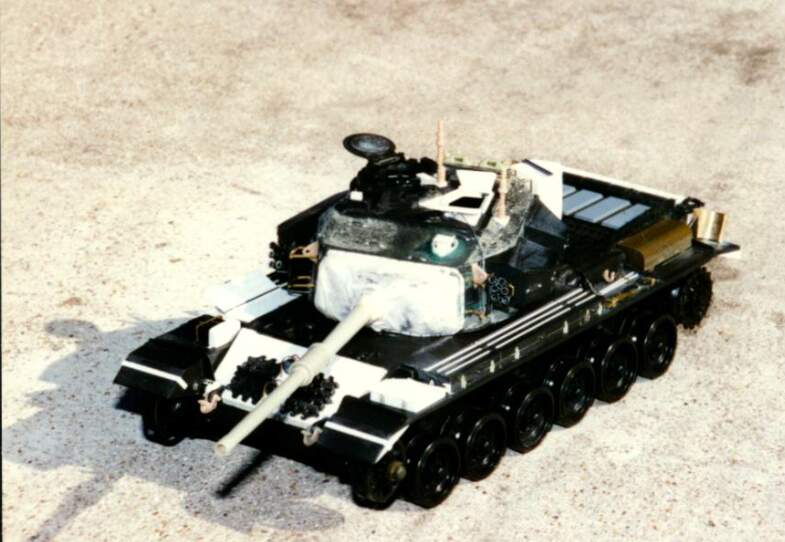
Thanks for the awesome photos and input! I really like the dozer blade on the first one, and the flowers on the second one look nice.
3 Likes
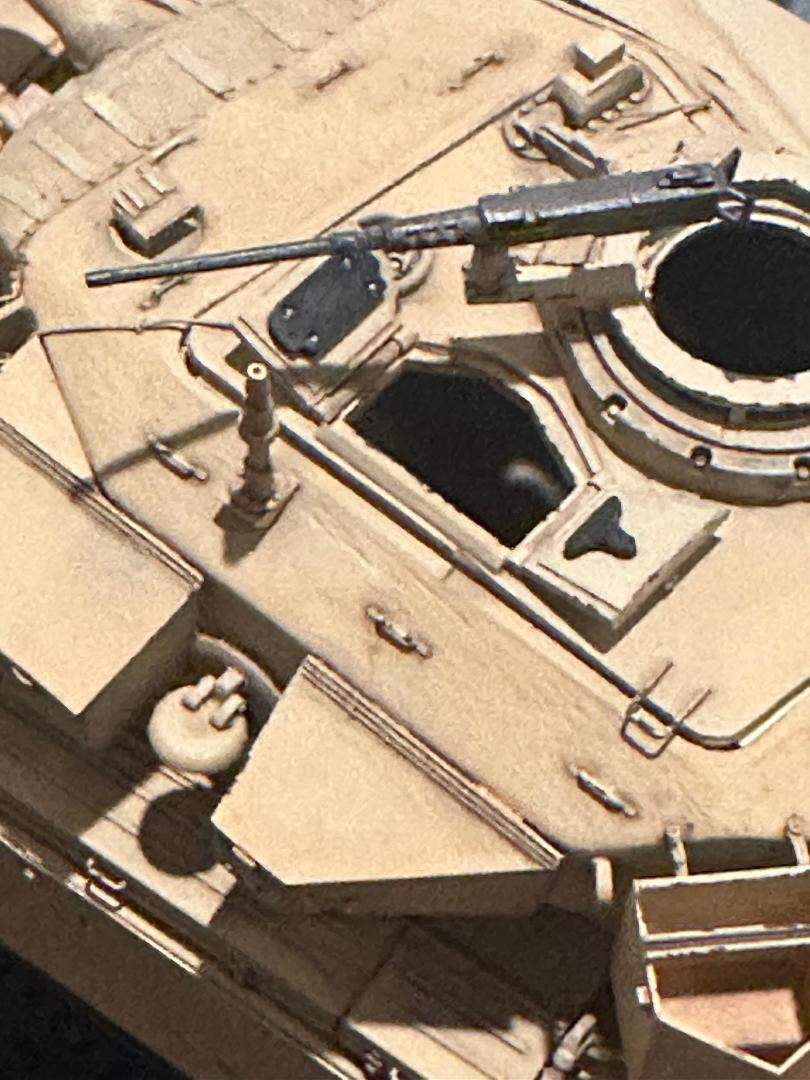
I really like the centurion you built! If you don’t mind me asking It looks like you scratch built the IR searchlight holder on the back of the turret. I’m planning to do the same on my Sho’t, would you have any advice or tips to give?
3 Likes
Also I just realized that I used AM instead of AH (for Amusing Hobby) earlier, my bad ![]()
4 Likes
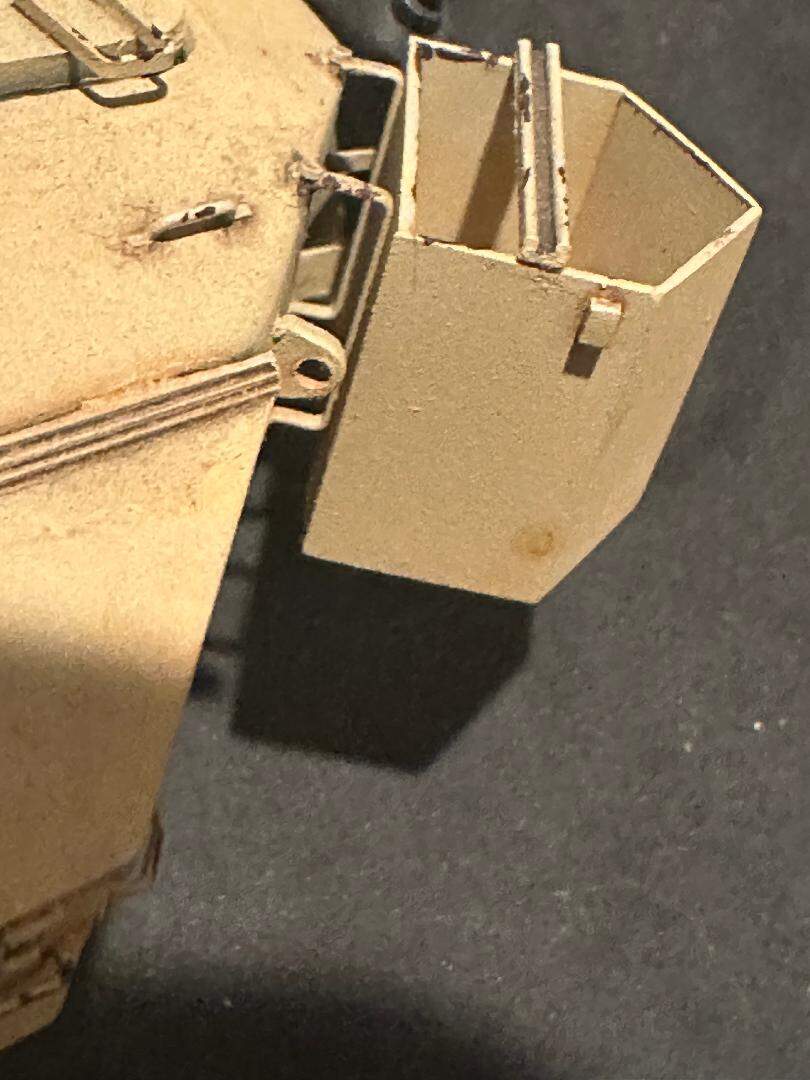
I don’t try to cut anything exactly the right size - except for the height. I let all of the walls overlap, then cut the excess cleanly after letting everything set up for 24 hours, and sand smooth with wet/dry paper on a smooth surface so nothing gets rounded off accidentally. Same with the 45 degree angles - I can’t see a trace of the joints inside or out, except on the top, which I just discovered after 30 years. Now it’ll bother me…

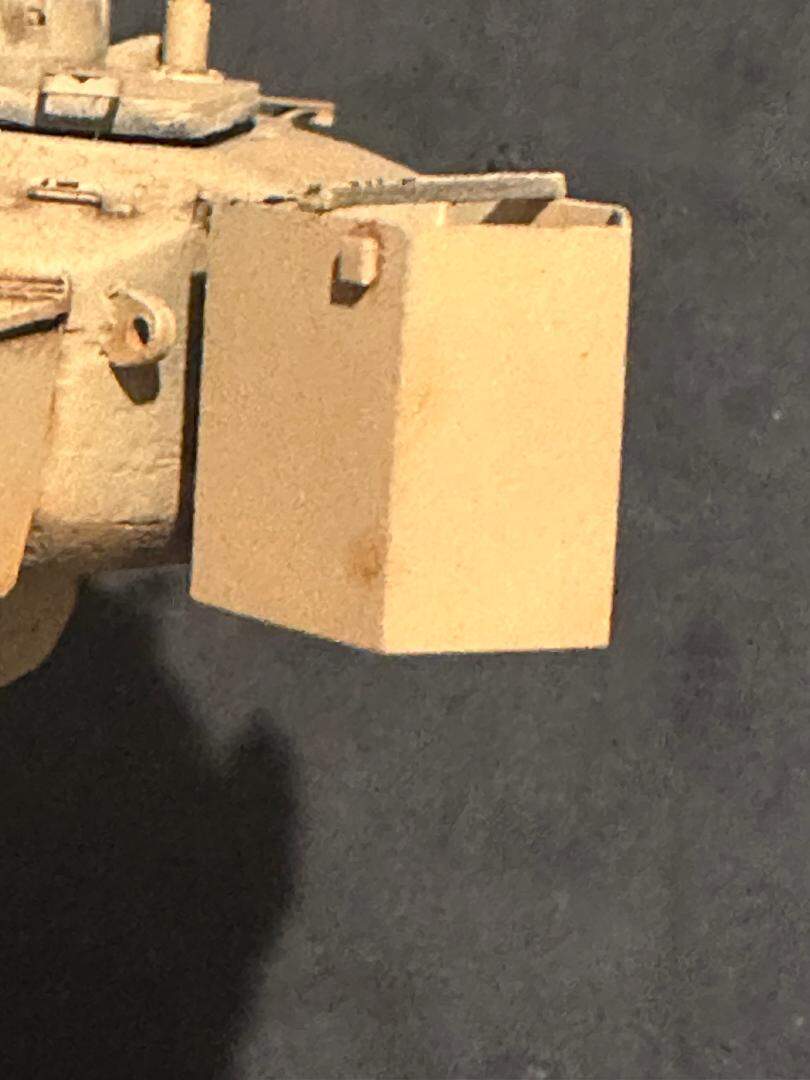
I made the mounts from brass strips and added bolt detail. May the photos will help more than I can. My camera sees better than I do these days.
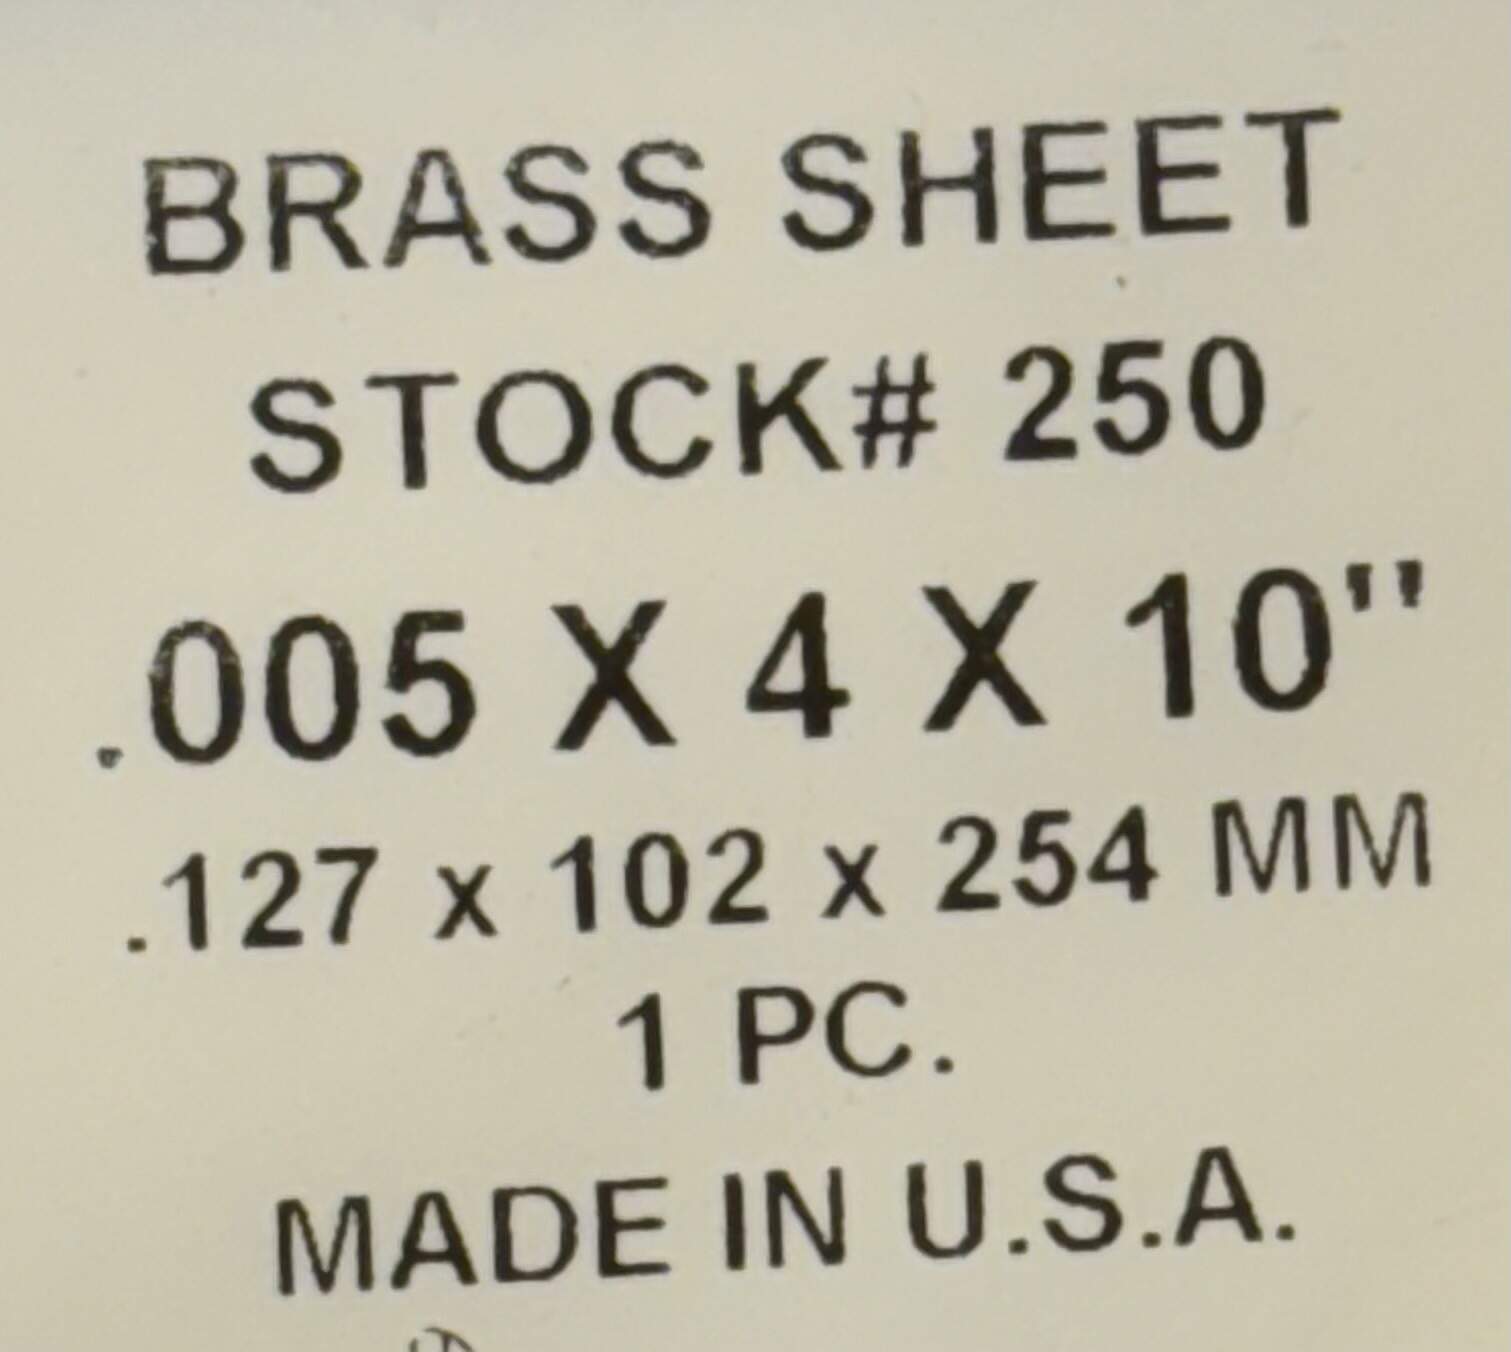
The last advice - use .010 plastic card. You can see in this last photo the walls are no thicker than the footman loops I made from wire. Too often it looks like guys are using whatever they have laying around, and it shows. This is sheet metal, not 2 inch armor plate. In fact, if I were to do this again - I’m even suggesting it - try using brass shim stock from Hobby Lobby. Cut it to the right height. Cut a piece of paper the same size. Use the paper to get your bends in the right spot to get the right size. Once your paper model is correct, transfer the bend lines to the brass. Lightly score the brass inside. Make your bends. Now you only have one joint at the back you can finish with solder or CA. Either way it’ll sand nice and smooth. Then just add the bottom piece. I do all of my Bradley turret baskets with brass - they look way better than any kit piece. That’s how I’d do this box if I had to do another one. You’d be surprised how little time it takes. I did a quick how to for a fire extinguisher box earlier this year (?) just to show how easy this is.
It starts here:
Or here, actually:
5 Likes
I think we all knew what kit you were referring to lol! No worries ![]()
3 Likes
Here are a couple of pics to show what i mean
a pic i grabbed from google of a kit. Should be no seam running across behind the hatch
And the actual tank from a Prime Portal walkaround
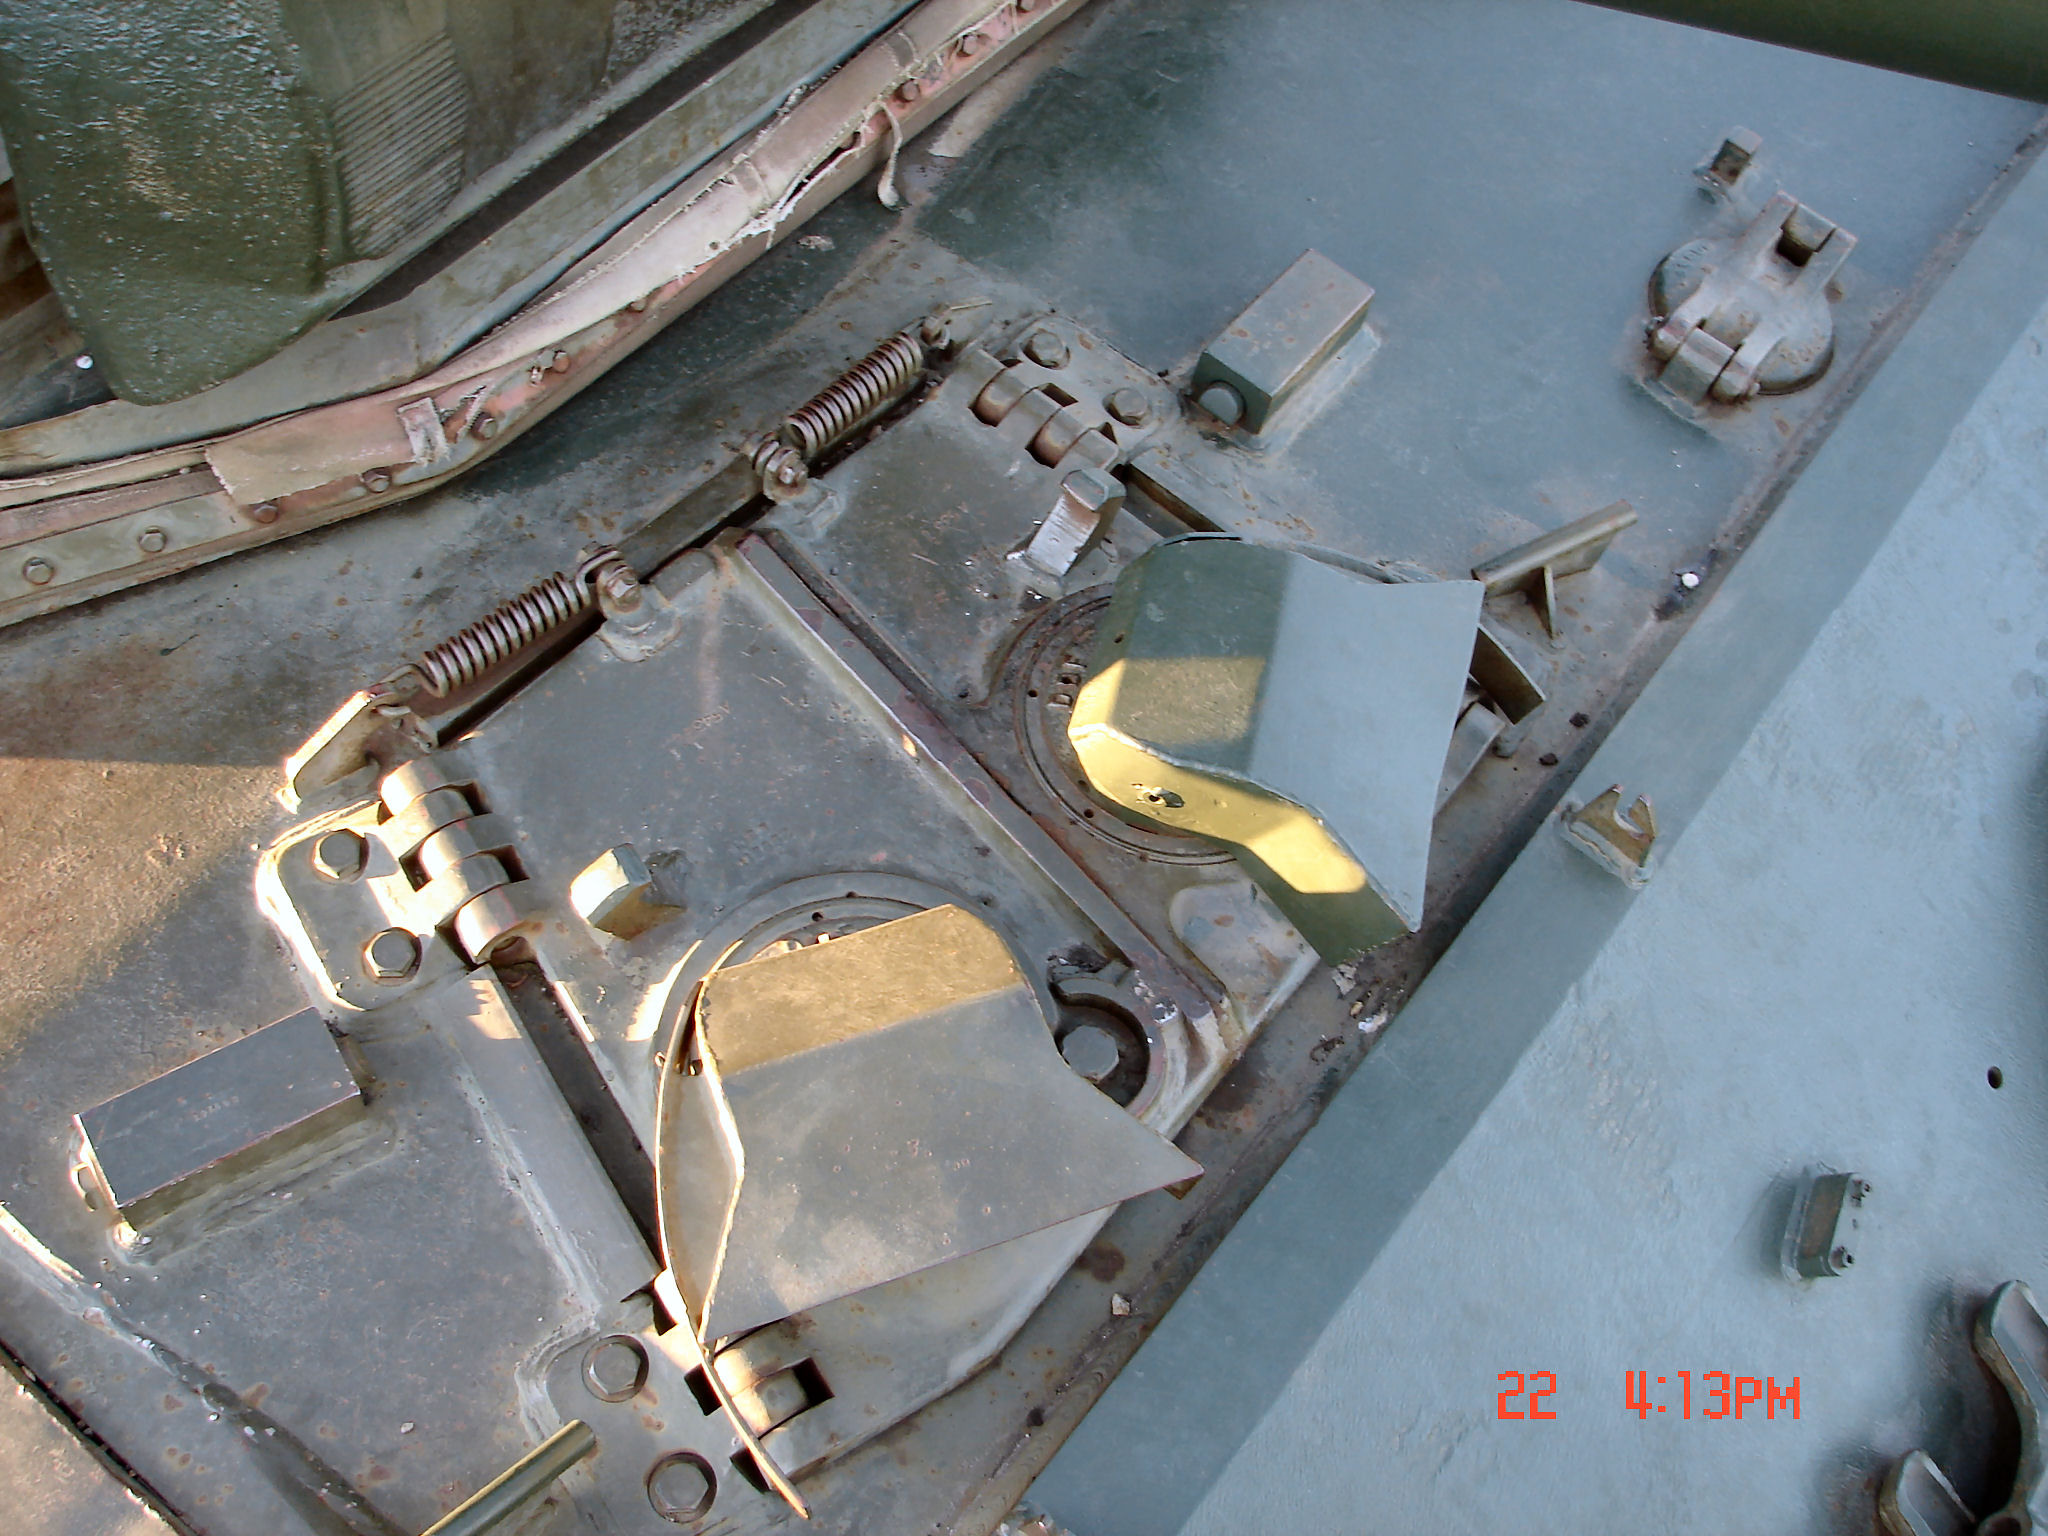
You can see that the hull top is bent down to meet the glacis in one piece.
It was Michael Mass pointed this out to me during a group build on the old IDF-Inscale forum. He is always a wealth of knowledge
4 Likes
Thanks for all the advice!!
This genuinely helps me out a ton, I’ll go with the brass sheet method, do you think this’ll work?
Also, if you can help out with measurements for the IR light holder I’d really appreciate it; I seriously appreciate all the help!
2 Likes
Thanks for the references! I’ll be sure to take note of this for my future centurions. Also would you happen to know any more notable information on Centurions/Sho’ts?
3 Likes
That’ll work!
I generally tell people not to use models as references. There’s no guarantee that I got it right. ![]()
However, since you’ve been forewarned…
Measurements are expressed in inches.
Height: .633
Length of rear: (same as width between sides) .579
Length of side: .373
Length of angled rear pieces: .423 This length will vary slightly depending on what angle you use. I don’t know it - I eyeballed it. But if you want to measure you can use this photo:
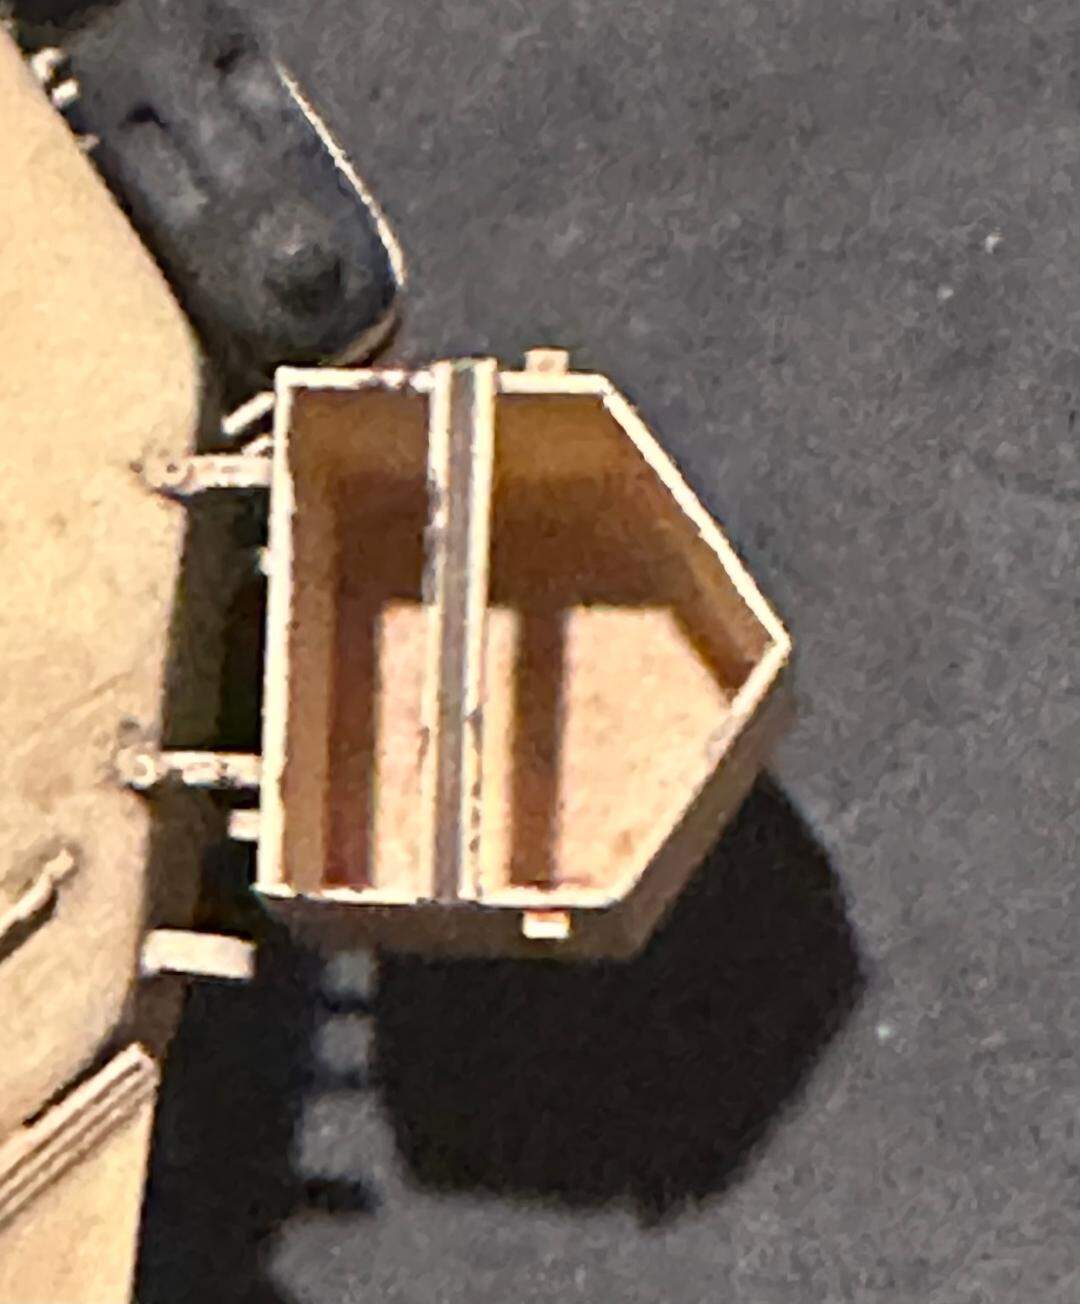
If you can get the image the right size you can literally mark the brass at each corner and bend it.
3 Likes
Thank you so much!
I’ll be sure to use this as a guide, once again THANK YOU SO FOR THE DETAILED ADVICE !!
2 Likes
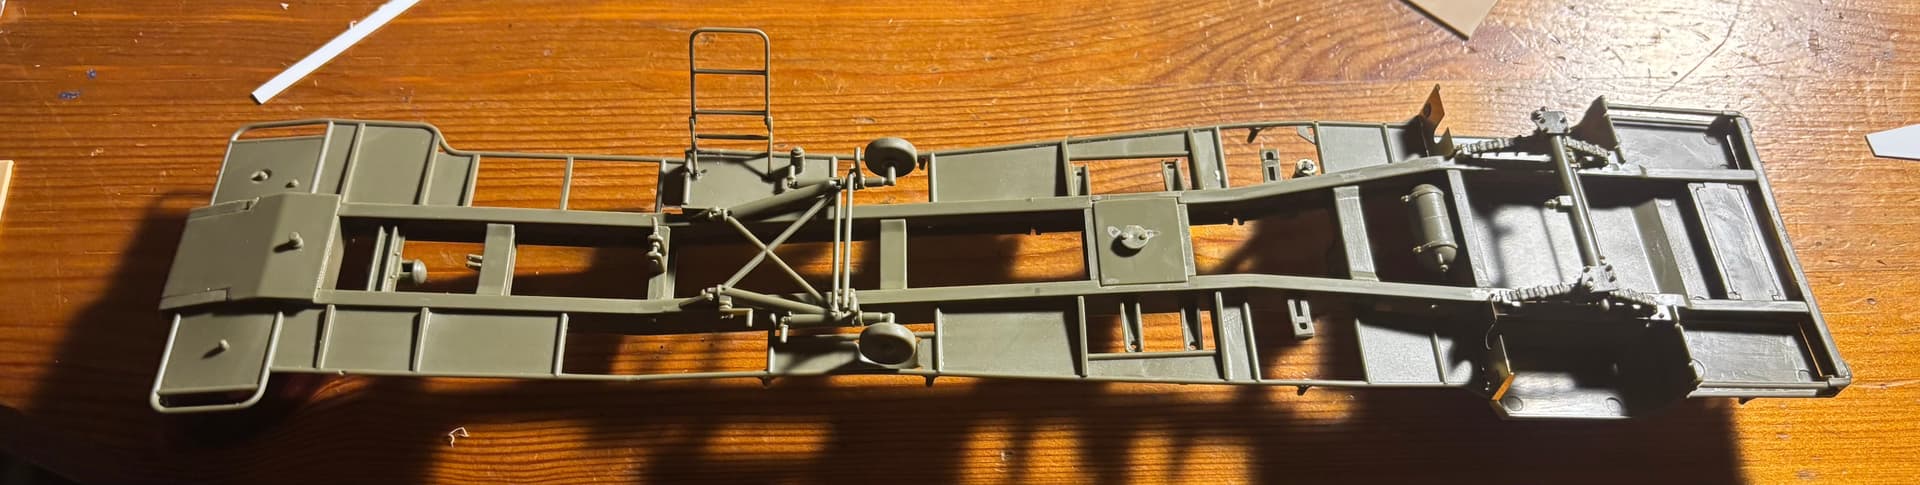
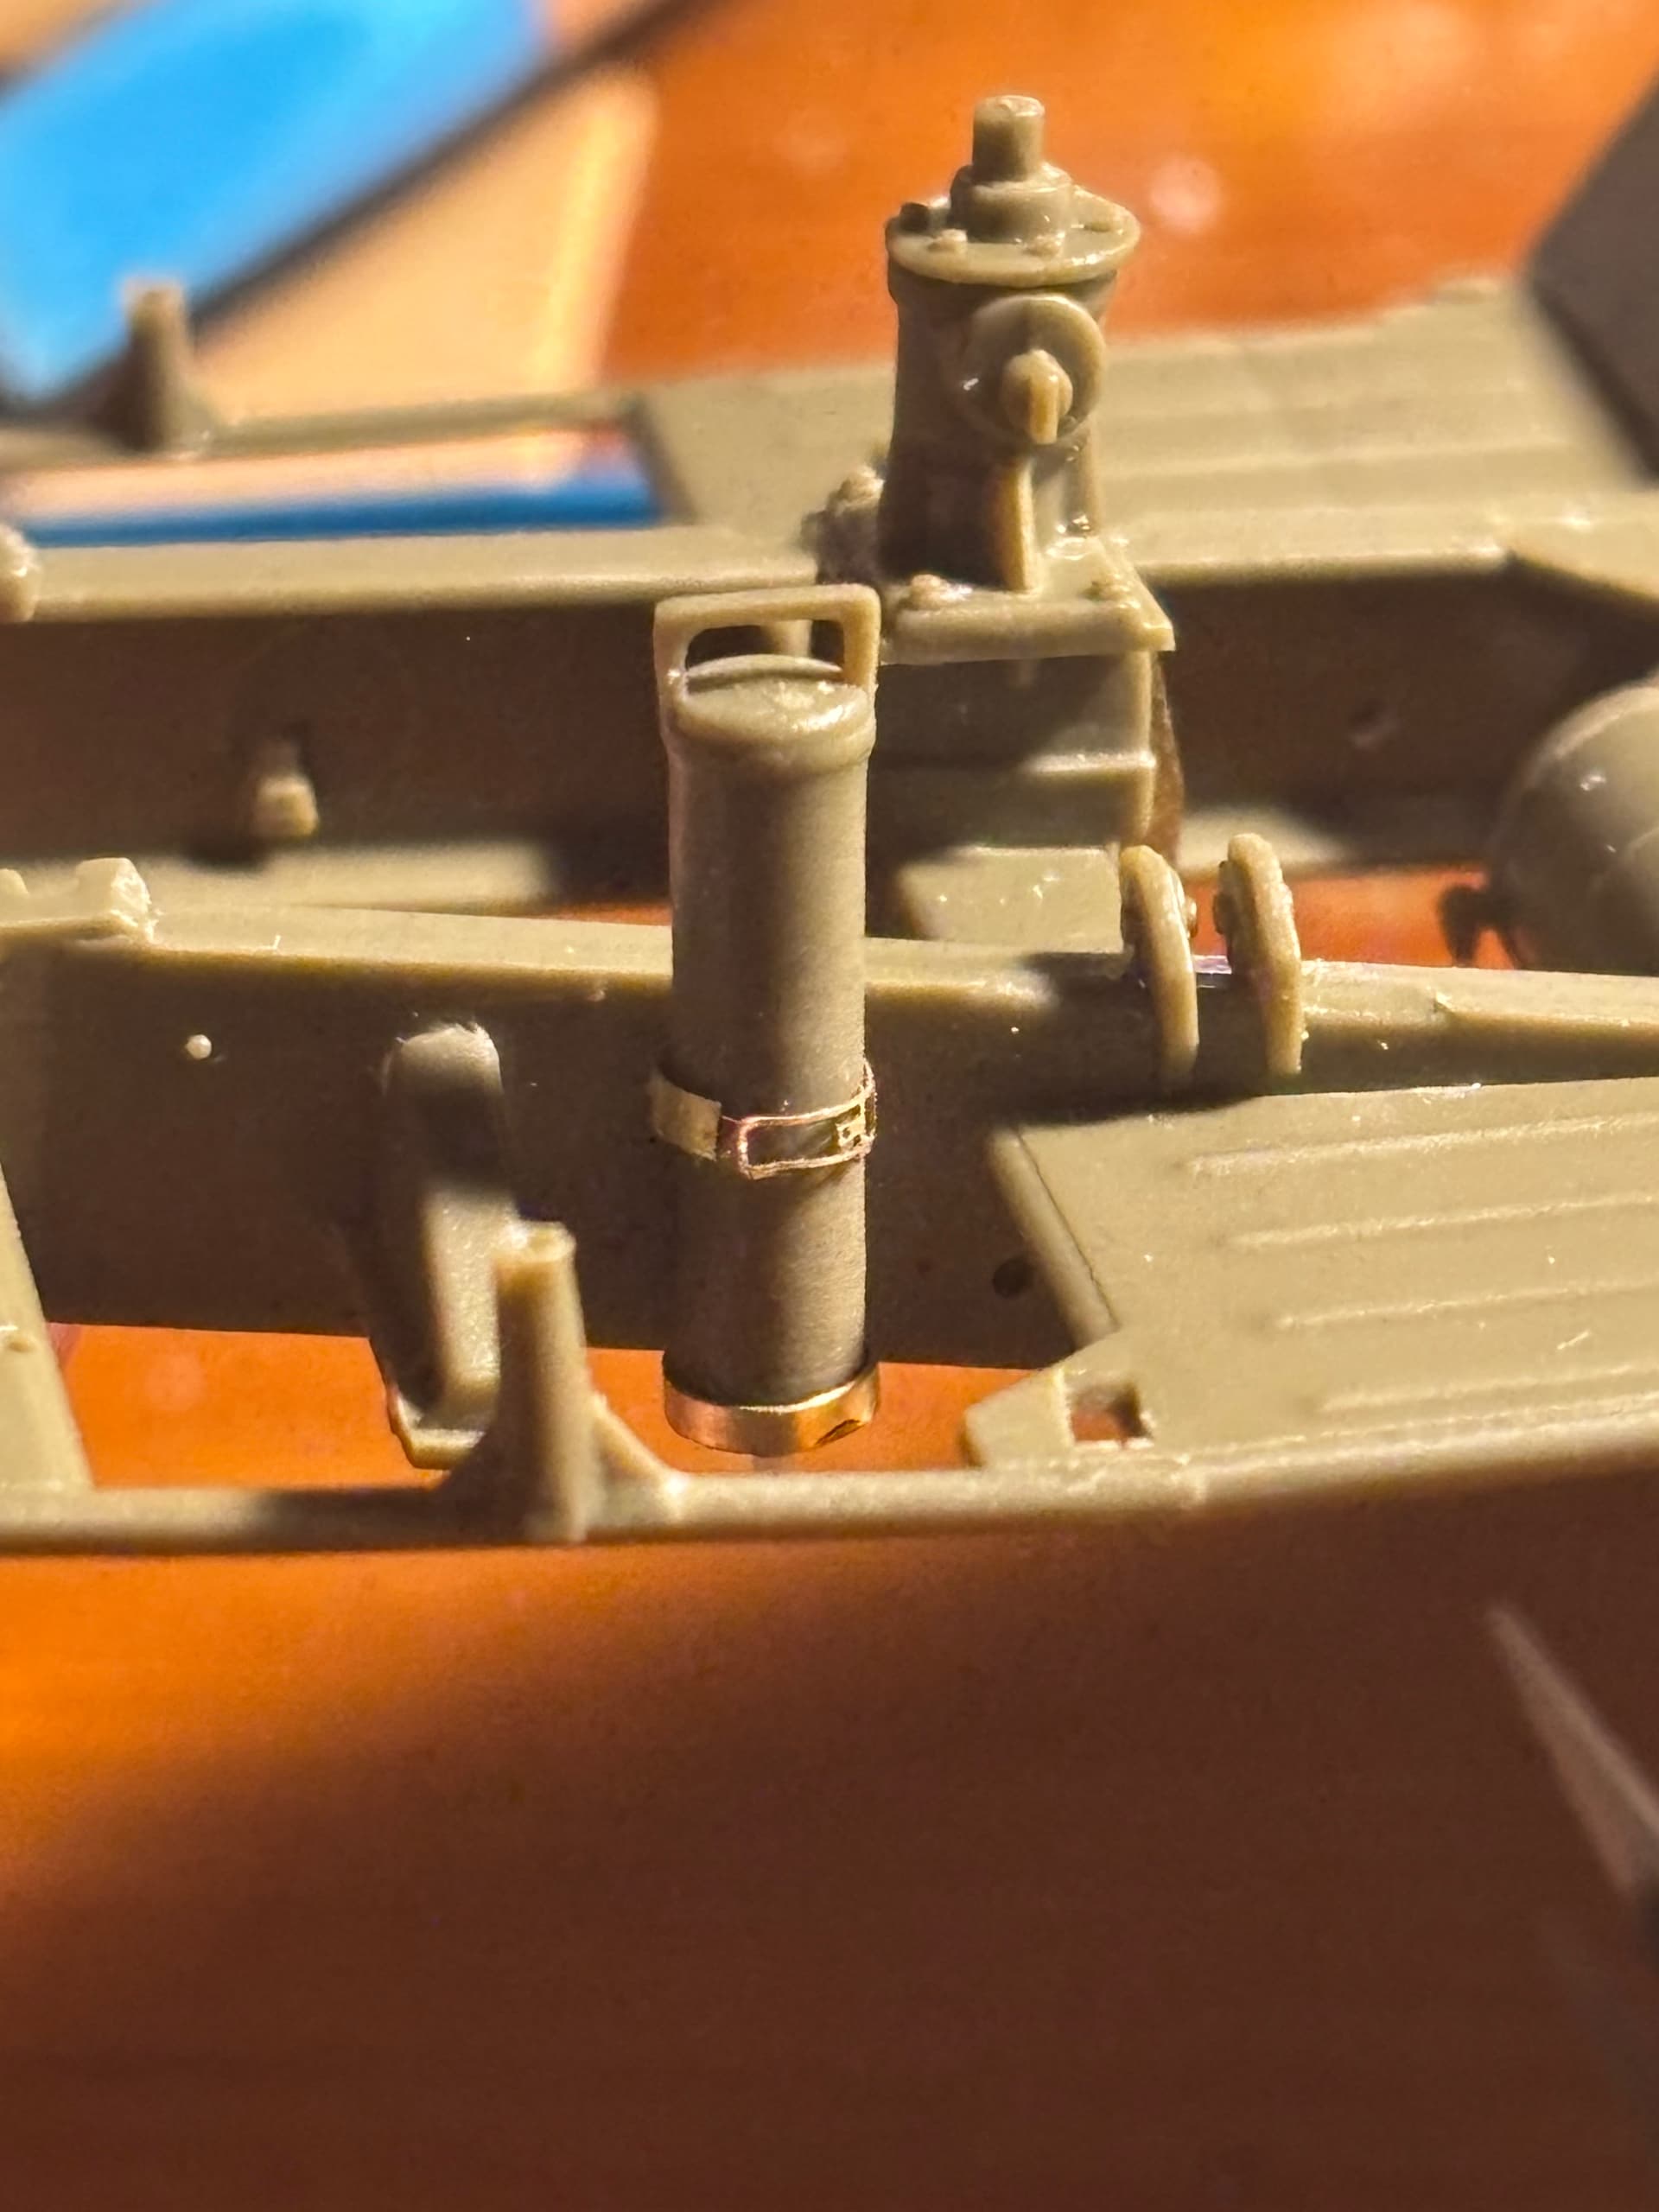
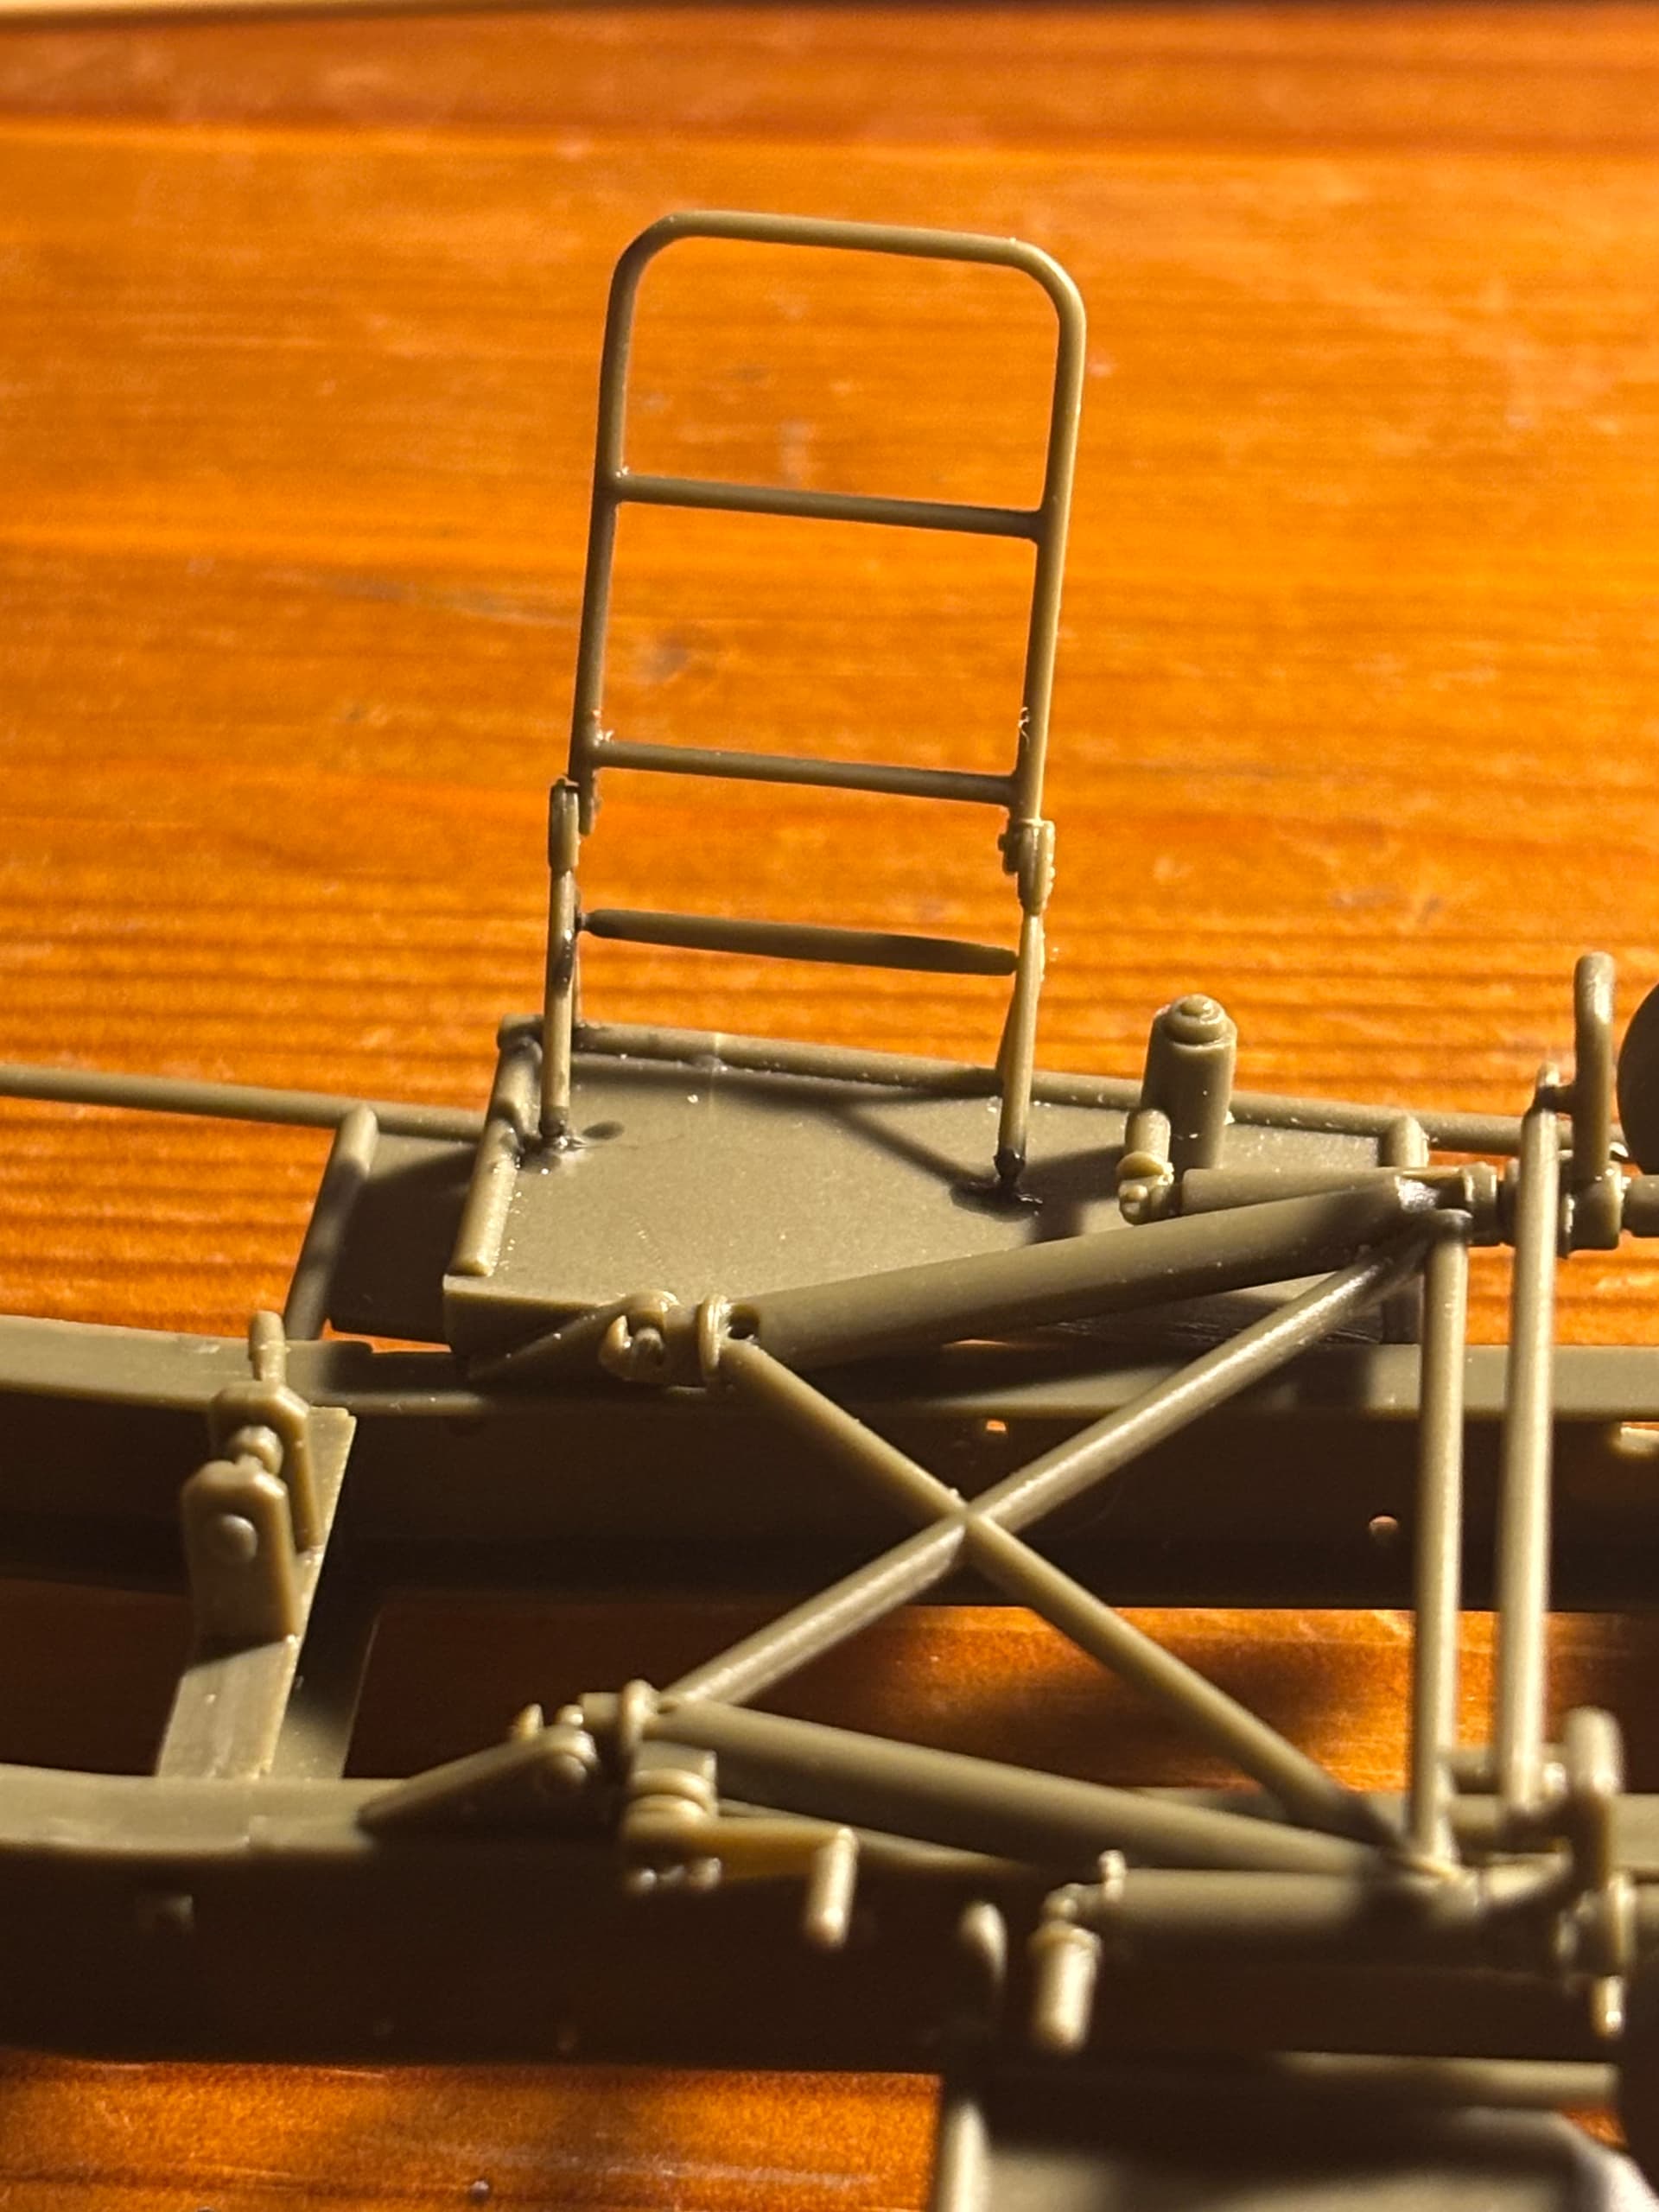
Hi everyone! I’ve been at work on this project, and I’ve gotten more progress done on the SA-2 trailer and some on the Sho’t Kal!


This ladder was a tedious to make (it needs some scraping to fit together properly)
I’m also getting PE work done and I found that little part that just disappeared earlier ![]()
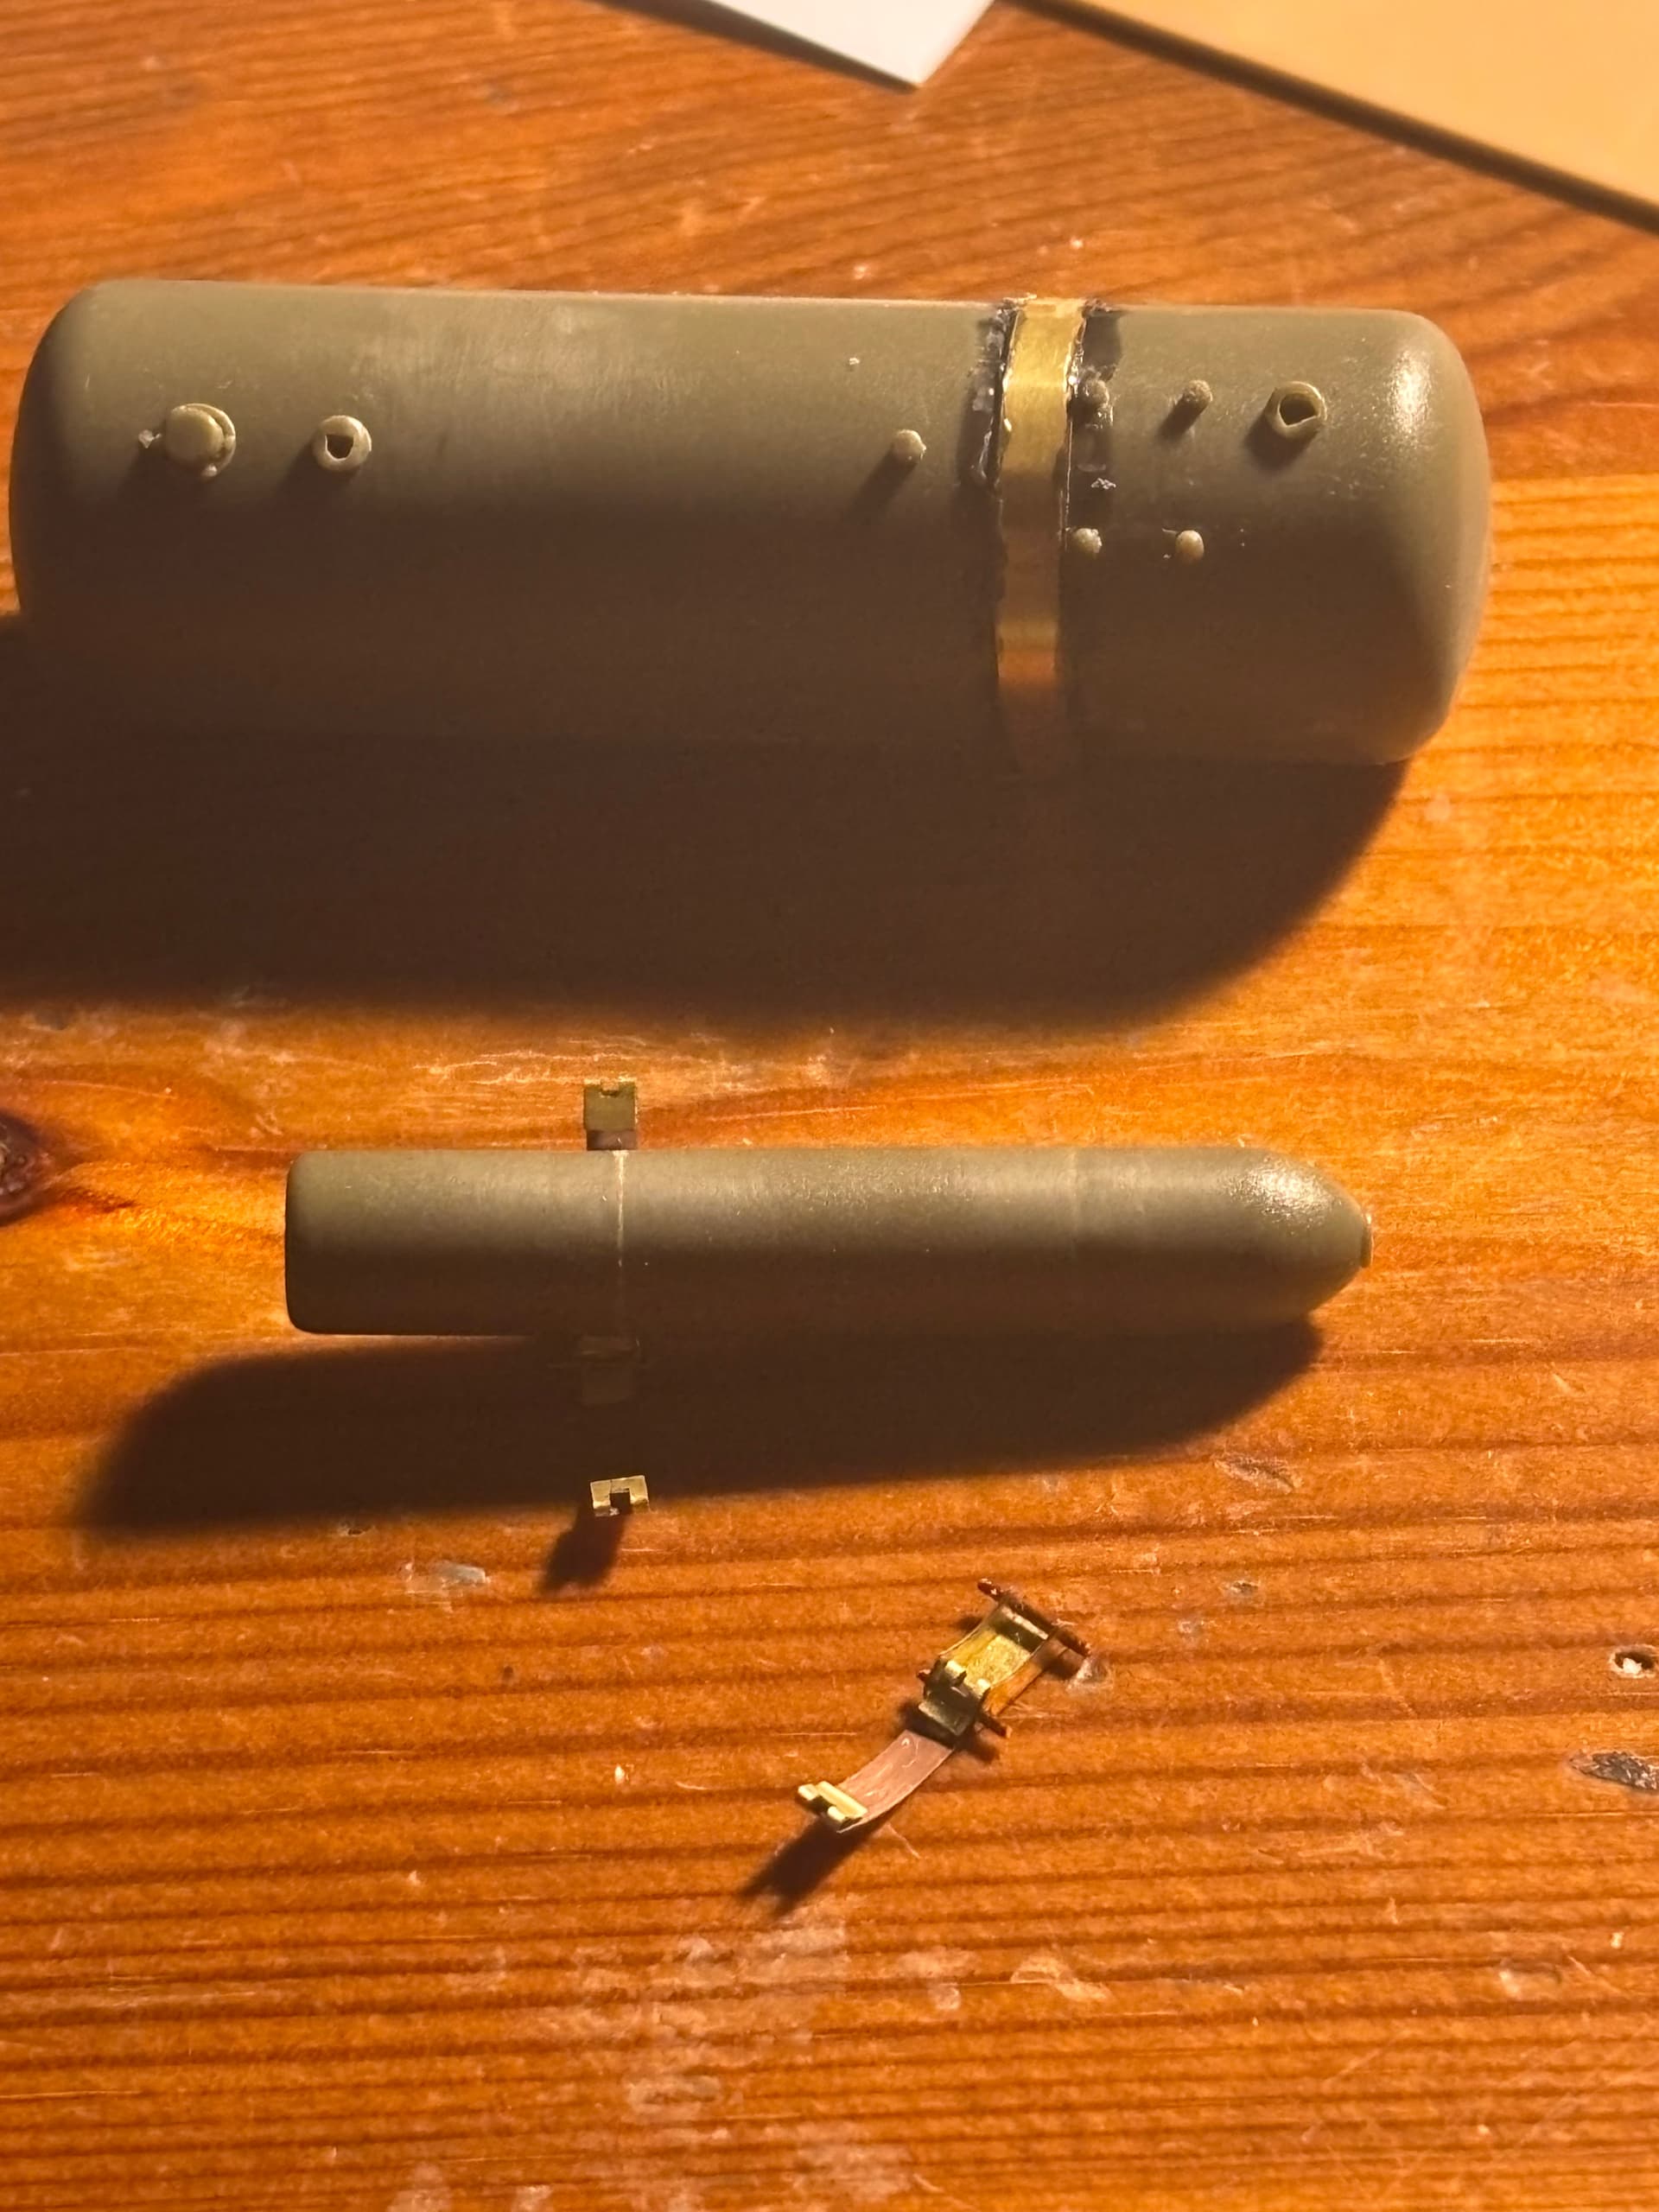
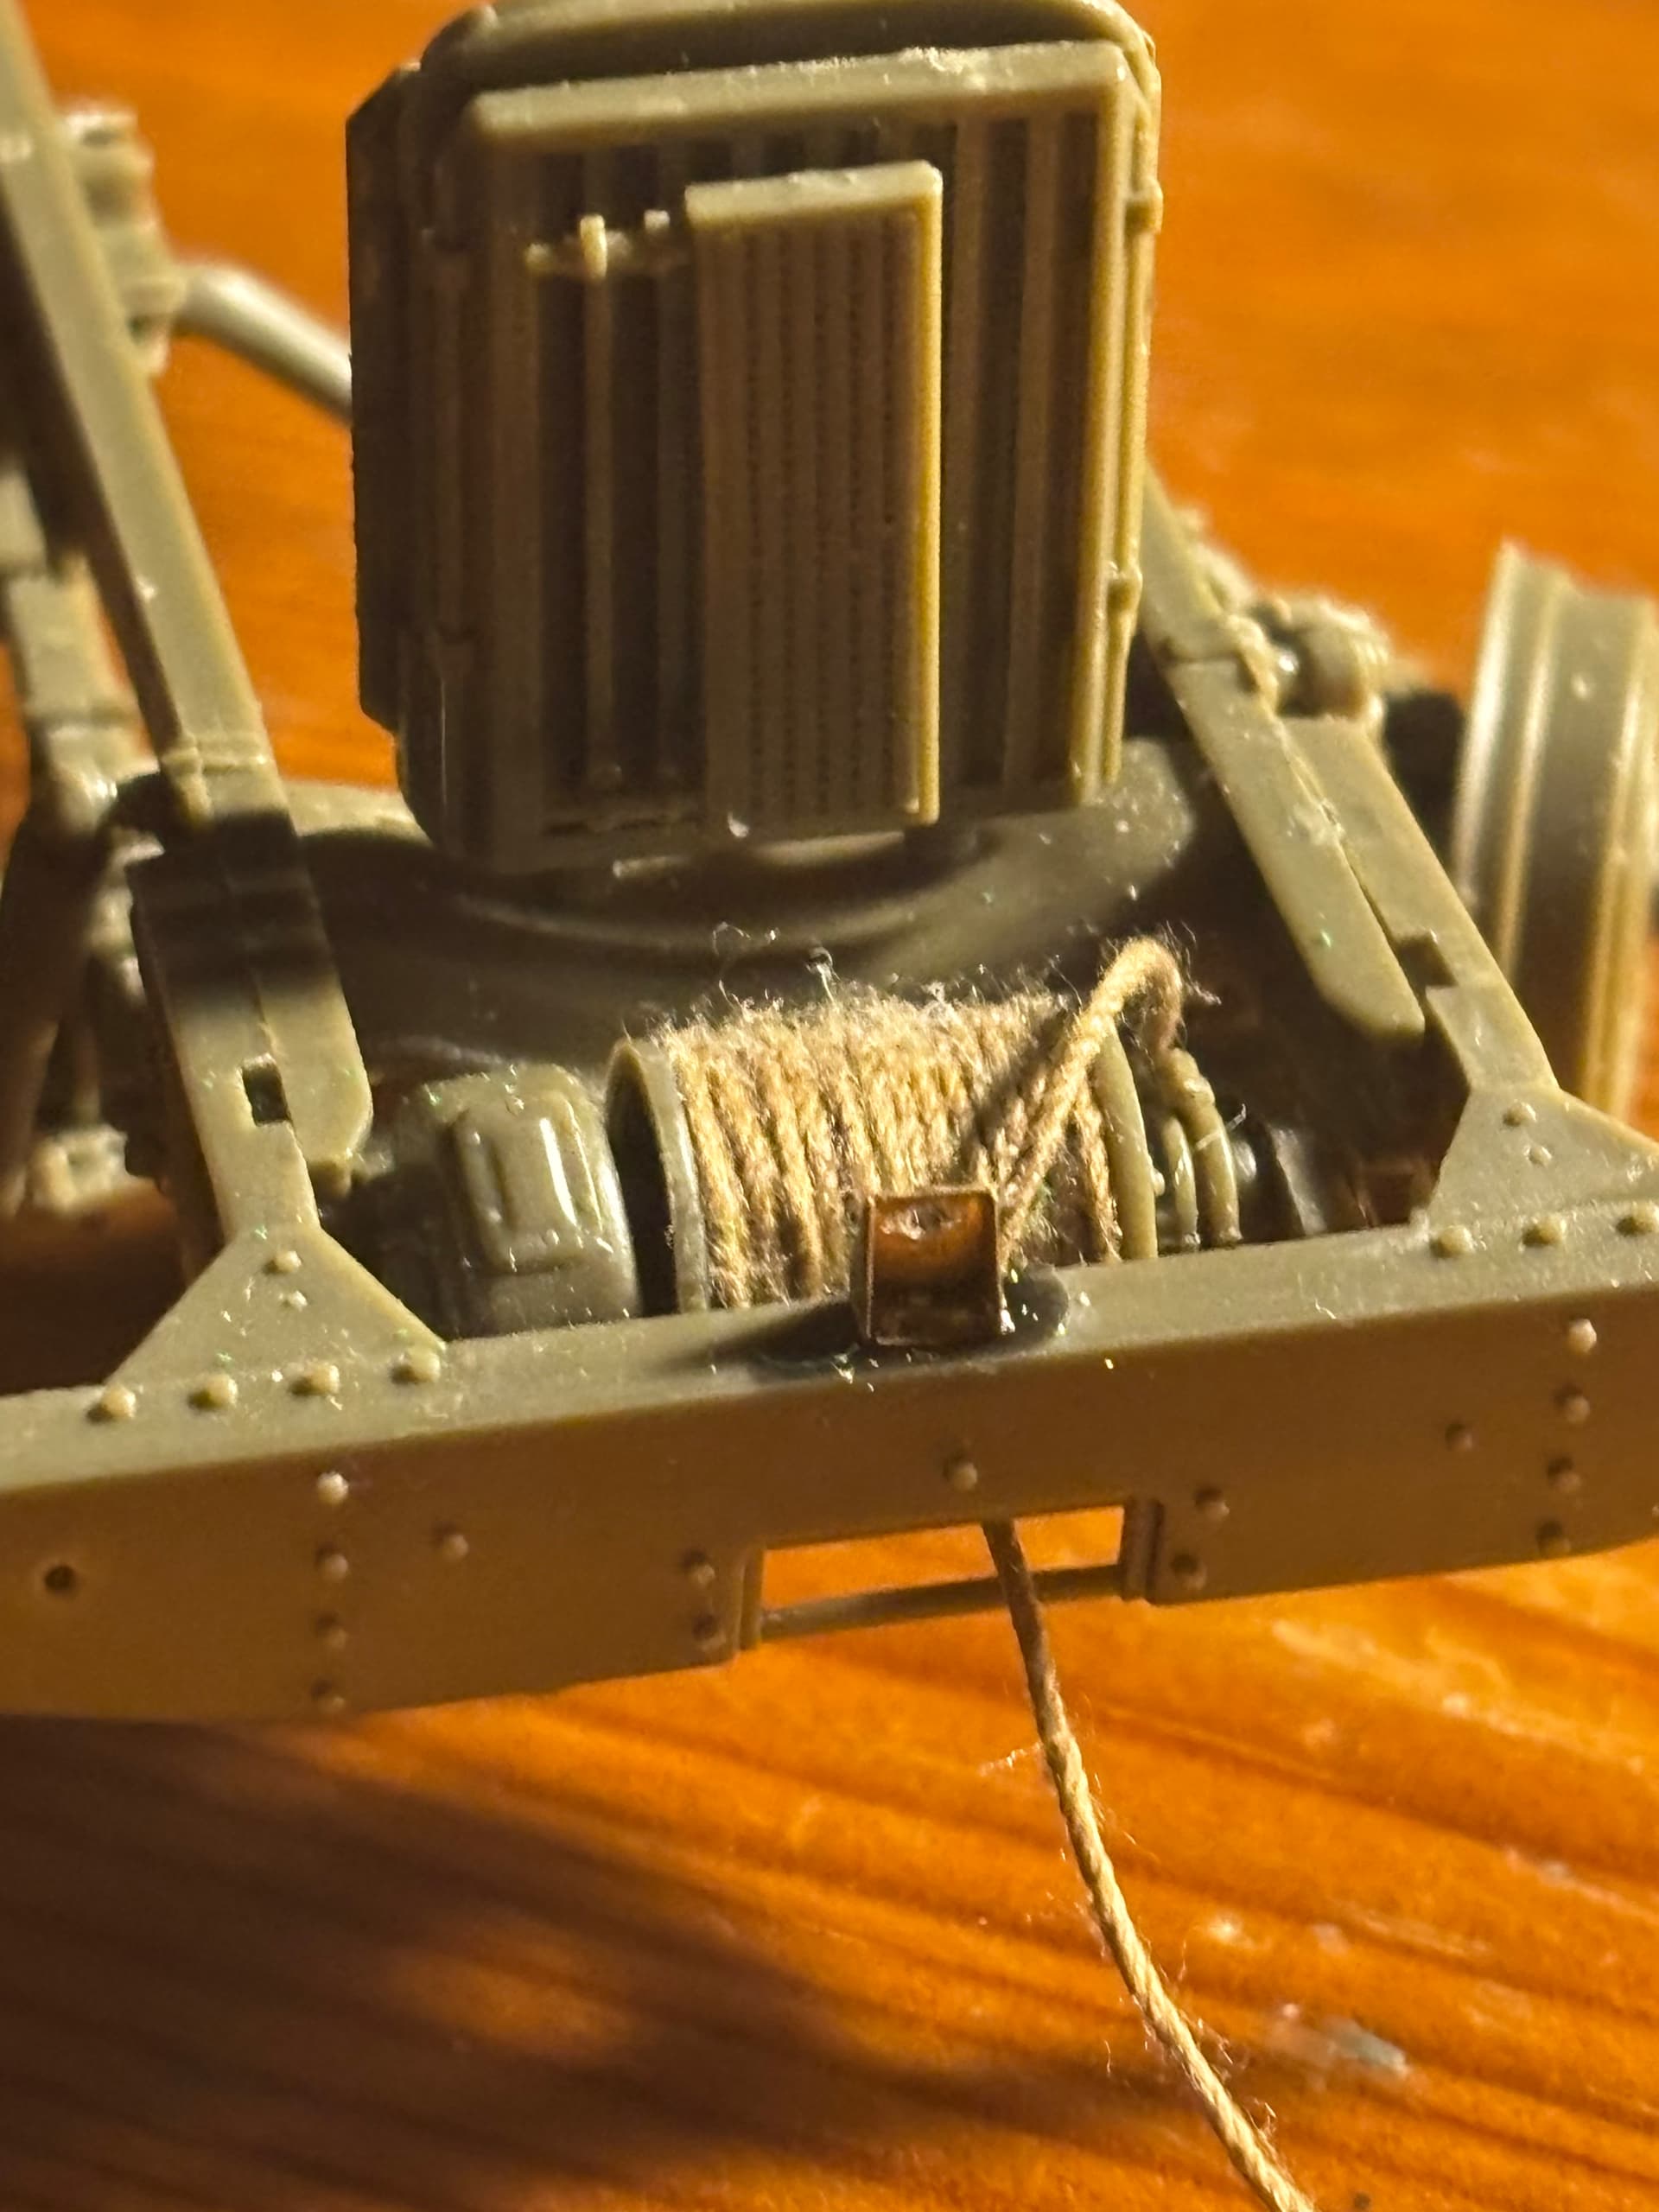
(I also made the trailer wheels)
But on another note, I cut out some plastic styrene sheet in the shape of the sho’t kals side skirts since the kit parts feel overly thick.
(Styrene sheet part)

(Kit part)
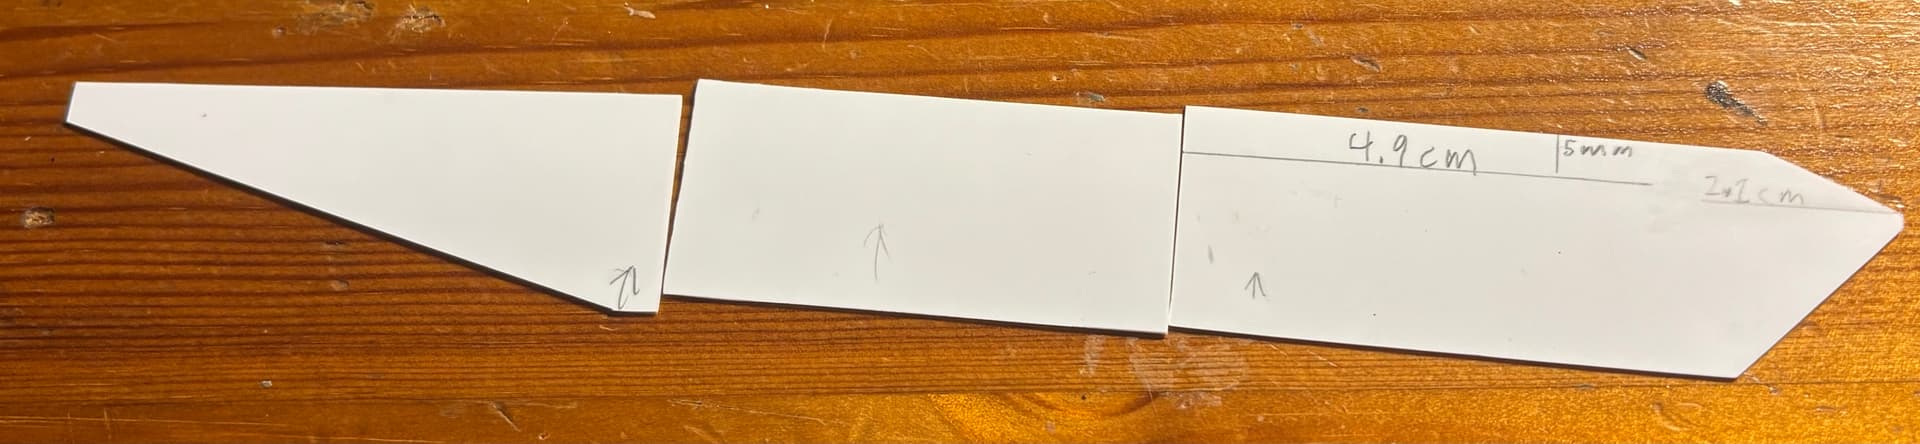
Although they’re not the cleanest scratchbuilding job ever, I’m planning to add copper wire grab handles so it’ll be better than the kit part nonetheless.
Take care and happy modeling!!
11 Likes