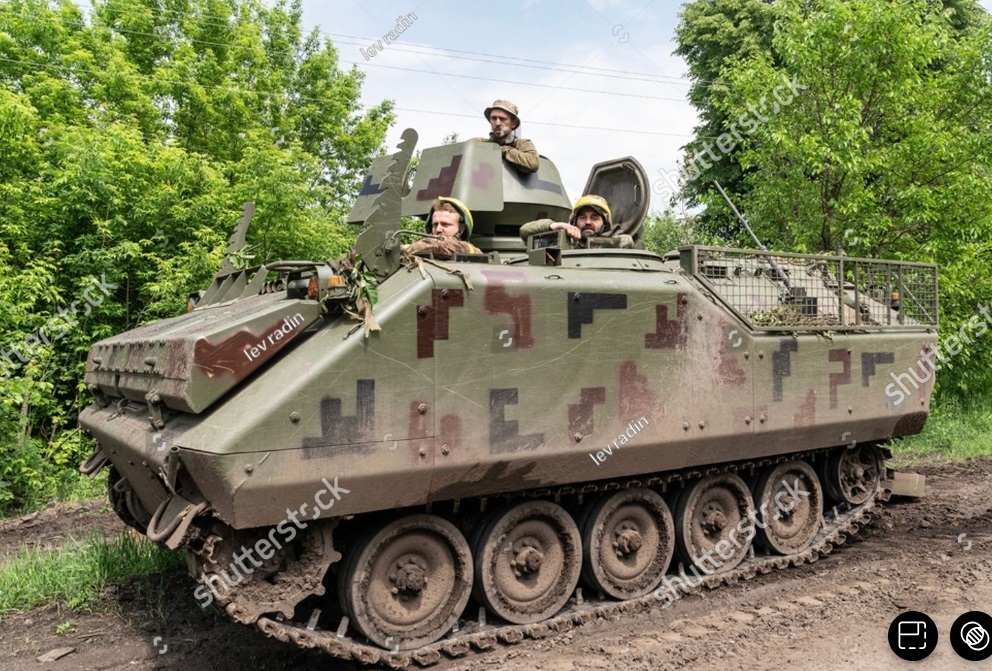
I have started another project. This one is going to be a Ukrainian YPR-765A1 PRI .50 APC. The Netherlands provided a bunch of these APCs to Ukraine. The version I am building is the APC with an M113-style cupola in place of the 25mm turret.
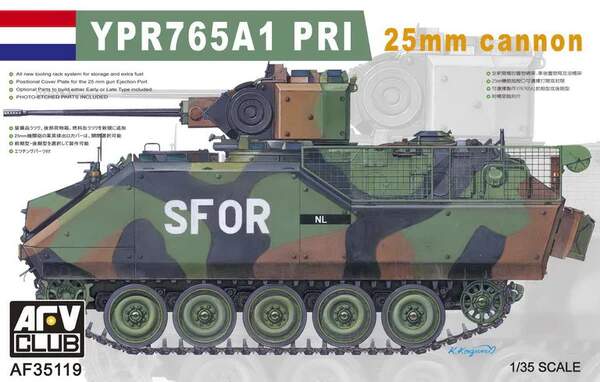
I am starting with the AFV Club YPR-765A1 PRI SFOR model (35119). It is a later version from the mid-2000s with added mesh storage racks on the sides, Diehl tracks, and a few other new features.
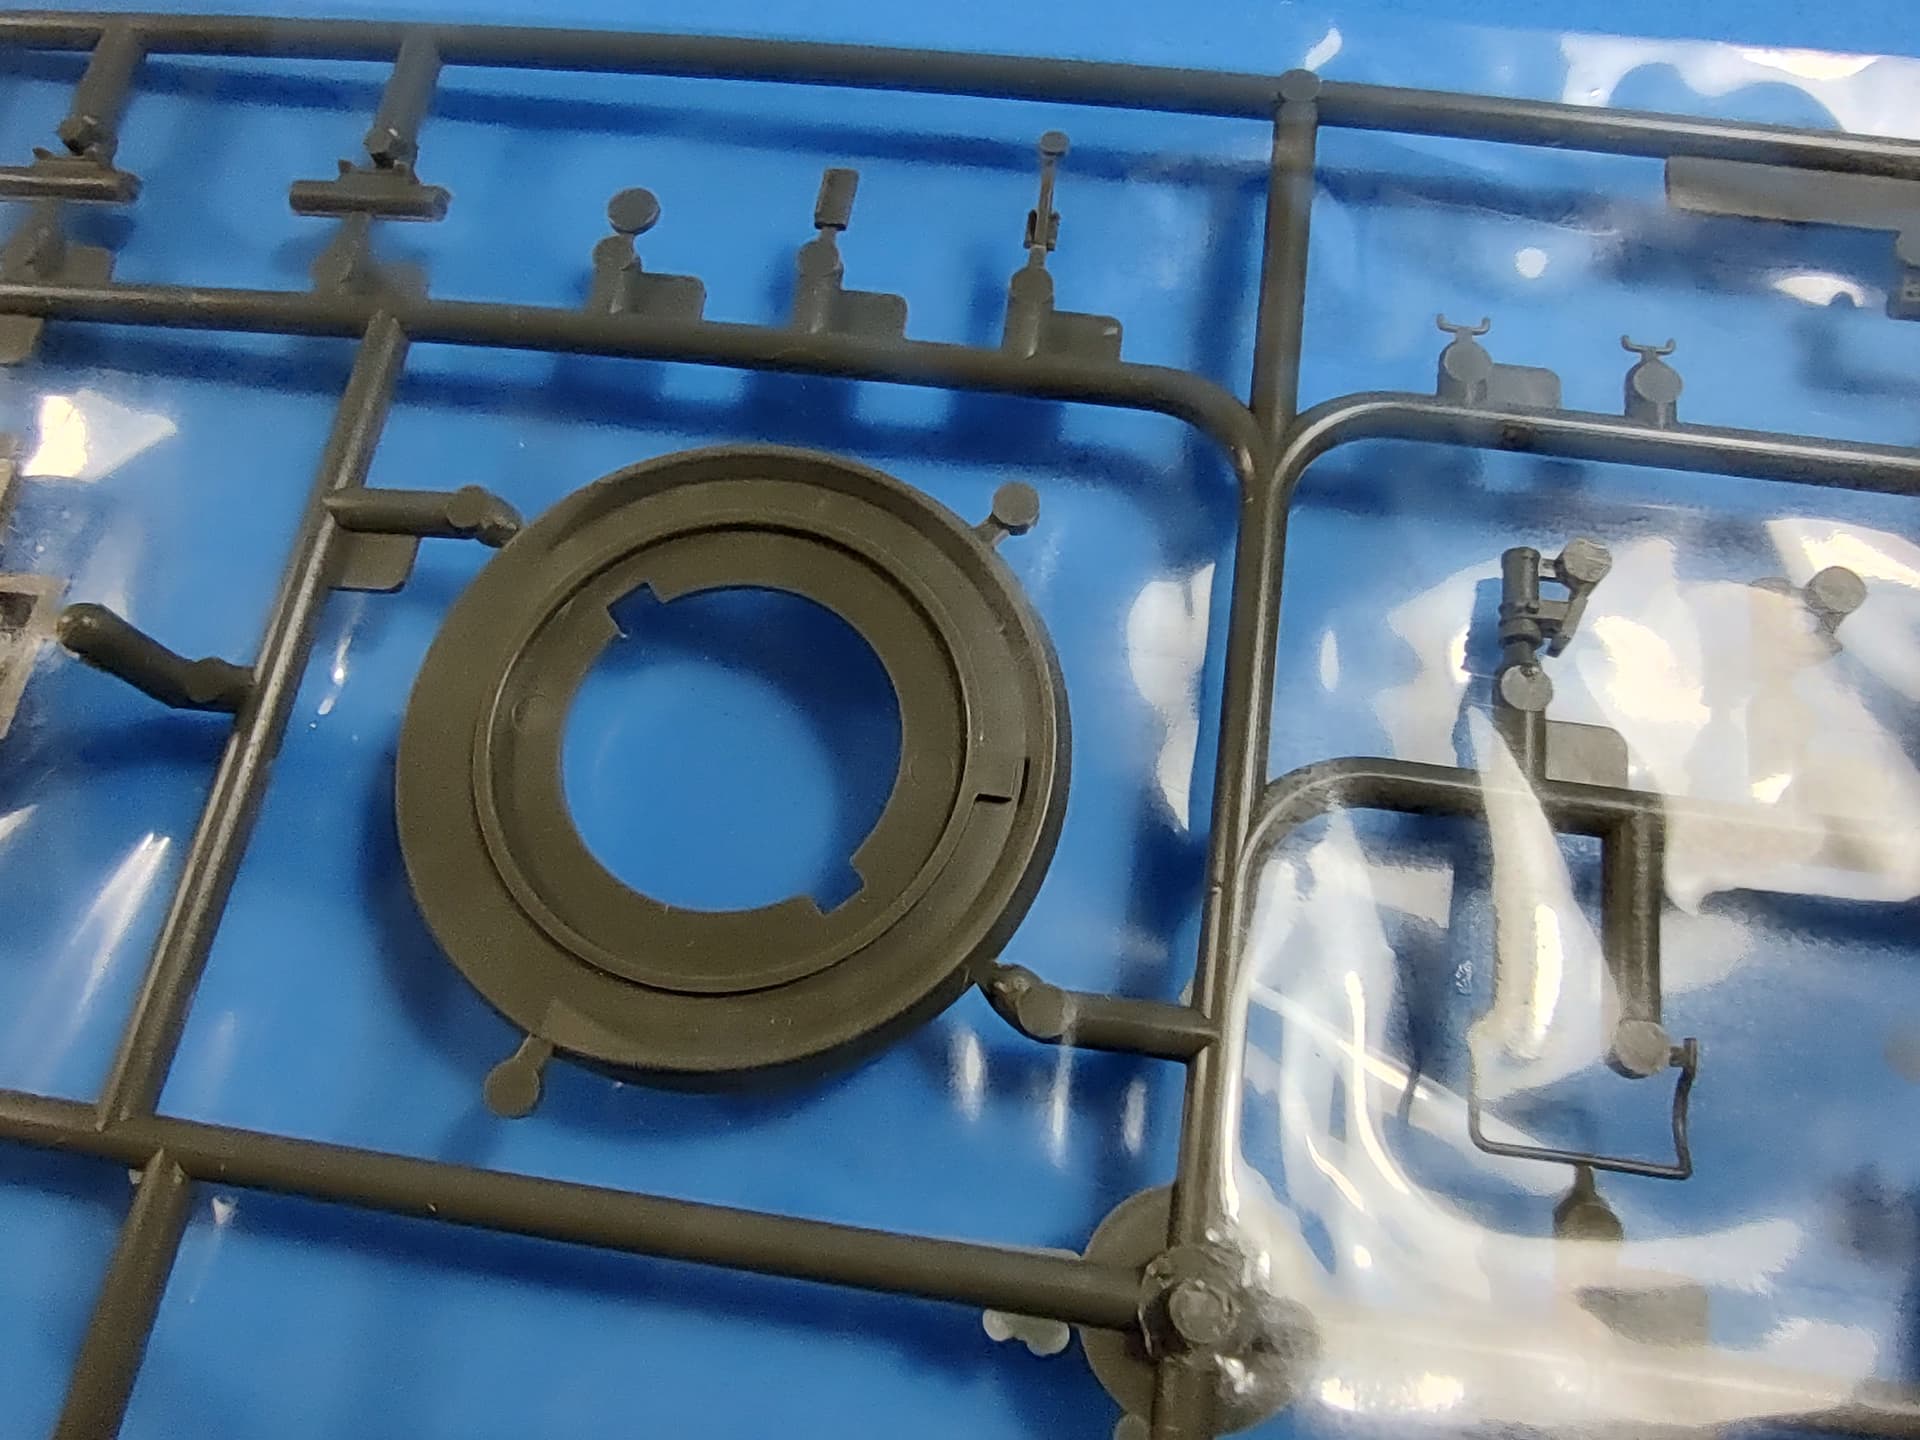
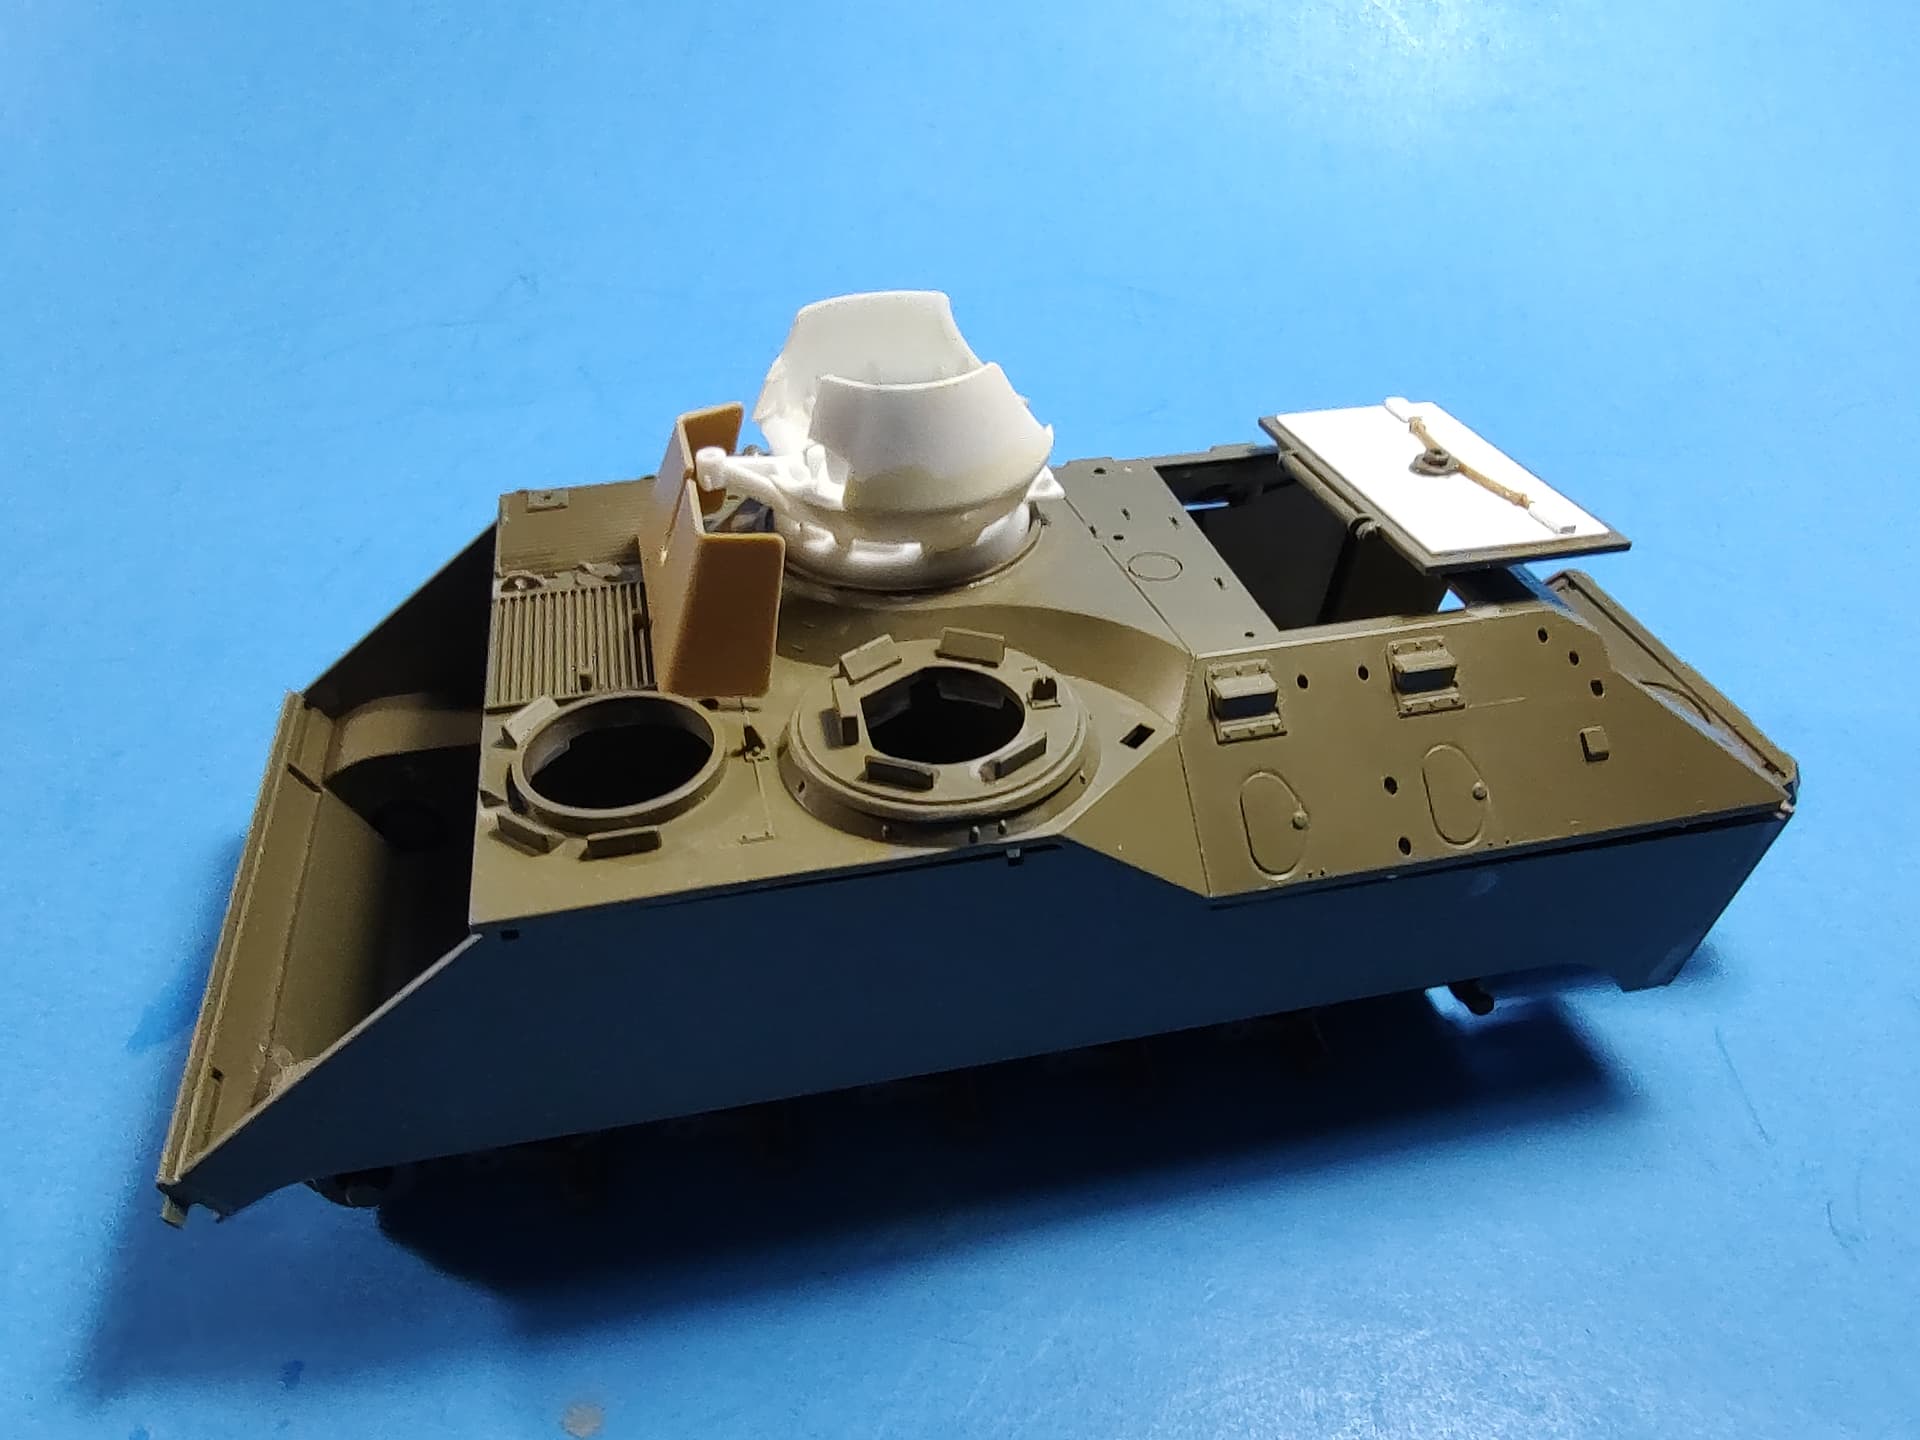
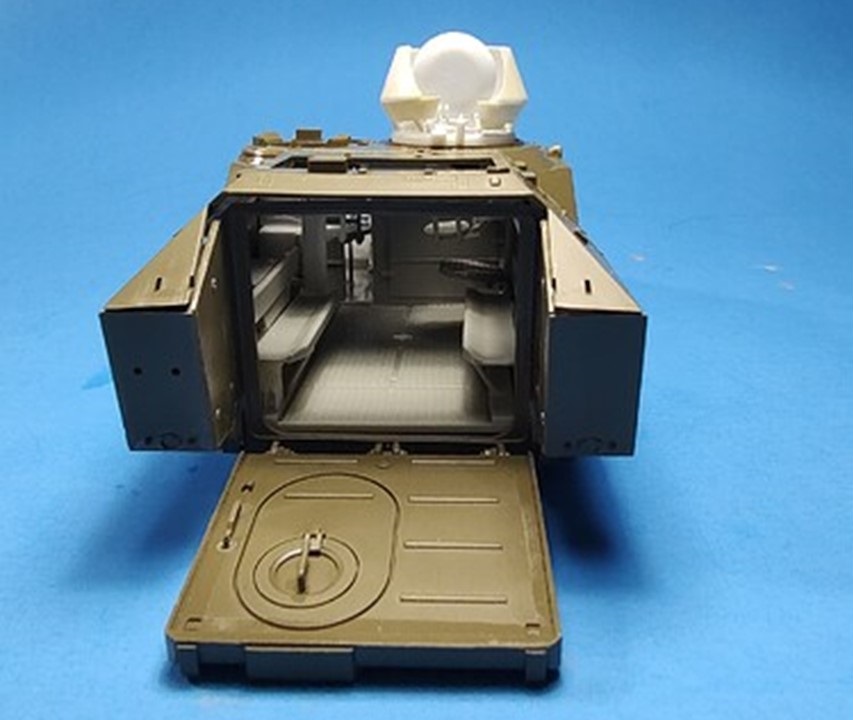
I started by flipping over and cutting the kit ring to mount the 25mm turret to fit into the opening flush with the roof. I then cut the inner opening a little bigger (out to the keyed slots) to accept the M113 cupola.
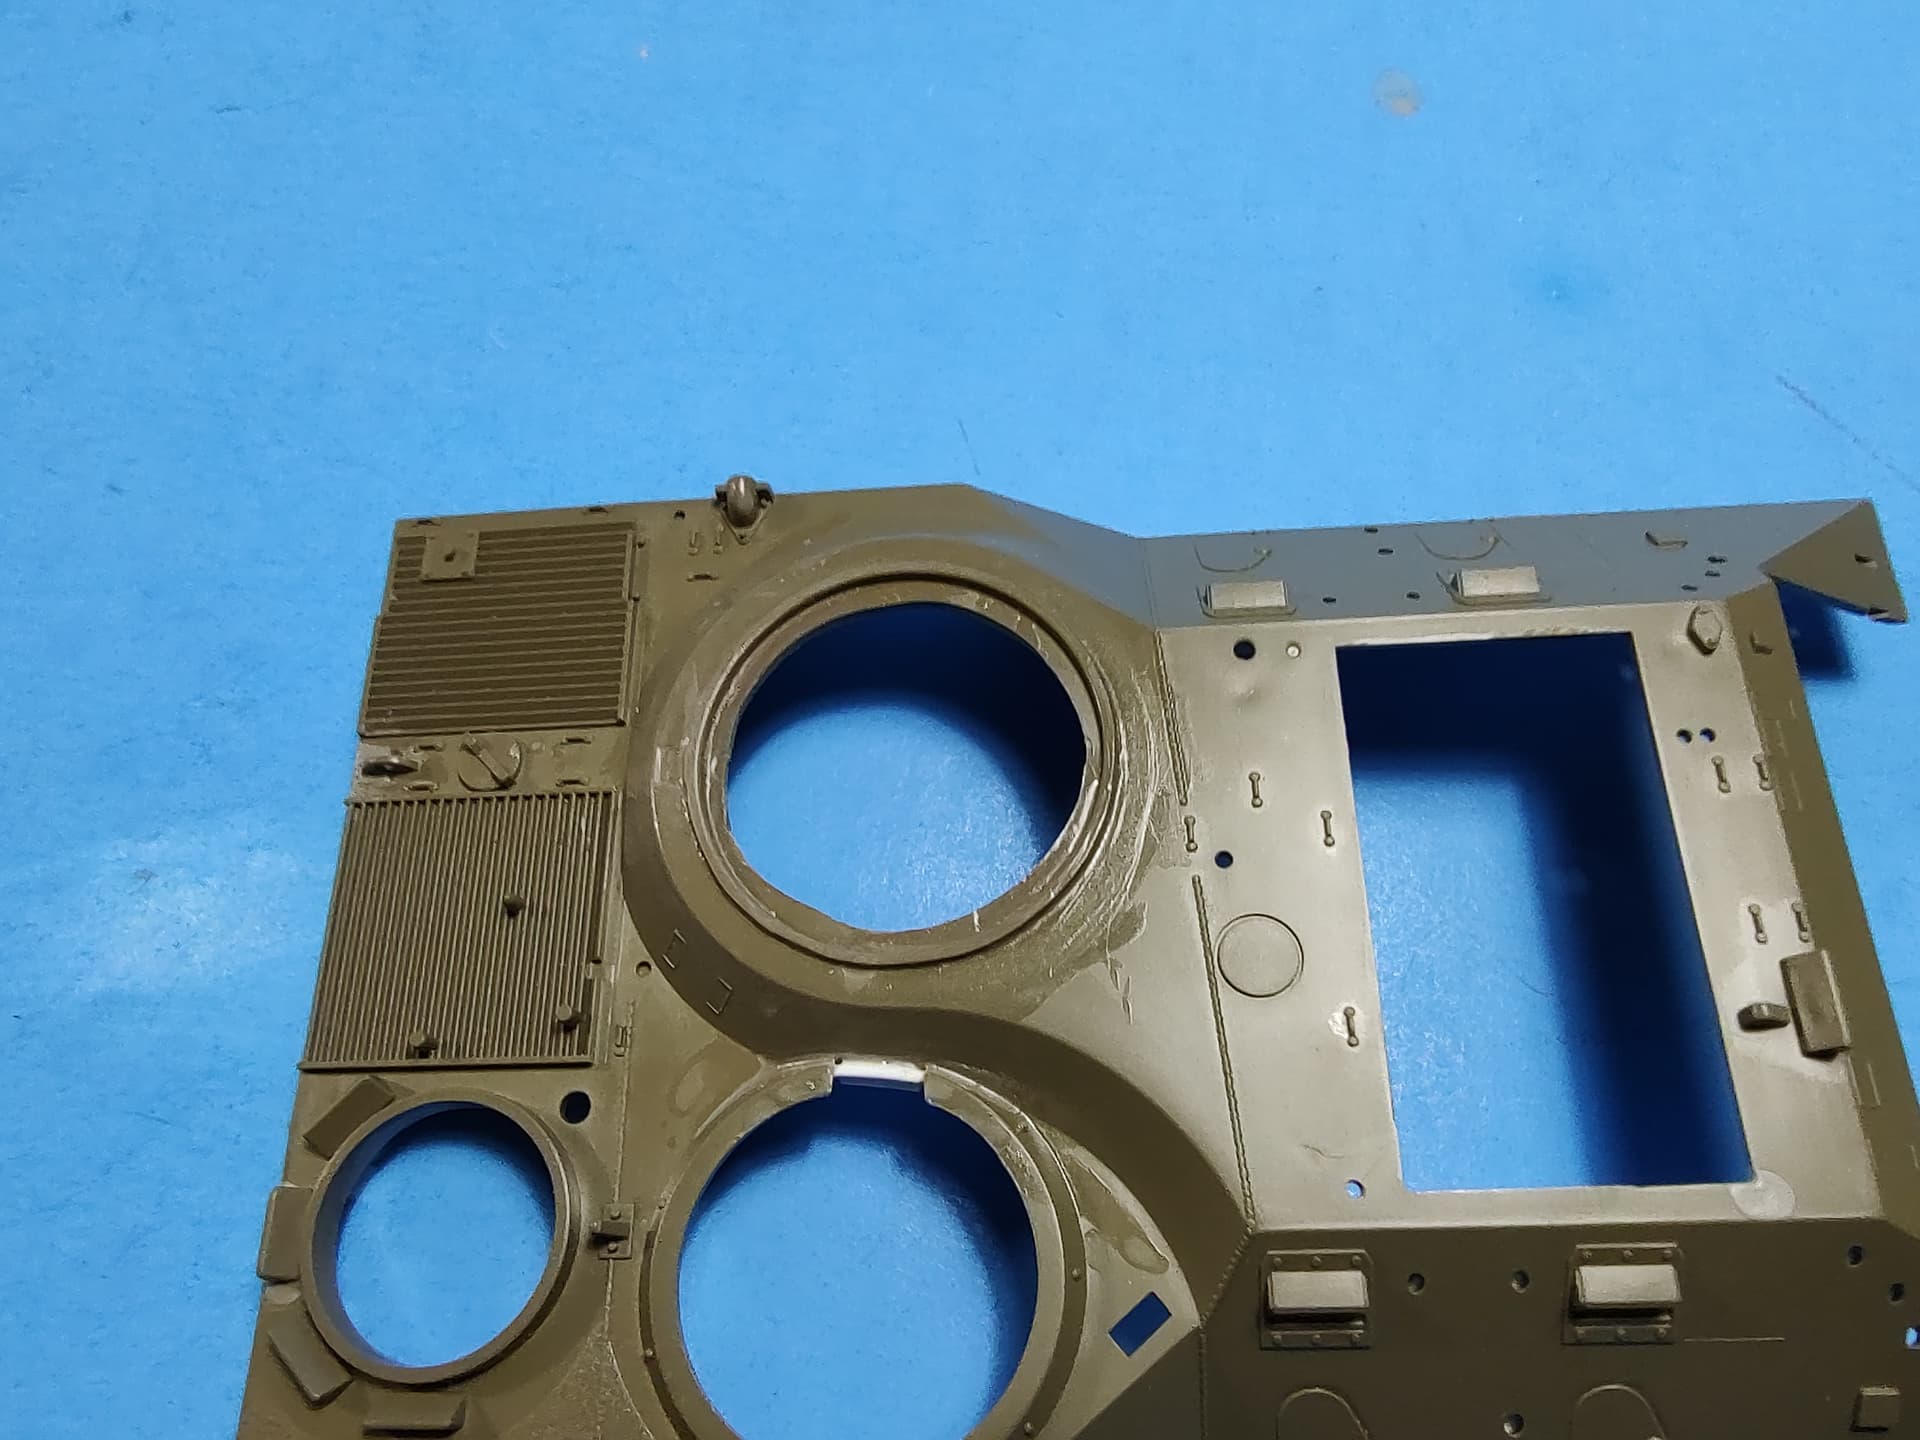
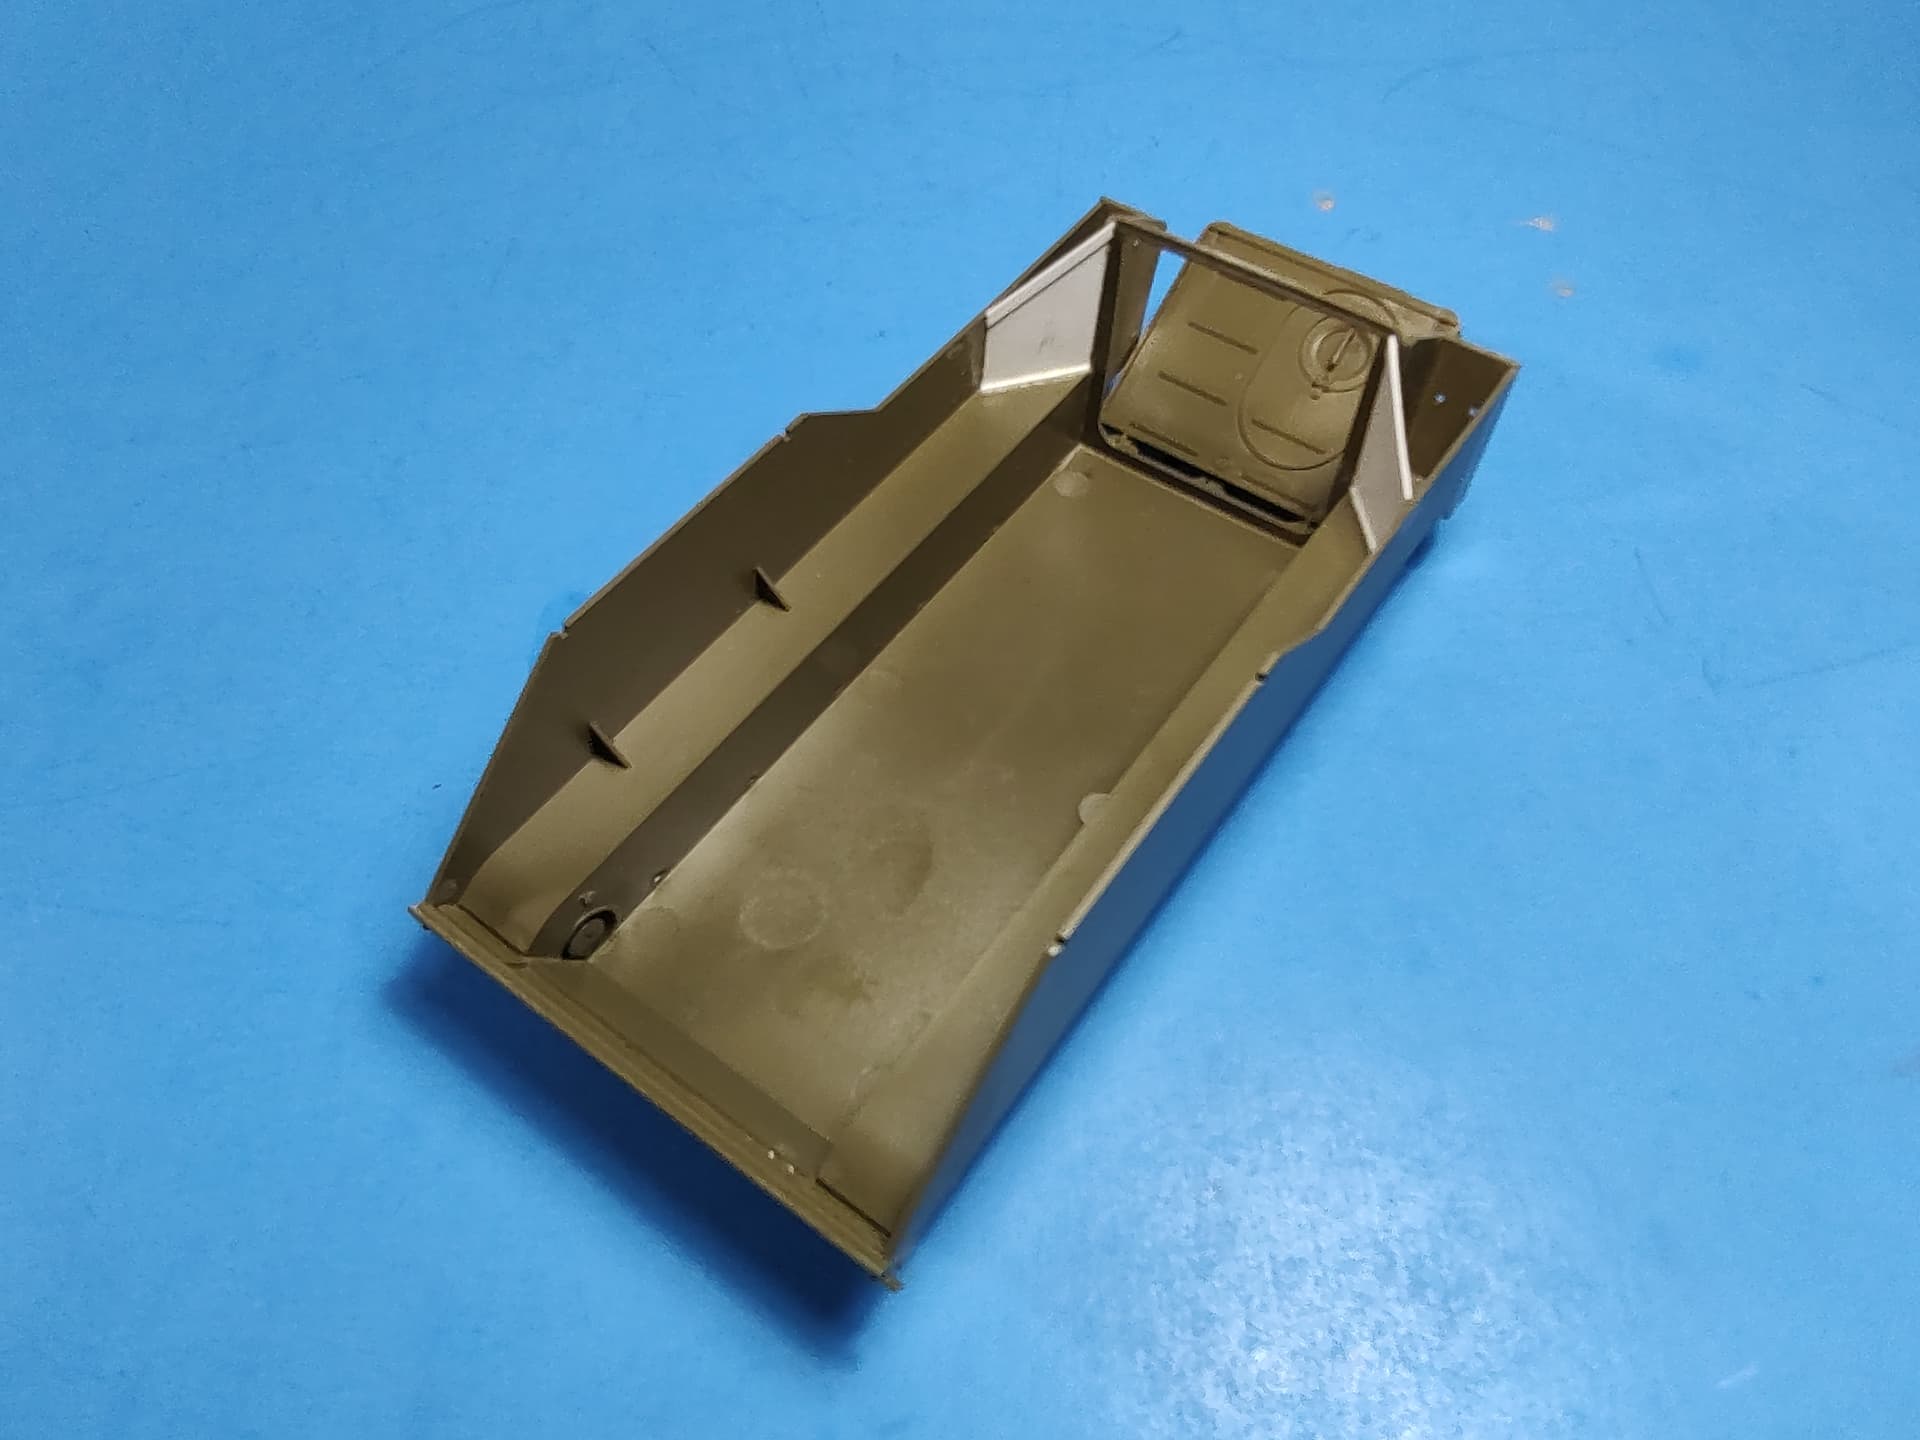
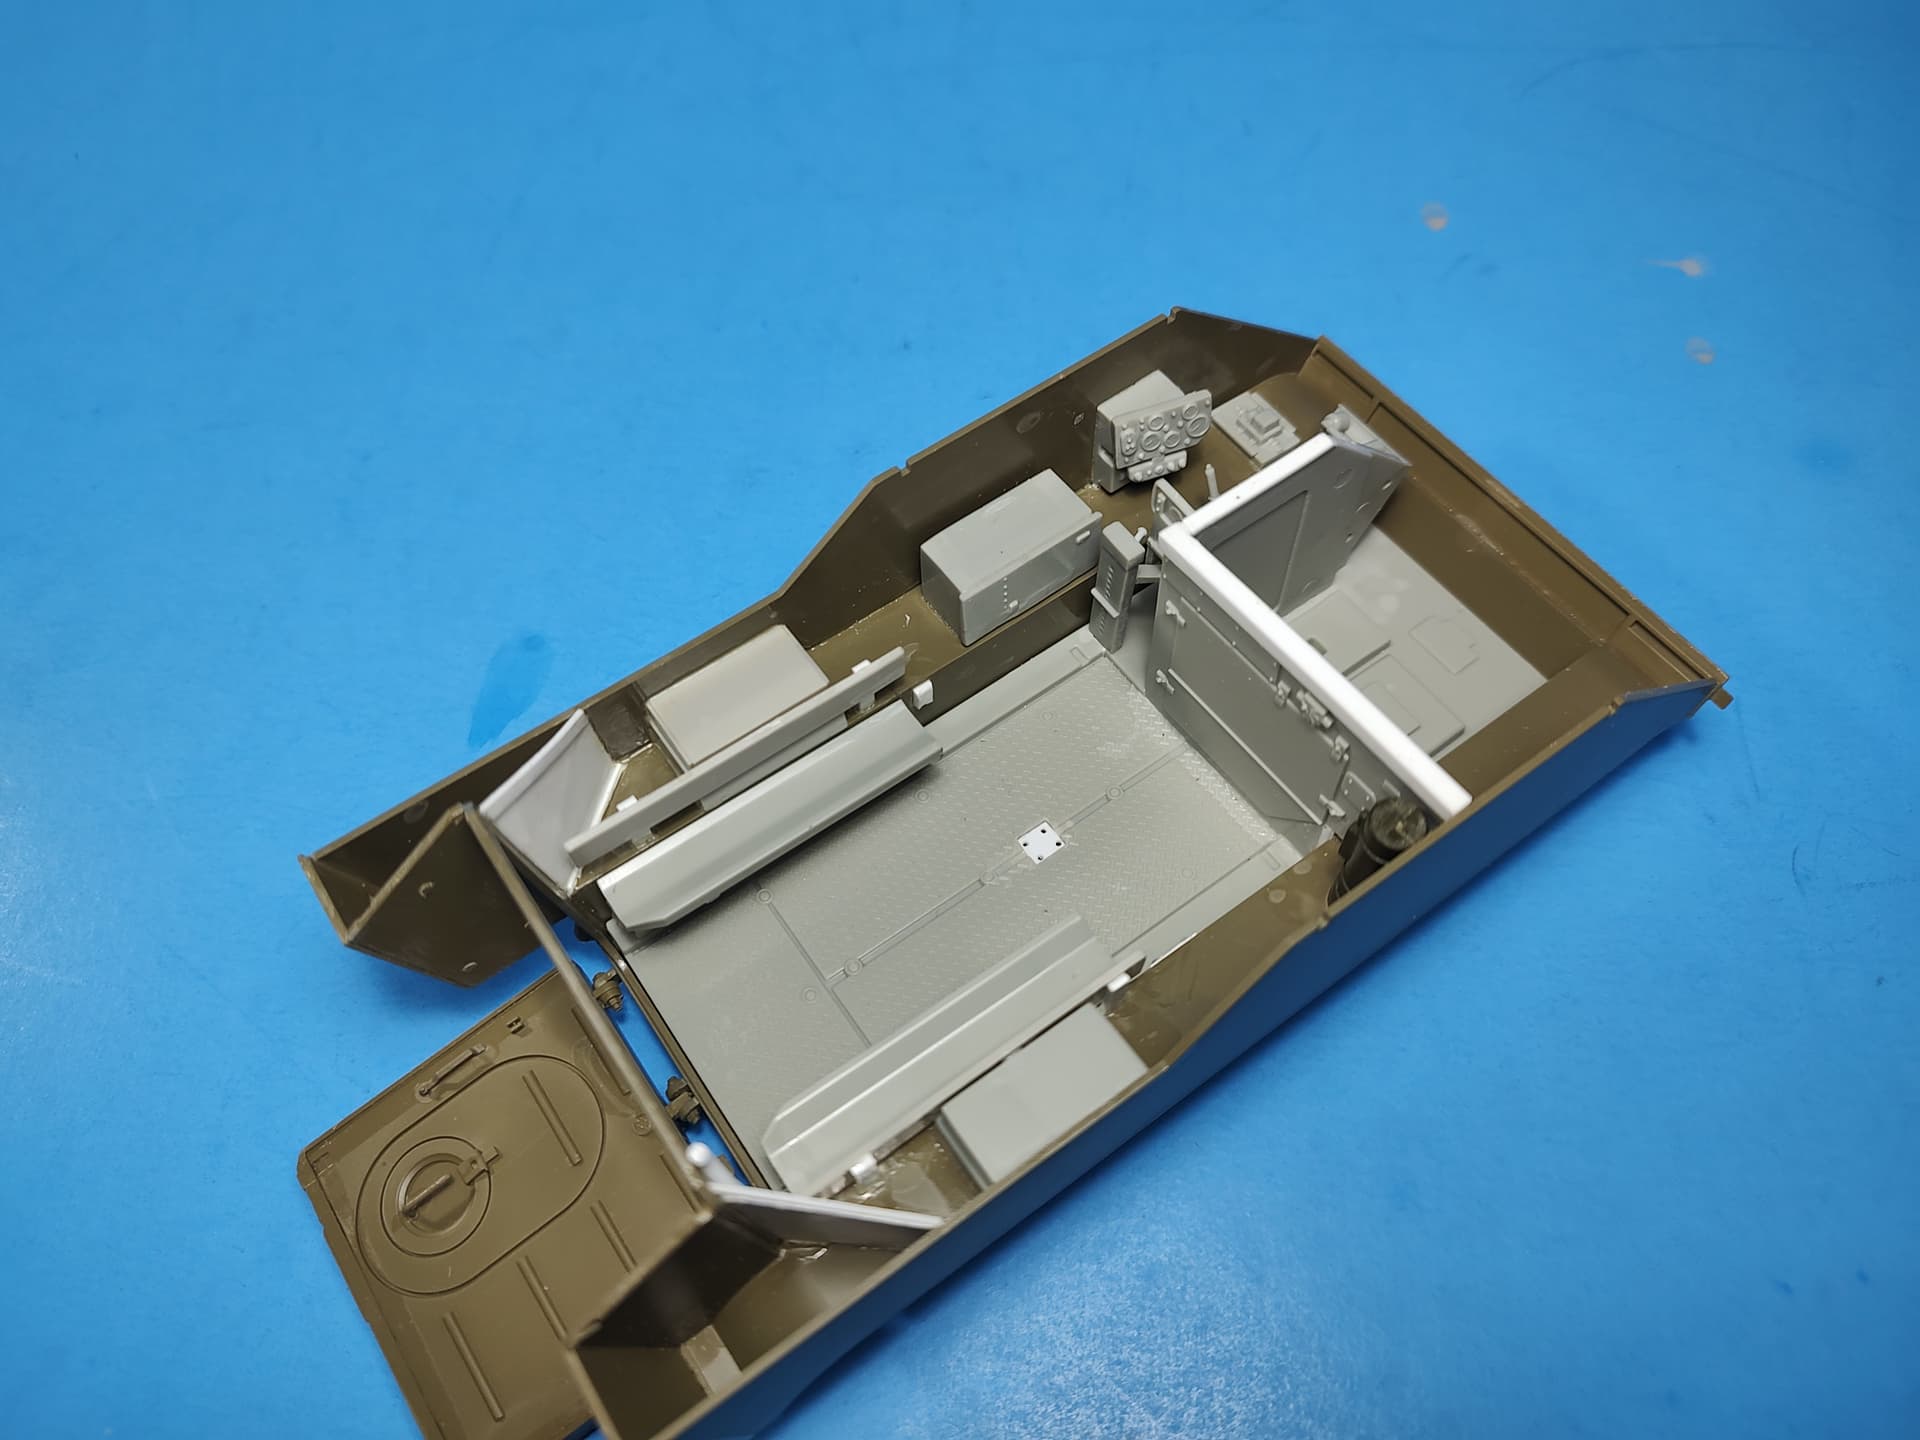
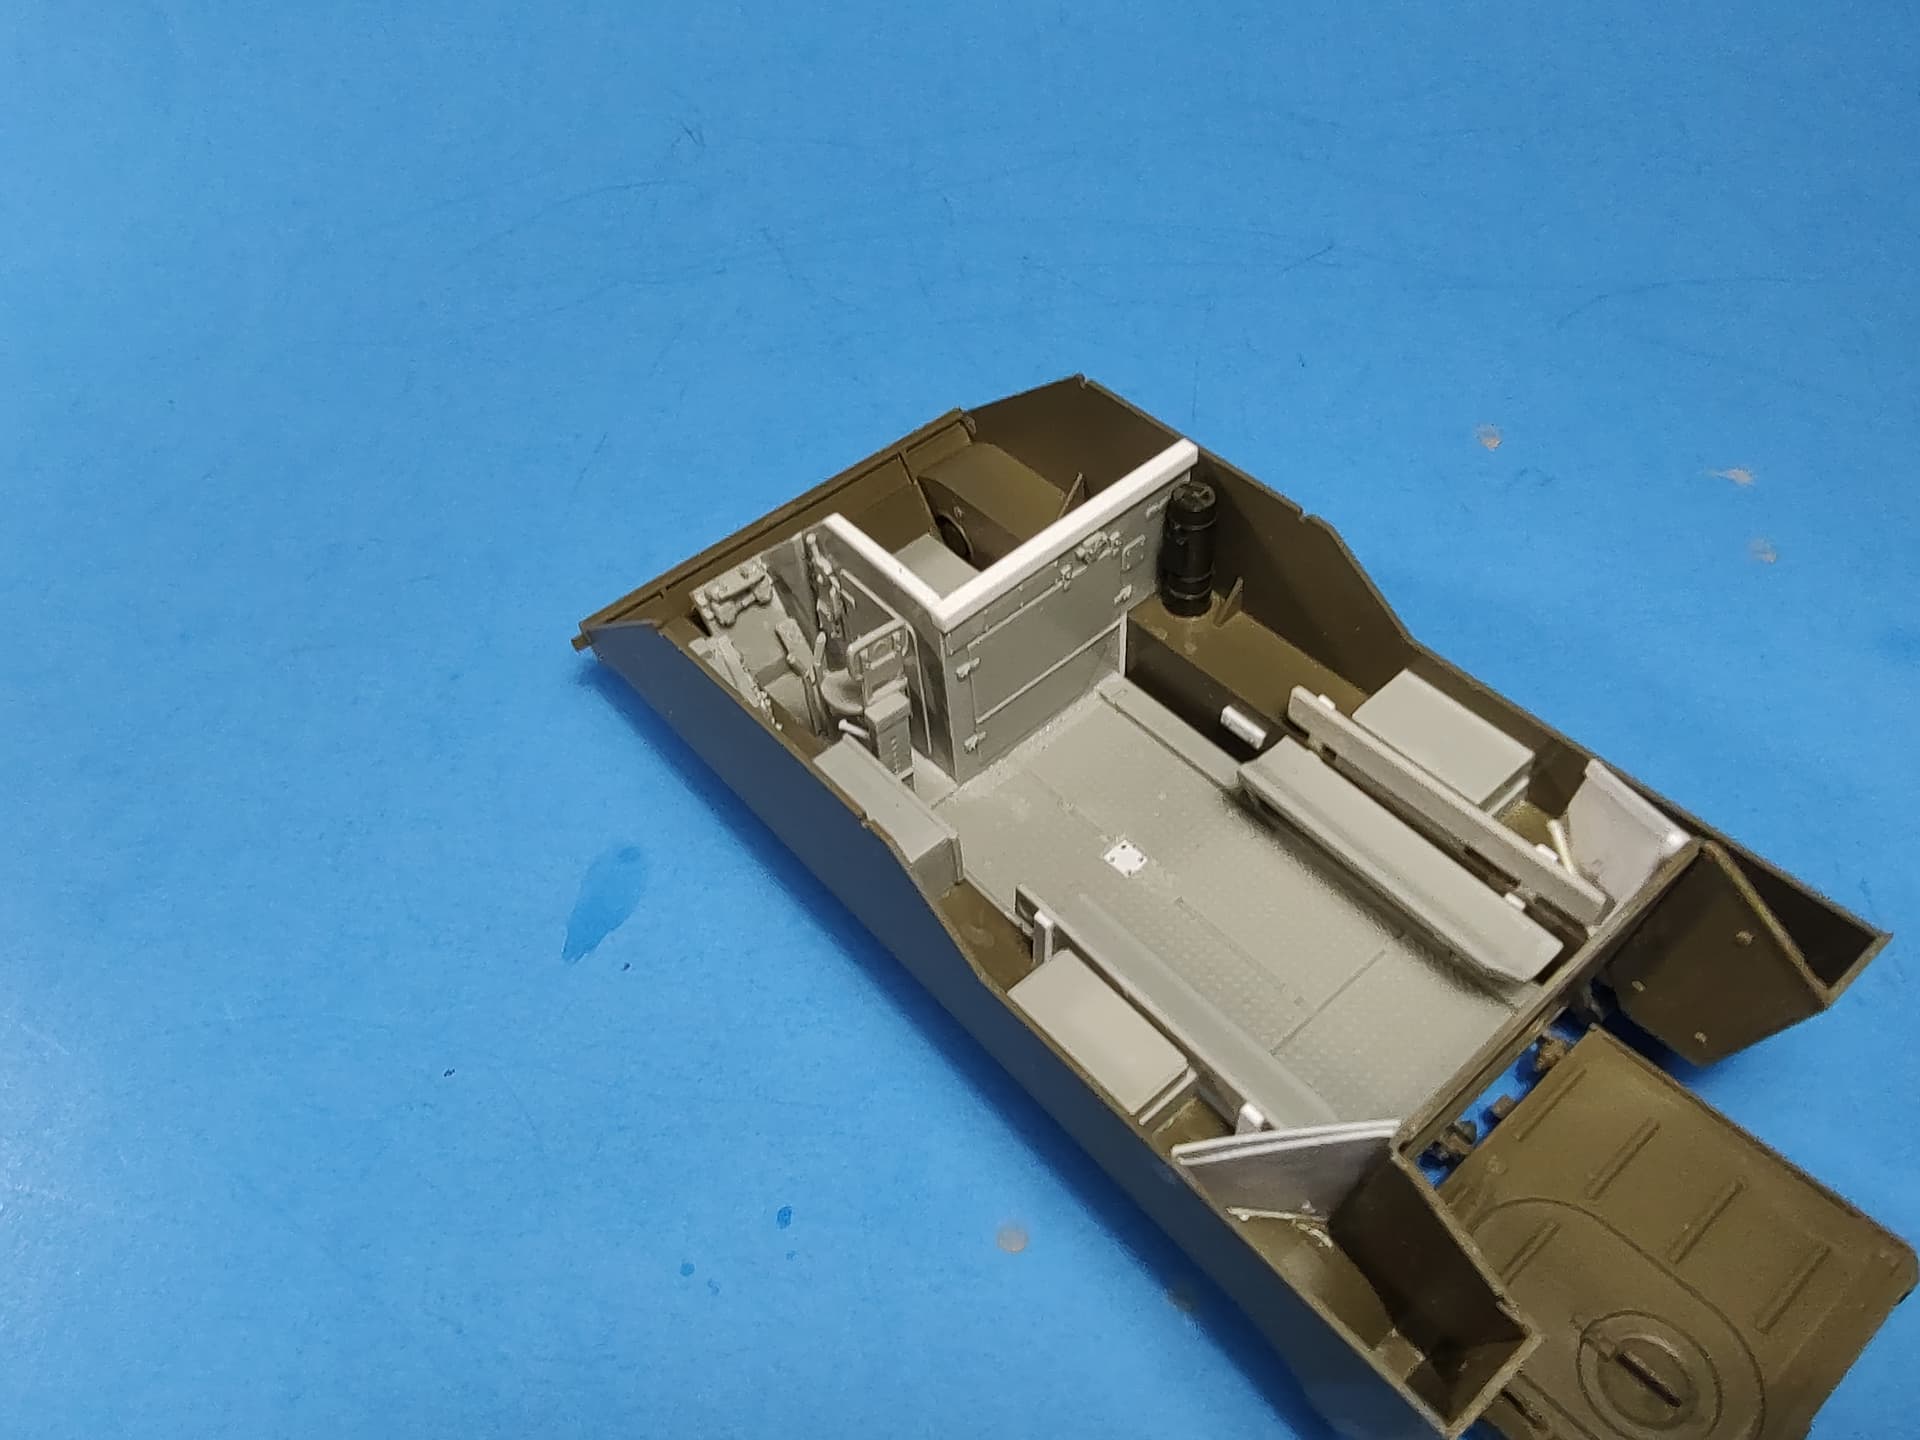
I will also be adding a full crew compartment interior on it. To start, I added details to the lower hull interior by adding the front walls for the fuel tanks from sheet styrene.
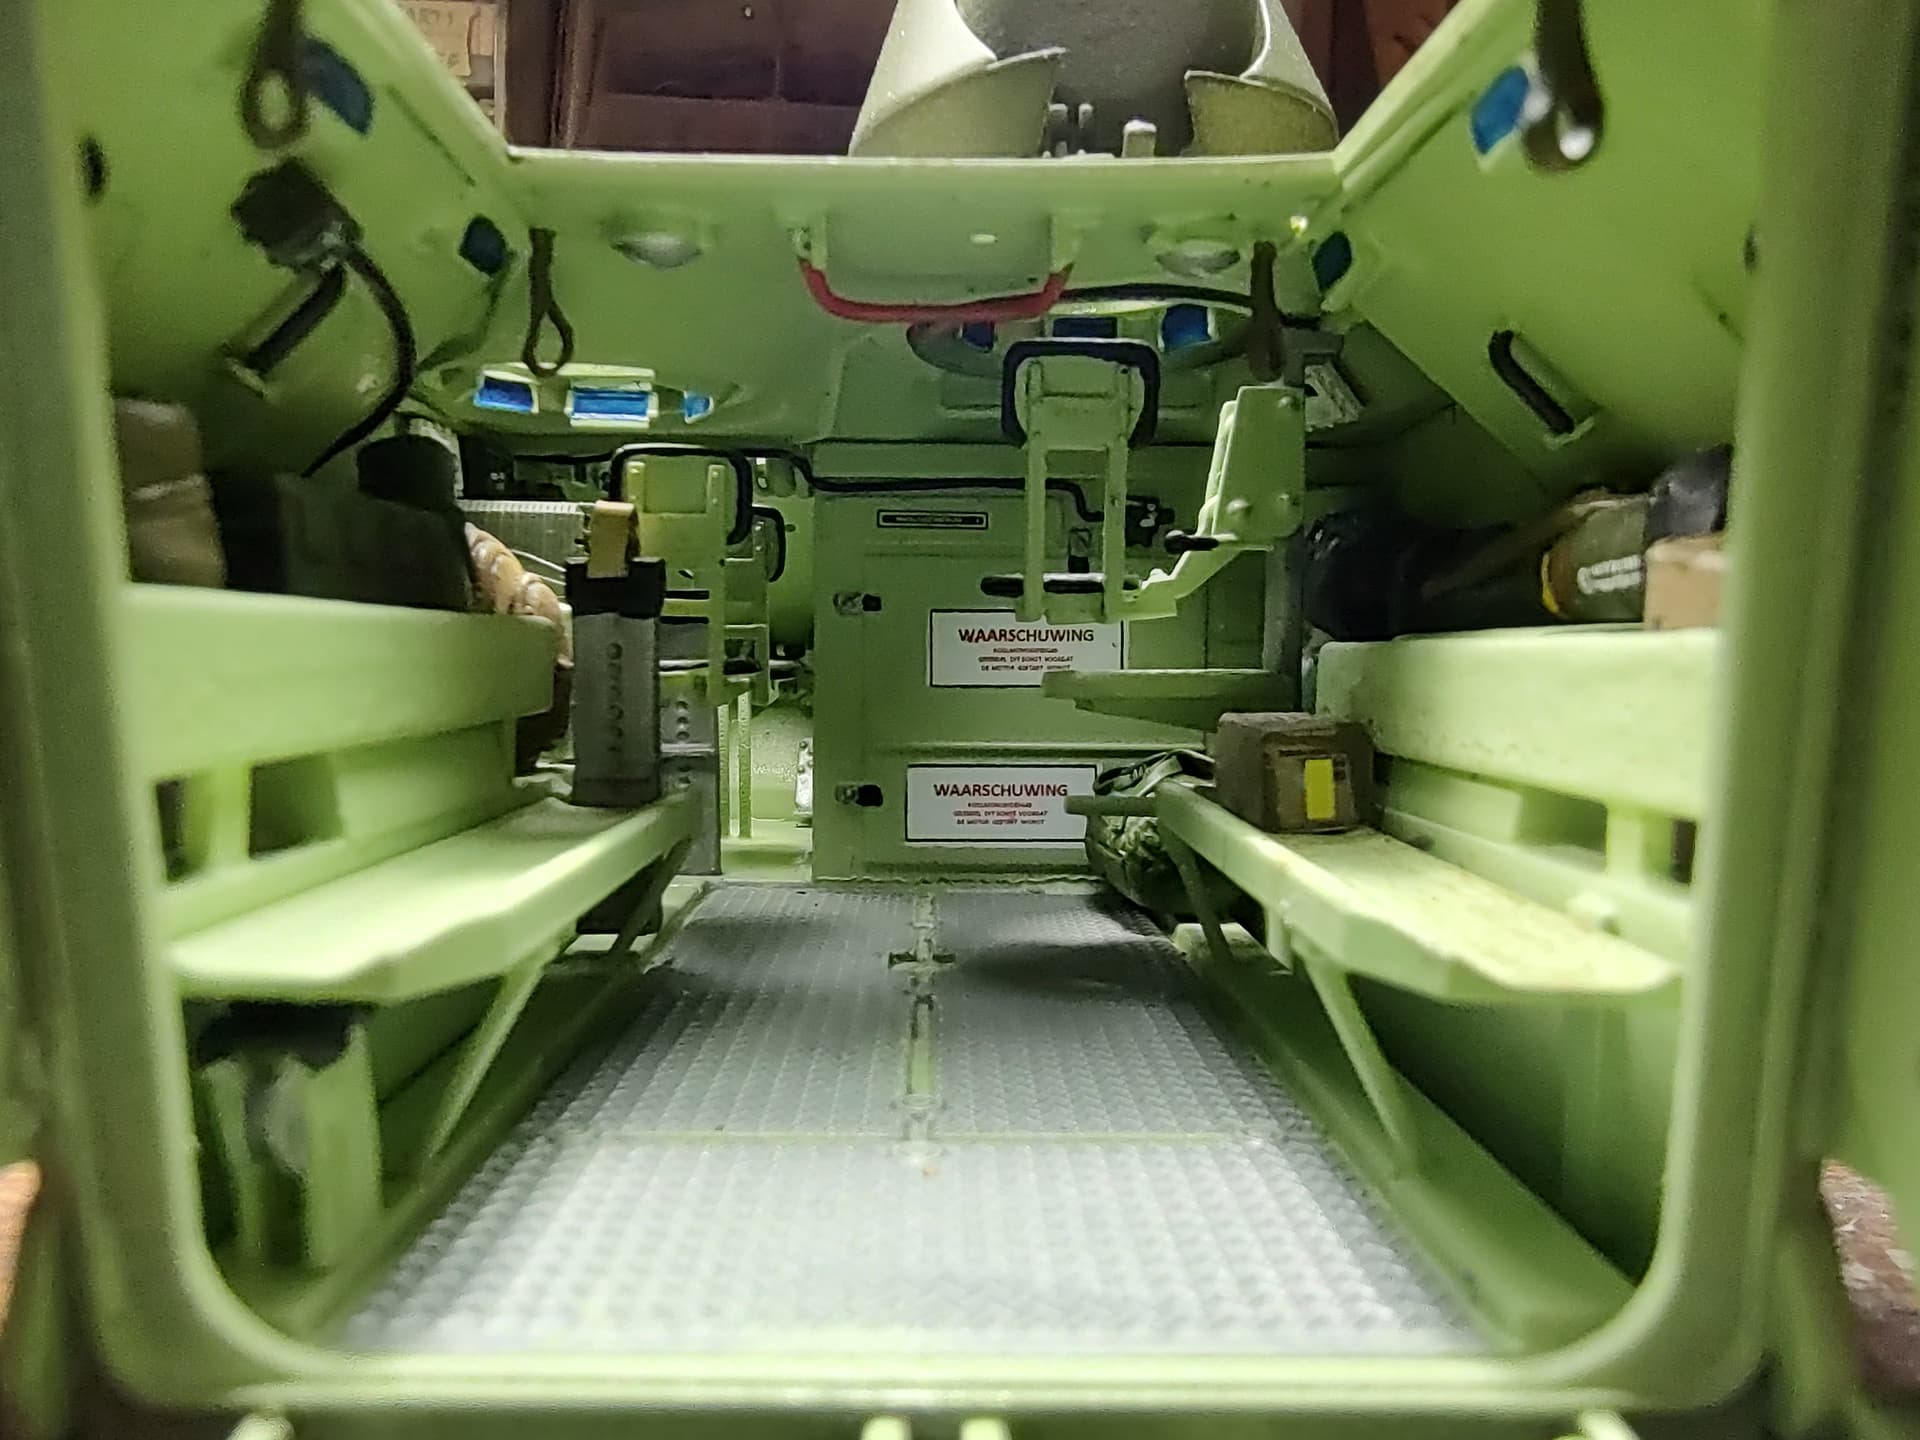
I also detailed the inside of the upper hull by adding a layer of Kevlar with cutouts for the firing ports, handles to open/close them, vision blocks for the rear gun ports, and periscopes for the driver and commander.
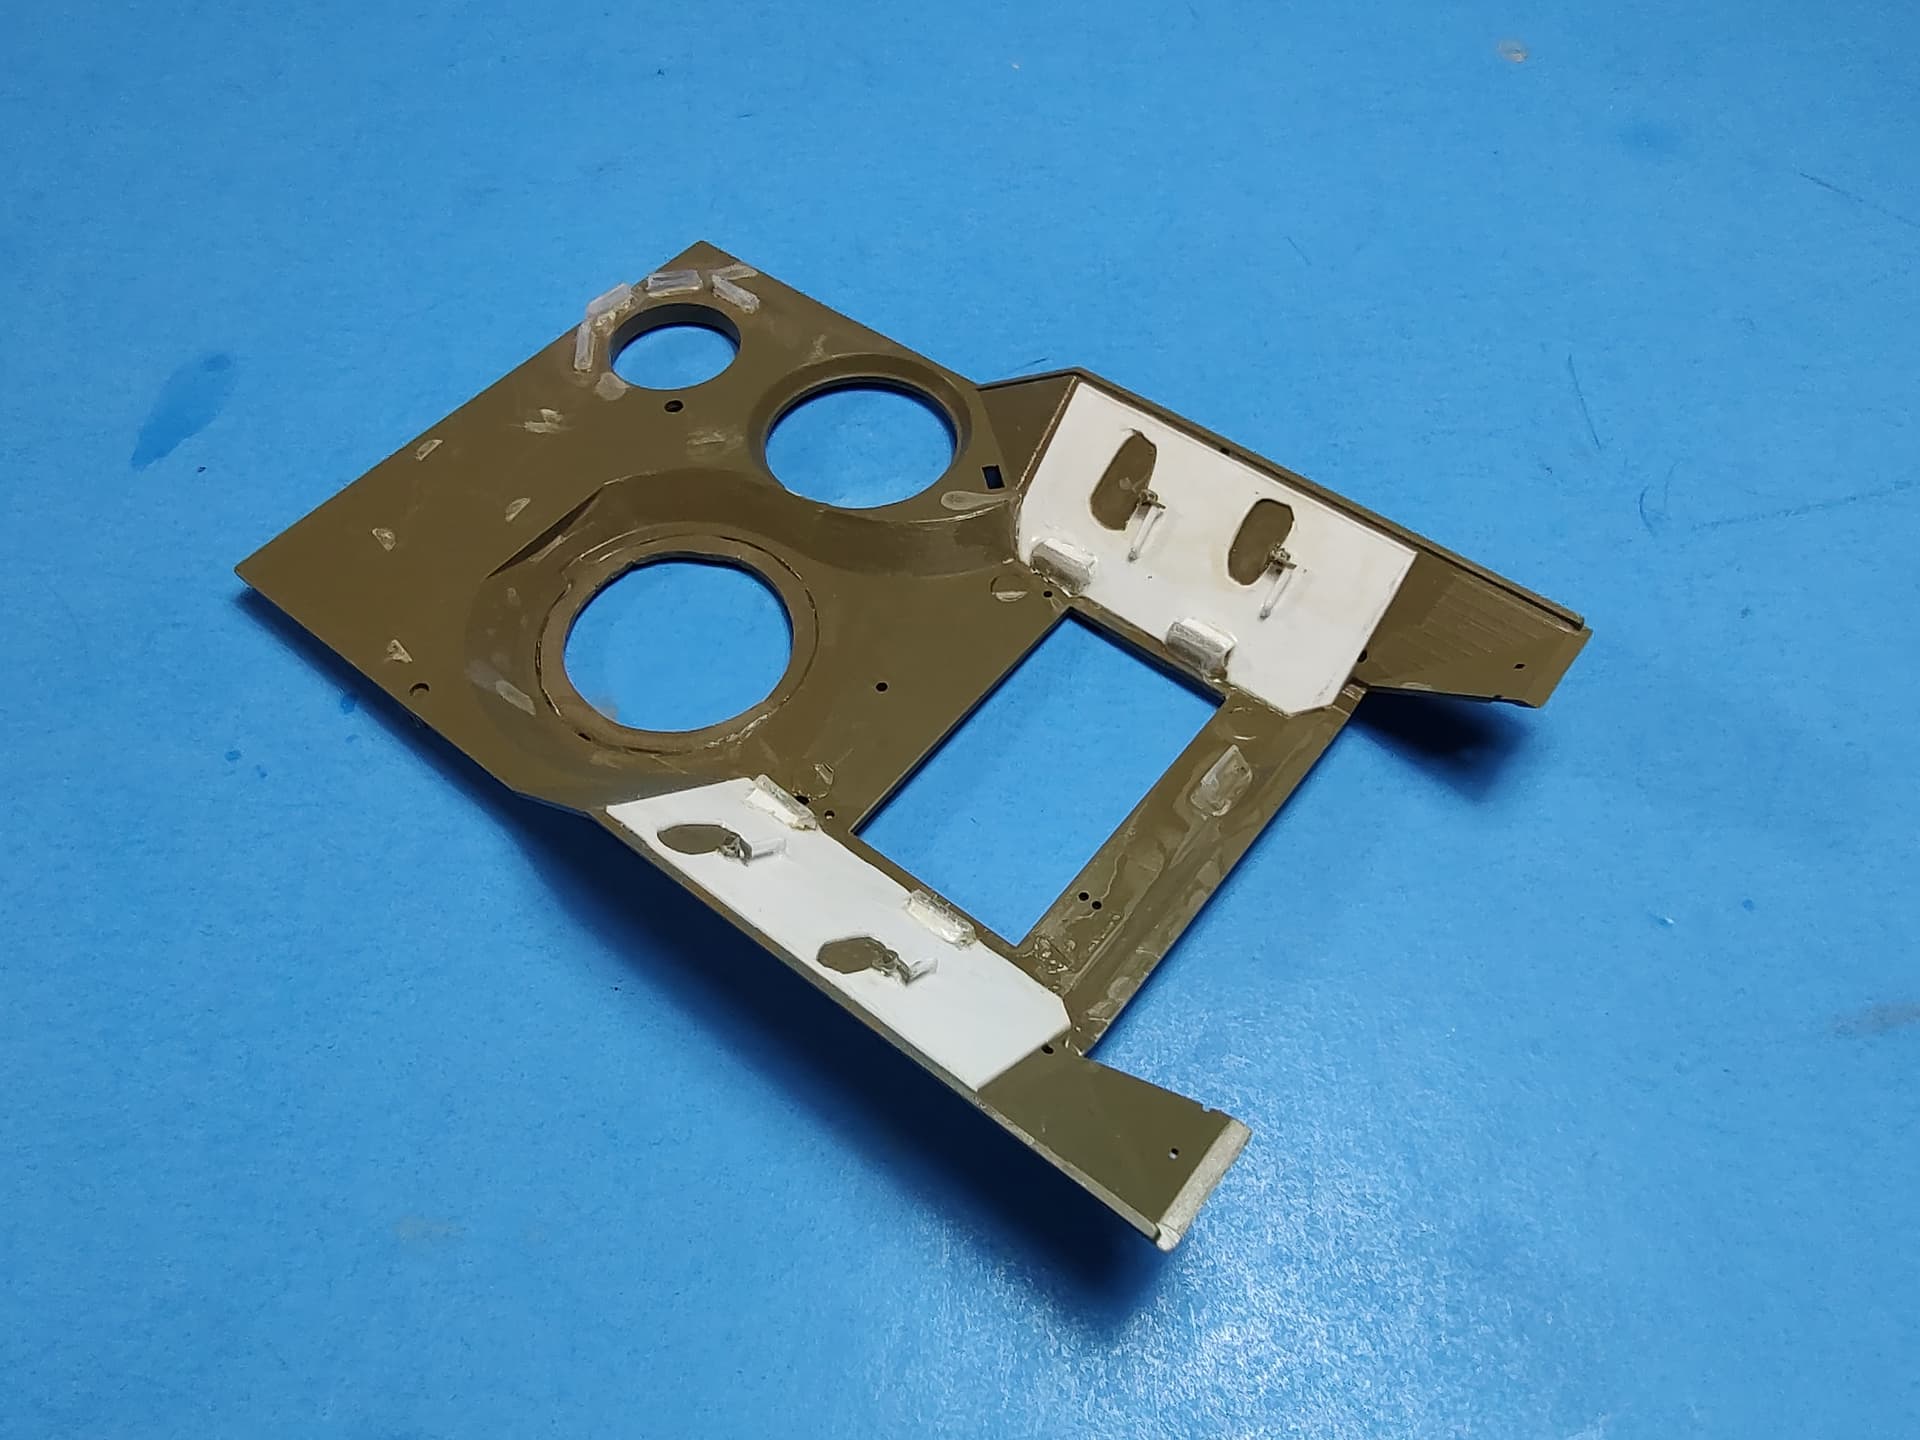
I added a second driver’s seat for the commander, just behind the driver. It is also raised up a bit so he can see over the driver. I also modified the gunner’s seat/platform to attach on the sidewall and swing up out of the way if he wants to stand on the platform.
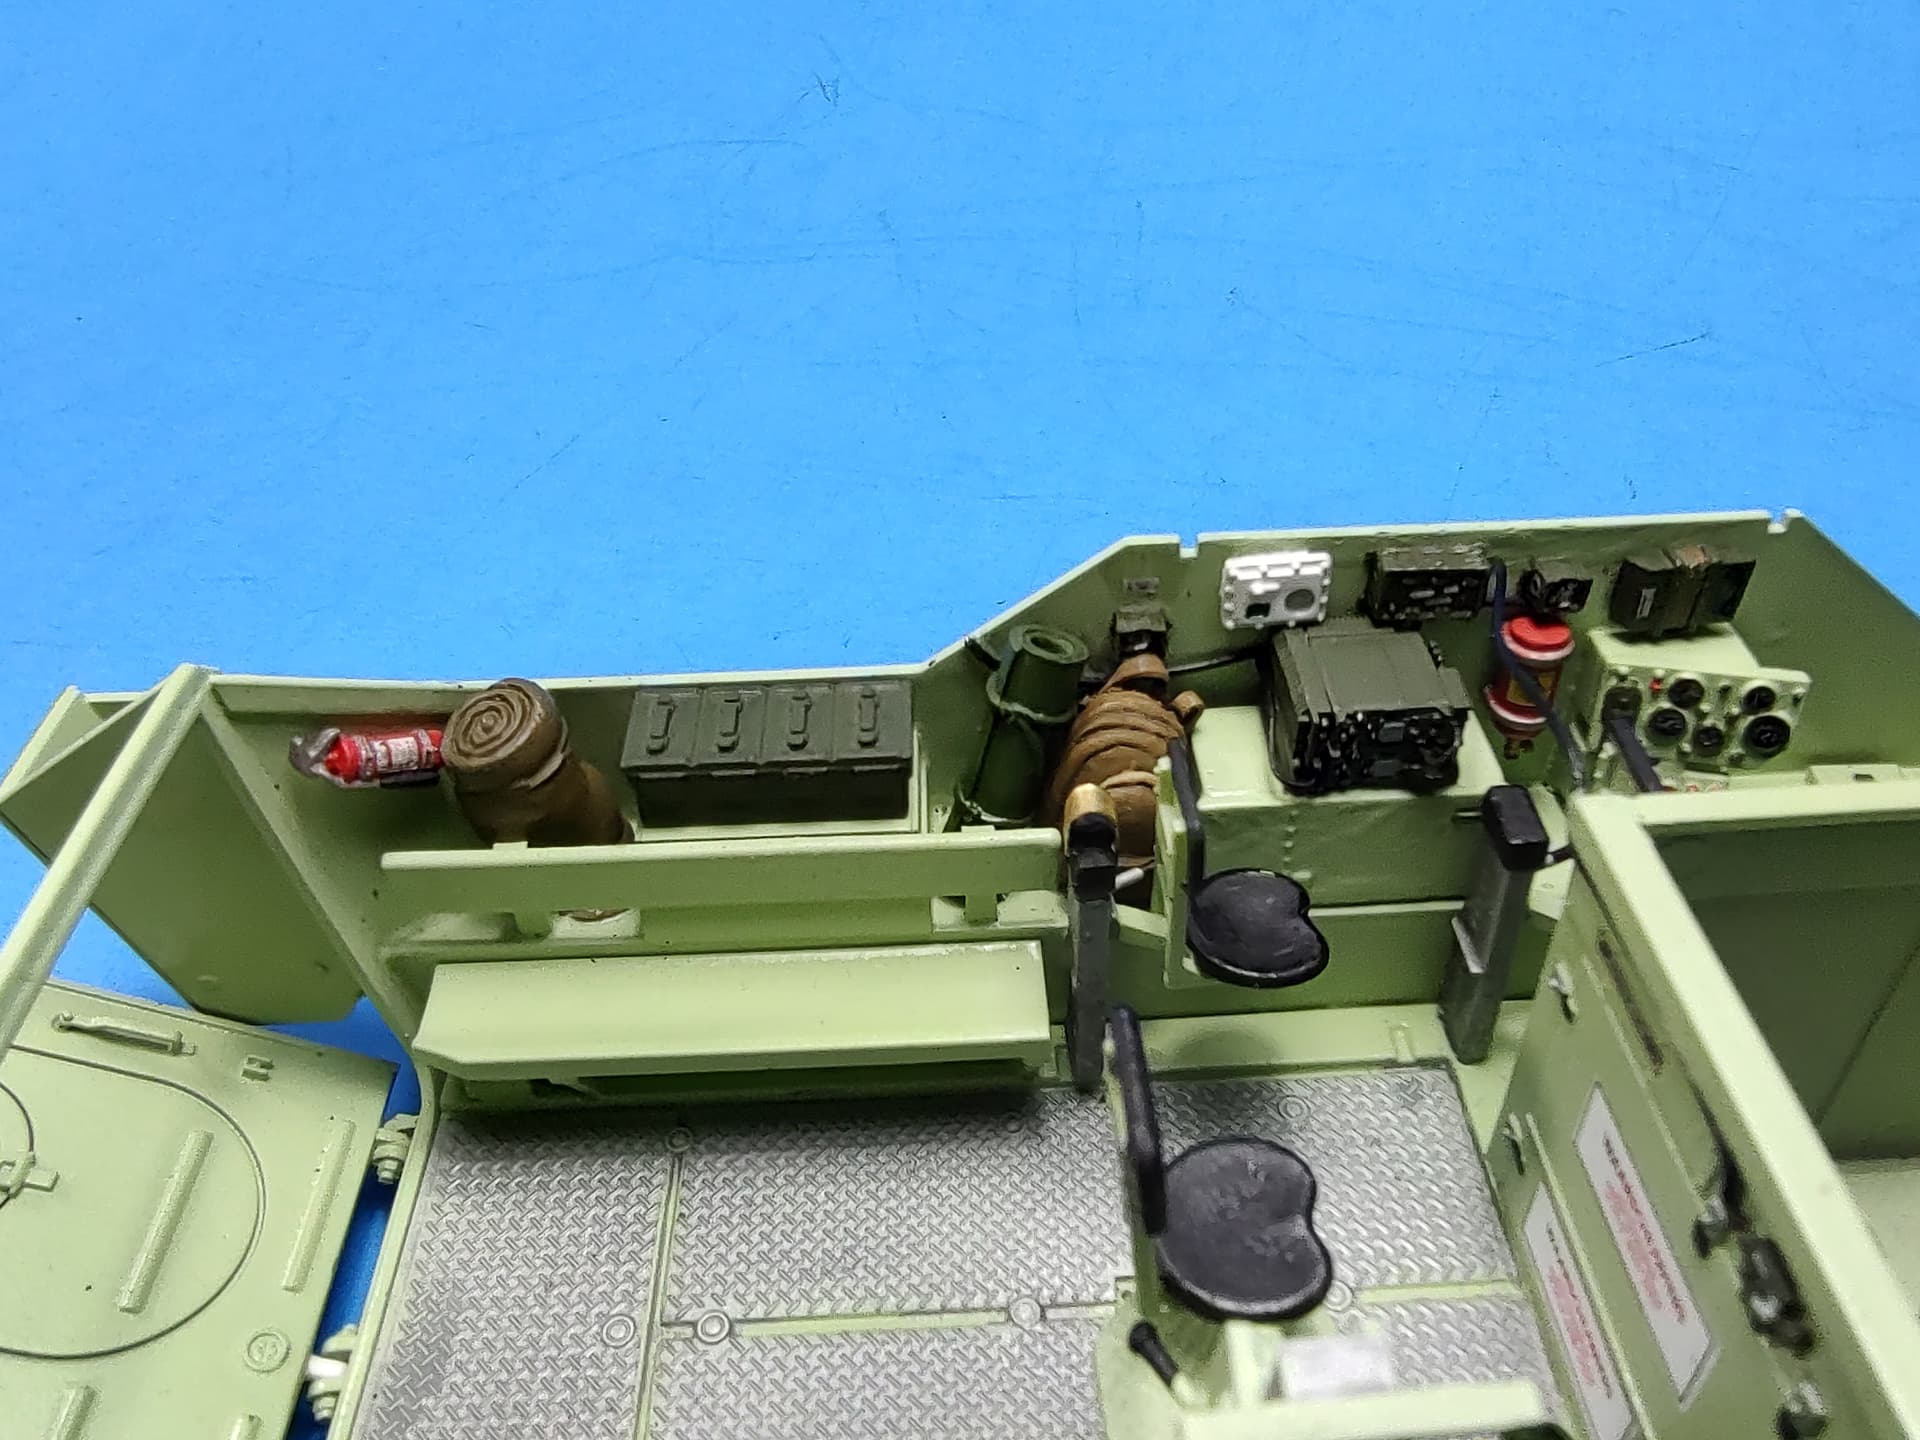
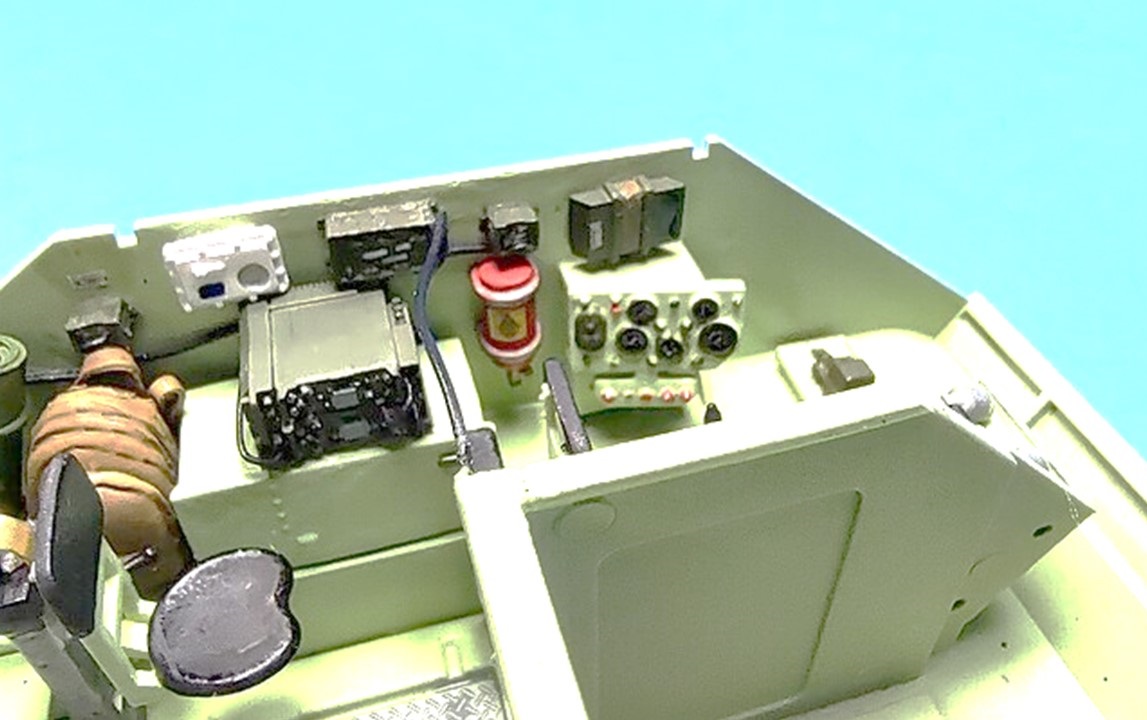
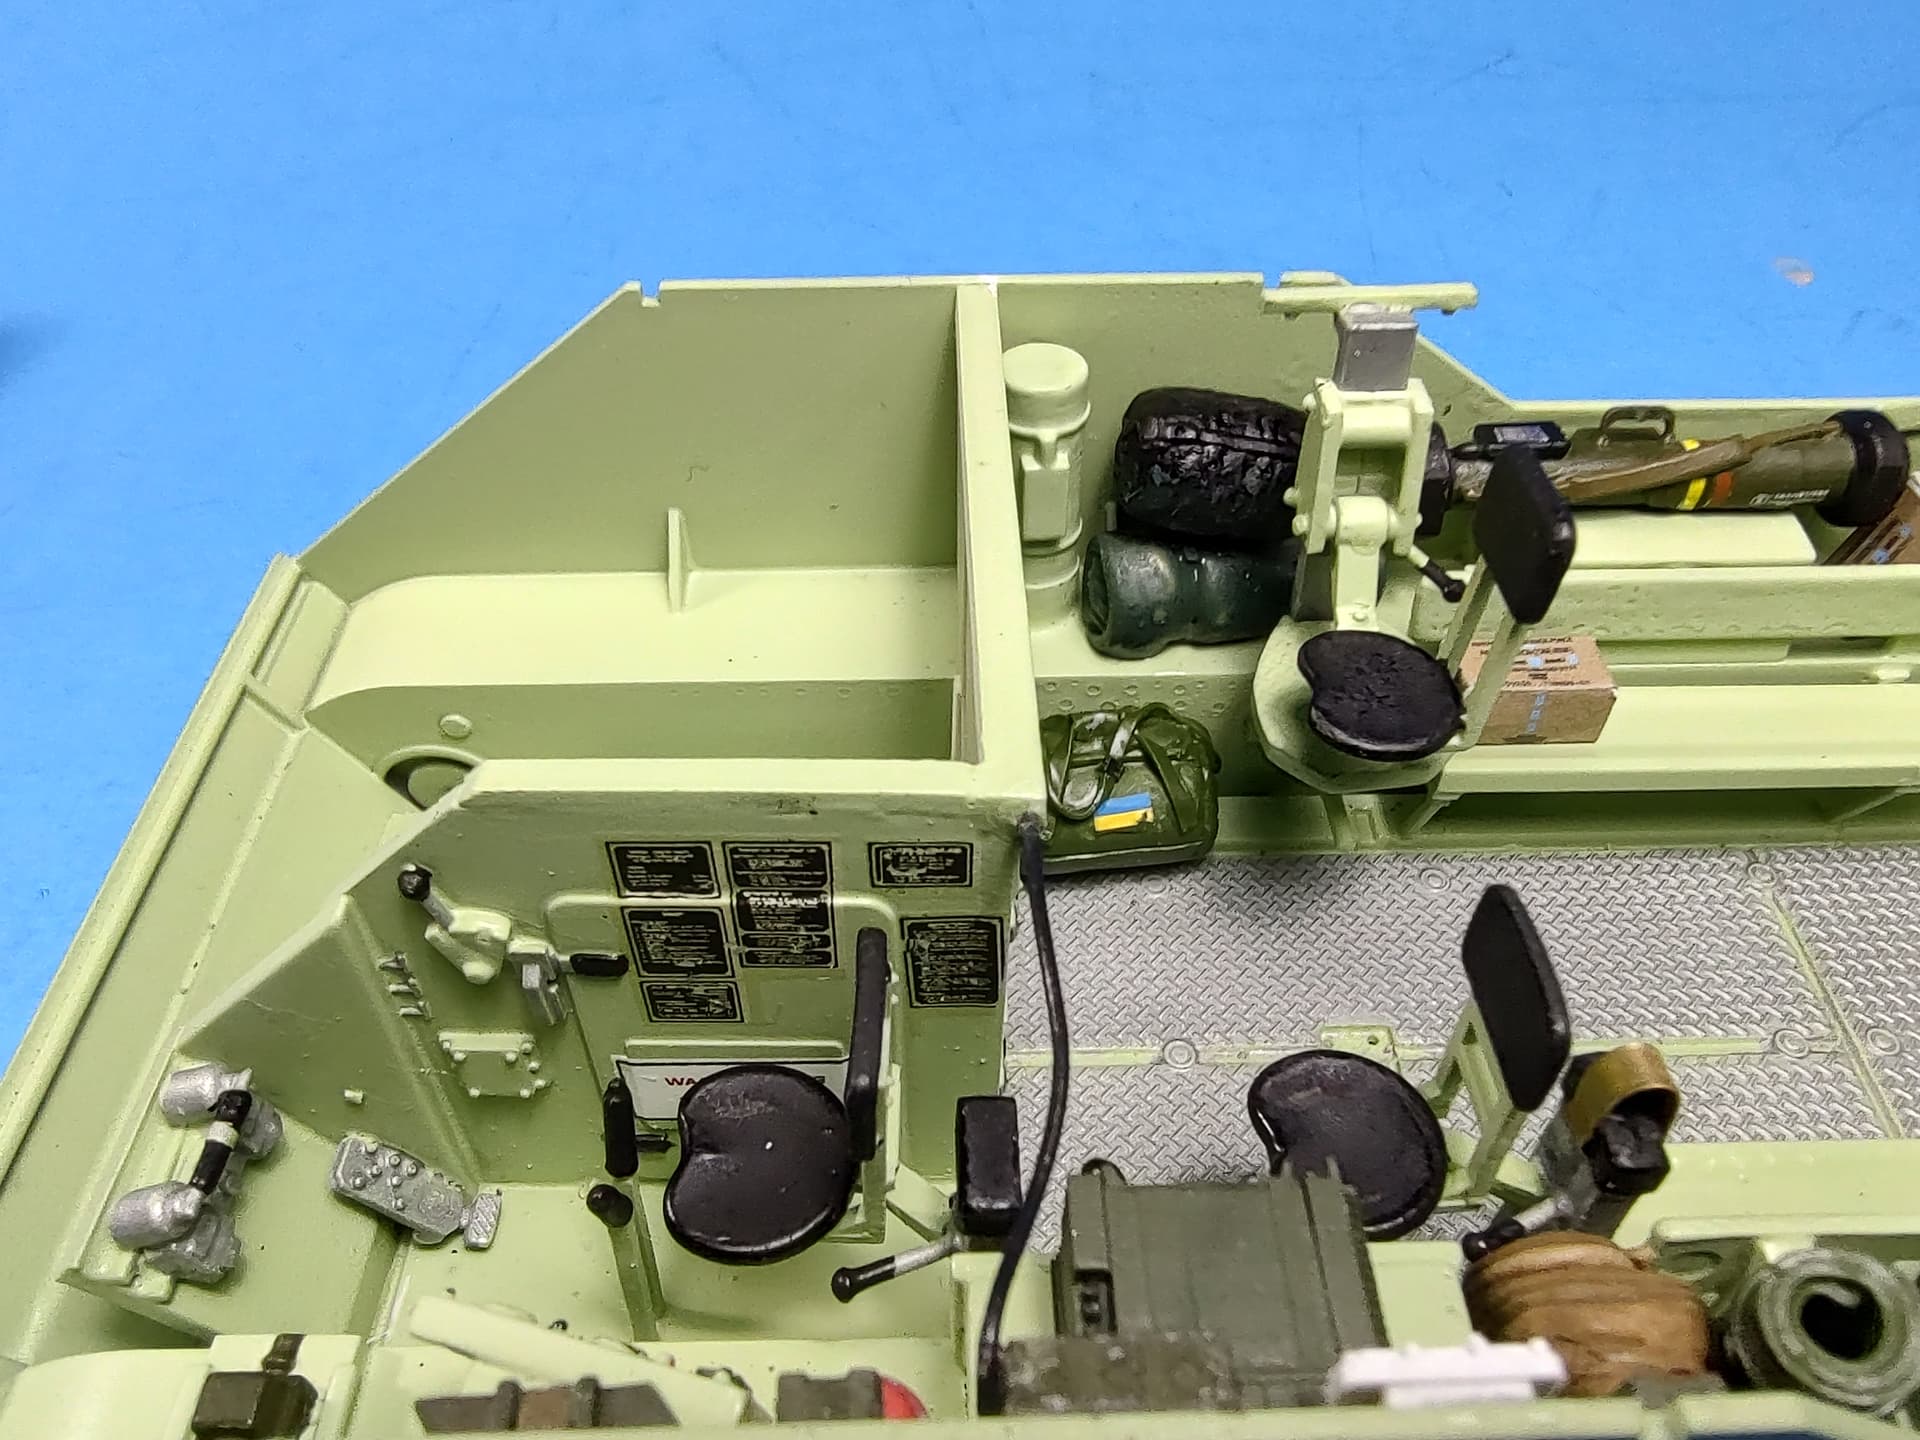
Here it is with the commander’s and gunner’s seats tacked in place. I also tacked a SINCGARS radio and a halon bottle in place where they will attach behind the driver.
I also added more details to the ceiling. I added the handle to drop the ramp, and the cables going back from it. I added ceiling lights, a grab handle, and a handle for the driver’s hatch.
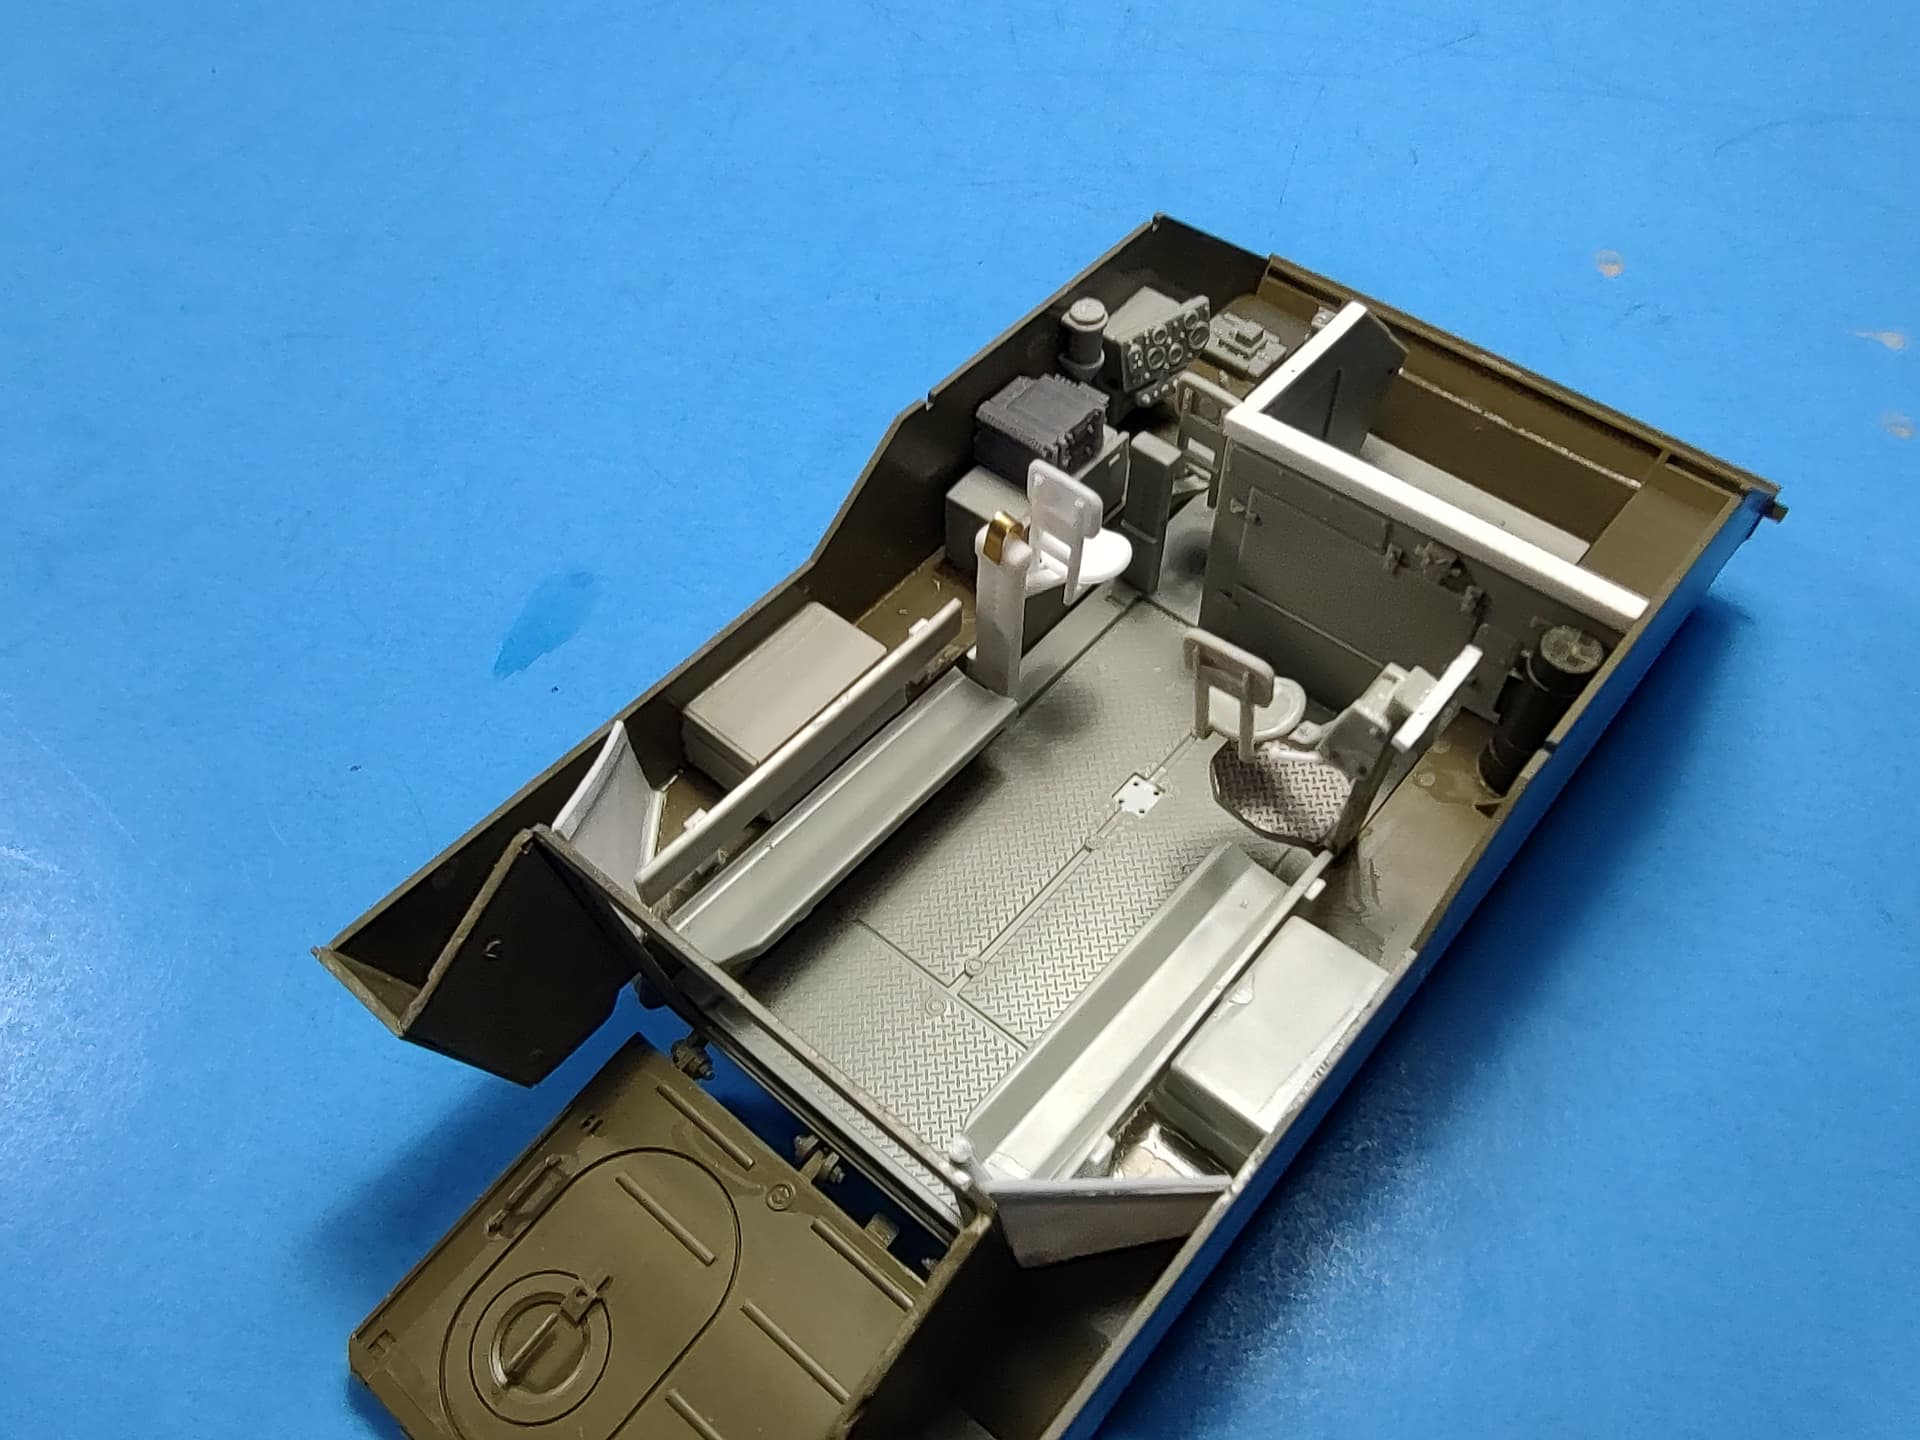
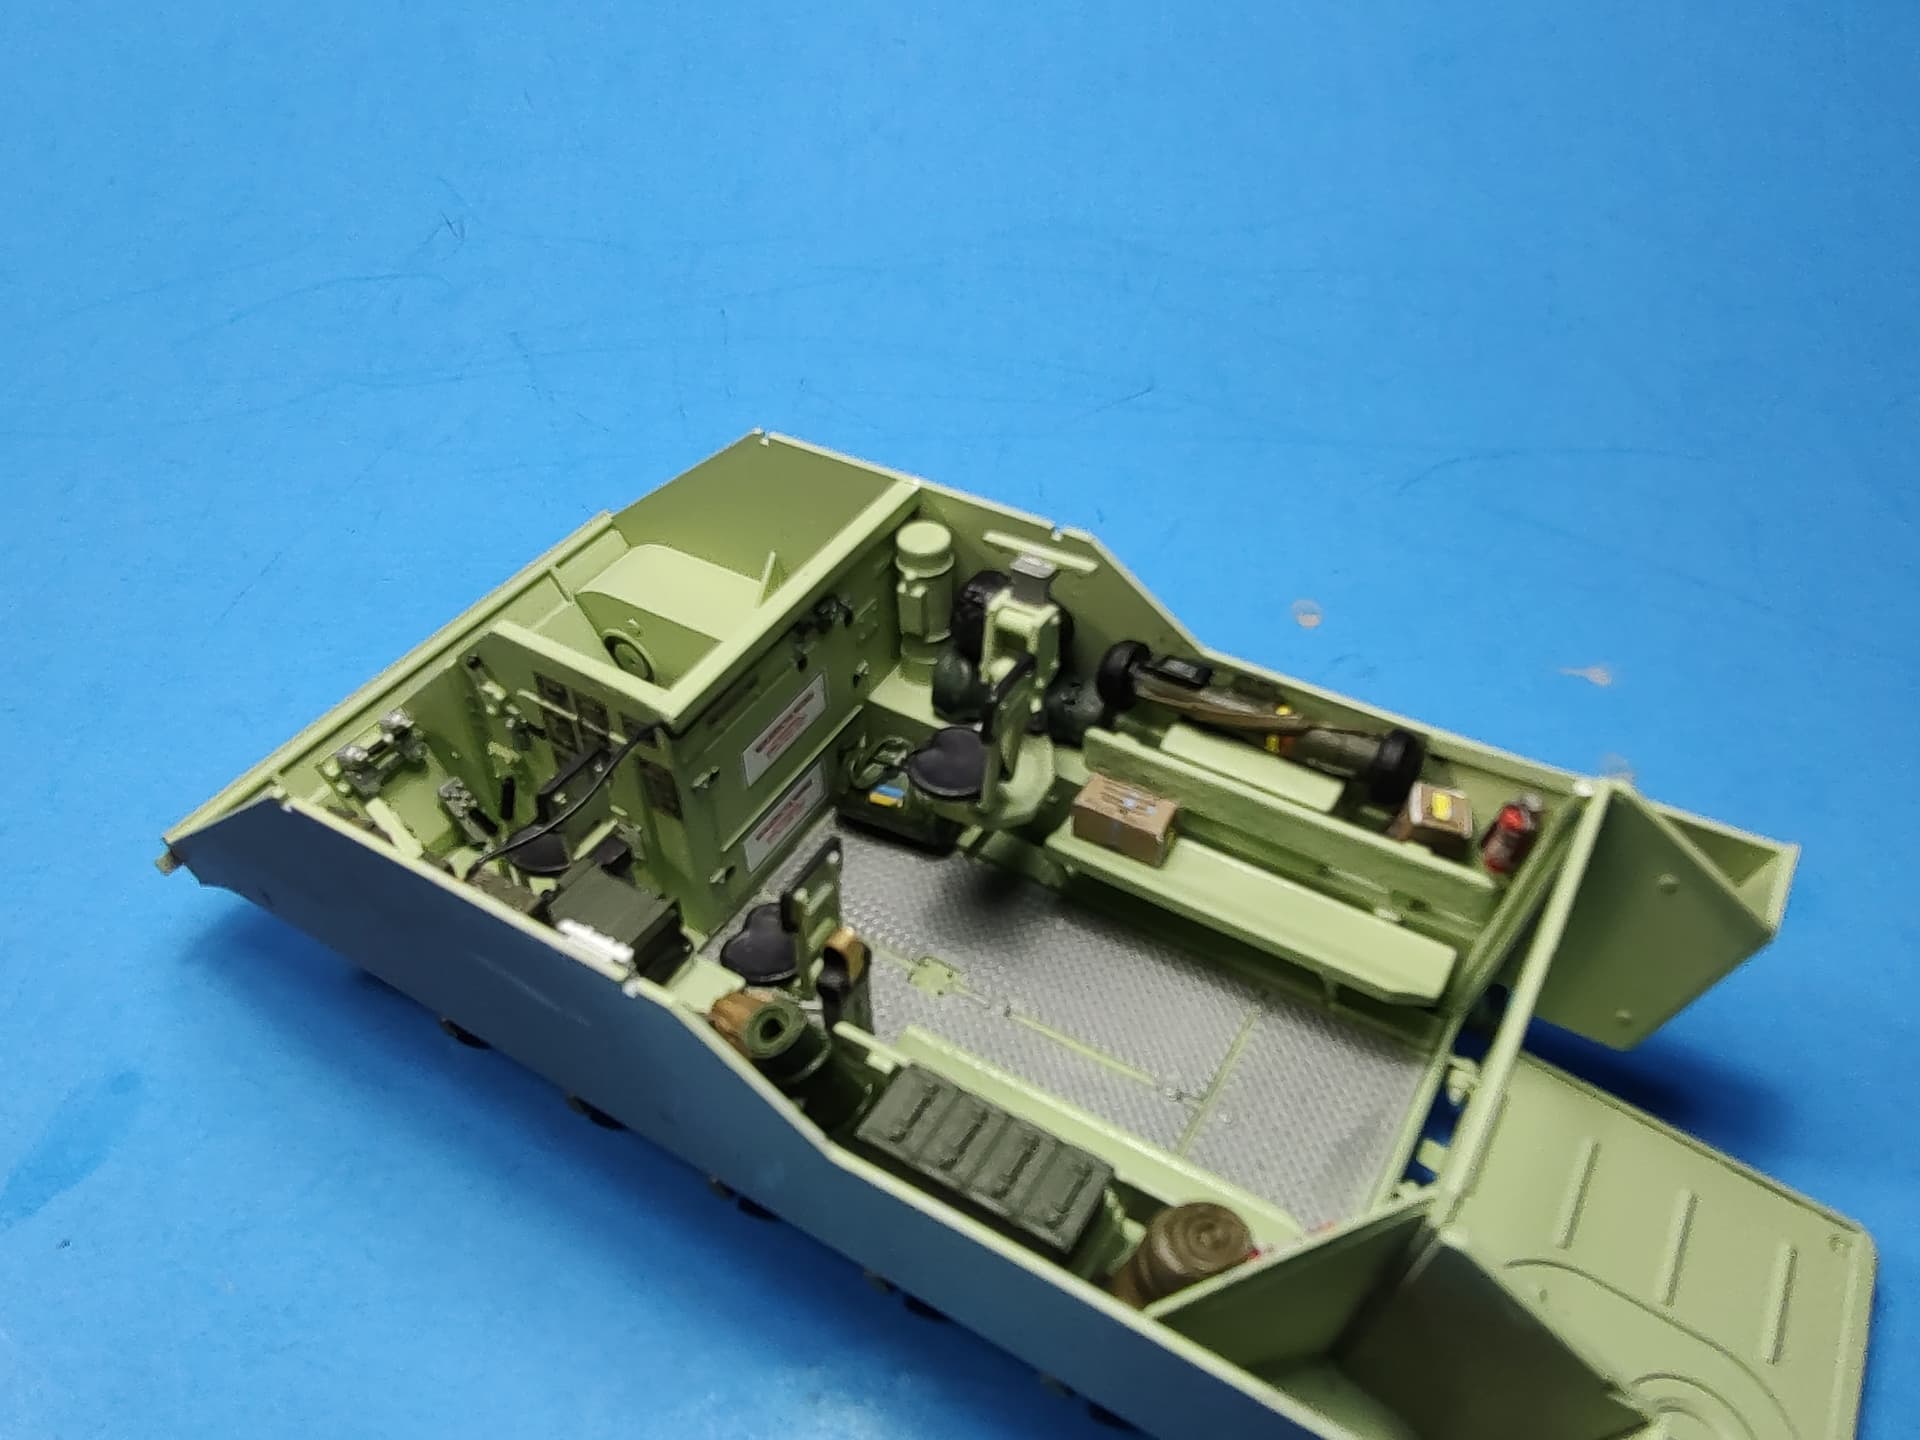
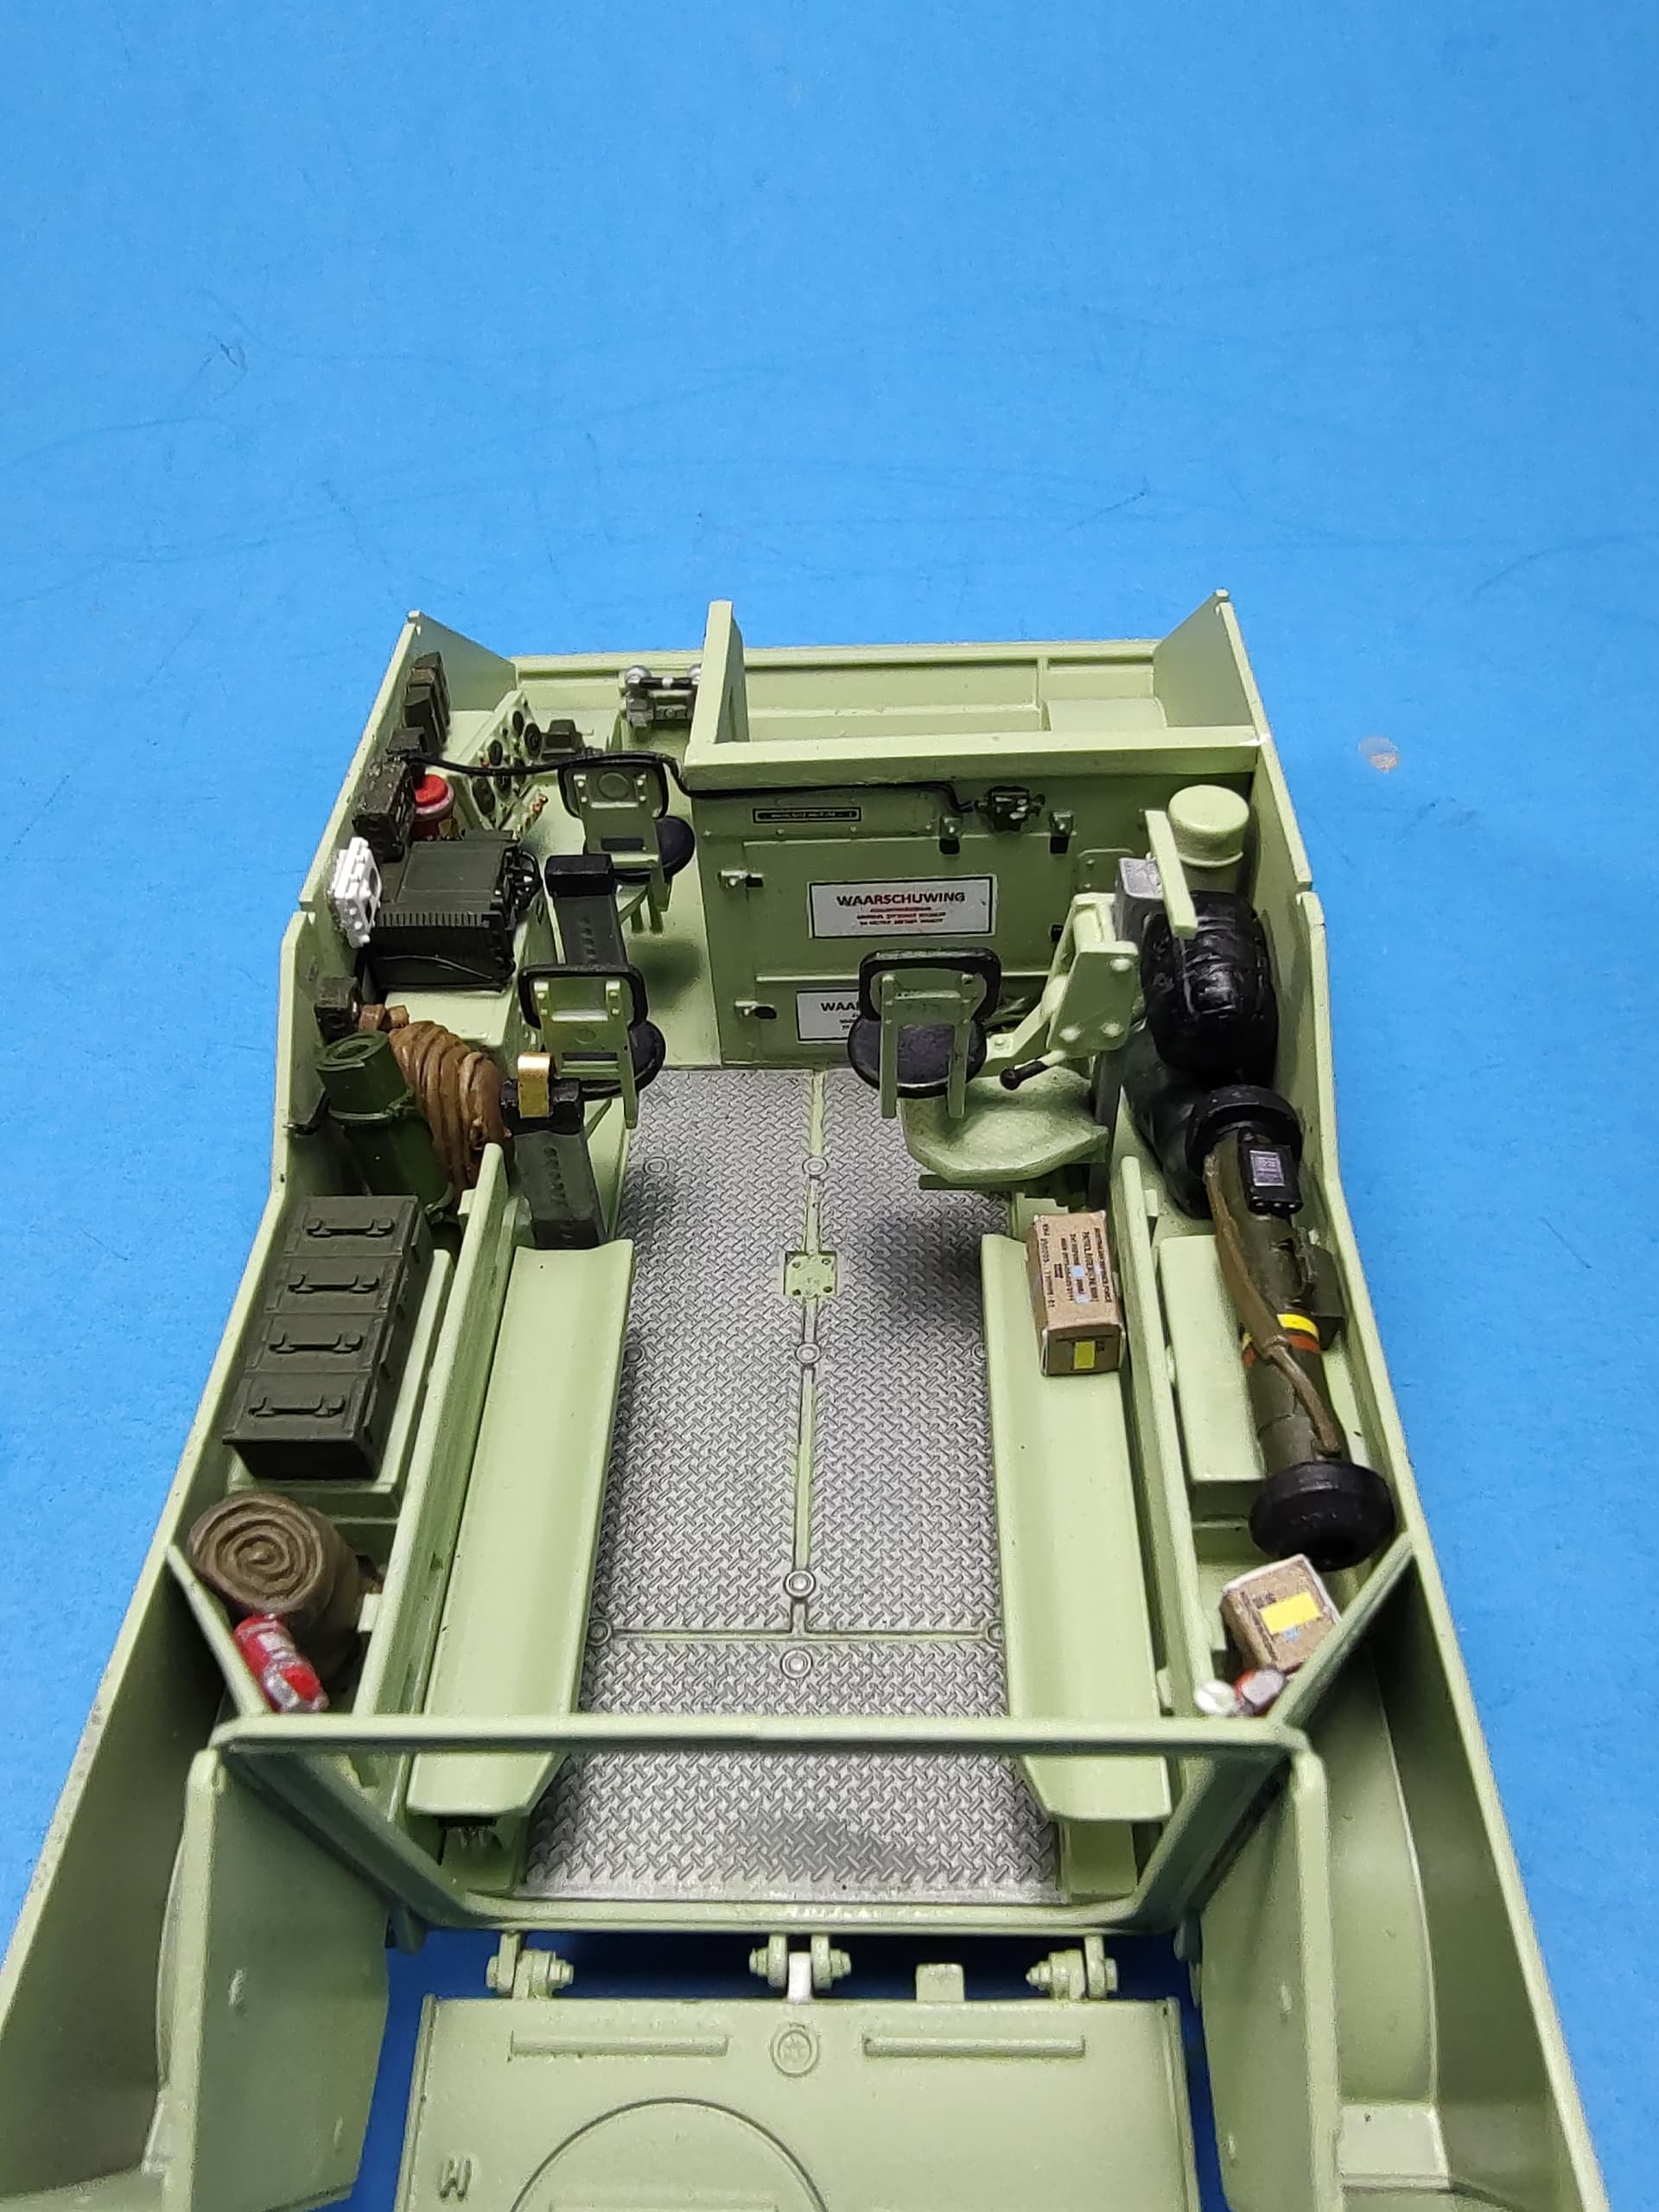
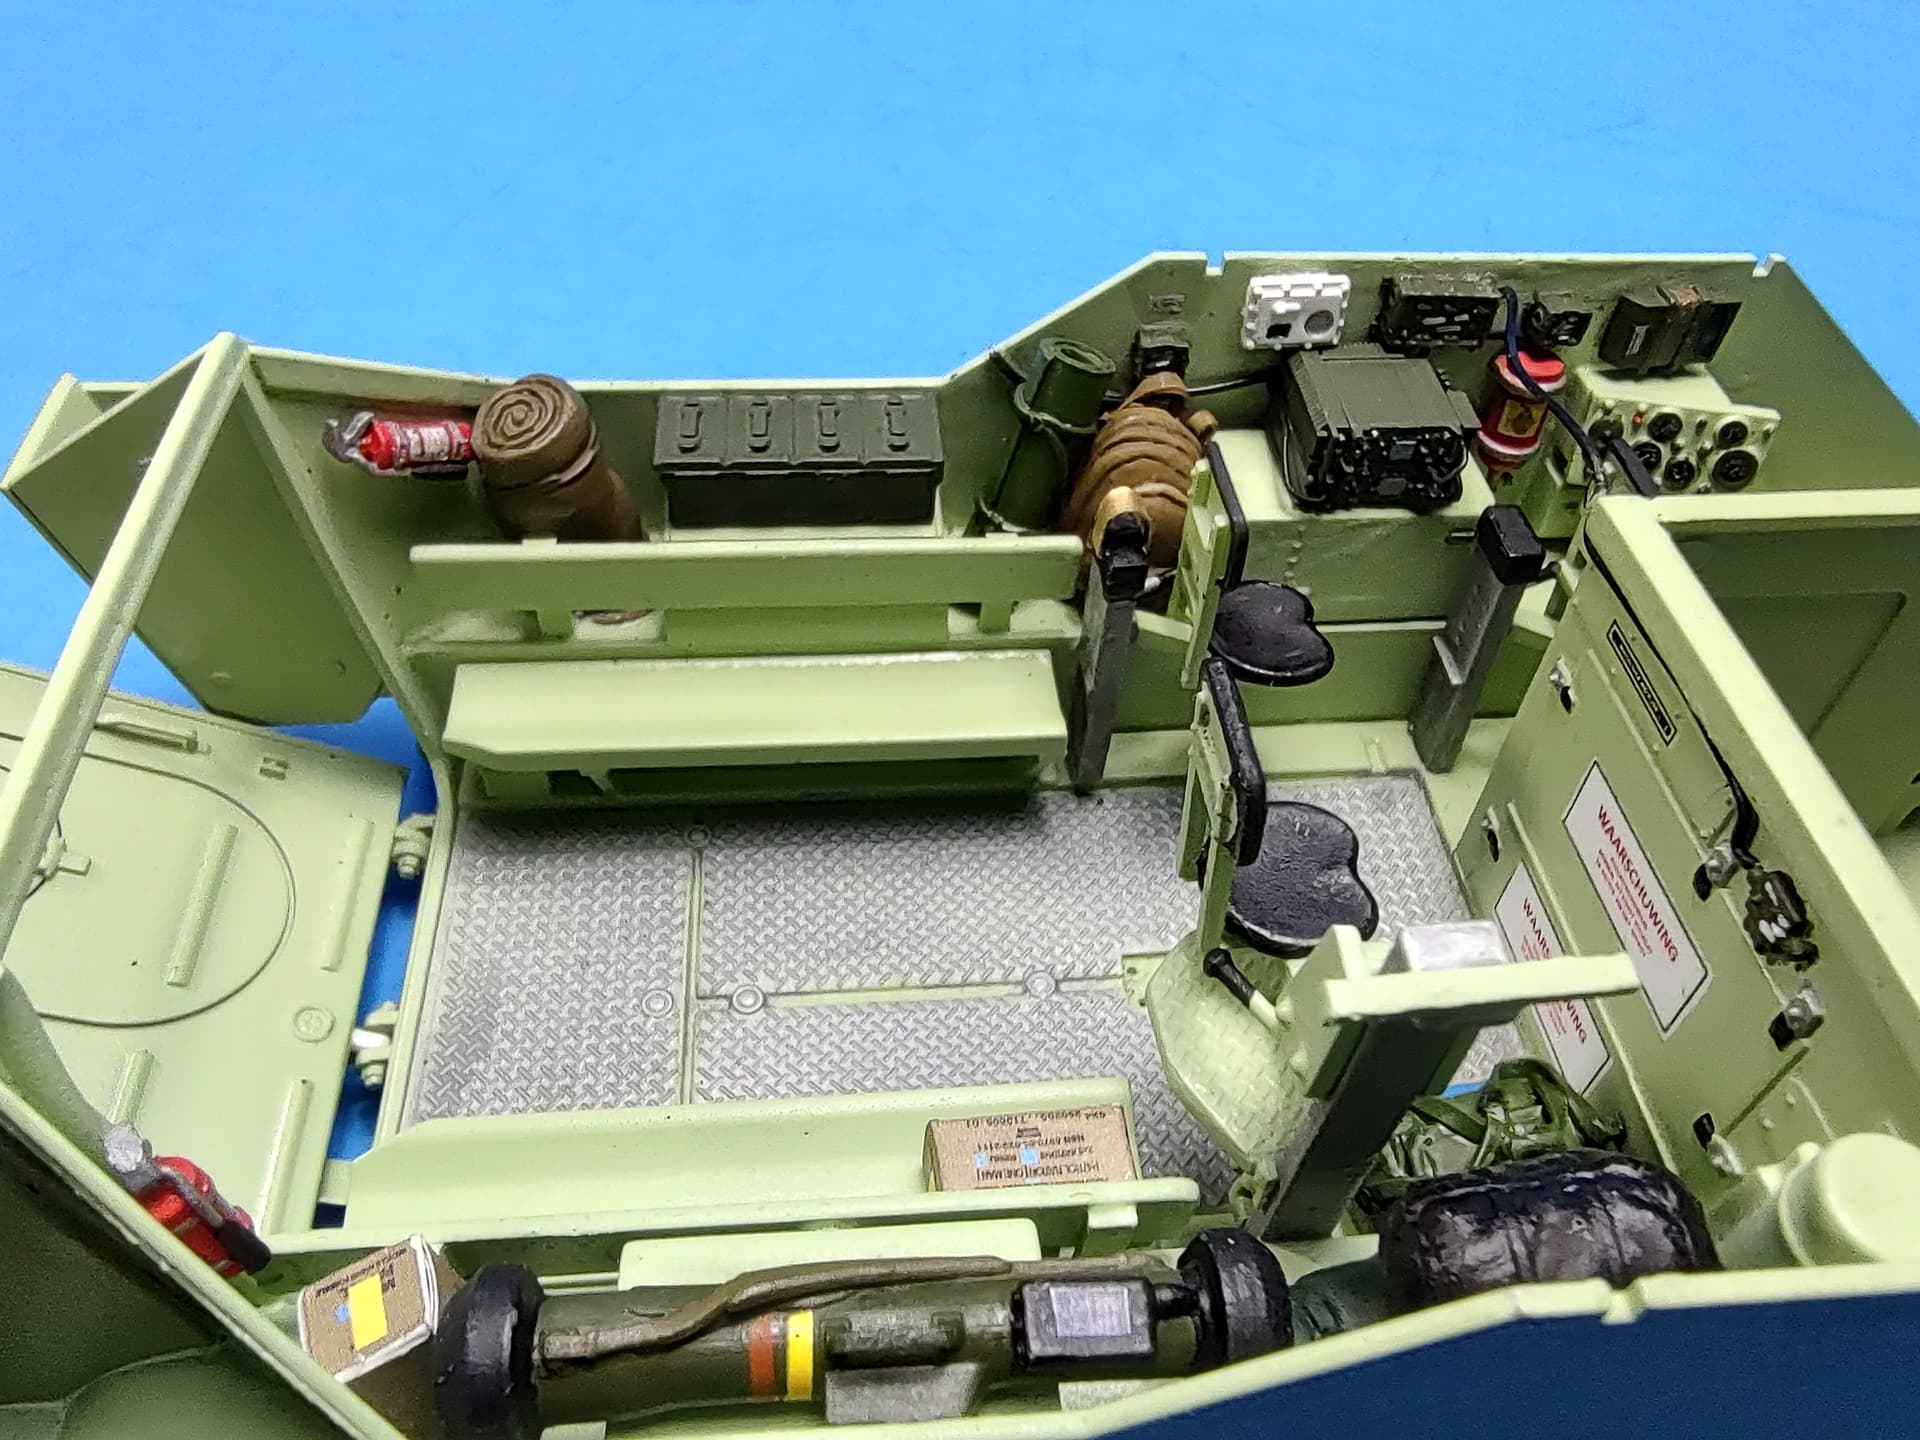
With the holidays over and the kids and grandkids back home, I had some time at the bench. I was able to paint and complete the interior. I painted it overall using Krylon Pistachio spray. It is a perfect match for interior Seafoam Green. It is so close that we used to use it on actual vehicles as touch-up when I was in the Army.
I added details such as fire extinguishers, bags, a couple Australian MRE boxes from the AFV Club Javelin set, a Dan Models (out of Ukraine) Javelin, and some generics bags and bedroles.
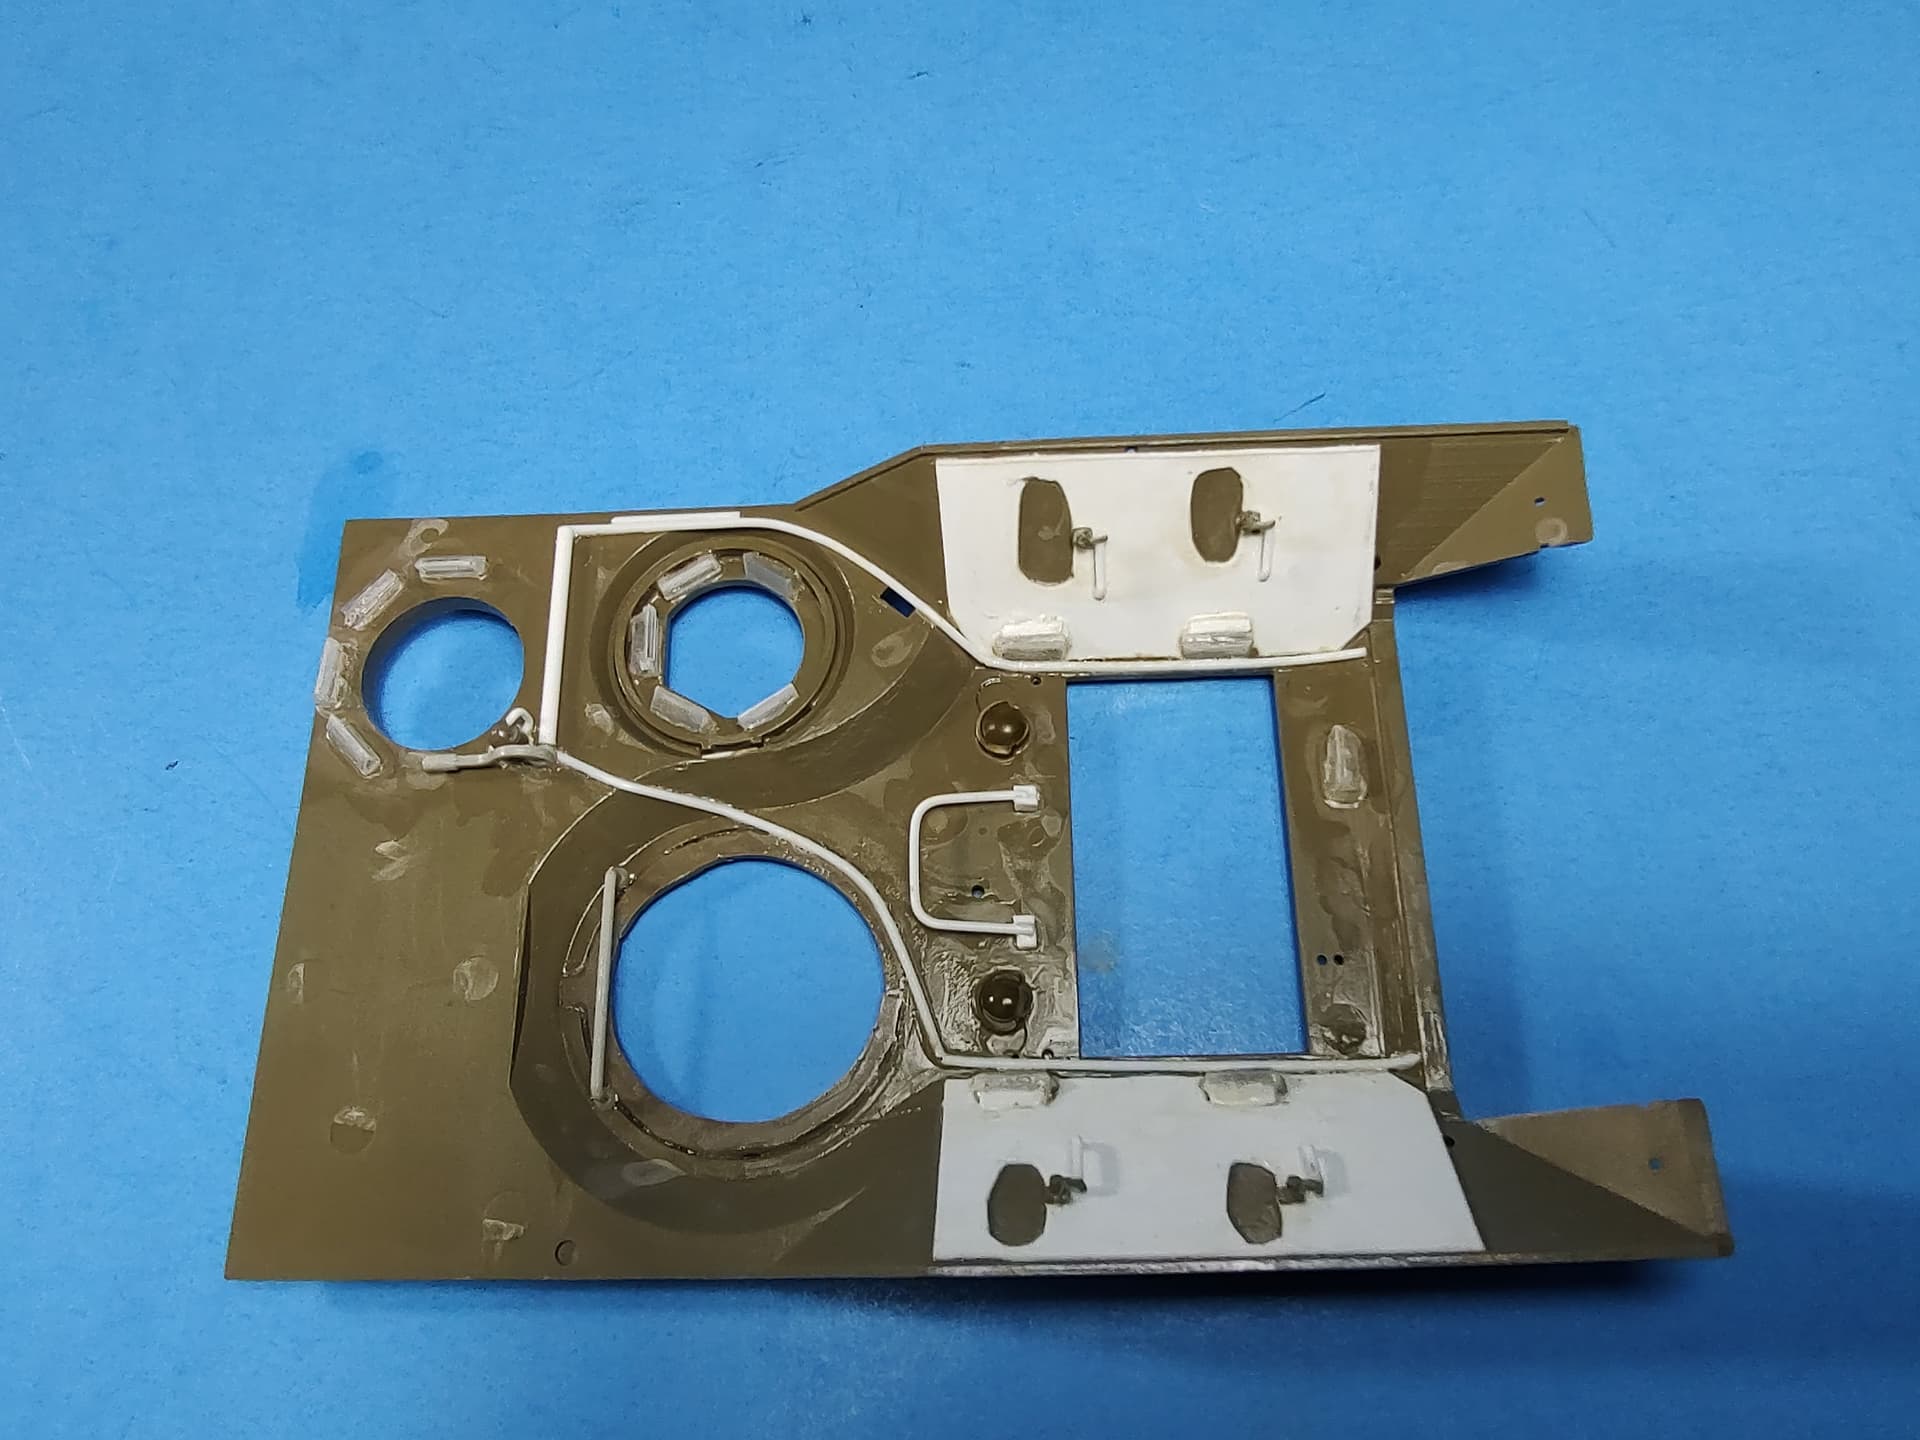
I used individual instrument decals for the gauges, I also made the Dutch warning labels on the bulkheads myself from pictures of them. I also added the intercom control box and individual J-boxes and wired them all back to the SINCGARS radios. The Intercom and radios are 3D printed parts by @MikeyBugs and look really great.
Fantastic work so far Gino - I’m pretty late to this topic but I really appreciate this build considering my country (Philippines) had/still have some AIFVs mucking about - I have the afv club kit which I abandoned two years ago after I broke some parts.
Good work on turrent instalation. I had similar problems couple years ago when i depicted this vehicle, albeit with some local modifications. I haven’t touched interior as you did (great work!).
You can see it on this link on my blog.
I was satisfied with vinyl tracks, they were glued nice with PVC glue, so don’t waste money on some aftermarket…
Thank you, gentlemen. I really like how it is coming out.
Nigel, hope you continue yours. More YPRs here would be good. They are an interesting little vehicle. I have another that I plan to build w/the 25mm turret, and a full interior of course.
Marko, yours looks great. I really like all the locally added bits and pieces.