Zvezda BM-21

Alright, here we go on my BM-21.

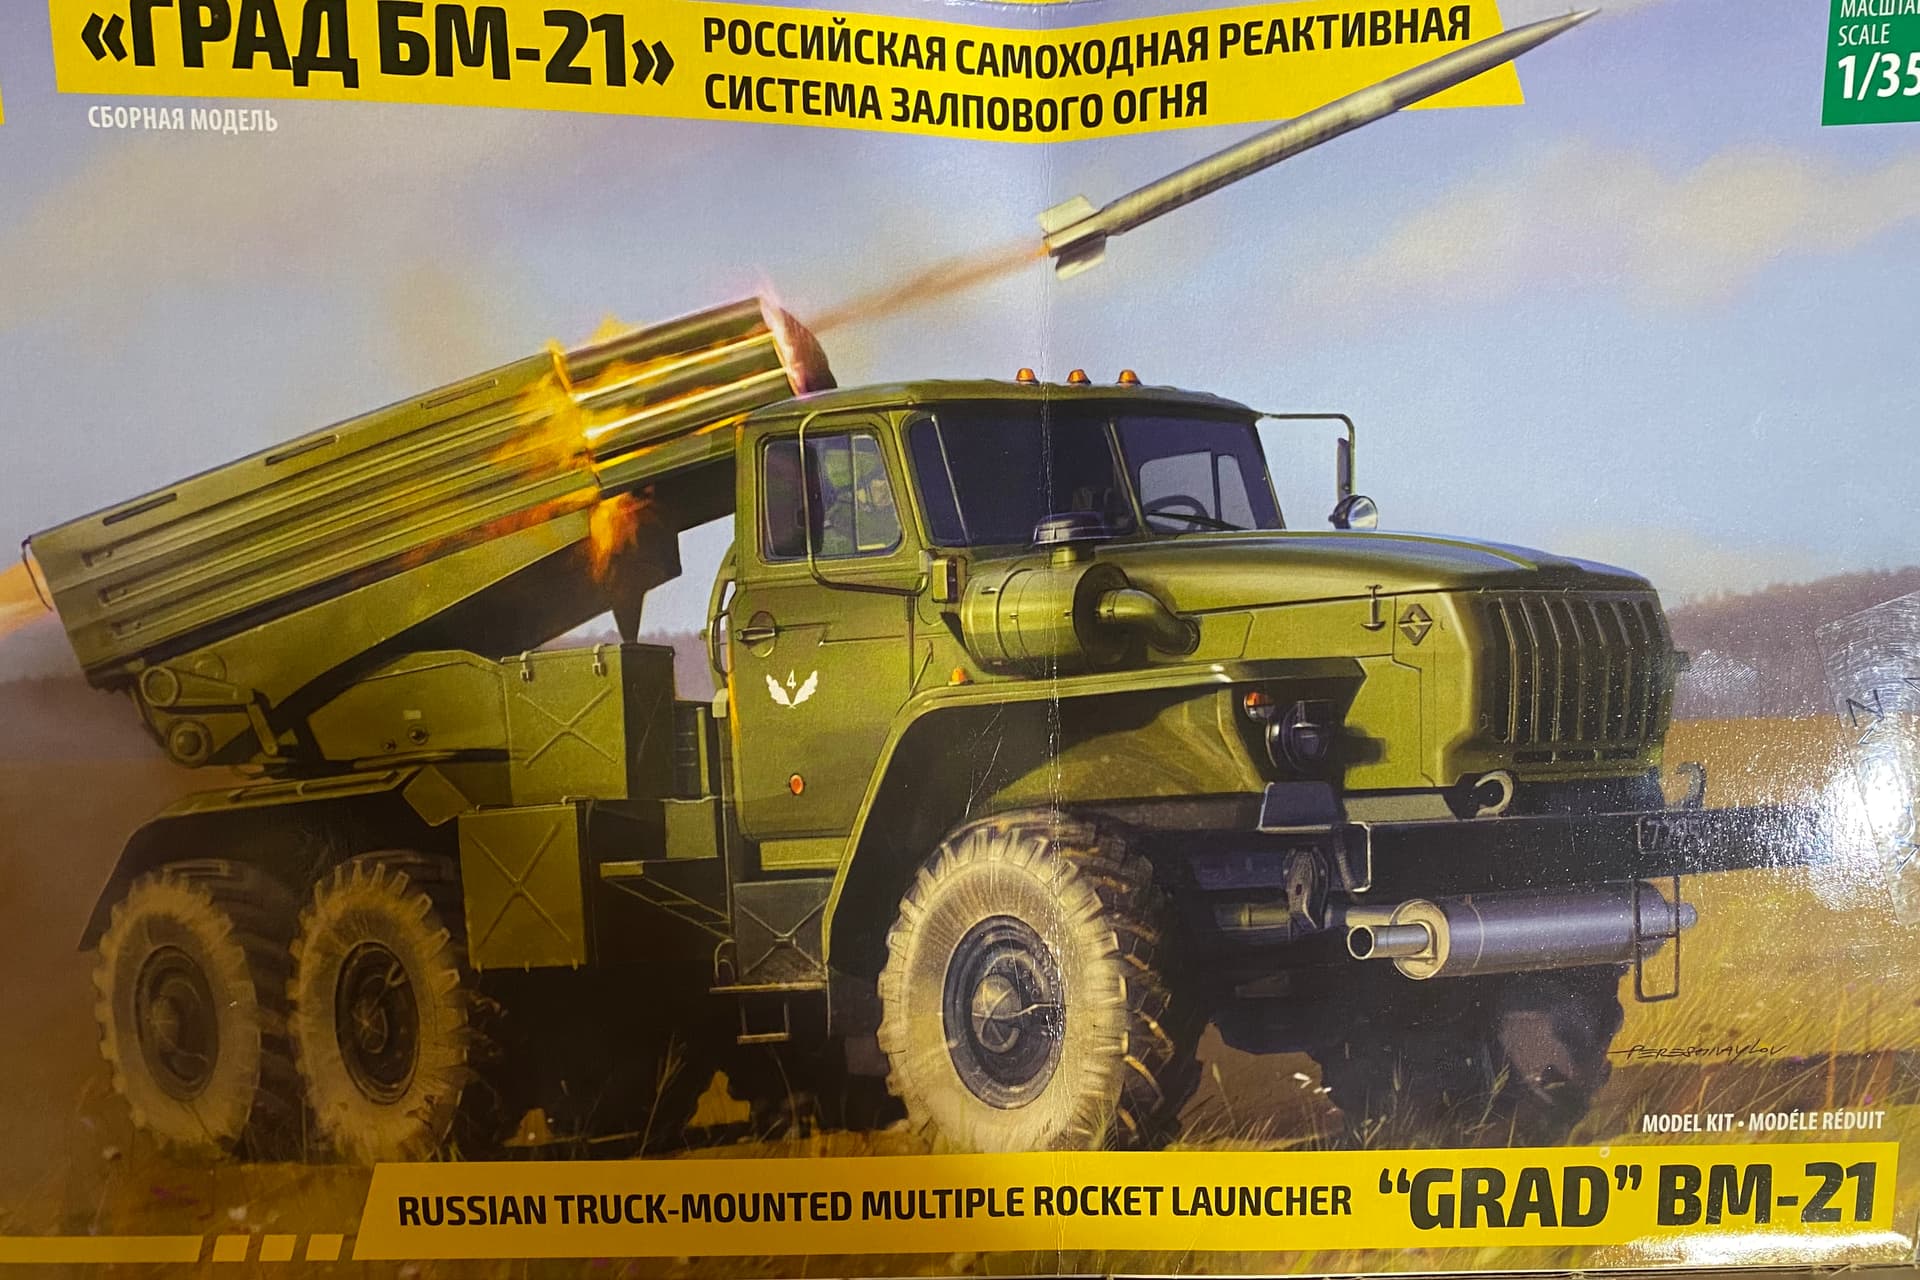
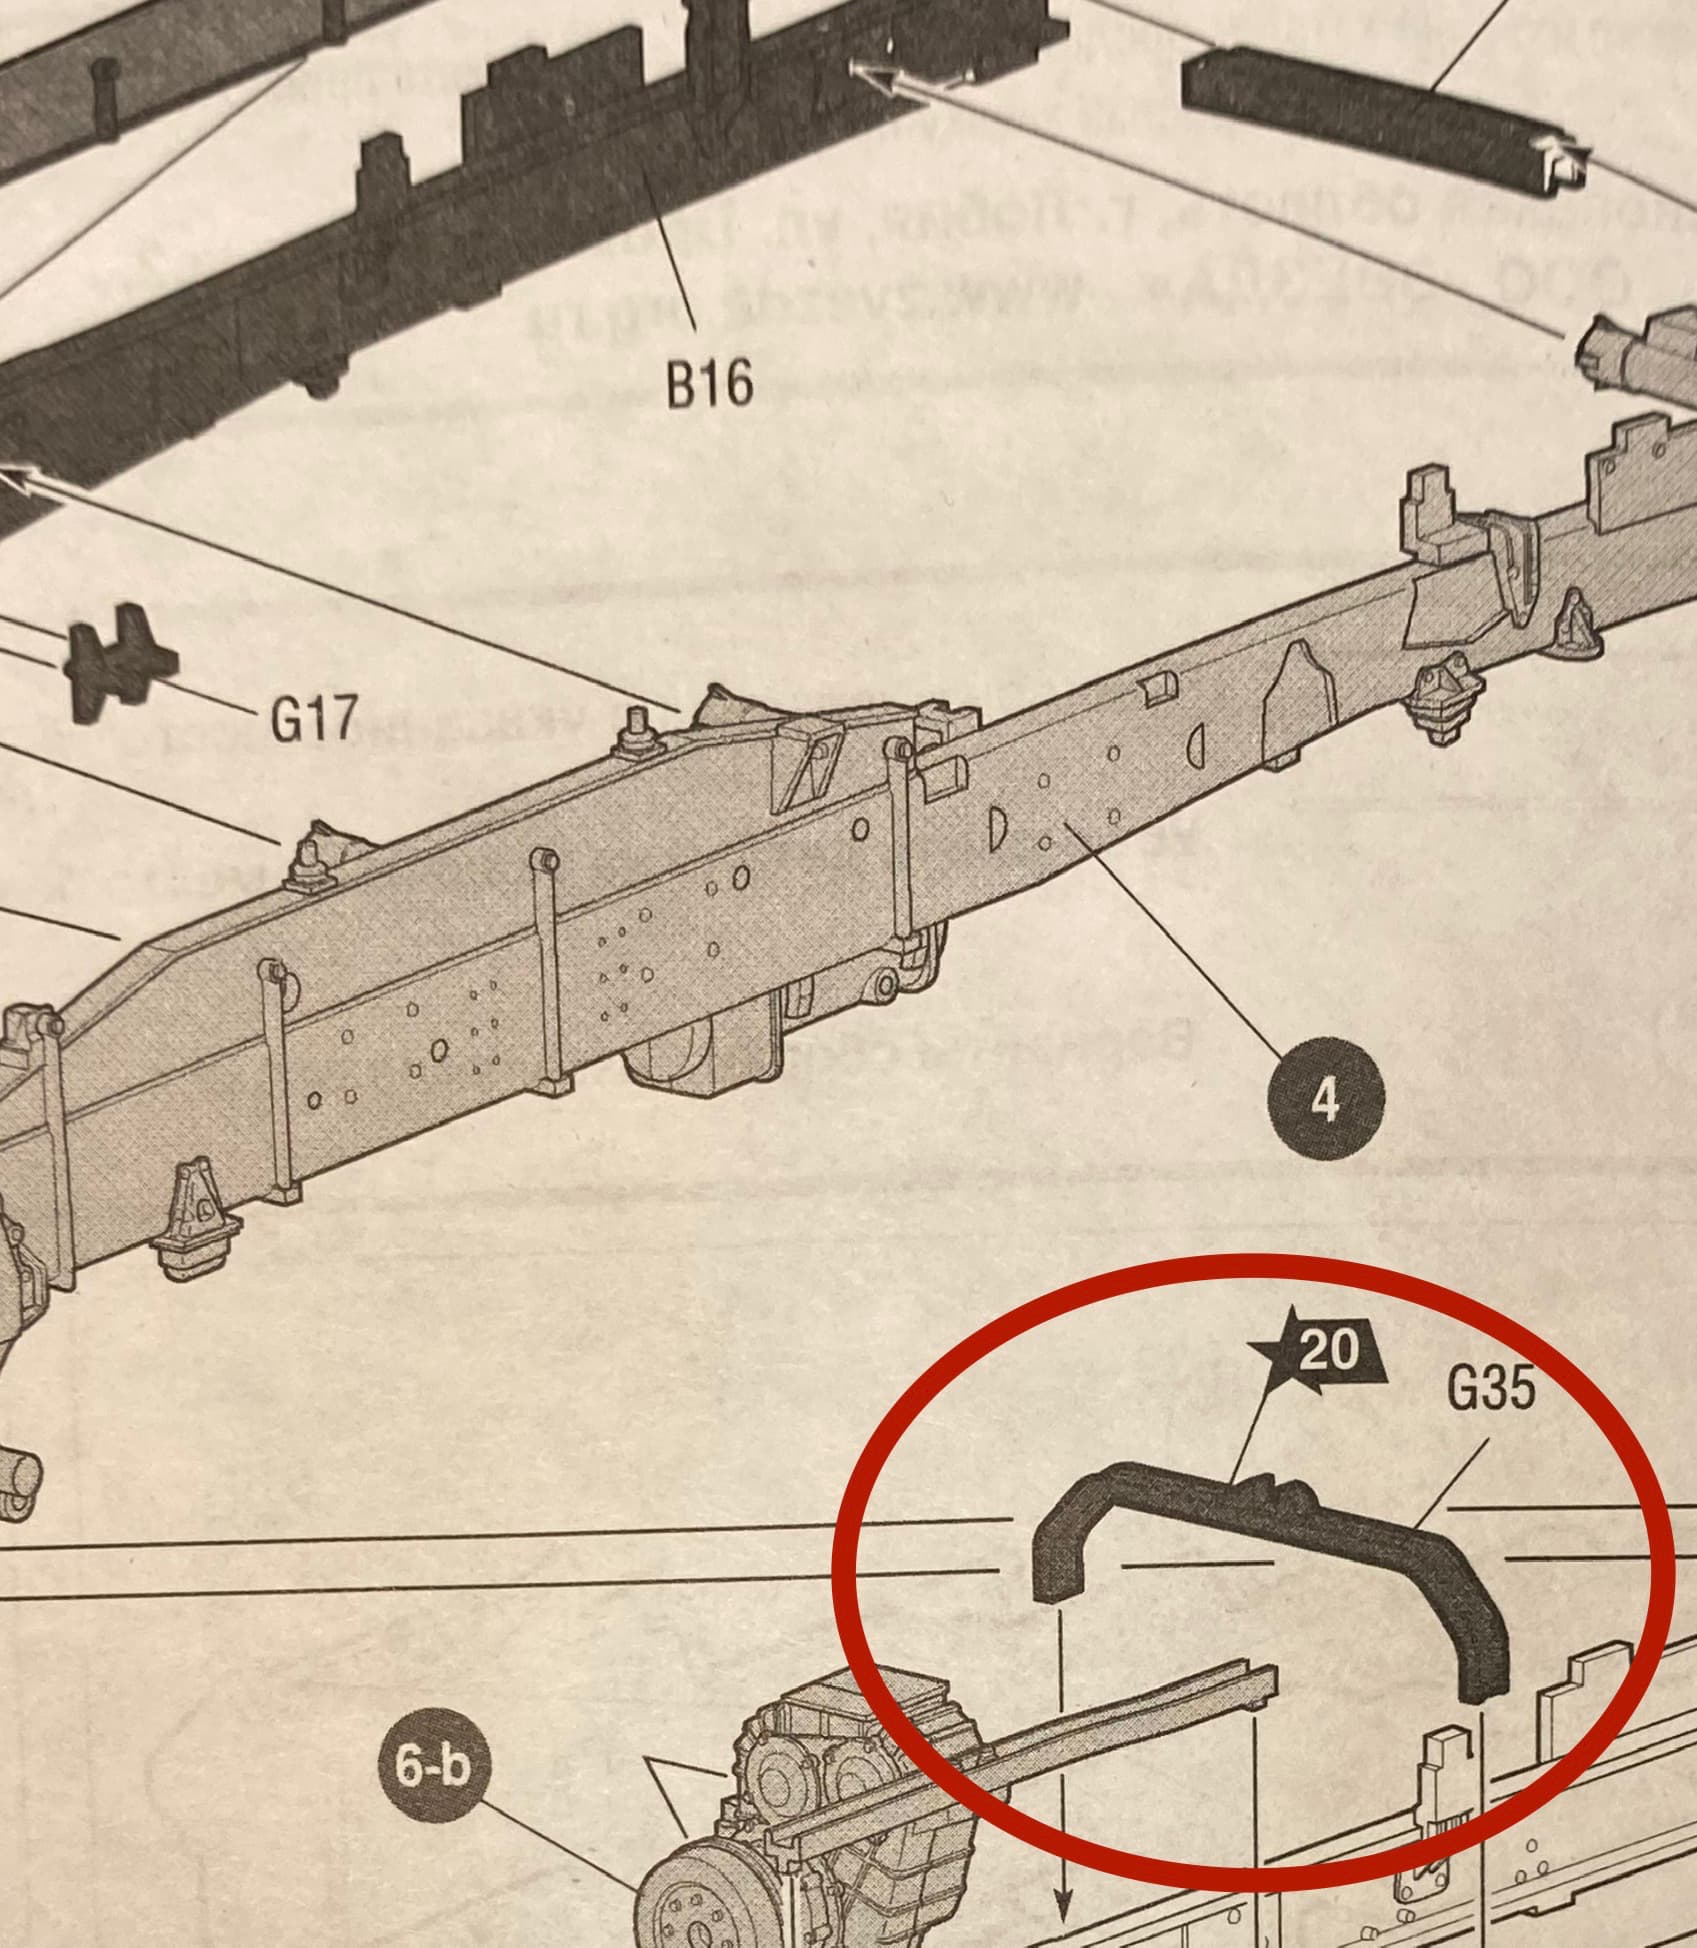
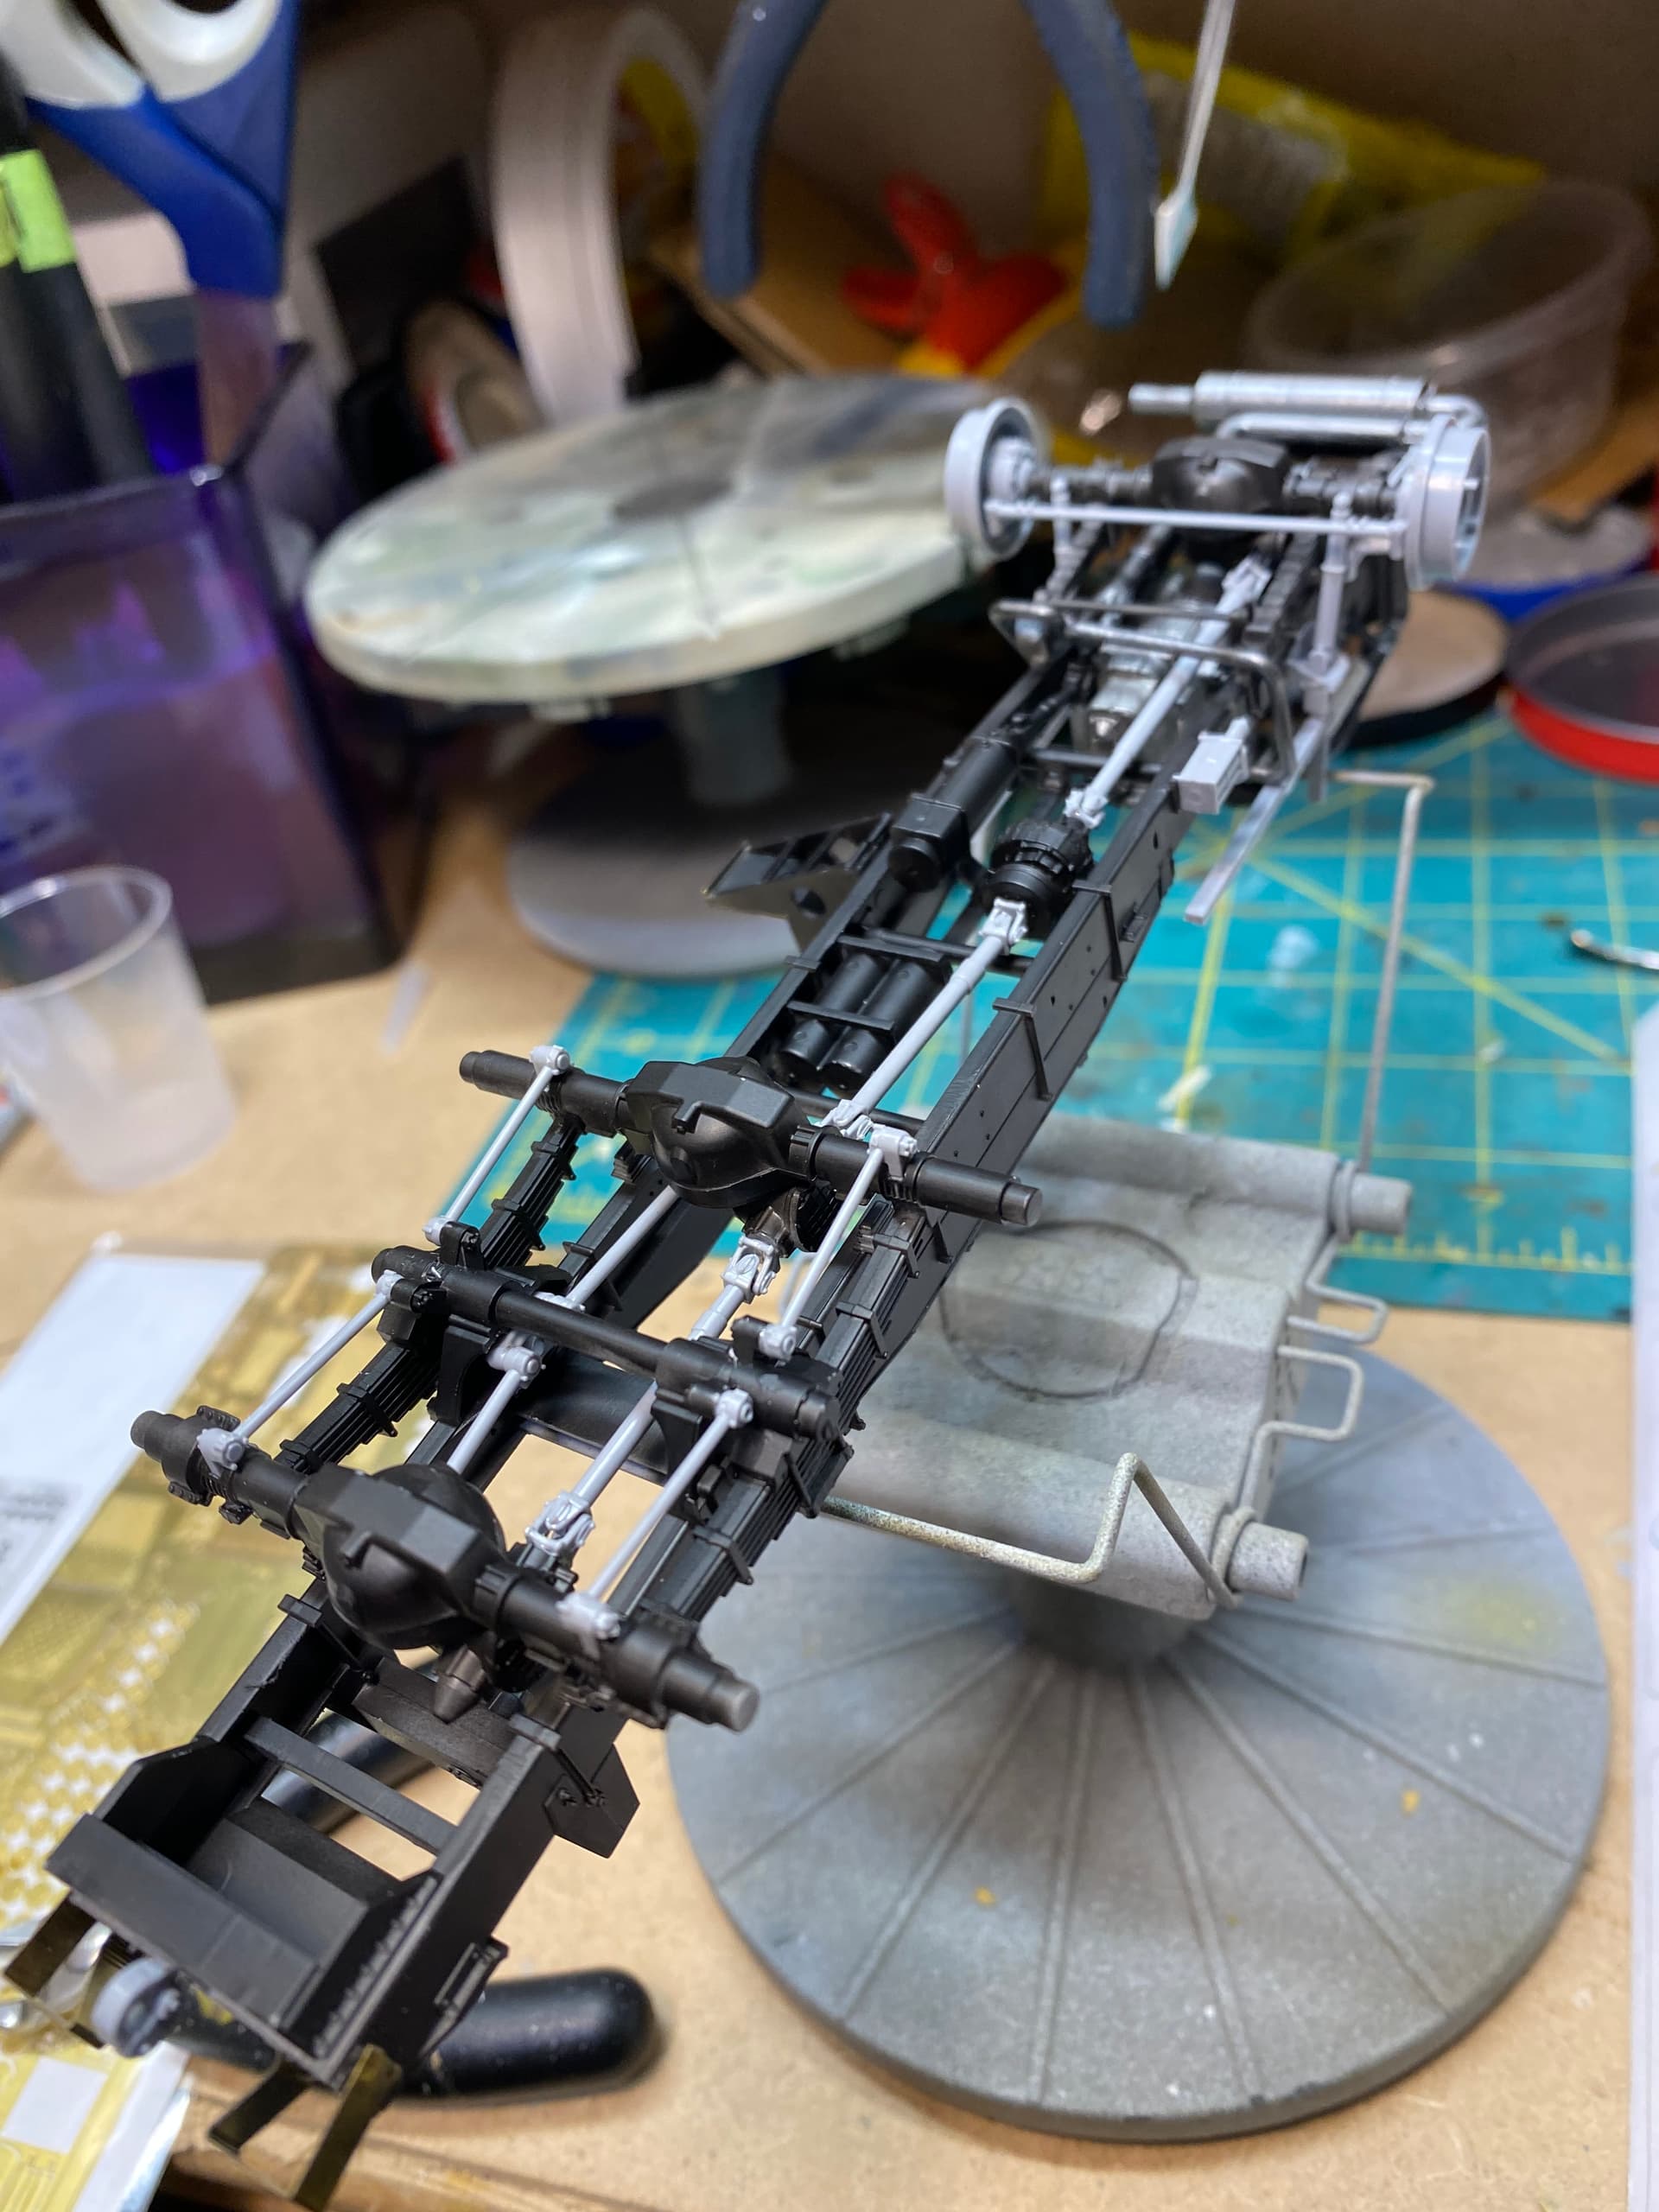
Base kit is Zvezda’s BM-21. Kit was released in 2019. It’s based on the URAL 4320 chassis. This is my first go with one of their kits and so far I’m quite happy. The box is absolutely stuffed with sprues. Over 429 parts according to the box.

Detail on everything is crisp. No over flash, sink marks or other defects that I’ve seen.

Tires are sold rubber/vinyl. They’re well cast but don’t quite meet the bill for accuracy, at least compared to what I’ve found online. I think they’ll work for me though.

Decals and markings provided for a couple vehicles in Russian service (we won’t be needing those) and some stickers for the mirrors.

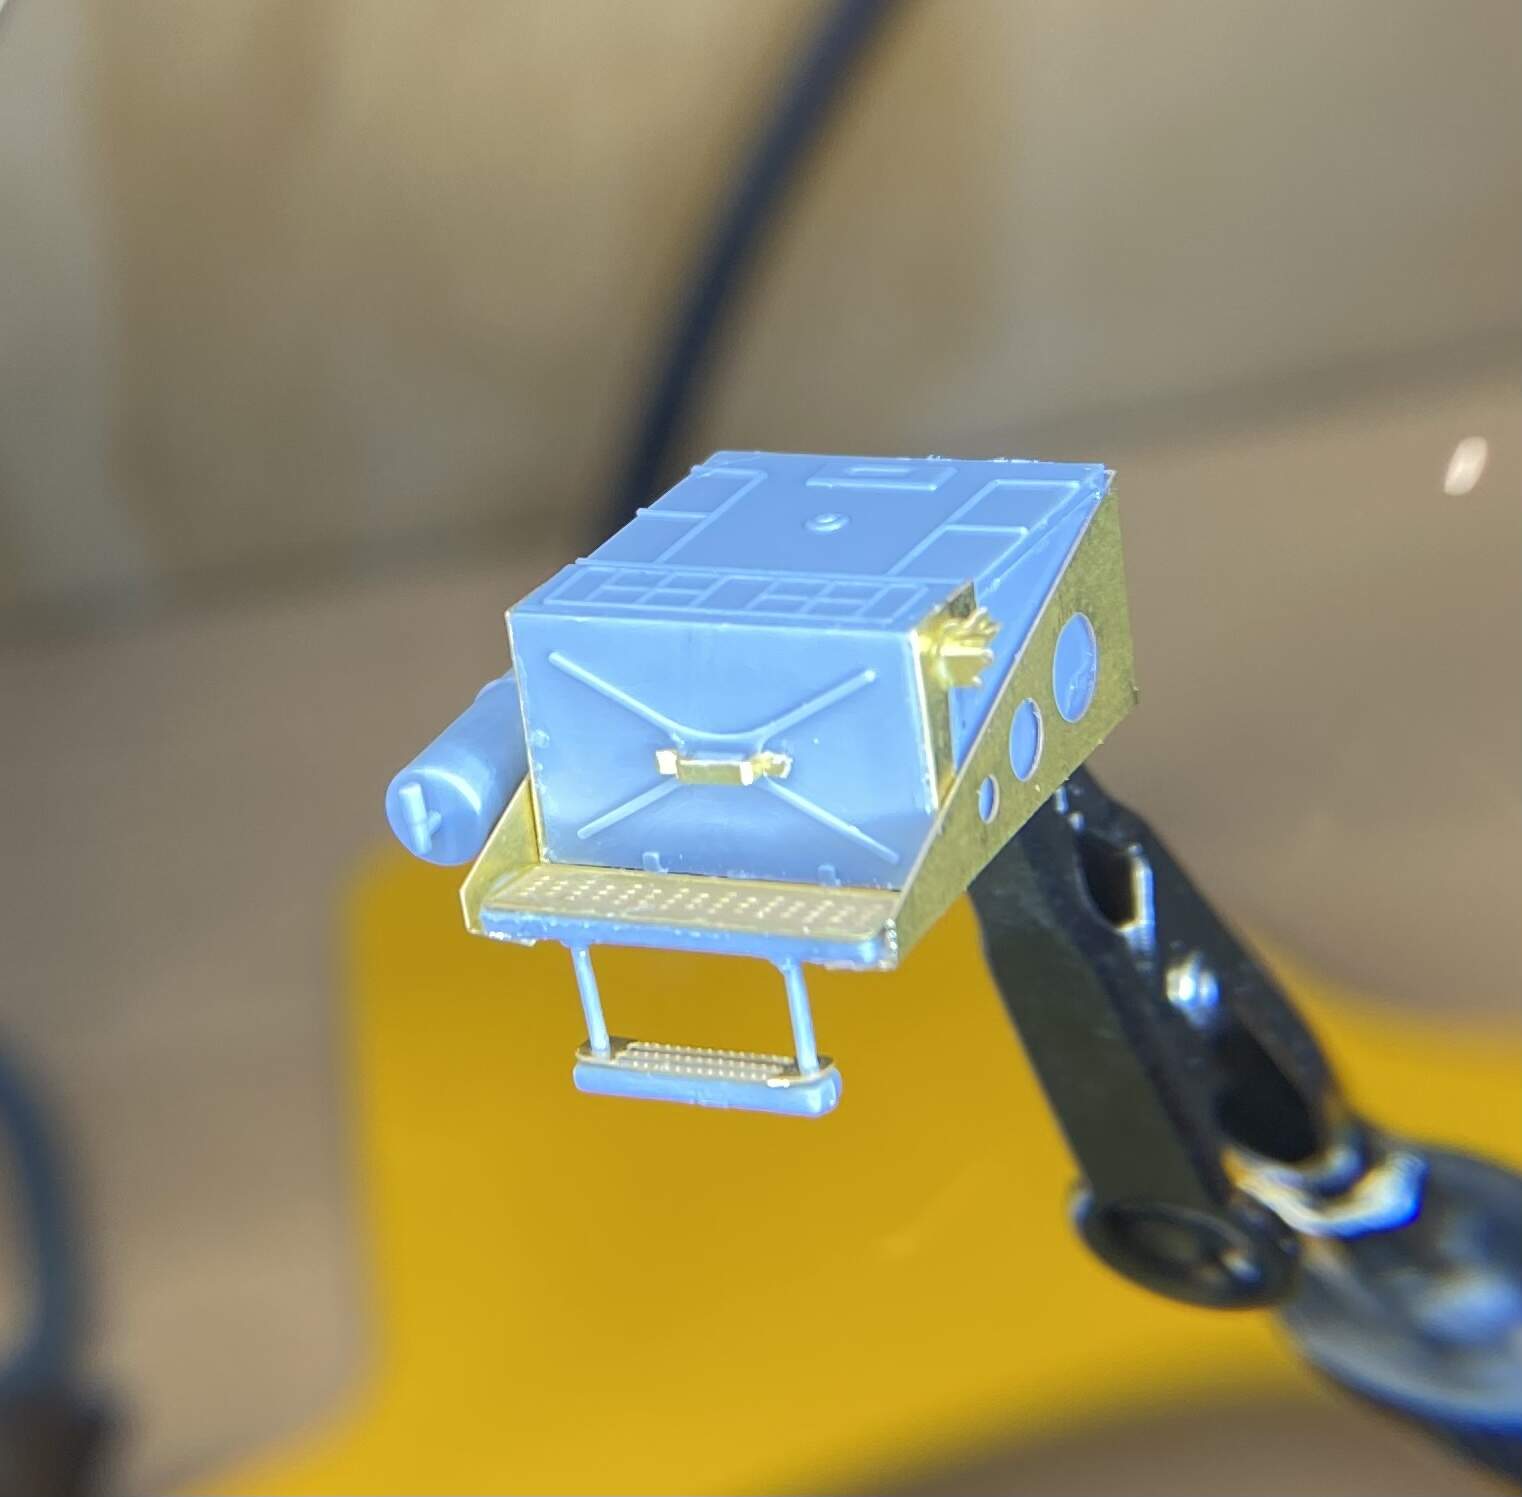
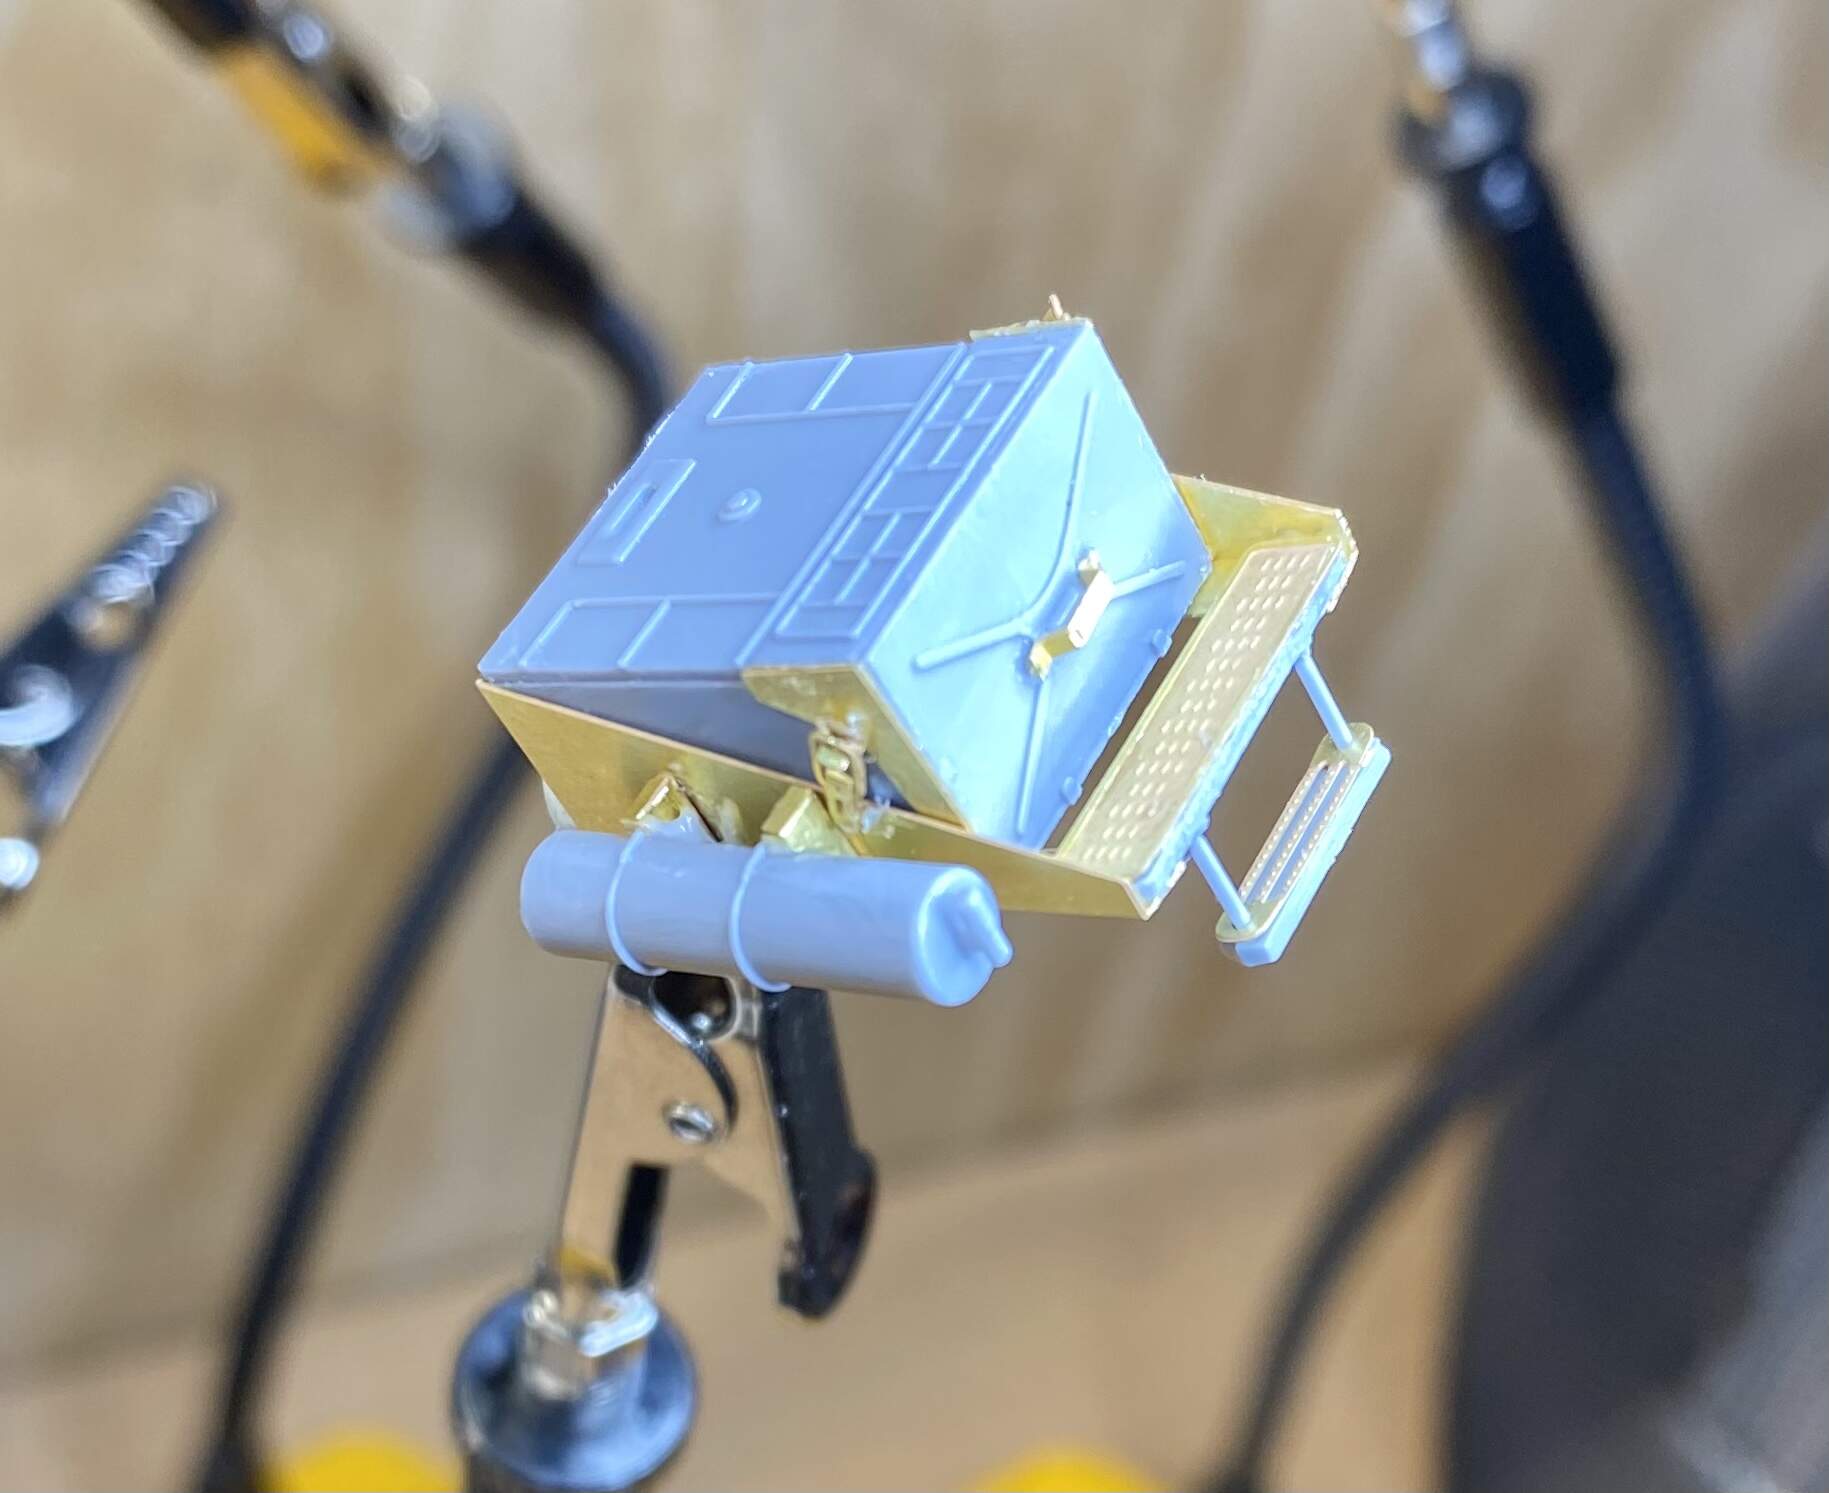
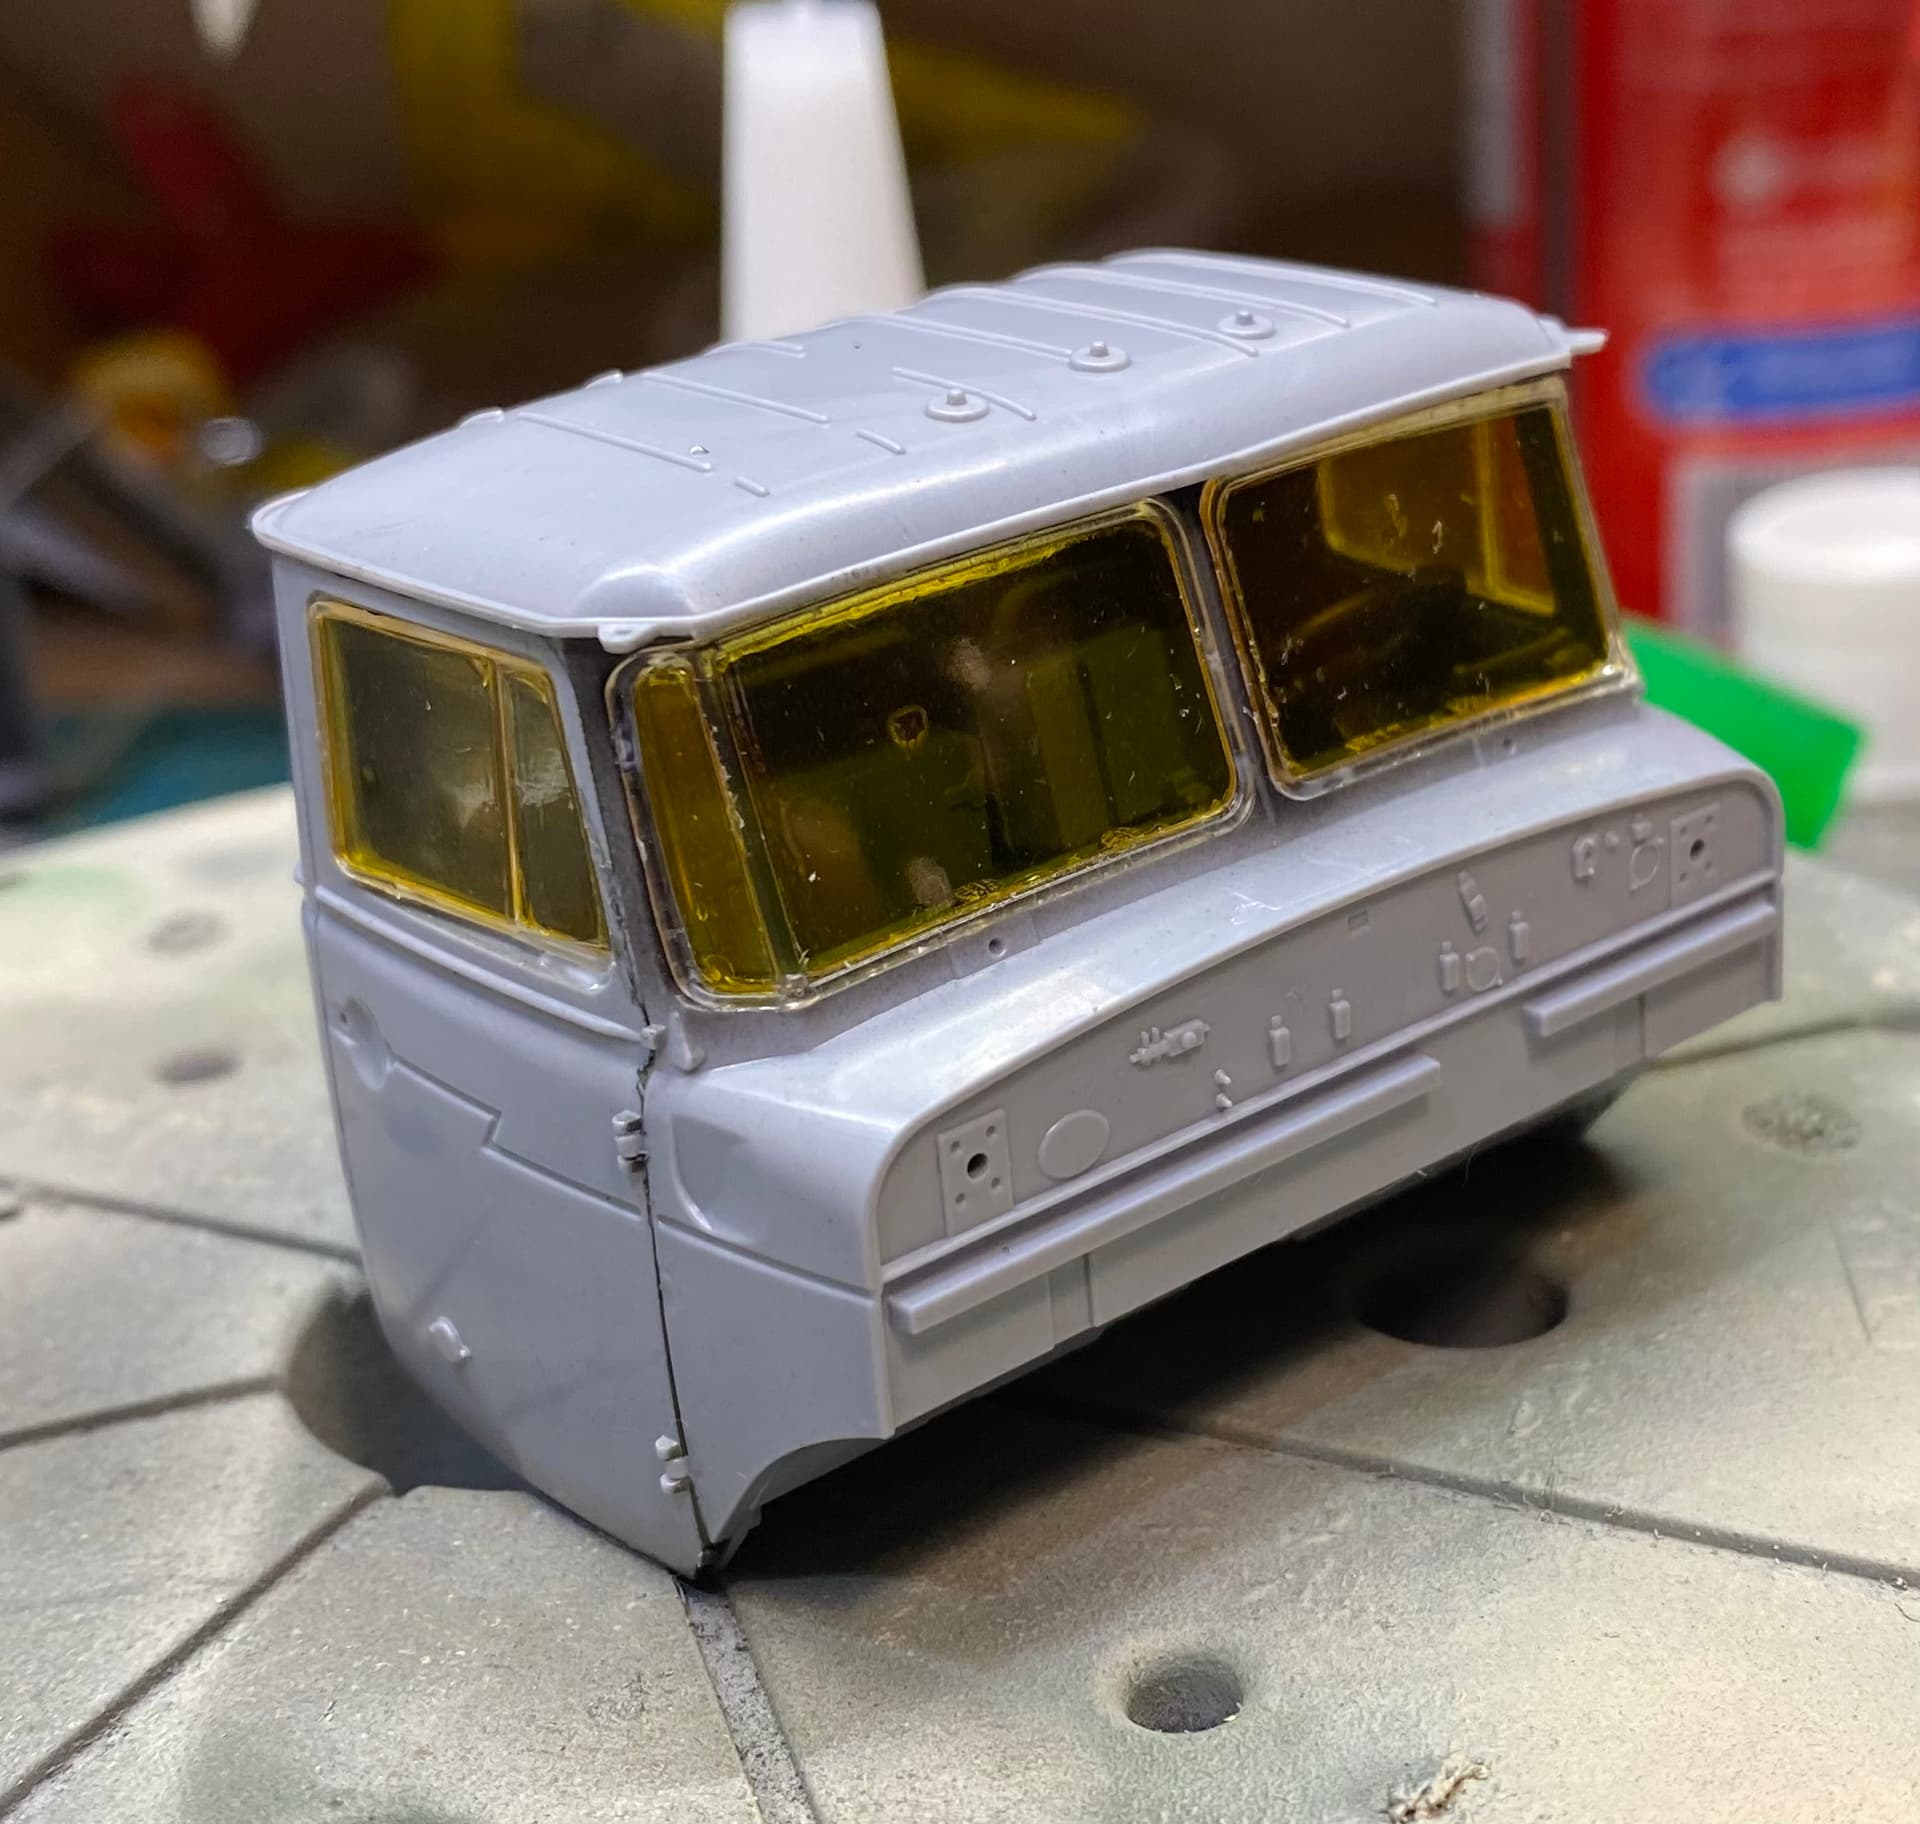
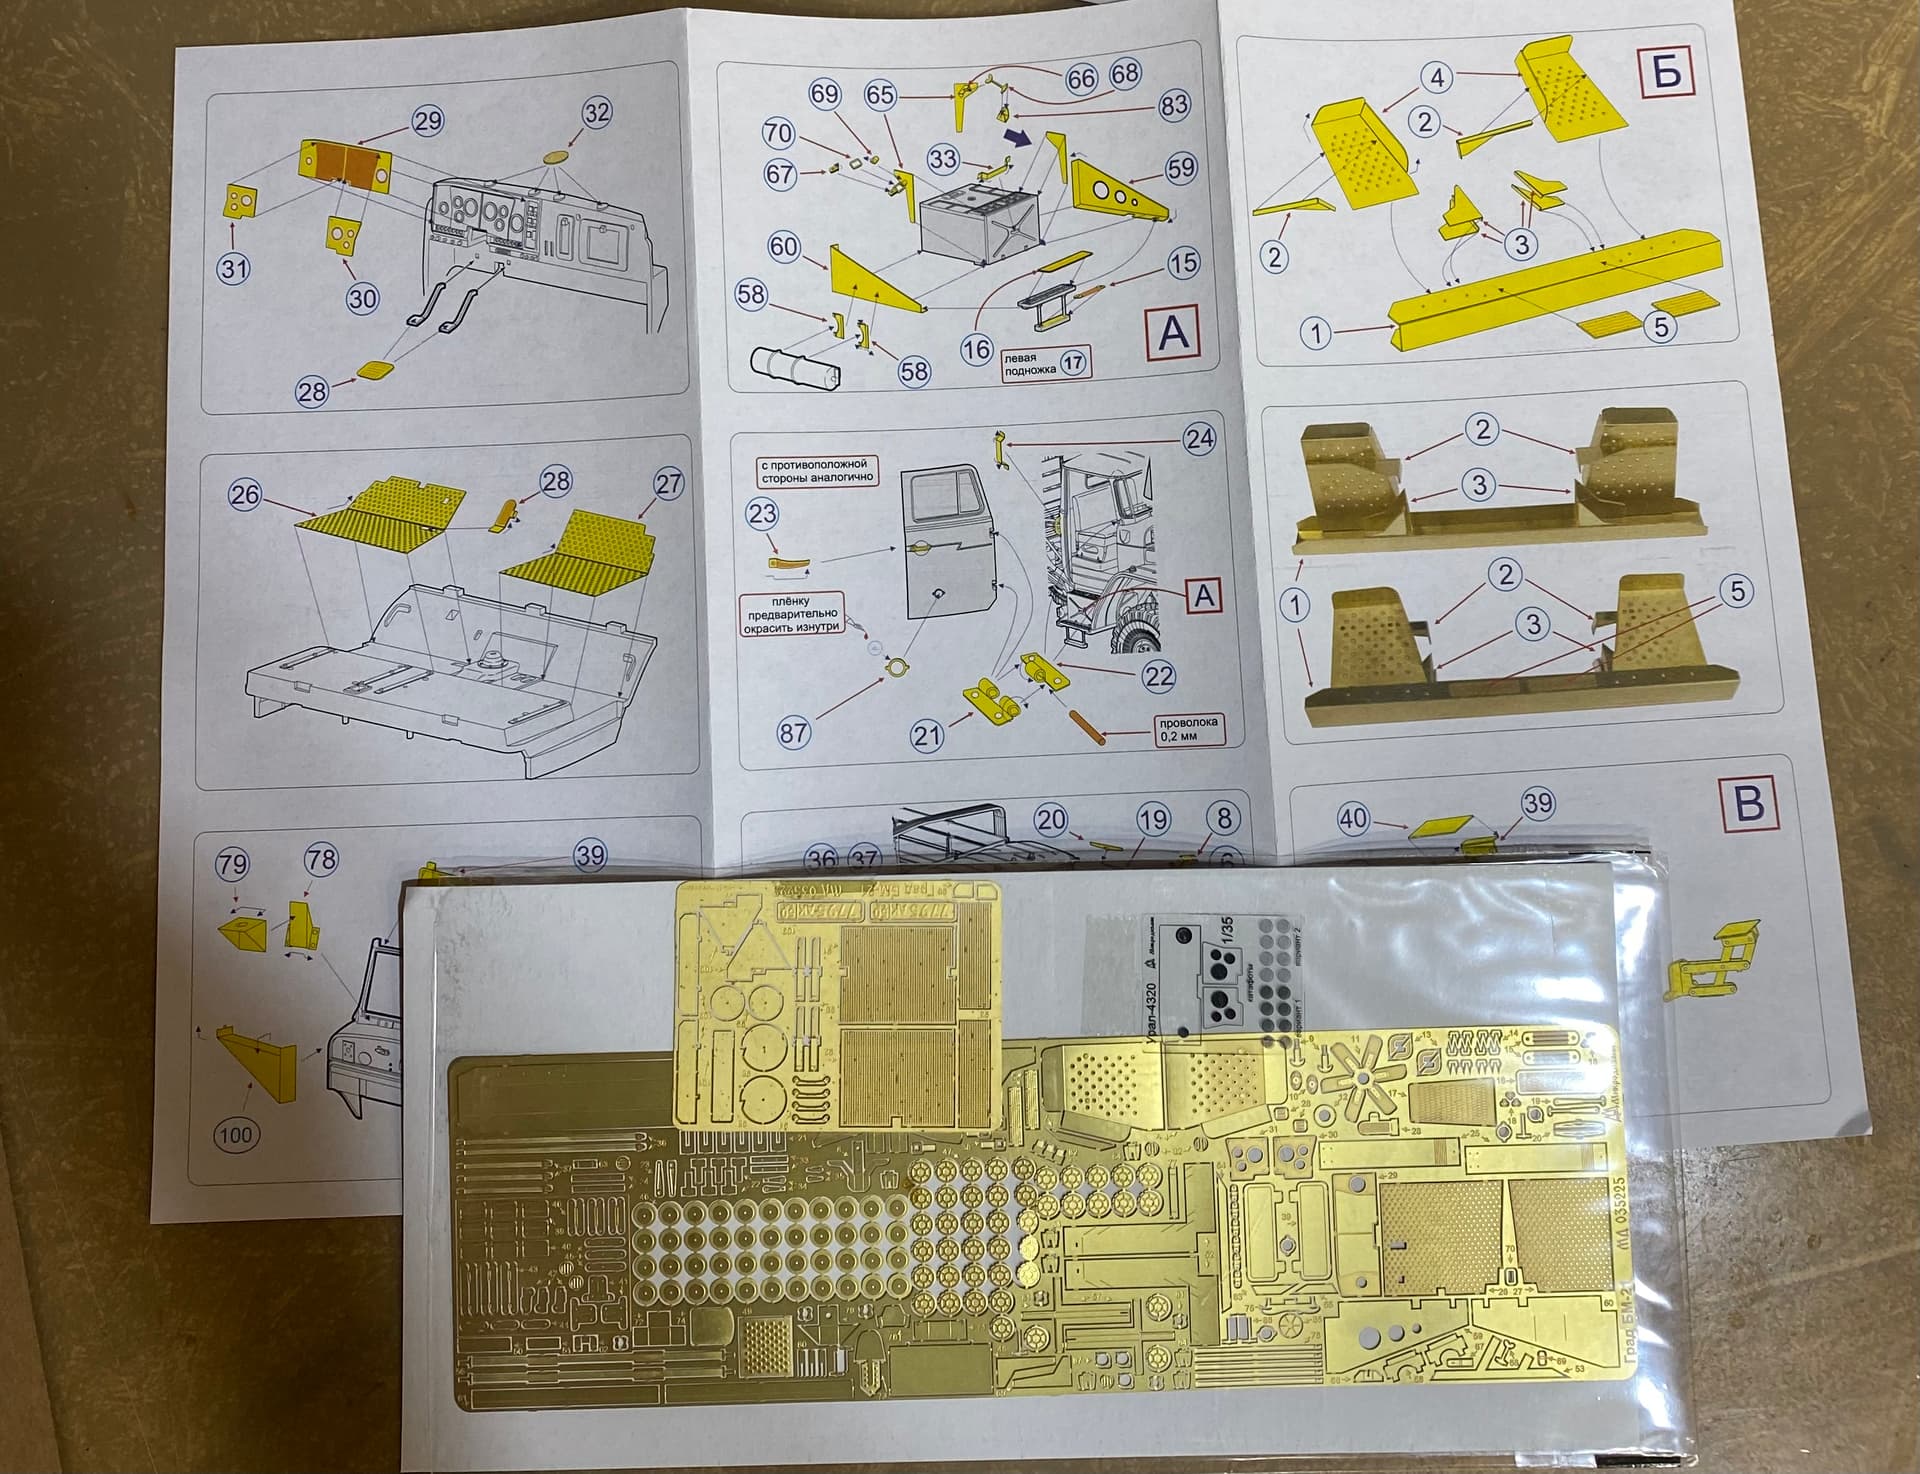
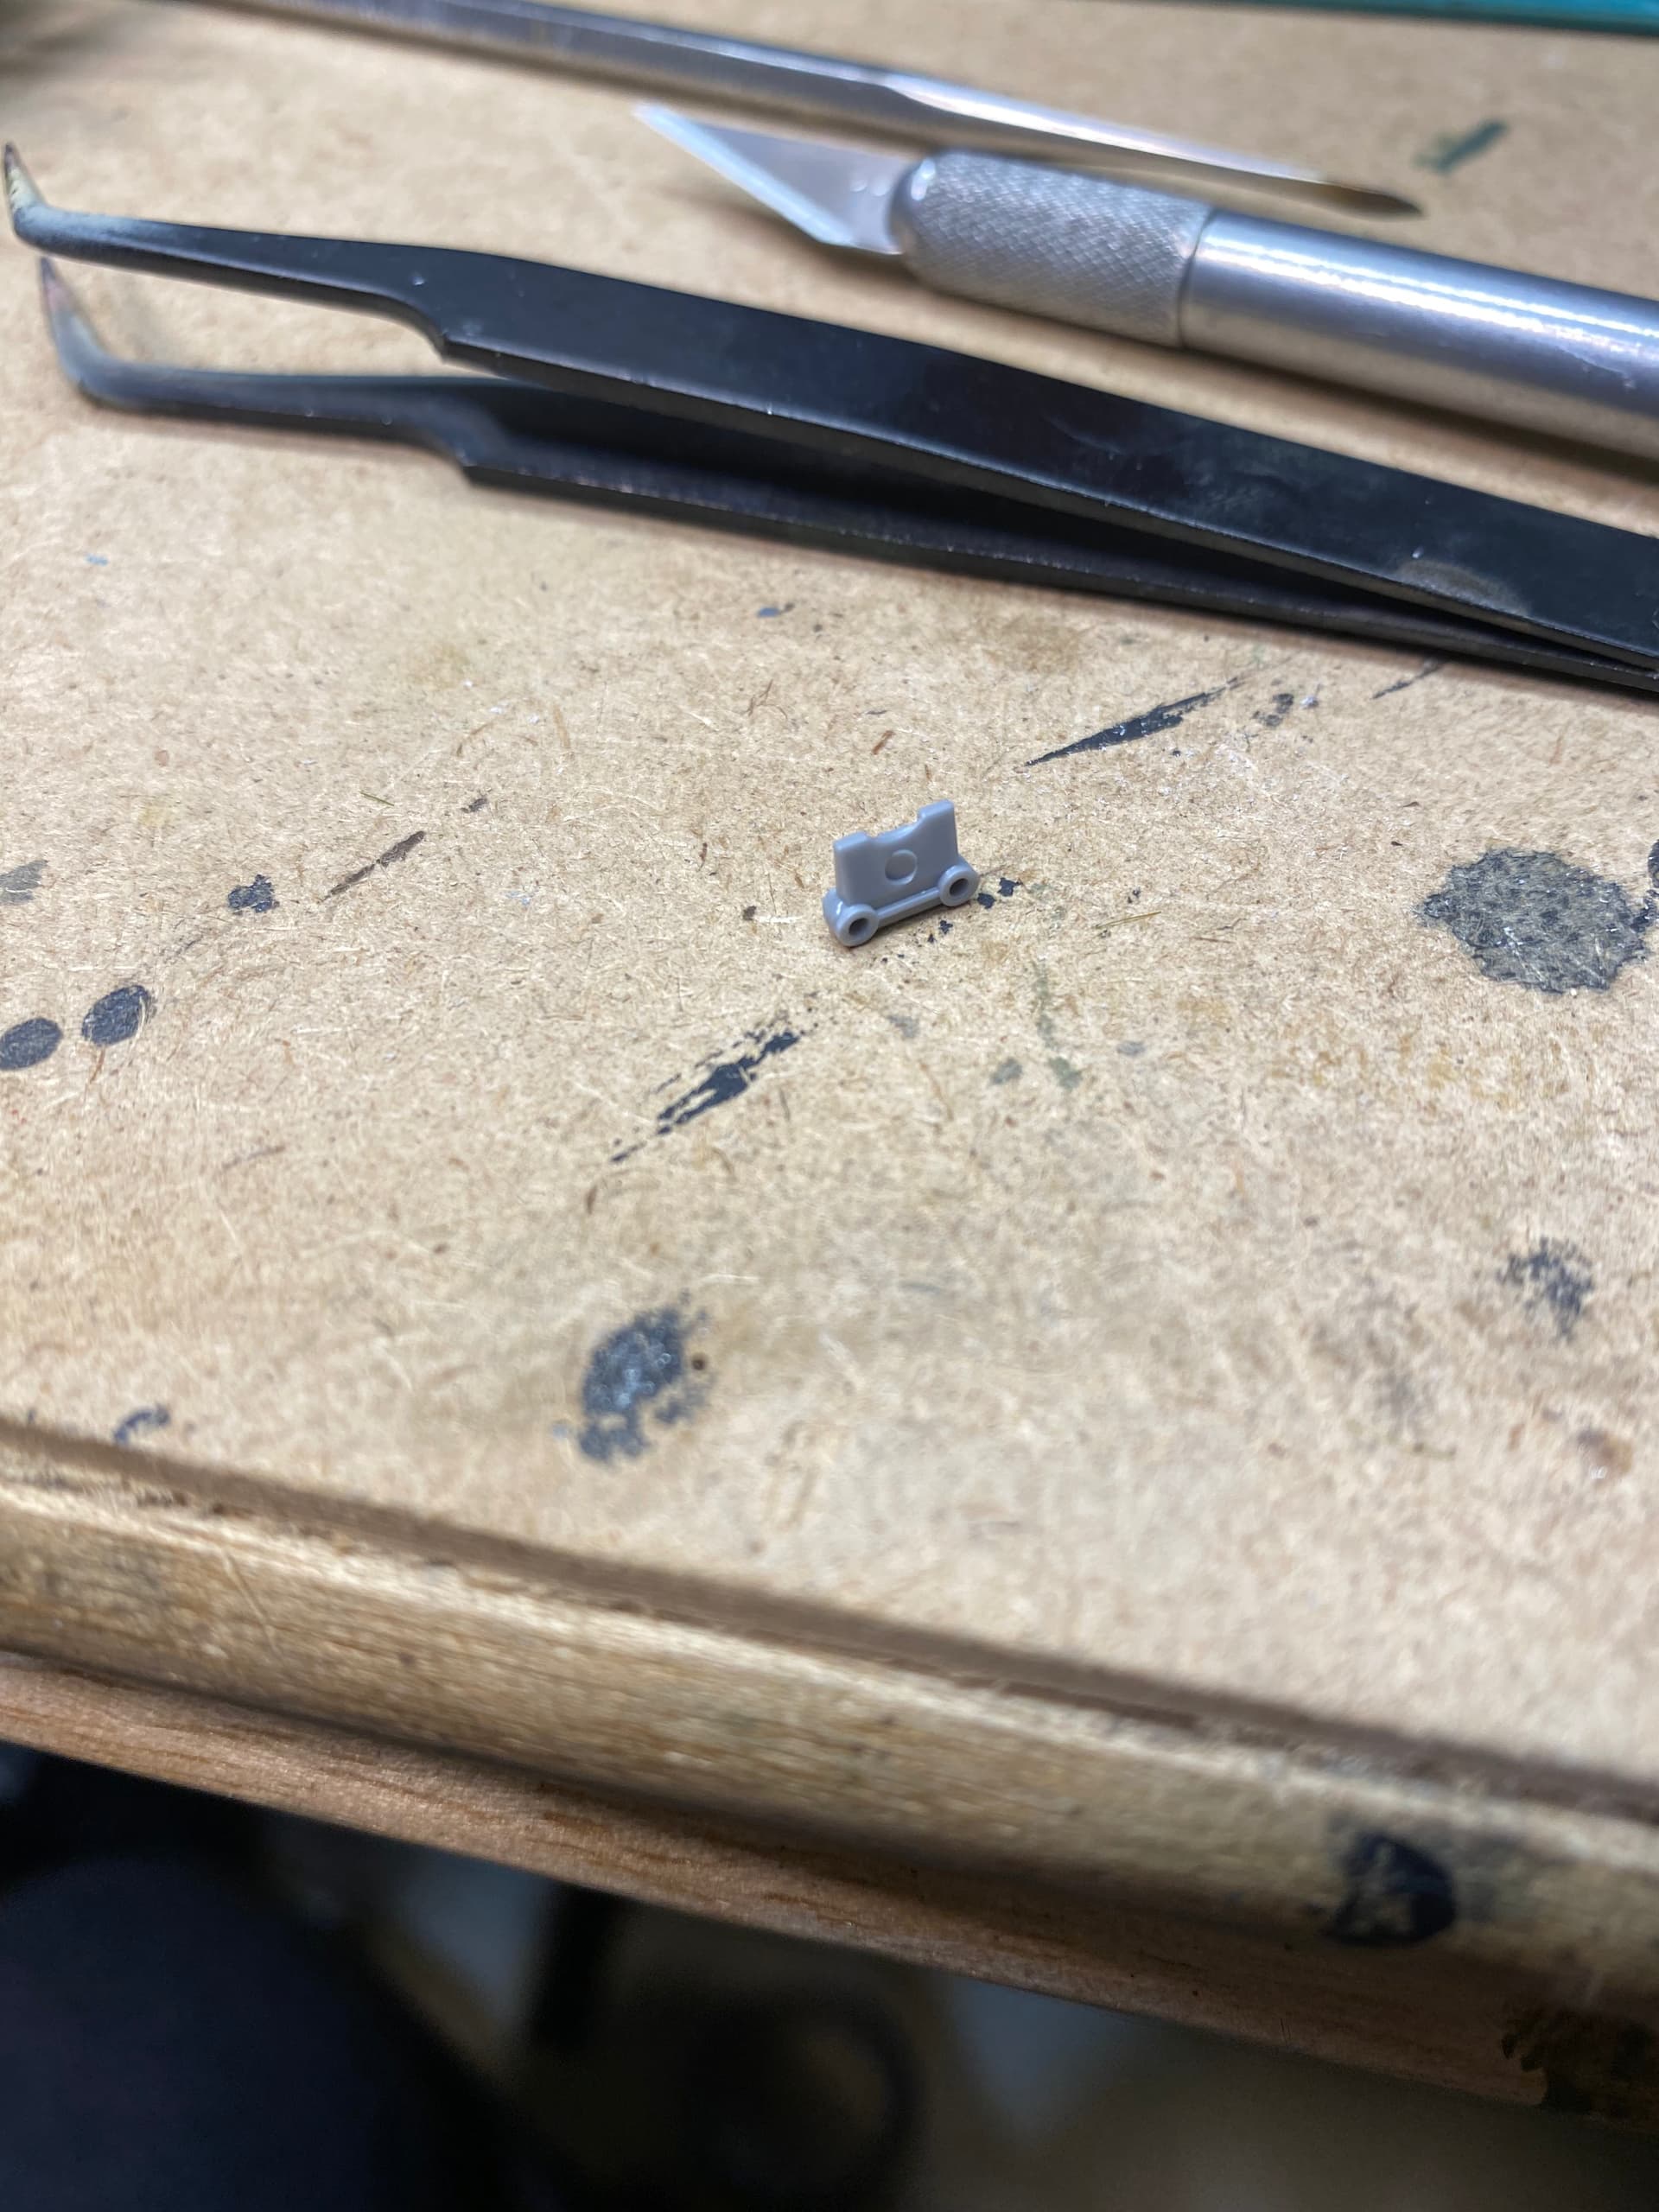
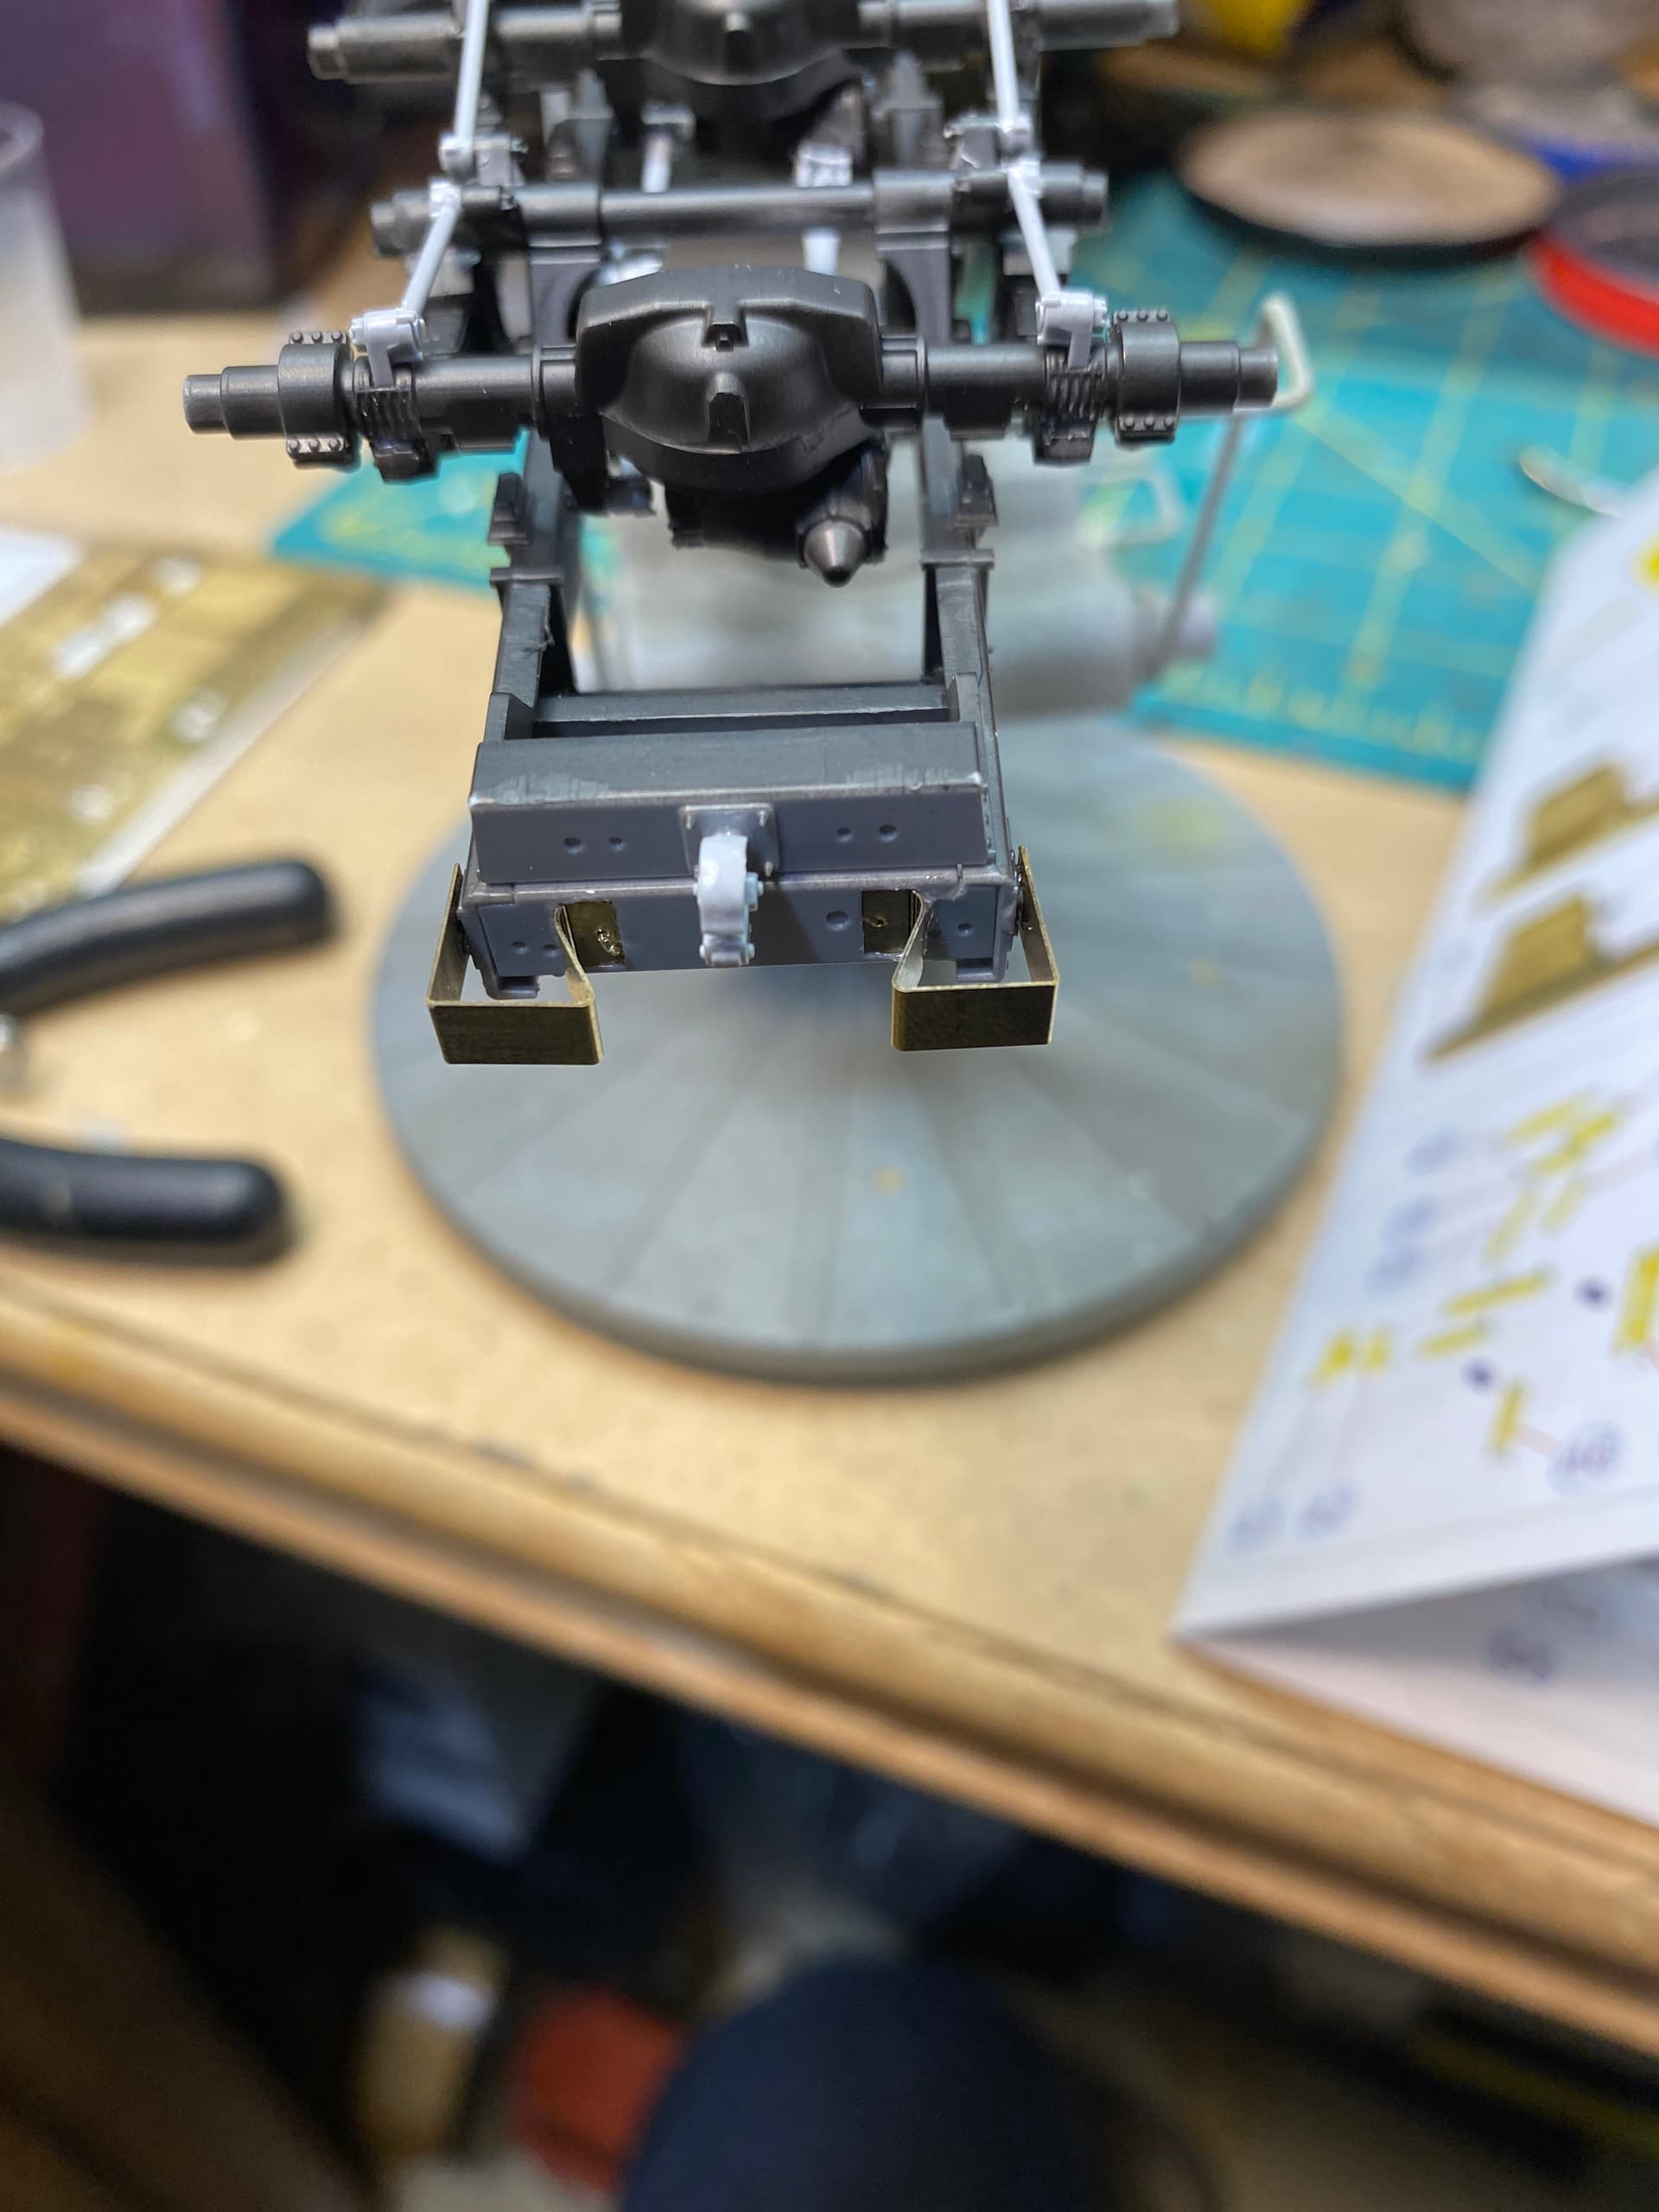
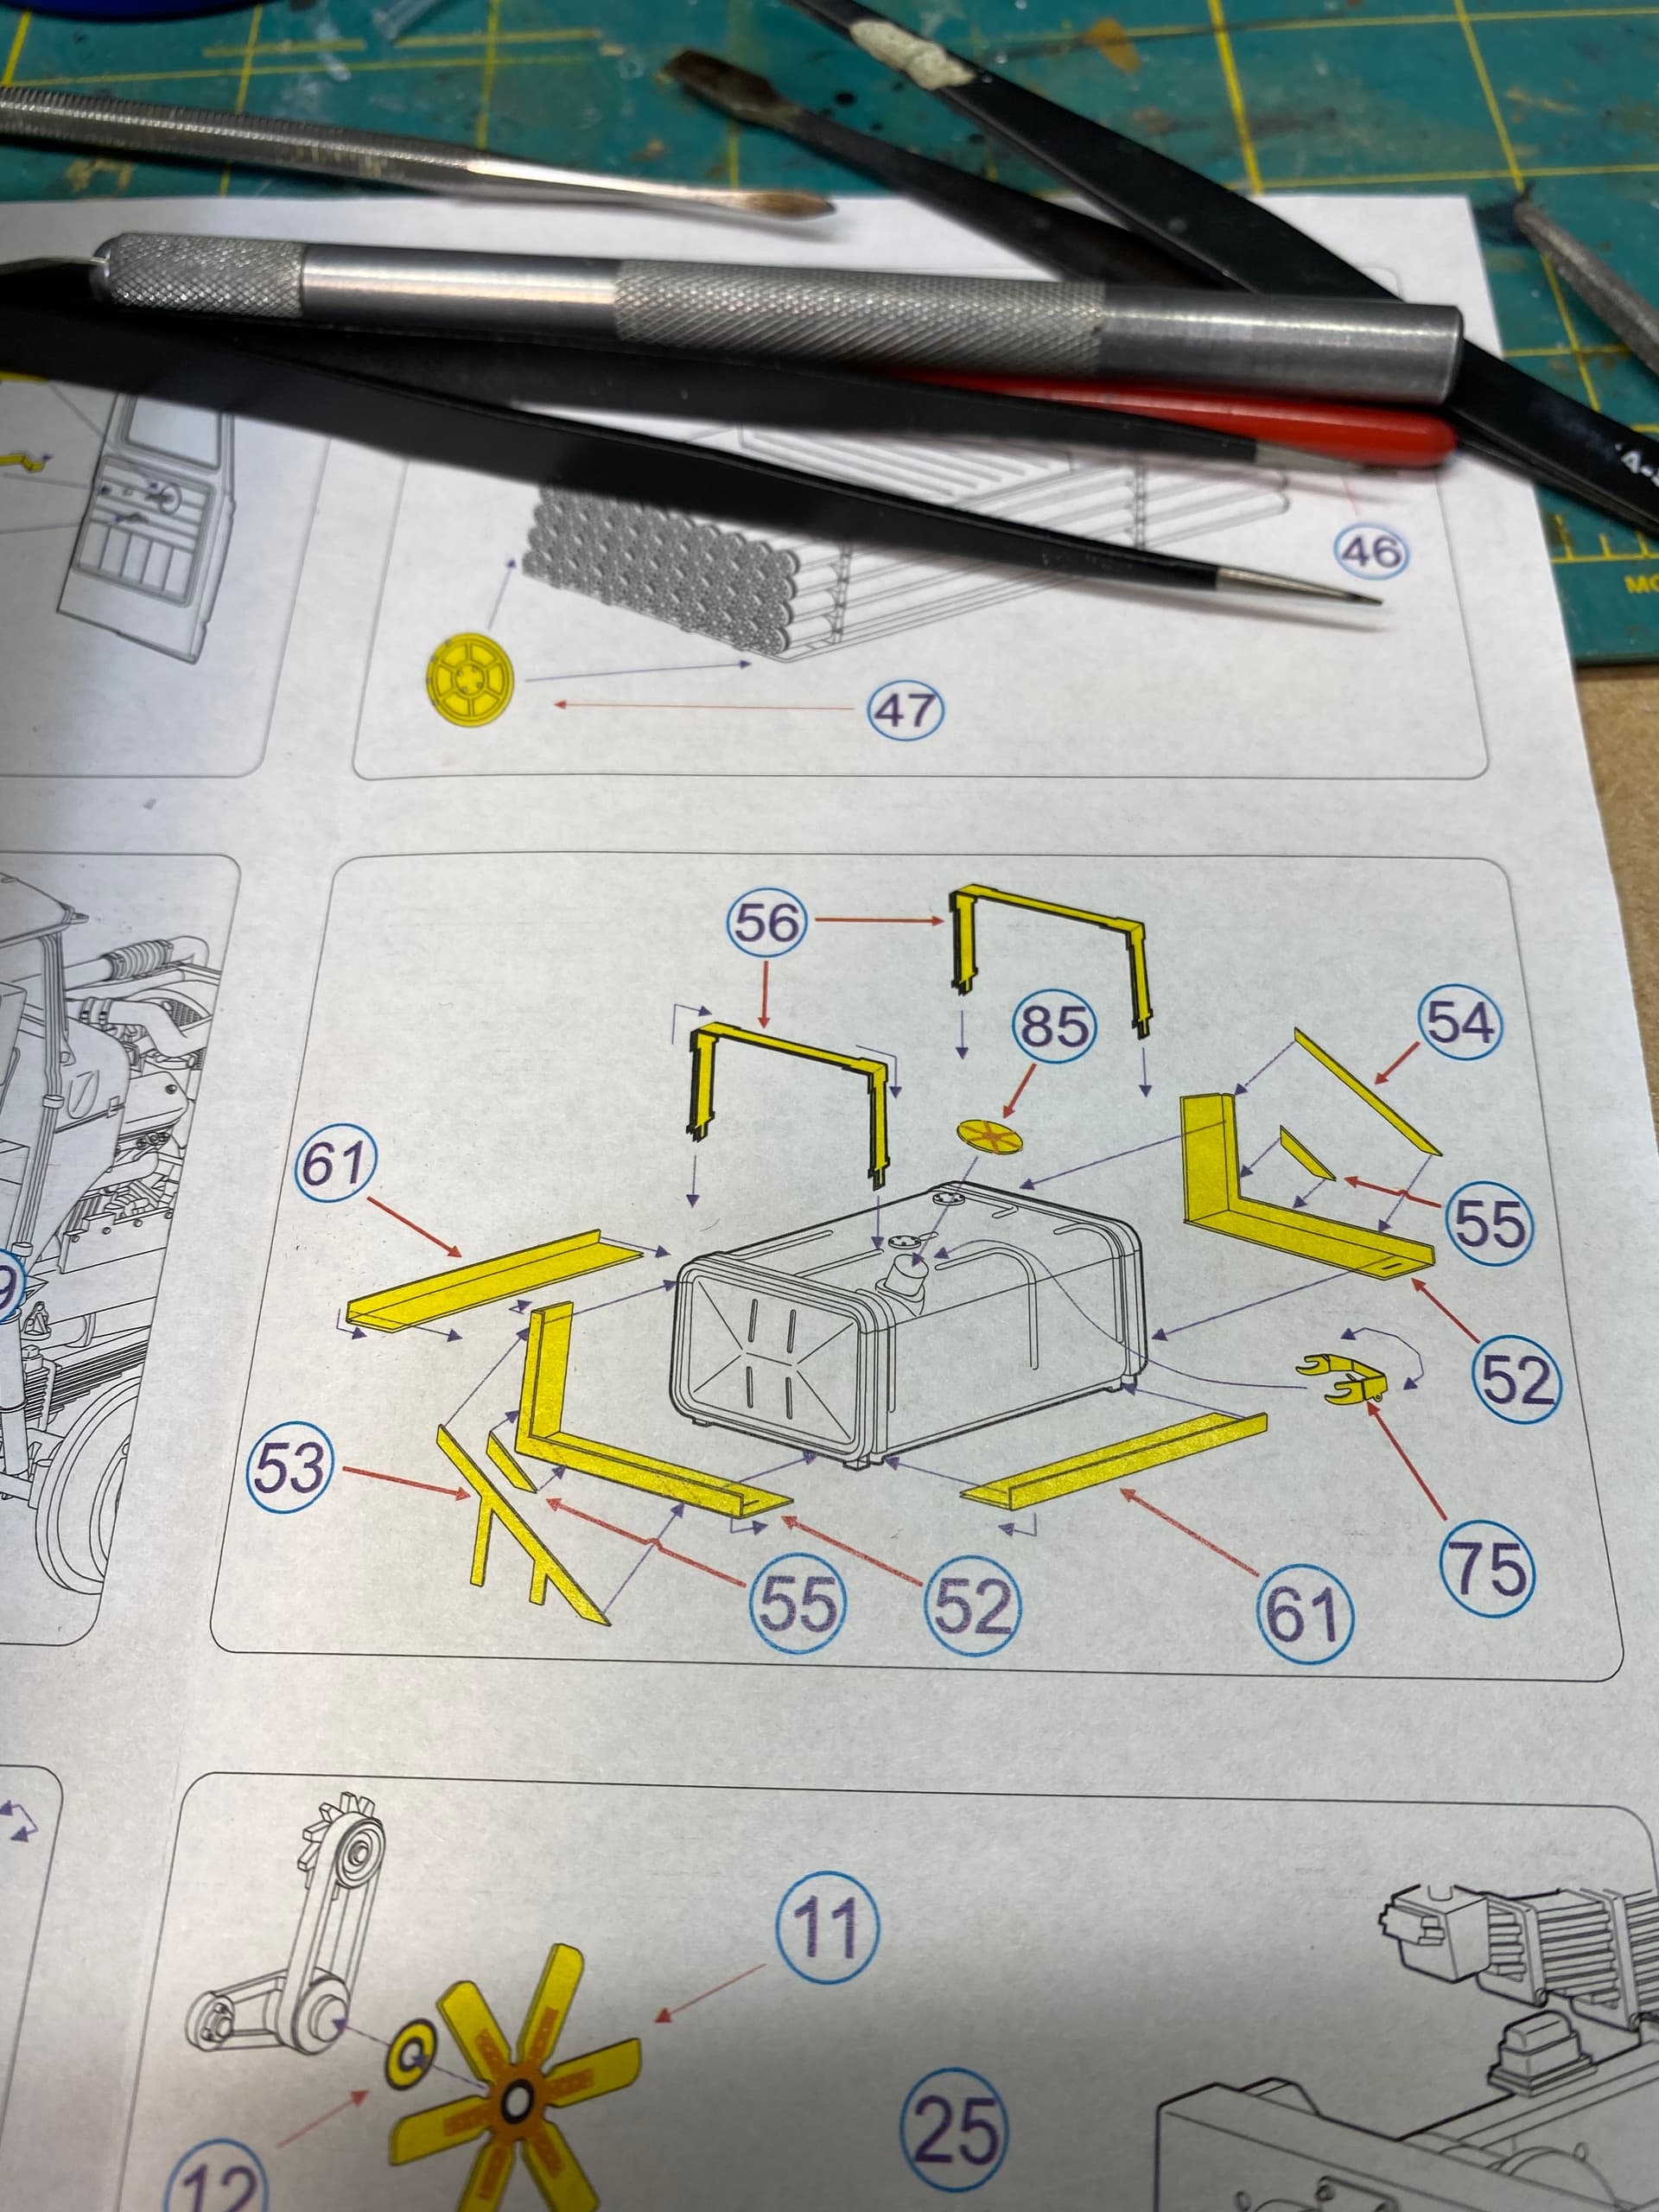
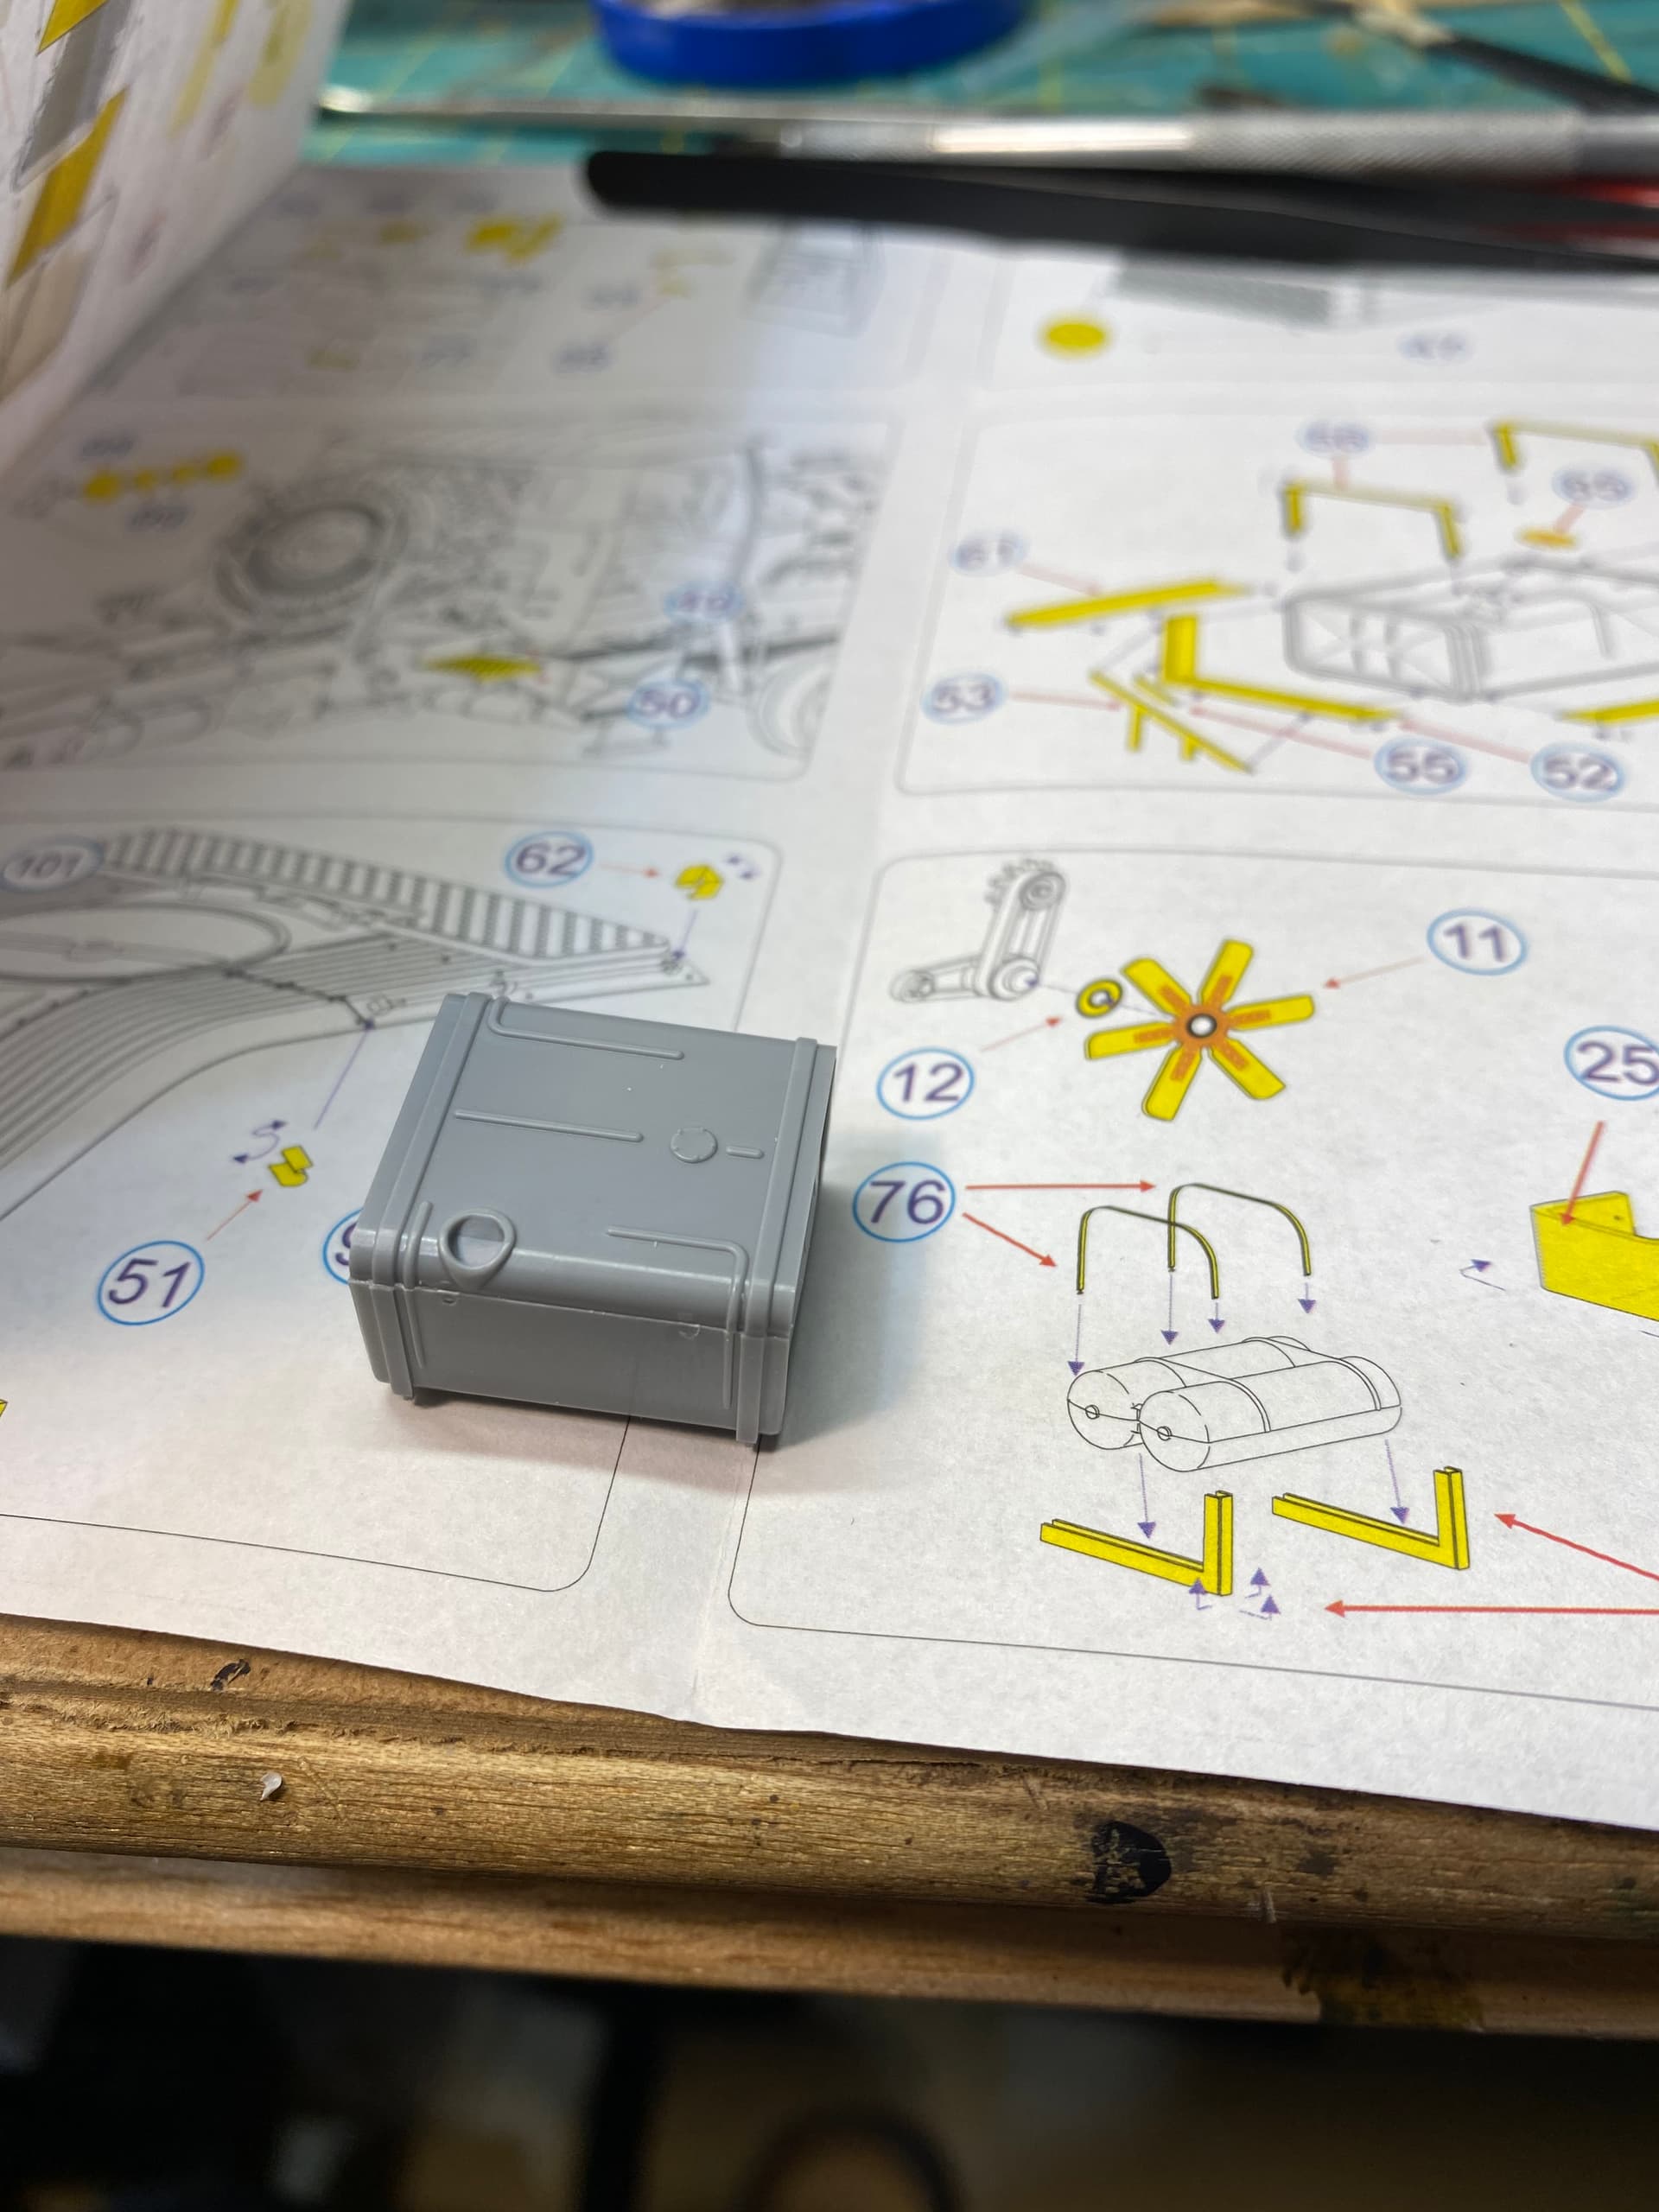
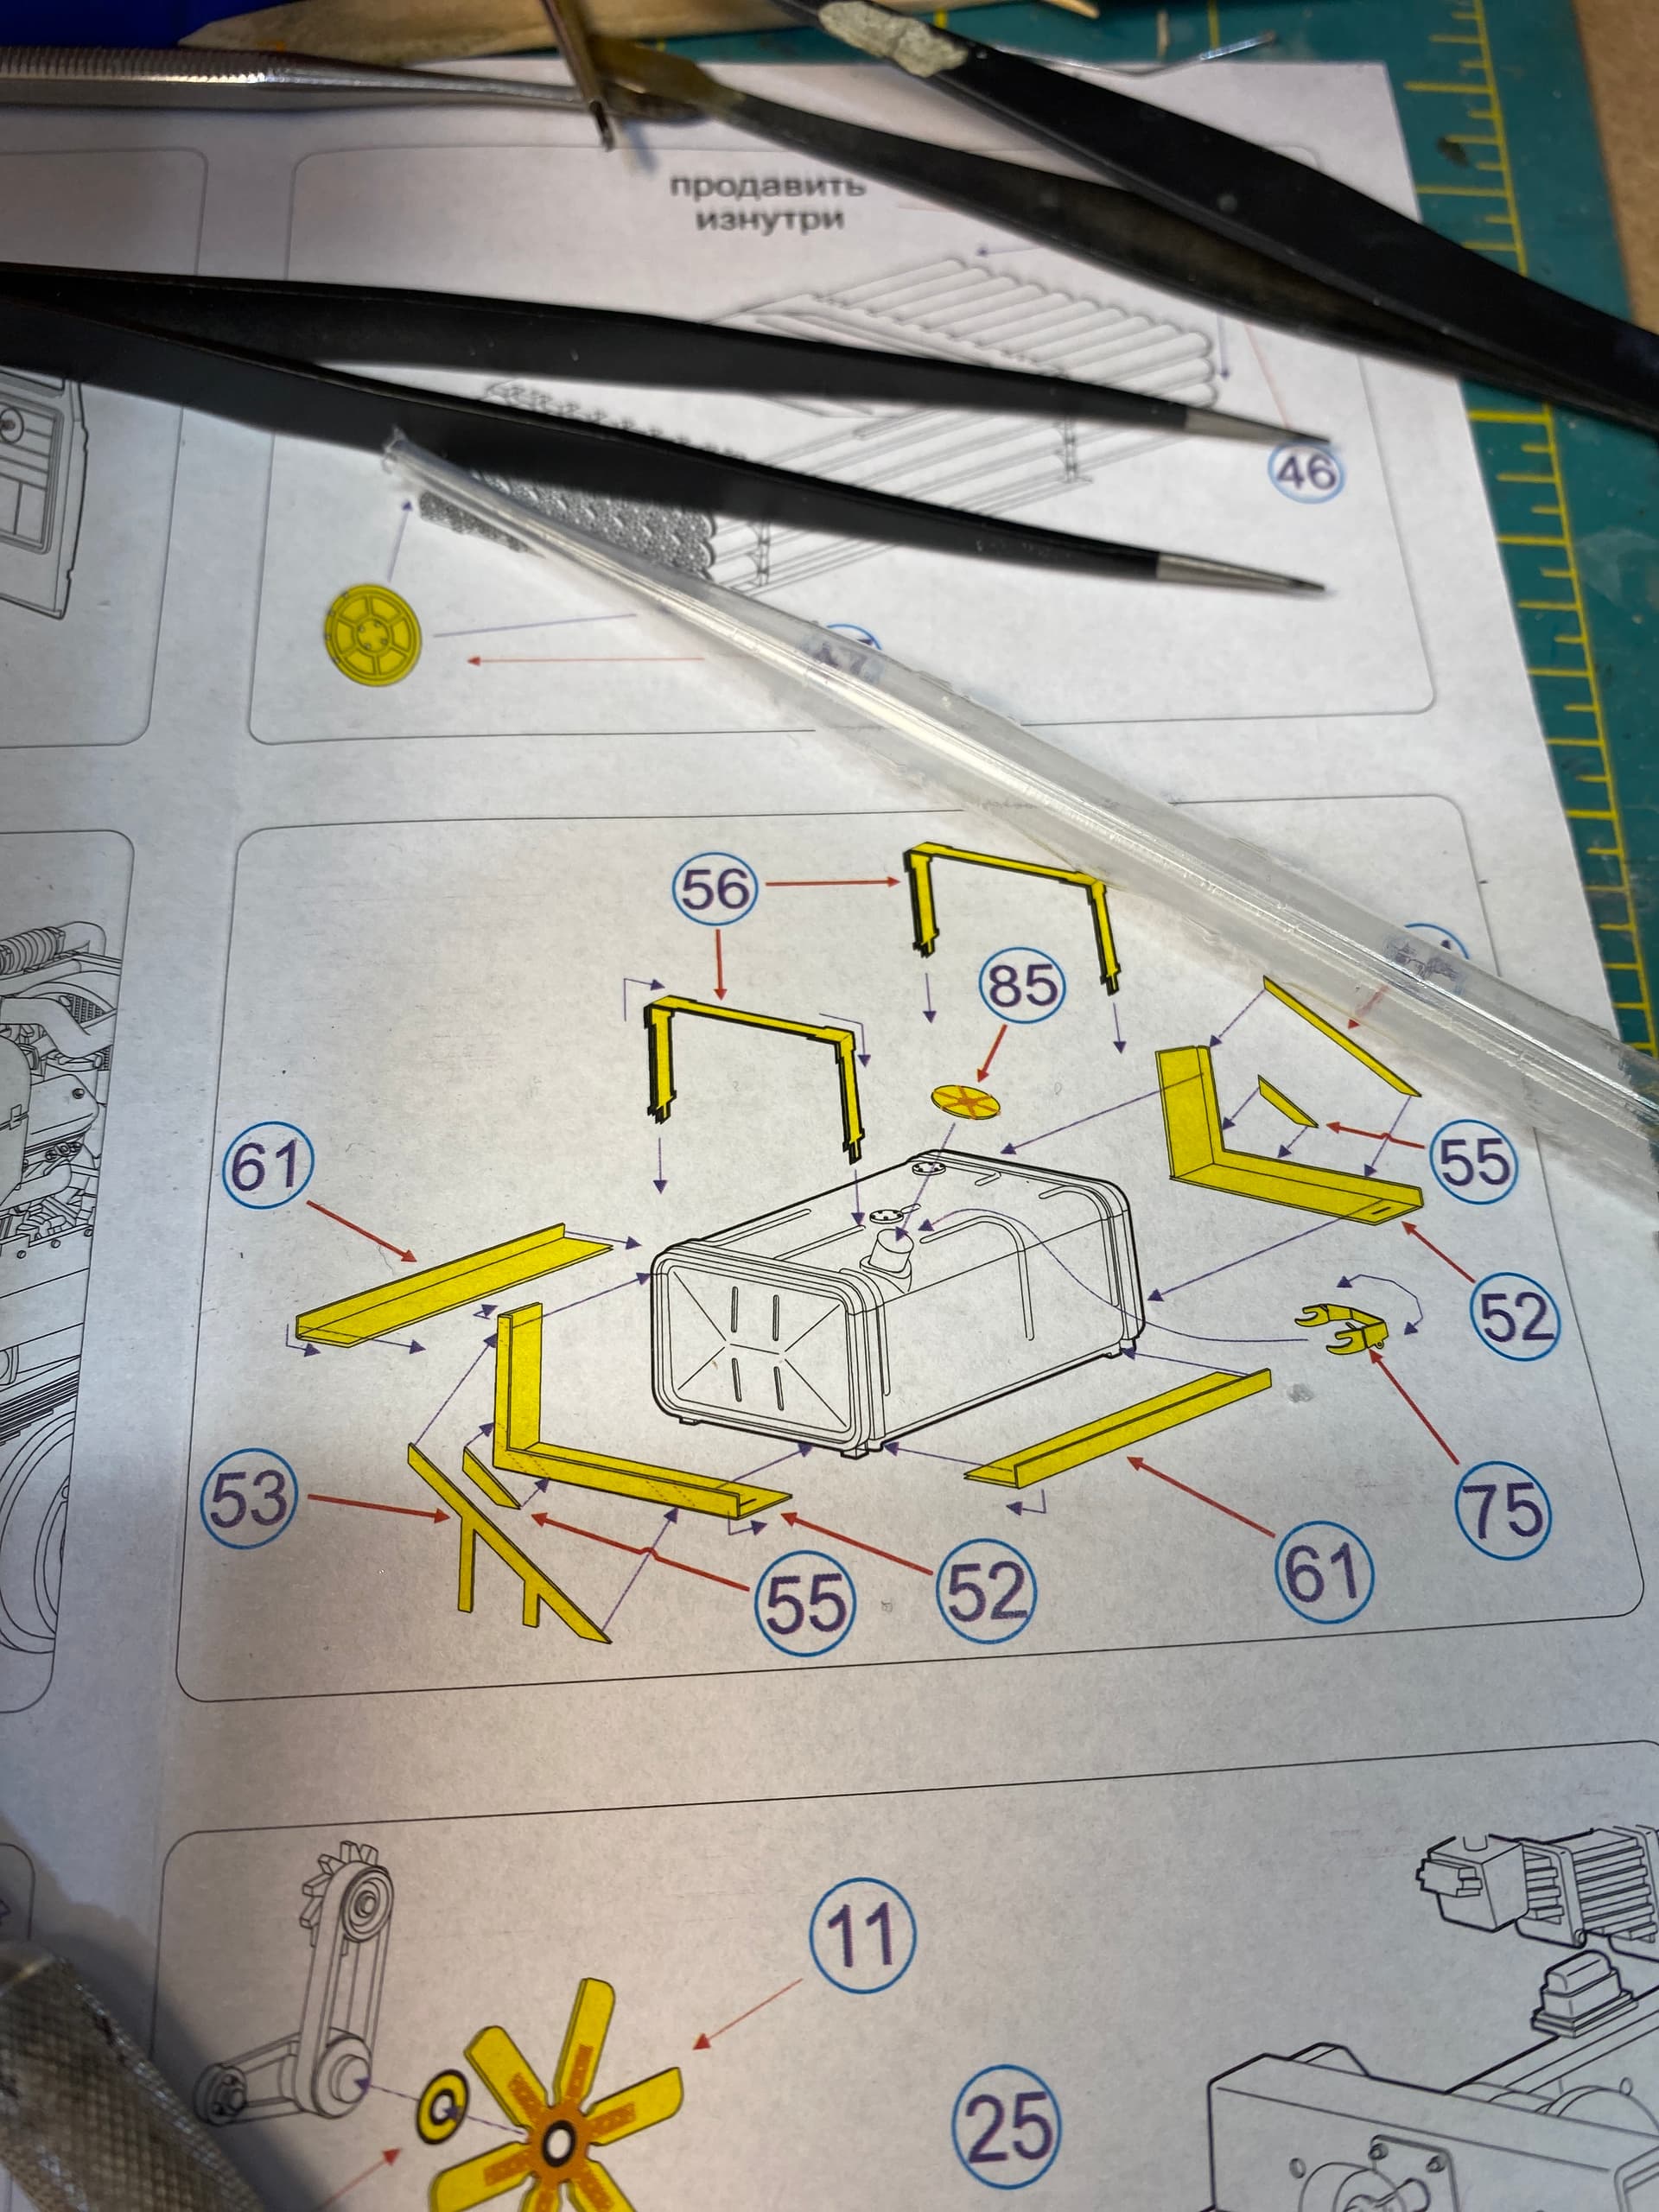
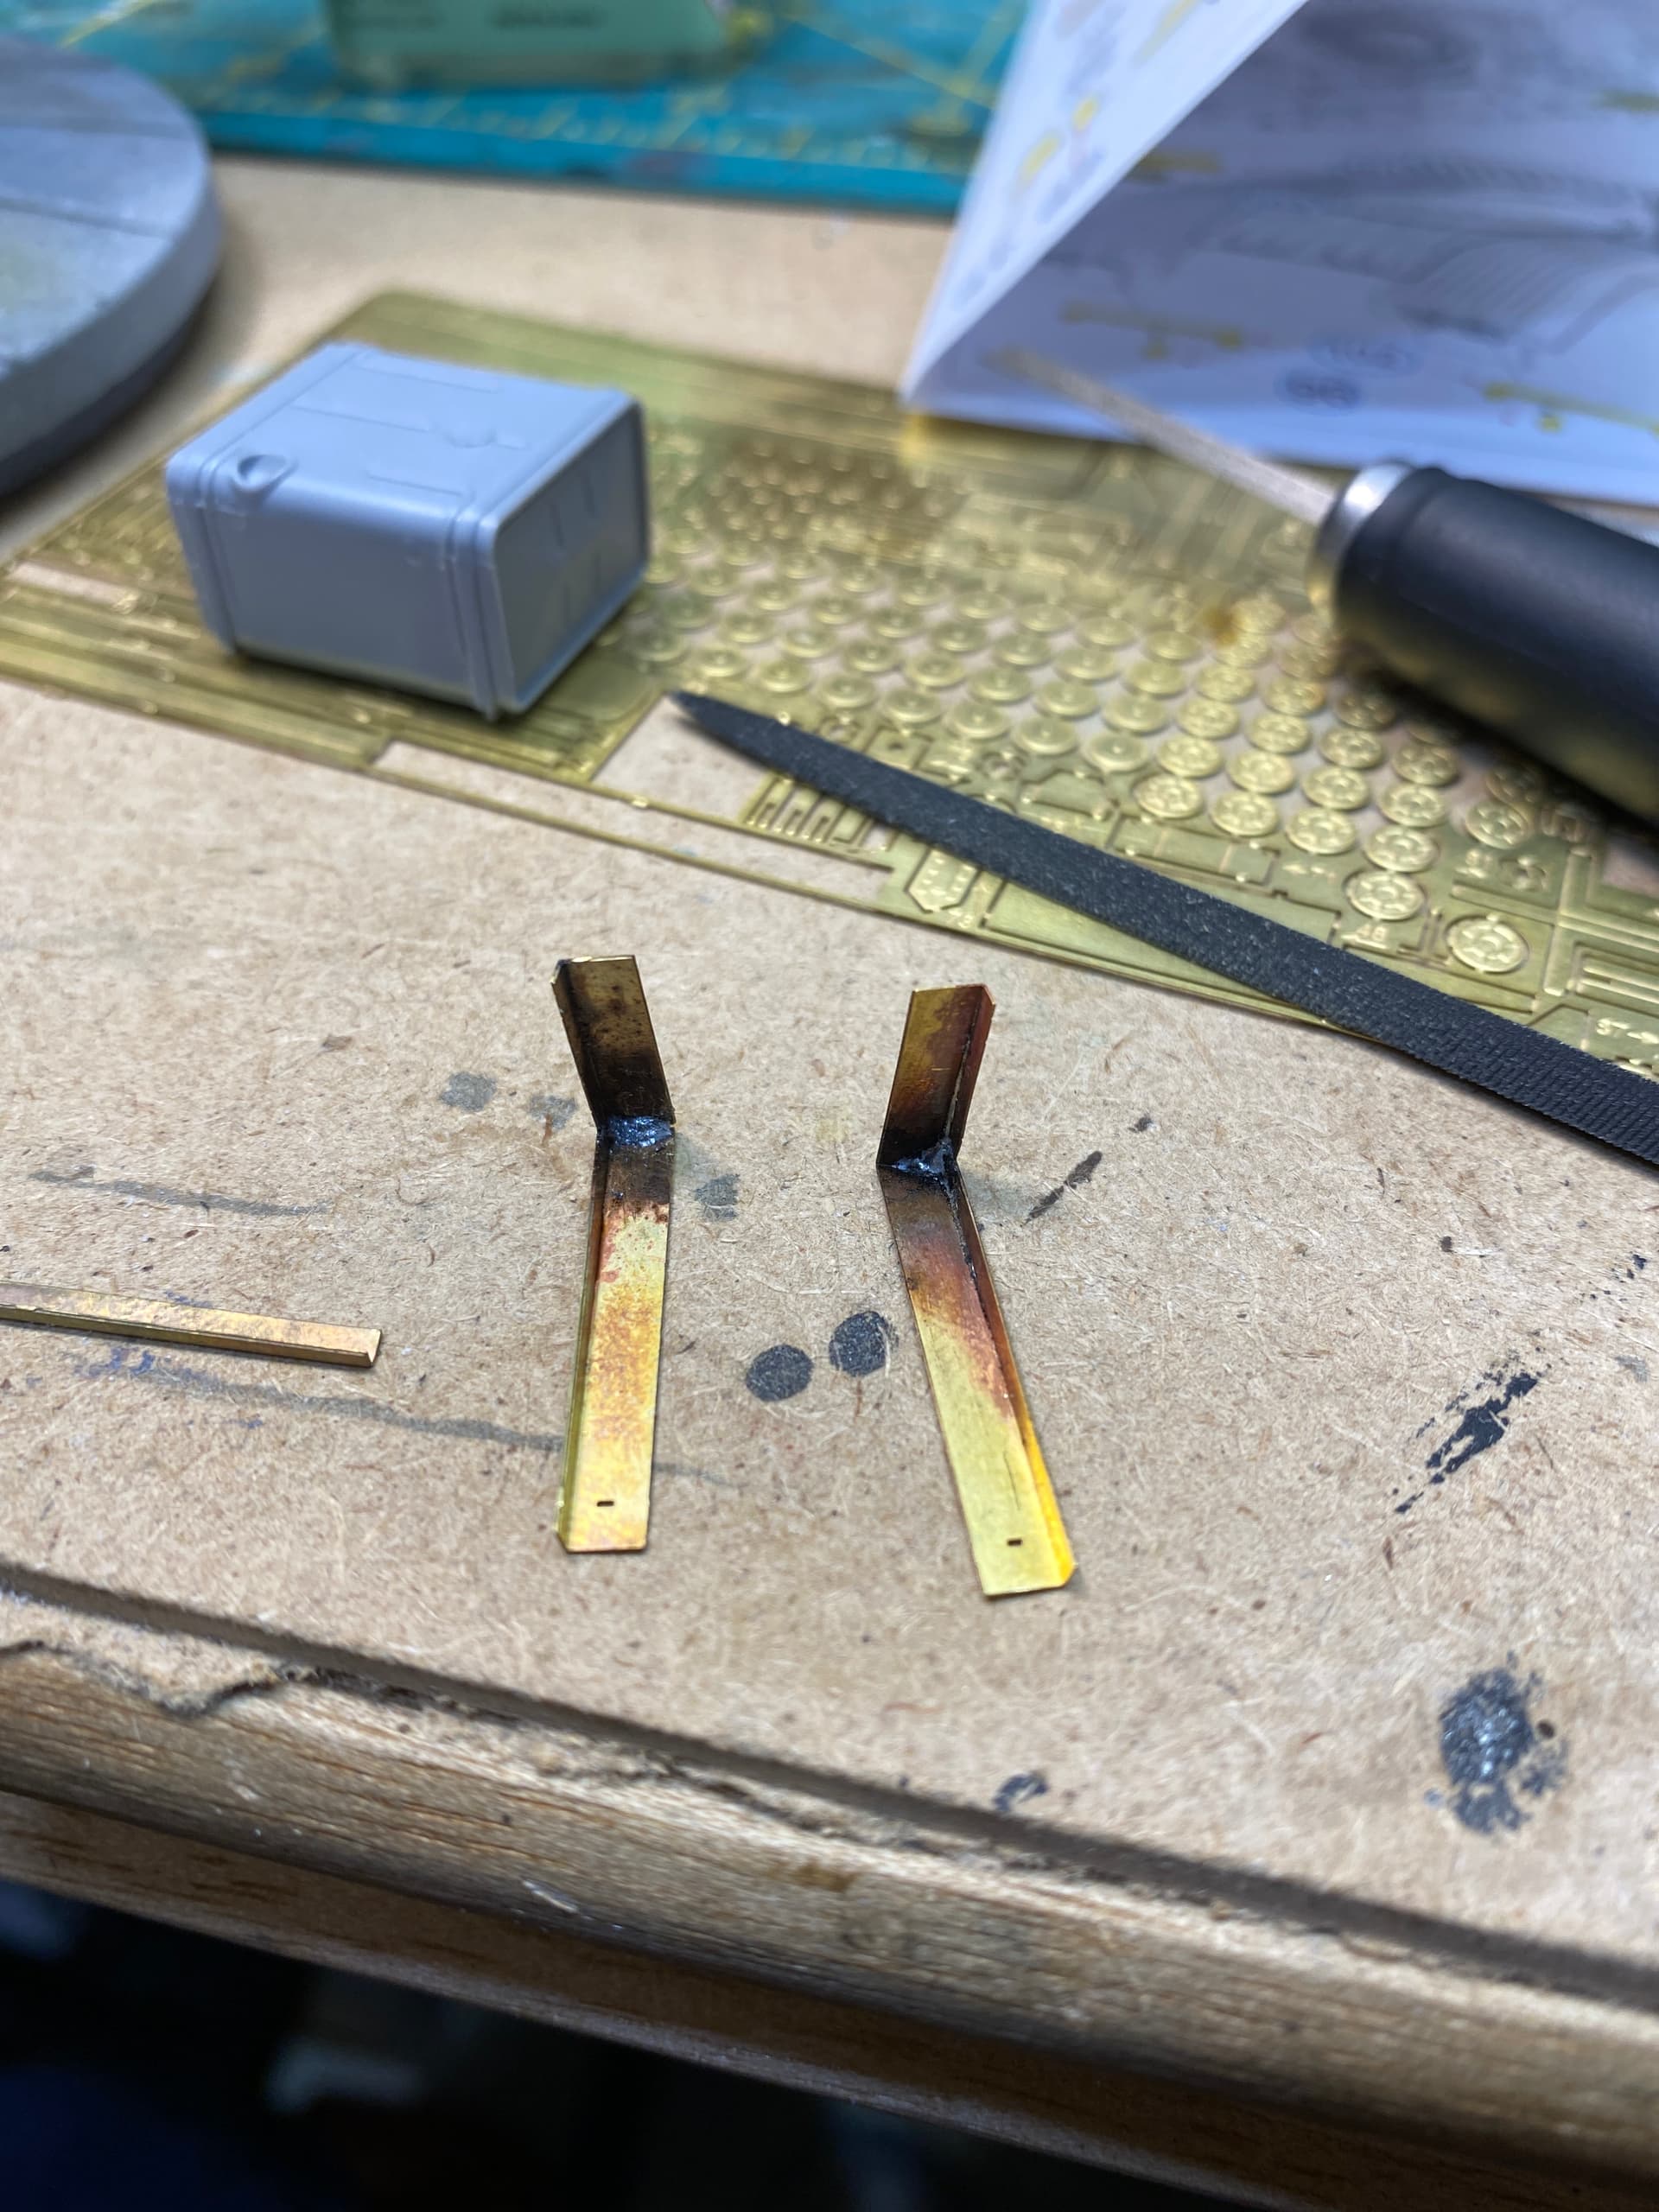
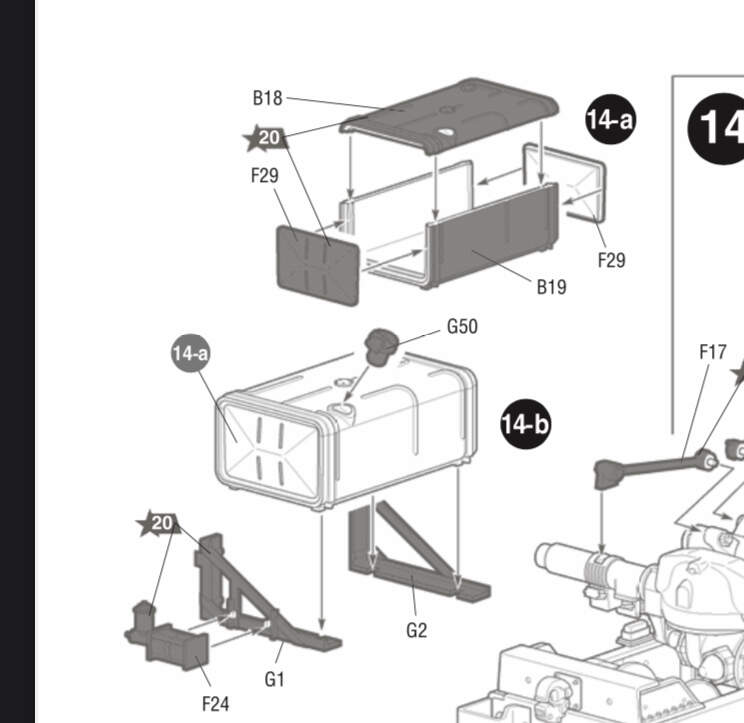
There’s no PE with the kit. I grabbed the Microdesign set which comes with some pretty solid instructions. I have a set of Quinta 3D decals coming for the cab as well.

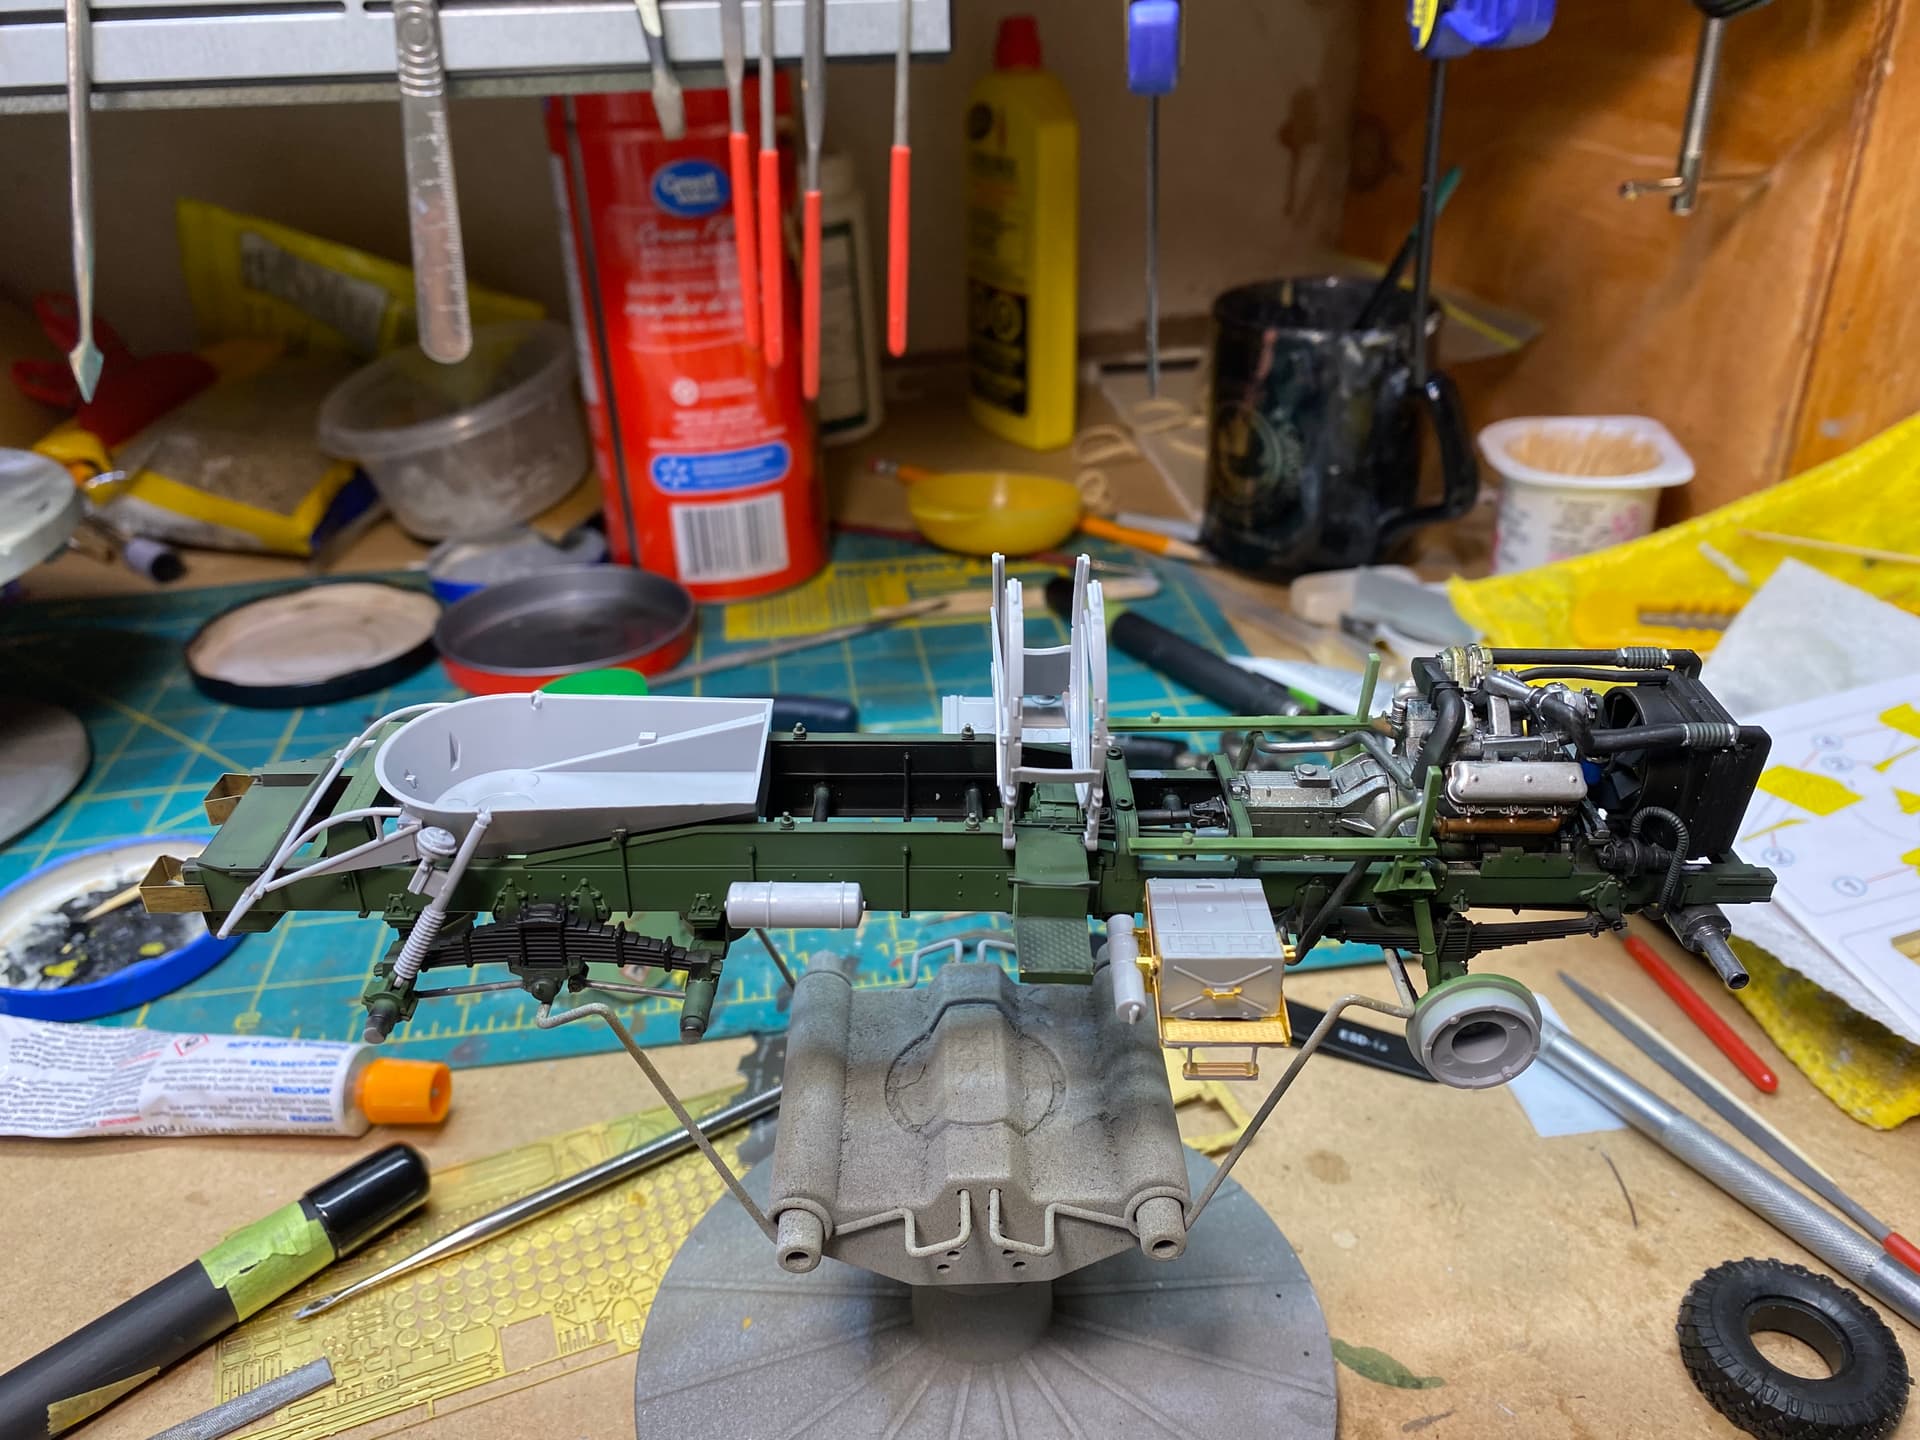
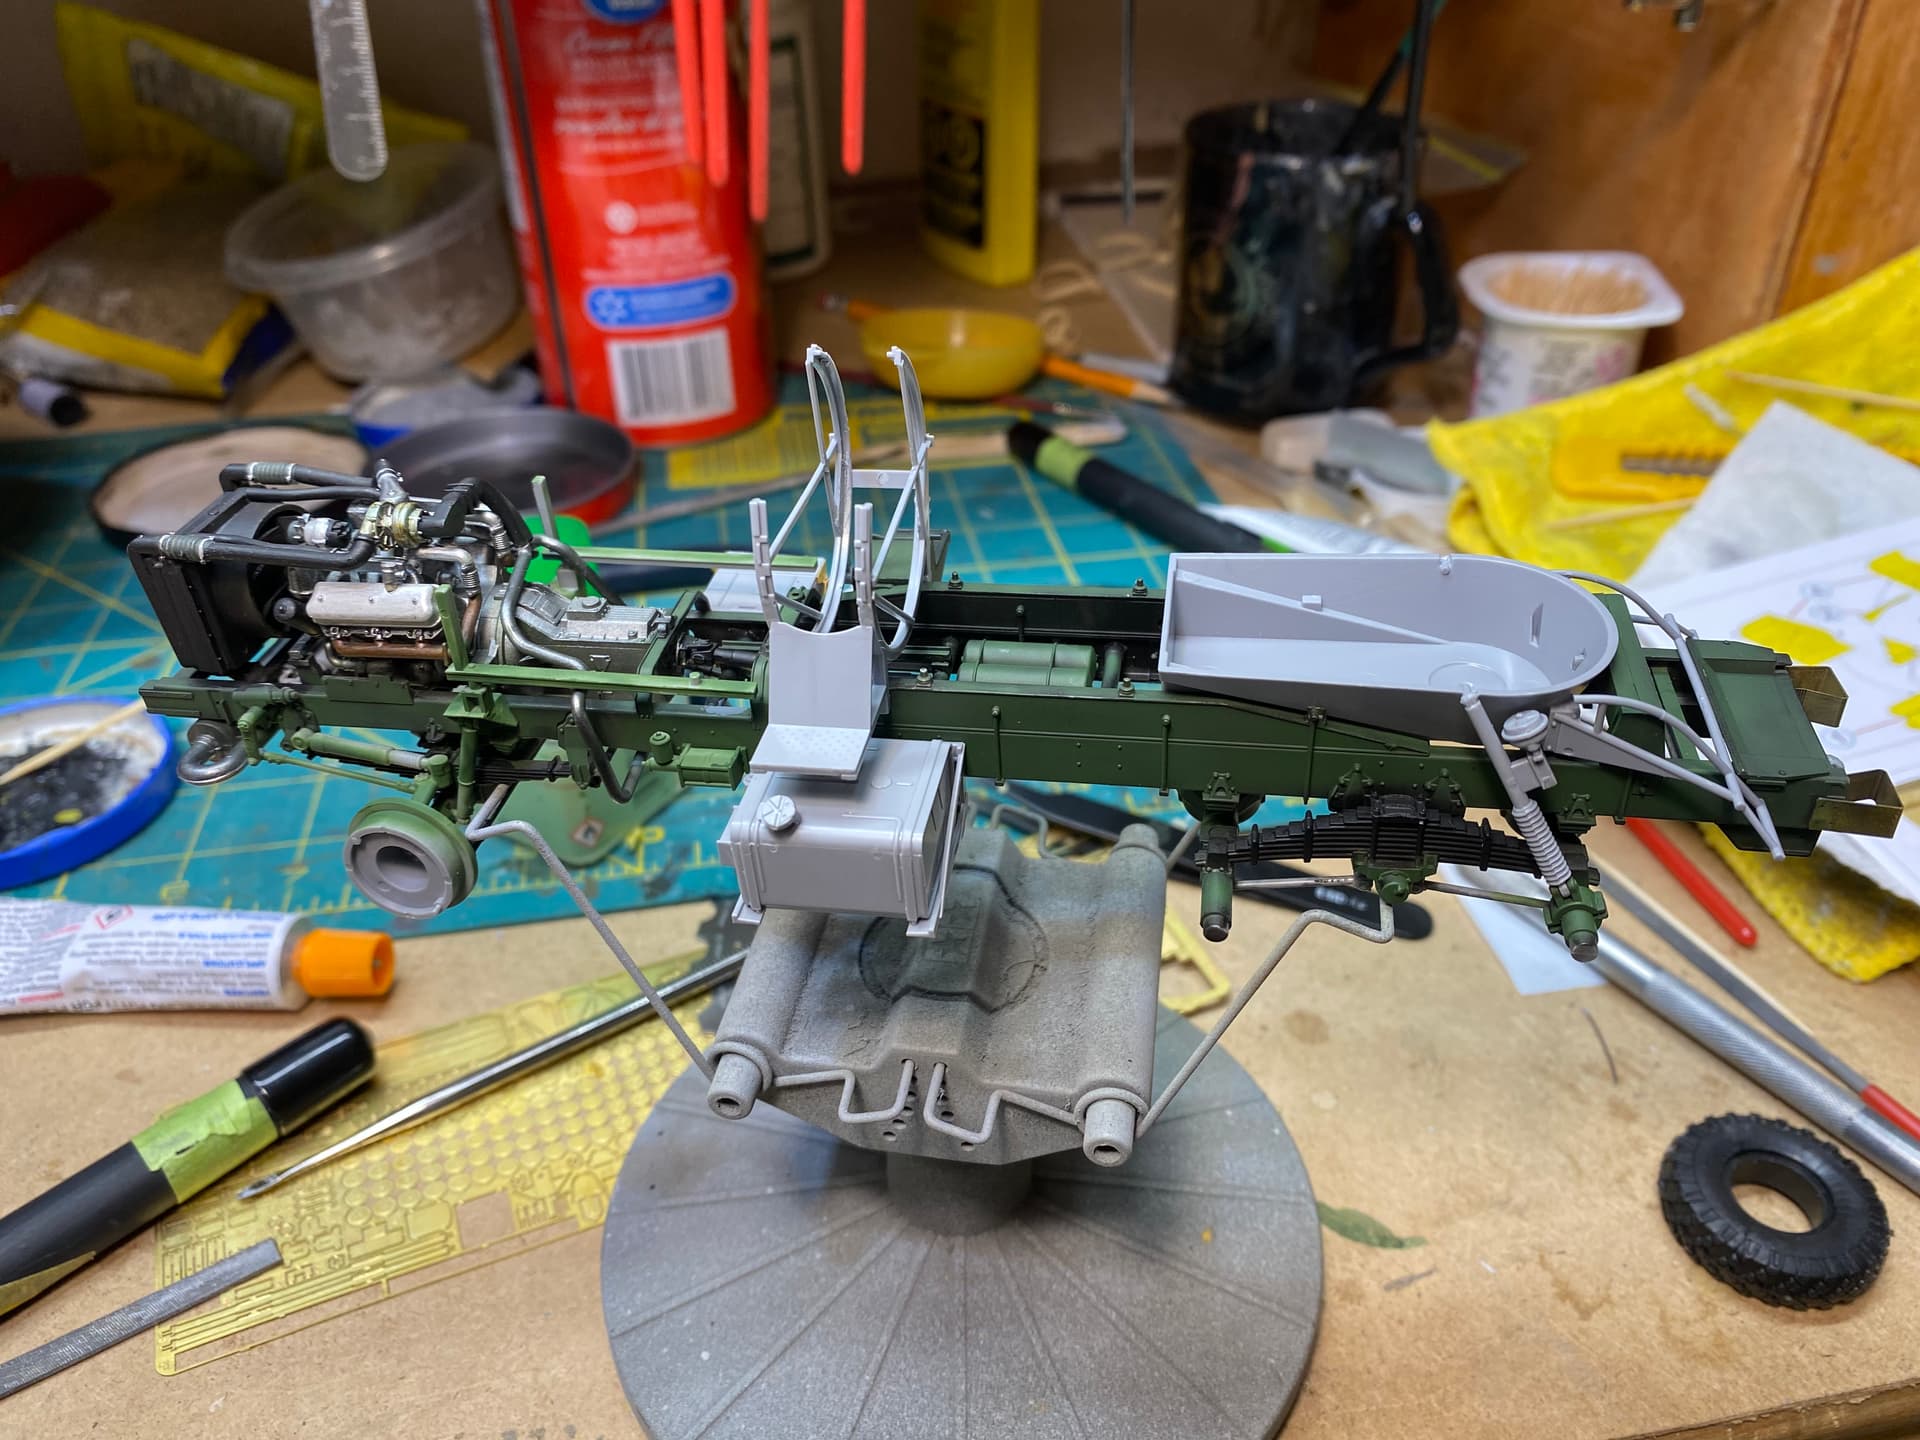
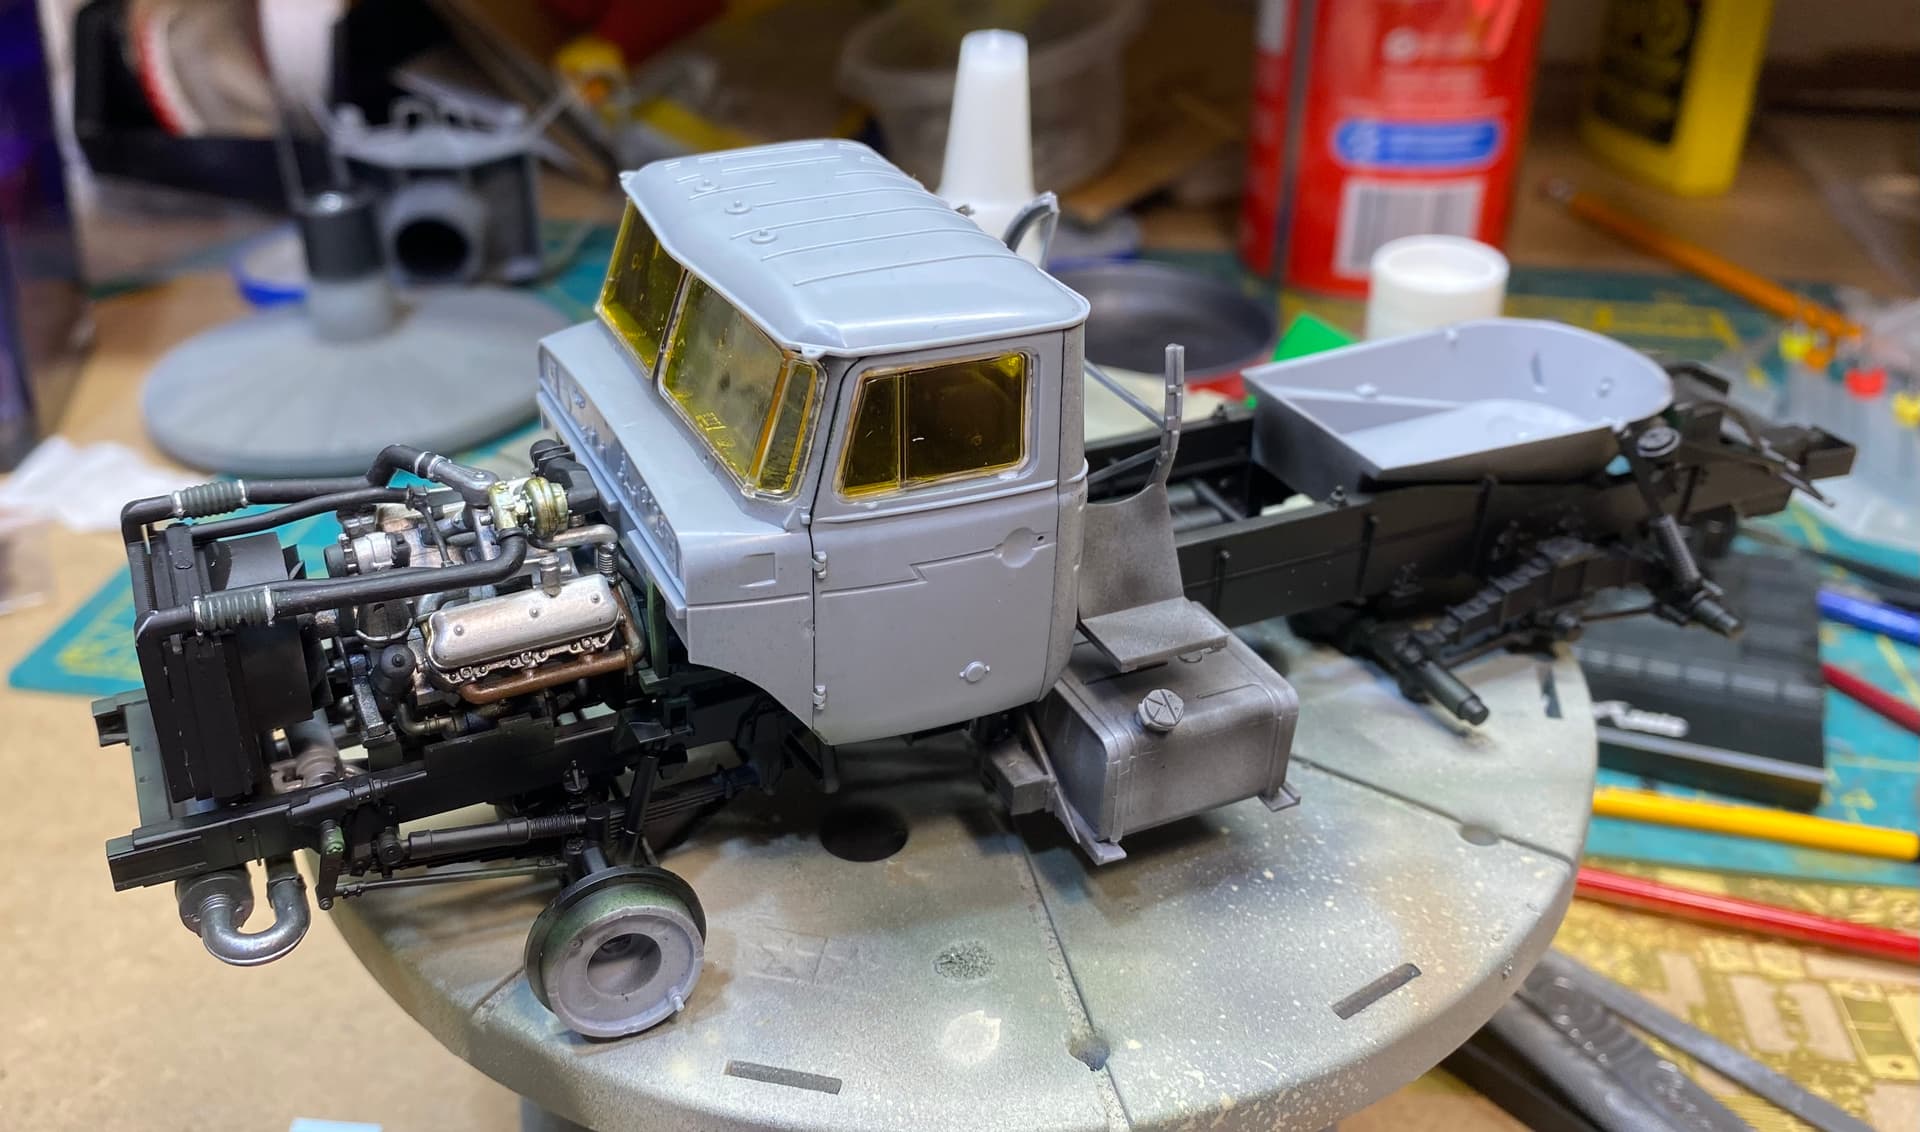
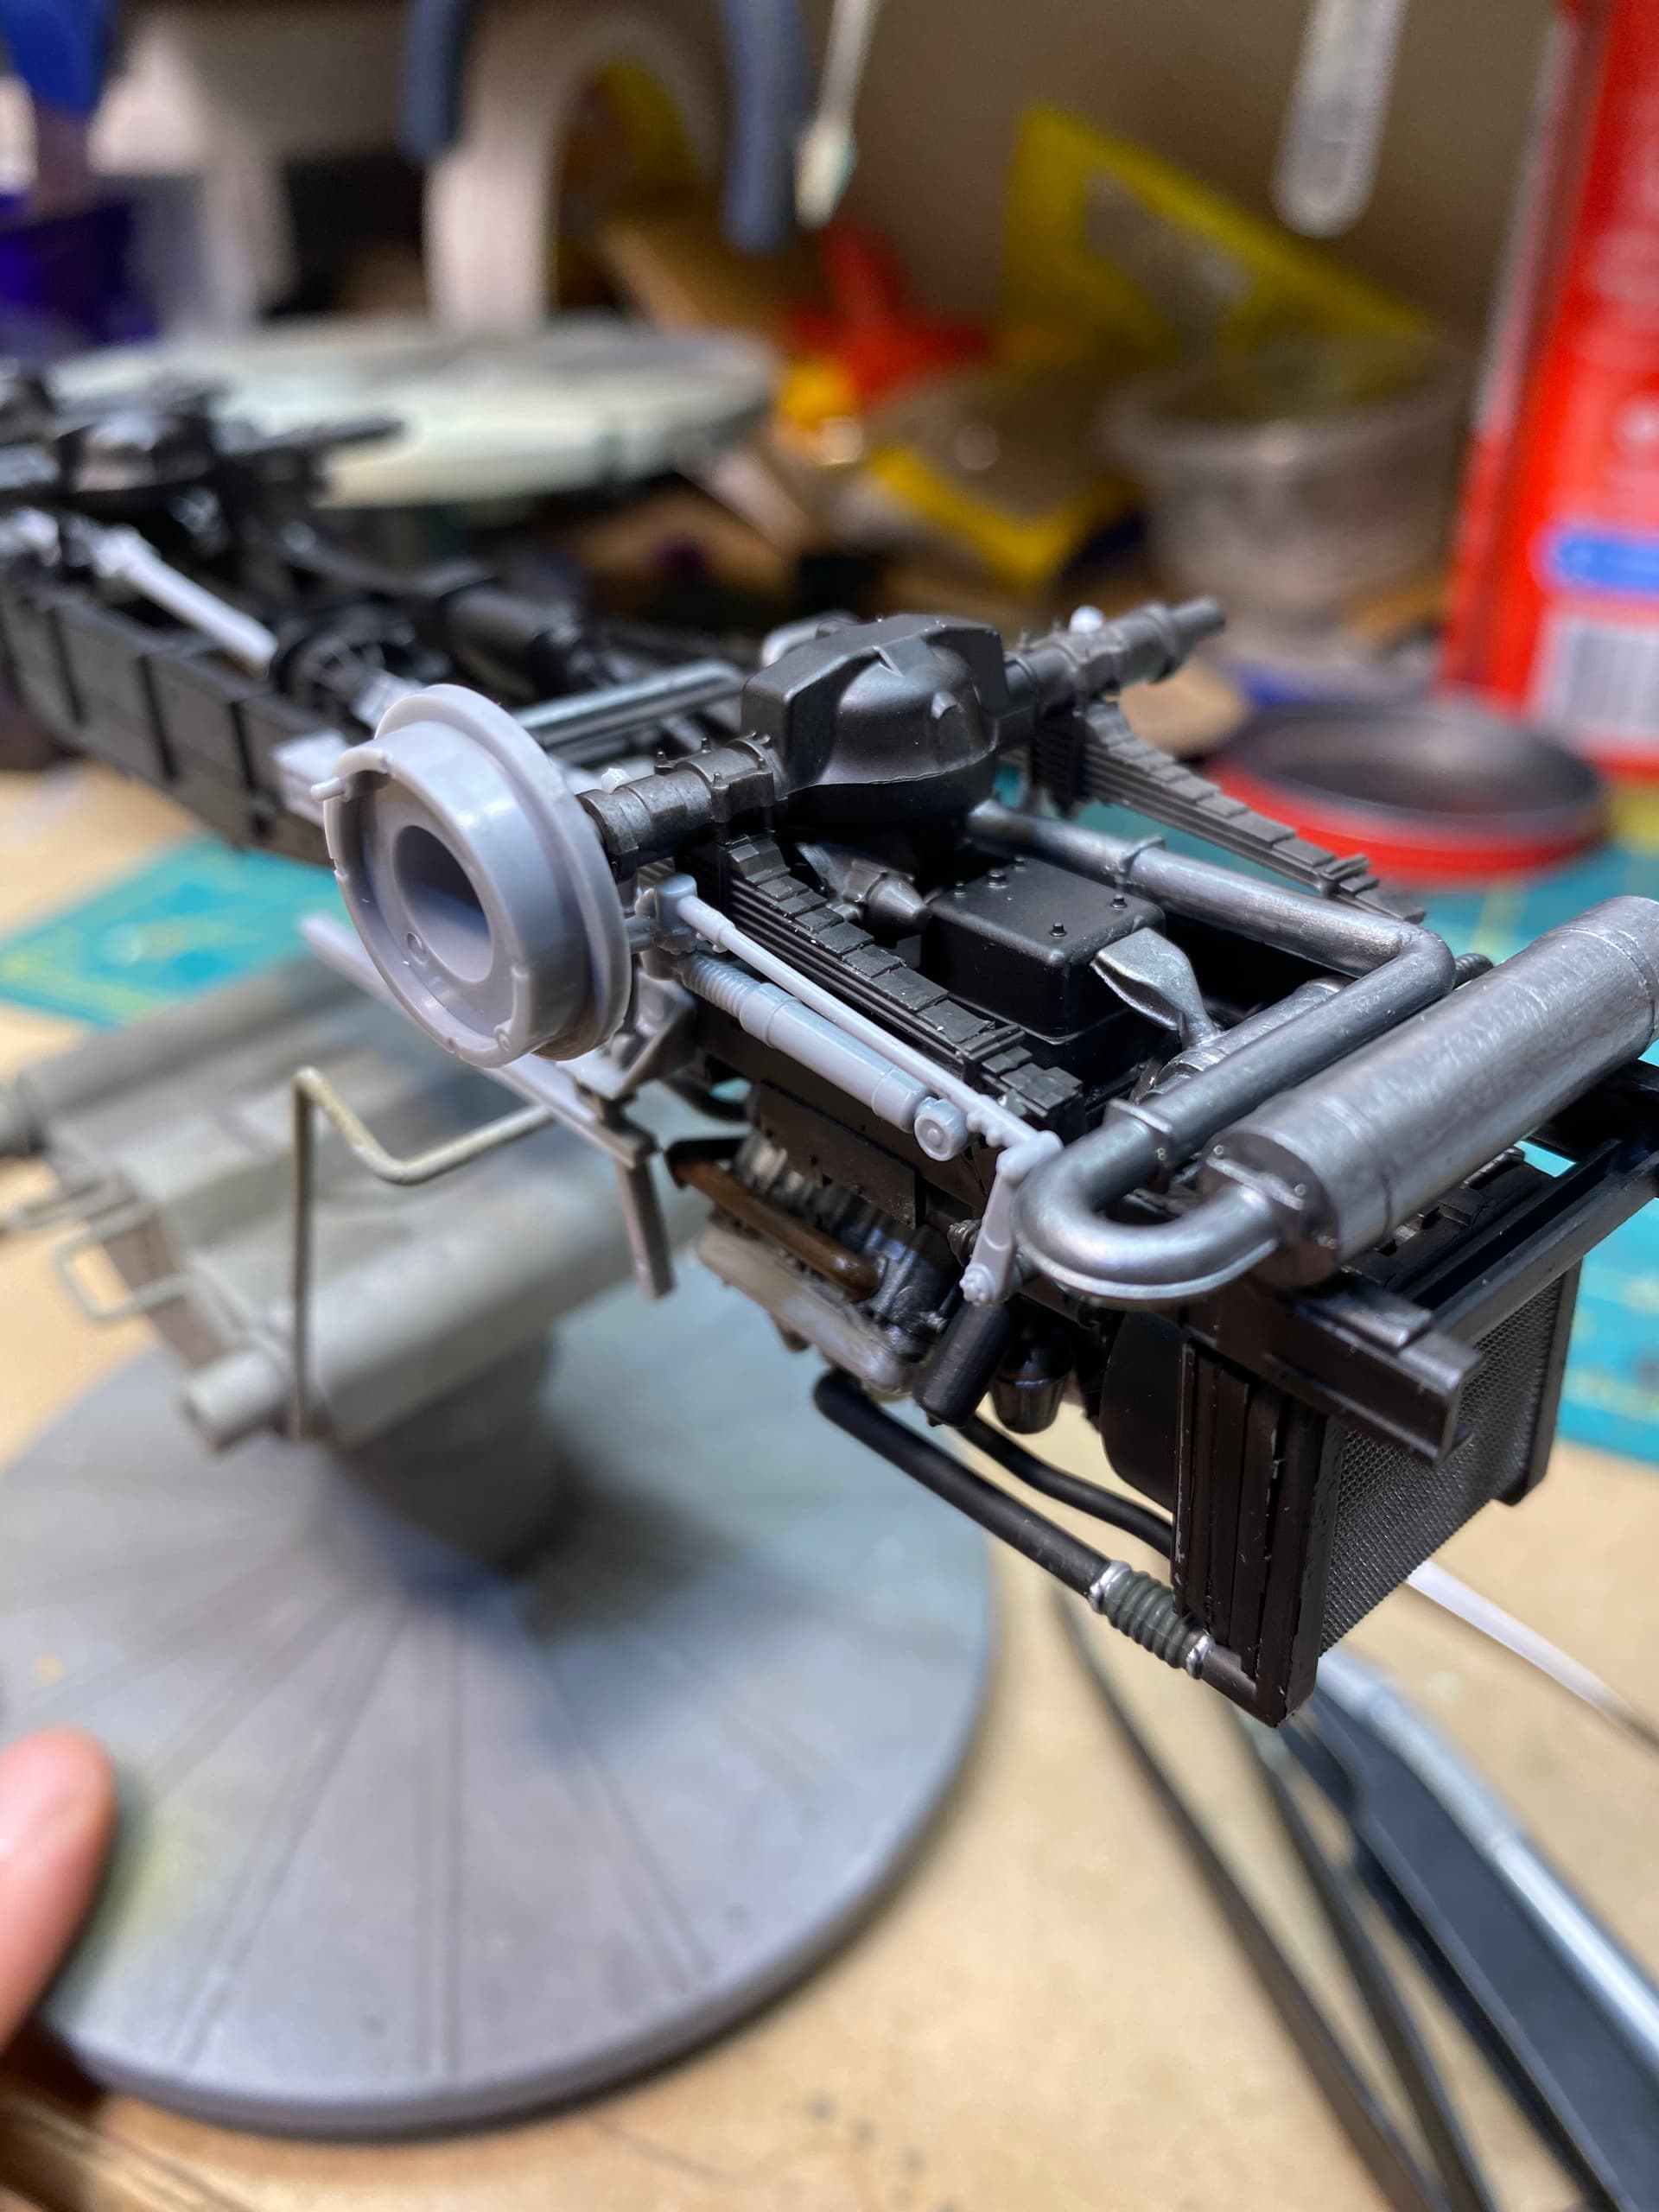
So far I’ve managed to knock the majority of the engine block together, which I think I’ve ID’d as the YAMZ-236 V6 Diesel.


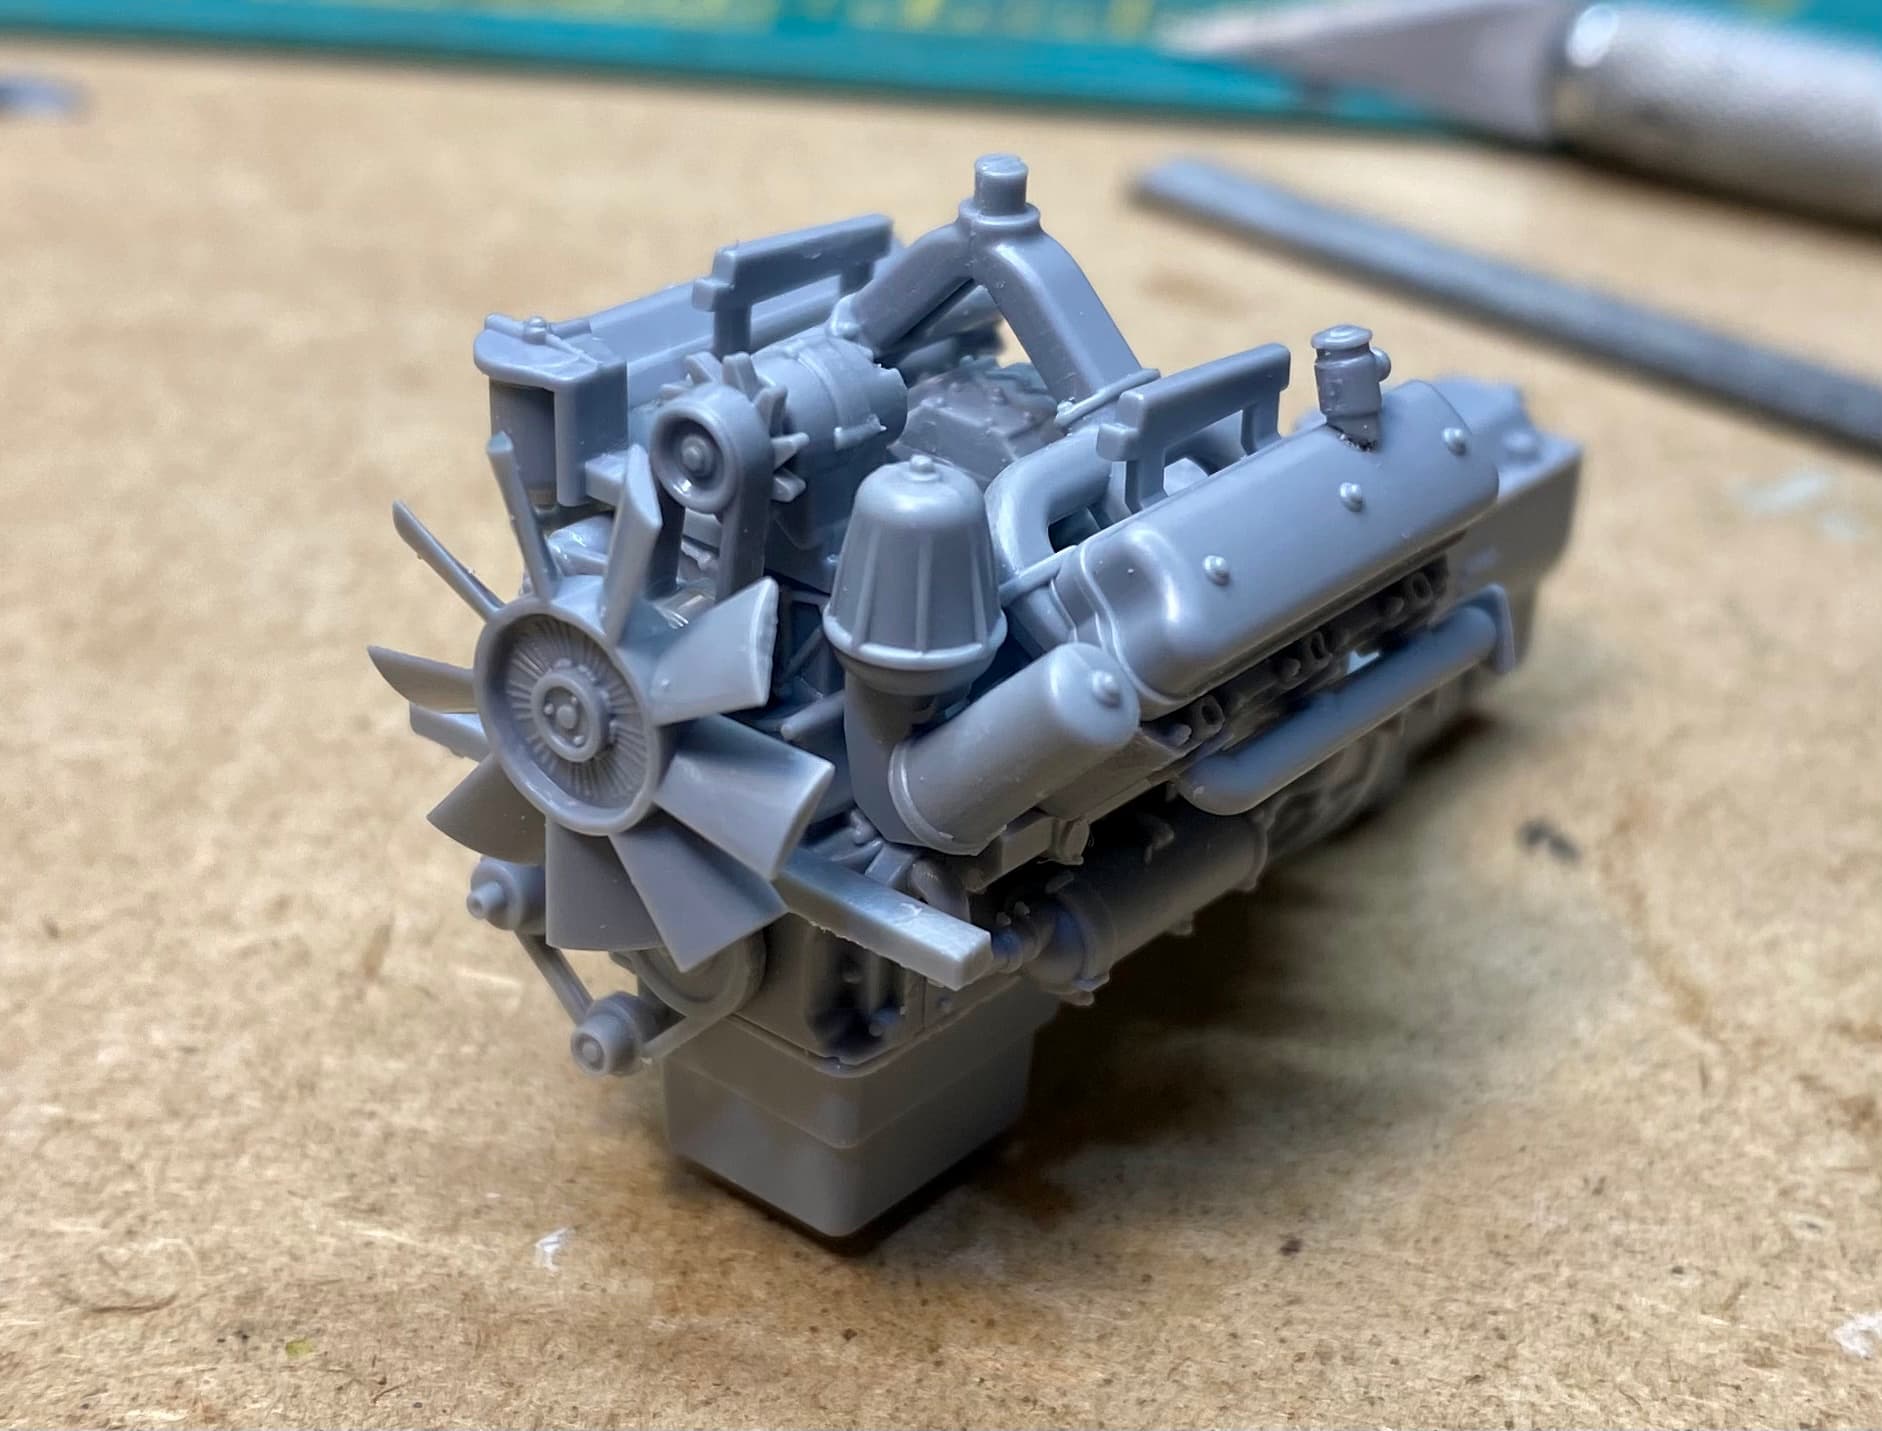
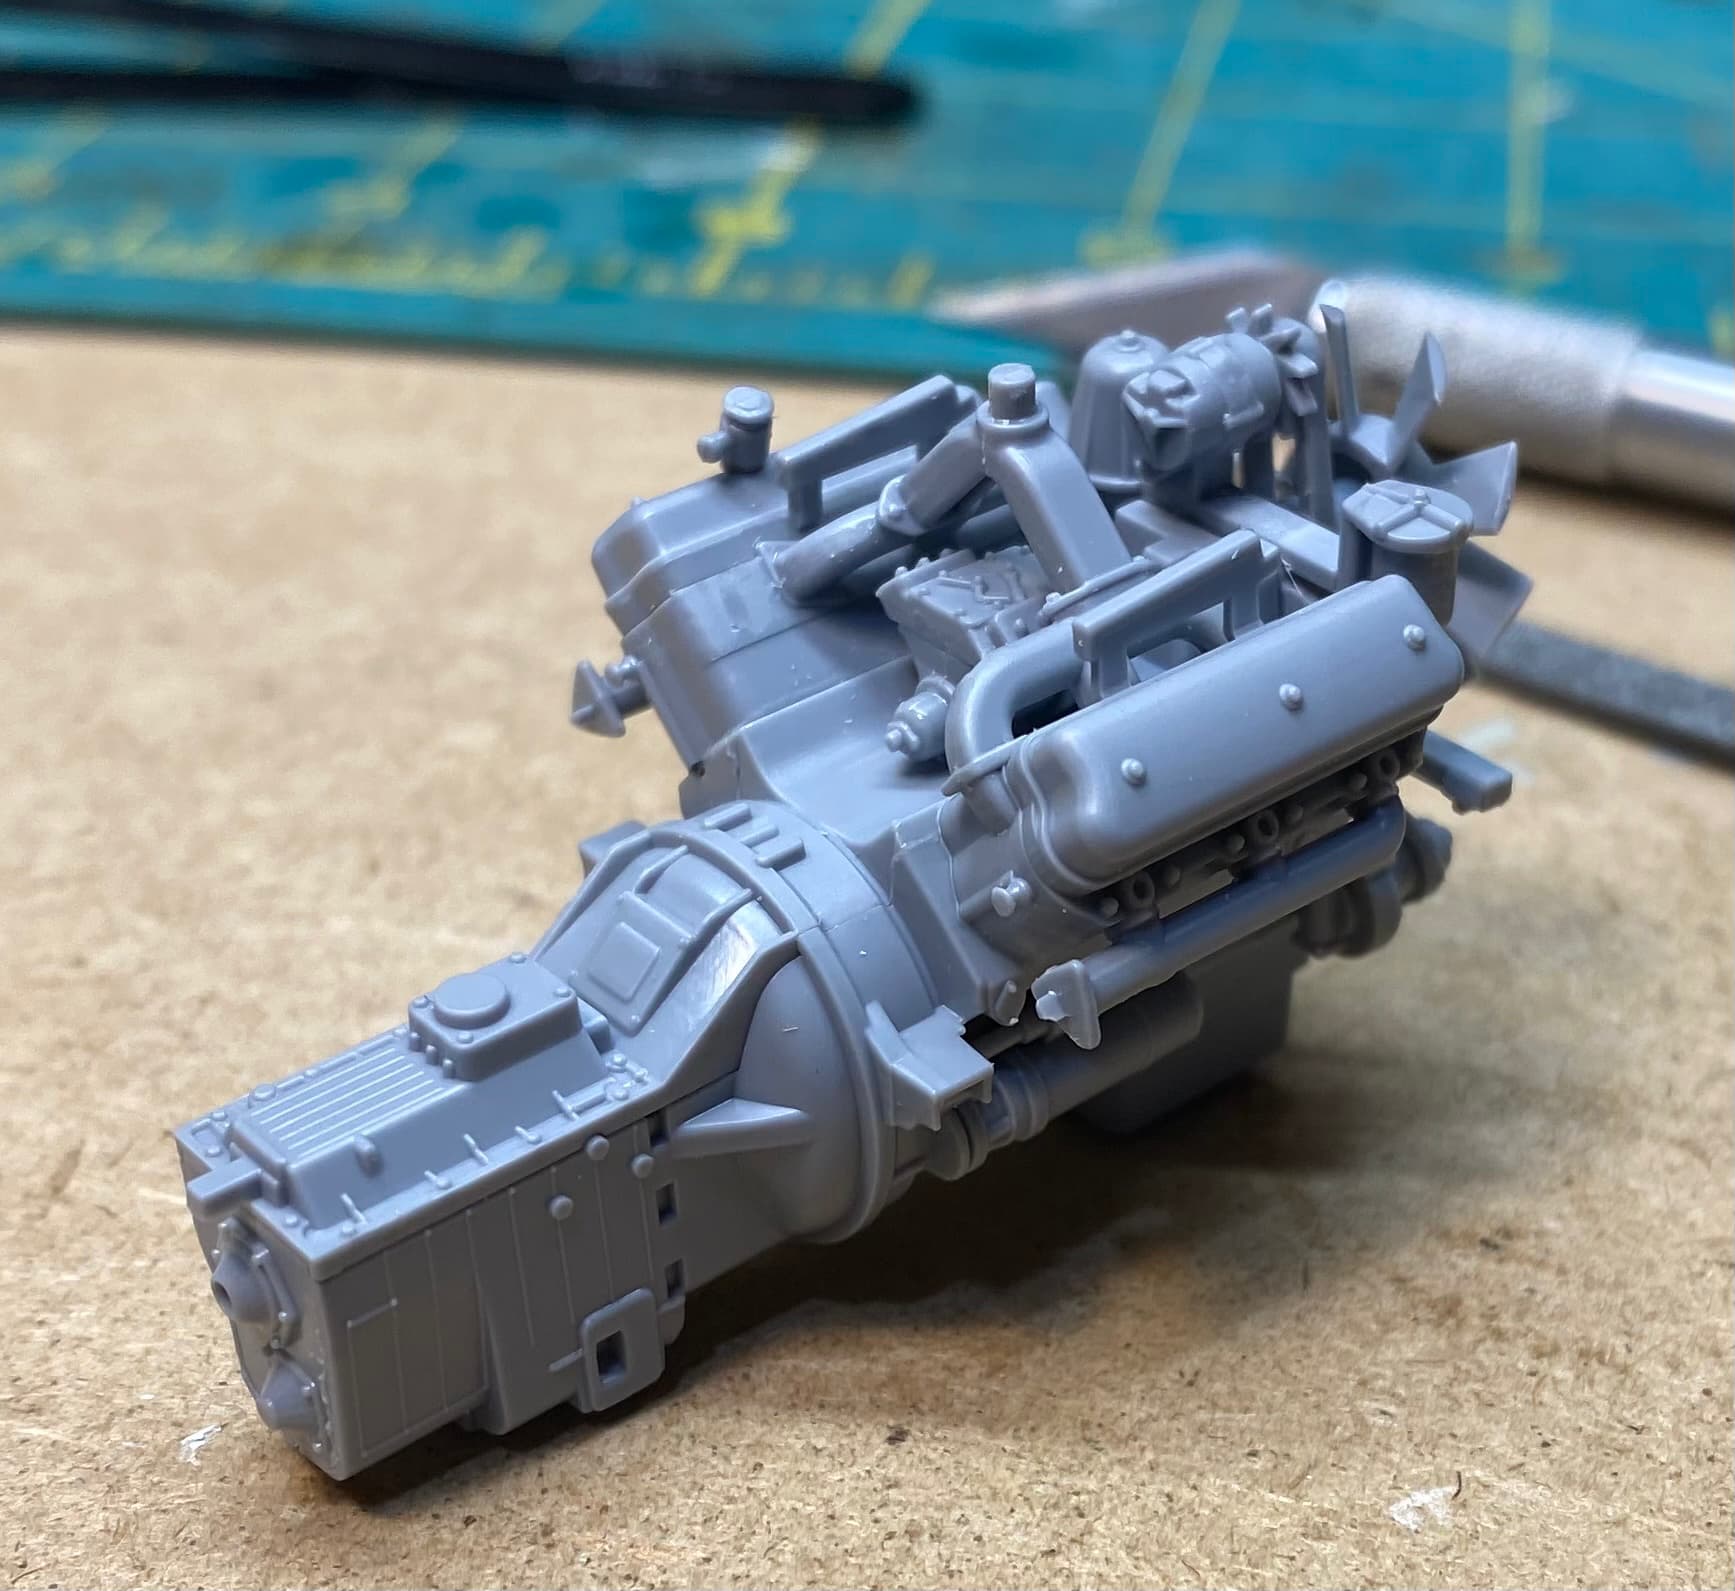
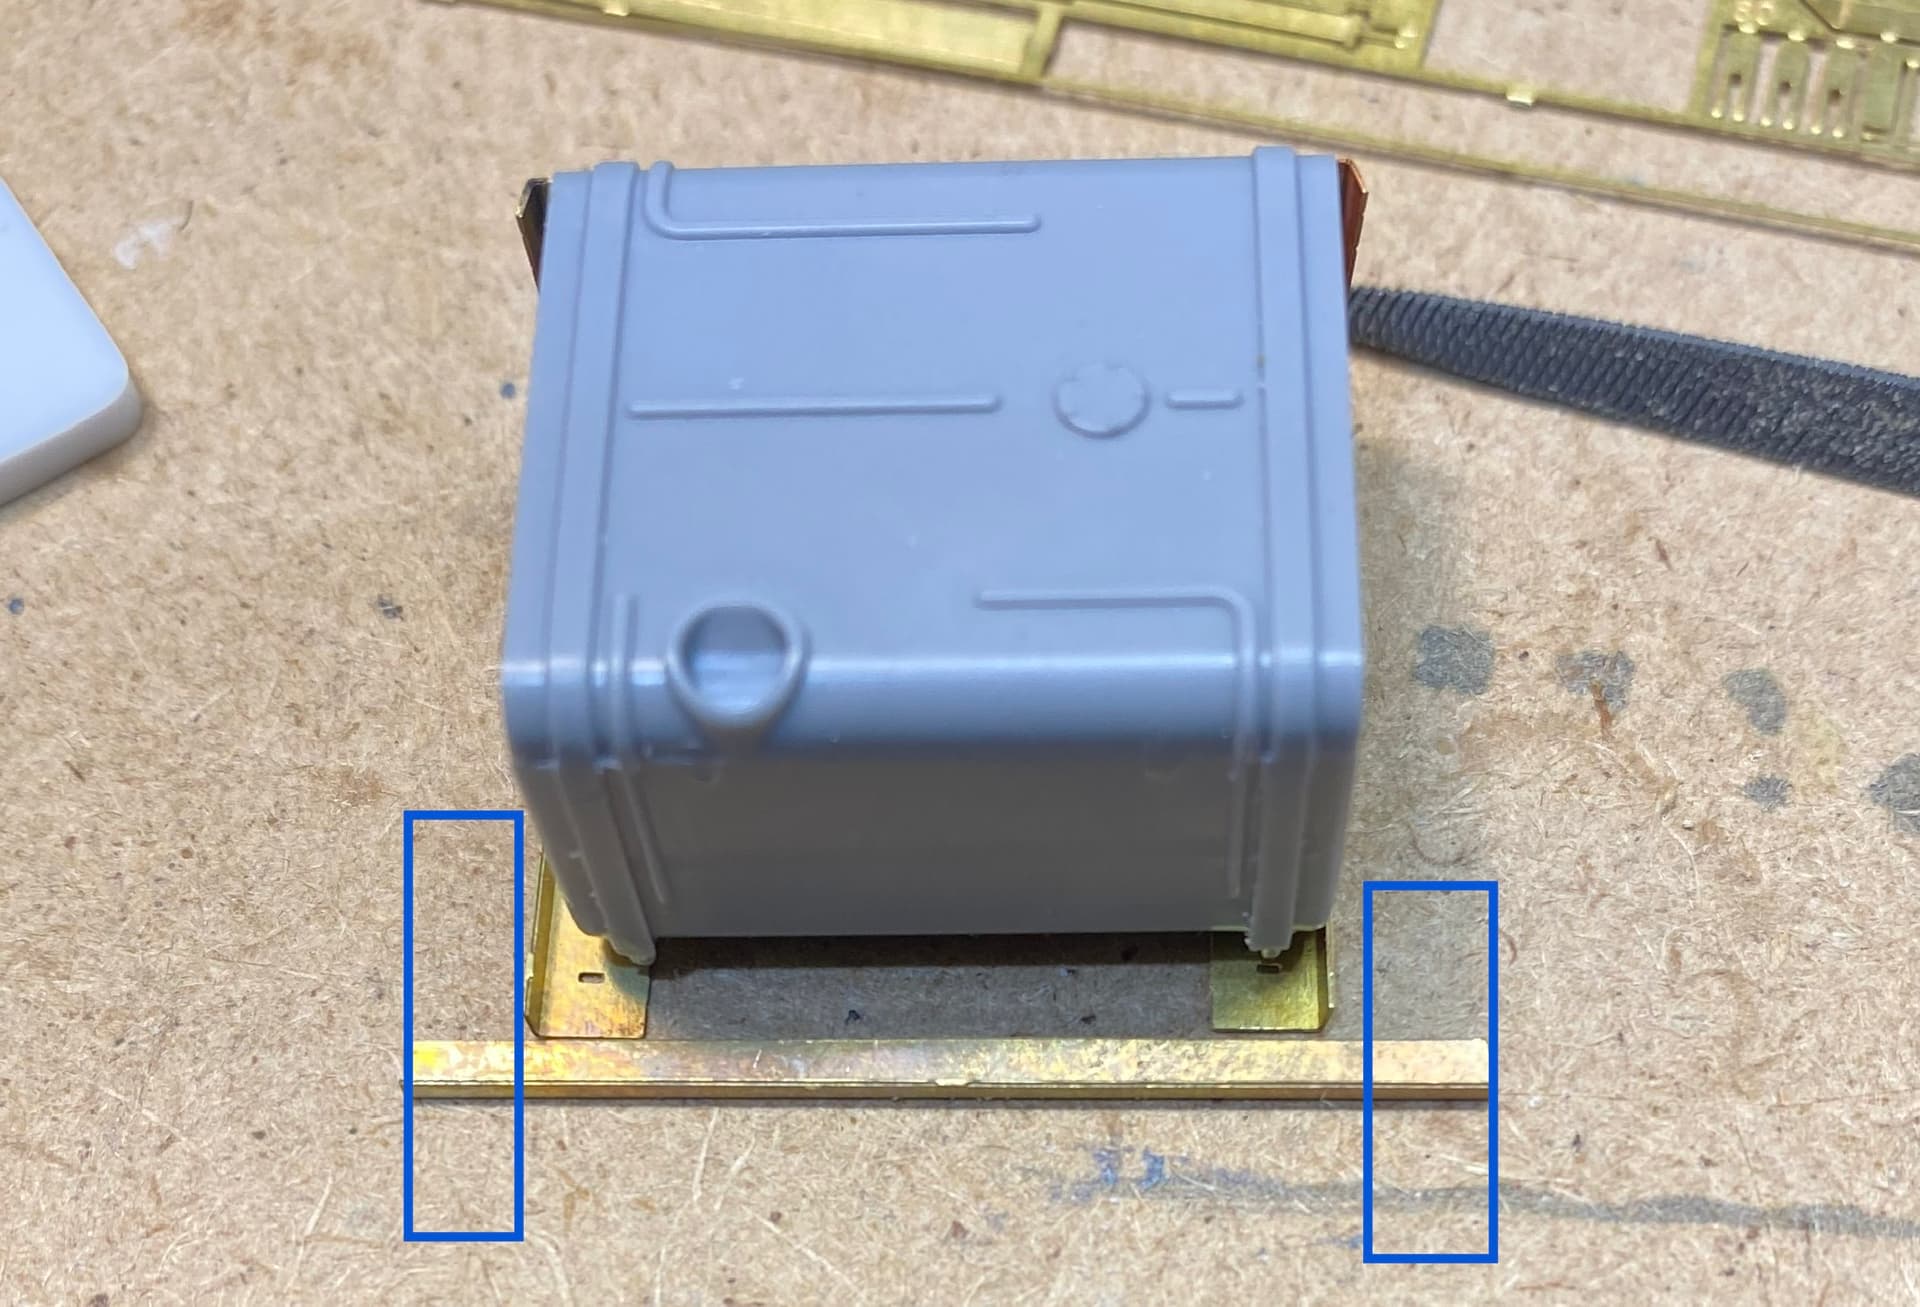
Fit has been pretty good with minimal cleanup of parts, mostly seam lines. There are some very small gaps here and there between parts where the tolerances between them are just out of alignment, but given their location in the engine bay, I don’t think they’ll be too noticeable after some paint.

On that note, the kit gives you the option to display the hood and cab doors either open or closed, which given all the detail they’ve crammed in here will be nice.

This is defiantly one of the more daunting builds I’ve undertaken, but if the engine is representative of the rest of the kit, I think it’s going to be a lot of fun.

10 Likes

Nice job so far on the engine. It would be a pity to hide it under the hood.

Olivier

1 Like

Lookin’ good so far! I’ve never done a Zvezda kit; but have been looking at their Pantir S-1 kit with lust in my eyes!

:beer: :cowboy_hat_face:

1 Like

You will love the Quinta decals, I just got an order from there Russian site and it was one month from ordering to delivery.

1 Like

Couldn’t agree more. I have a few of their vehicle ones but not used them yet though I recently used their their F-4 cockpit set and they were awesome.

Looks like an excellent kit- I have the base model Ural in the stash so I will be interested to see how the chassis and cab go together.

1 Like

Making some progress on the chassis today. This will probably be the first ladder frame I’ve done where I think it’ll actually be square in the end!

Fit is excellent and continuing with the minimal cleanup theme. Though I will say, Zvezda has made the choice to use 8 sprue gates where 2 or 3 would suffice. Means nothing is going to be warped, but it is extra polishing.

I have noticed a couple small design/engineering decisions which are getting a little frustrating.

First is that the numbering of the parts on the sprues is a little… baffling. 1 generally seems to be the top right corner, and then the numbers serpentine right to left up as you work your way down the sprue.

Second, someone decided it would be a good idea to illustrate all the parts that will eventually be painted black, by printing them in the same colour. The problem is, the contrast is so low in the drawings, that it’s almost impossible to determine the orientation of the part.

That tab sticking up off the top of G35 isn’t centred on the arch, but sits flush to one side.

Thankfully it was shown much clearer in the next step, but that wasn’t the case for a large part of the chassis. This luckily was also the most problematic piece. For anyone else building this kit (and I assume it’s a trend that will follow through in others as well), if you’re not sure, make sure you’re looking ahead as you go.

6 Likes

Engine needed some primer before it got so buried that I could’t reach everywhere. And then I figured if I was priming I might as well base coat. And then if I’m doing that, why not pick out some details. So now I have a half assembled but fully painted engine block!

Base is Tamiya Metalic Grey as it’s the only thing I have that was close to an engine colour. All the reference photos I’ve seen of these motors have them in a uniform, dead flat aluminum/grey colour. That’s boring. So I picked out some details like the cylinder head covers and alternator in a brighter aluminum and toned down some others with some gun metal. I tired to add some heat shimmer to the turbocharger which came out looking gold but I kind of like it so it’s staying put.

I still need to add some more plumbing, but it looks like it’s all black plastic/rubber stuff.

Also, that radiator has 3 sheets of PE mesh in it… none of which are visible because they have plastic parts that go over top of them. Like even without the PE, that entire radiator assembly is both a work of art and a complete waste of plastic because you can’t see any of the detail.

Also also, these showed up today!

8 Likes

Got the majority of the chassis done now. Today was axles, differentials and prop shafts.

Fit on the differential components was a little middling. Big seams on complex curves that I don’t have the finesse to sand out nicely. Good news is, it’s all on the bottom side where only the dust bunnies will see.

A few hiccups in here that are mostly my fault.

Biggest goof was missing this piece about 6 steps back

Which needs to go here

Got it done but a word to the wise to double check before moving on.

On that note, I made the mistake on installing the diffs all at once and then going back for the prop shafts. It’s doable, but only because Zvezda have taken the trouble to make the U joints on them functional. If they were once piece shafts I’d have never got them in without having to trim the locating pins.

Also tucked into the Microdesign PE set some lore today. So far, I’m sad to say it’s been PE for the sake of it. The plastic parts that are being replaced are almost indistinguishable in terms of detail. These bumpers are a prime example. It was a fairly complex curve to replicate though admittedly it’s probably a little more in scale.

Here’s everything as it sits right now.


Now to punish my self, I’m going to try out the PE frame for the fuel tank.


6 Likes

And my frustration with the PE increases.

Compare the fuel tank here

And here

They’re two totally different shapes. The kit tank is substantially shorter than the one shown in the PE instructions.

The end result is that the parts are the wrong size!

So far the height and depth of the tanks look close, so I’ll see if I can’t trim down that cross member to make it functional.

Oh! The upside is I (mostly) successfully soldered a joint!

5 Likes

And mystery solved. Well one of them anyway.

Went and took a peek and the instructions for the standard URAL 4320 that Zvezda makes. The one who’s tooling was supposed to have been used to make the BM-21.

Lo and behold… it has a bigger gas tank! And a radiator that would have shown all the PE I used!

The 4320 was a 2017 release, so obviously Microdesign just added the BM-21 specific parts to their existing kit without accounting for the changes.

I wonder what other surprises will be in store?

5 Likes

Ah, the adventure of PE detailing :laughing:! Looks like you are doing a great job with it though.

PE that fits is an undertaking. PE that doesn’t fit should be a punishable offence.
Fantastic job so far!

Gave up on the frame for the fuel tank. It’s just not designed for that tank and fighting it out of spite isn’t getting me anywhere.

Fear not though, for the modelling gods are with me today.

I moved instead to the frame for what I think is the battery box. Everything looks much better today and I’m pleased to say the parts all fit where they should.


Plus, I successfully assembled not one but two PE latch assemblies! These are by far the smallest parts I’ve ever tried working with and it was a good exercise.

And as if that wasn’t proof enough, I managed to recover this microscopic bit from the clutches of the carpet monster!

It’s part of one of the latch assemblies and it’s maybe 2mm square.

In celebration I’ve downed tools lest I screw something up.

8 Likes

Alright, I’ve got 98% of the chassis assembly done, minus some parts for the spare tire rack because despite the instructions saying otherwise, I’m not convinced I’ll actually get the tire in with them on.

Shot a rough coat of Modern Russian Green. Not sure how much will stay that colour vs Yellow, but at least this way everything has paint on it. Anything grey is stuff that went down today and I’m waiting to cure up before paint goes on or that I’m reasonably convinced will be yellow.


6 Likes

Coming along very nicely Don- there looks to be plenty of nice detail in the kit. One thing I must mention though- the chassis of Russian built trucks are usually painted black. I’ve had a look around at the pics of the Nigerian one you are doing and as far as I can see it is black underneath as well. I don’t mean to be a PITA- its your model after all and you can paint it however you please- I just wanted to point it out because now might be the time to correct it if you want to.

No, you’re entirely correct and I noticed that last night after digging through some pictures of other Russian trucks looking at weathering patterns.

I got thrown off because the paint call-outs showed only the inside surfaces in black. It’s an easy fix.

1 Like

Very nicely done Don, it looks like it is going together well. As always it is interesting to see how different modellers break up the painting process.

Very nice detailed progress. Looks good

1 Like

Quinta decals for the win!

These things are just mind blowing in terms of detail. Hardest part was carving out the existing surface detail on the dash (I should have taken a before picture).

A warning though, the carrier film used on some of the smaller bits is impossibly fragile. So care must be taken when moving things from backing to model. I had two strings of five switches that I ended up having to lay individually because the film just dissolved.

Also, these are not nearly as forgiving as traditional decals. You can’t (or at least I couldn’t) reposition them because you’re not sliding them on a bubble of water/micro set and PVA is substantially more… well… adhesive.

Game changing things though. I’ll be using these for anything I can in the future.

8 Likes

Aaaaand all those lovely details are gone forever.

Mostly. Passenger door is glued shut, but I’ve just popped the driver door in place for now and it’ll eventually be displayed open. I briefly considered tackling the PE hinges, but I couldn’t for the life of me figure out where they actually went and what parts of the kit I needed to remove to install them.

Cab went together like a dream. It’s square and everything fits snug. Windows are all masked. I just need to add some exterior bits and bobs and it’ll be ready for the paint shop.

8 Likes