No, not fantasy. Such a thing was known as a Beutepanzer or literally, ‘captured tank’. If it had a working gun with a supply of ammo it was put back to fighting or if no gun but still useable as a transport or tow vehicle then just as good. The Germans captured and reused a lot of enemy vehicles. I have built a few examples myself.
I meant more of a “fantasy” where the vehicle is plausible, but not necessarily based on a specific vehicle. I could have chosen my word a bit better though.
1 Like
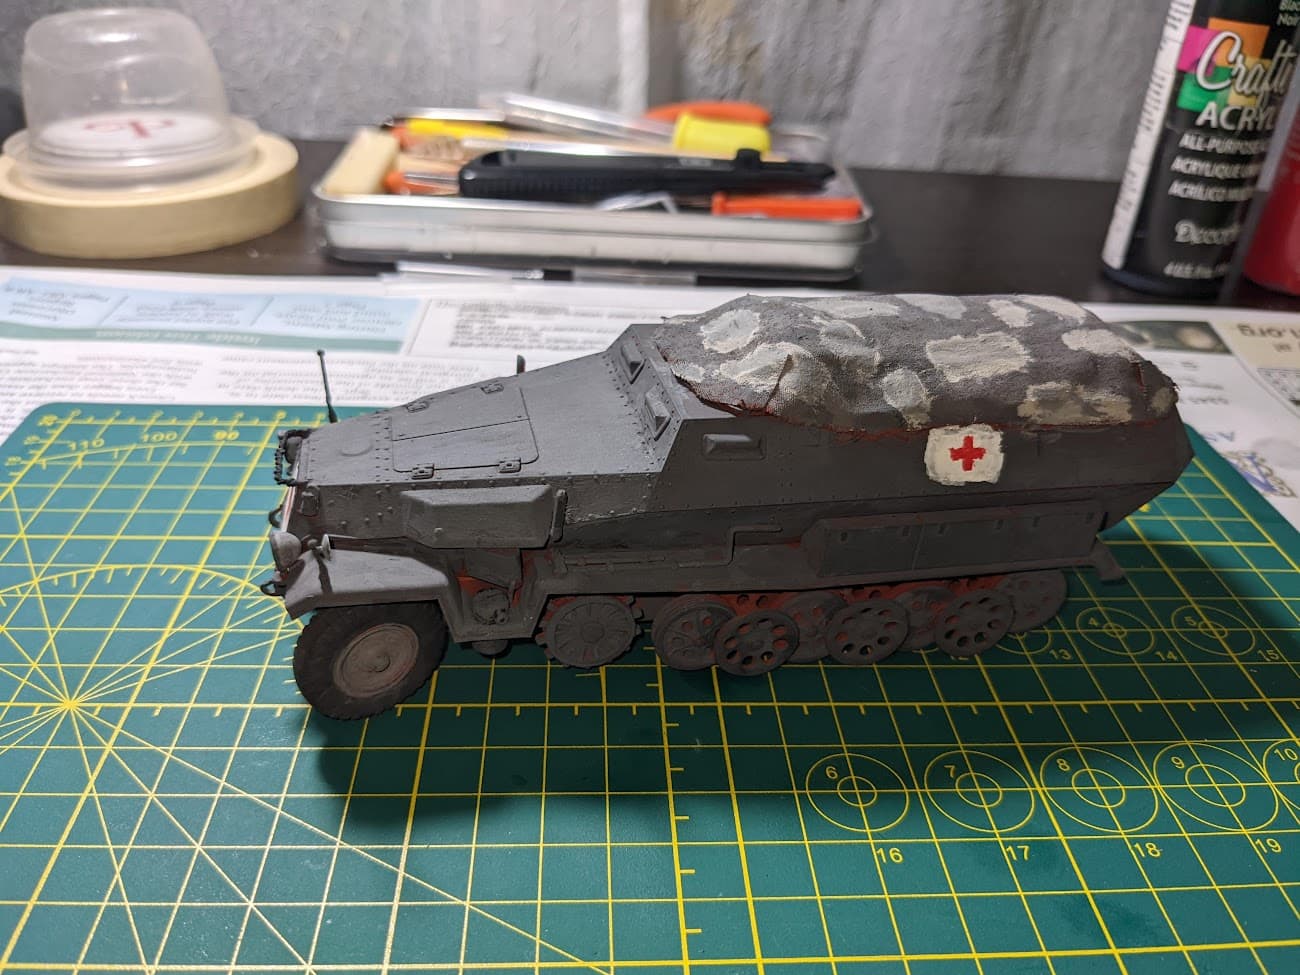
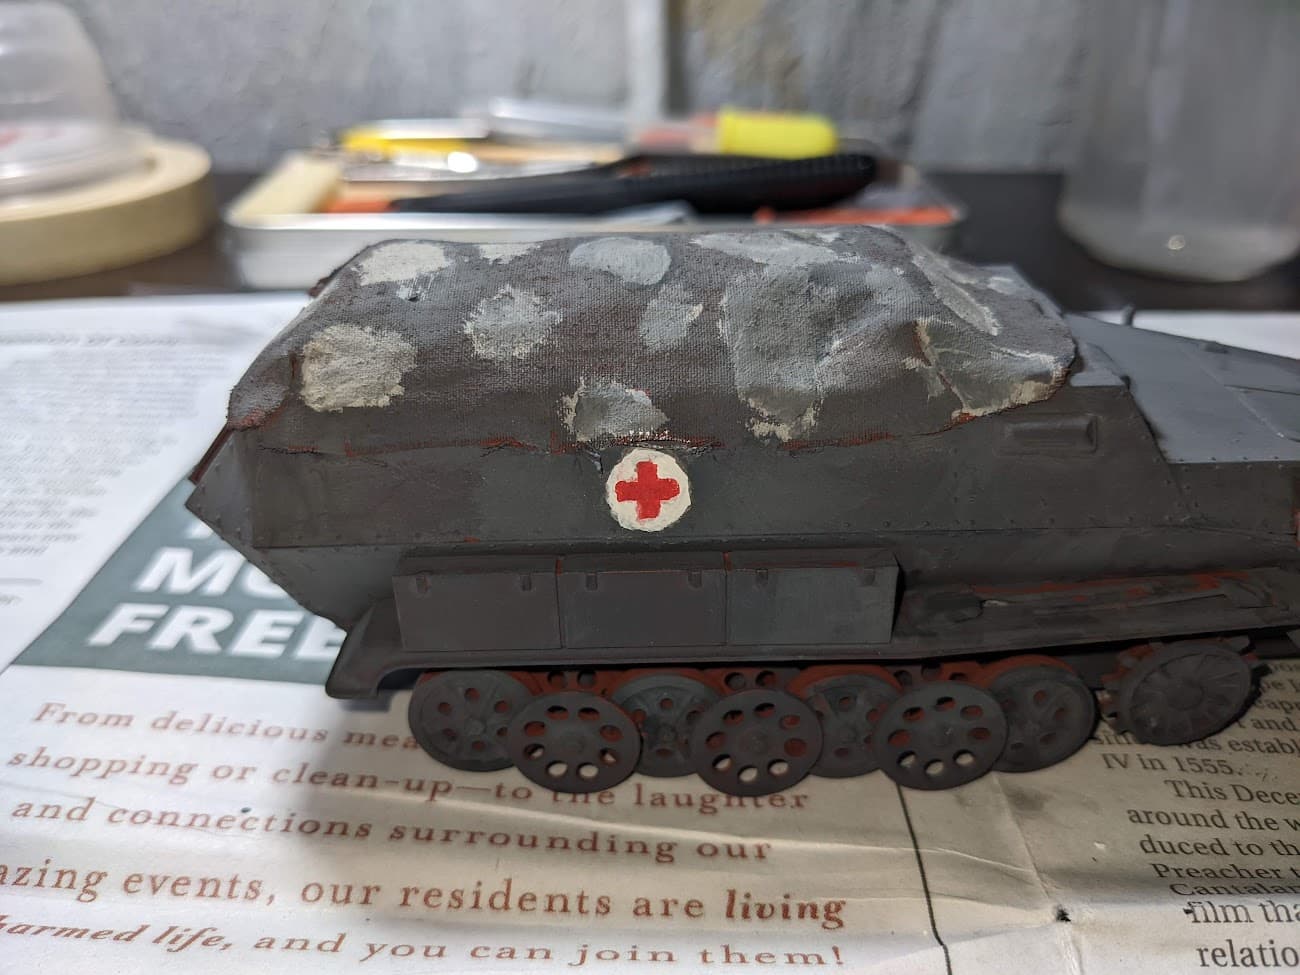
Tonight’s progress. I’ve spotted even more areas to touch up on the main paintjob. Guess I’ll do that tomorrow.
For making circle masks, invest in a cheap cutter. I expect you will find them in Walmart or similar.
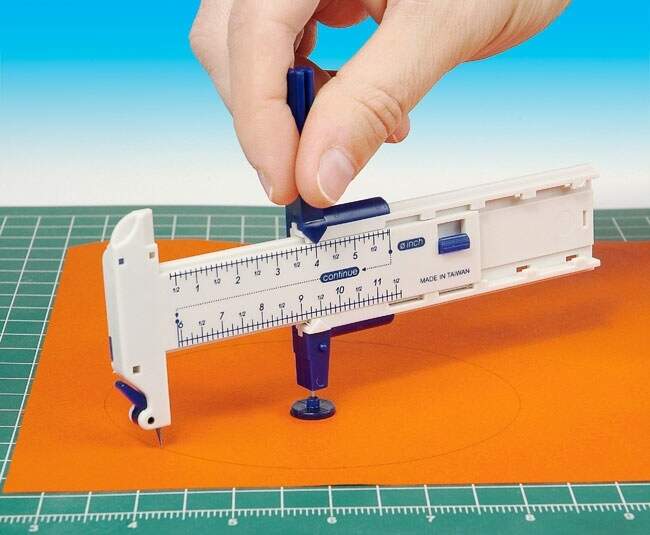
Trying to paint white inside a circle mask, then red over that just builds up paint in the recess and will bleed around the perimeter edge of the mask. I find it better to do a reverse paint job for items like this. Paint the whole area white so there is no tape for paint to pool and build an edge on. Place tape the width of the cross in place where it will be painted. Cut squares of tape to fit in the spaces under/beside the cross arms, then remove the tape cross - now you have the perfect width cross masked. Brush a little white very lightly along the tape edge where the cross will be painted, so any paint bleed is white. This will help seal the mask edge for red later. When dry, you can paint the red. When painting masked areas using a brush, never have too much paint on the brush. Just enough so you can paint starting on the mask and brushing off the mask in very light coats - almost like dry brushing. That way you limit the paint build up on the mask edge and possible bleed. Be careful not to brush off one piece of tape then onto another or you will get bleed and a hard ridge of paint.
Remove all the tape - now you have a big red cross on a patch of white. Cut a circle the size you need your red cross markings to be using the circle cutter - leave the circle for a moment and using the tape you cut the circle from, place that on the model so the cross is in the middle of the hole. Place the circle you cut inside the tape hole and now your circle mask is perfectly aligned. Remove the outer frame leaving the circle in place. Paint the edges white or red corresponding with what is poking out of the circle, then when dry, paint your grey.
It is very important that when painting masked areas using a brush, never have too much paint on the brush.
1 Like
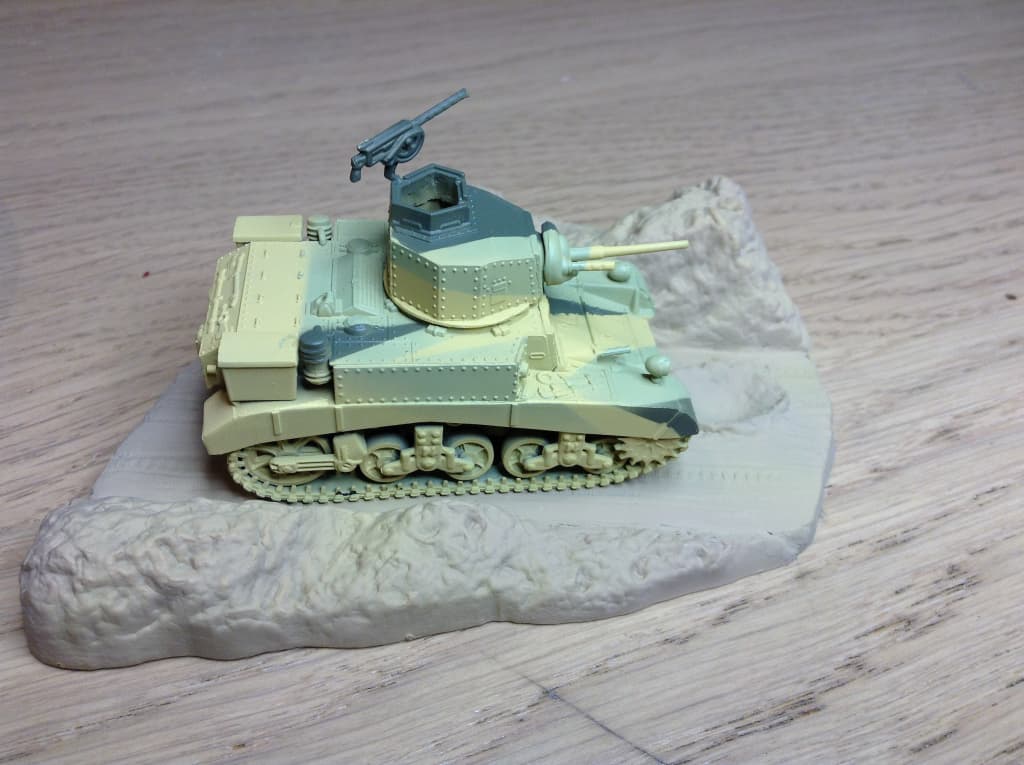
Here is my latest masked piece. 1/76 scale. The edges were first sprayed the base colour, then the correct colour to prevent edge and bleed - result very sharp lines and no bleed or touch up needed, even with the rivets being on the mask edge.
Thank you very much, sir.
1 Like
Should I clear coat the model before applying the sanding and camo, ro should I just sand around the markings? Also, do you think that the camo would be painted onto thigns like the fenders or road wheels?
Fenders would be painted with a camo scheme if they otherwise stood out from the rest of the vehicle. The road wheels may or may not get painted. Regulations were not to do the wheels anything other than solid as the belief was the spinning pattern would give them away, but a large moving patch of camo against a backdrop would seem unusual in and of itself and likely noticed before any spinning things near the ground.
Now, since you’re doing a winter white wash you’d definitely want to make sure whatever you don’t paint white gets its outline disrupted enough to–again–not stand out against the rest of it.
There is enough variation in German camo that you could select any option and it might very well have been done at some point within reason.
I’ll not address the sanding question as that was Dioramartin’s suggestion and I’ve not done that myself, but I imagine you’d sand before coating if the end game is to create a feathering effect. But whatever he suggests is what you’ll want to do.
2 Likes
Thank you. I’m gonna imitate the camo in post #38. I am still working on refining the crosses, and am still amazed at how my 2 round brush can come to a finer point than my 3/0 round brush.
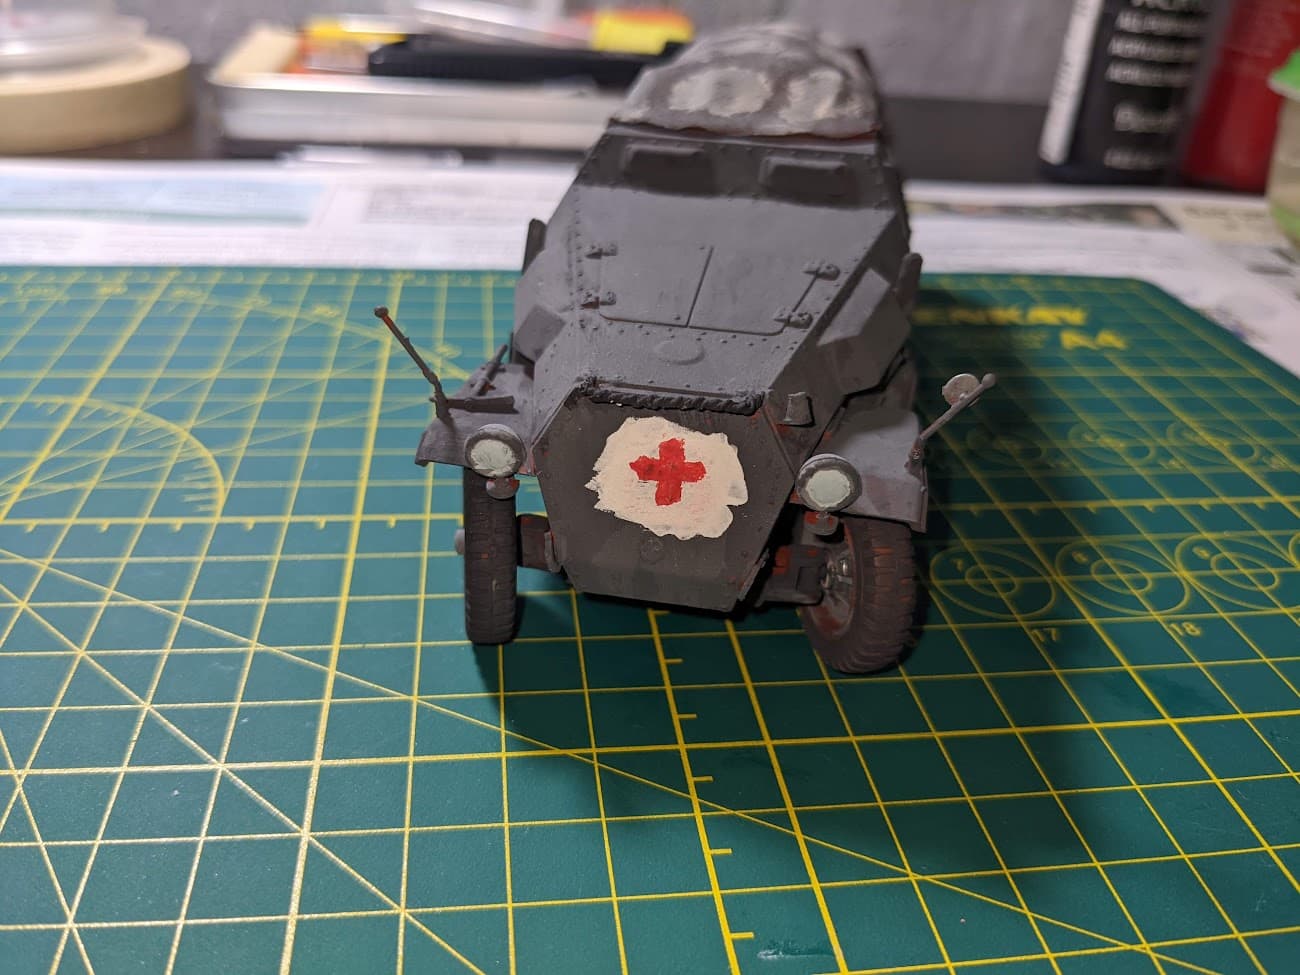
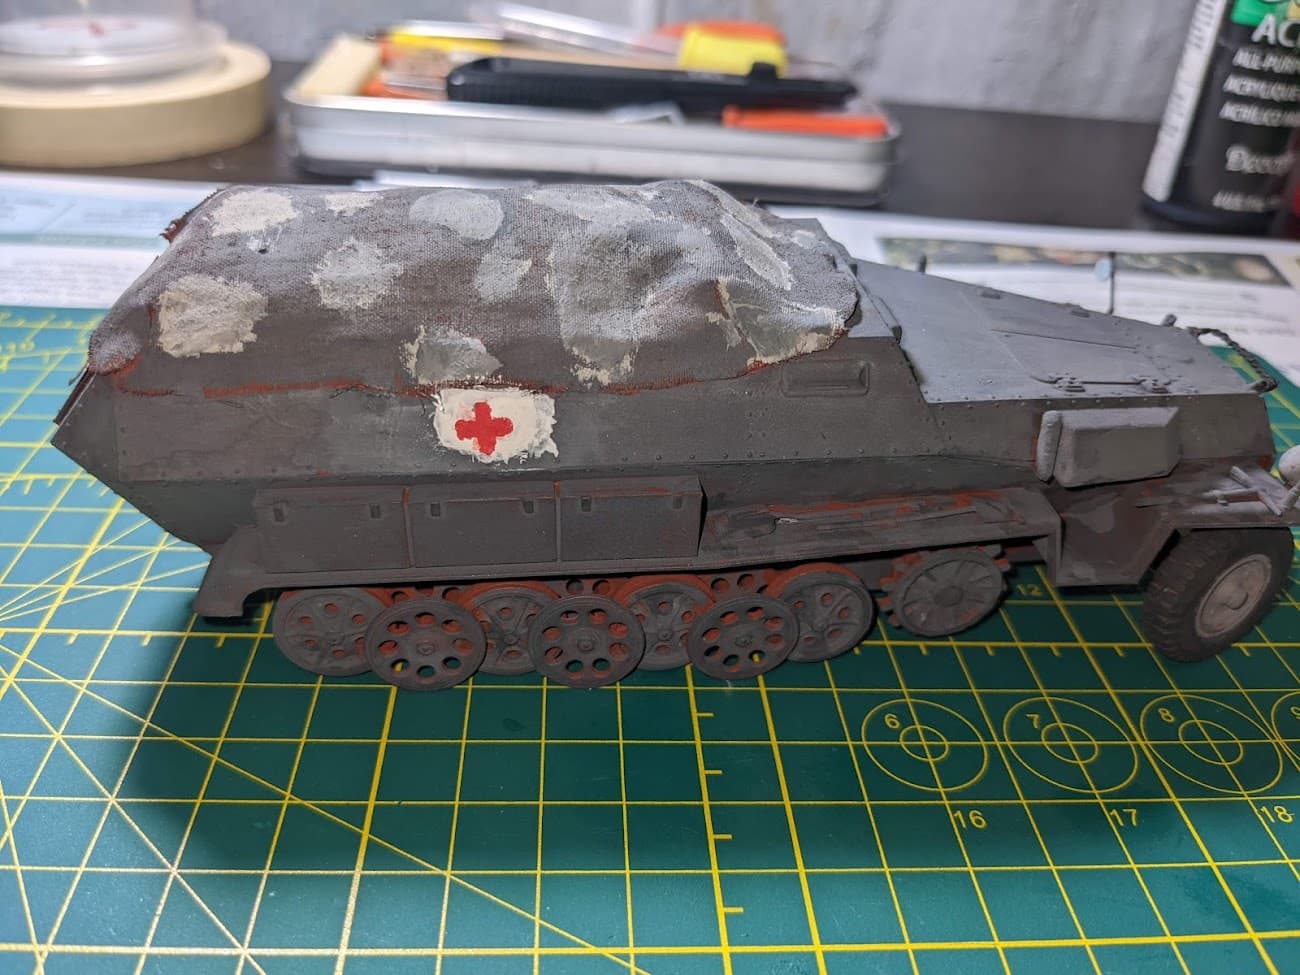
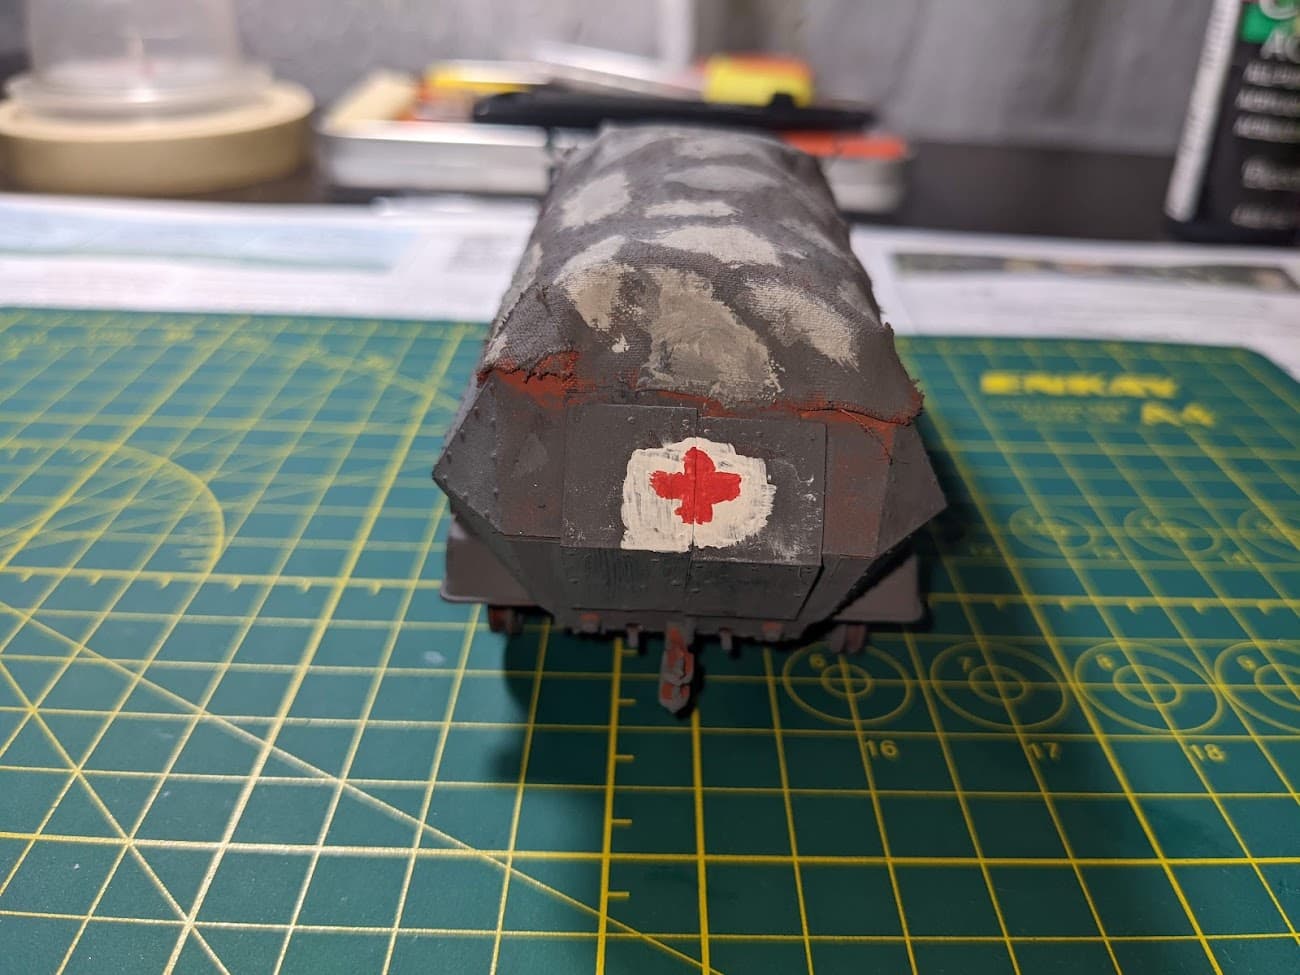
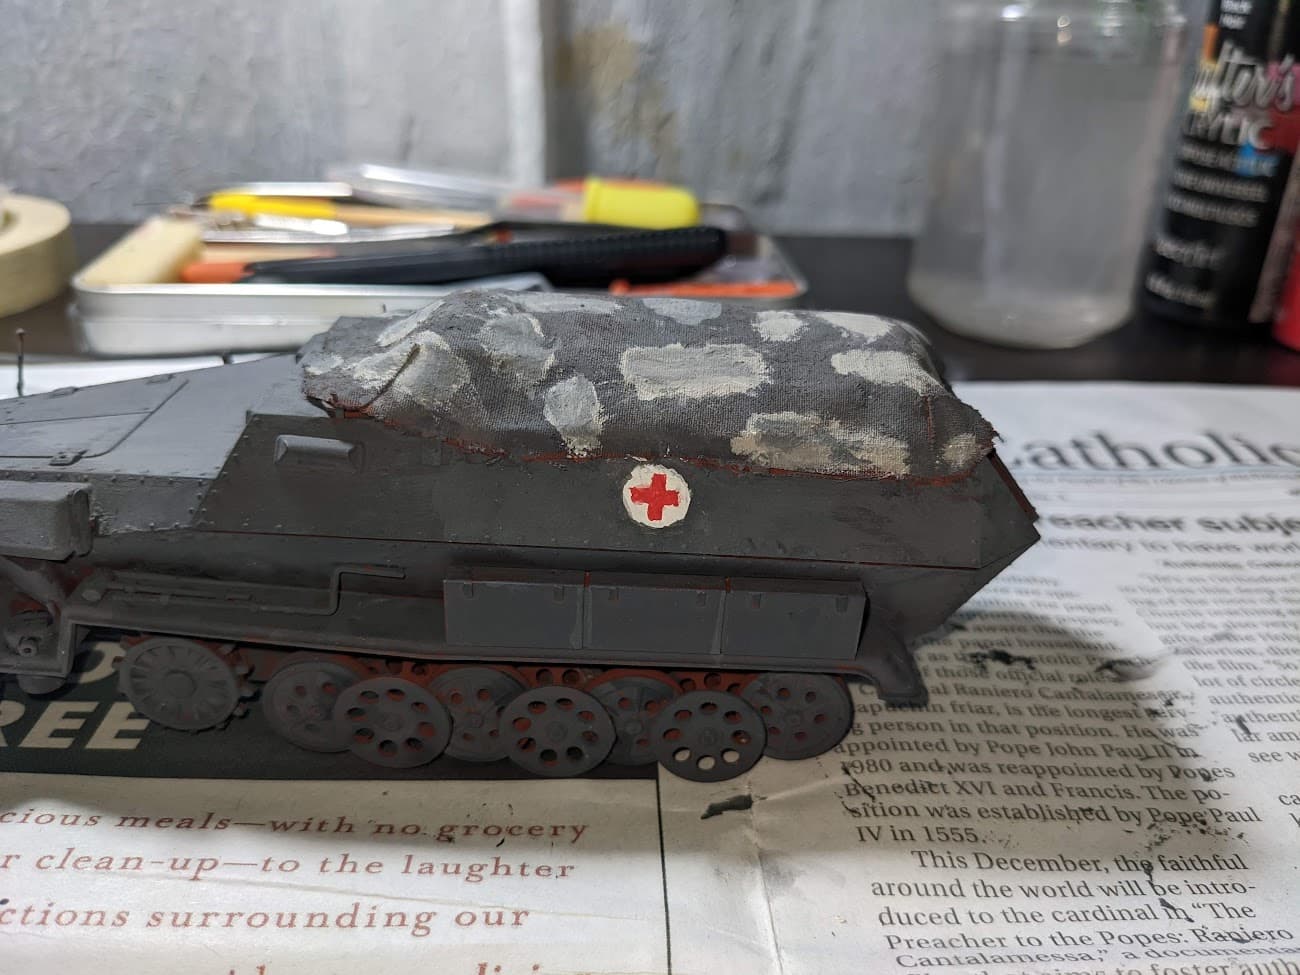
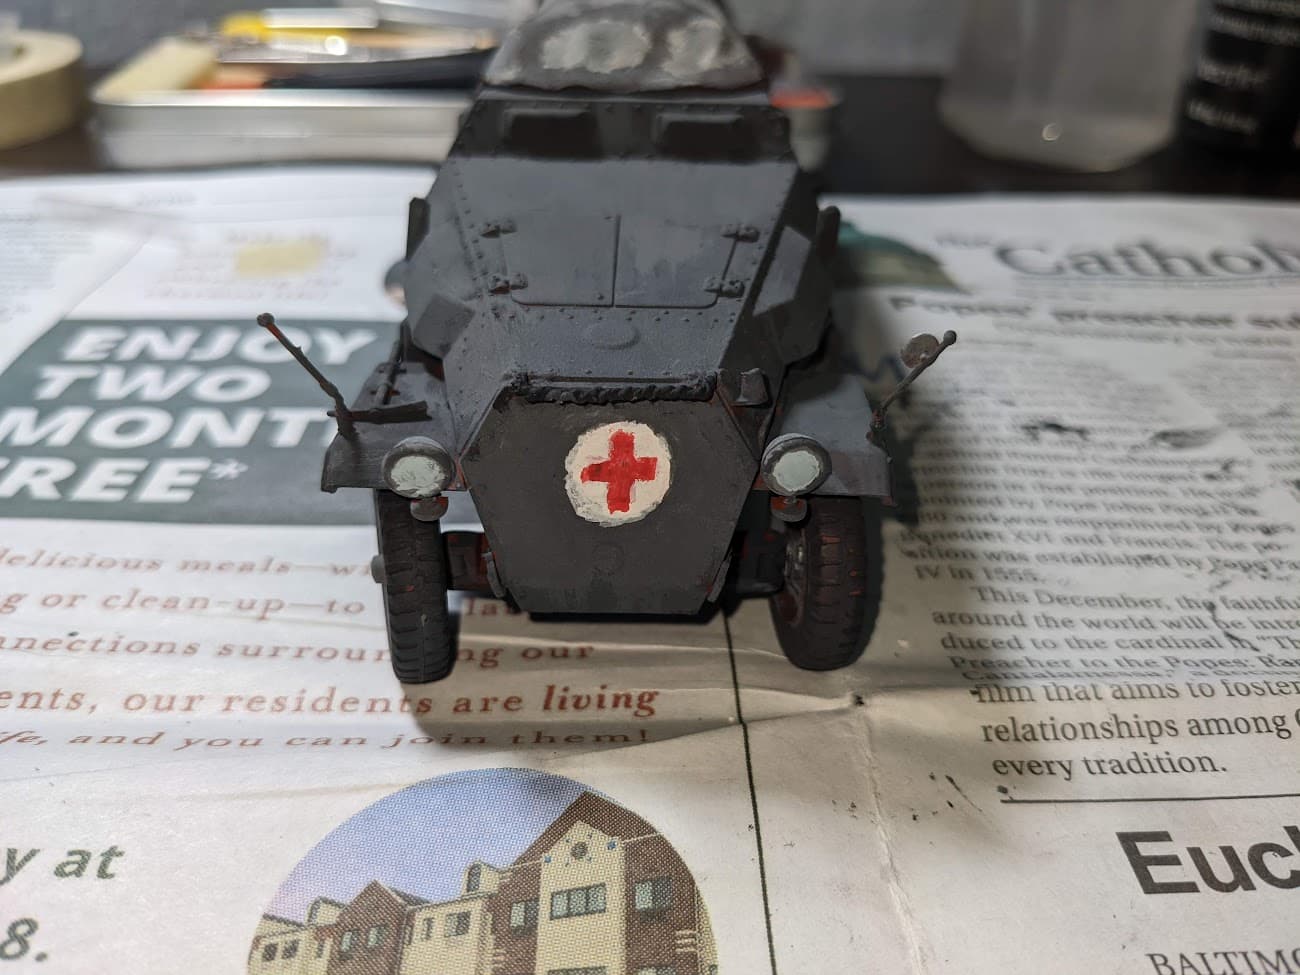
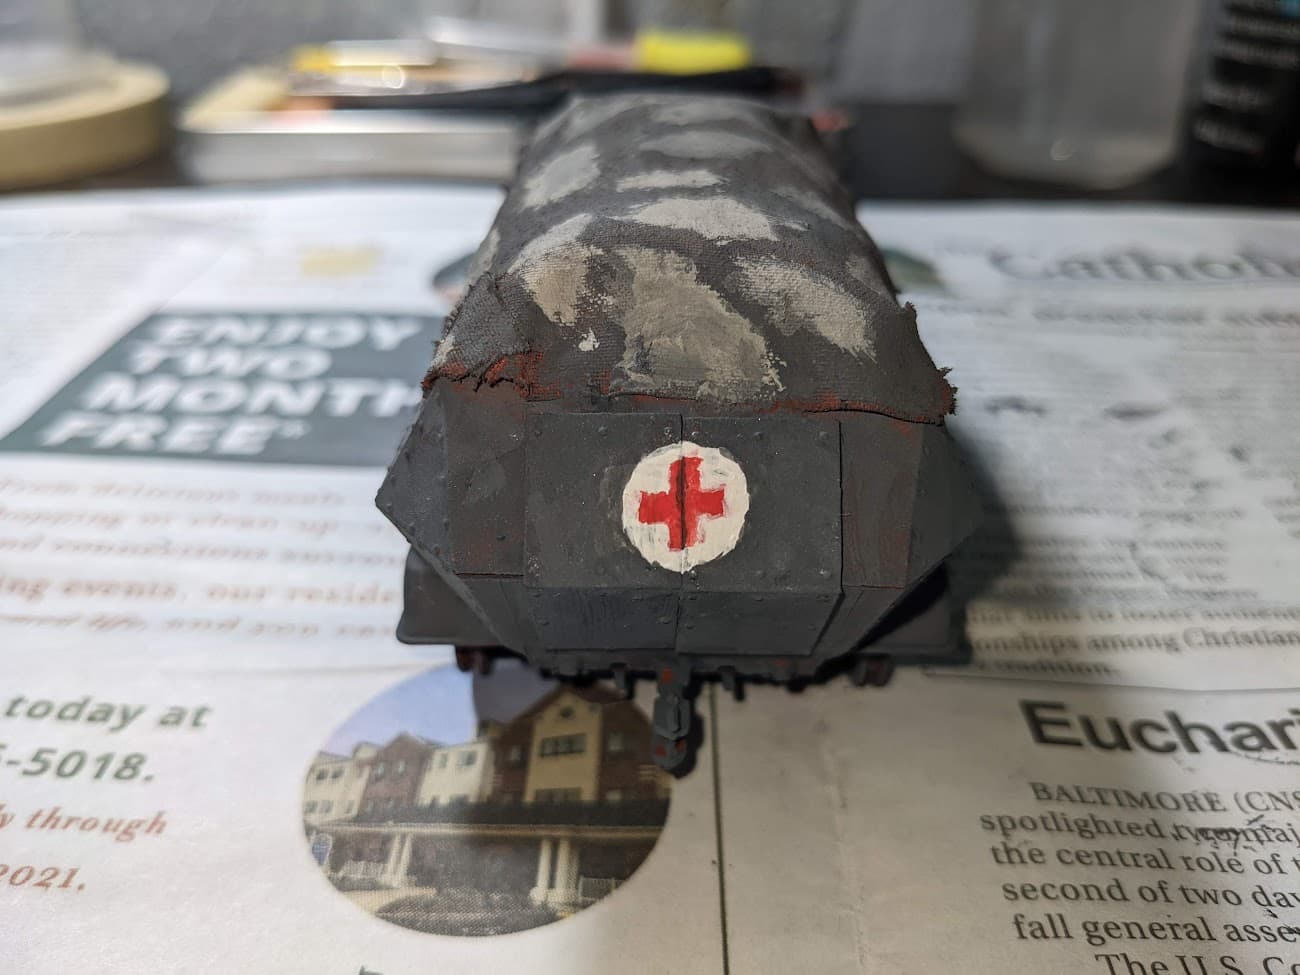
Finished the crosses tonight, might start sanding for the camo. Any suggestions for improvement so far?
I bow to my learned friends on the camo question. I’d only add that as a general rule of thumb if you can’t find the answer in period photos, imagine yourself in charge of that vehicle in the war-zone with a bucket of paint needing to minimise its visibility…from ground level and from the air. How would you do it? Personally I wouldn’t bother with the wheels because unless all the mud & grime was removed you’d be painting on top of it, to little purpose because it would only get covered again with more mud. Even so, I’m sure some did throw what was left in the bucket at the undercarriage. Your choice.
Good question re sanding. I’ve just realised that you’ve got all those rivets on the panels (whereas my Stummel didn’t) so you’ll have to go real easy and try to avoid touching them. Tricky indeed, I’d probably use an 800-grade sandpaper with the gentlest possible pressure. I think if you don’t also sand the markings they’ll contrast even more than they already do.
Hard to answer the other question because I’ve never used or needed clear-coat, believe it or not. If it’s applied post-sanding I’d imagine it would settle in the micro-scratches and nullify the whole point of the exercise, which is to help the bleed/feathering effect. So probably clear-coat, then sand, then camo but ideally I’d want to experiment on something that doesn’t matter because it’s beyond my own experience. ![]()
![]()
I think I’ll attach some of the decals given, clear coat, then apply the camo. (Or clear coat also before to make the decals easier) This is because the logic goes that it was a Dunkelgrau vehicle with the markings on it, then winter came, and the crew whitewashed it.
1 Like
Now, onto markings – specifically liscense plates. I read somewhere here, likely on Nightgaunt’s Sdkfz. 223, that the german license plates were enumerated in numerical order, so bigger numbers are later in the war. Out of the three options available, which would be more plausible during winter on the Eastern Front?
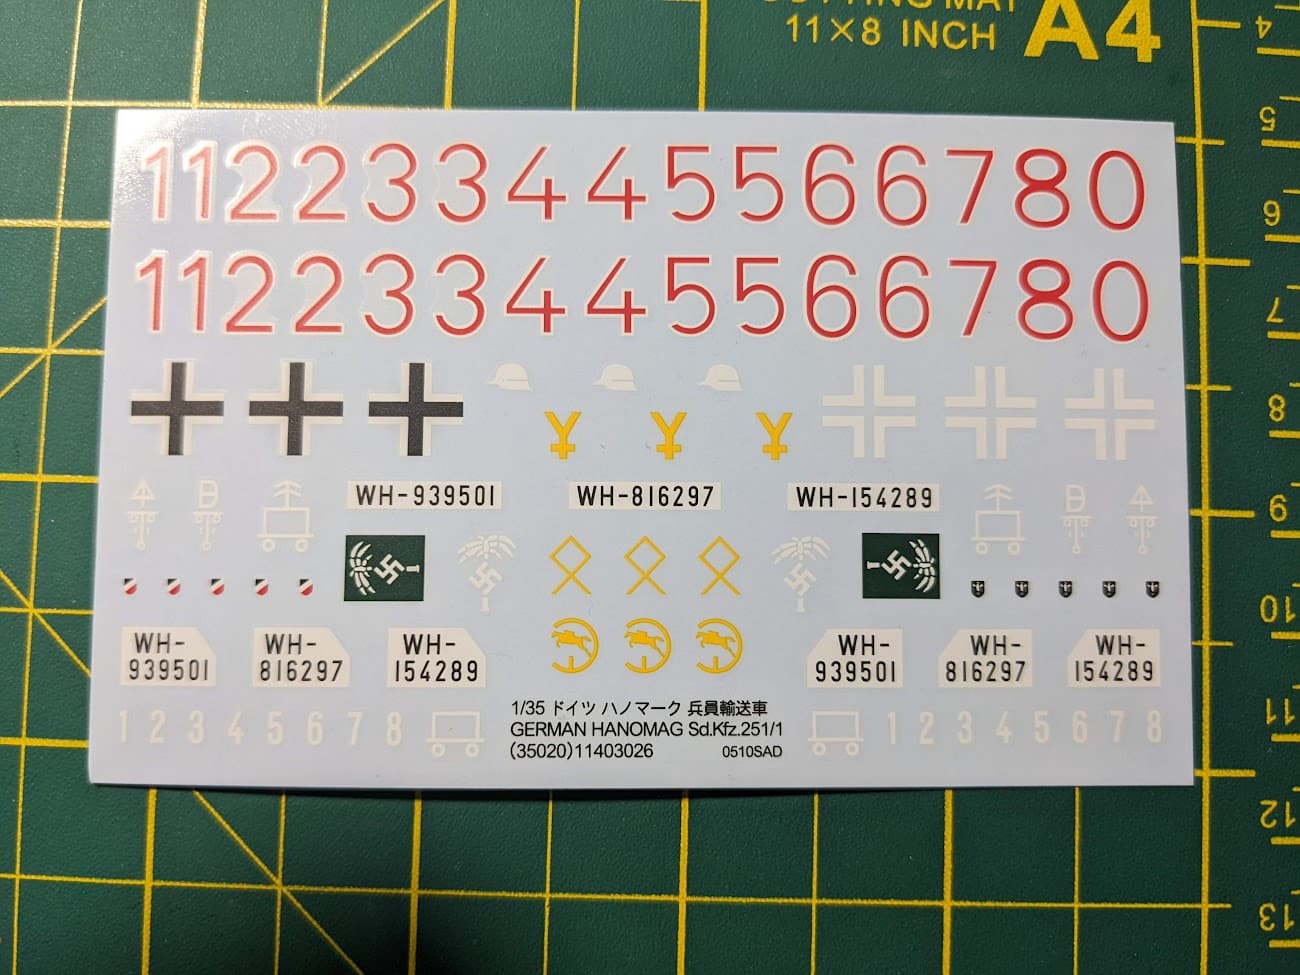
Looking at the instructions, it suggests the lowest number plate for a 1942 Eastern Front vehicle.
I’d go with the 816297 number if you are going to add them.
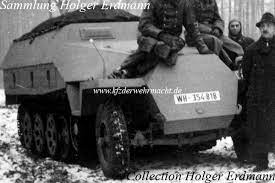
Here is an Ausf B with a 600k series, so 154289 is way too low:
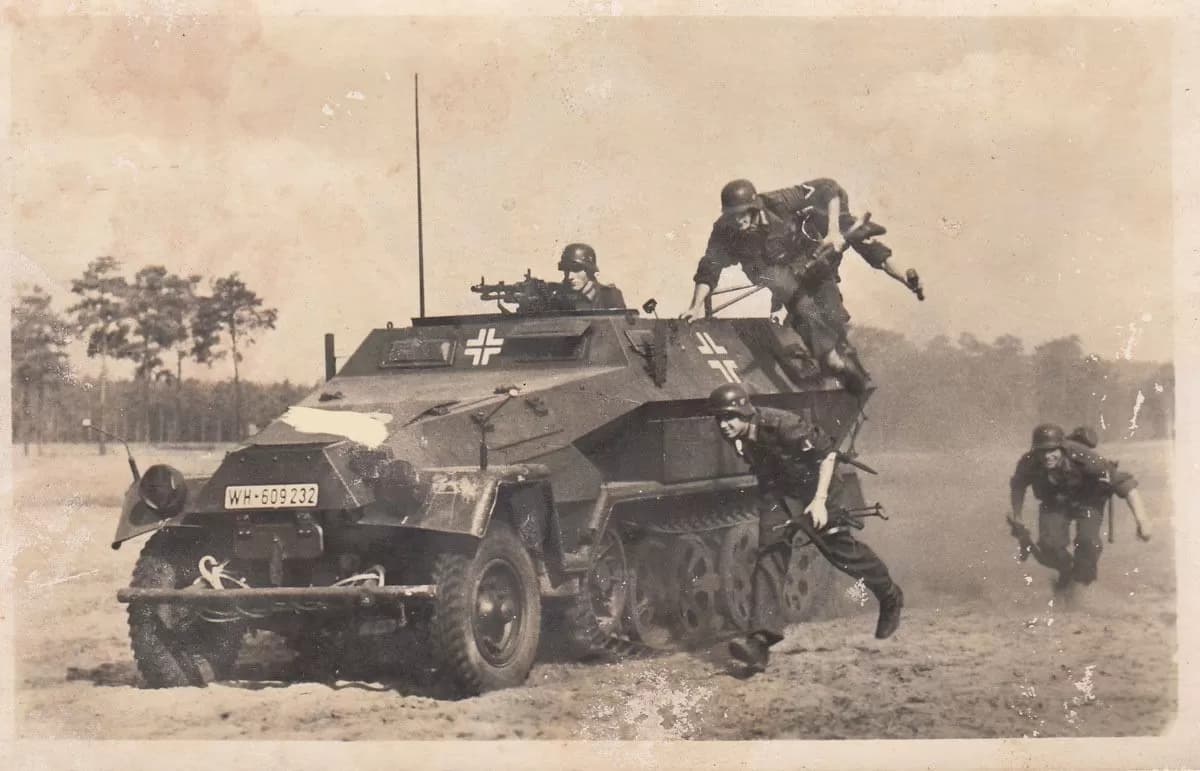
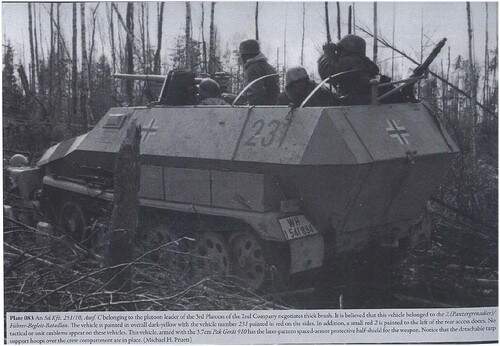
An Ausf C with a 600k series:
If the 154 had another digit, it would be usable for an Ausf C painted Gelb:
![]()
and another ith a 1.2m number, probably gelb:

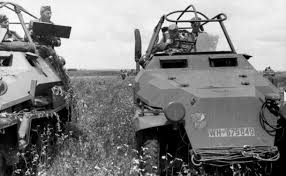
But then, there are anomolies - and Ausf D with a 300k number:
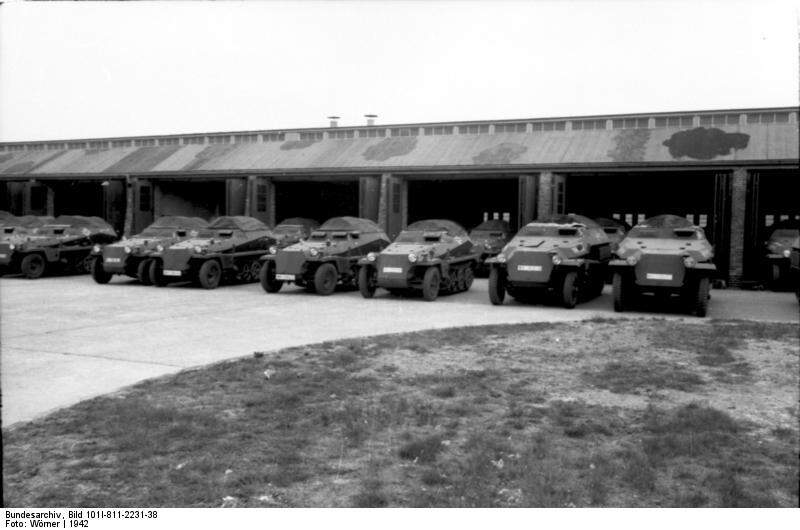
A lot of time they were not added to the front. In fact, from the factory, the location varied vehicle to vehicle. Here are Bundes archive photos of 250 and 251 vehicles lined up outside a factory in 1942 - not the rightmost vehicles and the marking placement!

1 Like
Alright, thanks. I’ll take off the front plate witht he 100k series and throw that away, then tape the other two to the back of the sheet and use the 800k ones.
1 Like
I frequently find myself chopping number plates on German vehicles. Since I tend to model SS vehicles, the first job is usually to paint out the WH or WL letters and add SS runes. Then I usually find myself removing the last or first number. If you can obtain a set of Dragon transfers for Sdkfz251s, they provide blank plates and separate numbers so you can make your own up. It’s a fag, but an option. I’ve got several spare, but since you are in the US the cost of posting sort of discounts me supplying them, but there may be someone nearer to you who can oblige. If you use the ones in the kit, the 900 one would also work. I don’t know quite when they reached seven figures, but for the Wehrmacht I think it’s late 1942. The SS had reached seven figures by the war end.
1 Like
That Ausf D plate is interesting. I wonder if someone was tasked with collating all the records of destroyed vehicles and reissuing the numbers? You never know with the Third Reich. Records were kept of which chassis number went to which unit so why not? Or maybe they reissued the numbers from units destroyed at Stalingrad for historical or “tradition” reasons. We’ll never know.
2 Likes
Could be. I’d say that the plate may have been some sort of “good luck charm” to the crew, so they decided to keep it once they had to change vehicles/get an upgrade. Their original vehicle would have either broken down too much to repair, or something like that, but they kept the plates or something.
I appreciate the offering, but will decline it, because I am not such a rivet counter that I will make a 100% accurate plate (even though I modified the vehicle based on a single piece featured in the driver’s compartment). Also, I do not want to venture into double-layered decals quite yet. Thank you, though. I’ll keep that set in mind if I am going to recreate a real vehicle one day.
1 Like
Rather than decal on decal, you can always paint the base plate white area and add the decal numbers on that.
1 Like