The intricate level of detailing that HG @HGBARNES is putting into this is still making my head hurt. Boeing Inc should be asking for this as a display piece in their head office foyer. I also really like the back and forth between the 2 of you as to getting the details just right … very good partnership ![]()
5 Likes
Thank you!
More Landing Gear Construction
For this one, I’m going to let HG do most of the talking.
Here are the tow hooks installed. * * * The light is really really bright so the parts look blown out. * * * Going to let these parts dry for the day since they’re enamel paint. I need them nice and hard for all the handling which is soon to come. The rubber hoses will be added after the installation.
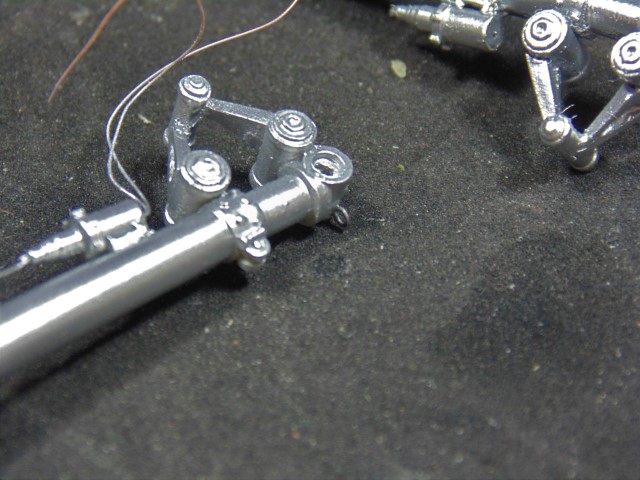
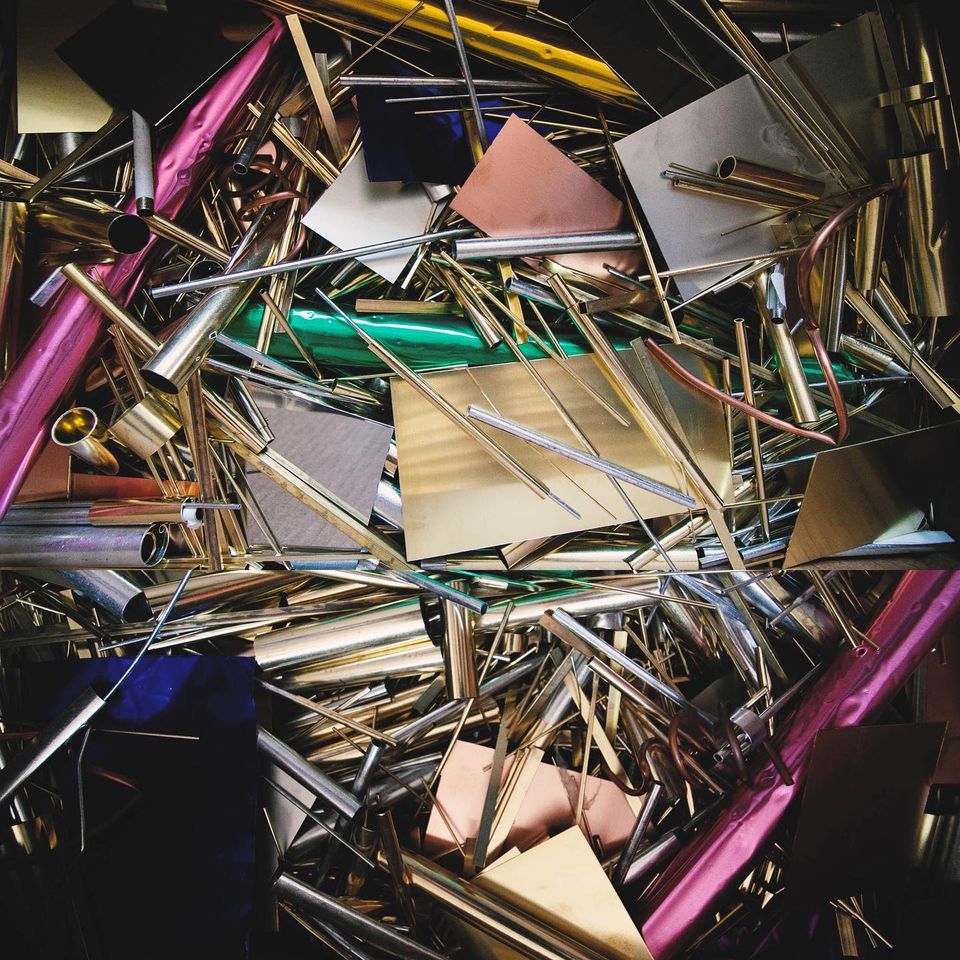
And the other landing gear parts also make an appearance.
Lots of parts here, few of which had to be remade several times. The longer shafts slip into the tubes on the left. They are not cut to length, that will be part of the install.
The tubes need to have strips on each side along with a square cap at the top. They have to cut to size first then have these additions then primed and painted and permanently installed.
I really like the weathering on the closest wheel! And here’s a close-up of “those tubes on the left.”
HG closes with
More when completed.
And so will I, except to say I have a feeling of disbelief that this is truly in the final stages of construction. We actually talked about some shipping details the other day.
One more thing. The custom nose art decals arrived and the Lady is dimensionally correct – shorter in length than the KitsWorld one. They came without a cover film but that’s no big deal. HG knows what to do.
It will be great seeing the Lady on the nose, but all in good time. Let’s see this Bird standing on its legs first.
11 Likes
Landing Gear

It’s time to give this bird some legs.
OK, H.G., show us what you got.
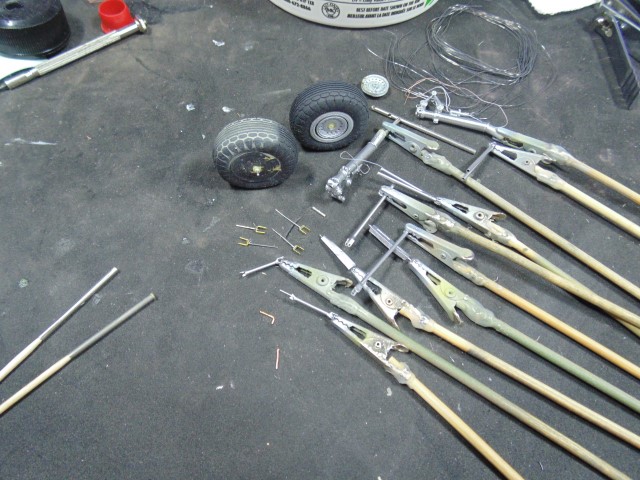
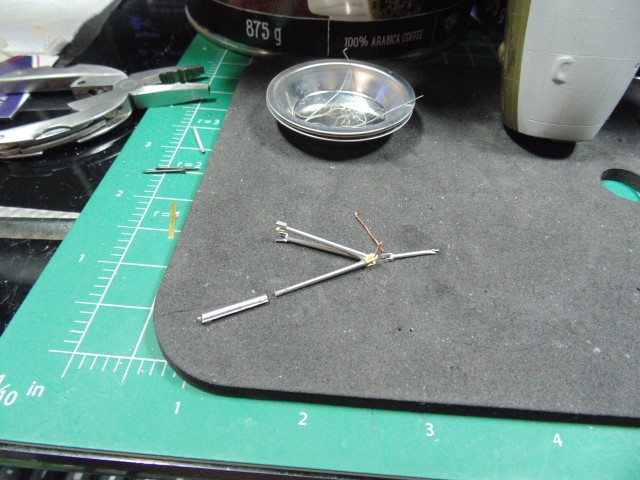
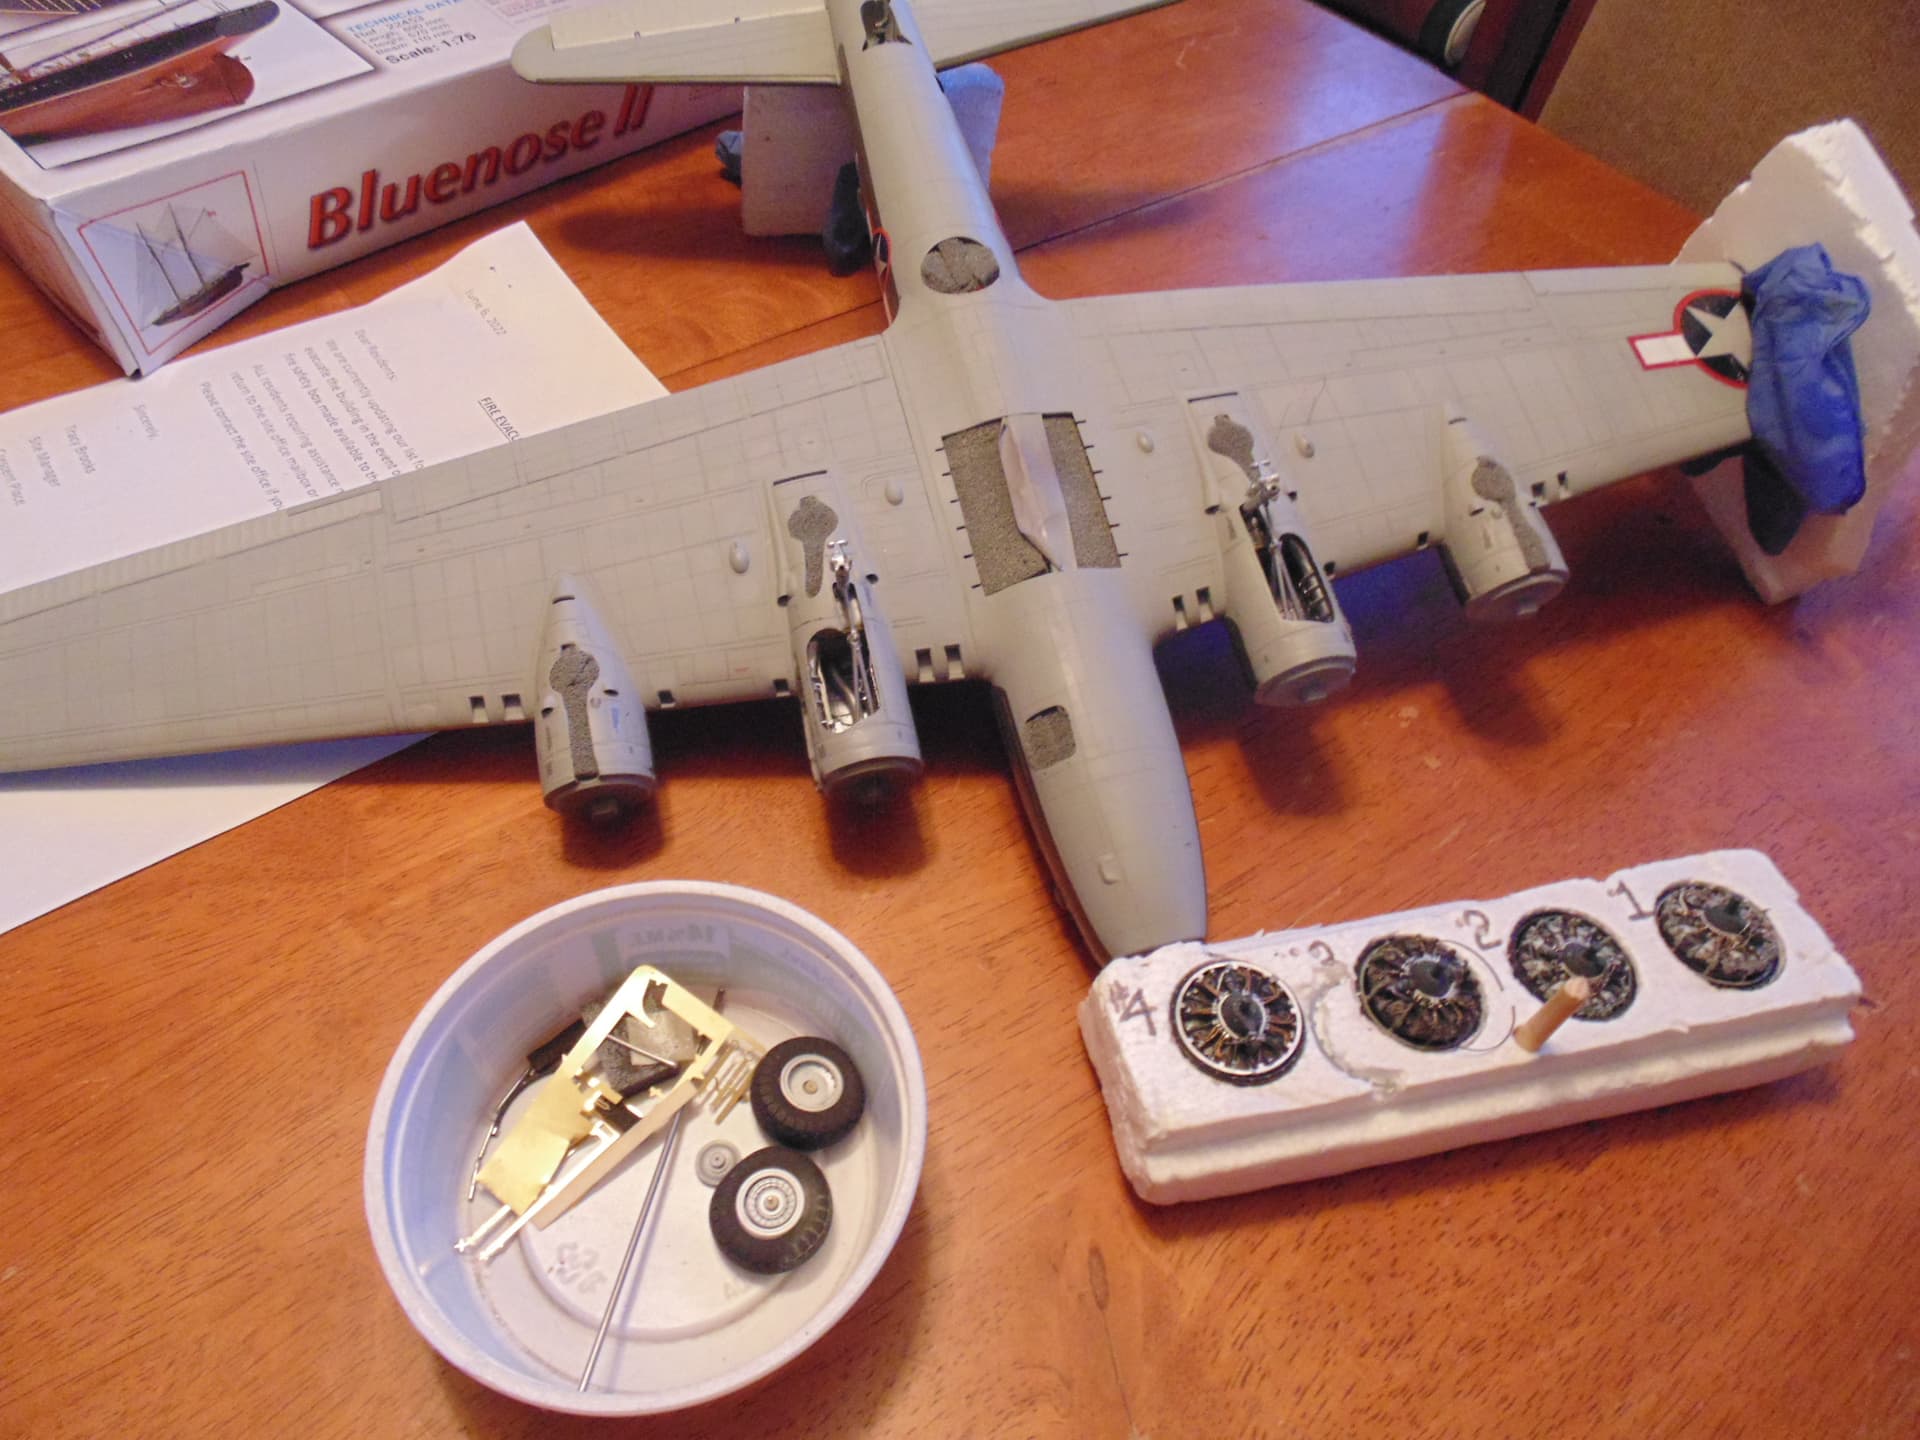
In the first picture are the parts laid out. There are 31 parts per side including the wheels, rims, pins, knuckles, struts, shafts, rods and lines. The upper retraction housing has to go on yet, but it needs the pinch welding replicated with 0.2mm led wire.
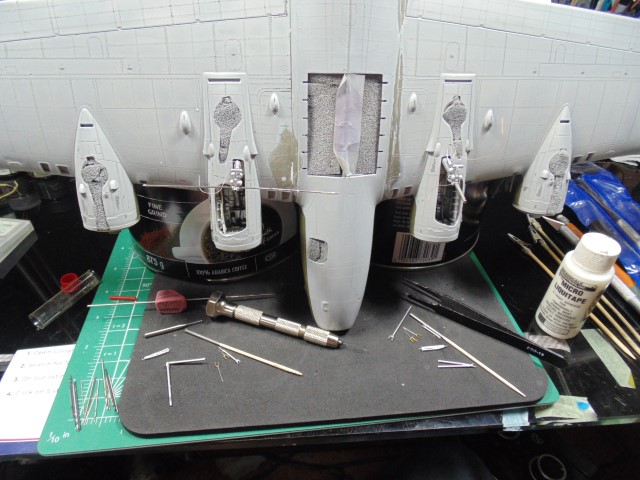
The second picture has everything trimmed and in final test fit. Naturally everything will be cleaned up, painted and epoxied in place. Looks pretty good, if you don’t mind me saying so.
I don’t mind. Somehow, I think of this as one of the best pictures of the whole build.
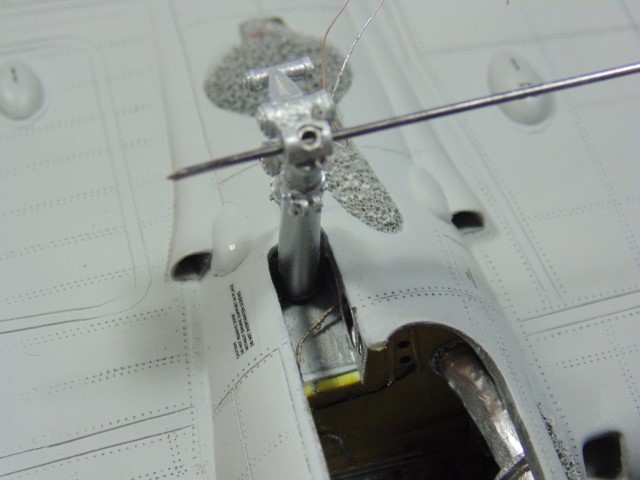
A few hours later H.G. writes me:
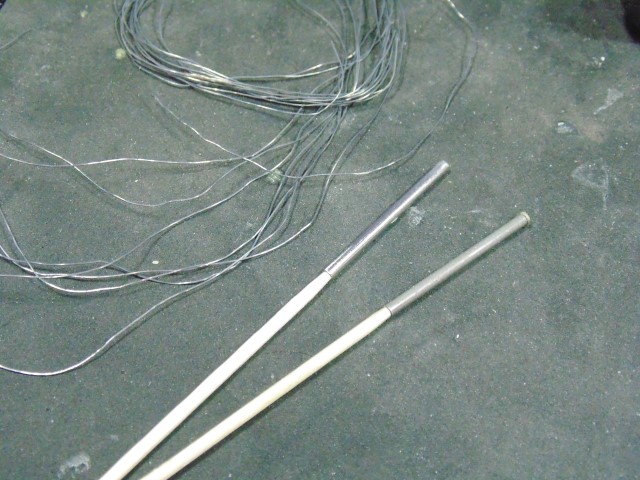
The upper retraction housing has to go on yet, but it needs the pinch welding replicated with 0.2mm led wire.
A picture is worth a thousand words.
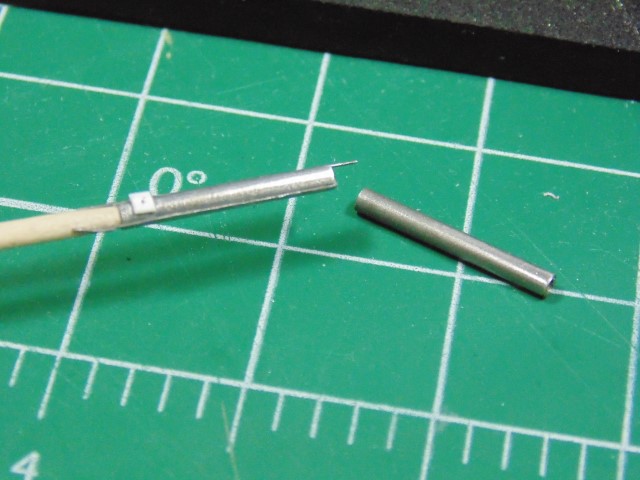
He adds:
The other tube [the one on the right] is the “before” version.
And still later in the day H.G. writes:
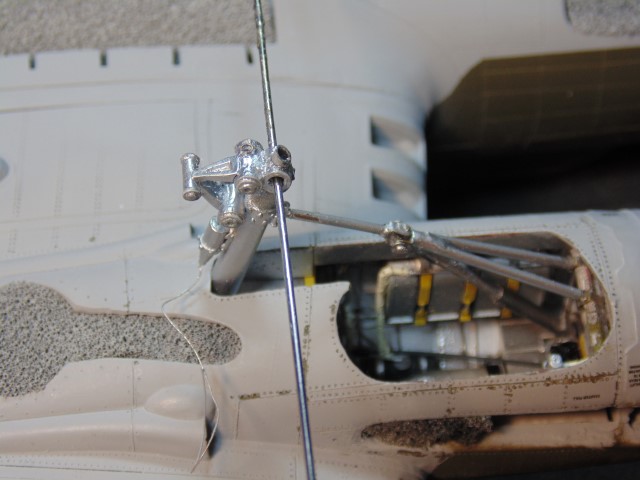
With the upper shafts done I now need to get the distance correct. Working from the actual drawings you sent, and what I built, found that the length of the inner bars were too long. They needed to be shortened, yet move enough for testfitting. That’s been done now.
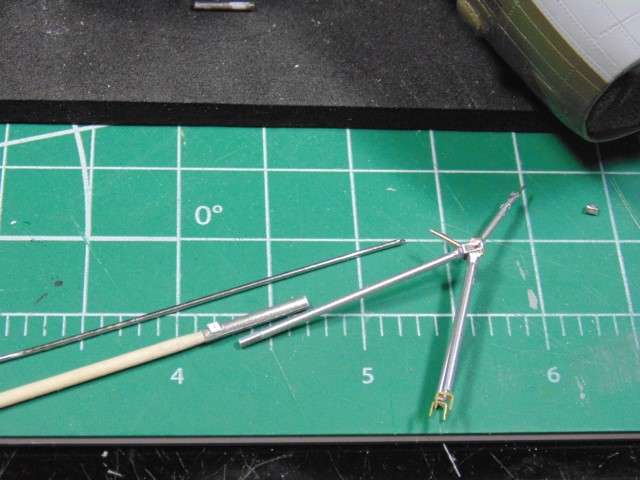
H.G. comments:
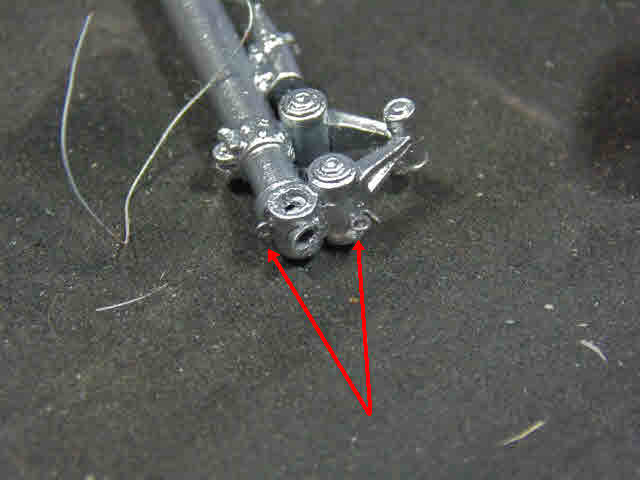
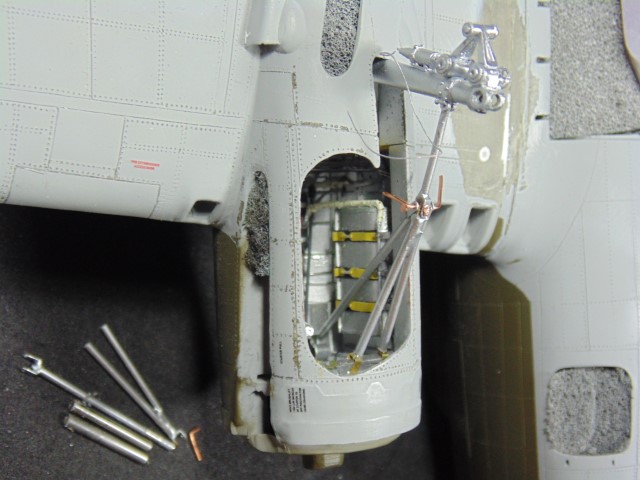
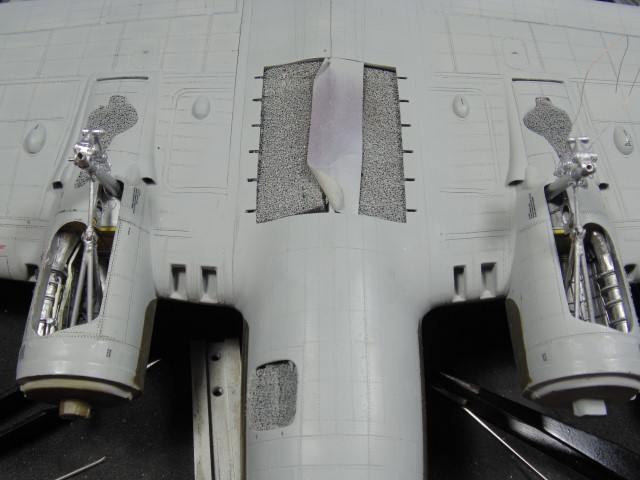
I’m marking off the angle as to where to drill the hole for the metal rod to support the retraction gear rod assembly, no it isn’t perfect.
I fail to see the imperfection and, TBH, to follow all of this. But the blue circle in the below picture with the arrow
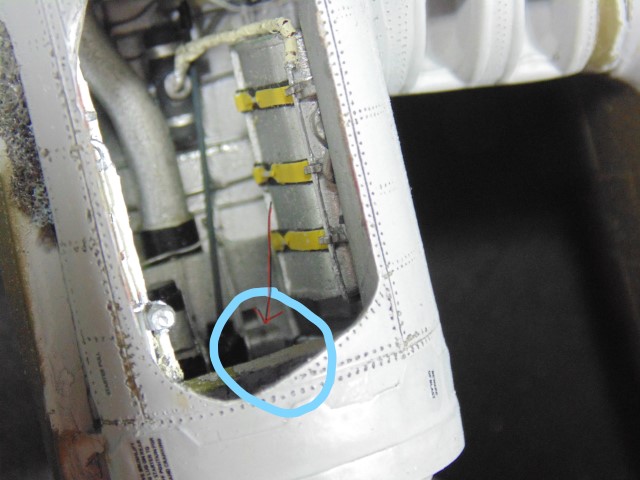
surely marks the spot where the end of the retraction gear rod assembly will be fixed. (See the second picture in this post.)
I am reminded of a scene from the fabulous film adaption – Master and Commander: The Far Side of the World – of two novels from the late Patrick O’Brien’s Aubery & Maturin series: “My God, that’s seamanship!”
10 Likes
a model within a model within a model ![]()
3 Likes
Landing Gear: Almost ready for a three-point landing?

More back-and-forth between H.G. and me as he explains the time-consuming process of measuring, truing up, and installing the scratch-built main landing gear.

Here’s the numbers for the rods;
Upper rod 1.82mm
retraction shaft, 1.24mm
“V” rods, 1.27mm
strut connecting rod, 1.05mm
inner strut support, 1.84mm
Somehow, I don’t think my usual “seaman’s eye” approach to such a task would, ah, measure up.
H.G. comments:
The left side took some time (6 hours minimum) due to extreme tolerances of microns in distance to play with in test fitting which led to having to remake parts. It is not going anywhere without excessive force. It still needs paint touch-ups.
I’ll bet but I truly can’t imagine. Six hours! As for the right side:
Right side has the strut epoxied and a new retraction shaft built. I grinded a railway tie nail to use as a connector to the knuckle. Doing the test fitting on it now.
Well, that explains the nails we see on the cutting mat photos above.
He adds:
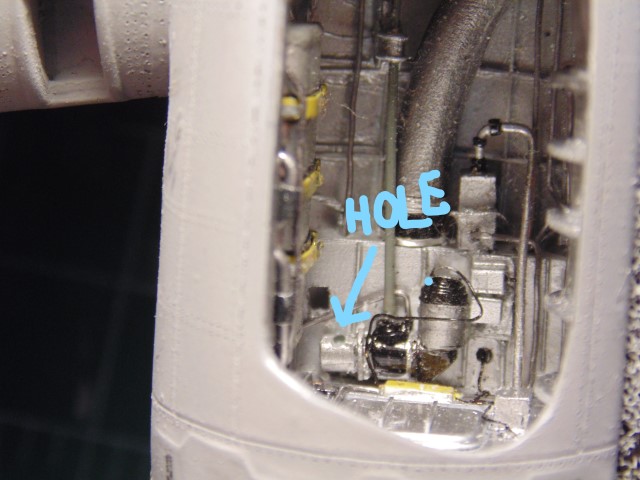
Also, that long pin going through the wheel hub area is to prevent the metal support rod in the strut from moving out of alignment with the pin in the connecting shaft.
Finally, here’s a picture of the right wheel well with the hole circled where the two-piece retraction shaft
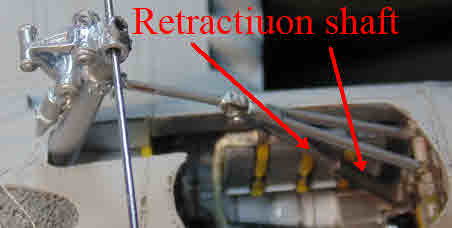
will mate to the actuator and electric motor.
Finally, I of all people receive a compliment as a justification for all H.G.'s hard work.
All this extra work and support is because you said it was going to taken to shows and wind up at the museum.
I’ll weather these words by paraphrasing the last words I quoted at the end of my last post:
My God, that’s friendship!
The words also cement my decision (pun intended) to donate the Lady after I’m gone to what’s now called “The National Museum of the United States Air Force” in Dayton, Ohio. I visited the place once with my father on a road trip we took, and later I visited it with my own kids and another “old man” who had become a close friend until he passed away about twenty years ago.
The man was one Merlin Doyne Miller, late of the tiny, South Indiana town of Dugger where I also passed some time with him.

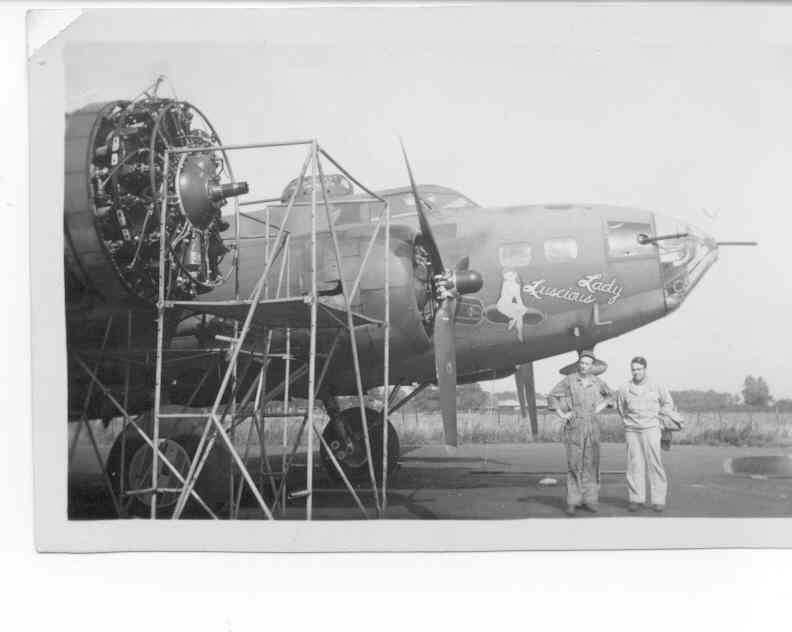
Why? Well, he was the tail gunner of Luscious Lady
and a major contributor to Half A Wing.

He was also a helluva good shot, having been clearly credited with shooting down a BF-109 making a tail attack on the Lady during Second Schweinfurt, among other gunnery successes.
It was one just like this, a G-6 with a 20 mm cannon under each wing, coincidently also lost on “Black Thursday,” though not the same one I am quite sure.

Messerschmitt Bf 109G6R6 9.JG3 Yellow 6 Alfred Surau WNr 18807 Bad Worishofen Bavaria Germany Sep 1943

In any event, Merlin and I were invited by the Museum to give a talk titled “Eighth Air Force History: Writing it and Living It.” A good time was had by all. Afterward, the Museum Director game Merlin and me a memento that I think I’ll add to the donation:
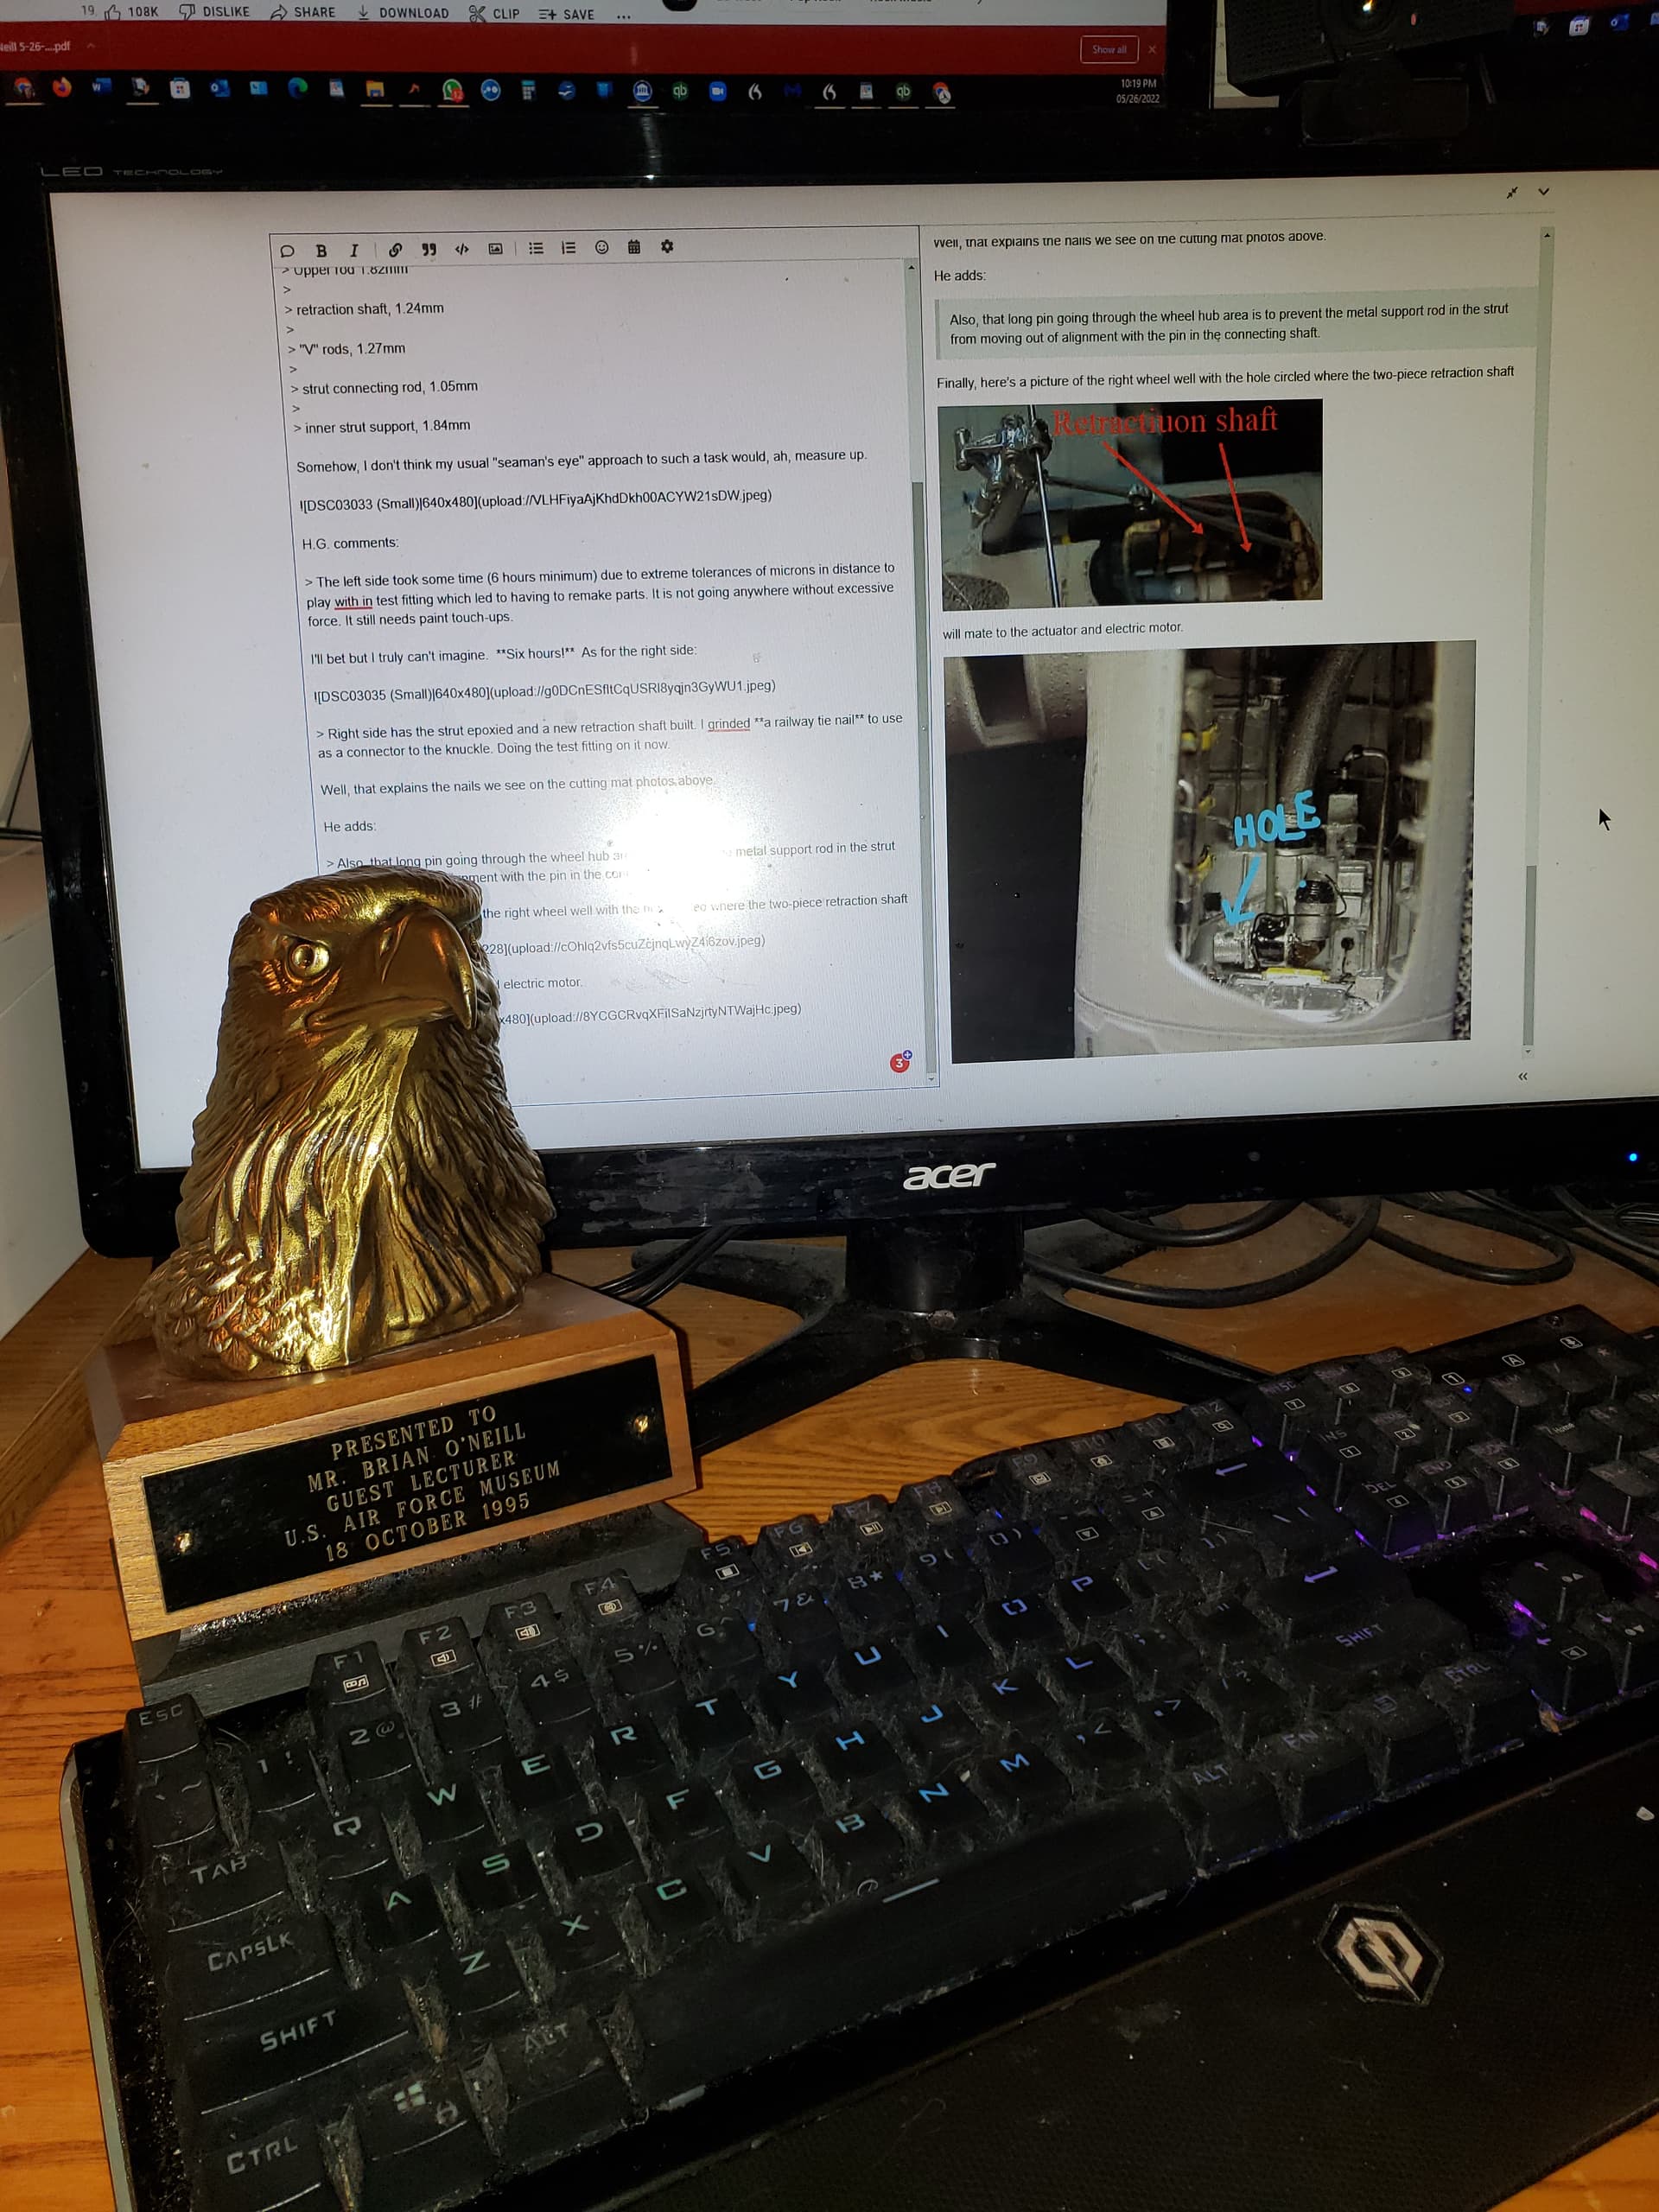
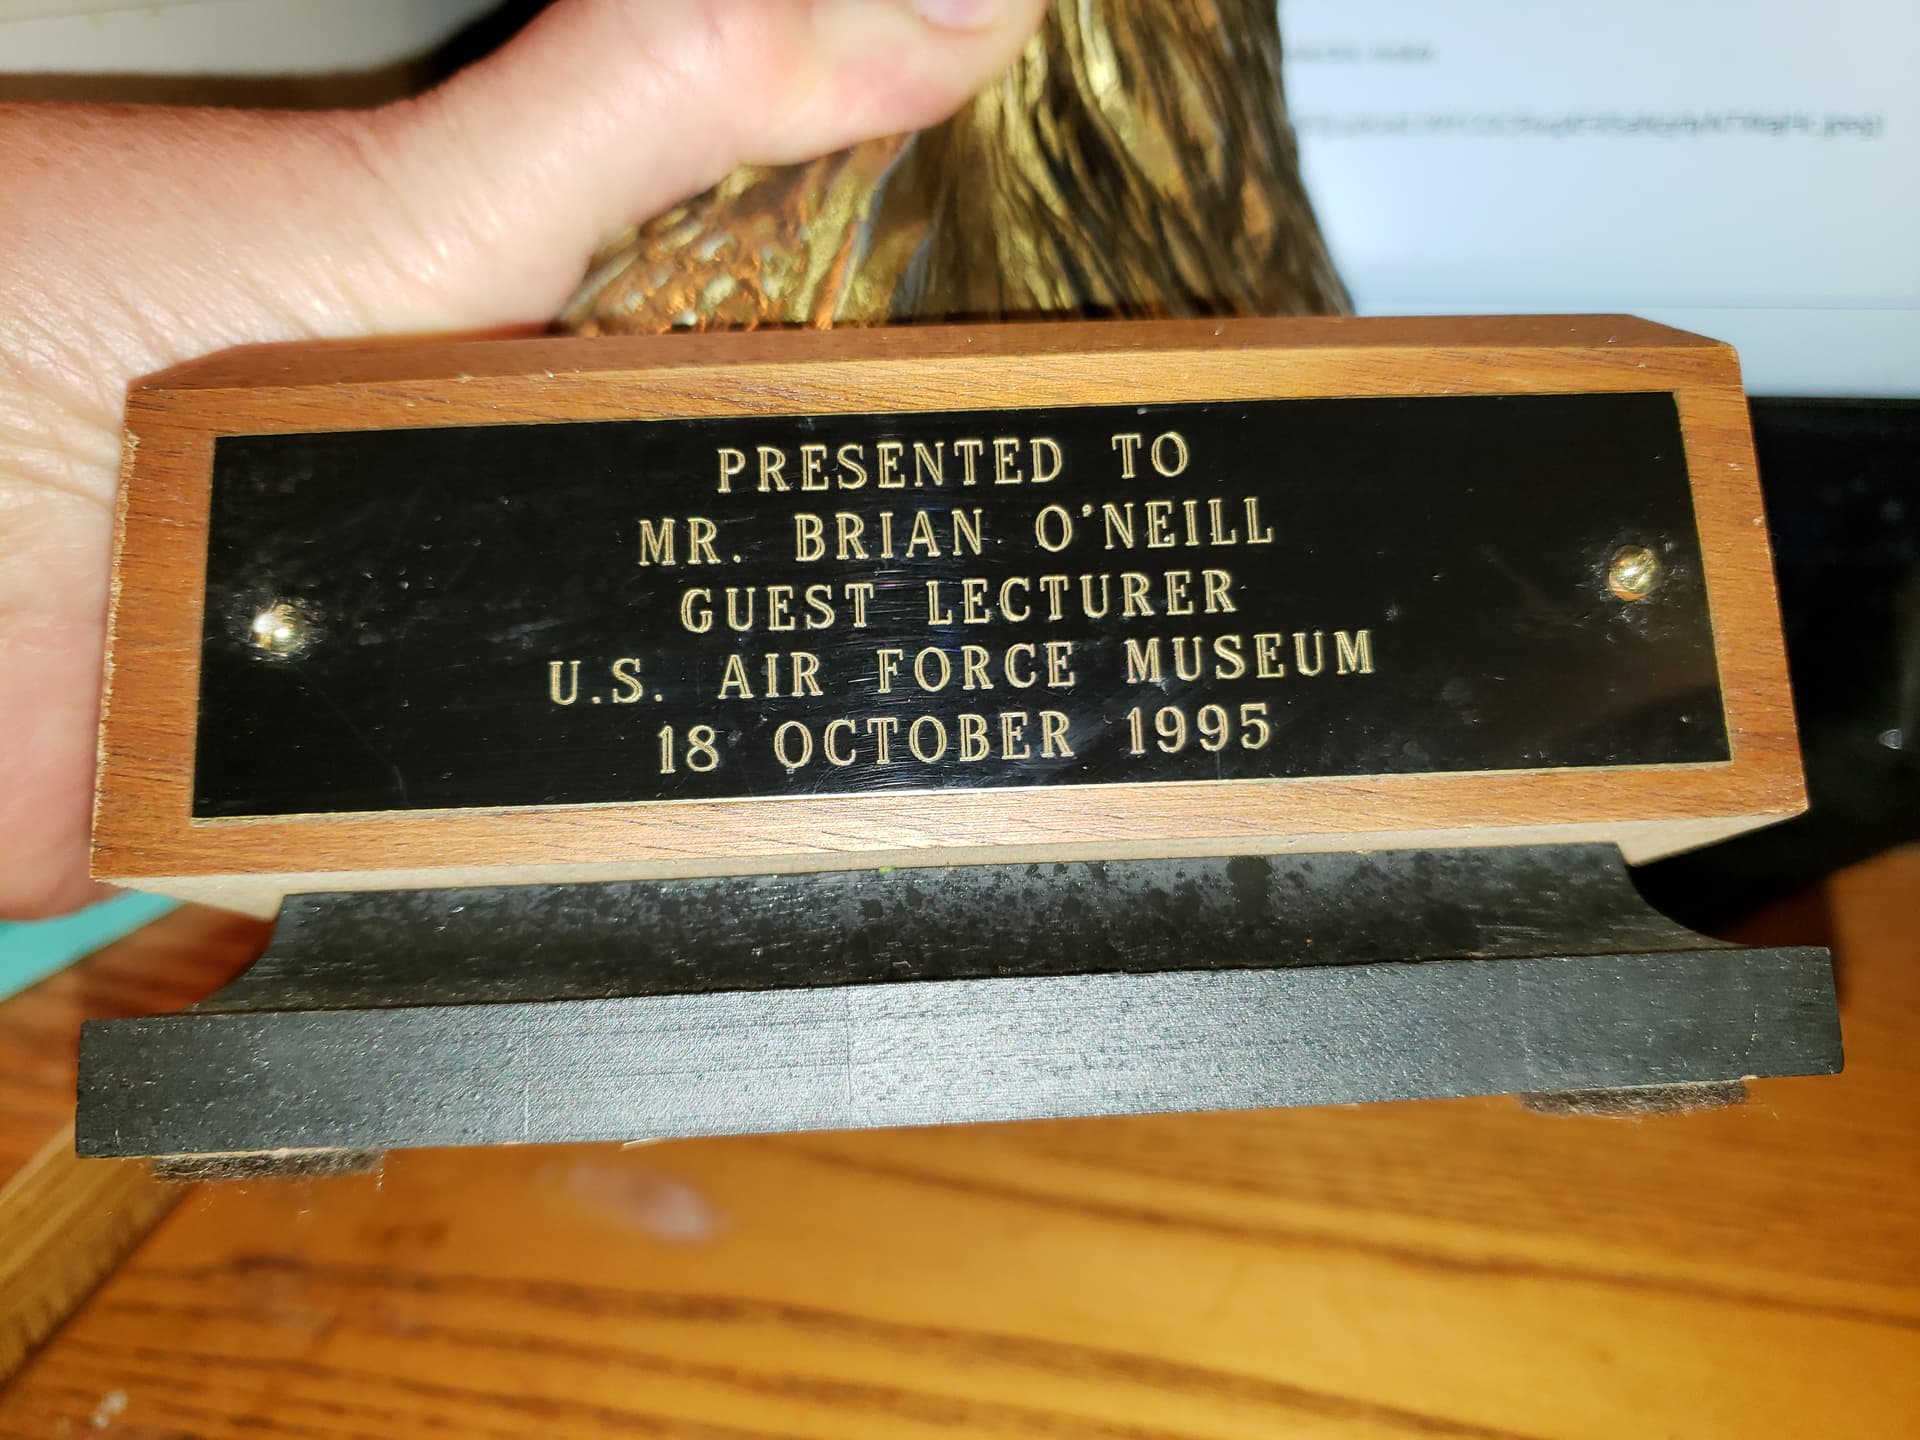
These days I guess I also think of it as a memento mori, but that’s OK. Life is fleeting and nobody lives forever. What should be timeless, however, is human memory of significant events. In this sense, I feel a line of continuity between Merlin, me, and H.G., and if I can make this donation work out the way I want, the man who promised to “be my hands” and carry out my dream for this model, will also get more than a mention under the display case glass.
More to follow.
11 Likes
Brian, as always I really enjoy reading through this thread as it’s also full of historical background. That’s what I really like. And here I can contribute at least a little, even if it’s “from the other side” …
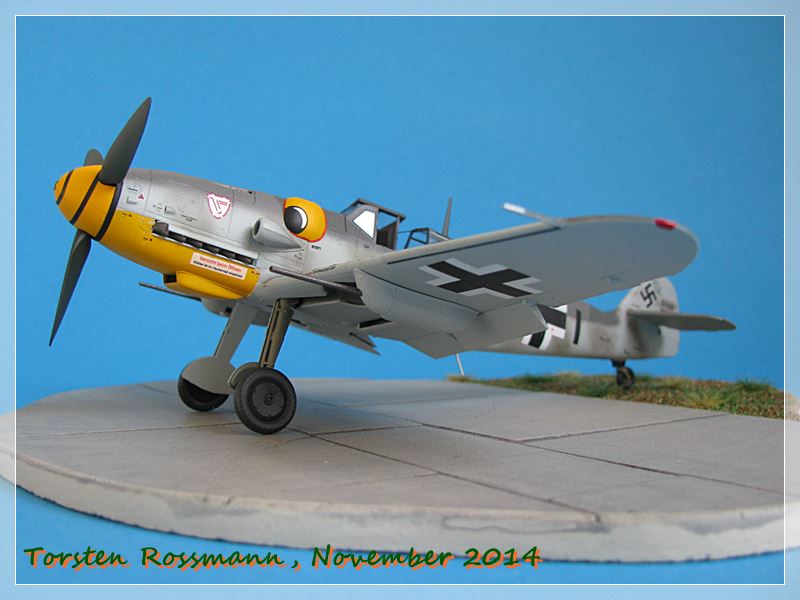
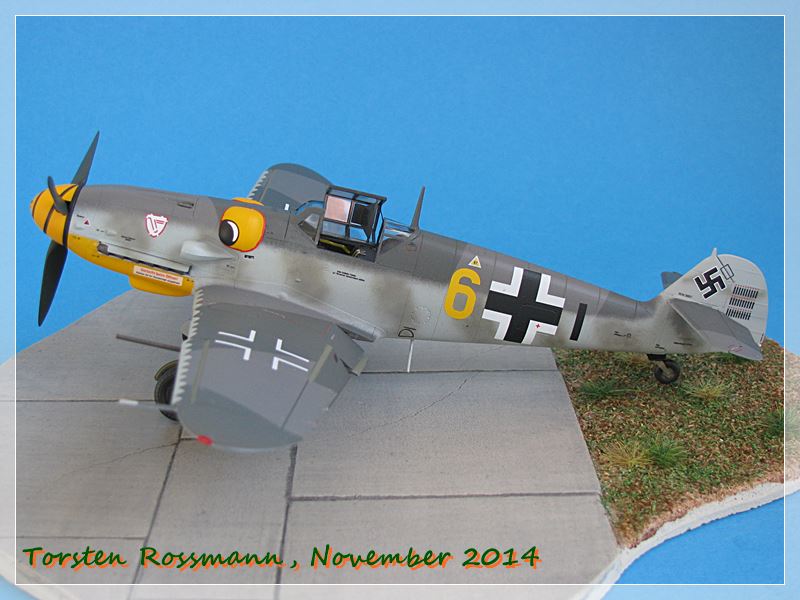
Your friend took part in the Schweinfurt Raid and might be one of the gunners who shot down Oberfeldwebel Alfred Surau. Some years ago I have built his “Yellow 6” out of the Eduard kit in 1/48 and this is my interpretation of his plane …
The photo you’ve posted above is well known, during my research back then I found another one of him (on the right with the black cap) in the www …
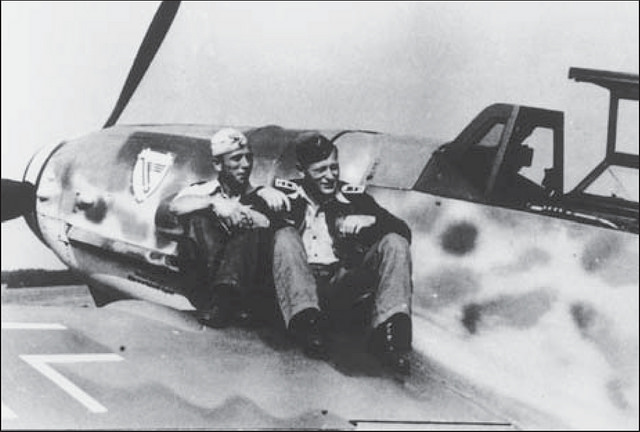
Oberfeldwebel Alfred Surau was an ace with 41 aerial victories on the Eastern Front which he scored between 17. April and 30. July 1943. His most successful day was the 21.07., when he scored 5 times. In August his unit was transfered to the “Reichsverteidigung” (home defense). Between 6. September and 14. October he shot down five B-17, one of them over Swiss territory. His last combat took place on the 14.10.1943 when US bombers attacked Schweinfurt. He succeeded in shooting down a B-17 but his machine was heavily hit by return fire from other bombers. Though Surau was severely wounded, he was still able to bail out of “Yellow 6” but died the same day in the hospital of Wertheim.
4 Likes
Great build of Yellow 6, Torsten (I like “clean builds”) and that’s a great picture of Sarau. New to me. A keeper.
The idea that Miller might have been the one who shot down Sarau has always intrigued me. Here’s the account from the book, in Miller’s own words, also confirmed by the Group’s records.
At 1447 an Me-109 with a … cannon slung under each wing came in from five o’clock high. … Not surprisingly, the 109 was, Miller remembers, "one of those fighters you saw every once in a while who was determined to add a B-17 to his score. He came in straight and level with our tail. He throttled back, and I could see his prop slow down. I could see him fishtail as he started to aim at us.
“There wasn’t much doubt who he was going to shoot at, but to put it bluntly, I sneezed first, before he could pull the trigger. I hit his plane at the base of the left wing where it joins the fuselage, and it blew the wing completely off the airplane. He immediately flipped upside down and spun away. I didn’t have time to see whether or not the pilot bailed out.”
The details about the prop slowing down and the rudder fishtailing as the pilot took aim really brought this to life for me. It certainly could have been Sarau, but bailing out of an aircraft with the wing blown off like that makes it doubtful, in my opinion.
Miller grew up on a farm in Indiana, and he was one of those “country boys” who was used to firearms from a very early age. My impression is that B-17 tail gunners were placed there because of their skill with firearms and the vulnerability of the position.
Thanks for your comments!
2 Likes
A Sense of Completeness on American Memorial Day Weekend.
H.G. writes:
Forgive the poor camera angle, but the mark 1 eyeball says it’s spot on.
I don’t doubt it. Can the wheels with those colorful hub covers, and the bomb bay doors, be far behind?
7 Likes
What a brilliant back story…amazing. and the detailing and precision of the undercarriage fit is phenomenal.
1 Like
A Picture of Things to Come
I think I’ll let this speak for itself.
It will be so satisfying to see the landing gear completed and those individually crafted engines go on as “final construction” continues.
8 Likes
Got Wheels? Yes!
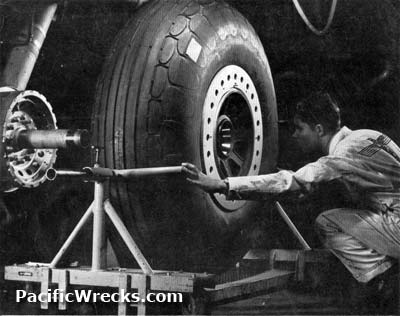
I will start where H.G. has – with the tail wheel. As a refresher, here is the real thing.
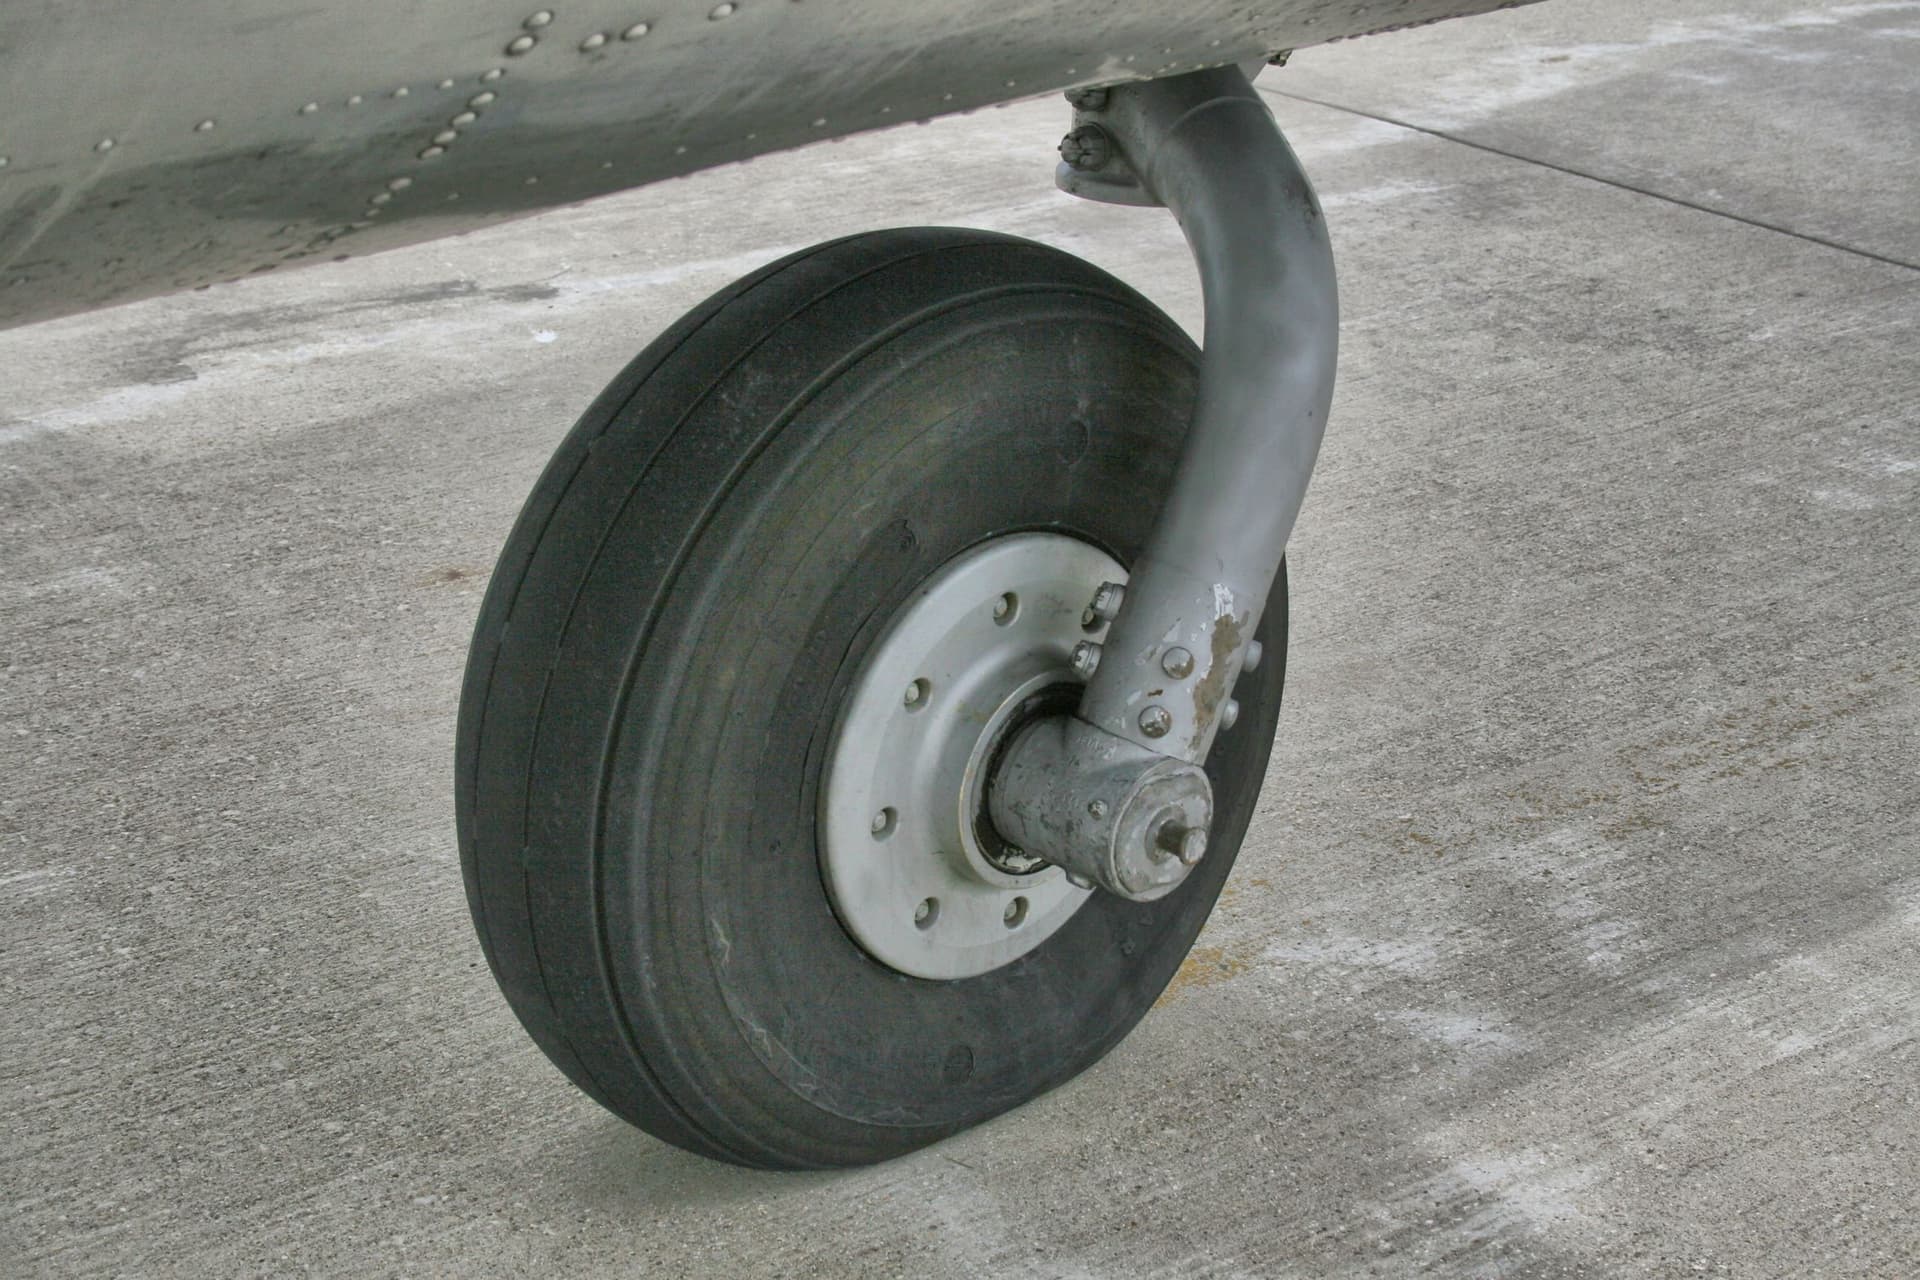
Note the slight compression in the tire, replication of which we will discuss and show in a later post.
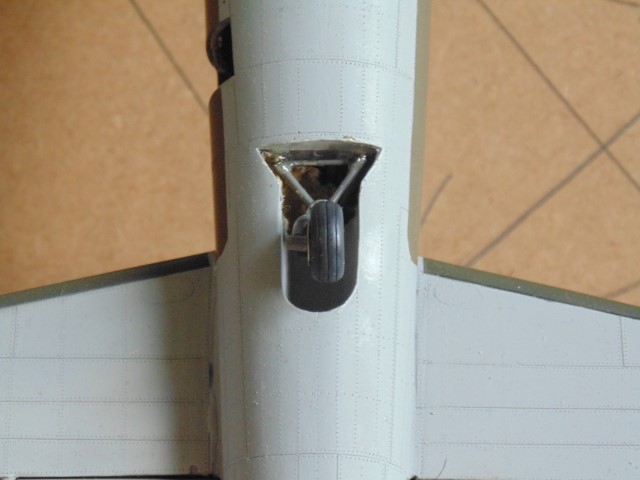
Here is a shot of the tail wheel finally mated to the landing gear.
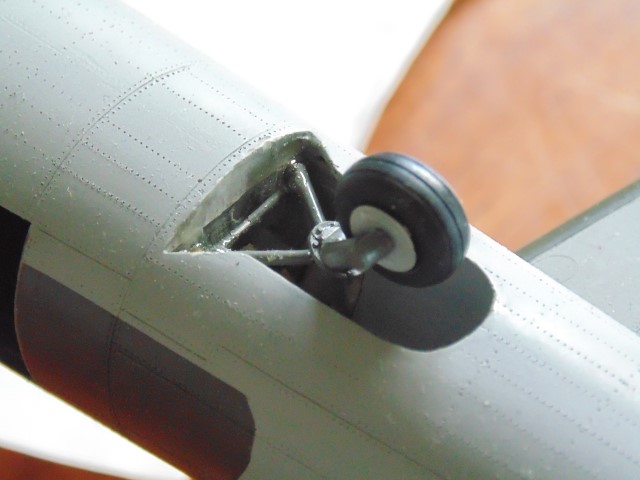
H.G. reminds me that there is still paint touch-up to do here.
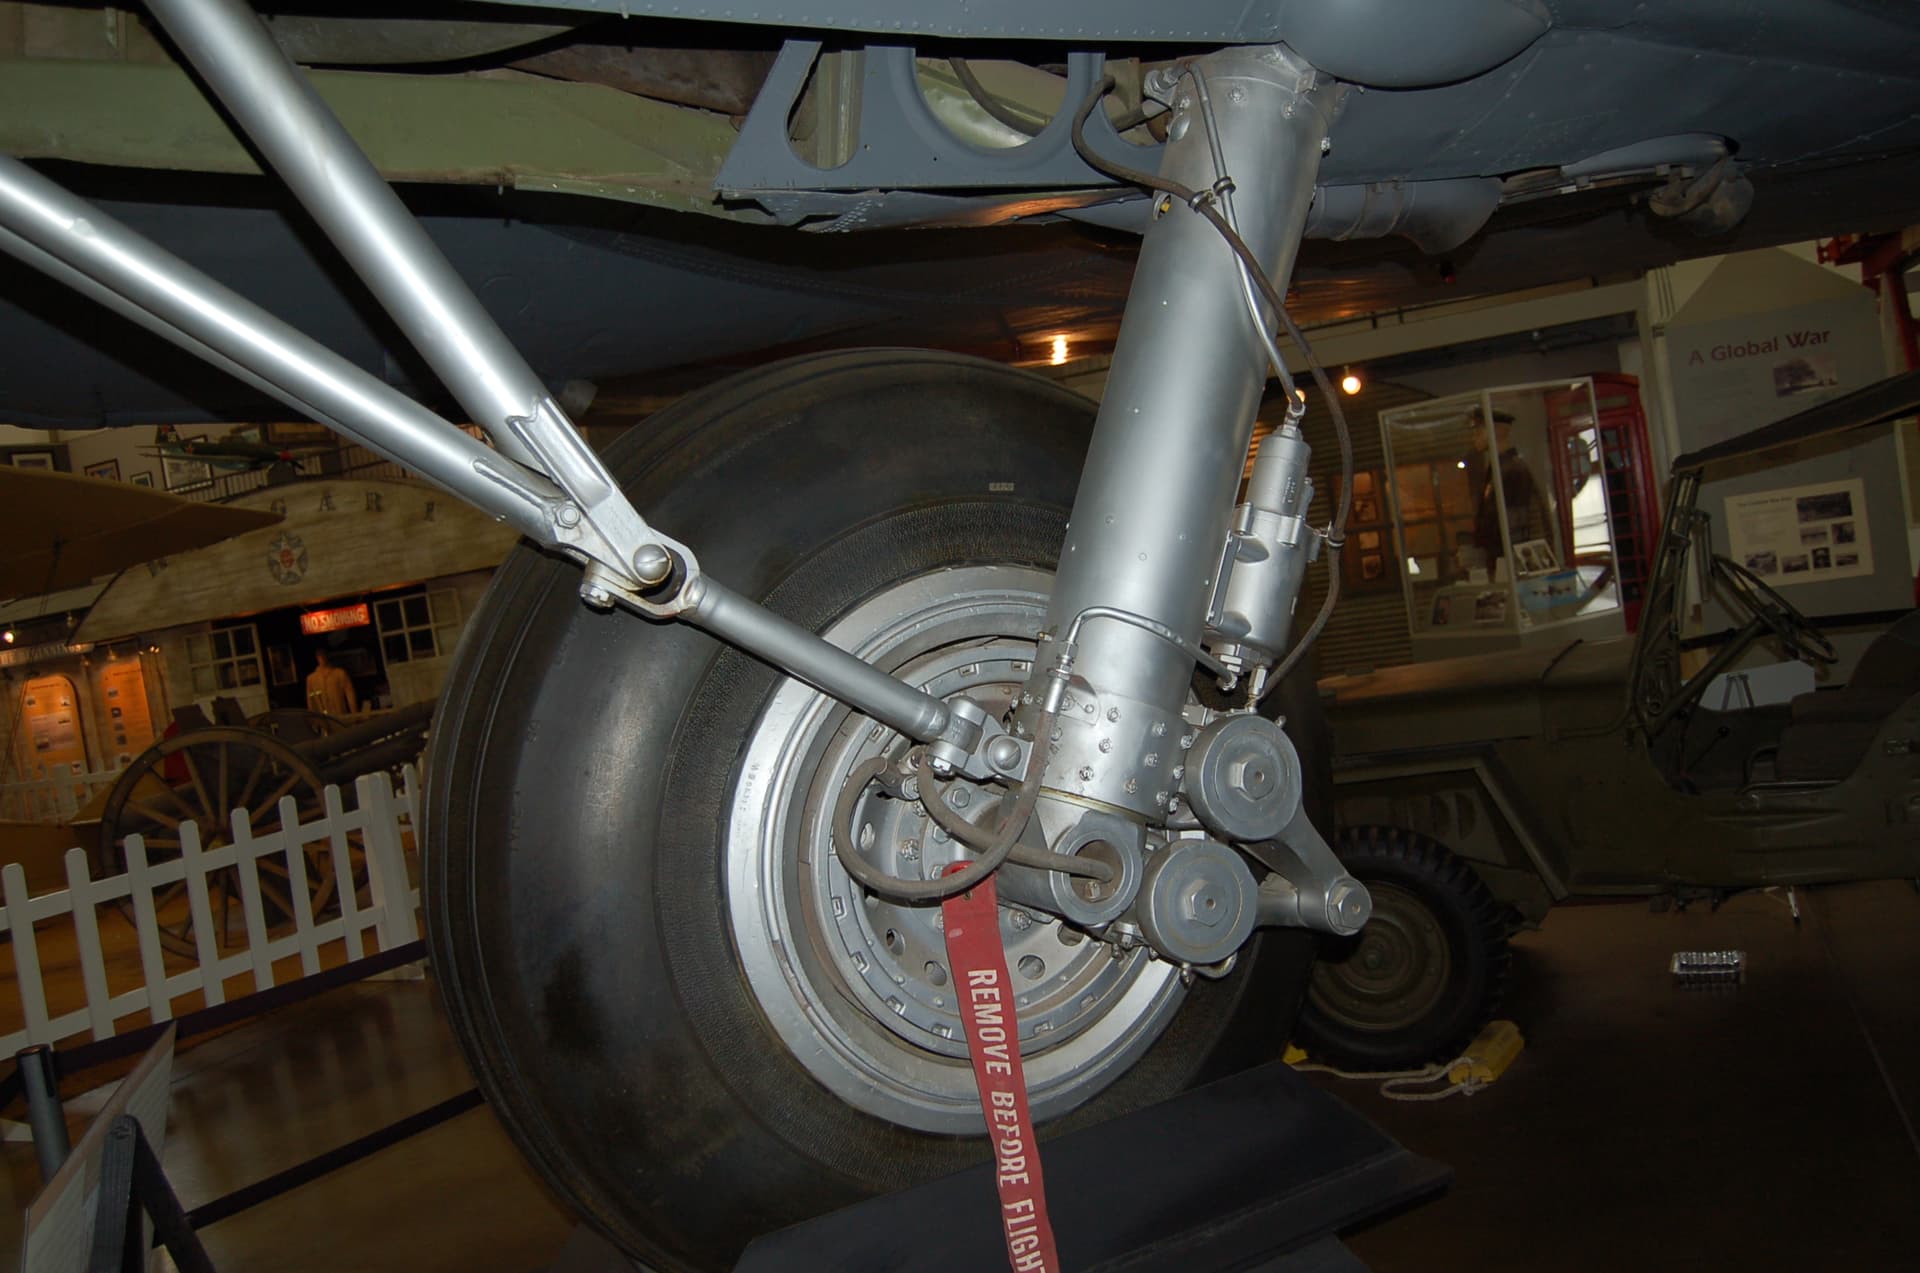
I do see some structural differences, but there is plenty of room for debate, and I’m pretty sure the above “real thing” picture is from a modern restoration. Also, from “The Sally B.”
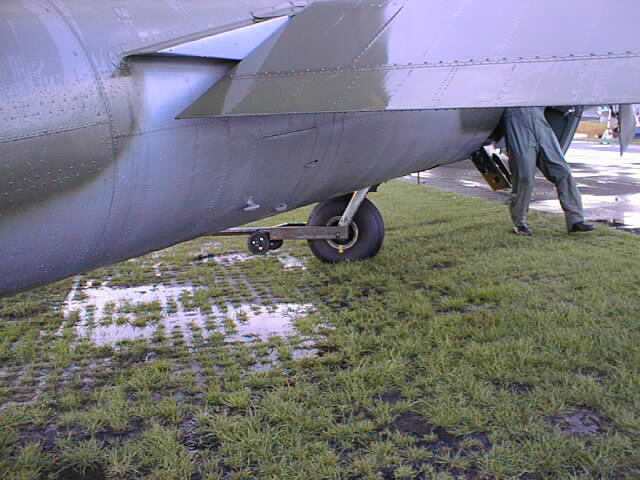
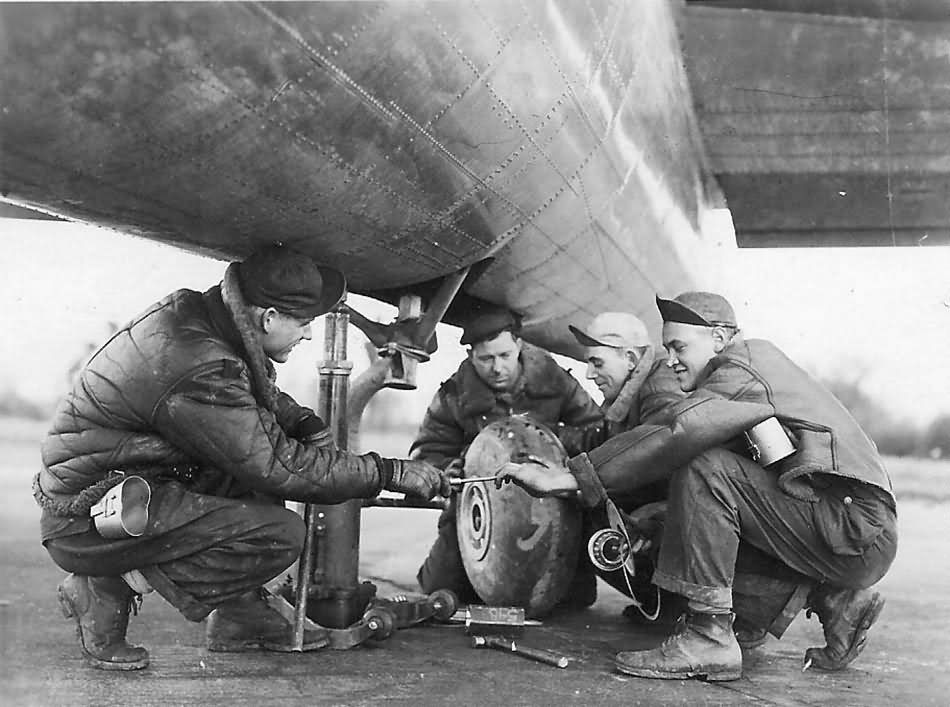
and a true period photograph.
I’m good with it, and then some, especially as H.G. stated that the epoxy glue joining the resin wheel to the metal strut took hours to cure and set.
Also,
Now on to the main wheels, and it’s time to remind you where I sourced these:
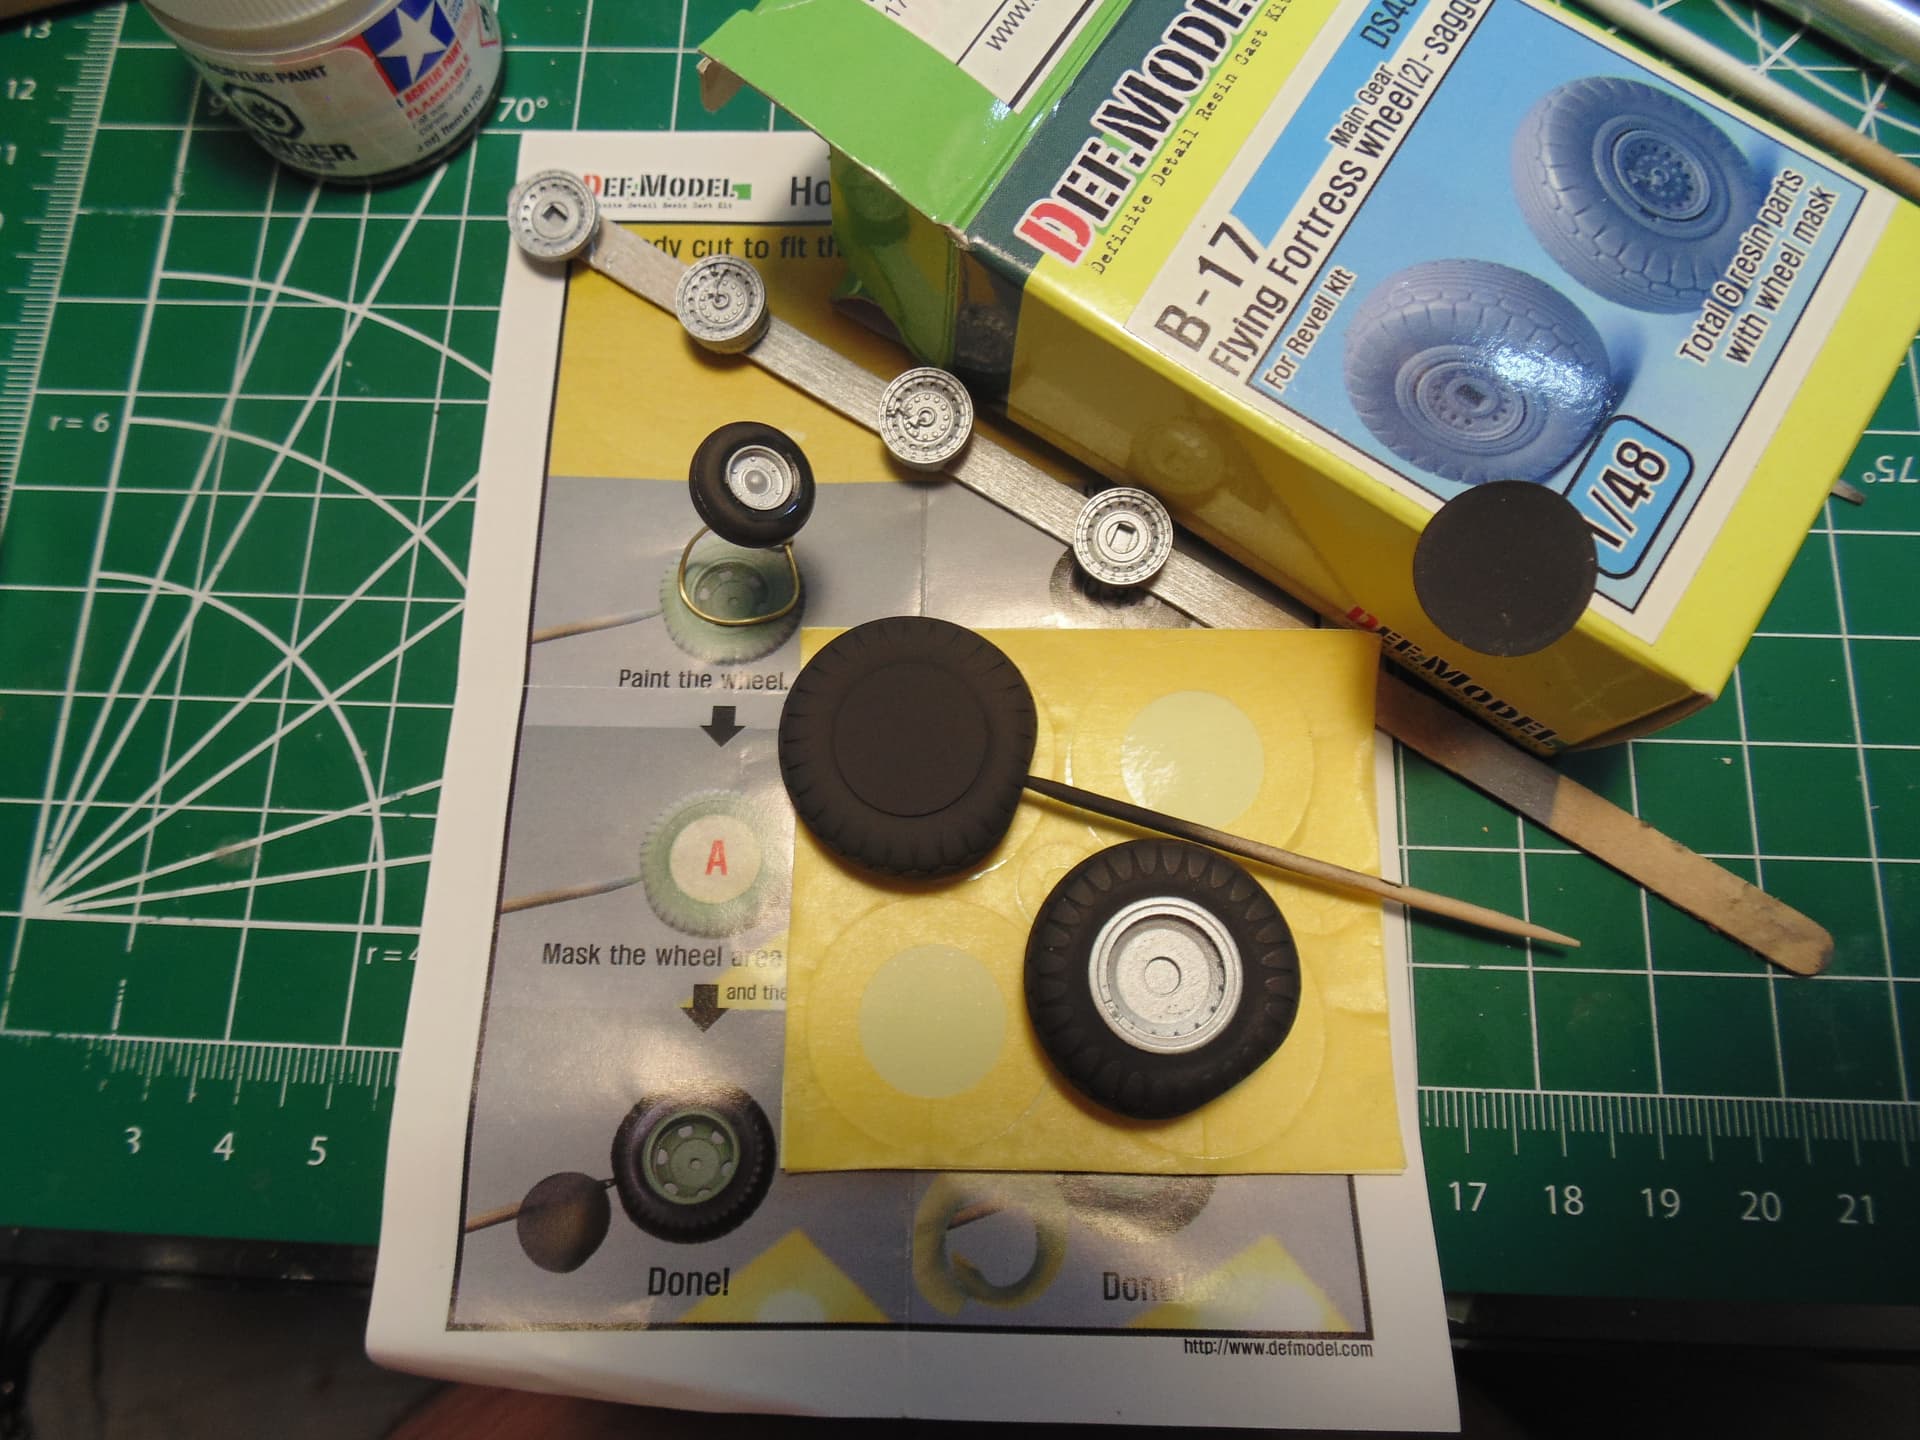
H.G. says this set is a joy to work with, both in the details and the workability of the resin. When I purchased it and compared it to others I had acquired, I felt it was the best of the bunch, by far, though I haven’t compared it to some more recent Eduard offerings for the HK 1/48 B-17s.
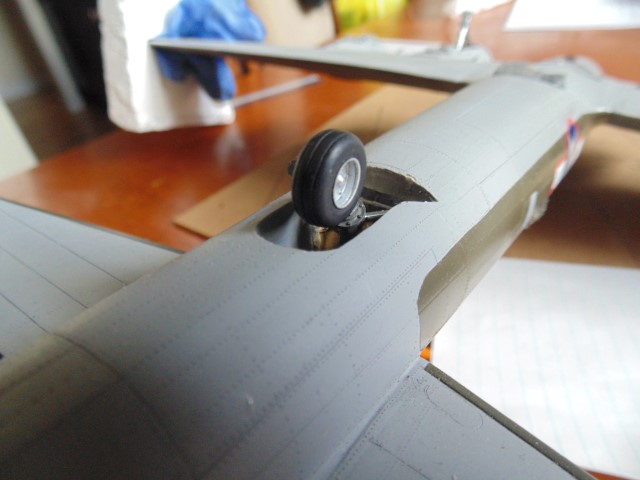
Out of the box with an initial paint job the tire bulges looks bigger than we would want for a B-17 with an empty bomb bay, but somehow those bulges appear the have lessened as H.G. has continued working them. But first, an intermediate stop showing what was used for weathering – Not the finished product!!!

Now, check these photos out, and you’ll see what I mean about the circumference.


We are getting closer to the point where the main wheels will mate with the landing gear
Also, note a nice detail on Luscious Lady’s wheels that has a significant unit history in and of itself – those colored rectangles on the hub covers.
![]()
I’ll discuss this history in an upcoming post so stay tuned.
10 Likes
Lovely work again and nice update. As HG has done such a sterling job with this one, surely the natural progression is a B29 ? ![]()
3 Likes
Oh dear…
5 Likes
Or two ?
1 Like
Between 17 and 29 is 24 … ![]()
1 Like
Noooooooooo! ![]()
![]()
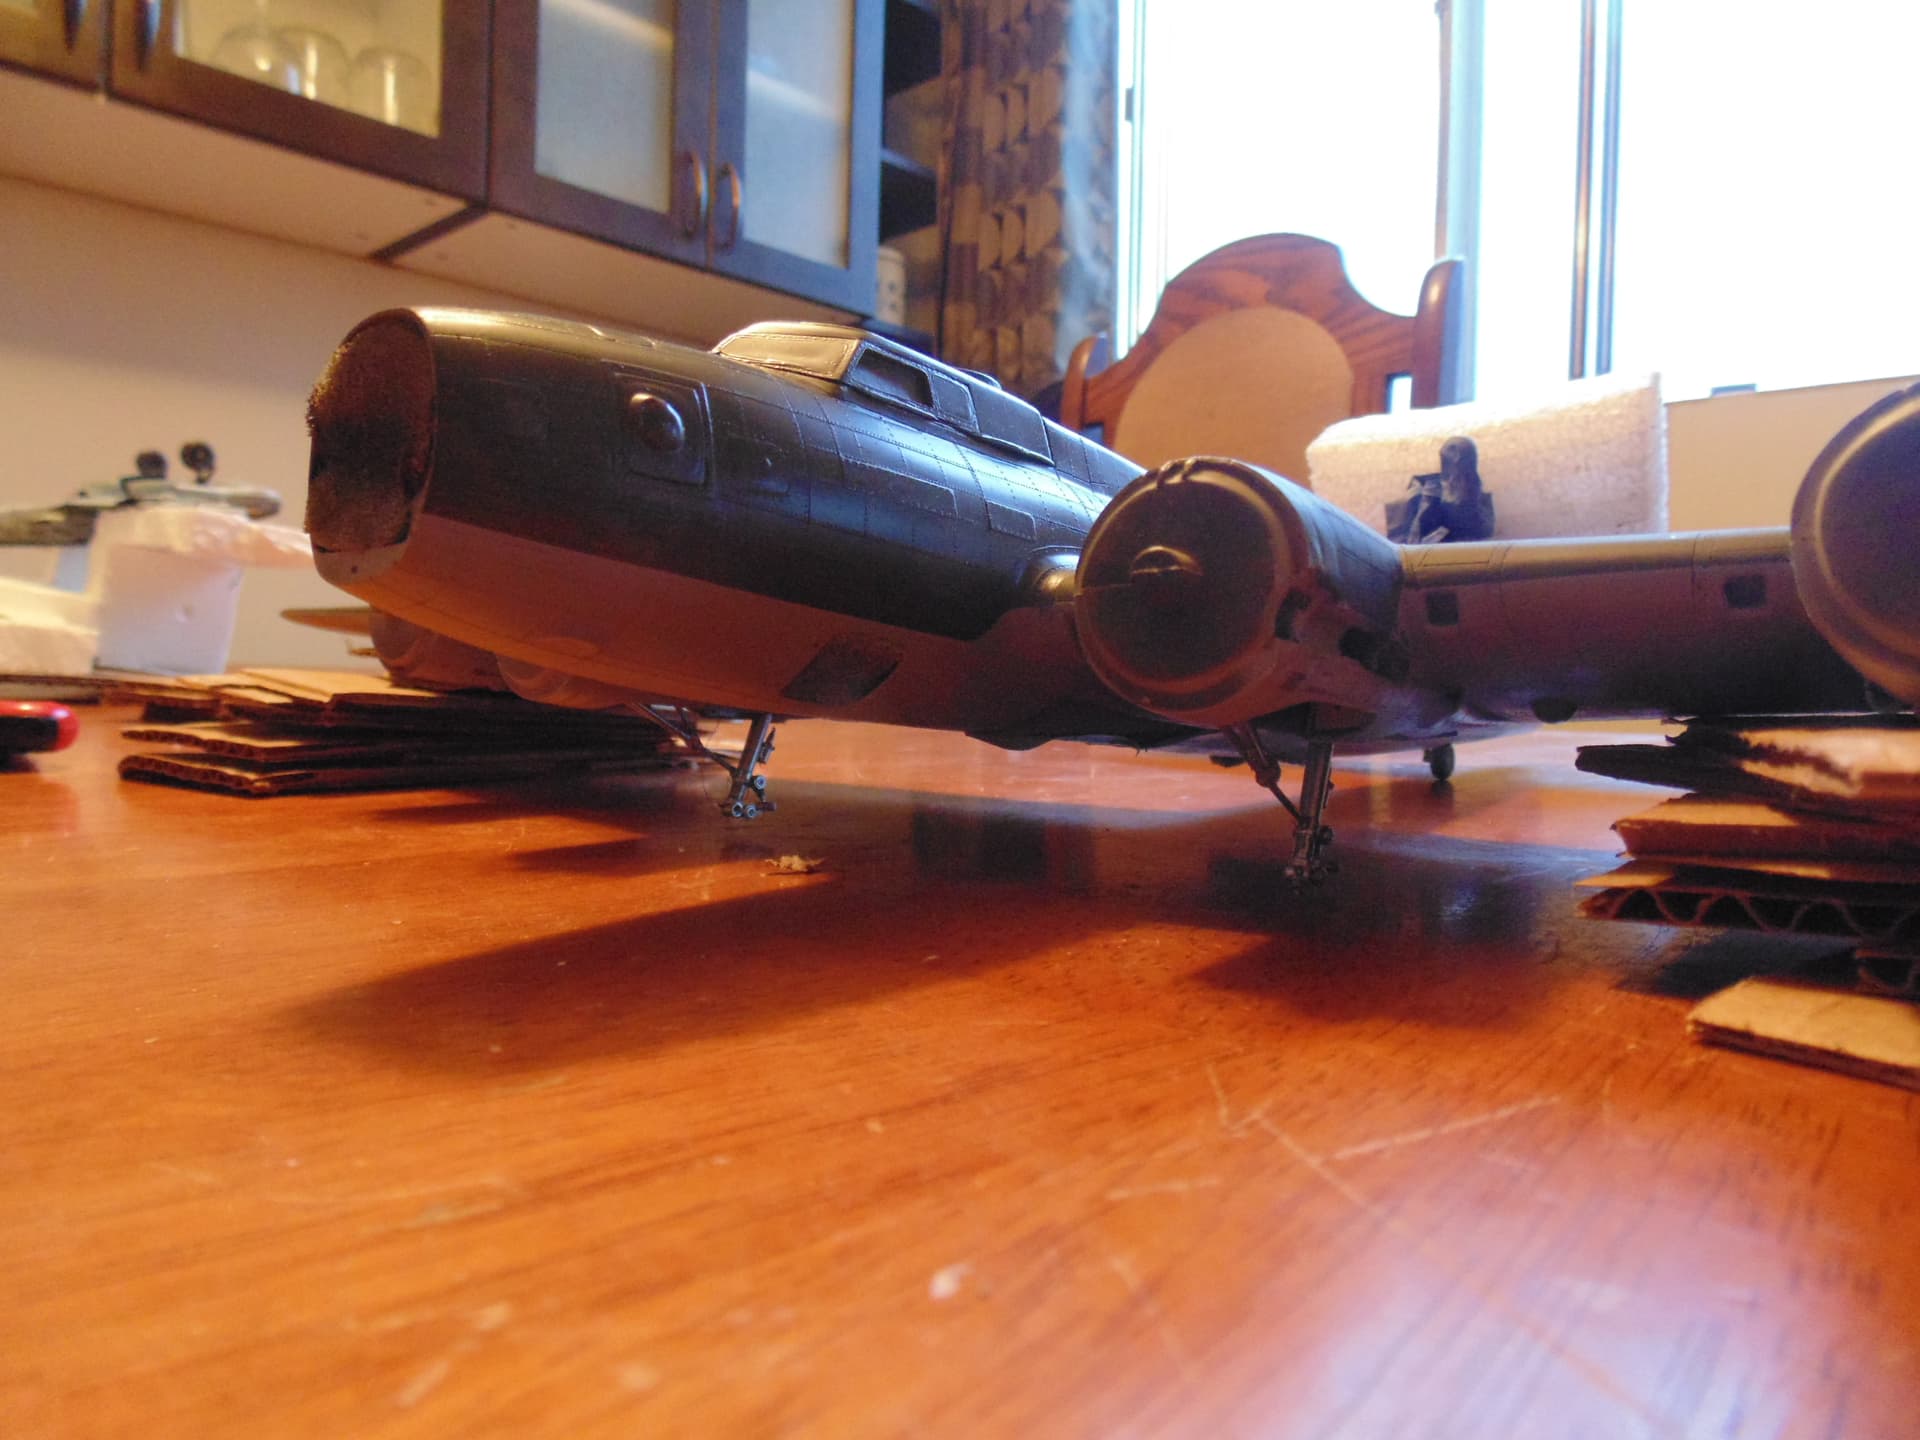
This isn’t the best photo – spots on the glass – but I did do one of those, with an assist from a now-deceased friend, who installed a Squadron vacuform upper canopy, and helped with the early radar configuration underneath.

It was pretty heavily researched and is one of the really early OD A/C (obviously) with a two-gun top forward turret. It flew out of India until it crash-landed and was junked.


On and off it took seven years. Since I finished it, there are a ton of aftermarket items available for this kit, but I worked with what I had and am happy with the result. I can’t imagine doing another one, with or without help!!
A family note: when I showed it to my father, who flew KB-29s in the 1950s,
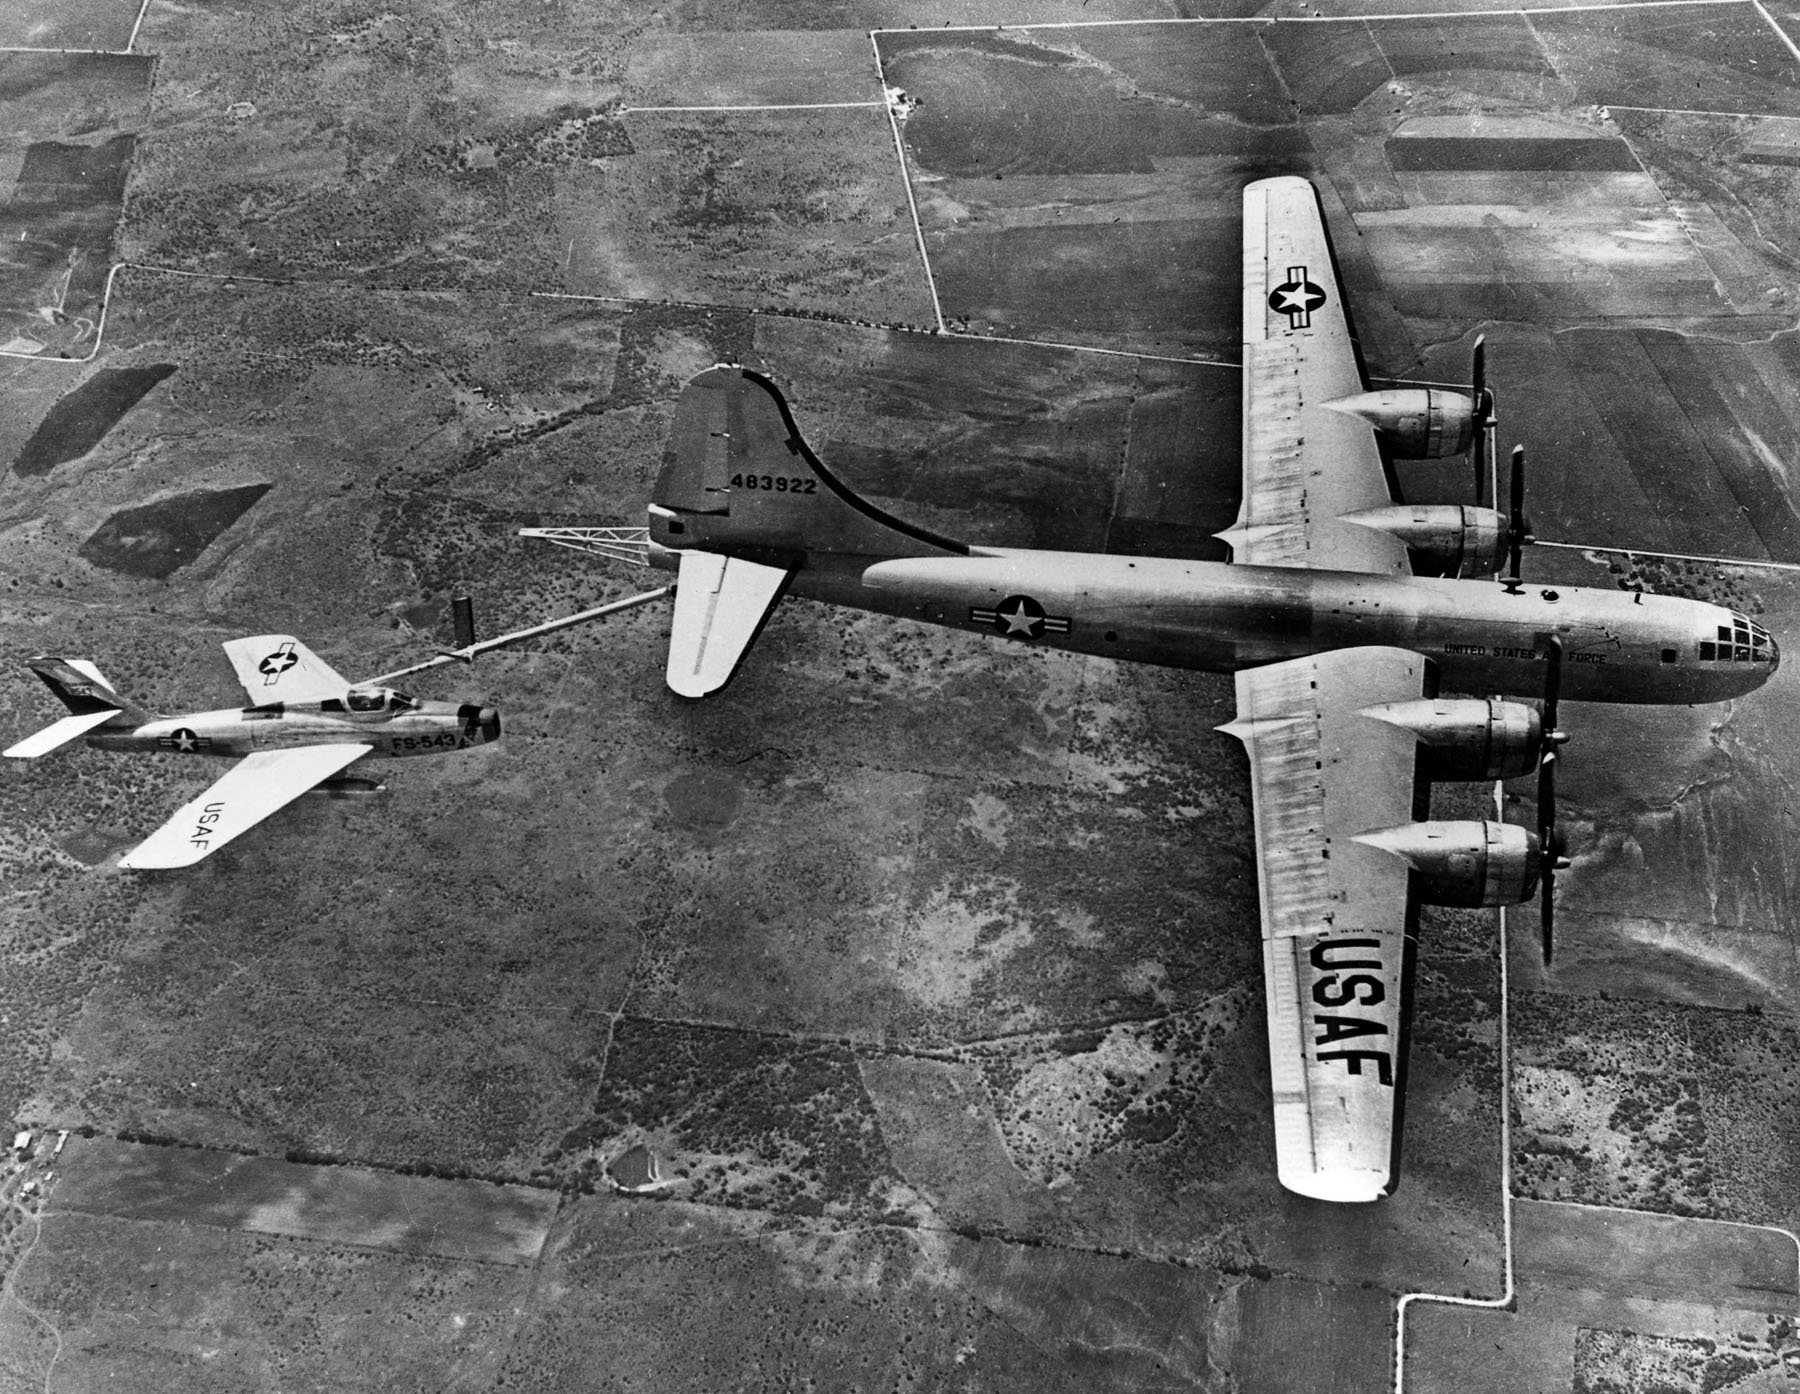
he referred to it as “that black thing behind the glass.” I’ll just say he was proud of his own service, but not at all nostalgic about KB-29s, WB-29s

or KB-50Js with four turning and two burning,
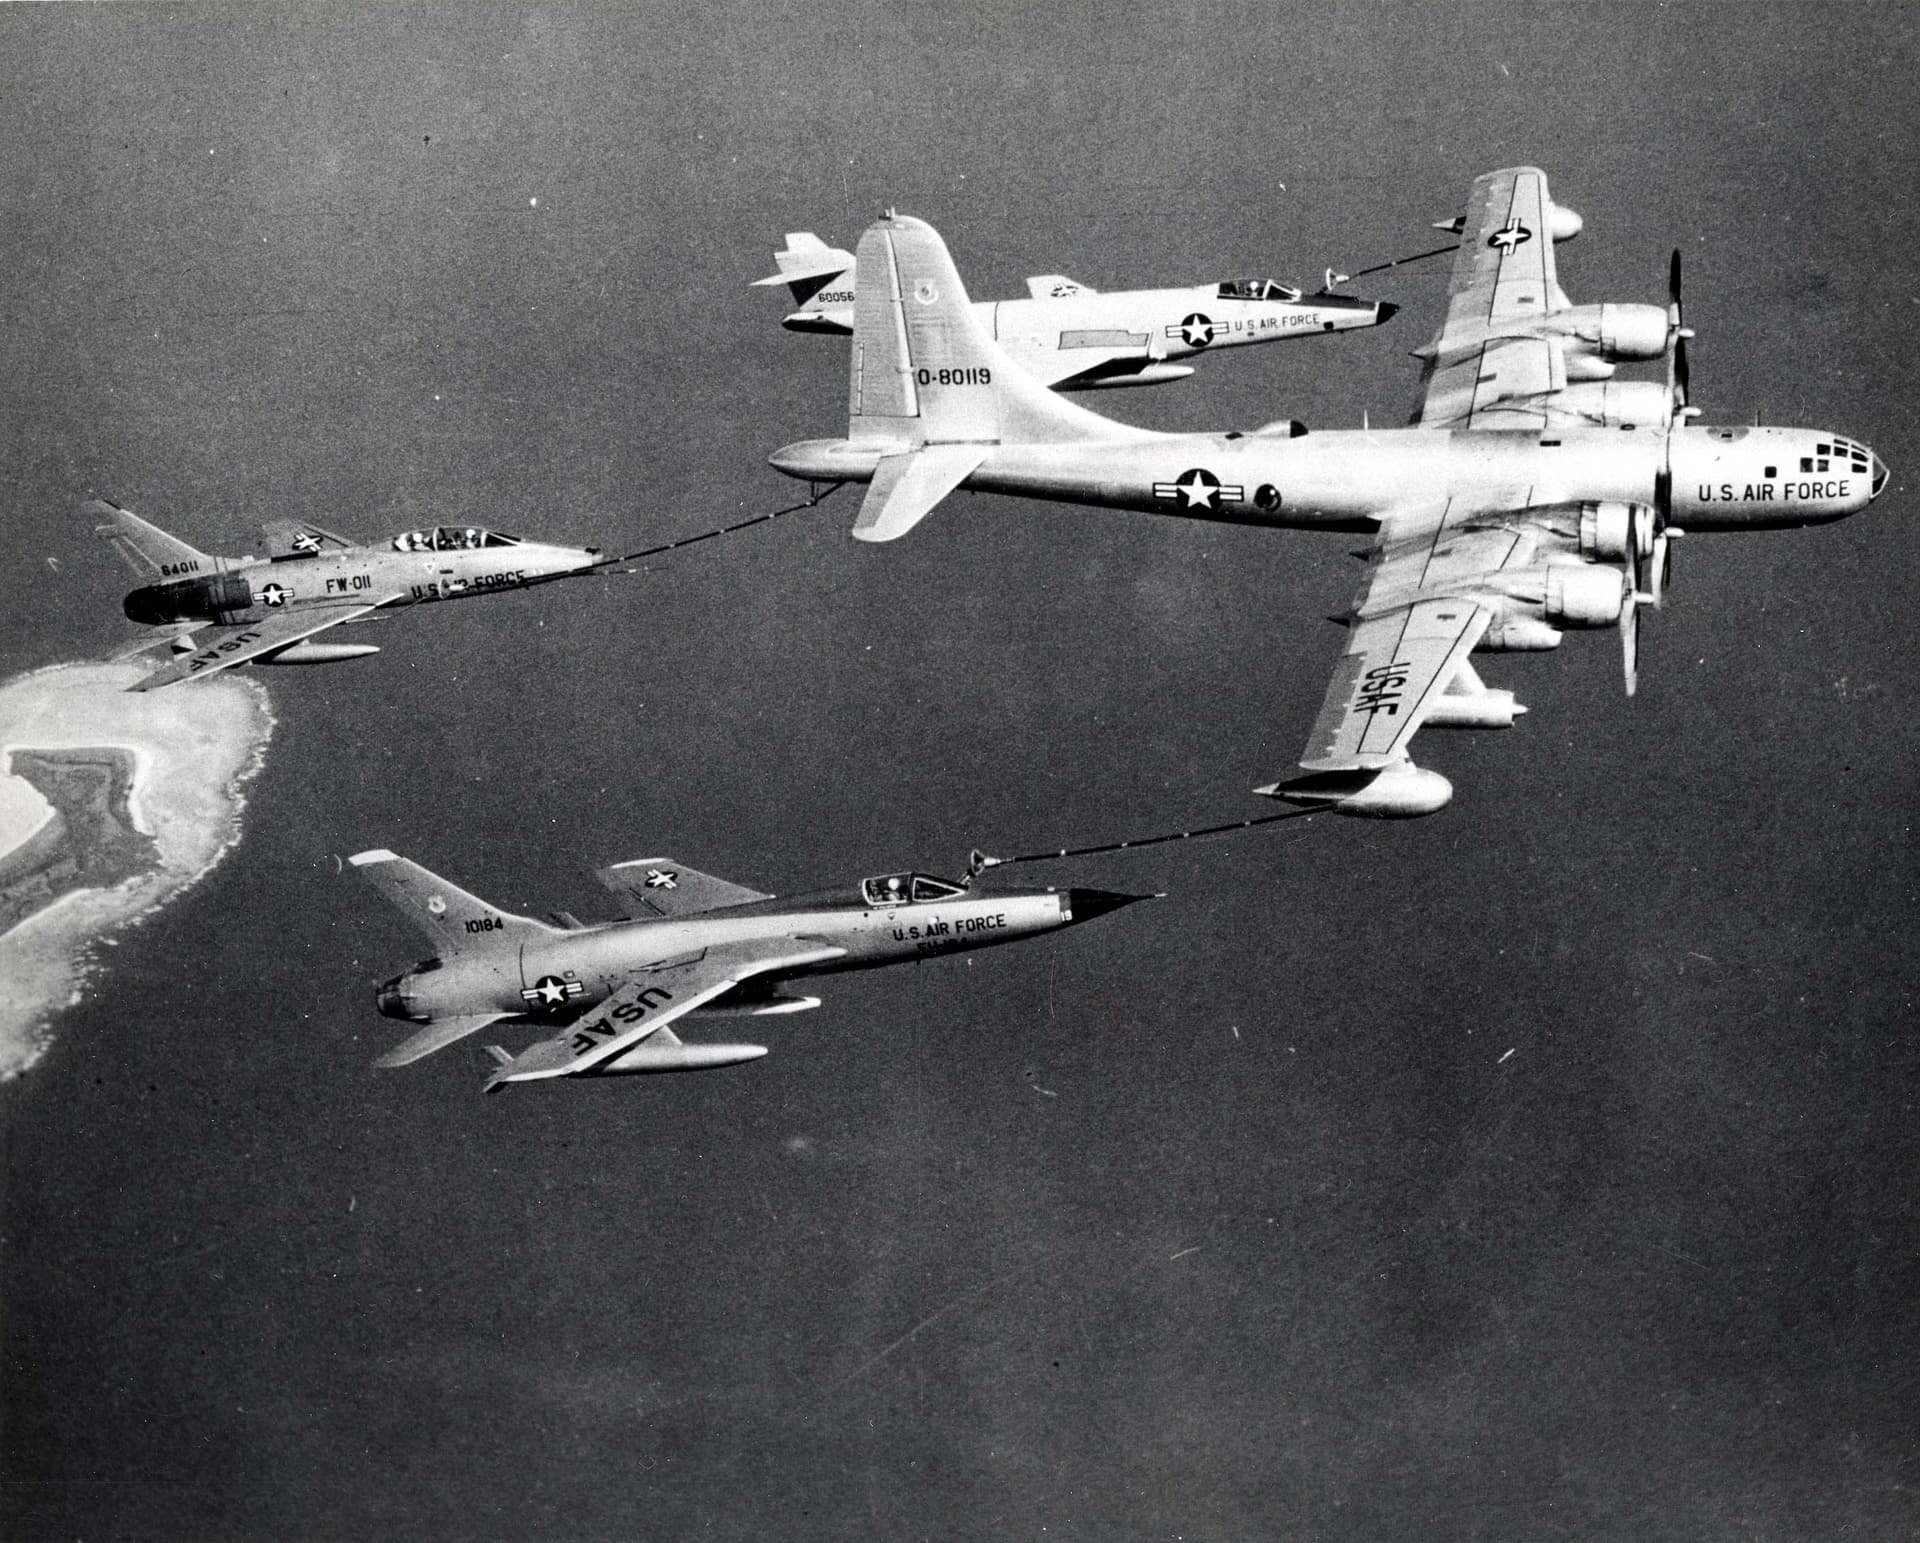
all of which he flew during his career.
He preferred horses as a hobby. So I had something of a “one man’s meat is another man’s poison” relationship with him in hobbies (and other matters!) IYKWIMAITYD. May he rest in peace.
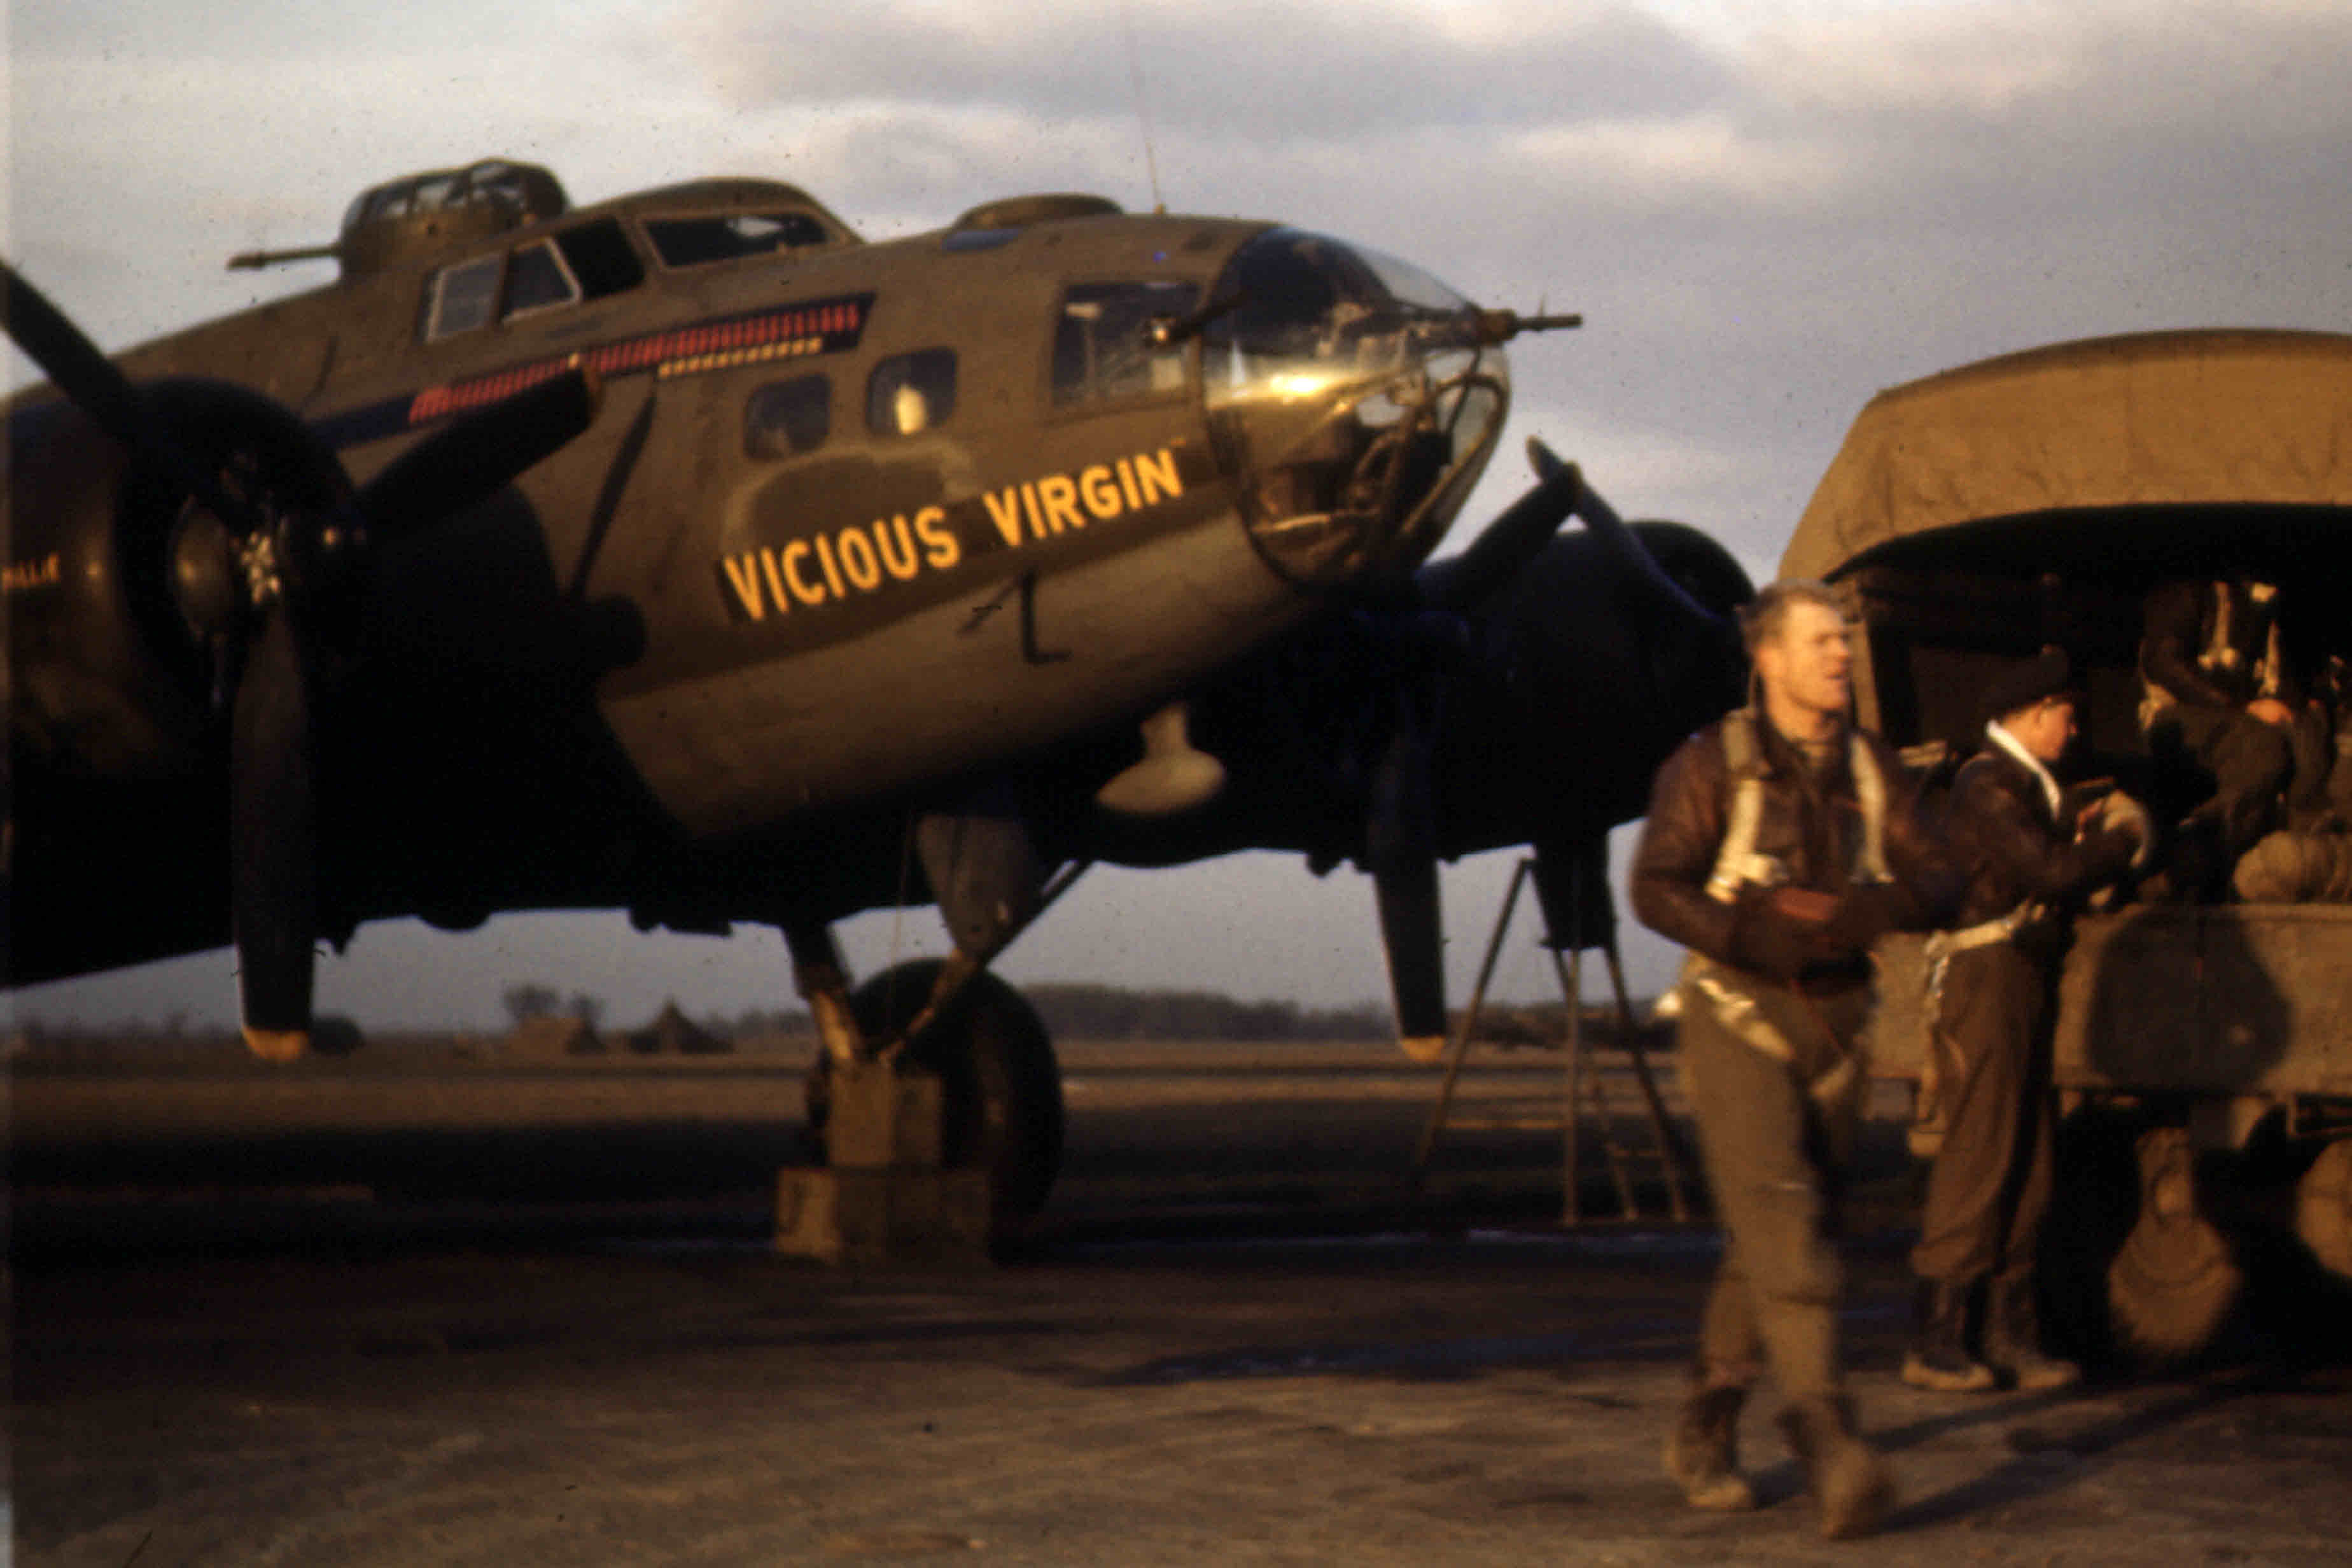
H.G. and I are talking about him doing a buttoned-up Vicious Virgin after this, however.
7 Likes
Standing on Her Own Two Three Feet.
Another milestone. Luscious Lady’s main landing gear have finally been fixed in place, and she can now stand on her own two three feet. Check her out!
Originally, H.G. was going to use some kind of mini-jack (my words) from Hong Kong to raise the fuselage and position the main landing gear, but the tool failed to arrive, and he had to do it by “seaman’s eye.”
I am told that when H.G. finishes attaching the main wheels, he has some technique in mind to gently flatten the tail wheel to match the effect we see below in the main wheels.

Here’s how he describes what’s going on:
I’m using some K&S rod for the pins. I’ll add extra length to be certain then use my mini grinder to finish it. Each pin is sanded to help the epoxy to grip the metal, more surface area. Once the epoxy has fully hardened you’ll see the aluminum touch-ups. Later the hydraulic hoses will be finished and painted.
I inserted the link because I was unaware of this exotic supplier, whose slogan is:
OUR MATERIALS, YOUR CREATIONS
He adds:
I’m using BSI for the axles. It says 5 minutes but usually takes 30 to 40 minutes to become completely cured.
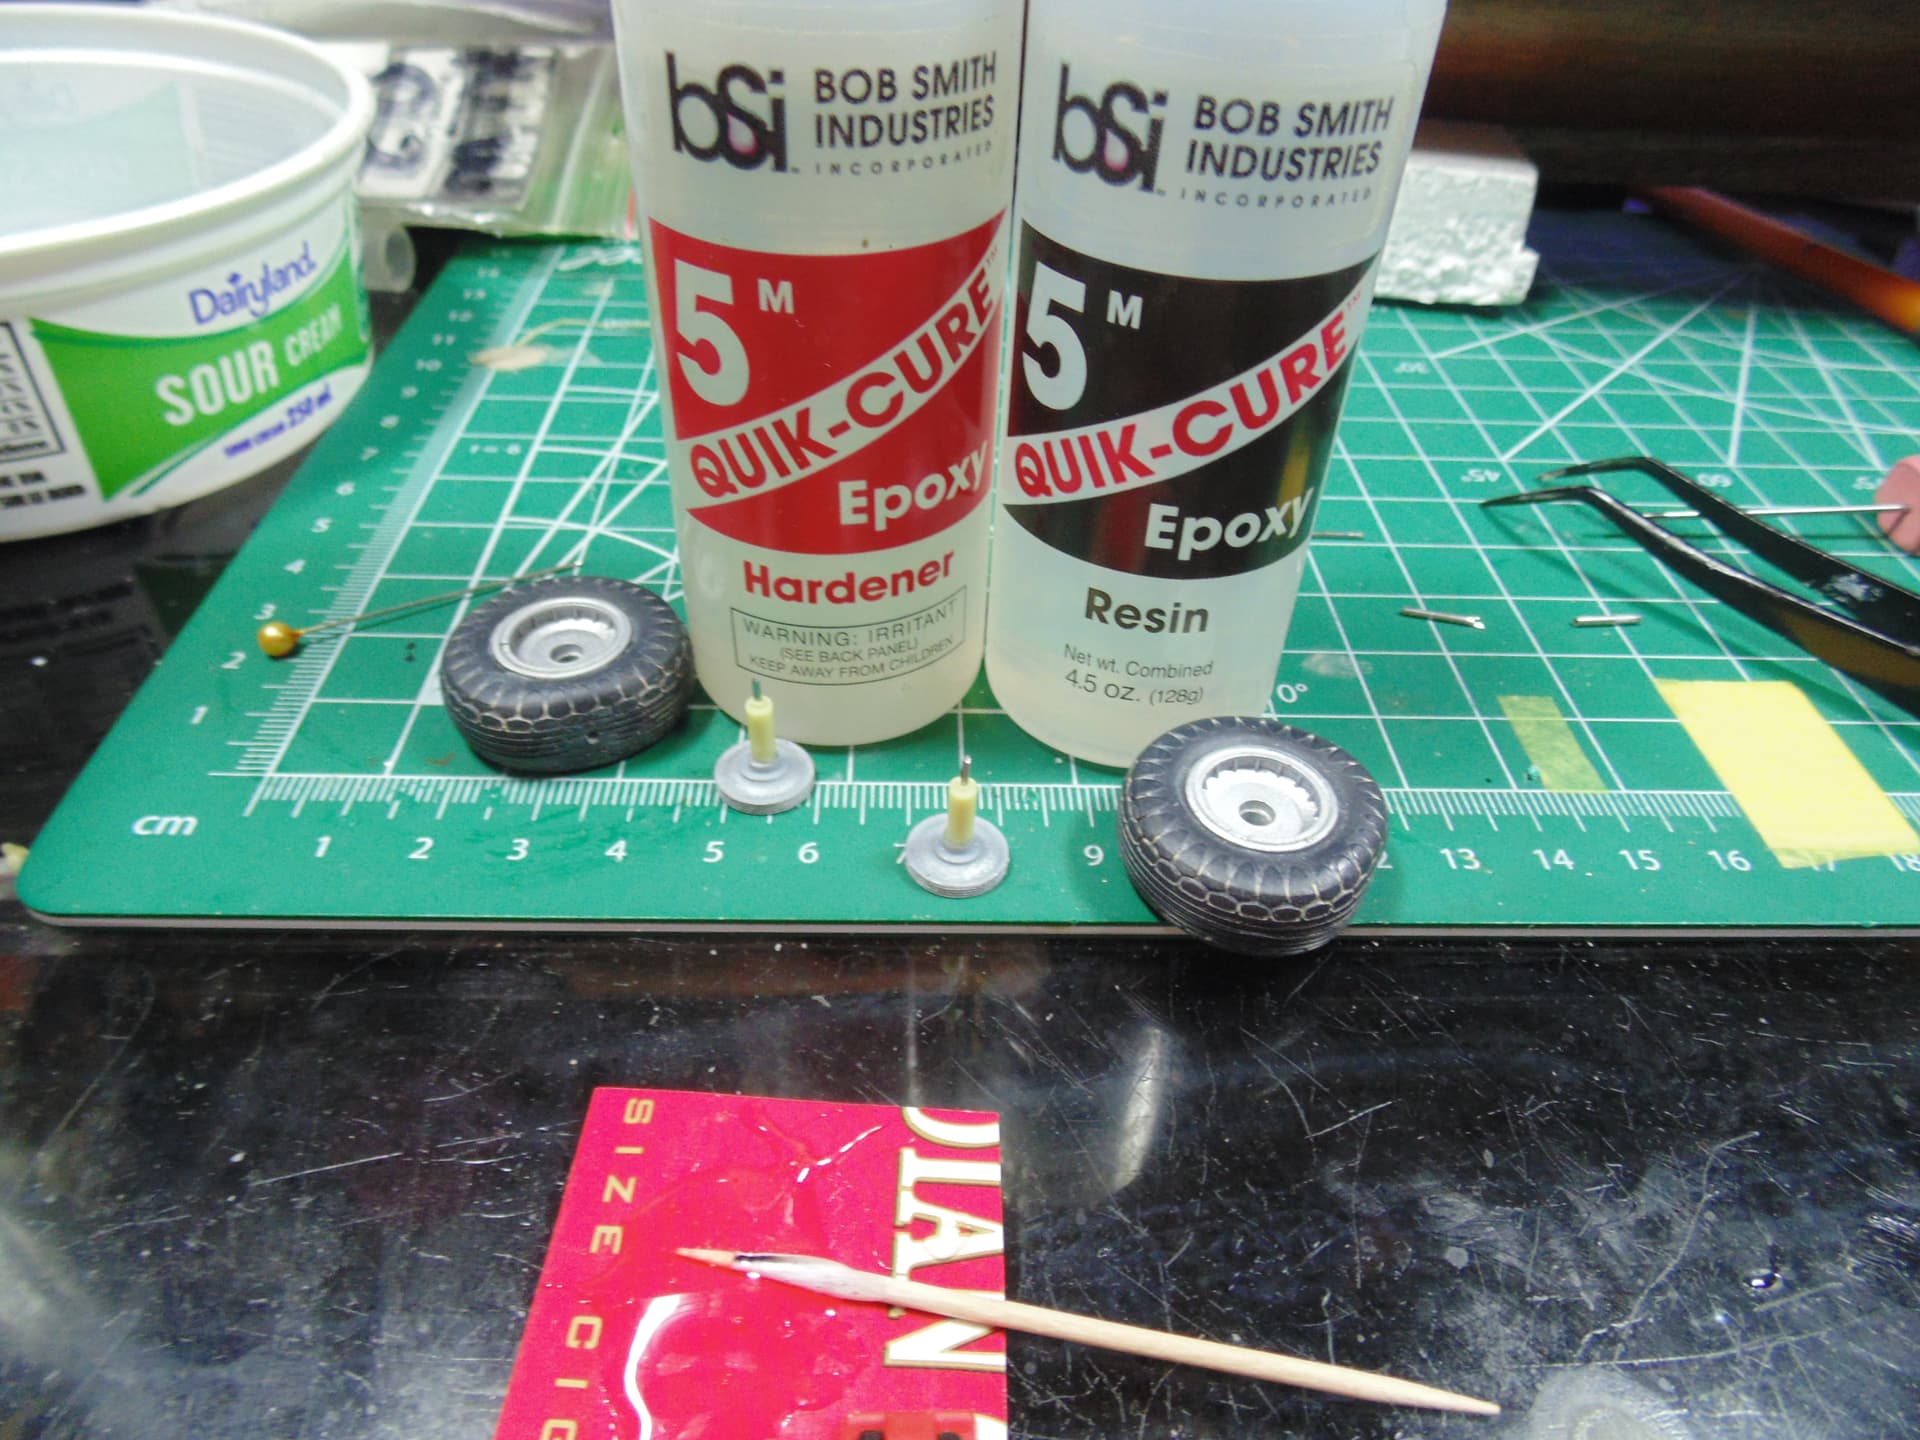
I at least knew about Bob Smith Industries. I use their “crazy glue.”
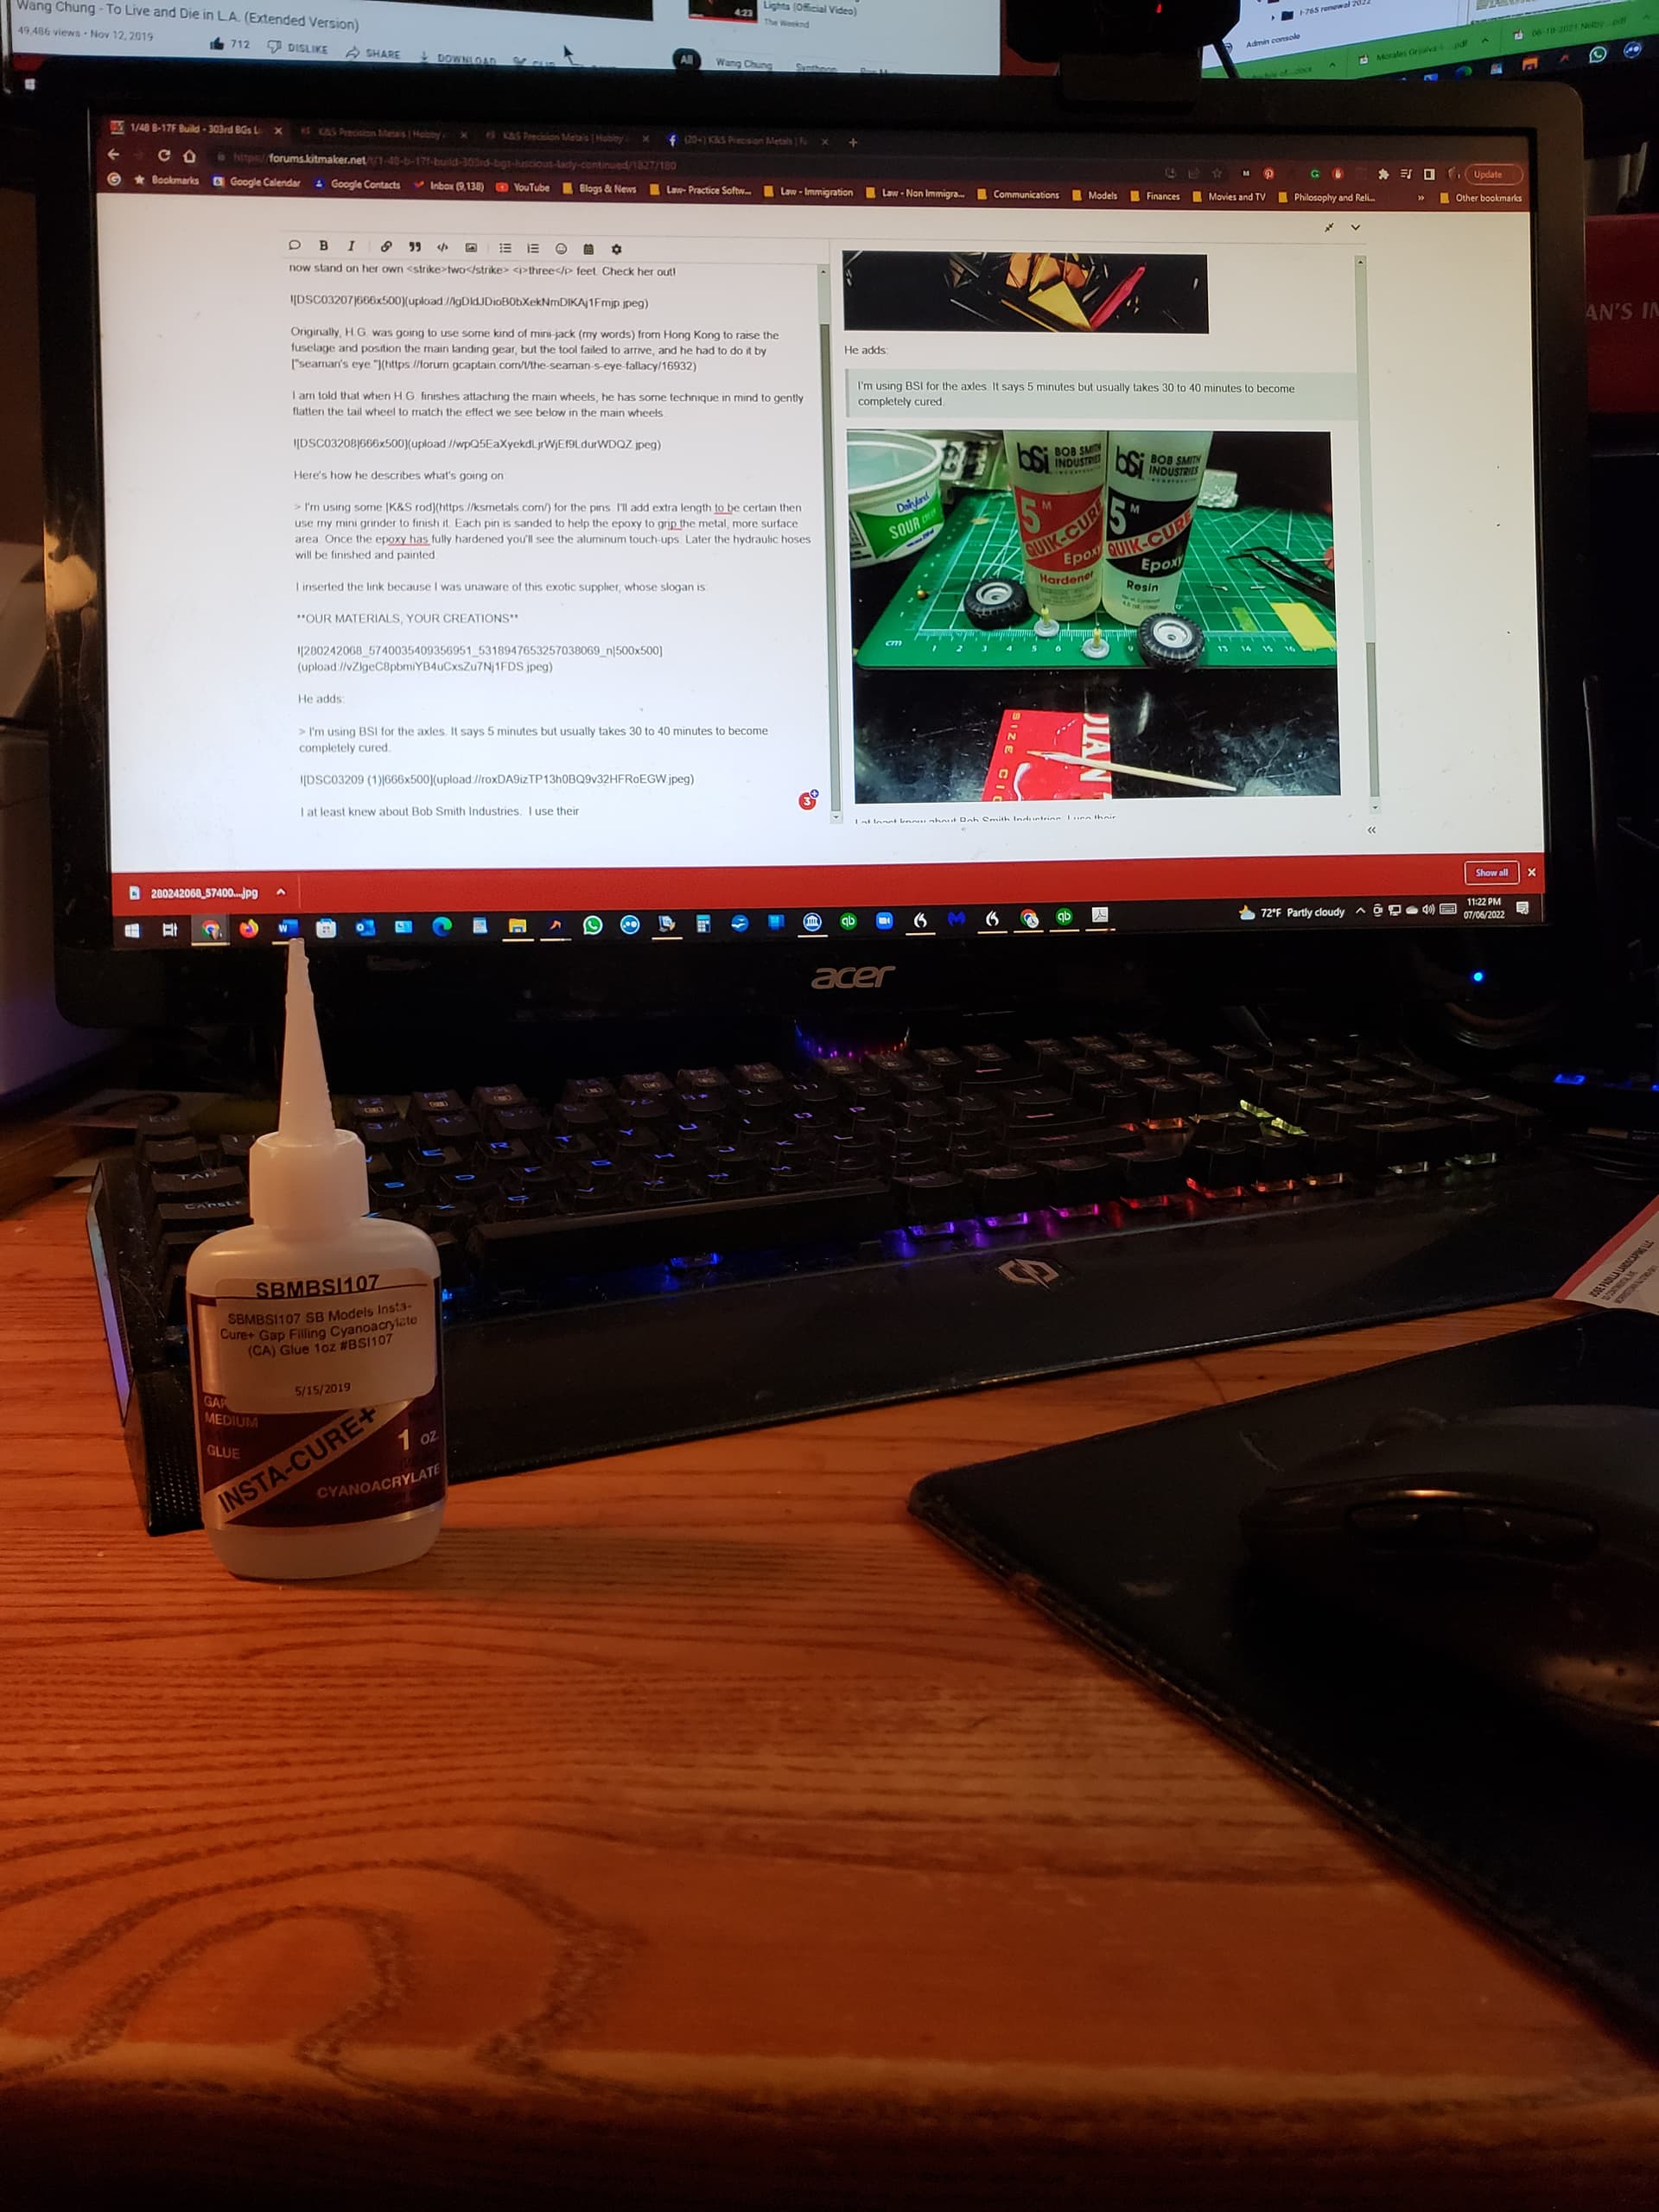
We have also actually started a discussion about how to present this model when it is done.
I recently moved into a slightly larger office in my complex. There is a second table and room to display the model on the table but under a Plexiglas box that fits over a wooden base. (Custom-built)
After all these years, I do plan a mini diorama with one or two vehicles and other toys near the aircraft.
There are two hard-stand diorama bases that I am considering using.
The first is by Noy’s Miniatures
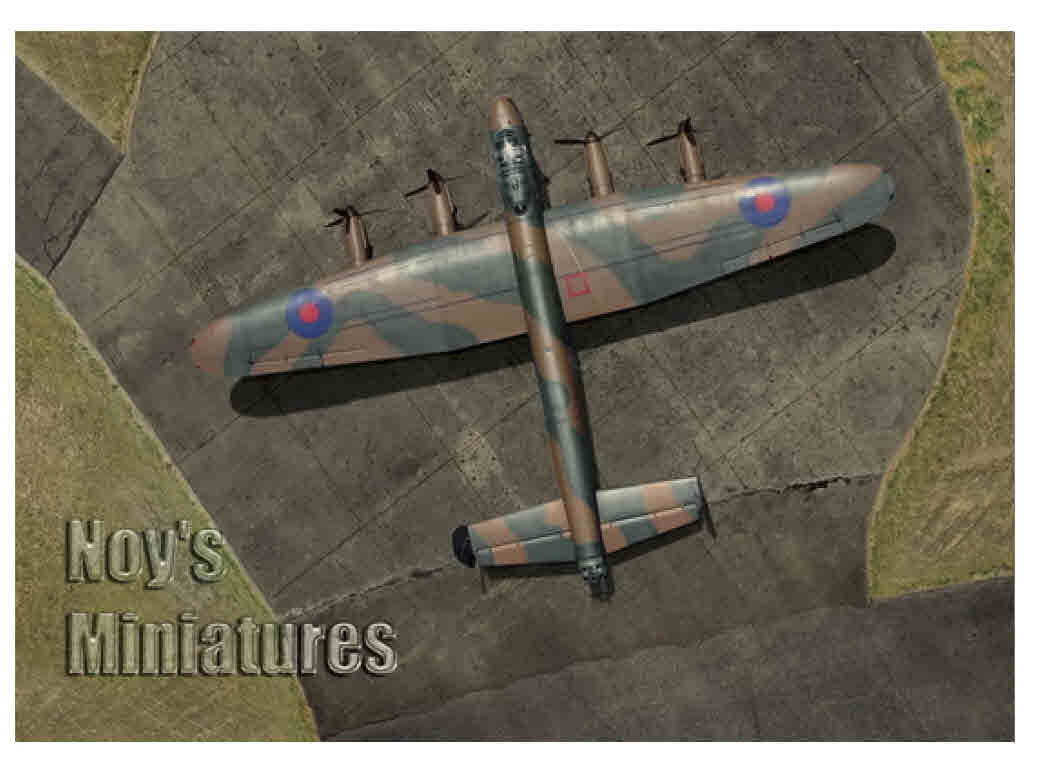
And is probably my preference. The hardstand is known as a “frying pan” type and was present at Molesworth Station, where the 303rd was located.
The second is a more recent offering by Kits-World, which is a bit smaller.
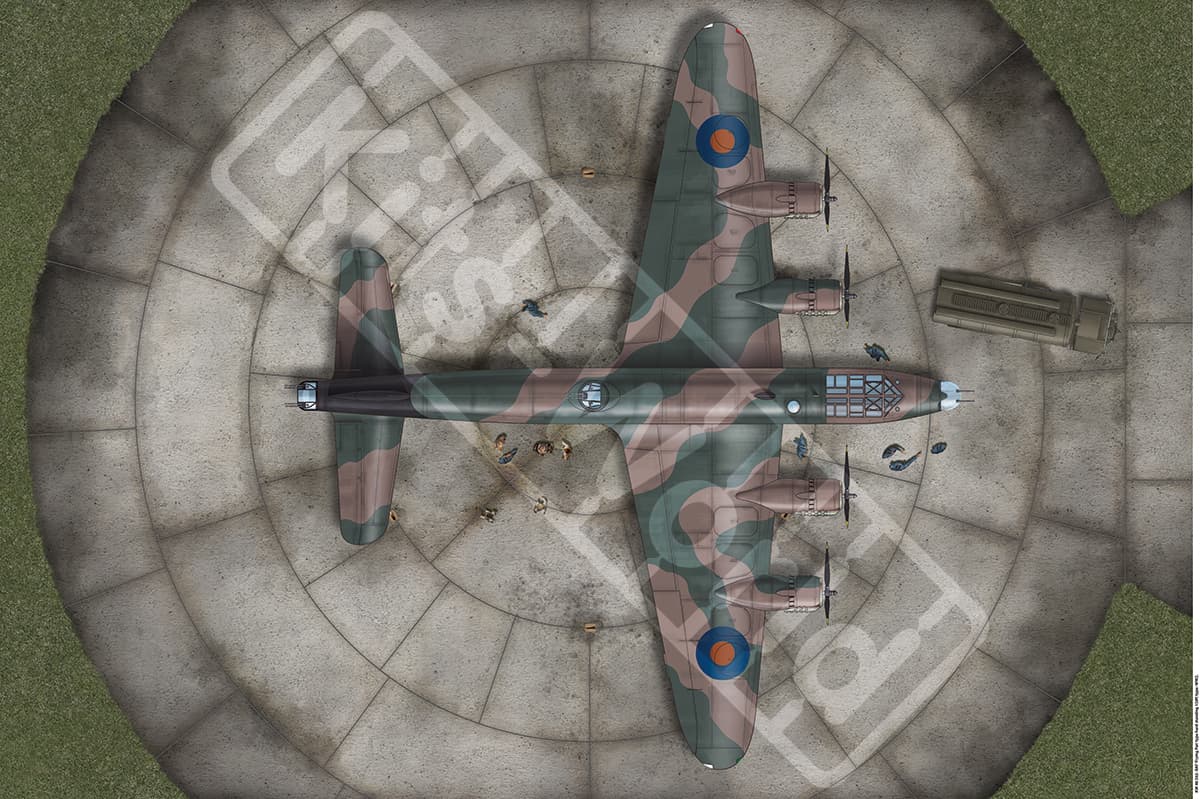
Its advantage is that you can see a little better why it is called a “frying pan” hardstand, but I’m a little leery of the Short Sterling wing dimensions compared to a B-17’s.
Also, they didn’t exactly endear themselves to me by putting that huge logo in the middle of the image. Let’s just say I consider it an exercise in anal-expulsive marketing that borders on bad taste. Also, I’m still a bit burned by the need to second source their Luscious Lady nose art decal.
It’s late, and I’m not into showing all the stuff that I have, which could go into a diorama, though long-term followers of the blog will know that this is a subject also covered many moons ago in the archived front end of the build. However, once I do put up all these images, I’d be interested in your thoughts about how much should be included in a diorama and of course, what.
It’s sort of like the existential question about how many prunes one should eat. I remember an old TV ad, sadly not on YouTube, where an elderly lady asks a friend, “Are two too few?” To which I silently added the counterpoint: “Are sixty too many?”
I promise the next post will be more family-friendly.
7 Likes
I would suggest to add only one more thing to the display… USAFM Dayton, Ohio please!!
![]()
1 Like
Its not marketing, its a watermark to prevent the now (very real) threat of complete strangers copying such a picture and using it for their own needs, even plagerising it. A form of copyright.
My wife is a photographer and she has to do this too. Its annoying but necessary.
1 Like