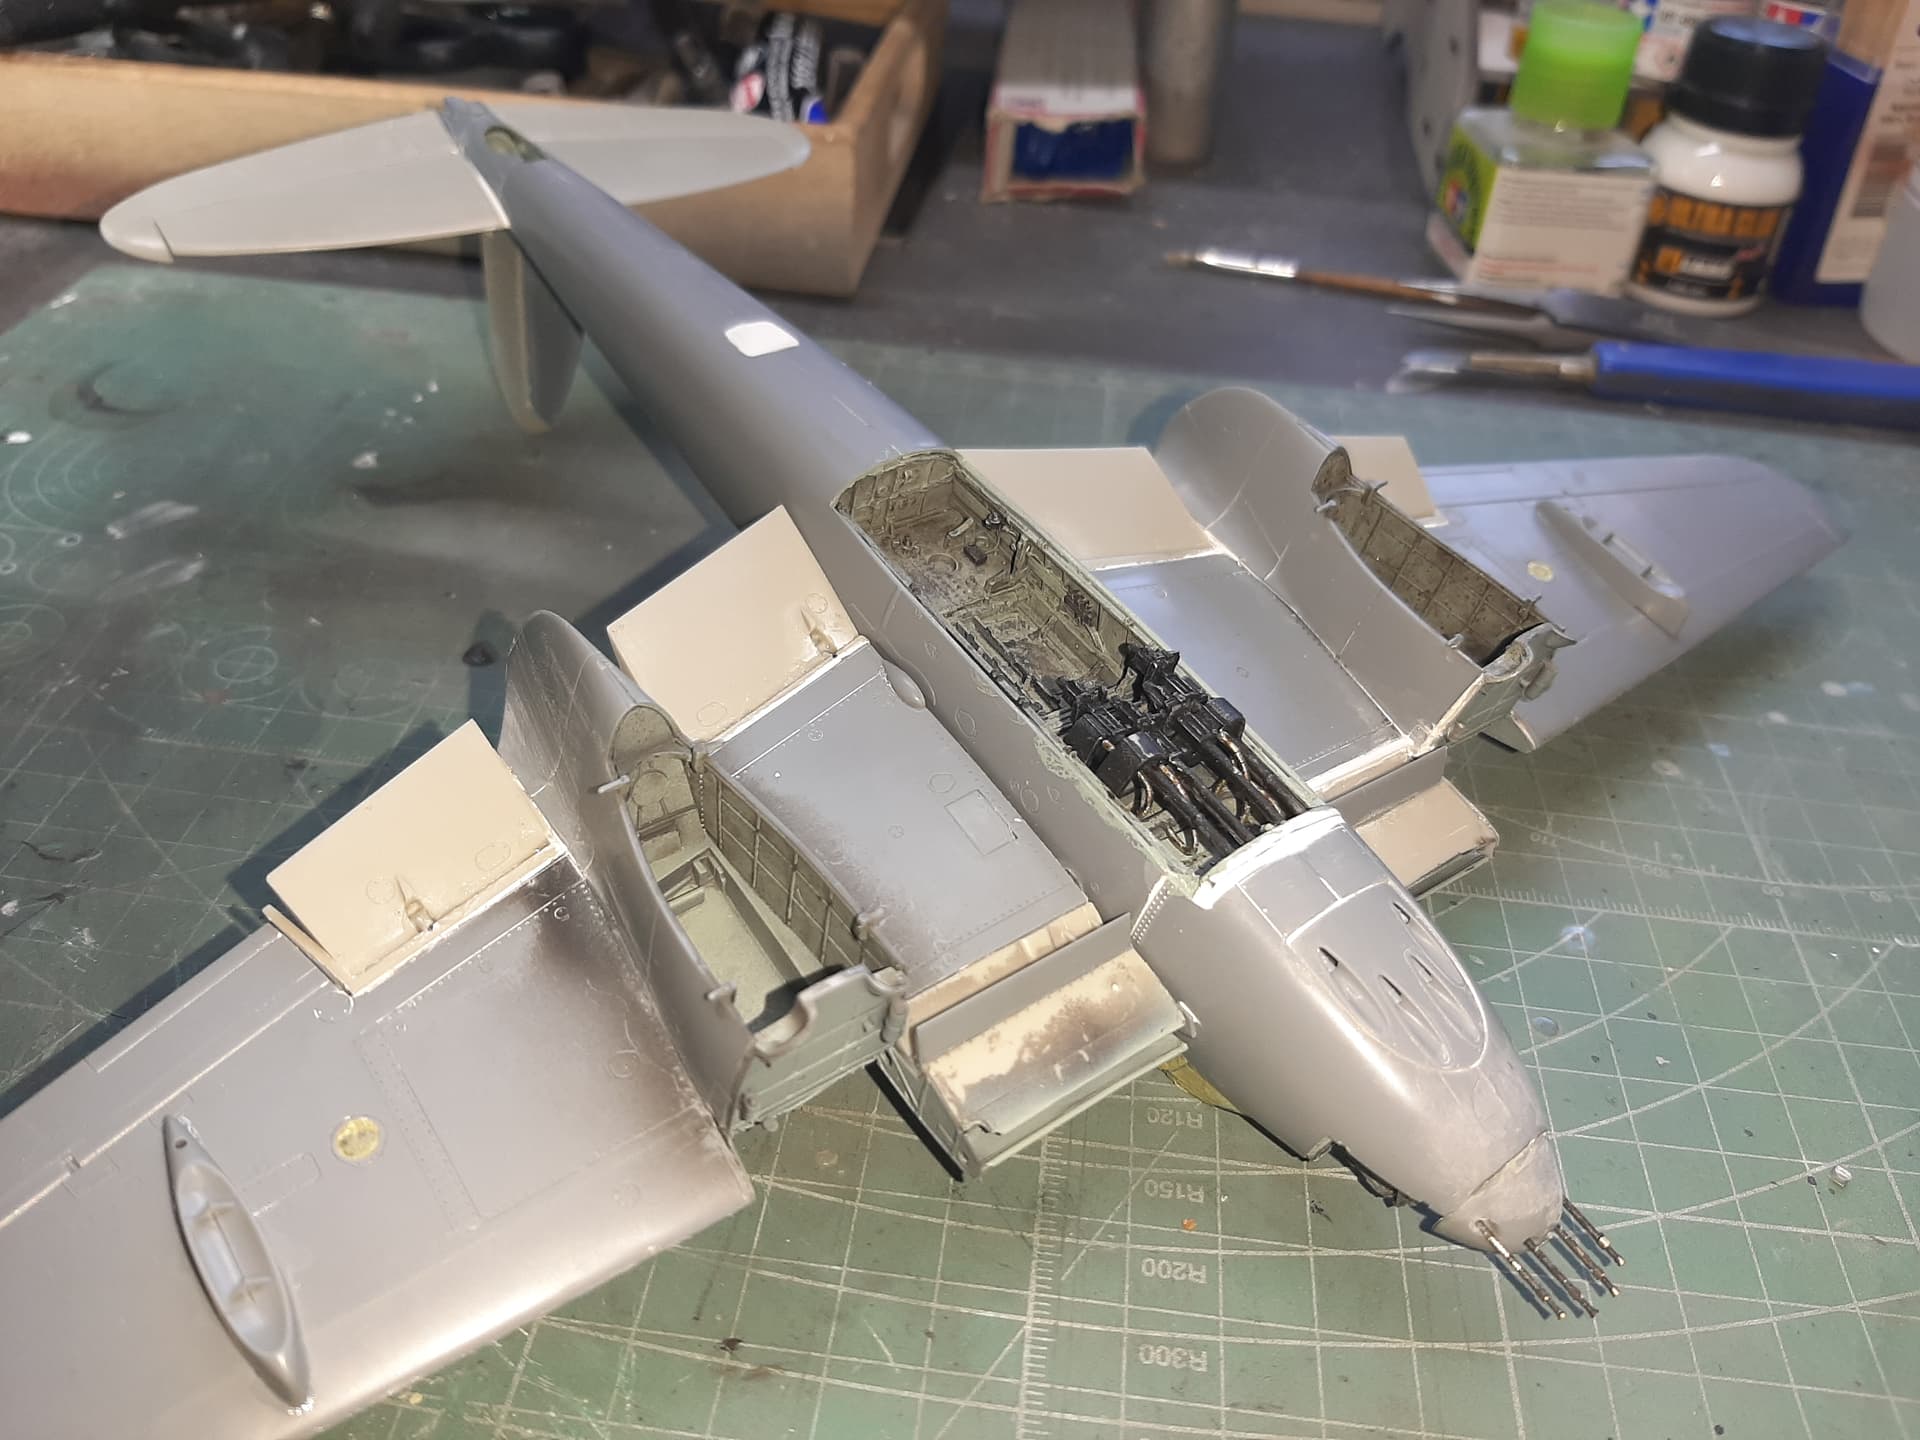
Now the Aires bomb bay (not part of my original plans but read on and you’ll see why it became necessary…)
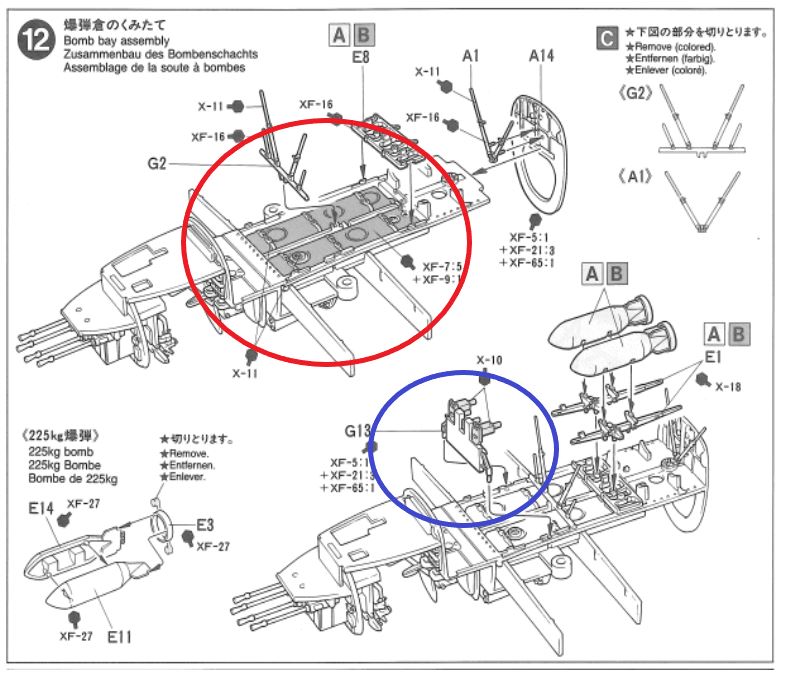
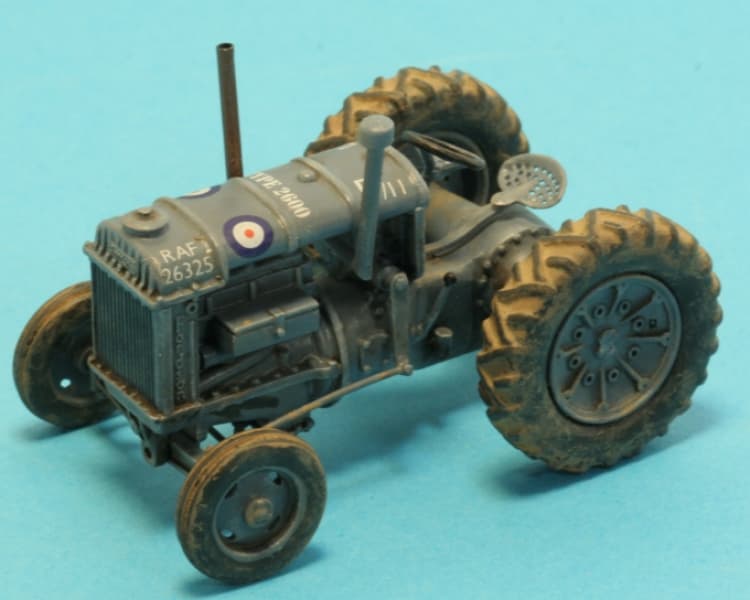
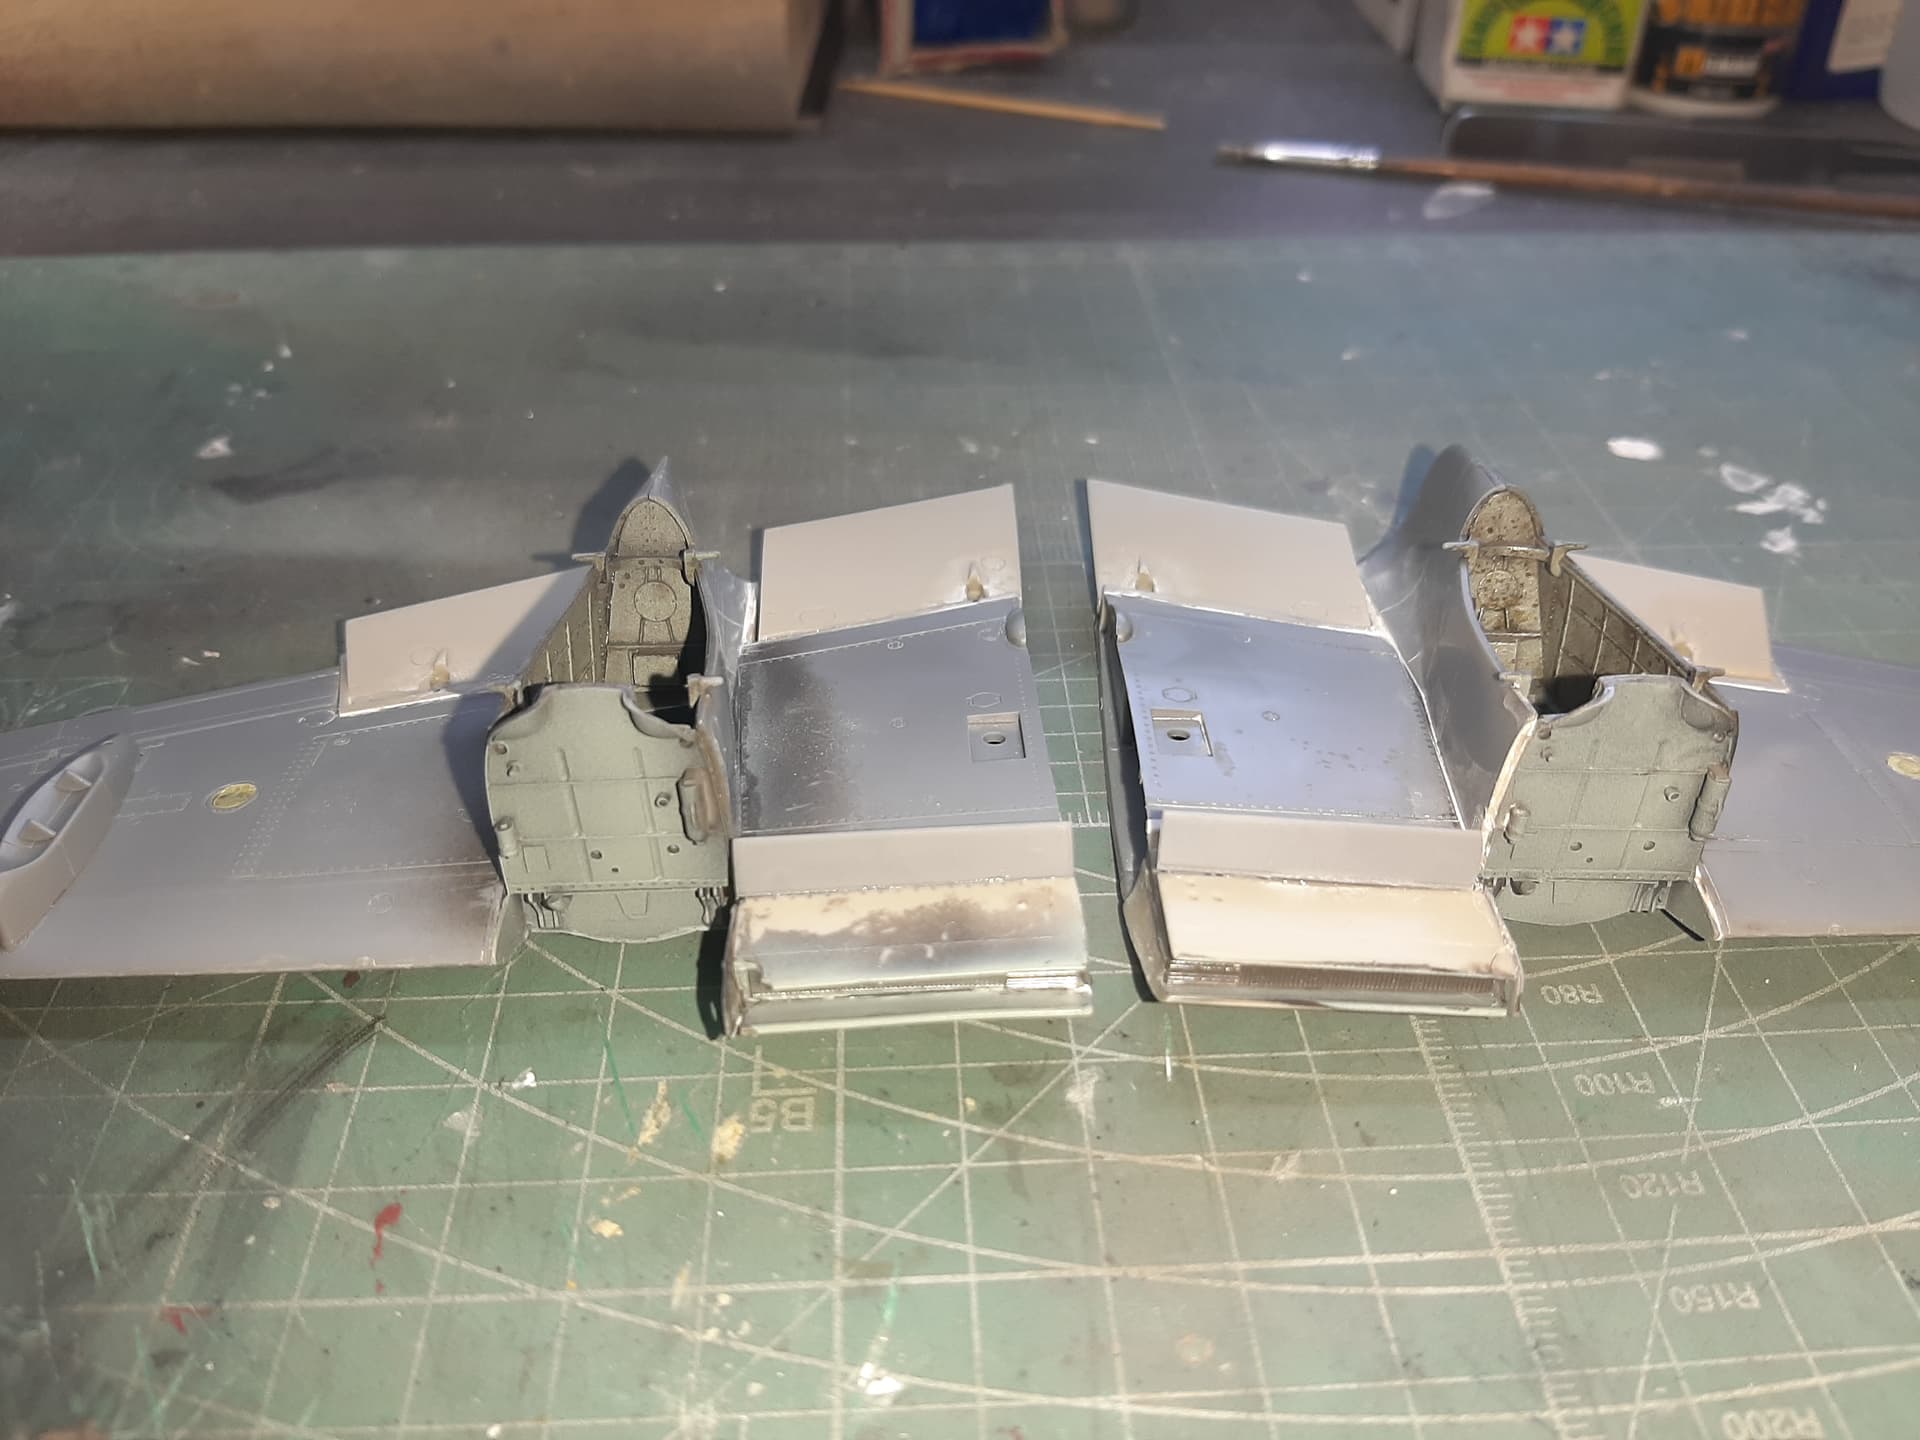
The main reason I got this in the end, was for the display of the Hispano 20mm canons in the forward section of the bomb bay, but also, because the kit supplies a bomb bay which is so innacurate its embarrassing (and i’m definately not a rivet counter I can assure you). The kit part shows the underside of fuel tanks (circled in red) that are only present in the B Mk IV version of the aircraft (maybe the PR version too, I’m not sure) - but anyway, in the FB Mk VI, this portion of the bomb bay is taken up by the Hispanos, and the fuel tanks just simply are not there. I just couldn’t let it go.
Circled in blue, we can see how superficially Tamiya present the Hispanos, only showing the ‘rear’ of the guns themselves and later covering up the forward bomb bay section with the forward two bomb bay doors.
1 Like
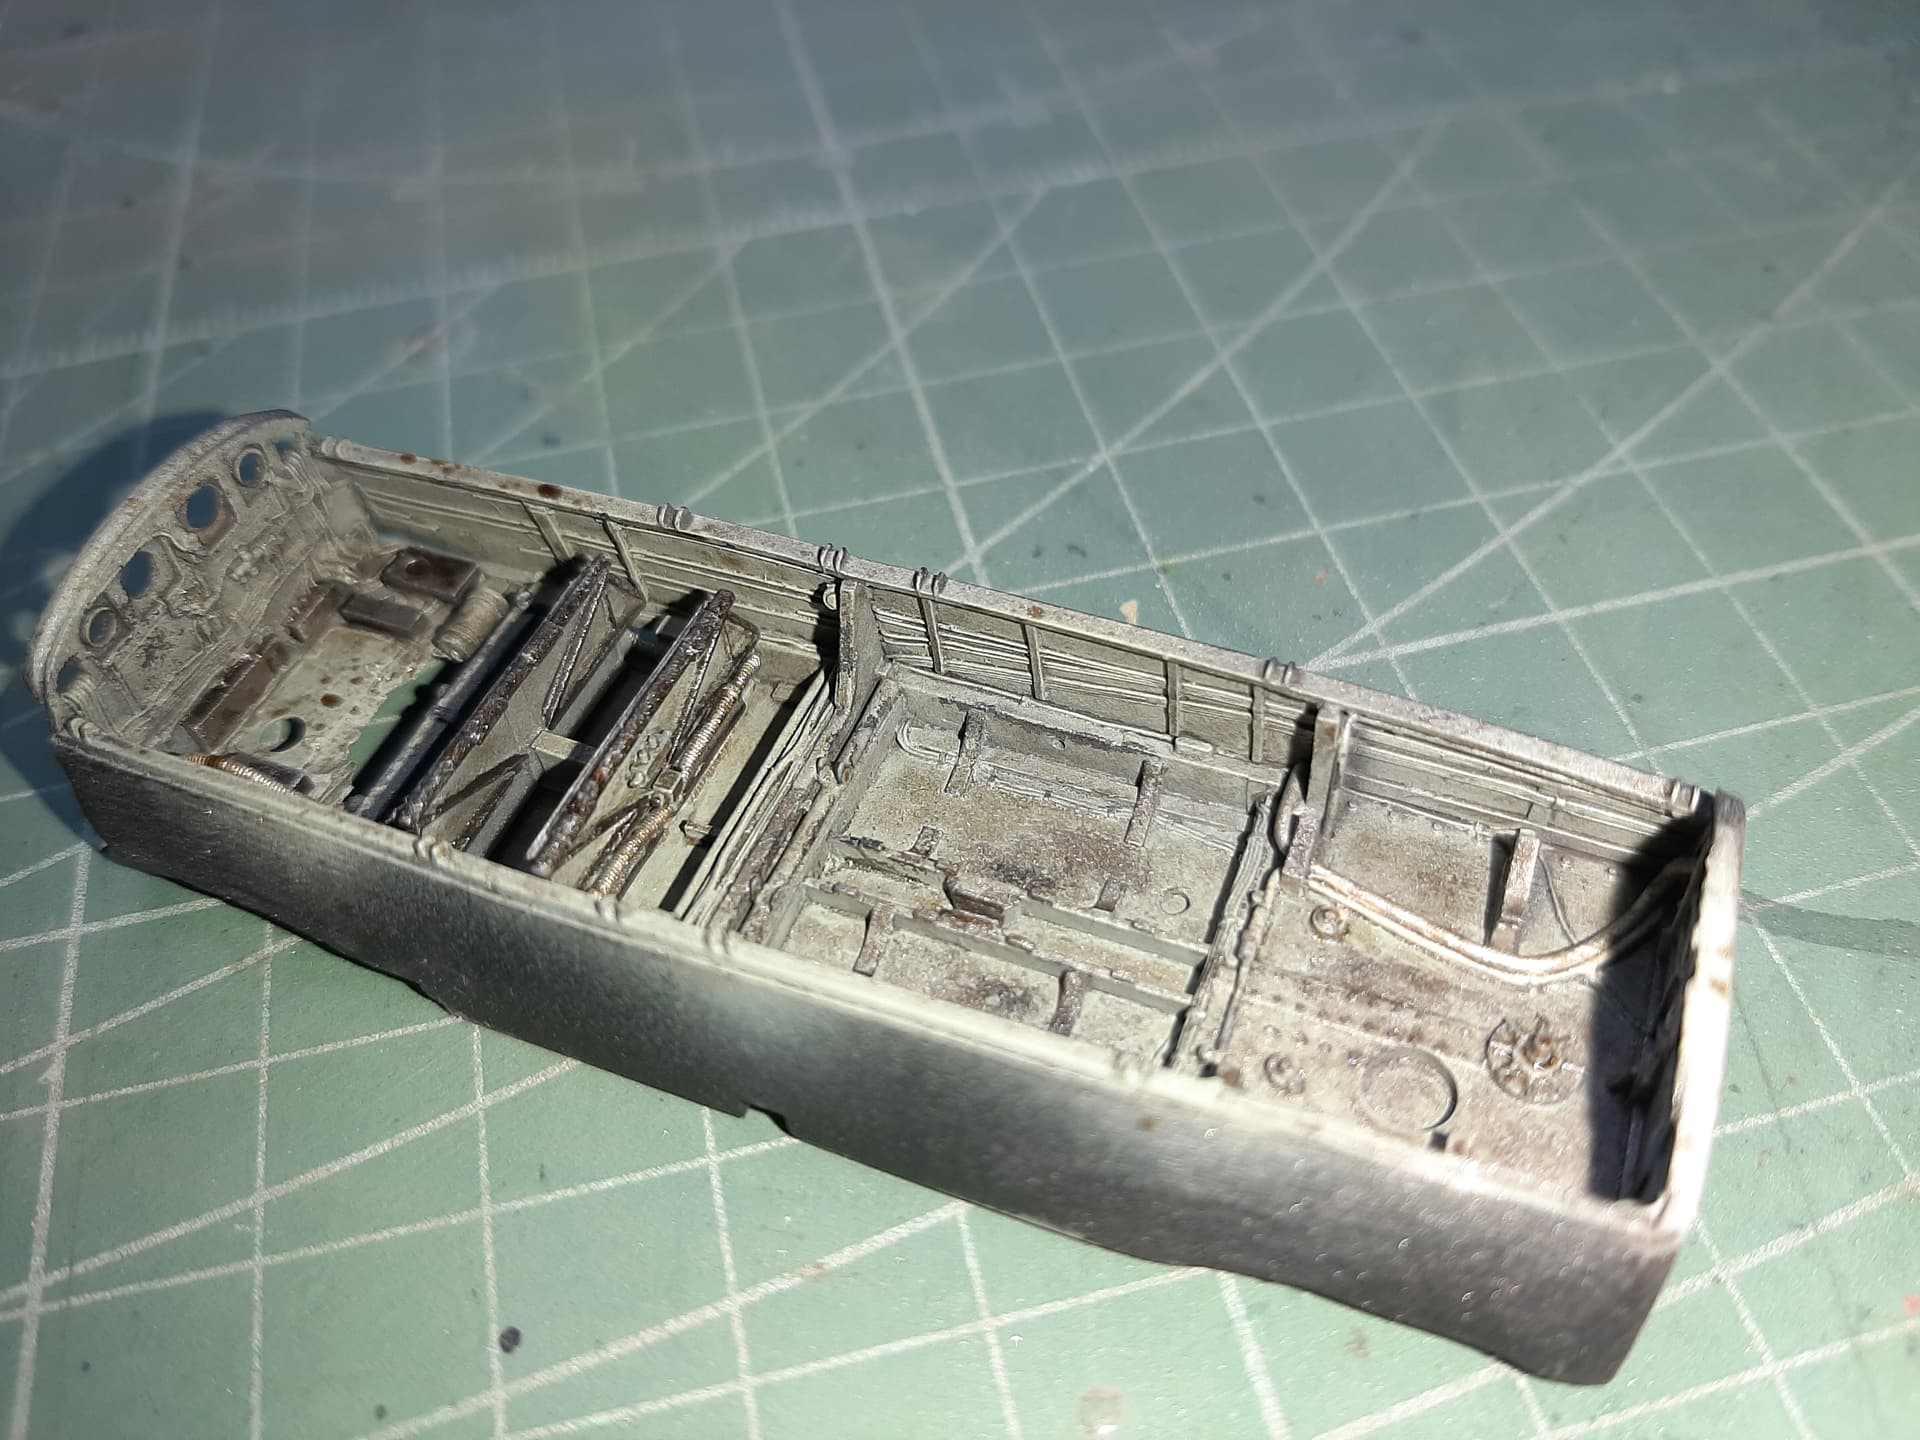
This Aires bomb bay part has to be butchered to within an inch of its life to get it to fit. Constant and I mean constant, filing, sanding, fitting, grinding & swearing are required to get this to fit - not only into the rear fuselage section, but to get it also to fit underneath the AM cockpit floor (remember I said about being careful to ensure your cockpit was assembled correctly).
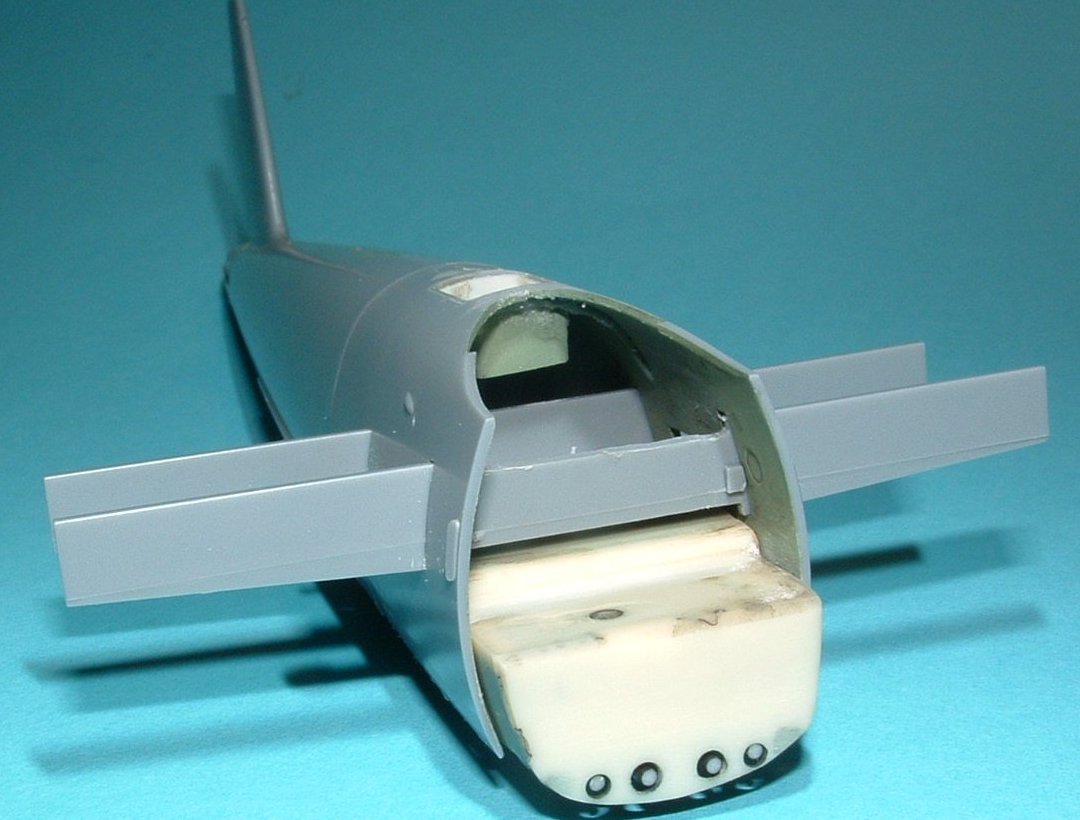
Much work needed here, but the end results are definately worth it, particularly when compared to the Tamiya kit offerings.
Look at those lovely Hispanos!
3 Likes
Nice work @Khouli, the extra work was definitely worth it. Detail looks great.
Looking good this far… I like it how they do those big wing braces for when they get fitted.
Cockpit and gun bay is very nicely detailed 
Some great work on those Aires replacements. I gave up on using Aires stuff a long time ago. I just couldn’t be arsed with the work to make it fit. I did use the cockpit set in my build of this but I think that was the last time! 
1 Like
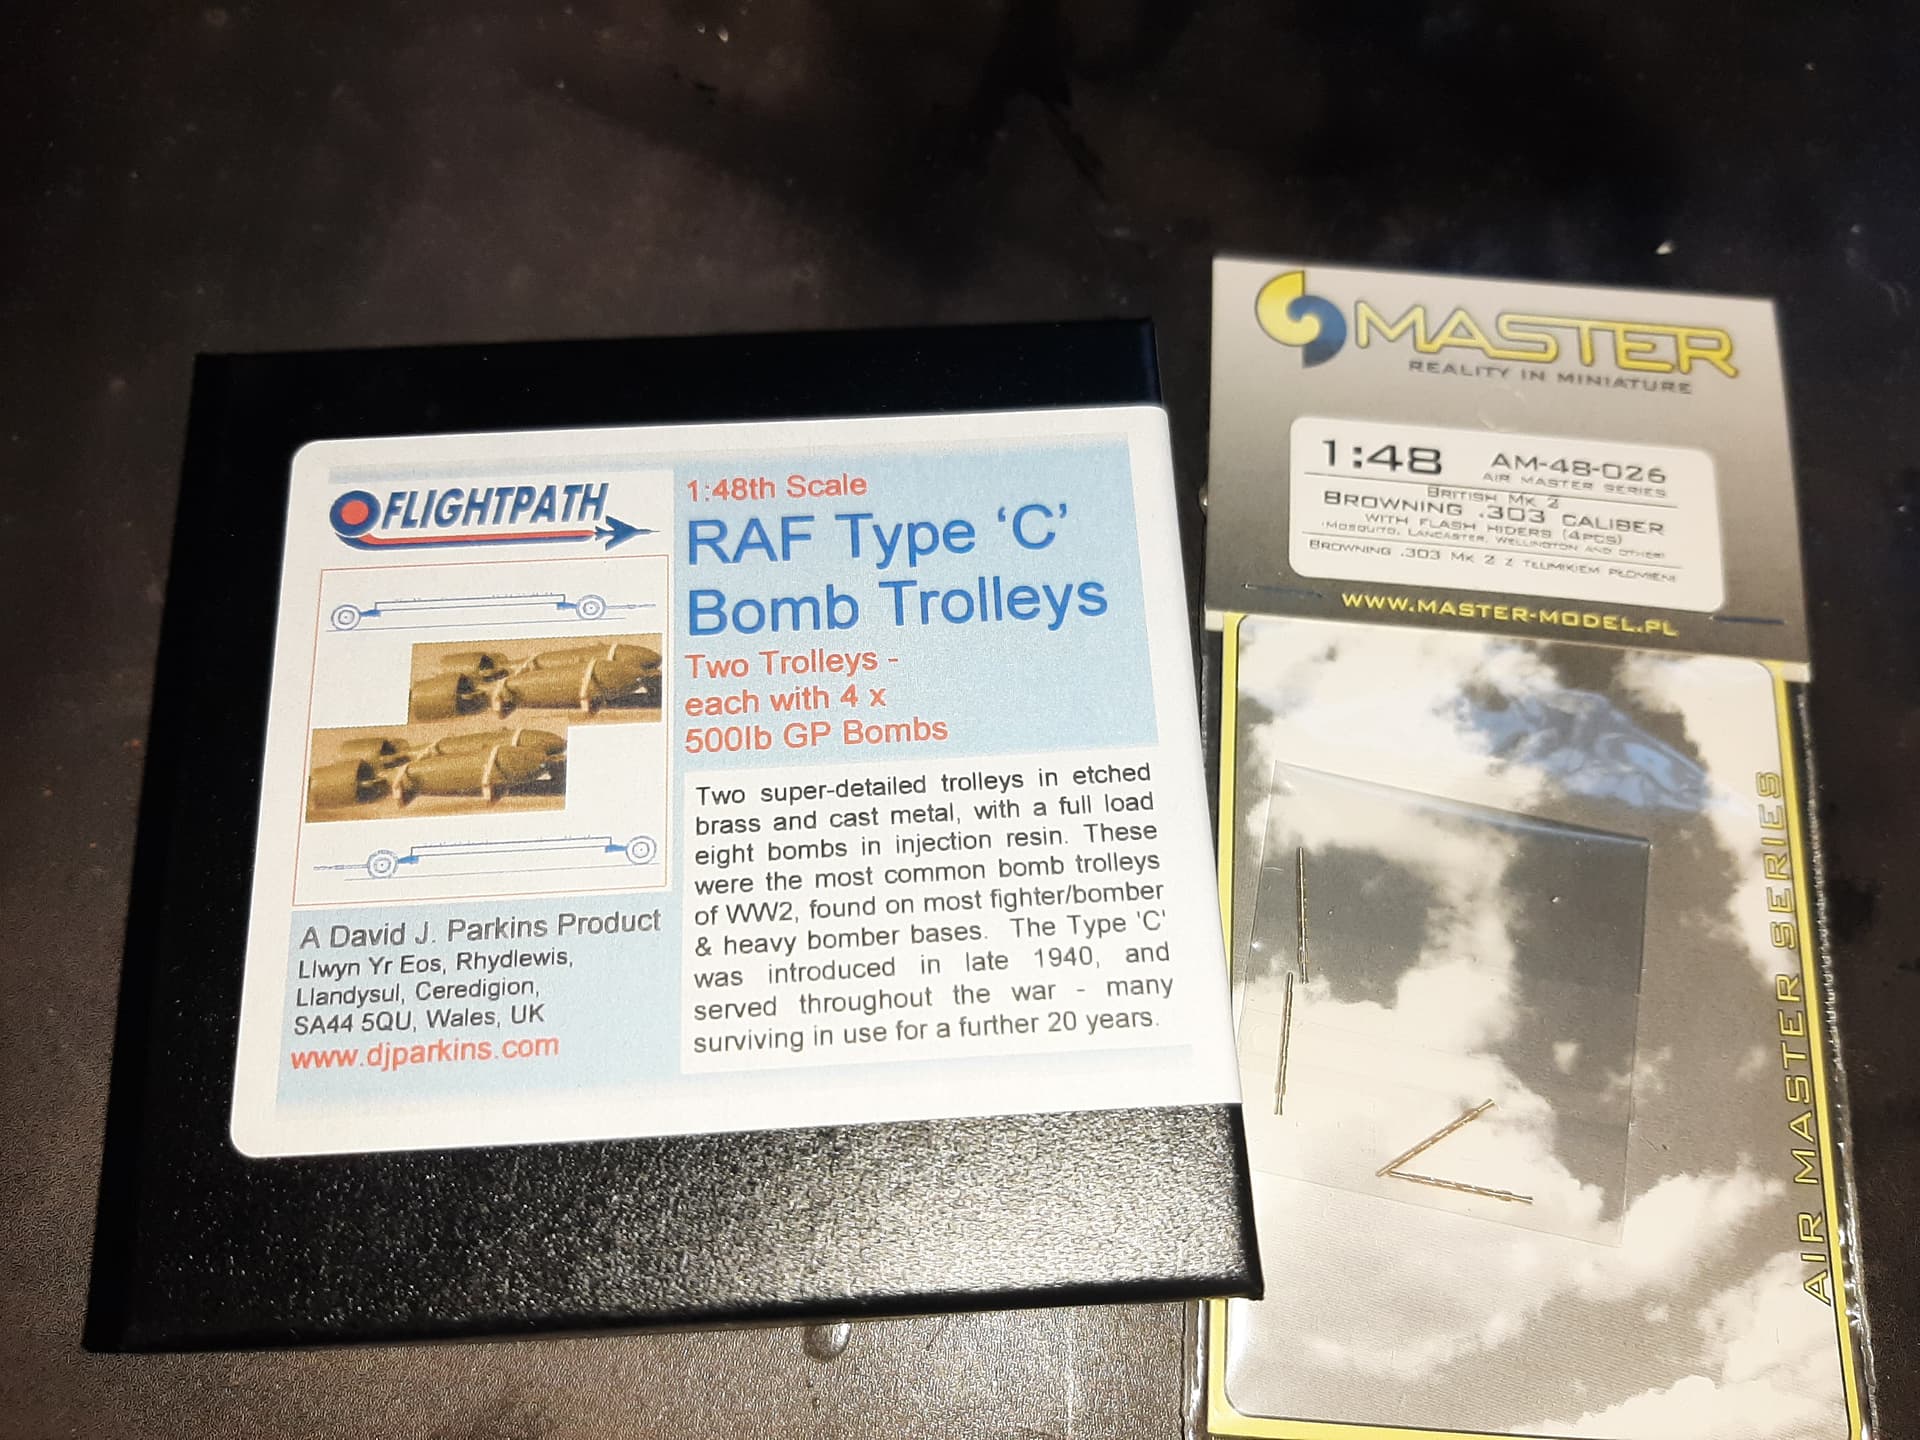
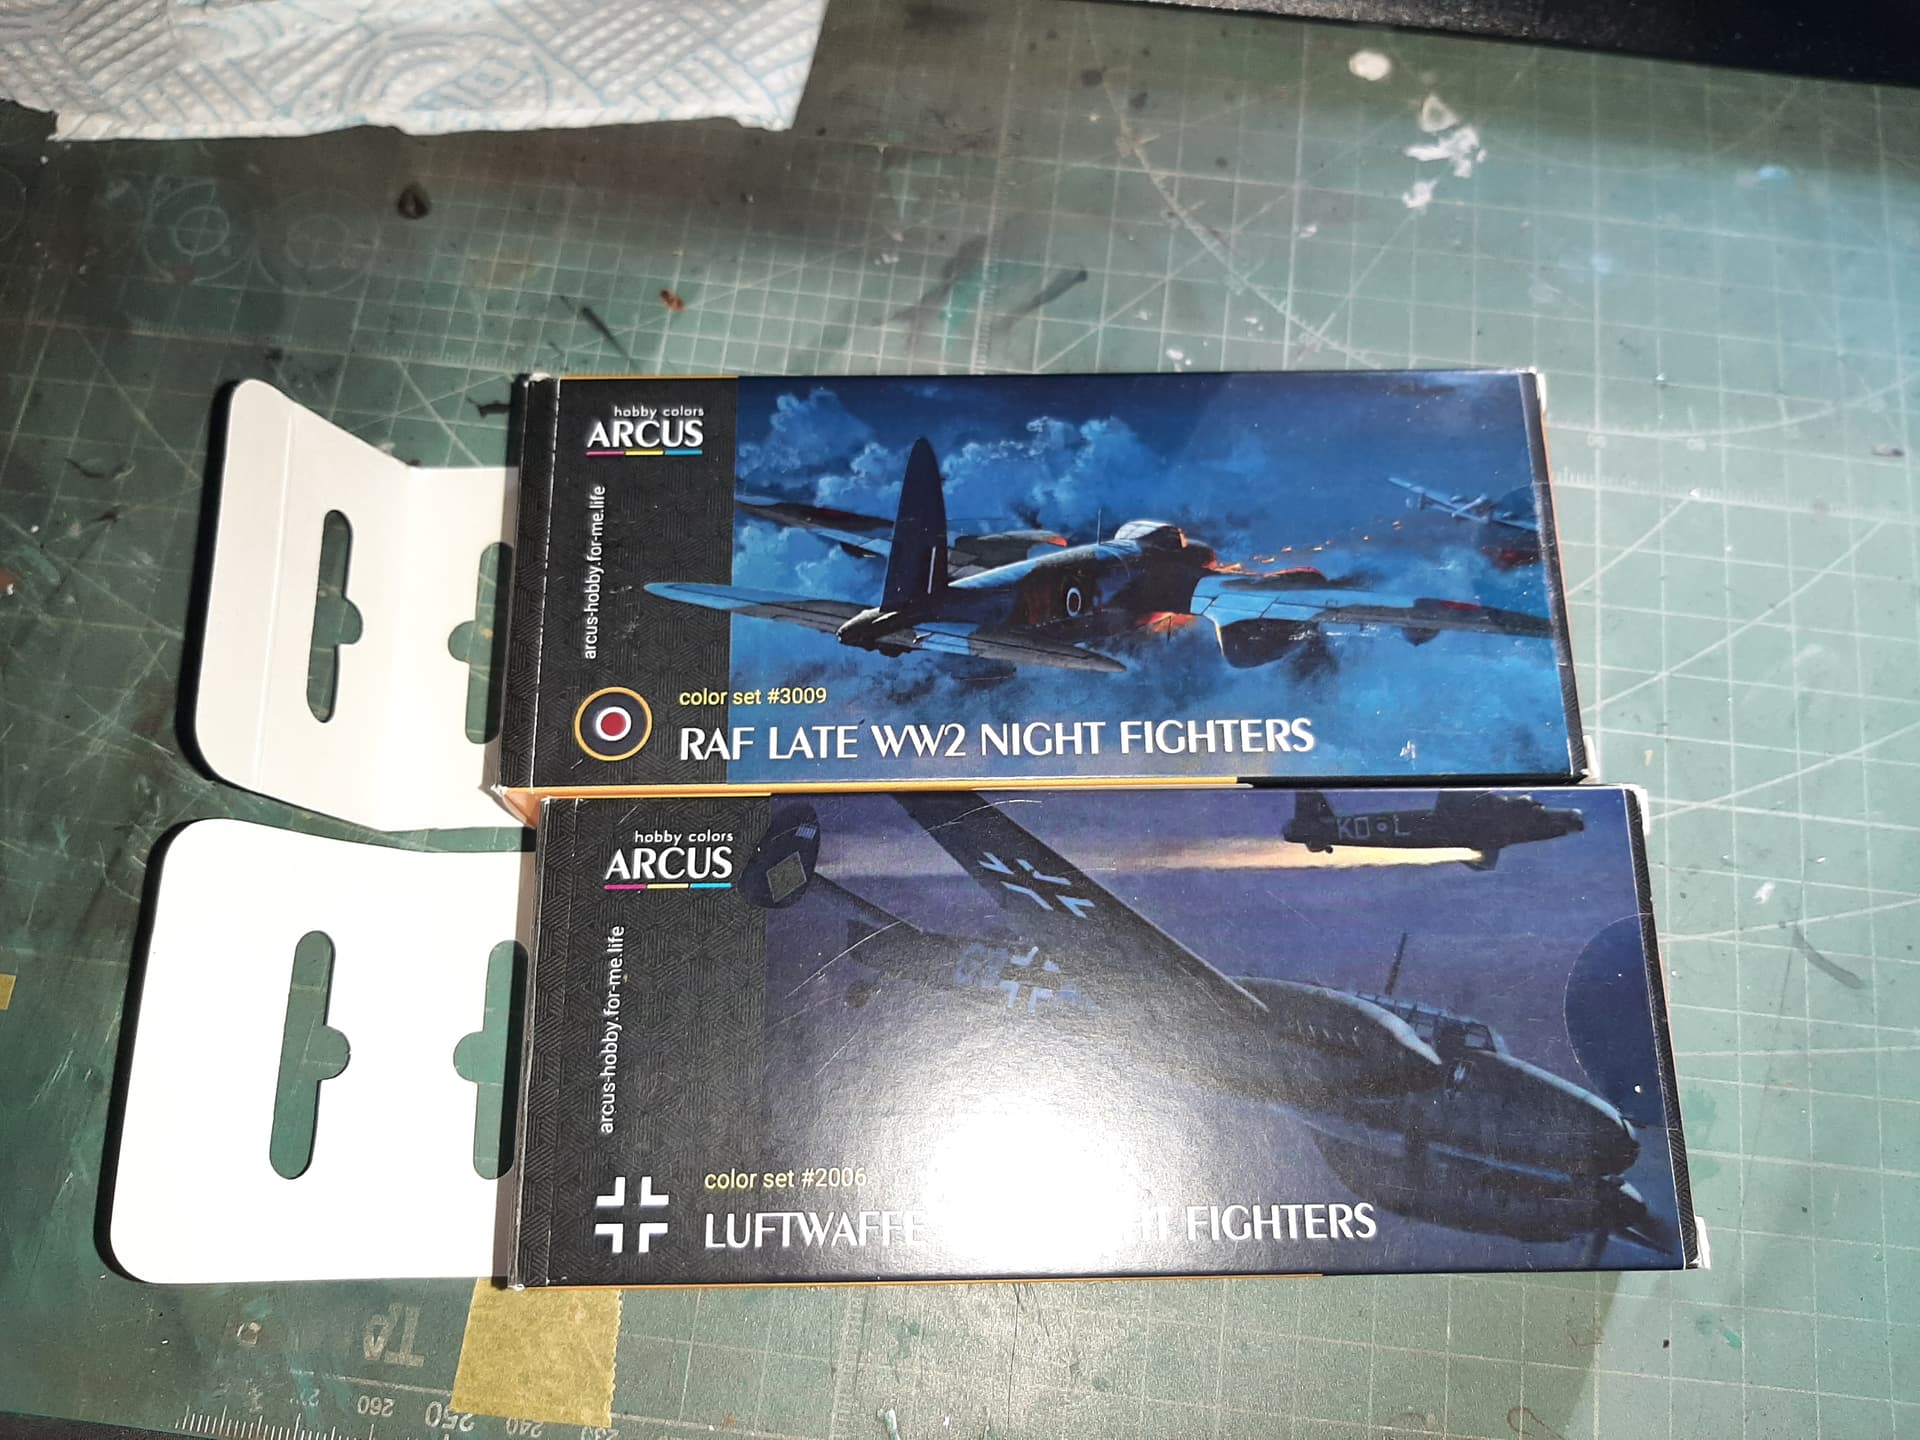
Not much to report except that I took delivery of these at the weekend.
My aircraft will be depicted (or staged) during a maintenance/pre-flight period (i.e. engines exposed etc. Therefore it would be inappropriate to attach the 2 x 250 Kg bombs in the bomb bay, as the aircraft would not be armed in this state.
So I invested in the RAF Type C Bomb Trolley c/w 250 Kg bombs from Flightpath Models. An absolutely exquisite kit, multi media (resin, white metal and PE) which just blew me away on opening the box (which is lovely on its own!).
The Master Browning brass .303 gun barells were a necessity. I’m not using the kit parts as i’m replacing those with an Aires gun bay, and the Aires supplied barrels were cast in resin, and as usual, resembled lethal bananas.
And i’ve just ordered this little beauty from Acurate Armour, to tow the trolley(s)
I have done some work joining up the fuselage etc. but i’ll report on that later this week hopefully.
1 Like
@Khouli … Just an FYI really about the black finish. I have just finished my Cr2 Nomad in its all black livery and it was looking very black, in fact overly black if that makes sense. I got some AK neutral grey wash and did a very thinned coat over 95% of it. I went about 60% white spirit to 40 % wash. It really toned down the black and gave it some nice variations over all surfaces. Will be posting pics later in the Lifting the Fog of War: Command and Control thread.
Hi there, and many thanks for that advice.
I think i’m going to keep it simple as I can really. I’m going to lay down a base coat of NATO Black (which isn’t quite black of course). Then i’m going to spray RAF Night over that. Havent decided whether i’m going to do panel by panel to achieve a counter-shaded effect, or just lightly overspray the whole thing. Then i’m going to finish with some light coats of grey to tone it down.
Very similar to that which you have described. Its my first attempt at a night camouflage scheme, so fingers crossed.
1 Like
The Accurate Armour Fordson arrived. Beautiful kit, but this is for later…
1 Like
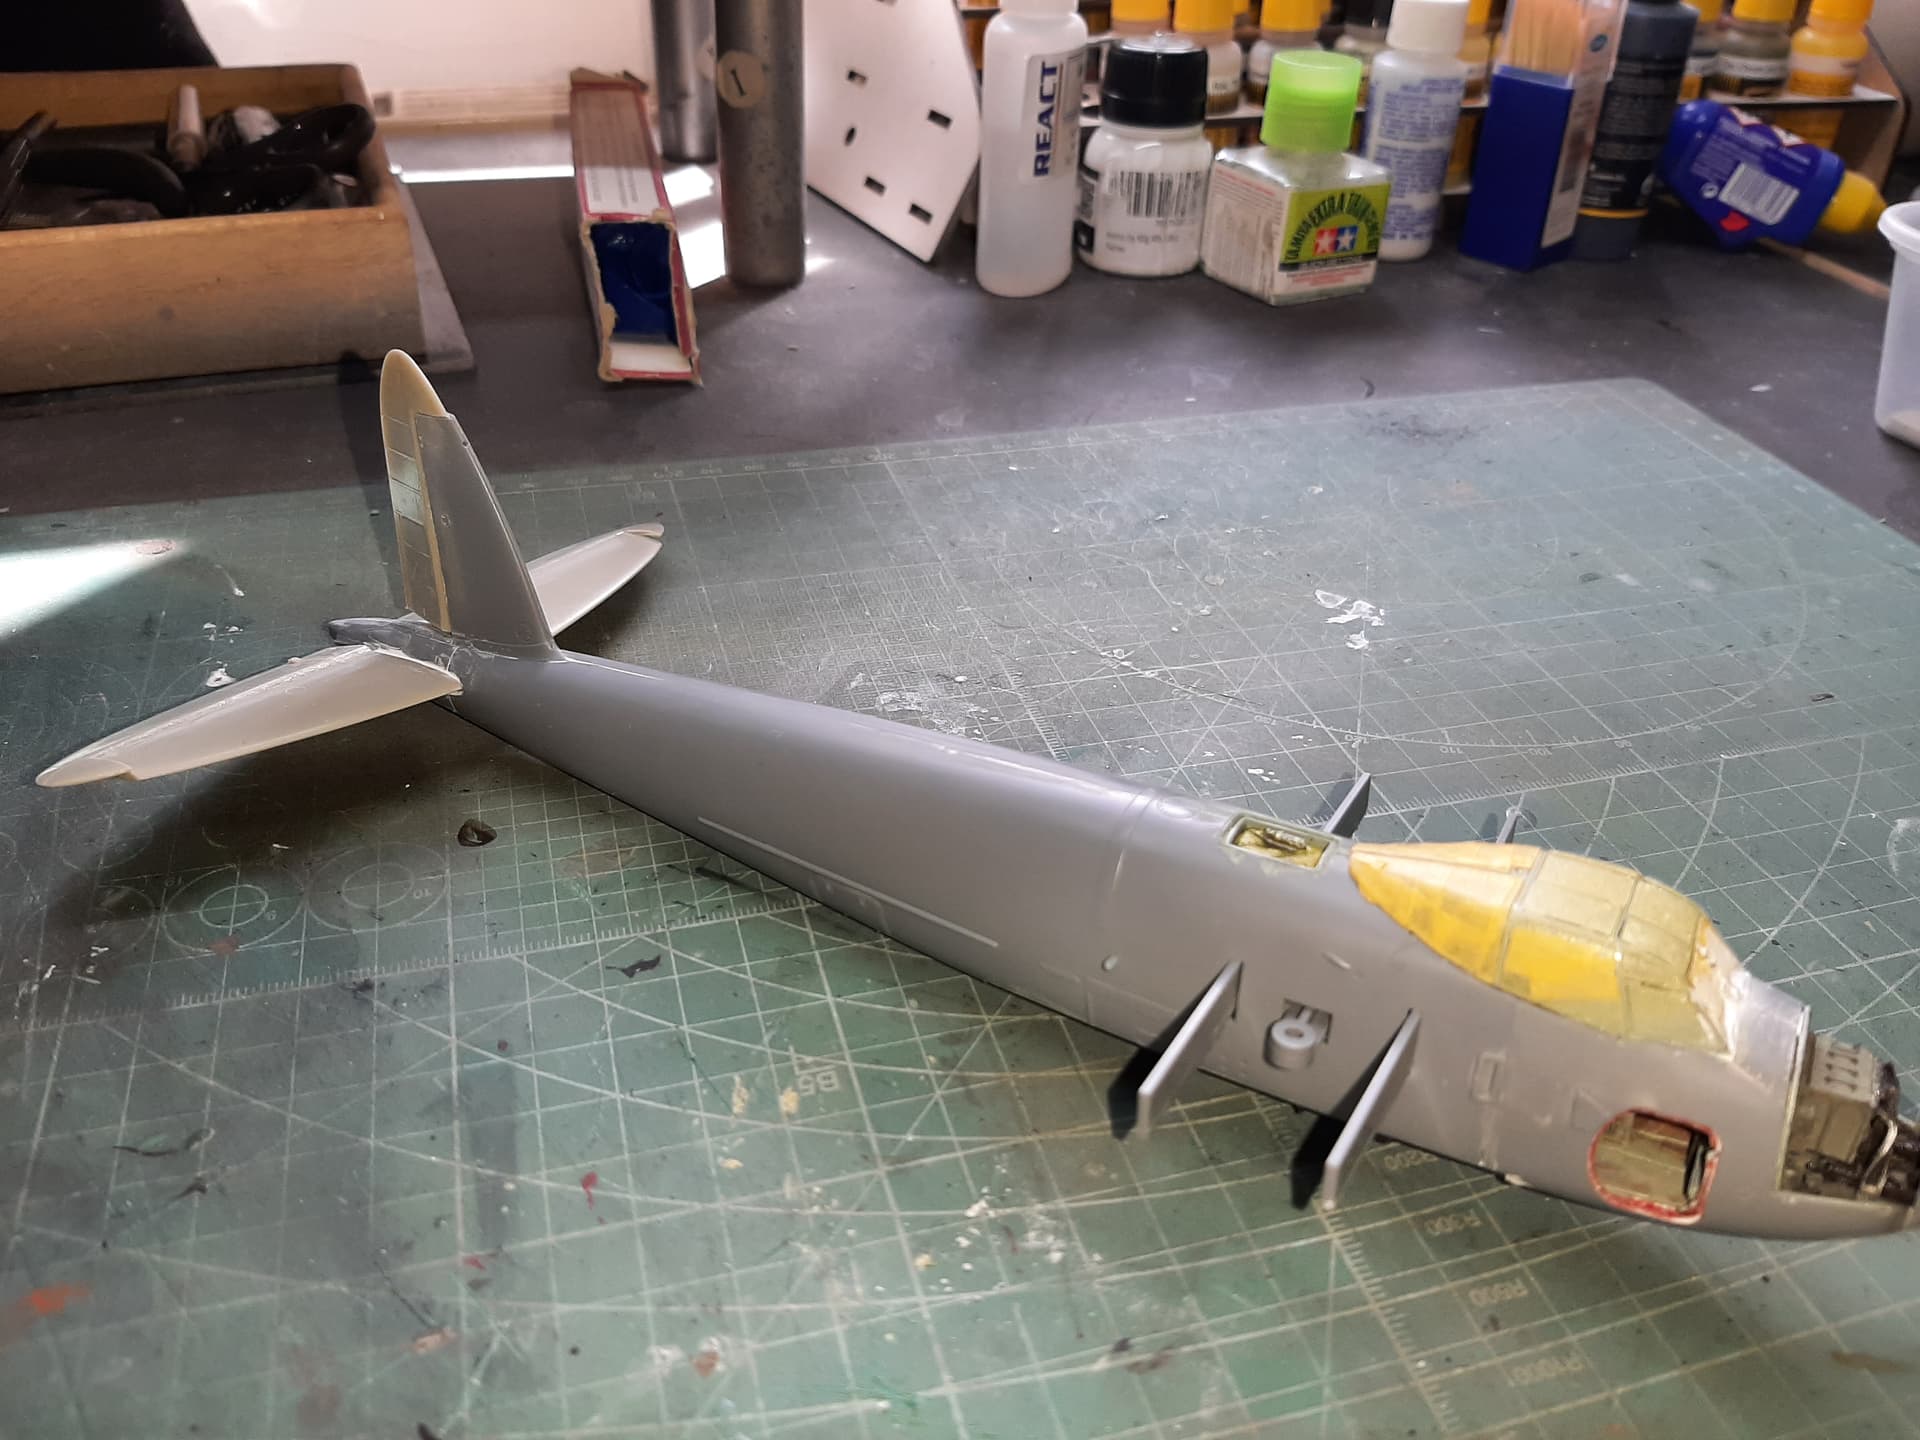
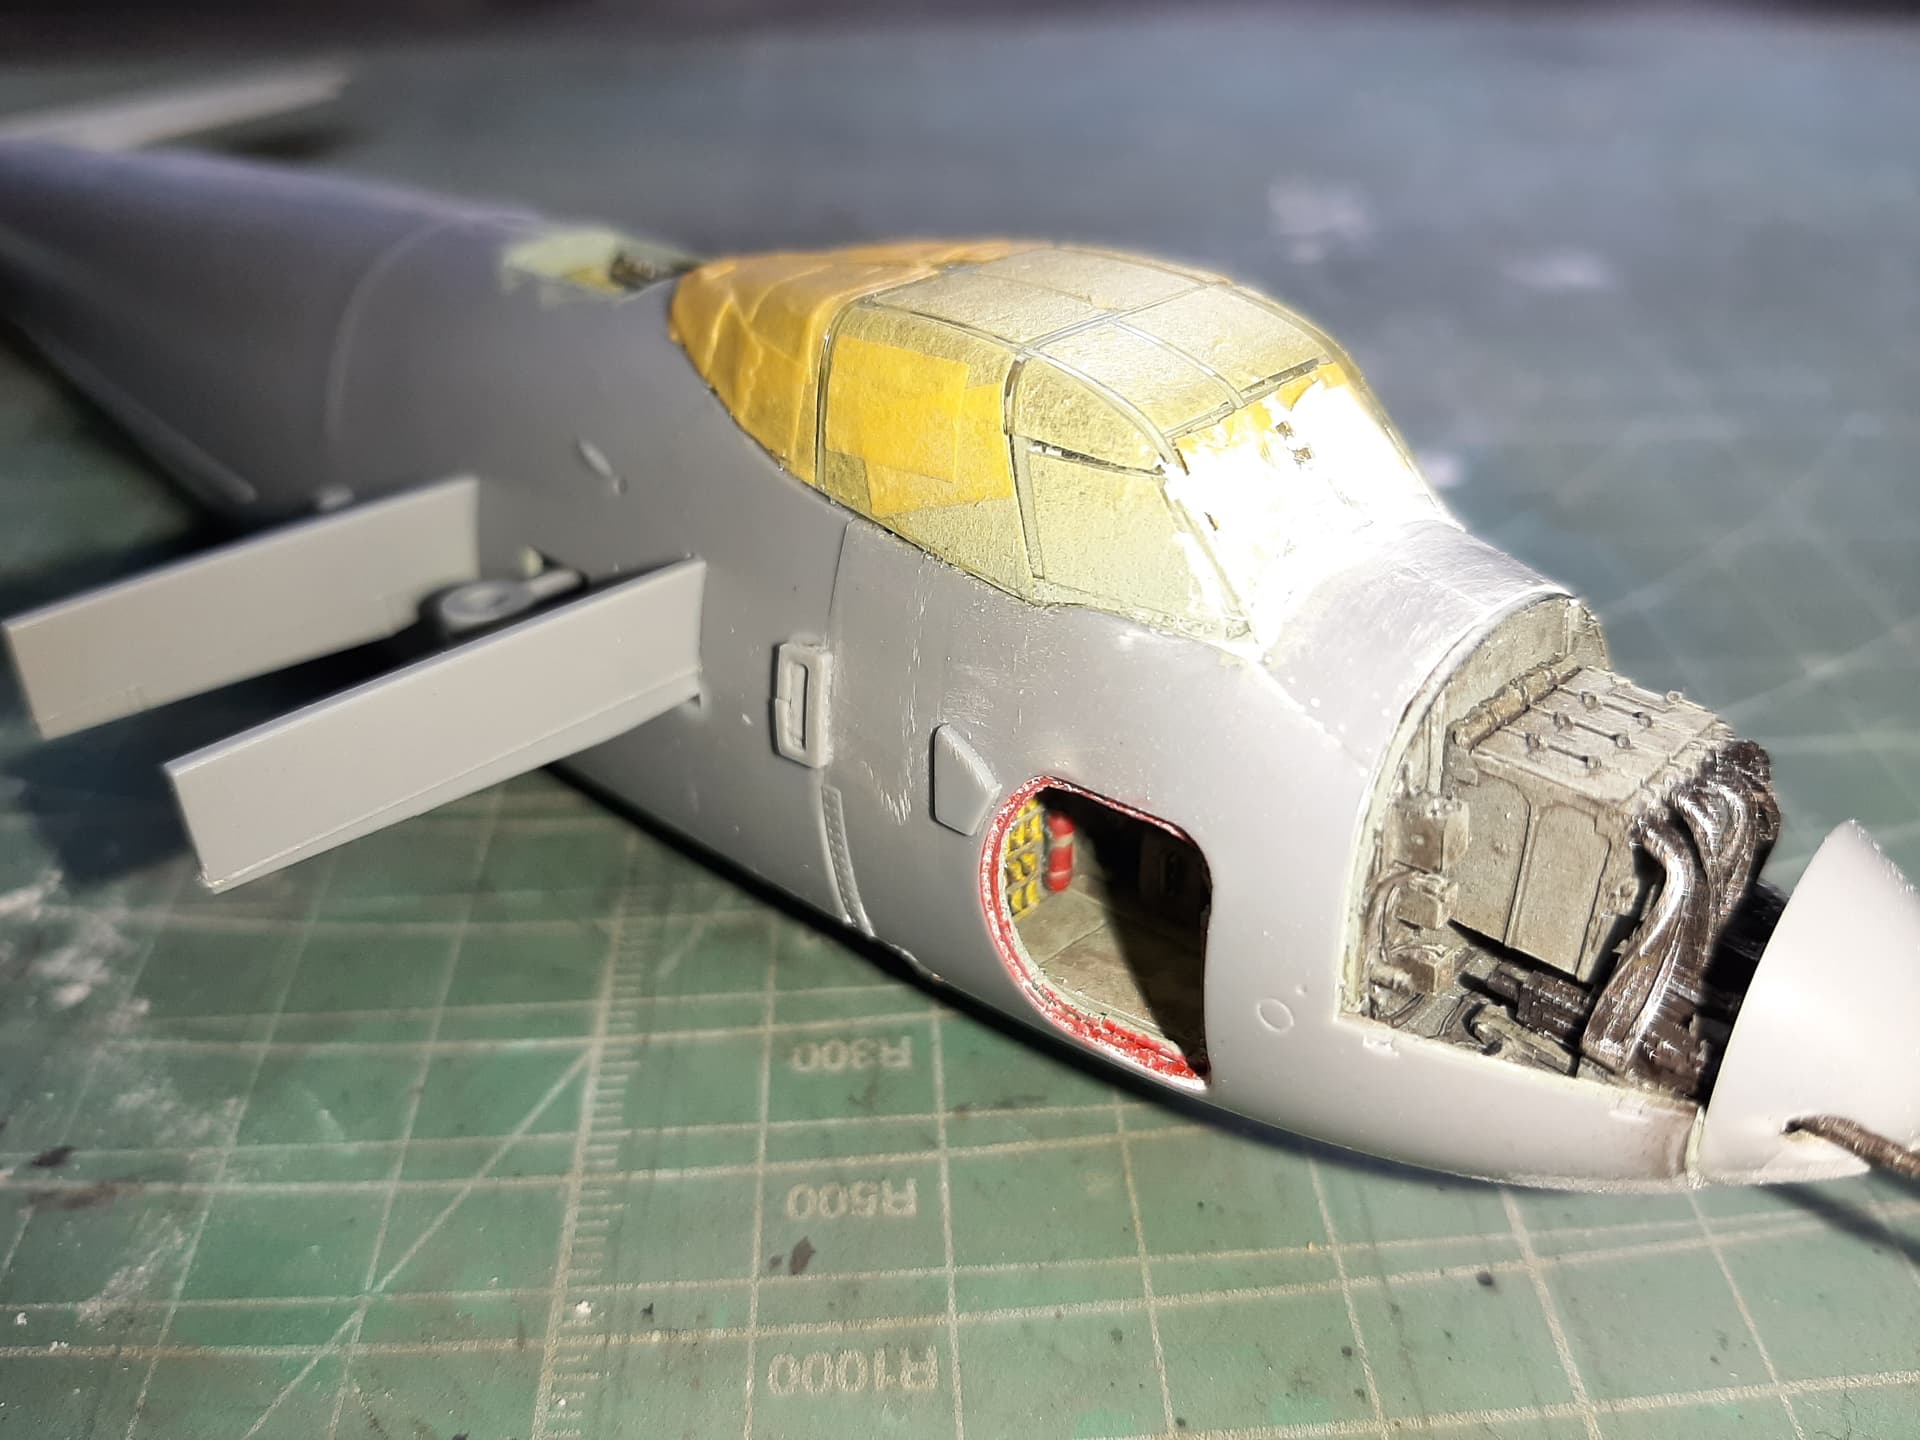
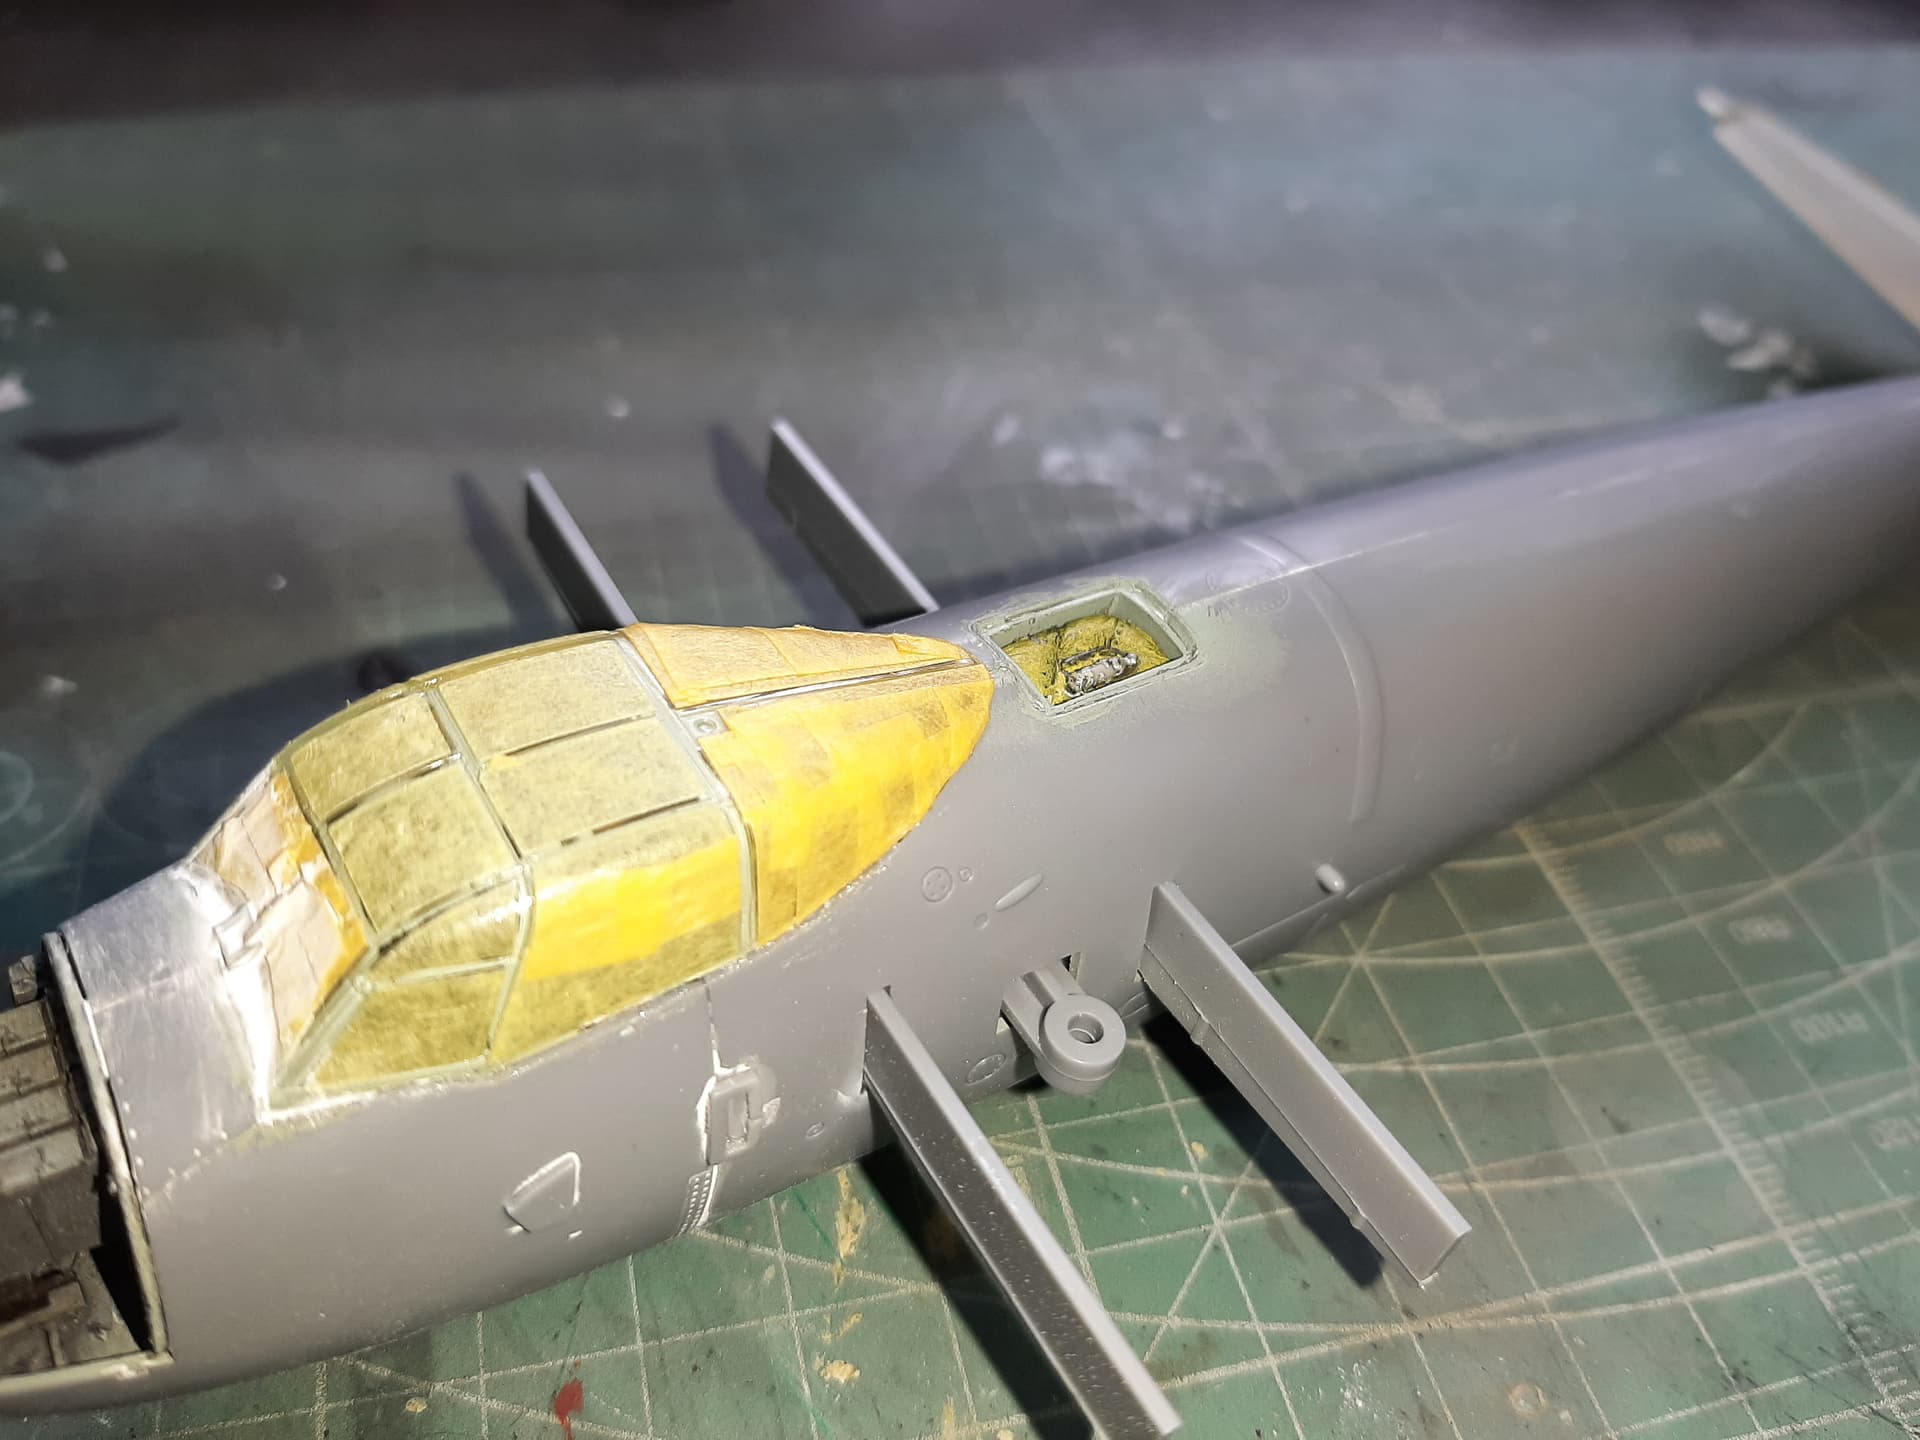
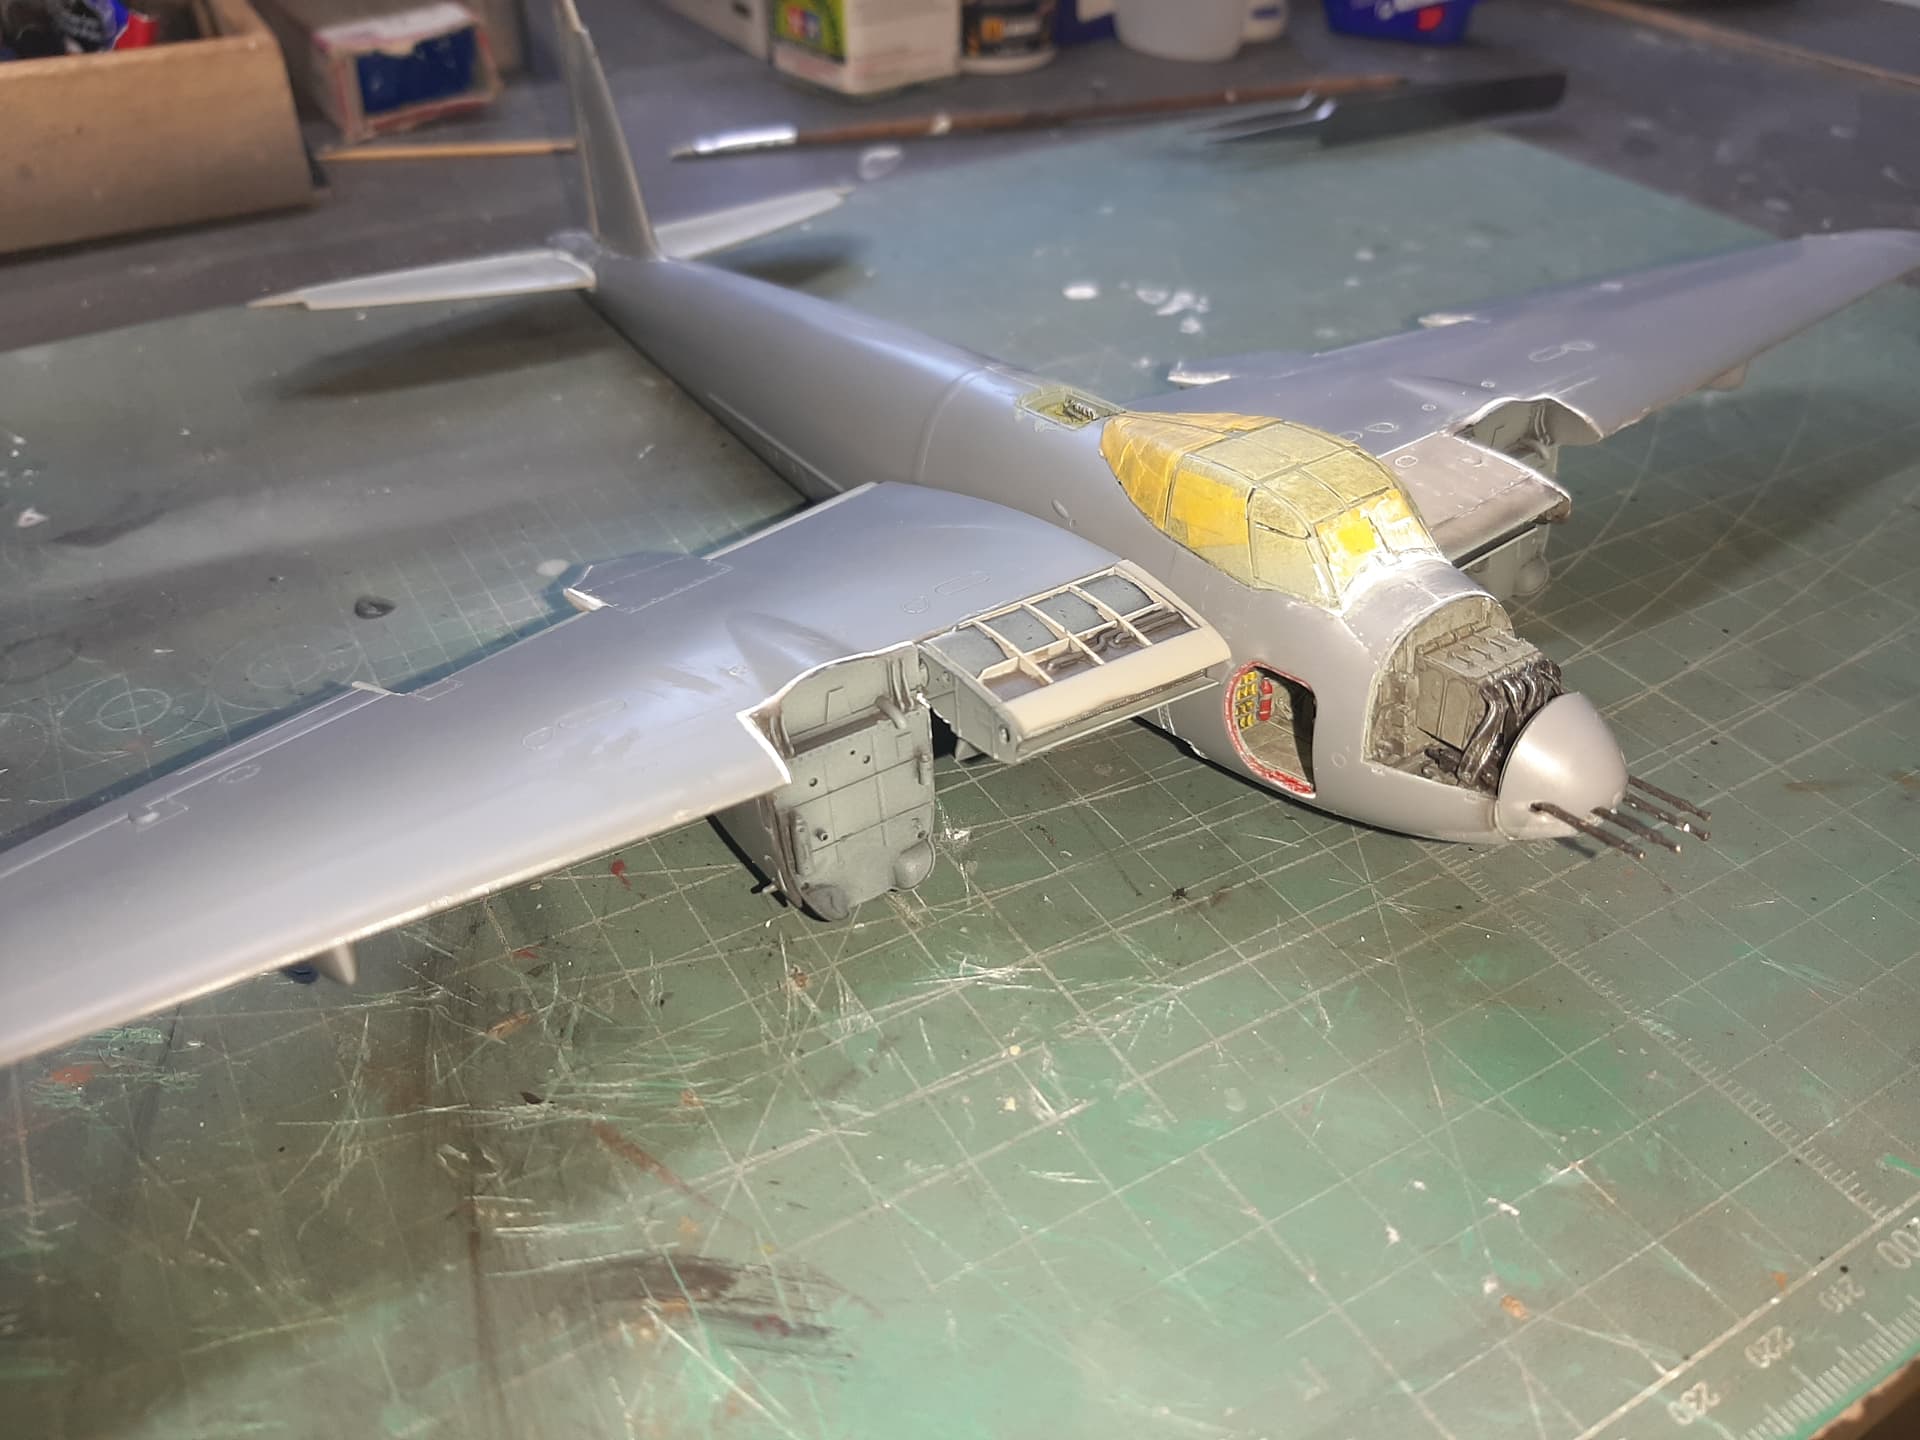
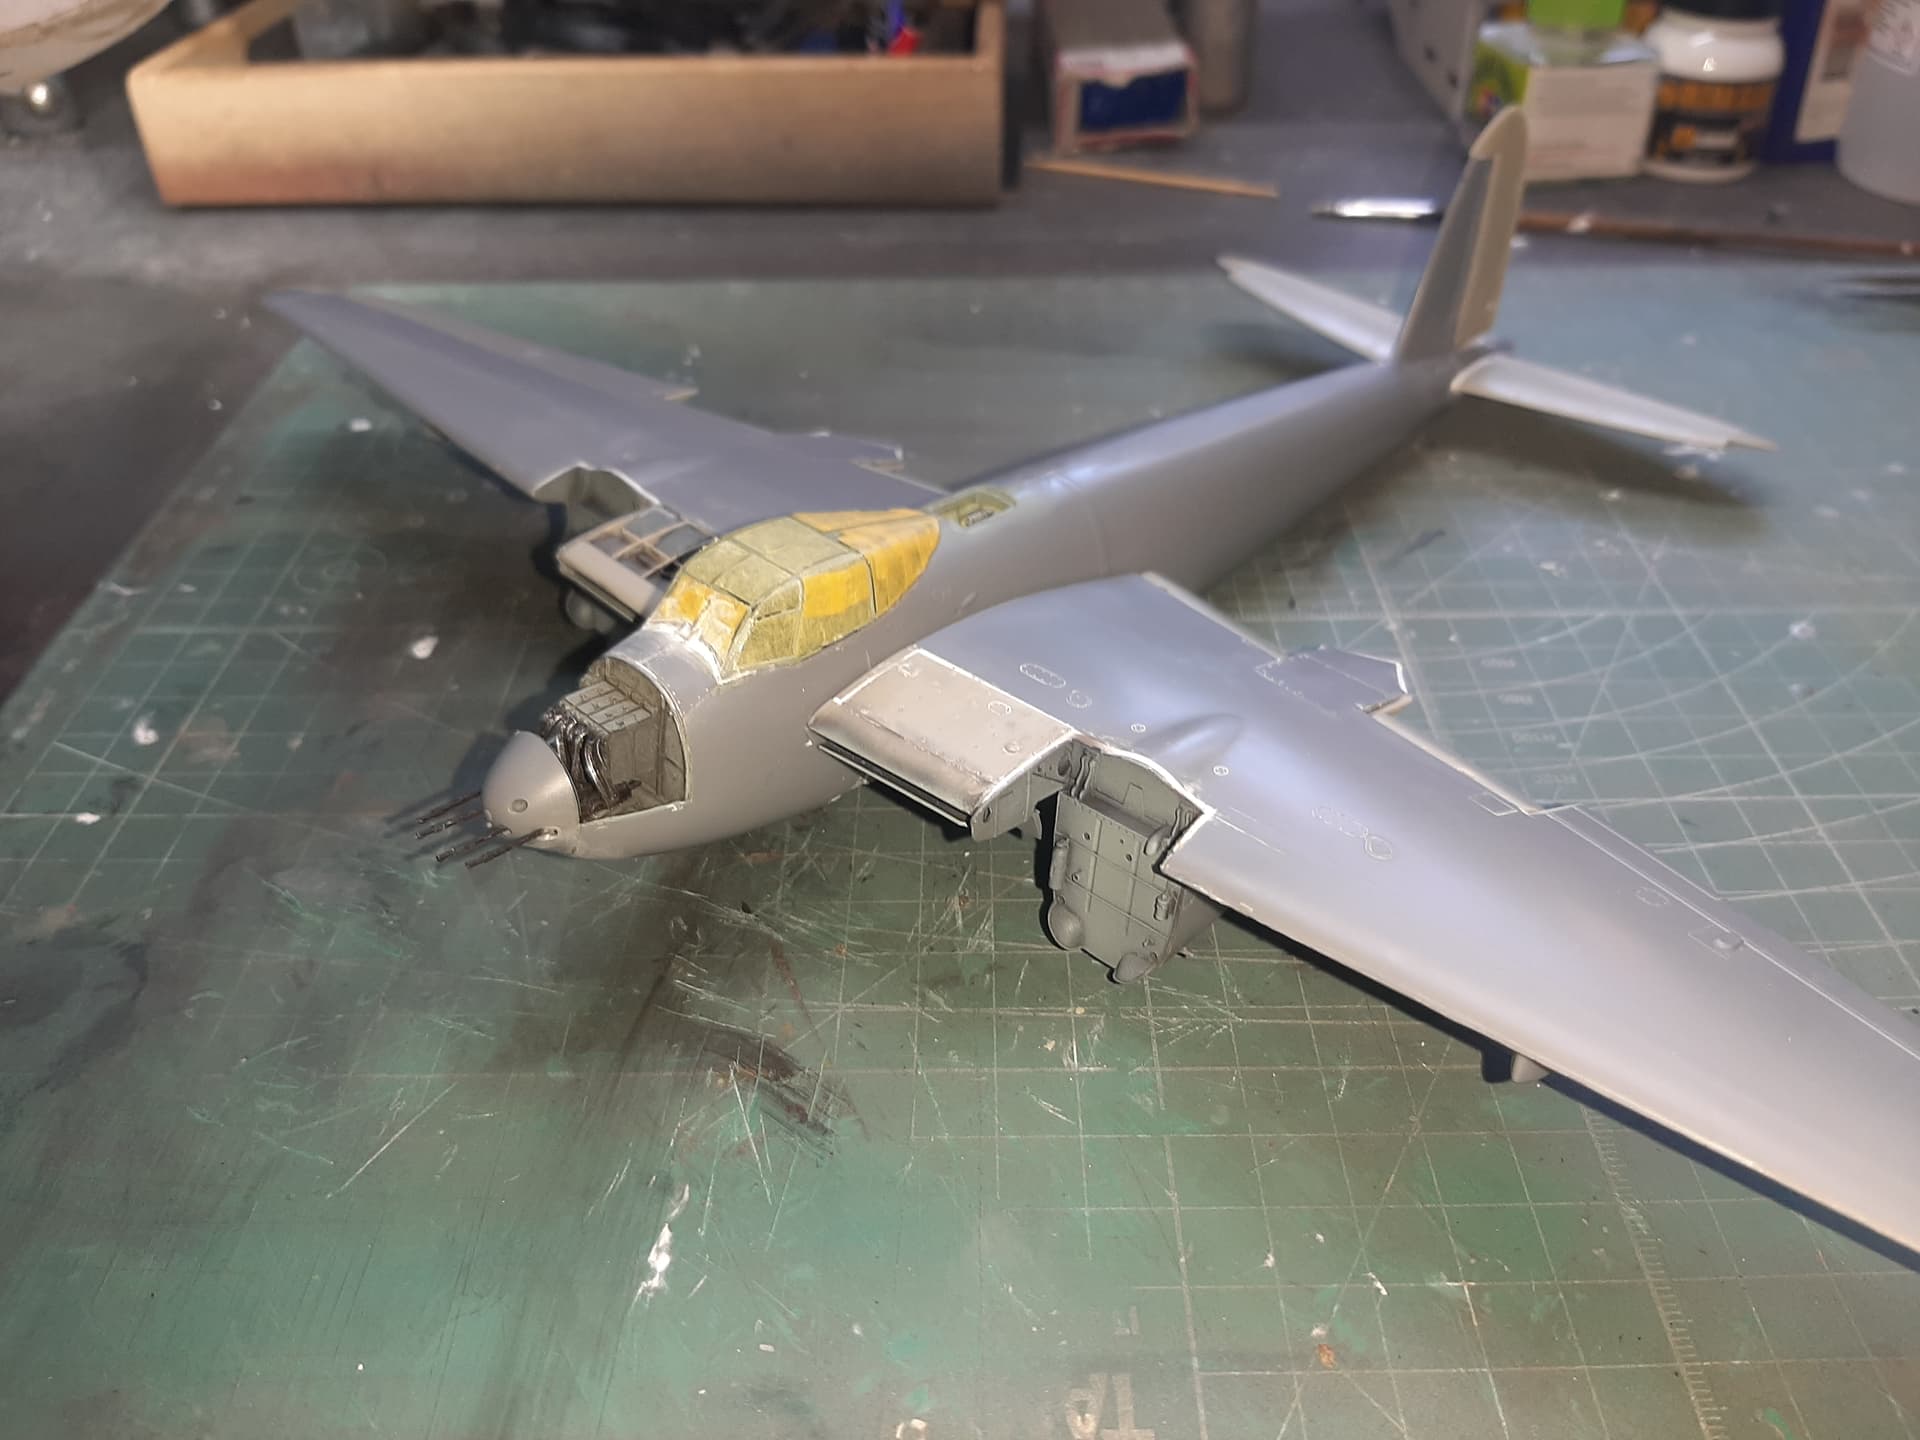
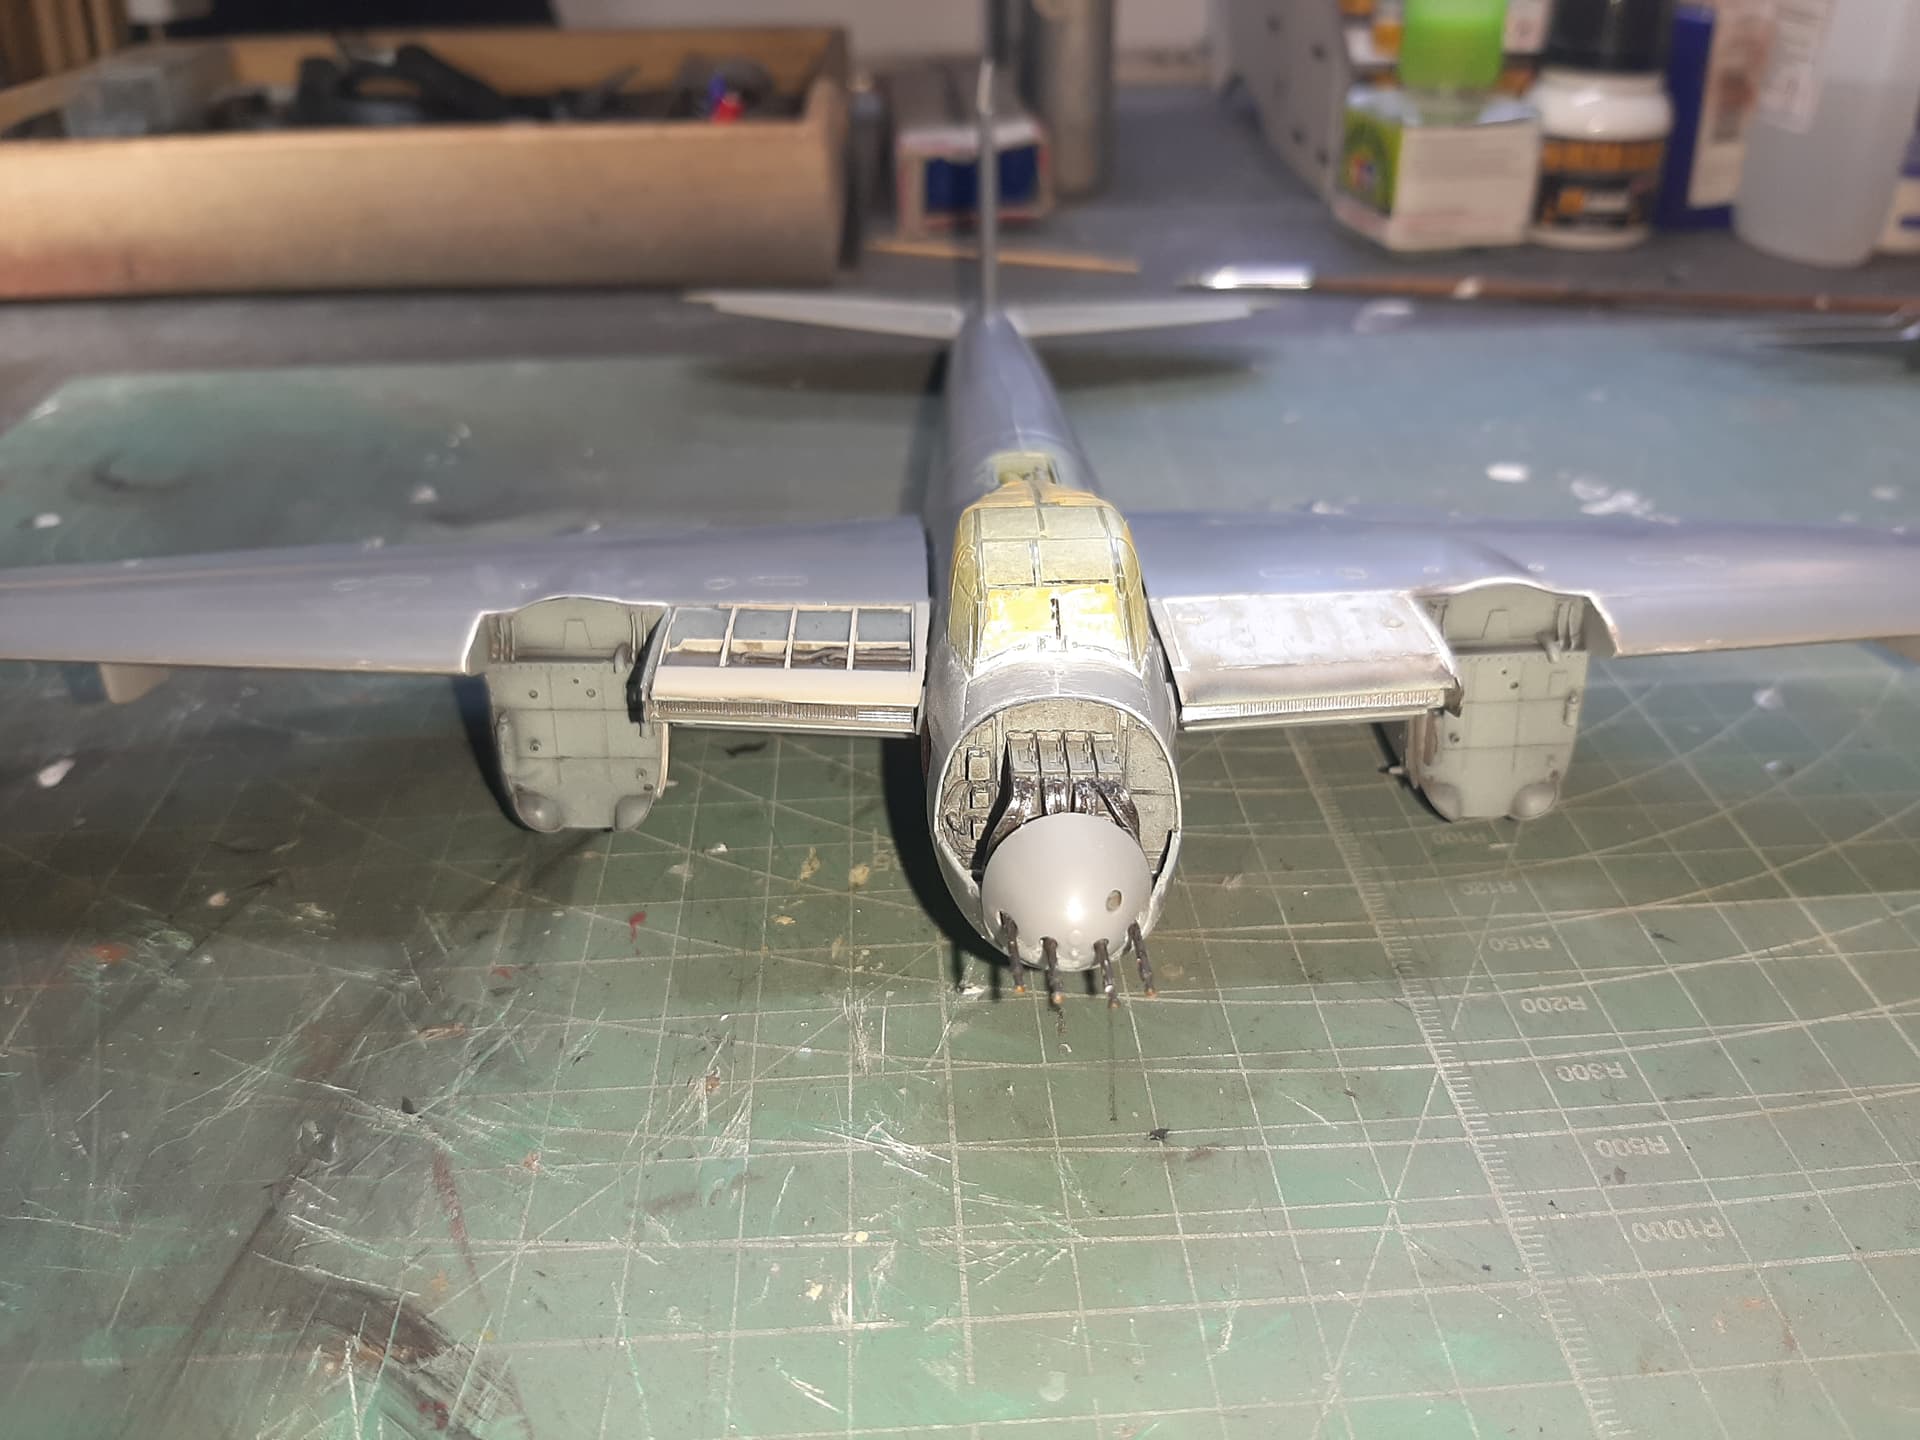
So, have more or less completed the fuselage.
Some filler was required, and it still needs cleaning up, but construction is done. The rear control surfaces and the dinghy stowage are CMK from the exterior kit.
Bomb bay and gun bay are Aires.
Gun bay is a pain. Instructions on actual gun installation aren’t clear, but it seems the guns themselves were angled slightly downwards. I installed them mounted level, so the nose cone didn’t want to fit neatly, and some cosmetic bodging was required. Close up, it looks awful, but the reality is, it isn’t.
Now to start work on the wing sections.
4 Likes
Some nice detailing going on with this. Looks very nice.
1 Like
The Aires engine kit comes with both engines, firewalls and cowlings.
Having experience of Aires kits now over some years, I am wary of opening up both port & starboard engines - firstly because it requires a lot of modification work, second, opening up both sides looks a little…‘over done’ perhaps.
So, I will definately open up the starbaord side, and depending on how that goes, consider opening up the port side too.
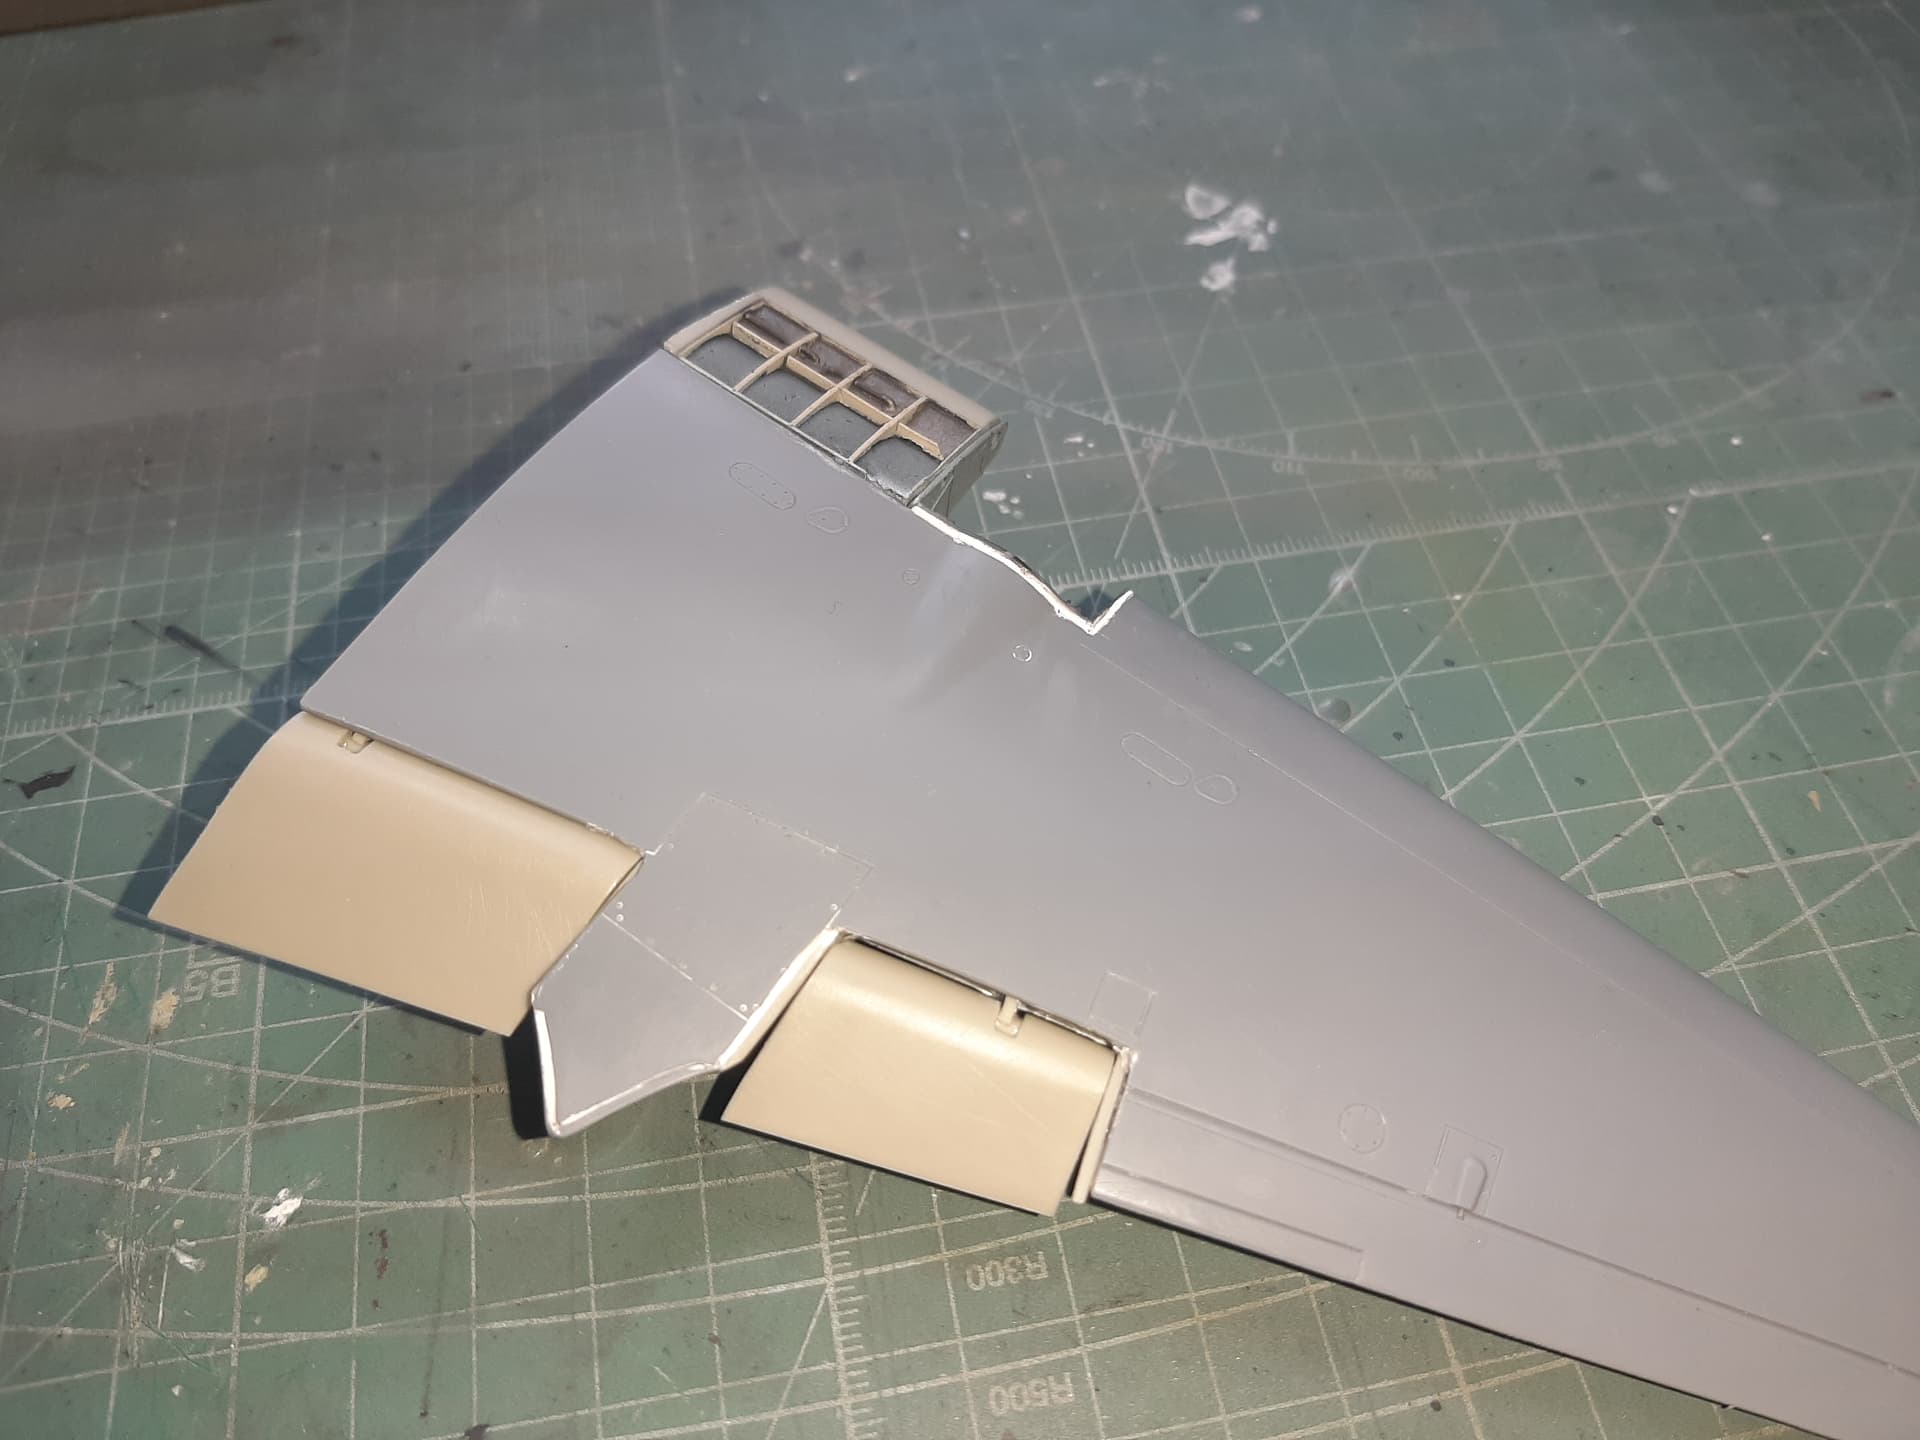
The CMK exterior kit works well, so i’ll be enhancing the Tamiya wings on both sides with the CMK radiator housings and drooped flaps.
This is the starboard wing, ready to go. Lots of cutting (actually, I use a Tamiya 0.3mm engraving tool for this - its perfect for the job) filing and sanding.
2 Likes
So, I messed up.
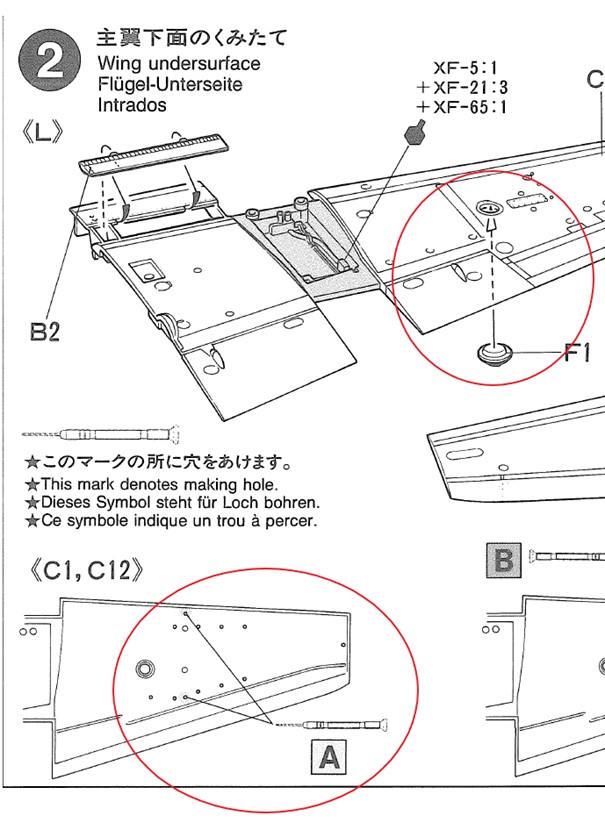
I did read somewhere that it was important to study the instructions carefully, because it was easy to miss steps… But, in my defence, i’m juggling the Tamiya kit and half a dozen AM sets at the same time.
I’ve already sealed the main wing sections together. However, part F1 (a clear part) should have been inserted from the inside out and I have forgotten to drill out the two holes for the underwing pylons. I’m pretty mad at myself.
Thankfully, I havent touched the port side yet, so can drill the holes on that side and use that as a template for the starbaord side pylon (aligned by eye!). I think i’ll have to take part F1 and remove the lip that would normally keep it from falling through the wing, attach it to some Tamiya masking tape and insert it from the outside, using clear glue to hold it in place.
2 Likes
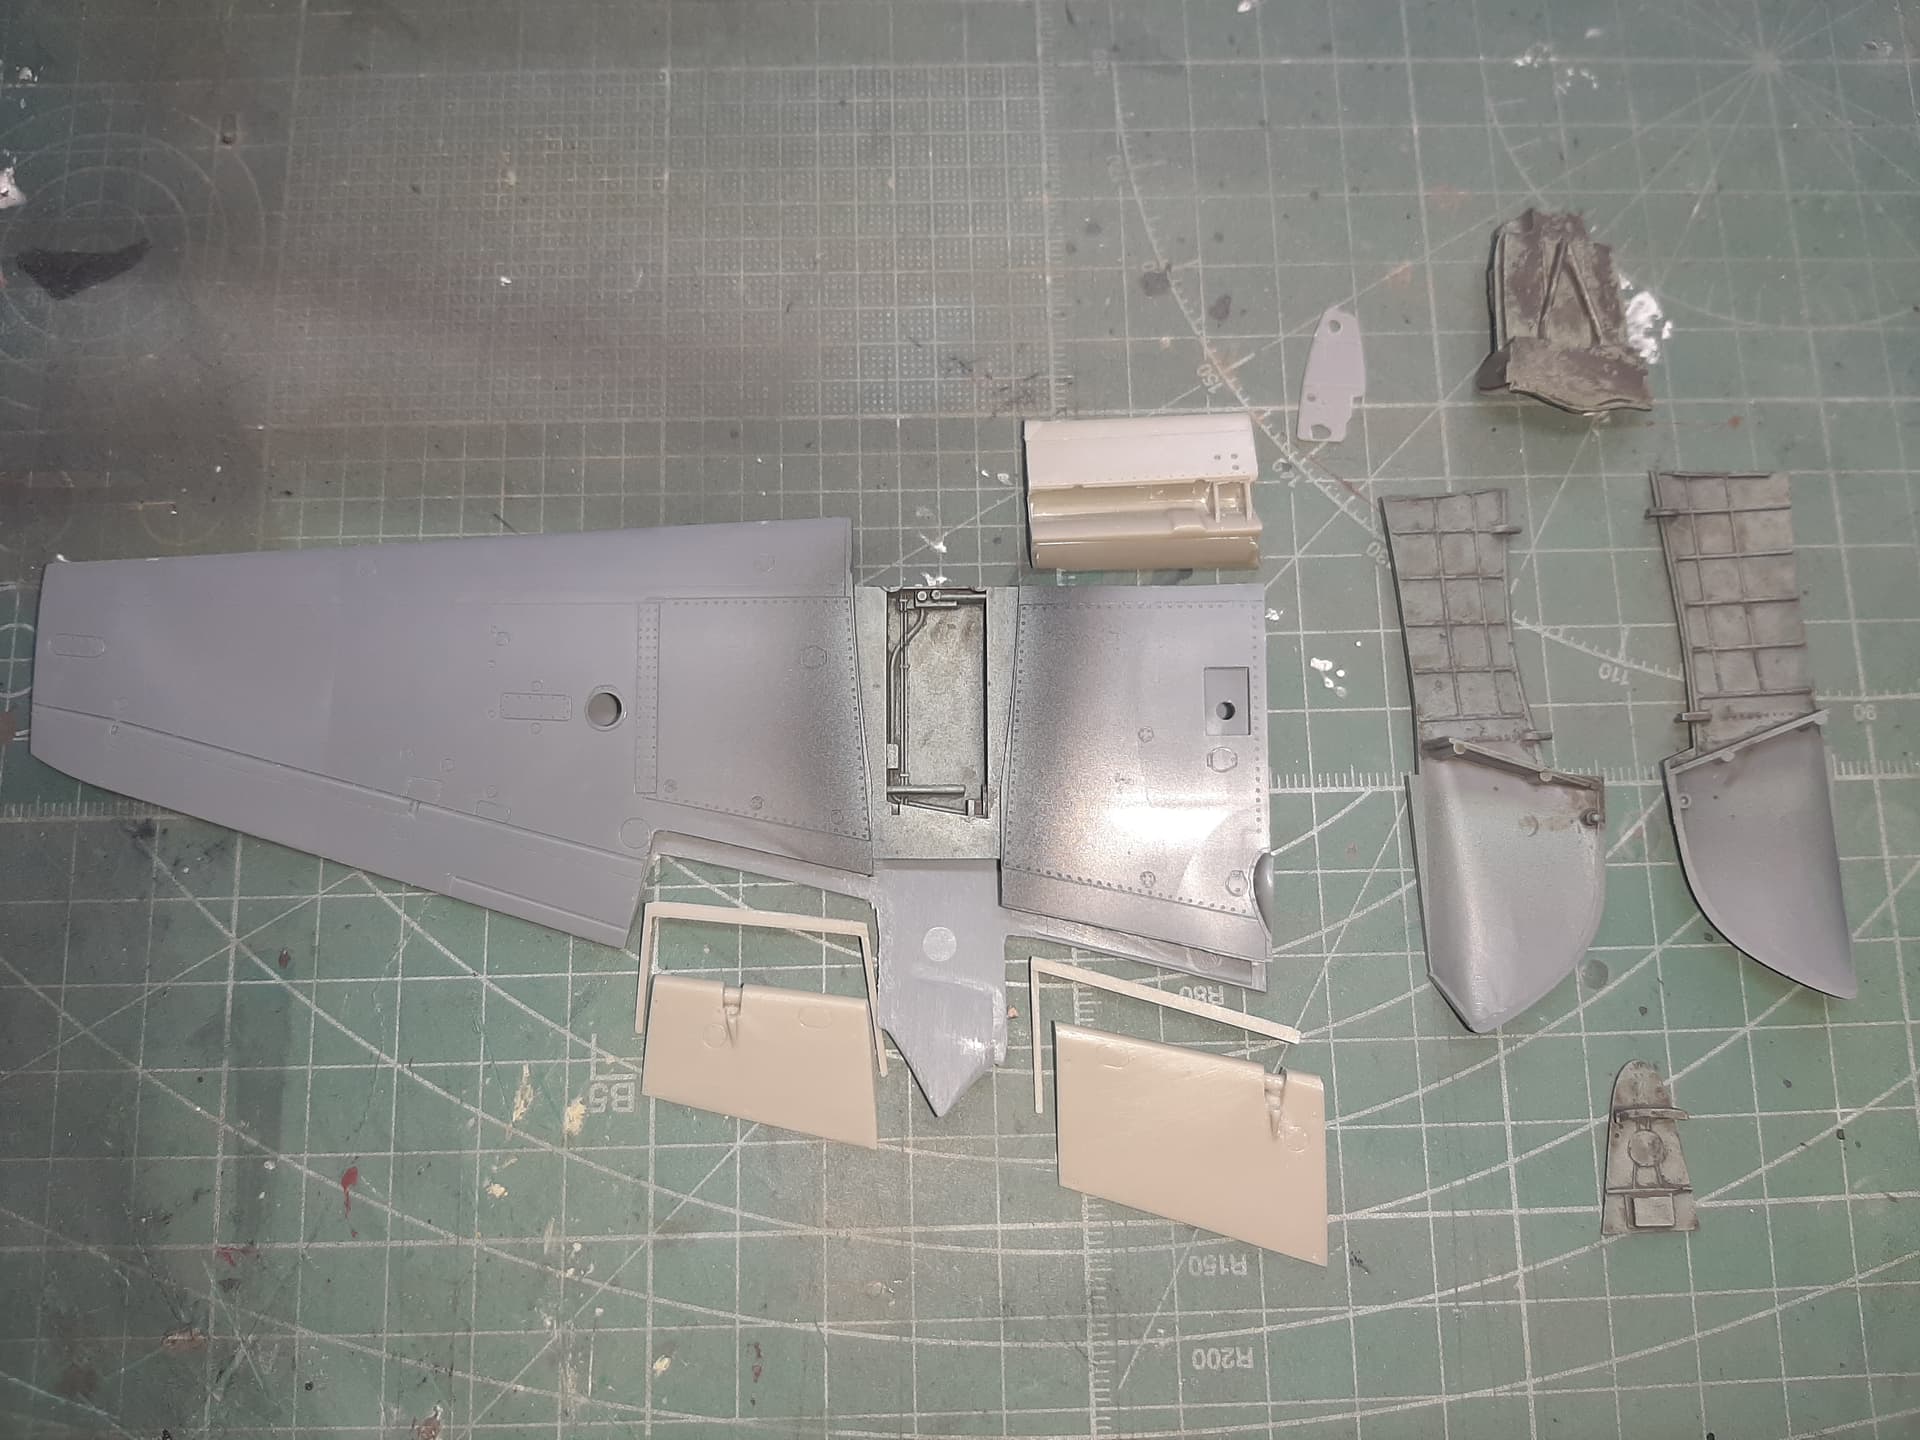
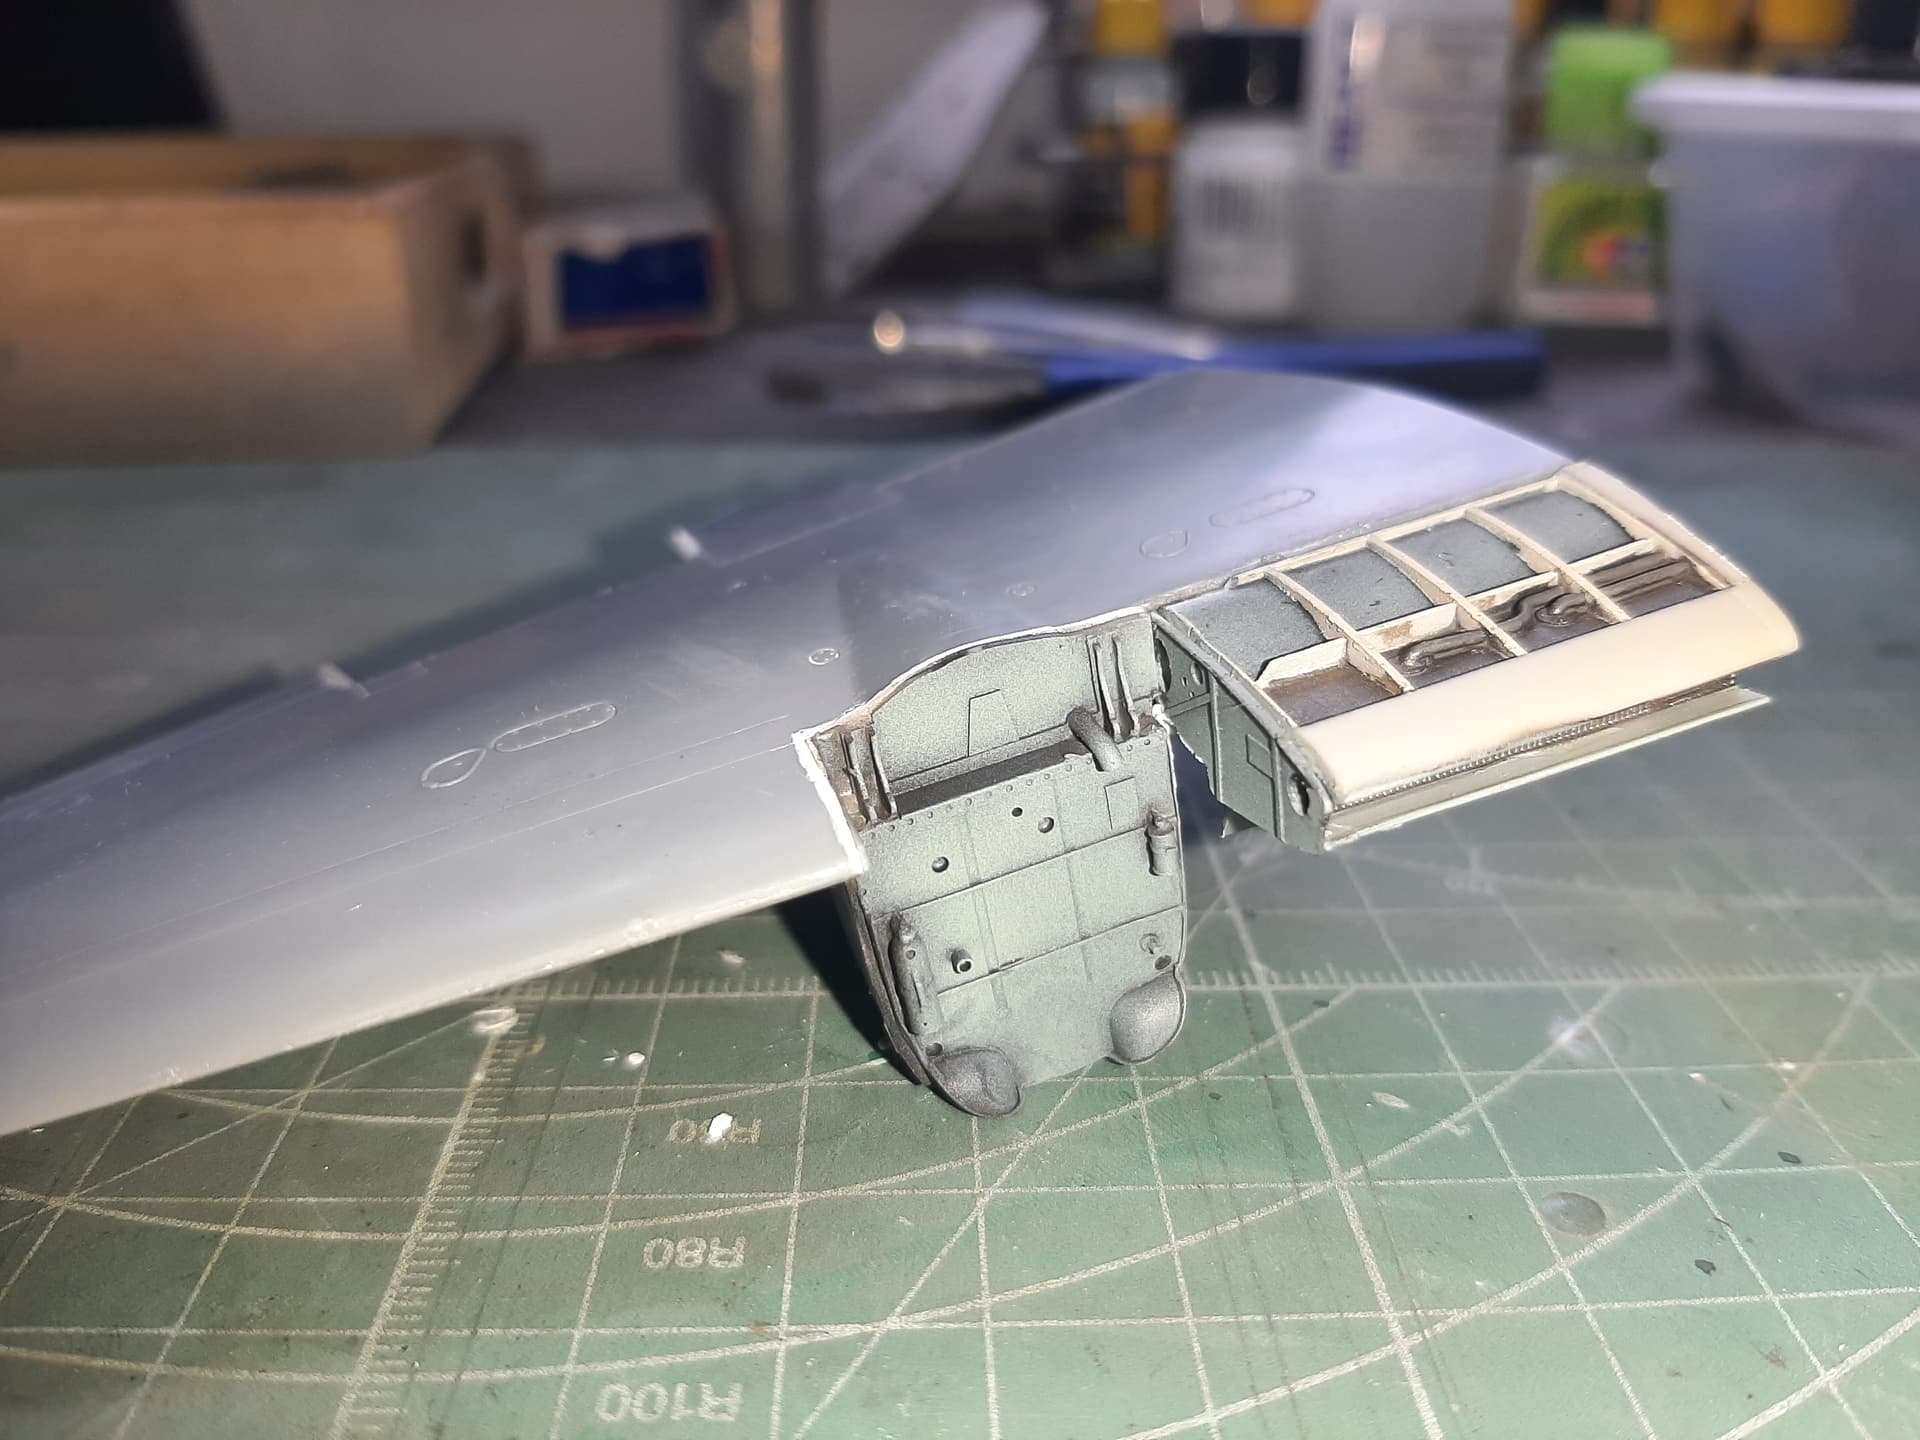
I’ve now completed construction on the starboard wing.
I did manage to somehow get the clear circular light part into the wing with some trimming and care. It isn’t sitting completely right in there, but as its on the underside of the wing, it wont be obvious when the aircraft is on display. I’ll know its there, of course, but it was either that or fill the hole. I suppose that wouldn’t have been a disasterous option. I also managed to drill the holes for the underwing bomb pylons in the other wing, and use that as a guide to drilling one hole in this wing’s underside. One is all you need really.
Wont be making these mistakes again. Sloppy.
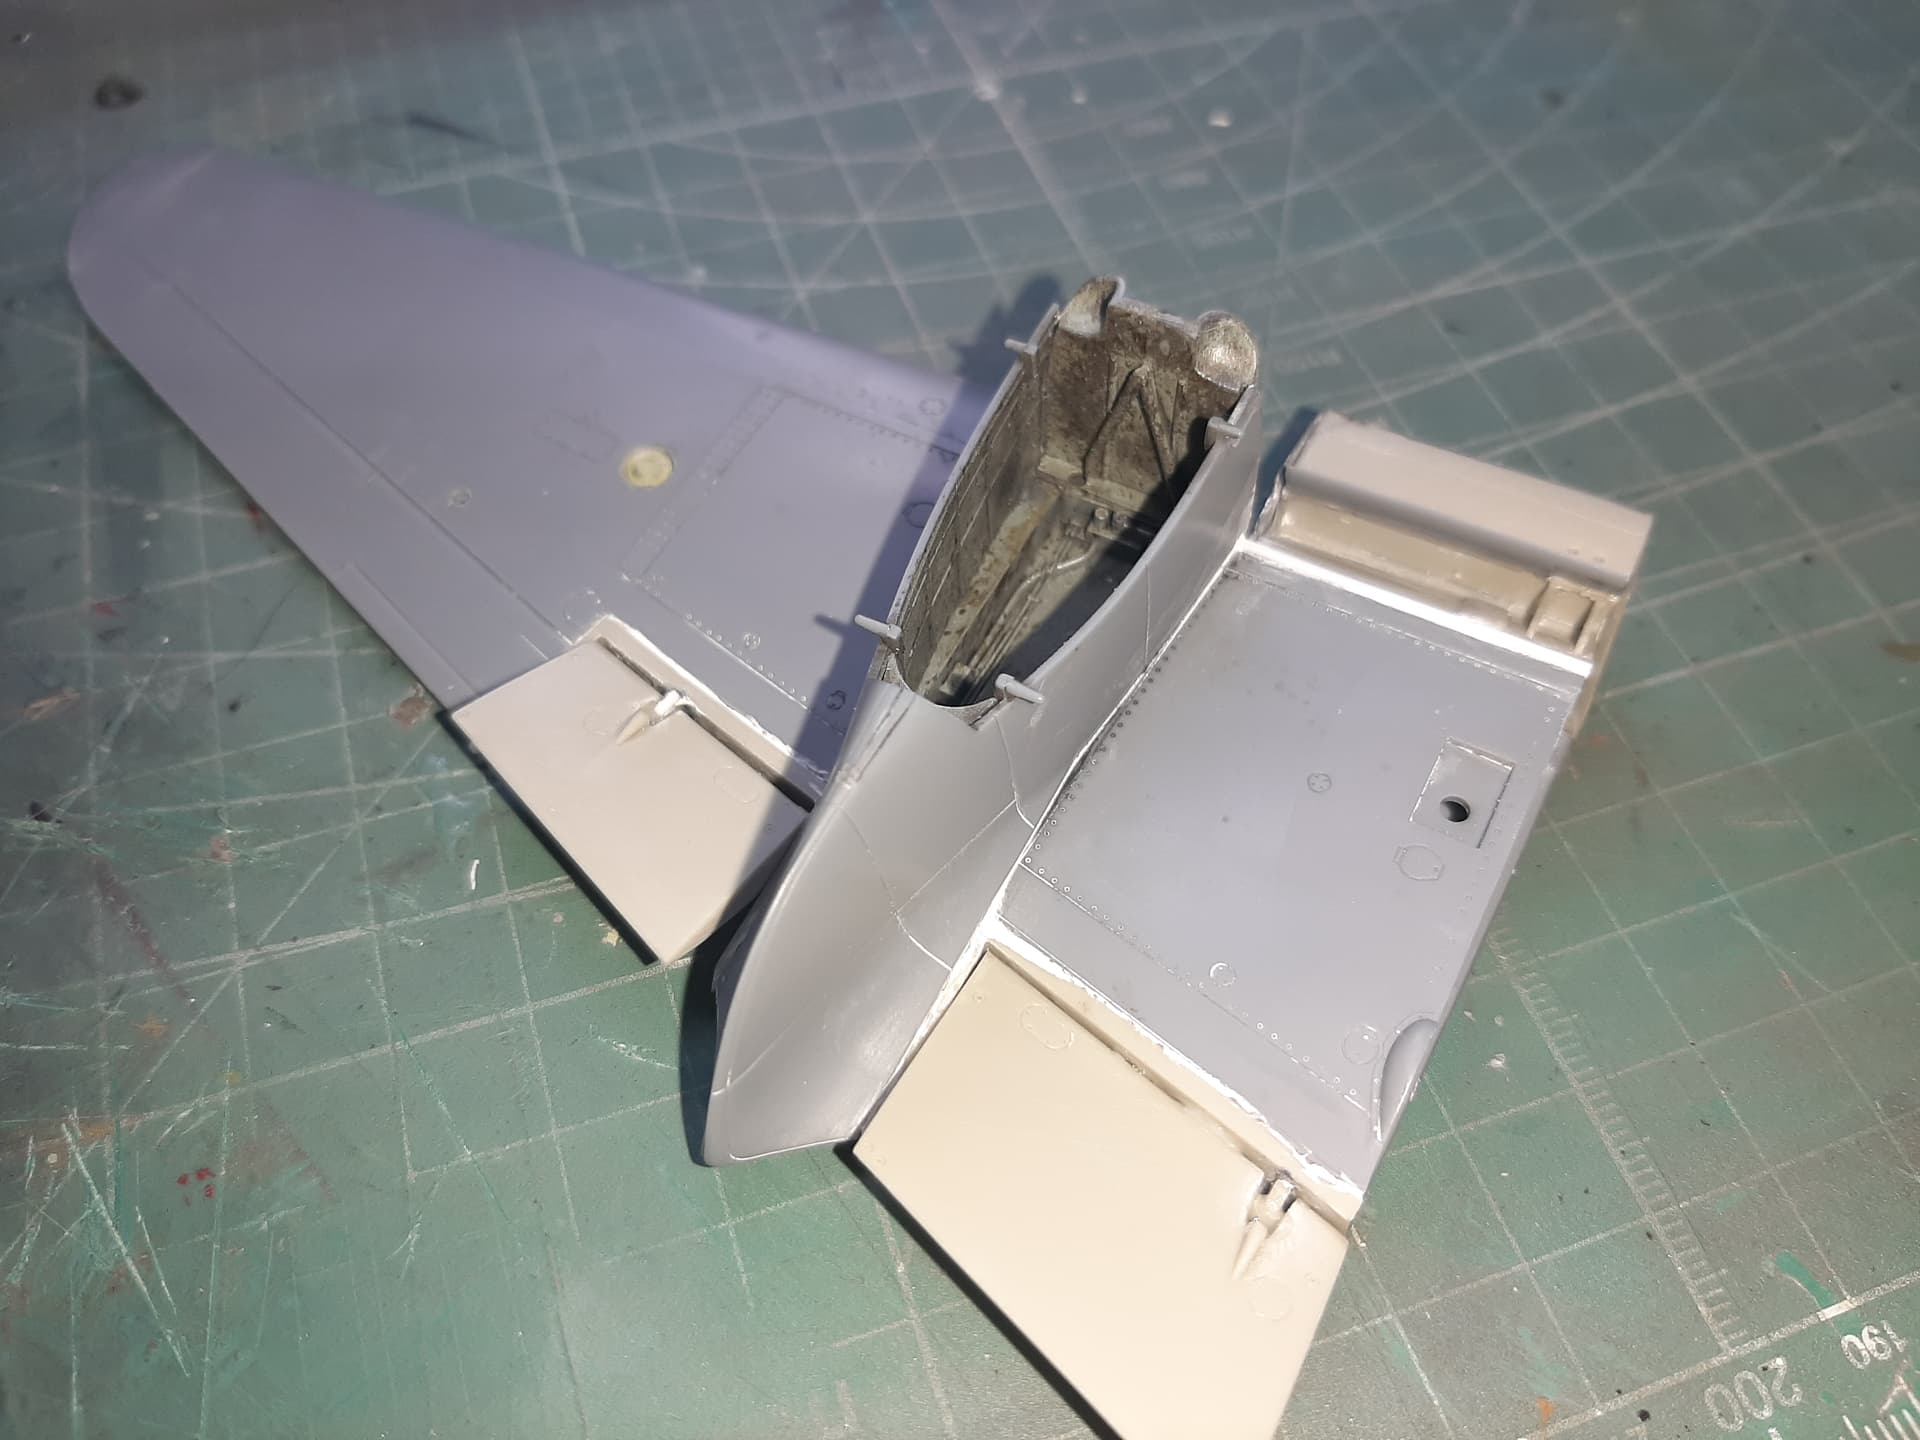
The wing went together pretty well. Lots of surgery required, some sanding and filling, but the CMK parts went in okay and actually fit. The engine firewall is from the Aires engine set (that fit suprisingly well too) - noting that the CMK Exterior set also comes with an engine firewall that shows interior (wheel well) detail only.
I decided to paint the radiator prior to attaching it.
Since this did go relatively smoothly, I have begun work on opening the port side wing up too.
2 Likes
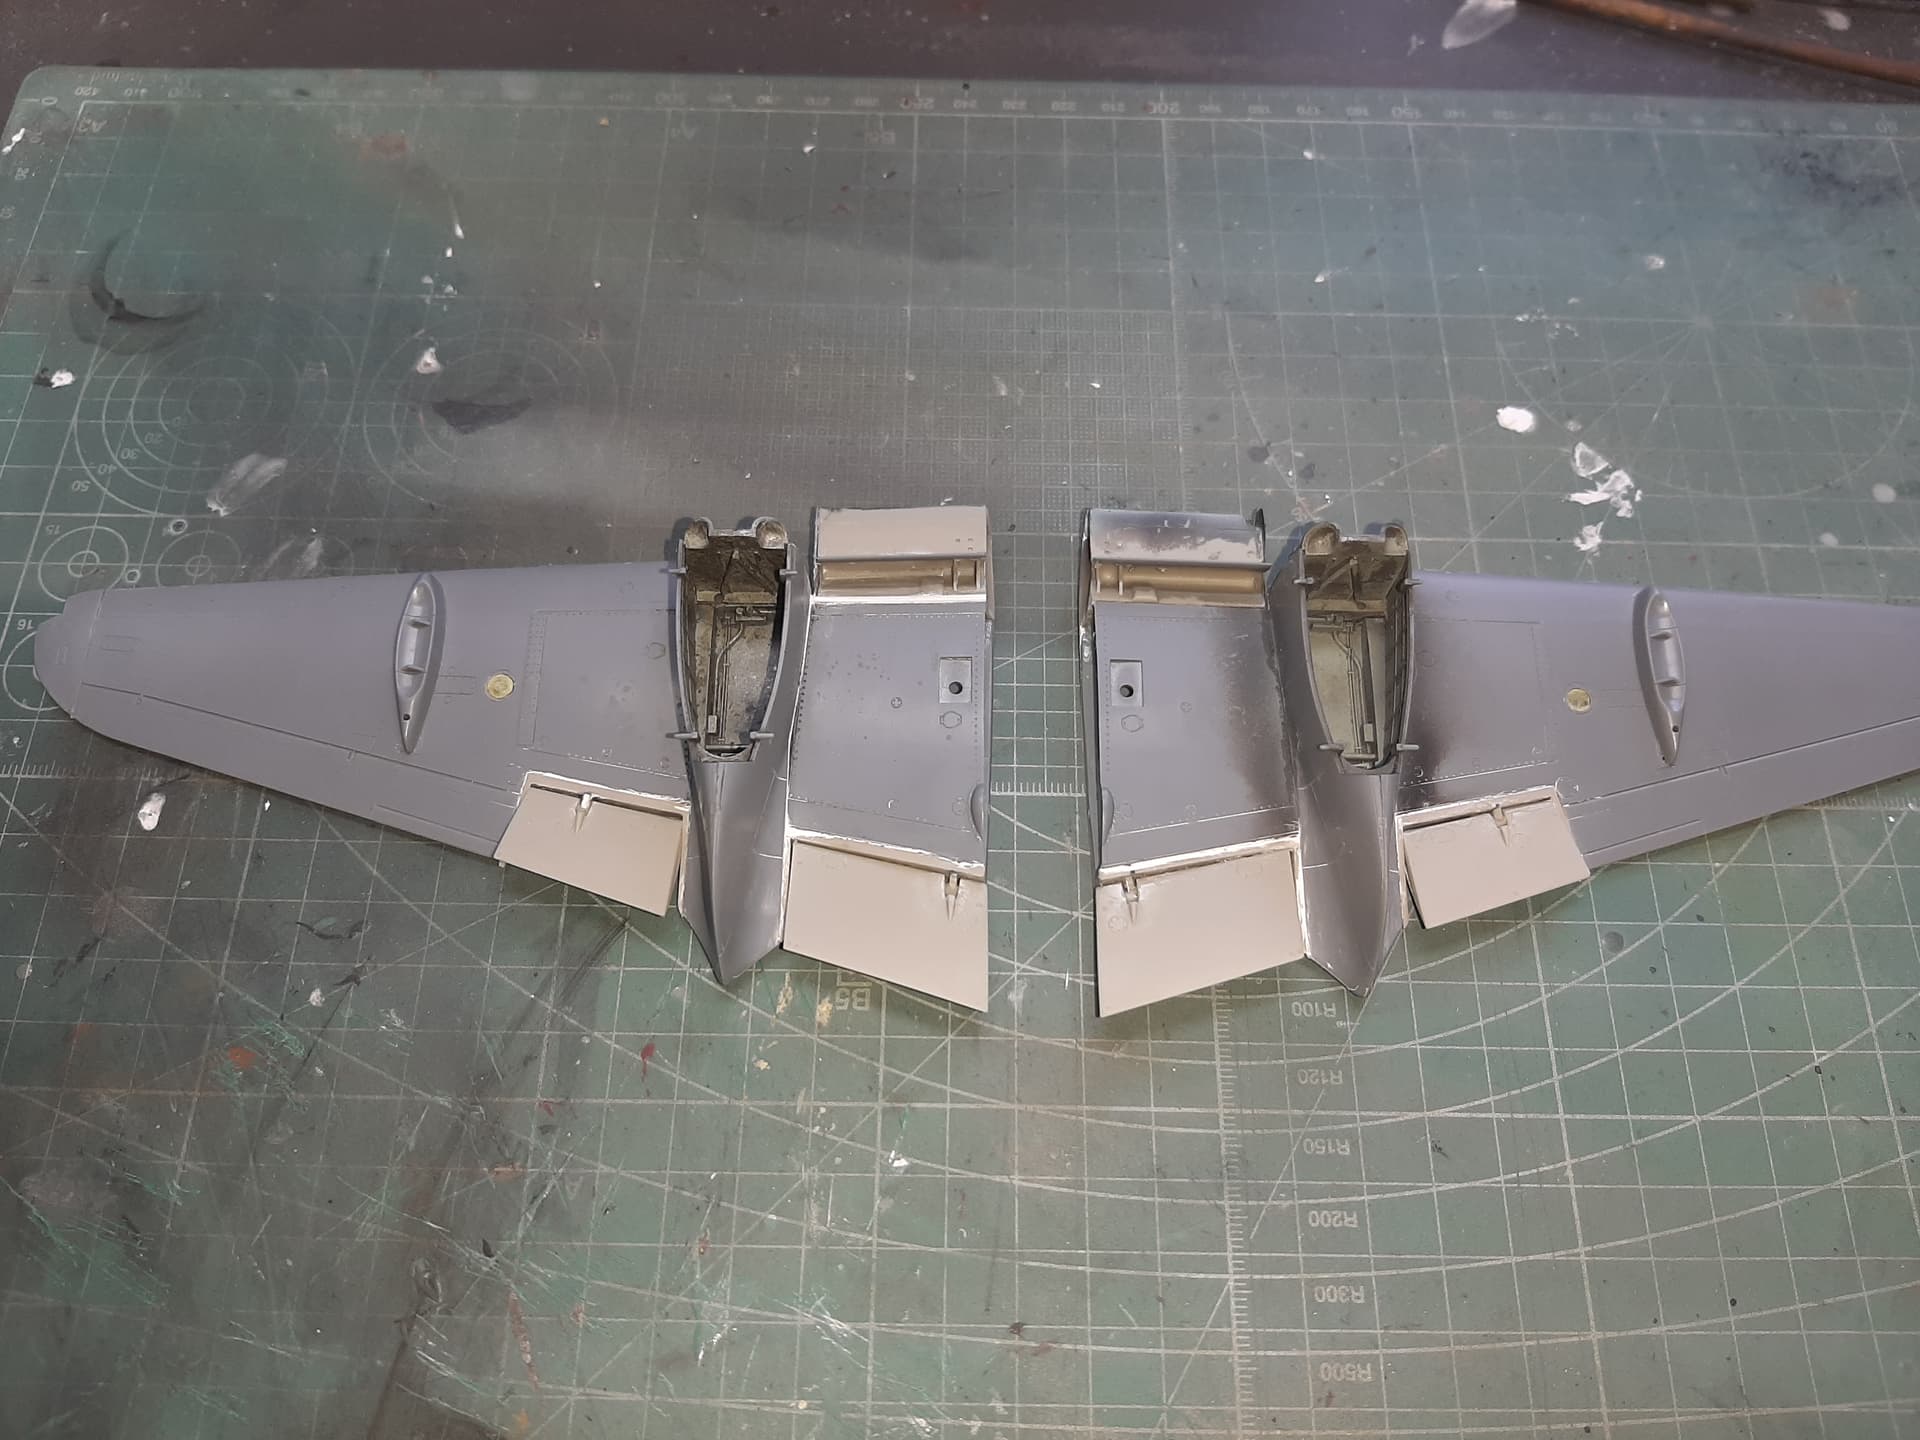
Back from a week or so off. I had Covid, pretty bad actually, and was off work - but I was still able to make progress.
Both wings now constructed. It reall went together quite well. Although I did use some superglue on the underside of the flaps, at the hinges to secure them on one side. This was rather a clumsy job, and is obvious in later pictures after paint has been applied. It would have been very difficult to sand this away due to the location and fragility of the joint, but as it is on the underside, I decided to leave it.
The only real mistake i’ve made, and a bit disappointing, but its a learning curve.
2 Likes
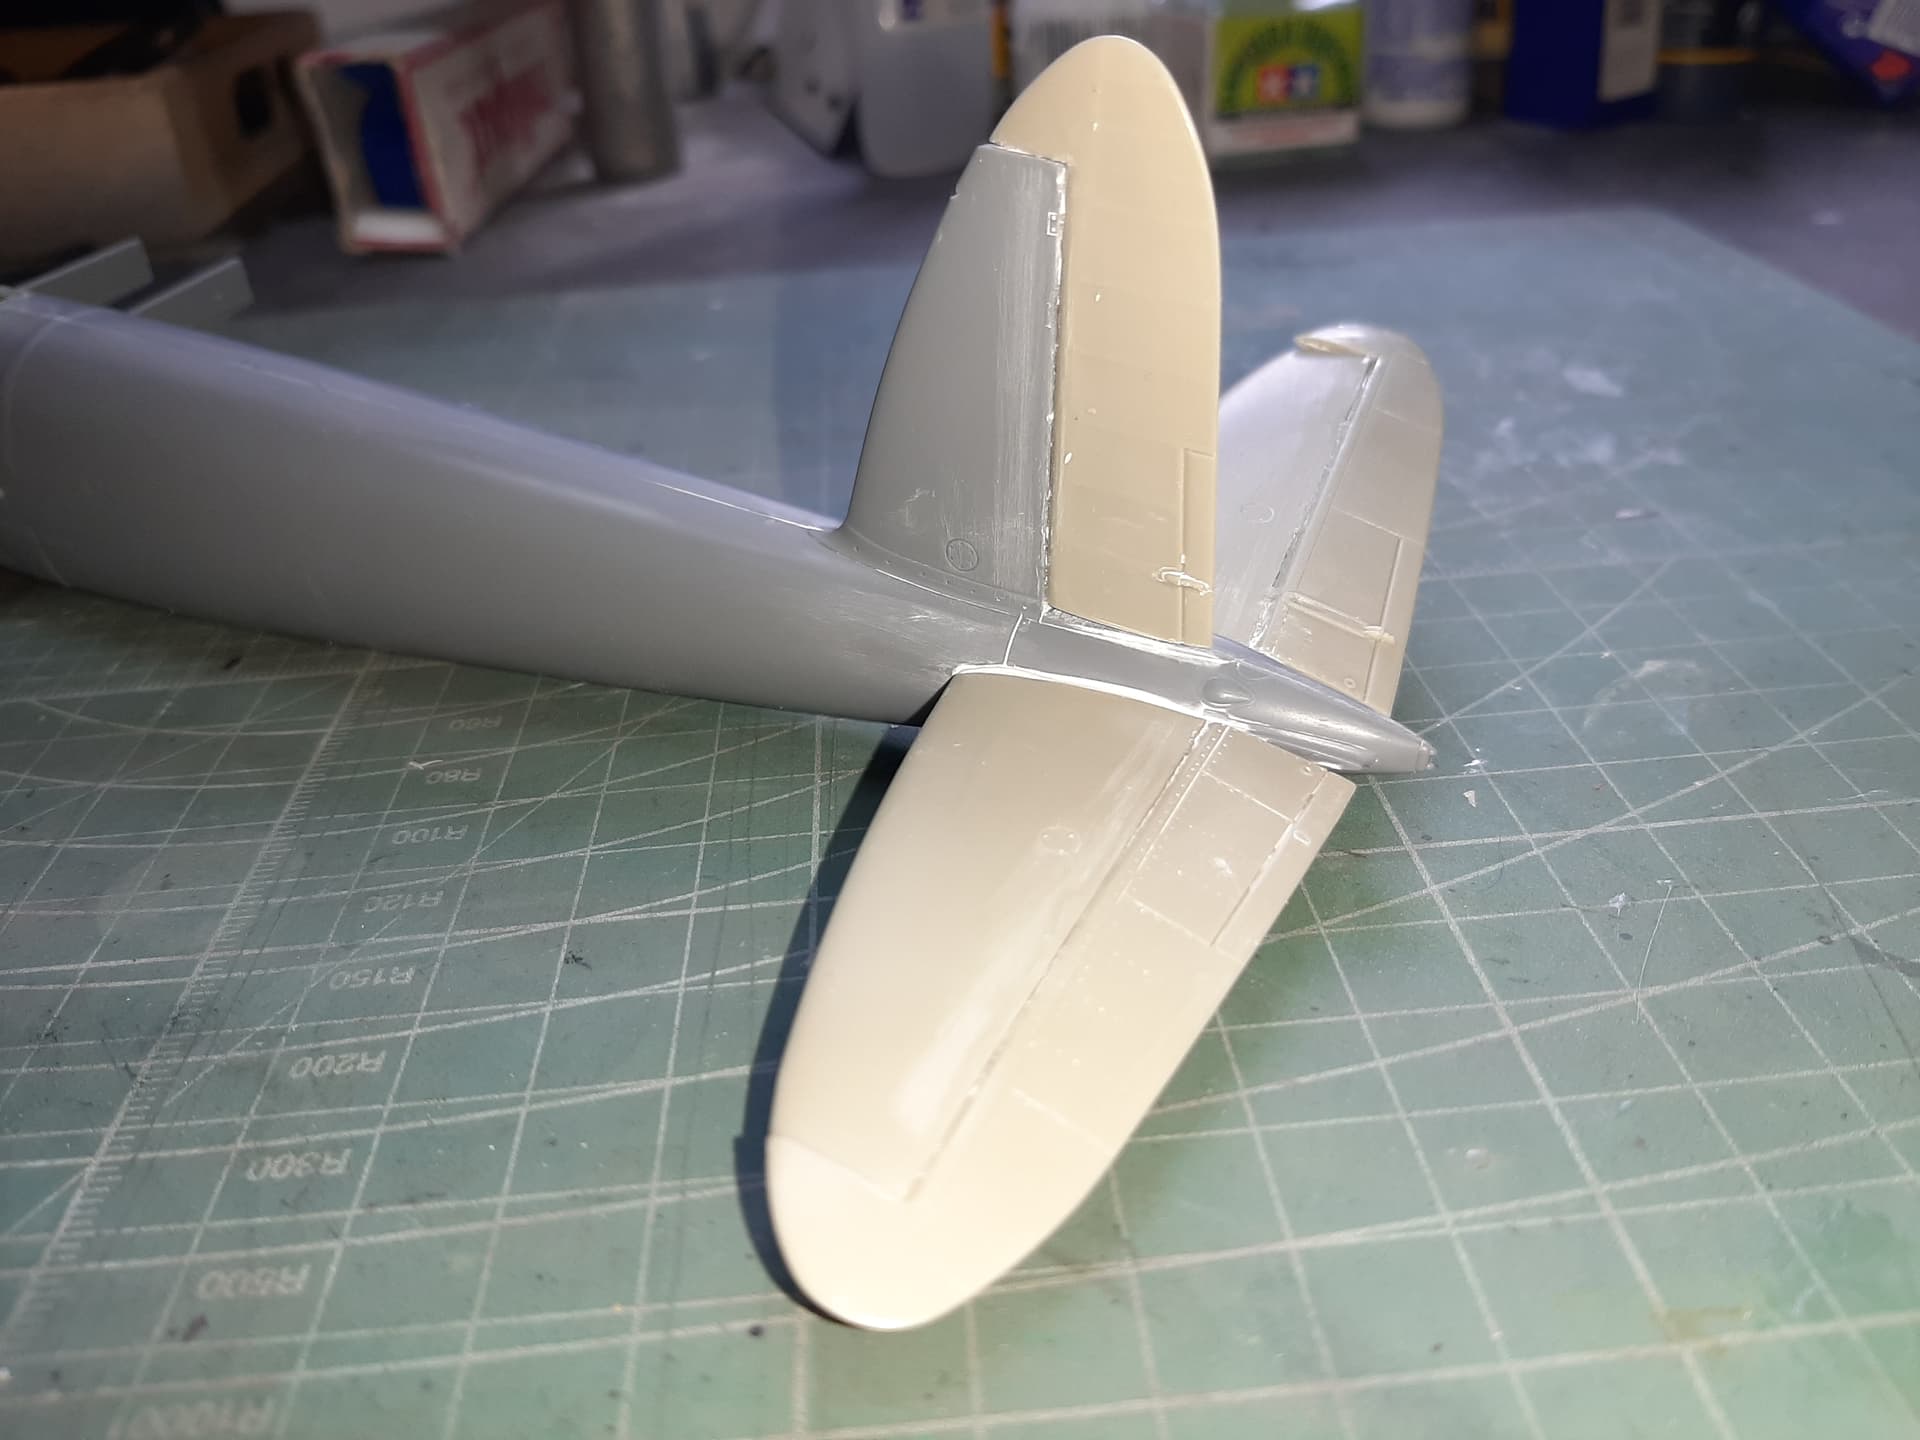
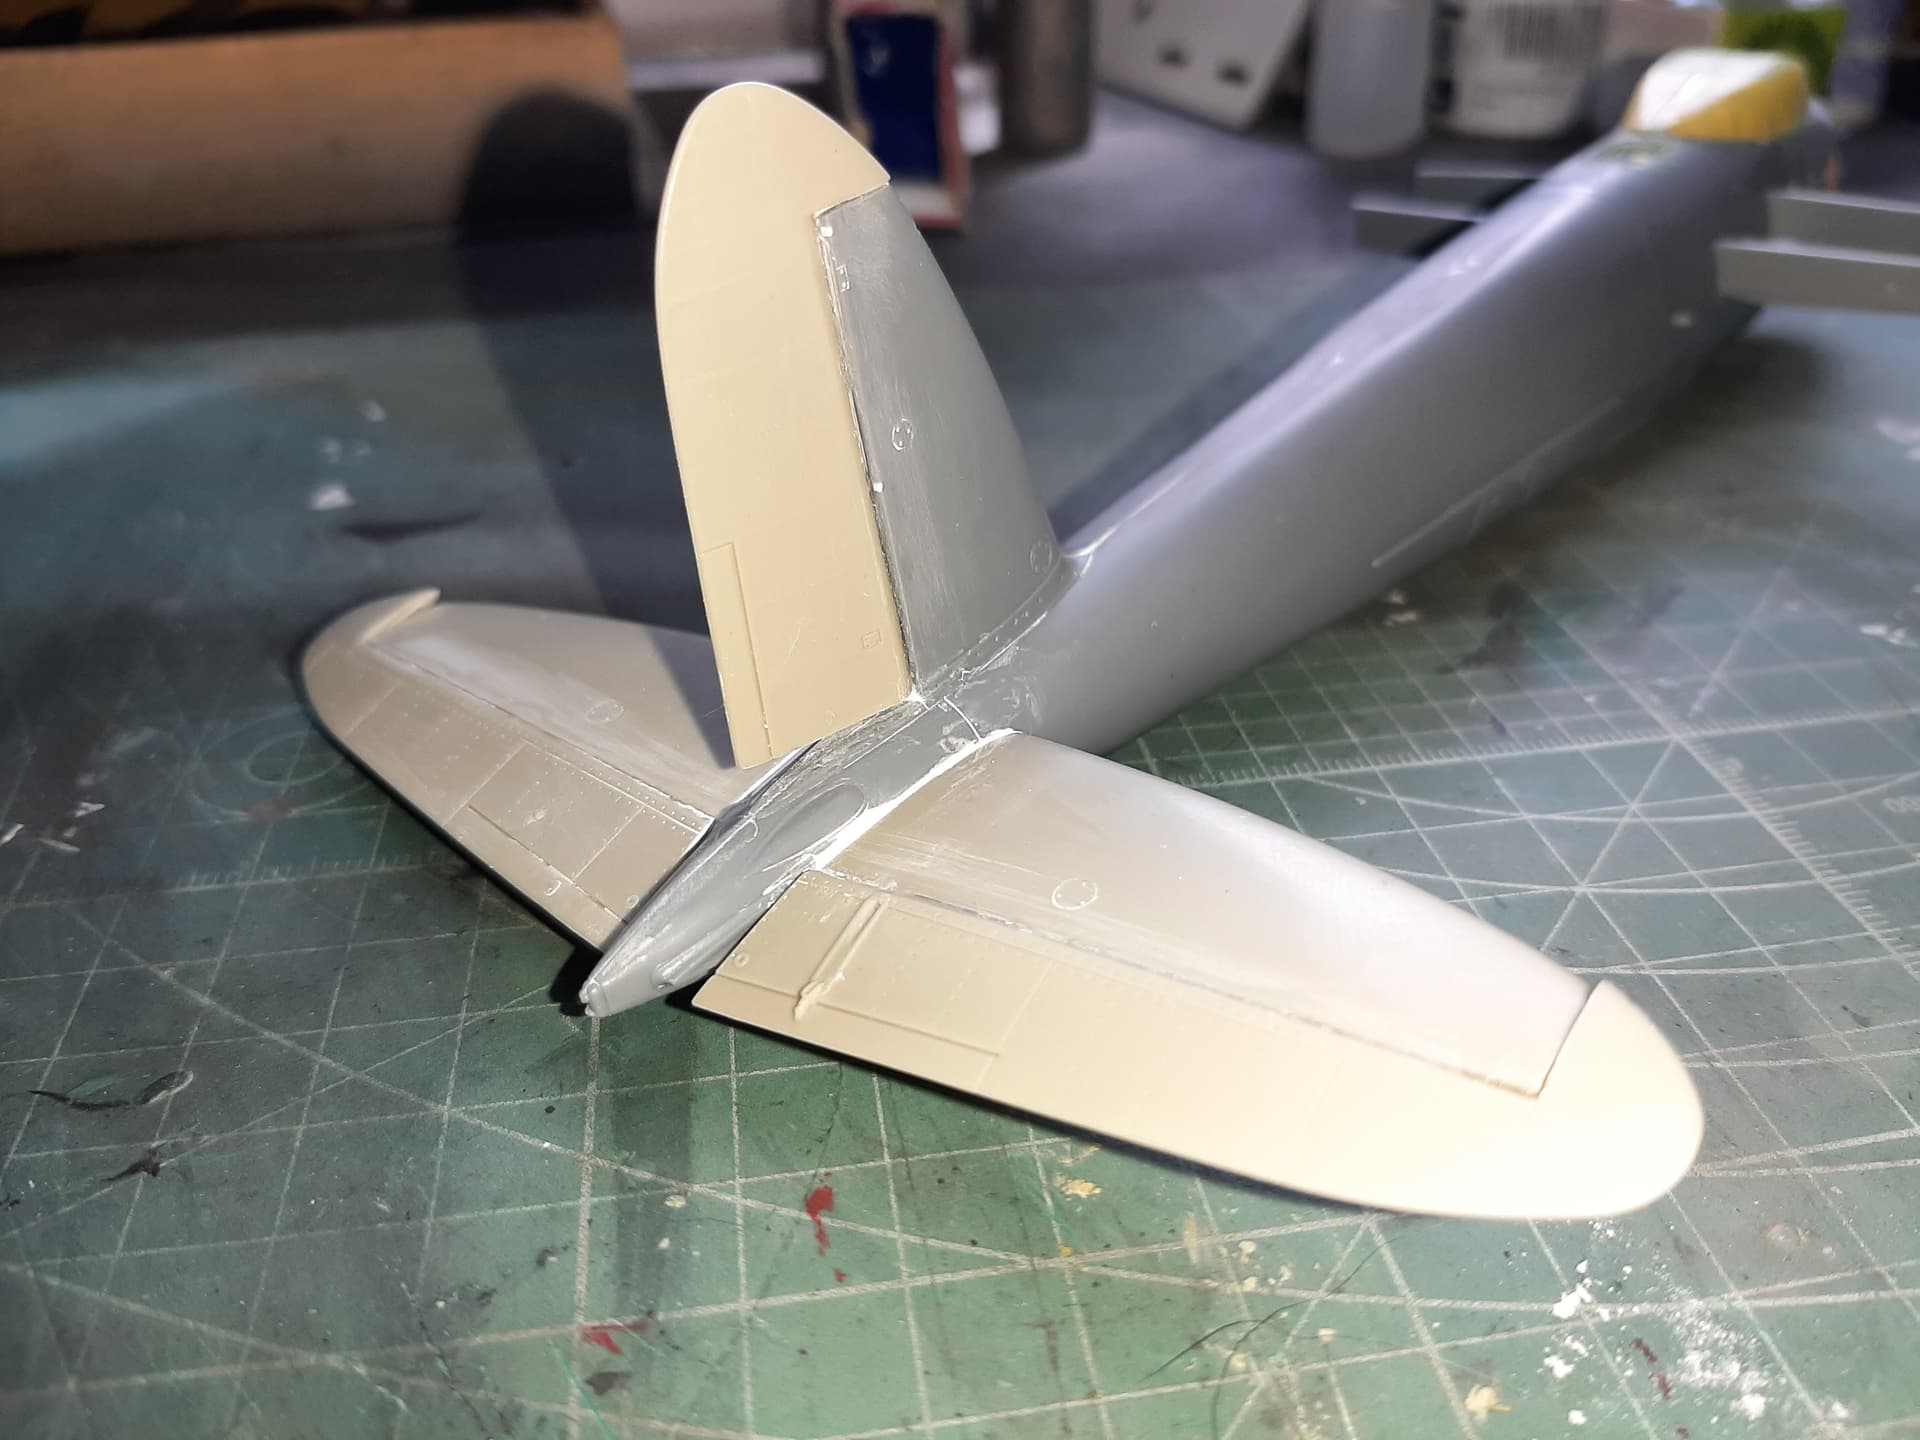
Now the wings are attached to the fuselage. It wasn’t a perfect fit, but some filler will take care of that.
Starting to look like a Mosquito now.
3 Likes
Now to begin the painting.
Its my first ‘Night’ scheme and so this was a challenge. I decided to use enamels, mainly because the only paint manufacturer I could find that did a ready-made RAF Night colour, was ARCUS.
I have to say, these paints are outstanding.
Pre-thinned, no levelling agent is required, and as far as I can tell, are ‘scaled’ for 1/48 - they sprayed beautifully through the airbrush at 14 psi. Why the Luftwaffe palette you ask? All will become apparent.
2 Likes
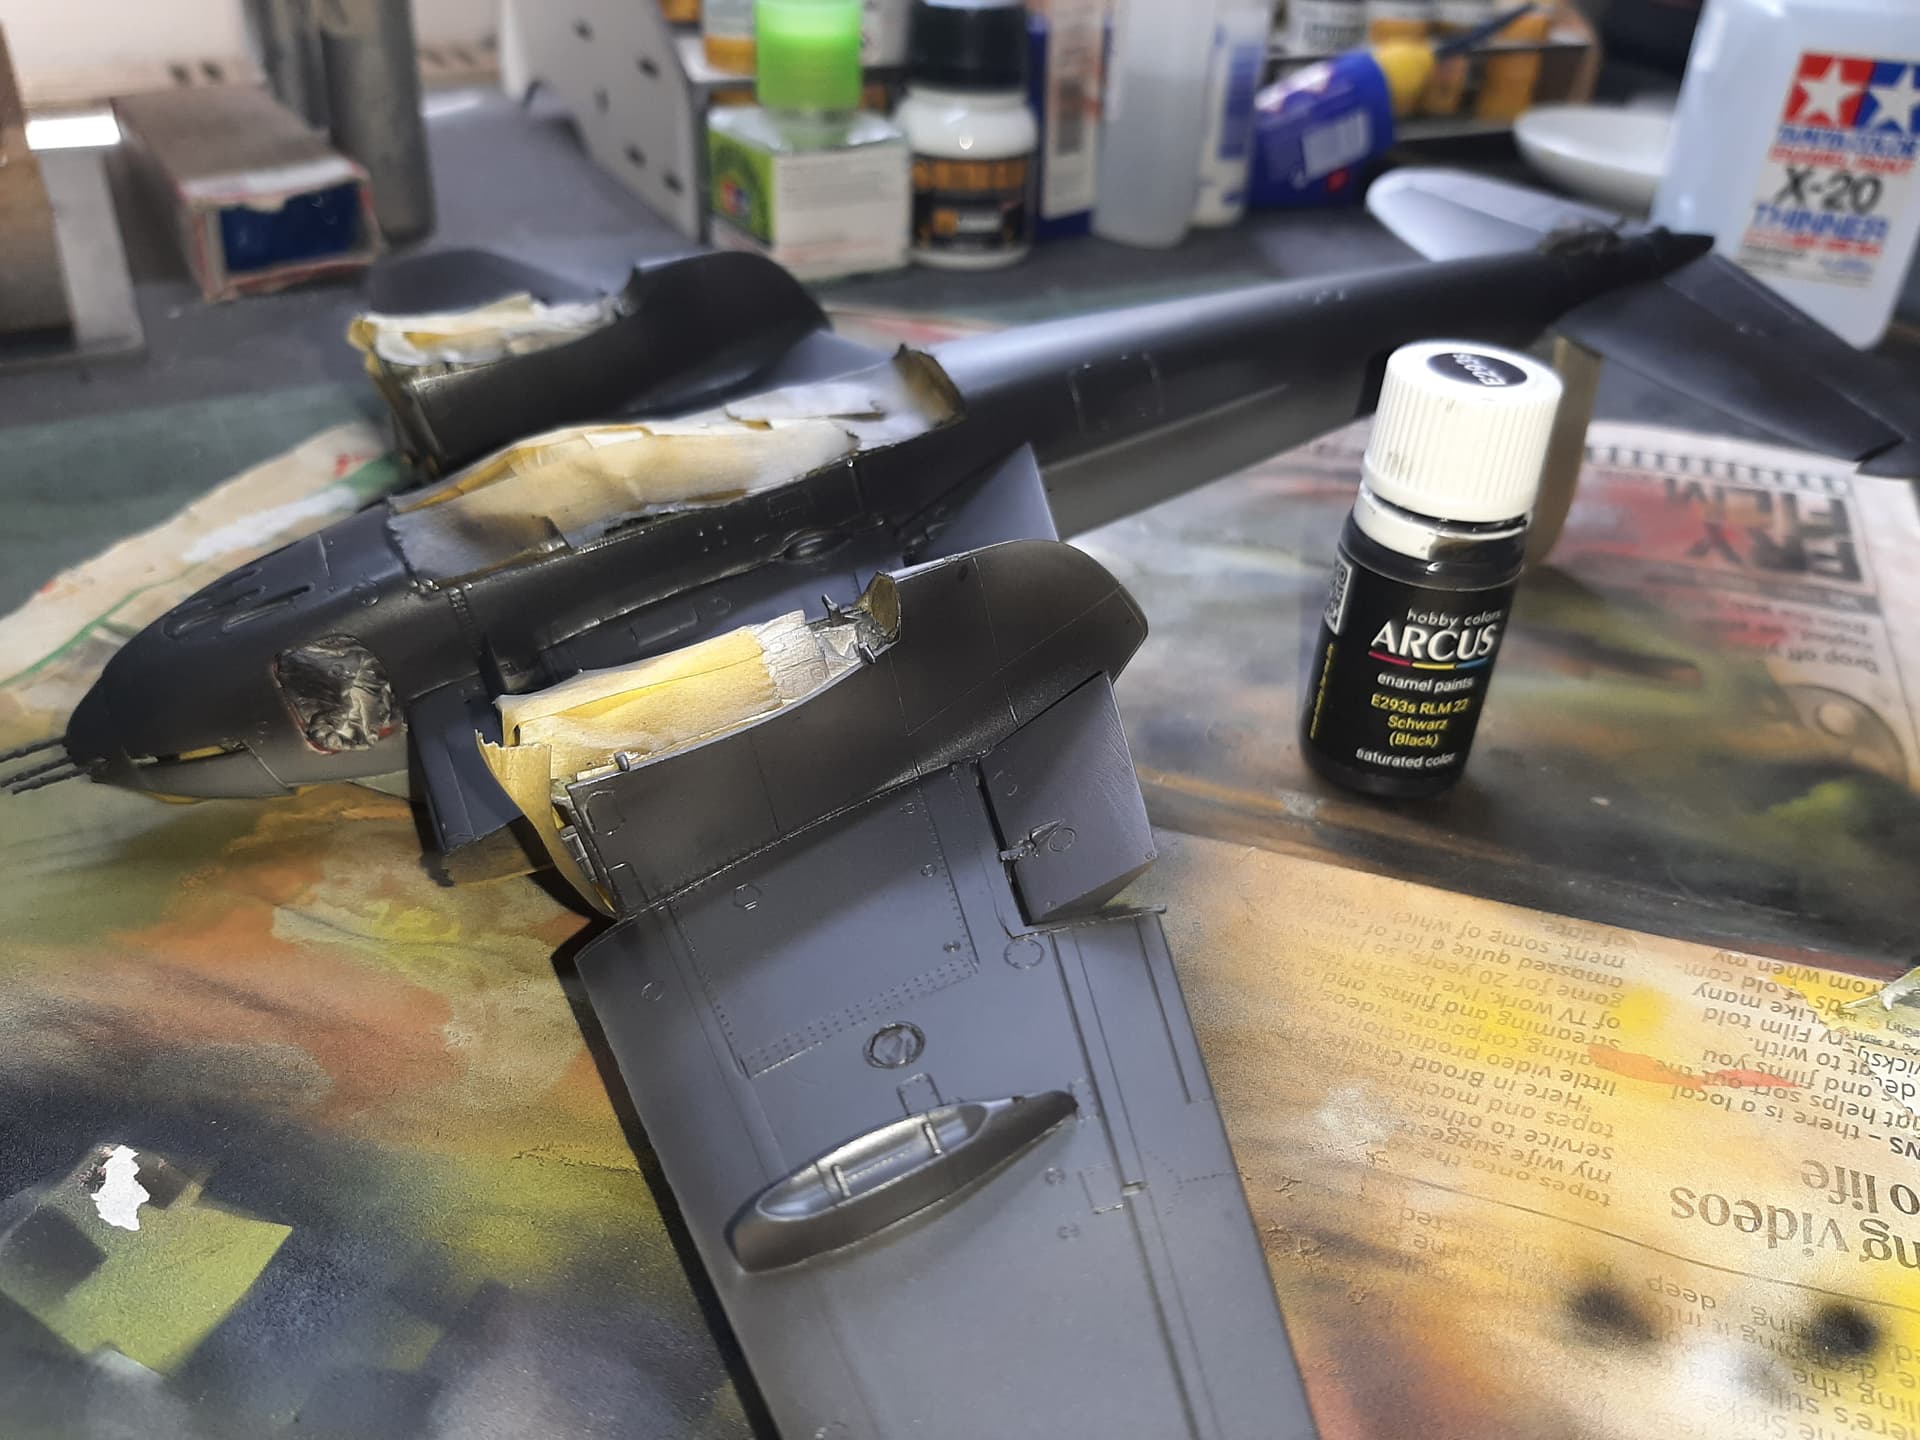
Okay, so here’s how it went.
Ironically, the Luftwaffe came to the rescue.
Started with a base layer of RLM 22 (Black). This paint goes down so beautifully, it was a joy to use.
1 Like
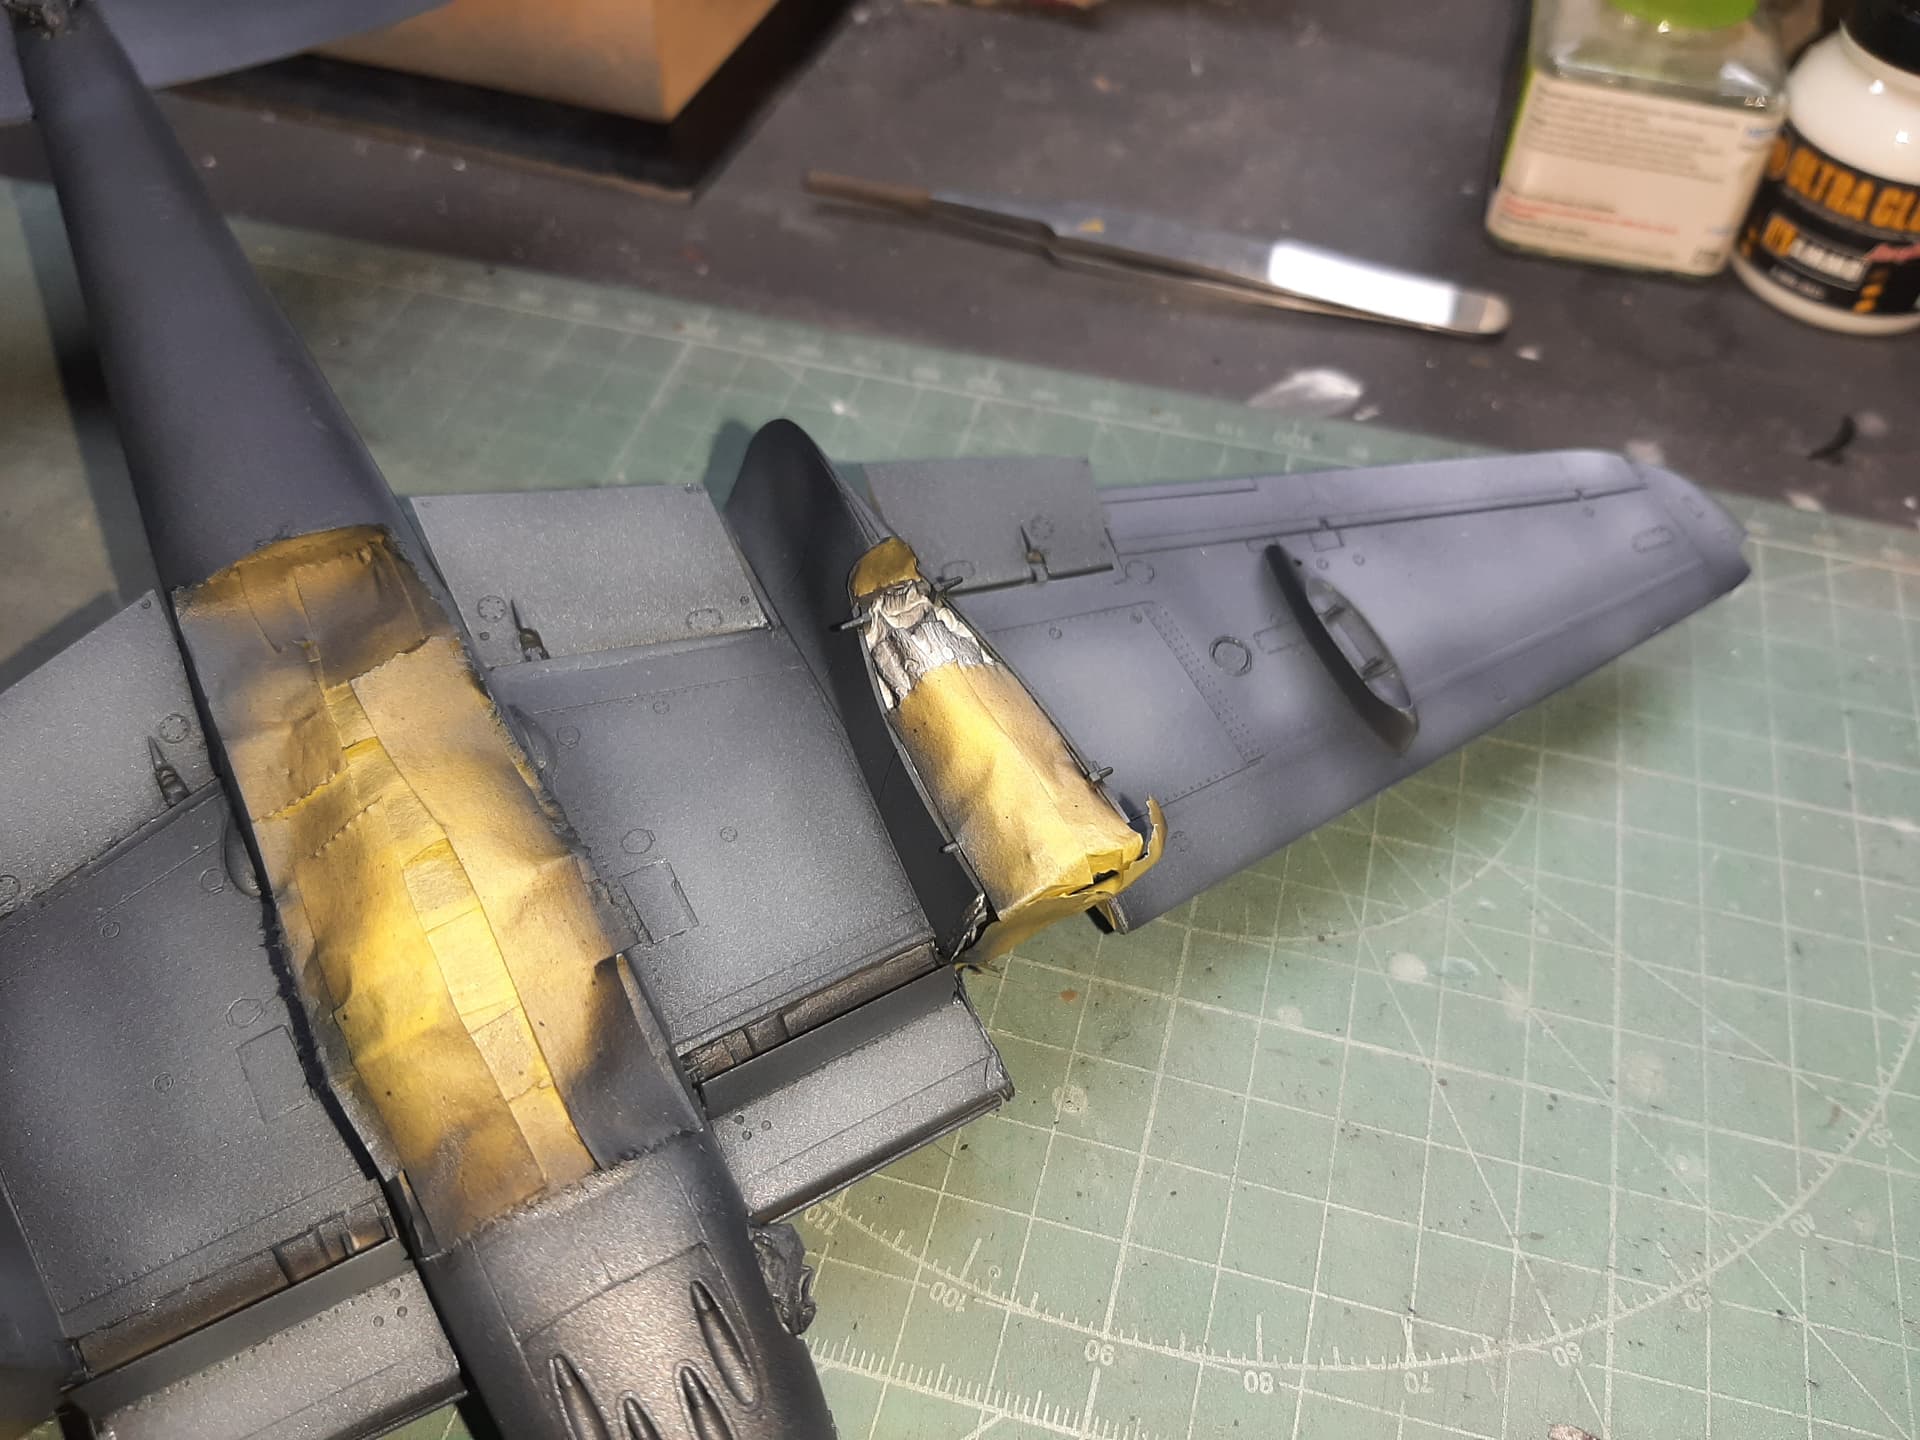
Then a light overspray of RAF Night.
RAF Night isn’t black, its black with a turquoise hue. It softens the base coat.
Then, I countershaded with RLM 66 (SCHWARZGRAU).
Then I mixed some RLM 66 with some RLM 77 (HELLGRAU) to achieve a lighter shade of RLM 66. Countershaded.
3 Likes
And then finally, a light overspray of RAF Night again to soften the countershades.
I think it work out pretty well.
5 Likes