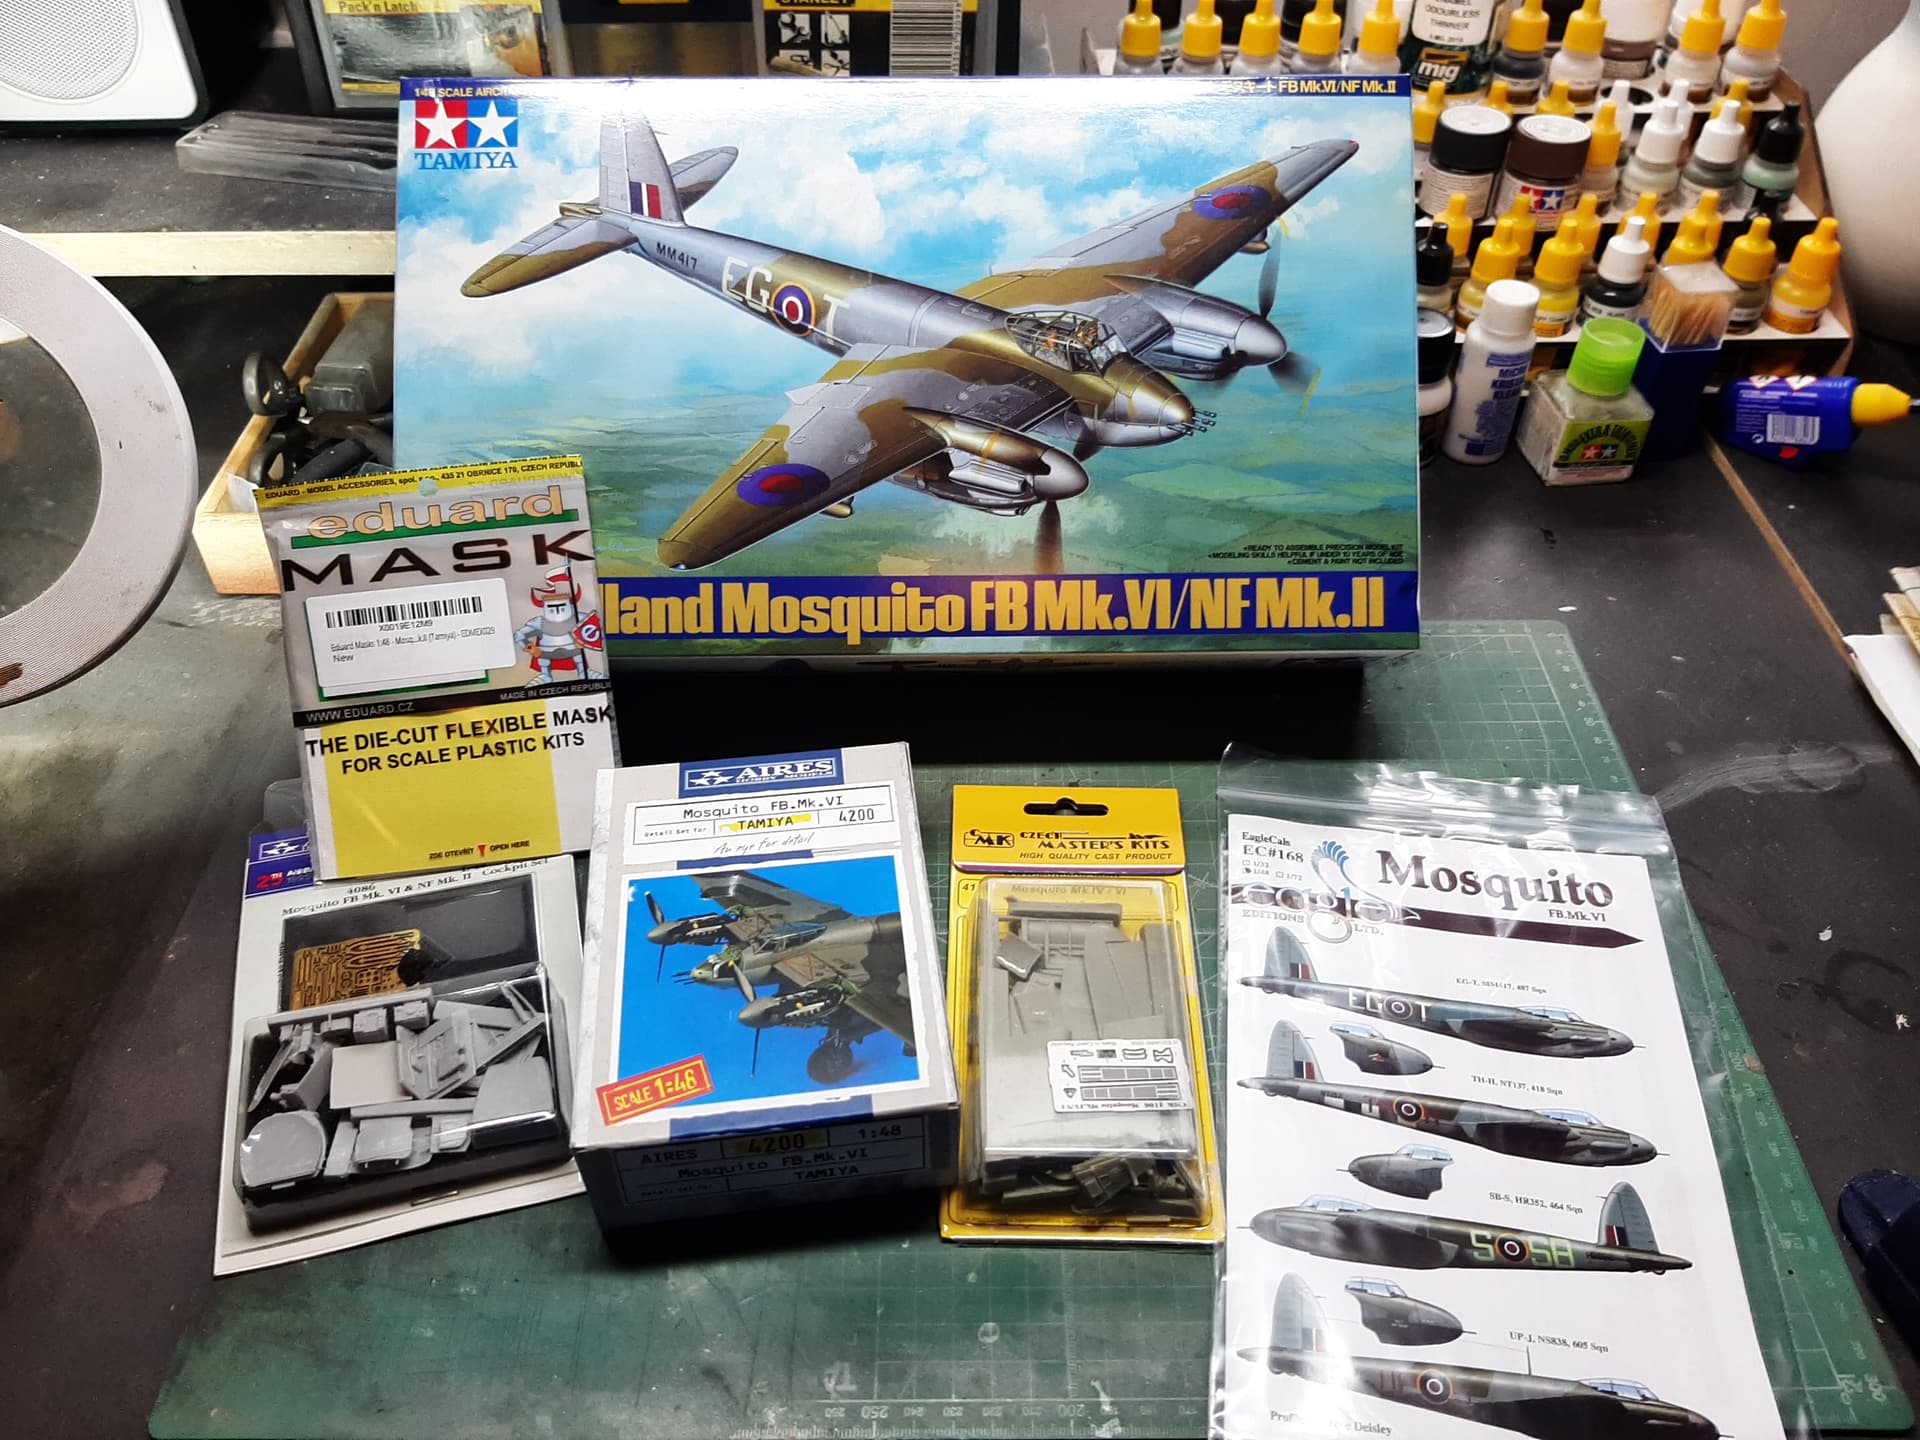
Next project - 1/48 De Havilland Mosquito FB Mk VI.
Plenty of aftermarket here, and some still to come.
Aires engines, cockpit & and nose gun assemby (nose gun assembly not in this picture), CMK exterior set (mainly for the control surfaces). Eduard masks and Eagle Cal decals.
I’m probably going to have a go at the Night Intruder ‘Wag’s War Wagon’, as it was actually operated by the RAF as opposed to the the top aircraft on the sheet which was operated by the RNZAF out of the UK. However, the RNZAF aircraft has historical significance as it took part in Operation Jericho and is incidentally the aircraft pictured in the box art. So it seems silly to use aftermarket decals for markings that are already in the box, unless they’re a significant improvement I suppose.
Some aftemarket metal gun barrels to come, and may get some resin wheels but other than that, I think i’ll have a crack at this beginning next weekend.
The Night Intruder has RAF Night Black undersides. This will be my first attempt at a black camoflage. If anyone knows where I can buy (or who produces) an RAF Night Black, preferrably acrylic that i can use and tone up/down to modulate the camoflage effect, i’d be very grateful for their advice.
9 Likes
Very nice load of bits there. Will be following this one as its a fav of mine. What a fantastic aircraft.
Thanks John, I hope I can do it justice. The CMK kit, in particular, was very hard to get hold of (its out of production now) and it didn’t add to my ‘green’ credentials, as it came from BC, Canada.
2 Likes
I’m sure it will be just as good if not better than the Mustang - So no pressure 

1 Like
I have this kit, albeit with significantly less aftermarket that yourself. Looking forward to seeing your build come together.
Another great one in the making! Hannants Xtracrylic line has the Night you’re looking for, # XA1012, but they appear to be out right now and I have it on my Watching List. On the other hand, you might try mixing your own as Night was actually a mixture of carbon black (pure black) and ultramarine blue – I believe I did read somewhere recently it was a 4:1 ratio of black-to-blue, but at the moment I can’t lay my hands on the reference for that (sorry).
By far my favorite WW-II aircraft, just ‘looks’ right. Have built several since watching 633 Squadron a long time ago. As for the black, I seem to recall the same 5:1 mixture as mentioned. There is just something about a pair of those RR Merlins that stir my soul. Best wishes!
1 Like
If anyone knows where I can get turned metal 20mm Hispano Cannon Barrels for this, i’d be very grateful.
Aires offering for the bomb bay upgrade turned up with four lethal looking bananas in the pack.
Or alternaltively, what o/d brass tubing would I need to replace the aftermarket barrels?
I would be very surprised if Master Barrels don’t offer them .
Master does make a set of 20mm open barrels for the Firefly. Don’t know if they’re similar or not, I don’t have my Mossie references handy.
Michael 
They do, but they are very similar as those fitted to the Spitfire - short barrelled equipment.
Weirdly master seems to make a set for the mossie in 1/24 but not 1/48
Can you get the Firefly set and extend them or measure their diameter and make longer ones ?
Everything but 1/48 my friend!
MASAM48095 1:48 Master Model Fairey Firefly Hispano 20mm Cannons with Uncovered Barrels
MSRP: $12.00
$10.99
(You save $1.01 )
SKU:
MASAM48095
Scale:
1/48
PRODUCT DESCRIPTION
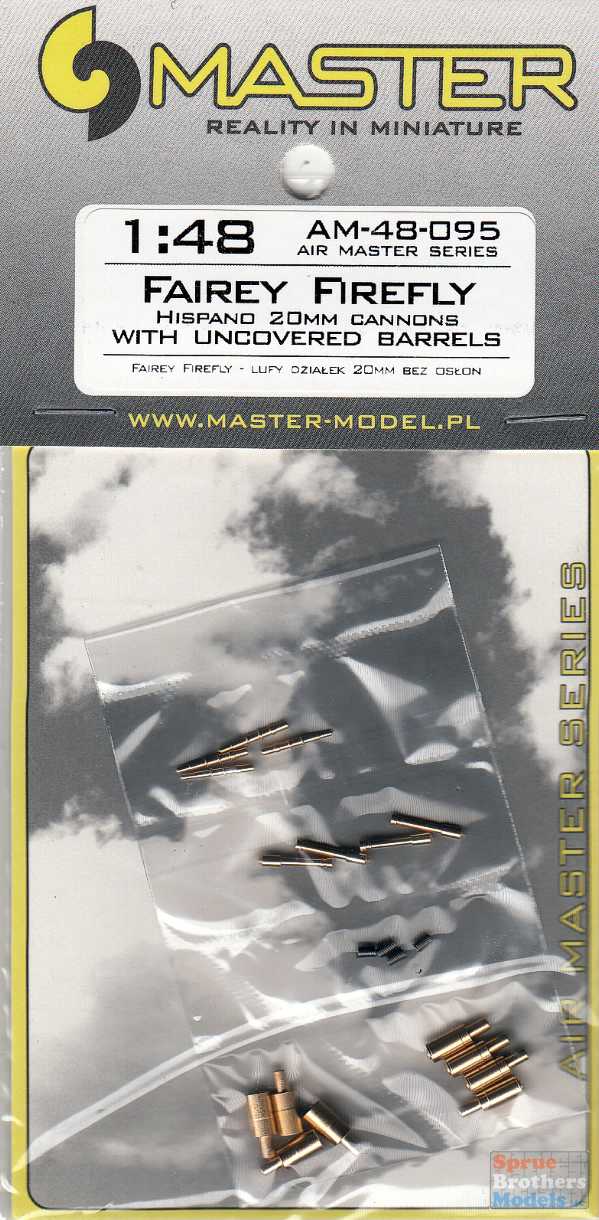
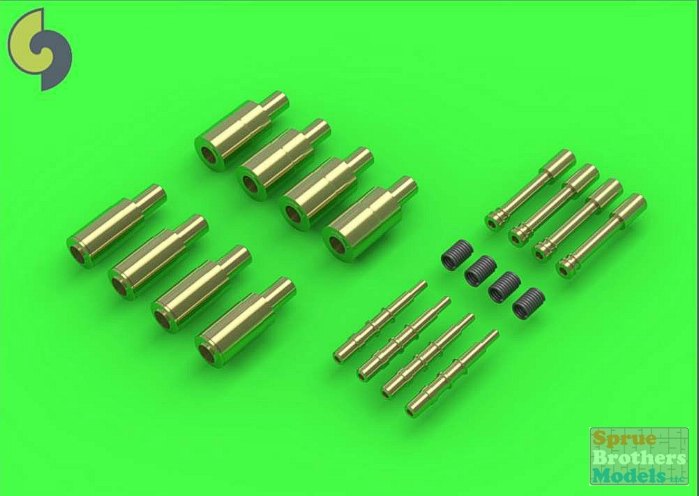
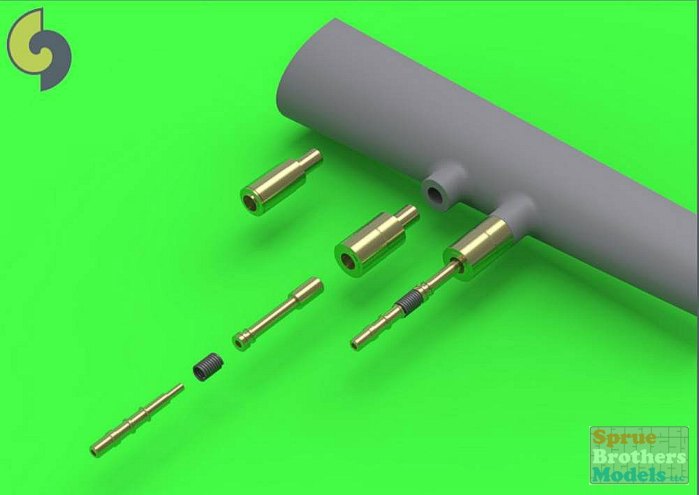
The set includes turned brass barrels.
It is very simple to use in Your model, and makes it extremely realistic. Simply cut off the original plastic barrel and drill a hole in the remaining plastic parts and insert the metal barrel using Cyanoacrylate adhesives.
JOIN
1 Like
I think that due to difficulties sourcing turned barrells of sufficient length, I will use the Aires supplied guns. In actual fact, I only require a length of gun barrel that extends just beyond the ‘knuckle’ of the barrell as it leaves the bomb bay. The supplied barrels aren’t really badly bent up to that point.
This means, once inserted, I can remove the bent portions of the barrells that extend beyond the bomb bay bulkhead, as they get progressively more bent towards the end.
1 Like
Returning after a 9 day hiatus as we in the UK celebrated the Platinum Jubilee of Her Majesty The Queen.
I had begun… I must stress, i’m no expert and there are, i’m sure, many, many rough edges that can be criticised. Constructive criticism is always welecome. But, I am improving, in my opinion.
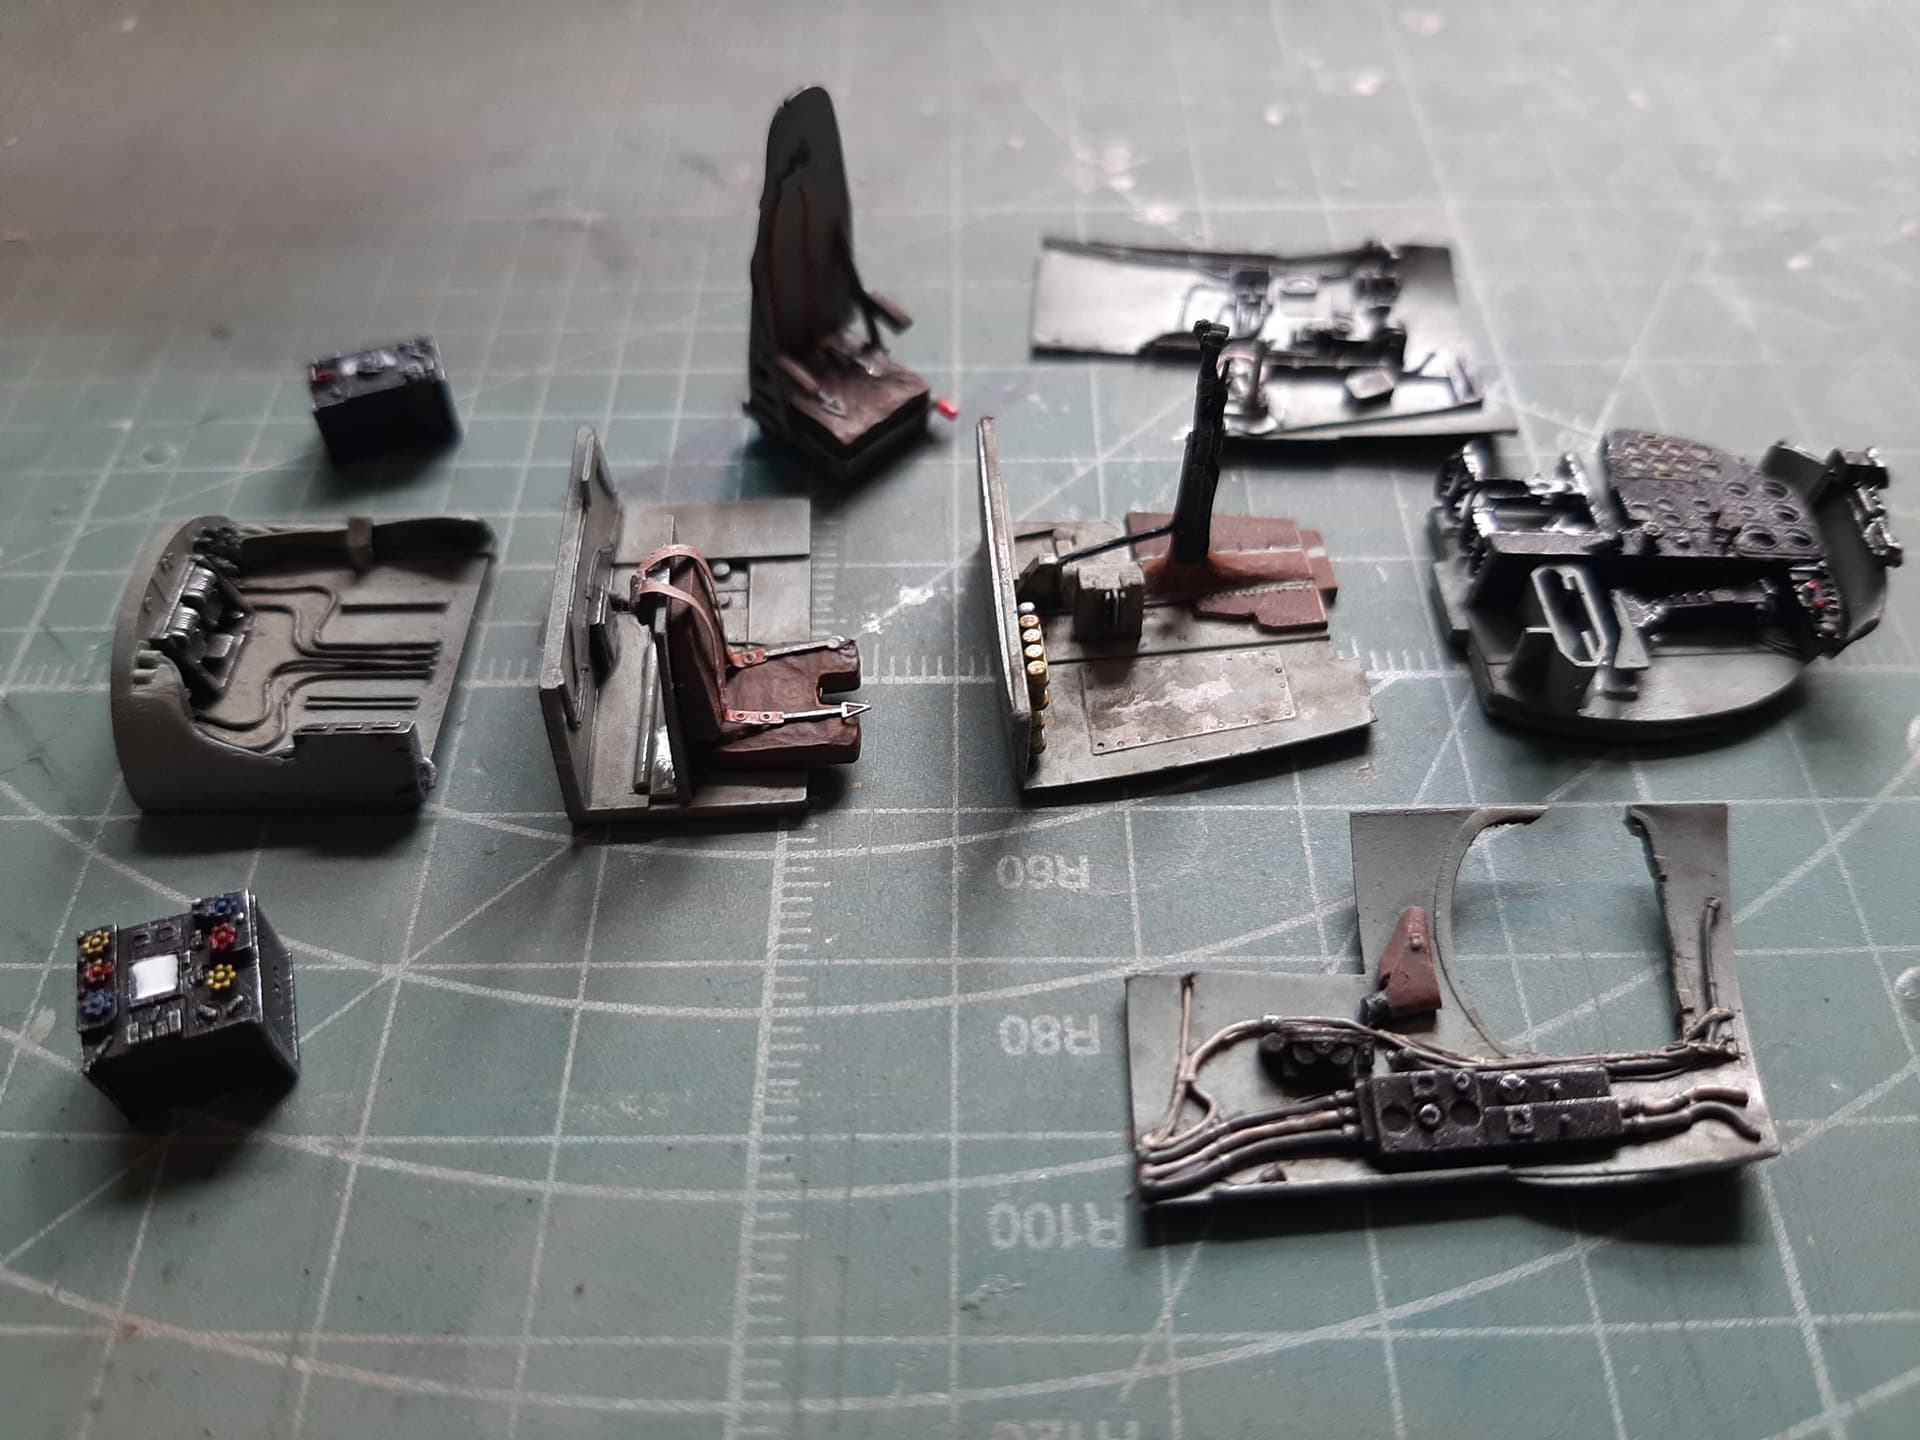
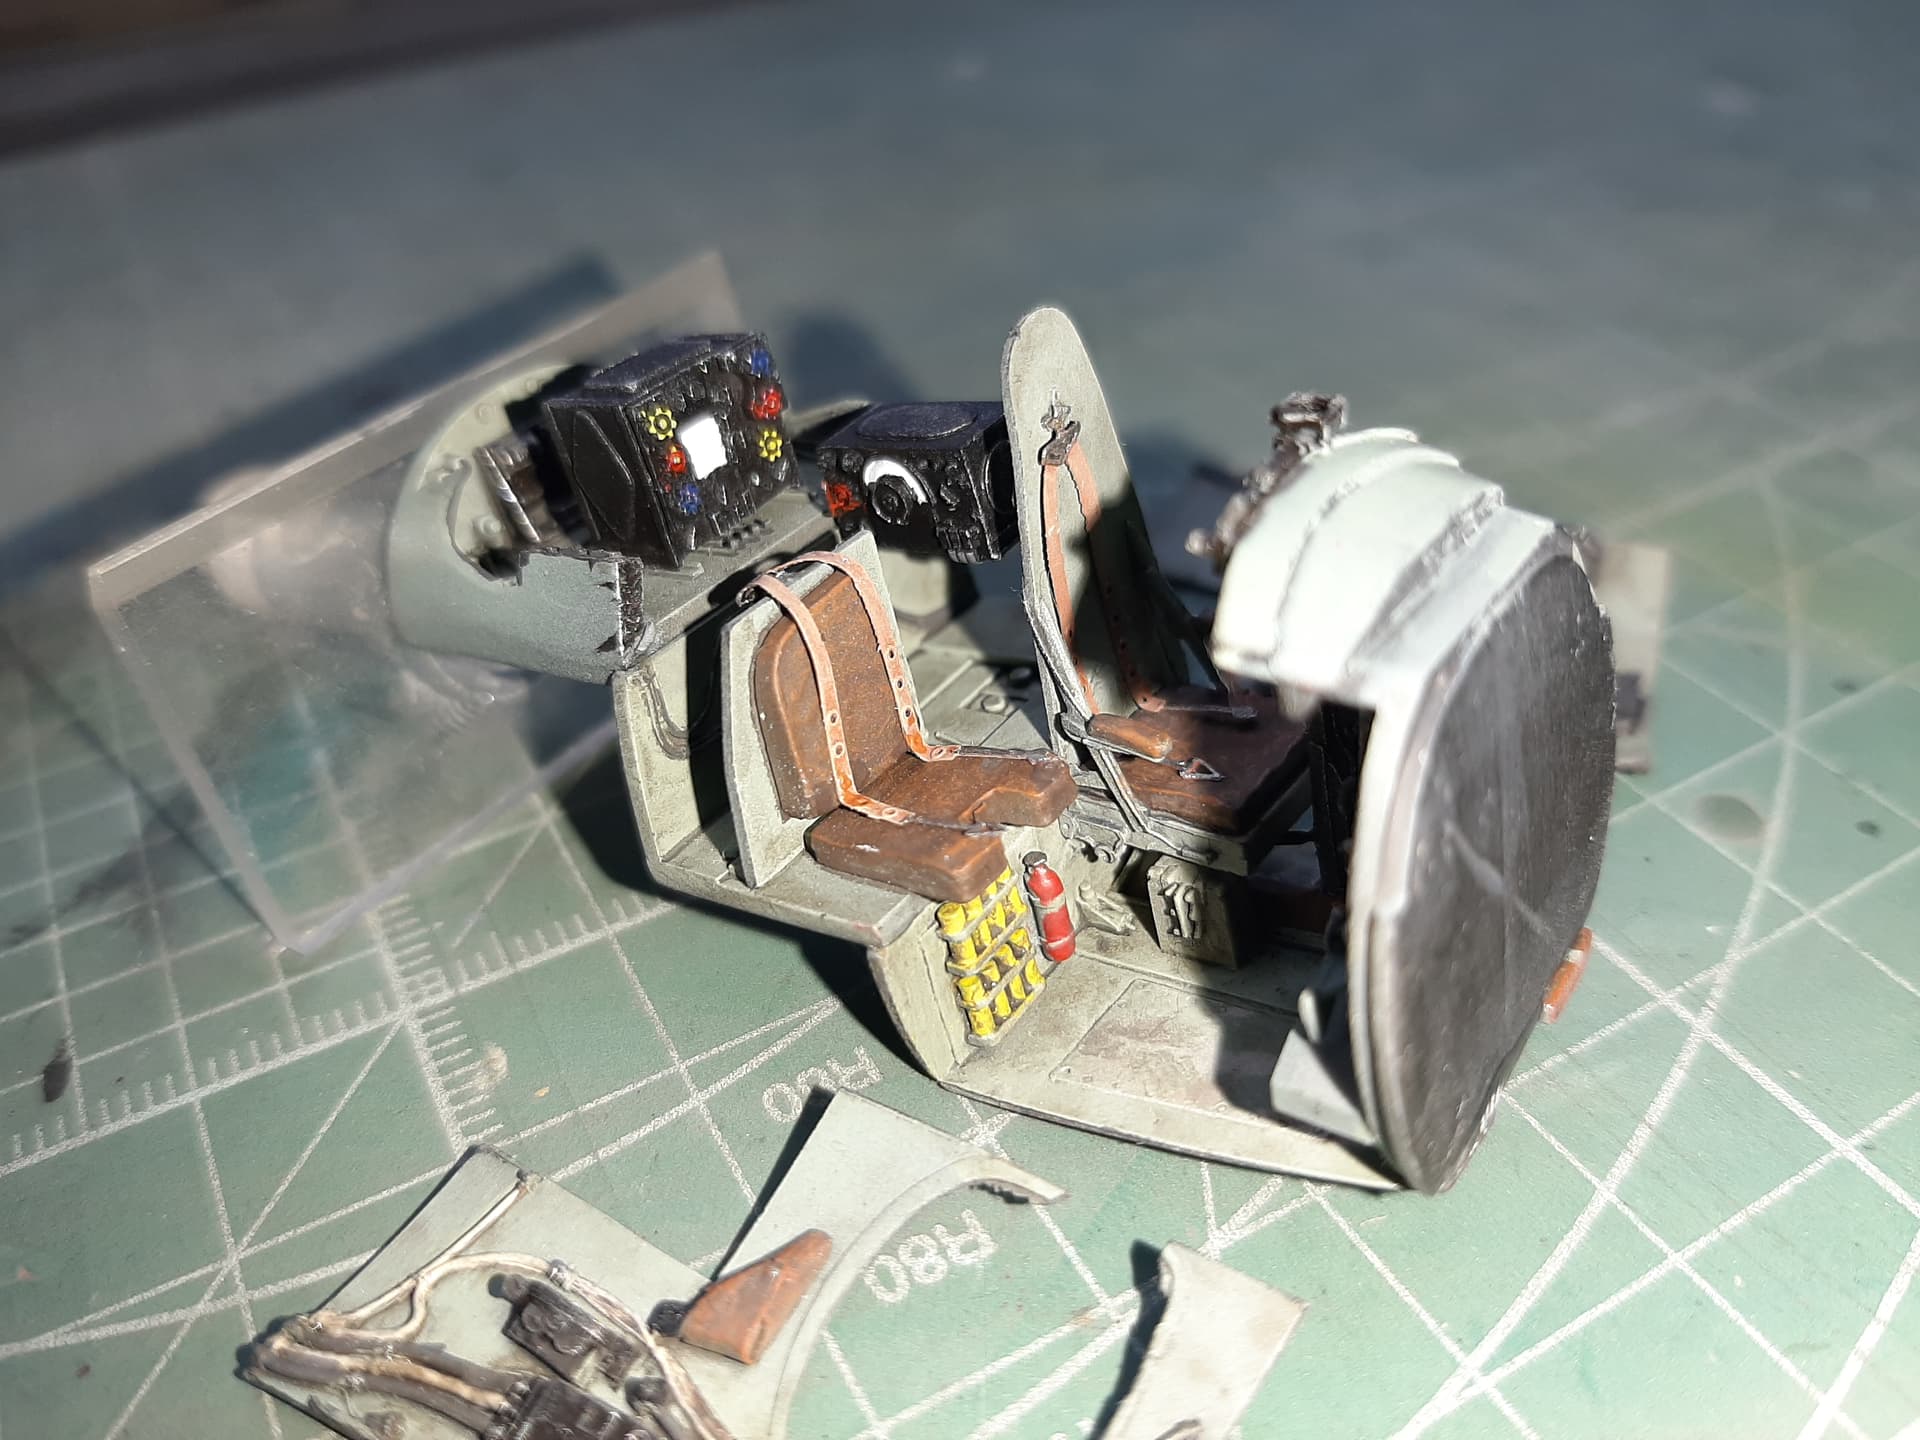
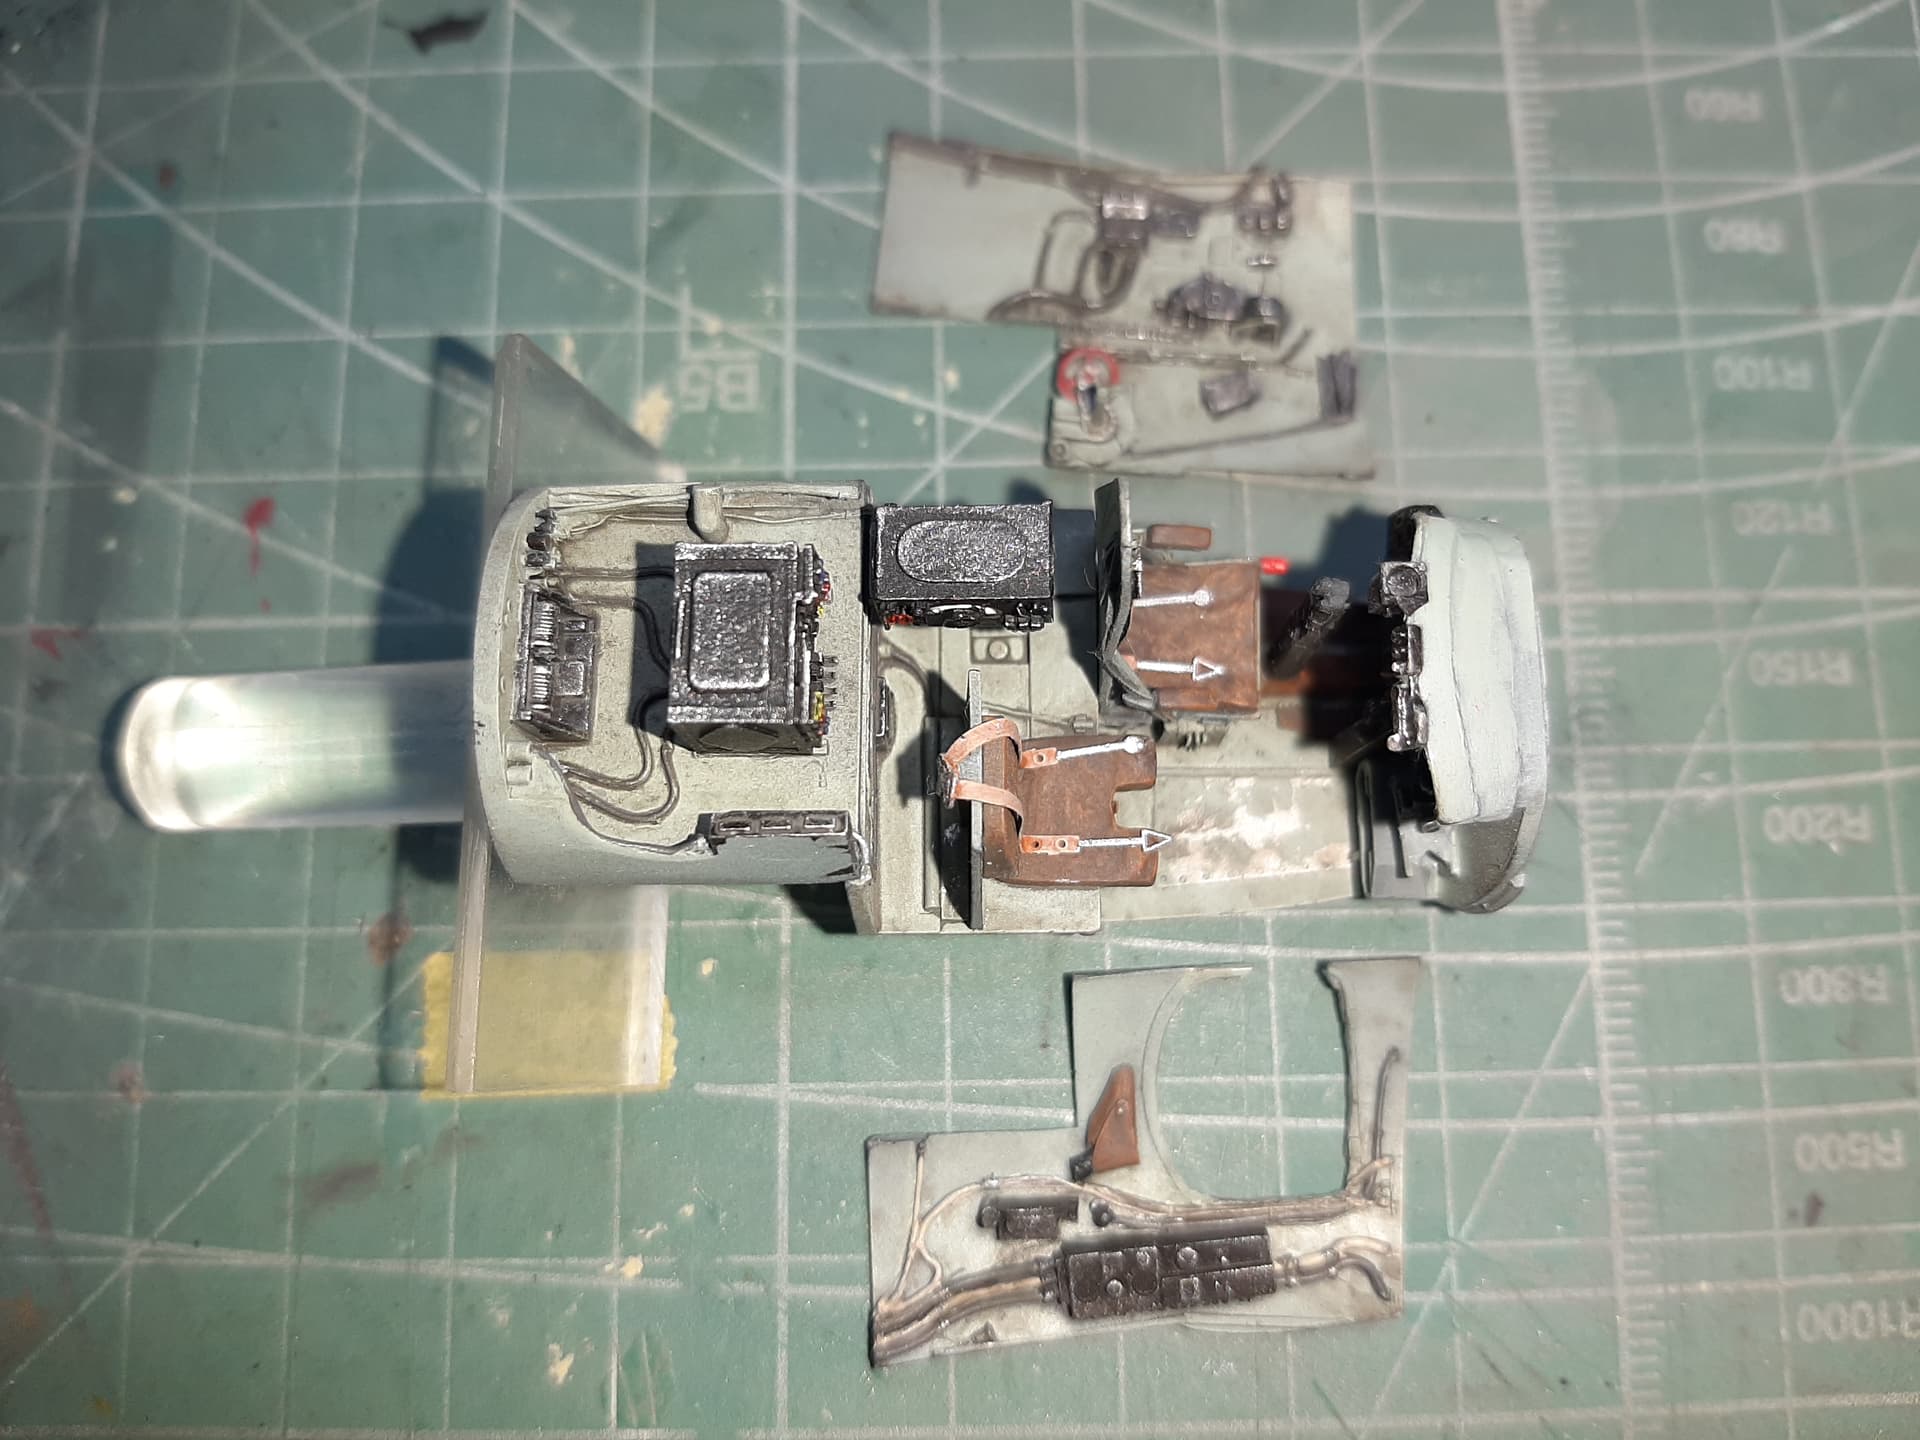
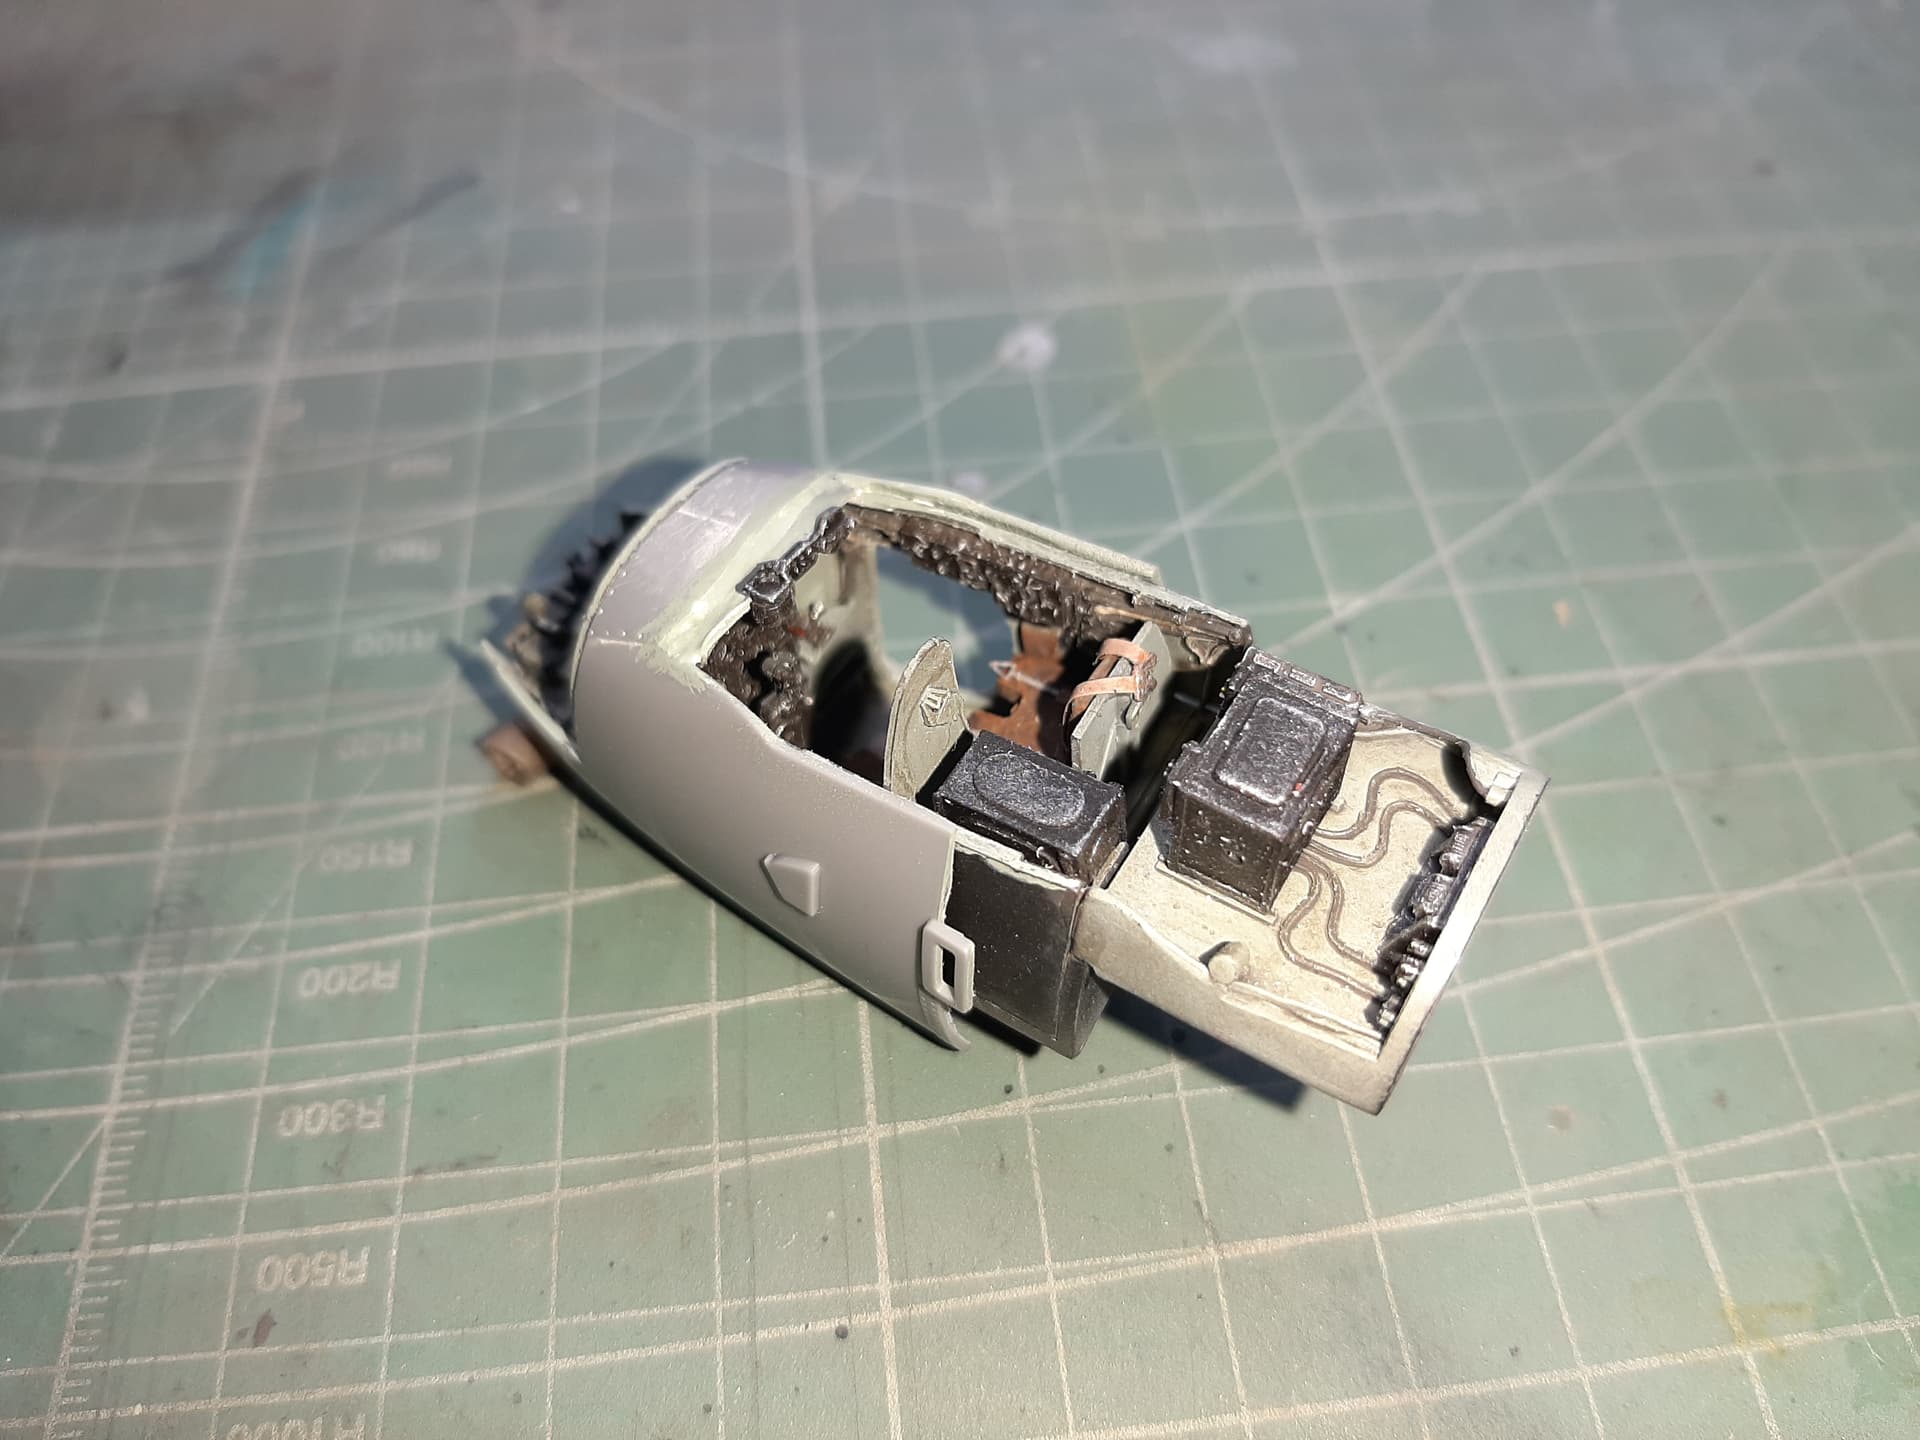
The Tamiya kit instructions unusually start with construction of the wings and undercarriage. Construction on the fuselage doesn’t kick in until around Step 11. No problem, but as I have an Aires cockpit, nose gun bay and bomb bay to go in, to my mind this is where the real challenge would be (getting everything to fit) and so I started on the fuselage, with the cockpit ‘insert’.
It is pretty straight forward, but I was careful to put the kit cockpit together first, so that this could be used as a profile template for the Aires offering. Those who know will be aware that the Mosquito cockpit is ‘staggered’ in profile and it is essential when using an after-market set to ensure that your finished work is going to fit into the tight constraint of the kit shell.
I had missed some tiny details like control levers from the sidewall throttle quadrant, but these were literally so small, i couldn’t be bothered with them and when the kit is all together, it would be difficult to see them anyway.
2 Likes
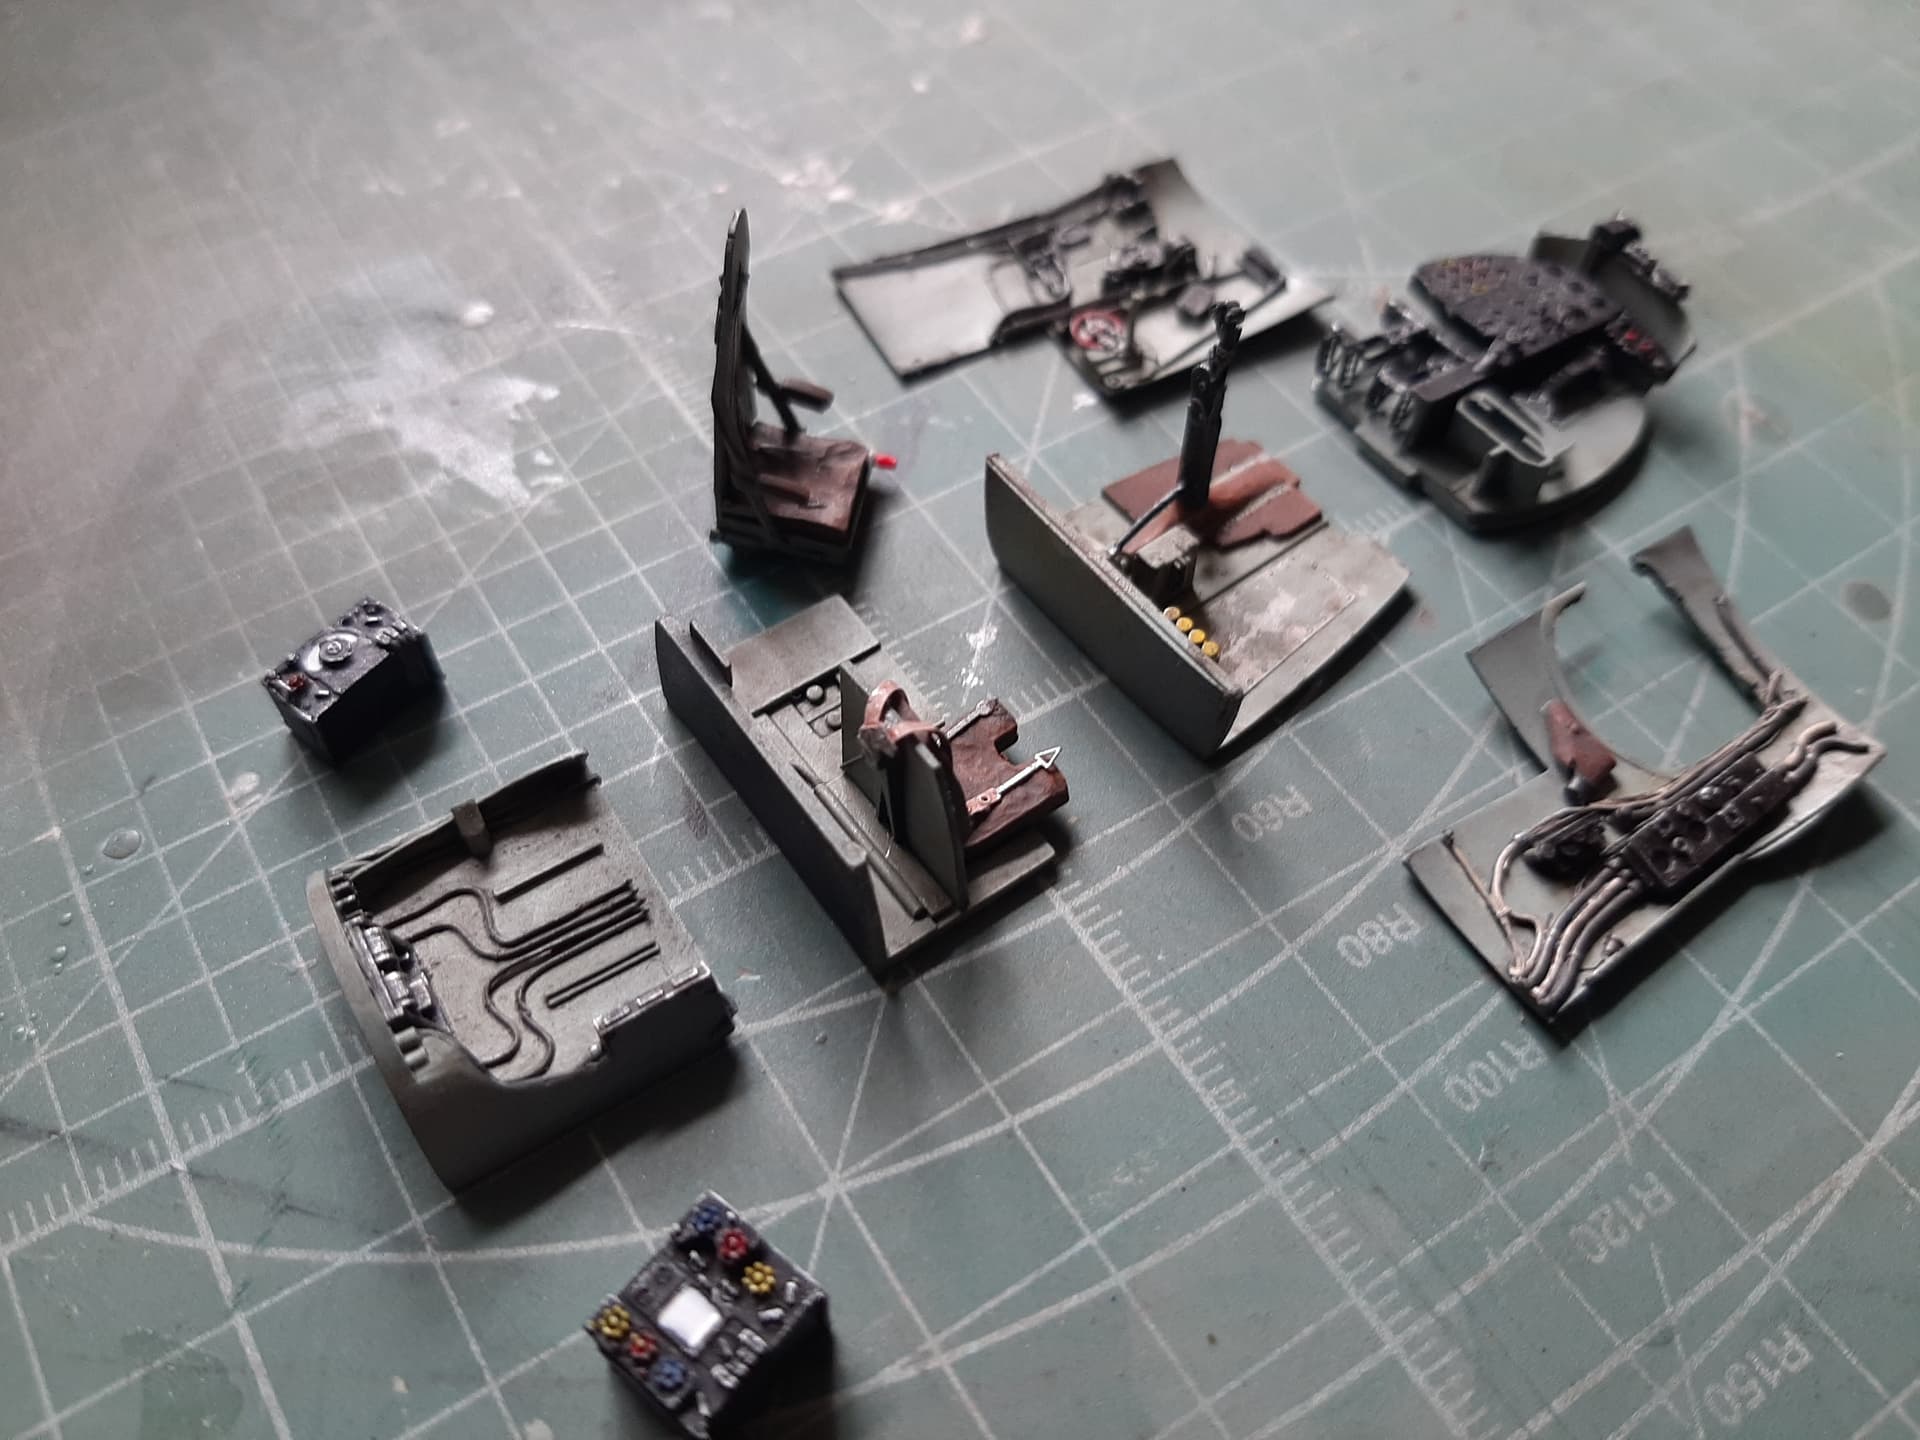
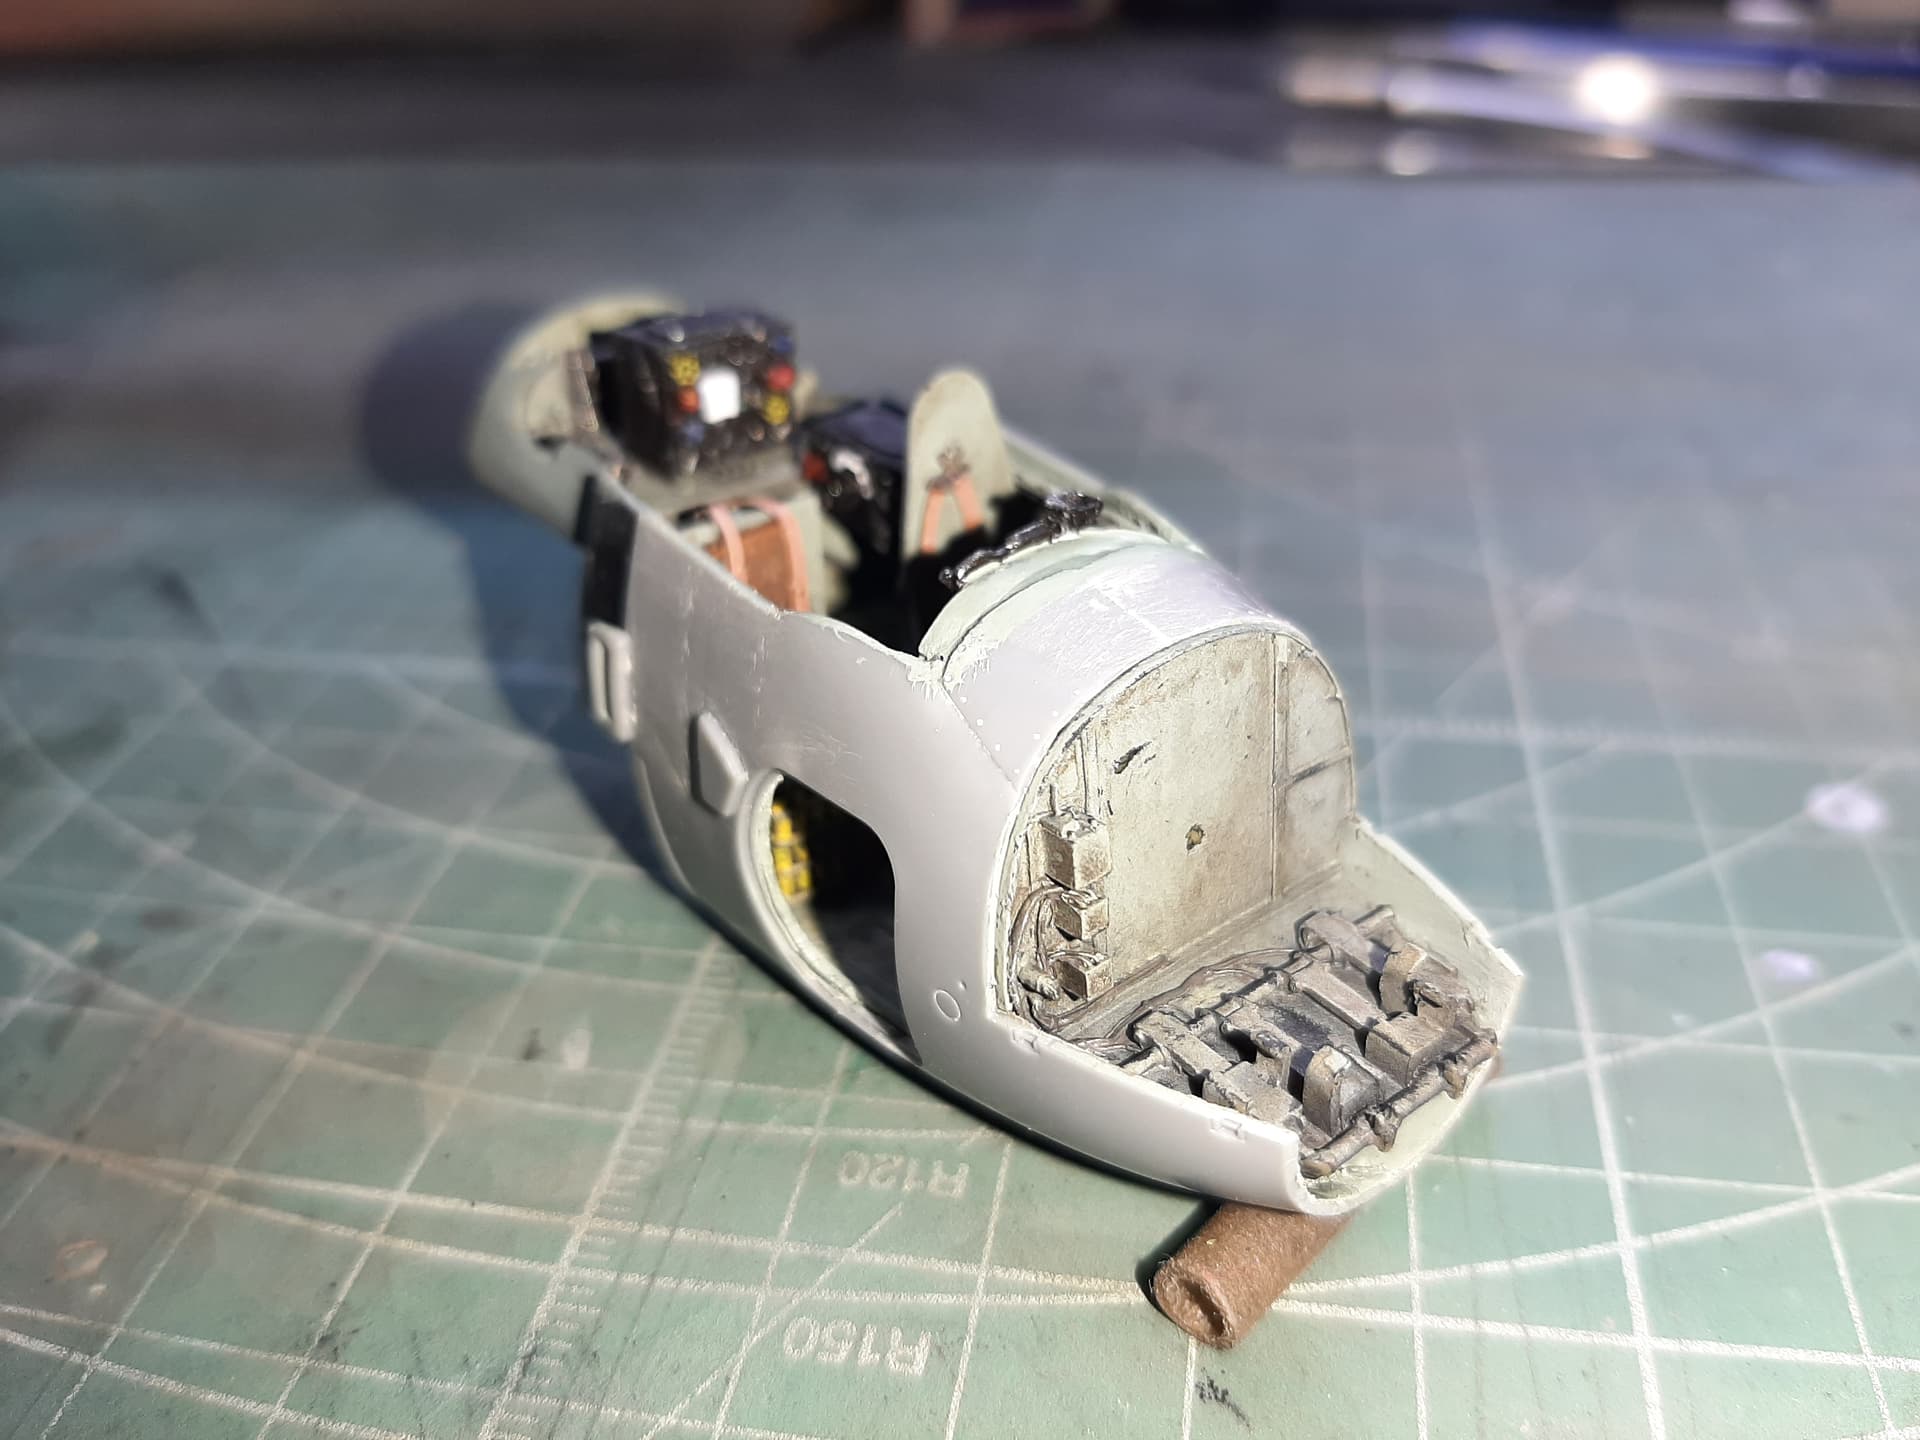
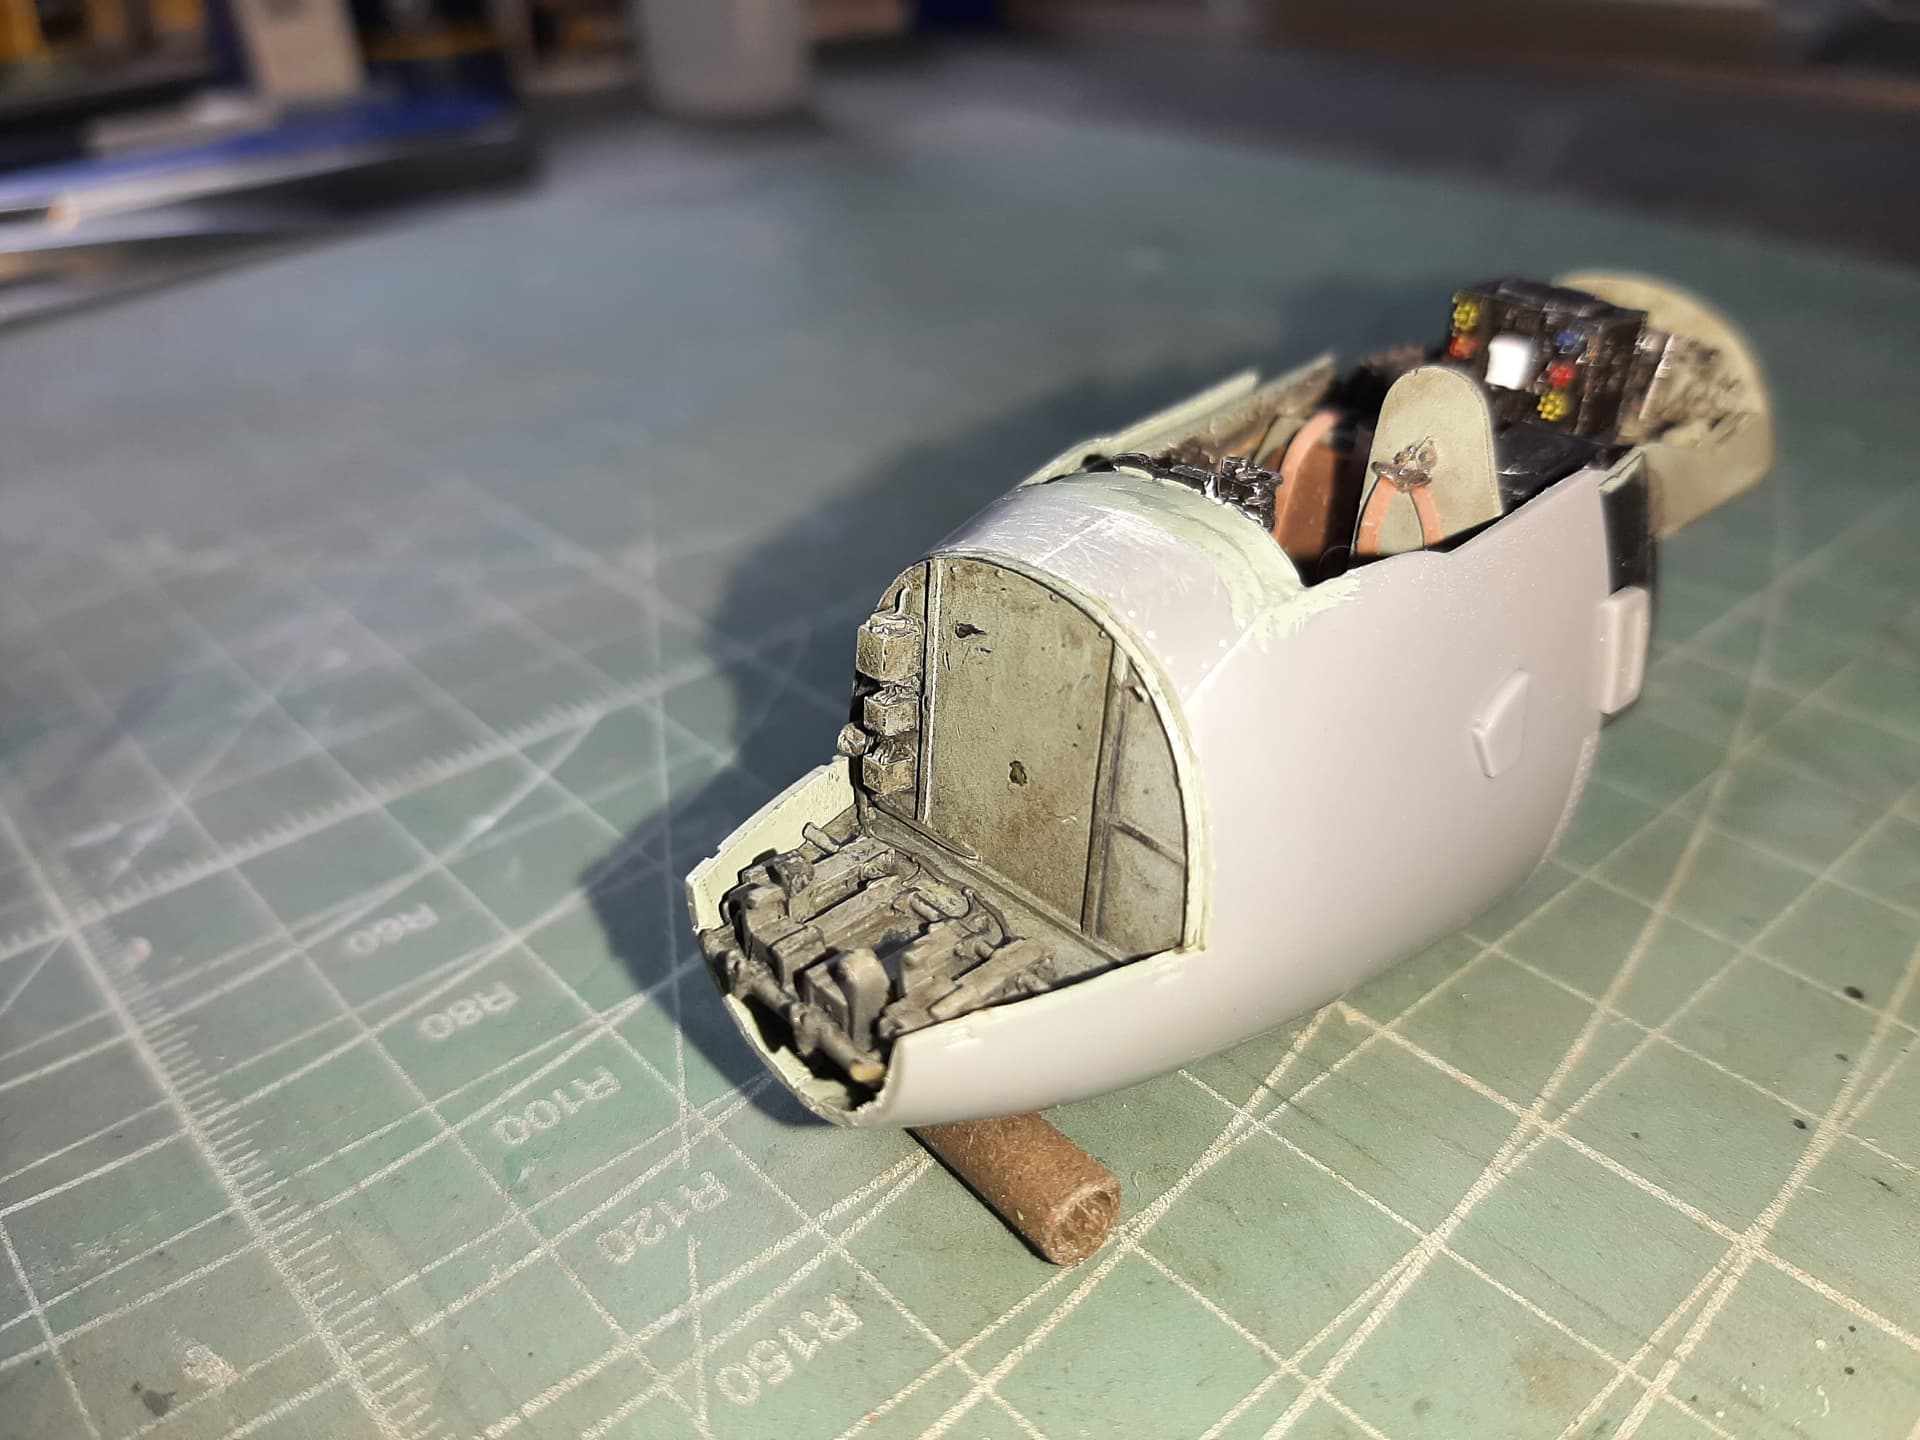
Now, it is easy to see the ‘staggered’ cockpit profile.
For an Aires kit, this went together quite well. Patience is the key - it is very important to use the Tamiya kit cockpit as your template here, because the Aires instructions do not make it clear how the seperate elements of the cockpit ‘stack up’. If you go under rather than over (if you see what I mean), you can leave yourself a whole world of pain.
2 Likes
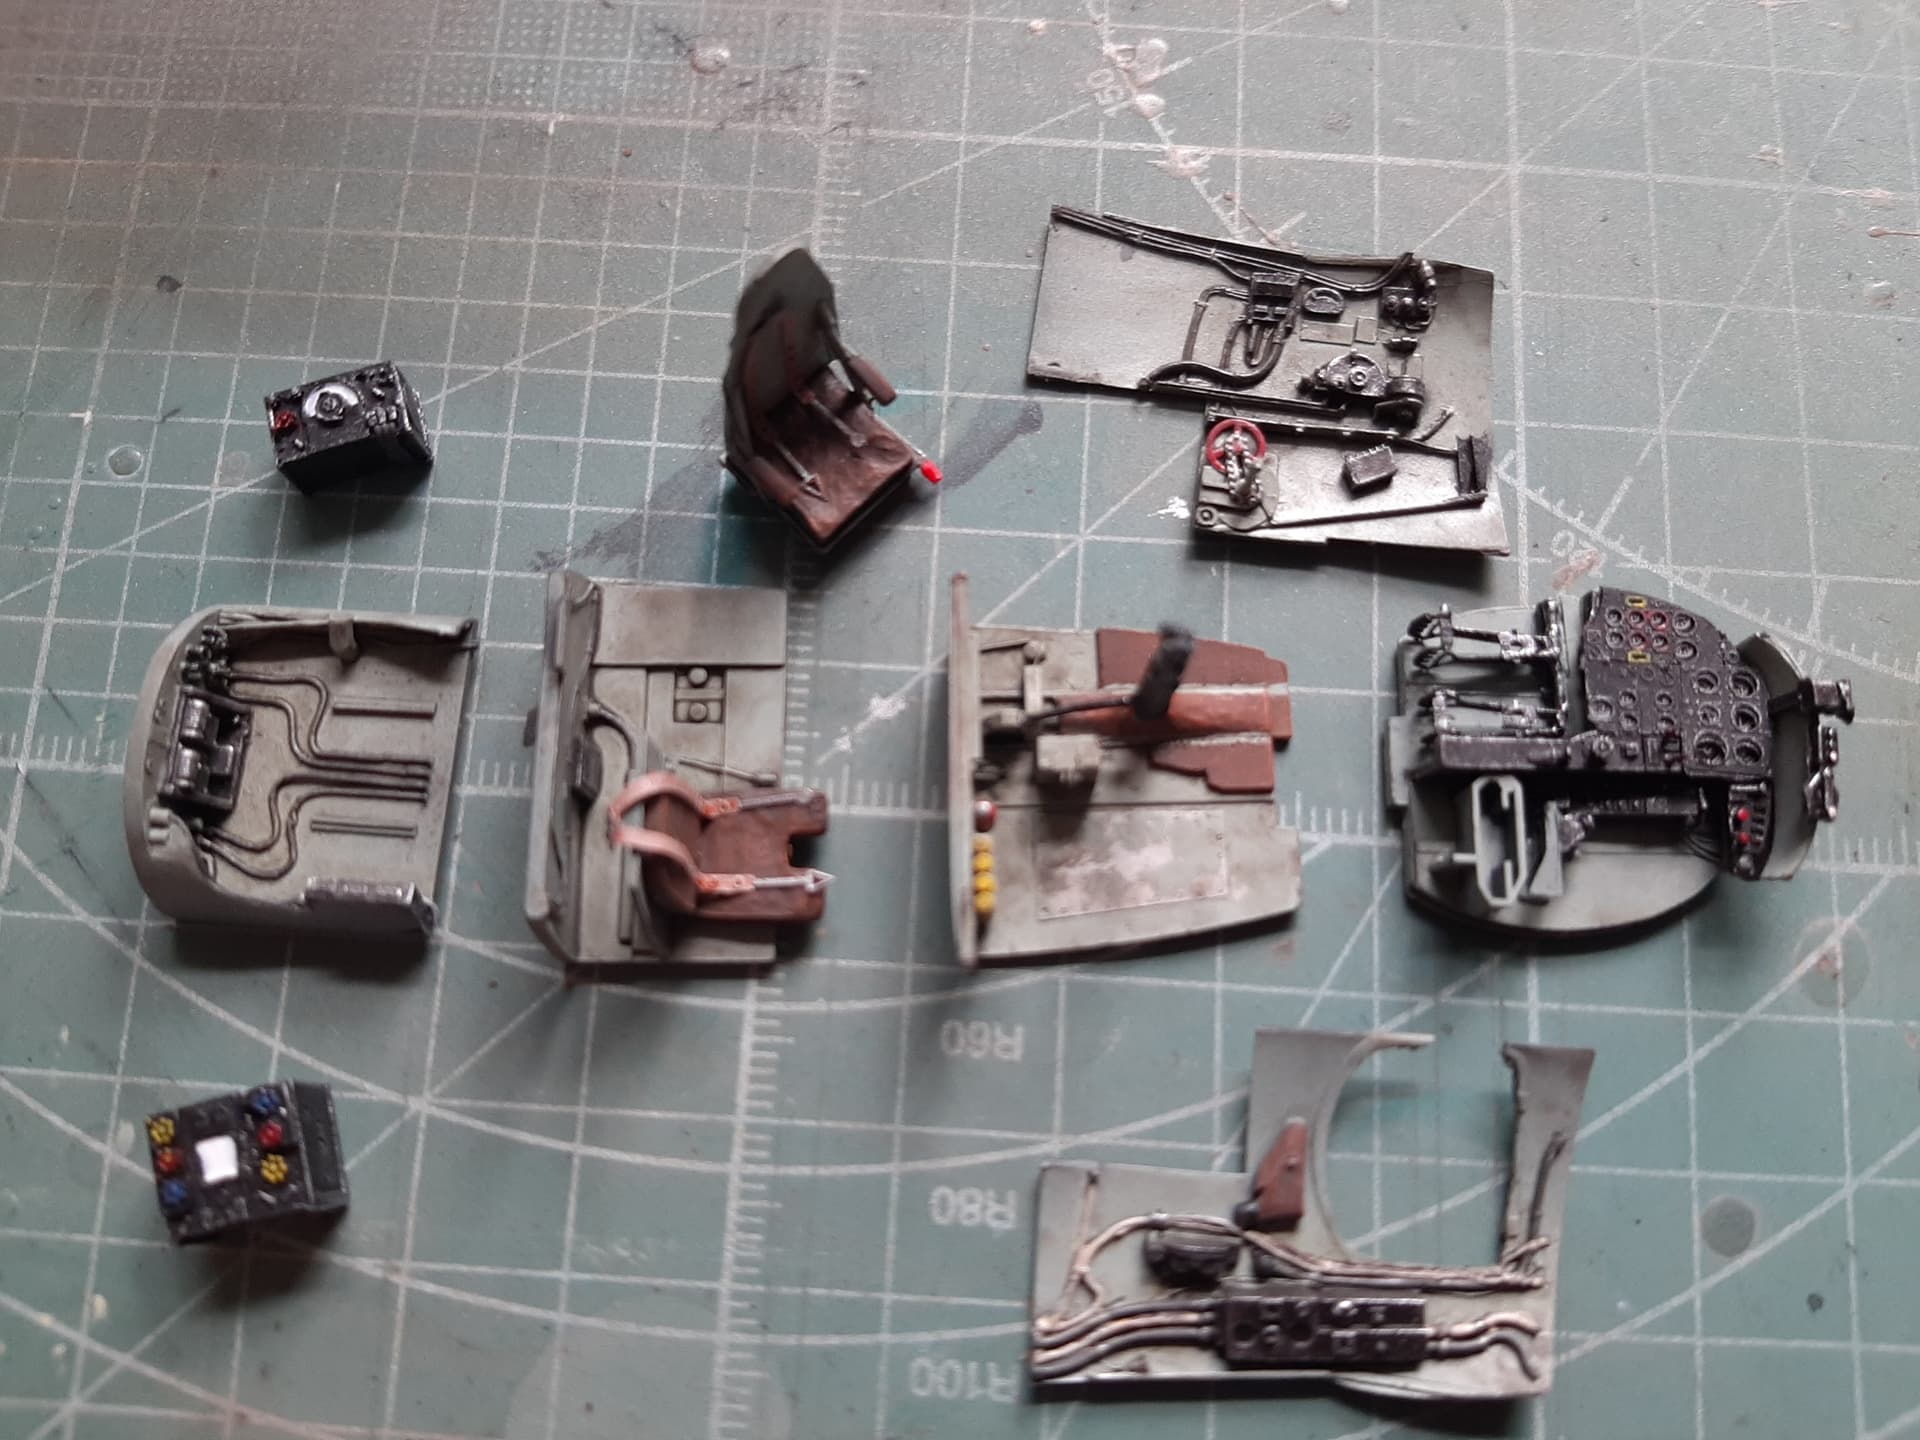
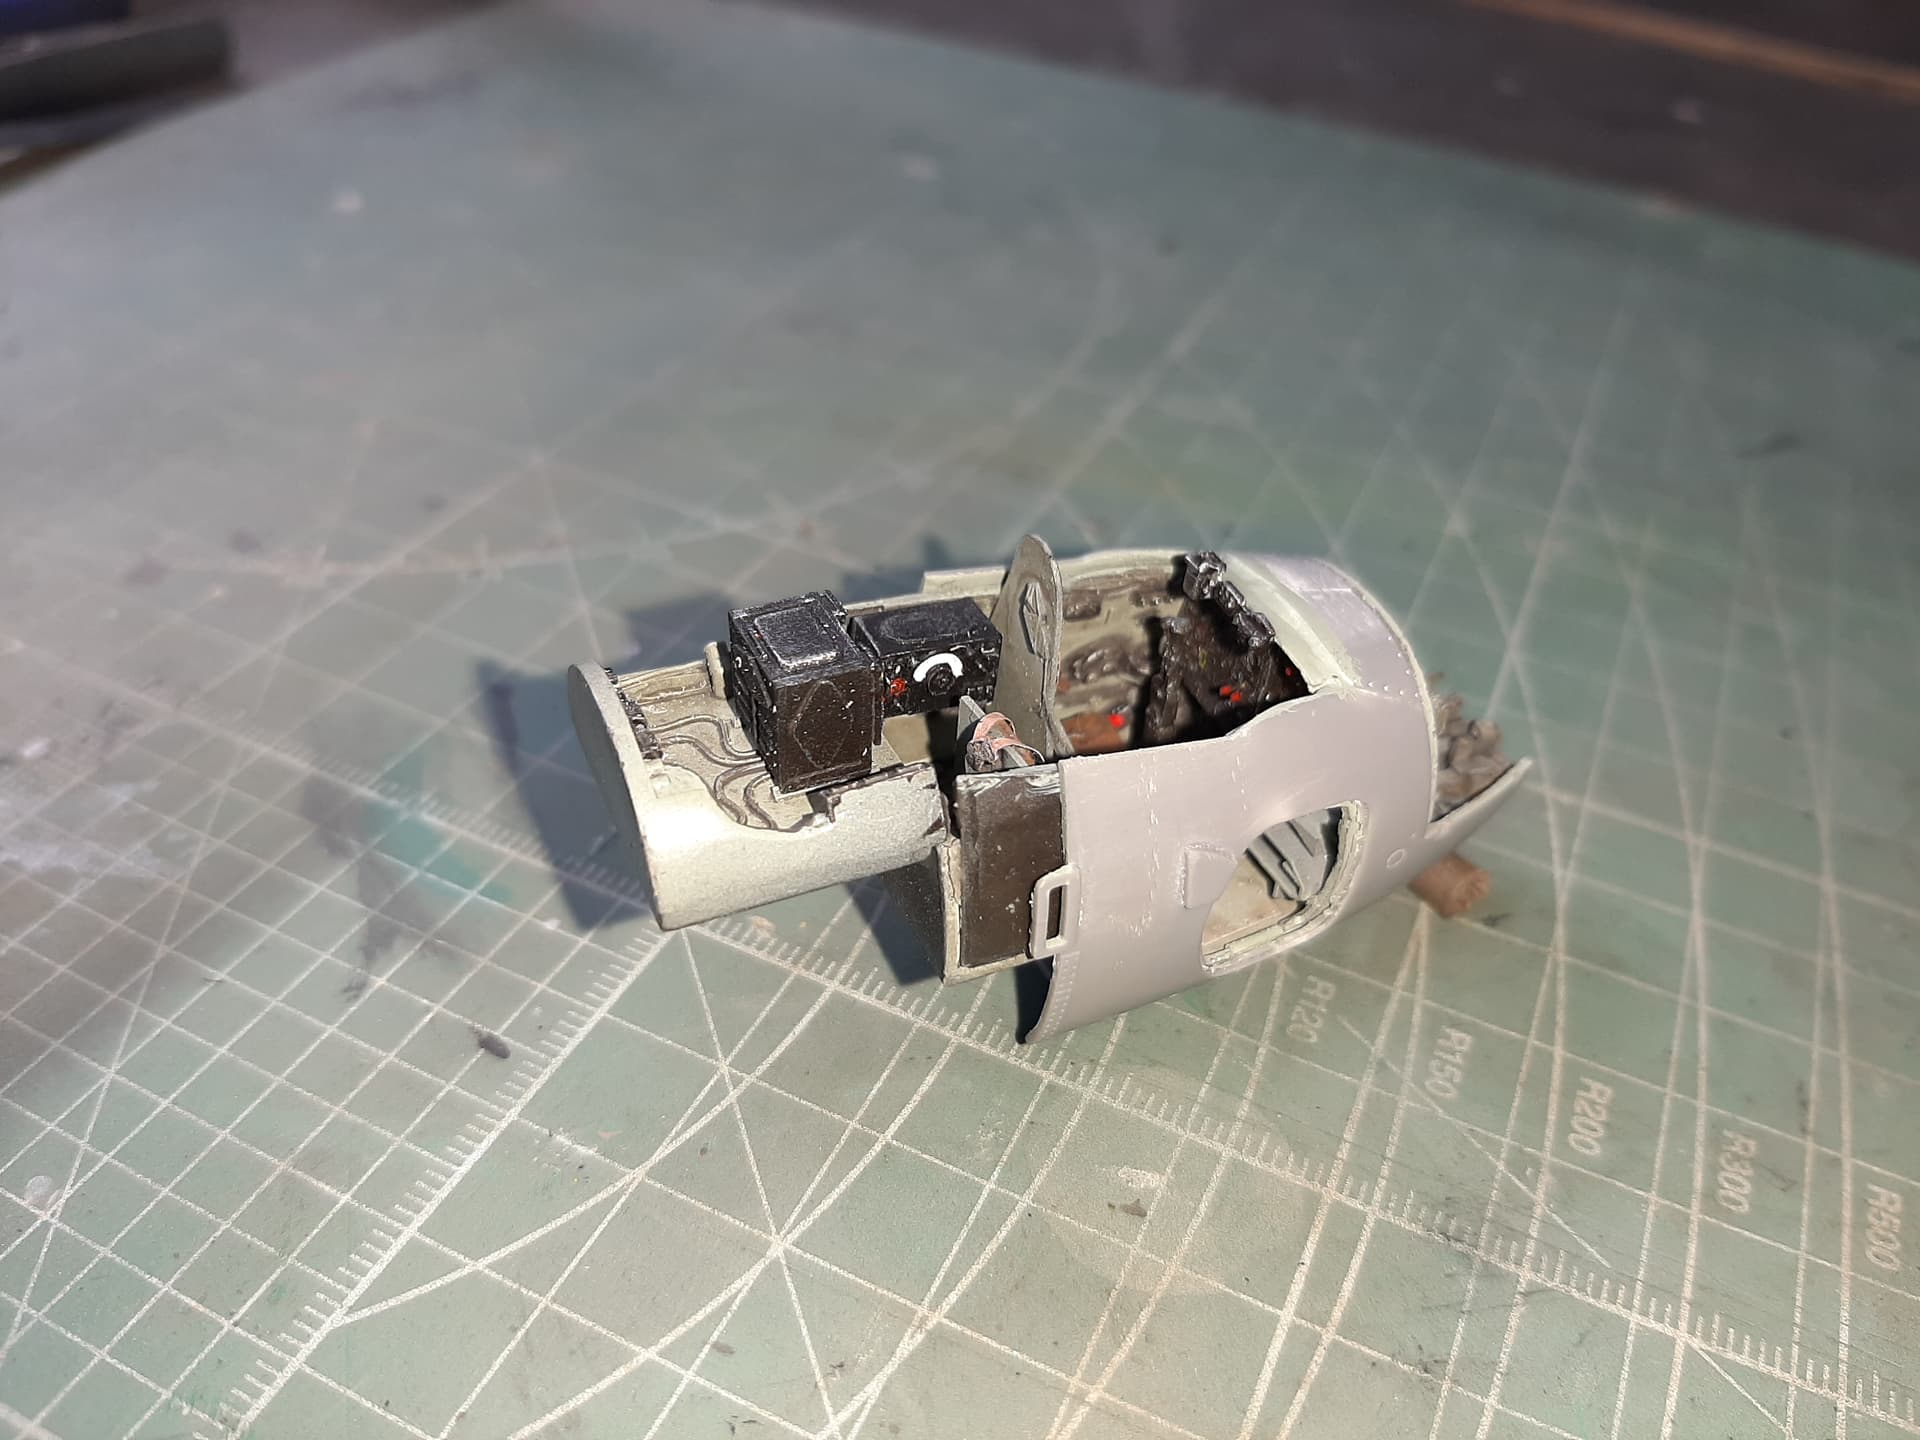
With the cockpit complete, it was time to insert it into the kit fuselage shell. This shell mates up with the aft section of the fuselage later on.
It can be seen how tight the fit is. It is worth knowing if you’re going to take this on that both the inner surfaces of the forward fuselage and as much excess as physically possible from the resin cockpit ‘tub’, must be filed/sanded/ground away before a good fit can be obtained. Do not try to force things together, it wont work. Just be patient keep filing, fitting filing etc. and eventually, it will fit together. Fortunately, a good indication of alignment is achieved simply by lining up the fuselage crew access door with the corresponding hole in the AM kit.
Also, welcome to the Aires nose gun bay which fell into place. You could have knocked me over with a feather!
3 Likes