Wow! Congratulations to a nice build John! As soon as you have some figures everything comes together. You should be proud of your first 1/72 diorama. I hope to see another one soon 
Cheers! Erik
1 Like
Really looks excellent John. Spectacular finish.
Amazing work, john‼️a beautiful scene that was enjoyable to see coming together and being completed. The outside pictures really gives an air of realism which you can only be proud off.
I really enjoyed your build and hopefully when I’ll complete my little work (I’m a very slow builder) it will find a place besides works of art such as yours and the others
Top notch work, really impossible to tell that you have no expert with 1/72 scale.
I think the outdoors images above show your build off to perfection John, and help highlight those outstanding little details, those individual vignettes within the diorama that help build the bigger picture, especially when combined with your background narrative, 
 .
.
A build to be truly proud of my friend, .
Cheers,  ,
,
G
1 Like
It might be slow progress Ryan, but it’s still good progress, the little armoured car is coming together nicely, and I like that you’ve taken the time to improve some of the kit parts with your scratch built elements, .
Looking forward to see it married-up with your groundworks, .
Cheers, ,
G
1 Like
Thanks G … Very kind to say so… Once I saw how much the natural light changed yours I had to try it… It makes such a difference and gives it a proper real tone… I thought the background story would just give it a bit more depth as it’s purely a what if scenario…now I’m looking forward to your Quayside work and seeing that grow.
Thanks Gil and @SSGToms , I think work of art is stretching it … But I’ll definitely take that complement 
It was a learning curve but I do like the fact that 1/72 allows more kit to shown and the detailing on these kits on general today offers some interesting and different scenes you may not have room for in 1/35… looking forward to seeing yours as it progresses
Thanks and people think we are not diverse. 
@G-man69, thanks G. When looking for another part I dropped I found the earlier lost post. The carpet monster will make you crazy.  I sorta look forward to the ground work and playing with DAS. Need to reread your posts on the how to. The next area ready to go is painting the figures. We will see what happens. New kits and aftermarket parts have shown up and it’s tempting not to to be pulled away.
1 Like
I’ve been working on the railroad
All the live long day
I’ve been working on the railroad
Just to pass the time away…
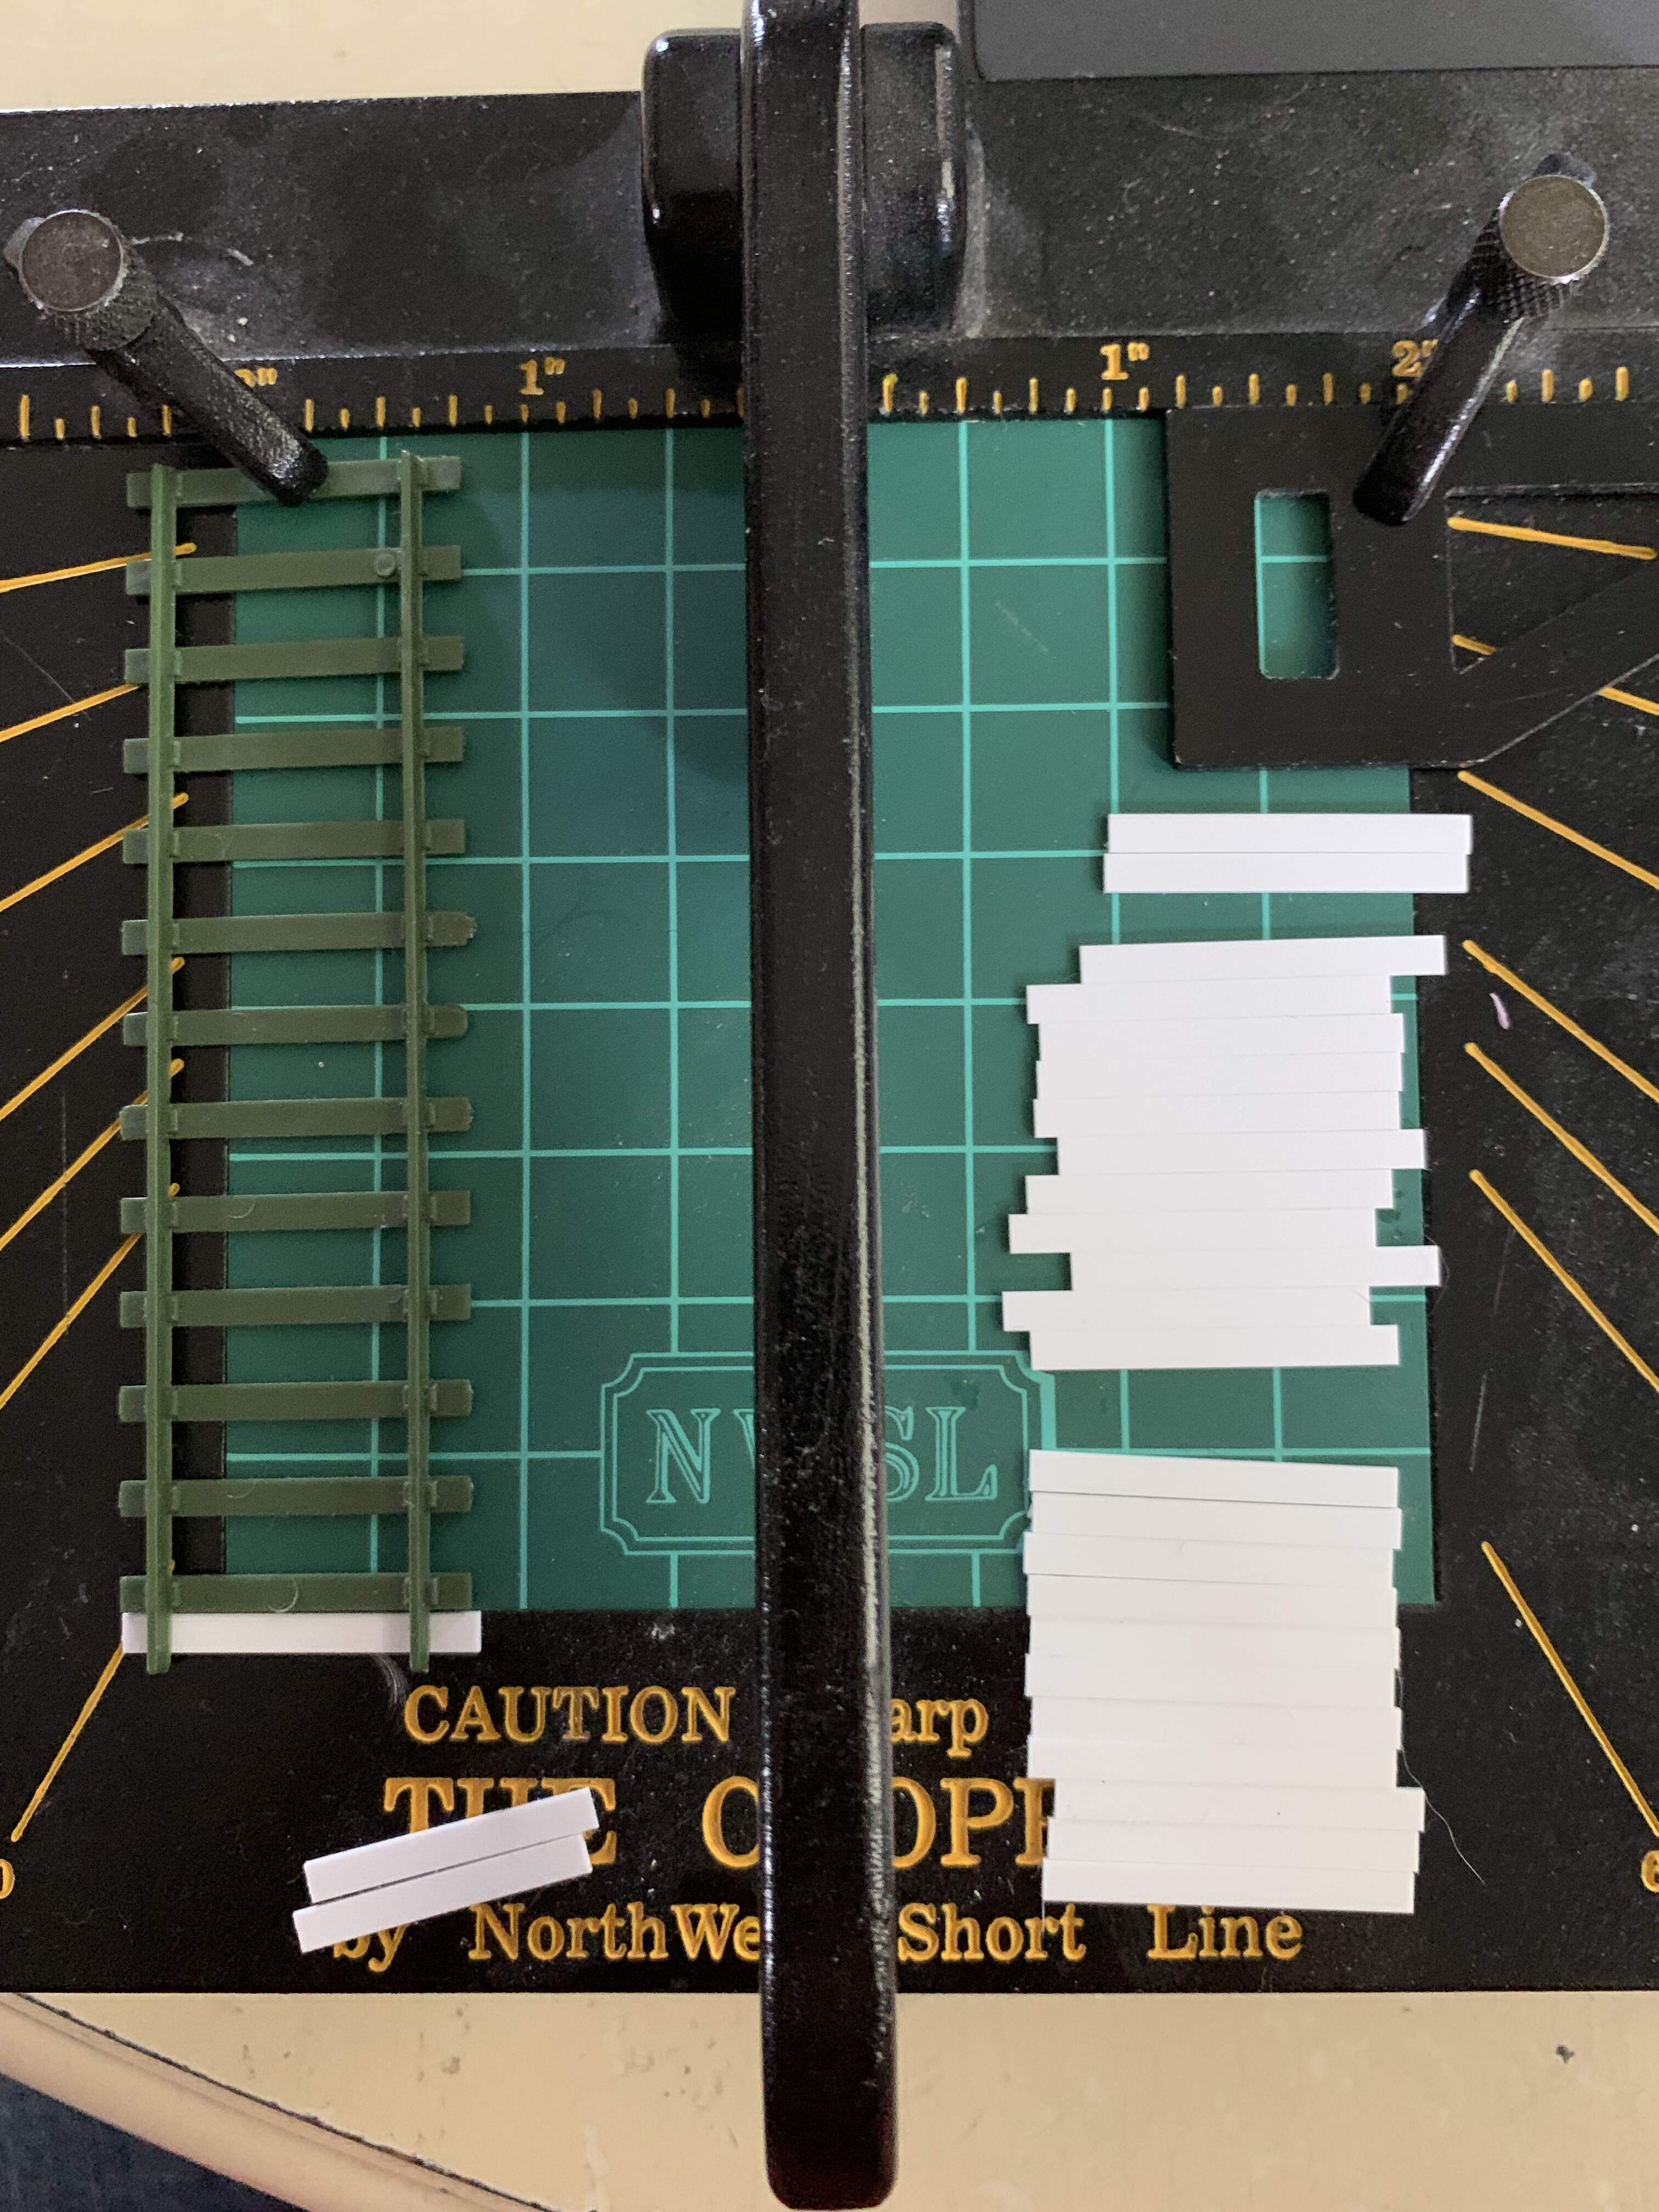
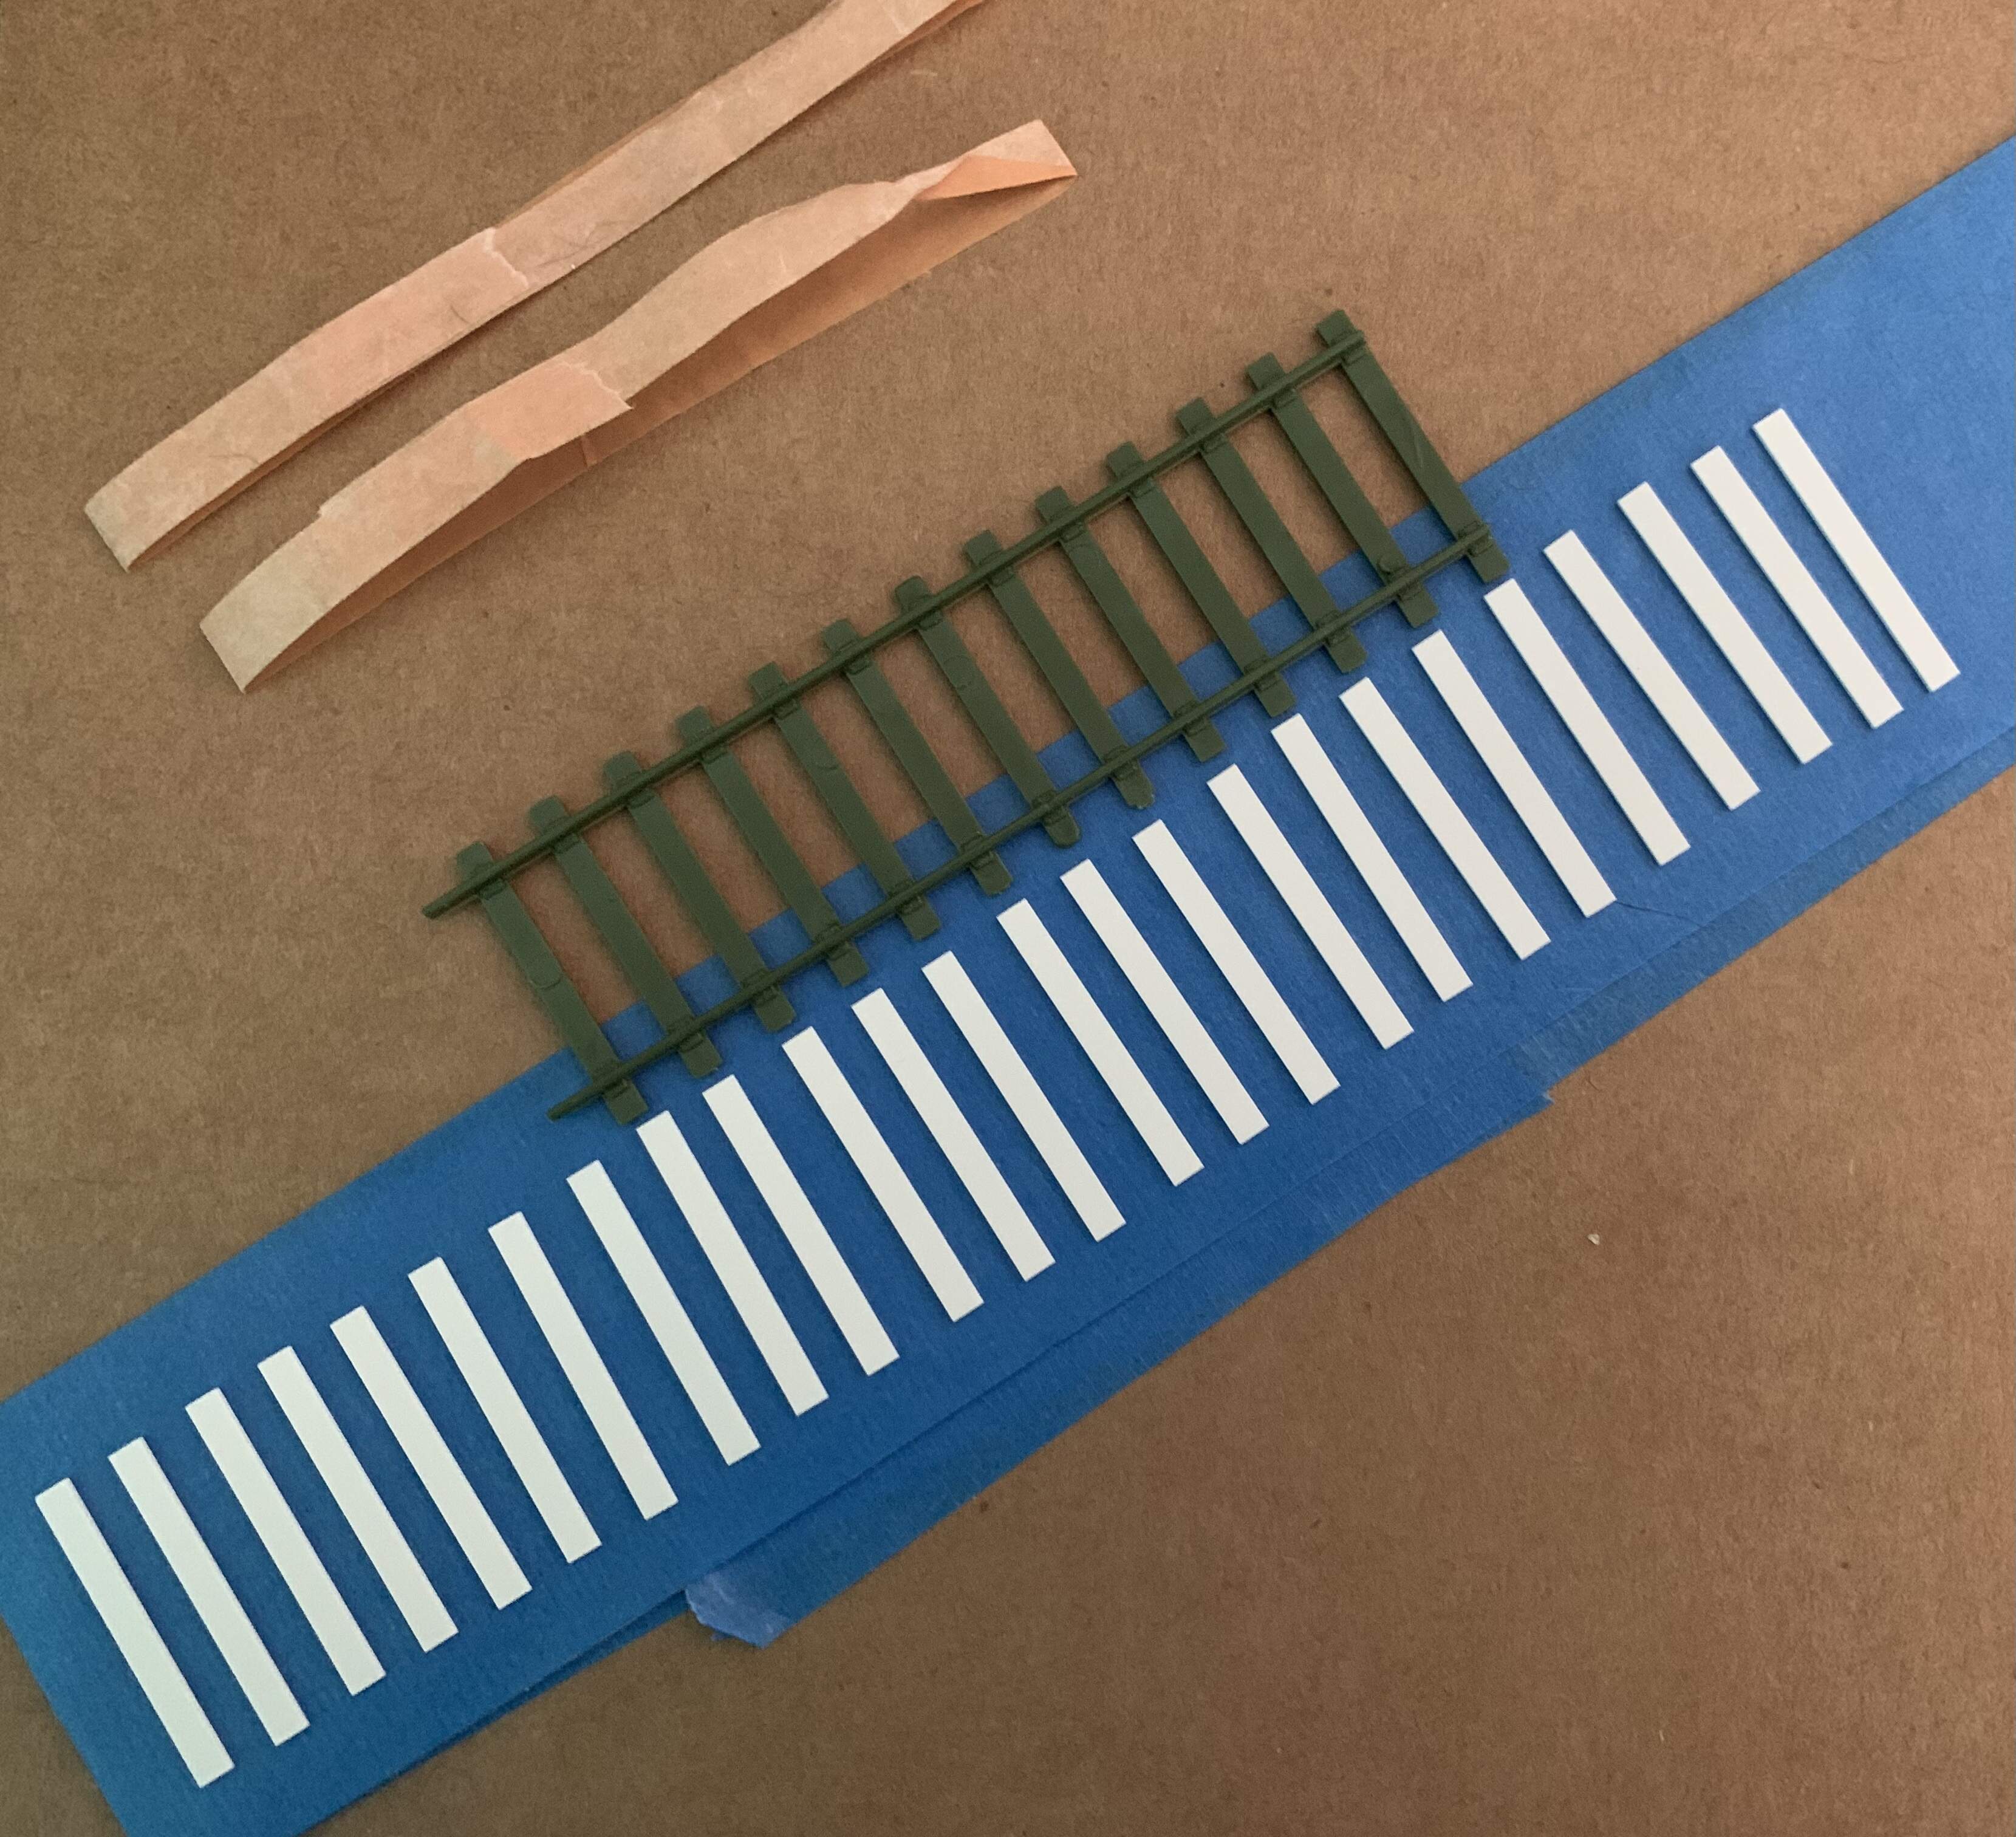
I have chopped up evergreen #136 stripes for the rail ties. They match what UM came up with. I am using evergreen #292 L angle (not pictured) for the track. I will be trimming the points between the ties and using the scrapes for the interior rail tie connectors or at least that is the plan.
2 Likes
That’s a lot of chopping Ryan, but well done for moving it forward… It’s another step closer now
1 Like
I am trying. Doing a bunch of web searching I think I have figured out the bridge design I want with regard to the abutment and pier. Now to find/build out the parts needed before adding the Das.
1 Like
I recognise that chopper, FNURR! FNURR!, that’s some number of parts you’re going to be cutting Ryan, looking forward to how it all comes together, .
G
1 Like
Thanks G, so am I.
I was hoping to use this to make wood grains, paint and lay the rails. Not going to work for the rails, oh well but I will have time to make a jig before I finish the first 2 steps. With luck I can work on the abutment and pier this weekend.
2 Likes
Hi Ryan,
Can you scribe some fine lines in the plastic sleepers with a sharp blade tip, or a proper scribing tool? I did something similar in 1/35th, and I am going to have to try something similar in my 00 scale quayside diorama…just a thought my friend,  .
.
Cheers, ,
G
1 Like
Yep, I have a few metal brushes that I plan to use to create the wood grain while taped to the cardboard. I have a few scrap pieces to test the idea on. I think the brushes will give me a more natural look and feel then me using a scriber for each one, I am not Erik after all.
1 Like
Look forward to seeing how the brushes work Ryan, I tried a wire brush on my 1/35th sleepers and the effect was far too subtle for me, though in 1/72nd it might be more appropriate to the scale, .
G
1 Like
P.S., none of us are Erik, he’s out there in a league of his own when it comes to both quality and productivity Ryan, .
G
1 Like
The top is the black pen and the bottom is the yellow pen with Tamiya dark brown panel liner added.
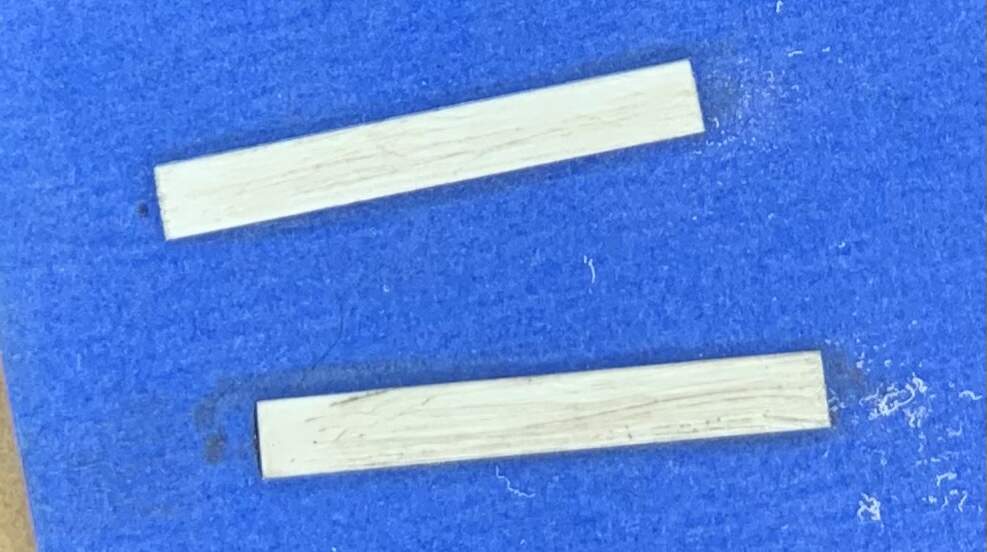
I think a little harder with yellow pen (bottom) will work. Probably switch up to break up the uniformity.
2 Likes
Ryan, I concur, had a real good zoom-in on both, and the bottom one has the edge regarding grain effect, , now only another 135# to go,  .
.
G
1 Like
Your full of all kinds of good news. ![]()
1 Like