Thanks for the tip, Gil. I have made some rubber on some of the wheels. Maybe I should remove all the rubber wheels and make the T-34 completely burned out.
1 Like
When I had built my T-34 a bout a year ago, I gave the wheels a coat of super glue as a protective layer from the rubber. Only when it was completely dry I joined the tires to the wheel, so there is a solution.
BTW, I love the diorama 
4 Likes
I agree with the others, it’s really starting to take shape Jesper,  .
.
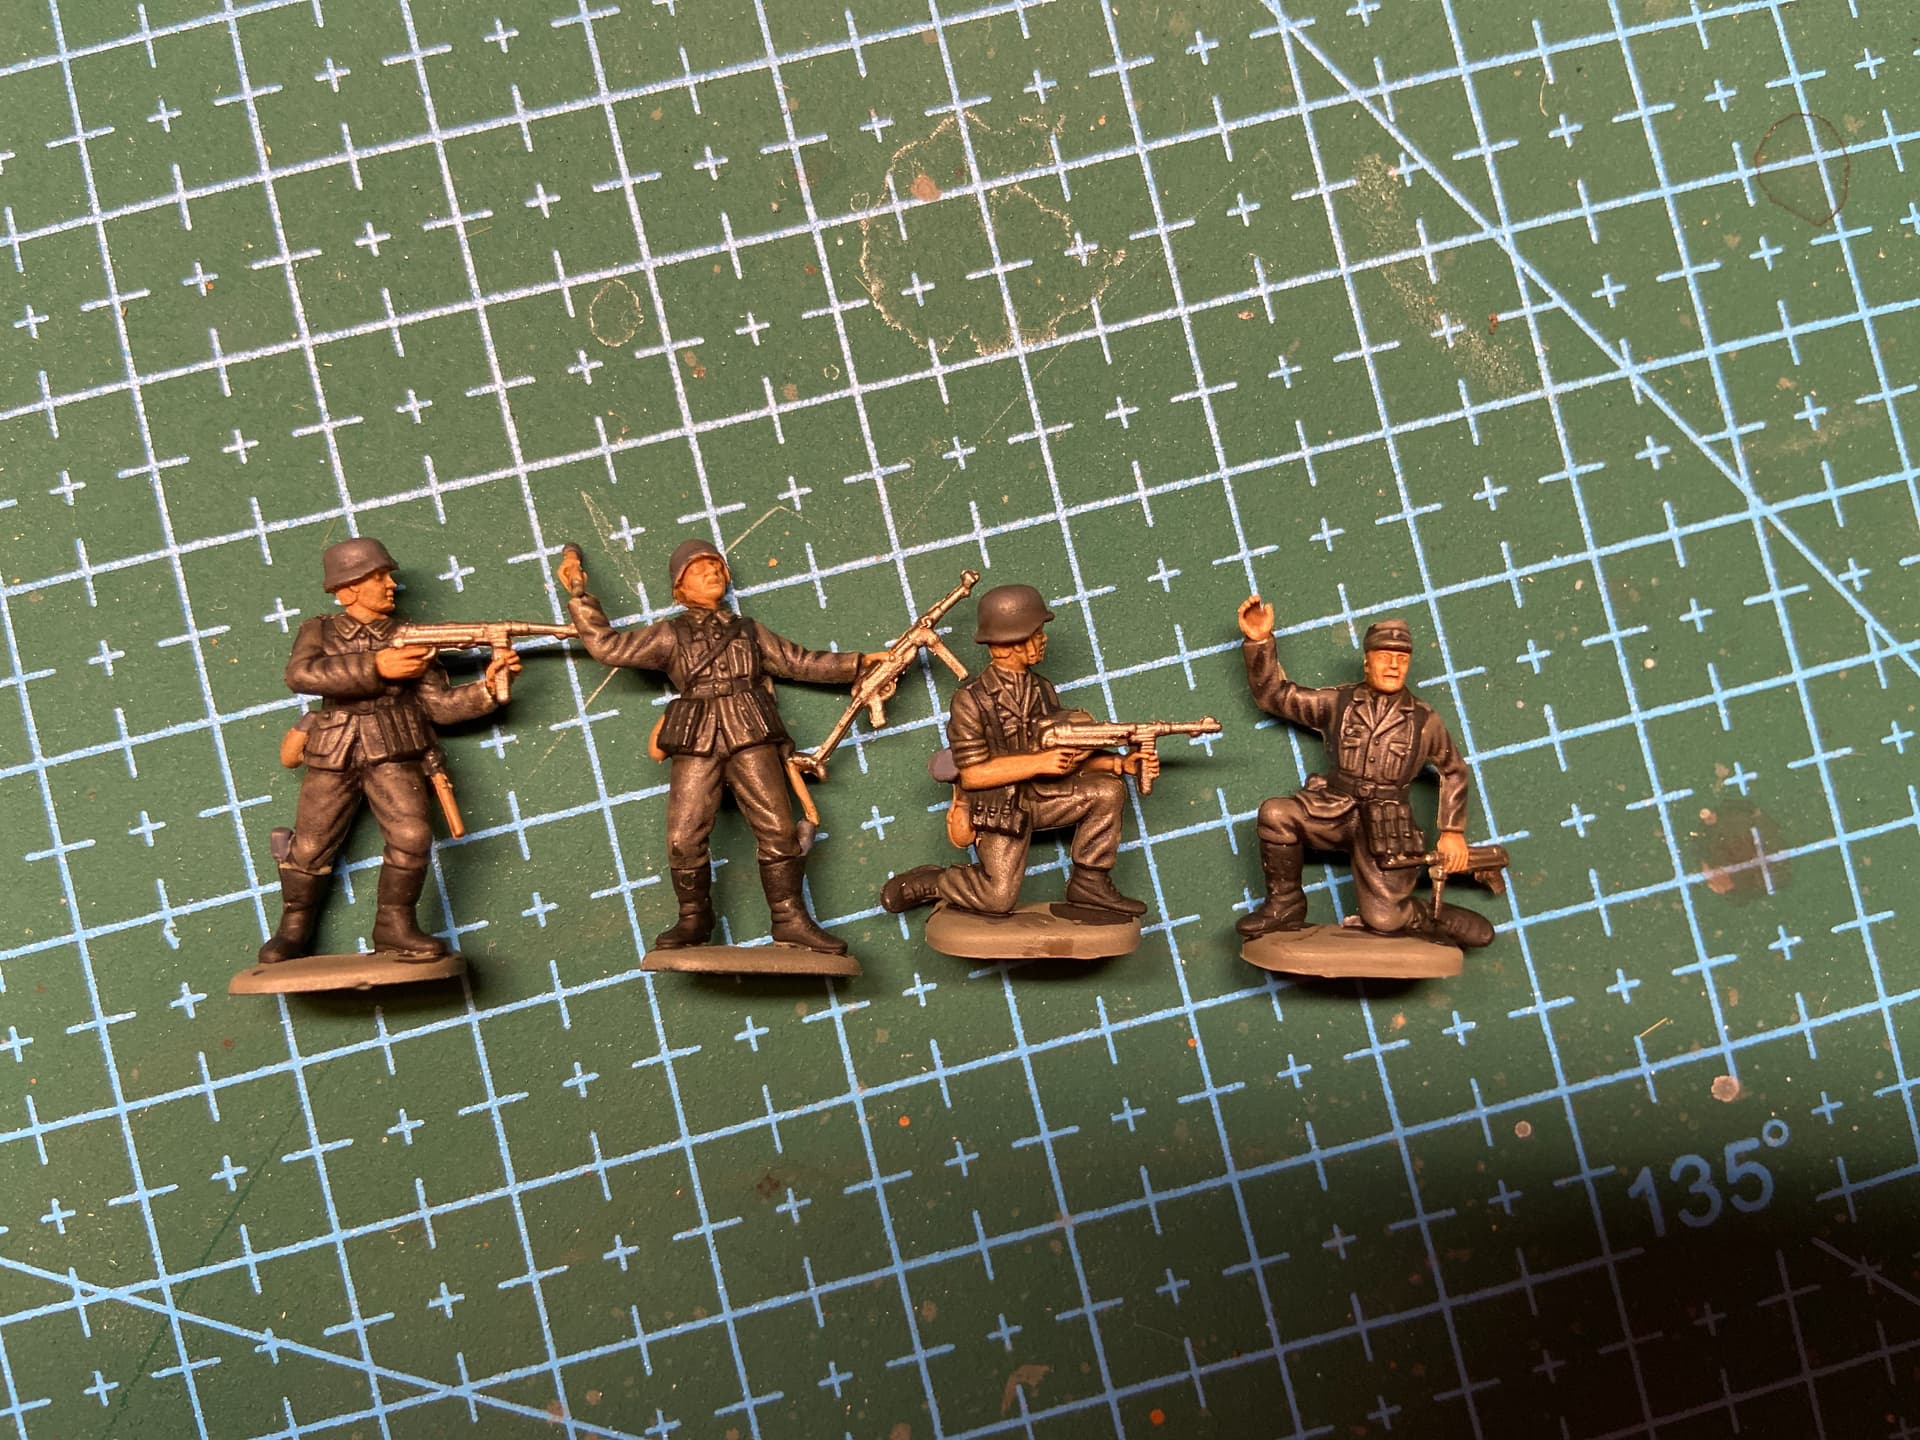
How did you paint the figures, is it a grey undercoat with a dark wash run into the creases in the uniform? For their age the figures look remarkably well detailed, and crisply moulded.
G 
1 Like
G, I gave the figures an undercoat of Vallejo German field grey and a wash of Games Workshop basilikum grey contrast paint. It works surprisingly well for this scale.
2 Likes
I agree Jesper, you’ve really made the detail on the figures zing, .
G
1 Like
Thanks for the comments. Figures are done now. Pretty satisfied considering the scale.
Made 14 figures, but not sure I will use all of them
Made to follow….
4 Likes
They look good Jesper, you have given them a nice finish and some good shadowing on the uniform areas. Look really good
1 Like
Thanks for the comment. I will probably go over them once more with some details, when they are on the base.
They look brilliant Jesper, , you’ve really nailed the german uniforms in this scale.
G
2 Likes
3 Likes
You must of been reading my mind Ryan … Nice job, and it looks great. Once you start building on top of it, it will of served its purpose. I bought a block of DAS a while ago and still haven’t used it …
2 Likes
Kinda surprised you didn’t use it on your photo campaign build.
2 Likes
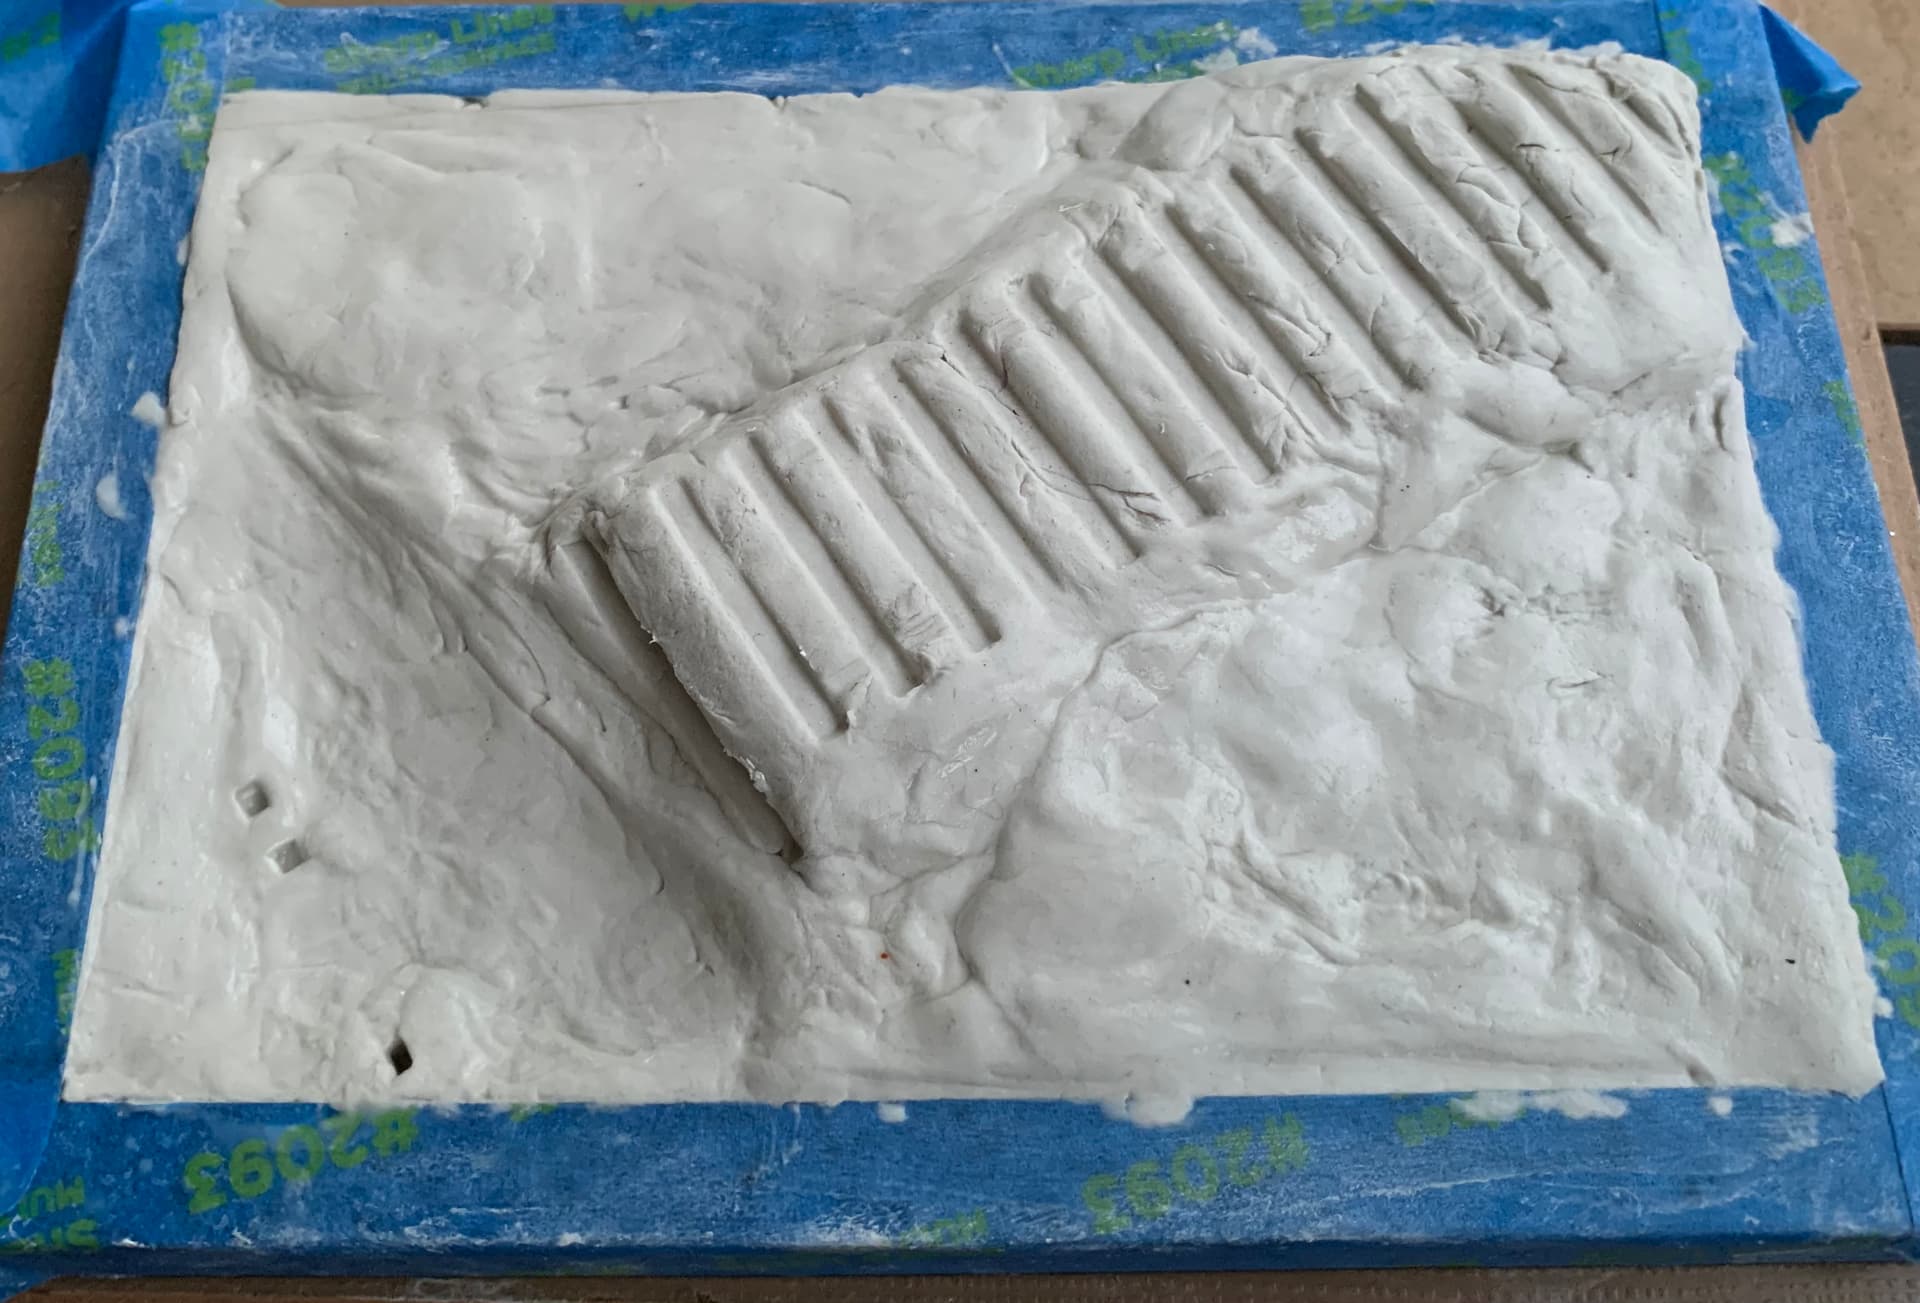
Yeah I was going to, in fact that was why I bought it. But G said it could be tricky rolling it so thin and uniform for the upright sections and then I thought about the ground work, and decided the mixed plaster of Paris gave a better feel for rough ground and I could sculpt it as it set… I’m going to use the DAS for the Stillbrew base and also build a generic simple base with it to use in finished photo shots of other kits
2 Likes
GTG, I used a small section of pvc pipe I had as roller on a dry piece of faux wood flooring. I was able to get thin sheets to lay over the base. I do get what G was saying. We will see what the drying/shrinkage does. Look forward to seeing your use of it. G is the master of DAS.
2 Likes
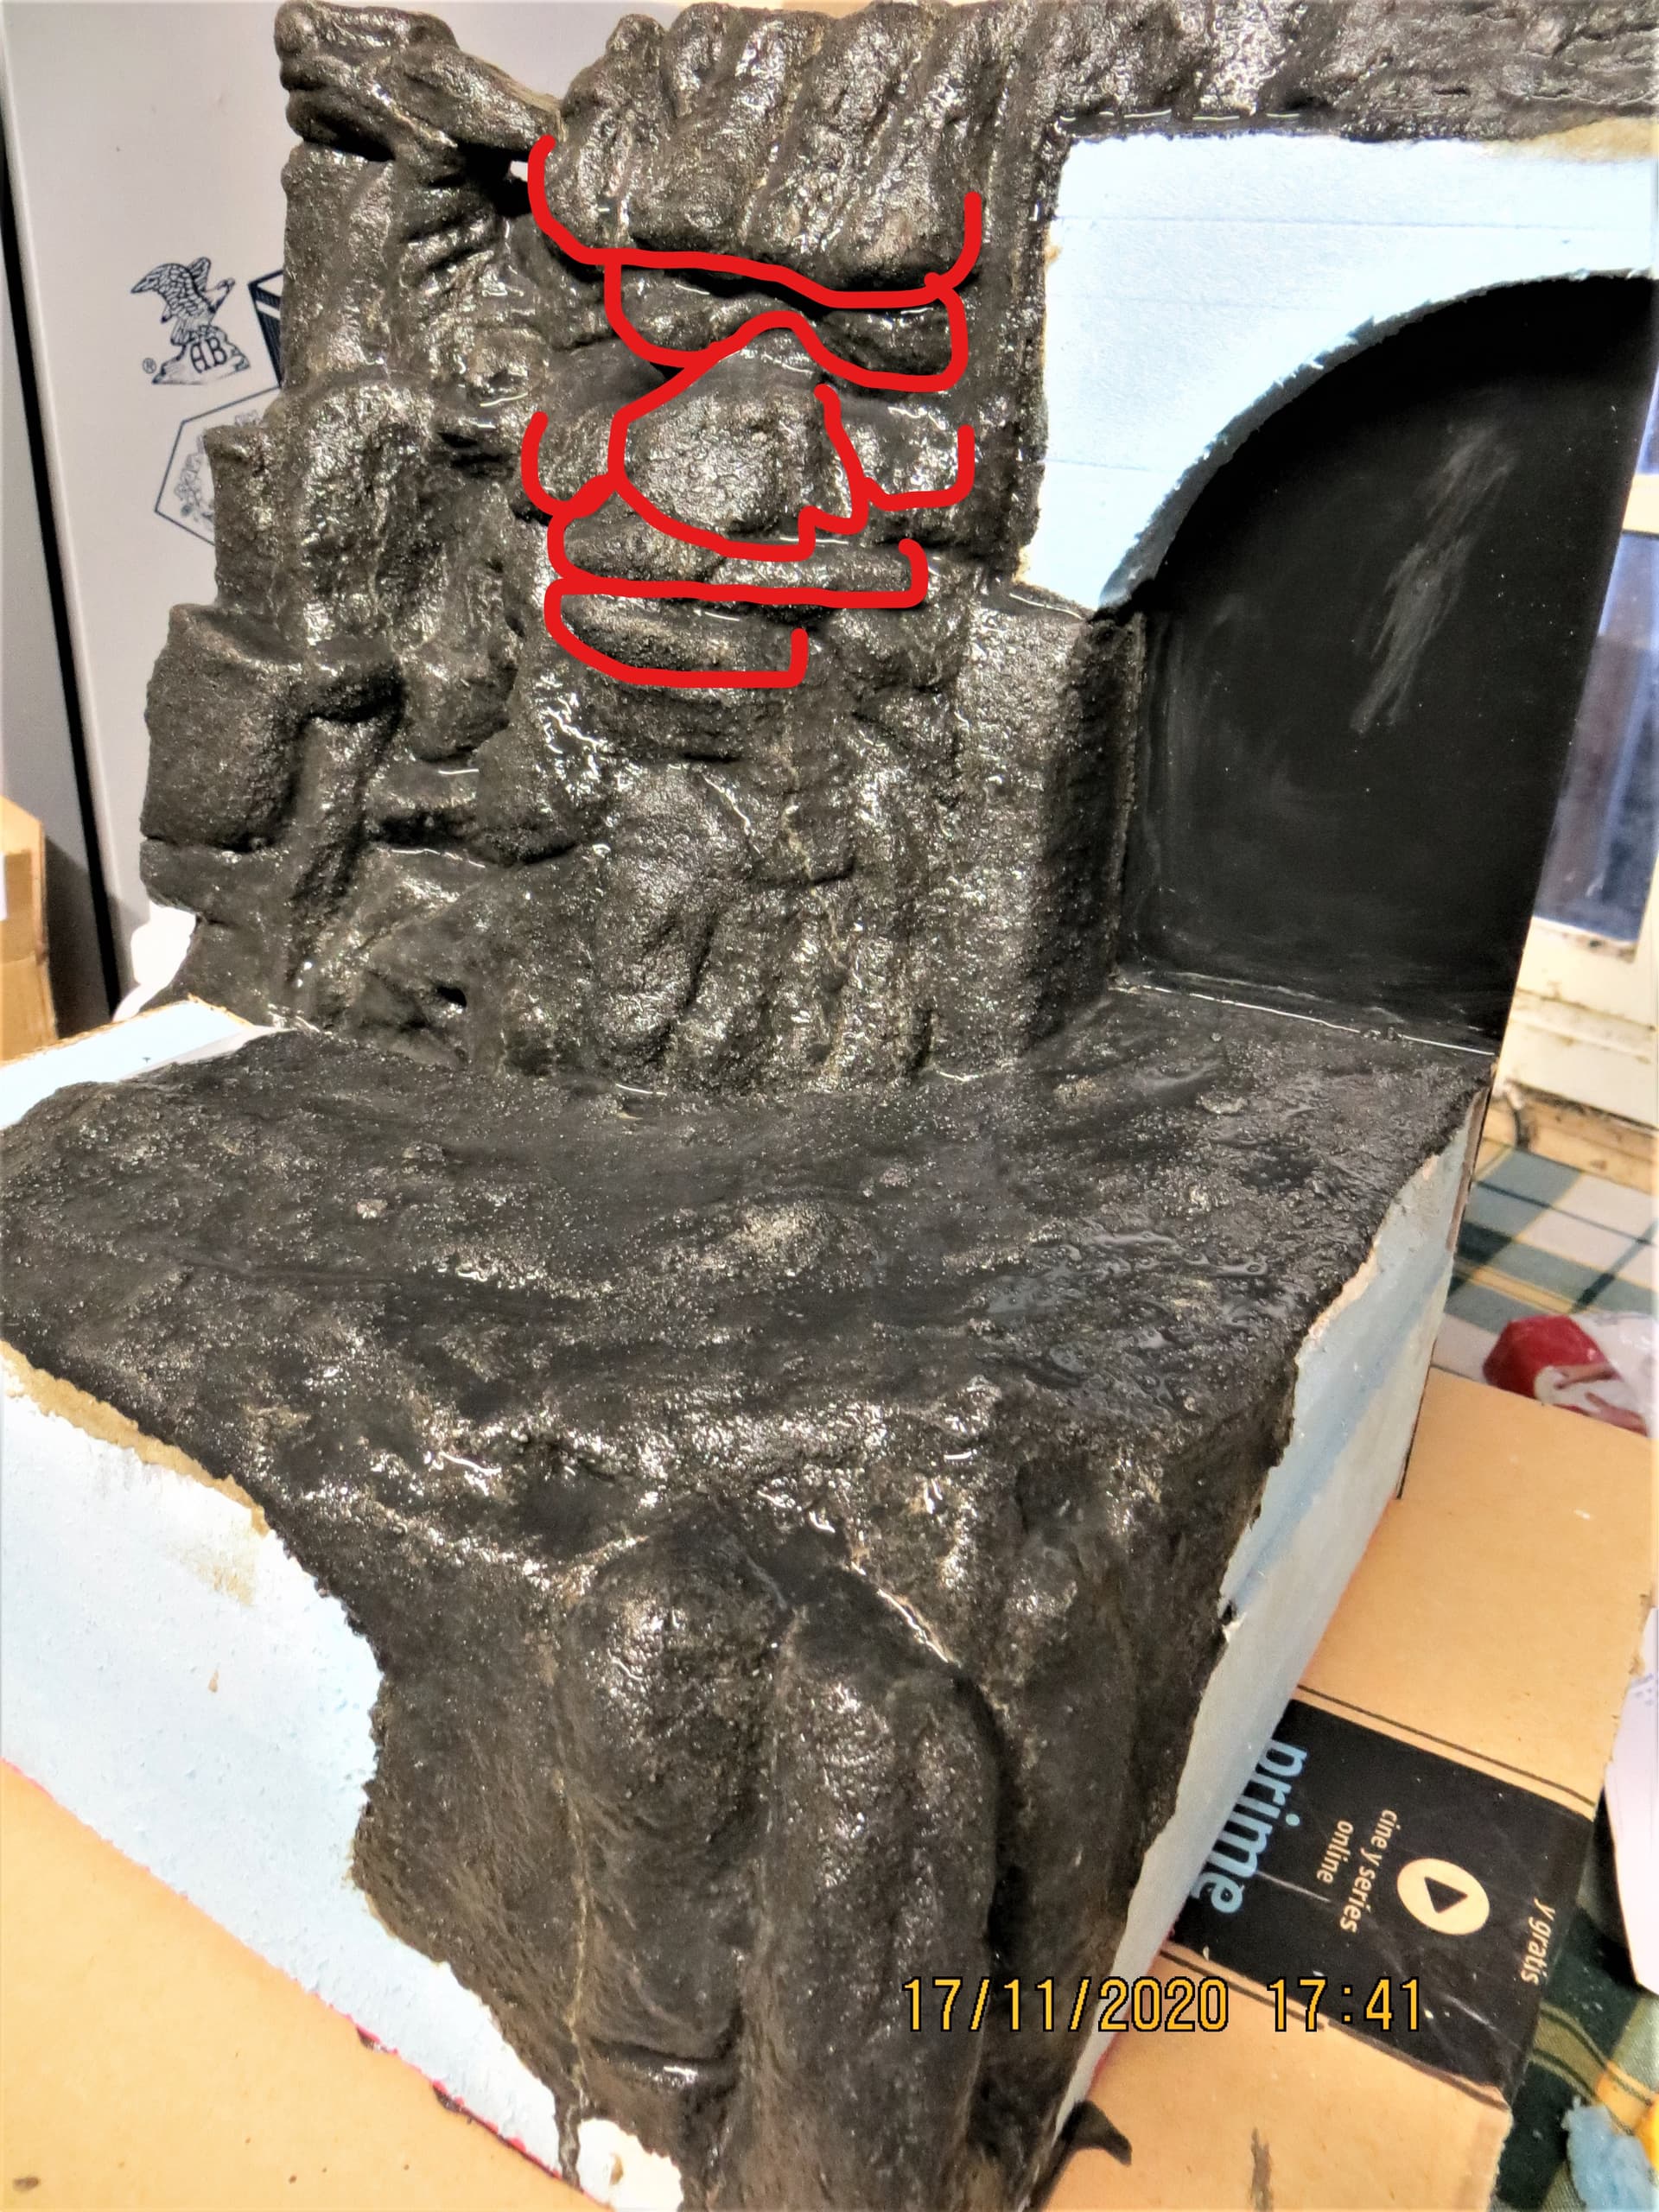
That’s looking really good, especially for a first attempt with DAS Ryan, . Not trying to impose, but don’t forget that once the DAS has dried that you can carve, sand and shape it, so you can soften and resculpt areas, also you can apply another thin skin of DAS over areas you might want to modify, .
When I did my rock face it took several applications until I was reasonably happy that I’d hidden the face that everyone thought they could see,  .
.
With face:
Without face:
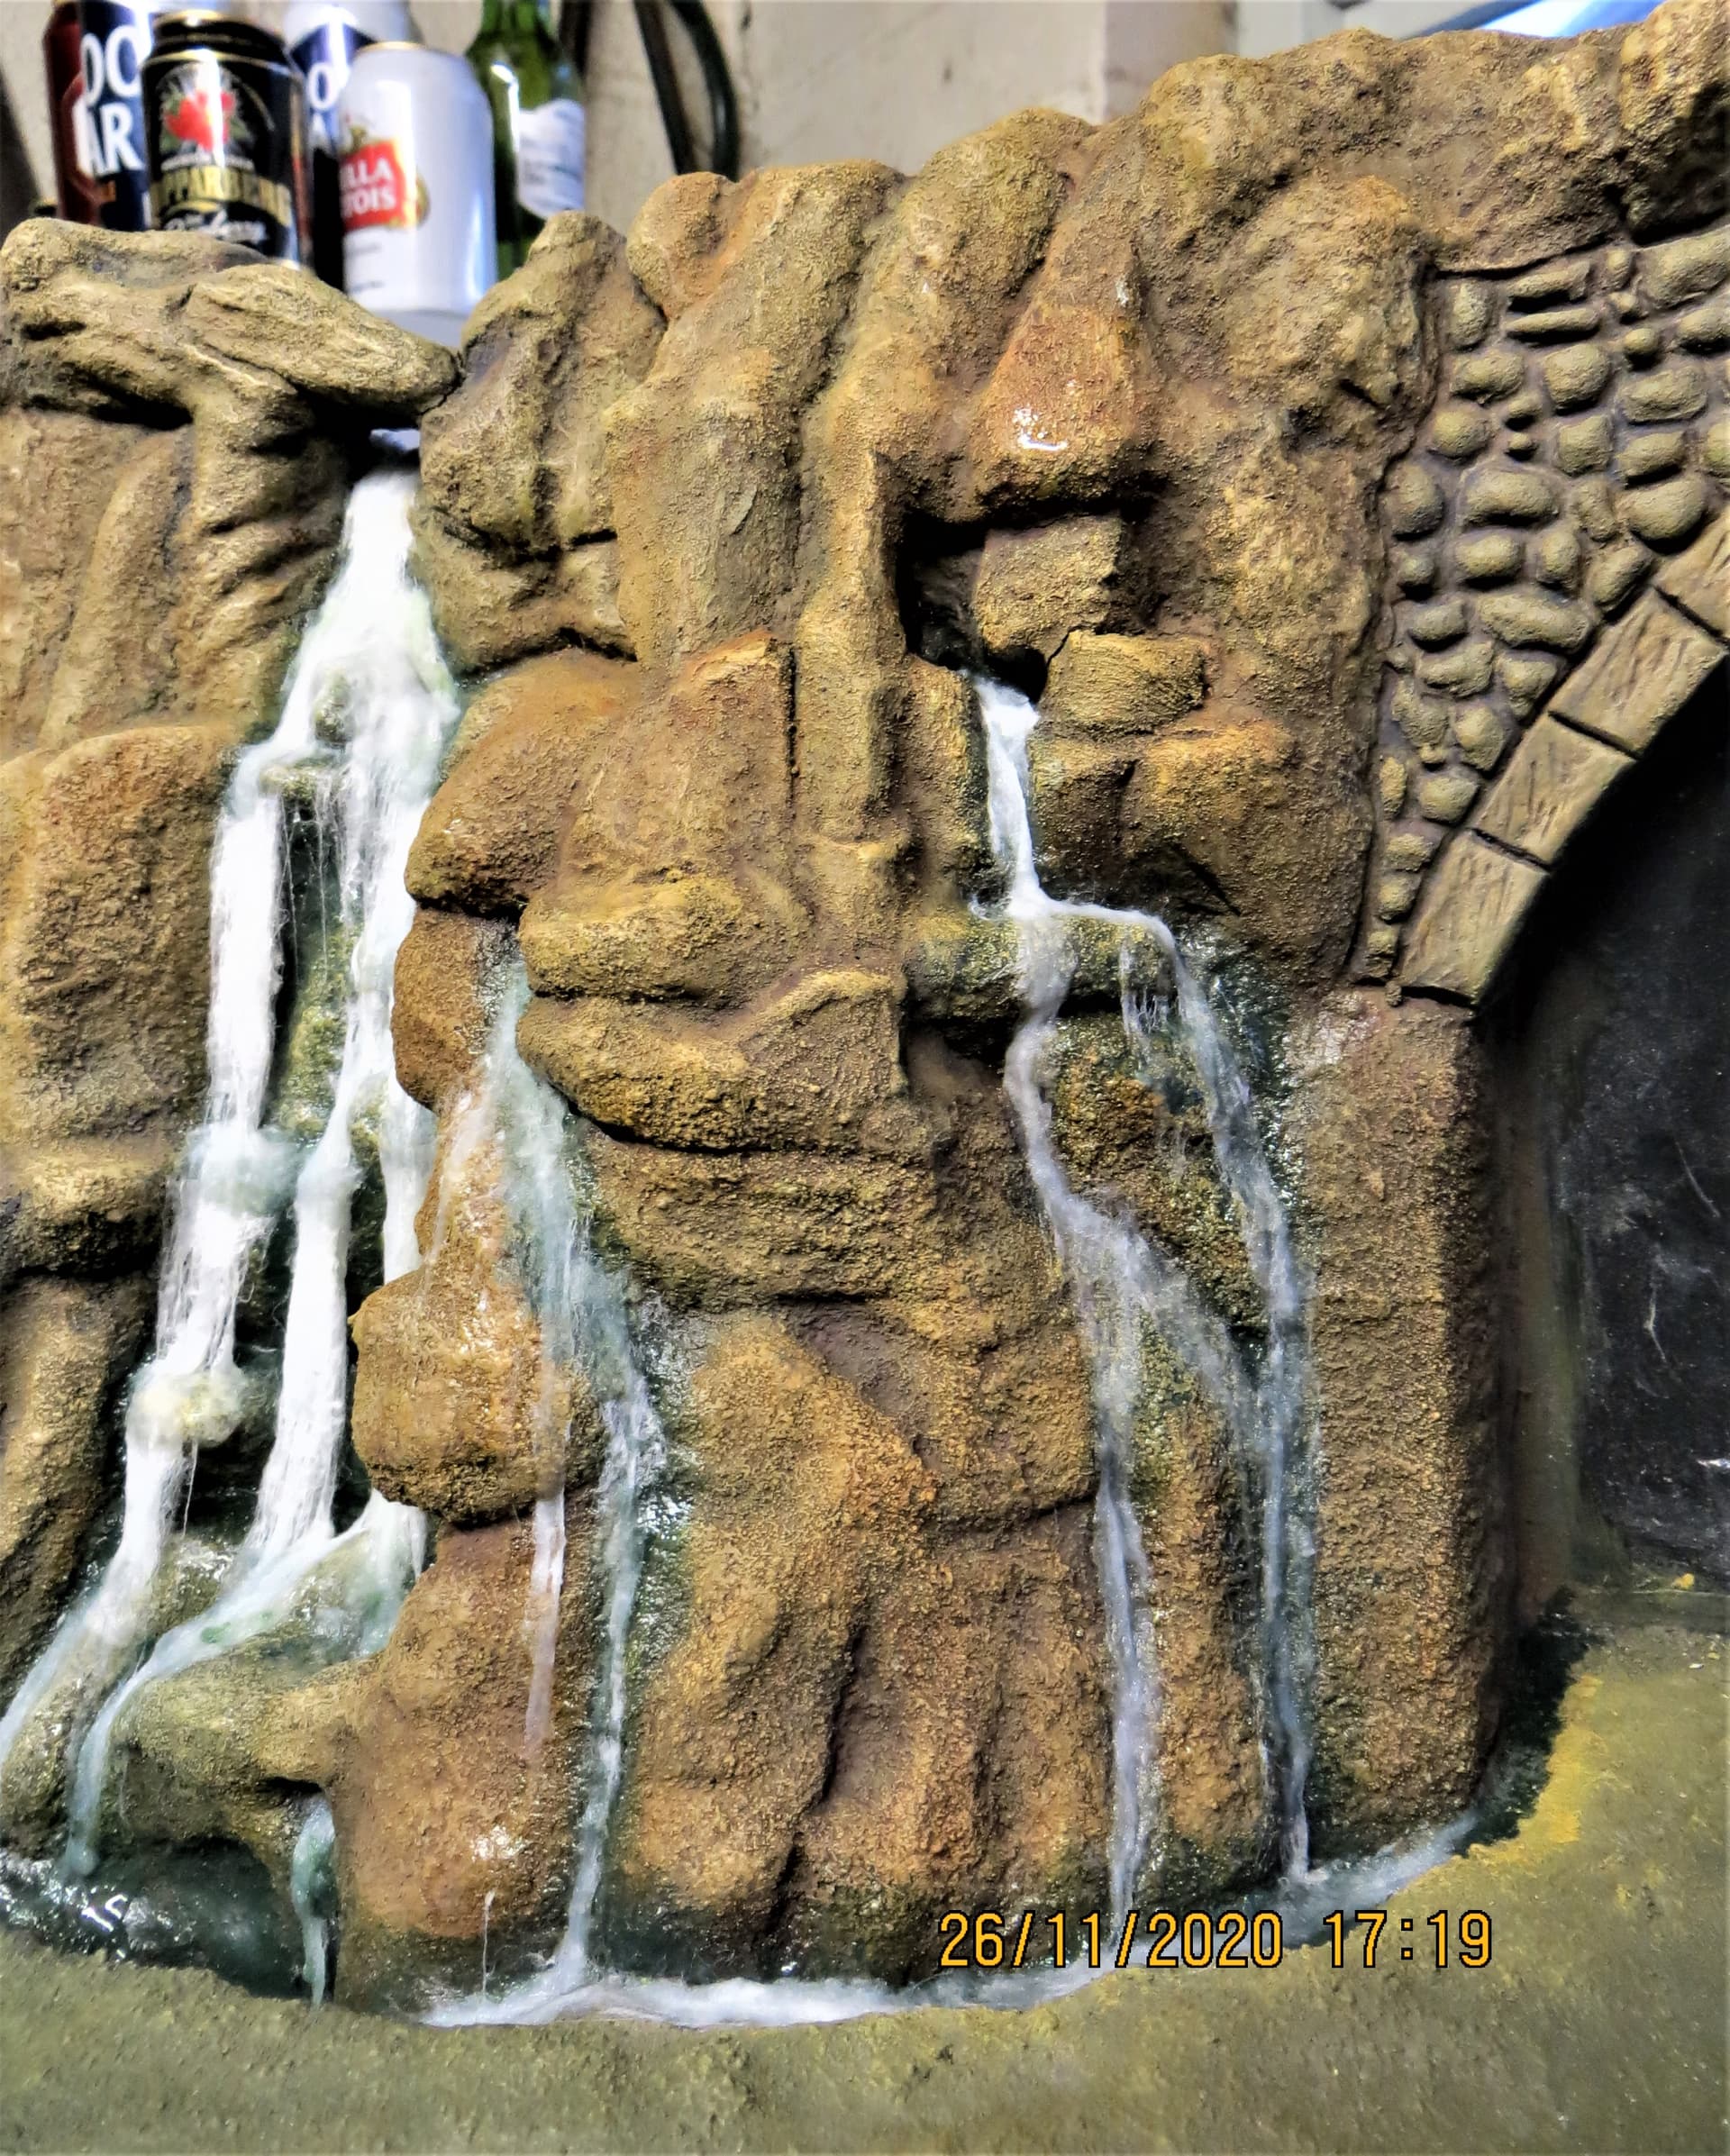
And, as you say, you will be covering a lot of it up with ground materials and vegetation.
G
3 Likes
I’m certainly no master with DAS, but I don’t recall saying that it’s tricky applying it thinly John, the couple of builds I’ve used it on have all been applied a maximum of 1-2mm, much thicker and it takes an age to cure.
I did say it was difficult to get a totally uniform thickness, but that slight undulations helped give a sense of uneven reality when scribing stonework, etc. Maybe it was that comment that caused the confusion, if so, I apologise, 
 .
.
G
1 Like
Thanks, I was looking over that thread before I began.
How long is the drying time? I know I added water to help smooth out areas and at 18ish hrs on its still a little soft. I was expecting it to be harder at this point.
Depends on the thickness, how much water you added, and the temperature where it’s stored Ryan.
As mentioned above, I typically work 1-2mm thick, and when working/smoothing it I only use a wetted finger, so not too wet. In warmer weather (late Spring-through-early Autumn (Fall)) I would typically expect a minimum of 24hrs after the last bit was applied to the area I was intending to work on, late Autumn-through-early Spring I would allow between 24-48hrs depending on whether the heating had been on.
As it dries you should see the surface turn from a pale grey to a chalky-white, it’s a very noticeable difference, and typically starts at the edges and thinner applications. Once the latter is apparent I typically take my scriber to it and see what happens. If it’s not yet fully cured you’ll indent, rather than cut/scribe, the surface without generating a powdery waste, but if dry it will ‘cut’ the surface and generate a dust/powder residue.
Sorry if that’s long winded, but hopefully makes sense, .
G
1 Like
Great, makes sense to me. Thanks.
1 Like
Did my base from DAS clay (Terracotta color) applied a moderately thin layer (about 5mm thick) and in some places it cracked, after a few days. Will have to re-apply the cracked area. Then will cover with mud and snow effects by AK.