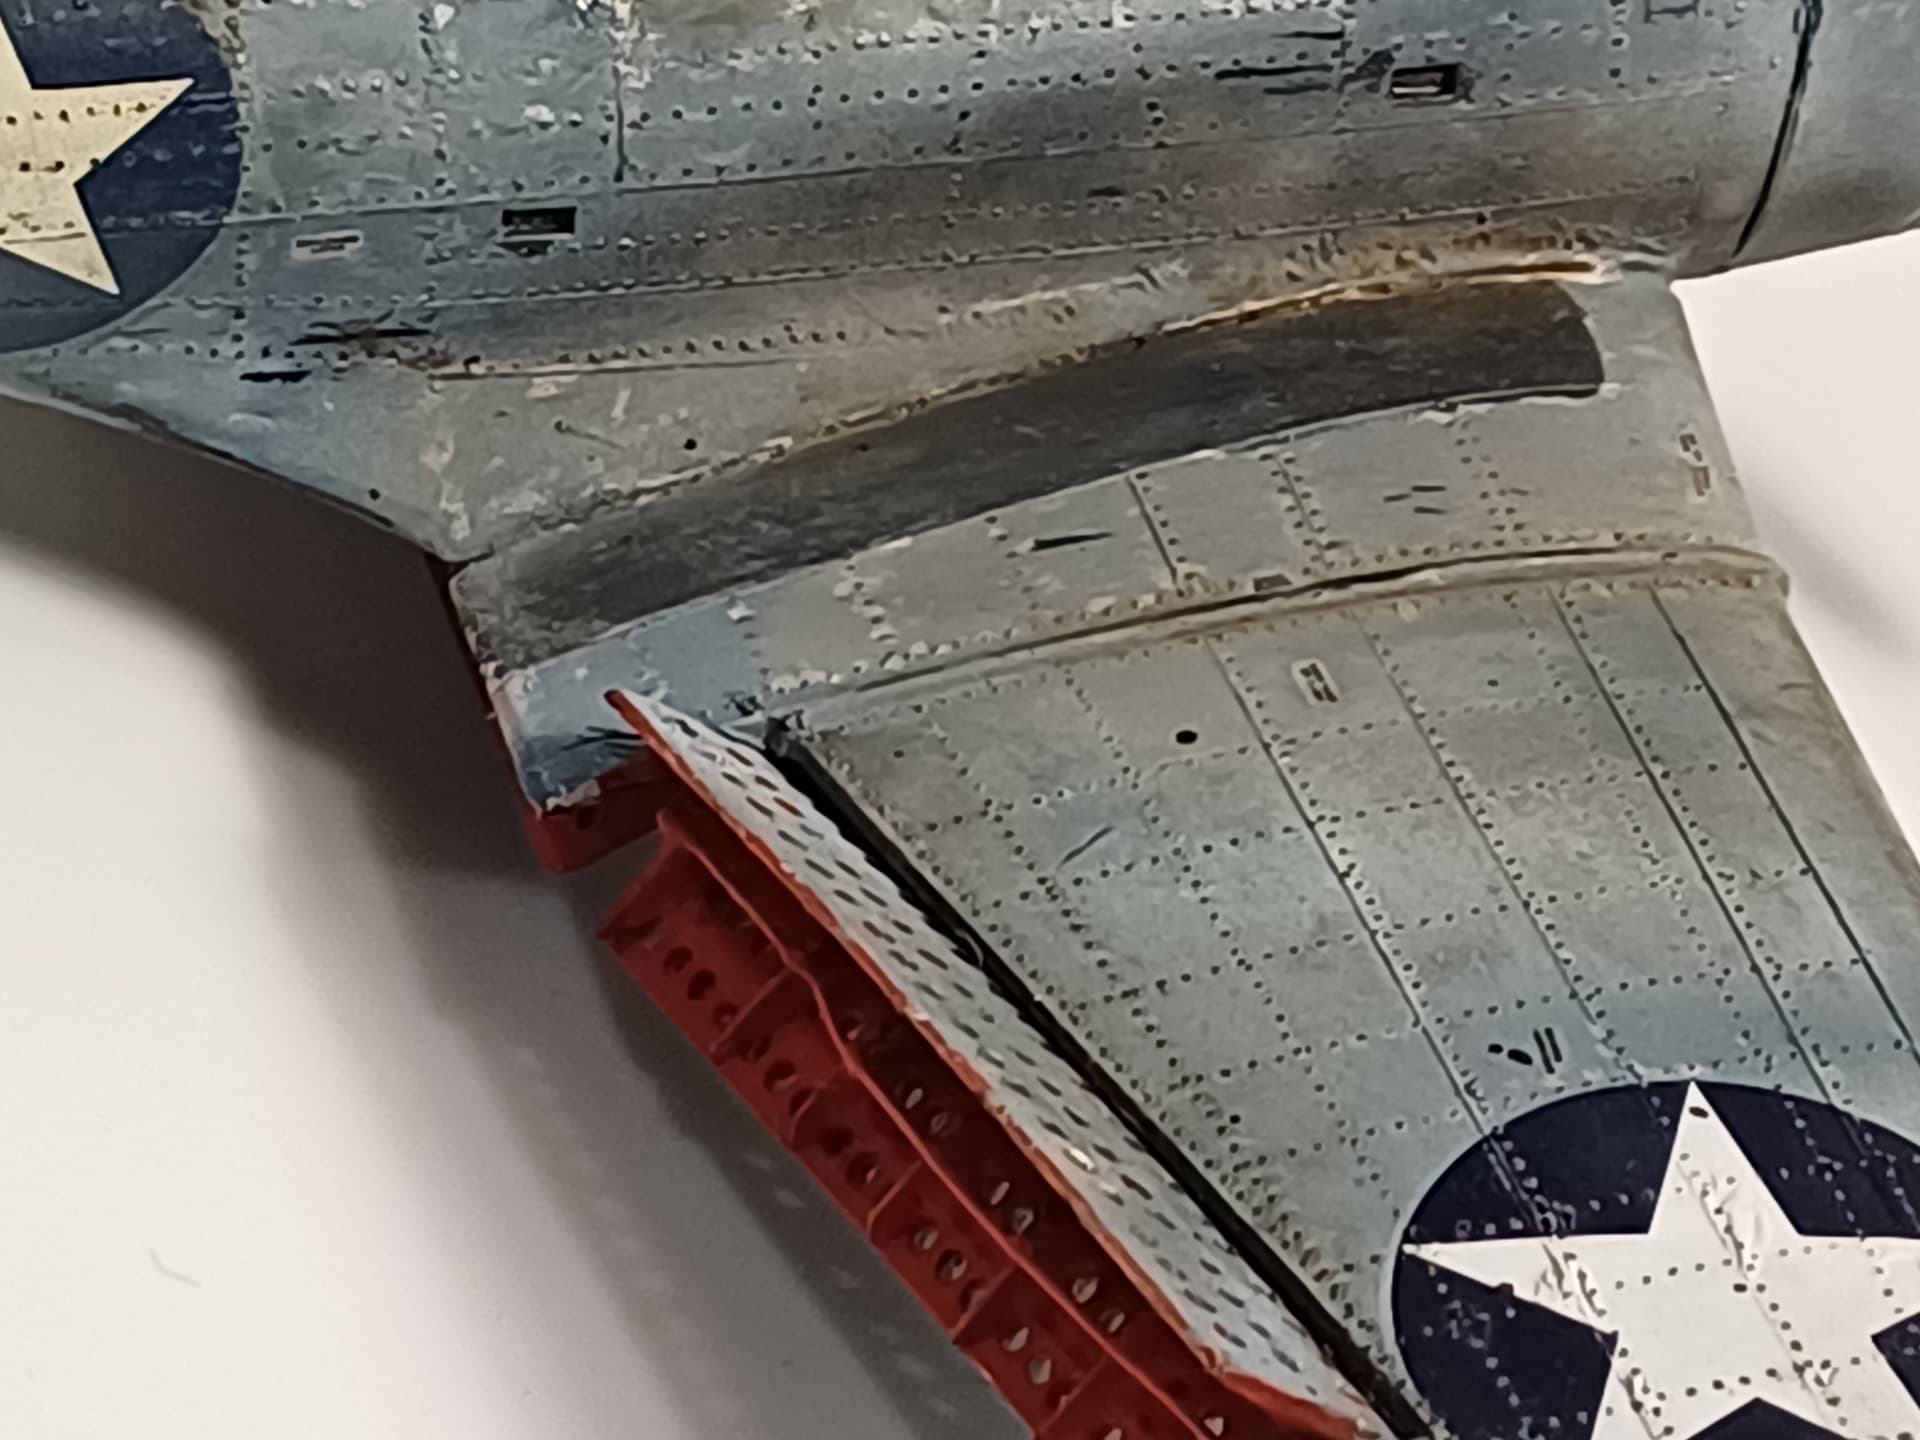
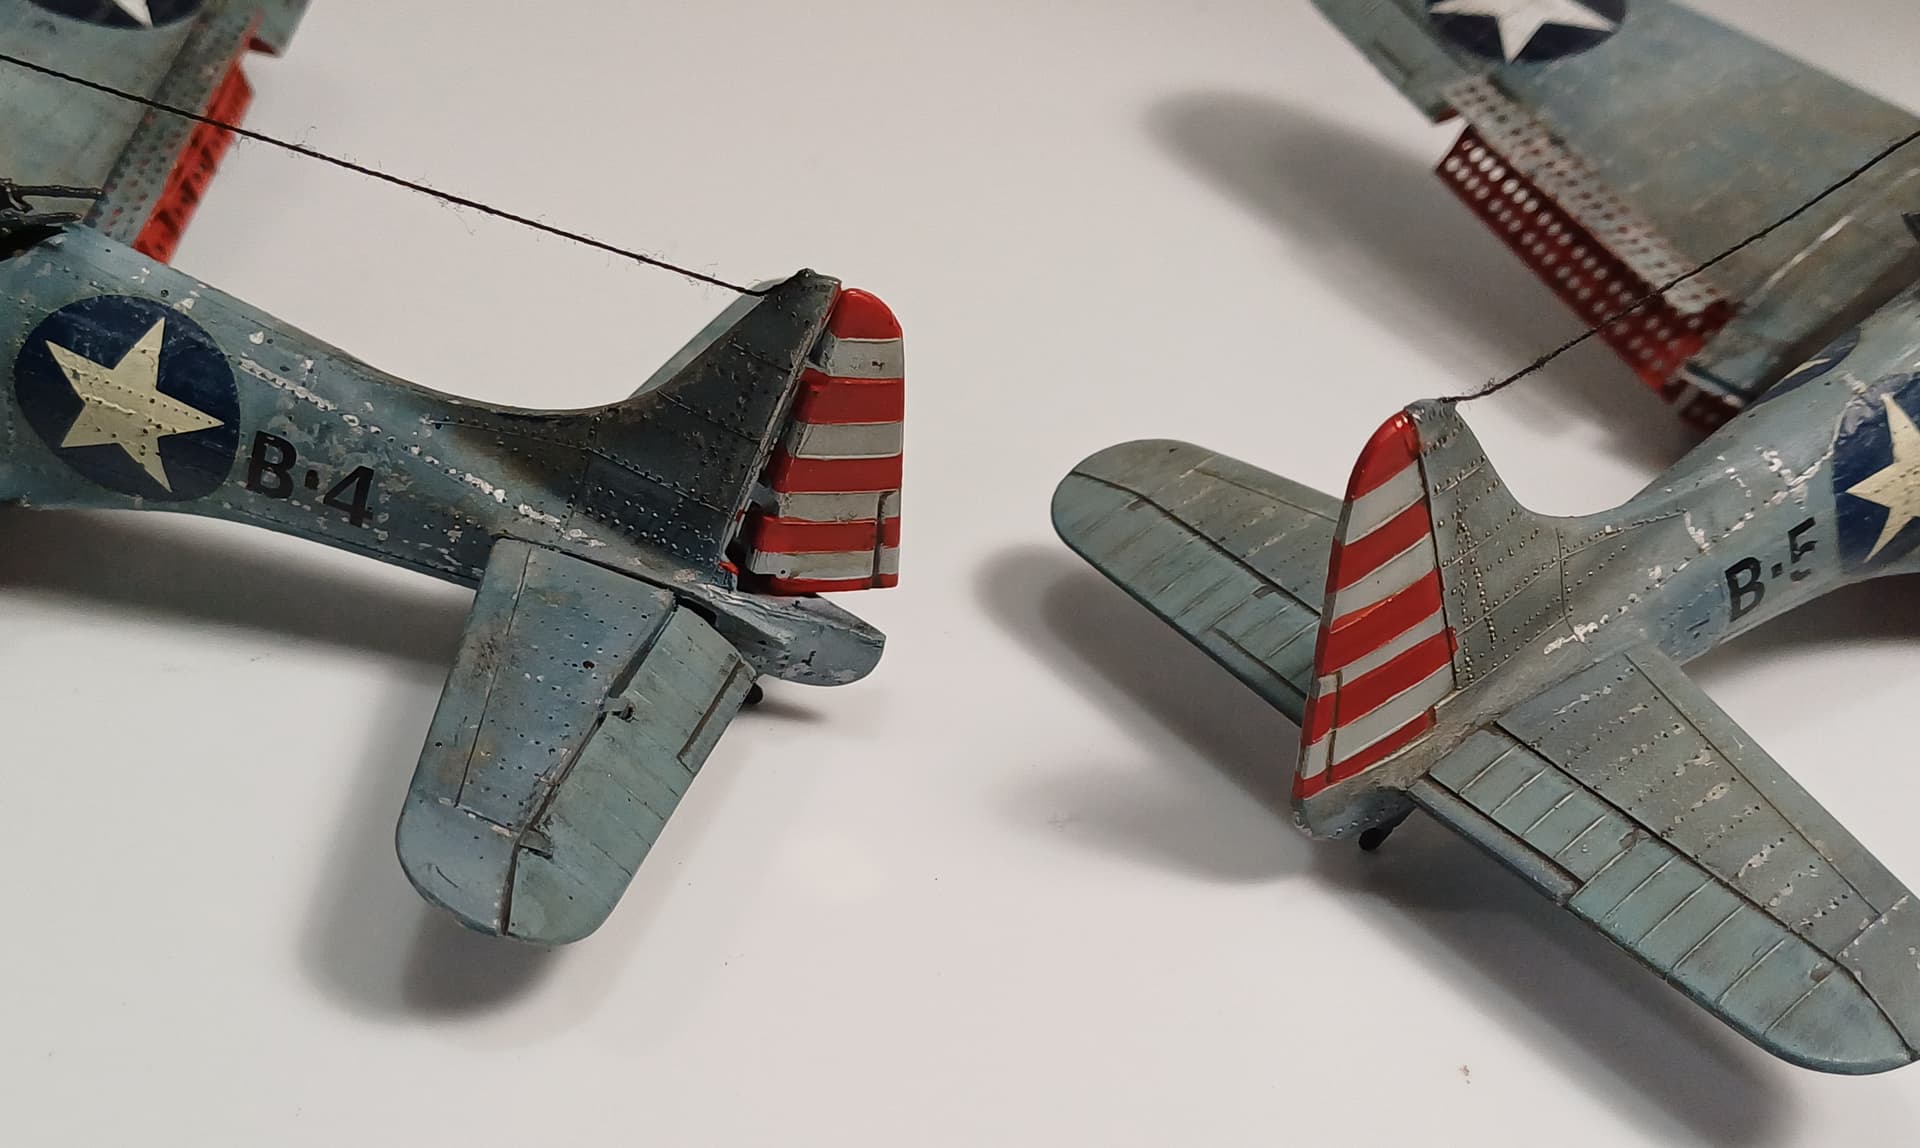
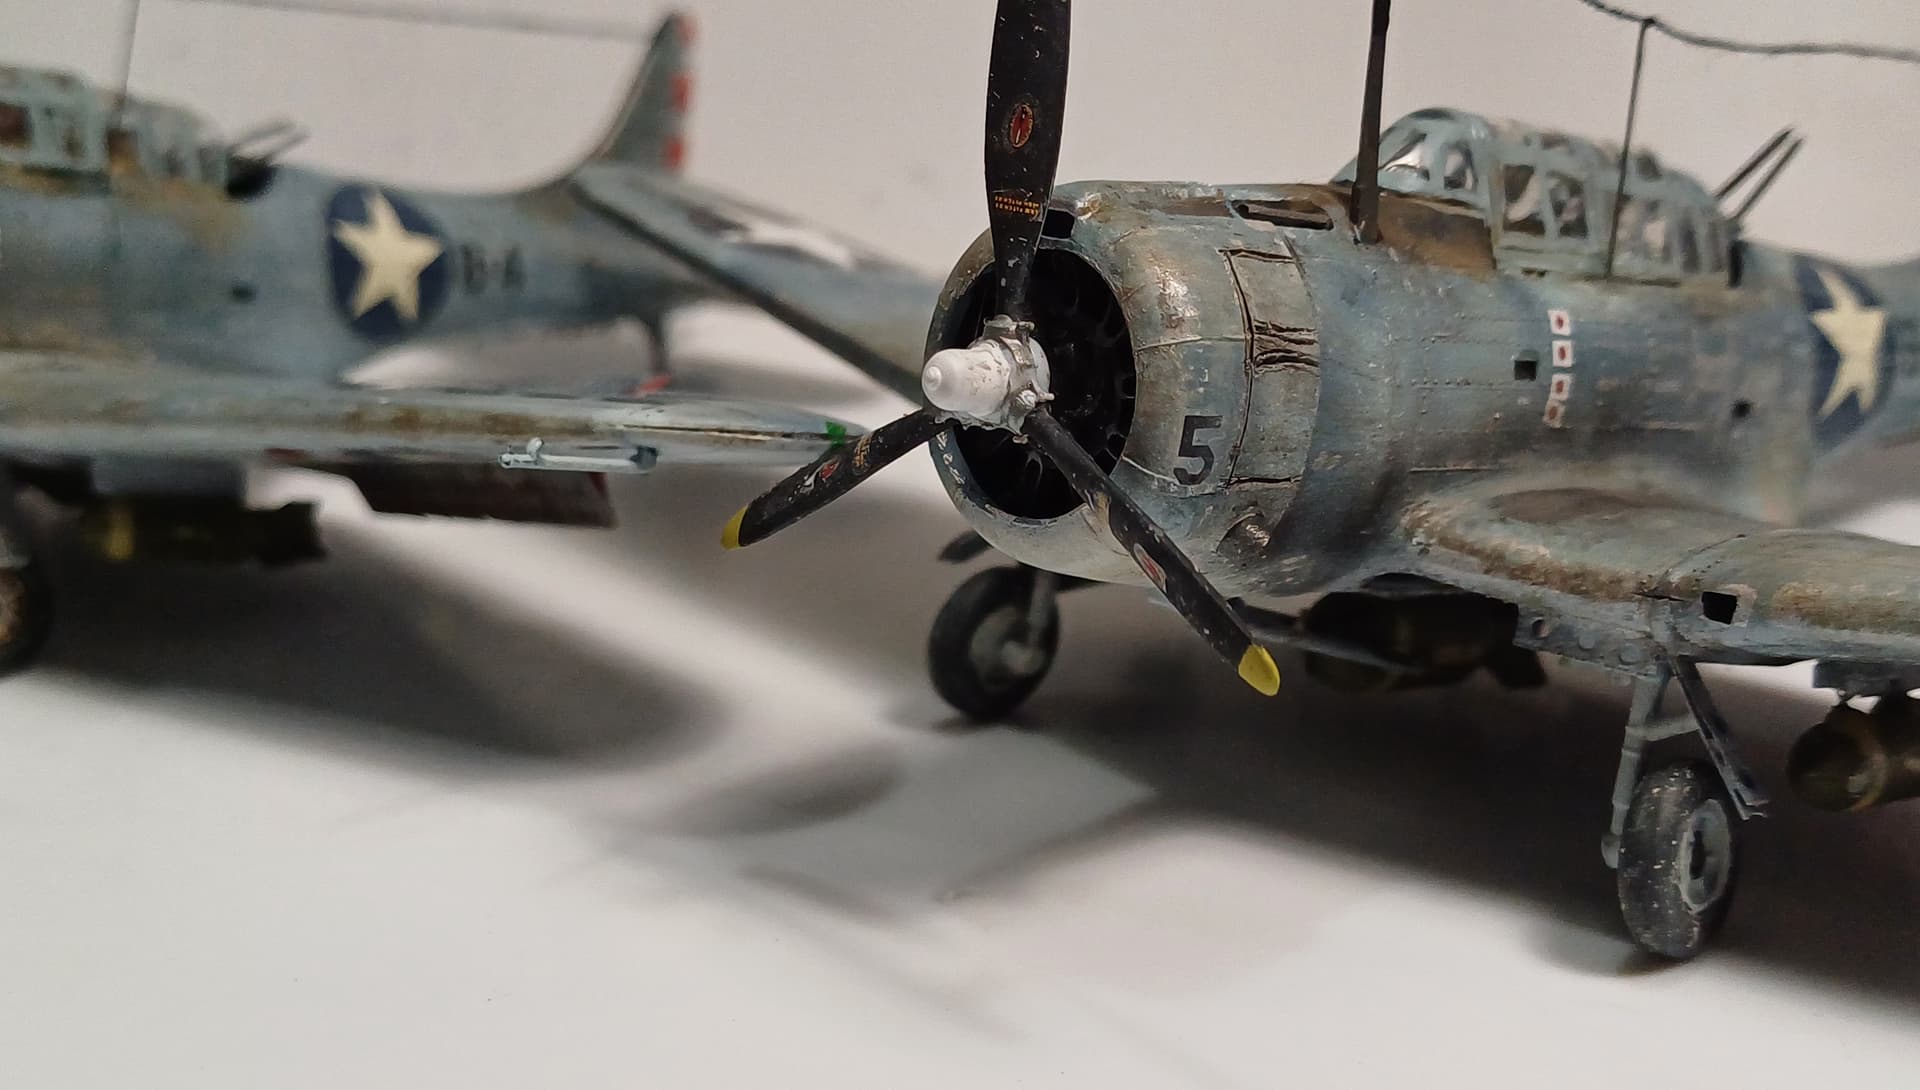
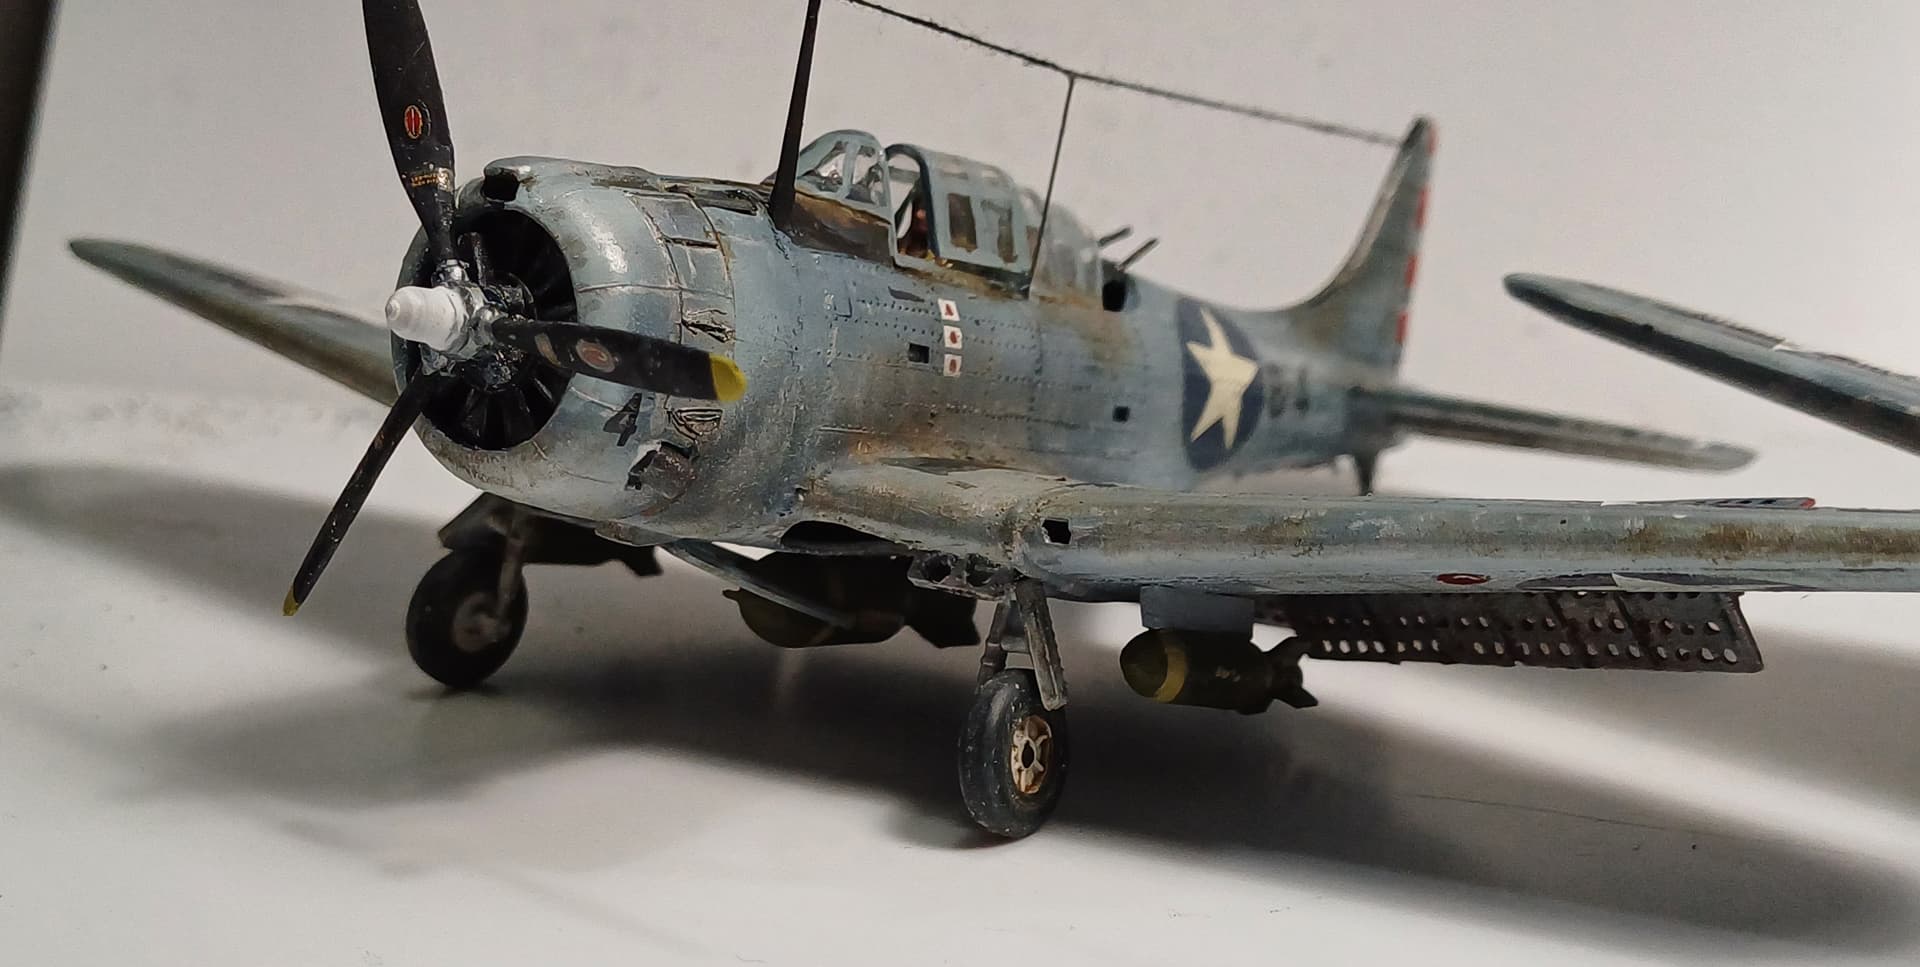
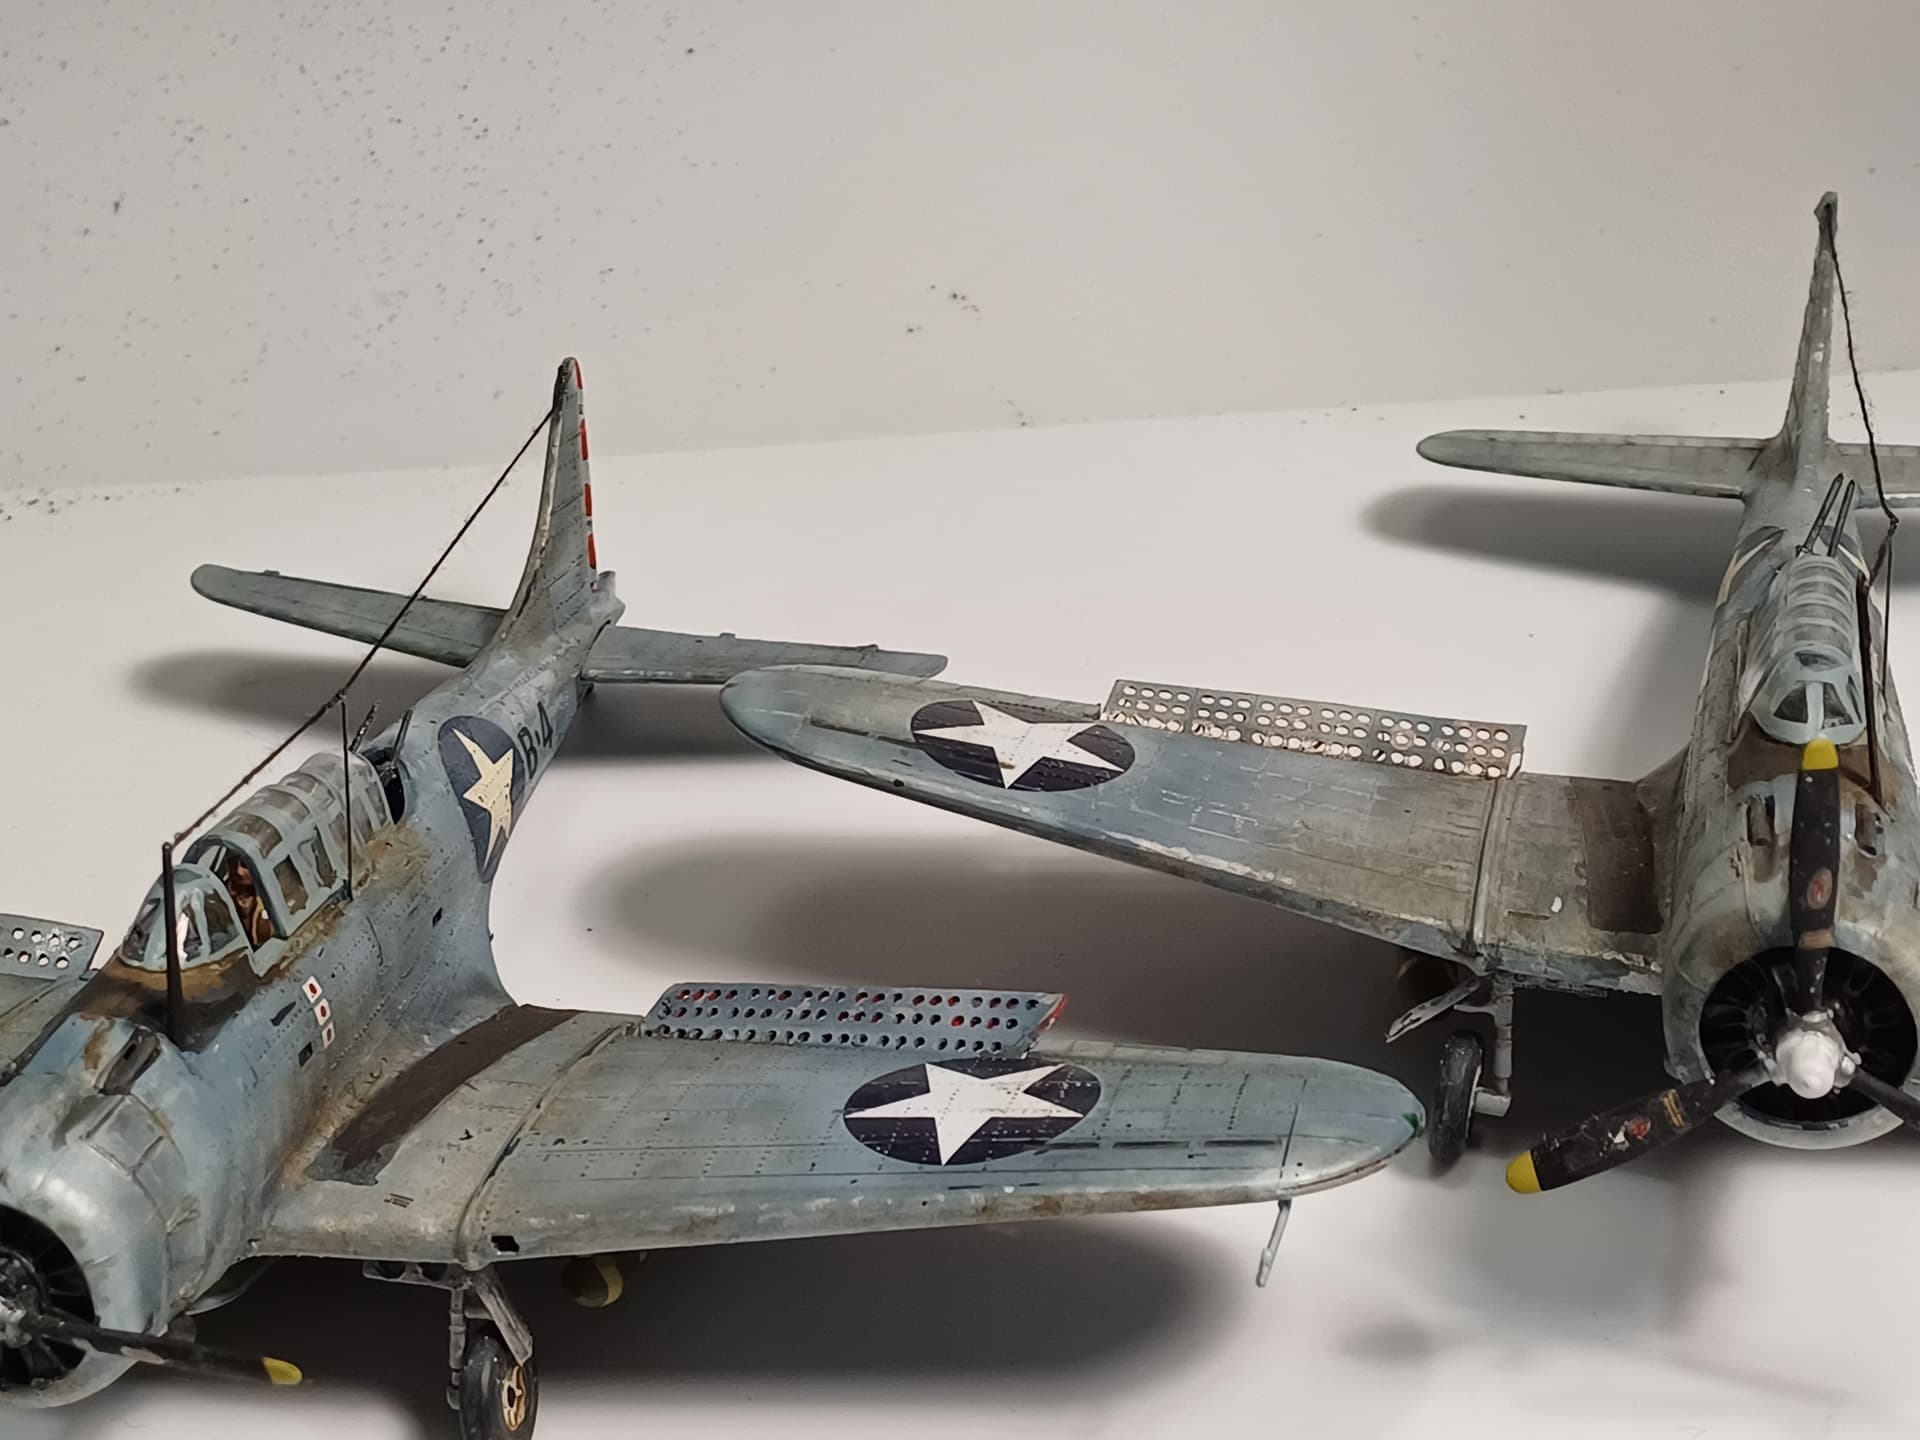
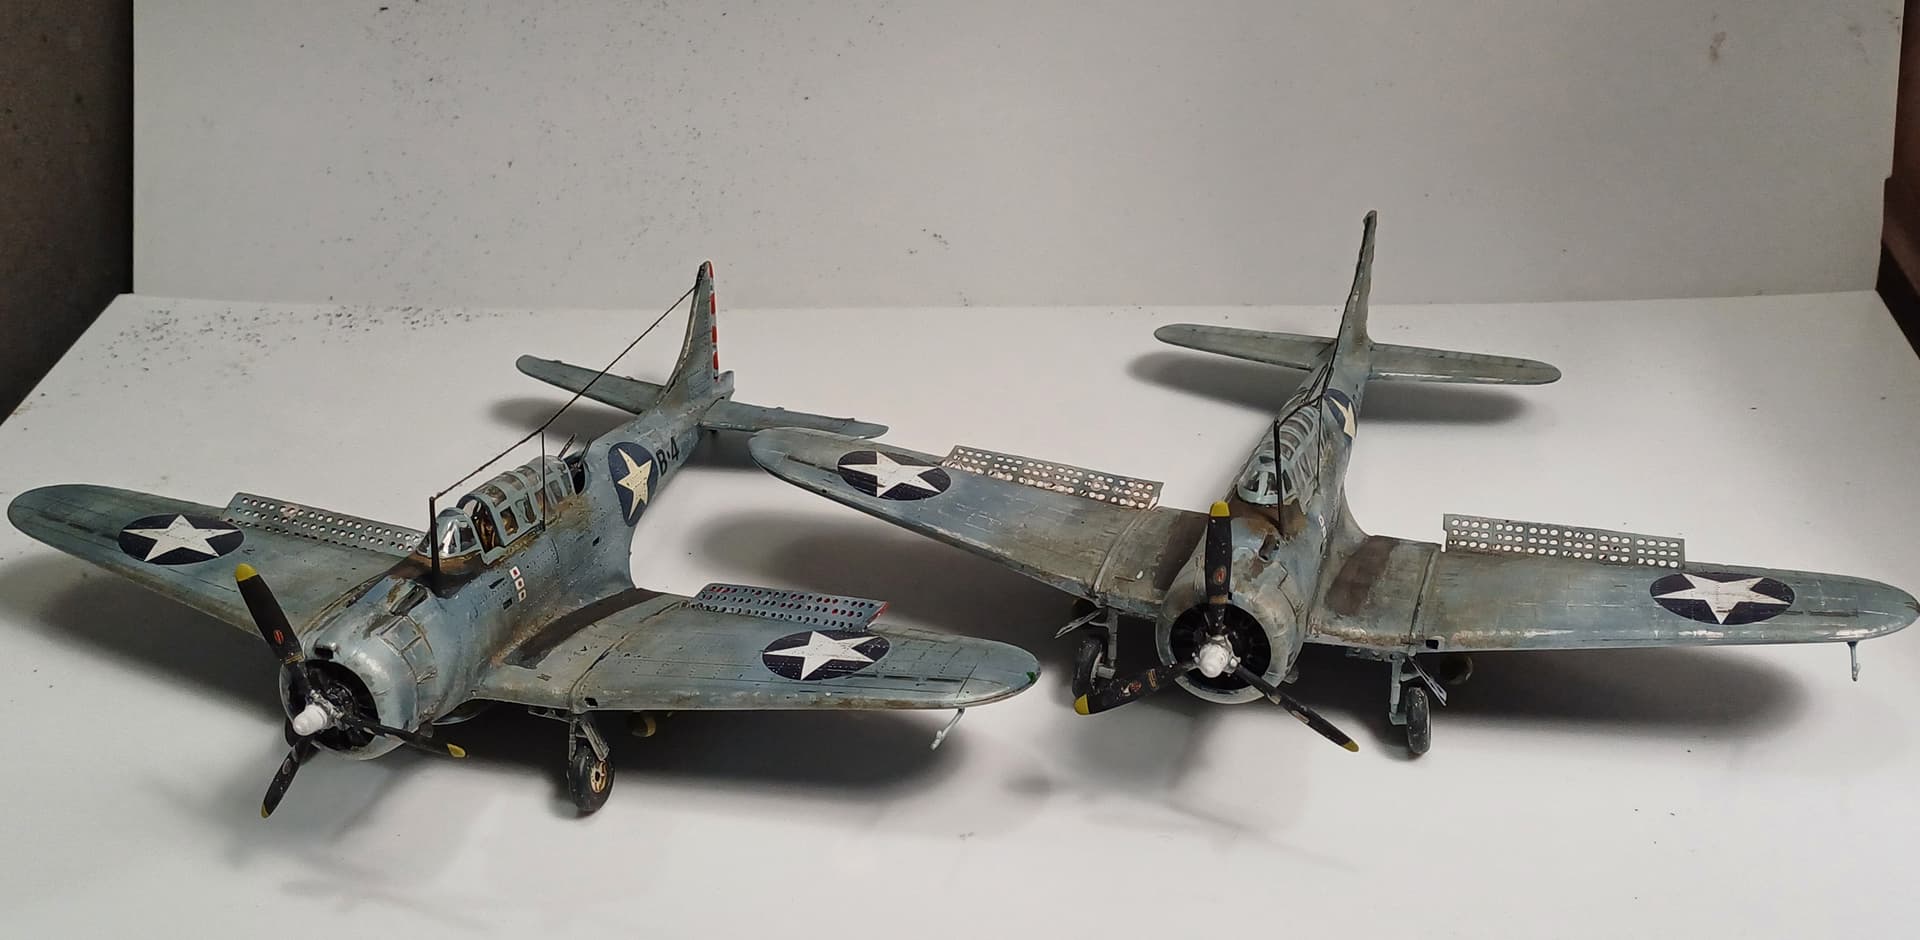
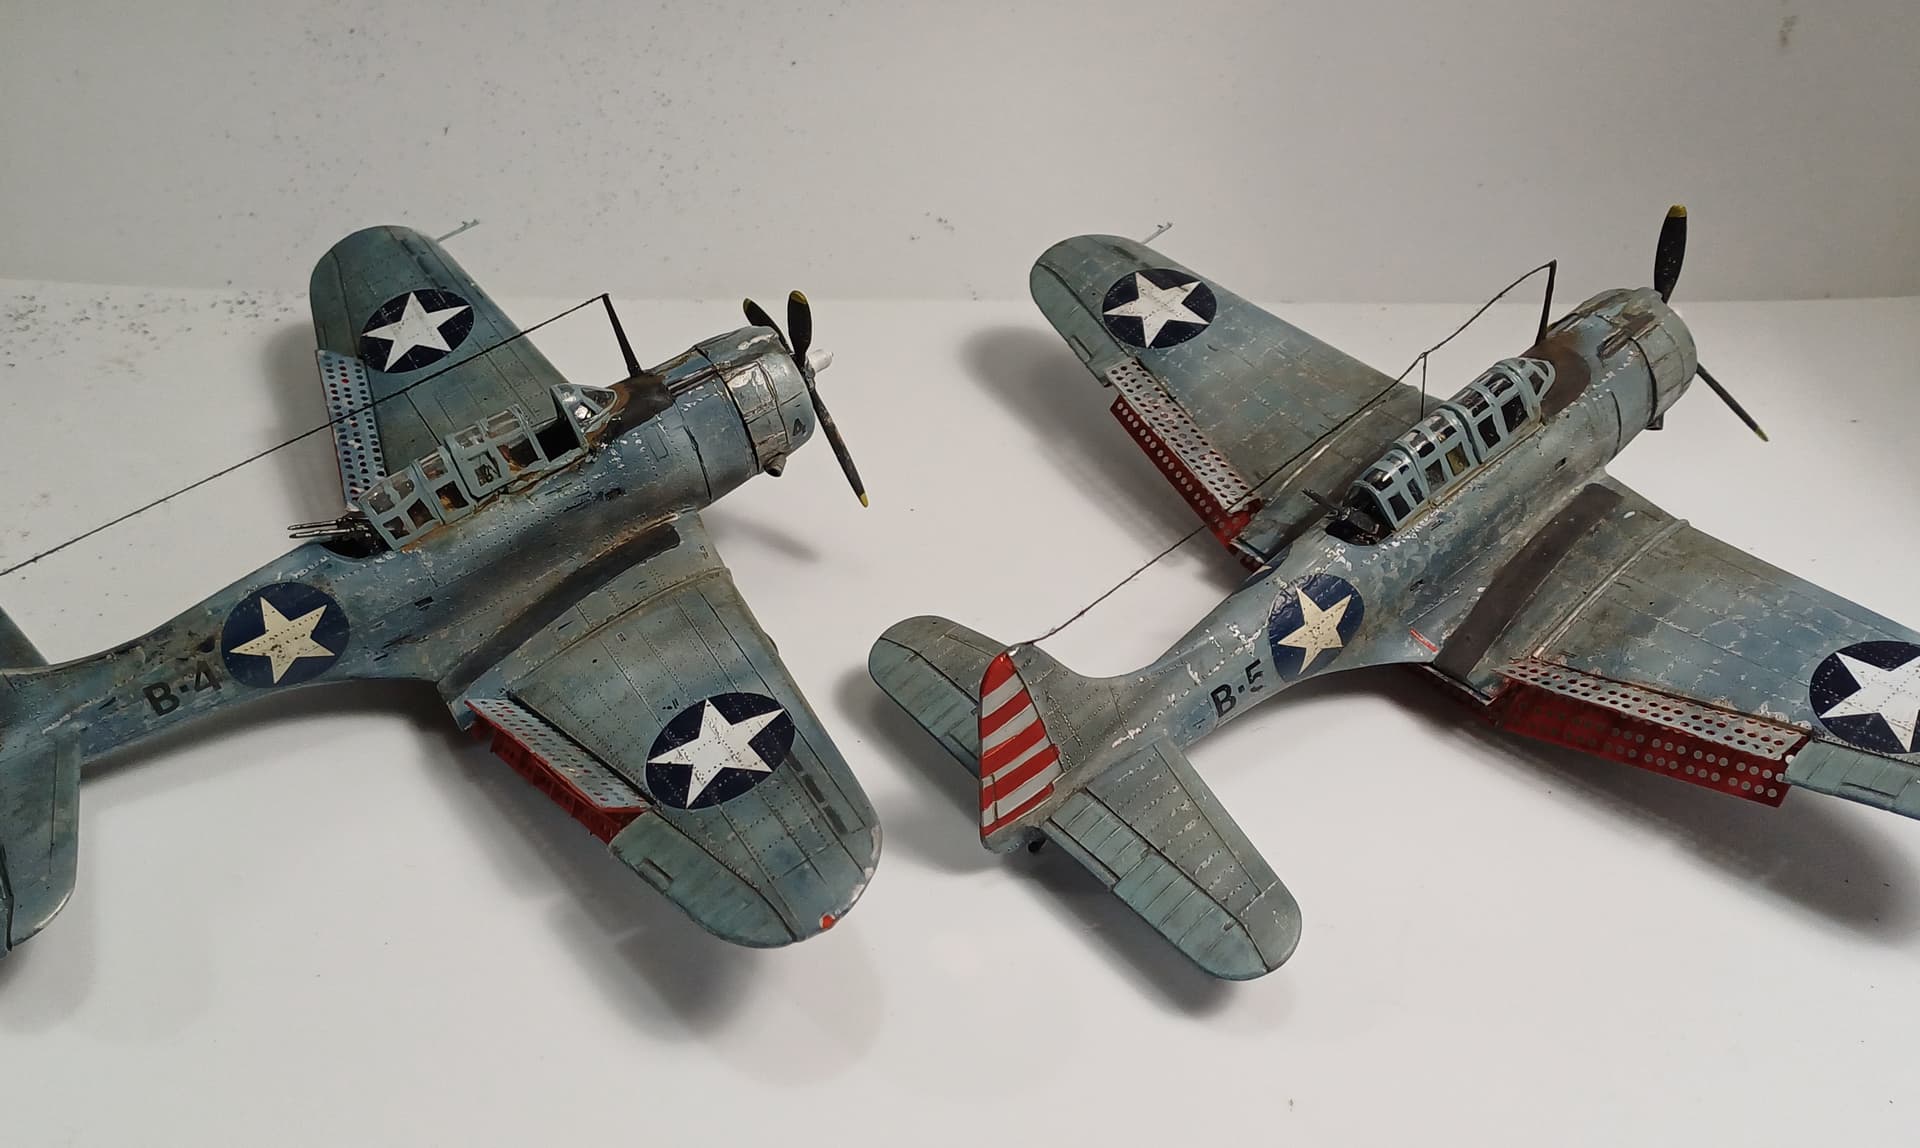
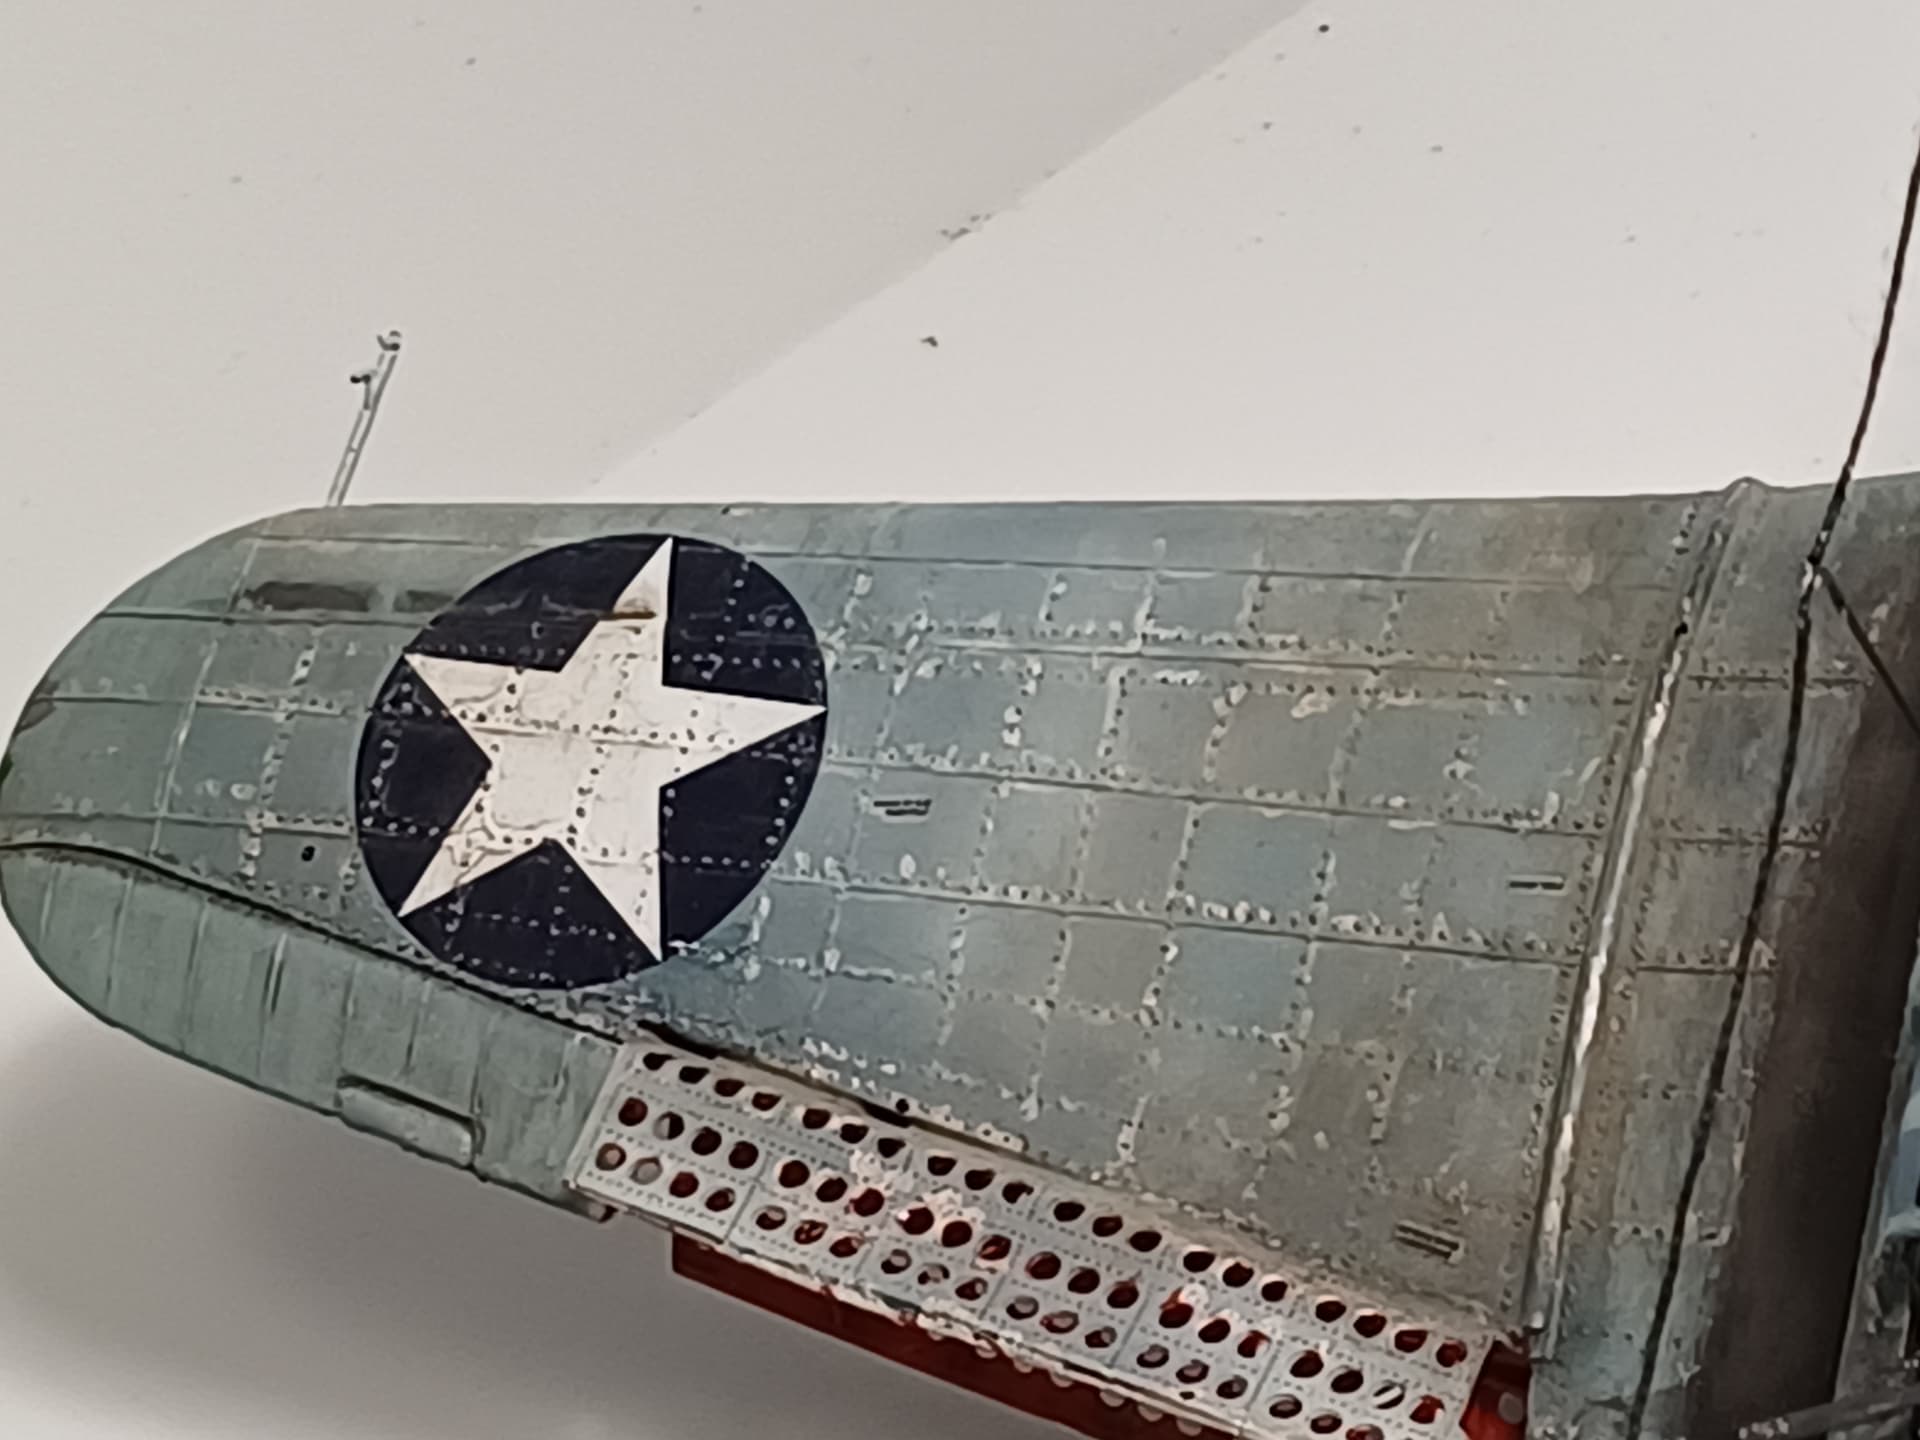
Think I can call my Dauntlesses finished… made them battered and dirty…

Thanks for the nice groupbuild, and good luck to all the others still building!
Think I can call my Dauntlesses finished… made them battered and dirty…
Thanks for the nice groupbuild, and good luck to all the others still building!
Look great Bert. I actually like the beaten up look you have gone for on these. Well done ![]()
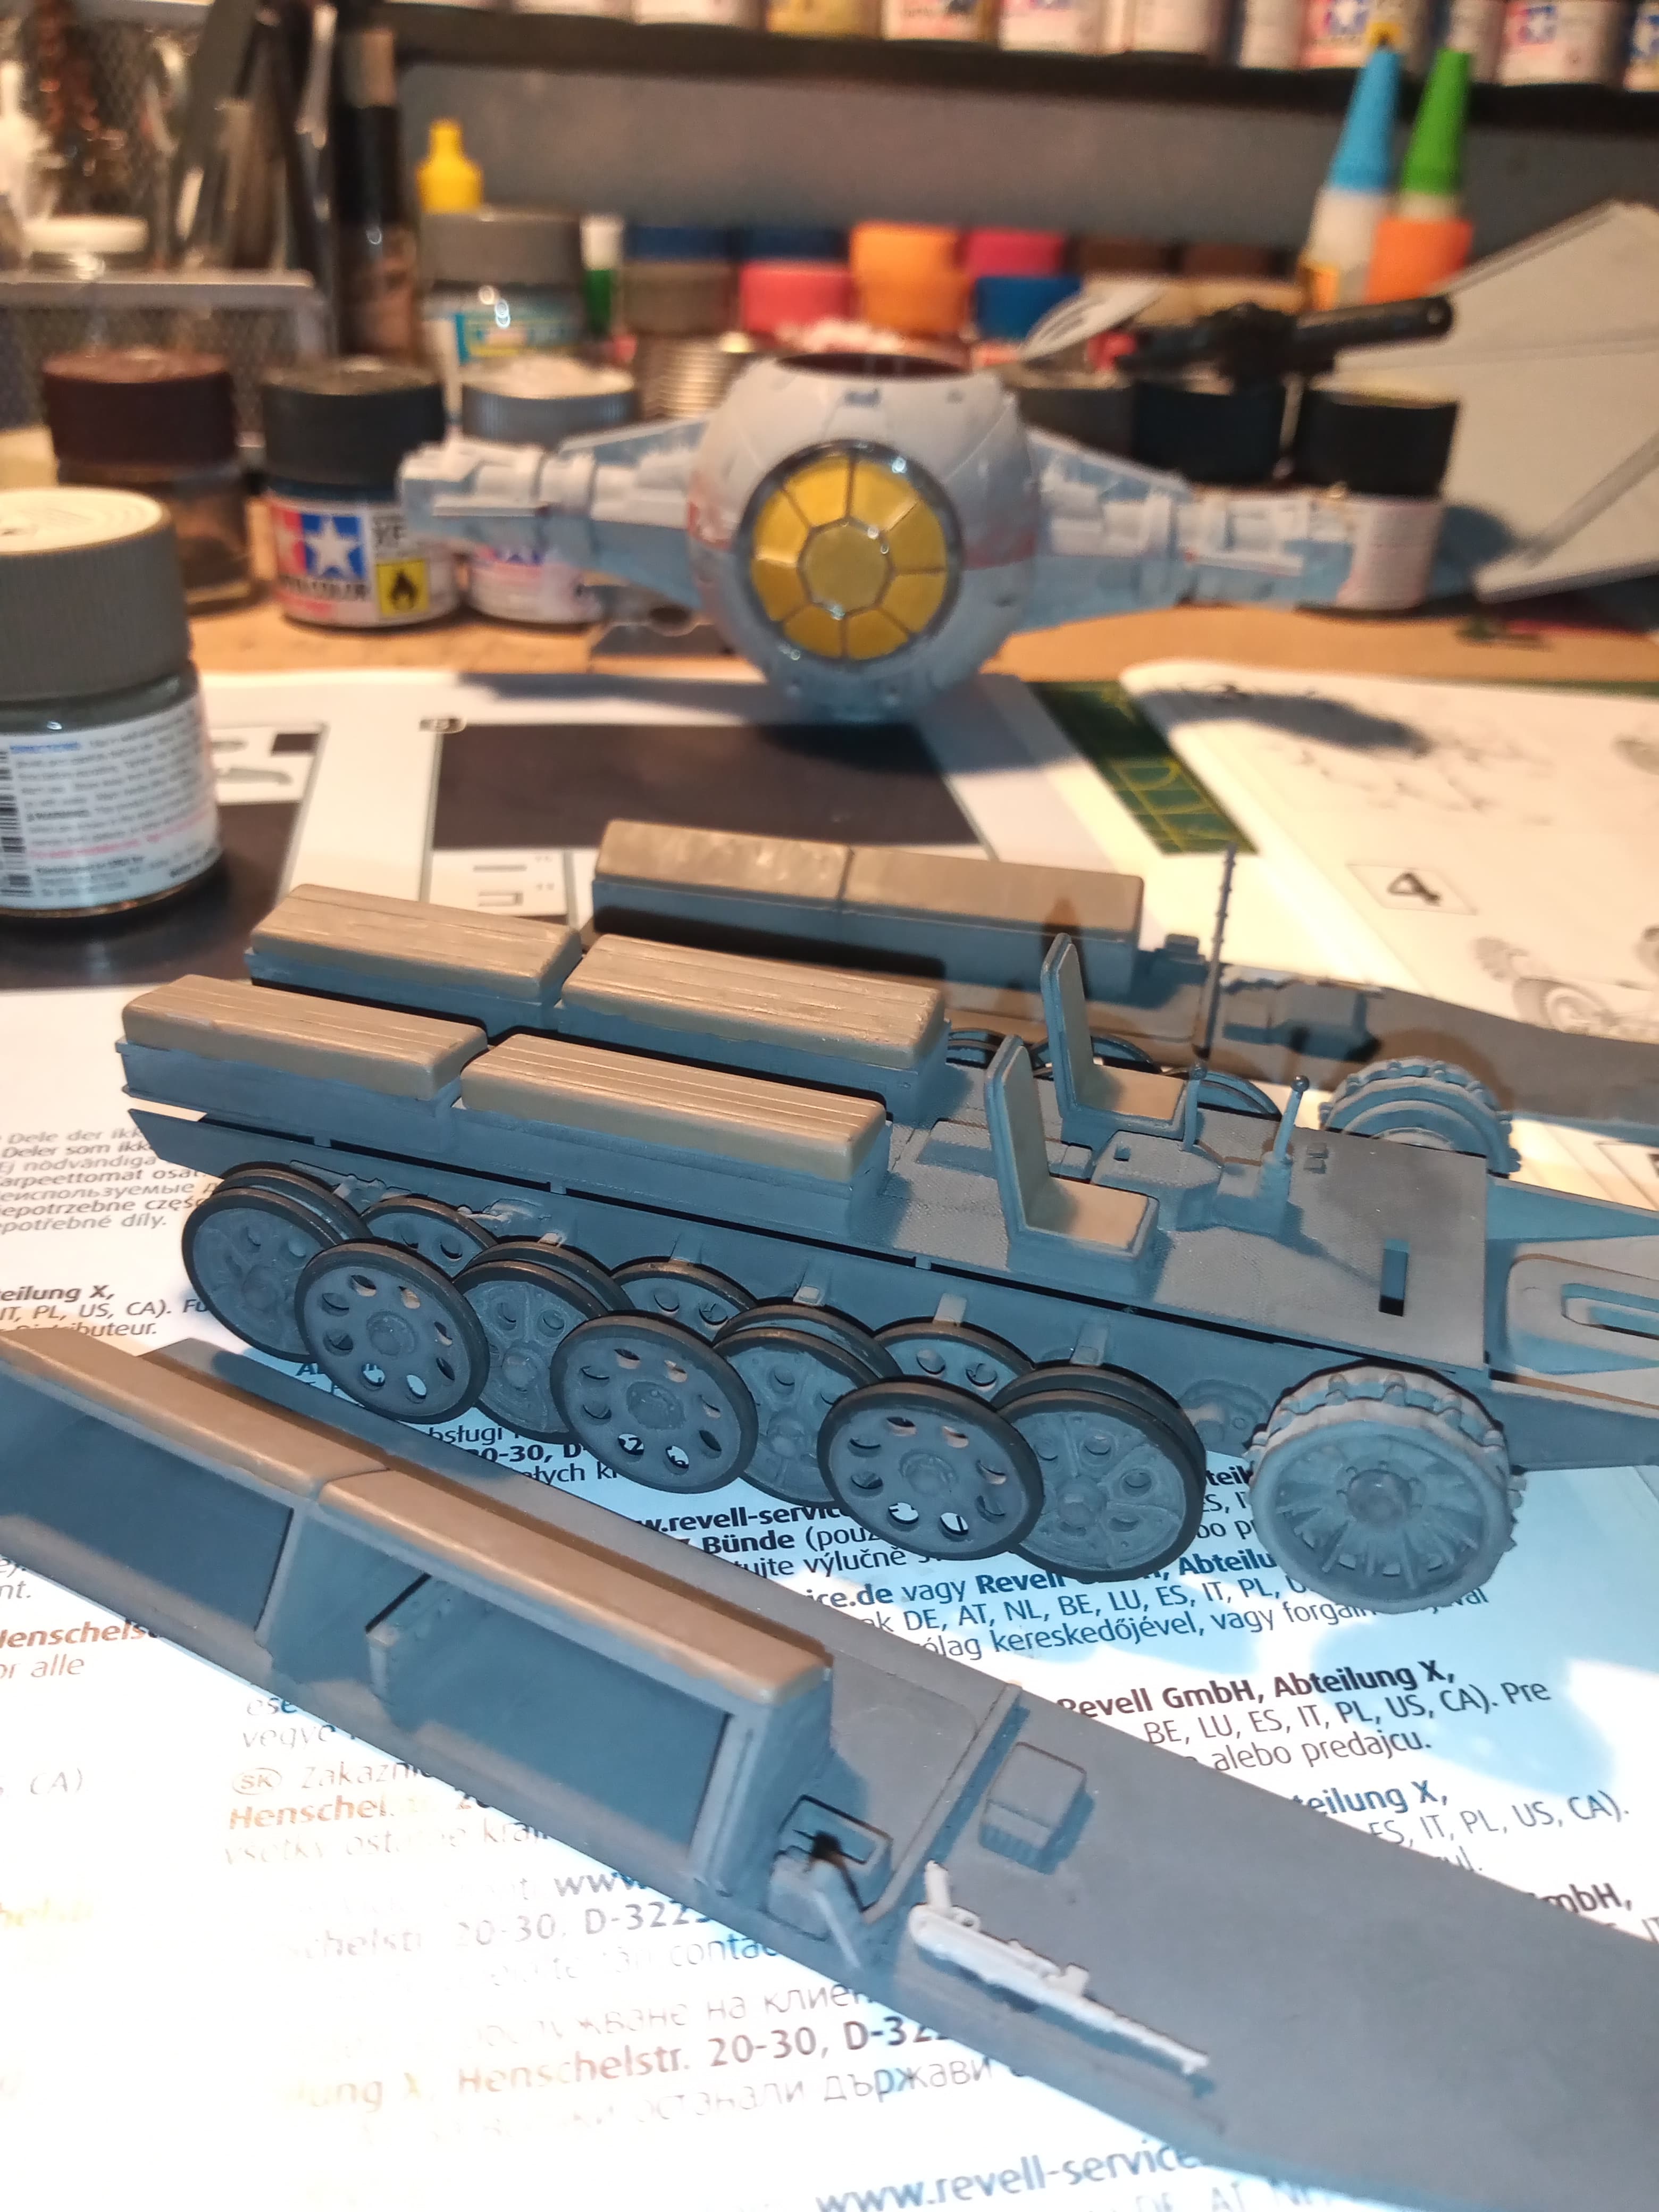
Nothing crazy for me … Just painted the seating areas and added the wheels… Everything sits flat and level so that’s a bonus.
Try and get the dash painted up and fitted, then add the lower hull sides tomorrow.
I’ve been beavering away in the background trying to get the camo on the Sm.79 right. Initially, the splotches of colour were too big and I felt a reduction in size was needed. So I broke out the Humbrol 148 and sprayed some lines across the colours to break them up. Then I went back over the areas with the appropriate colours. I used Humbrol 148 as a base for the top and SMS Lacquer Light Gull Grey for the underside. I really like the SMS Lacquer paints, they’re thinned and ready to use straight from the bottle. They spray beautifully and etch into the plastic for a hard resilient coat. I’m using Italeri’s Regia Aeronautica colour set for the camo colours. I masked off and painted the exhaust collector ring with Migs jet exhaust. It’s likely a little on the dark side but I’ll go with it. So this is where I am at present, next up gloss coat and then decals and weathering.
 IMG_2317 by Chris Wilson, on Flickr
 IMG_2319 by Chris Wilson, on Flickr
 IMG_2320 by Chris Wilson, on Flickr
 IMG_2321 by Chris Wilson, on Flickr
Chris
Nice Looking camouflage on the SM. 79!
@SGTJKJ Thanks Jesper! It’s not the easiest of camo jobs to render accurately. And I’m still not certain it’s 100% there. But it’s as far as I’m willing to take it lol.
Chris
WOW, that’s a very vivid cam scheme …I like it though … Very unusual ![]()
@Johnnych01 That’s the Regia Aeronautica for you LOL! They can have anything up to 4 or 5 different colours.
Chris
Typical flamboyant Italian lol
Aint that the truth!! But they’re some of the most eye catching camo out there. Even if you want to pull your hair out by the end of it all lol.
That’s a great looking camo. One reason I’m staying away from building RA birds is the complex camouflage.
I always believed the Germans lost the war as they were busy building road wheels for their tanks and the Italians lost as they were waiting for the paint to dry before applying the next colour of the camouflage ![]()
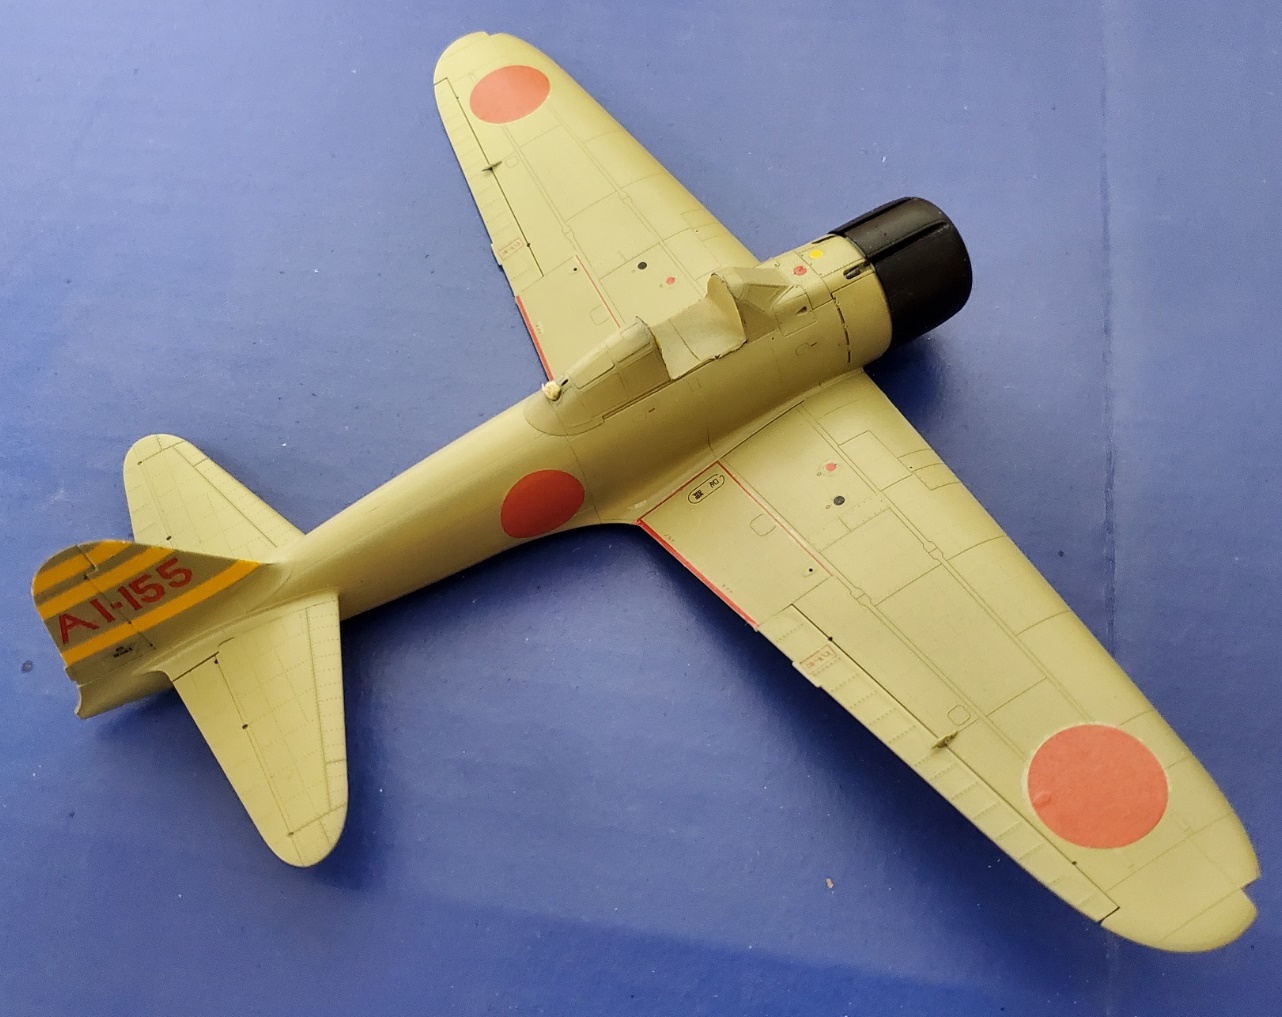
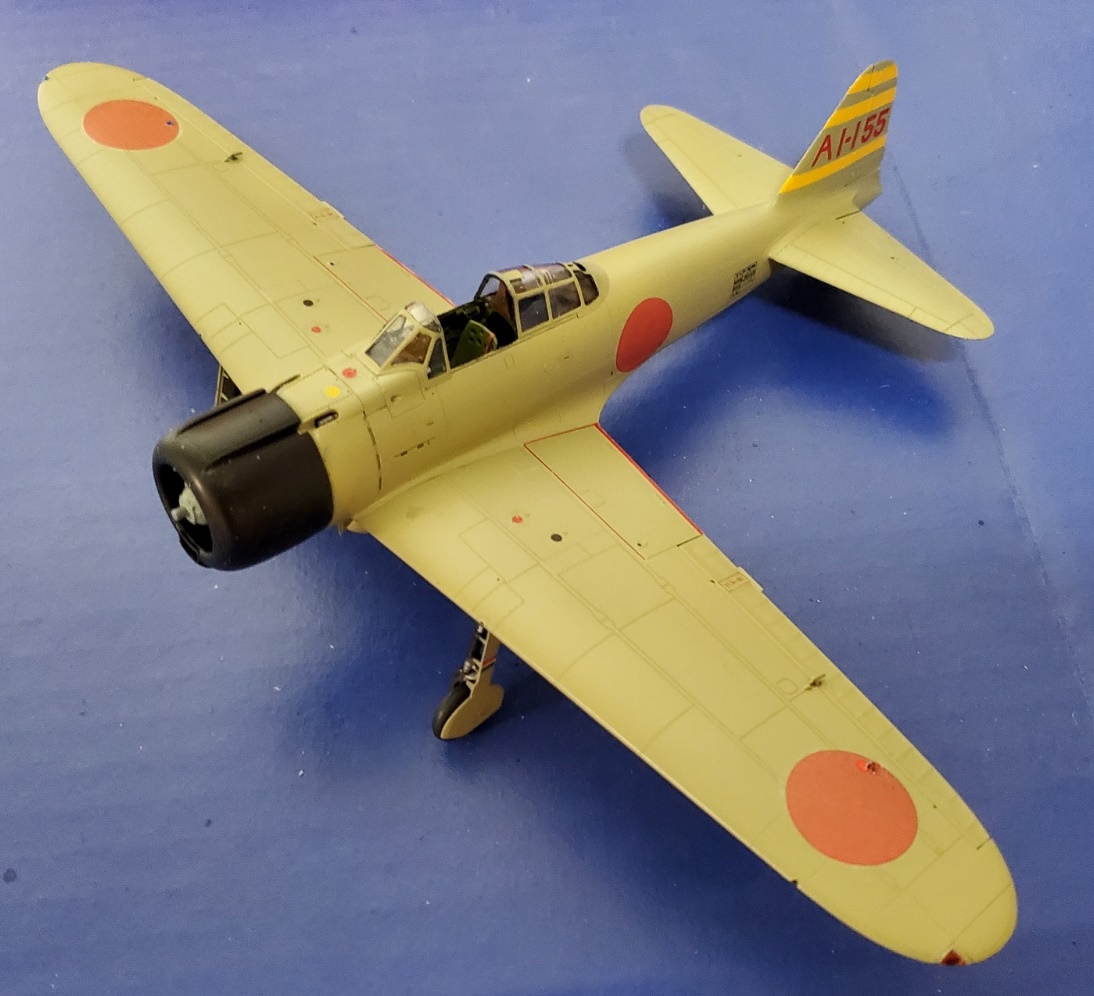
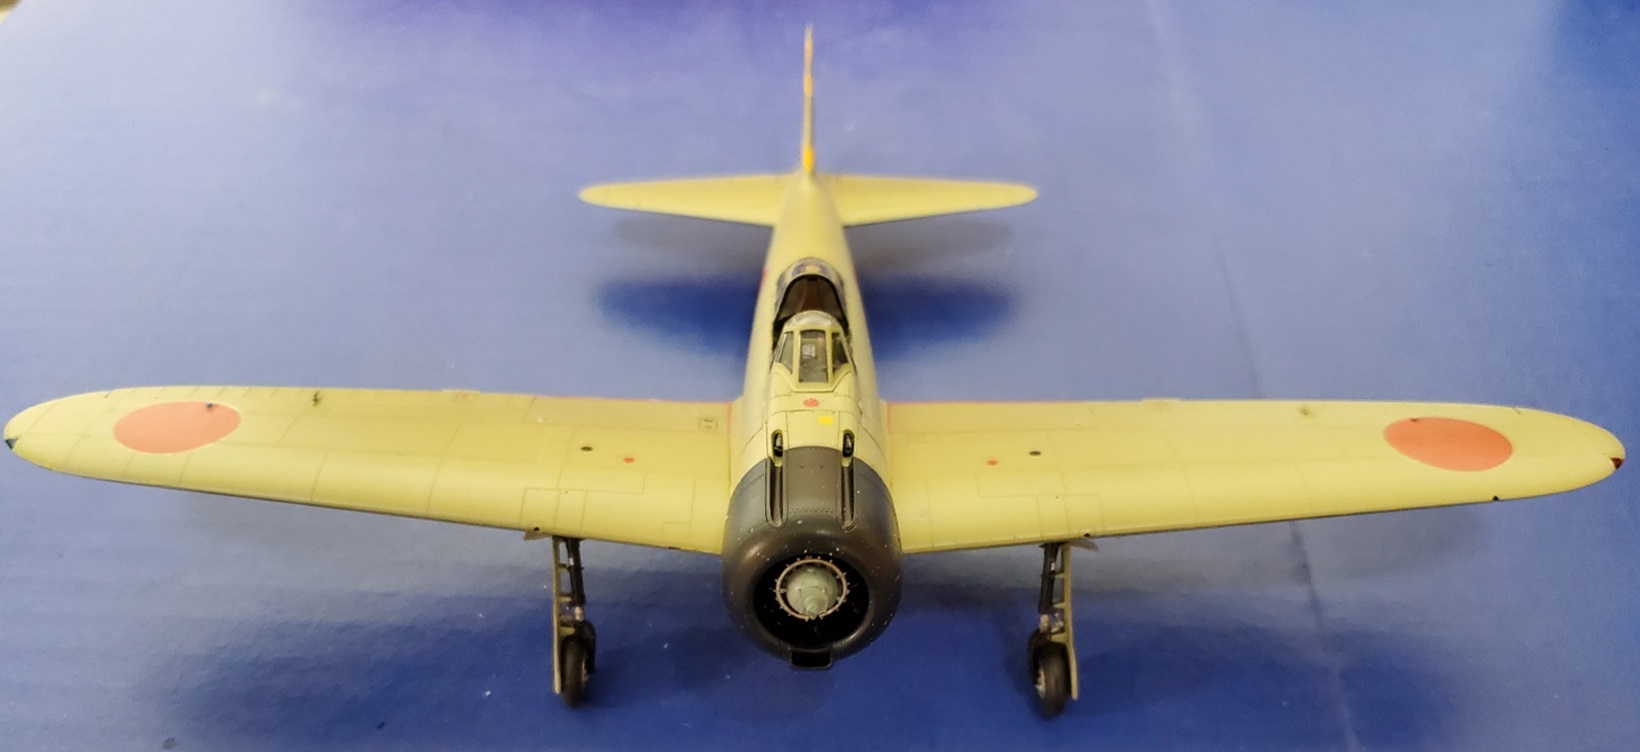
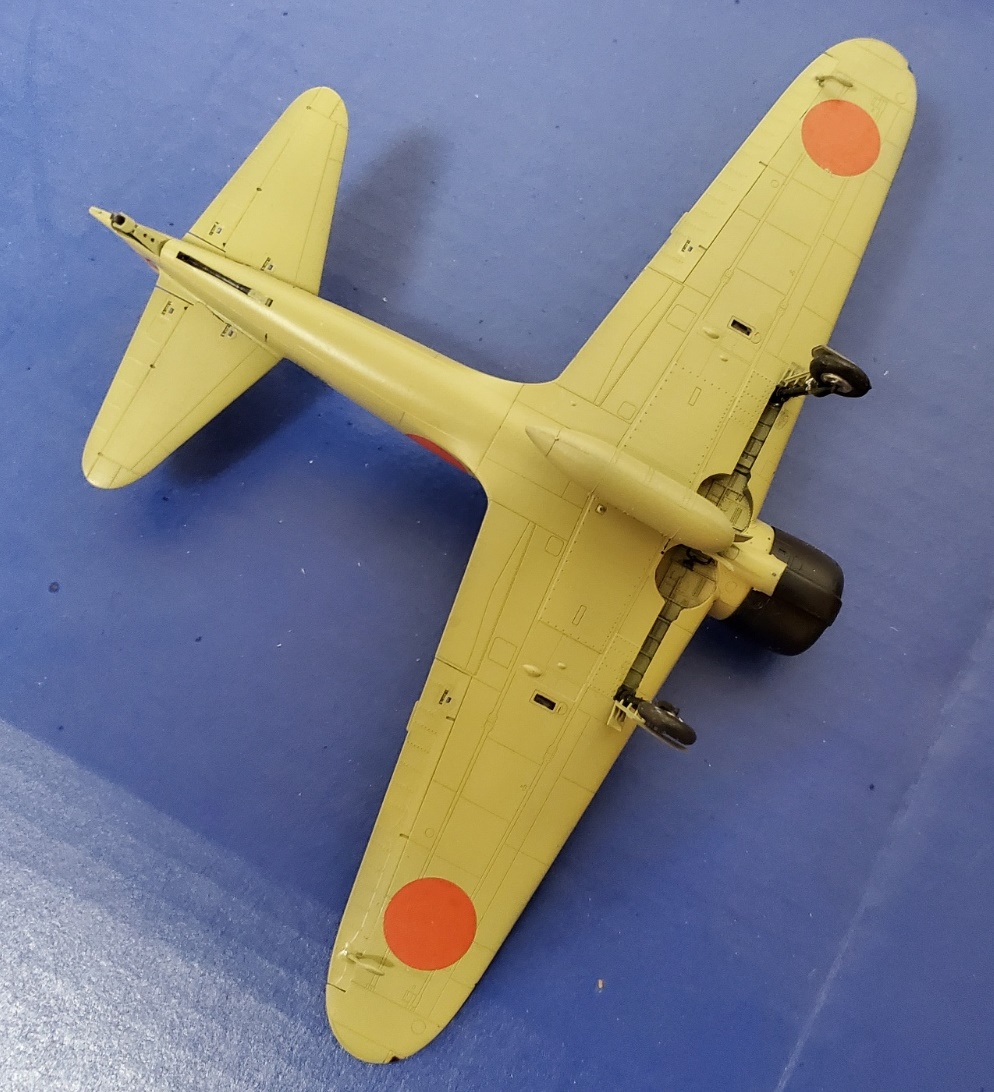
OK, getting over being blinded by the SM.79 camo, on to my update on the Eduard 1/48 A6M2. I’ve been off line for various reasons for a while, so here’s some catch-up.
I don’t have the dual combo box, but just the Profi-Pak. As such, it didn’t come with decals for Akagi, which is what I’m doing. So, as I mentioned a while back, I swiped some decals from an old Hasegawa kit for the letters and numbers and sliced up some yellow decals from the dungeon for the stipes. Here’s what that looked like:
This past weekend, I got some more work done, including getting it up on its wheels:
The landing gear was not a particularly positive fit, and I’m not sure I have them completely square, but here’s where it is:
Two of the tiny lights on the top of the wing were sacrificed to the gods. I do wish companies would give us some extras of those teeny weeny parts in case that happens. But so it goes.
Just about done!
Michael ![]()
![]()
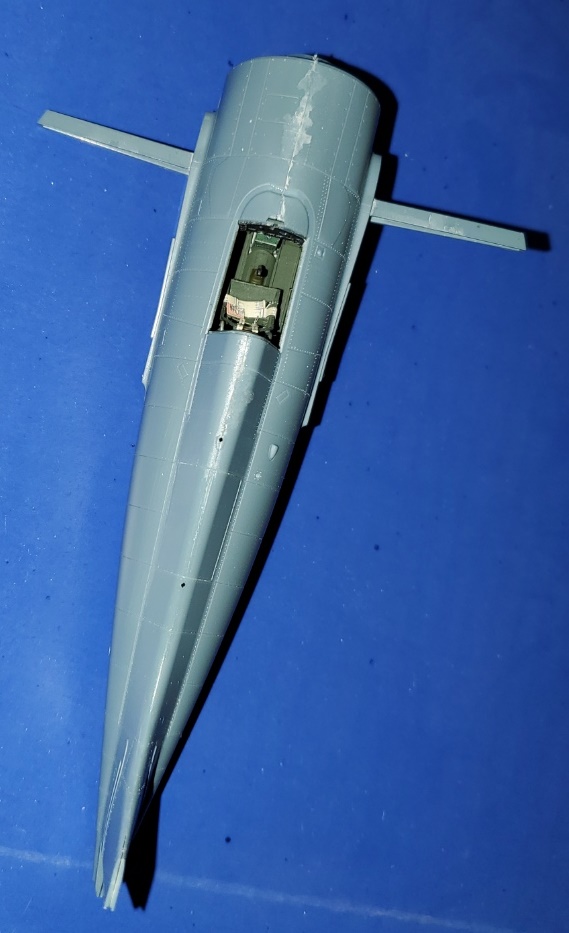
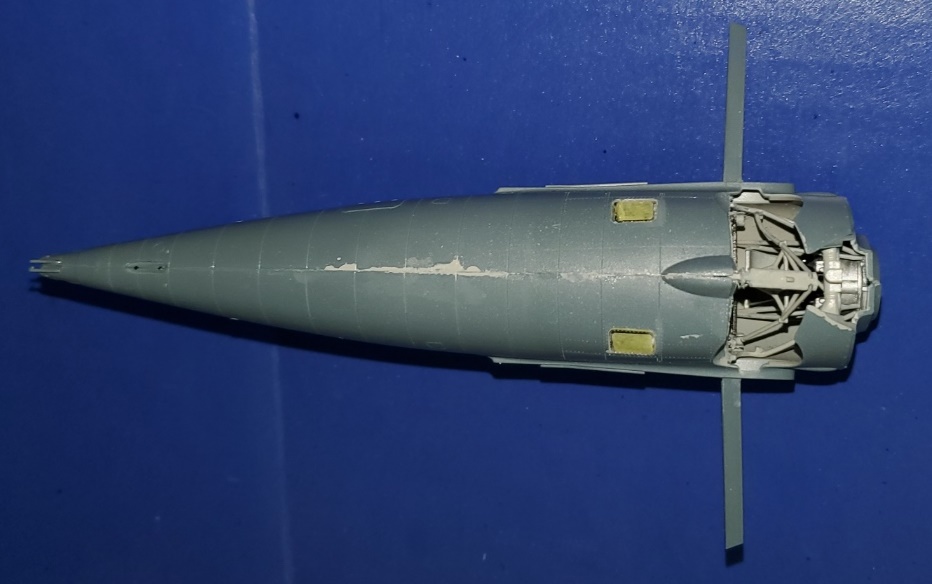
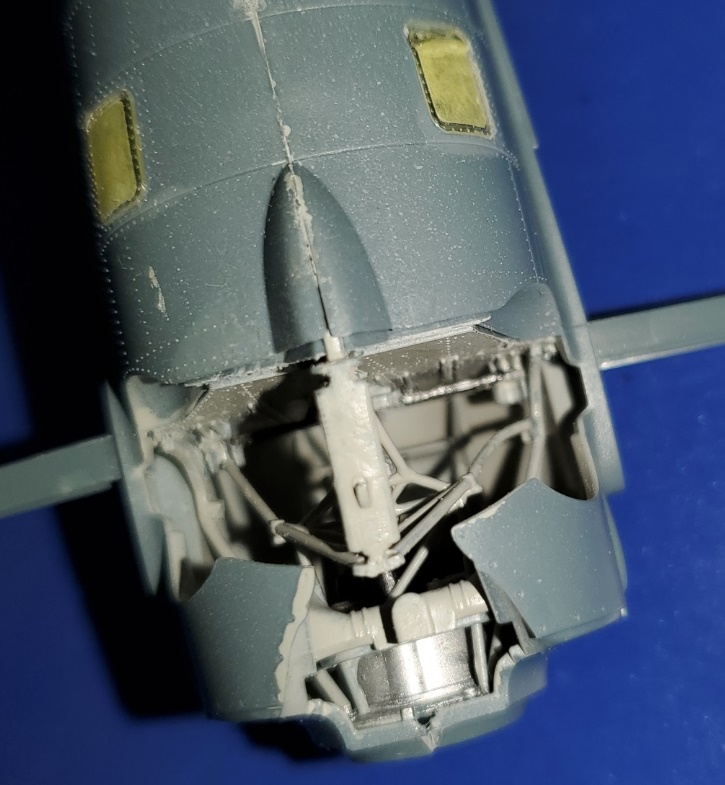
Meanwhile, I’d started work on the Eduard F4F-4. That’s a whole other saga! I was so into getting it together, I forgot to take pics. But when I went to join the fuselage halves, it just wasn’t happening. I had to pry them apart and really go to work on the bulkhead edges to get everything closed up, but here it is:
Just a small gap on that undersigned fairing that will be easy to deal with. If you look closely at the starboard underside window, the reason it looks a bit odd is because it actually broke trying to press it into the fuselage. Very tight fit. I had to use a fair amount of window glue to fix it (the broken part disappeared). Not sure how it will look, but there it is.
Here are a couple of close ups:
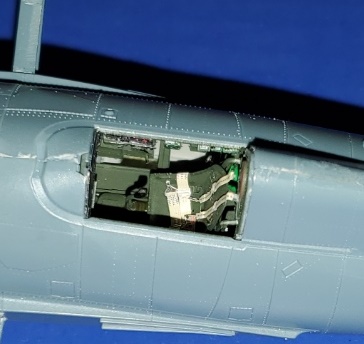
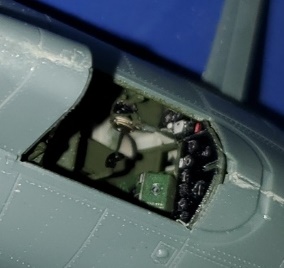
It sure is busy!
Michael ![]()
![]()
Chris some really nice paint work there. you think you could give a clinic on how you masked and painted it all?
Michael the zero looks great. i have that kit in the stash but was holding off on it because i was thinking of putting out feelers for a zero group build. any issues with the assembly? the wildcat is coming along there, the landing gear looks complicated. Btw i was under the impression that the wildcat and other early war US aircraft had only lap belts. i never been able to verify when they started using shoulder harnesses. I read several books where the pilot wacked his head on the gun sight as a result.
Also STILL can’t decide what subject to build for this campaign. just can’t seem to get my inspiration mojo going
Joe
@Bomber14 Hi Joe, uhmmmm would you believe that’s all free hand? 0.2mm Harder & Steenbeck at 15psi with the tip about 10mm from the surface, The camo paint is Italeri’s acrylics and was thinned down though not by a great deal. The base coats are enamel topsides (Humbrol 148) and lacquer undersides (SMS Light Ghost Grey). The topside green was in too large blobs so I over-sprayed some of the top coat to break it up, then retouched accordingly.
Chris
Joe,
Thanks! The Zero went together very well, the only problem I’ve had with it was the teeny tiny clear parts. Sigh.
As for the F4F, well spotted. My reading agrees with Eduard that the switchover to shoulder and lap belts occurred between Coral Sea and Midway and I believe -4s came so equipped from the factory. My -3 will have lap belts only when the time comes. And yes, the gear and engine bay is complicated and fiddly. At least a couple of the parts were bent and I’m afraid if I try to straighten them that they’ll break loose.
Michael ![]()
![]()
thanks chris. great work!! a .2 needle huh, i have a grex with a .2 and i couldn/t get anything through it. i don’t remember how much i thinned it down or even what paint i used i want to say tamiya. that may have been the issue since i believe their pigments are not that fine. i have a neoeco airbrush ordered that should be arriving today that comes with three needle sizes .2 .3 .5 so i will test it out. it got really good reviews.
Joe
good to know michael. i was not sure when the switch happened. i can’t imagine though that the dauntless pilots didn’t have shoulder harness. all their pilots must have had permanent forehead bruises-lol
i built the hobbyboss wildcat and found their gear very flimsy and it too was difficult to assemble. i guess that is more to blame in the actual design of the real aircraft.
you think there would be interest in a zero campaign next? i want to suggest it but i need a co campaign leader to help with setting it up and ribbon design.
Joe
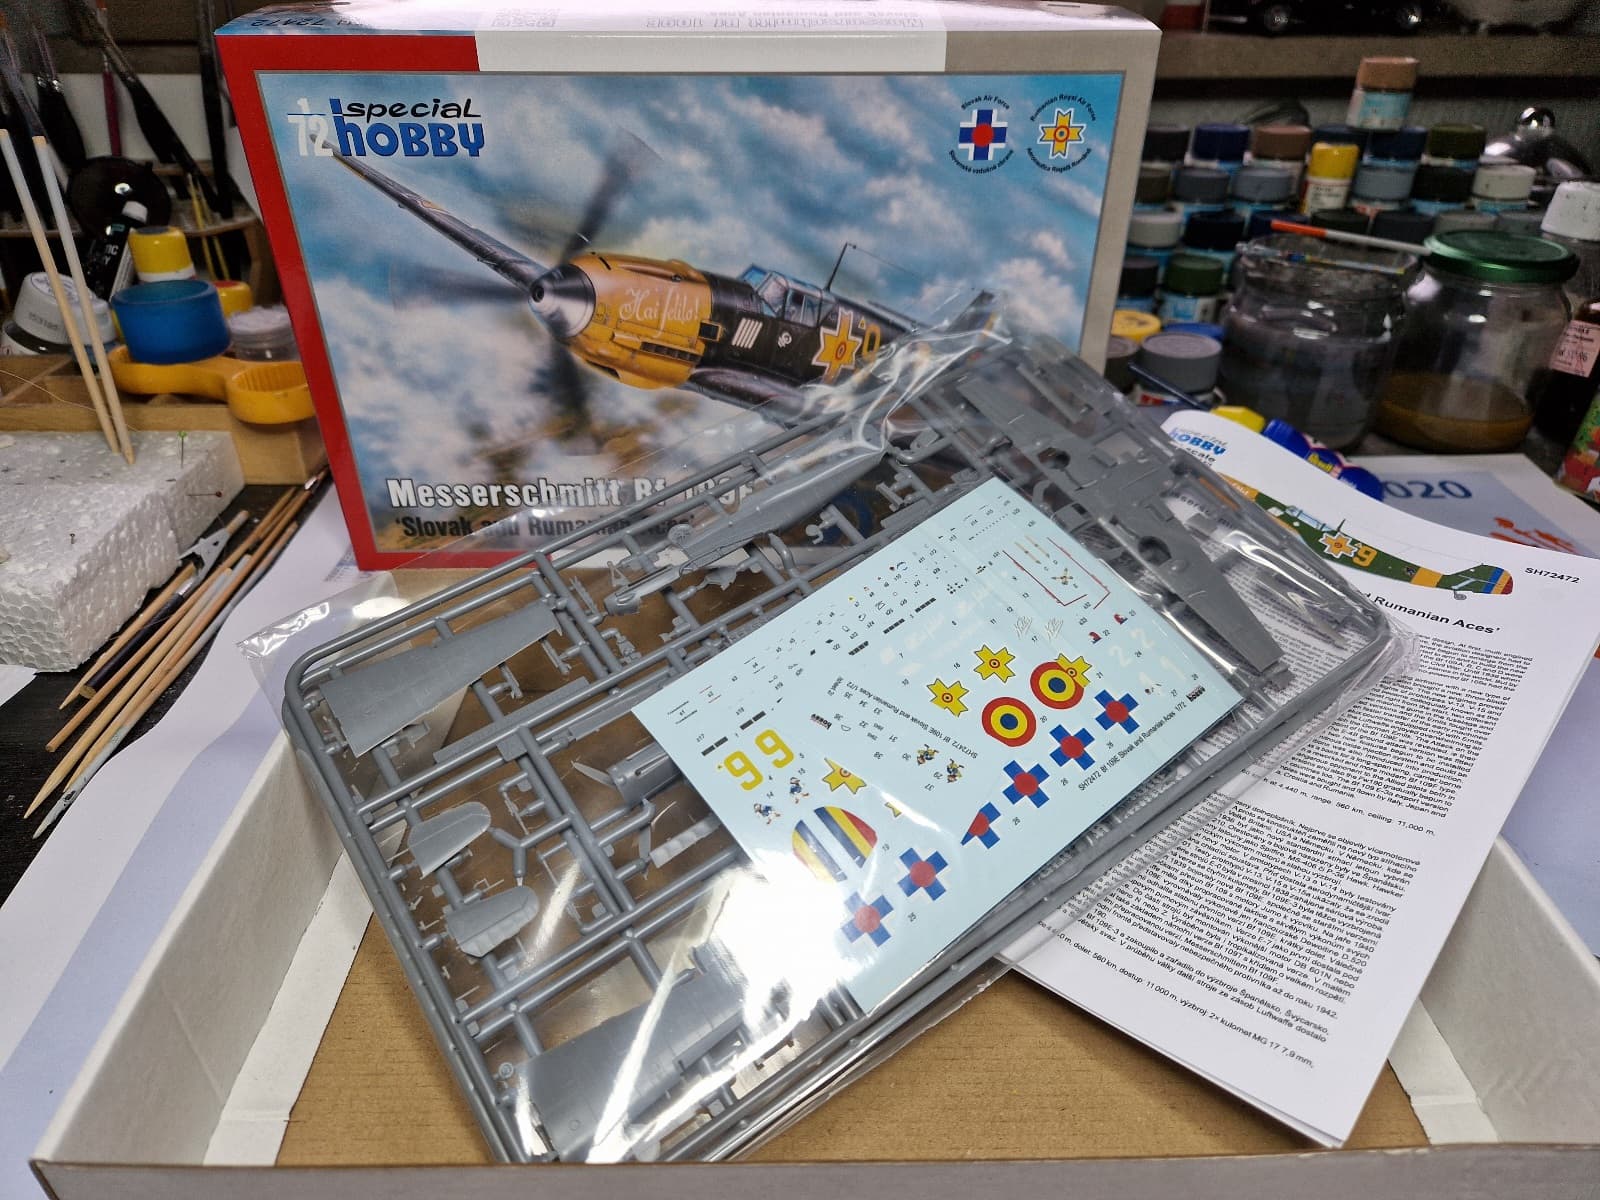
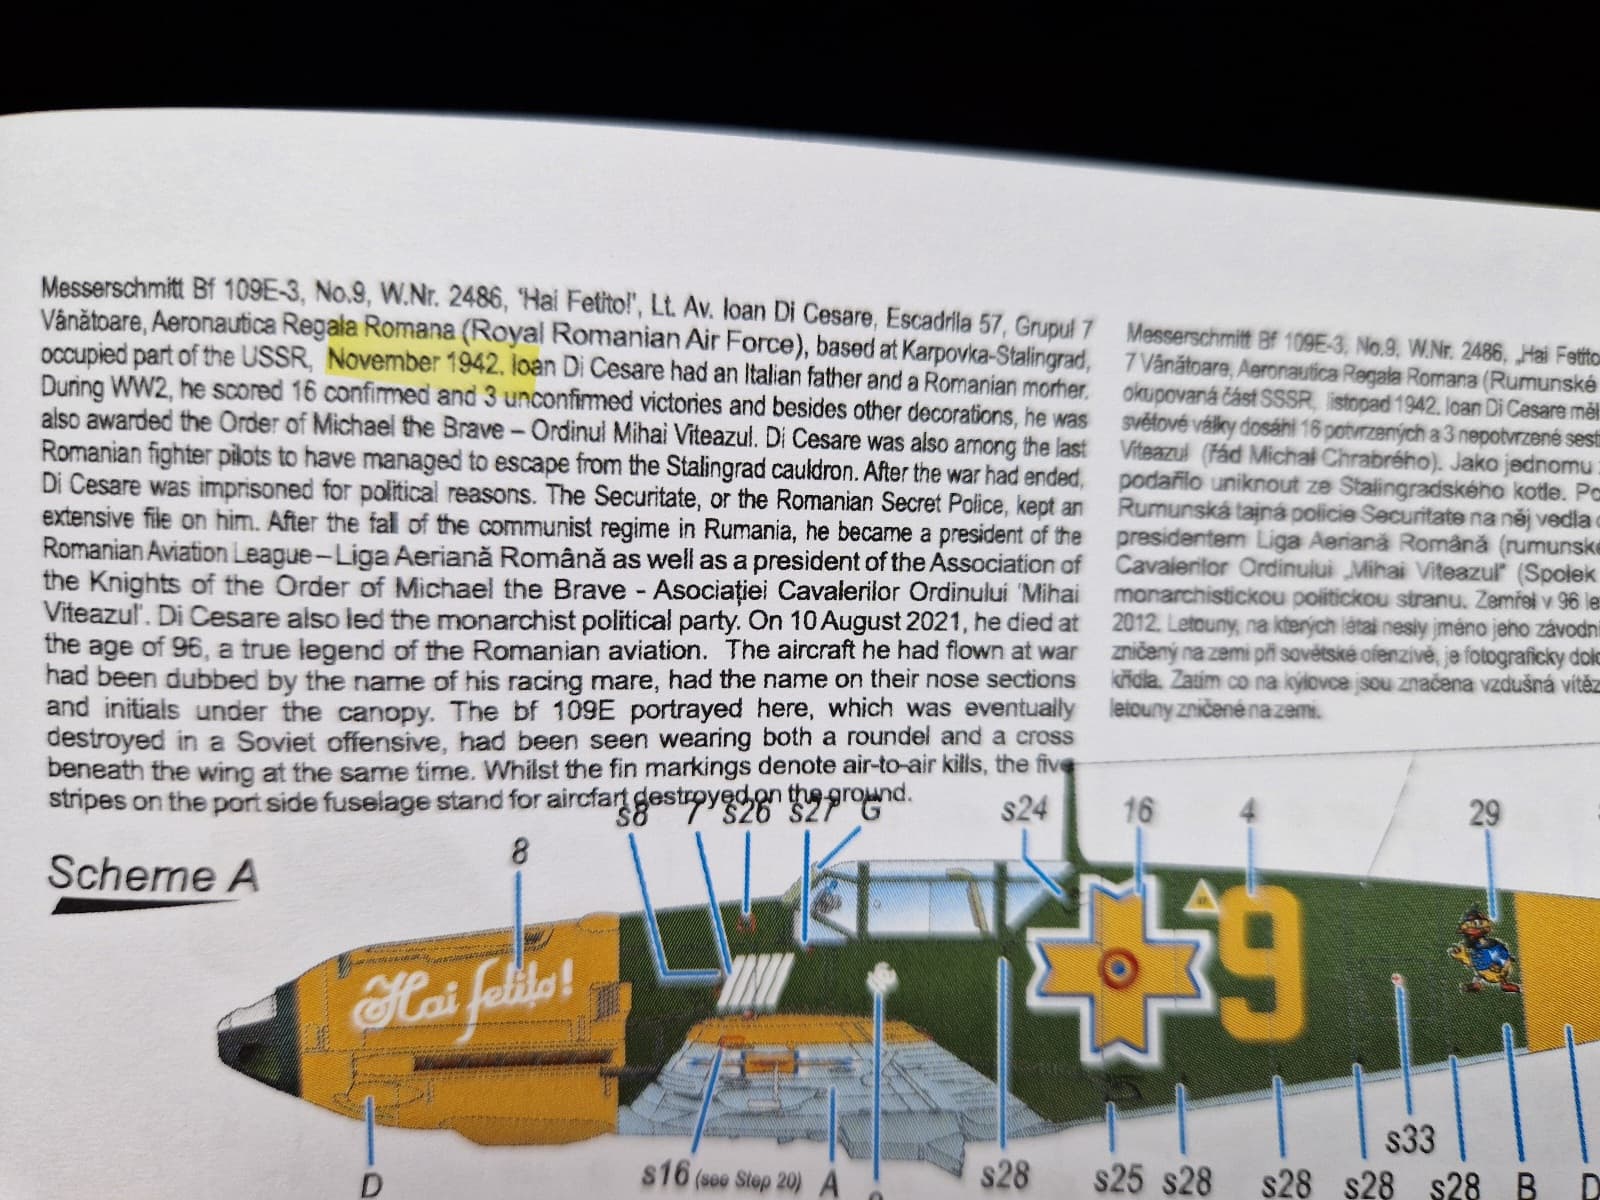
Hi mates, found something suitable in my stash, a Bf-109 Emil from Germany’s allies Romania and Slovakia at the Eastern Front 1942
Hi Peter! Interesting looking kit, at first I thought it might have been ICMs plastic but after checking Scalemates it would appear to be all Special Hobby’s. Going over the instructions it seems to be a very detailed kit for 1/72. I look forward to seeing what you do with it.
Chris