It’s a thrill to turn an idea into a 3D printed item. Well done!
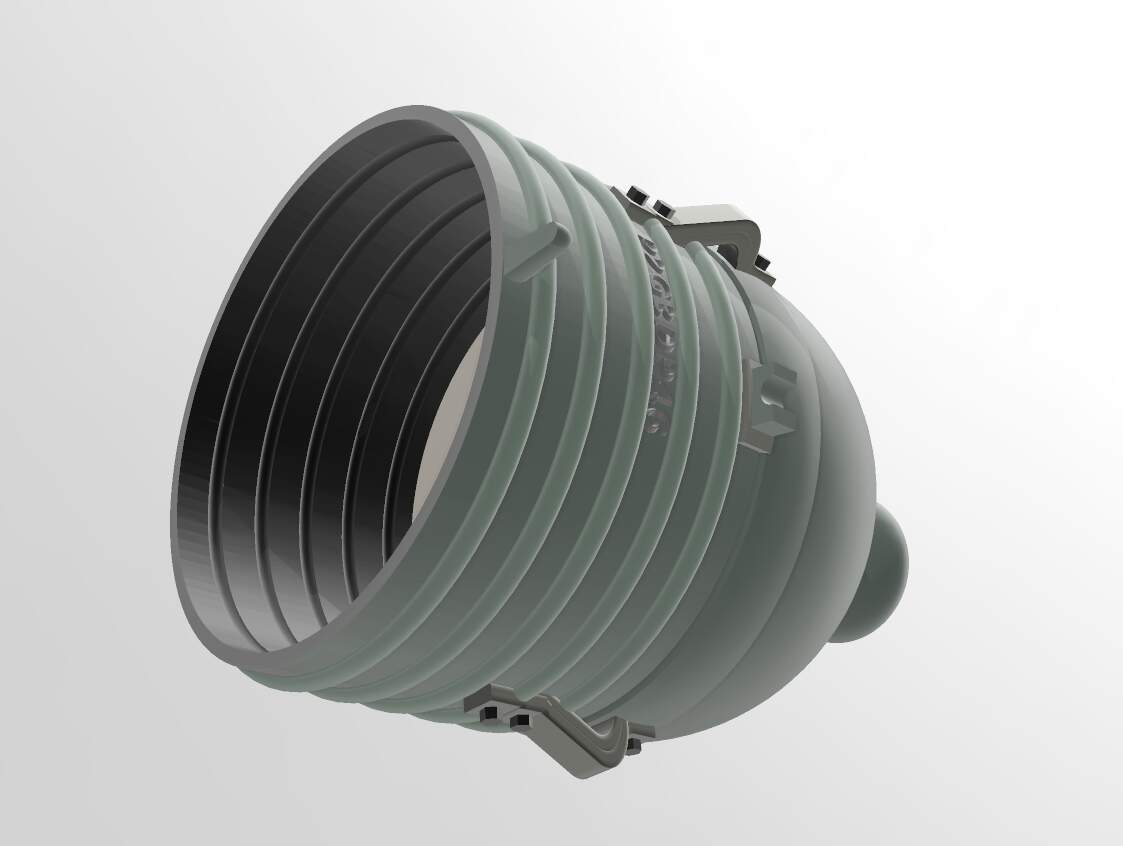
Work in progress. M4 series Sherman search light in 1/16 to replace the AHHQ’s kit part:


Reference photos used:

3 Likes


Do you still have some of the chain binders available?
1 Like
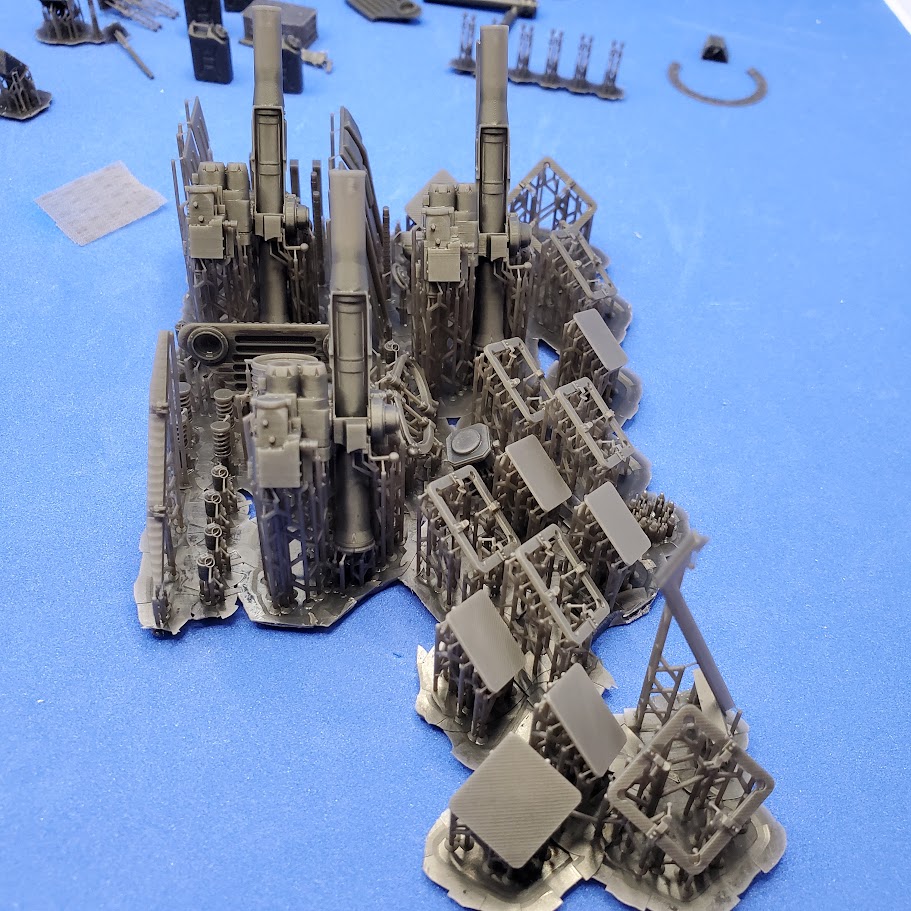
Some 3D prints from this past weekend.
Most of them for @Tank_1812


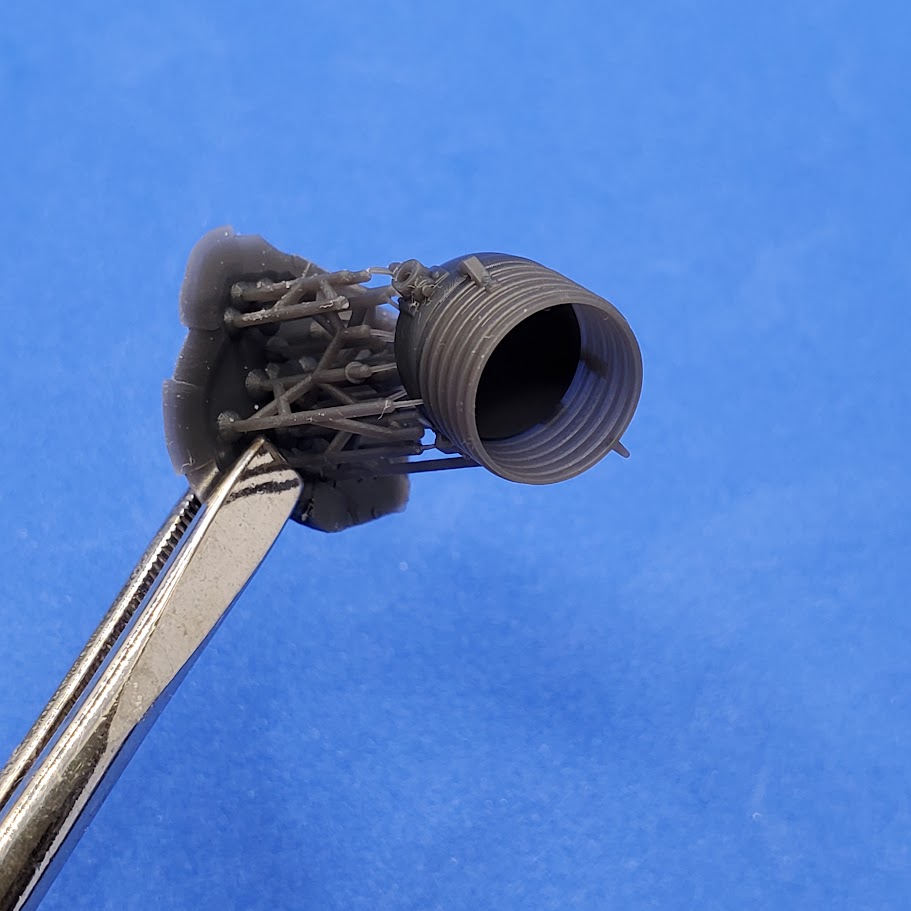
The M4 Sherman spotlight in 1/16 came out very nicely. The 1/35 version came out without a print fail luckily.


Improved design of BGM-71 TOW in 1/35 came out nicely, too:


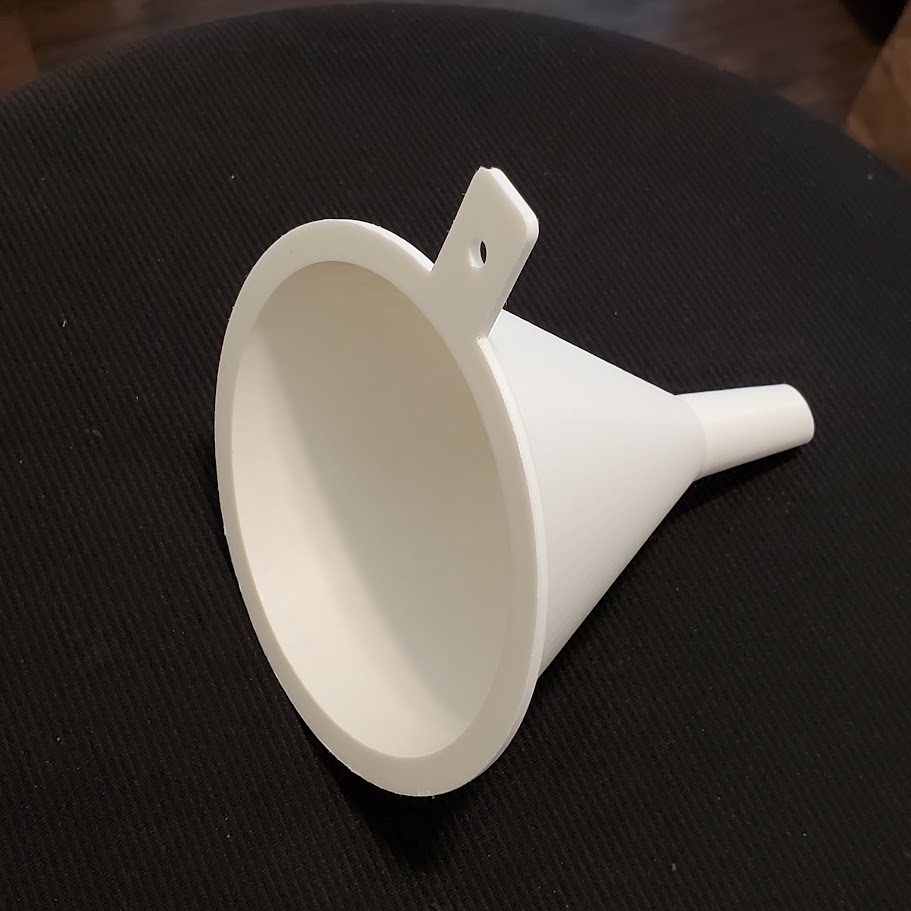
Using an FDM 3D printer, made a funnel (100mm diameter) to drain or pour back 3D UV resin:


8 Likes
Noice! ![]()
![]()
M53 SPH 155mm CAD in 1/35 done to replace the awfully inaccurate kit gun parts:

This will be 3D printed and sold in 2 parts:
Part 1 Barrel only
Part 2 Rear gun cover only


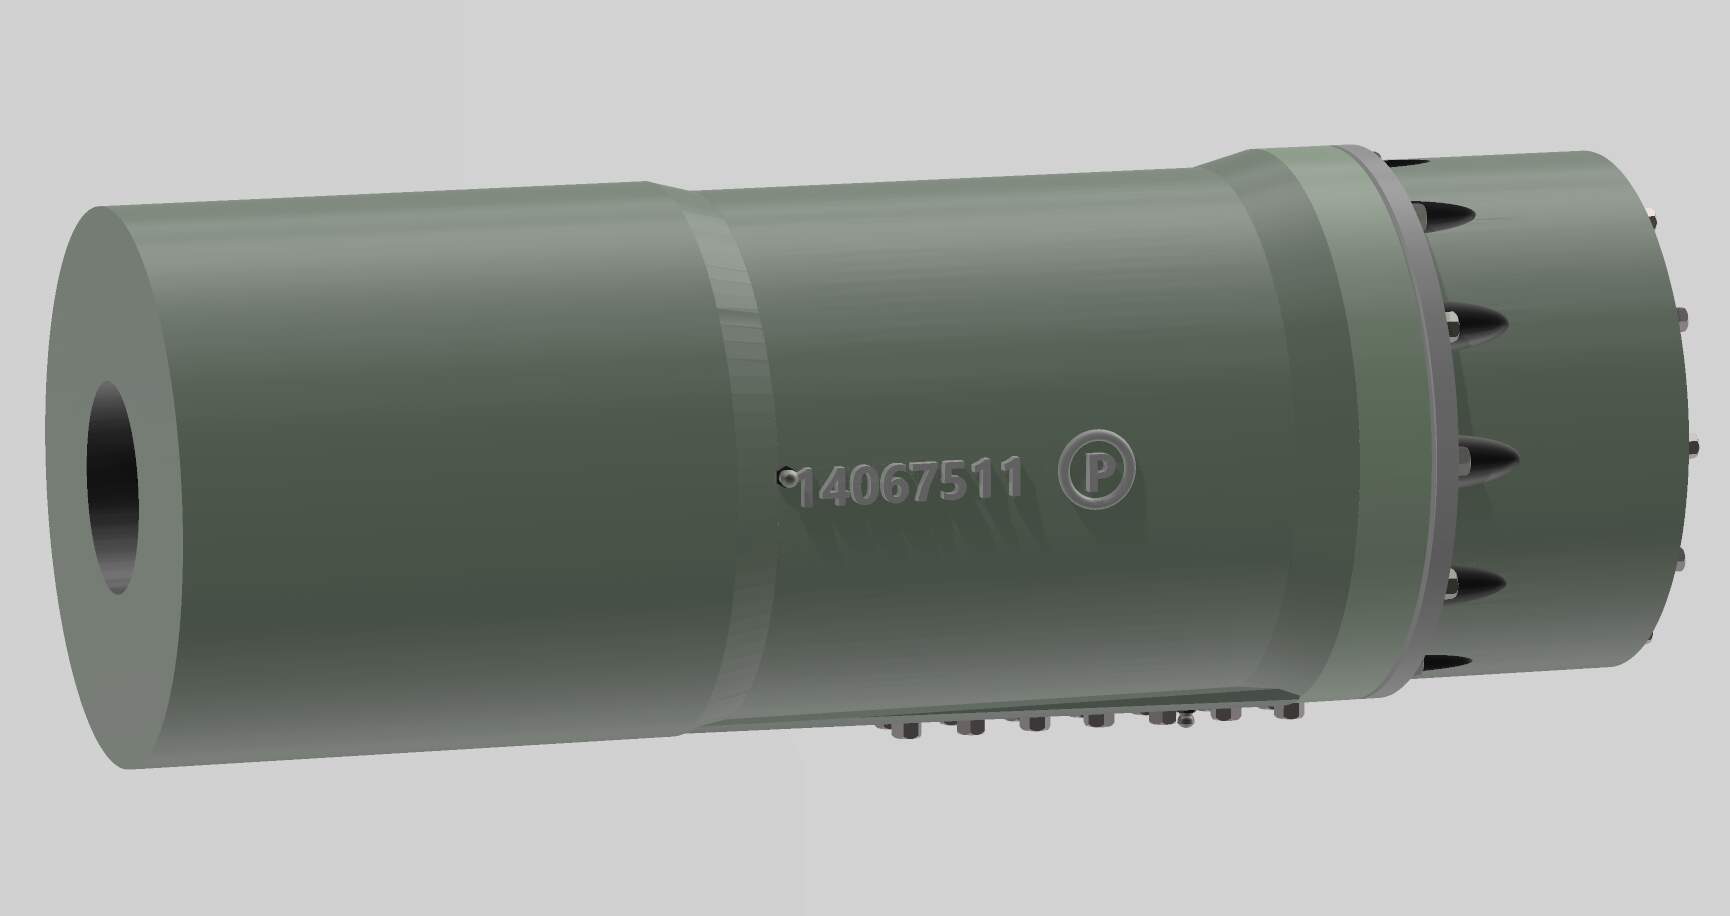
As assembled:


Reference photos used:


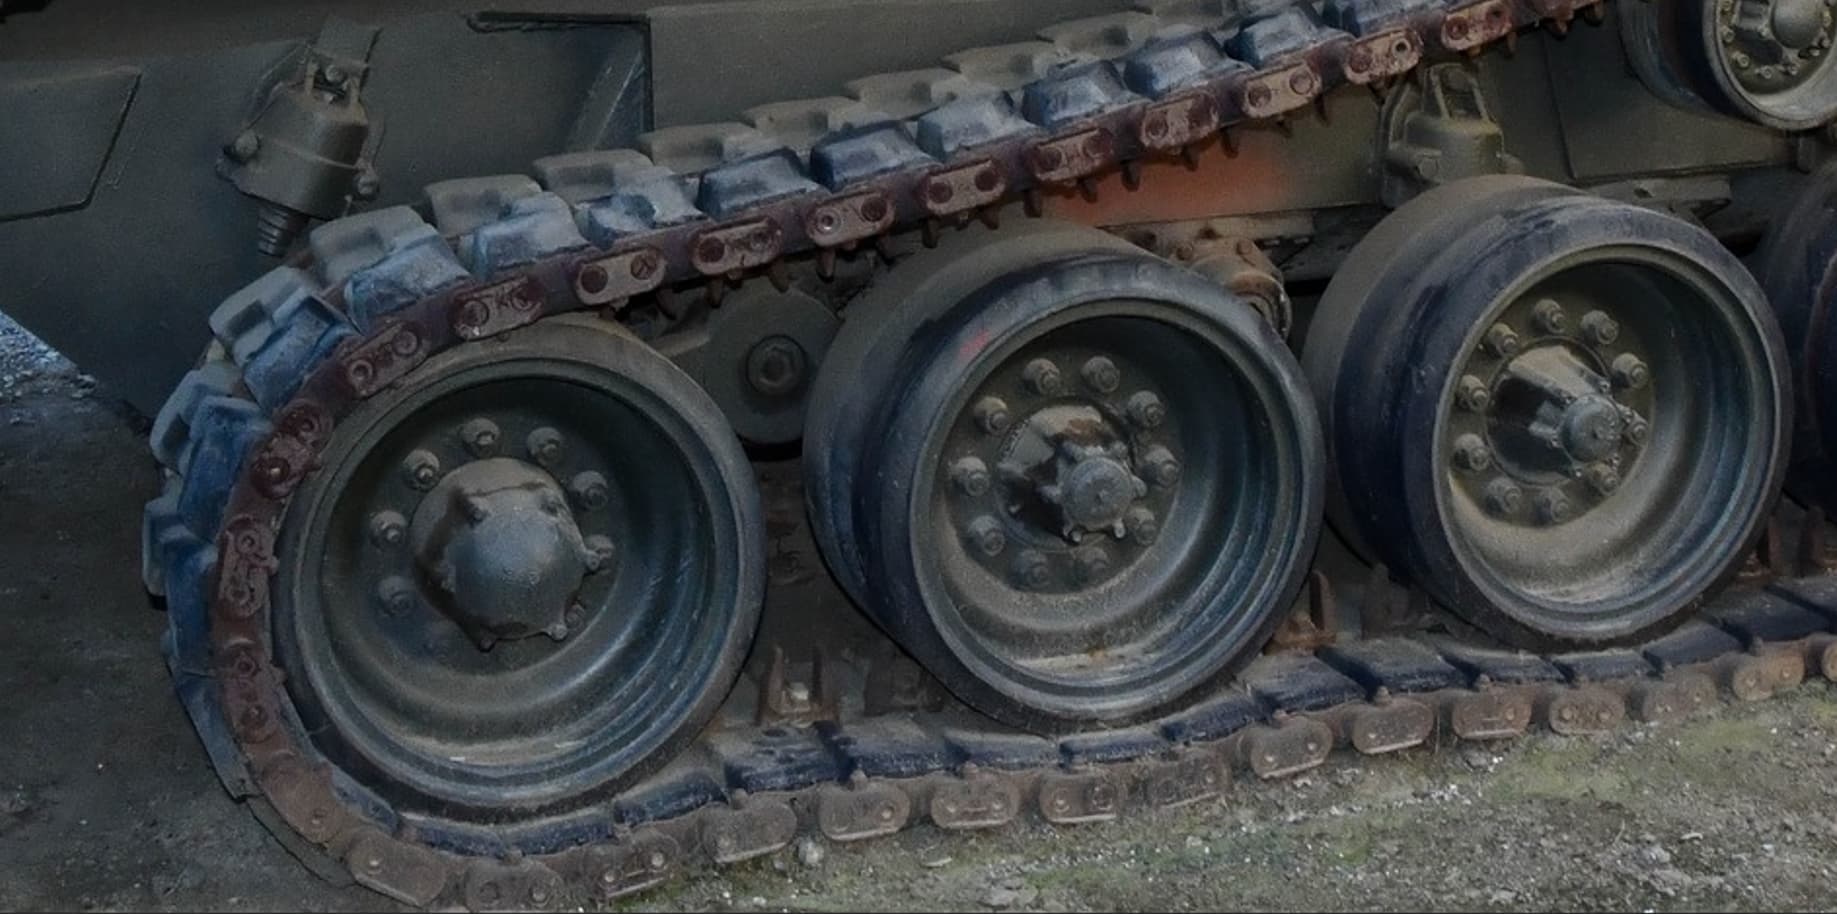
I’m also planning to do these replacement wheels, which ILK screwed up - photo courtesy of Chris Hughes (Toadman’s tank photos); posted for reference purposes only:

6 Likes
The reason for those markings on the machine gun skate ring is very simple; when the gun is locked in that position and facing forward, you can open the hatch without obstruction. Any position behind it, and the hatch won’t open fully. Any position to the front of that point, and the hatch may or may not open, depending on the orientation of the gun.
Since the gun mount is normally stowed in that position, there is no need to mark it.
Ken
2 Likes


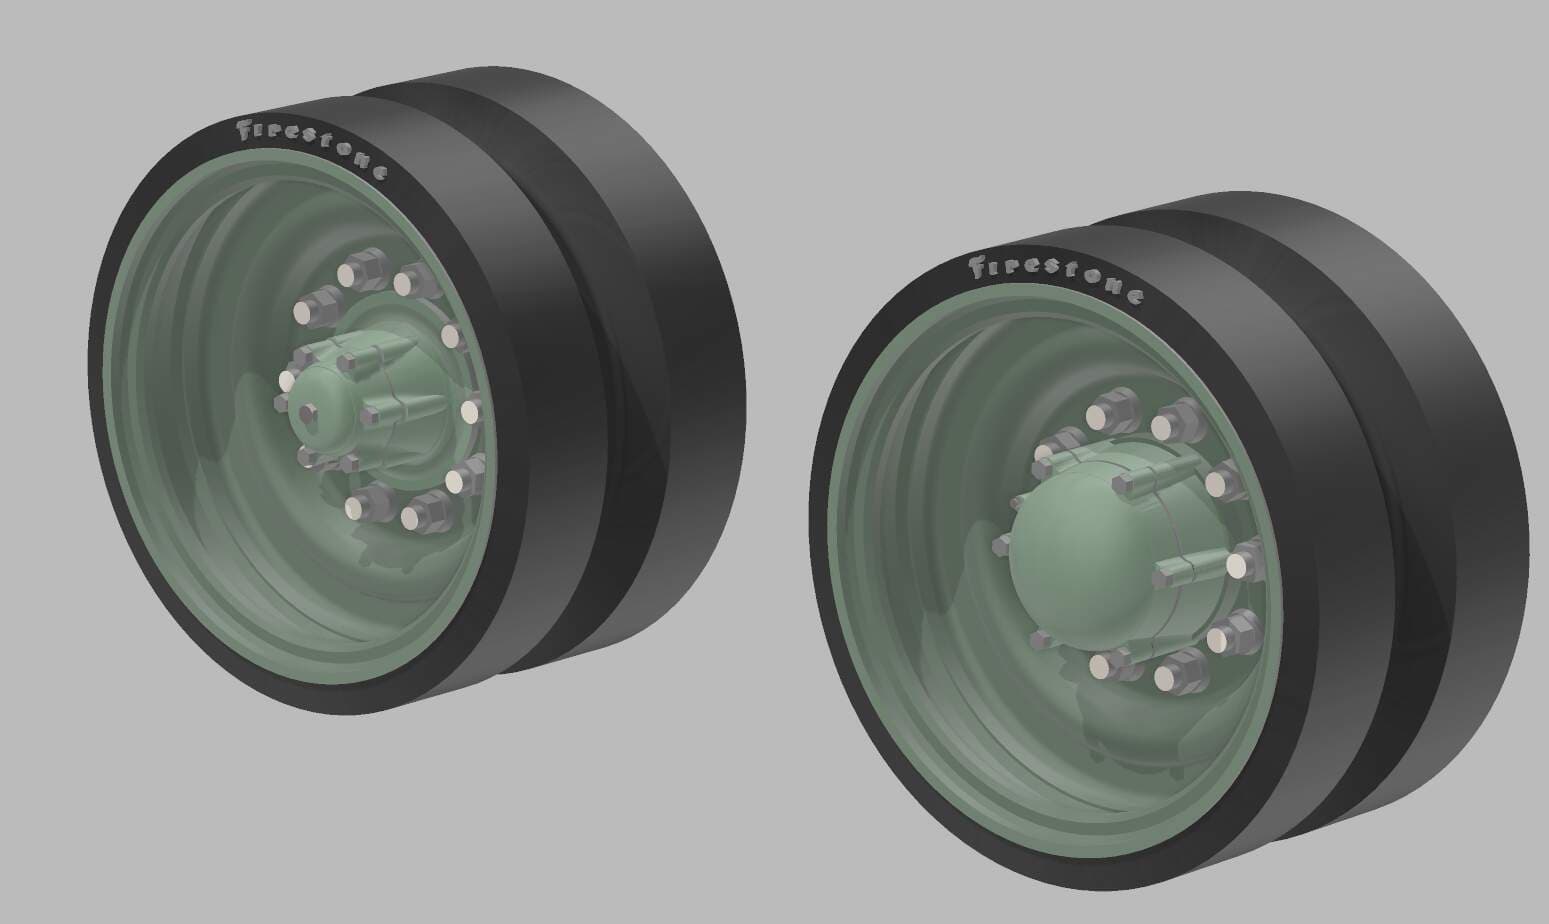
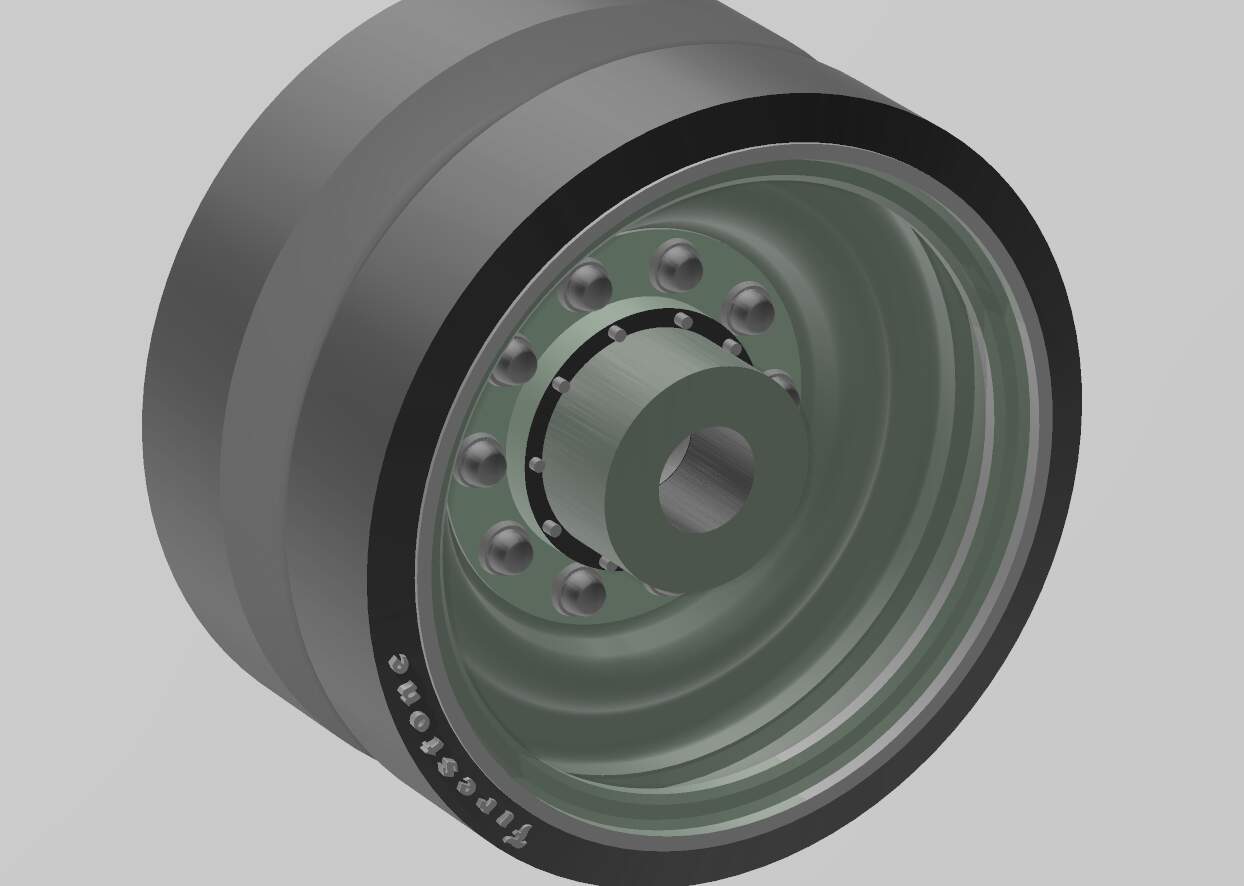
CADs for the ILK M53/M55 in 1/35 replacement wheels are done. 3D printing this weekend 5/17-18.


Reference photos used

6 Likes
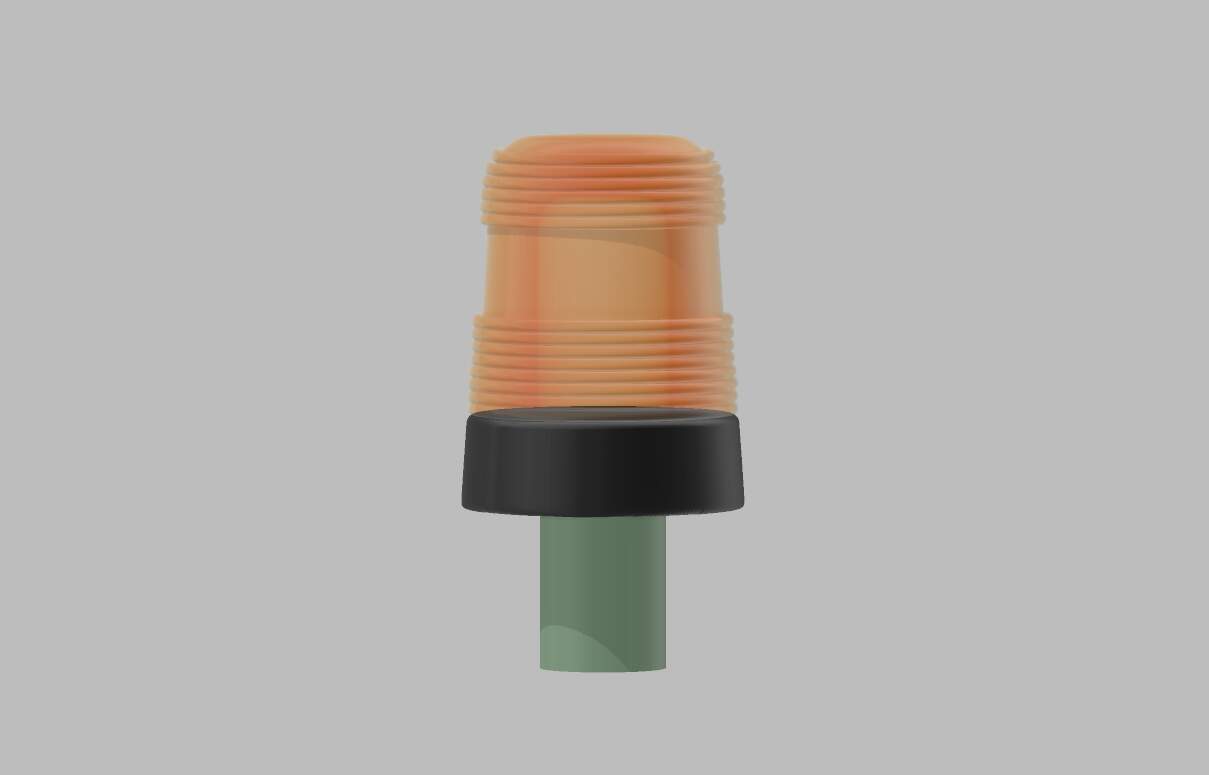
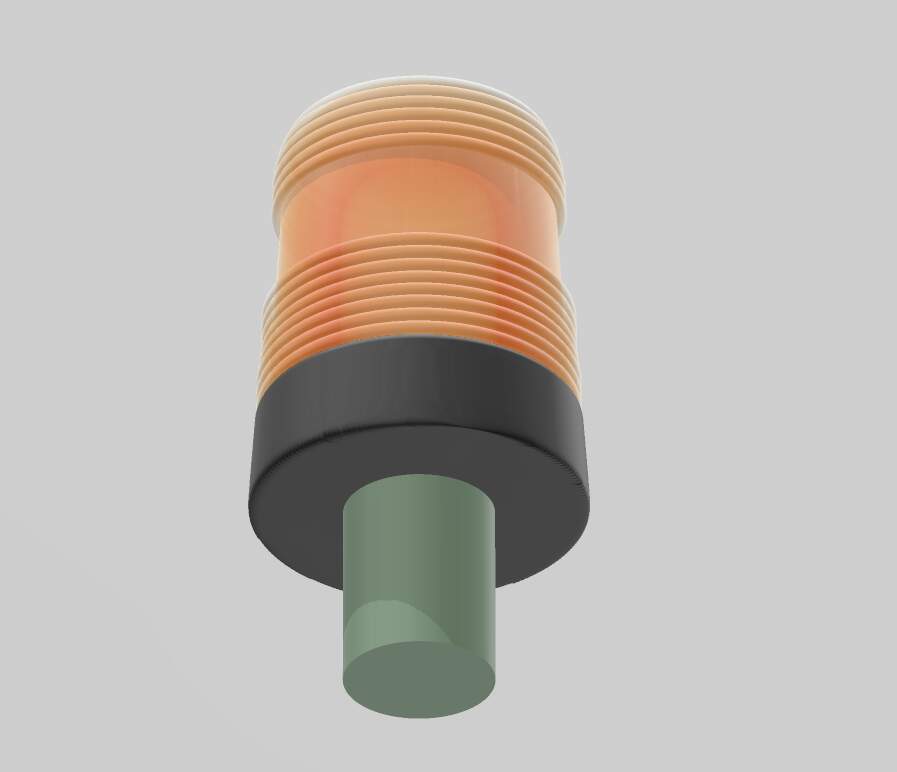
CADded the beacon lights (aka. Whoopie lights) in 3 different shapes for 3D printing. These will be 3D printed in clear UV resin. I hollowed out the inside to give an illusion of a bulb inside.
In 1/35 scale, their diameter is between 4-5mm. The heights are between 5 and 6 mm w/out accounting the cylindrical stands at the bottom.


6 Likes
The big fat version was very common in the '80’s.
2 Likes
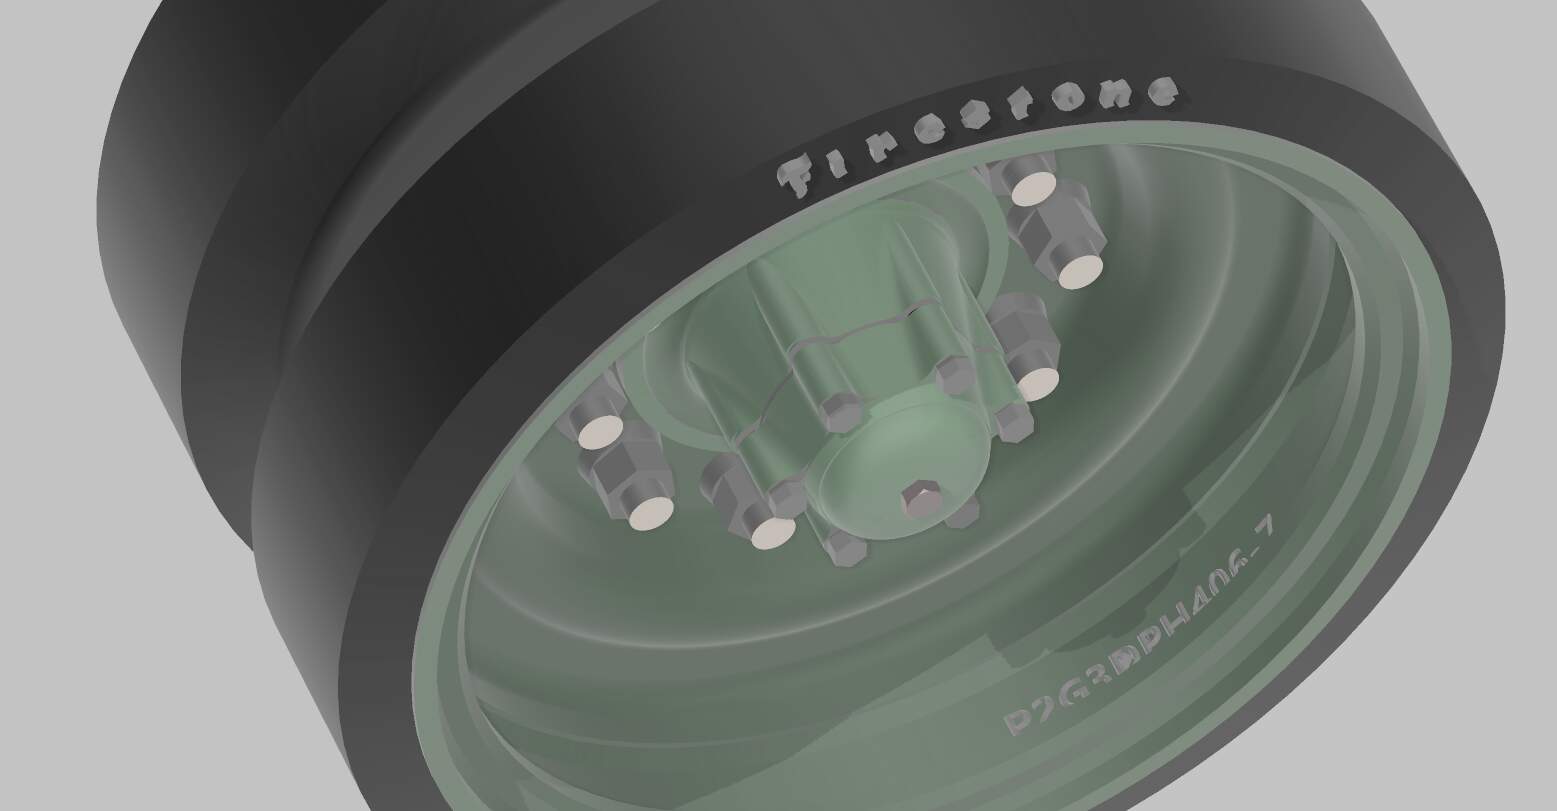
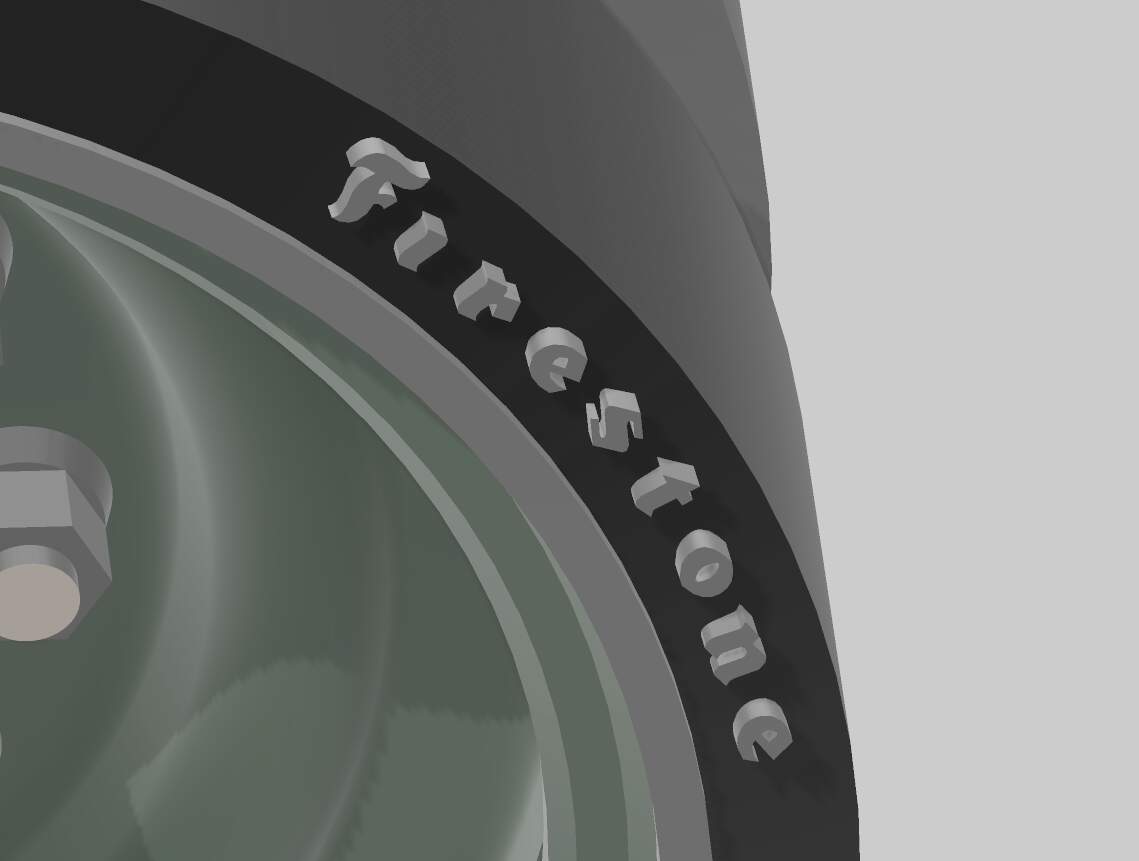
M53/55 wheels 3D printed in 1/35:


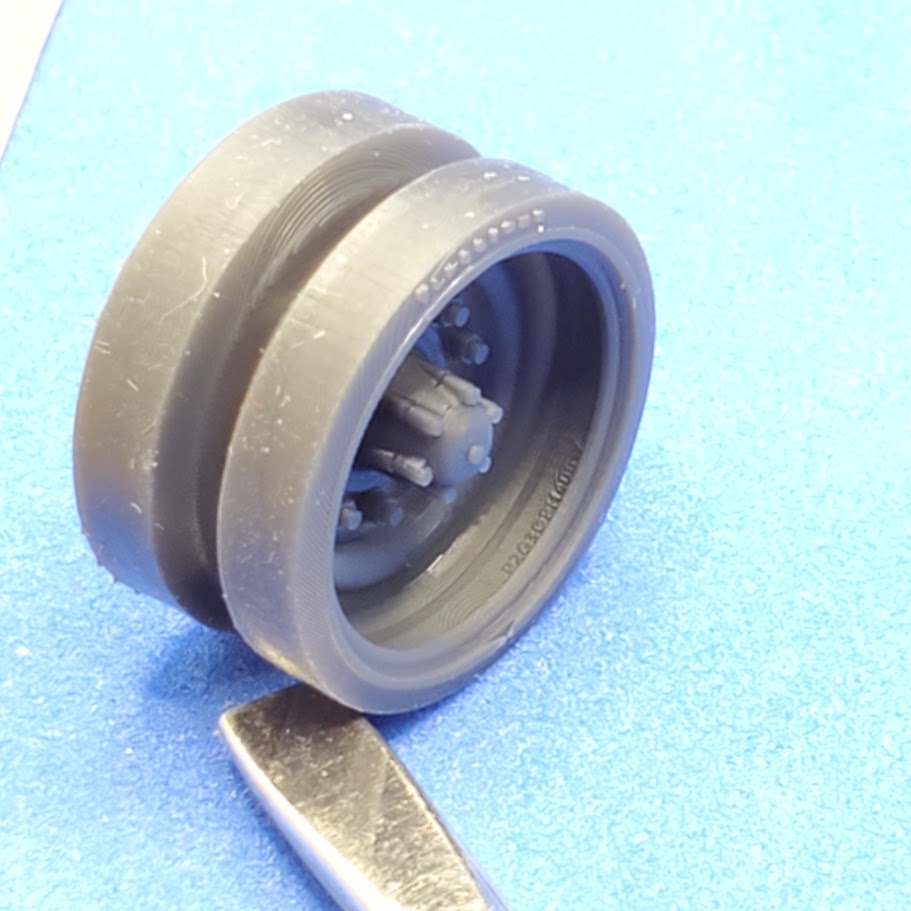
Faint print lines visible at x4 magnification.


The rear where the supports were attached - a bit messy


Embossing came out OK.

12 Likes

@Petition2God : The detail you manage to achieve baffles me every time.
that’s why I split the wheels in two parts. The face that is at the ‘inside’ of the assembled wheel gets the supports for printing. It is easy to clean up, for there is hardly any detail.
2 Likes
where can I get these?
Ian,
Those 3D prints are only available directly through me to the US residents. PM me if interested.
Kind regards,
James
Splitting the wheels into 2 parts to print is a great idea! Thanks Hans.
1 Like
Some FDM action today. 3D printed this shelf to help with assembly and painting later (attribution: Free STL file Honeycomb shelf stackable 🛁 ・3D printing template to download・Cults)


4 Likes