Thanks Mark! I need all the encouragement I can get.
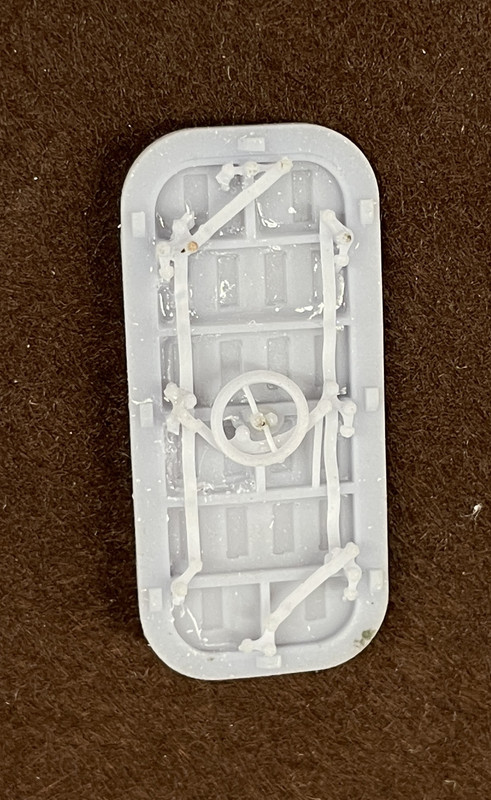
I finally unloaded that batch of QAWT doors and they did come out pretty well. The handwheel cross bars are almost too fine to hang together, but even there I did get some successful ones. The operating bars are so thin they’re kind of floppy and if I were to do them again would make them about 2X thicker. As I’ve said before, real world material sizes sometimes don’t translate successully to the model especially at 1:48 or smaller. Regardless, I’m happy with them. They will work and I don’t know where to put them in the model. It gives me confidence that any other doors I produce will work.
And the flip side. All the major supports were on the front side and the only supports on the mechanism side were supporting the dog rollers and removal didn’t damage anything to badly. I hadn’t don final sanding on the edges.
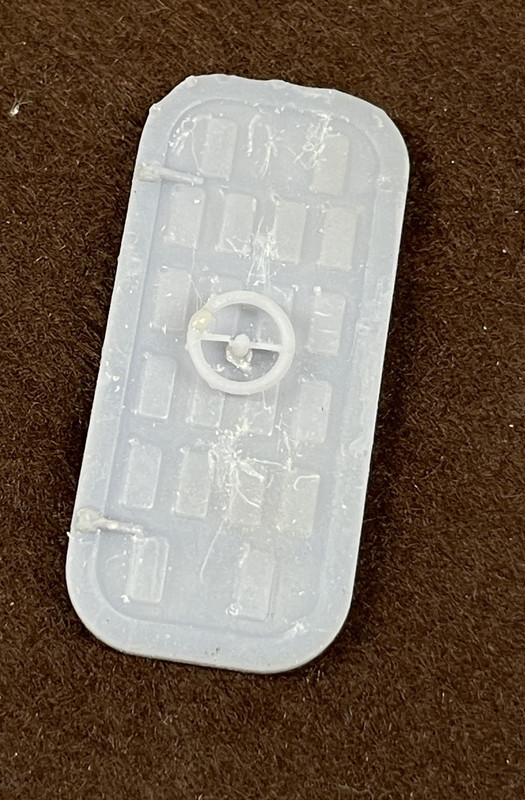
And here’s the second one I cleaned up. I still have four more that I haven’t trimmed that are in the spares box. This one did have the edges sanded. When primed and painted they should look pretty spiffy.
When I woke up this morning and did my usual model ideating, I realized that I could use the backing plank that I use for the ladder rungs as a drill jig to add them manually. The correct spacing is 11.5" and I had arbitrarilly a little over 13". I redrew the layout to have that spacing and set it up for printing.
Then, this afternoon, I put the back wall in the printer. 6 hours later here’s what I got. It wasn’t totally bad, and, in fact, since it’s quite an unusual piece to print, I’m not too upset, but there were some weak points.
Here’s as it came off the machine looking at three views. I had removed some of the supports around the delicate details, but did not post-cure.
On the left corner there was some distortion. I don’t know what cause it, but it’s usually a support failure. I will have to evaluate whats going on in the slicer. The handles and steps all formed nicely.
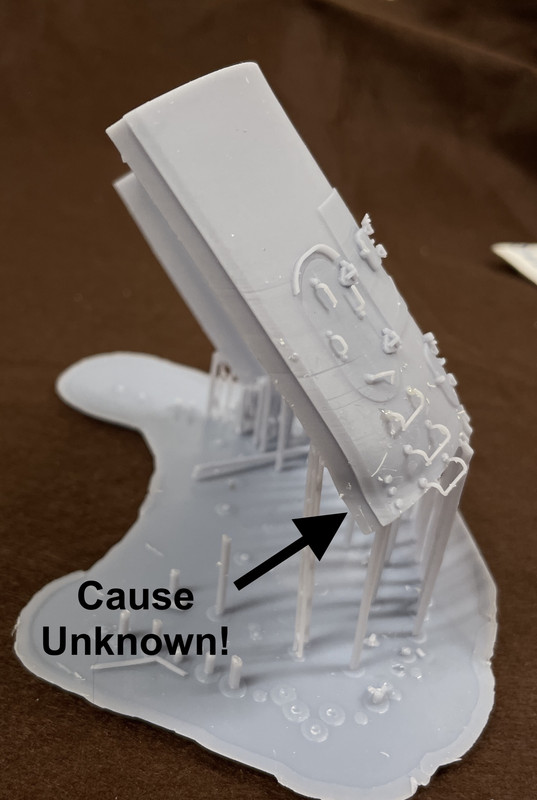
Note the delamination of the base raft! That’s also strange showing there was good adhesion to the build plate. Could be too much attraction to the FEP.
No distortion on the right side!
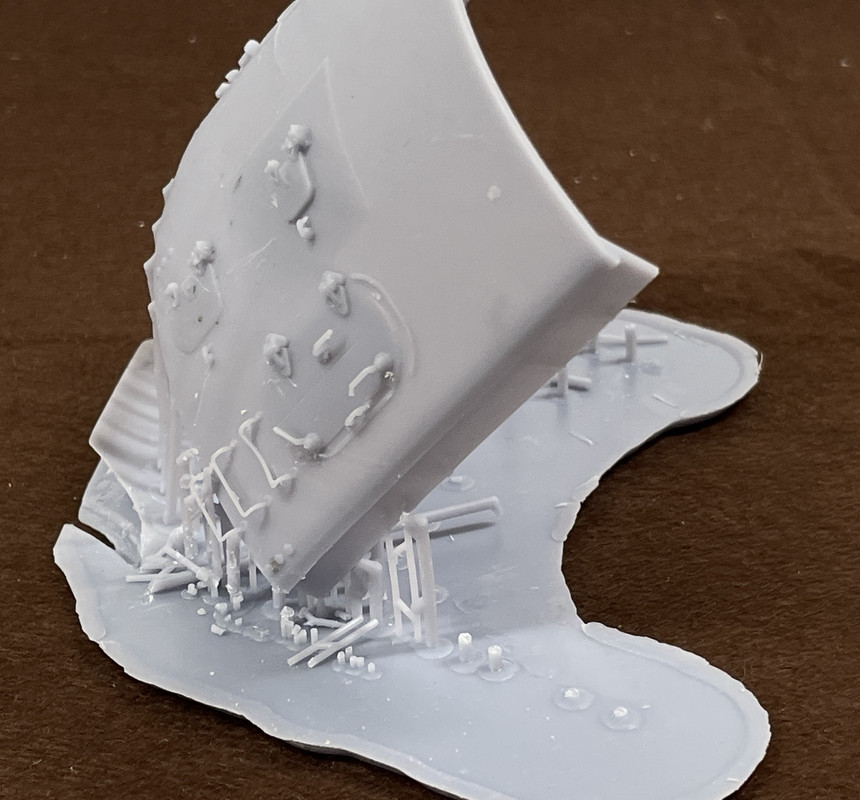
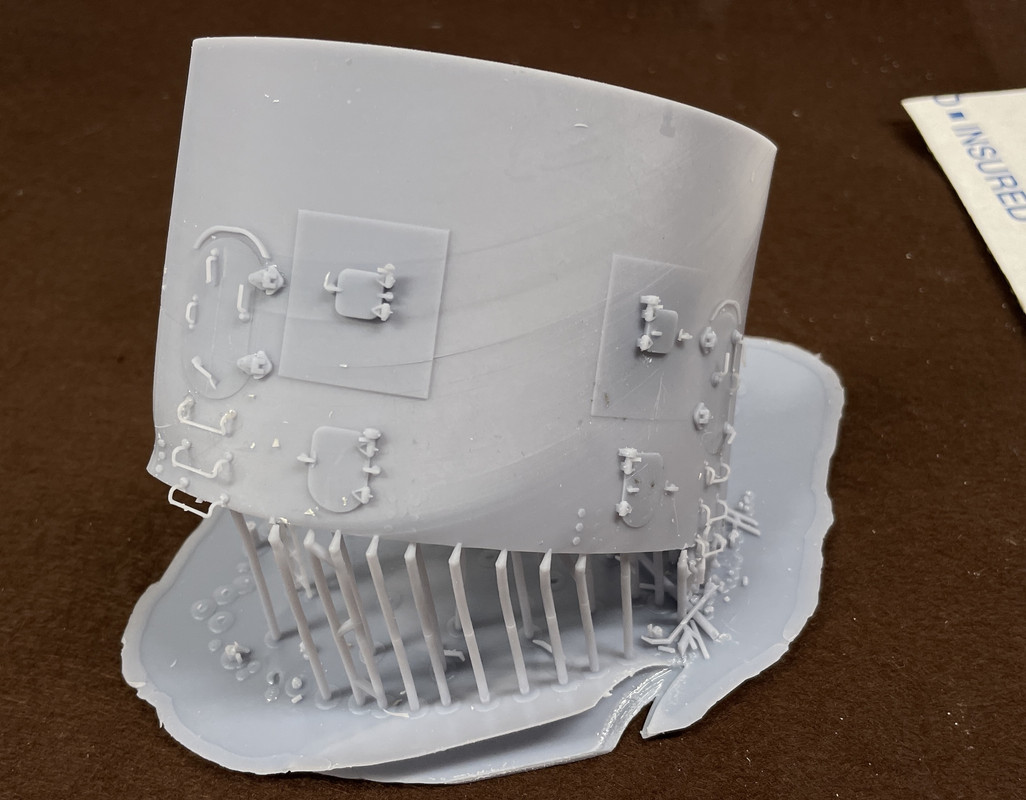
And the back. Strange things were going on in the back.
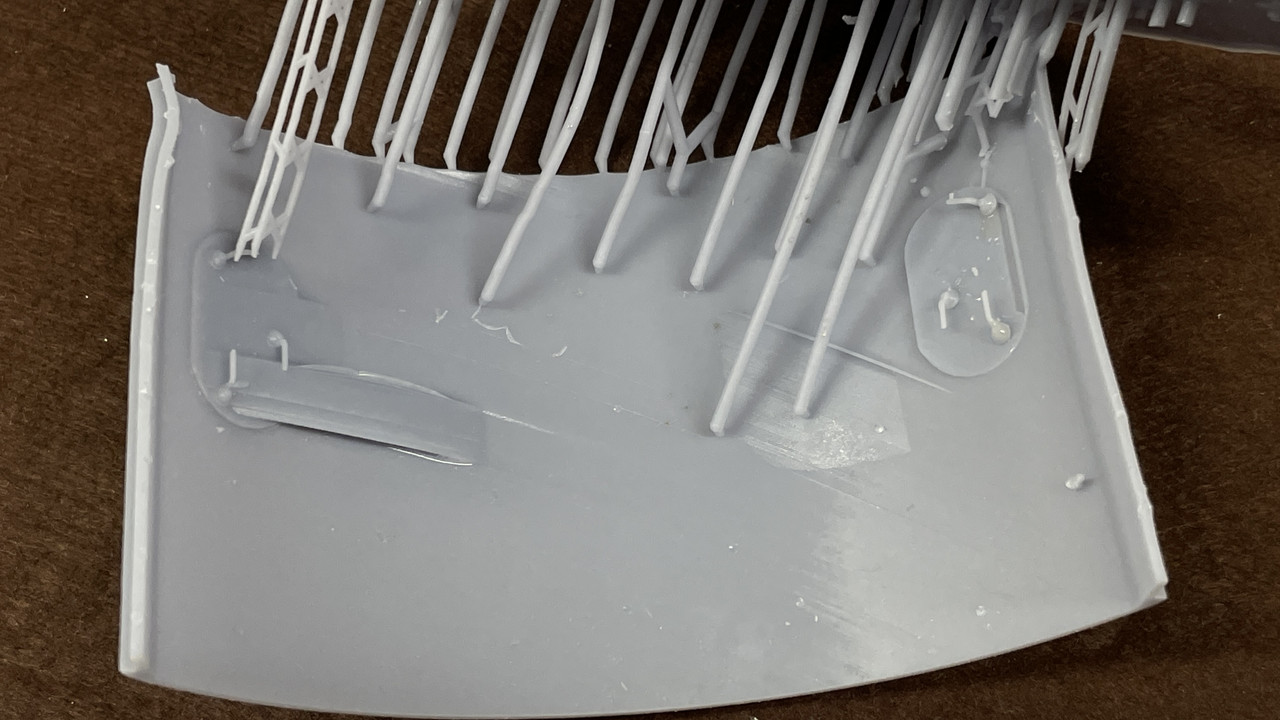
Some remarks about this…
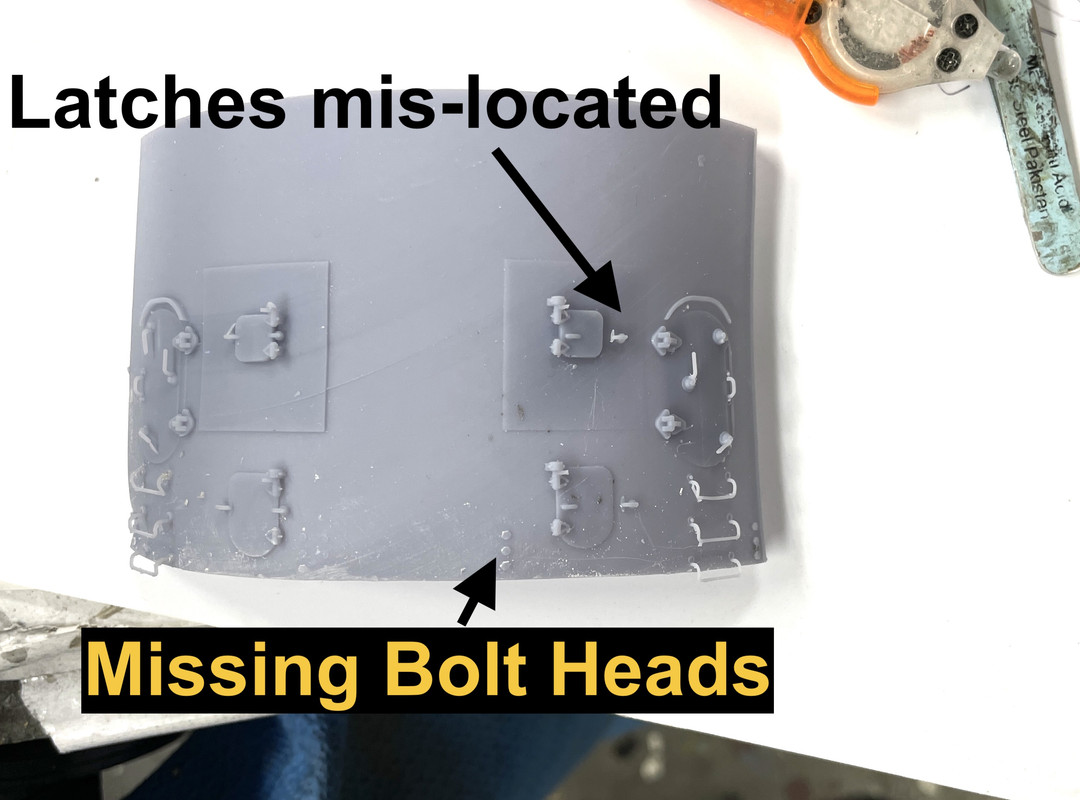
I thought the drawing was finalized, but the latches on the right side cartridge chutes moved out of position. The center section bolt heads are not there. That too is a drawing error.
BTW: As predicted, I already broke those bottom two foot rungs. I will have to add them late in the build and maybe make them out of metal.
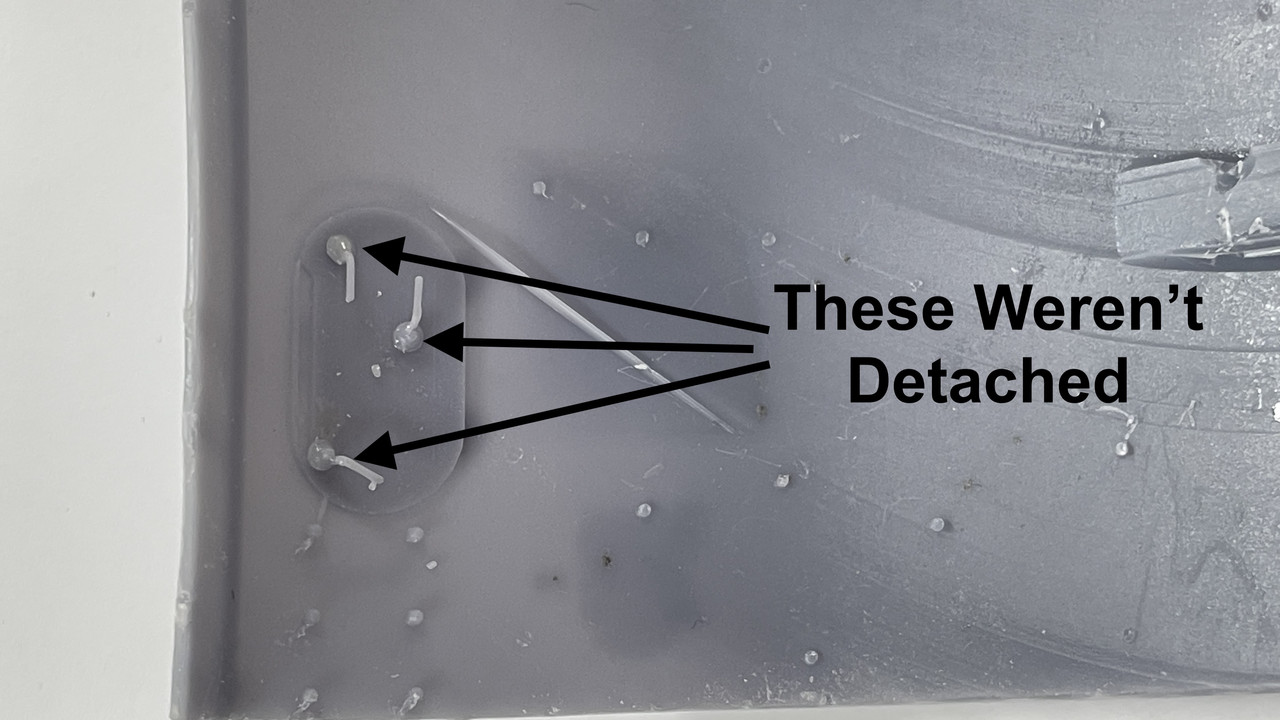
In the back, the right side latch dogs were not attached to the surface. Remember was I was saying about have to be sure their embedded in the drawing. Well… I guess these weren’t. I was able to put them back using Bondic, but I’m not keeping this part for the model. It’s going in the scrap box and will be used for parts if necessary.
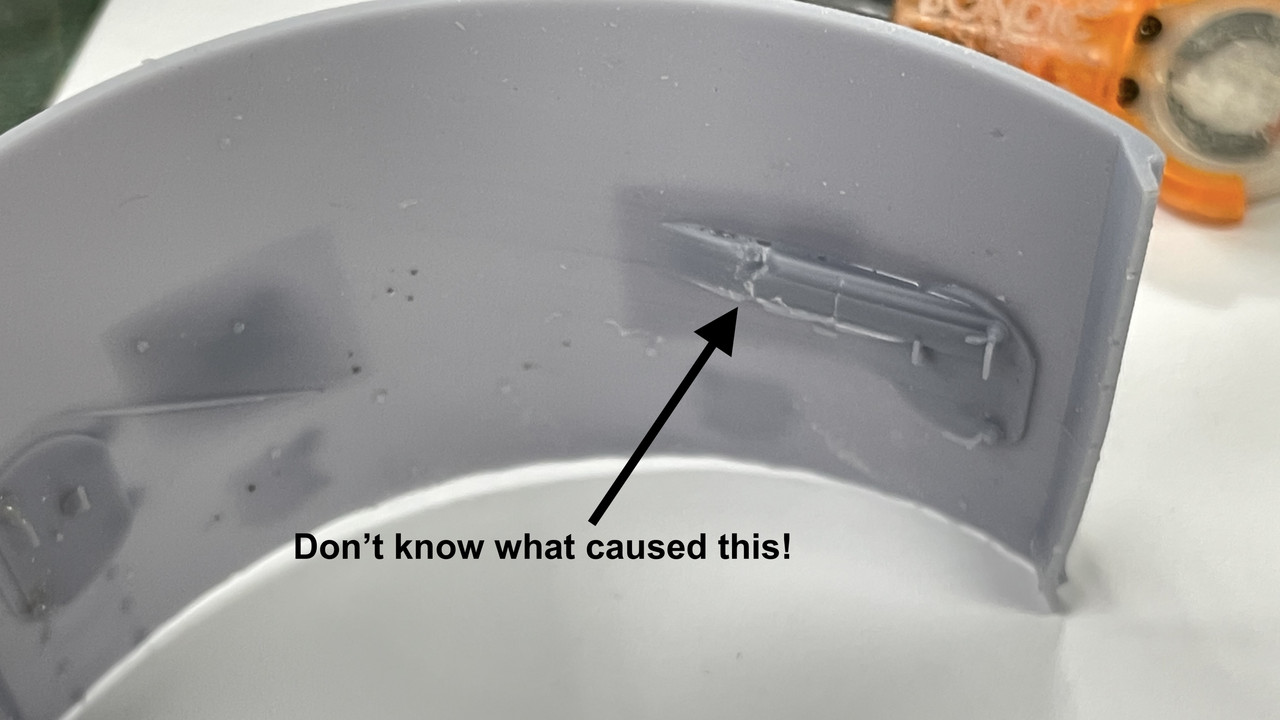
And then there’s these malformations. I’ll have to explore this defect. Because it’s actually more material, I can grind it off if I need this part.
I now have the powder handling doors in the printer. They’ll be done about 11 p.m., but I’ll get them tomorrow. If they come out as nicely as the QAWTs did, I’ll be happy. If I can’t get the curved wall to print effective, I can print the add-ons and build it out of styrene. There’s always a way!