Are you keeping the second set of mufflers?
1 Like
Hi Robin. Yes, the second set will stay. It will keep the cabin nice and quiet for the high-paying clientelle in the back, plus I just don’t have the motivation or energy to dig that much deeper into the underside modifications when it will probably never be seen.
Thanks for checking in mate.
Cheers, D
3 Likes
Excellent progress and mod skills, D. Yeah, those FB builds are WILD 
2 Likes
D,
Now that’s a great plan for sure. Looking forward to seeing you execute it to perfection.
joel
2 Likes
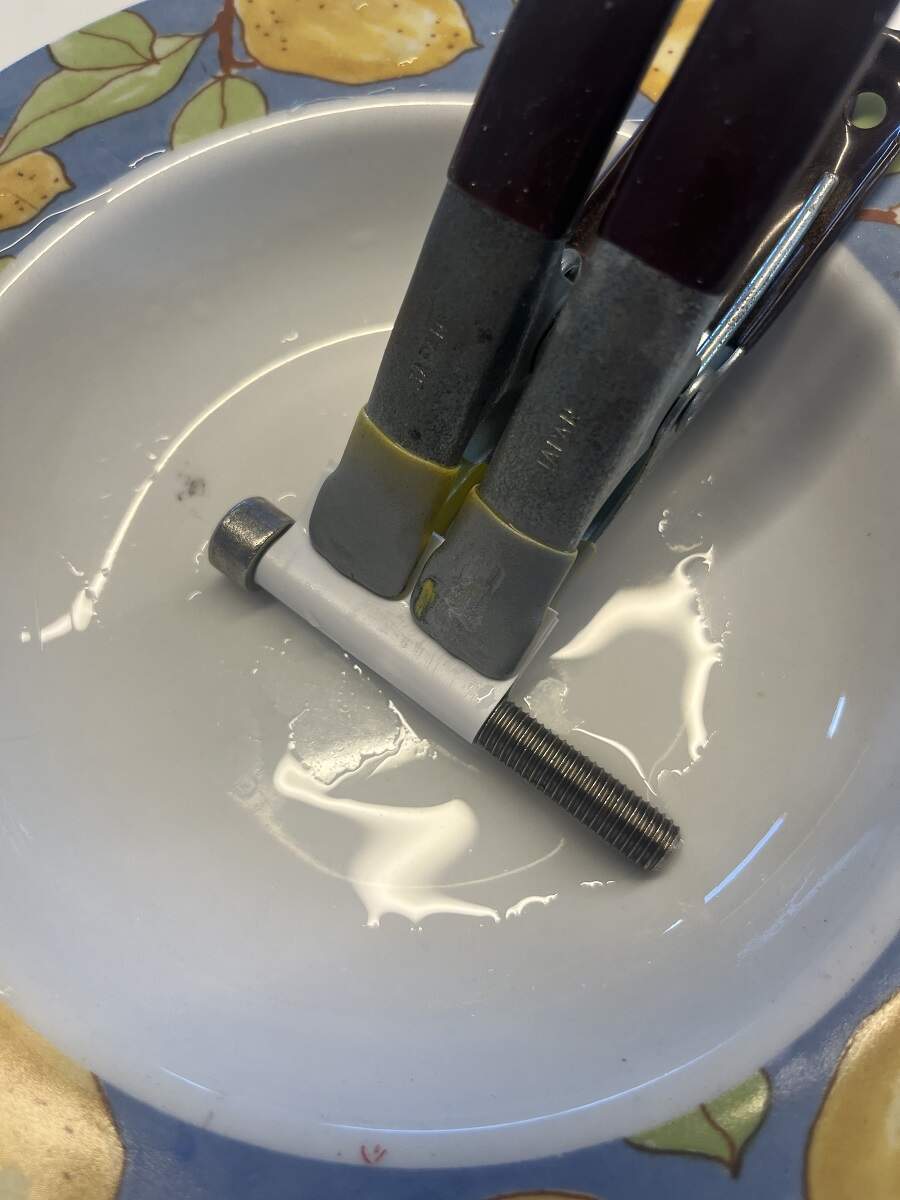
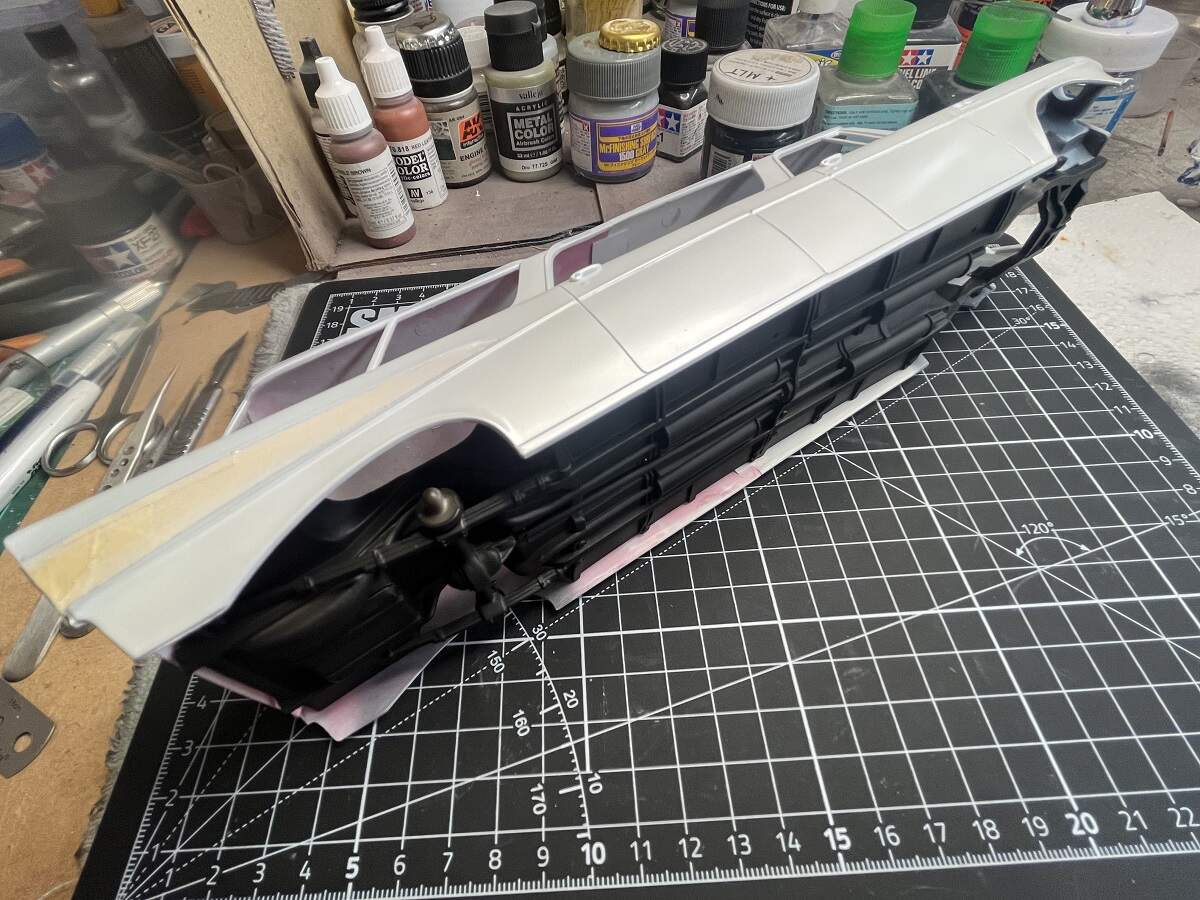
Time to get back to this build. I built up a basic frame and bearing a while back to extend the drive shafts. I couldn’t source styrene tube the right diameter for the transmission tunnel, so I found a bolt, wrapped some sheet styrene around it and clamped it, then immersed it in boiling water and let it cool. I had to do this 3 times for it to hold its shape but we got there in the end.
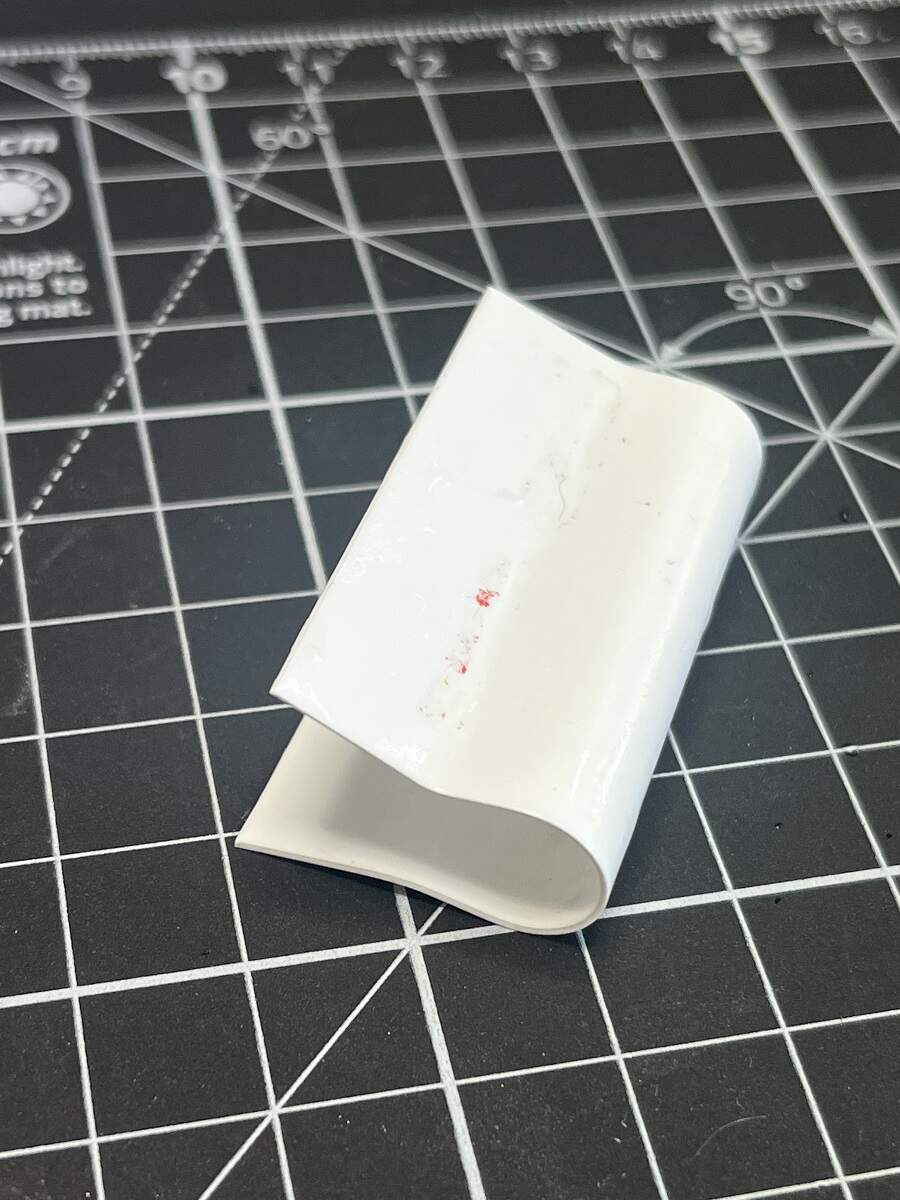
I framed out the missing section on the floor pan with some styrene angle and strip, then trimmed and fitted the tunnel piece in place.

It’s rough and basic, but once the drive shafts are in place and it’s all painted black, it will do the job. Besides, nobody will really ever be lying under this thing looking up!
Cheers, D
8 Likes
Clever piece, of scratch building D.
2 Likes
D,
I’ll 2nd what Jesper said. The drive shaft tunnel looks darn good.
joel
2 Likes
Thanks for the feedback guys, much appreciated as always.
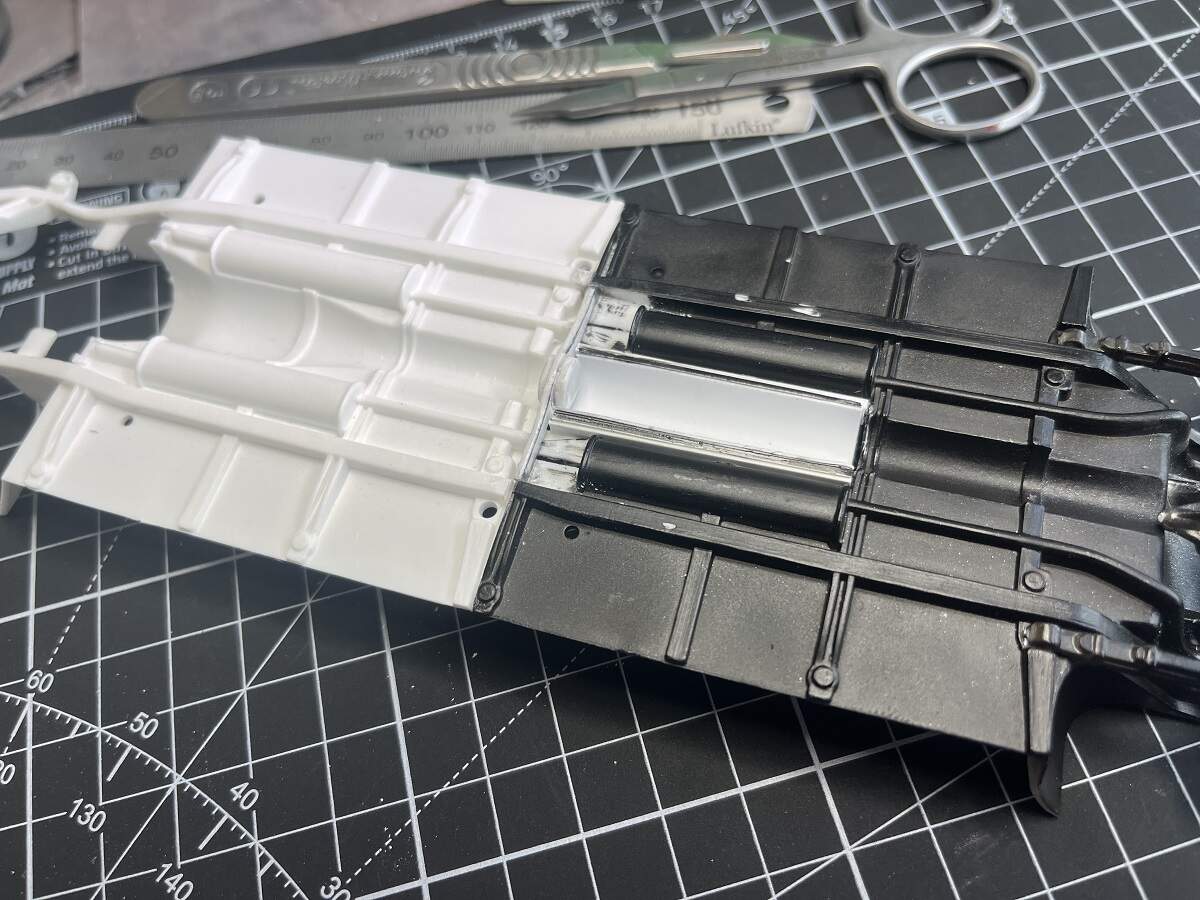
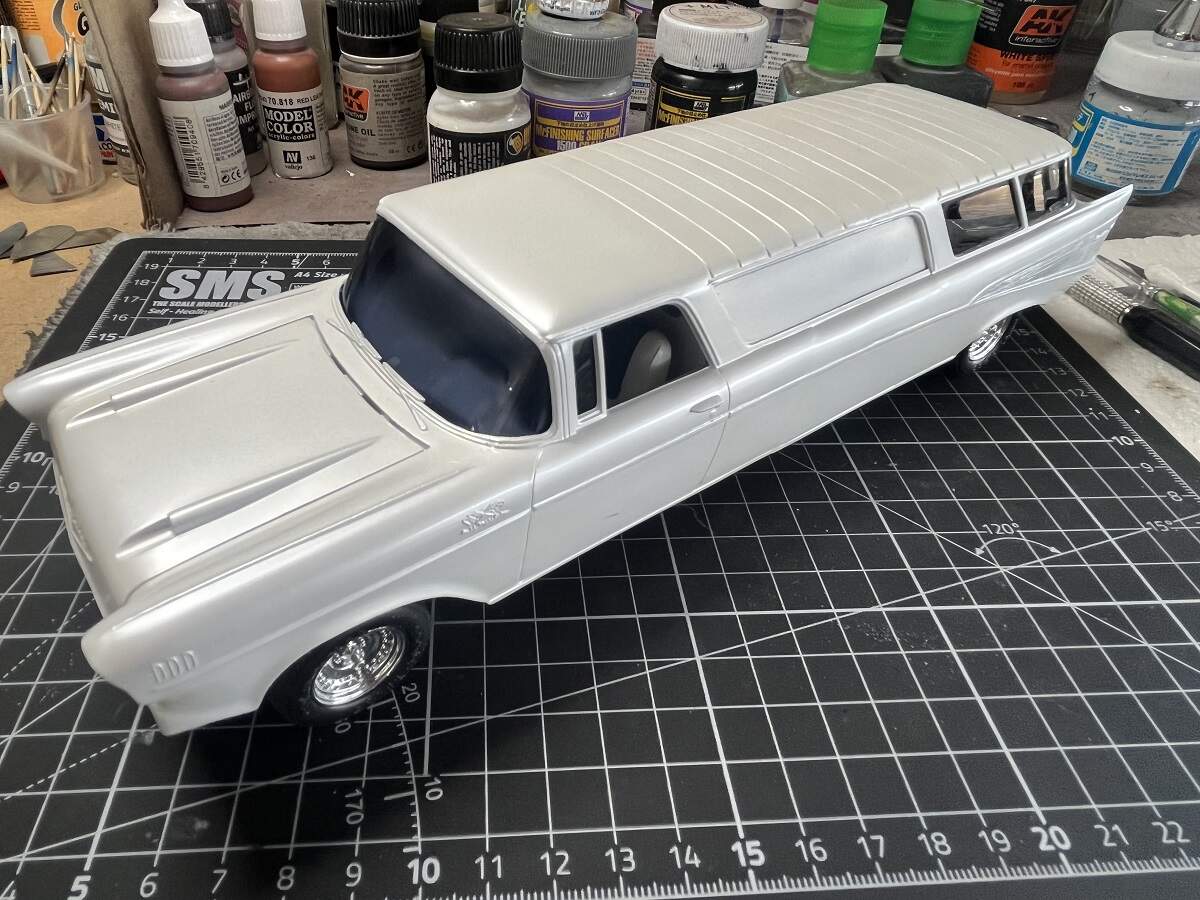
I refitted the short sections of tailpipe in front of the second set of mufflers, scratched up a rear drive shaft from some scraps, masked off the fuel tank then re-primed the whole underside.
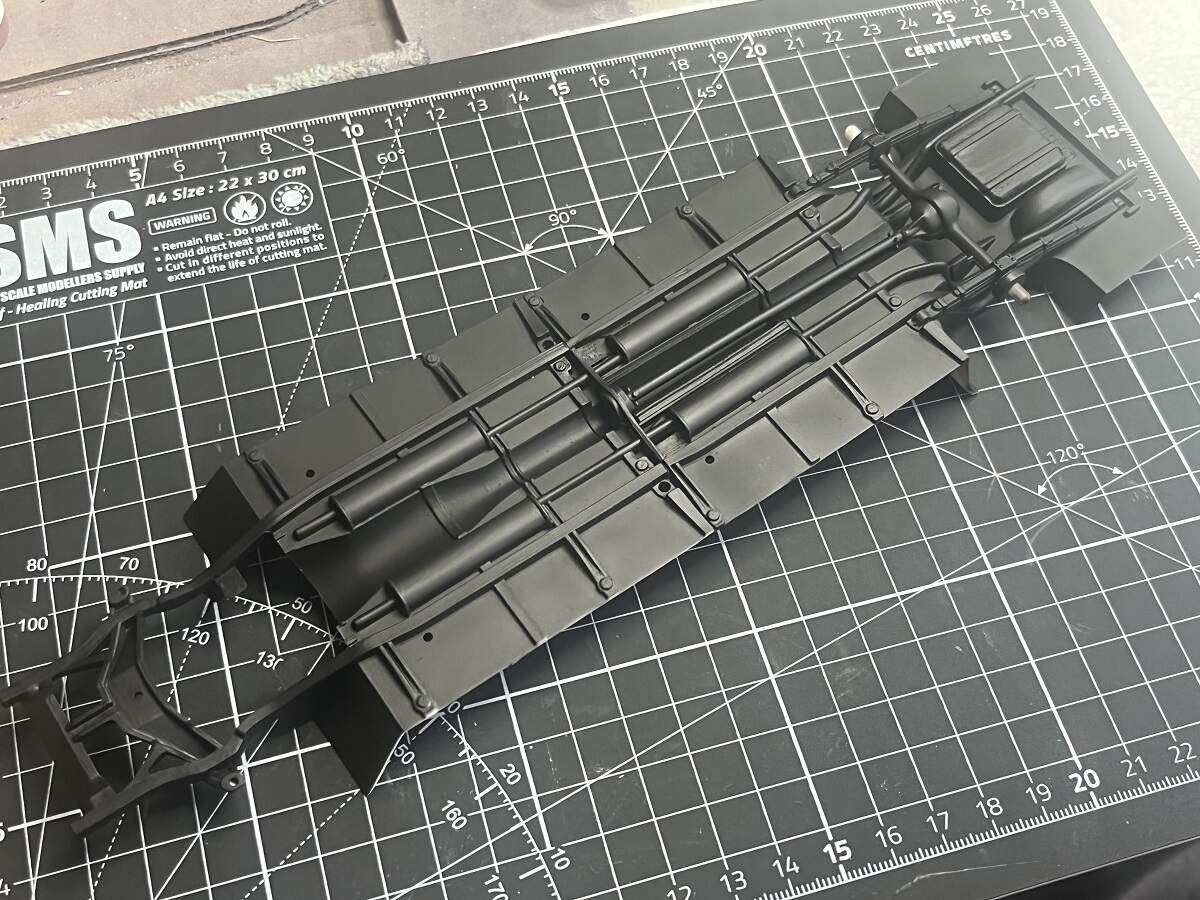
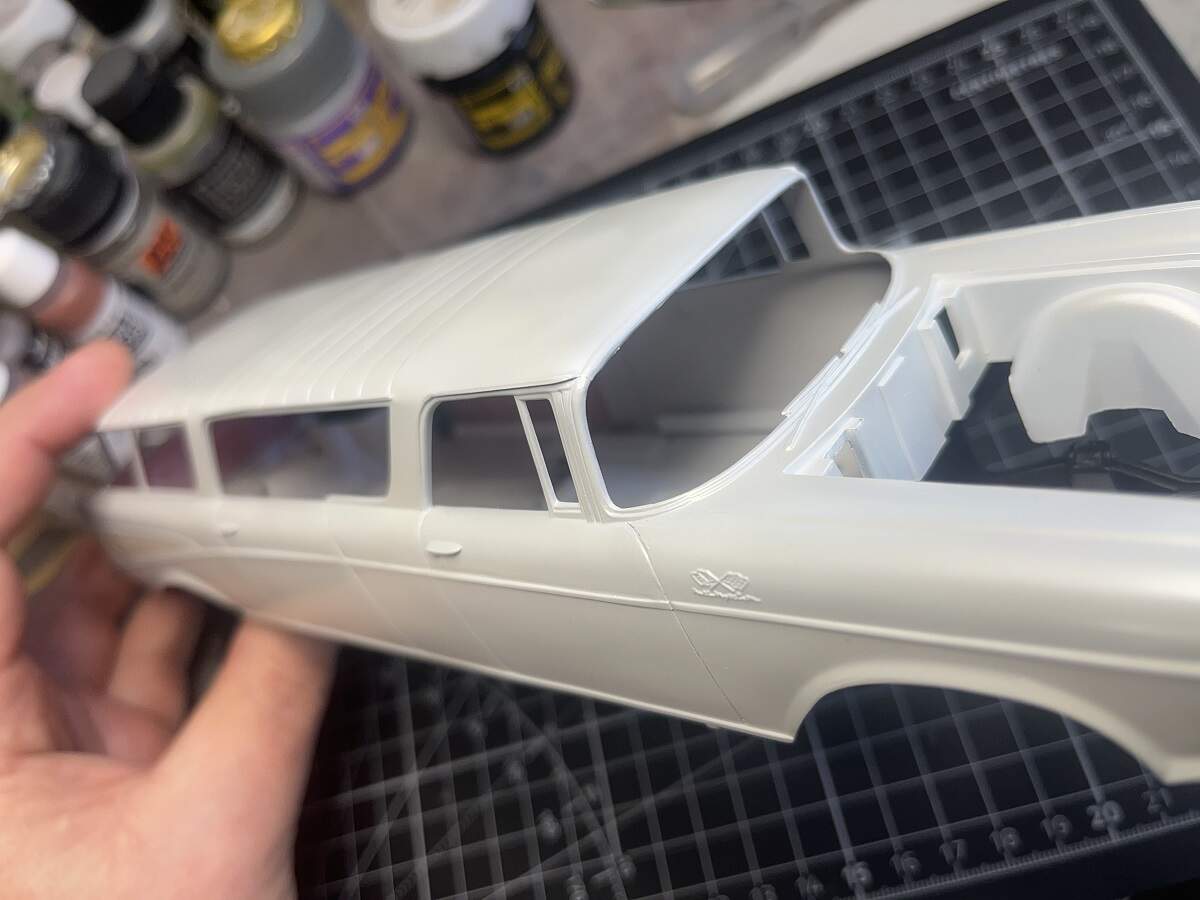
Test fitting to the body, the axles line up nicely with the wheel arches. I will need to place some blocks on the inside of the body to properly align the floor pan with the bottom of the shell and give it some strength.
Cheers, D
7 Likes
Looking great Damian. The body is looking very smooth. Your scratch building is working out a treat.
cheers
Michael
1 Like
Amazing work, D! Really clever made scratch work  And it looks indeed really smooth all the way across the globe here in Germany …
1 Like
Check out micro mart,part#86118, mini sand blast gun set
1 Like
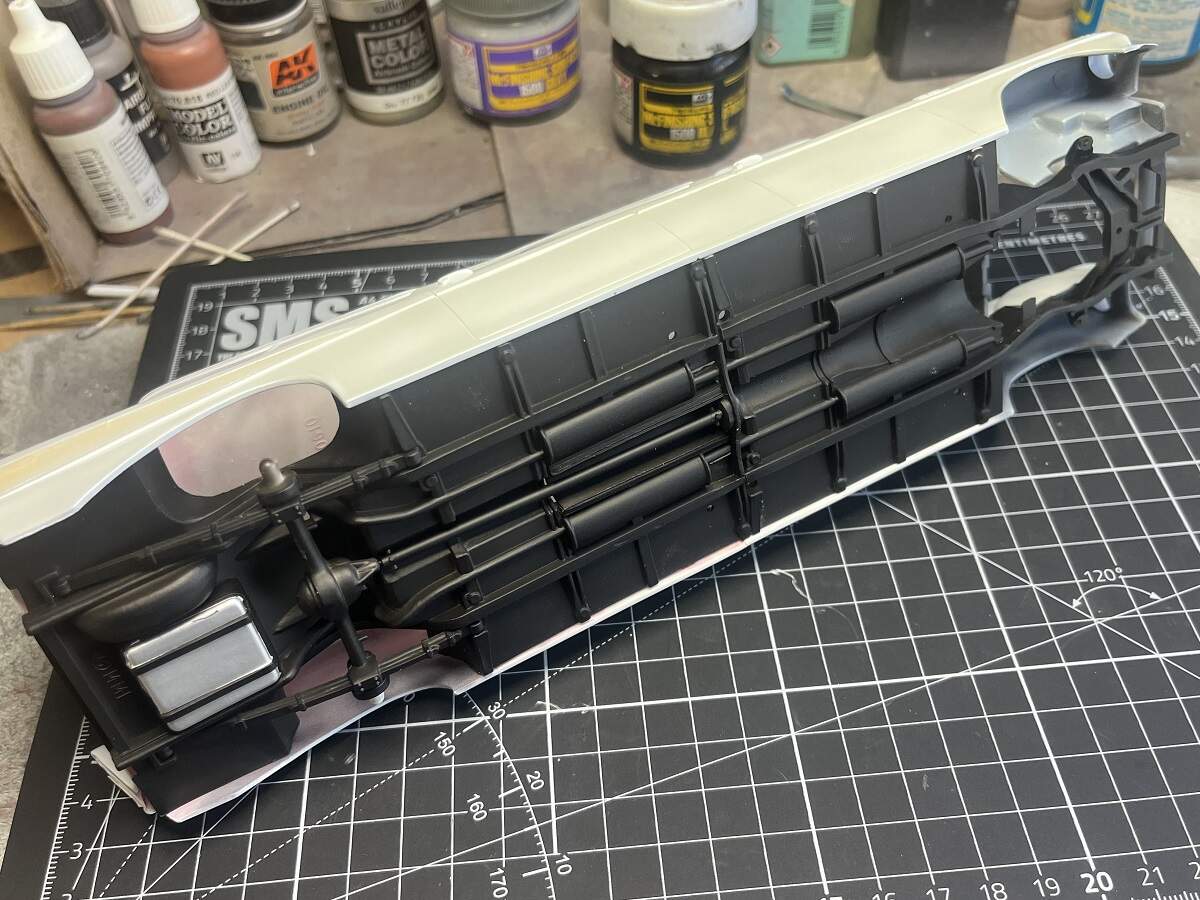
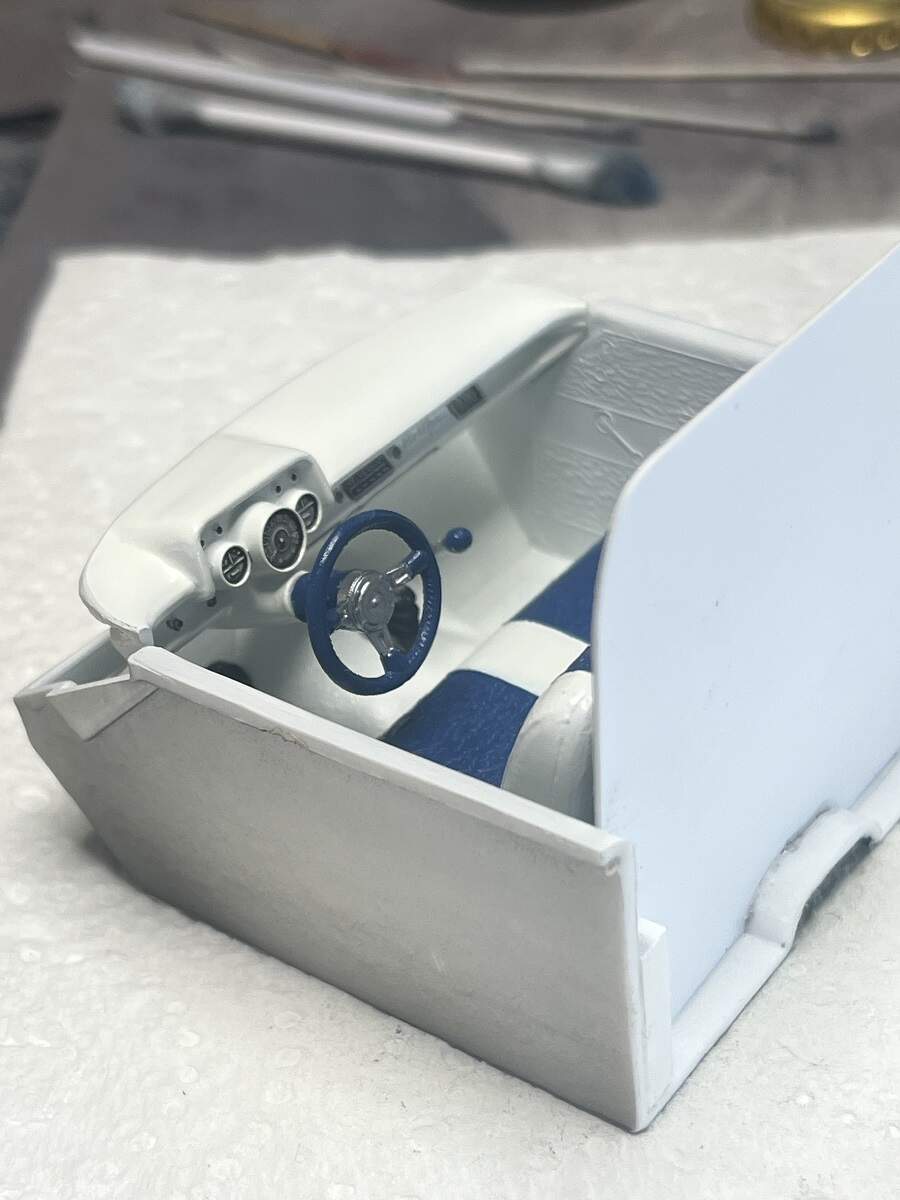
Working around with getting a neat and secure mount for the underside on the 2-Mad. I installed some 3x3mm square strip inside the shell for the floor pan to butt up to, happy now and time to move on to the drivers compartment.
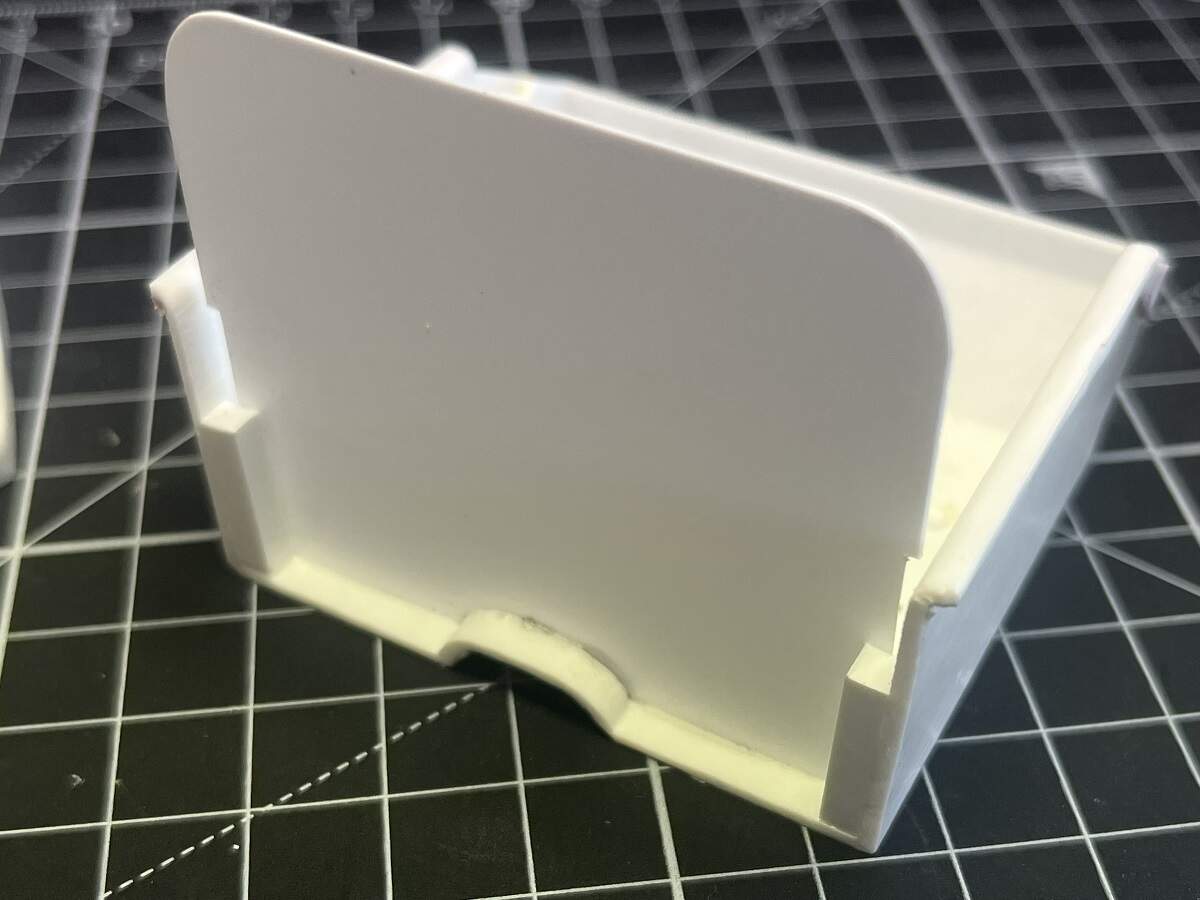
I removed the rear end of the interior tub as it won’t be visible, and fitted a basic wall behind the front seat. I will add in a small window and frame, and with some more test fitting get a neater fit of the wall inside the main body by adding a strip around the outside.

Cheers, D
3 Likes
Those 3X3 strips help establish assembly positions greatly. When scratch building it often becomes various ‘house of card’ subassemblies until you find those final mating joint positions.
2 Likes
Indeed, this is a great learning project for me! I have very quickly discovered that you need to be looking 4 or 5 steps ahead and test fitting to uncover those tripping hazards.
Thanks for checking in KSO, much appreciated!
Cheers, D
1 Like
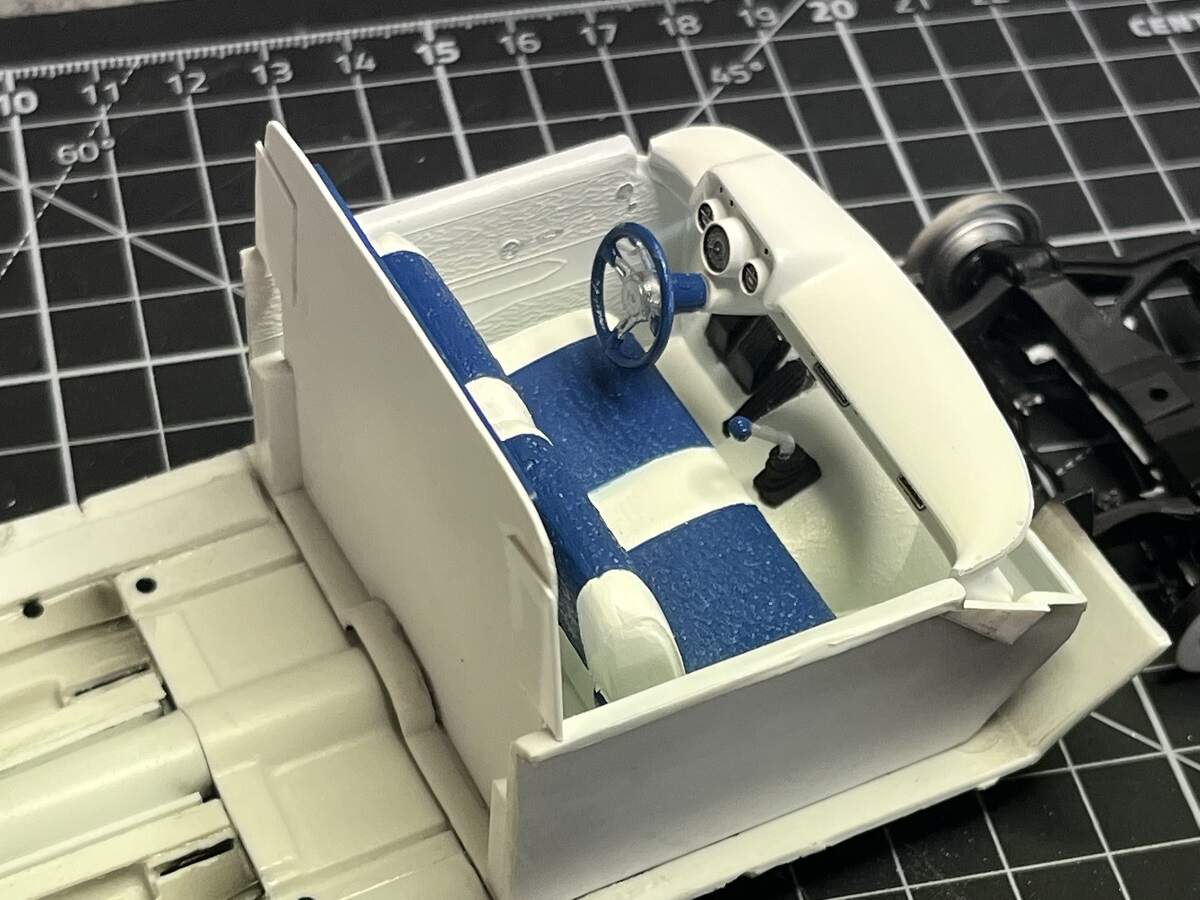
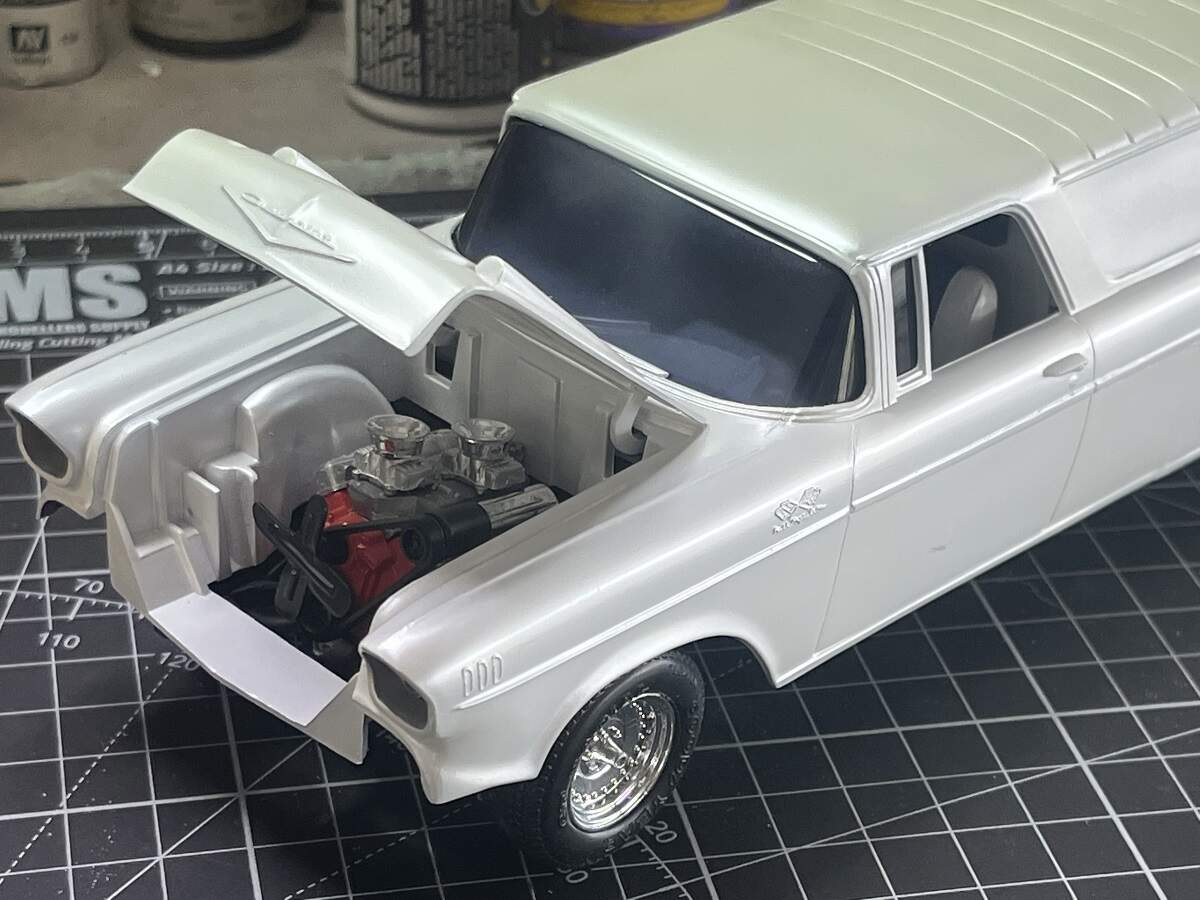
While I had the blue out for the '51 Chevy build, I thought it would make a nice splash of colour in the driver’s office on the Limo.
Dry fit of the seat and dash to see how it looks, I will leave them out until I’m finished with the rear wall.

Still some touch-ups and detail painting to do on the doors.
Cheers, D
3 Likes
D,
Love how you decided on leaving out the passenger compartment as the blackened windows would make seeing the interior a no go. As for the driver’s compartment, I’d say that you’ve nailed it to a tee
joel
1 Like
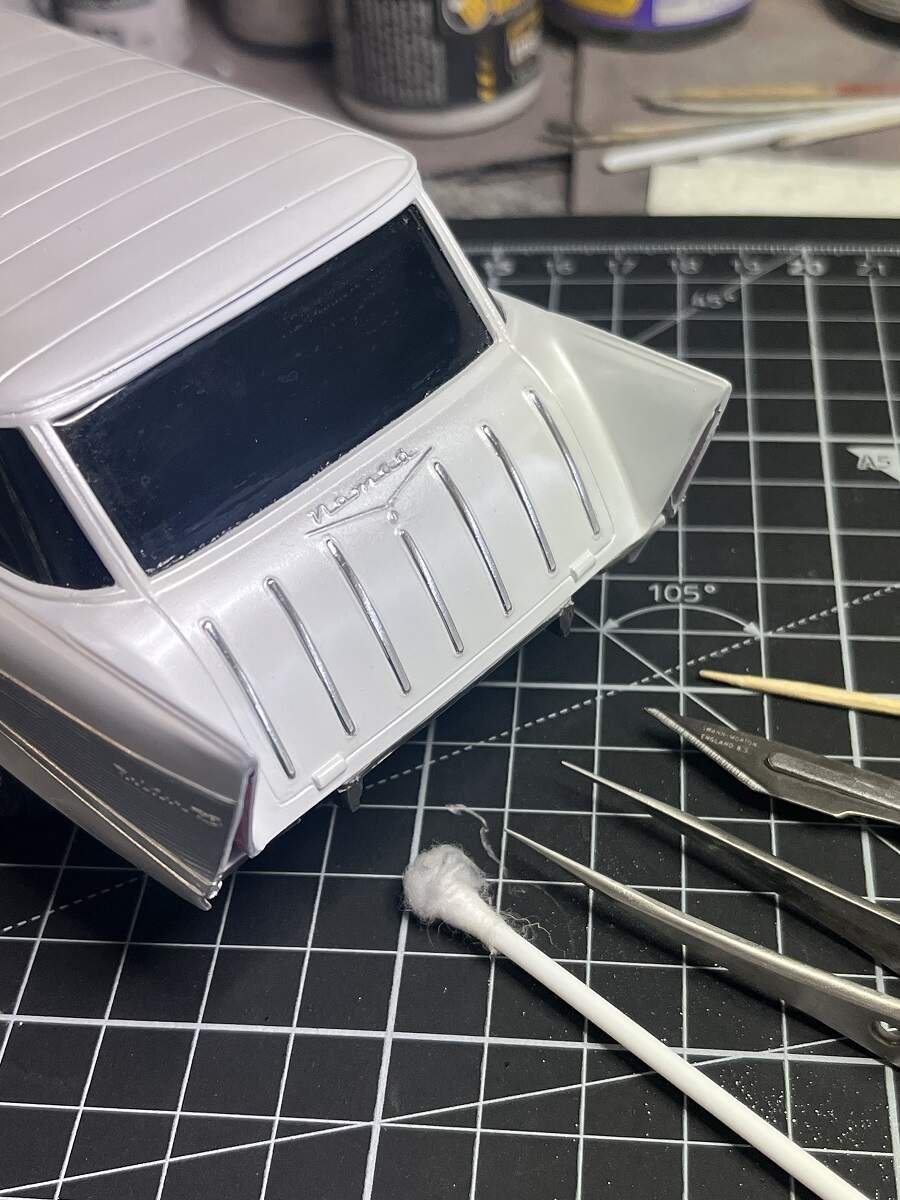
Update time!
Drivers office done, once the dark glass is fitted off you will need to stick your head in to see it. Started fitting the rear window sections as well.
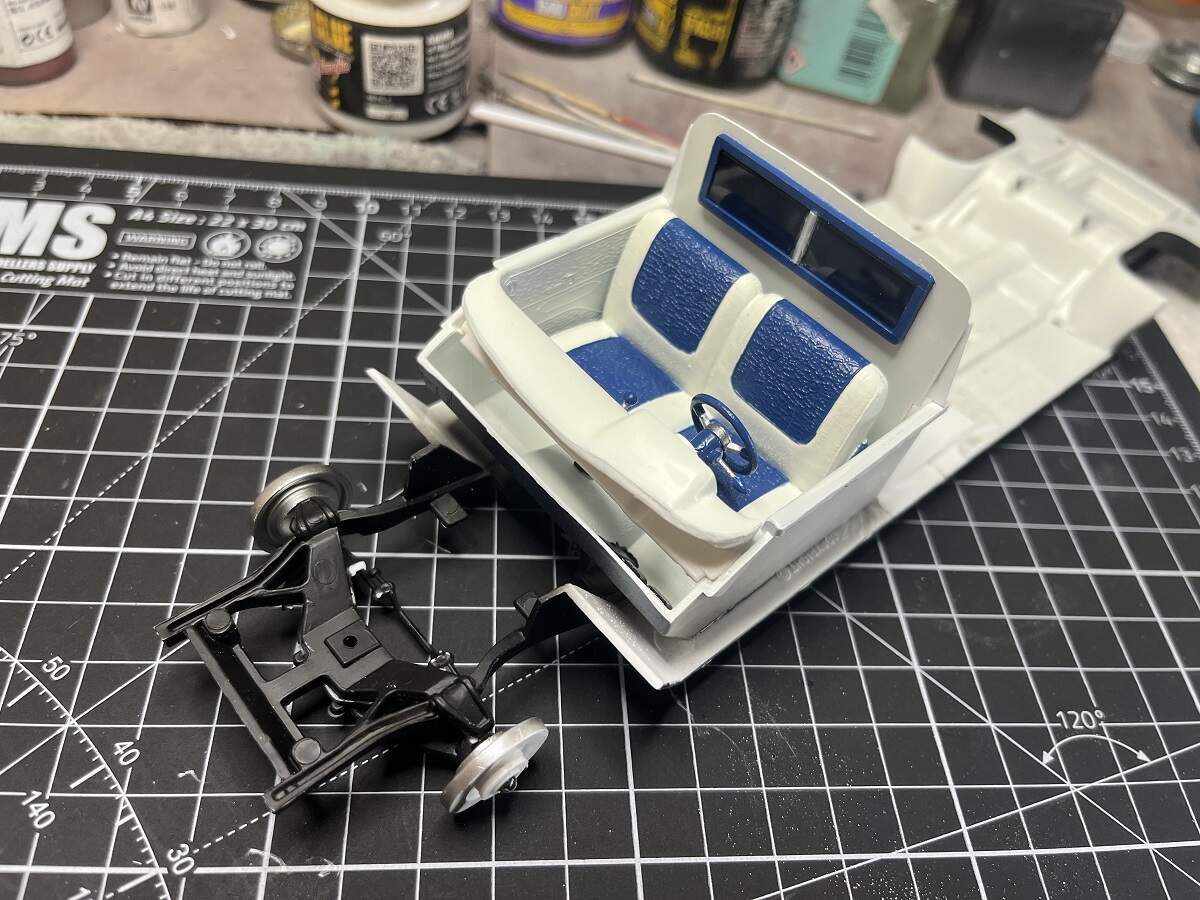
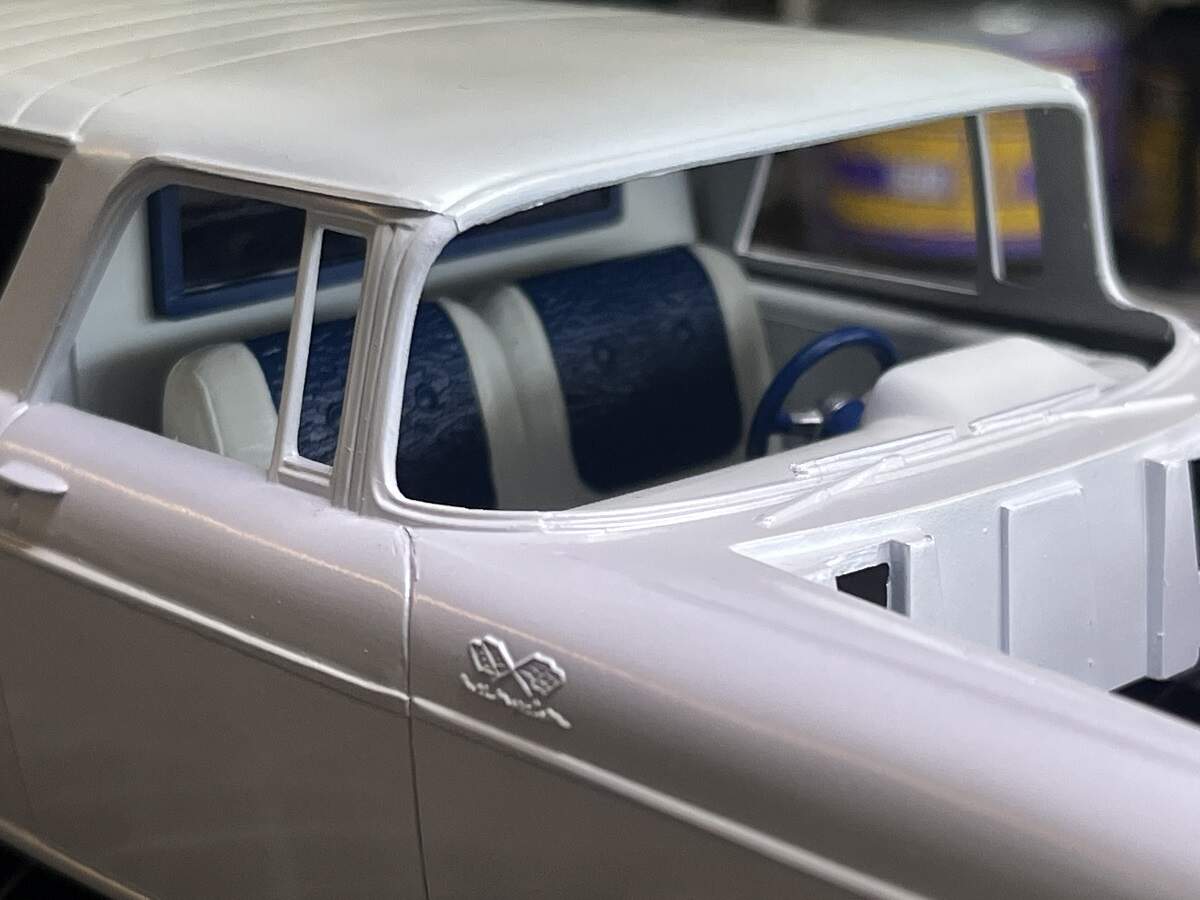
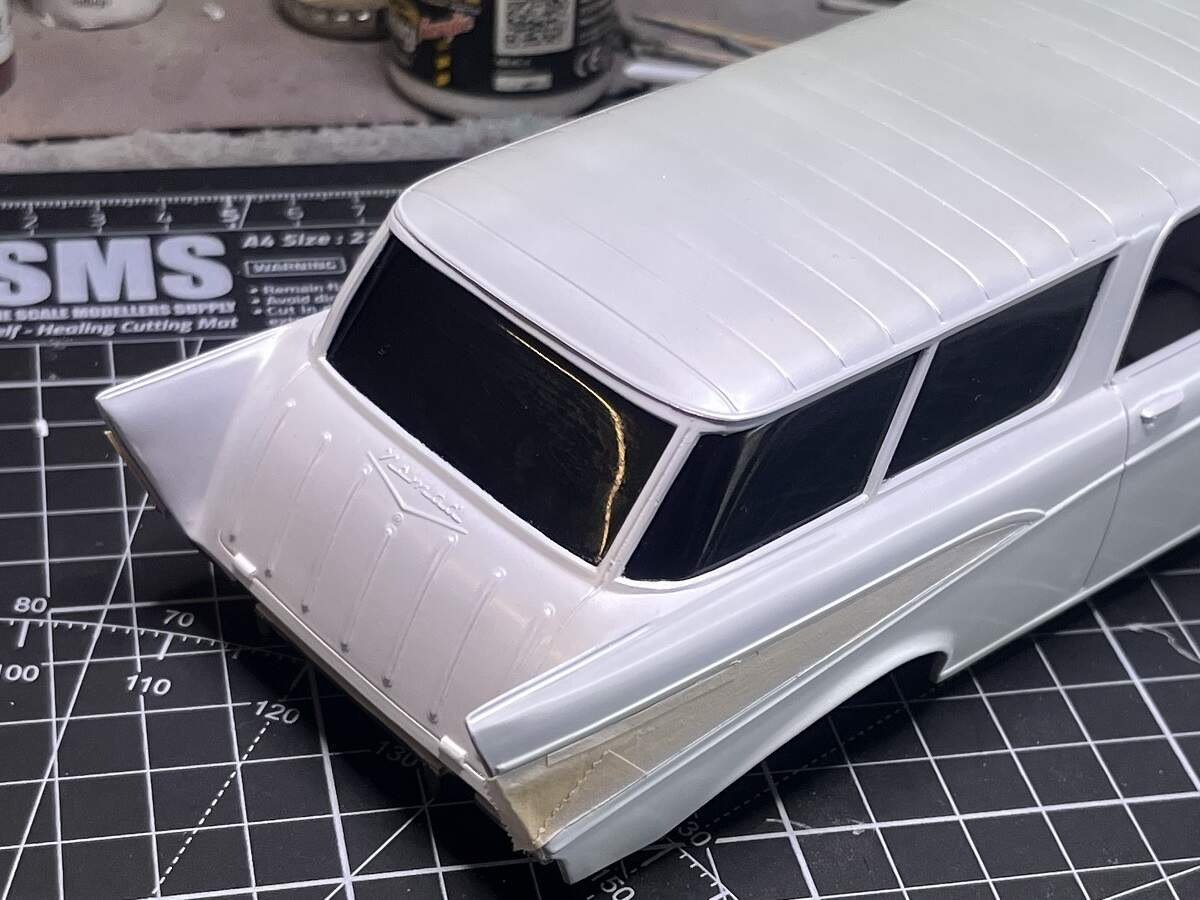
Mated up the rolling chassis and body, engine in, wheels on, unmasked the side flashes ready to start BMF on the trim.

Starting to bring the bling! Ultra Bright Chrome BMF.
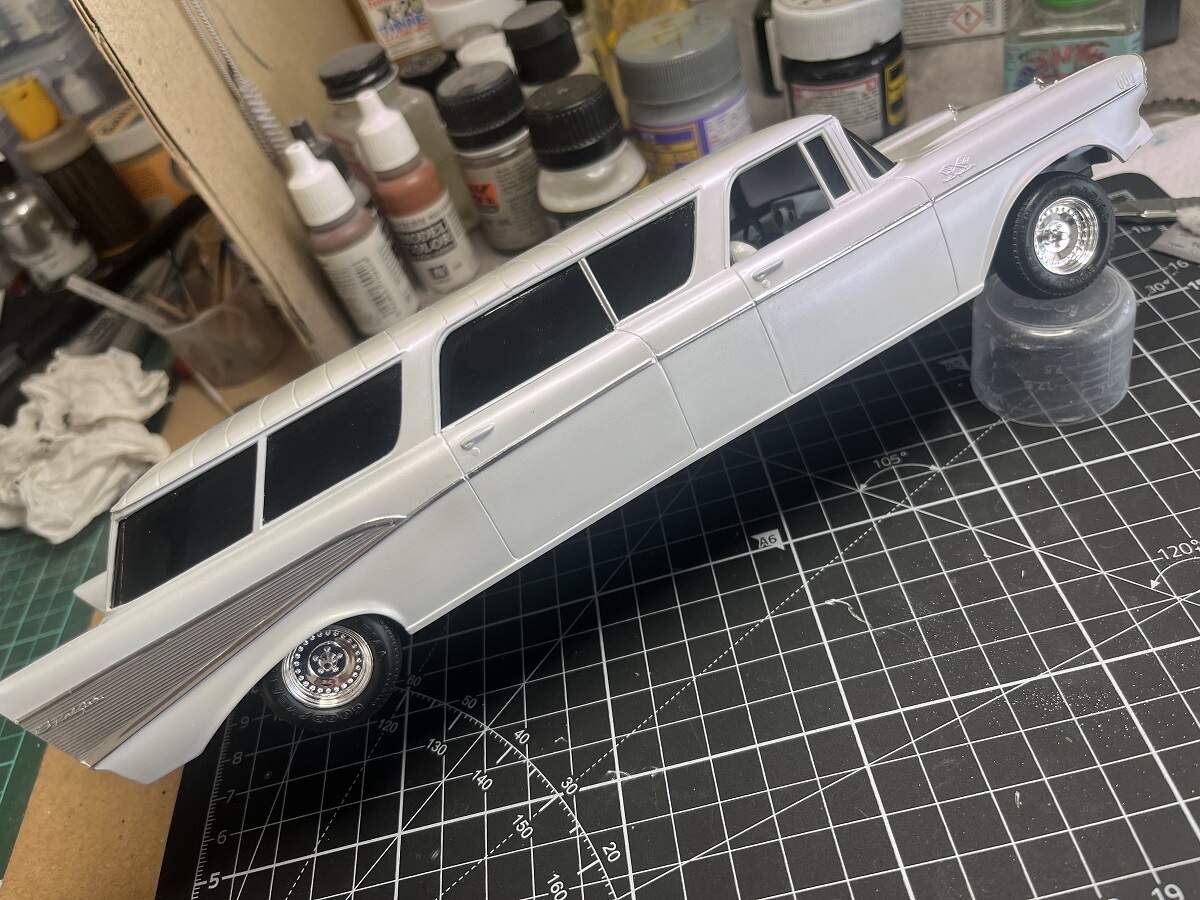
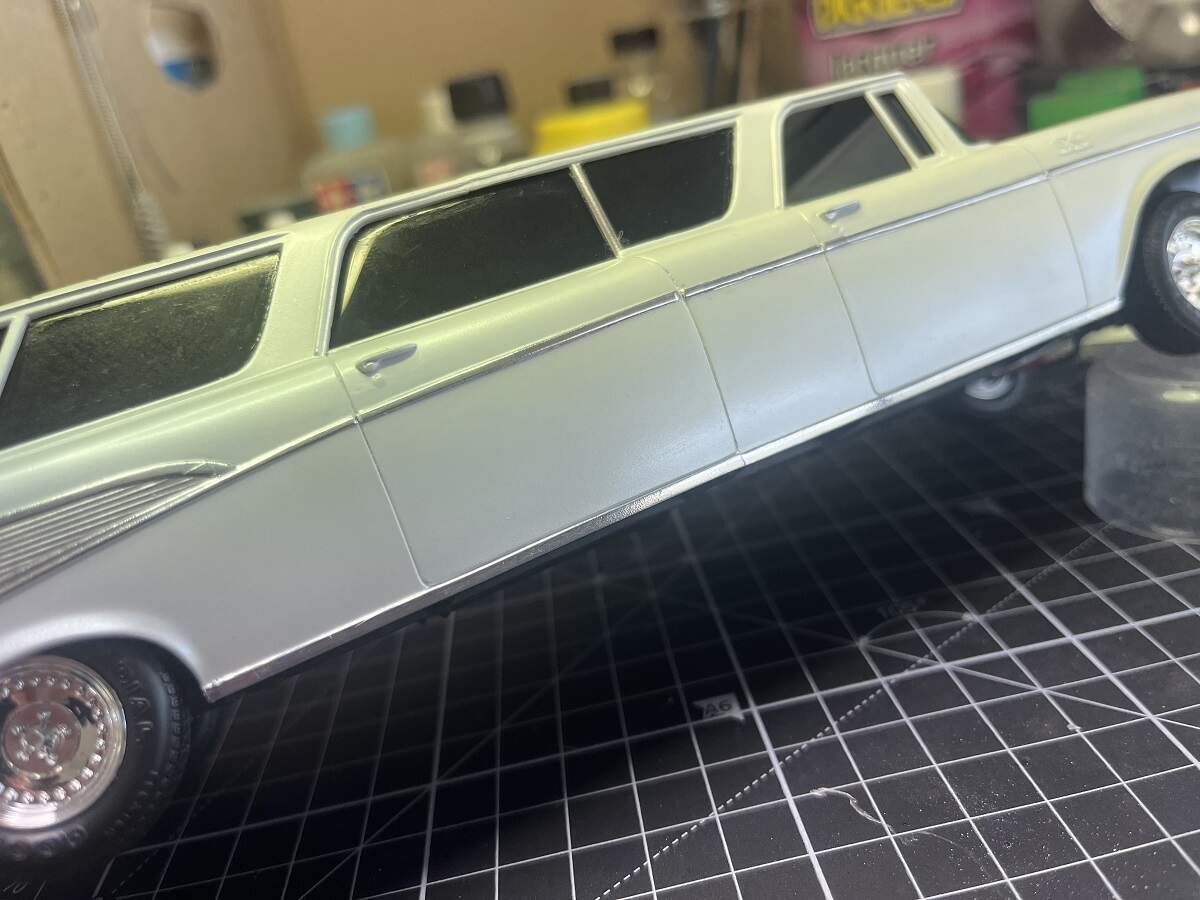

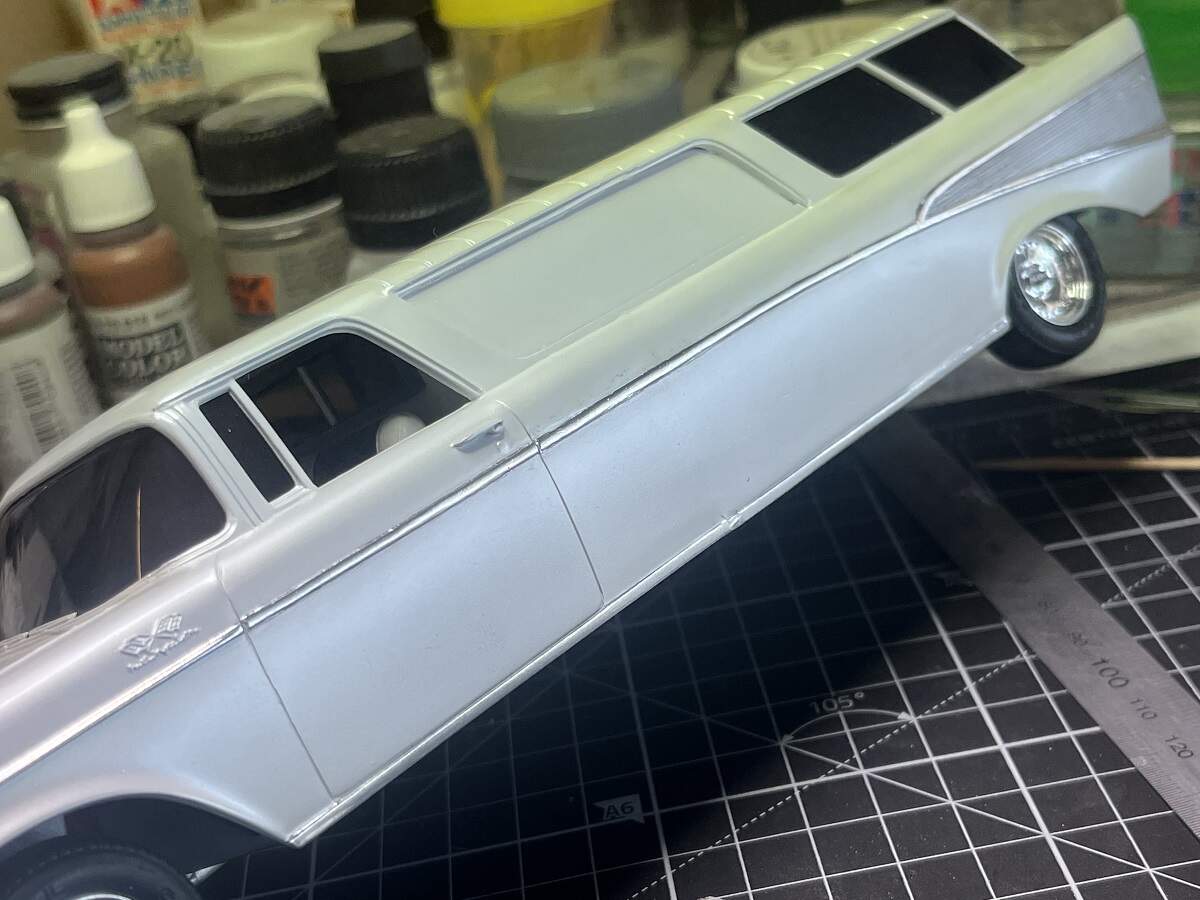
Some hand-painted details next (door handles, badges, quarter window frames etc.) then attaching the main chrome parts. Getting close to the finish line on this one.
Cheers, D
5 Likes
That is looking great. I like the office colors.
1 Like
What do you do when you can’t sleep? Get up, have a coffee, play with sharp and pointy little things 


Cheers, D
3 Likes
D,
The stretch Nomad is looking pretty darn good. Great process for sure. You really nailed all that chrome work.
joel
1 Like