Time consuming but really worth the effort Olivier. They look great ![]()
1 Like
A labor of love. Looks good from here. I am sure it will look better with the pin wash.
1 Like
Good call Olivier. I was in two minds about attempting to replace them as well.
1 Like
With the tie-downs done I concentrated to the various details all around the turret. The C sprue is full of flash which generates a lot of time to clean the parts like the rod protections. Some clear parts are larger than their housings in the grey plastic parts (main sight for instance). The both gun halves do not align. Perhaps the best is removing the pins to be inserted in the holes to “align” the halves. So a lot of sanding is required. The fiber glass texture of the smoke evacuator needs to be re-textured after this.
When you glue the large bin at the rear of the turret be careful to check there is a gap above the engine grilles.
Here is the turret done.


The hull is complete except the rearview mirrors which will be added after the painting.


Next step will be the painting. Does anyone have a good match (or the most approaching) for the SADF brown in the Tamiya range ?
Olivier
5 Likes
This page [TMP] "Painting SADF Nutria Brown?" Topic
suggest Vallejo 70.921 English Brown, my color app says Tamiya XF-72 and XF-49 mixed 2:1 is almost a perfect match.

HTH
2 Likes
That’s a nice looking build so far Olivier. The rear bin does look a bit tight over those engine decks. Sounds like you had a bit of work to do with this one !
Thank you Johnny.
The clearance is less than 1 mm on the kit.
Olivier
Thank you for the link Ryan.
At first I thought of mixing XF-78 Wooden Deck Tan and XF-52 Flat Earth. I’ll see if the other combination is better.
According to the discussion Humbrol 29 is a perfect match. The equivalence chart for Humbrol 29 gives Tamiya XF-52. I’ll probably start with XF-52. At least it’ll be a good base if not perfectly OK.
Olivier
2 Likes
Excellent Olivier. My barrel fit along the join was okay if you aligned the extractor and removed the pins, but the actual components were misaligned if you fit them flush at each end. It was like a section was removed from the barrel end one side and the butt end of the other. The flash you mentioned was bad on my copy too.
A couple of things I noted to references:
- The two holes on the hull side bin do not seem to exist on the real vehicle
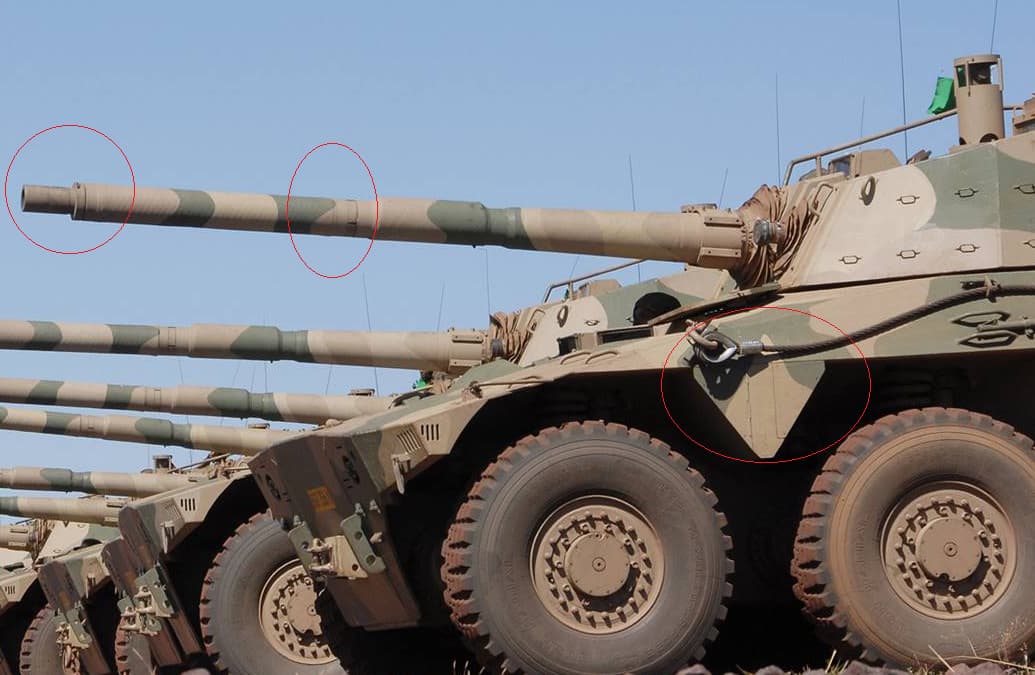
- The fibreglass texture on the fume extractor is barely noticeable in real life but the section on the barrel not so much, but Trumpeter has a smooth barrel.
- The barrel tip in the kit is too short and wide and the flared end of the barrel before the tip is incorrect it should be flat and flush (with a clear demarcation).
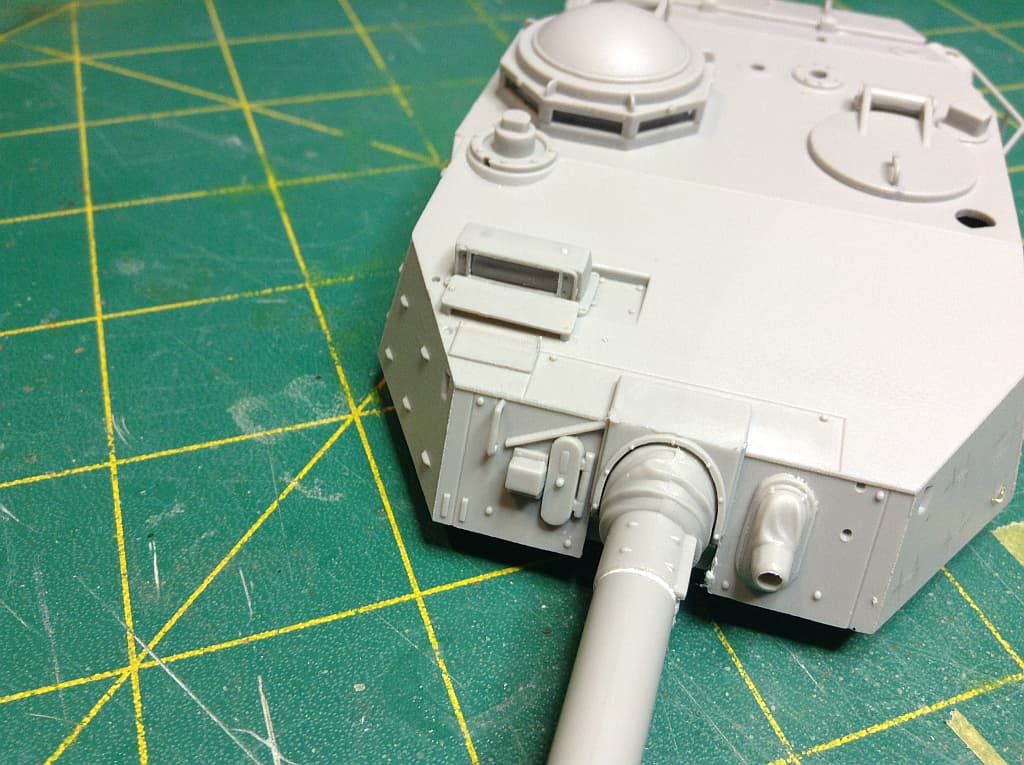
- There are rod like connections between the barrel and the fume extractor and this area should have a distinct recess. All Trumpeter did was have two misaligned grooves here:

3 Likes
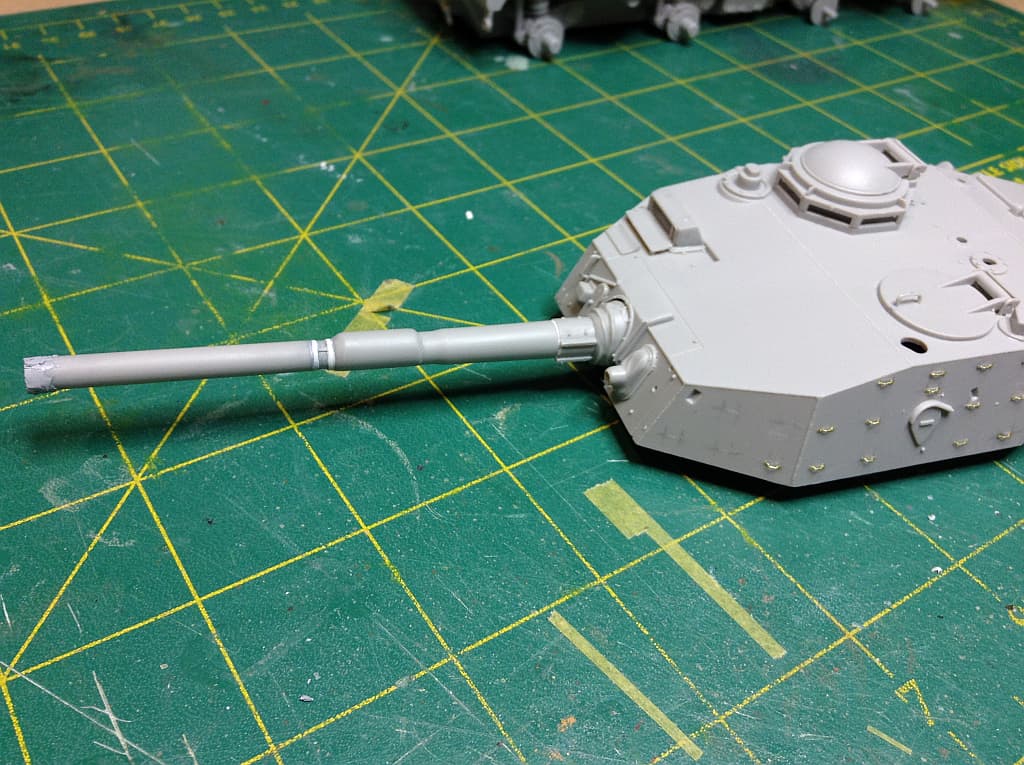
I decided to do the work, but I am a glutton for punishment. This is the area I am currently working on. Closing the gap with .10 x.20 strip and adding streched sprue is easy. A little filler as Trumpeters parts are offset as I mentioned above. I have filled the barrel end and will sand that when dry, then scribe the join - I may even saw off the end and replace with a disk.
As you can see, I took the route of replacing tie downs, which I now regret. I should have gone the smart way like you did. I still have the other side to do now… ![]()
I cut the rear off the large glass vision block and sanded the bottom and sides, and it fits fine now. No way it was going to fit otherwise, as you say.
4 Likes
Peter
I wanted an easy build with this one. Maybe I’m getting lazy. ![]()
I have applied the base color today.
I first sprayed a coat of XF-52 Flat Earth then I applied another lighter shade by adding some XF-78 Wooden Deck Tan to the former. It may look a bit too light but the gloss varnish for the decals and the weathering will darken the vehicle. I noticed I forgot to fill the holes you mentioned. Will do it tomorrow before I totally forget about it.


Olivier
3 Likes
Nothing wrong with an OOB build. I love the colour. - it has come out very well.
I am my own worst enemy at times. The number of times I have done work no-one but I know was done… yet I still do it.
1 Like
I sprayed a coat of Klir before applying the decals. When dry I applied another coat of Klir to seal the decals. To my greatest surprise the No step marking disintegrated. Fortunately there was another one on the decals sheet.


Now it’s time for weathering.
Olivier
5 Likes
Sorry for not replying earlier to @Bison126 or @petbat … As build leader I always try to chip in as much as possible but have just been caught up with work etc …
Lots of great info Peter and it seems to be throwing some hurdles at you but looks like you are cracking through them… And Olivier, really like that colour you have given yours. Your idea about the tie downs certainly paid off, those little carve outs have made a big difference and give them a real look with the shadowing and the way the paints darken in the recesses. Great work guys ![]()
3 Likes
Like most of the modern era of 8x8 AFV’s Clouded Leopard hull is fairly large and high off the ground. Compared to the hull the turret feels and looks really small despite being equipped with a 30mm canon.
AFV Club have rather nicely included a turned metal barrel for the gun which is among the first parts in the turret build.

Then it’s up to for the periscopes, hatches and sighting system housing.


This mates with the bottom parts and the gun cradle.

Adding the outer layers of armor begins to beef things up and that nice angular look appears.


It is a fairly busy turret for its size.
The rear bustle rack is a rather fiddly assembly with four levels to build up, into which goes some etch which I did not have a great time with. Bustle racks like this are a bit of a nemesis of mine!

Once done it will, along with the commander’s M249 SAW (locally made as the T75 LMG), be left off for painting. I also noticed some mis-alignment in the frontal turret armor which is likely my fault and not the kit. A little Evergreen styrene here and there helped correct the shape by making the gaps less obvious.
The finished hull and turret prior to painting.


Thanks for reading.
8 Likes
Looking great Karl. The Clouded Leopard is certainly the chunkier cousin to the svelte Red Cat Olivier is building.
Love to two Rooikat head decals in the kit for the two single colour options Olivier.
3 Likes
Looking pretty good there Karl. It has some nice detailing on it. Does it come with PE ?
1 Like
@petbat - Thanks for the kind words Peter and I must agree the Rooikat is the svelte beauty of the 8x8 crowd!
@Johnnych01- Many thanks for the compliments John and yes there is a small etch fret with the kit- the biggest bits being the two hull grilles.
1 Like
The Italian Centauro is not an ugly duck and is a decent challenger to the 8 wheelers beauty title. ![]()
I consider the Rooikat complete. I’ve put the rear view mirrors folded down. So I used some brass wire instead of the styrene parts to make the supports.
Then as usual I applied a minimal weathering consisting of a brown wash over the entire vehicle. Then I simulated streaking. I finally created some dust effect with Sienna pigments on the running gear and the undercarriage.


Olivier
9 Likes
Beautiful!! The contrast between the dust on the wheels and the brown color is very nice!
1 Like