Lovely build Olivier. That simple fix with the tie downs was worth all the effort and time. Those shadow areas make a big difference to the look.
You have the S. African dust down very nice, really realistic.
Great finish and a brilliant addition and now member of the 8 wheelers club ![]()
![]()
1 Like
Great stuff Olivier- it looks excellent in that color and with that weathering.
1 Like
Came out beautiful Olivier. The final finish looks fantastic.
1 Like
Calling my Stryker done. I took a hiatus for a business trip, but got to finish it this weekend.
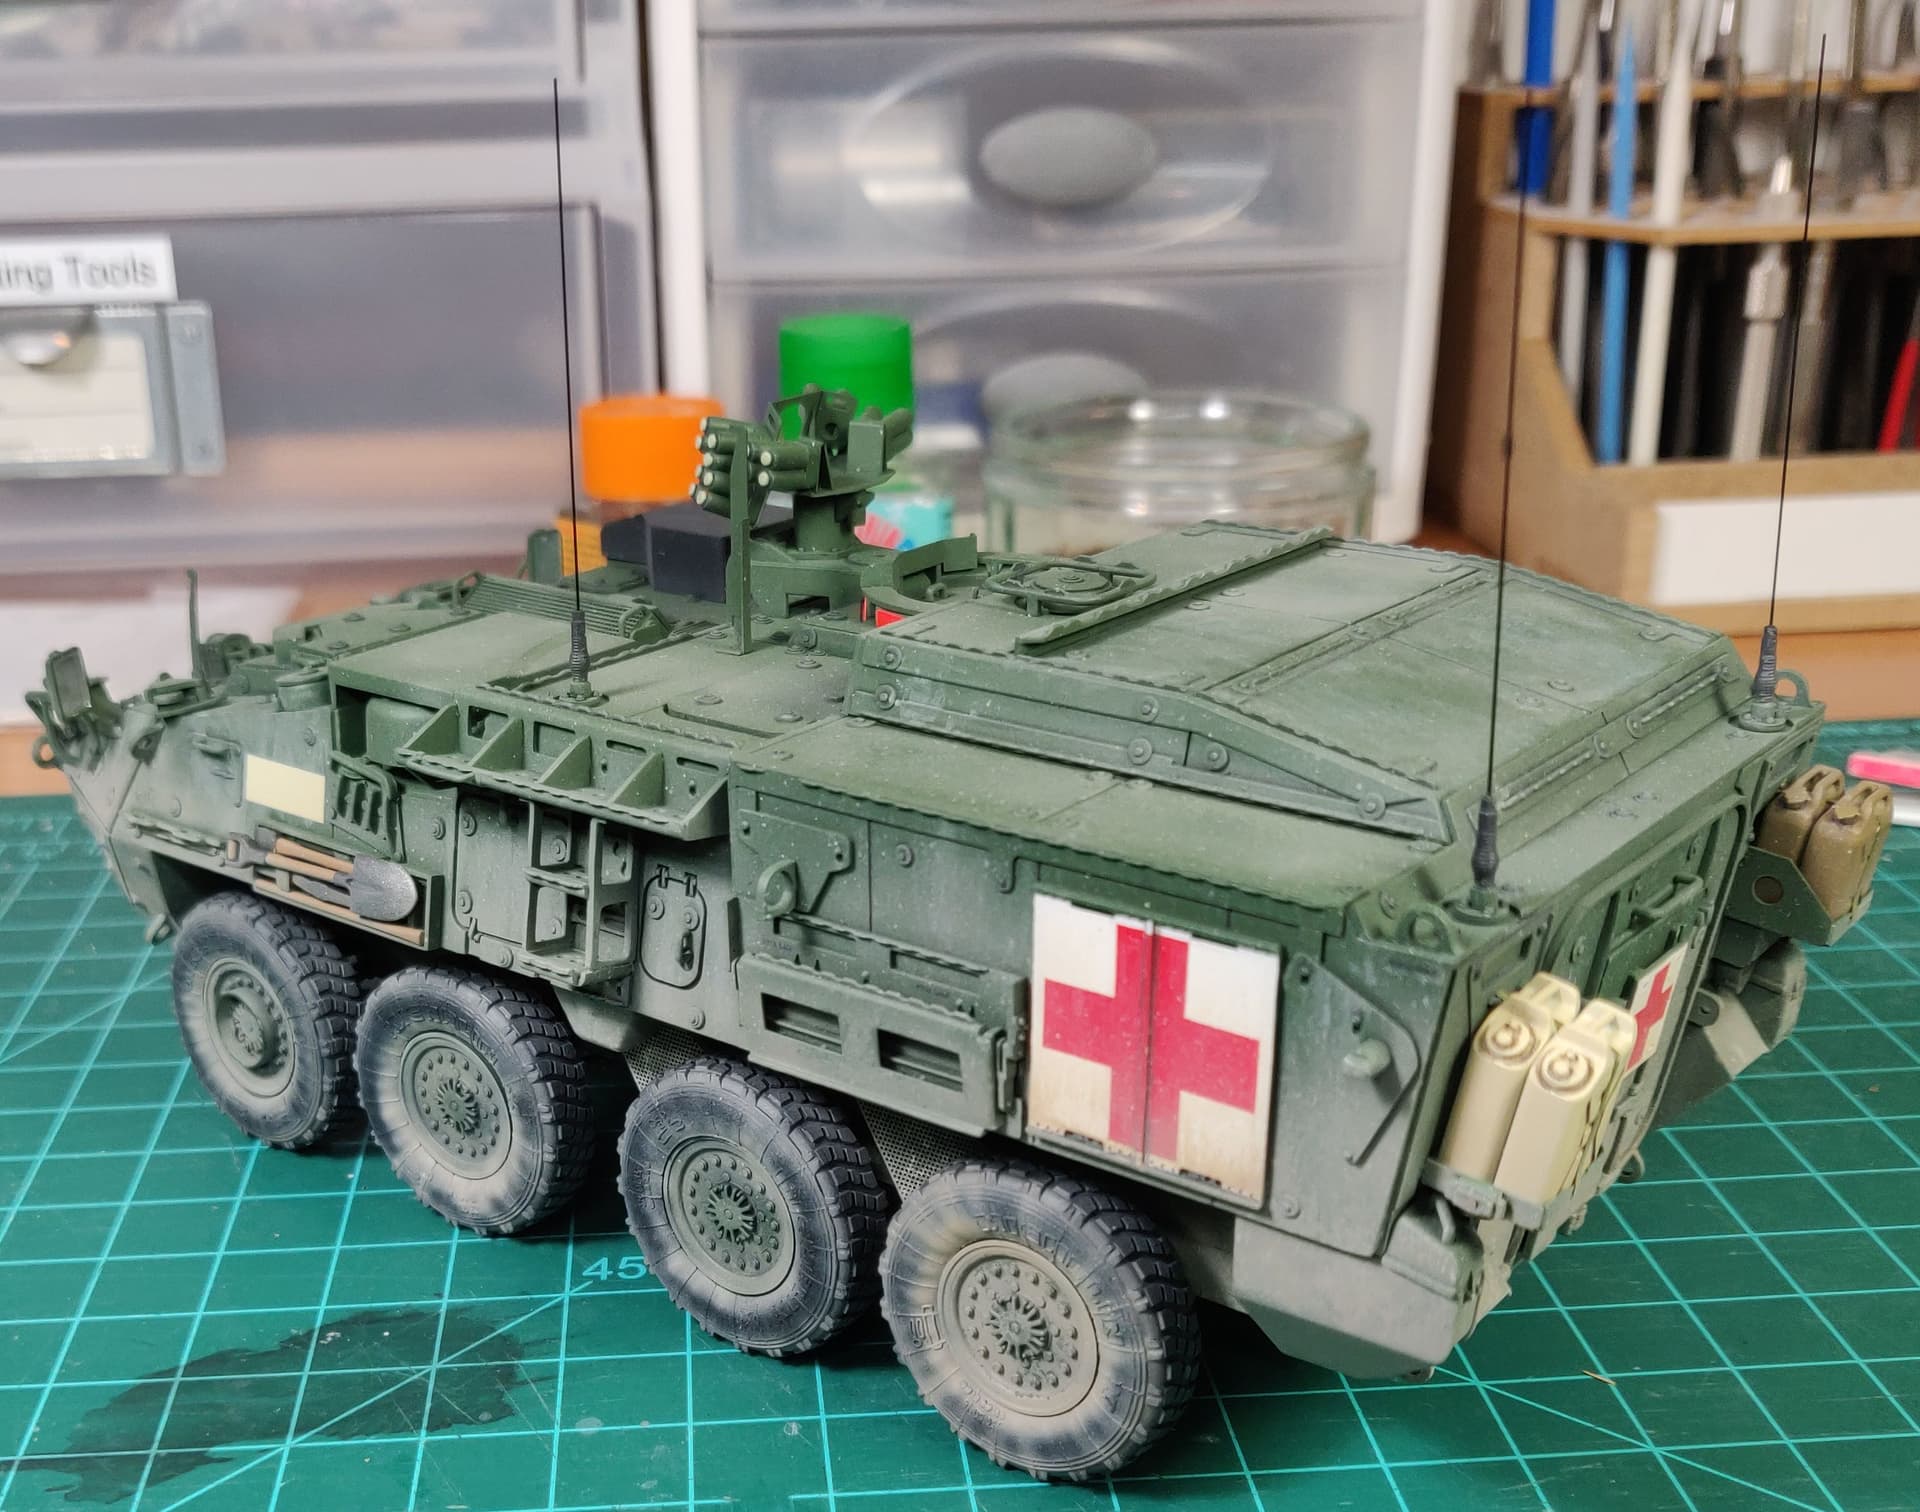
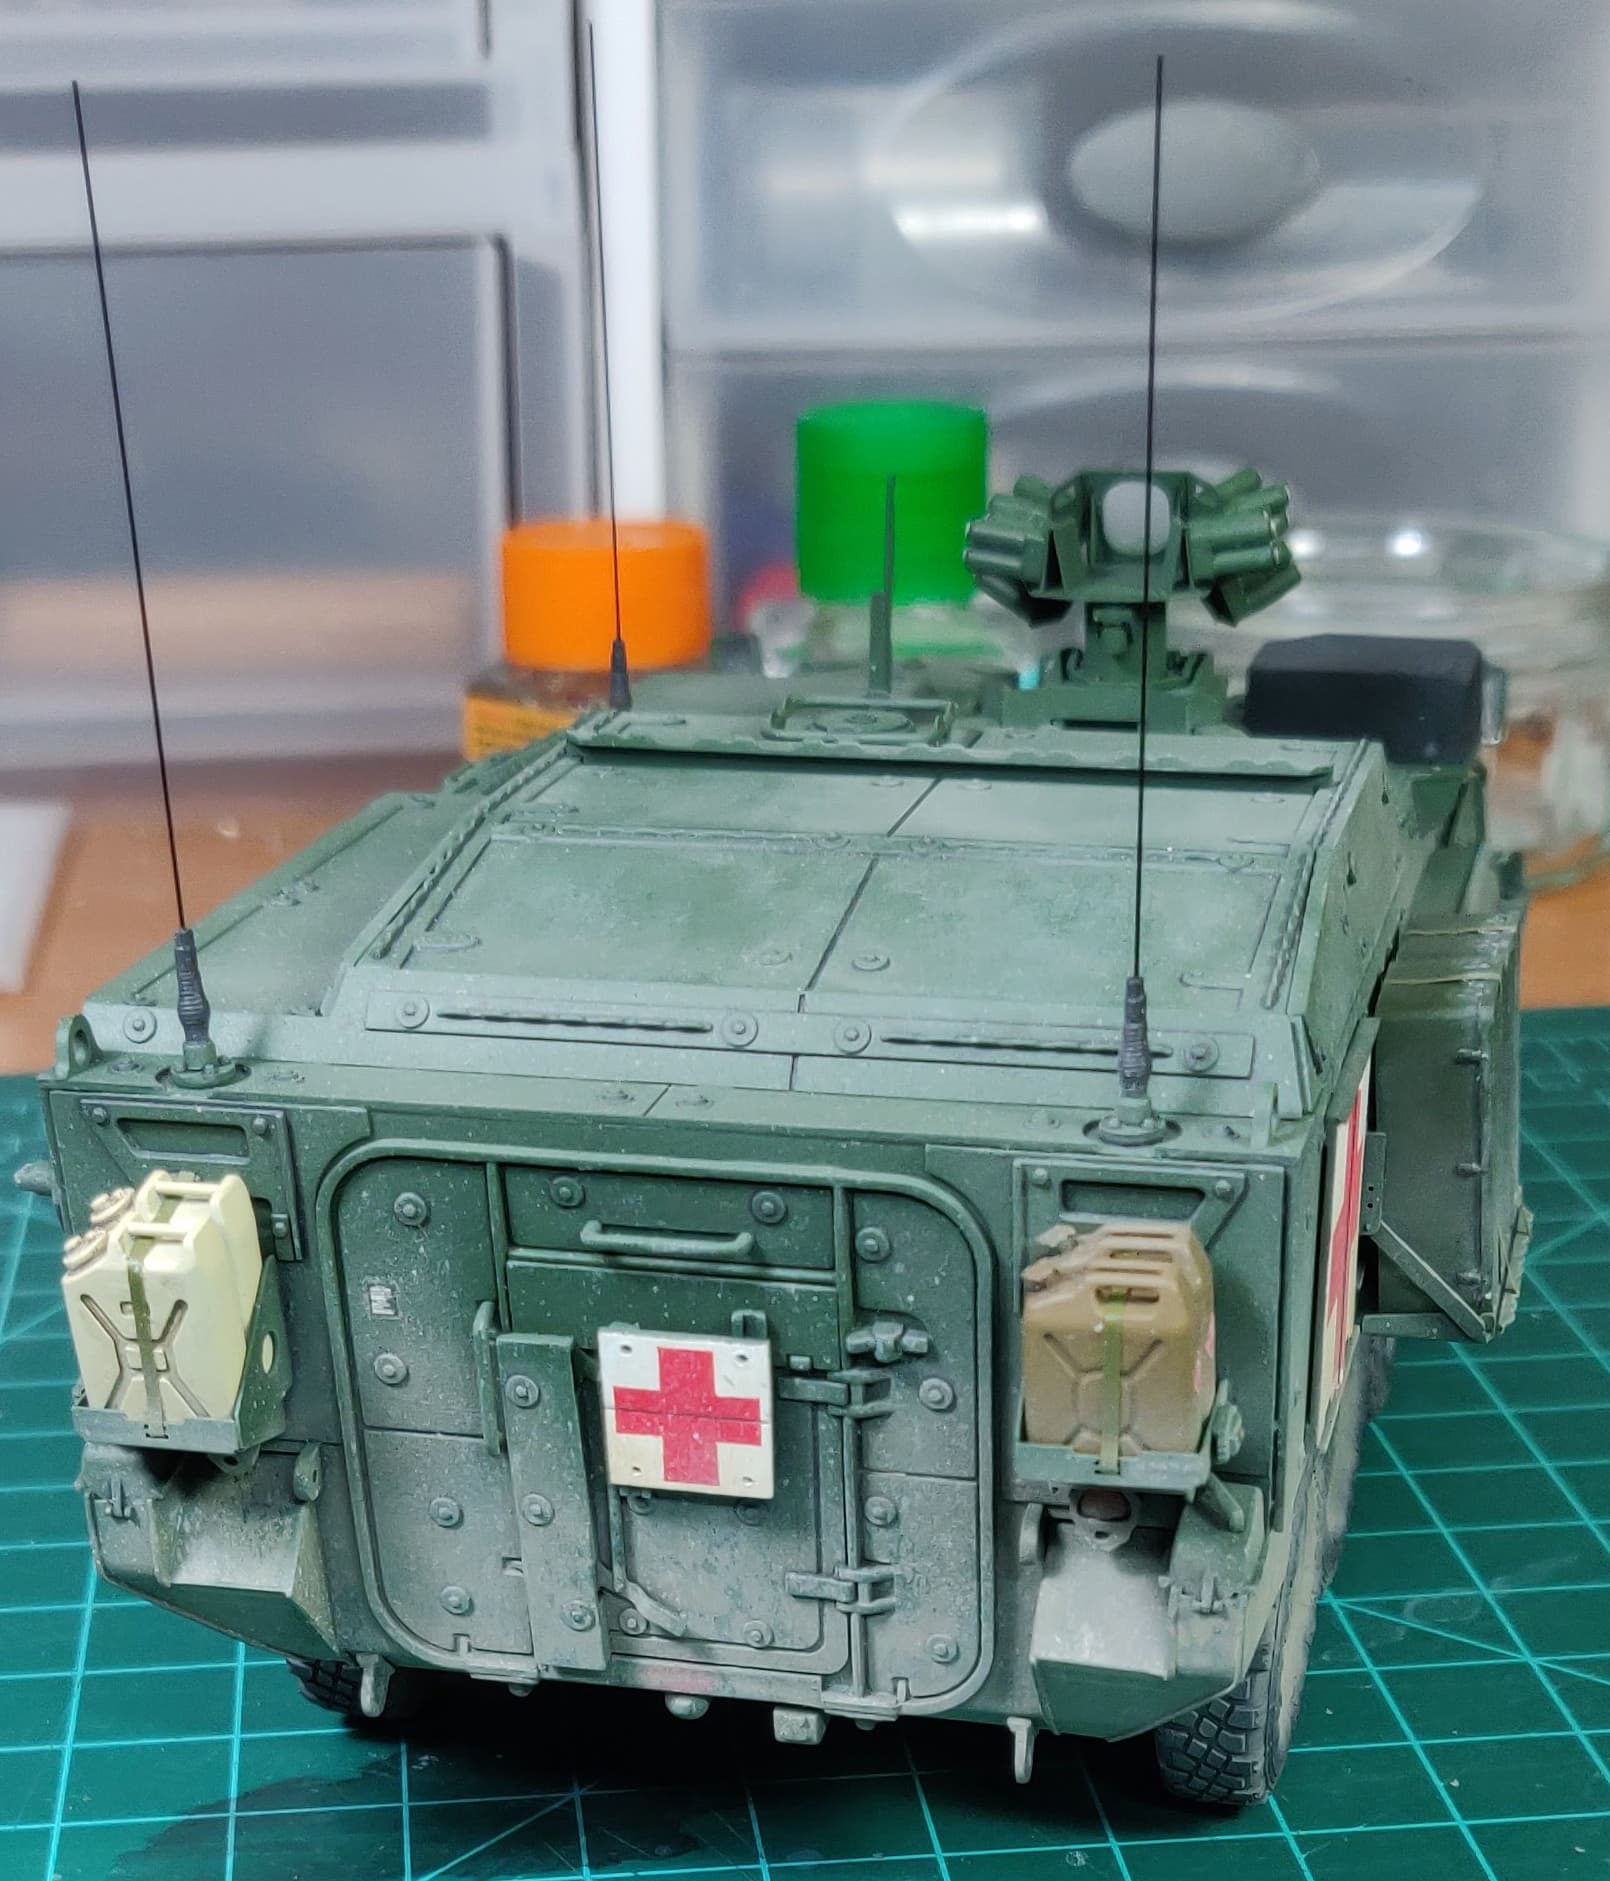
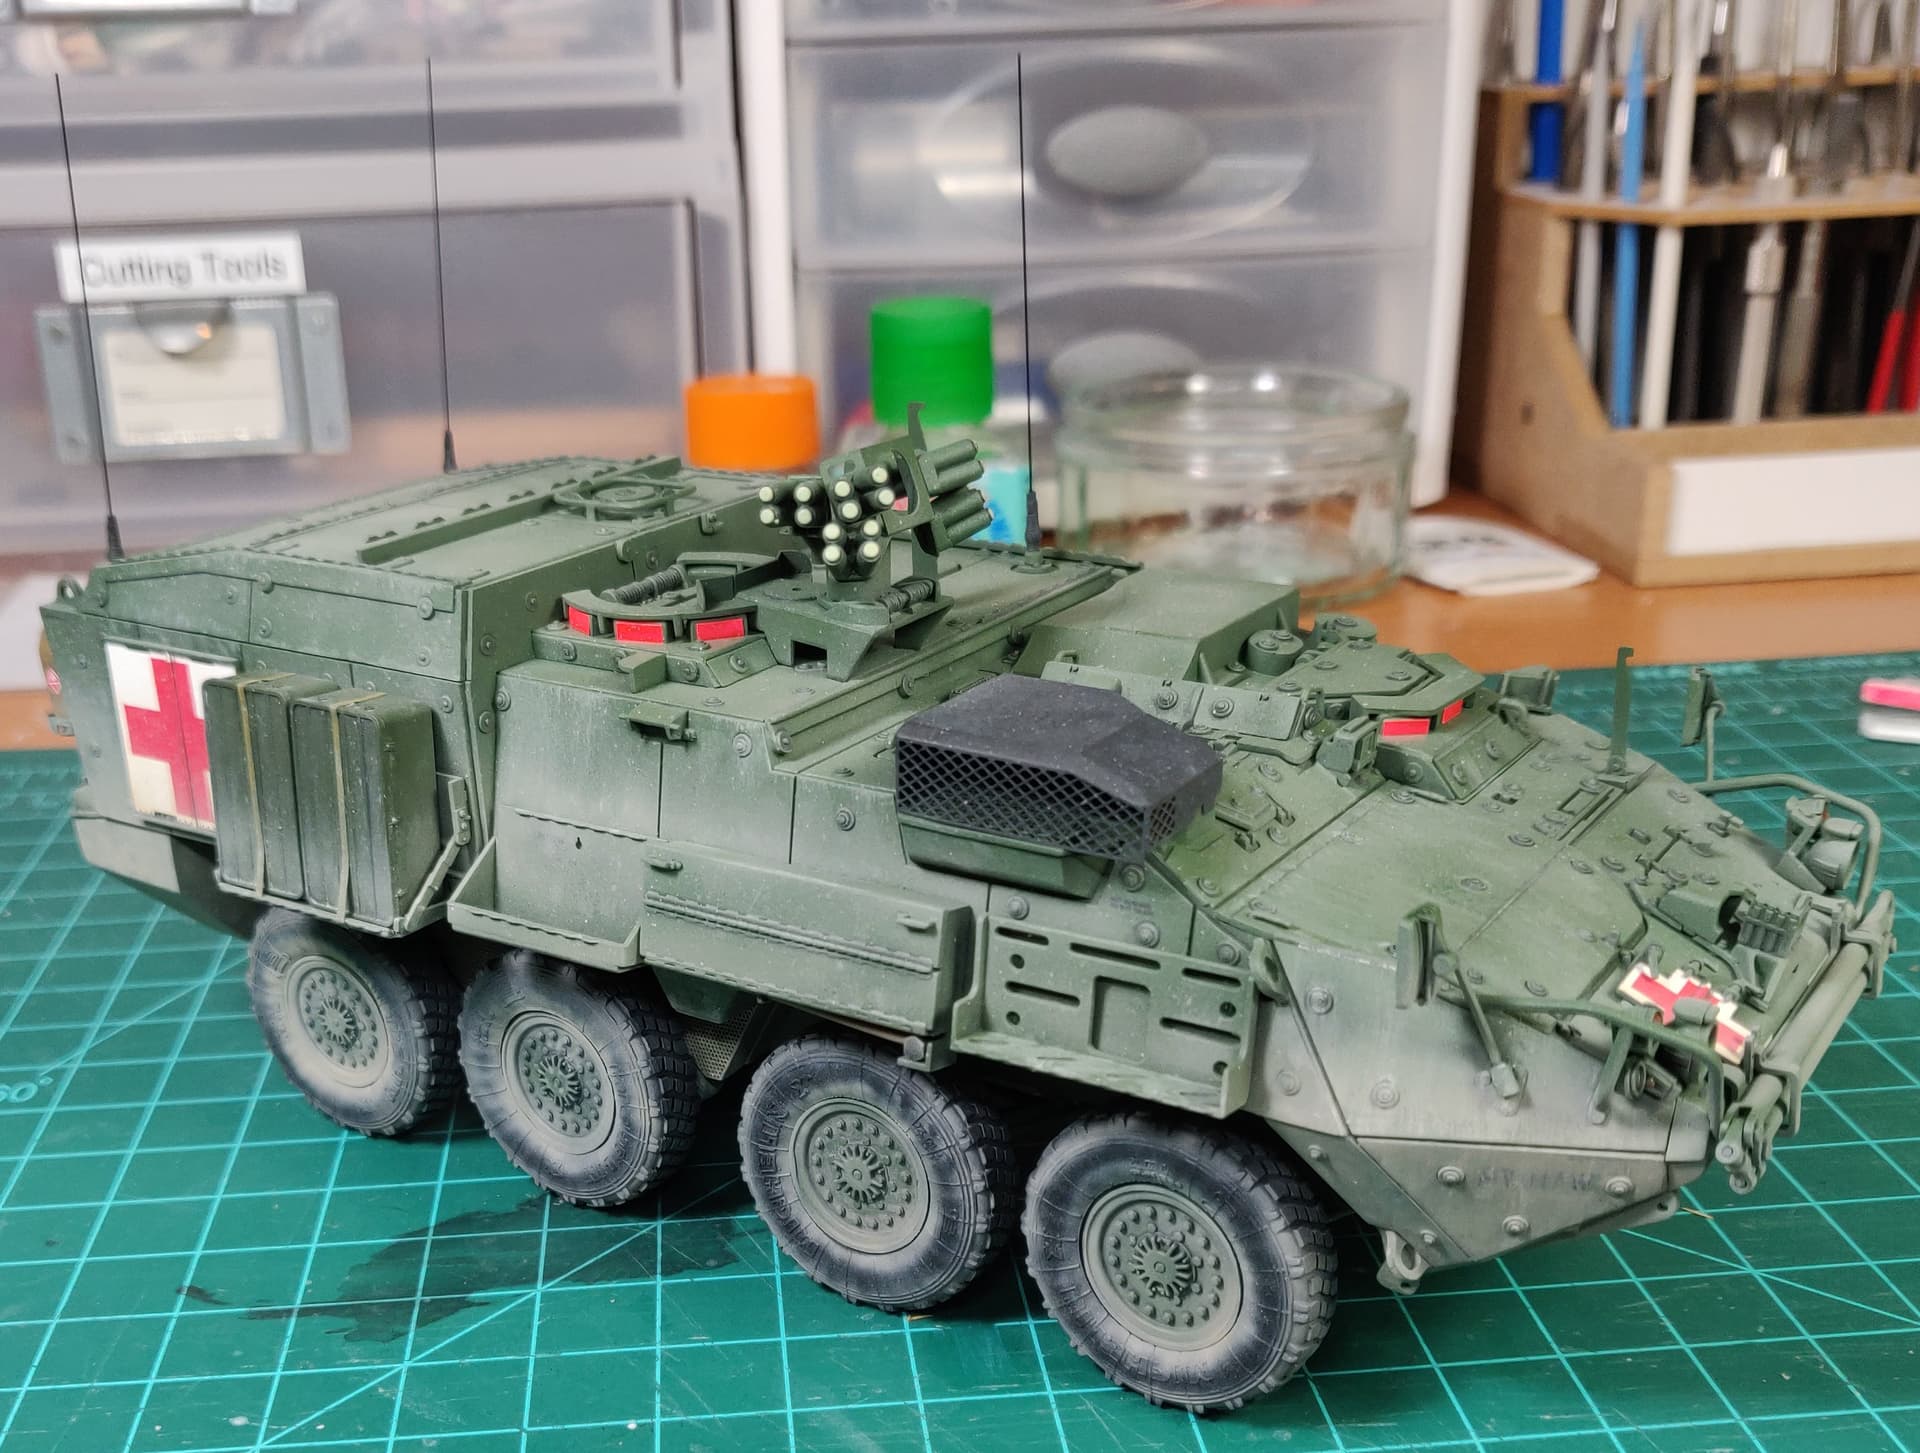

I made some MRE boxes to add to the stowage, but they wouldn’t fit in the racks, so I had to leave them off.
13 Likes
Well executed. Nicely dusted. ![]()
![]()
1 Like
Thanks!
Lovely build Lucas. Weathering looks great.
1 Like
What a beauty you have there Lucas- looks awesome with that weathering!
1 Like
Nice job. Nice clean build and excellent finishing. Great dusting.
1 Like
Really lovely rendition of the Stryker Ambo Lucas. The final finish is very well done, and the dust effect on each area is looking great. It doesn’t need extra stowage, it’s good to go as is. ![]()
1 Like
Great finish on your MEV.
Olivier
1 Like
Really nice soft and smooth weathering ! Love it.
1 Like
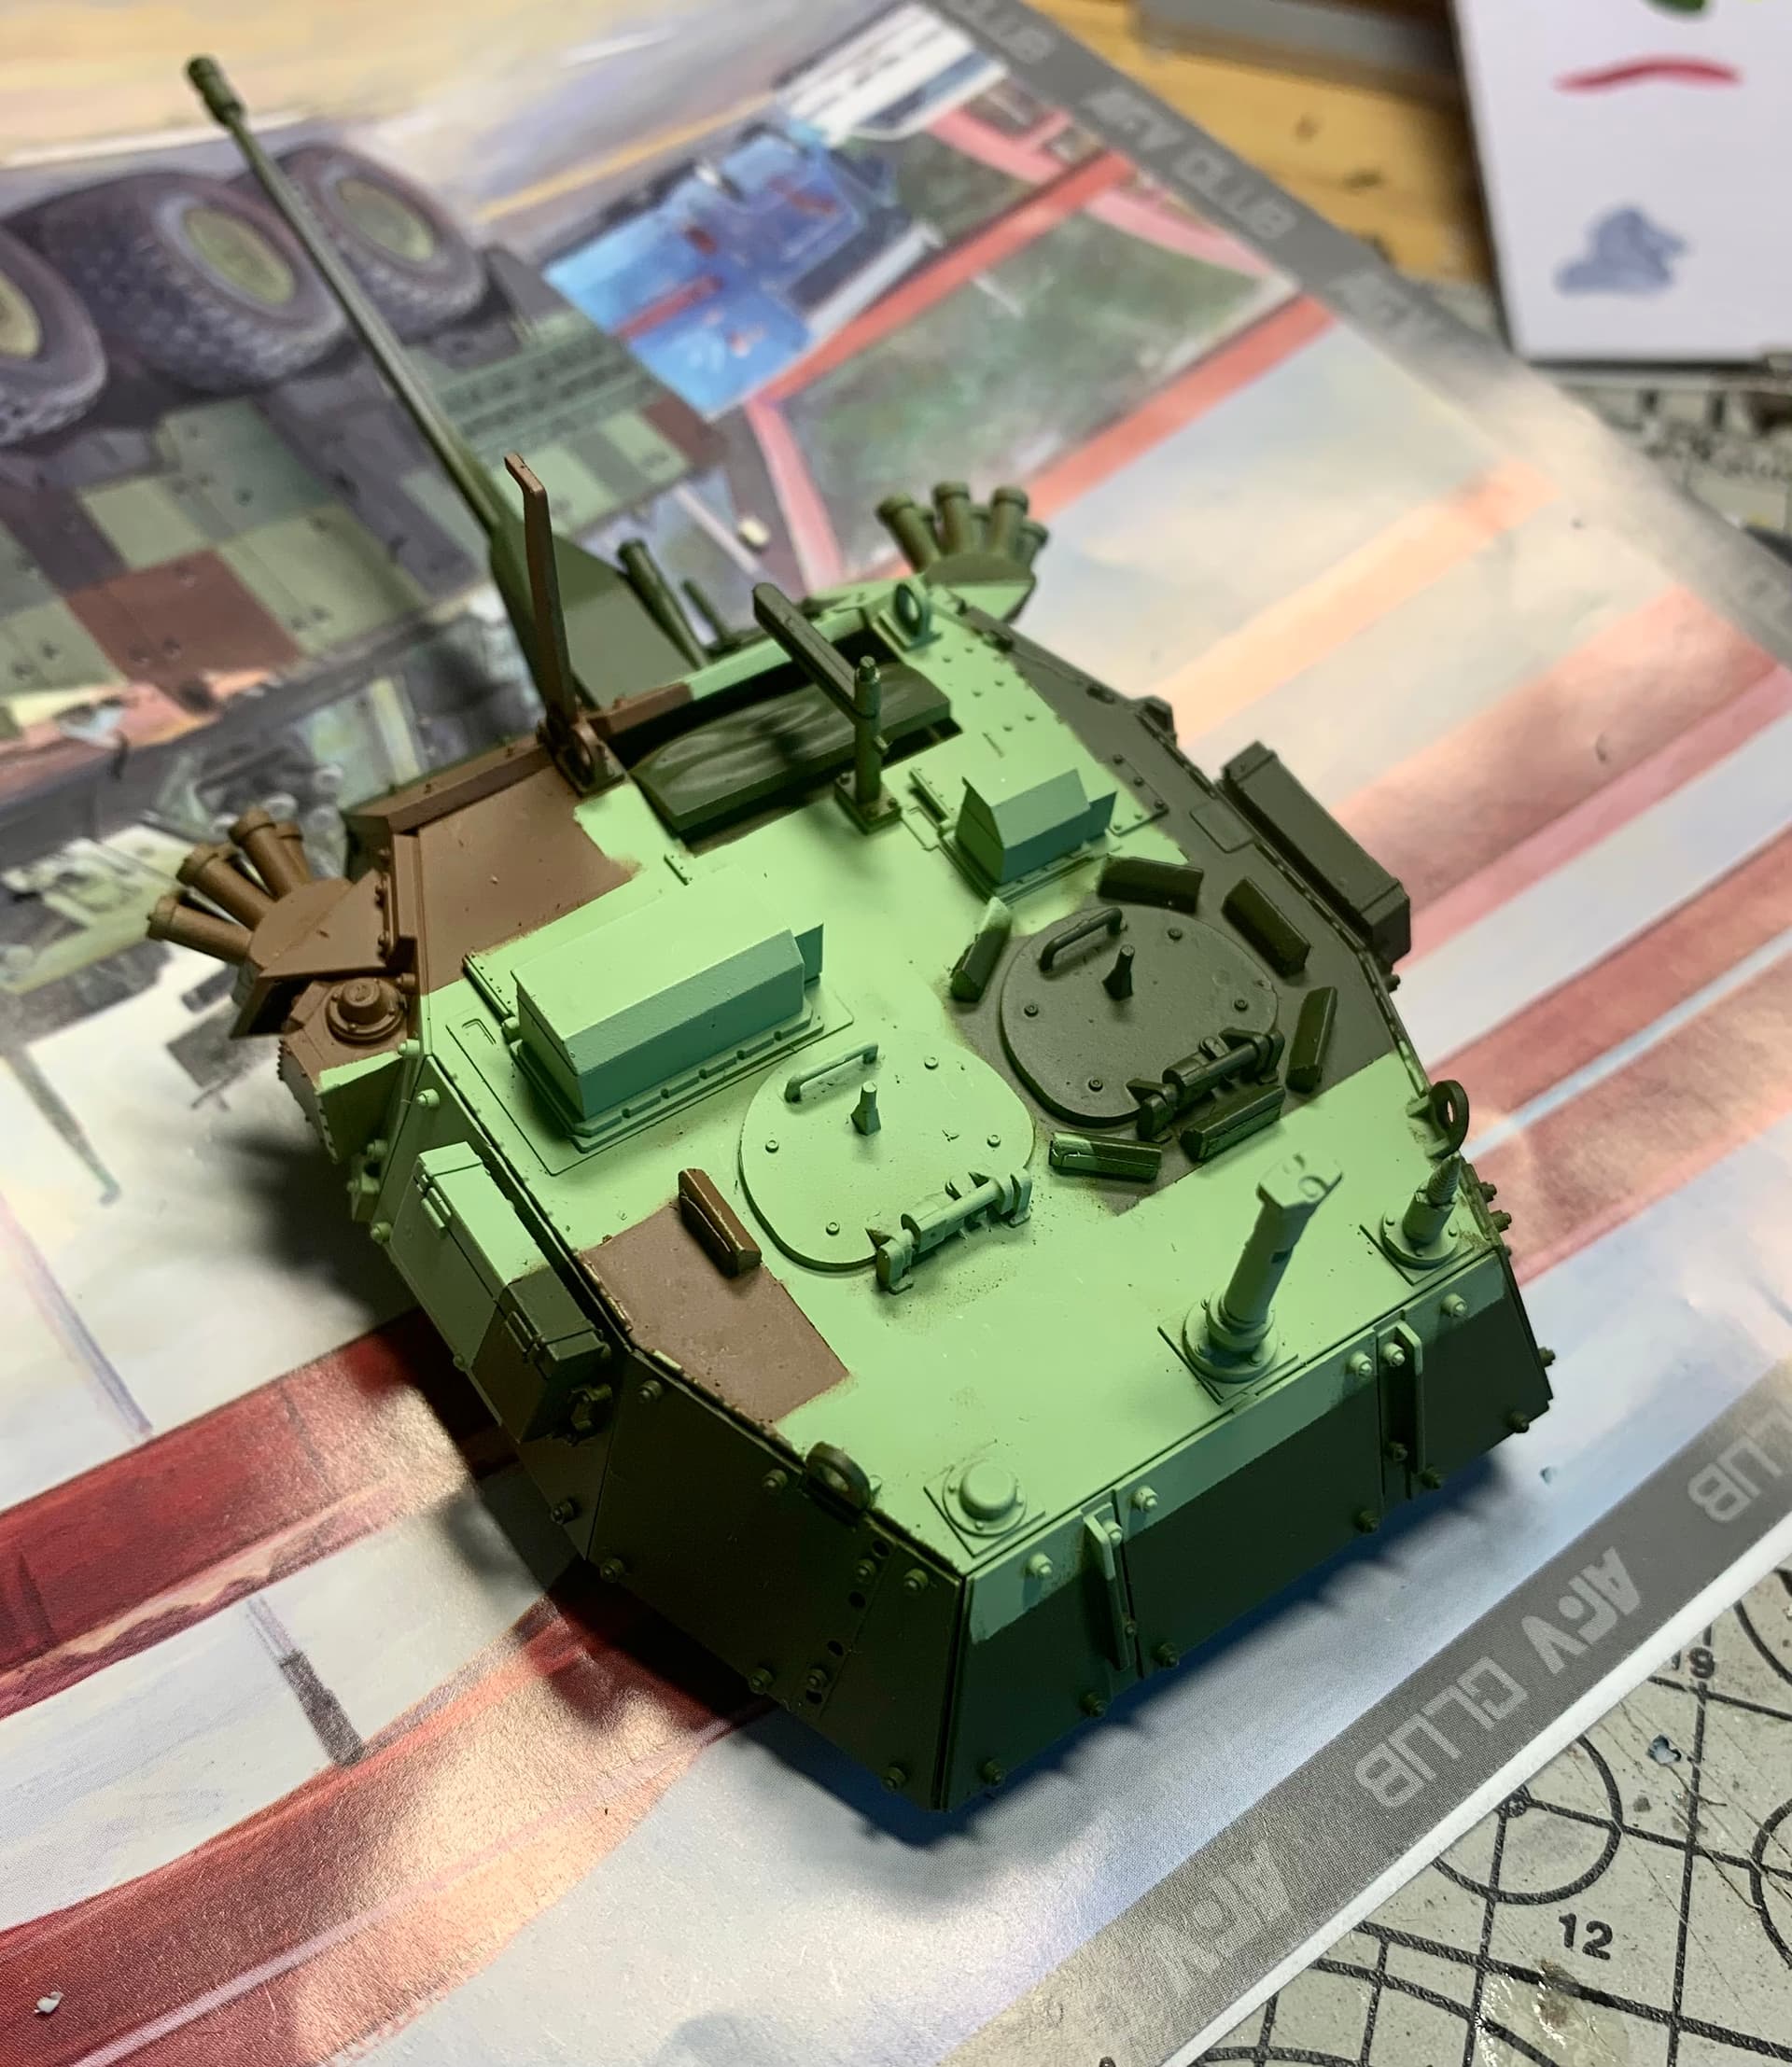
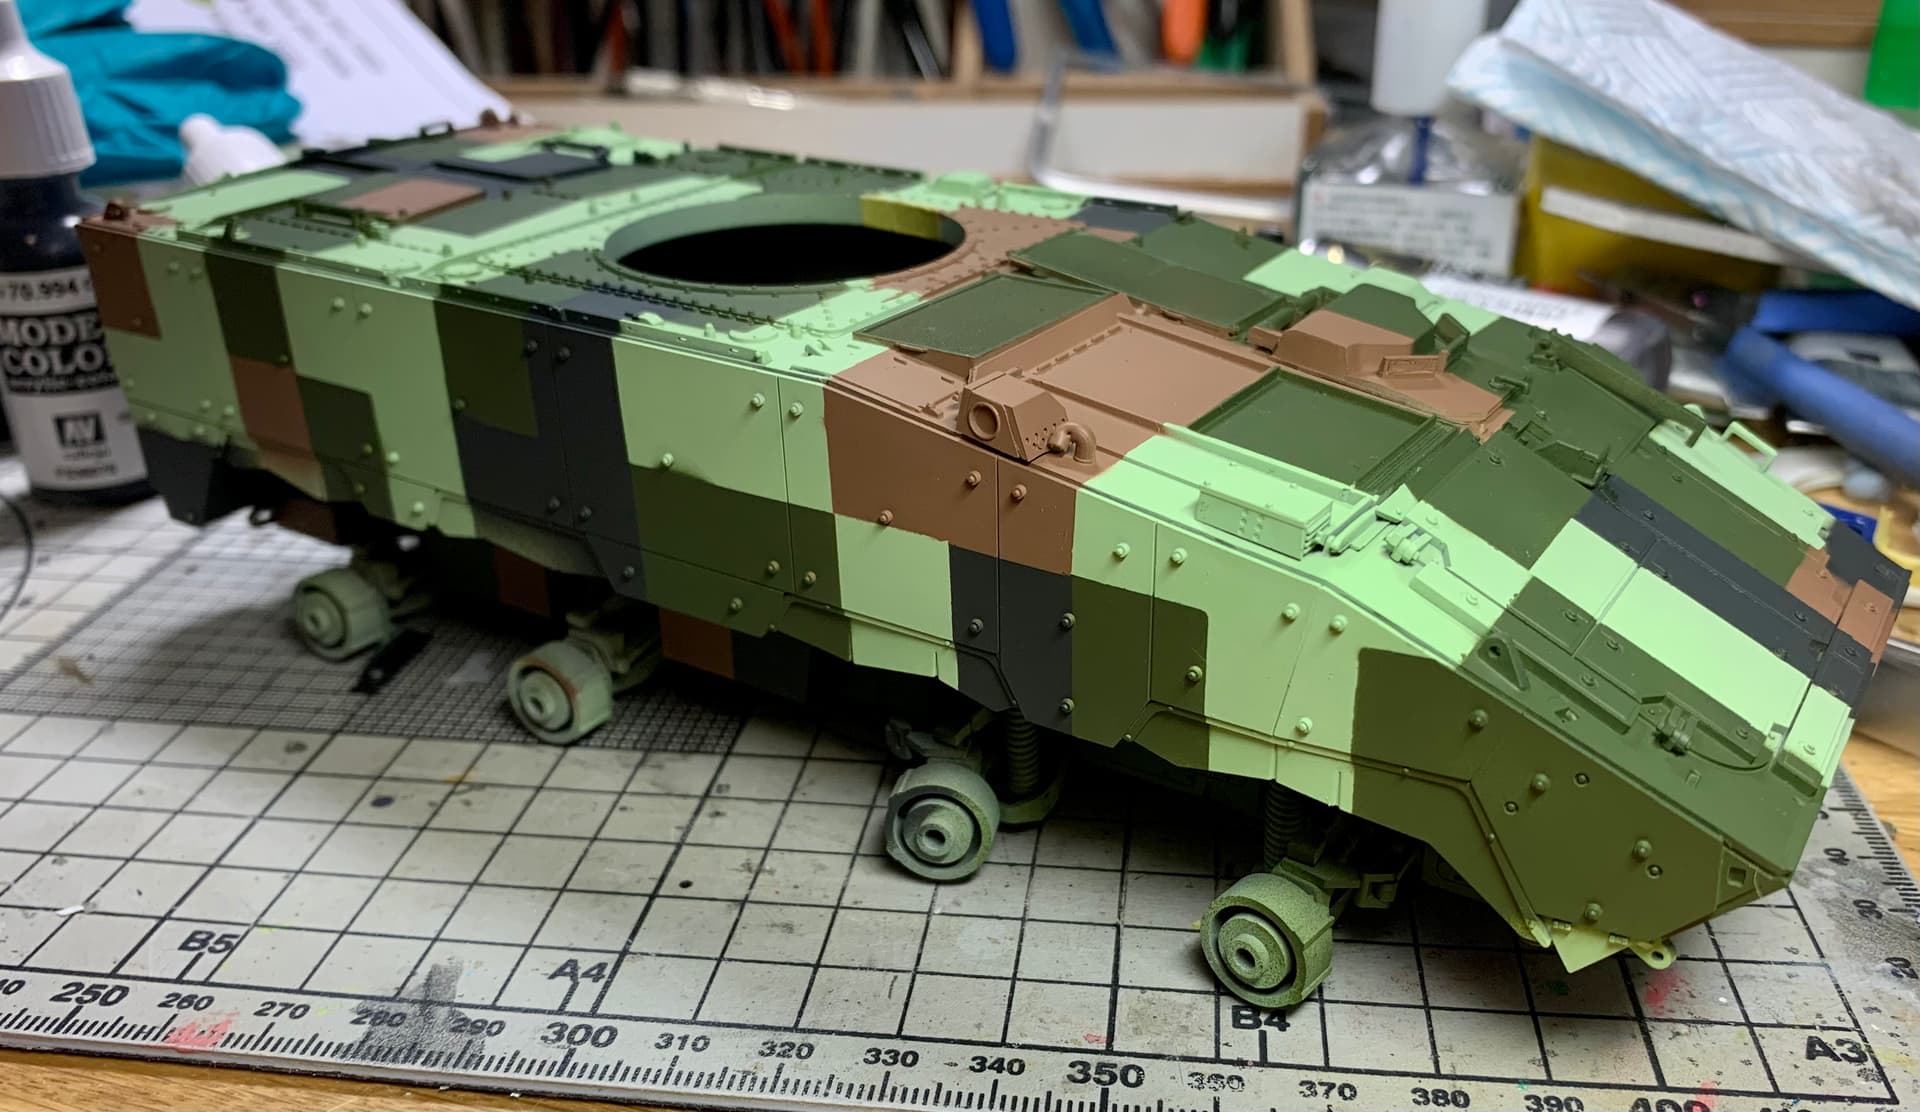
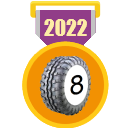
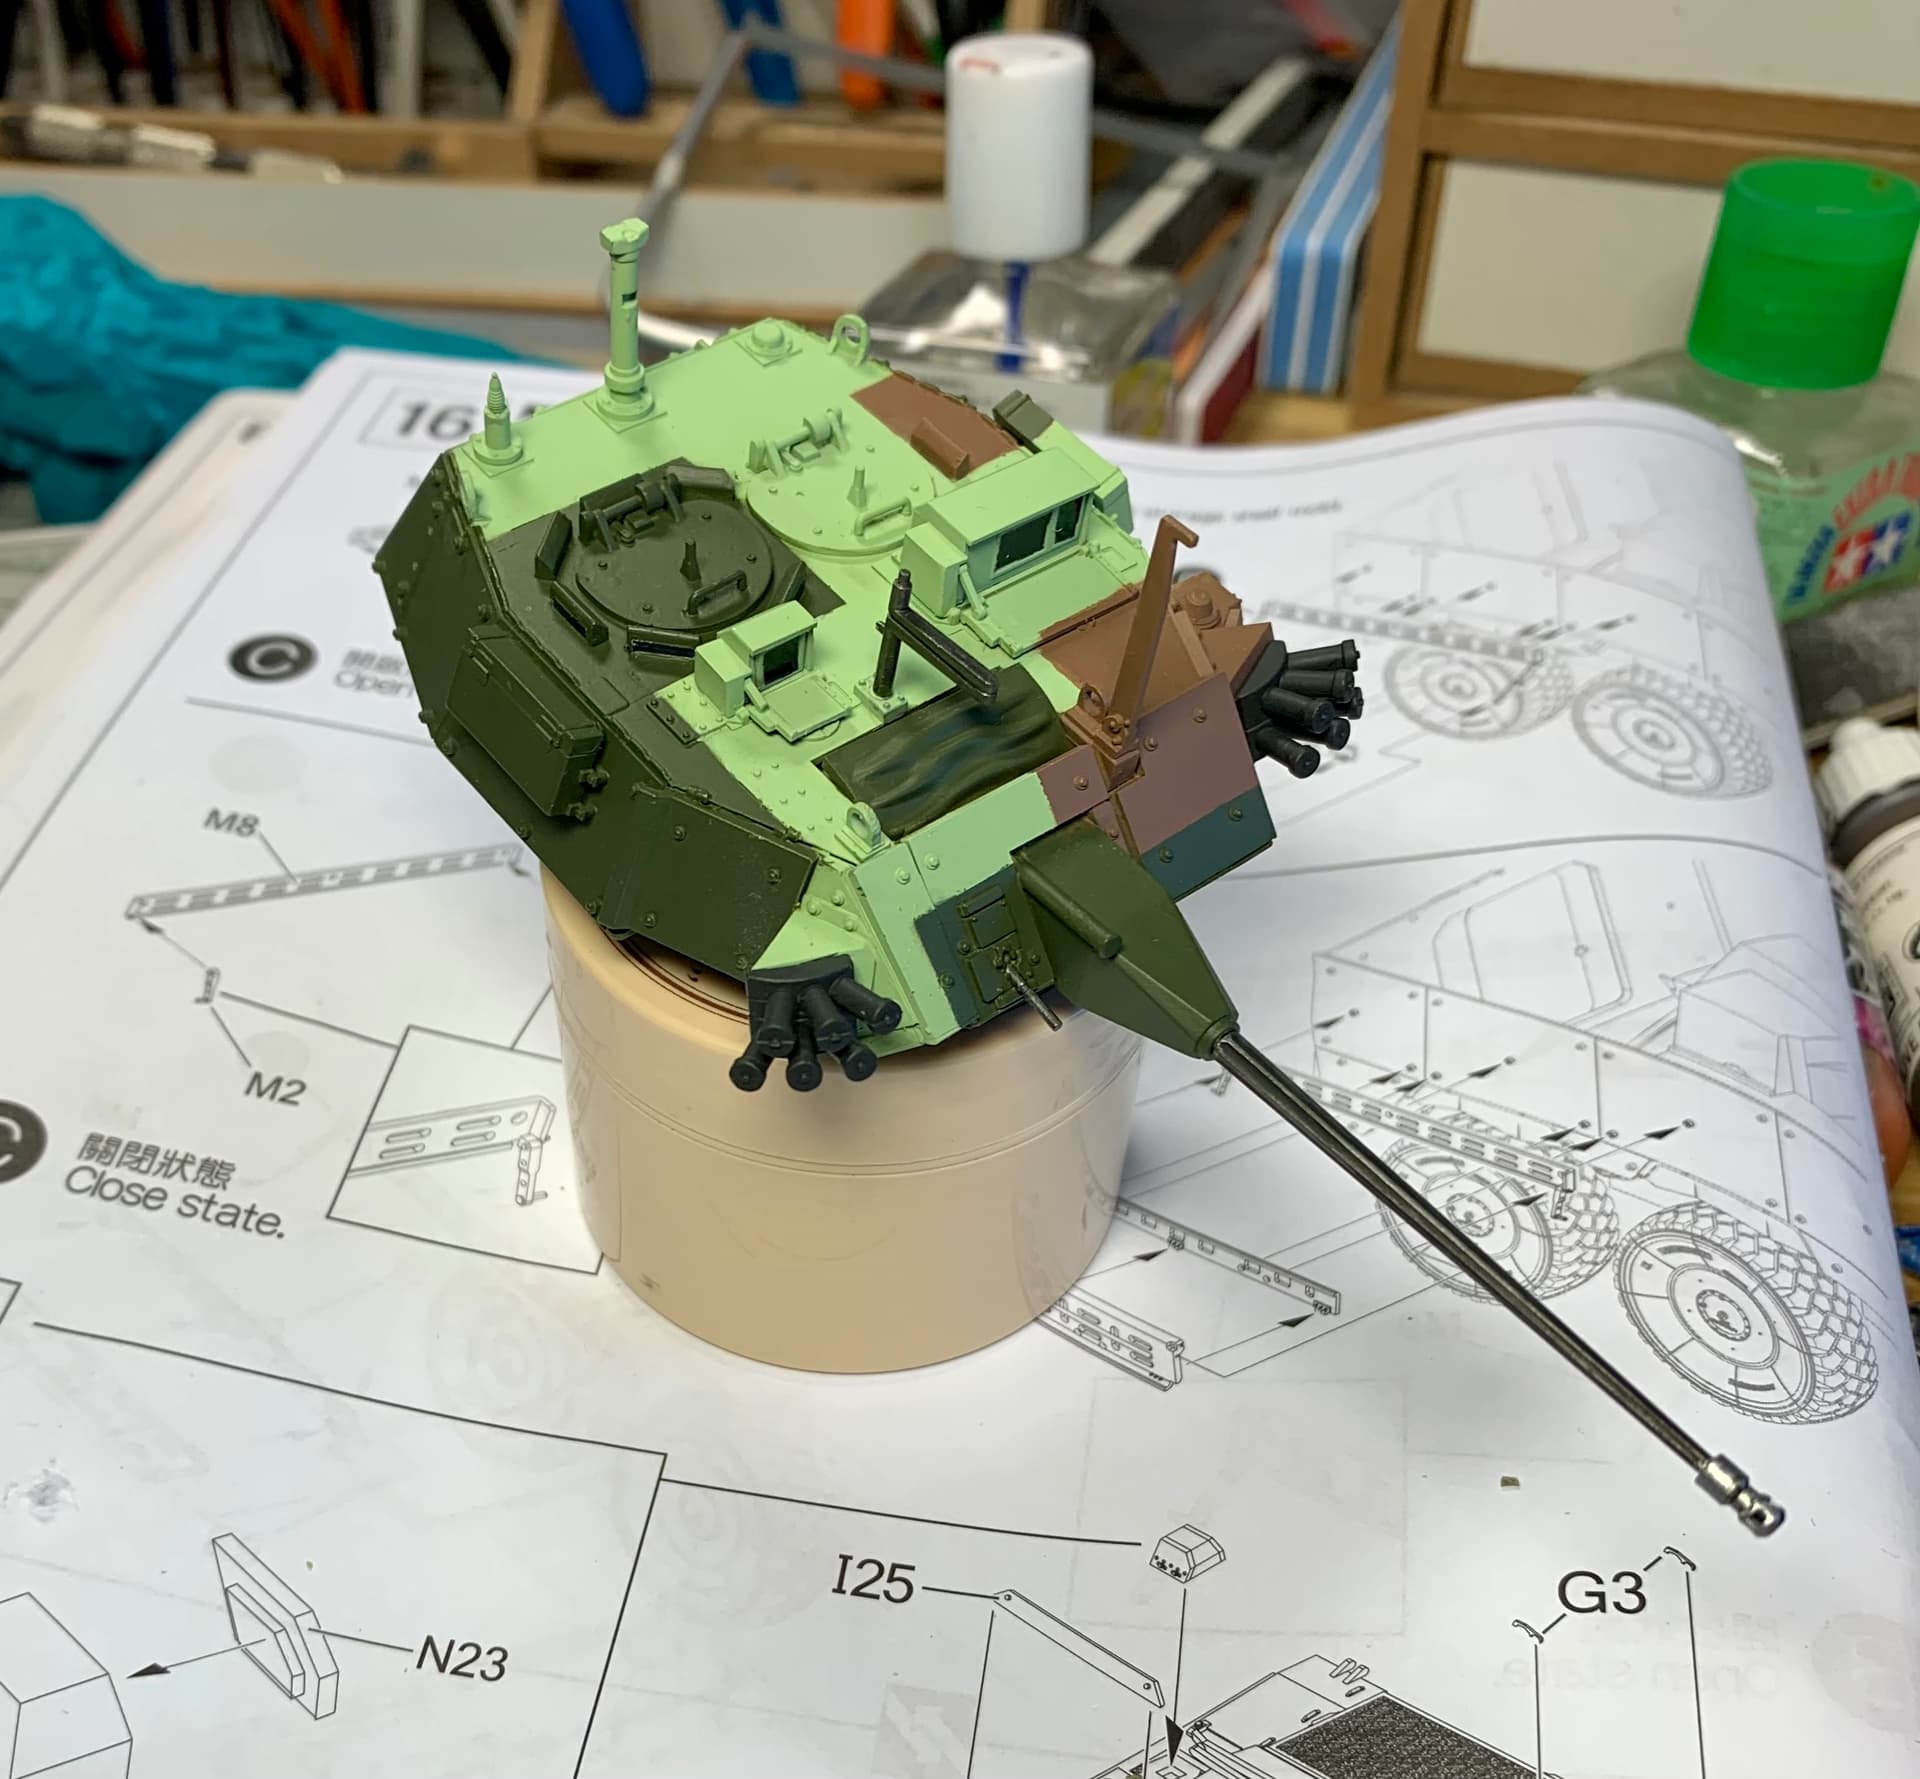
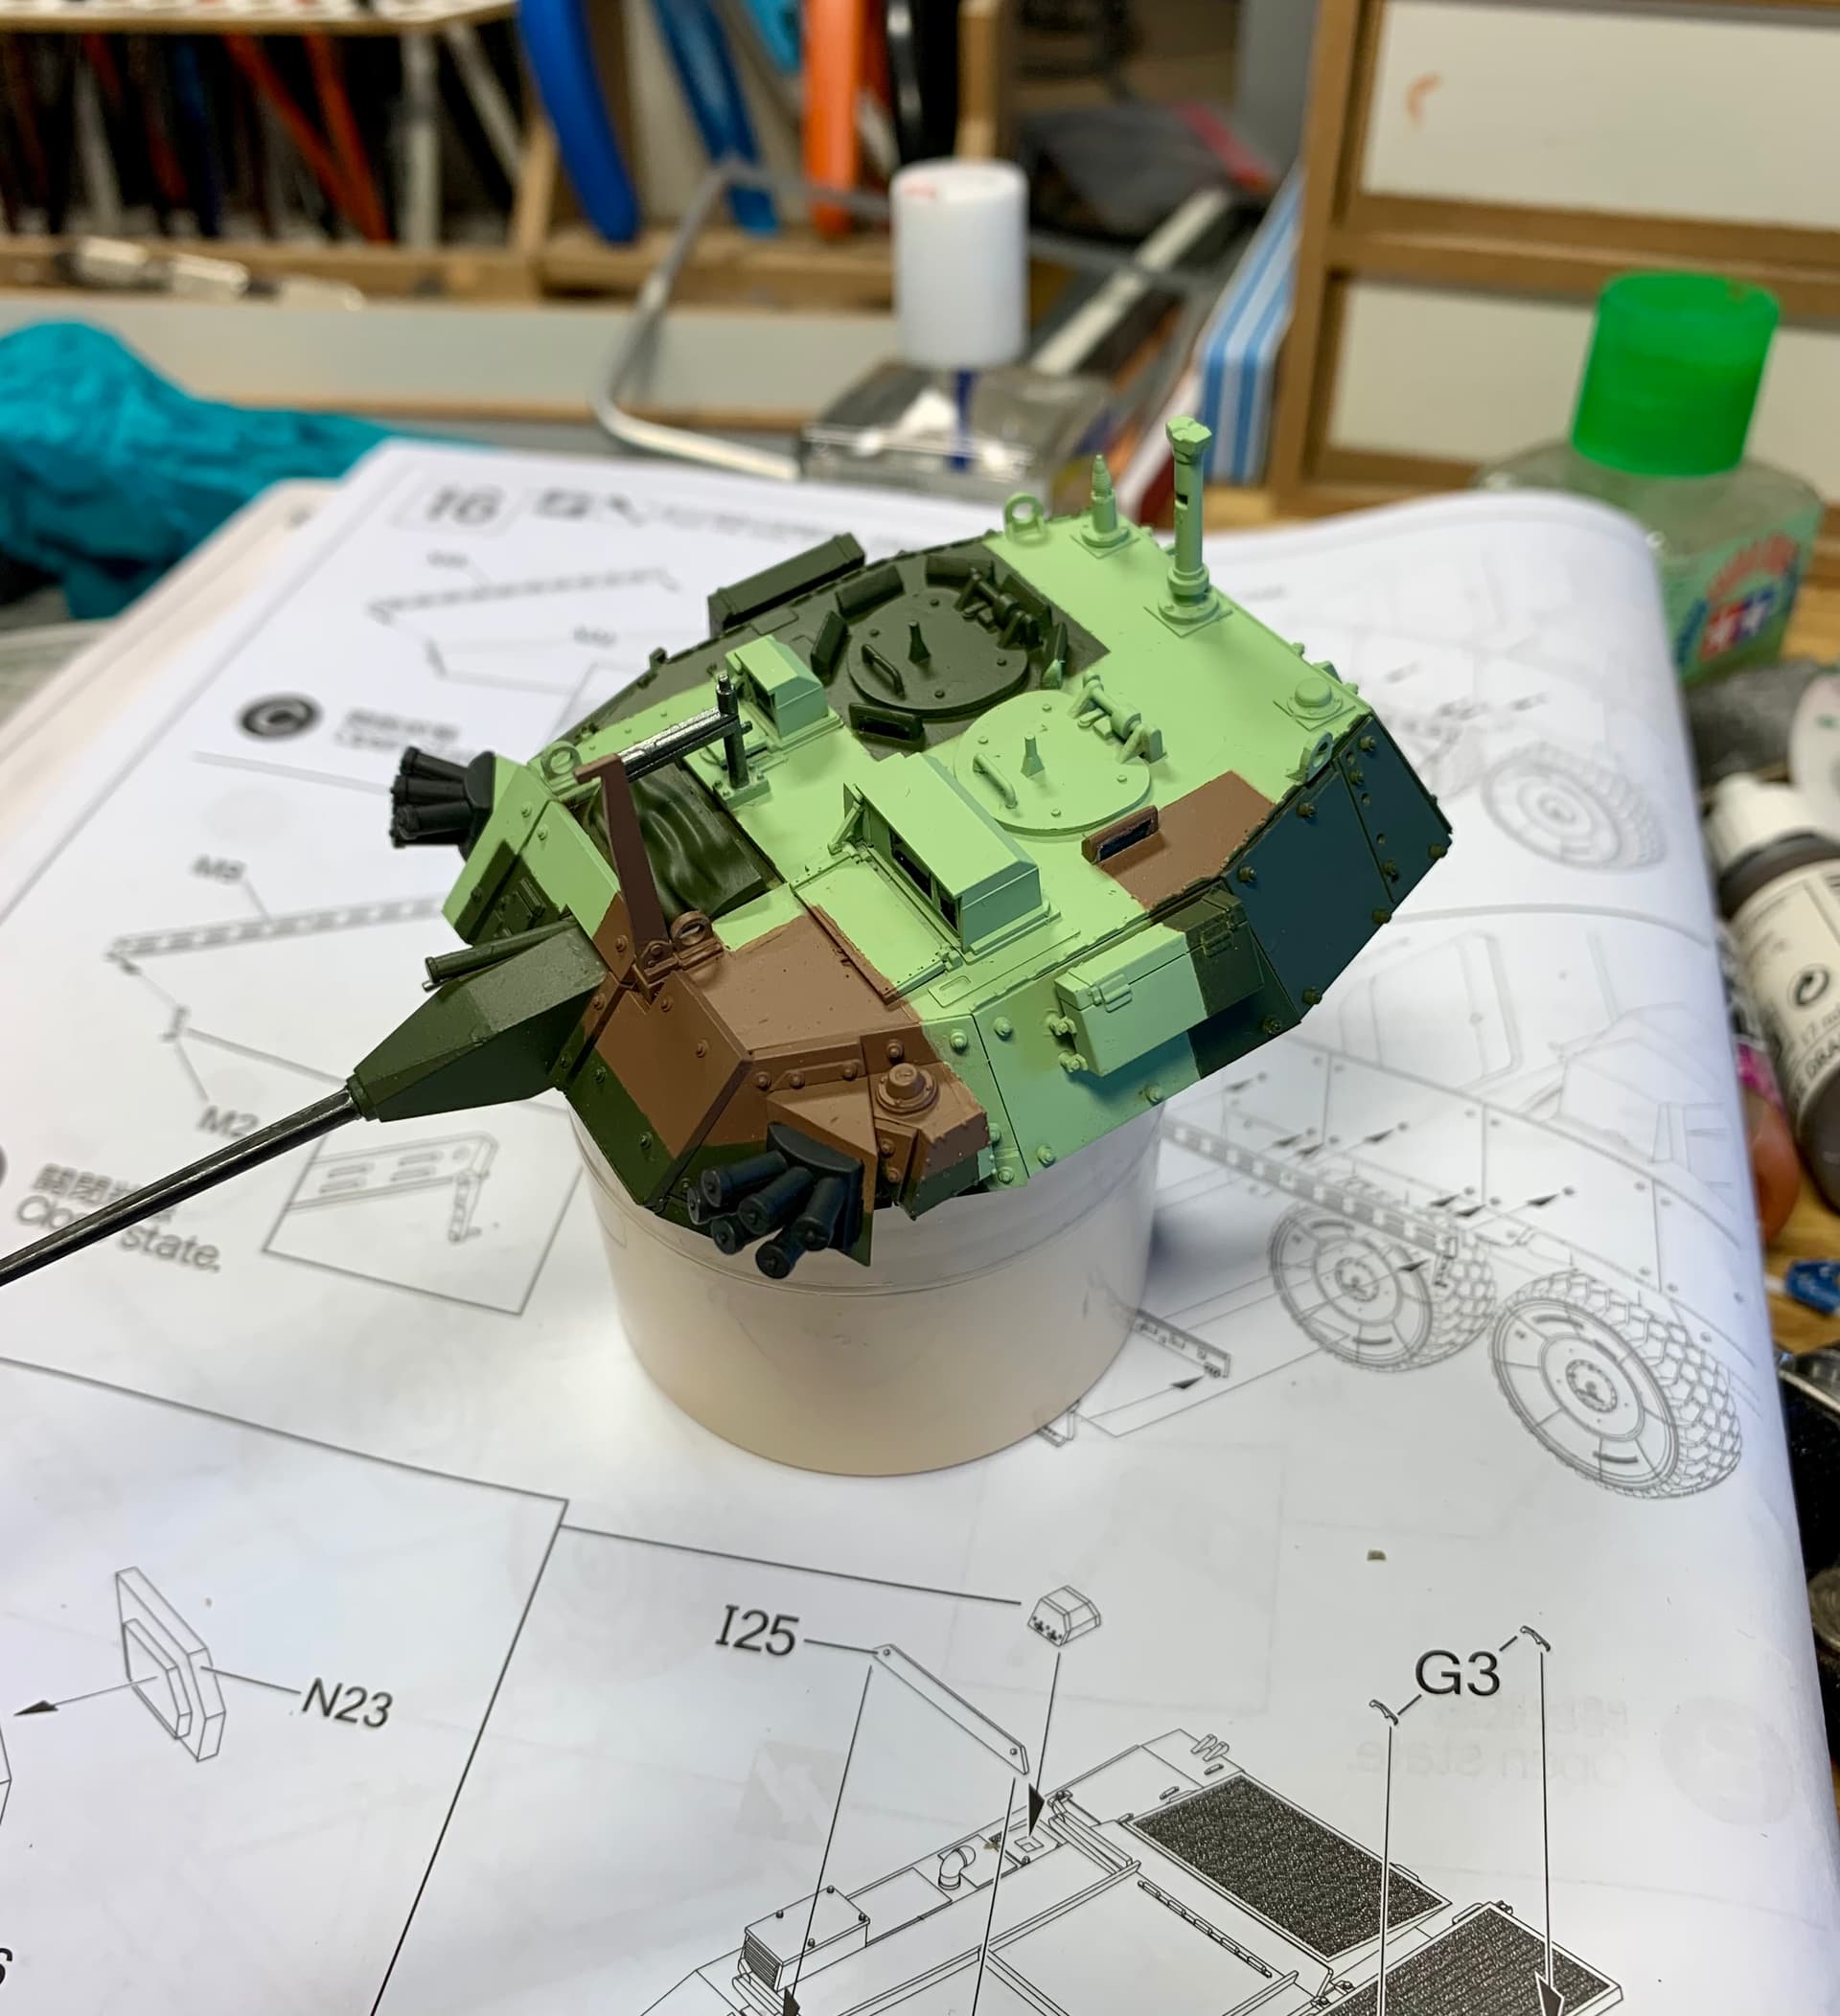
Painting the CM-34 began with a coat of primer which thankfully revealed only one small bit to sand down.

As soon as I opened this kit I began looking into the colors. The four I chose are from Vallejo Model Air- 71009 Eau De Nil Green DE Green, 71017 Russian Green, 71035 Camouflage Light Brown and 71056 Panzer Dark Grey. (I think the three NATO colors from most manufacturers would also work fine- leaving just a light green to source.)

The masking from AFV Club is actually for a different variant of this kit- for the Command & Control vehicle which has an RWS instead of a turret. Apart from a few bits under the turret the schemes are the same- though masking the turret would be totally up to me.
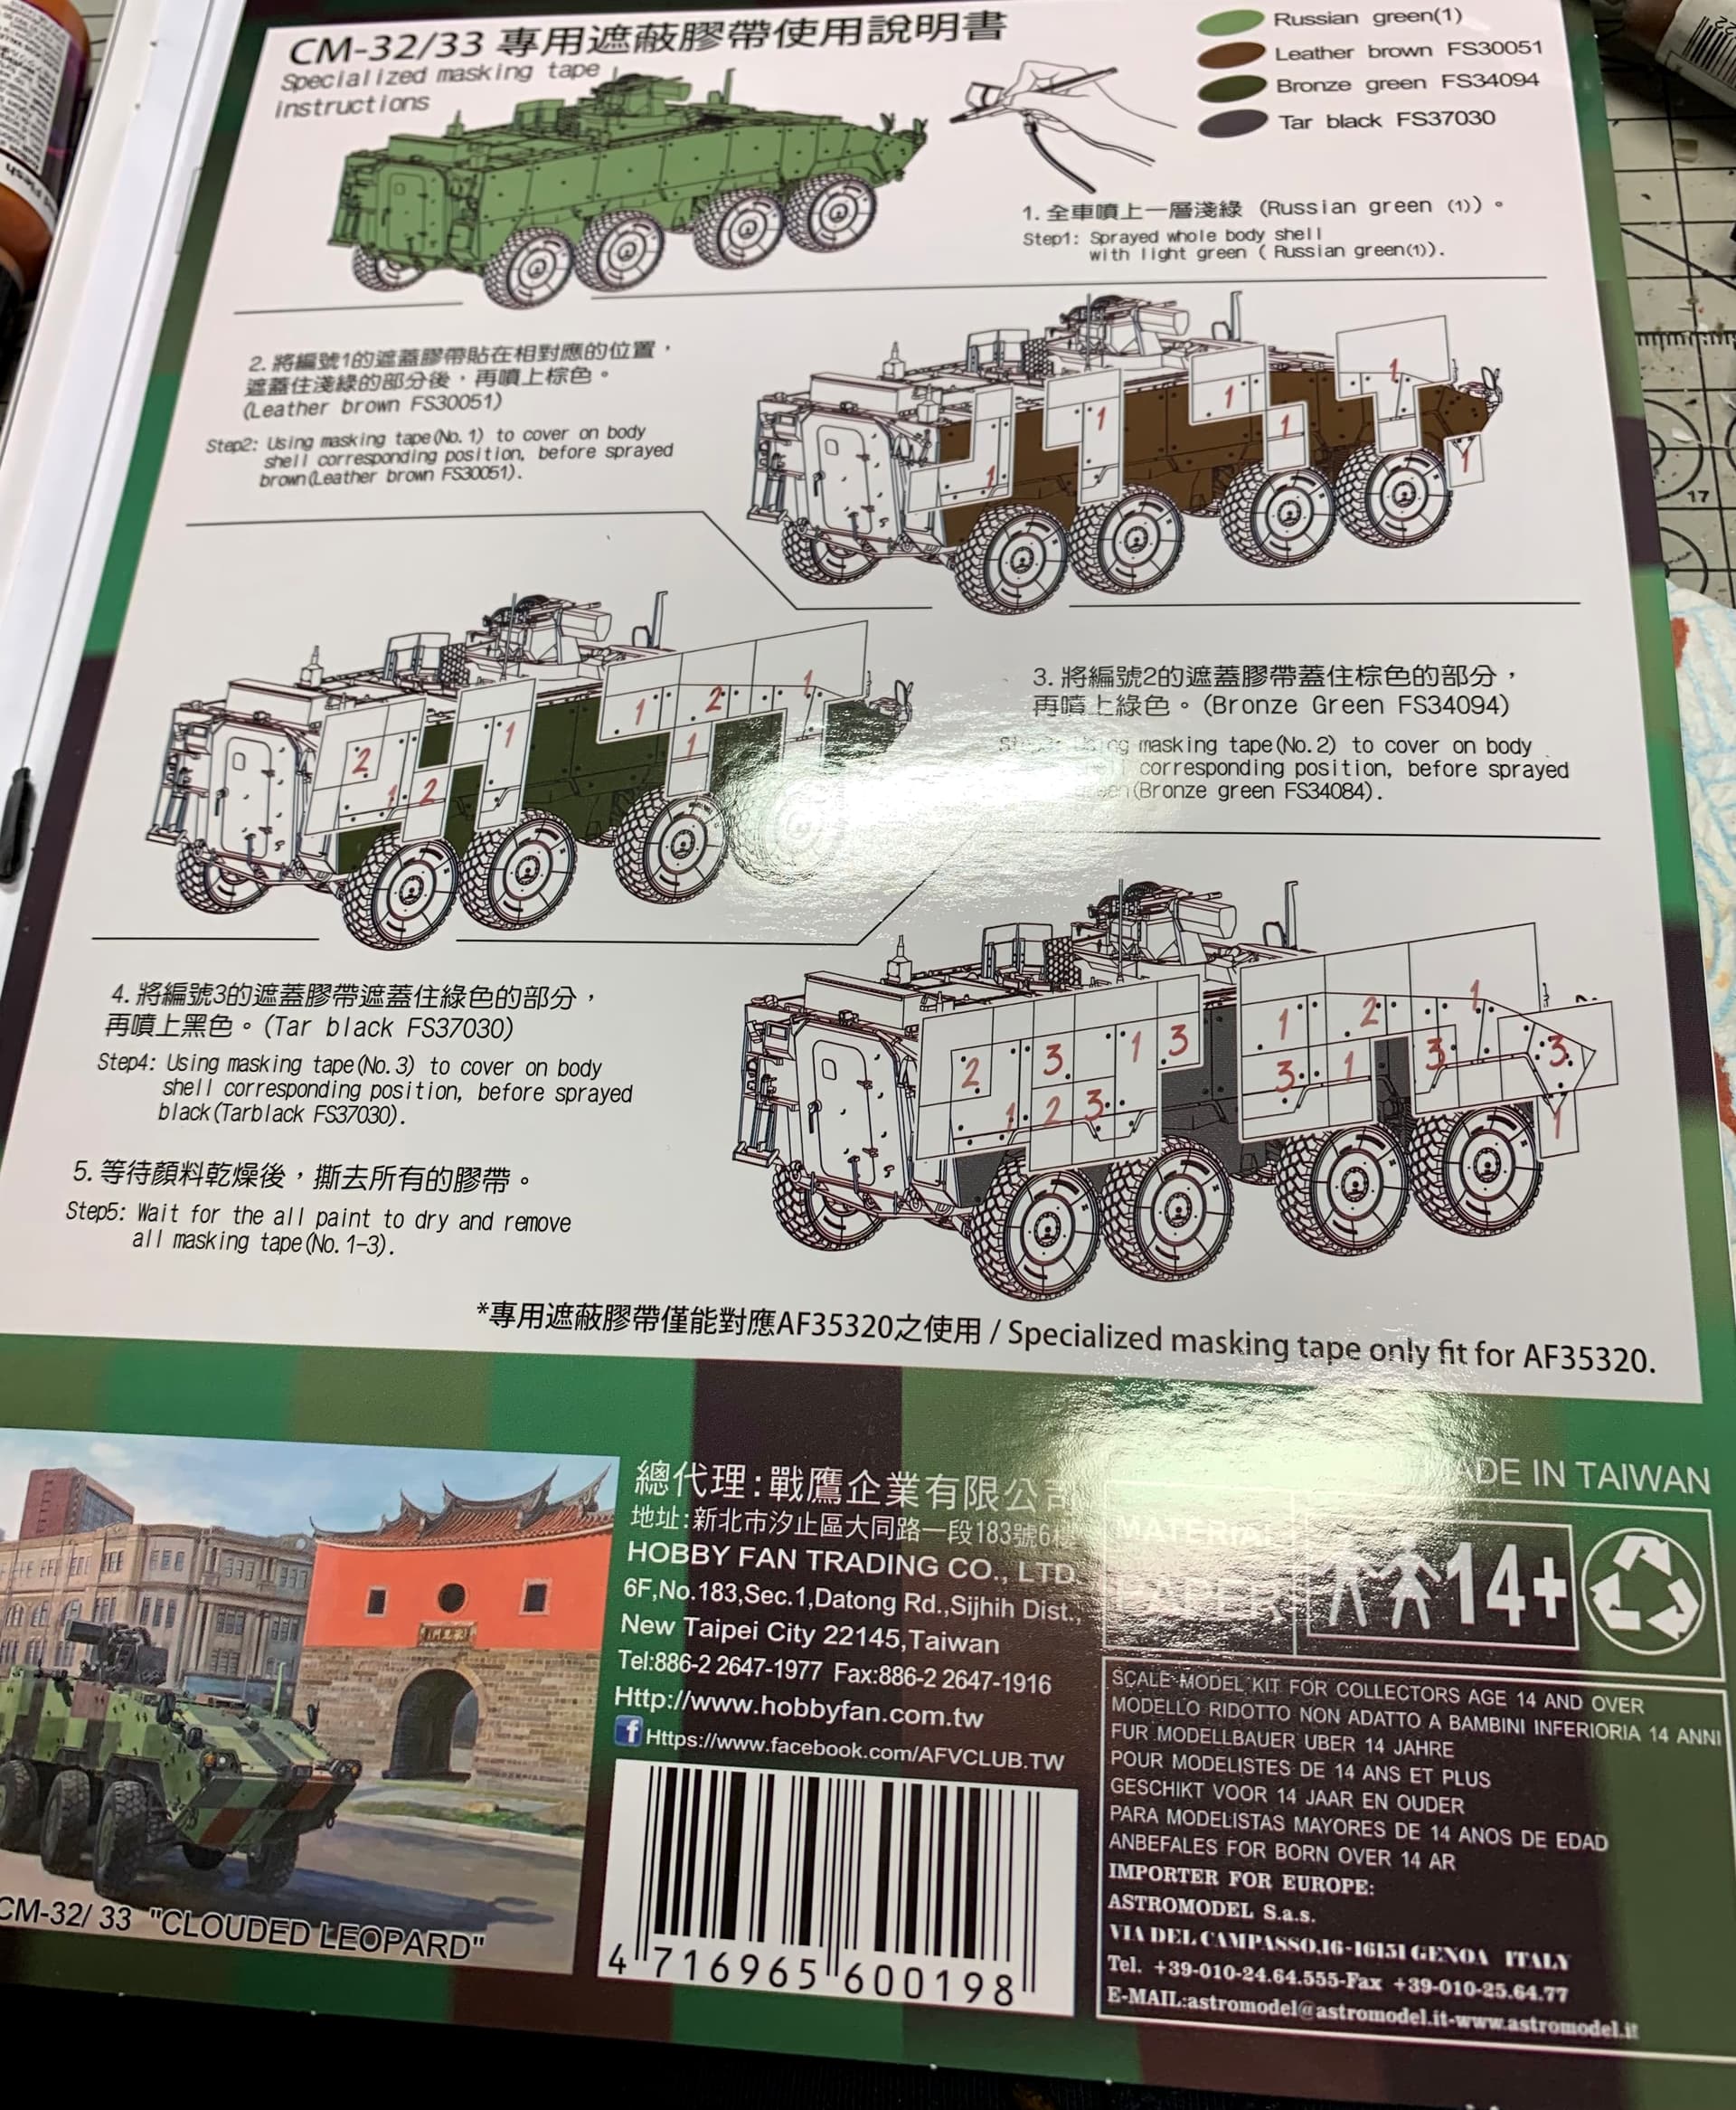

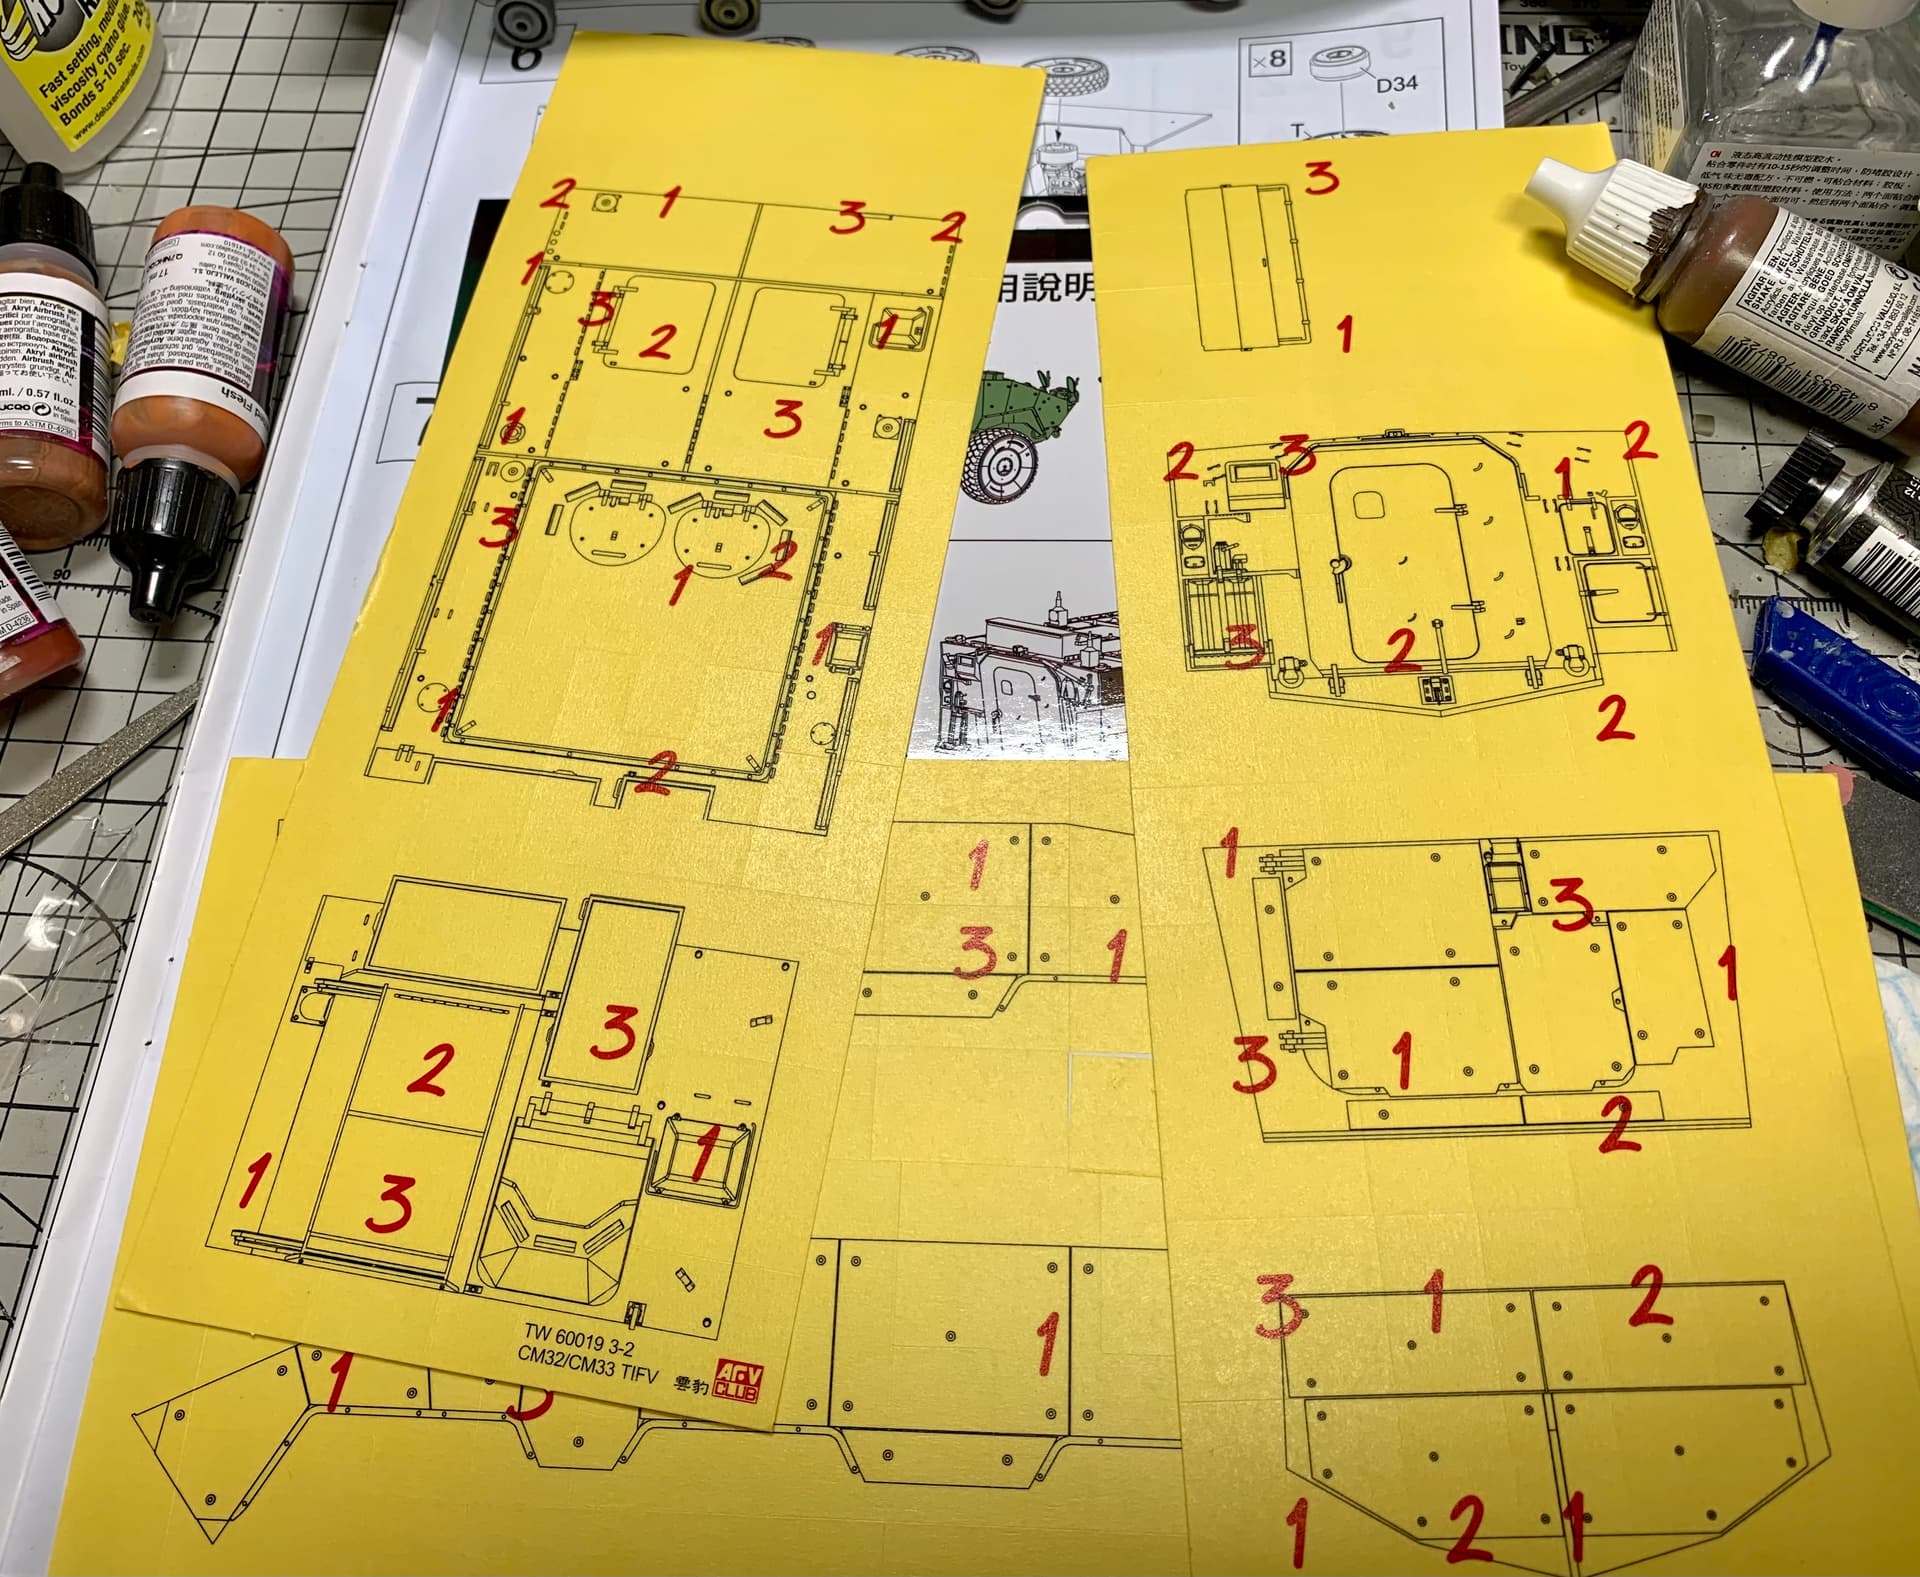
But first was to do the base color- the lightest of all. I did one quick pass then went back and, with the paint guide close at hand, just dialled in on those areas that were going to remain light green.
Now was time to apply the masks and I found them easy to use and accurate. My only complaint is they do not take into account the lumps and bumps of detail- the masks would fit 100% accurately if everything was flat but in some areas the detail means the tape sits proud of the plastic- so some overspray will occur.
The masking instructions would have you paint the entire model the 2nd brown color and the same again for the 3rd color, dark green but there’s no real need for this. It is easier just to concentrate on the areas that will remain brown or dark green rather than spraying the whole model.
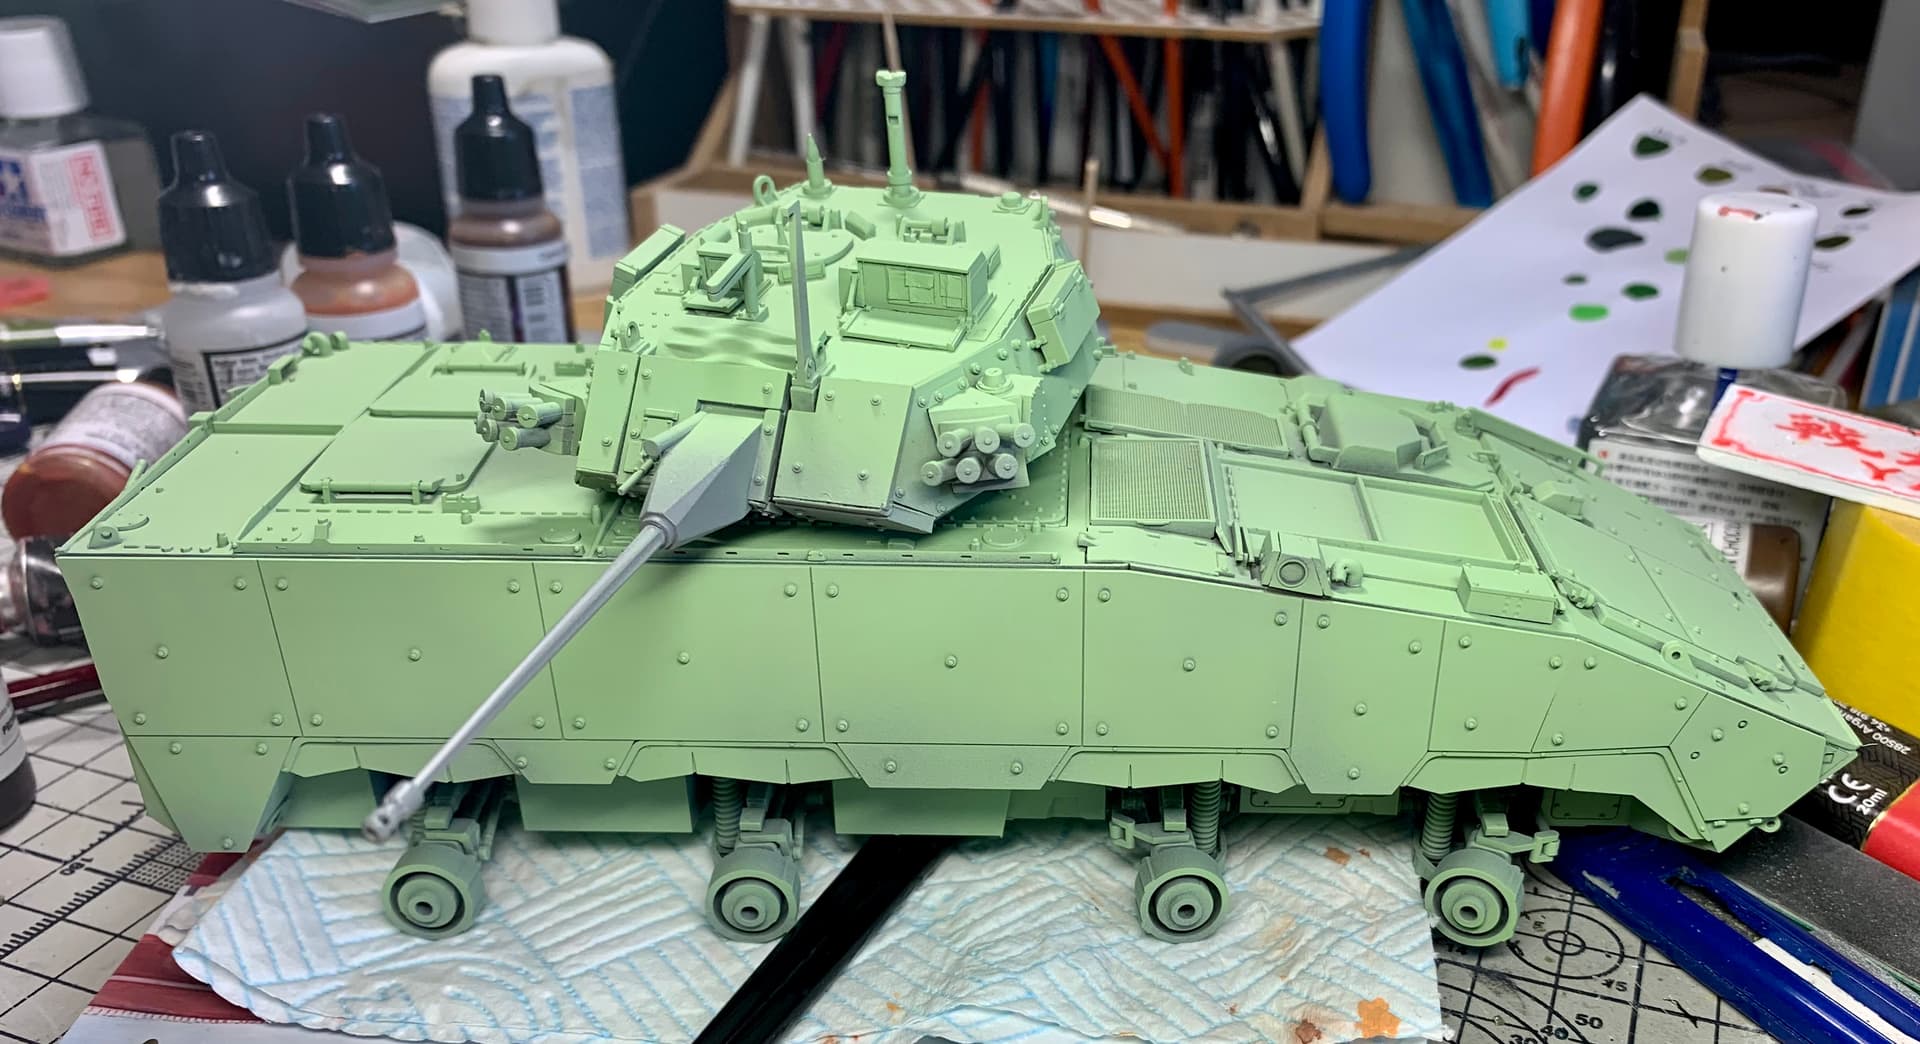
Unlike the hull the turret does not need the dark grey color and masking it myself was not too difficult.
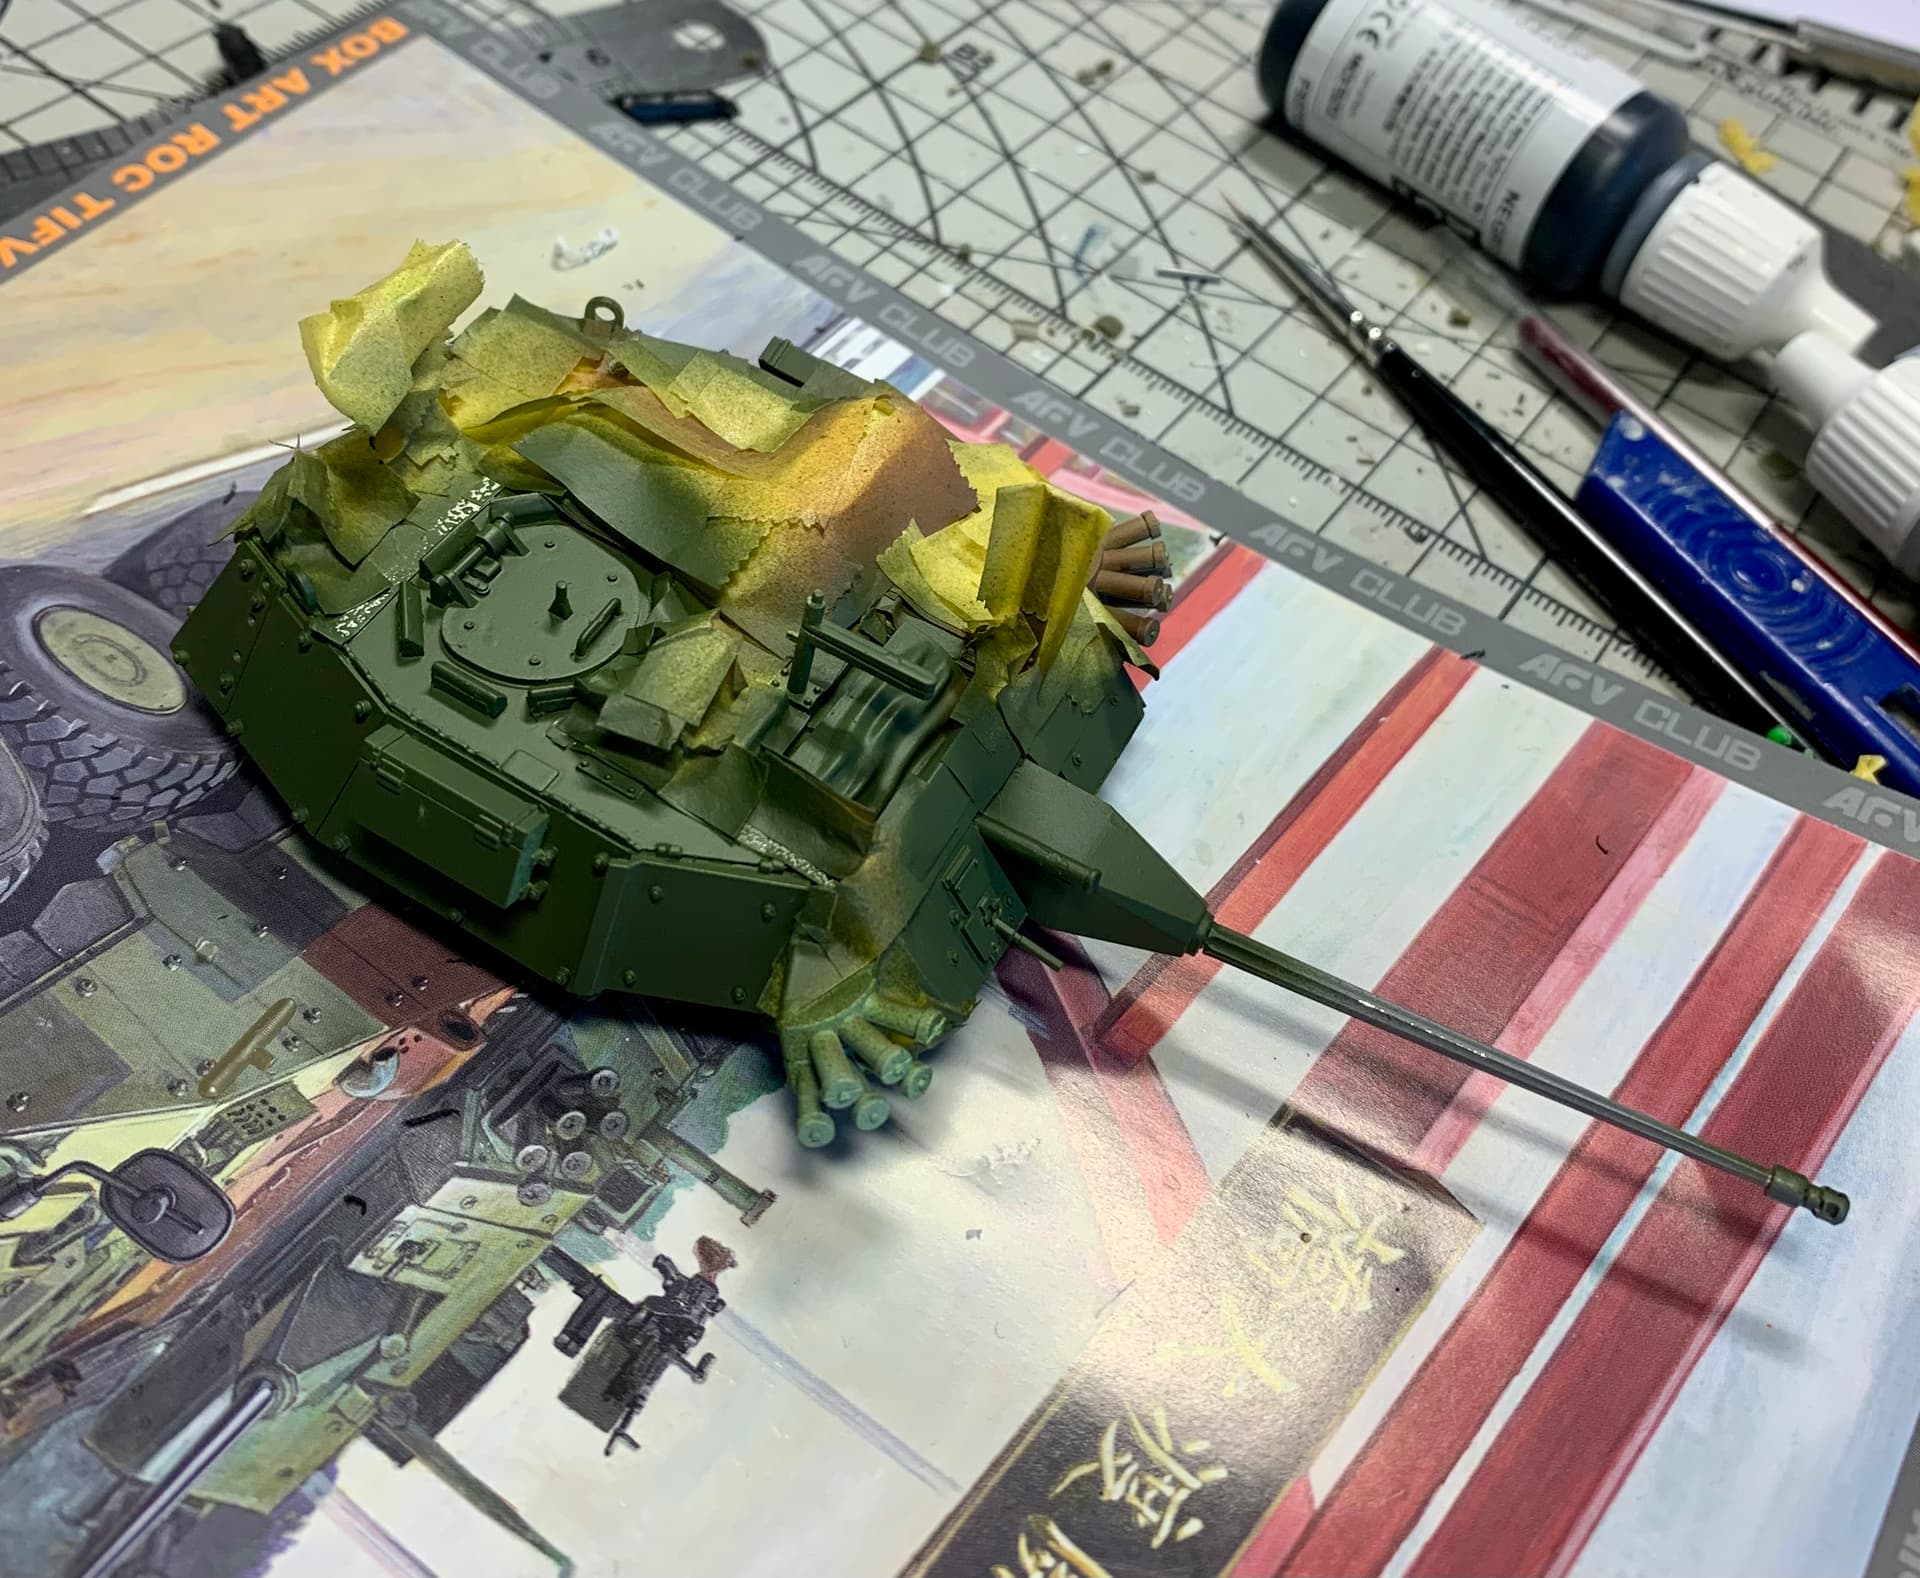
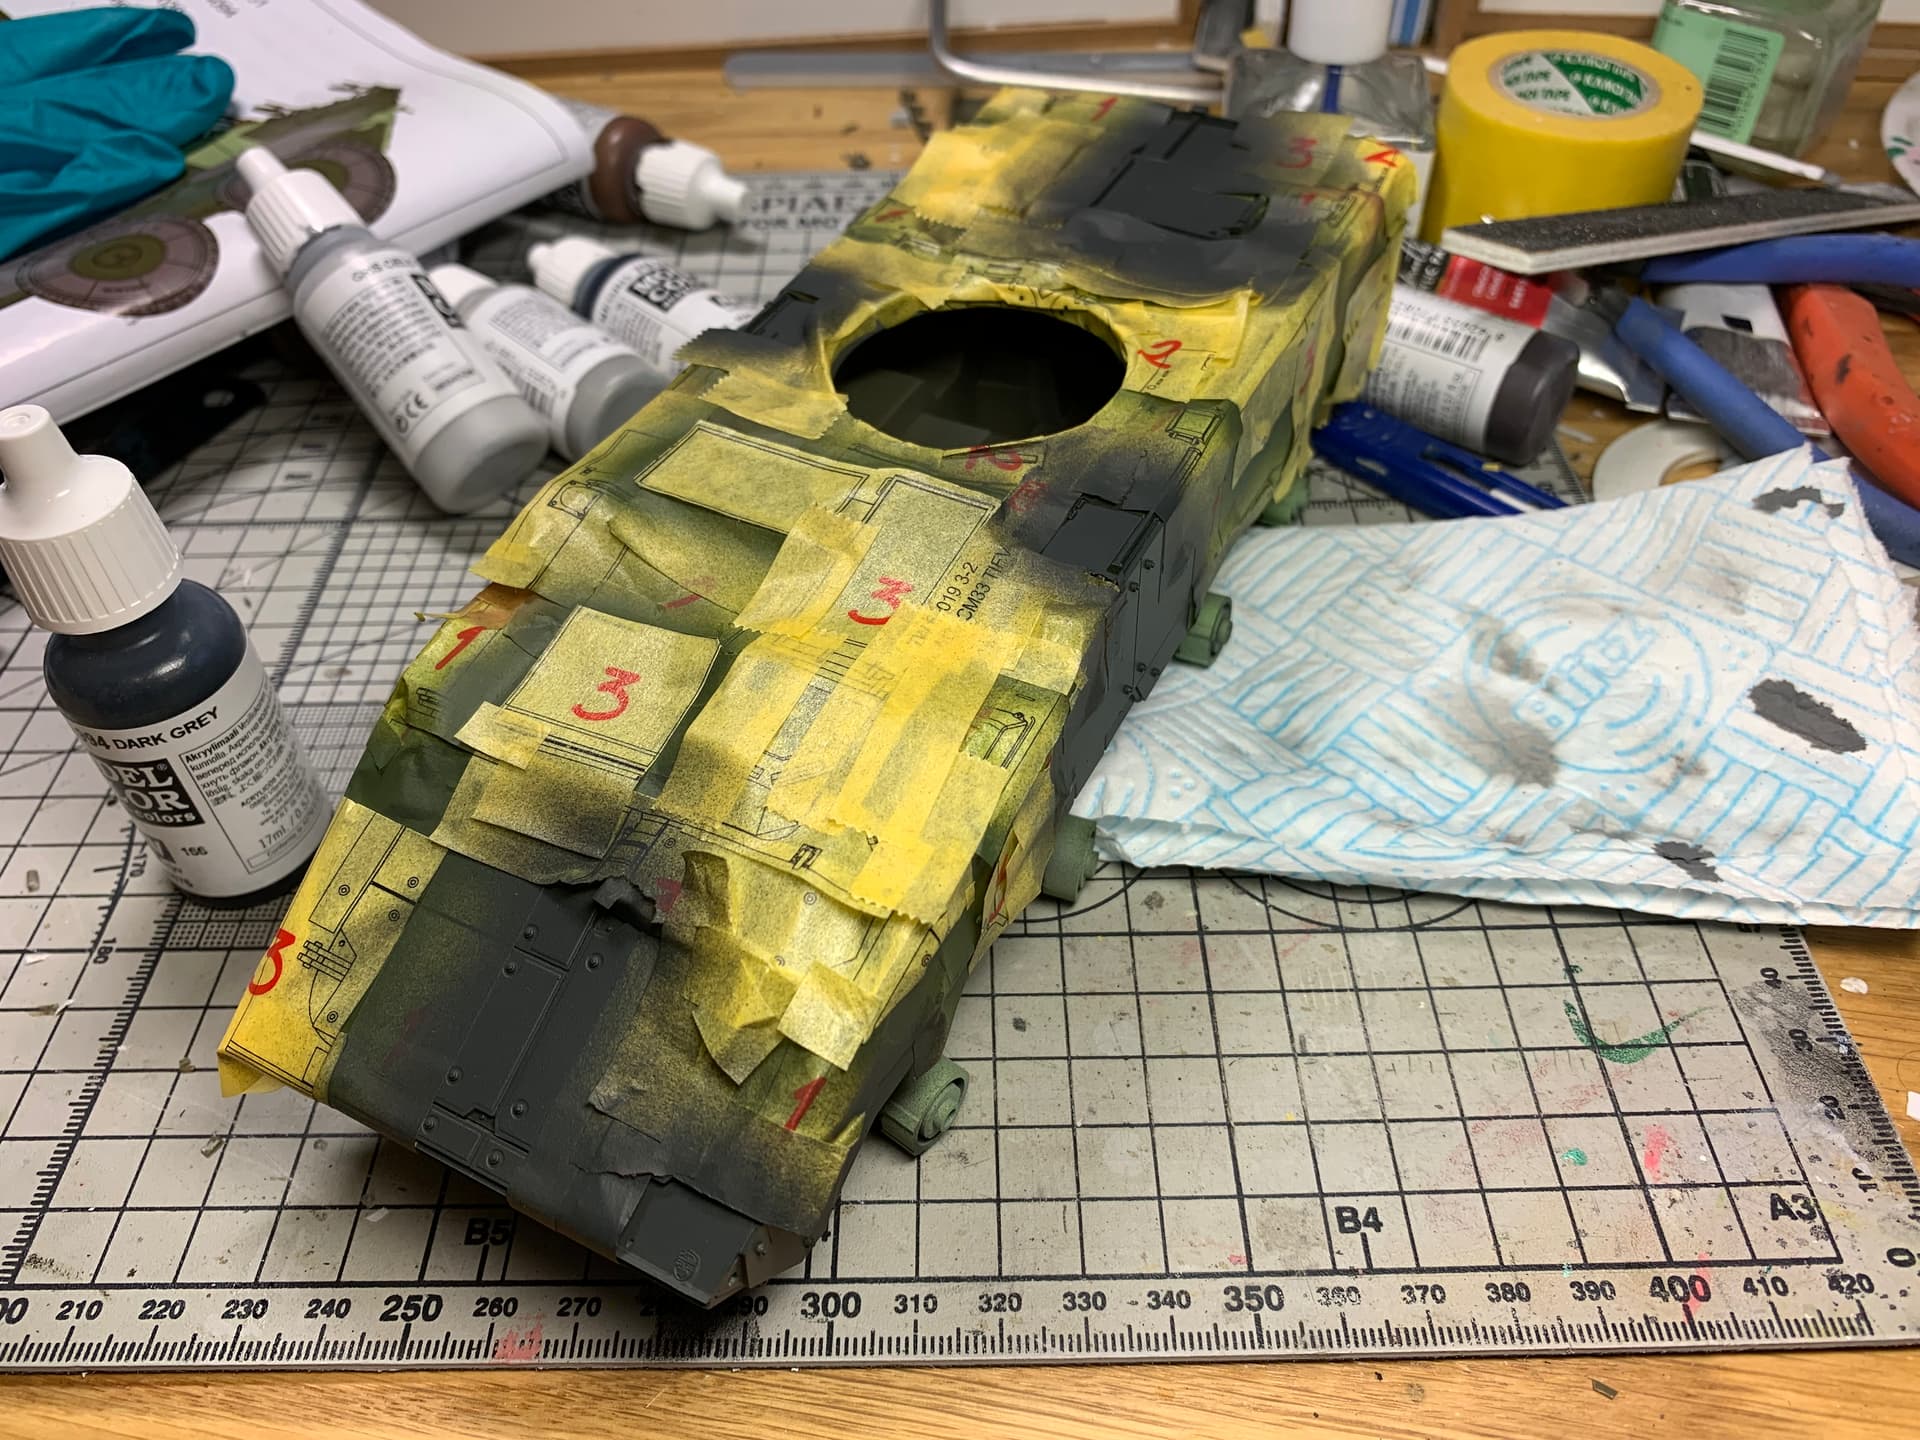
In the pics above you can see the hull and turret after the last painting stage.
Upon removing all the masking I was pleasantly surprised to find the scheme didn’t have too many over sprayed or problem areas.
At the minute I am just tidying up some of the camo scheme. I will get some more pics of it once I am done with that and the detail painting.
Thanks for reading.
11 Likes
That’s looks pretty impressive Karl, and the masks look very good and seem to of made that task a lot easier … Nice combination of colours as well…![]()
2 Likes
Made a start on my ASLAV-R. Resin Upper hull to Trumpeter lower was very good. Just a little sanding and a dab of cyano as a filler. Some filler needed on the rear, not unusual for resin.

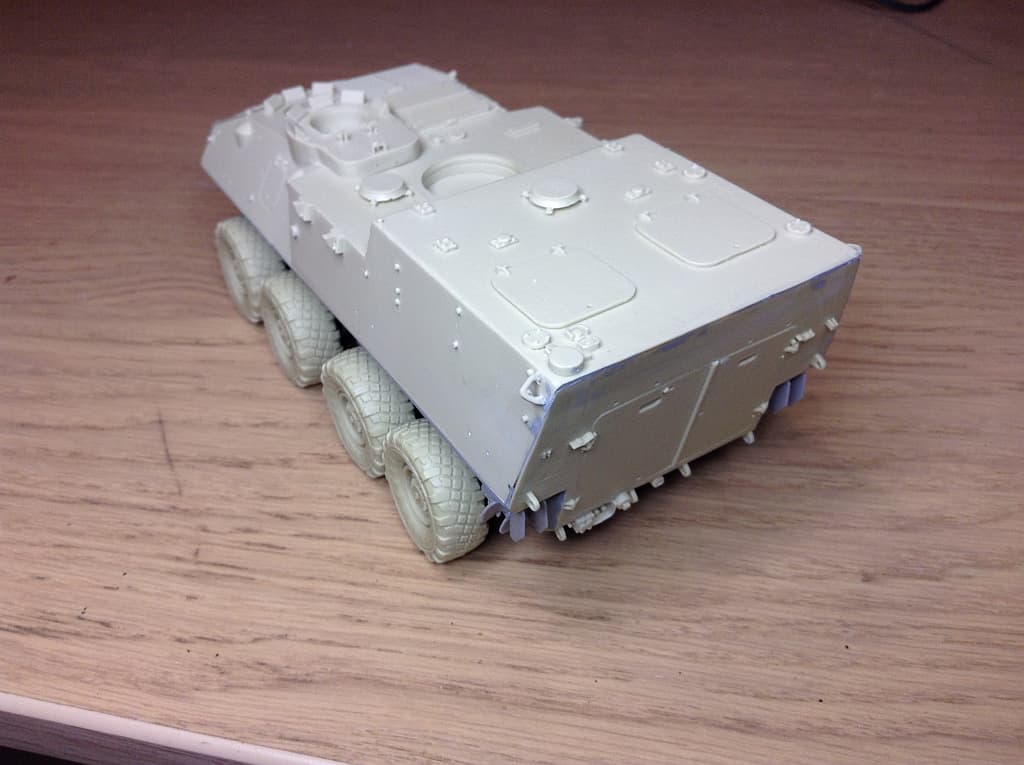
Trumpeter suspension and the ARMS Corp Models Resin wheels test fitted
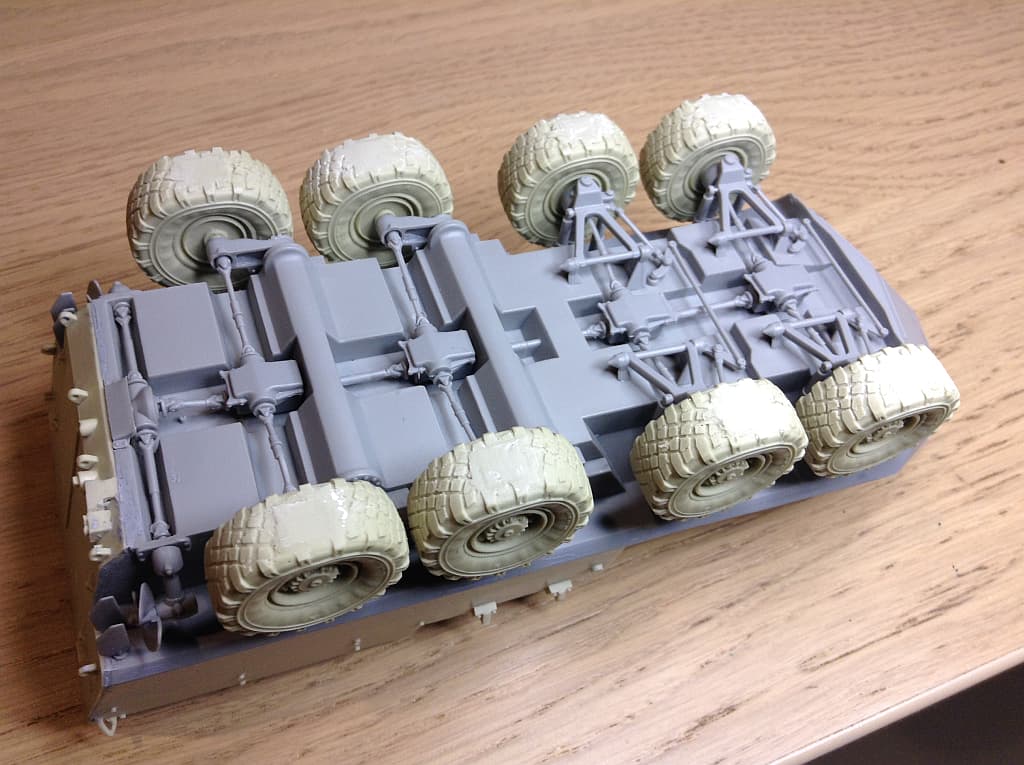
Now to find some more close up pics of the ‘R’. A little different layout to the PC and as usual, the instructions are vague as… (Are you listening Jason M… colour photos and close ups… ![]() )
)
7 Likes
Nice start Peter, looking good ![]()
1 Like
@Johnnych01 Hi John.
Re the award. I could do a silhouette of an eight wheeler vehicle, but at the size, the definition is pretty awful and a 3/4 view vehicle loses the wheel aspect. This is a quick alternate thought for the award - a play on the old ‘8 ball’…
Will look like this on screen:

What do you think? I can make the ribbon part wider to size with the medallion, or visa versa, but you lose the tread definition any smaller.
PS, I went with ‘Purple Heart’ type ribbon as a salute to the poor guys that have been in LAV rollovers…
3 Likes
That’s perfect Peter thanks. That is the official award … Or will be. Great work ![]()
1 Like
As I mentioned in the previous update I was glad to see there was not too much overspray on the scheme.
If I had been planning to dirty up the vehicle much then I would have tidied up any issues with a brush but my plan is to have minimal weathering to let the paint scheme shine.
So I took a bit more time to fix any paint imperfections using masking tape and airbrushing. One or two areas were finished up with a brush along with various details like the pioneer tools.


Thanks for reading.
11 Likes
That is real striking paint scheme. Really stands out. And you’re right, would be a shame to hide it away under a heavy weathering ![]()
2 Likes