I’ve avoided using pouring resin for water, instead using clear acrylic paste for smooth water for model ships. “Water” for model ships only need to be a couple of mm’s in depth, but for this project I need a lot more depth, and something that looks a lot more realistic for 1/35. I want to model a mountain stream running over a small waterfall, then flowing down a rocky stream bed. Acrylic paste, or liquid, won’t work for this, and I know will not harden in depths more than a few mm’s. I’ve used casting resin before, so I’m not totally ignorant in using resin. But I would like some advice in pouring resin so that it flows realistically yet does not pool, or collect somewhere at the bottom end of the stream. Parts of the stream is on the edge of the dio and will need damming, as well as at the bottom end, to keep the resin from just flowing right out.
Any advice from those who have done similar?
![]()
![]()

Towards the end they have water coming out of the drain pipe which is basically what you’re after. I haven’t tried it but I would like to one day.
That’s basically what I did here with artist’s acrylic gels and varnishes (which is what Vallejo is):
But I want my water running downhill rapidly, and with more depth than with just a couple of mm’s.
G @G-man69 has done a couple of really good flowing water dios. Maybe worth looking through ?
Carrier Crossing 2, Honey I Shrunk The Diorama
&
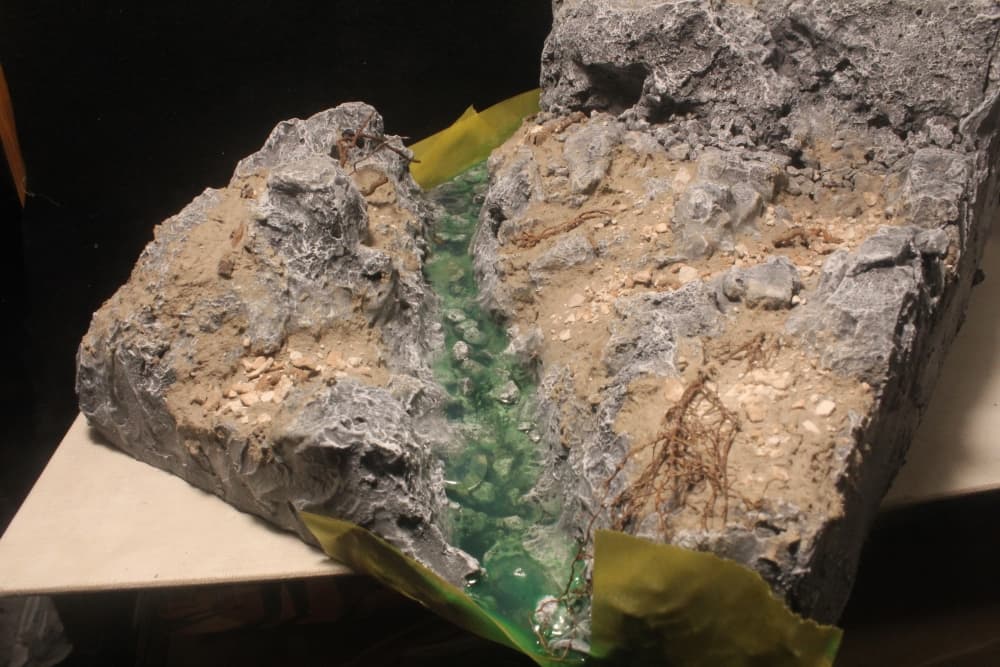
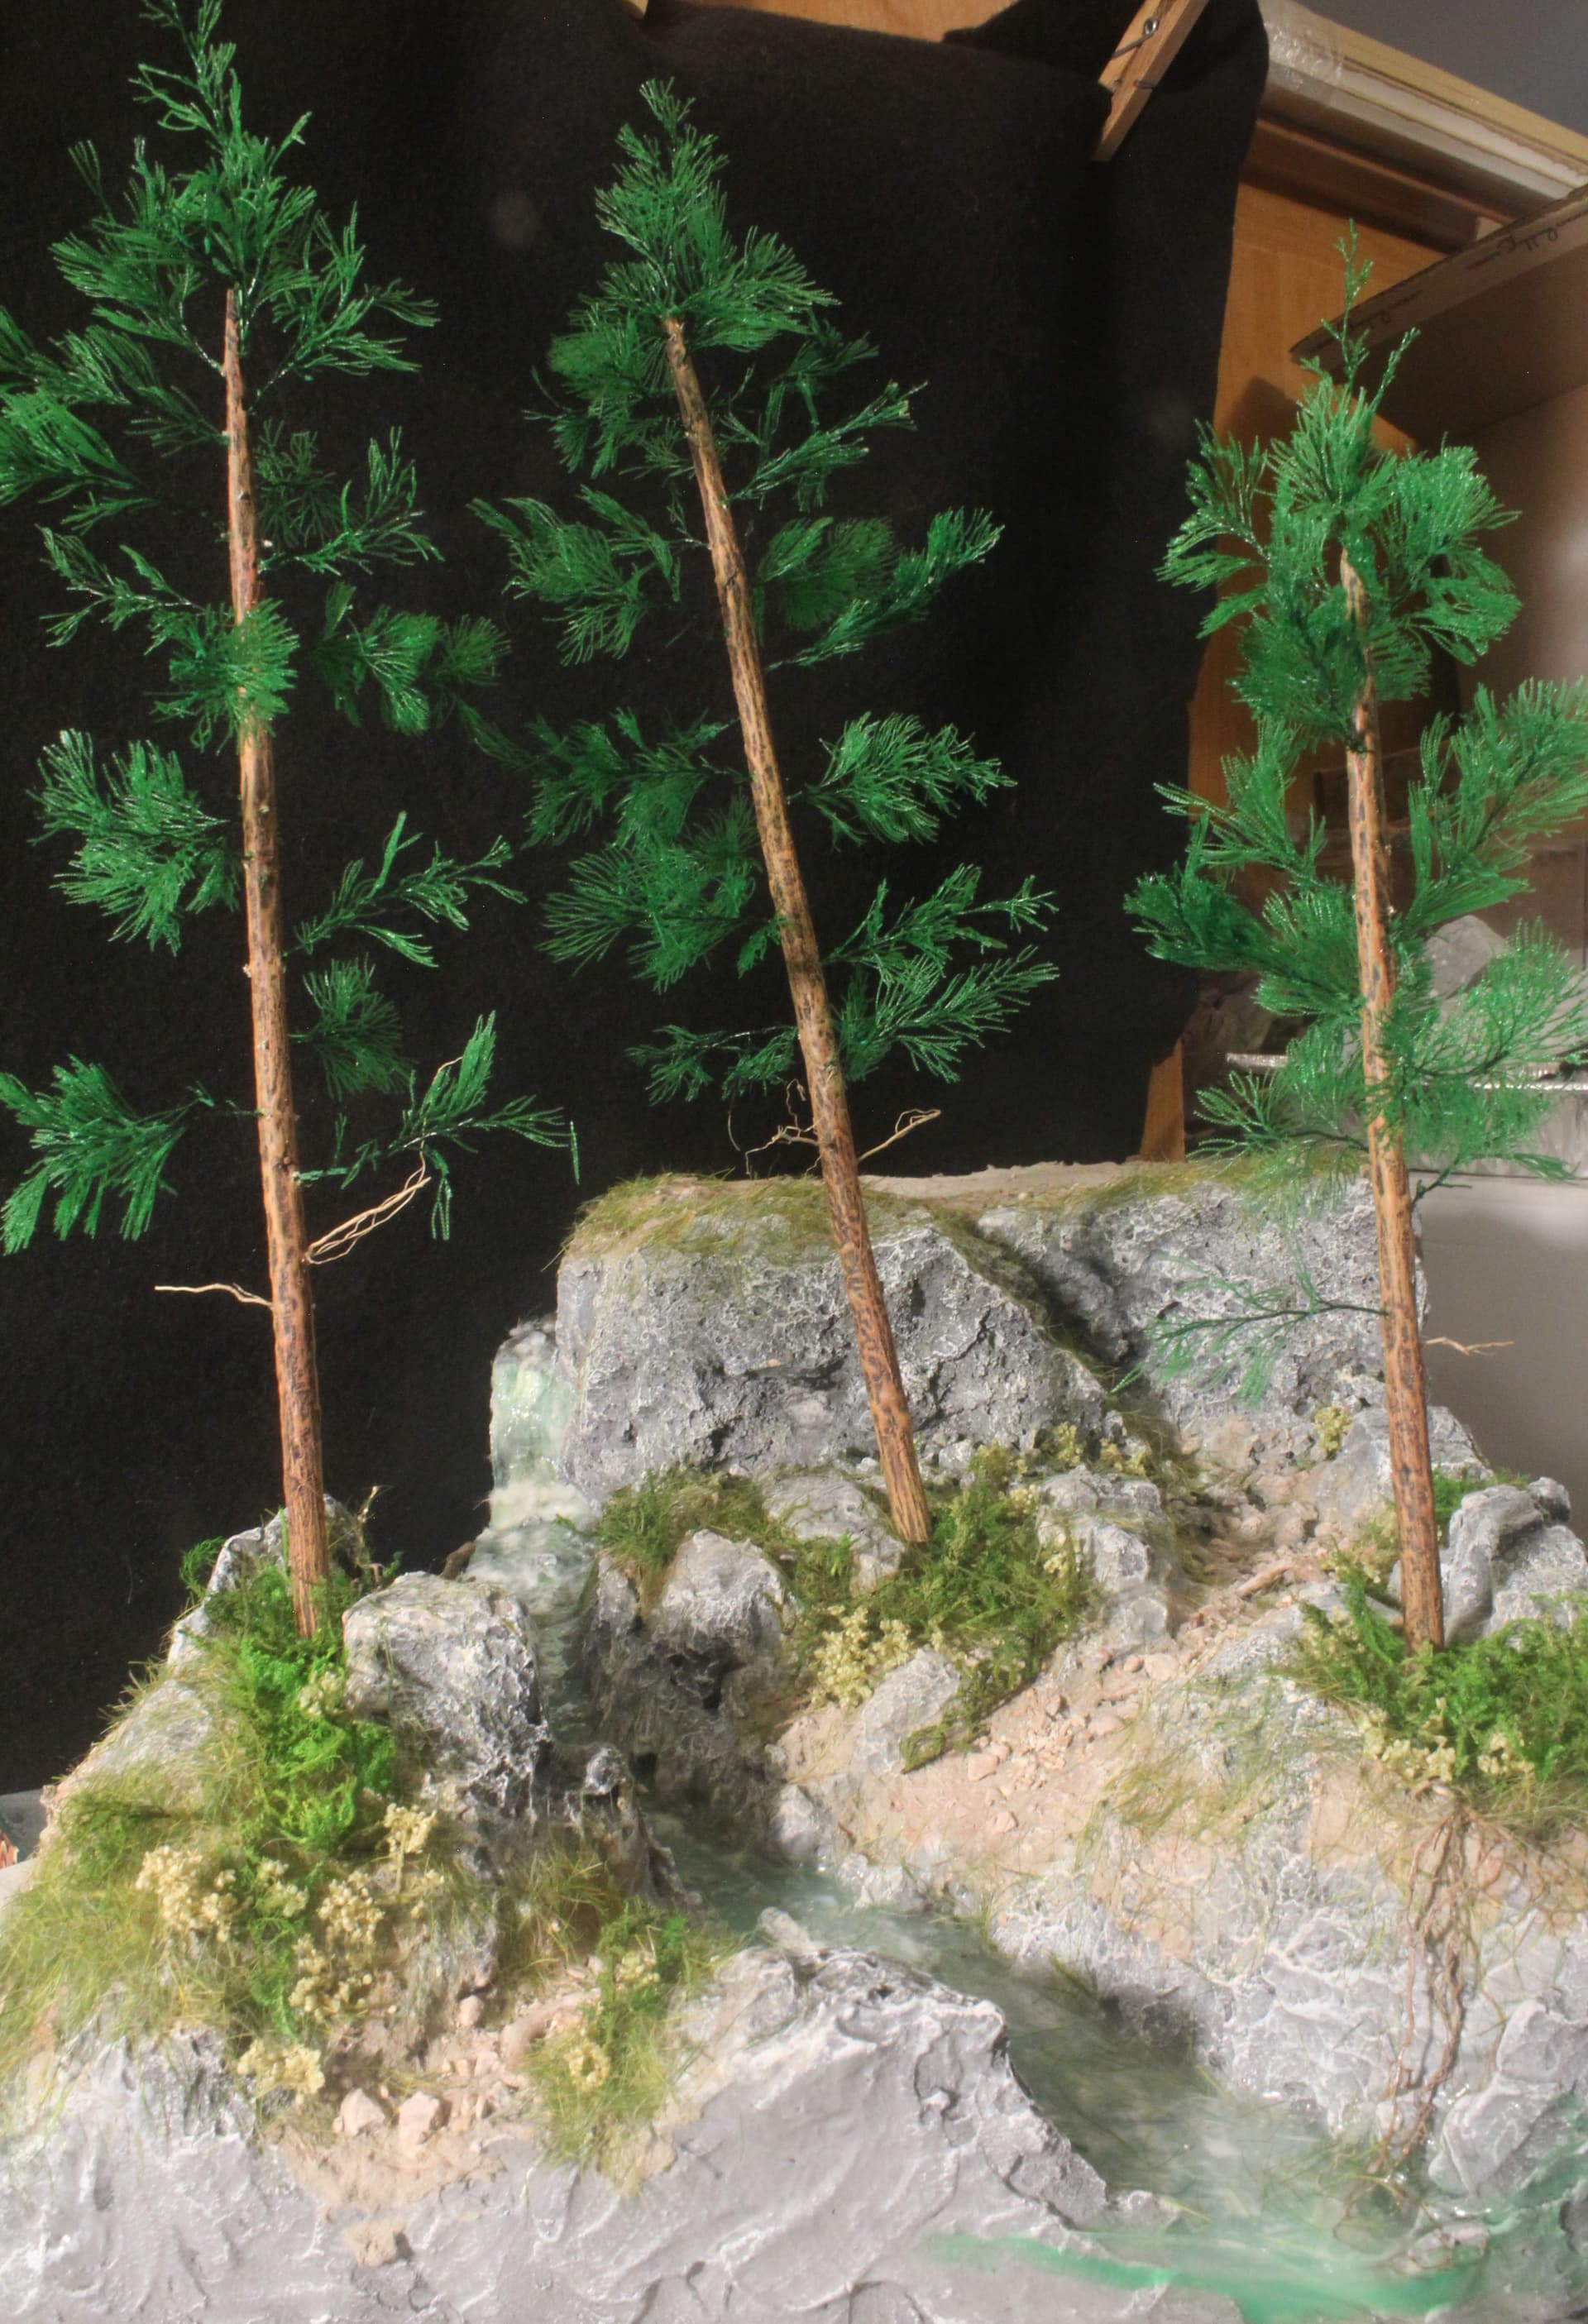
This is a WIP of my dio. This illustrates what I plan and what it looks like:

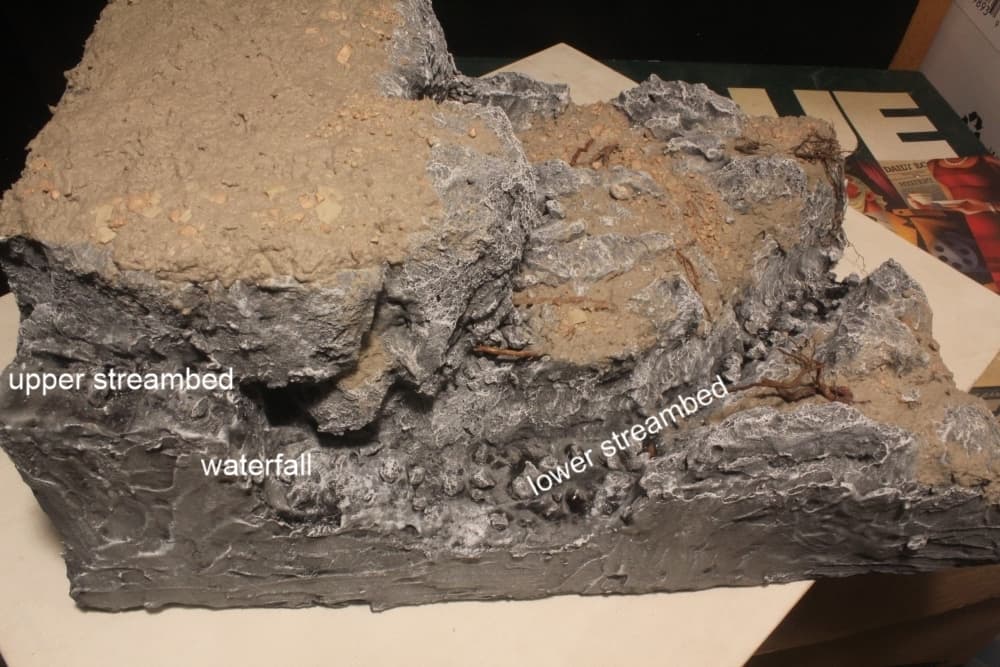
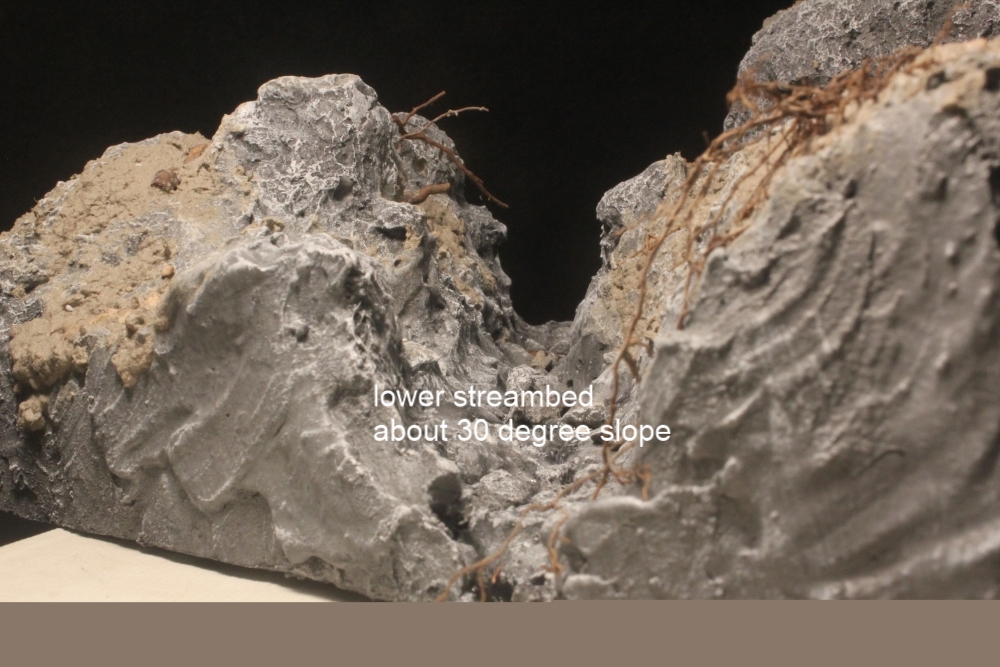
As shown, the water runs down, over a waterfall, then continues steeply downwards to the open end of the dio base. I’m looking for tips on pouring resin so that it runs downhill (obviously easy) without completely running out, or collecting in pools (not so easy). Do I have to pour in sections and hold the dio at an angle so that the resin doesn’t pool, or run out the bottom? The Vallejo, and other acrylic products are only suitable for very shallow applications.
![]()
![]()
Hi Leo,
That basework looks amazing, really looking forward to seeing it evolve, ![]()
![]() .
.
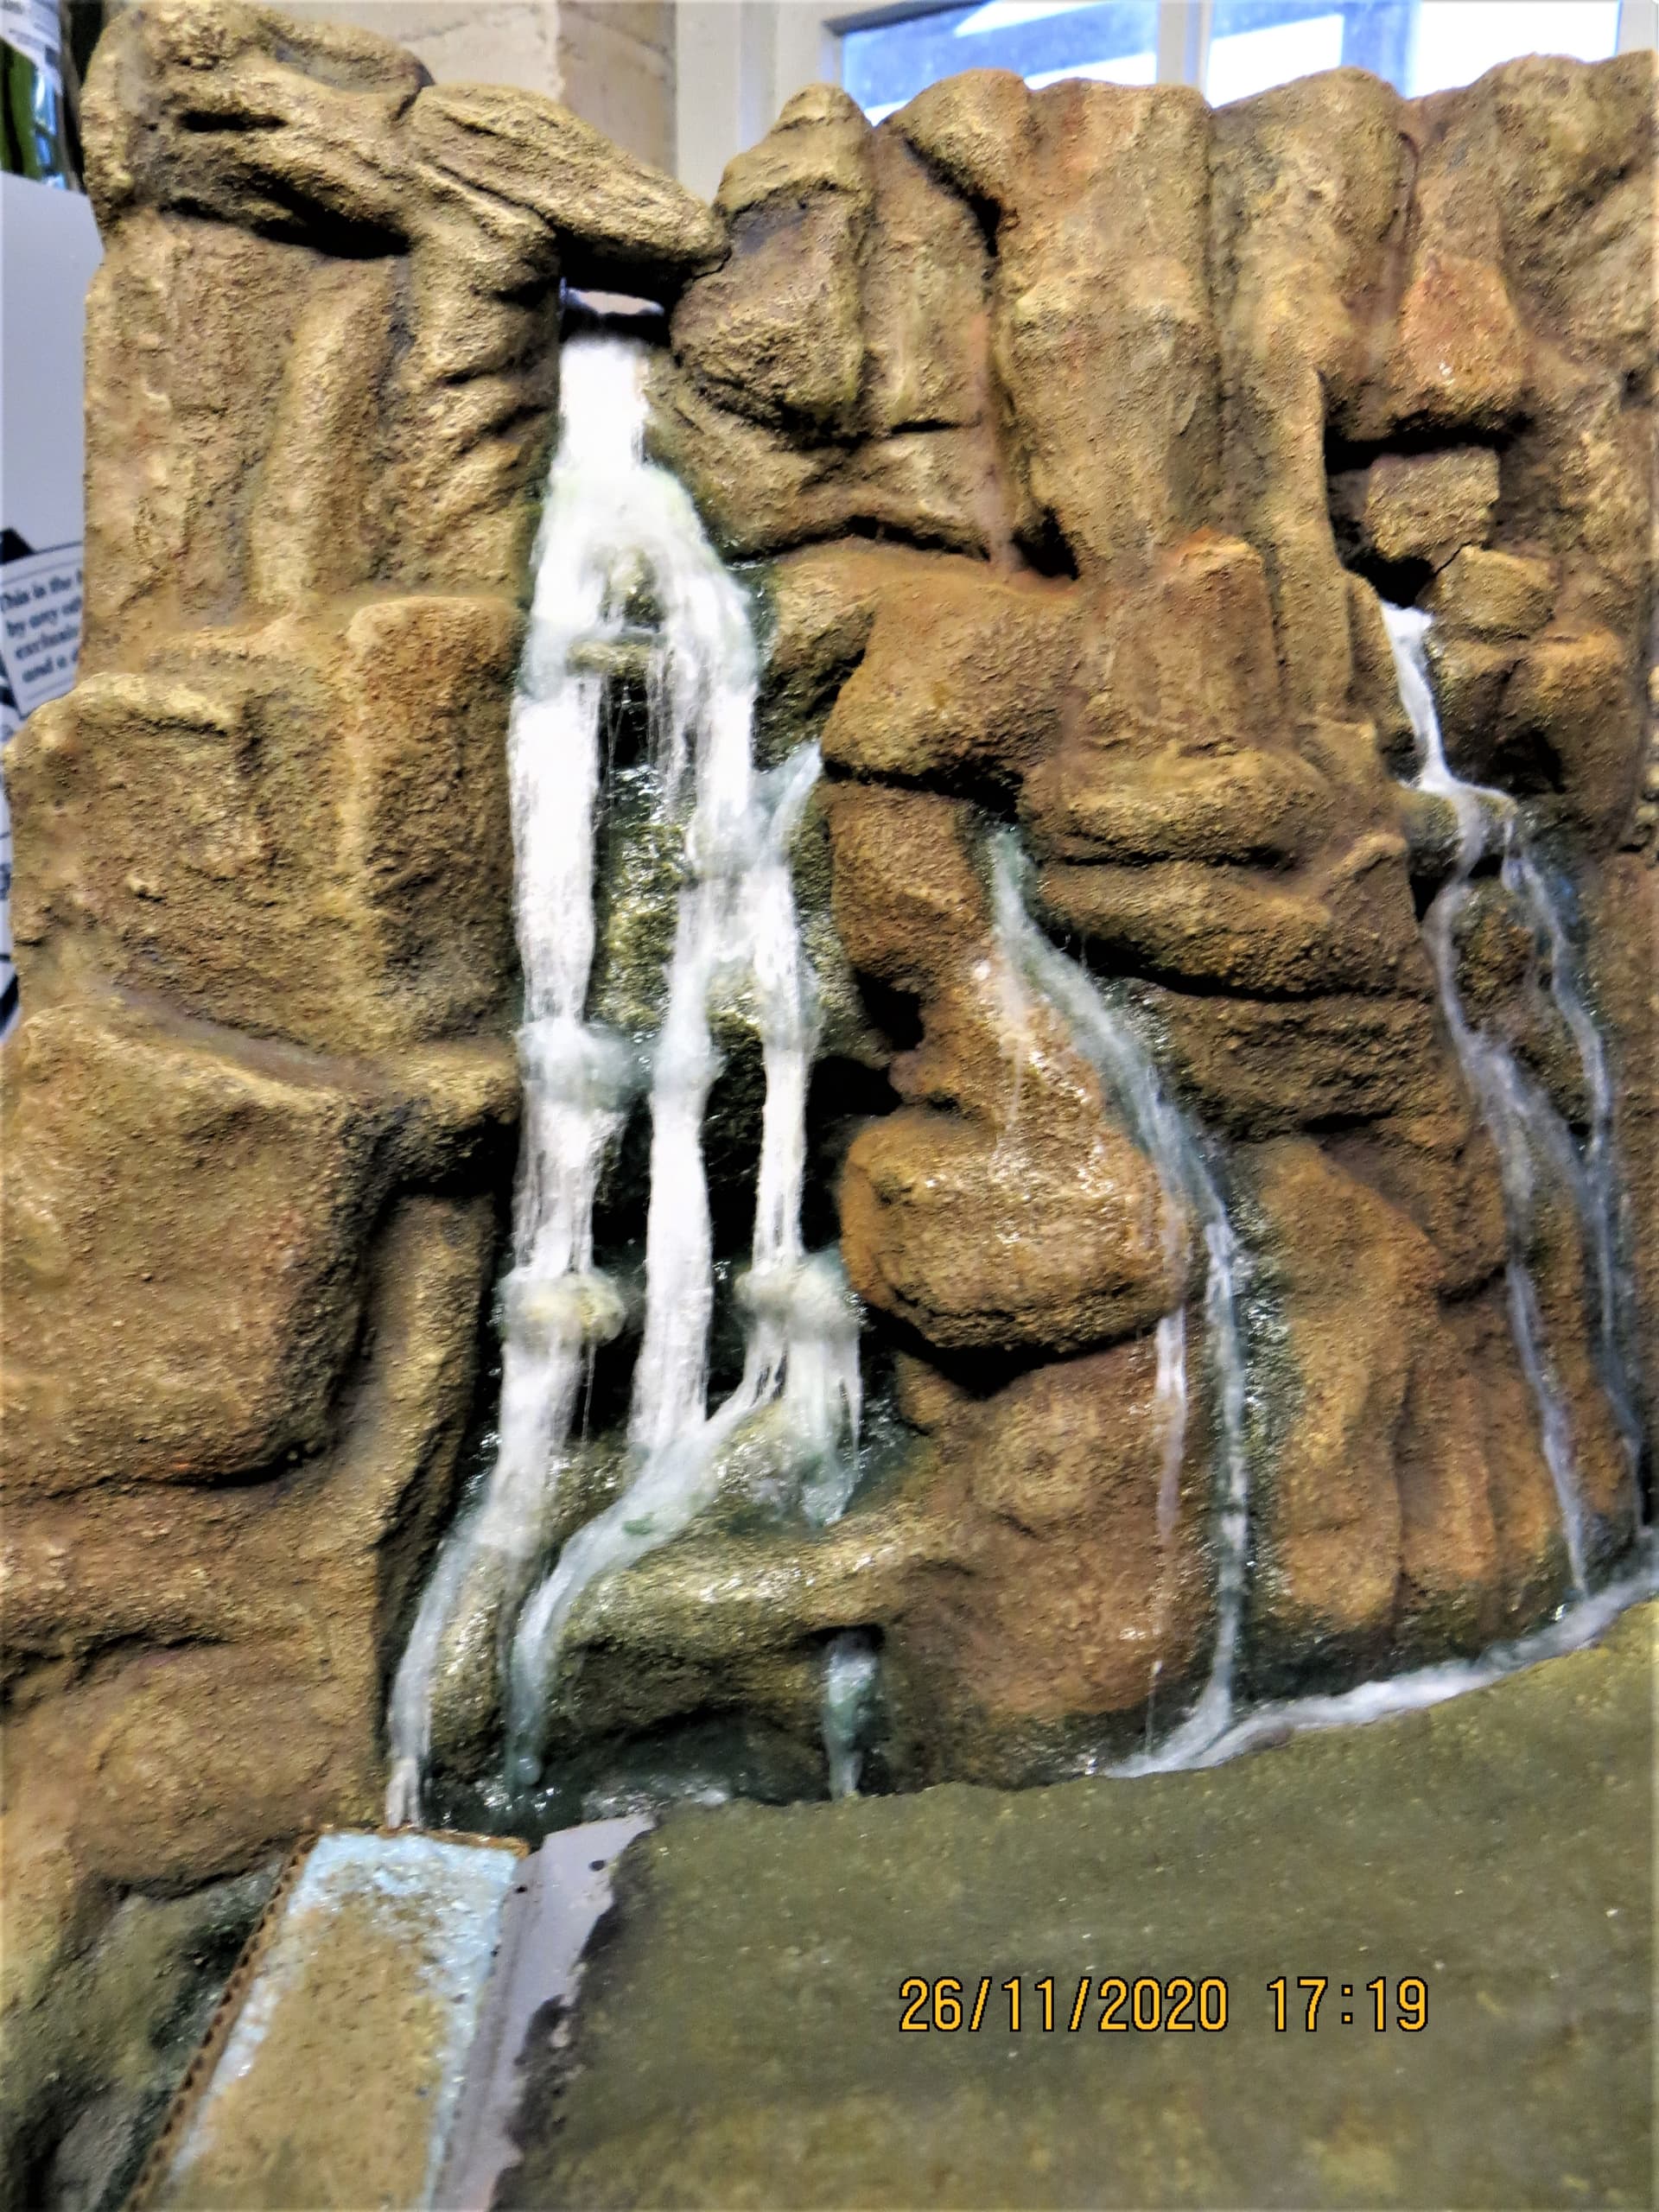
Not sure if this helps you, but I have tried to make a number of water features where I’ve tried to give a feeling of water cascading over/down rocks (see images below)…
These first two images are 1/35th:
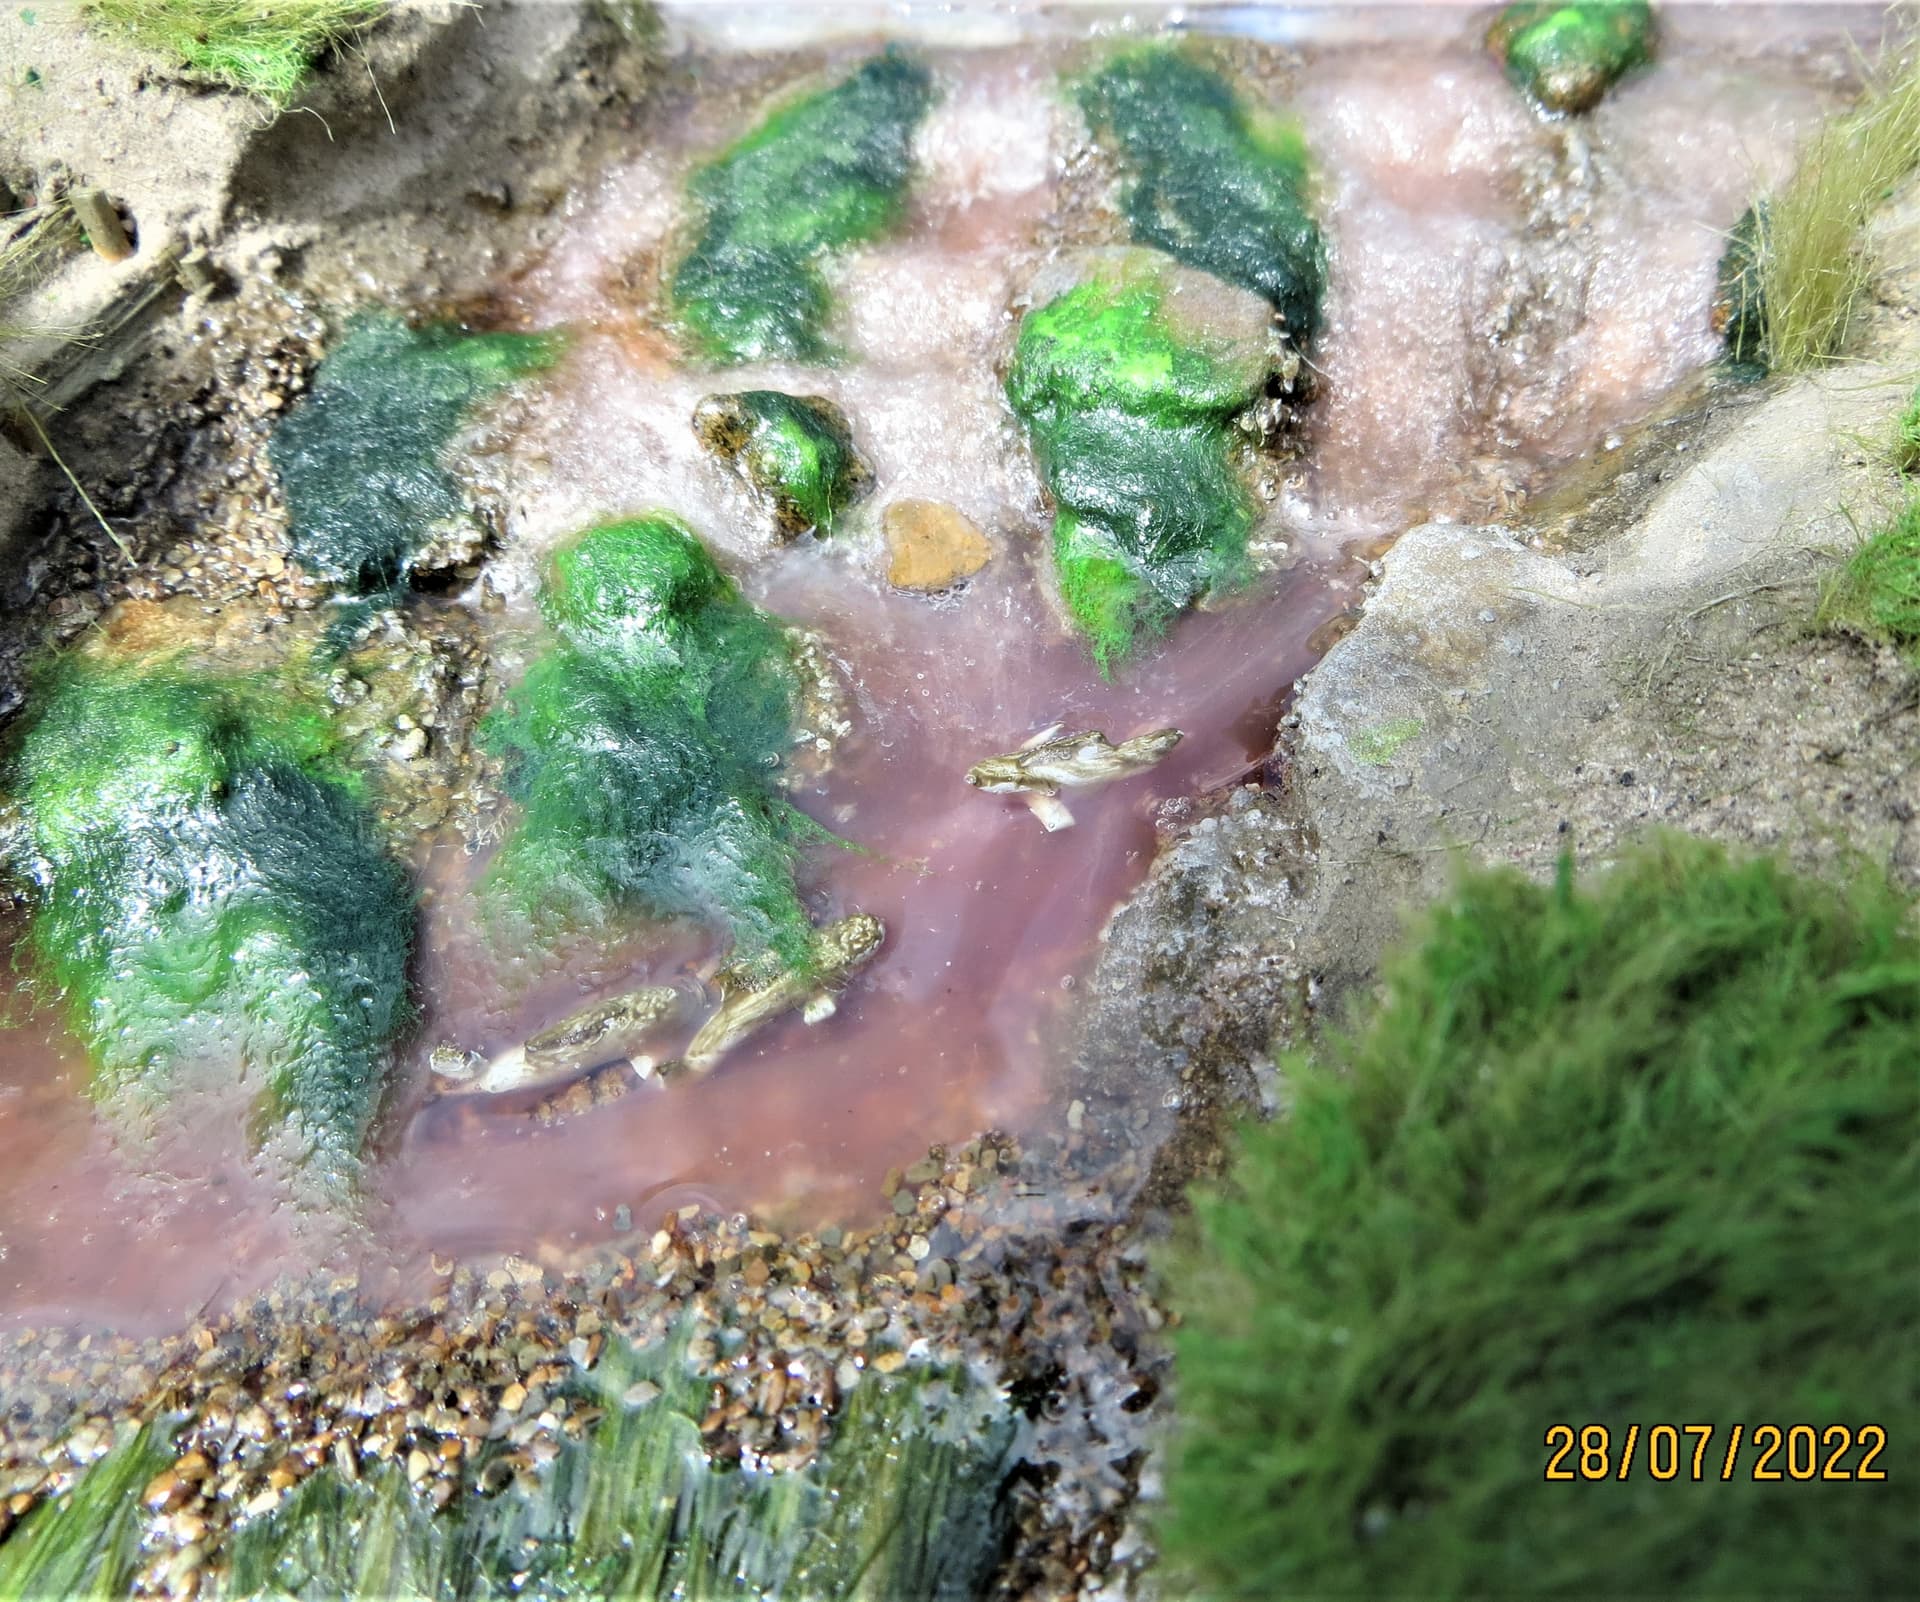
And these, 1/72nd, you might just make out the flow, centre back, in the first image:
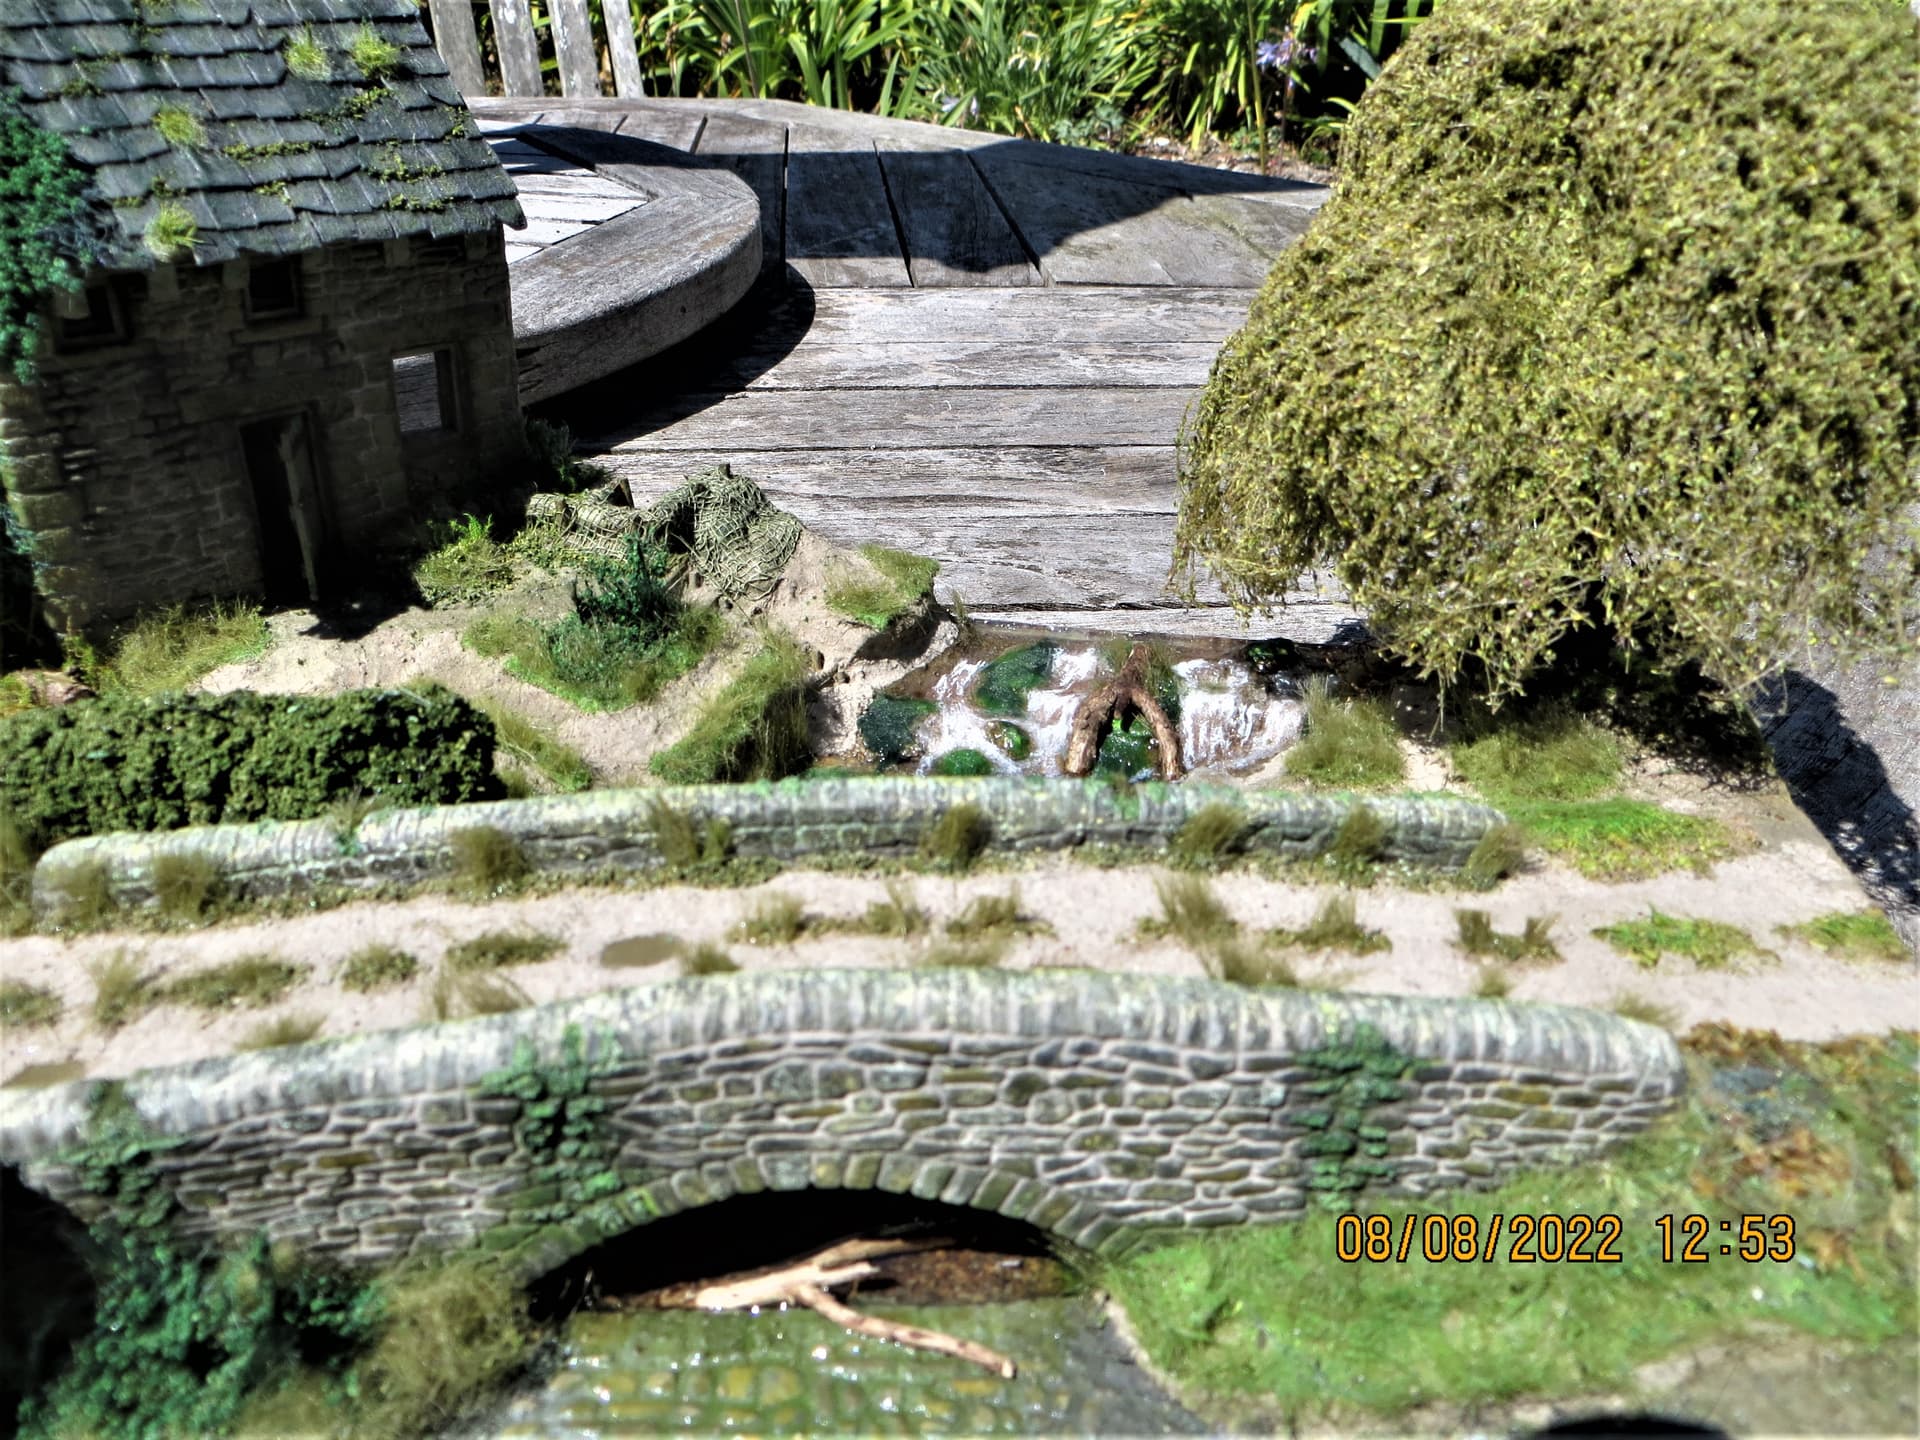
In both cases I teased out lengths of cotton wool and formed it into position over the base. Once I was okay with the look I then gently brushed over it with clear varnish in the natural direction of the flow. The cascading water doesn’t have to be deep, so a few coats are enough.
Not sure if this helps?
Cheers, ![]() ,
,
G
ps, thanks John, ![]() .
.
That rock work looks amazing Leo.
One thing I am wondering about from the upper stream and waterfall areas. How are you intending to block that end off from when you start the resin pour ?
I have only done some very very small bits of resin water work and it was mostly all level. I imagine your process will have to take a few days for each different height/angle as the resin will self level and try to flow everywhere it isn’t blocked off from going ??
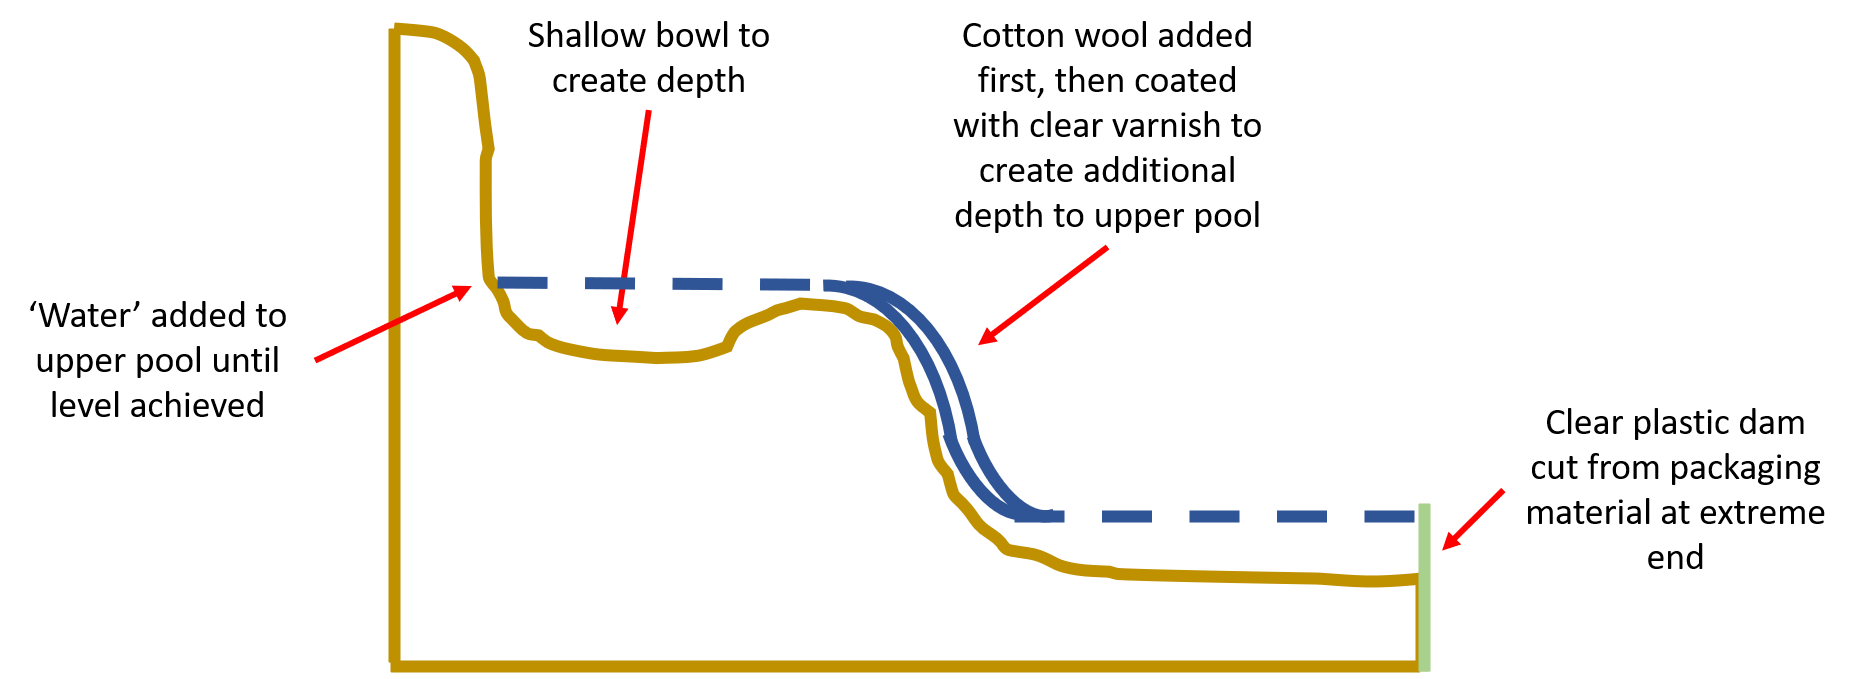
Good question John, not sure if this helps, and probably teaching your grandmother to suck eggs, so apologies if that’s the case, but this is how I tend to do it…hopefully a picture paints a thousand words, ![]()
![]() .
.
Cheers, ![]() ,
,
G
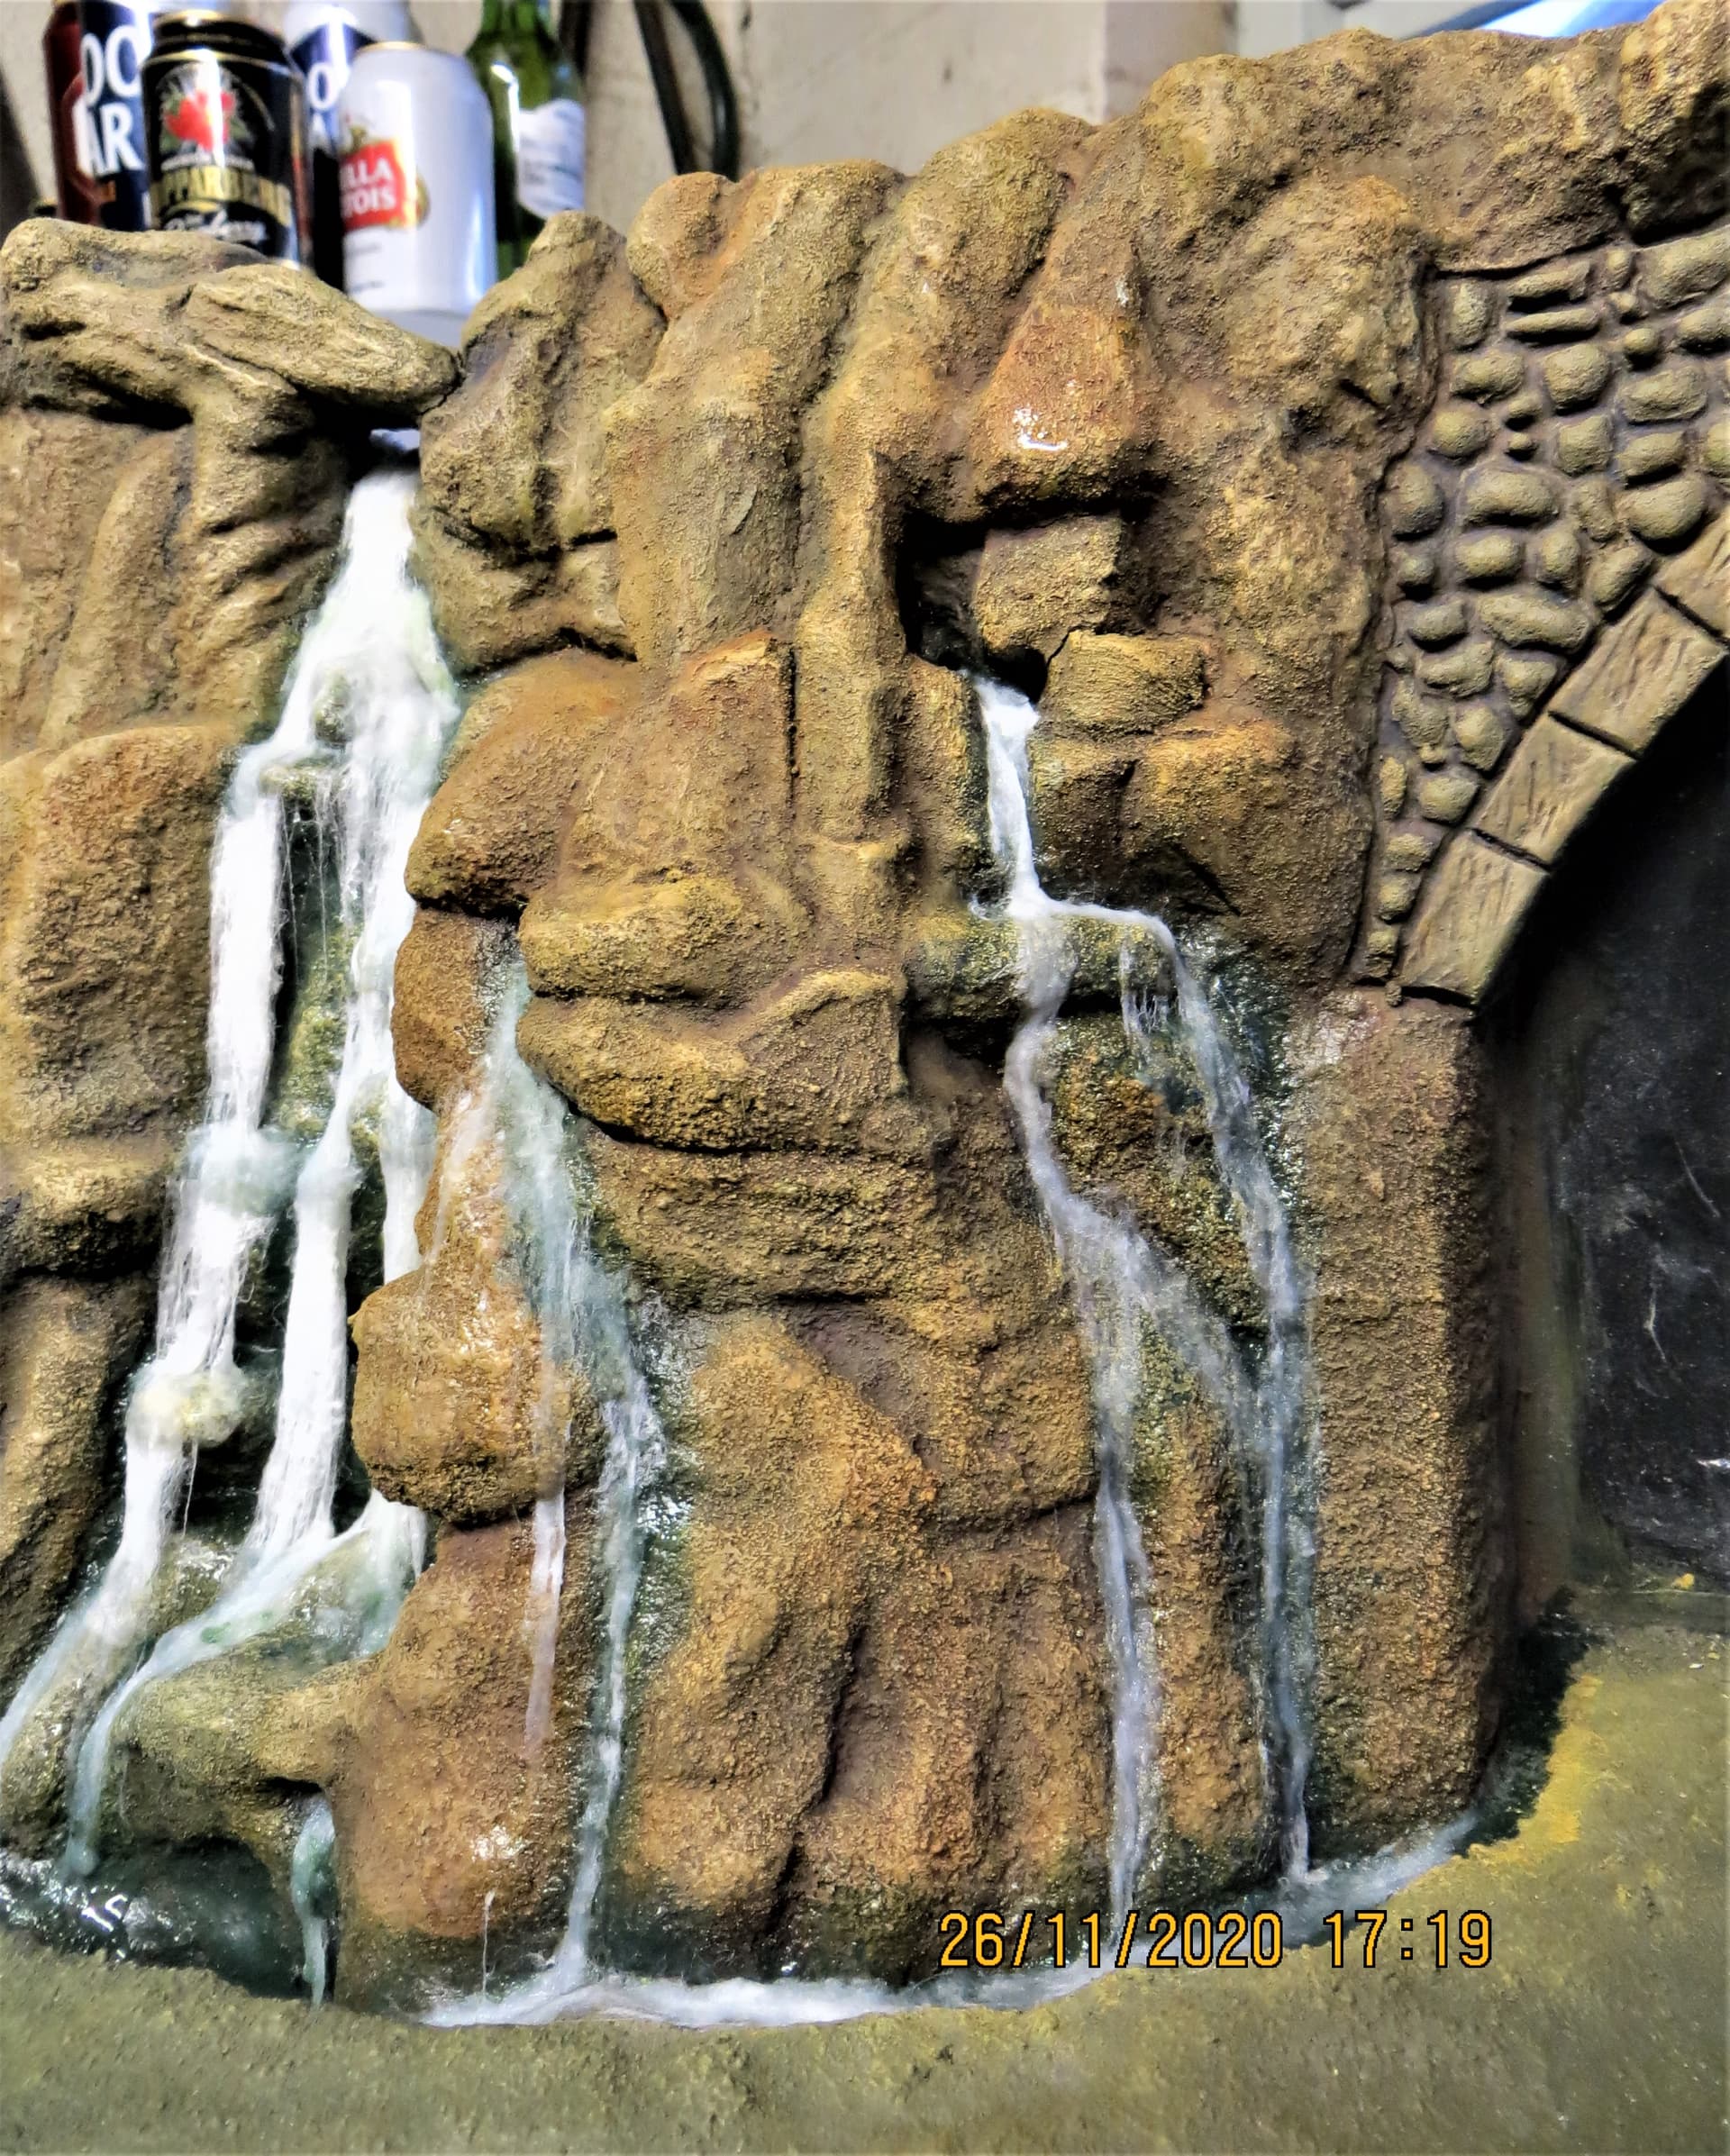
Yeah…I’m just damming it off with tape, and contending with occasional leaks! I have started to pour clear acrylic varnish, a bit at a time, and see how that works out. If that looks promising, I’ll add a drop. or two, of transparent green to the next pourings. The final coat will have cotton stringies (actually, white lint from the clothes dryer work better) to the flow around rocks, etc.
![]()
![]()
Thanks for your compliments…coming from you that means a lot! I was just looking at your “Honey, I shrunk the dio”, dio and didn’t realize at first that was actually 1/72 ![]() . Most of my modeling is 1/700 (ships), and 1/72 (armor, and occasional aircraft). That dio is truly outstanding and beats a LOT of 1/35!
. Most of my modeling is 1/700 (ships), and 1/72 (armor, and occasional aircraft). That dio is truly outstanding and beats a LOT of 1/35! ![]()
Have you ever submitted on “Braille Scale”, on Missing-Lynx? They’ll love you!
![]()
![]()
Started pouring “water” the other day. I’m using artist’s pouring acrylic, similar to the Vallejo product, but much cheaper. Unlike resins which harden through a chemical process, acrylic harden through air-drying, so it takes forever for each level to dry.
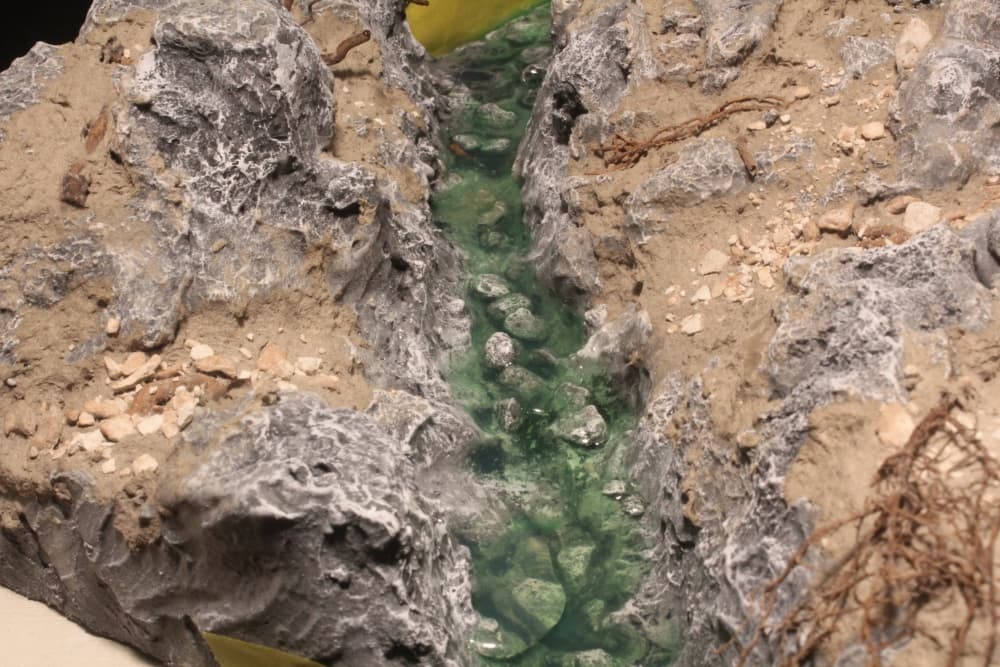
Still have a few levels of clear acrylic to add.
![]()
![]()
Looks good …how is the tape plan holding up with sealing the ends ?
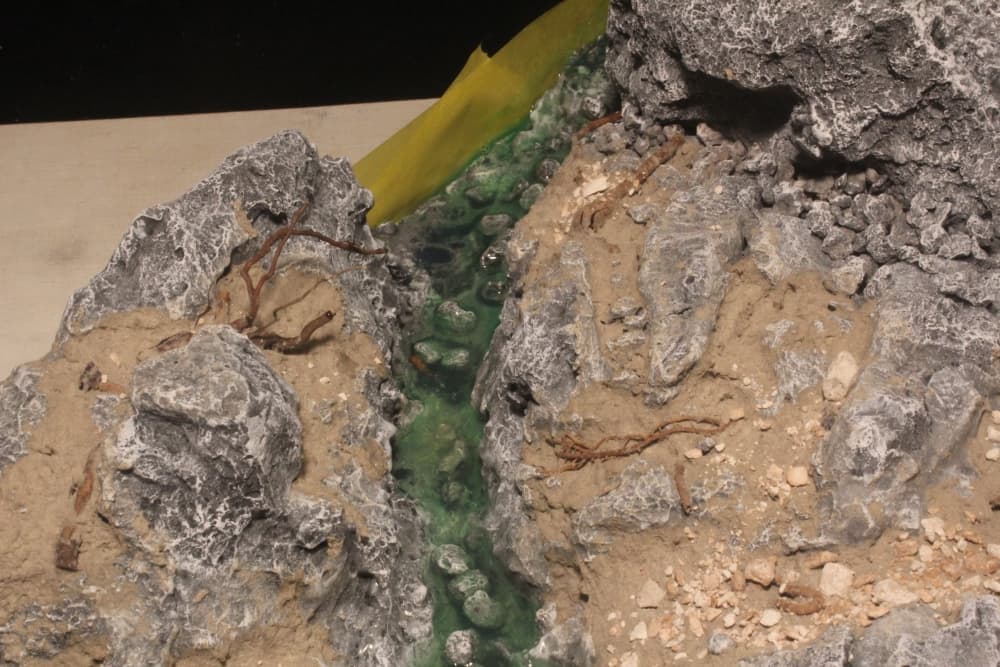
I’m using 2" wide Tamiya masking tape because it’s thin and conforms well to contours, and is sticky. However I have to use lots of it due to occasional leaks.
![]()
![]()
That water is looking great Leo, ![]()
![]() . Is the slight green tint the natural colour of the acrylic, or is that the influence of the grey base colour coming through?
. Is the slight green tint the natural colour of the acrylic, or is that the influence of the grey base colour coming through?
By the way, thanks for sharing the tip about using ‘artist’s pouring acrylic’, I’m always interested in anything that lessens the cost.
As an aside, I’ll trade your tip for another, ![]() …I have found that some of the acrylic ‘water’ products can be a tad soft and/or slightly tacky once cured, so they can either scratch easily, and/or hold dust. I have coated some larger areas of ‘water’ with a product called ‘Bonda Seal Clear’.
…I have found that some of the acrylic ‘water’ products can be a tad soft and/or slightly tacky once cured, so they can either scratch easily, and/or hold dust. I have coated some larger areas of ‘water’ with a product called ‘Bonda Seal Clear’.
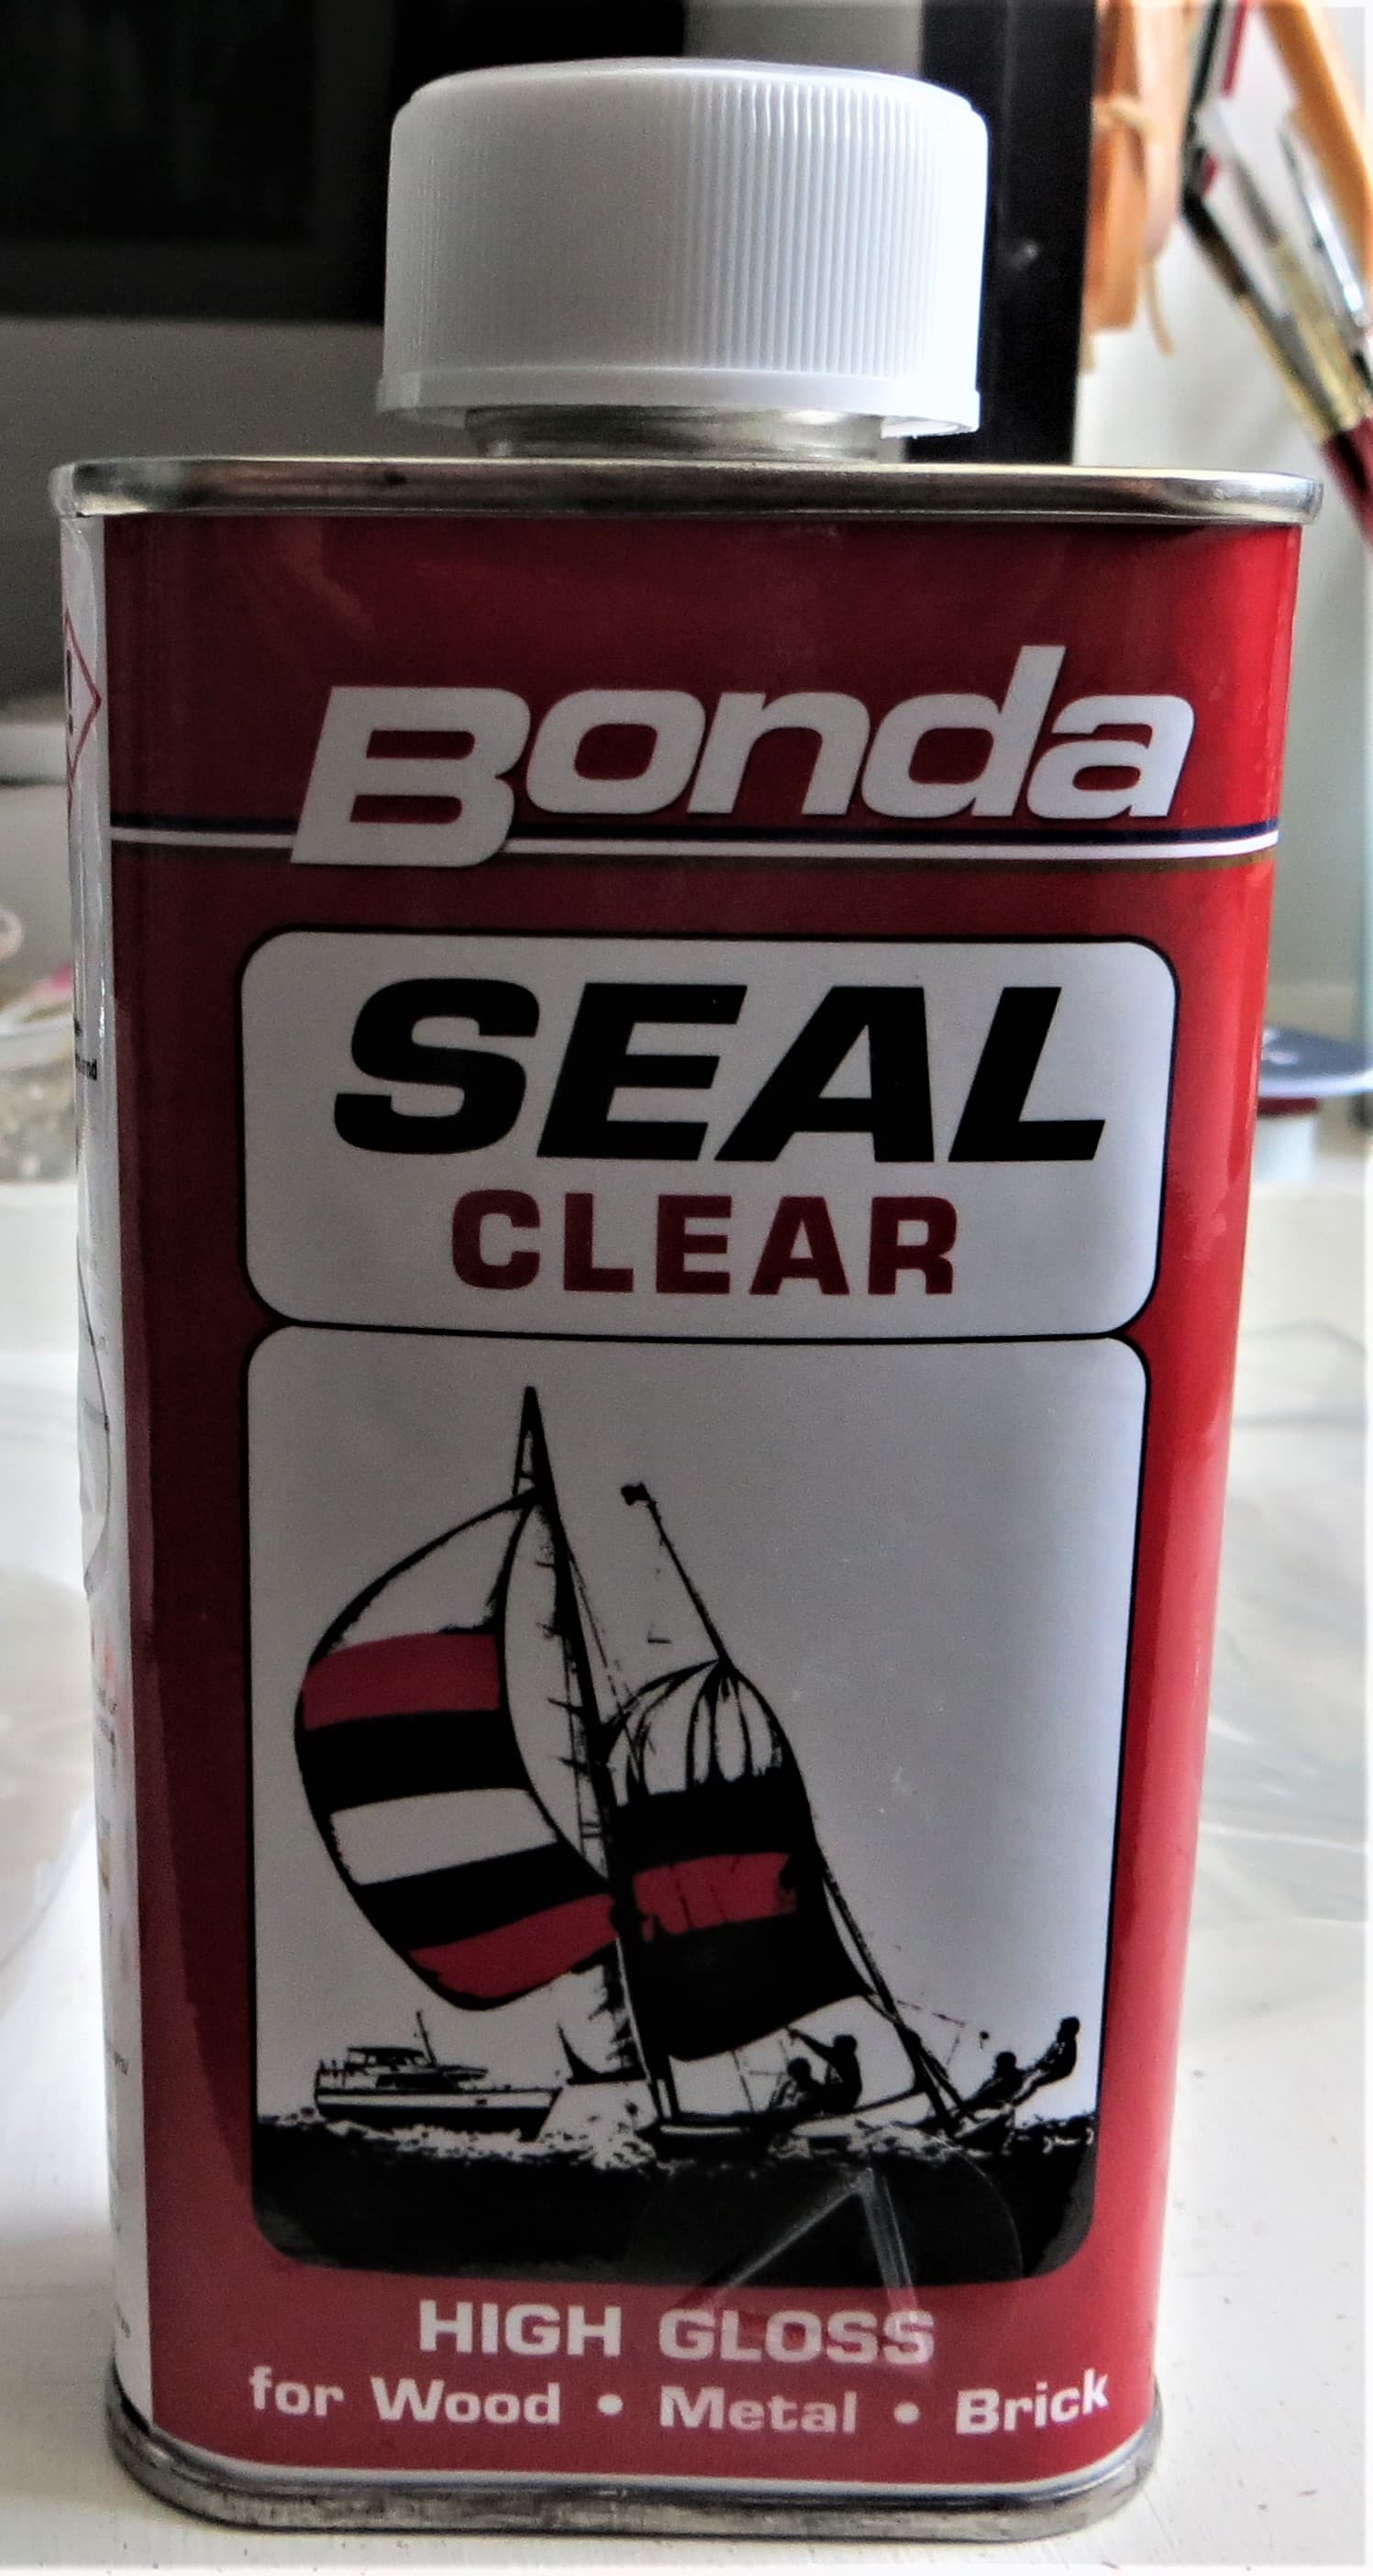
Once dry it is very hardwearing, and isn’t tacky to the touch, the other advantage is that it is more reflective that the acrylic, so gives a nice ‘wet’ look to the ‘water’. Obviously, try it out first on a small sample of the material you’re using to ensure that there is no adverse reaction.
The tin I have is 250ml, it cost about £15, so not cheap, but only a small amount is required as there is no real depth, only a surface coat.
I continue to enjoy following your build, ![]()
![]() .
.
Cheers, ![]() ,
,
G
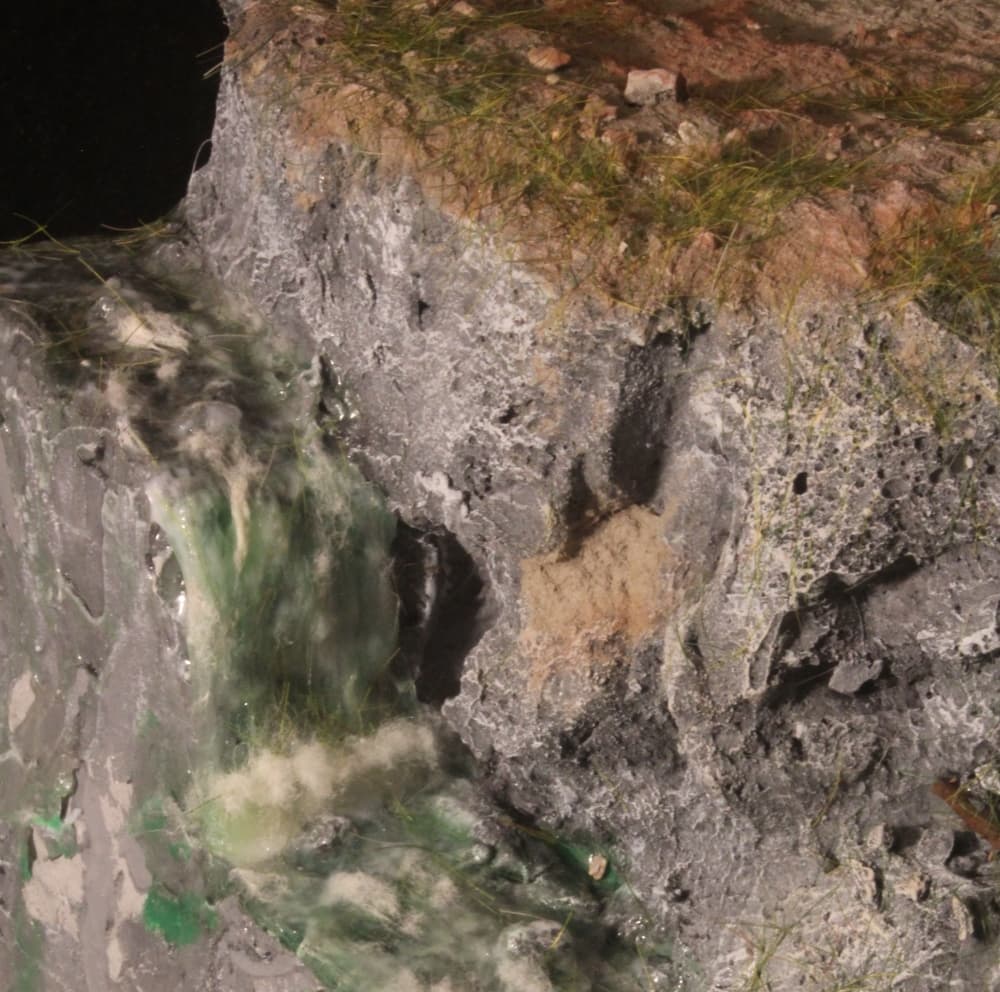
Thanks. Since I was using pouring acrylic, I simply mixed a few (but VERY few) drops of cheapo green acrylic paint as my first pouring. Subsequent pourings were clear acrylic. After about a dozen separate pourings (drying between) the maximum depth was about 1/2 ", but appeared deeper, and submerged rocks were visible - this will look really great on still water. Unfortunately, I made my water rushing quickly downhill, with a lot of whitewater, and splashes, which pretty well hid all my detail. In fact, I could have started with a very shallow stream with only a few layers of acrylic.
As my basic base is pretty well complete I plan on takeing some pics and posting them later today.
![]()
![]()
Latest updates:

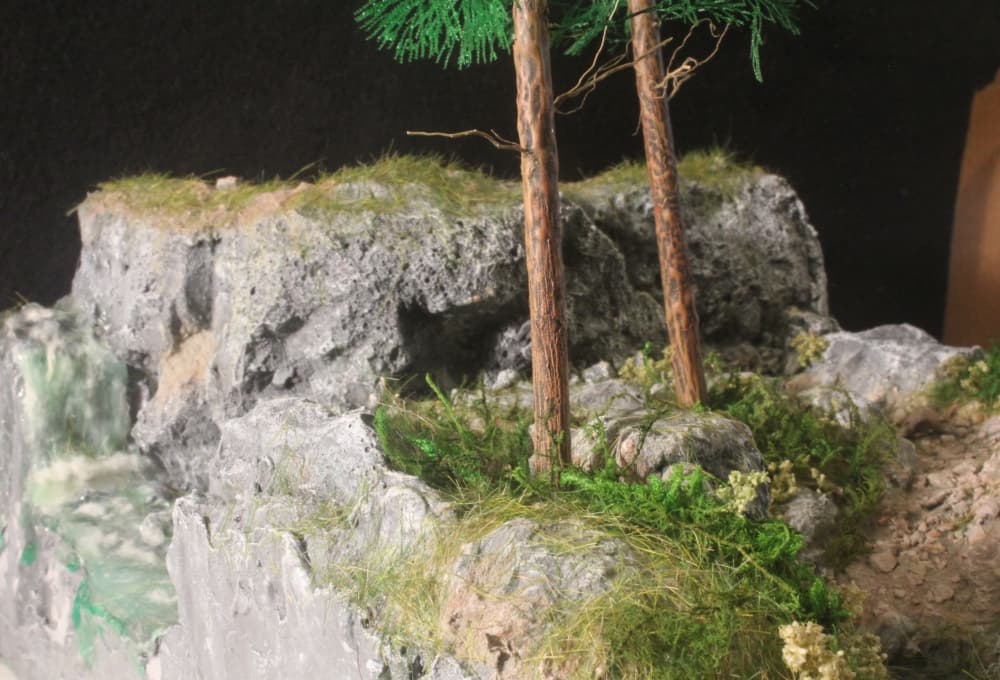

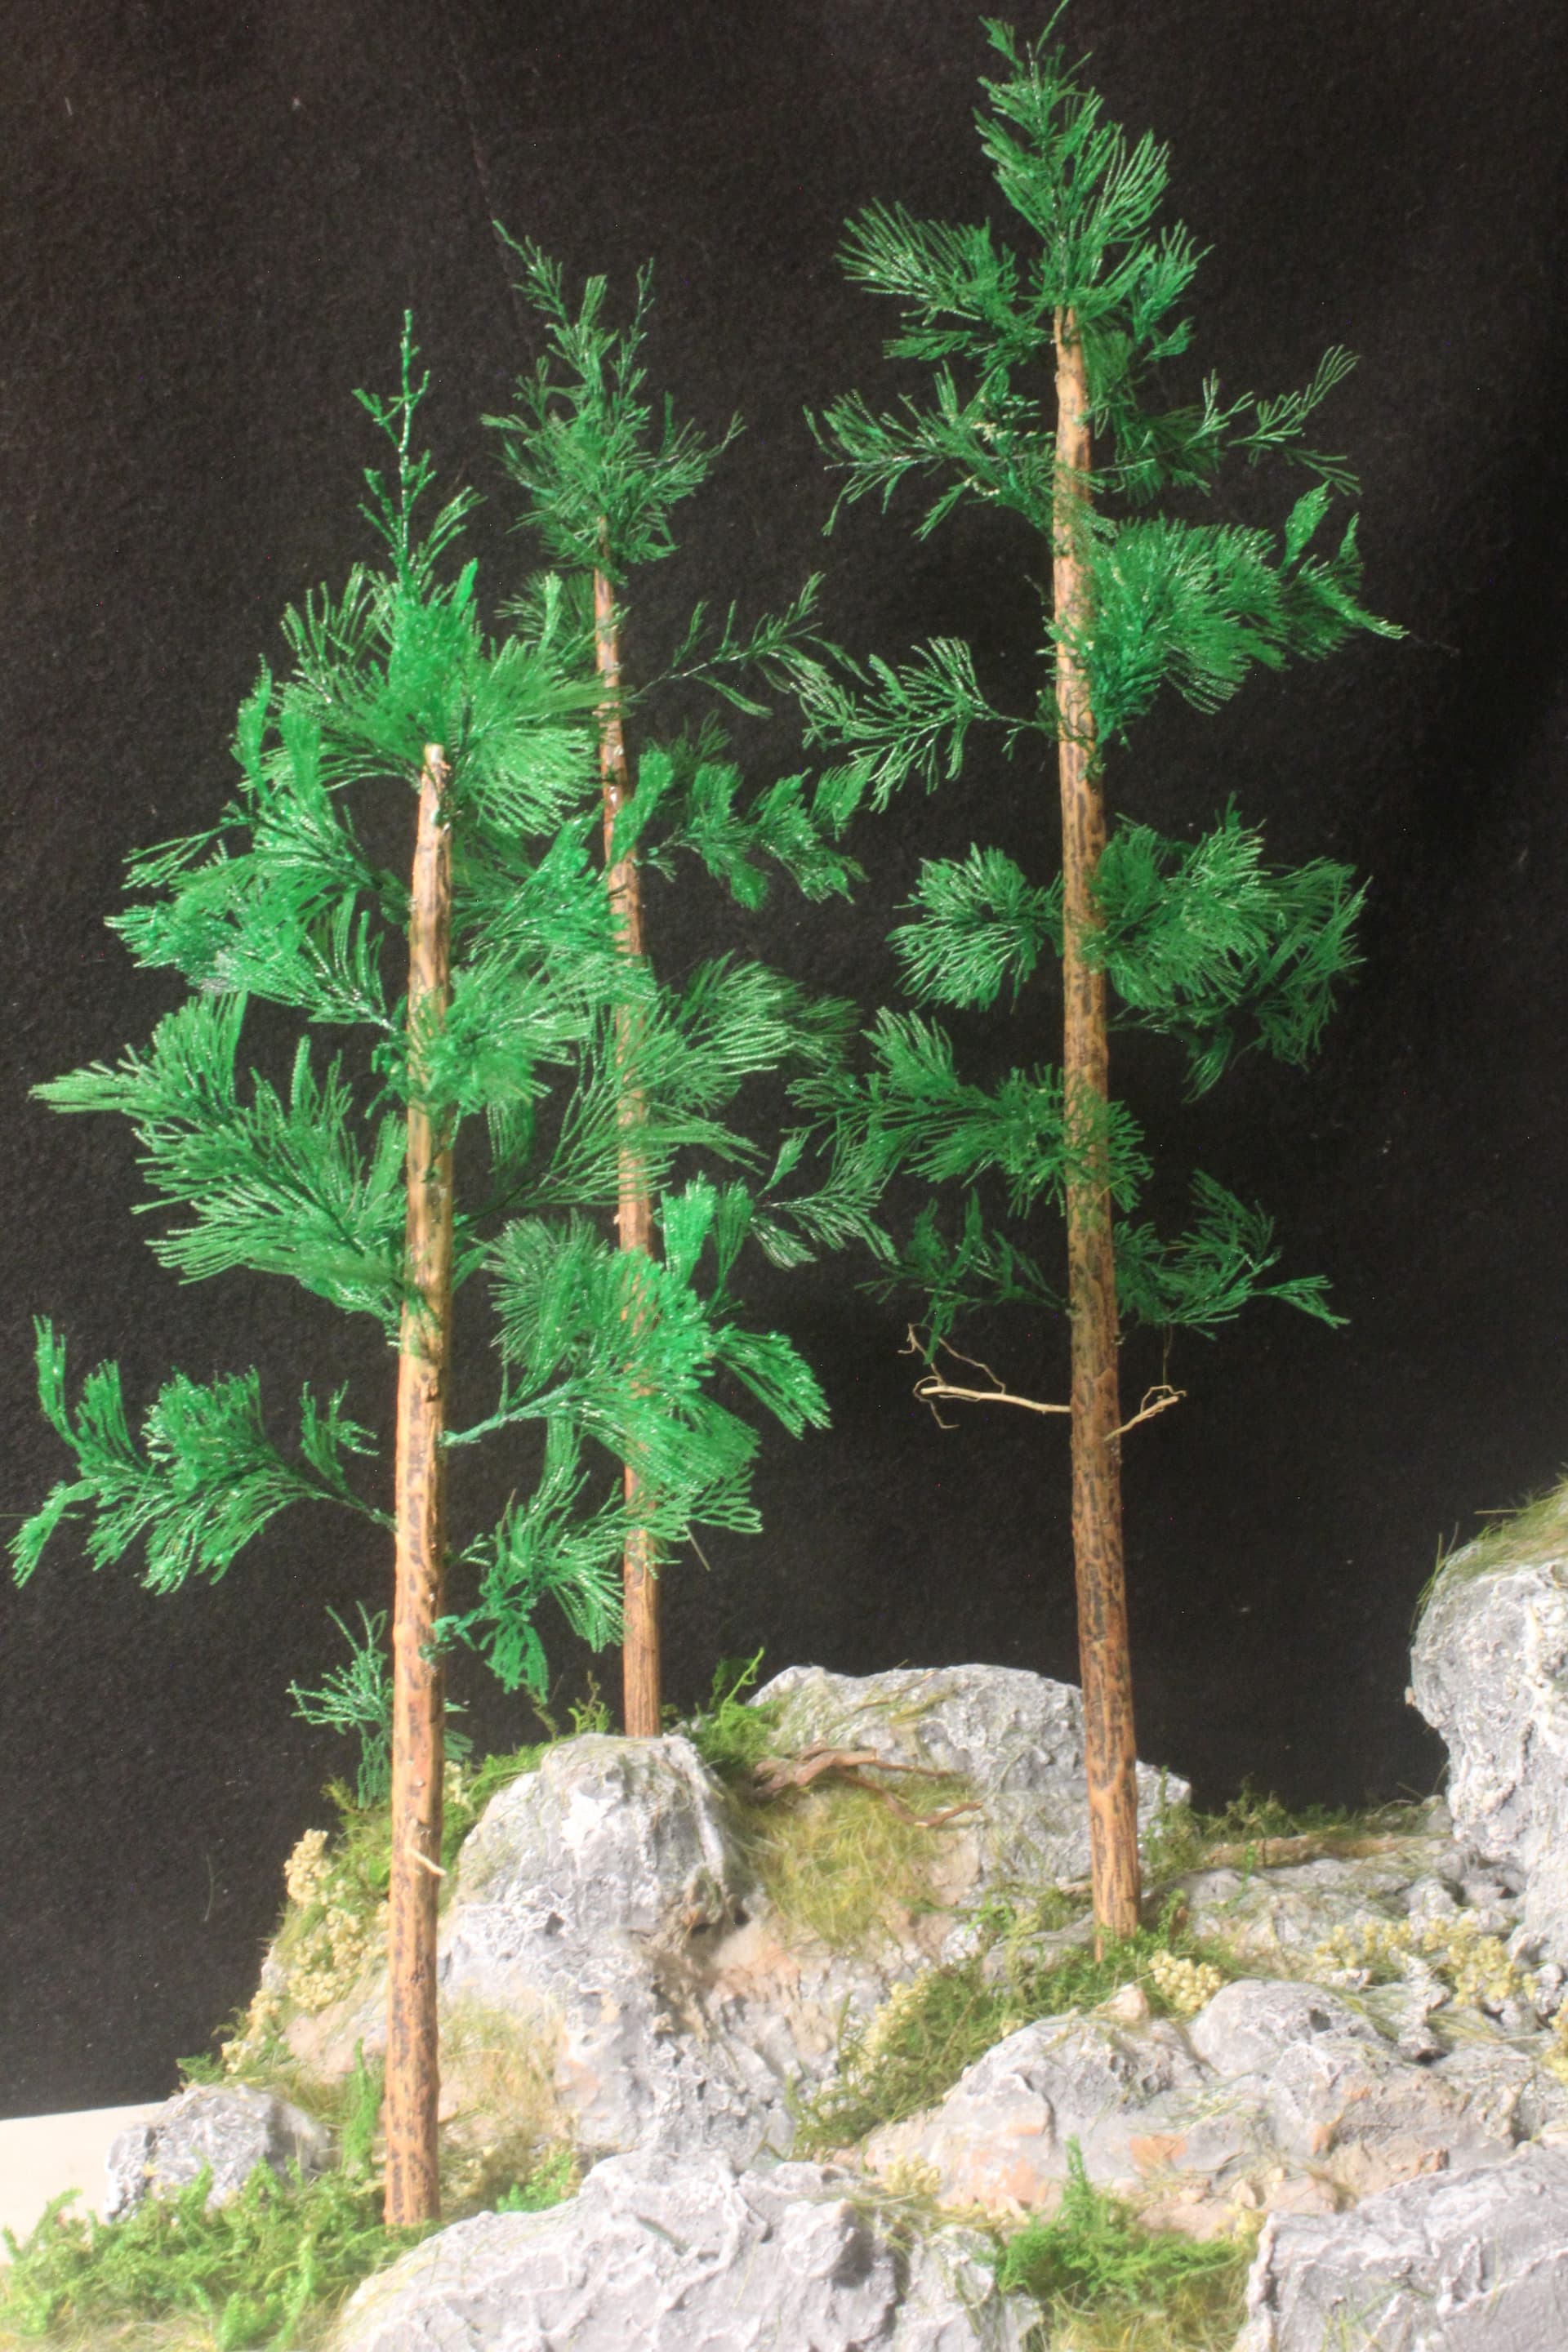
The trees are a rough approximation of Ponderosa Pines, although I think I may have to trim back the length of the “pine needles”. All the rest is commercially available static grass, and dried foliage.
![]()
![]()
Thats looking nice. Trees and the accompanying undergrowth really fit in well and positioned great. I am trying to decide on a decent pouring water medium for a part submerged T72 … and ideas chaps ?
If you decide to use resin, test it out in small scale first, like in 1/72, using the same paints on the small model as on the larger one. The heat from curing resin could ruin the paint job on the model, and even melt thin plastic pieces. If you decide to use an acrylic medium it could take a couple of weeks to complete the pouring, a couple of millimeters at a time. I suggest checking some U-tube videos on the subject.
![]()
![]()
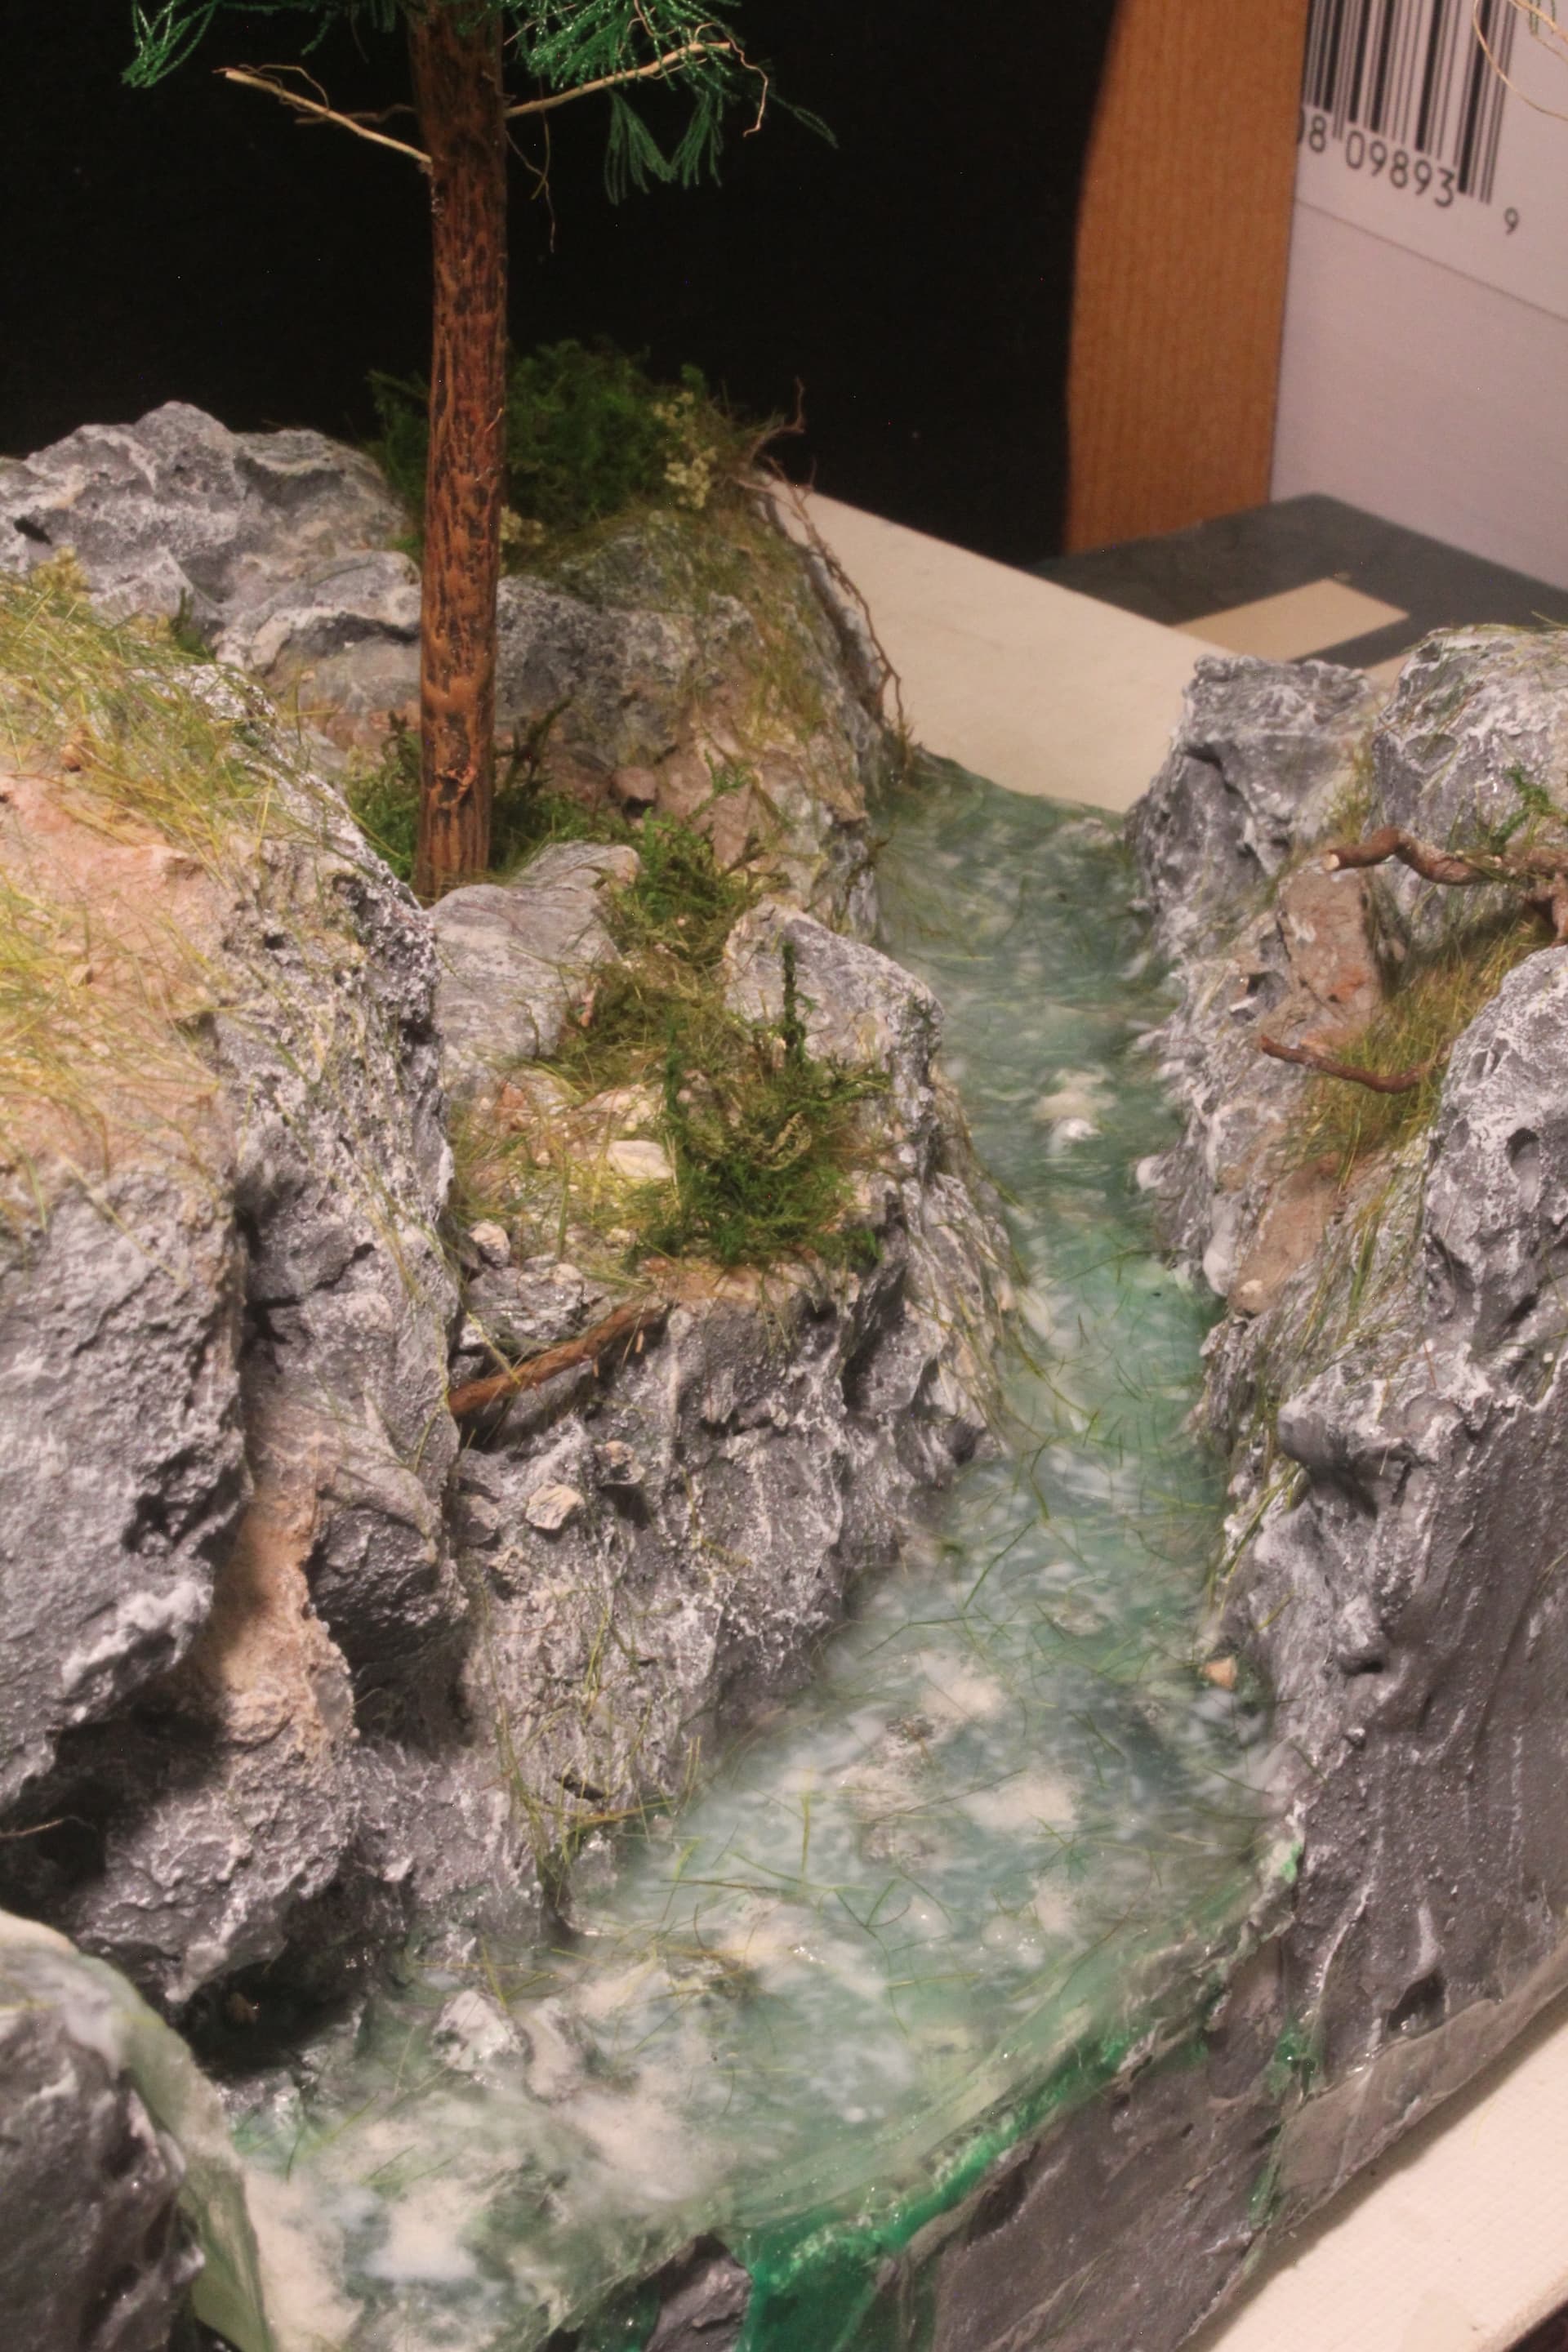
That water looks amazing Leo, I especially like the 6th? photo (last but one) that looks down the stream from the top, the slight blue-green gives it that icy mountain stream feel…outstanding, ![]()
![]() .
.
And the groundwork, greenery and trees really bring it to life for me, ![]() .
.
G, ![]()
I don’t want to steal Leo’s amazing posts, so I’ll mail you some thoughts, but I do concur with Leo about resin.
G, ![]()