Those external sights look really nice Olivier !
FC Modeltrend has an AMX-13 Detail Set that includes the Israeli antenna bases that appear to be correct. It also has a few other bits that may be useful for your builds (tools clamps, aiming sights, French style antenna bases).
You are doing some fantastic work and detailing with these 3 Olivier. Very interesting seeing and learning about the differences between all 3 as you go through the stages. 
Looking great Olivier!
Thank you Jon.
I know this set. Unfortunately the shipping cost is two fold the price of the set. And I would only use the antennas.
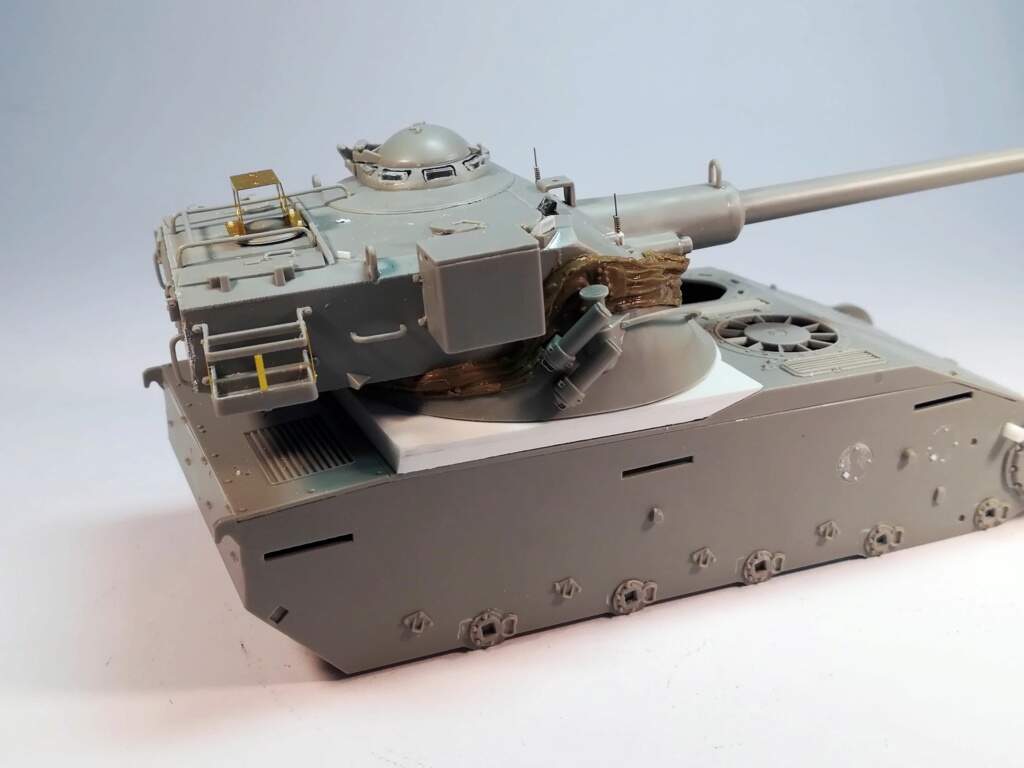
I consider the turret step complete (minus the final details like the roof MGs).
So I’ve shifted to the hull. This will be a 2 step story.
1 fixing Takom mistakes and omissions of the three hulls;
2 customizing the hulls according to their users.
Step1:
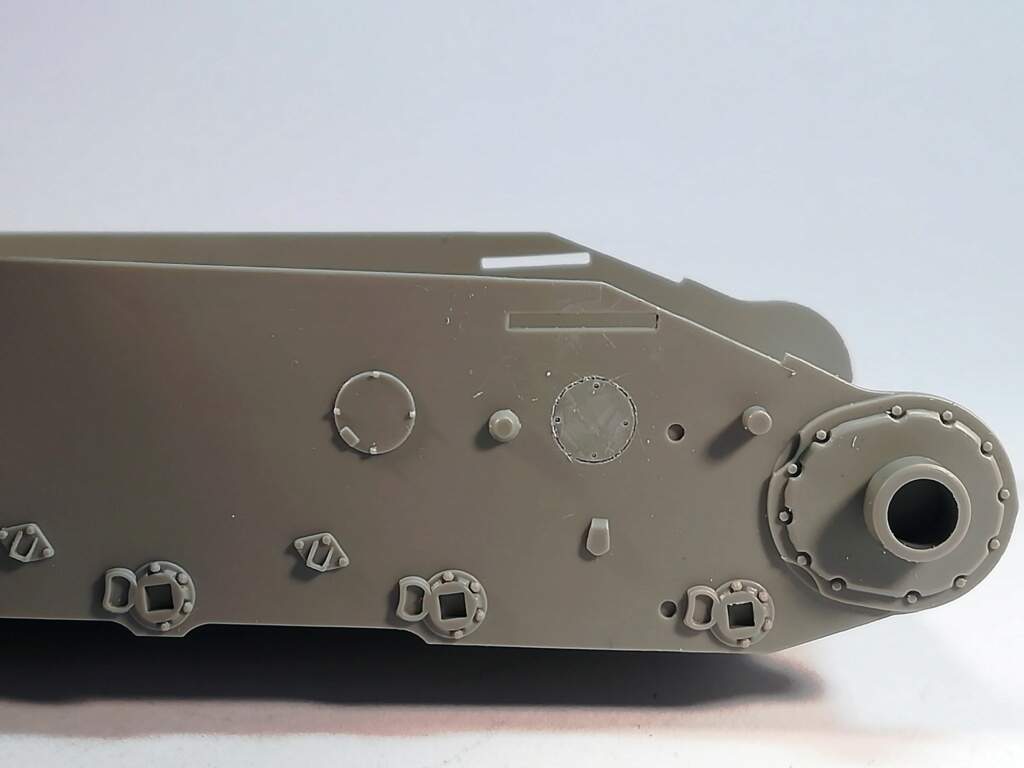
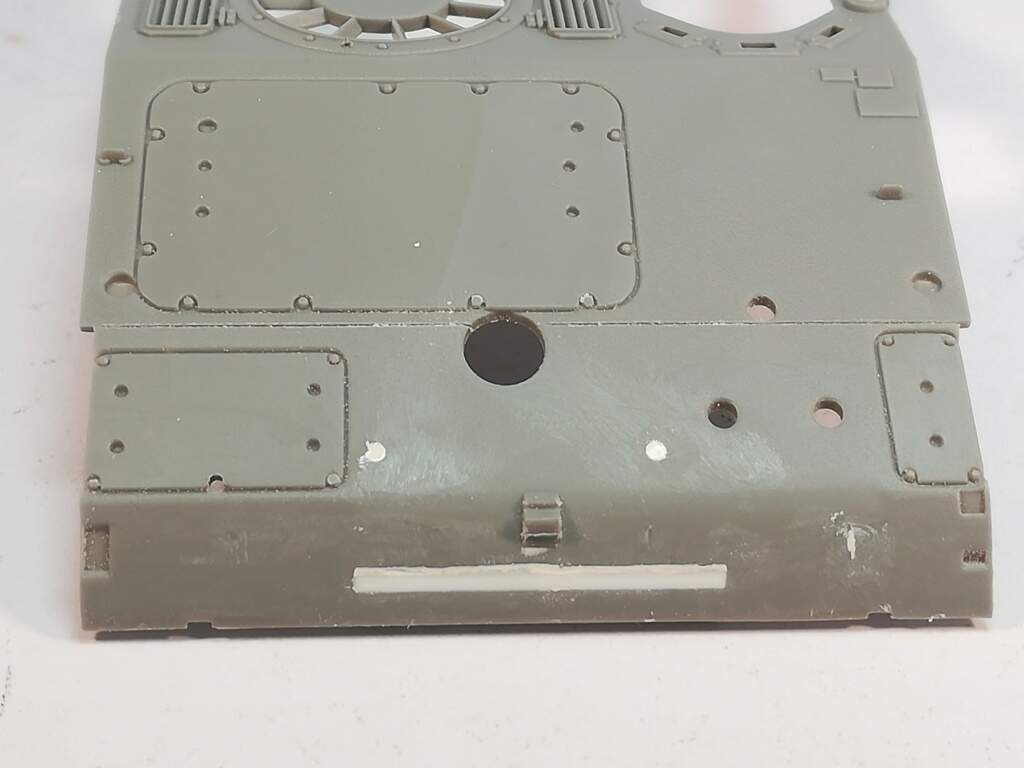
The hull sides.
Takom molded the spark plugs access hatches in relief while they should be flush with the hull side. With the tip of my knife I engraved the hatch shape, then I drilled the bolt heads location and I finally sanded away each hatch (x6). The hardest was having 6 fine circles.
I still need to add the bolt heads and the tiny plate.
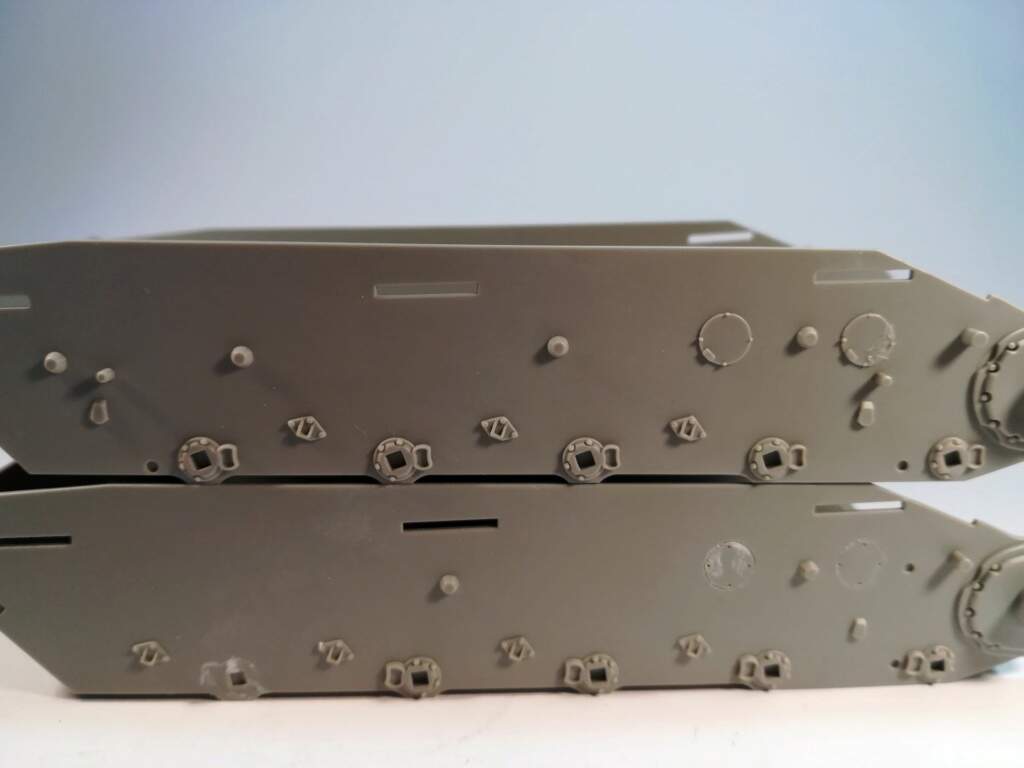
Then Takom like Heller molded the left torsion bars right ends at the rear of the right side torsion bar. So I gently removed the 10 parts and glued them back in the right direction.
Fortunately the hull type 2D (at the top of the picture) is correct.
Finally the mud scraper support which is too thin and too far from the sprocket is replaced by some 2mm rod. Do not forget the left side support.
TBC
Olivier
4 Likes
Very nice, lovely corrections Olivier
Hi all,
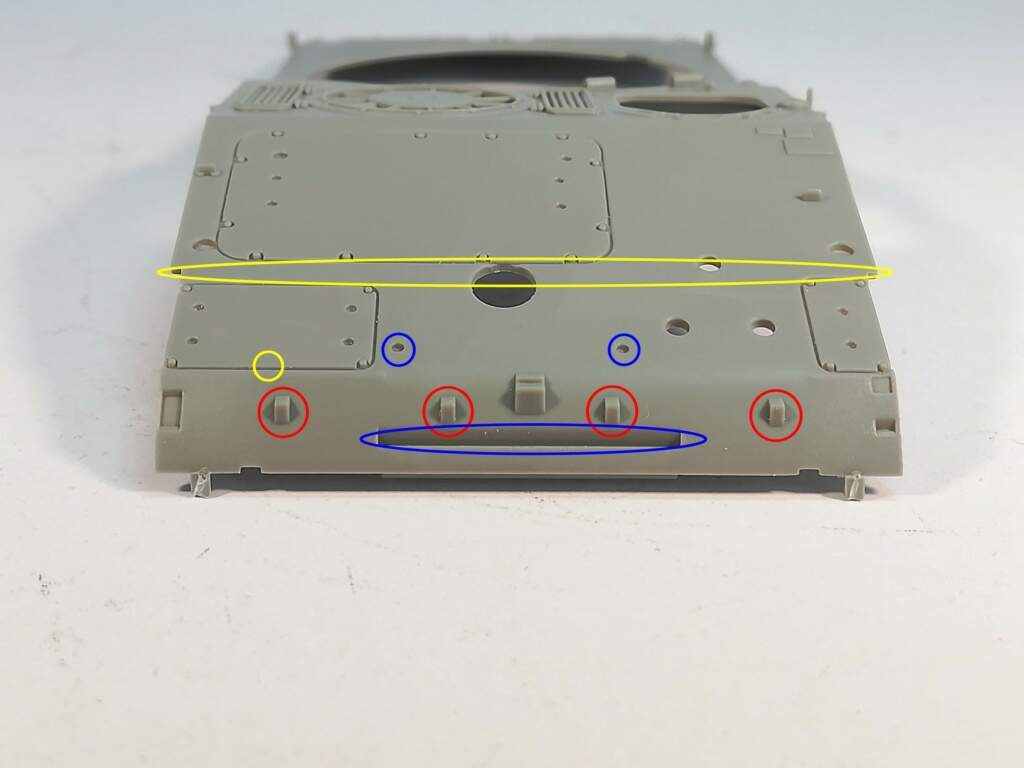
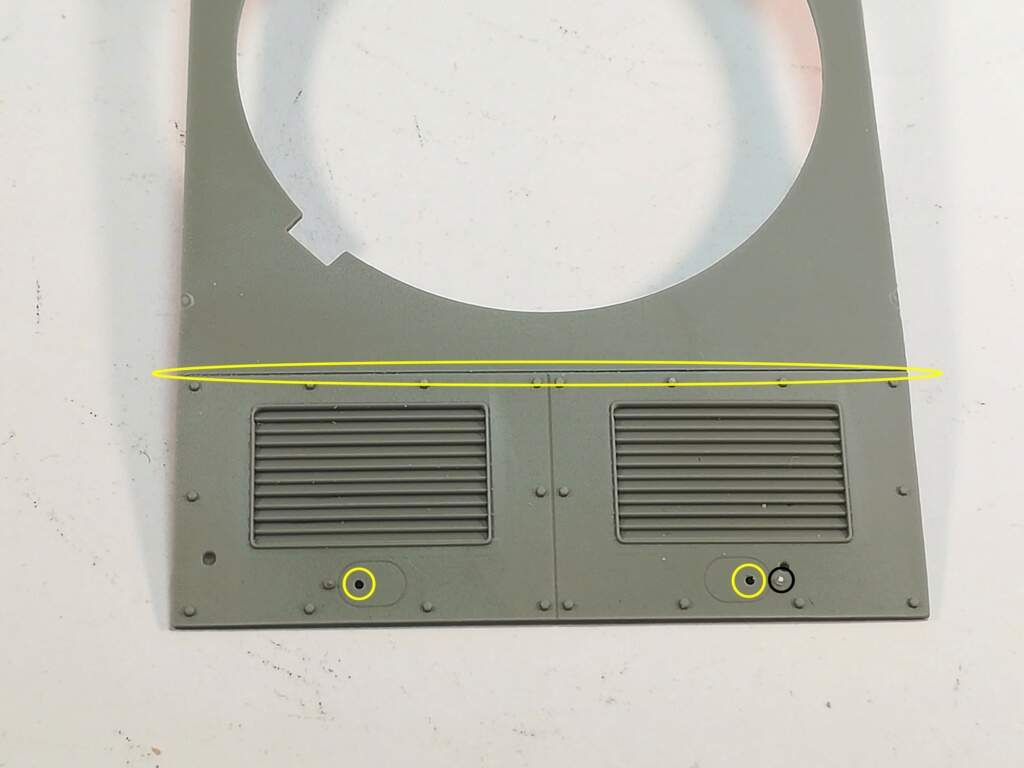
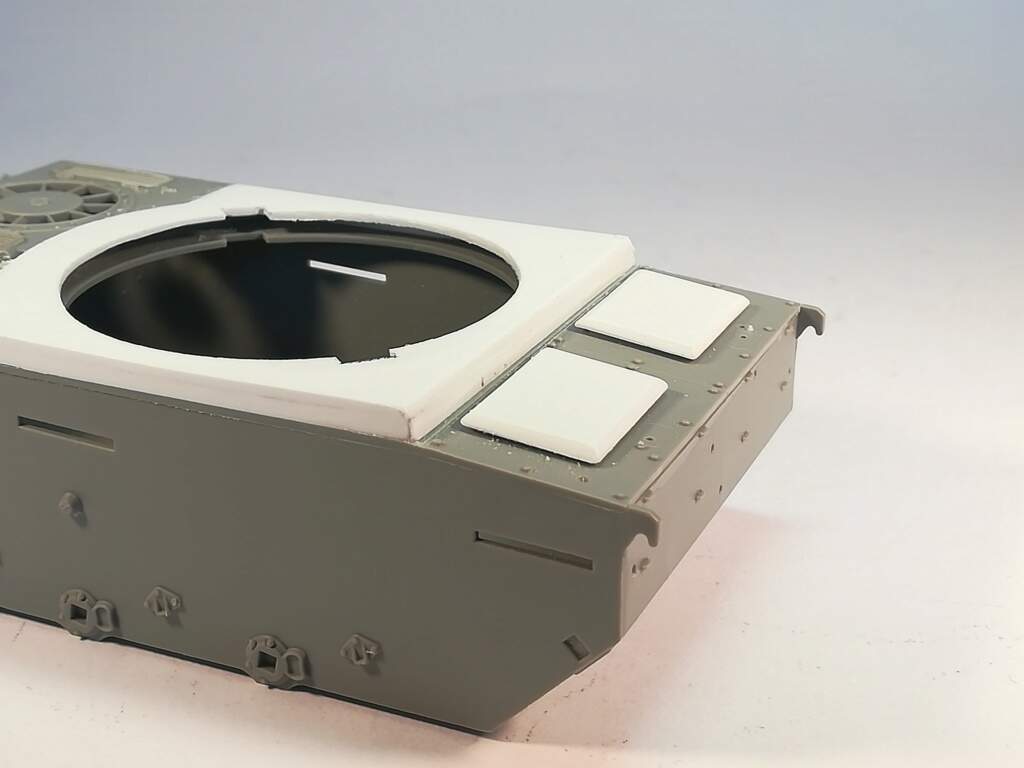
I’ve started adding details to the upper hull.
In red, the elements are to be deleted only if you don’t intend to mount the mud-guard/splashboard (early AMX 13 only). If you don’t put the mud-guard on the 13/90 and the 13/105 you just need to drill a hole in the center of the parts.
In yellow you need to drill the hole for the 5 bolthead (not necessary for the 13/90 and the 13/105 because it is hidden by a box) and to engrave the panel line.
In blue you need to fill the groove and the holes if you don’t put the mud-guard on the early version.
Basically here what you are supposed to get.
On the ventilator circumference you need to drill three holes for the lifting system.

At the rear in yellow there is another panel line to engrave and two holes to drill. Takom has just represented the holes so drilling them is just for fun.  In black this is a stop for the fuel tank filler cover. Takom only depicted the left one.
4 Likes
Today was dedicated to the IDF version and its platform to raise the turret. I had the scale 1 dimensions which I converted to 1/35 scale just to see it would not fit to the kit.
So I used my eyeball mk1, somes files and a bit of elbow grease. The result is fine enough if not perfect. I still have to address some fit issues.
The platform

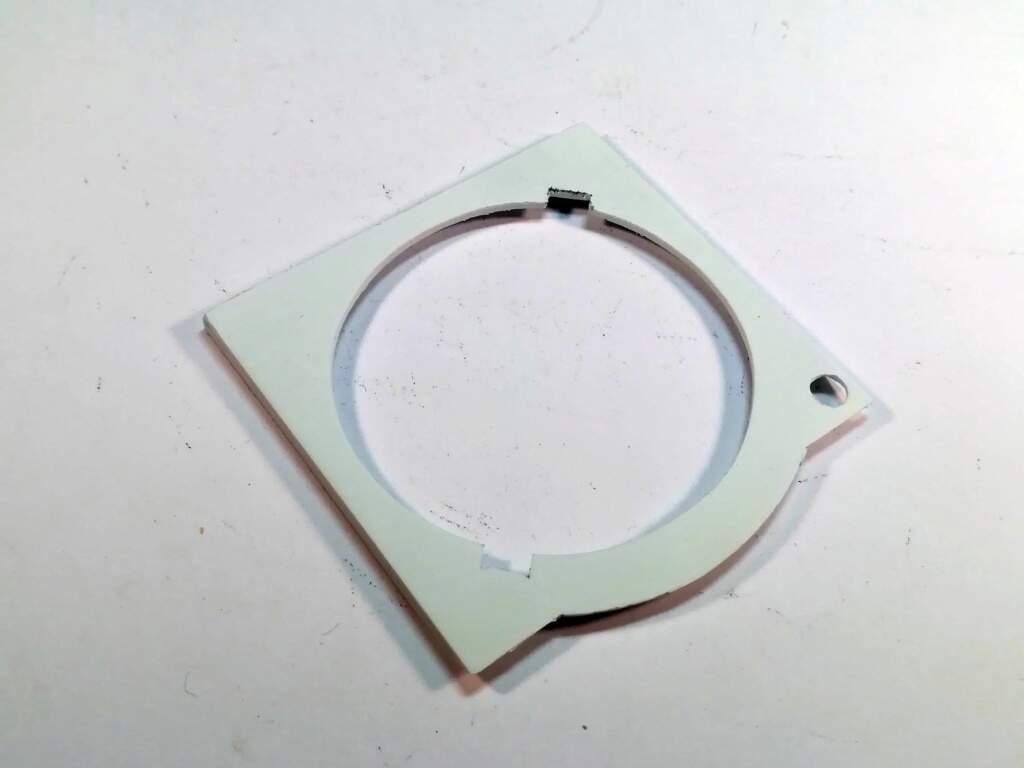
The platform and the turret dry fitted.
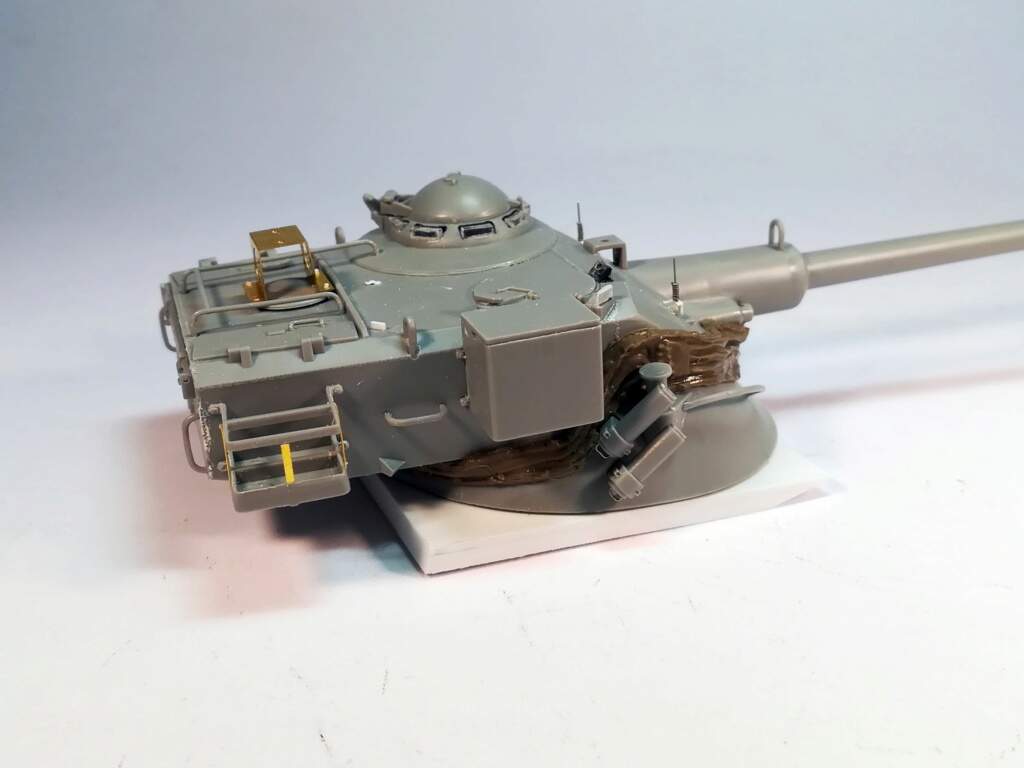
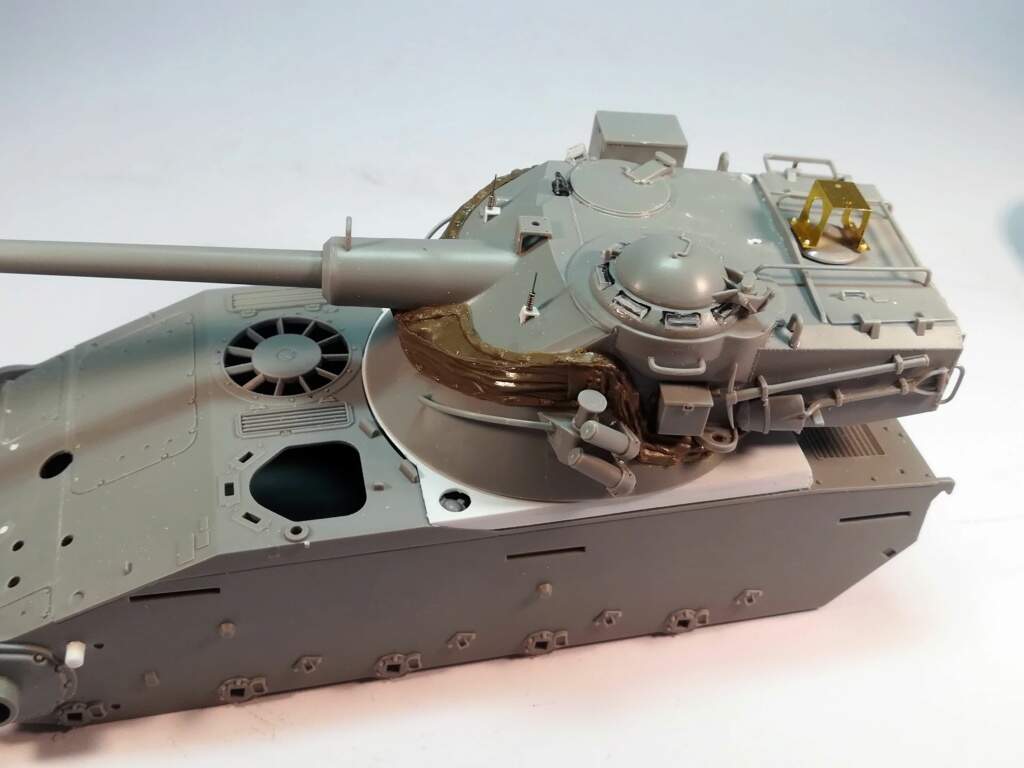
Next step will be the rear grilles covers.
Olivier
3 Likes
These are some great builds! I’ve always been attracted to the AMX13 style turret. But one thing I can’t find online…is how does the gun recoil get absorbed. My understanding is that the gun is hard mounted to the turret, so what moves to absorb the force? Does the top portion of the turret move a little bit? Anybody ever see a video of one firing? I’d be very grateful if somebody in the know can explain this…
Several YouTube videos show the tank firing its main gun and rearing back from the recoil.
1 Like
There is no recoil and the trunnions take the force I believe.
1 Like
If that’s the case they must fail after a while ? Or replaced on a regular basis… That’s alot of shock going on.
All the work you’re doing @Bison126 looks great and will add loads to each builds authenticity
1 Like
"The 75 mm (2.95 in) gun and coaxial machine gun were rigidly attached to the turret top. Rotation and pointing was provided by hydraulic power, traverse to a maximum speed of 30° per second, and vertically to 5° per second. Angles of elevation and depression were +12° and -8°, the elevation angle being limited aft by the recess of the turret roof over the chassis. Turret management was carried out by a gunner and the commander, but the gun did not have a stabilizer. Outside, the turret was equipped with grenade launcher for smoke screens, two banks of three with 12 grenades total. Total weight of the turret without ammunition was 4.5 tons, and comparatively to the gun caliber it was a fair trade.
This design allowed the use of a new system with automatic loading arms, consisting of two revolver cylinders, 6 shots each. After the shot gun recoil forces rotated another shell into the barrel bore. Cartridge cases were ejected through a special hatch in the stern of the tower. "
“Since the gun barrel is attached rigidly to the turret, the entire upper part of the turret recoils when fired. There is no mantlet as such and the barrel and breech retain their position in the upper turret. Recoil energy is absorbed by the usual oleo-pneumatic dampers, but these are mounted between the turret halves, rather than linearly alongside the gun.”
and
" As the gun remains fixed relative to the upper turret, even during recoil, it is easier to install an ammunition autoloader than for a conventional turret, where the gun must return to a fixed elevation for reloading. The French design used two six-round rotating magazines, allowing a high rate of fire and also a selection of two ammunition types. The disadvantage was that once the magazine ready capacity was used, reloading of the magazines was a slow process that could not be carried out under fire. For the AMX-13, this reloading had to be carried out from outside the vehicle."
The M24 Chaffee had the same system.
The gun did recoil (approximately 35cm) like any other gun. It was not rigidly fixed. Source: a former AMX13 commander.
Today I finished the modifications on the Israeli hull. I added the rear grilles protections. Those were made of 1mm thick plastic card (1.2x1.8mm) which upper egdes were beveled. I added spacers underneath to create the space seen on reference pictures.

Then I modified the travel lock. The Israeli AMX13 had the early long legged travel lock. I cut the upper ends of each leg and added 2 cm long extensions. On one I glued the hinge for the collar (removed from the original Takom part) and on the other I squeeze the end to have it flat and I drilled a hole.
Then I built a new lock. Originally the lock had the threaded rod and the “wingnut” at the front. It was only when the mud-guard was added that those parts were fitted at the rear.
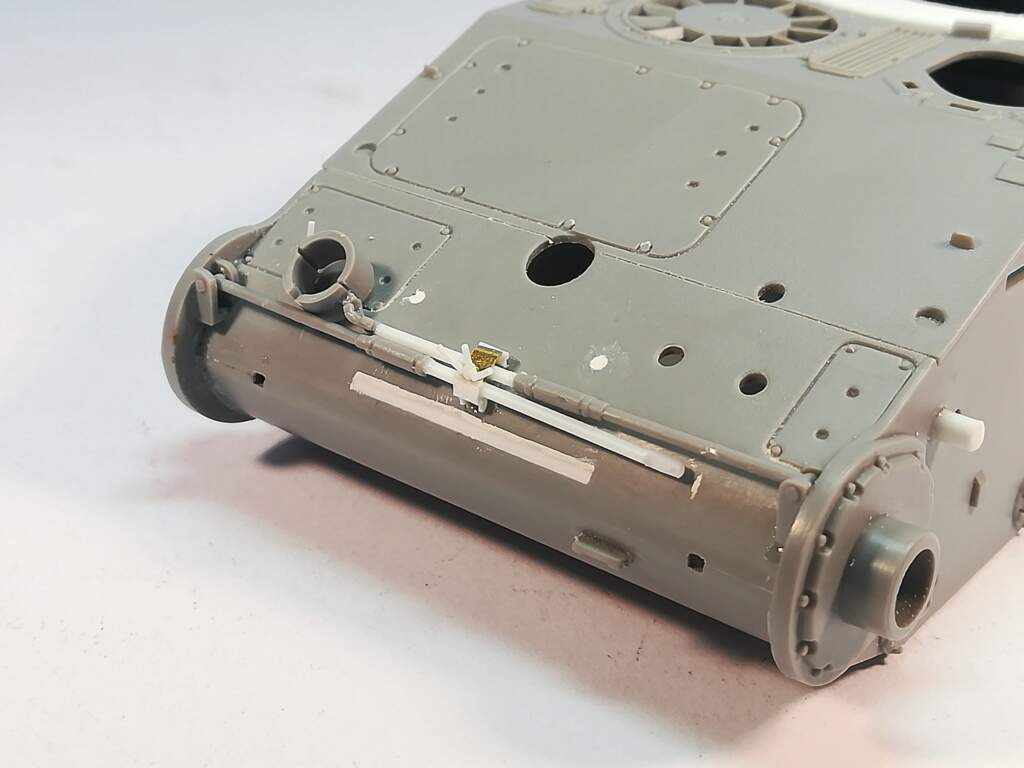

Takom PE part is bent as it should be (not in the instructions though).
Olivier
4 Likes
Looking great Olivier!
Great information too Olivier.
Thanks for the comments. The IDF hull is the one which needed to be the most modified. I still need to add the early single light protections. The rest of the hull should be from the box. The other version which requires modifications is the French AMX13/90. At the time the French army didn’t use the infantry phone anymore.
I haven’t spotted hull modifications on the Argentinian 13/105. I just have to check the spare track links bracket.
I intend to assemble the three running gears and let the tracks aside before adding the fenders with the bins and all the missing details.
Olivier
I noticed that I omitted to mention the largest flaw in the Takom kits i.e; the wrong guns dimensions.
To be honest the 90 mm gun is pretty accurate (it just misses the holes under the thermal sleeve sections) unlike both the 75 mm and the 105 mm ones.
The 75 mm gun is too short by 8 mm. It should be the exact same length as the 90 mm gun which simply was a rebored 75 mm barrel. The best option is to use a replacement barrel (DEF Model offer is perfect, Tamiya barrel is only missing 1 mm and Heller barrel is too long by 2 mm).
The 105 mm gun is too short by 7 mm and its muzzle is way oversized. I now understand why I thought it was impressive. The overall dimensions are too large by 1.4 factor. The gun caliber is 5 mm which would be 175 mm for real. That’s what I call a miss. Unfortunately I don’t know of a good replacement barrel. Heller one has the right length but the muzzle brake is not the right design. I think I’ll have to make a muzzle cover for this one.
Olivier
3 Likes
I still wonder why companies make errors like this…