Great stuff, I like the camo scheme and all the red details. Well done!
Mario
Great stuff, I like the camo scheme and all the red details. Well done!
Mario
@KoSprueone- Cheers mate! I’ve been really impressed with the details I must say- some interesting shapes too that have made weathering it quite an interesting job.
@Maki-Thank you my friend- the red details has been easily the most enjoyable thing to do- its not often you get to use such bright markings on a tank!
Sir you have inspired me to try to build this kit and I will more than likely use your thread as a reference. I am a huge command and conquer fan and secretly hope that somebody out there will start a line of 1/35 kits for all the vehicles in game I would love to build a prism tank.
Well thank you sir for your praise- I’m elated I’ve inspired you enough to purchase one! I echo your sentiments about more kits- a prism tank is exactly what is needed now in plastic!
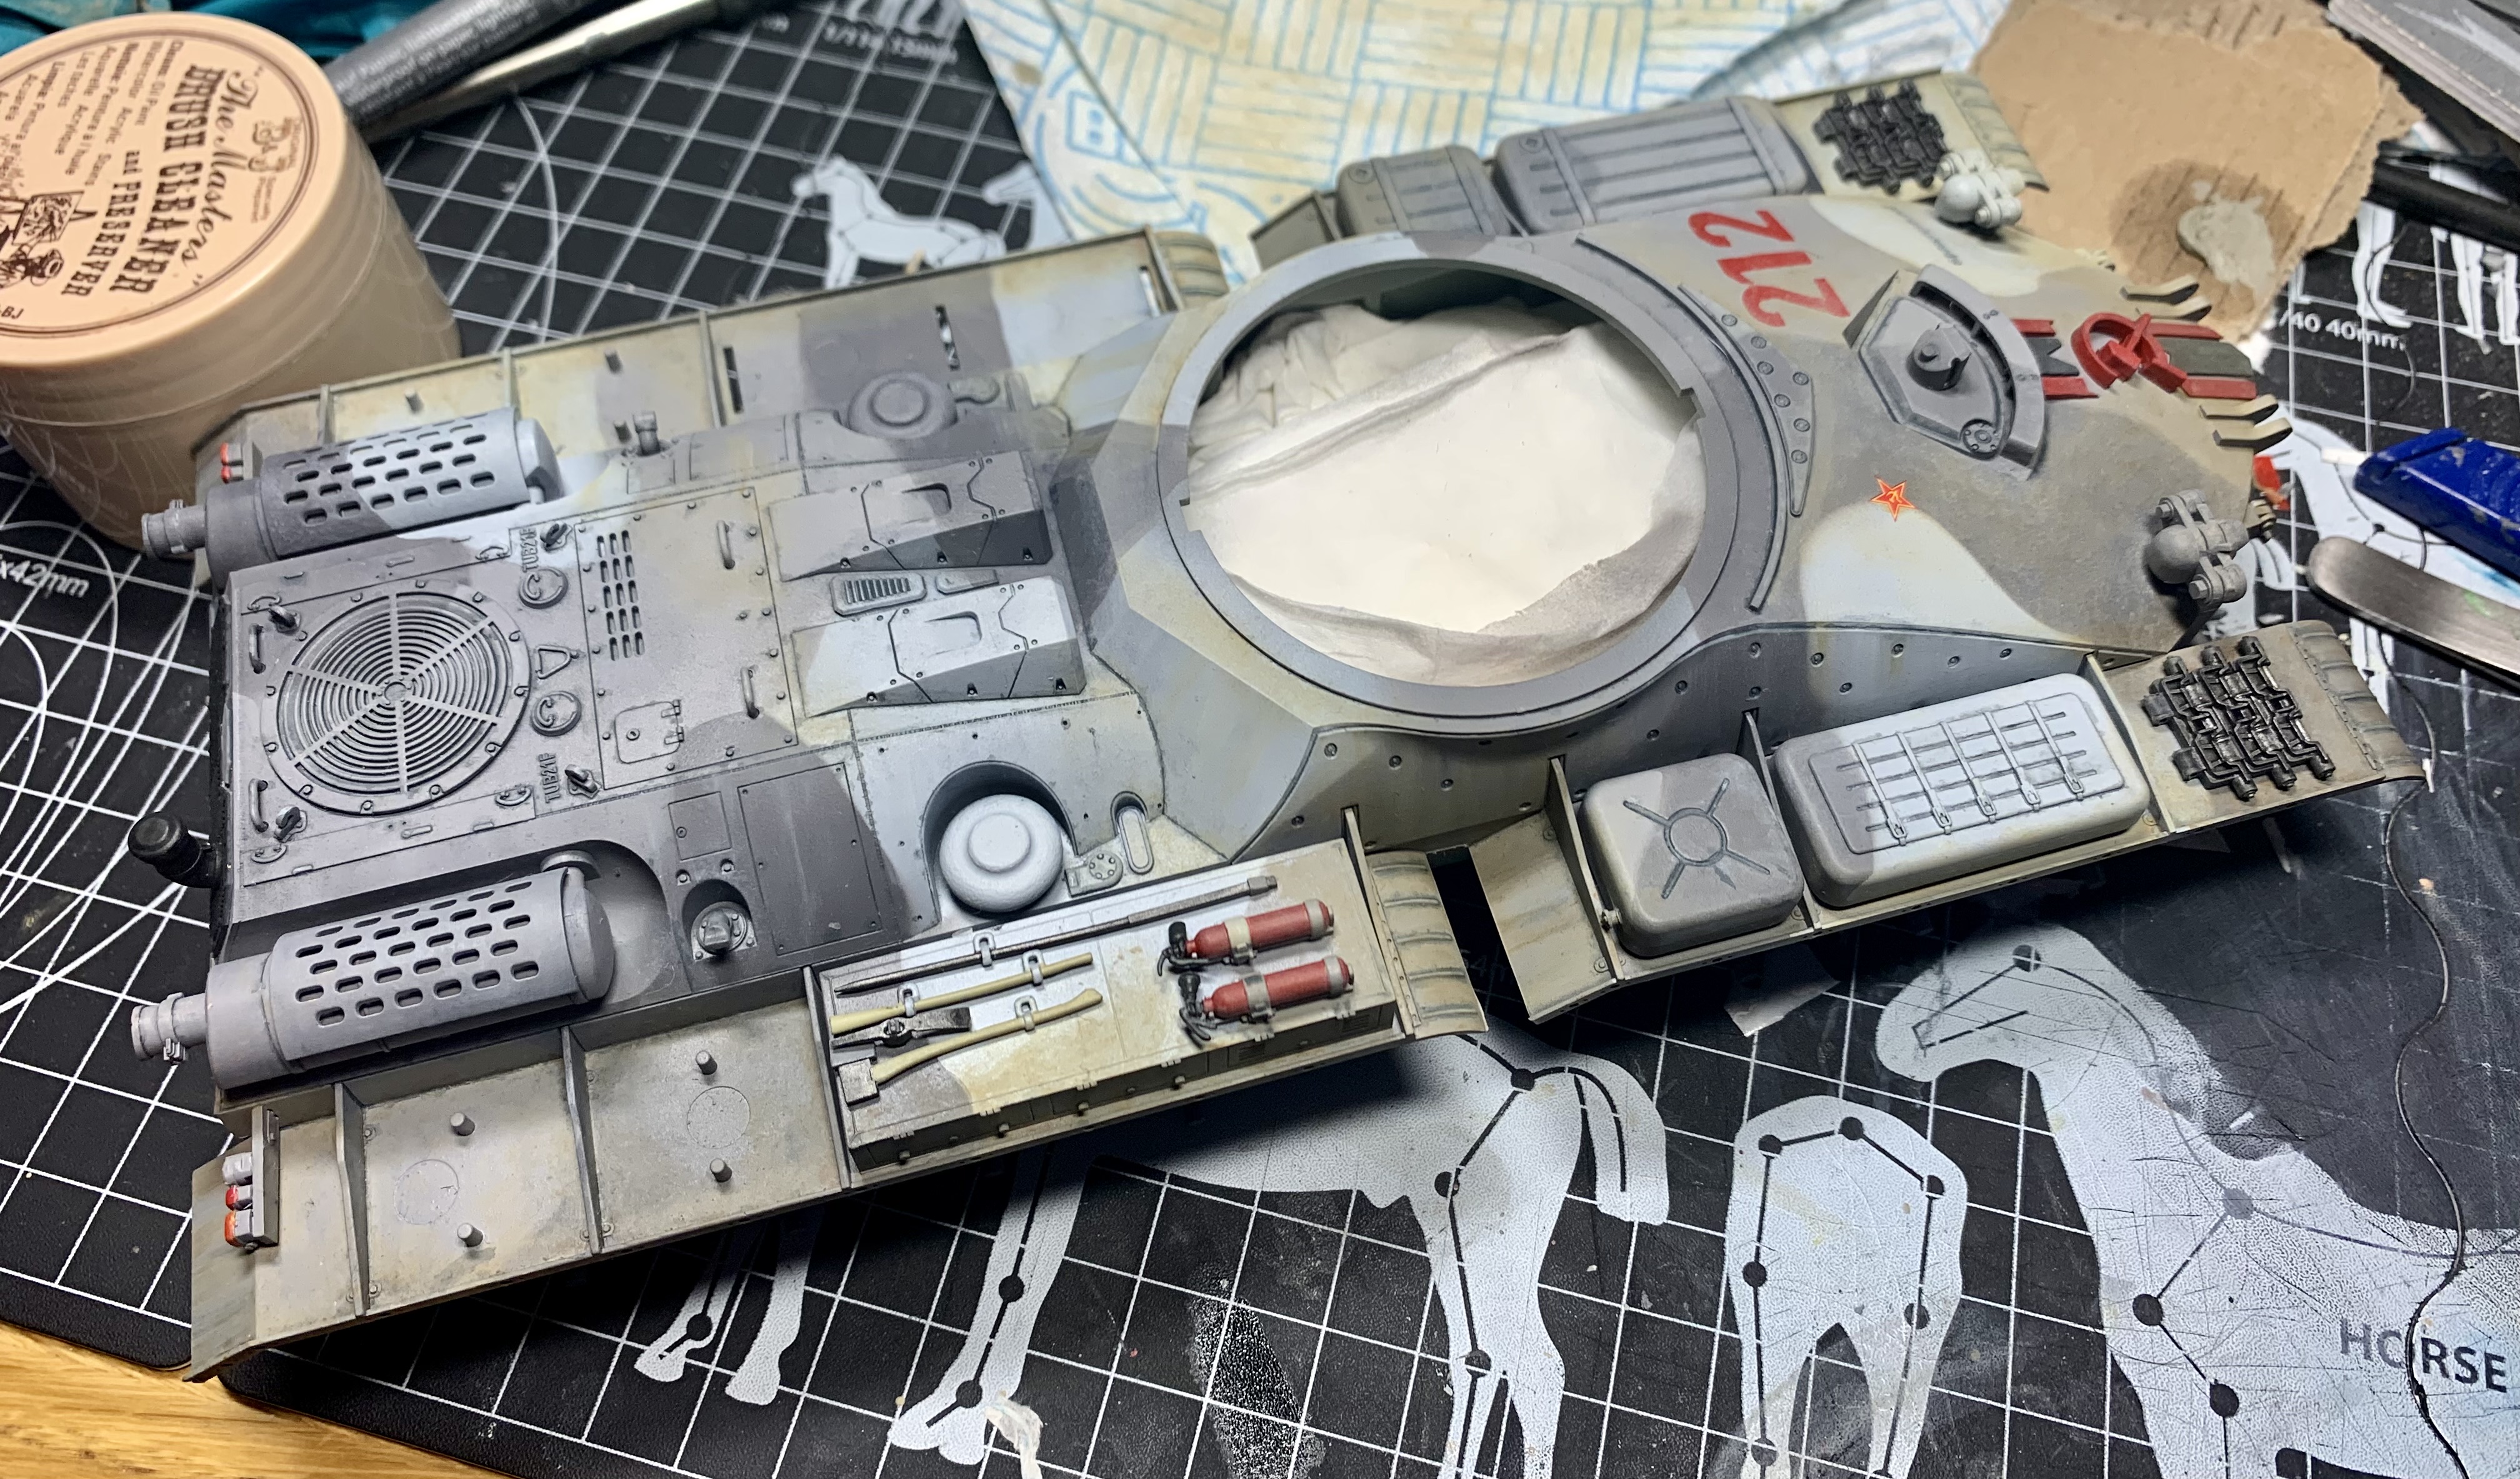
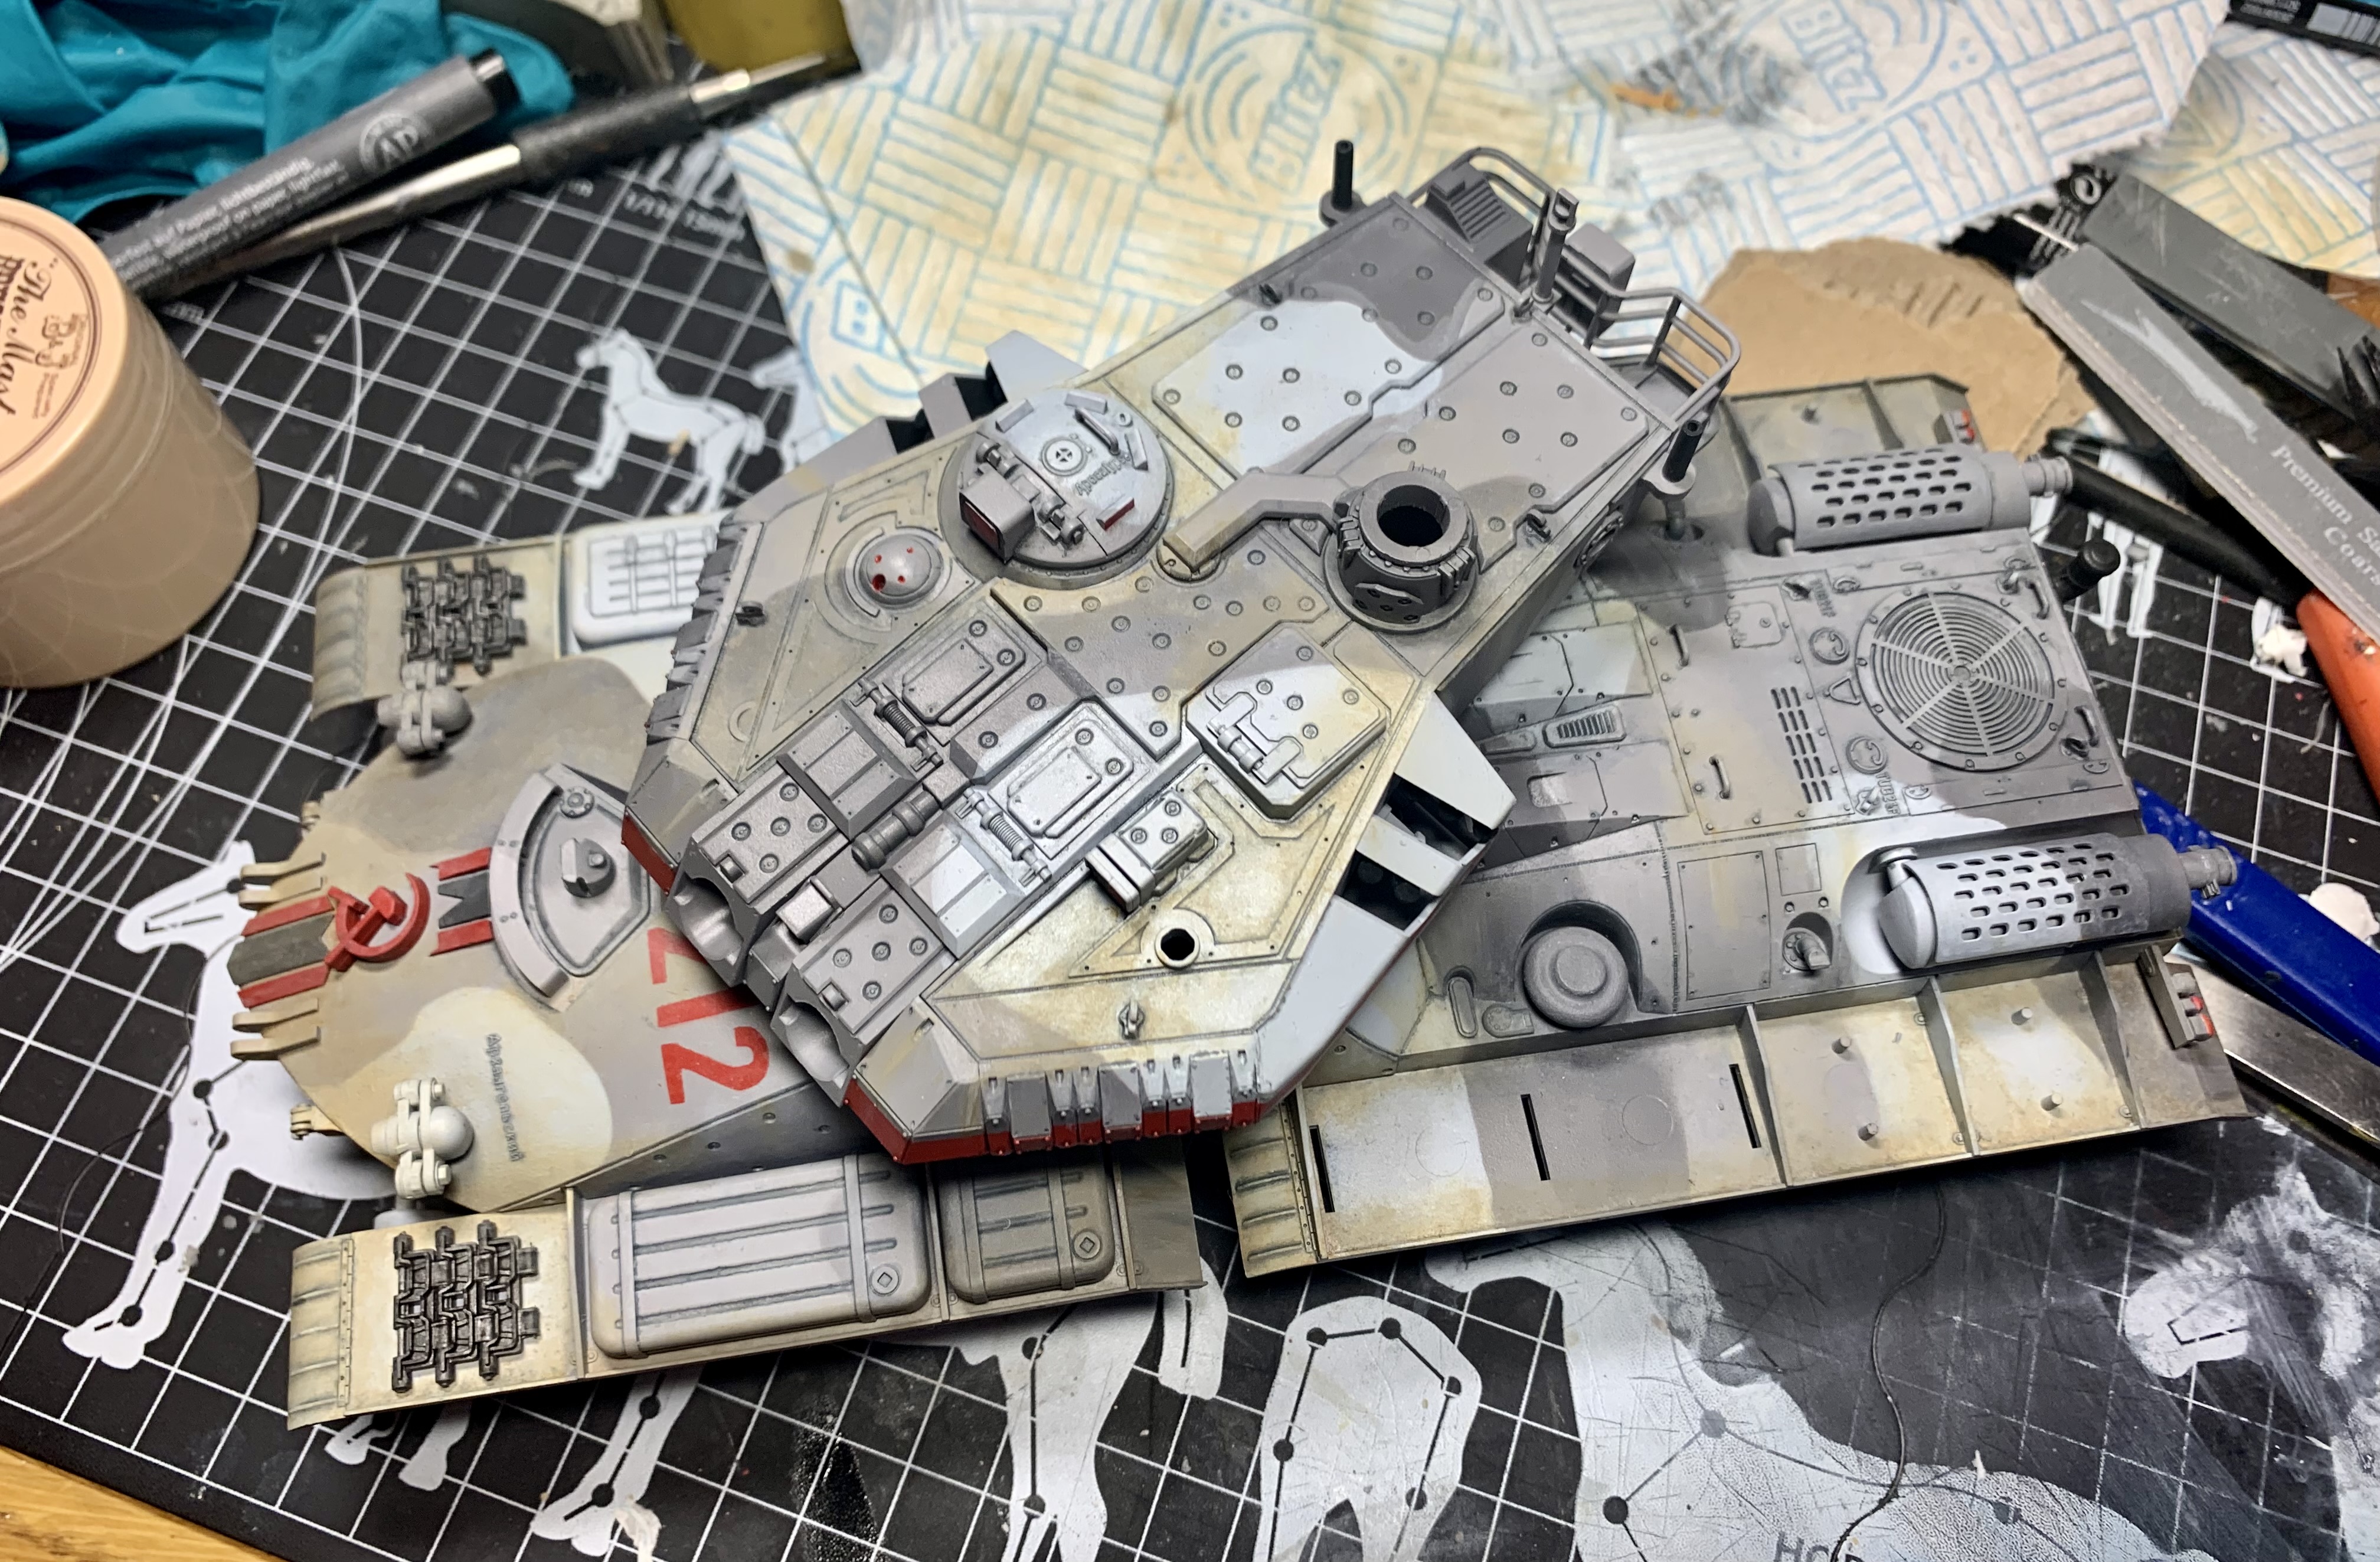
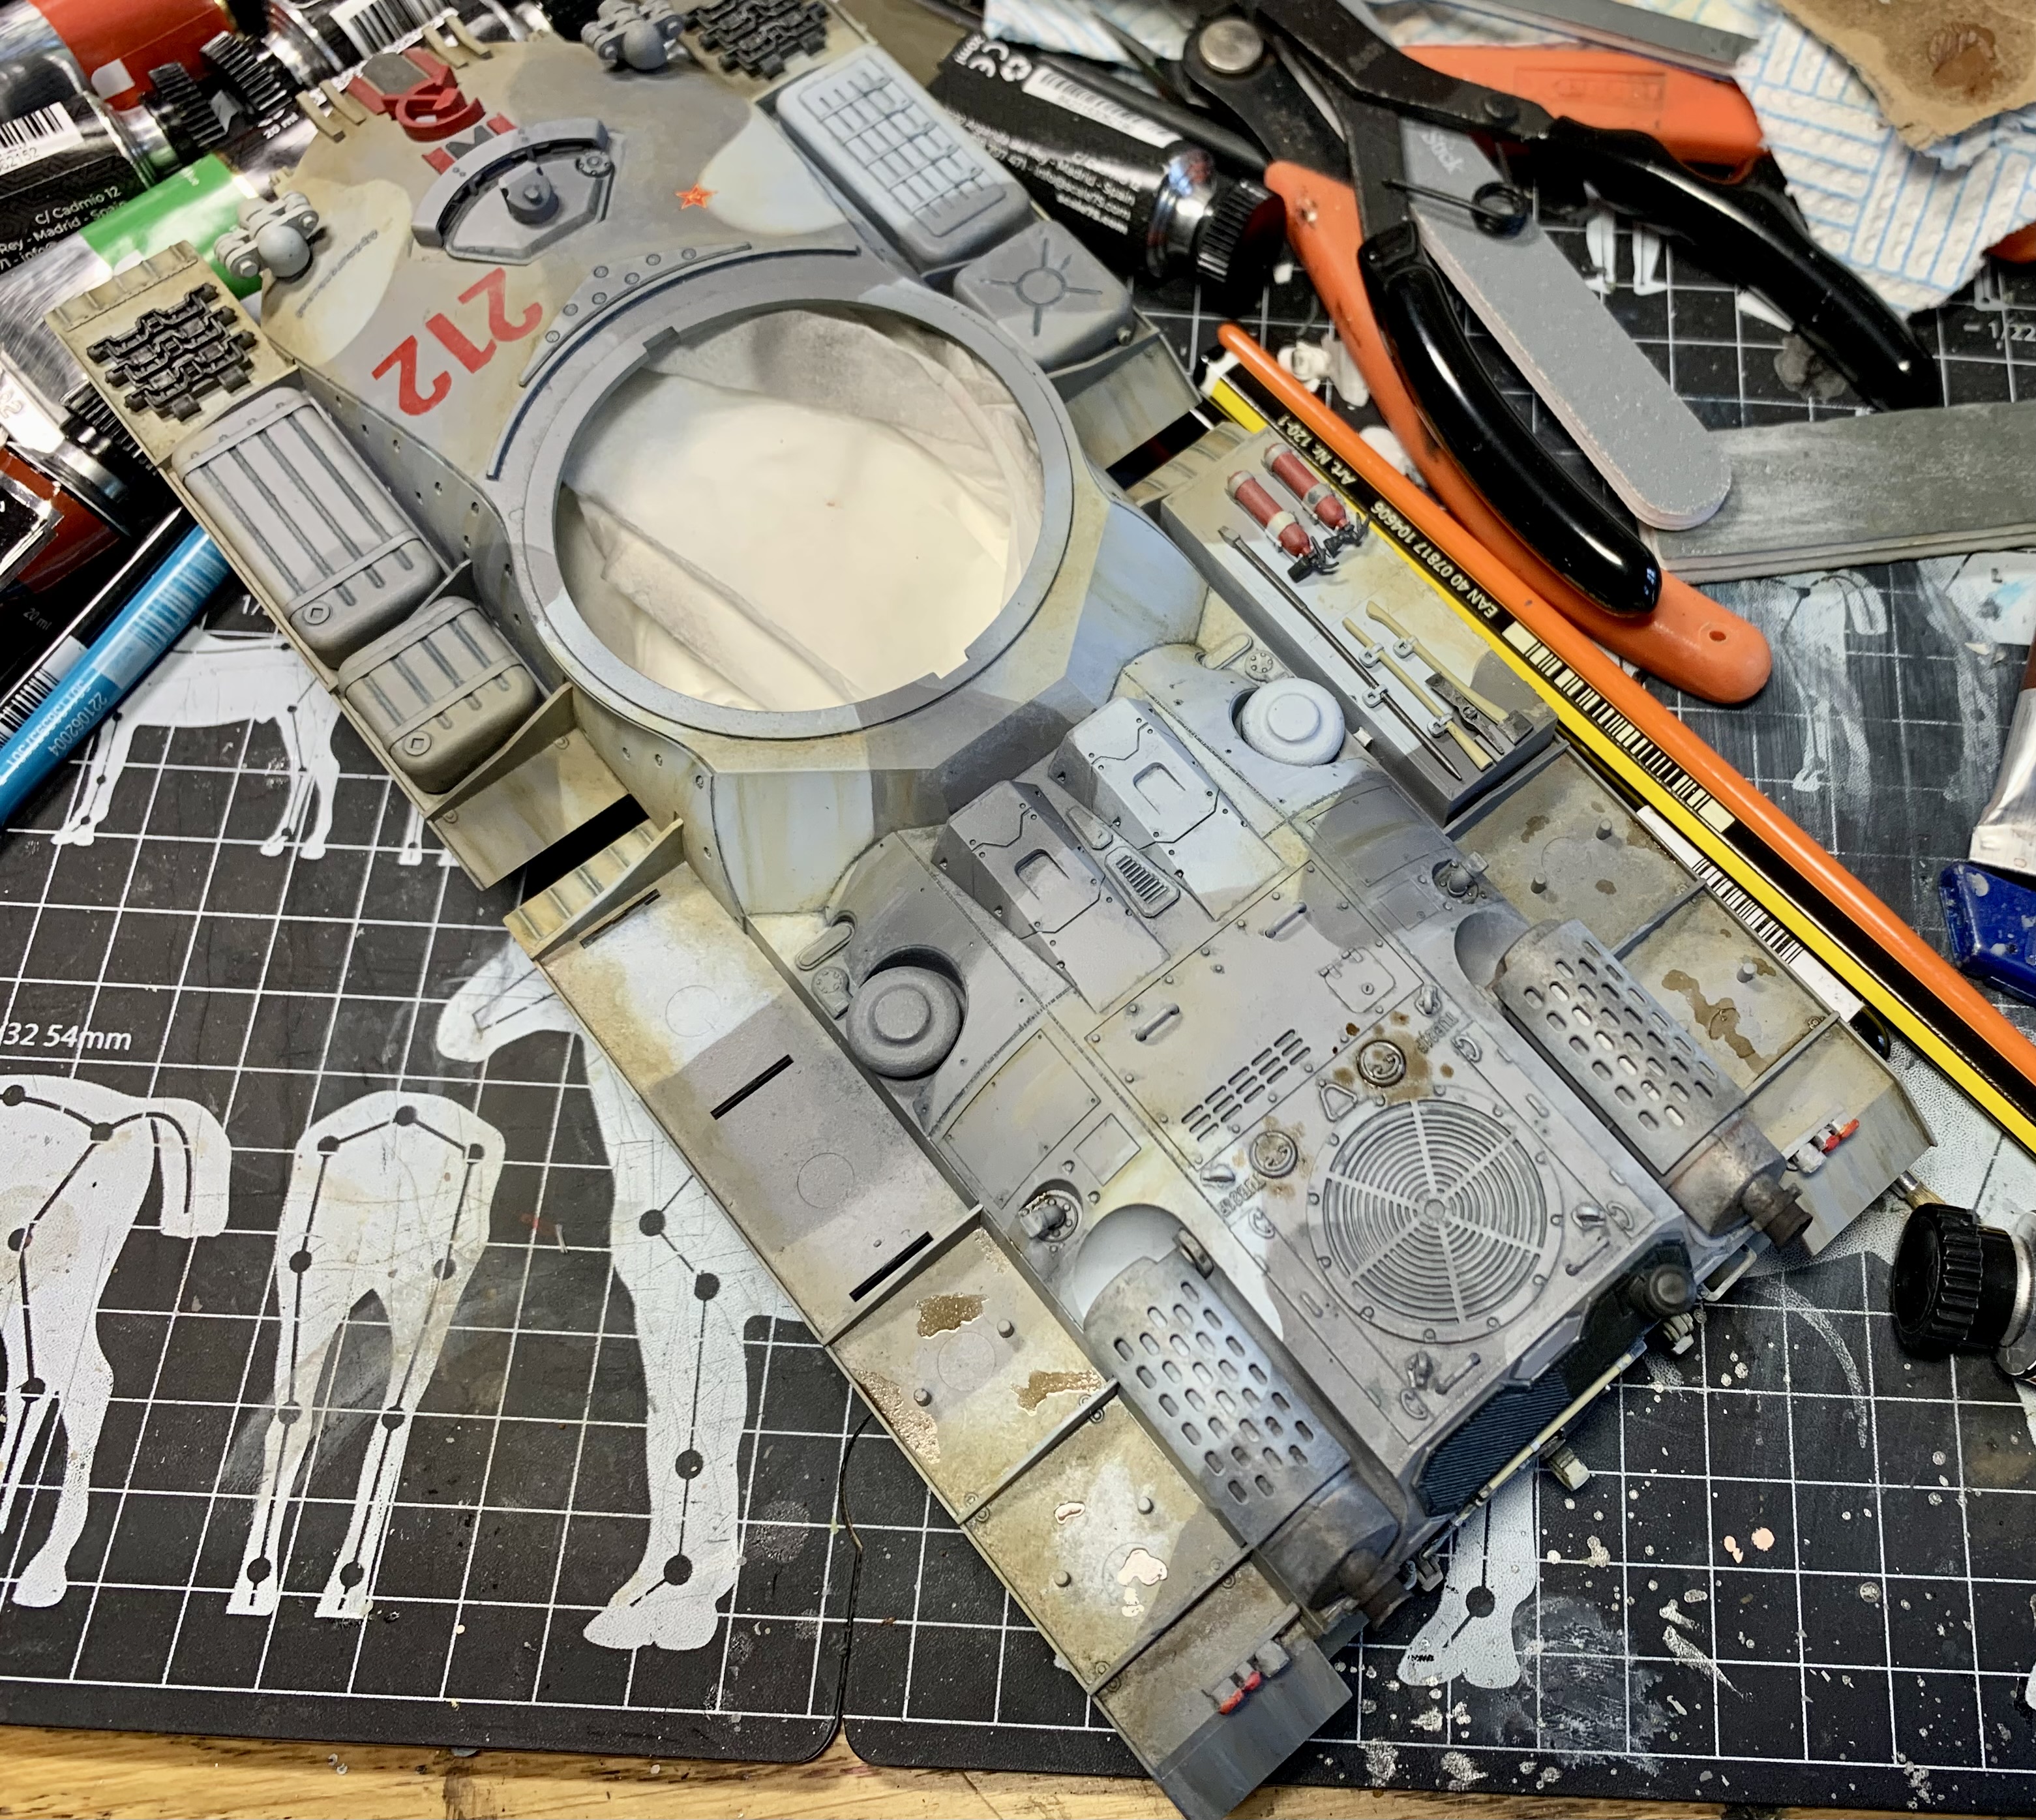
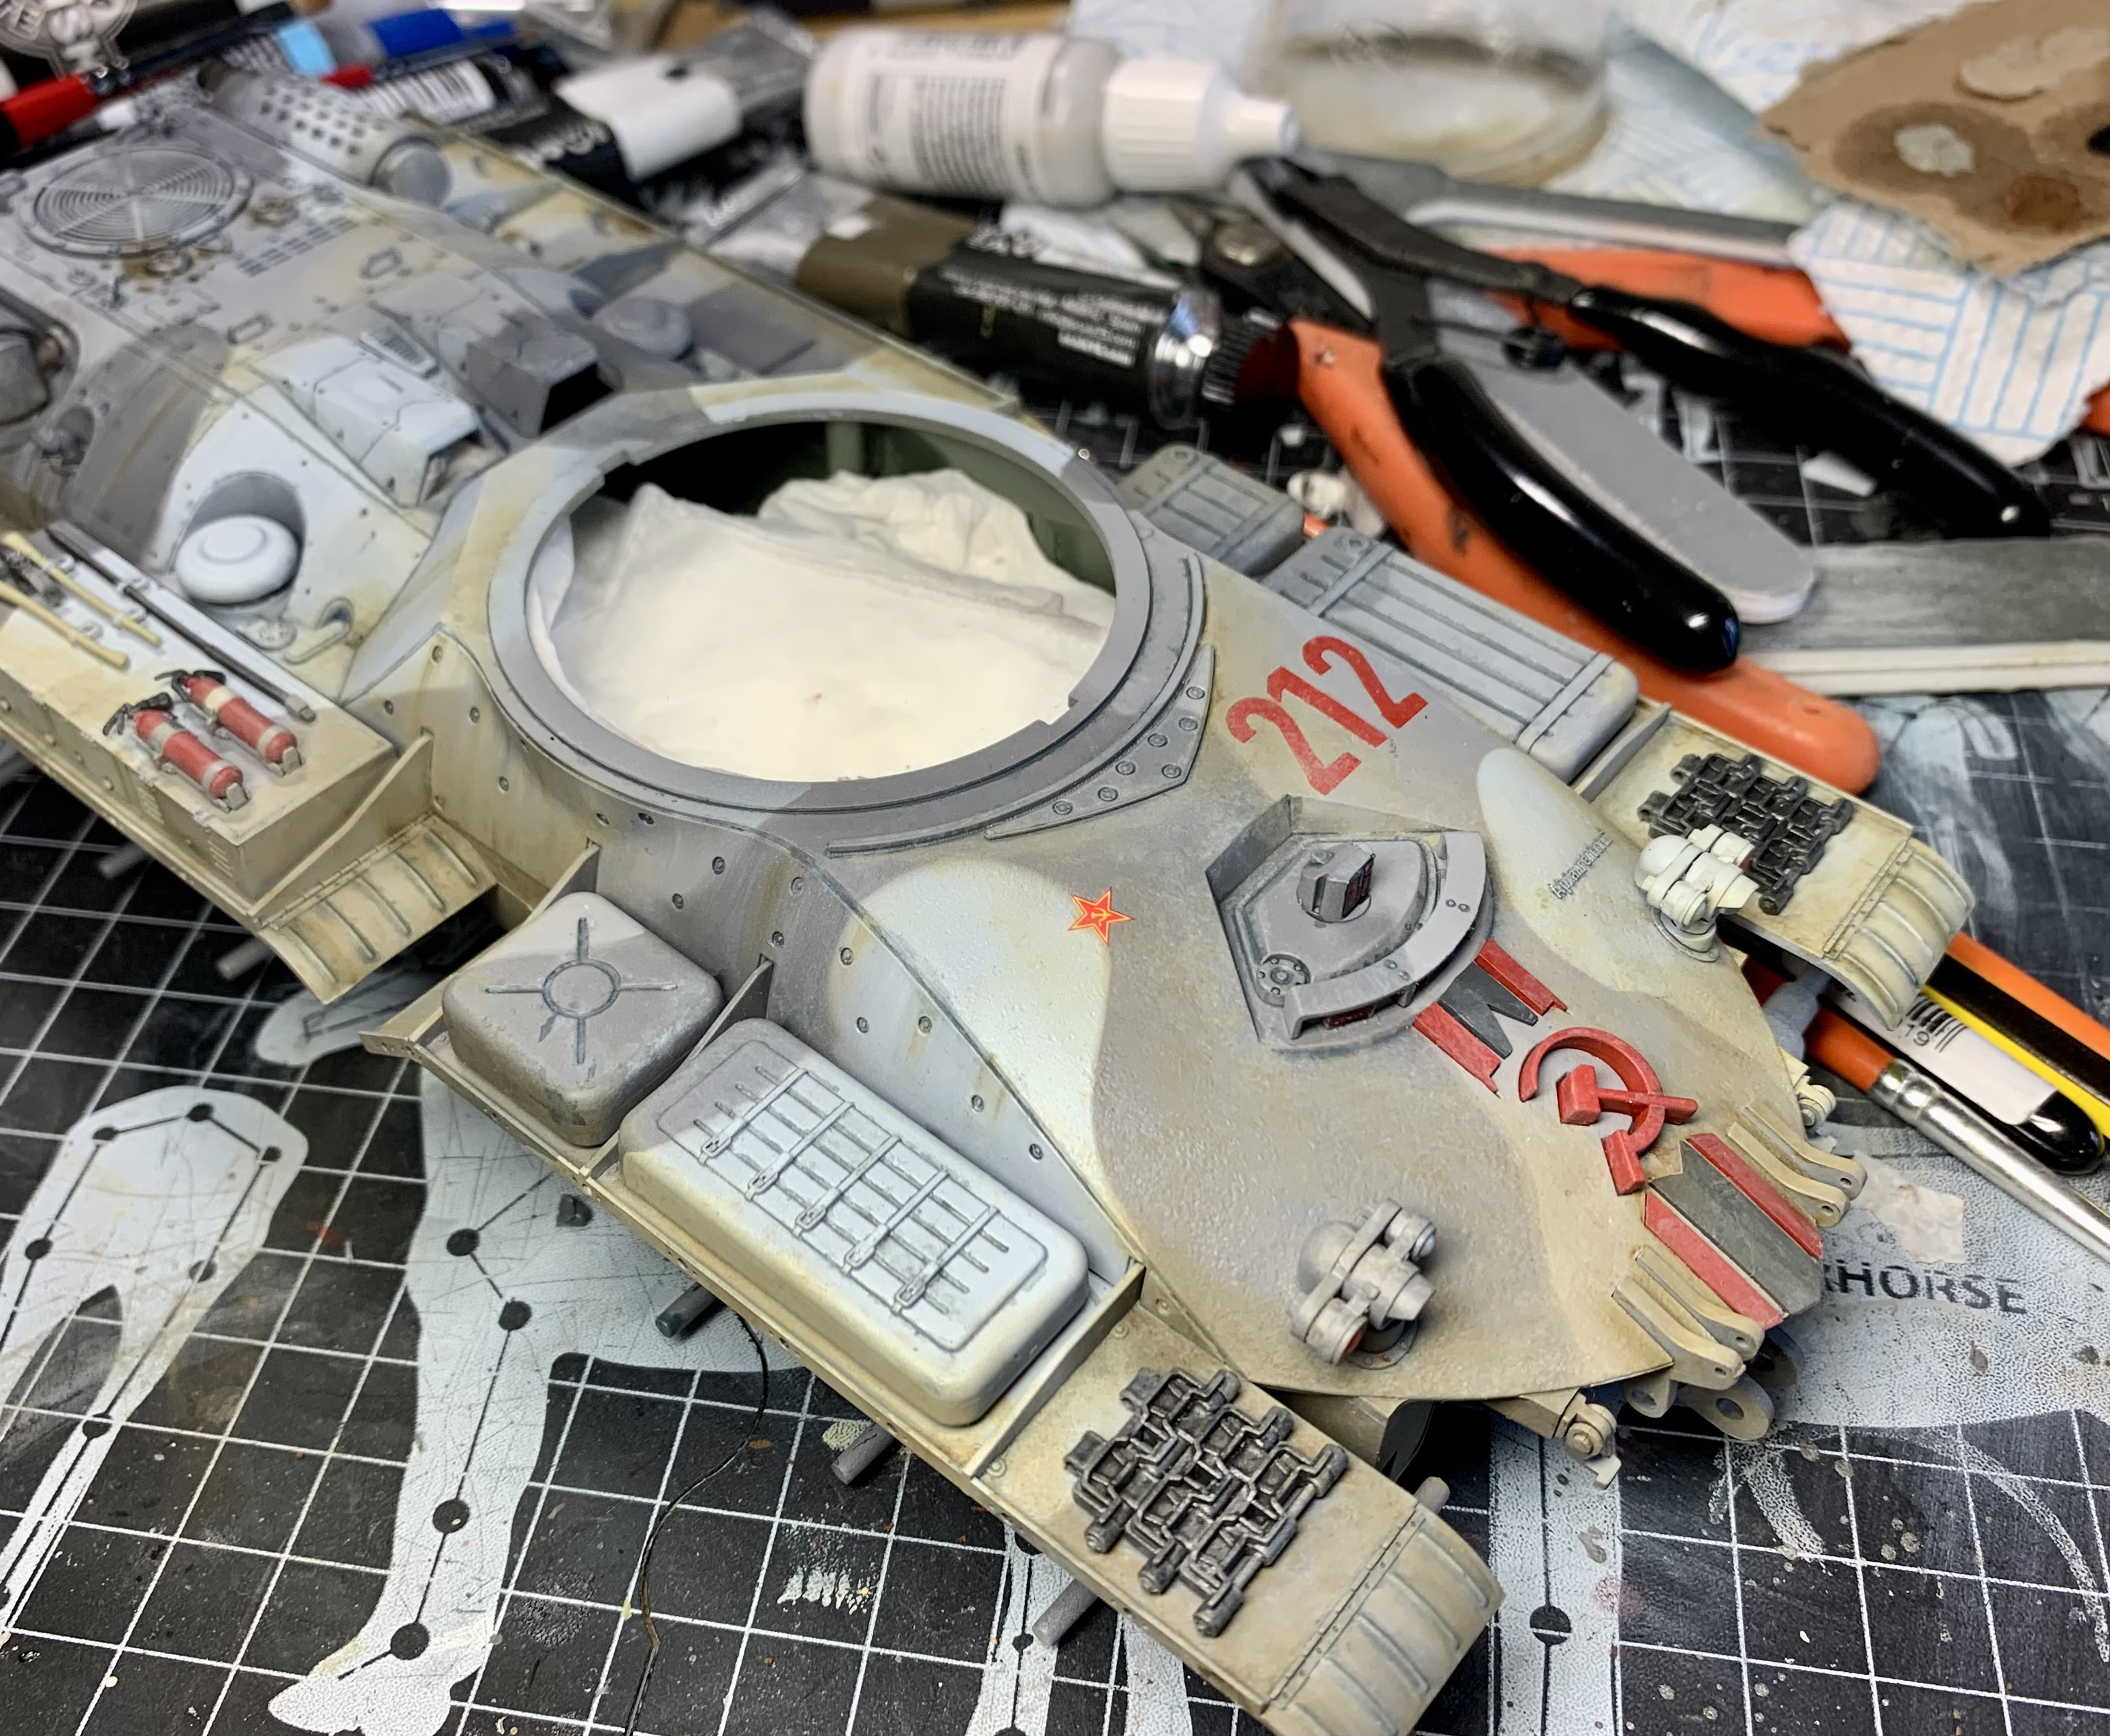
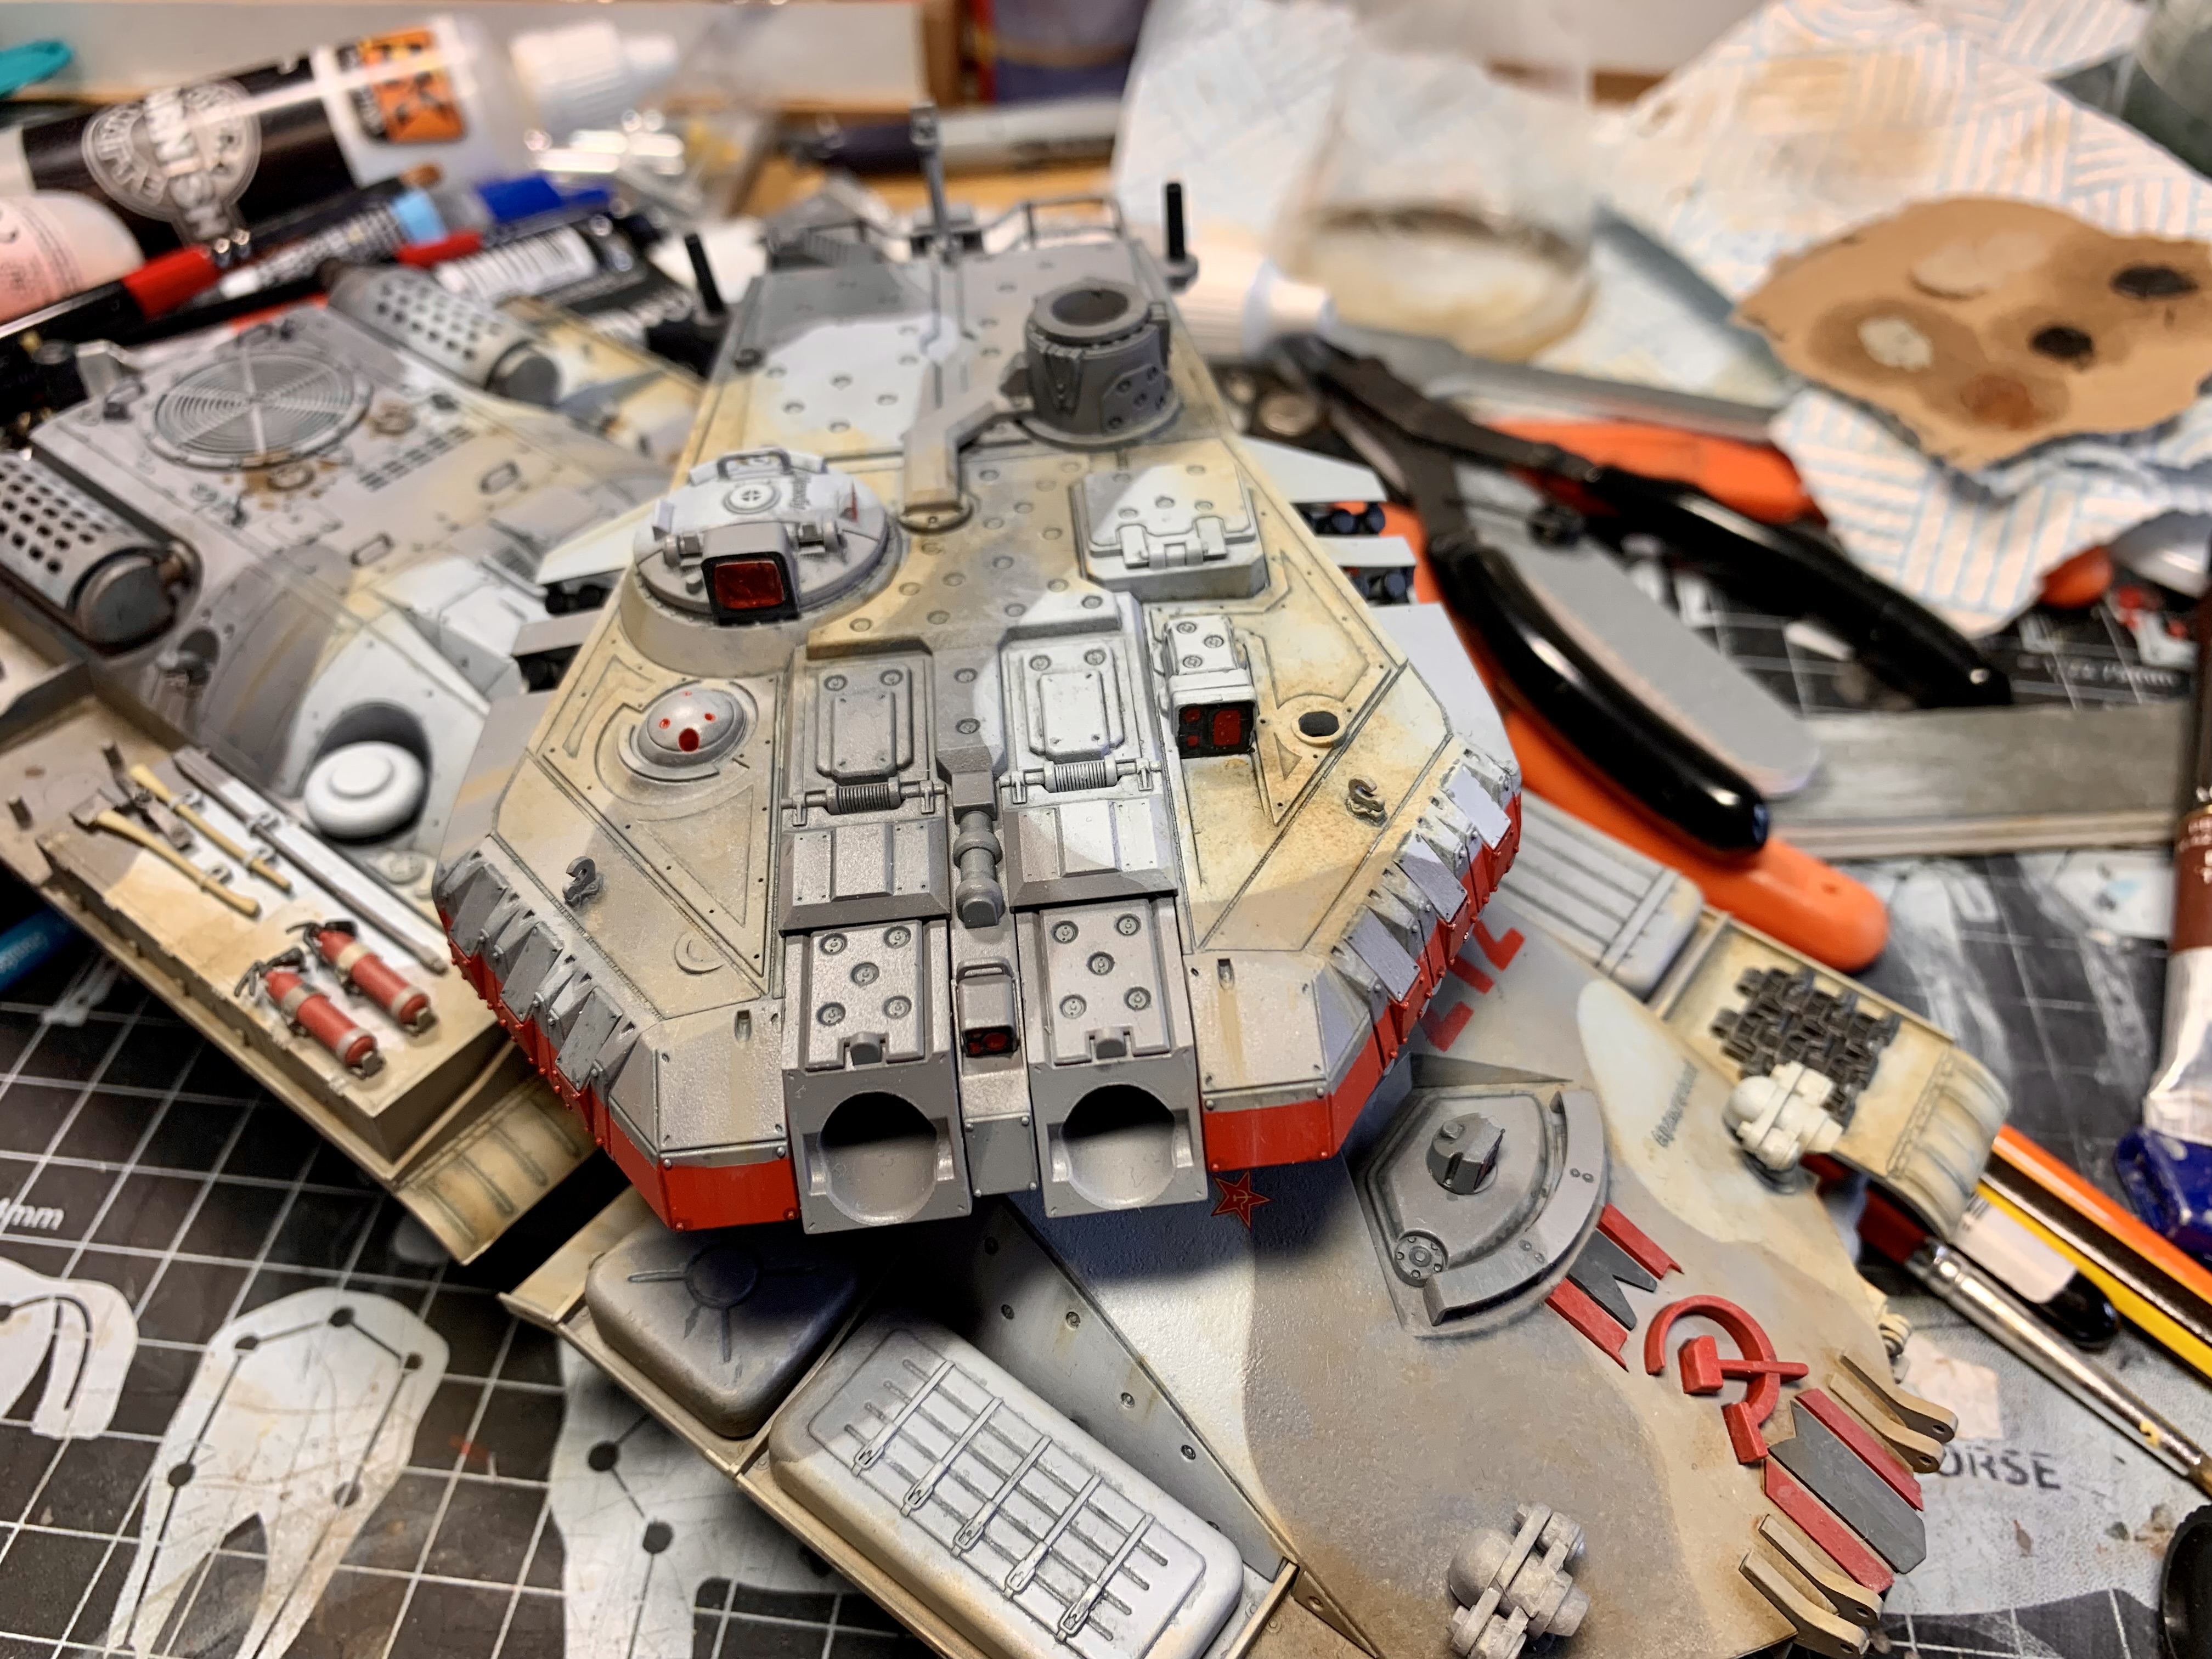
This is where I’m at just now.
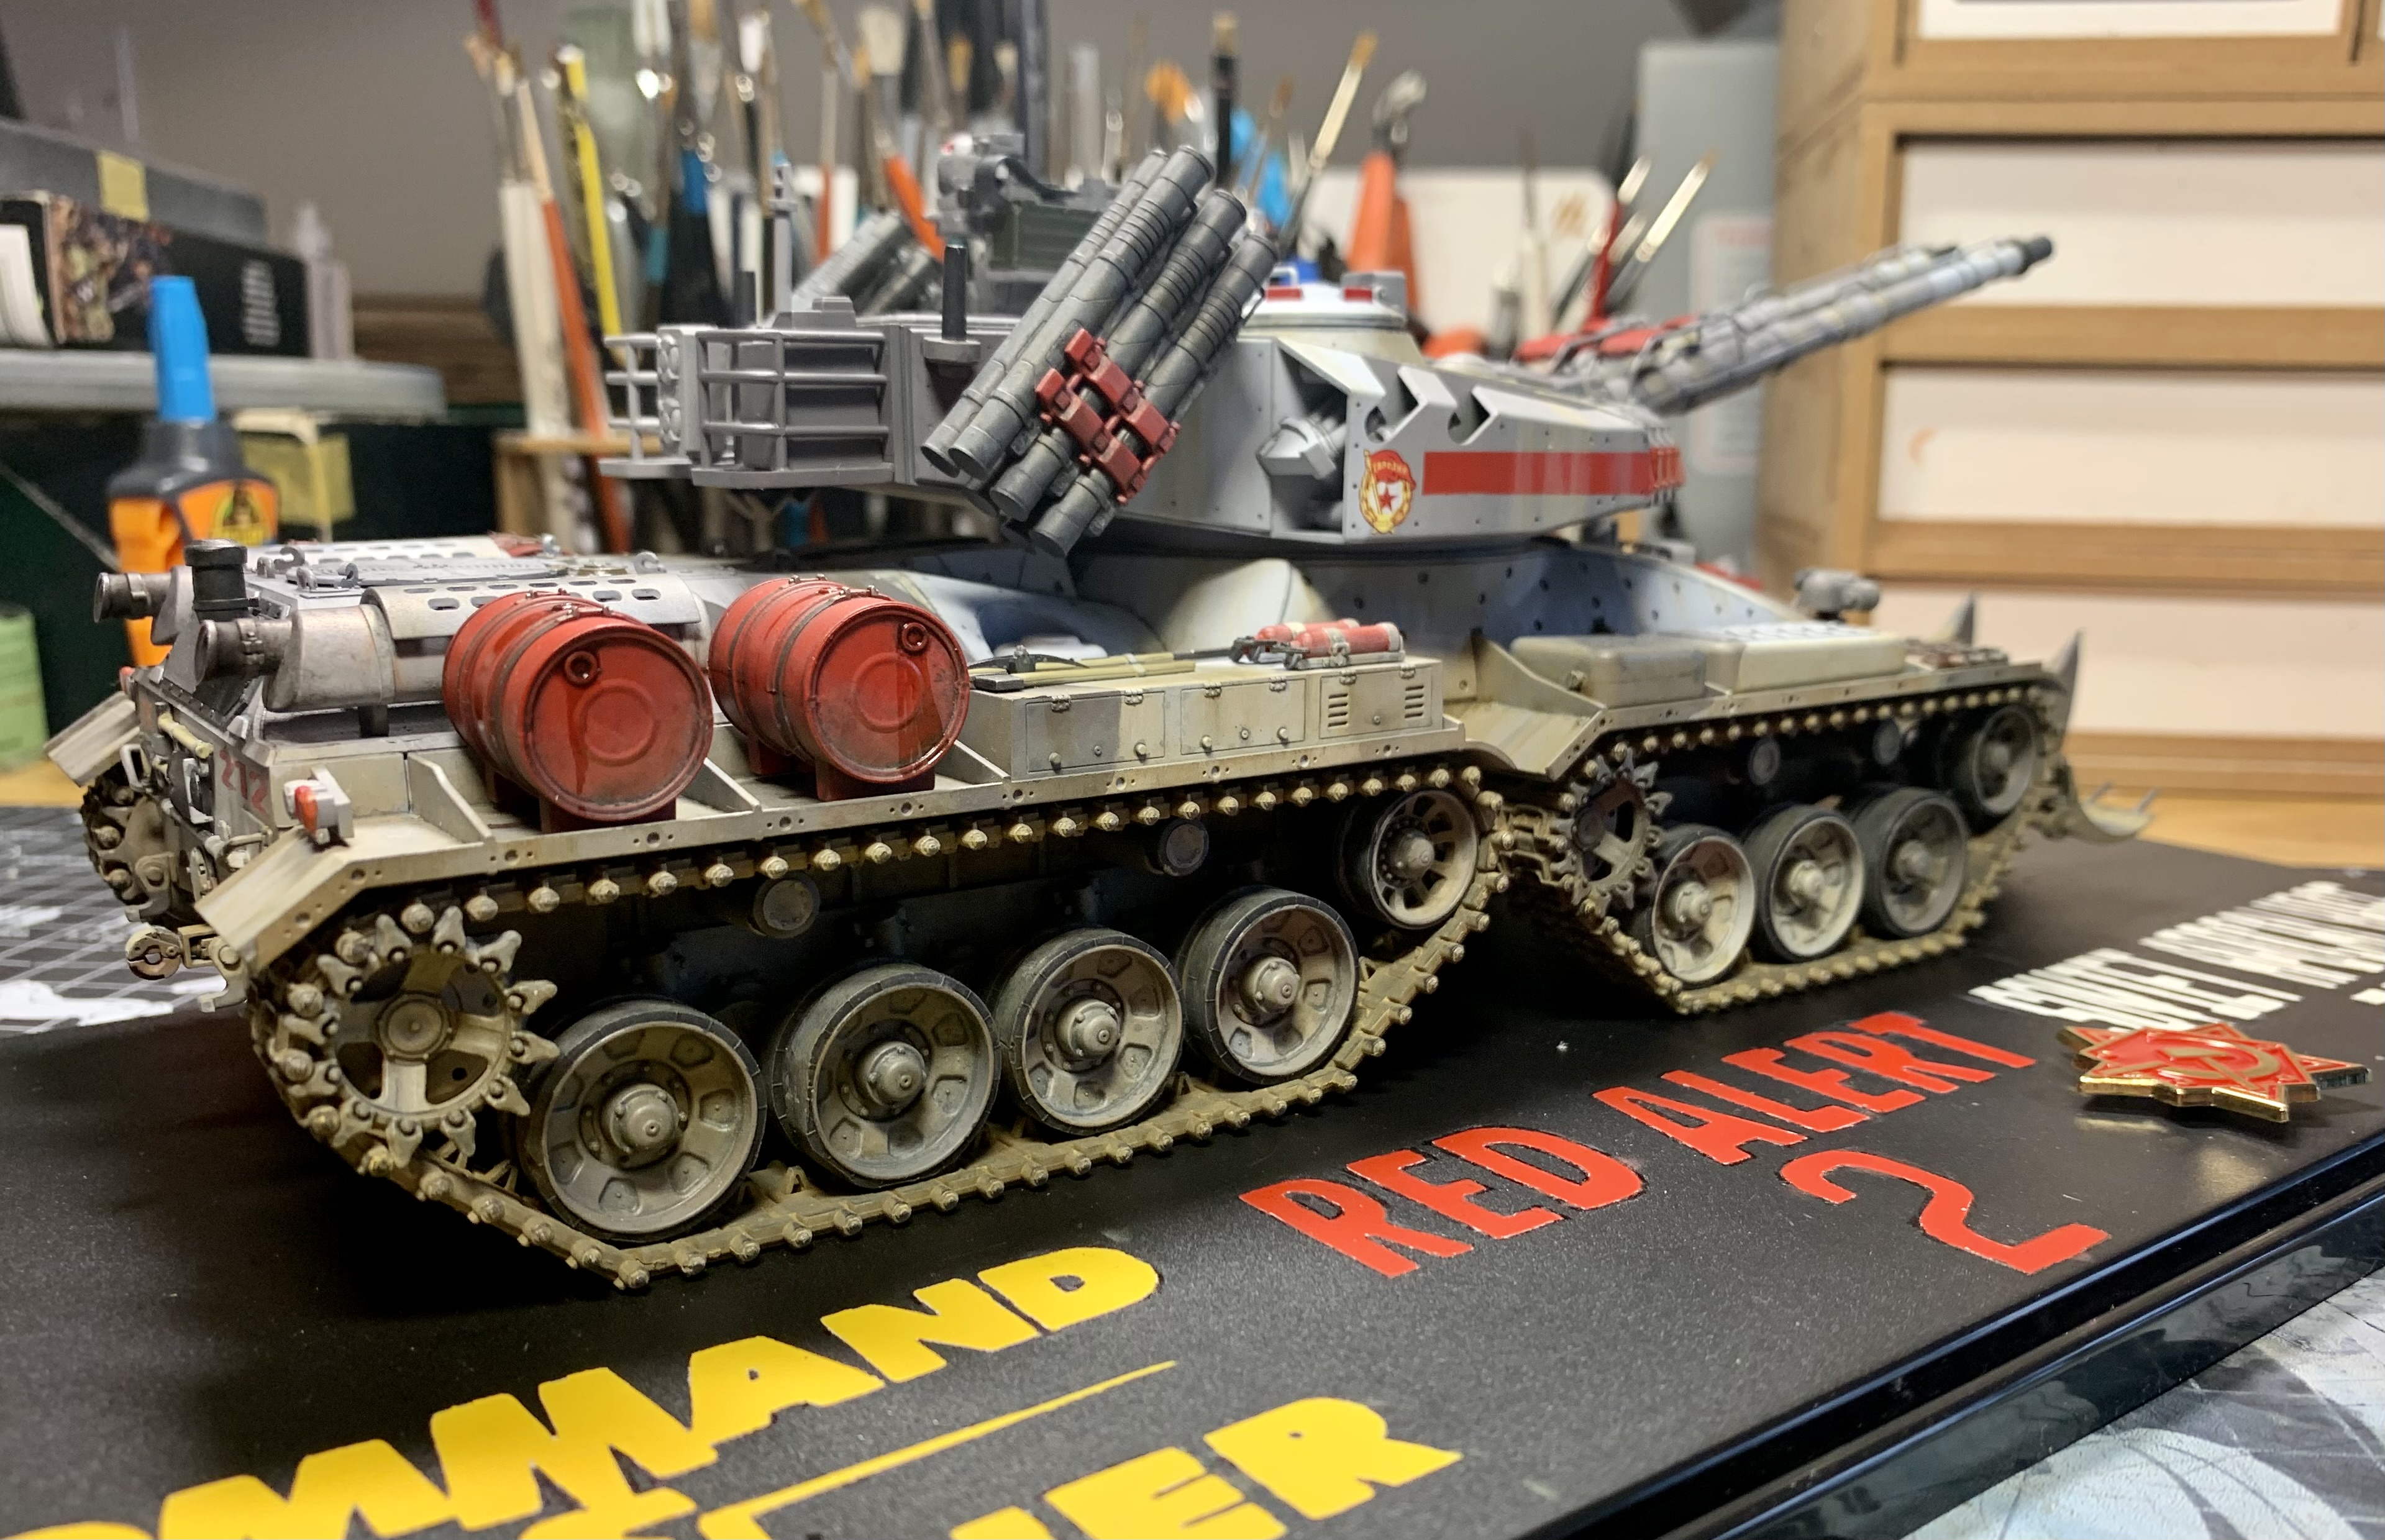
That’s two oil colors on to give the idea of a dusty tank. I am deliberately not going too heavy on the dust and dirt for the (I hope understandable) reason that I would like the camouflage and red markings to stand out nice and clearly. I enjoyed painting them so, darn it, I’m gonna make sure they’re easily seen!
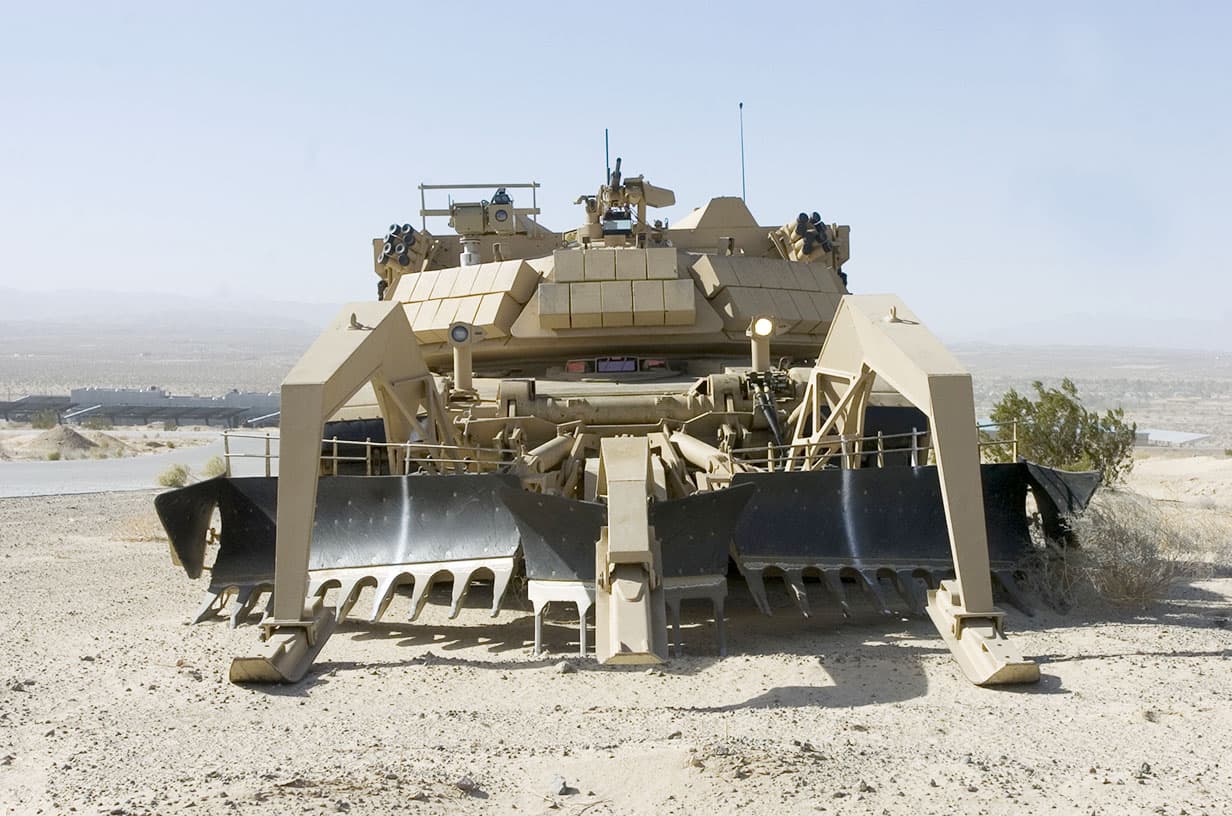
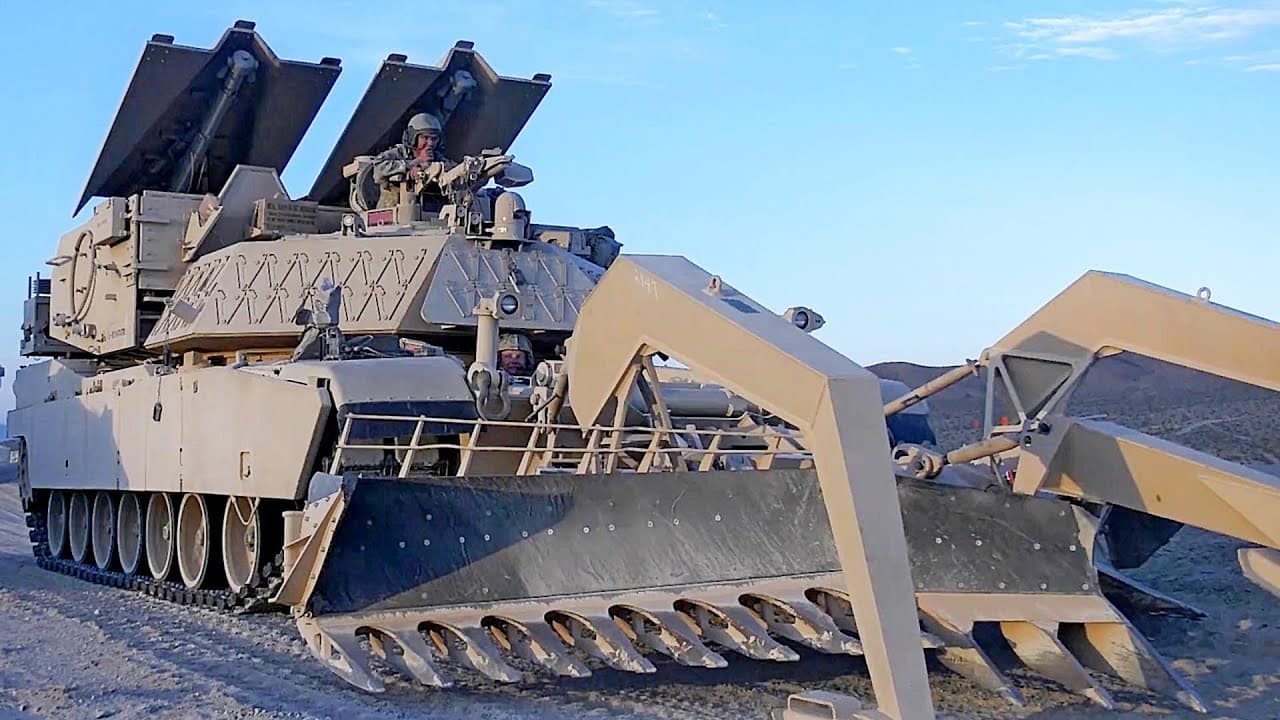
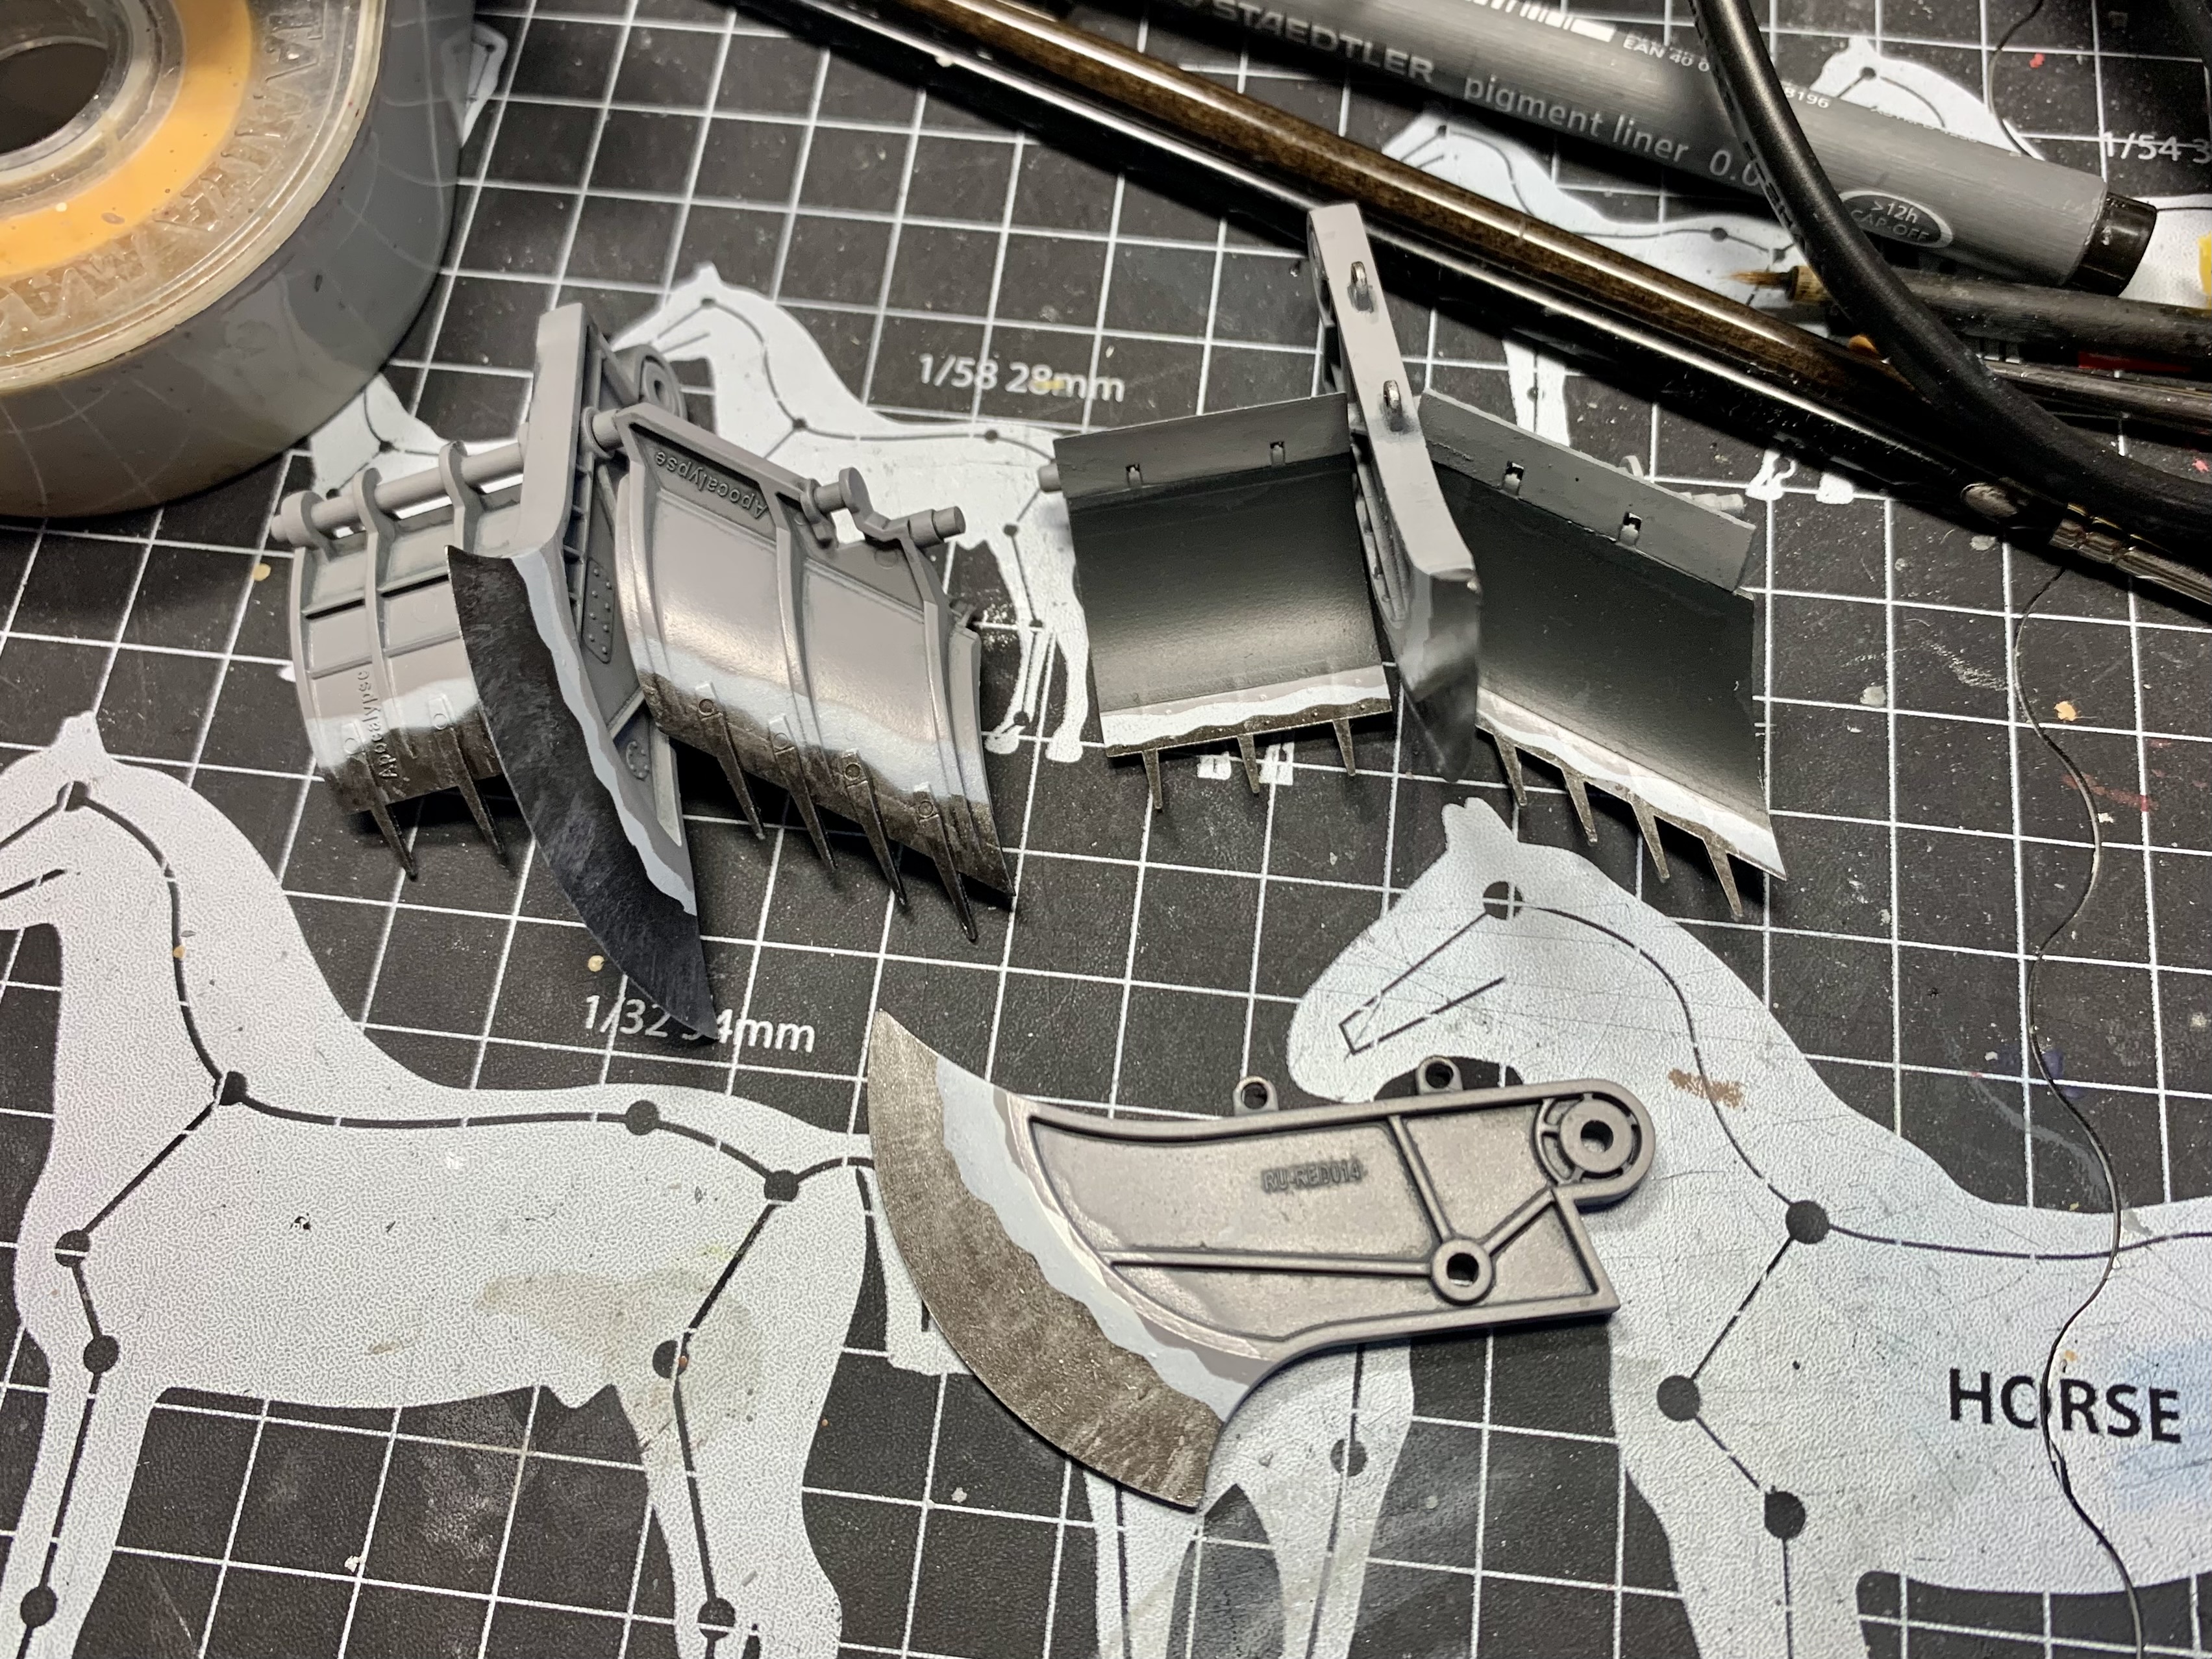
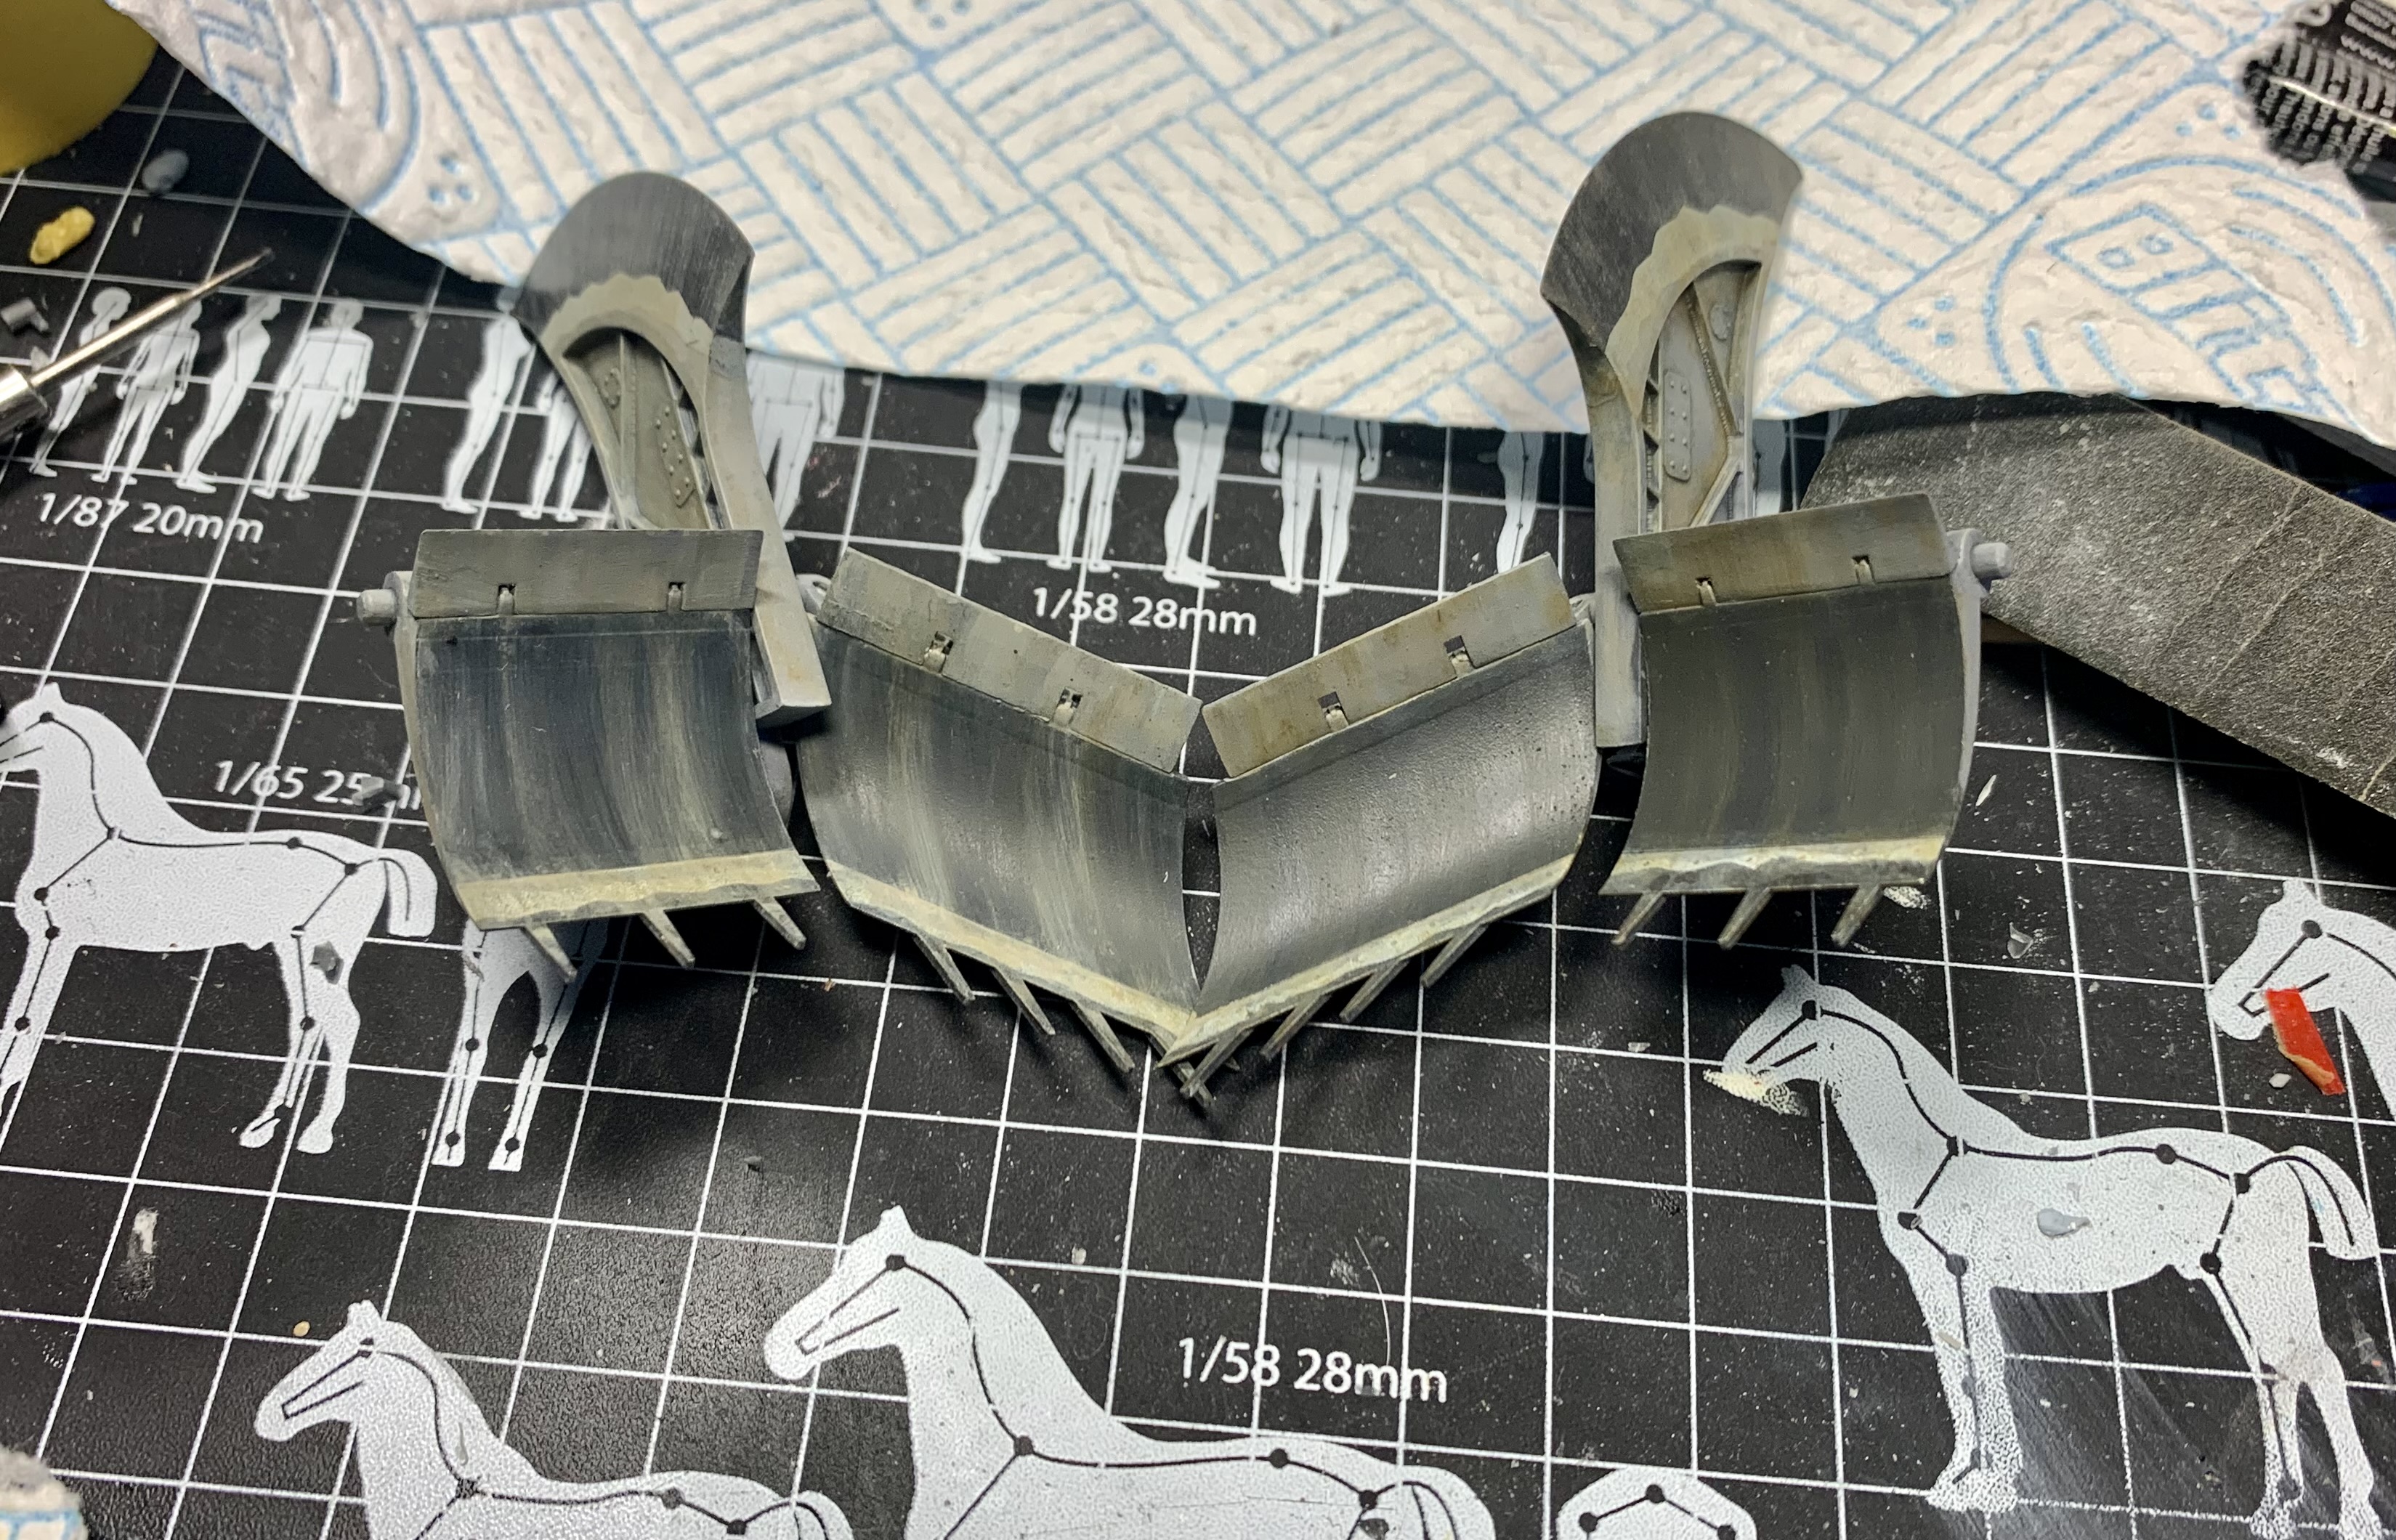
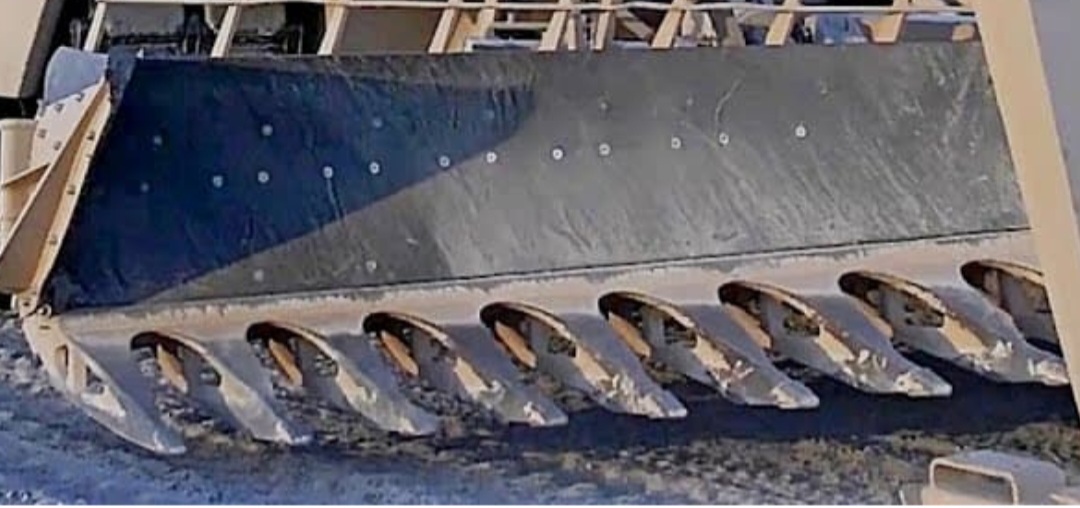
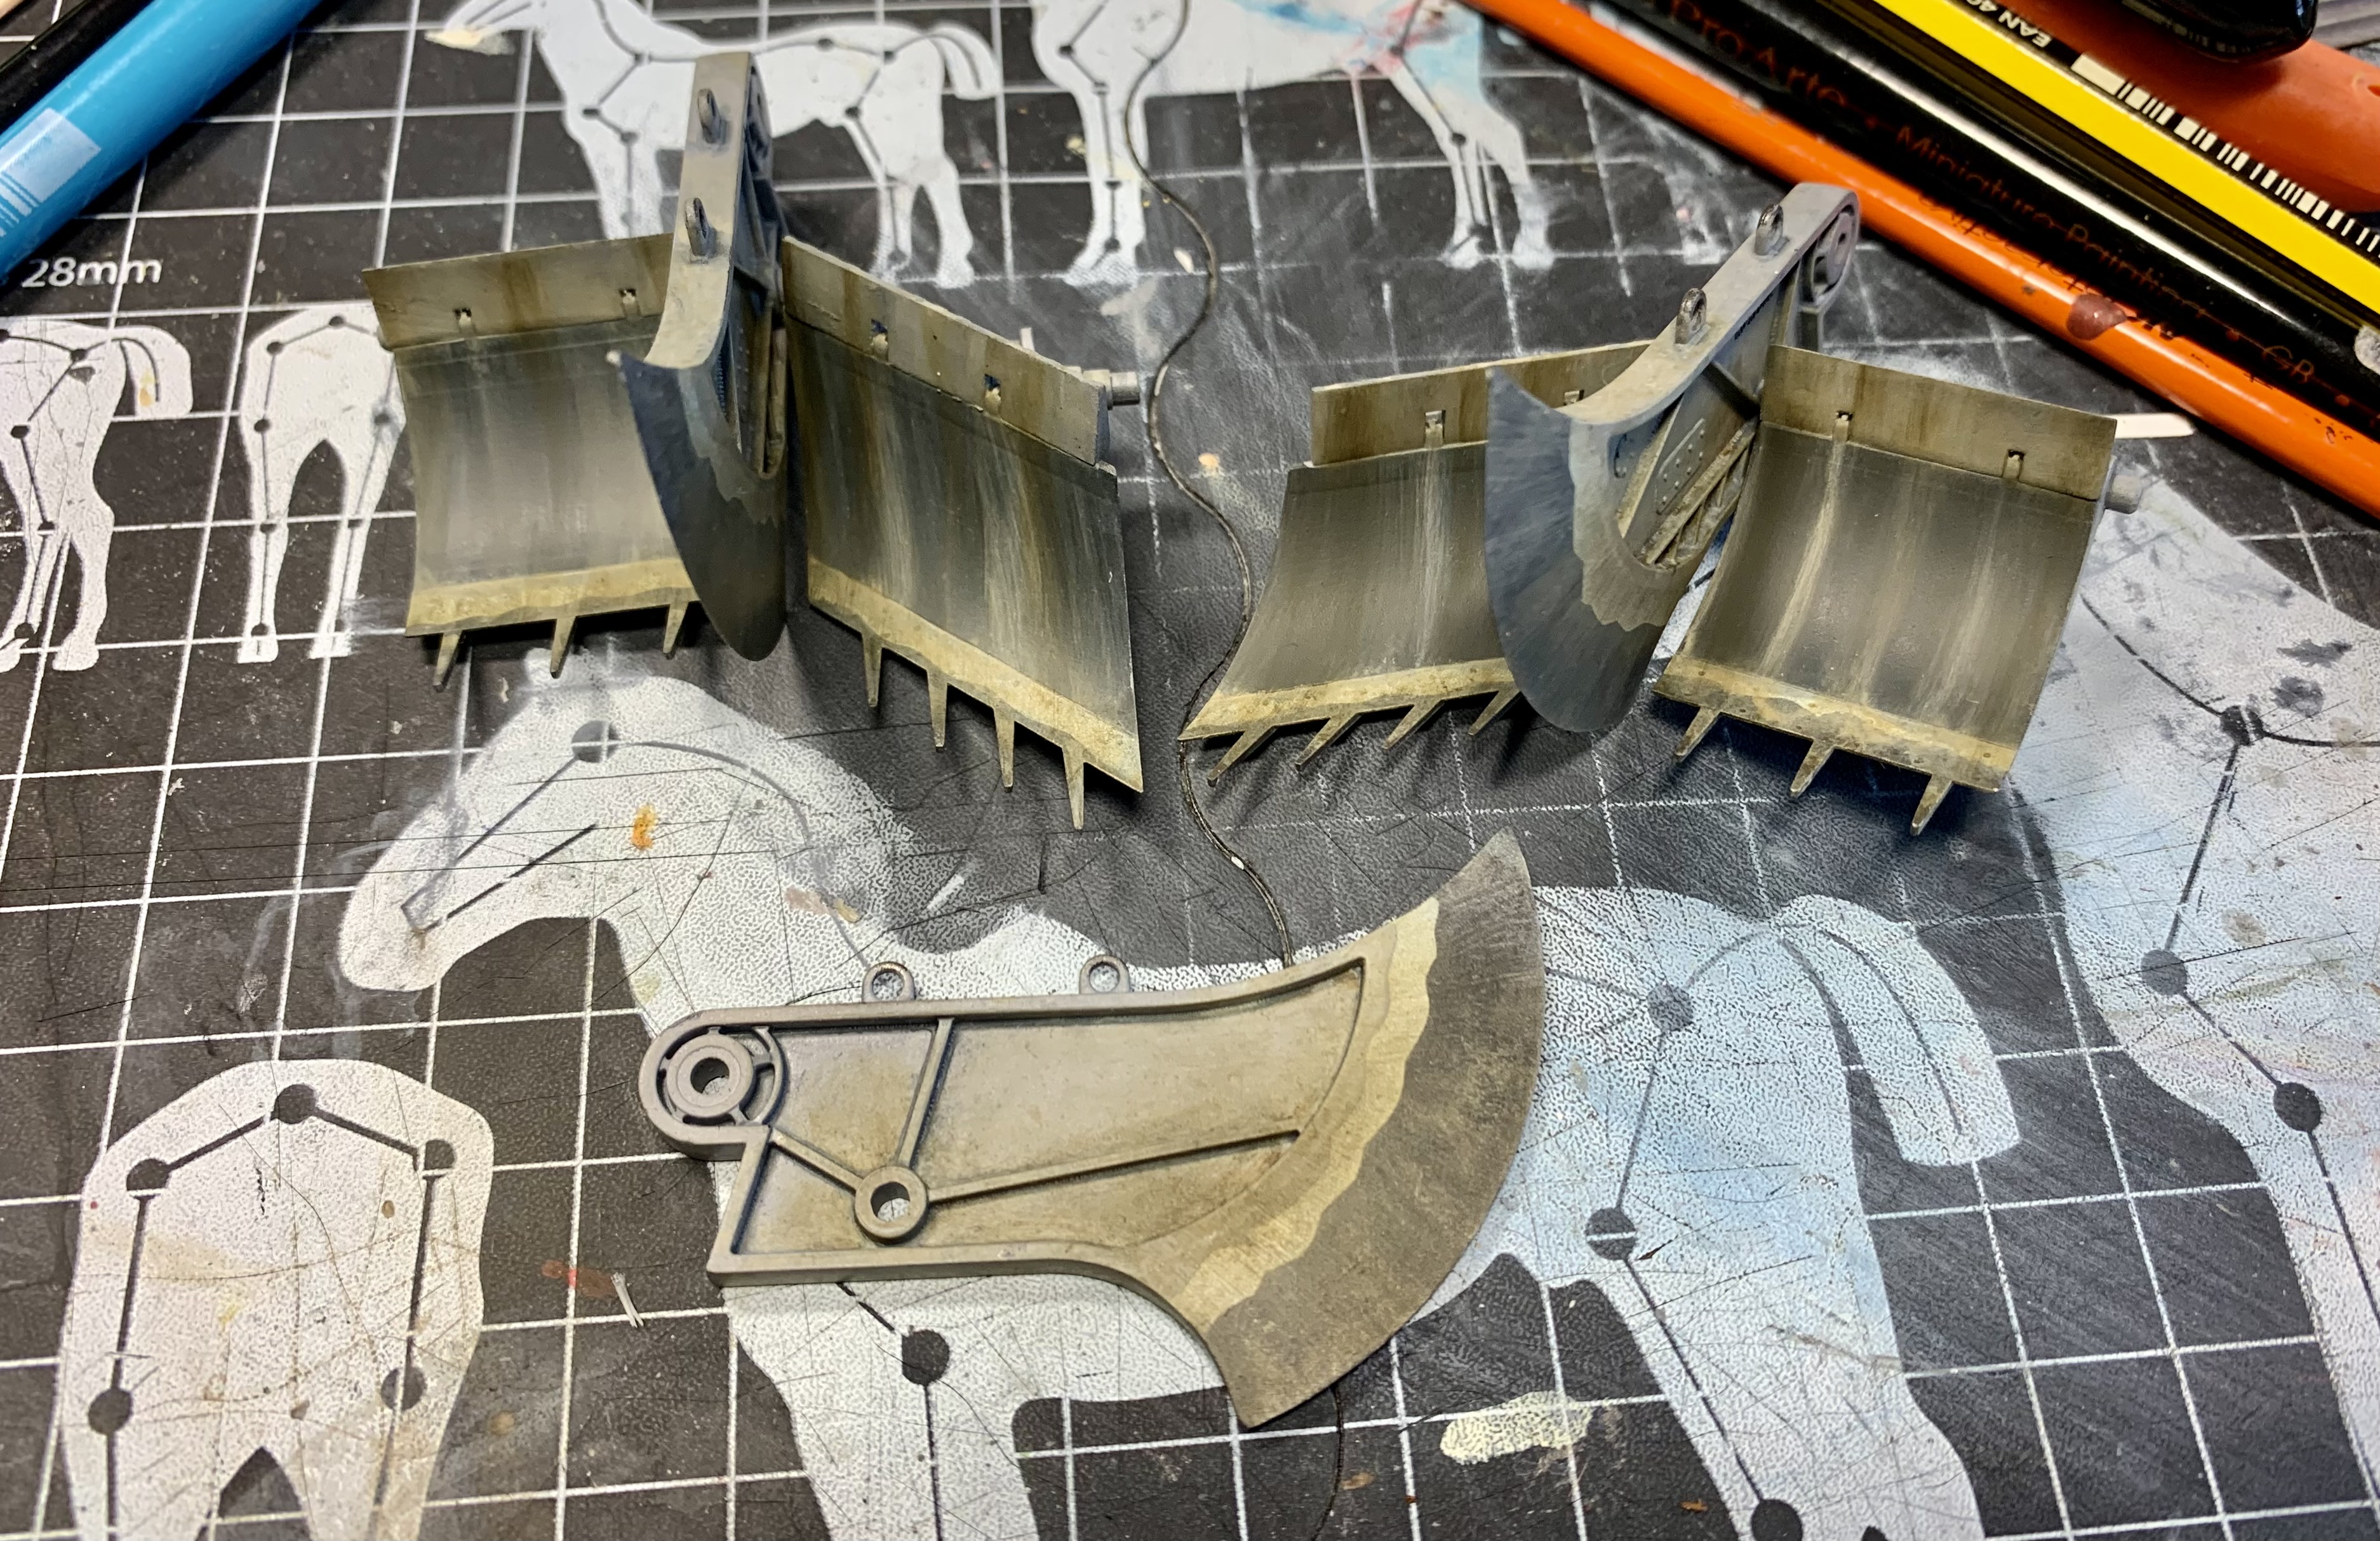
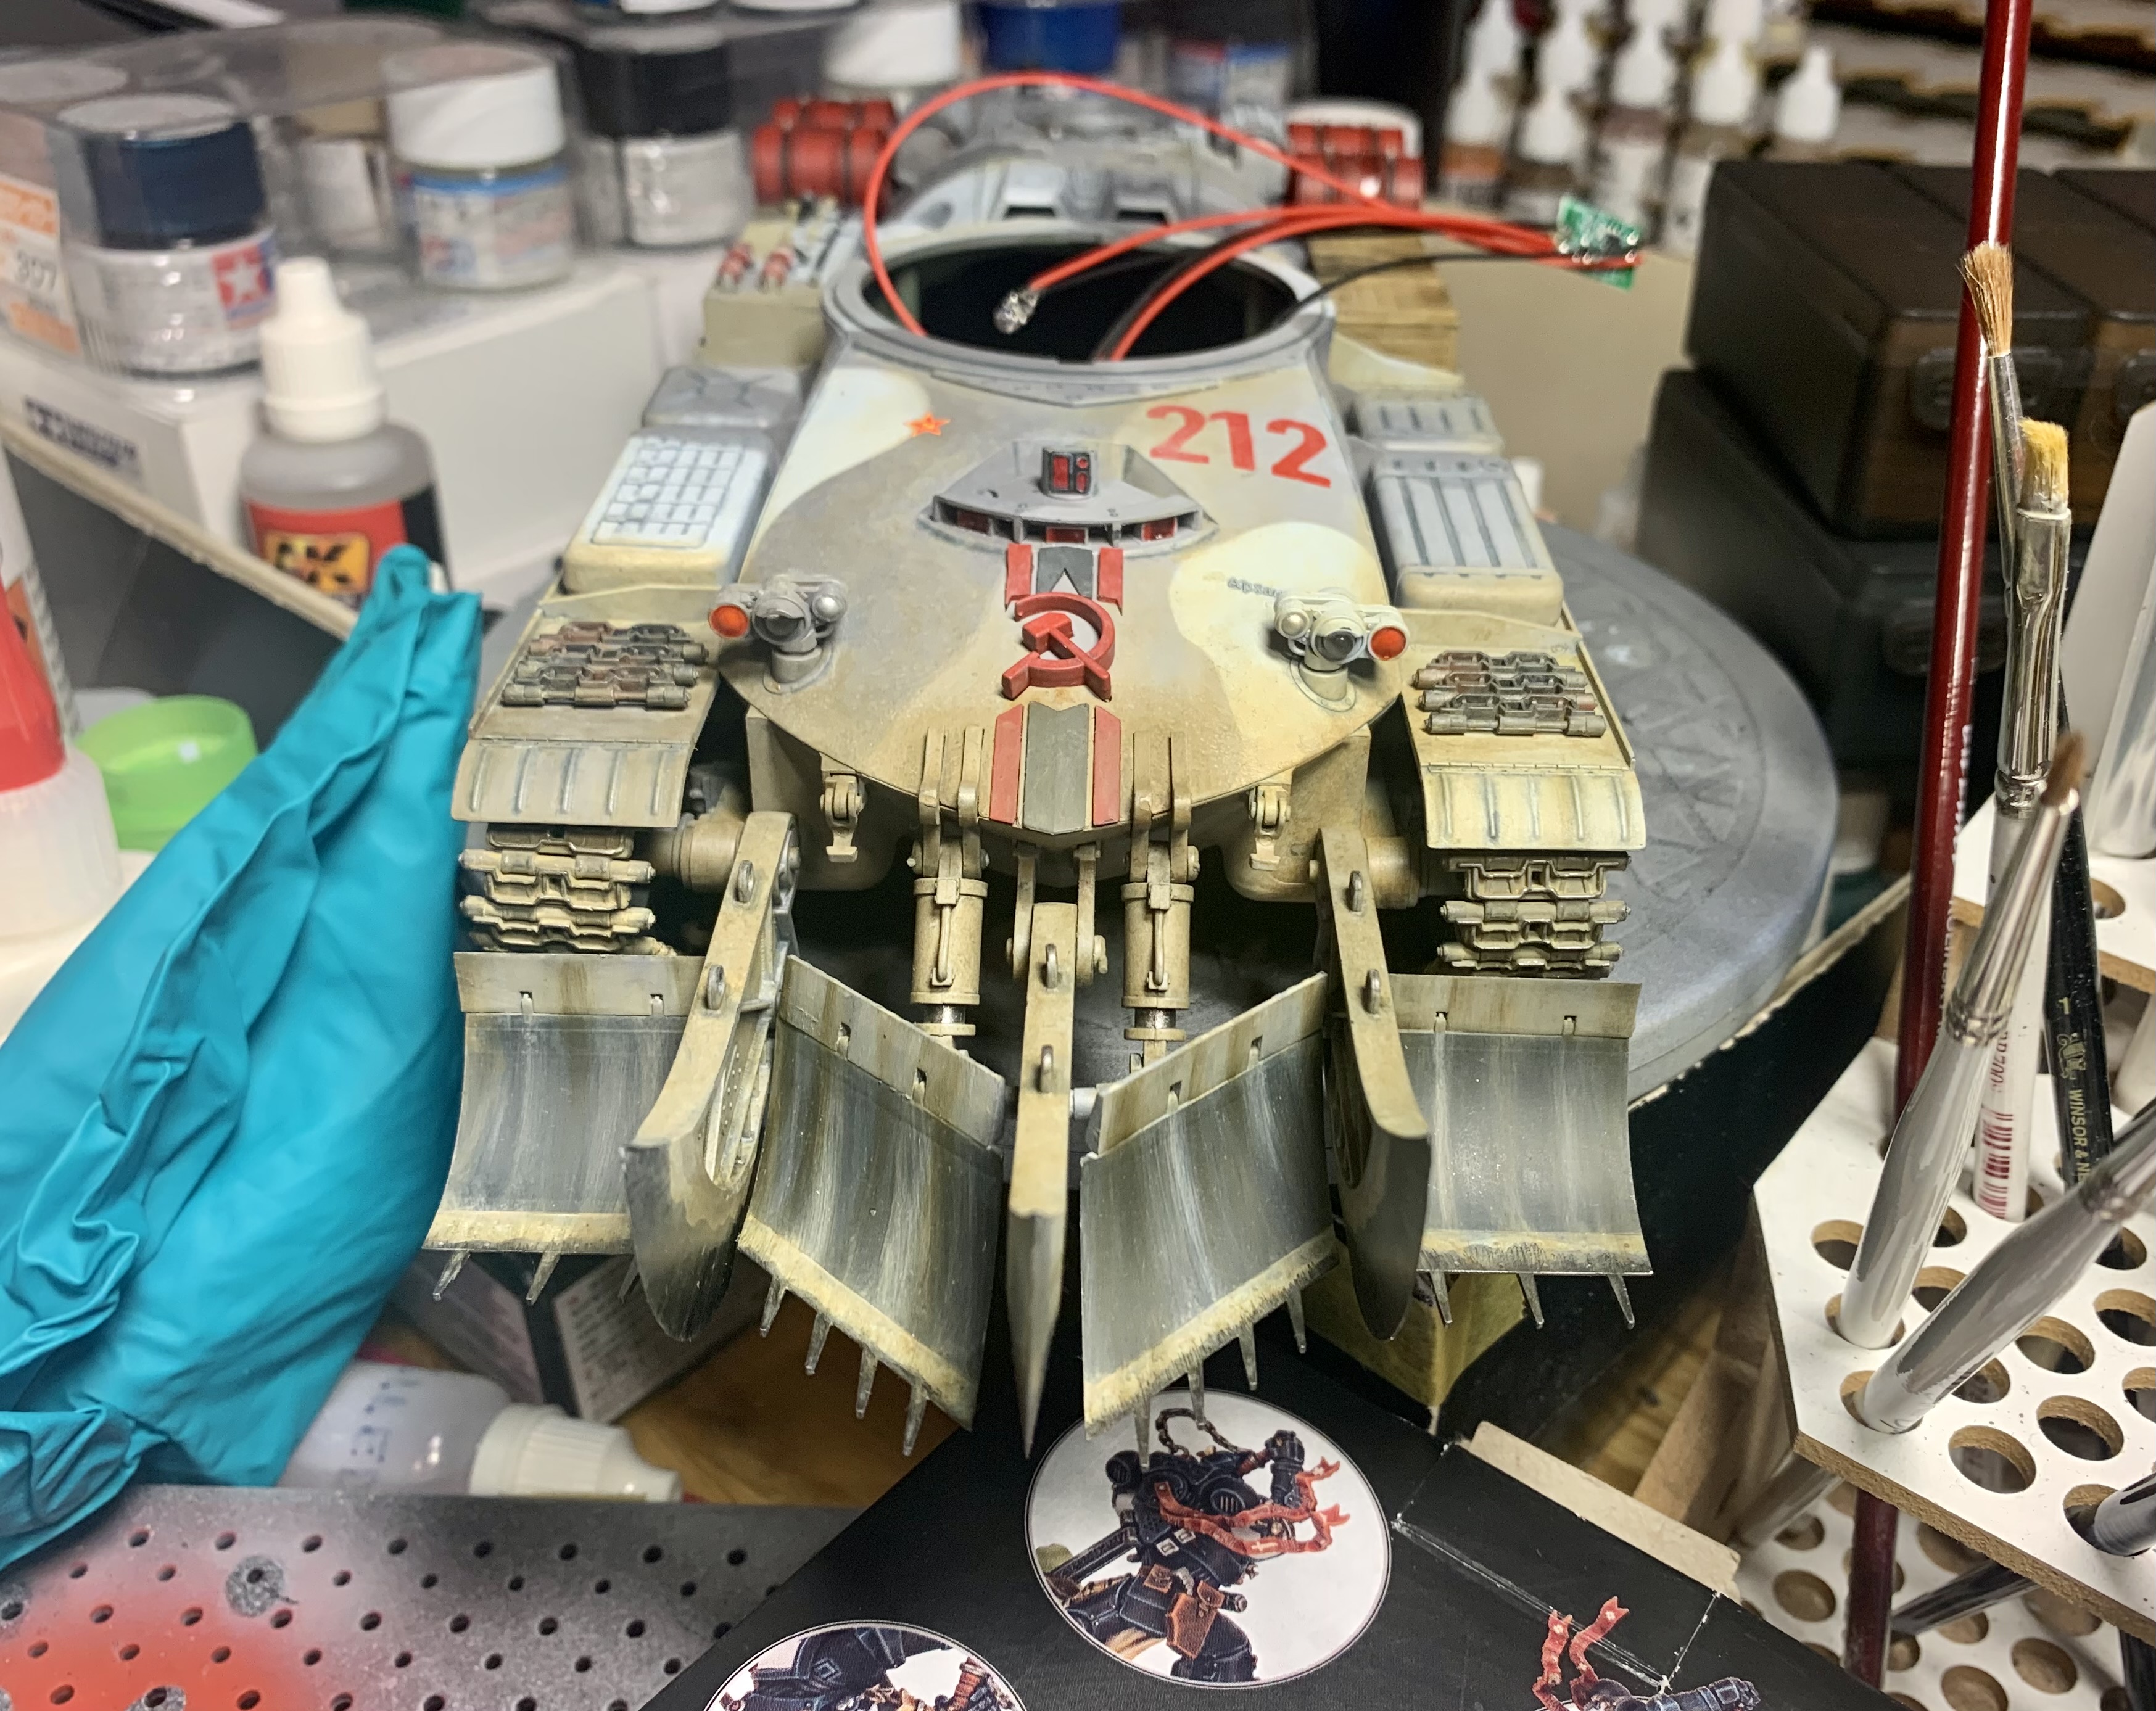
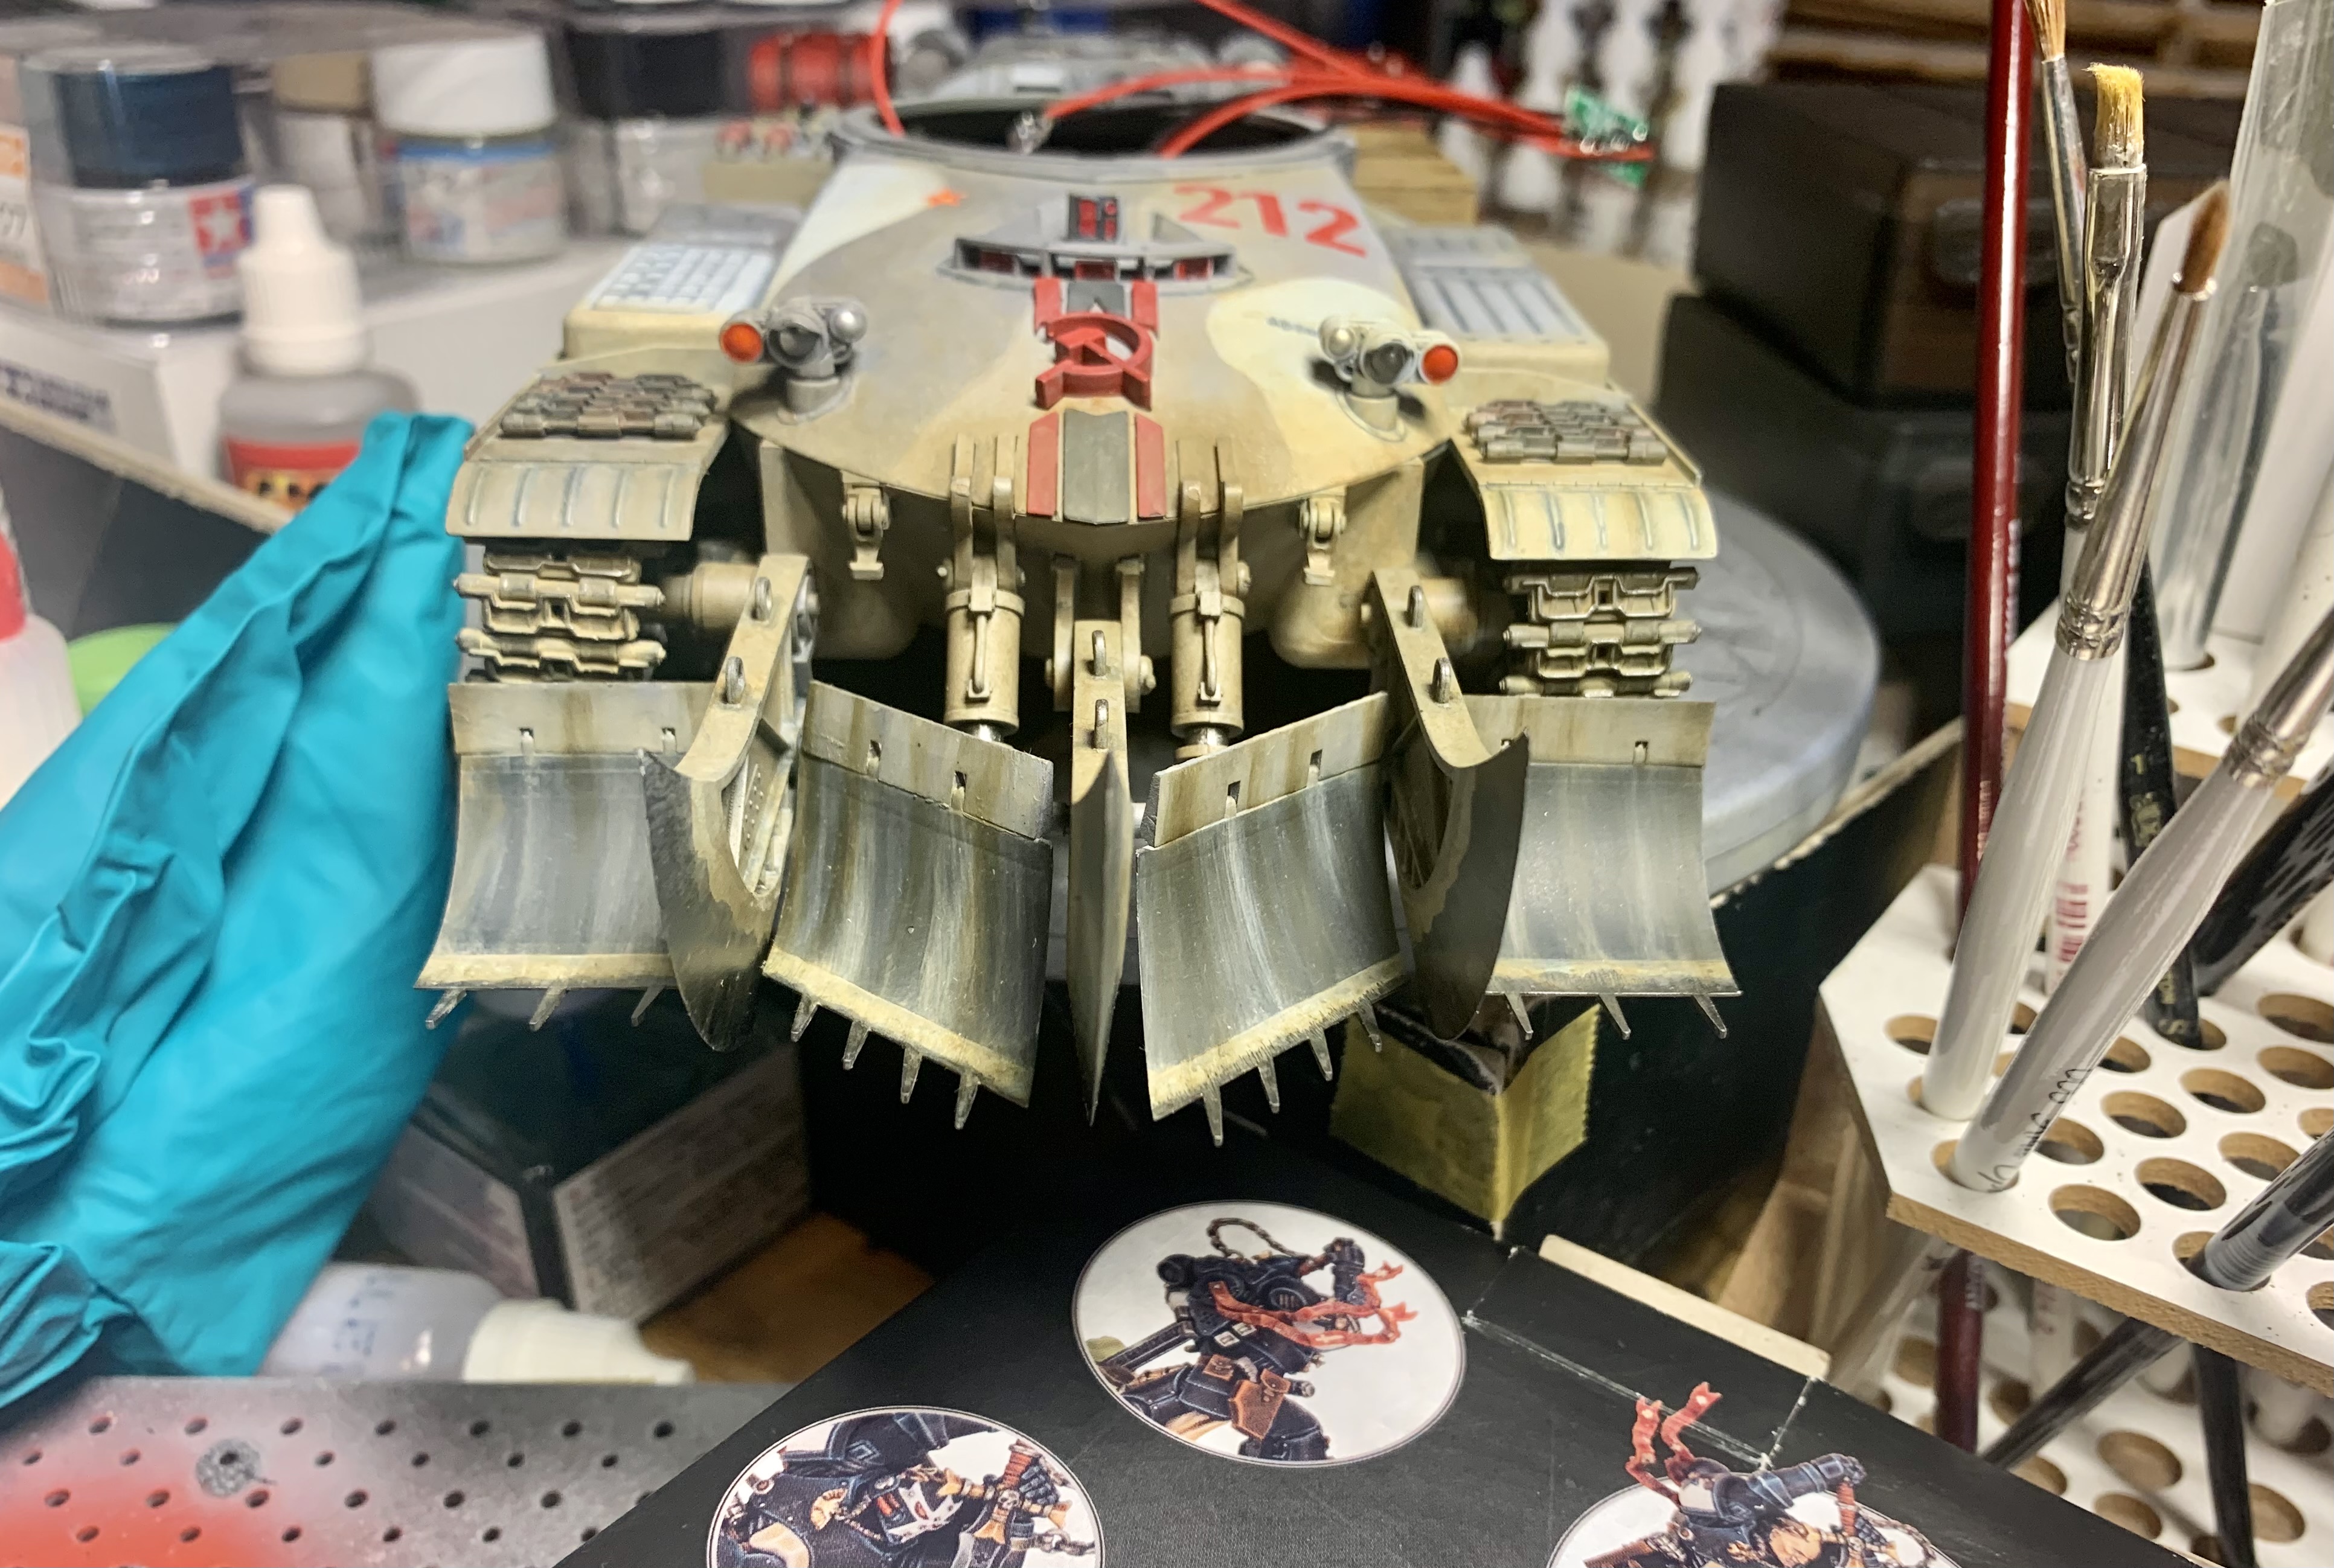
I was also working away on the mine clearer at the front. If you look at these pics of the M1150 Breacher you can see the front of the forks is worn to bare metal. Further up you can see a lighter band which I assume is a primer coating and then the CARC tan which, I believe, is the color the whole assembly is painted when brand new.
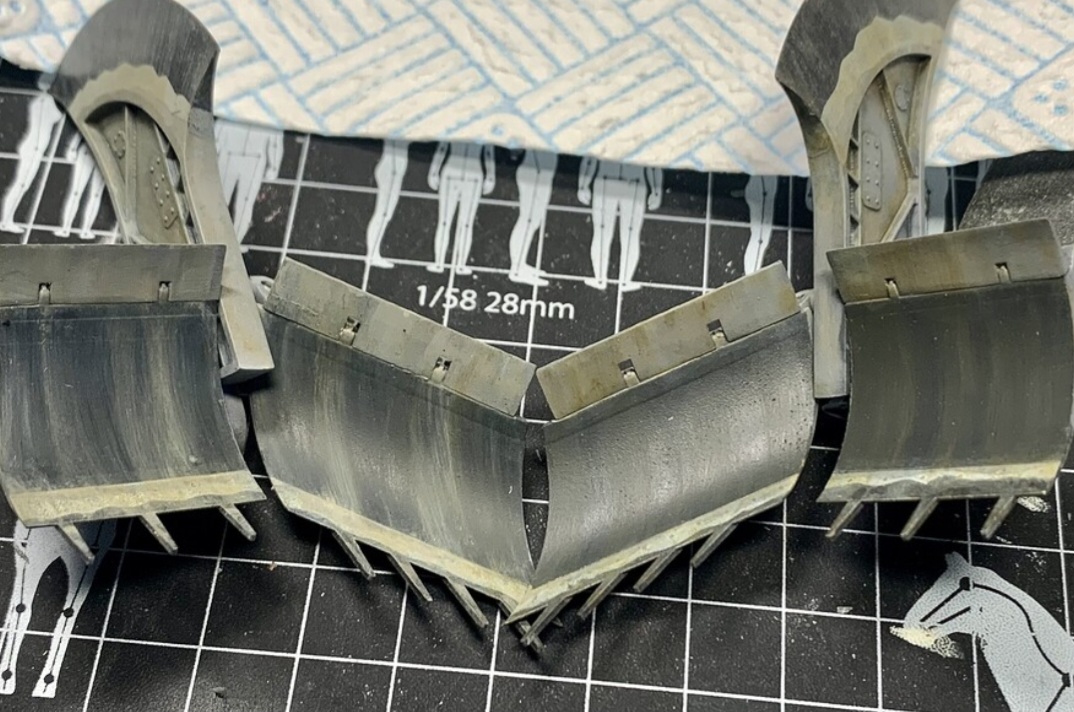
To show similar stages of wear I did some masking and painting for the three layers and have been weathering it.
Personally I think I’ve over-done the colors- they are too distinct and instead of kind of flowing into one another they are rather stark. Well, it’s a lesson learned for sure but I’ve some work still to do on this bit so perhaps it will get a little better as I near completion.
Thanks for reading.
Awesome job. I’m taking it as as inspiration for my building.
@Edson_Alves - That’s very nice of you to say Edson, I’m always happy to inspire other modellers because I’ve often been inspired by them as well.
@Armor_Buff - Thank you for your take on that- it makes me feel more positive about it!
Great colour tones and shading on this. Looks really nice … cracking job Karl
Cheers mate- had to choose the weathering colors rather carefully as I found the light grey paint kind of soaked them up- pretty much changing color if you applied even a wee bit too much.
Nice work especially the paint scheme! , I’m building the same kit though I haven’t decided how im going to finish it yet - I’m kind of leaning towards an alternative Ukraine war with it as a captured vehicle…
Heya, Karl,
I have to chime in and agree: this has been an inspiring build to watch! Can’t thank you enough for documenting it and sharing the issues and progress with the kit.
Have started building this one myself while on a recent vacation and have been using your awesome build as a roadmap. Not the easiest build in the world (tracks were a pain, some vague instructions, etc.), but it sure is a cool and original subject! Never played the game, but hope Border releases other sci fi tanks.
And personally, I think that the weathering on the tank’s “butcher-plow” looks fantastic! Great overall scheme, too!
Keep up the great work, bruddah, and thanks again for sharing, Karl!
With Regards and Aloha,
Johnny B.
@Darius359au - Very kind of you to say Darius! I think Border models perhaps made their decals with an eye on those seen on Russian tanks in Ukraine- particularly the white, graffiti type ones. So doing a piece from Ukraine should be interesting- plenty of odd markings on show there too so there are many to chose from!
@Havoc - Thank you Johnny, really made my day reading that. I’m glad its an enjoyable build to watch and it has been a really fun one to do as I might have mentioned multiple times!
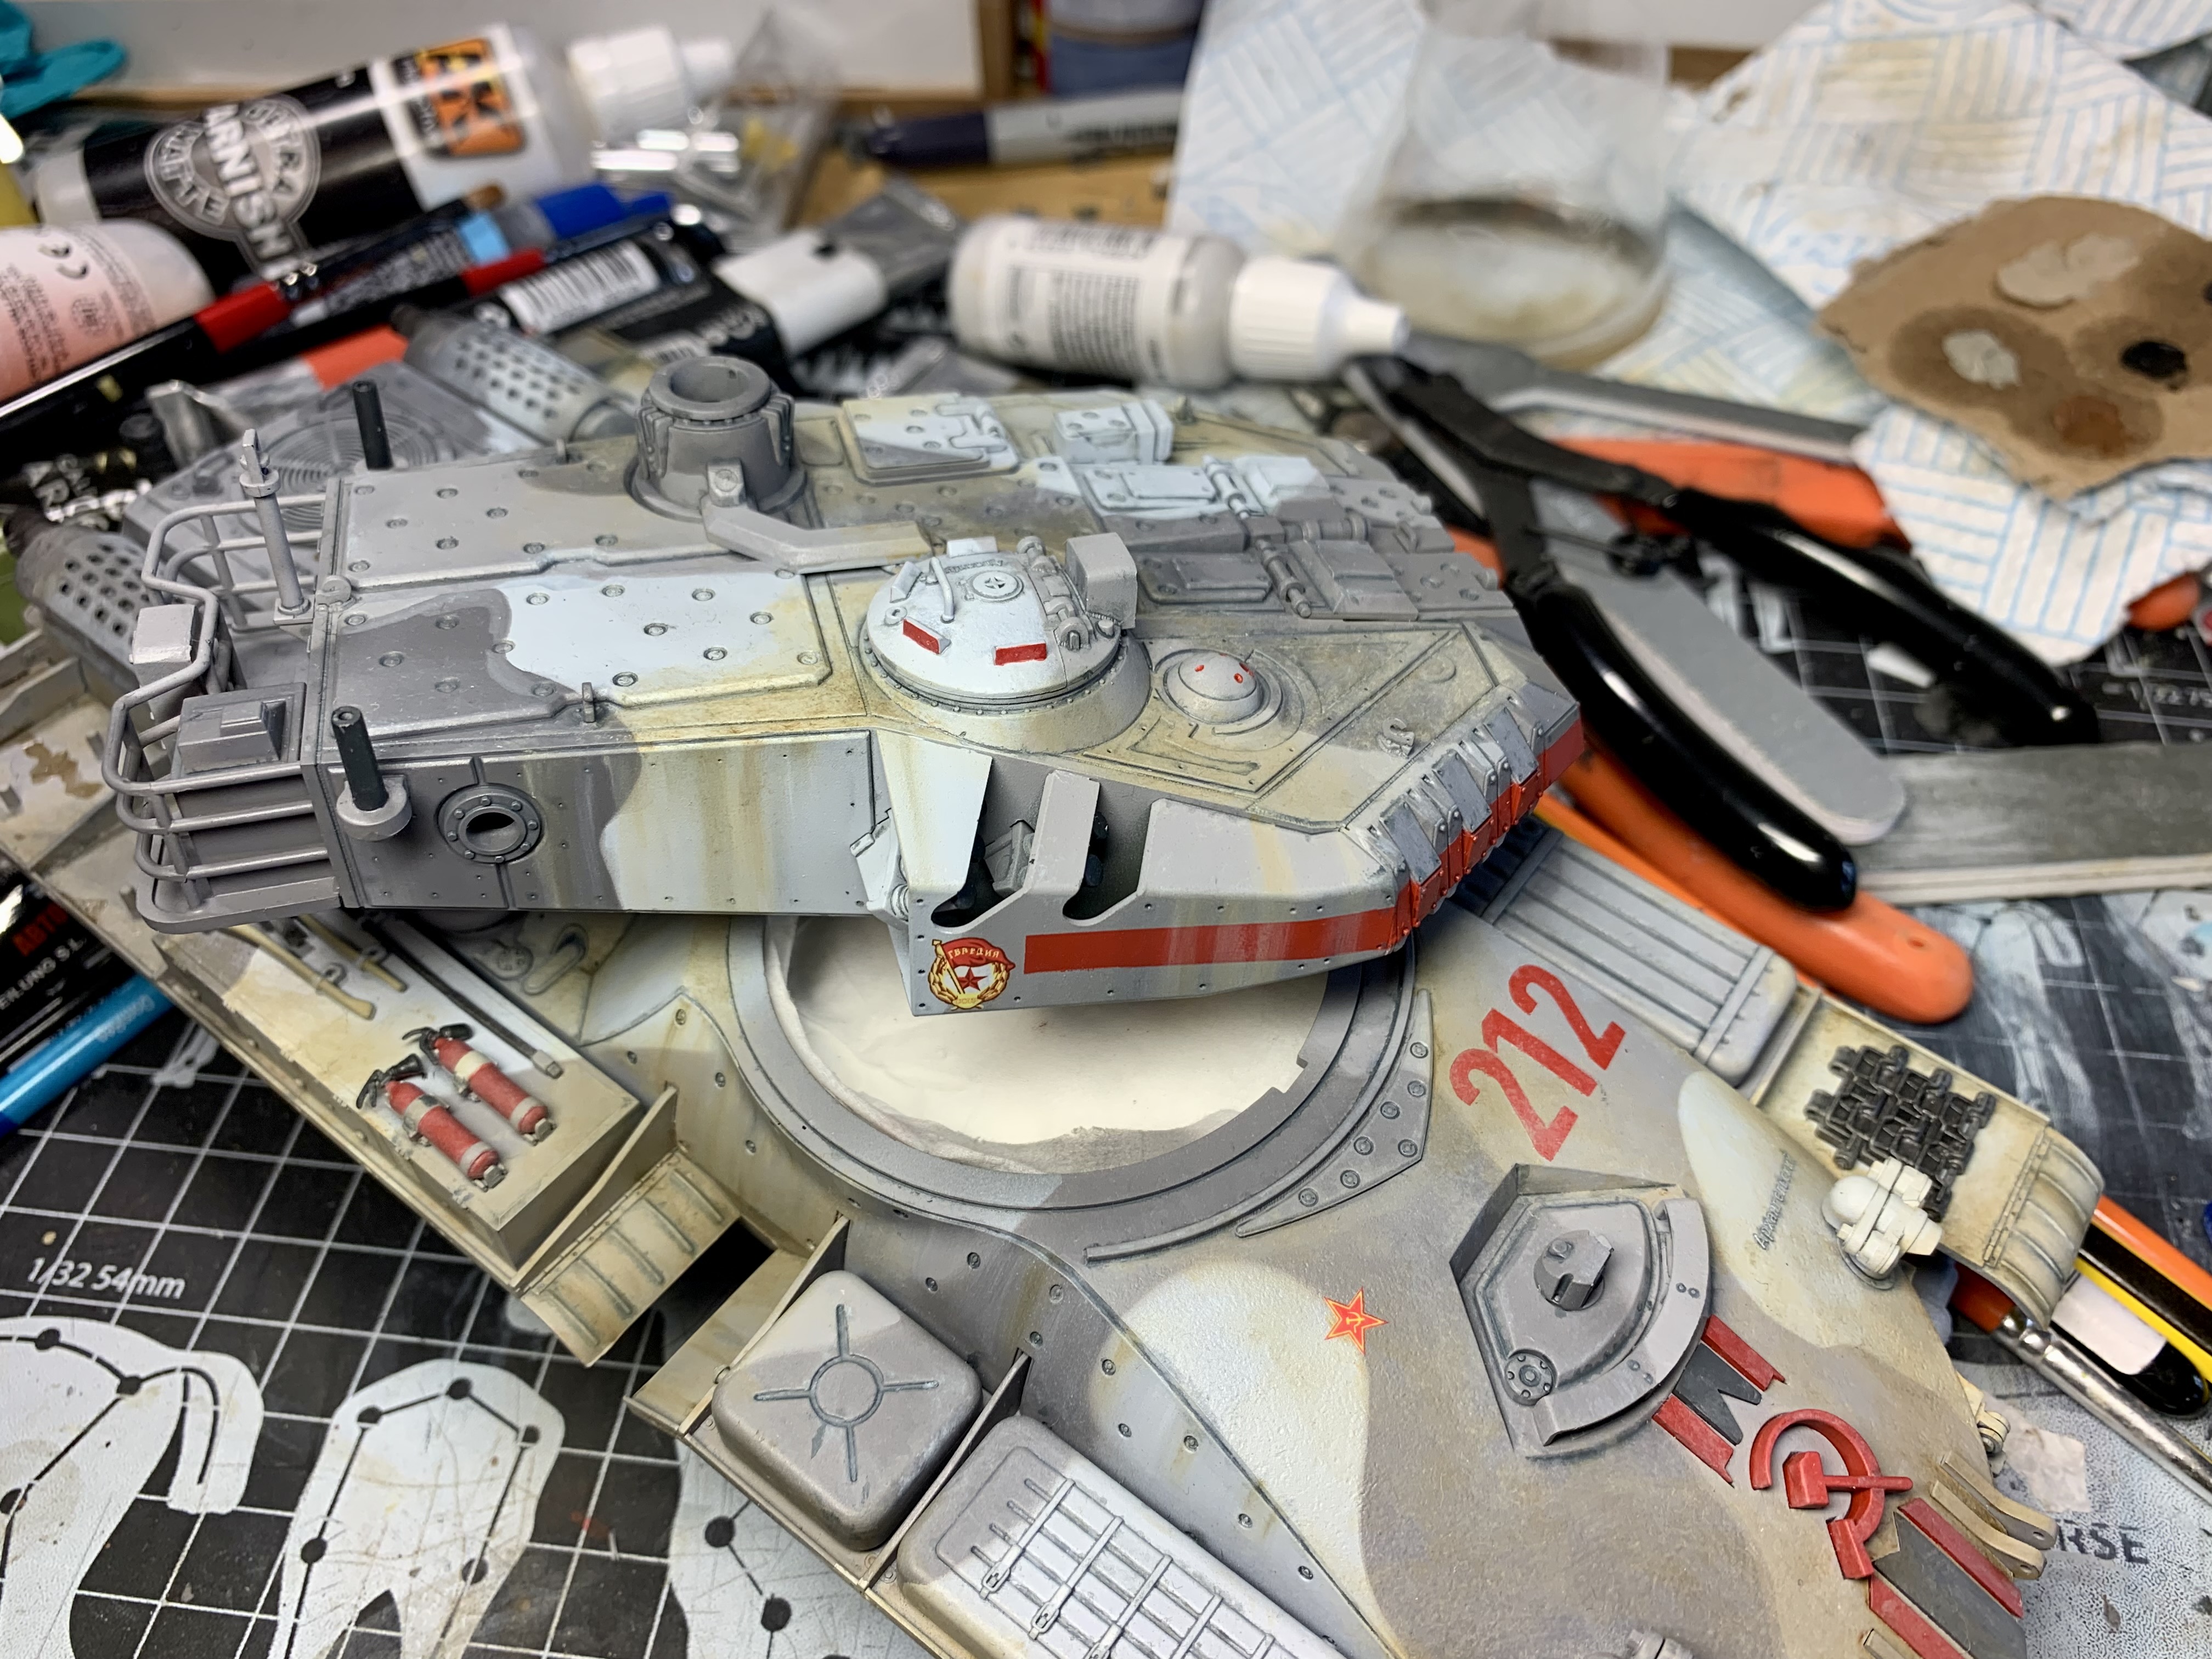
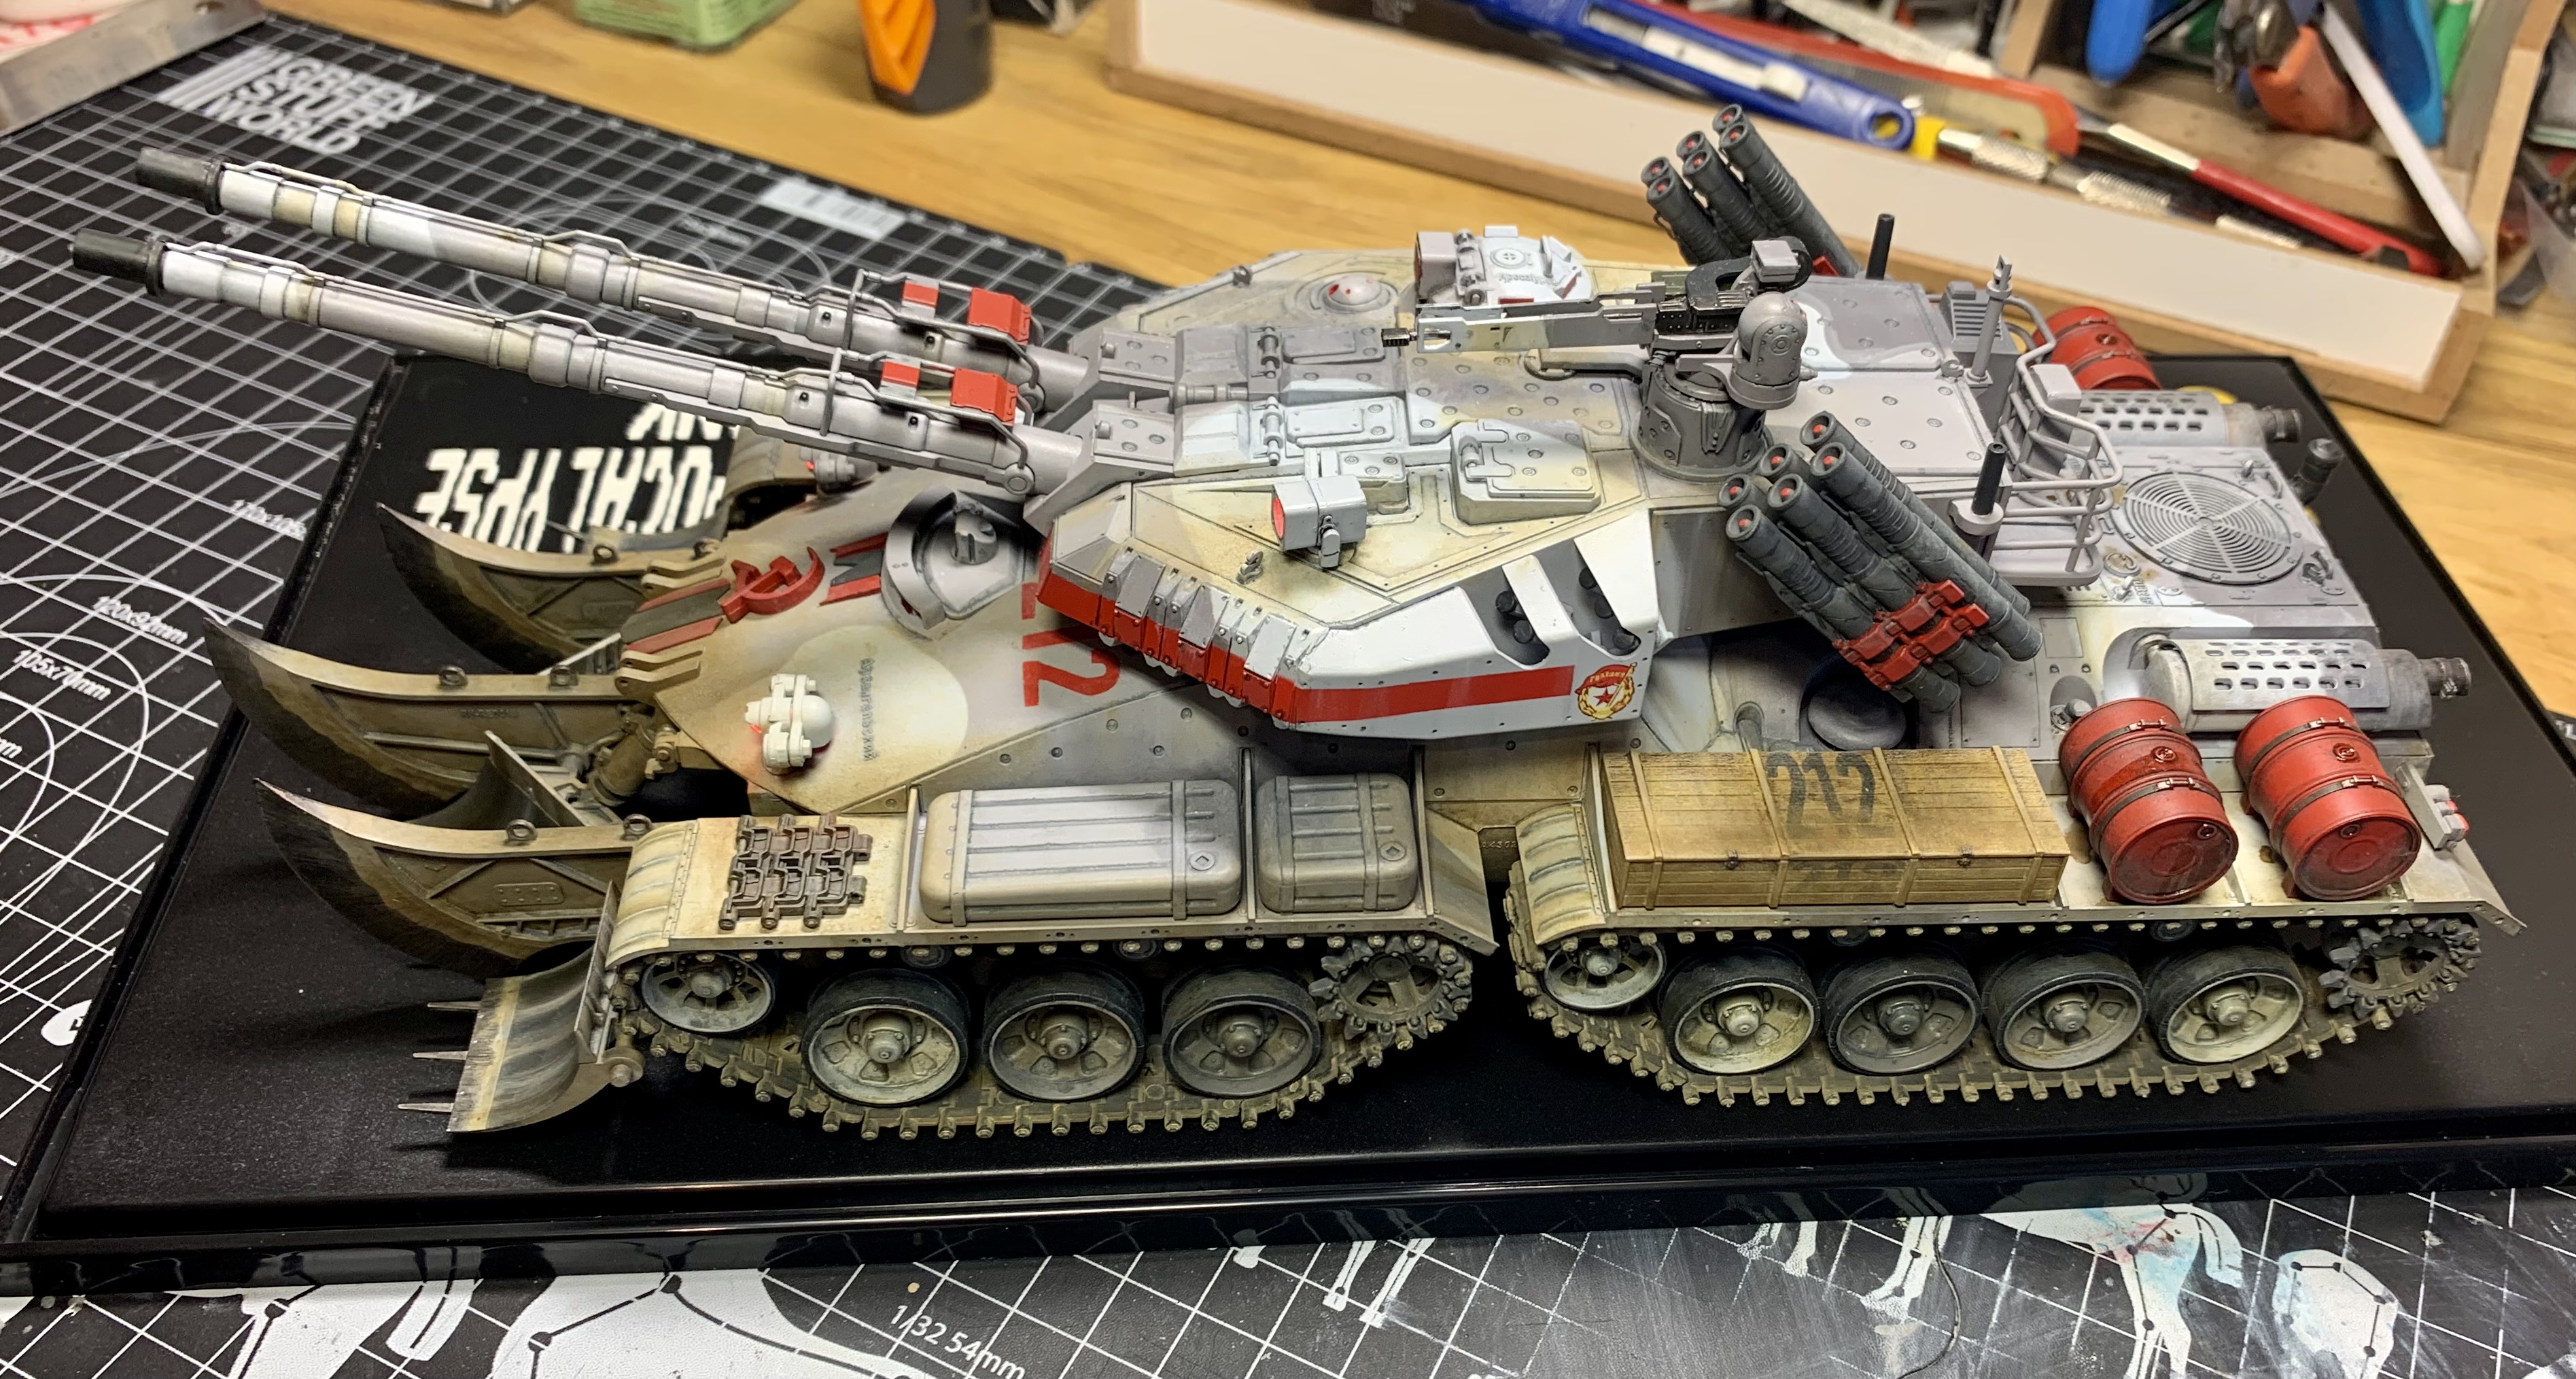
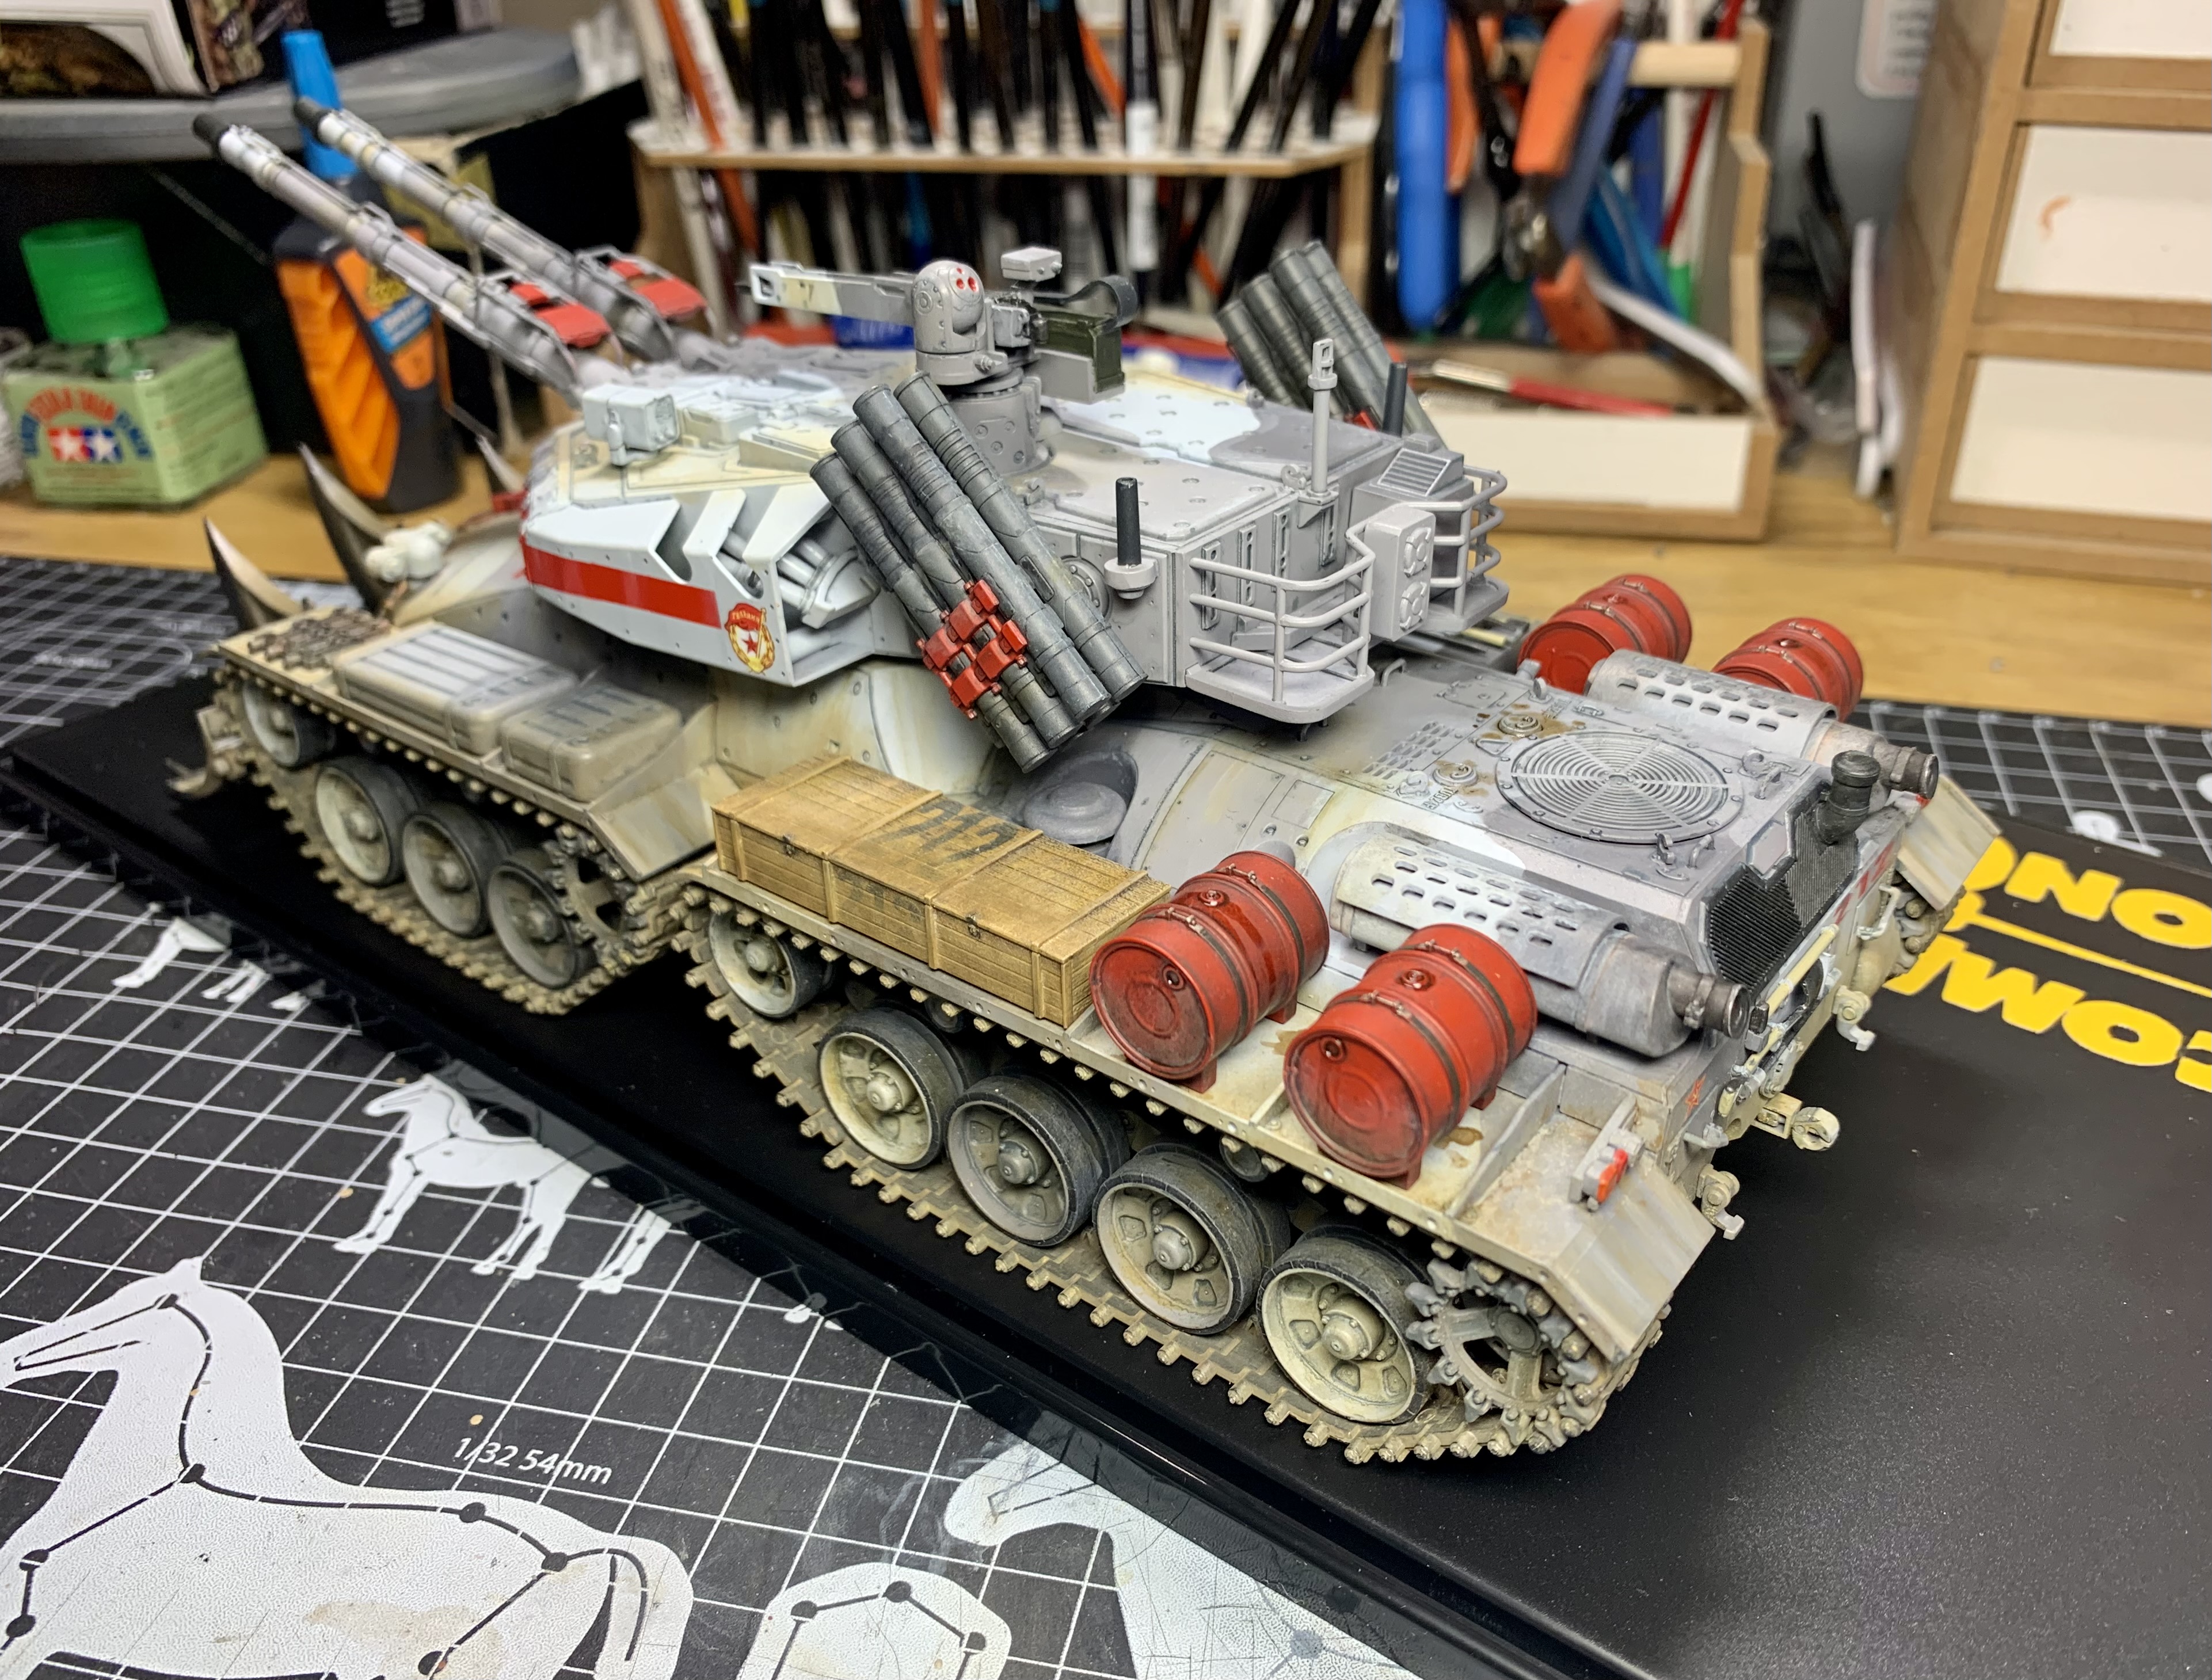
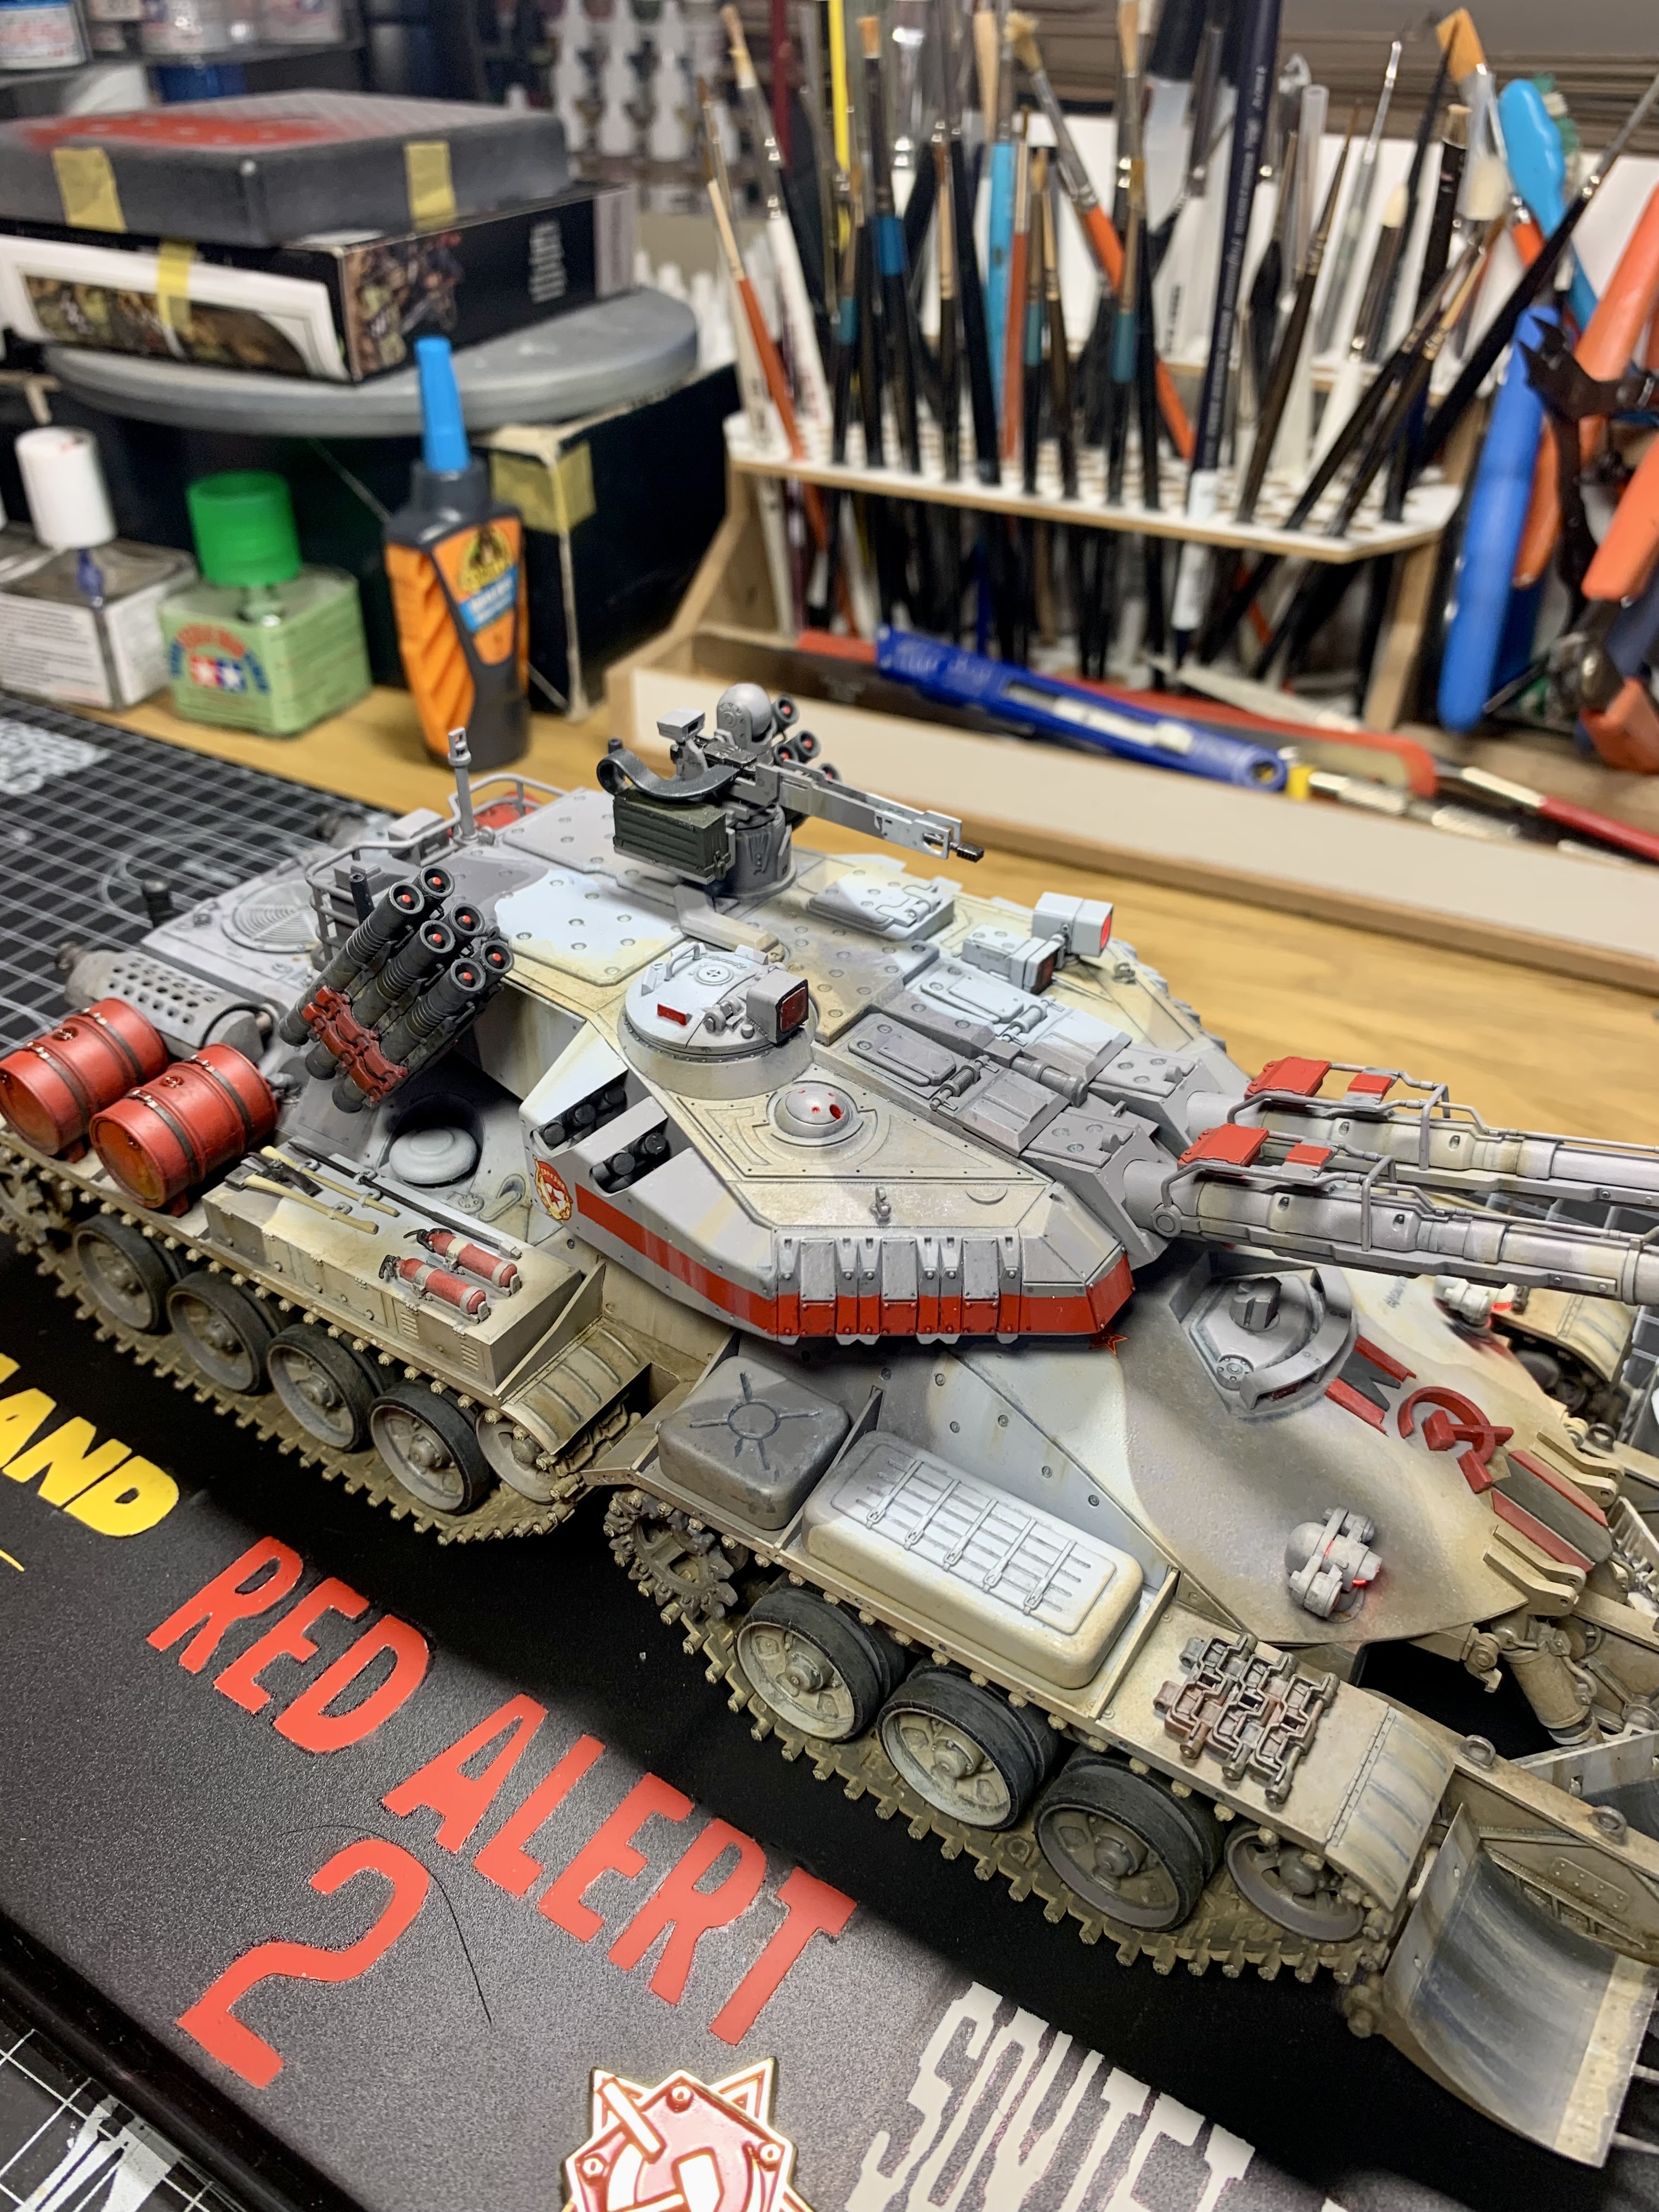
After the last update I added one more oil color to the finish- a more muddy, grimey shade.
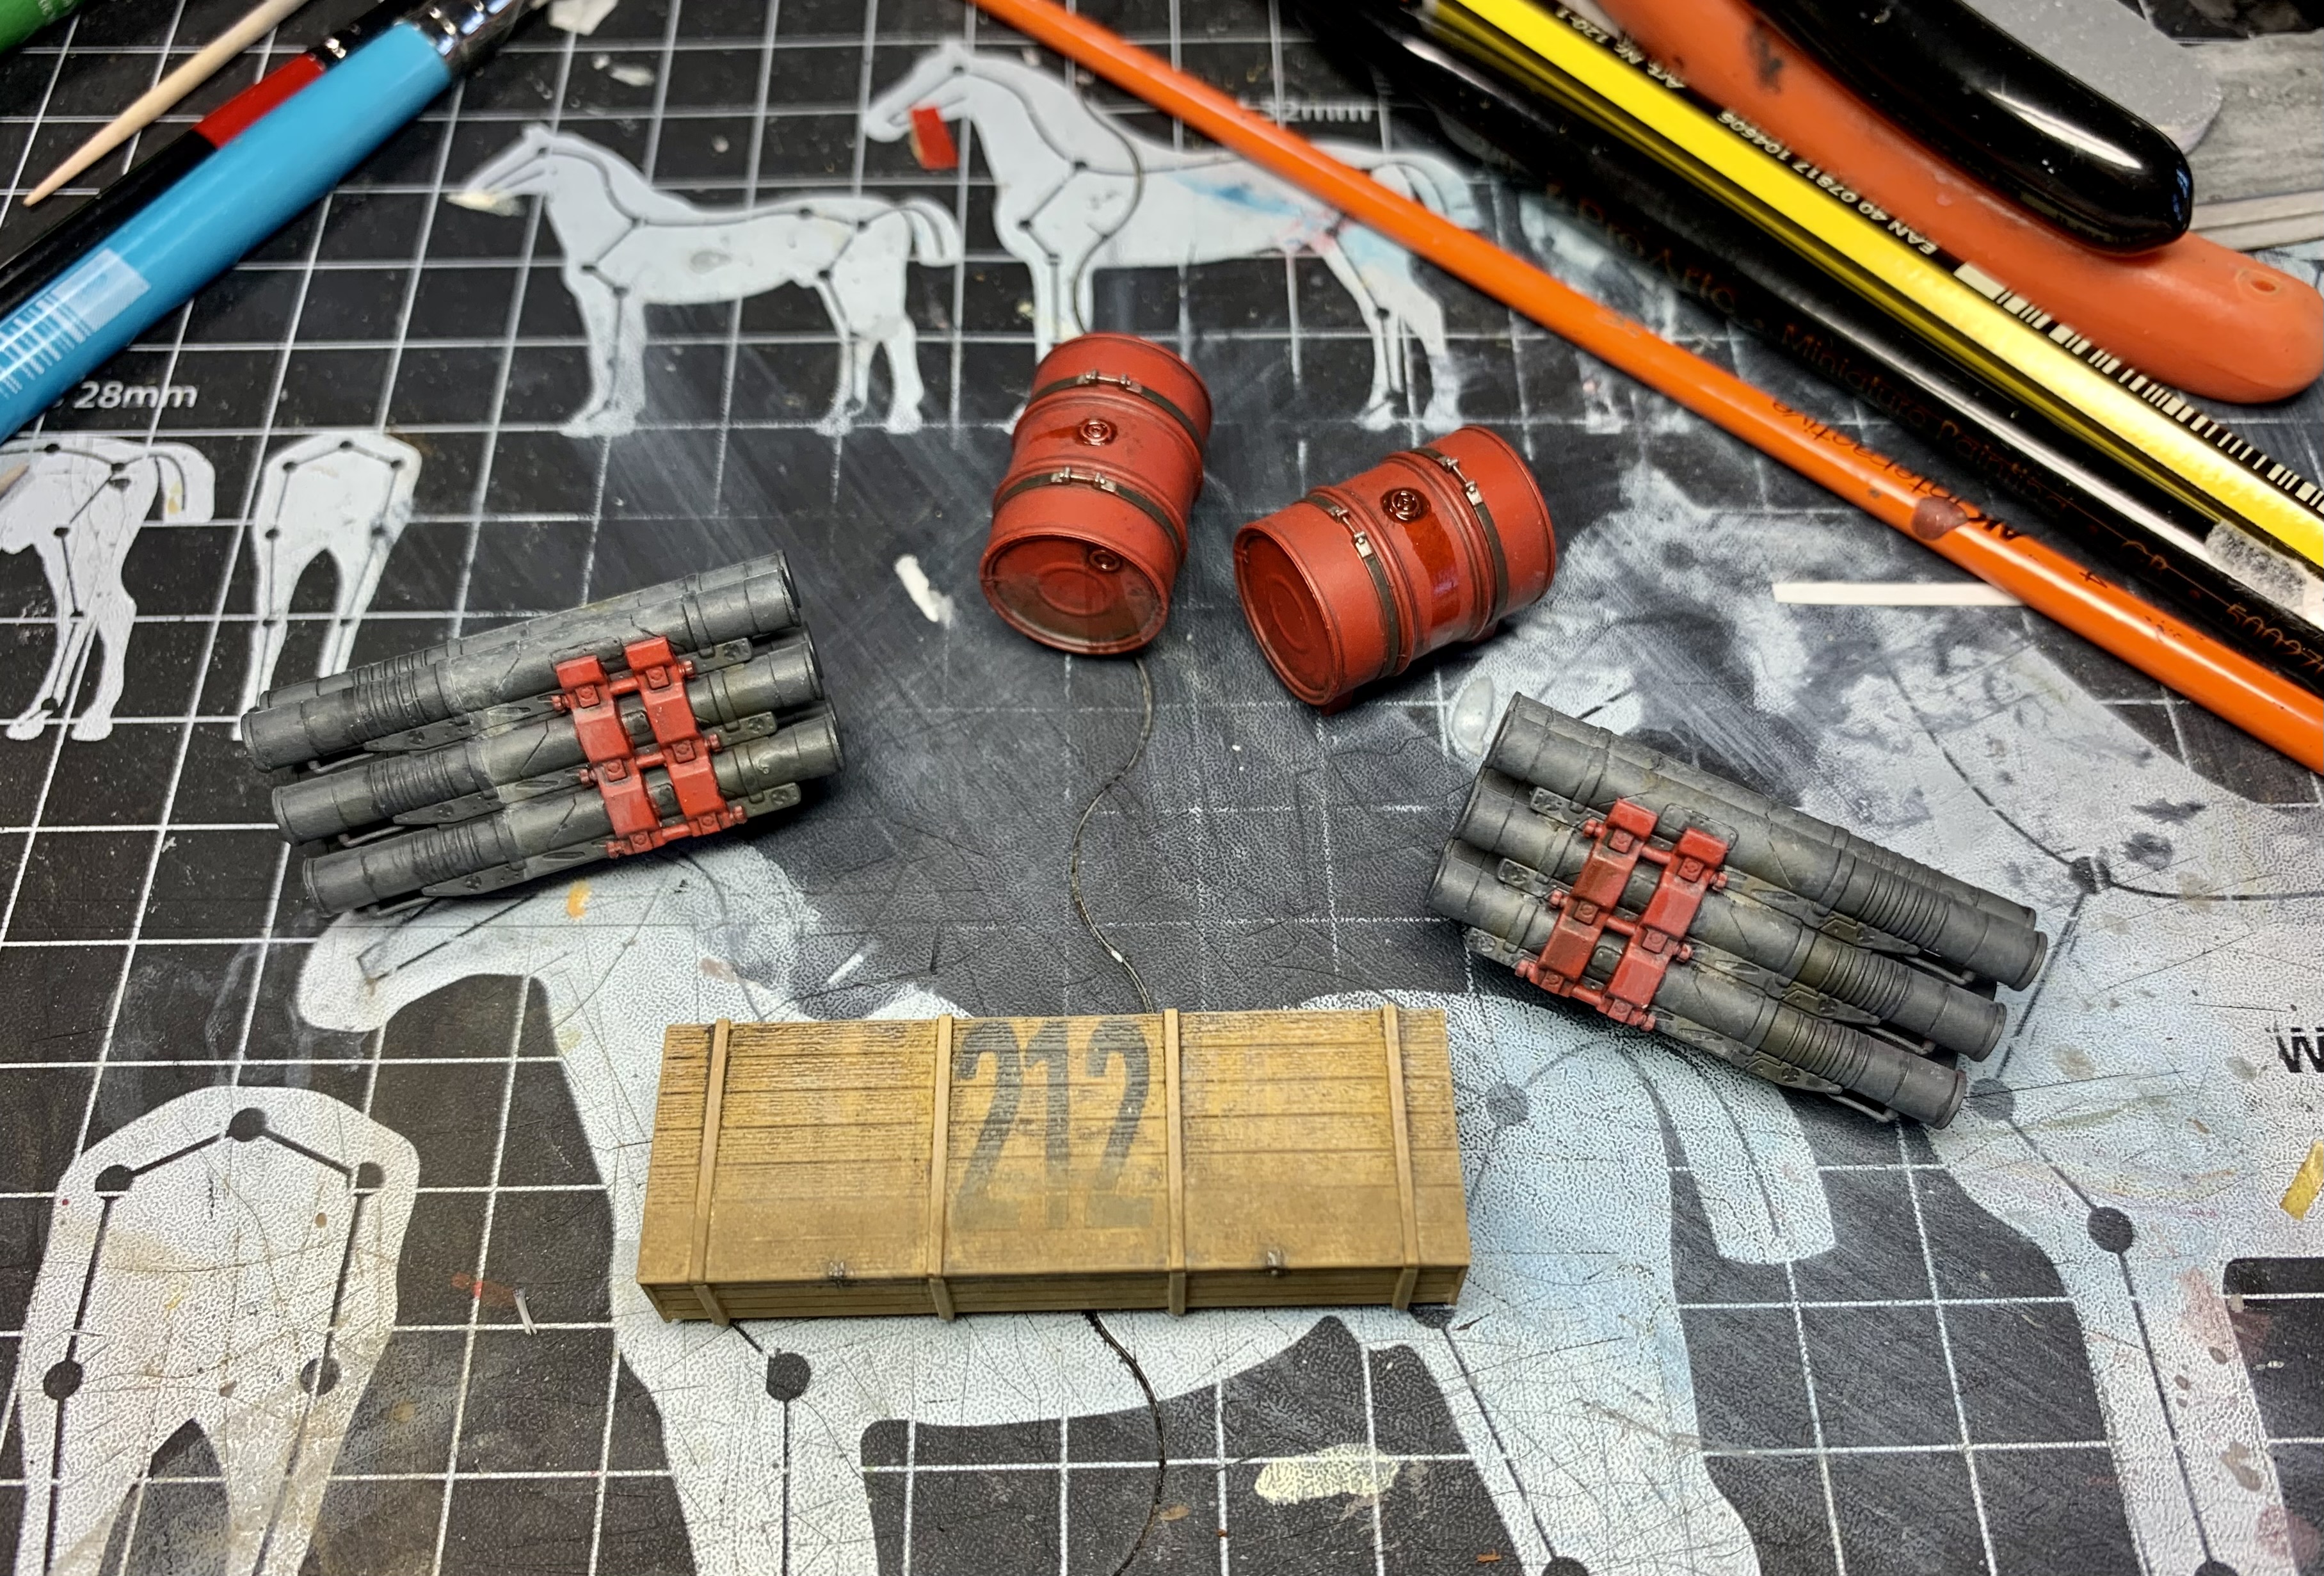
I also weathered the wooden box using oils and pigments before using some ‘Fuel Stain’ product from AMMO on the drums and around the area they sit.
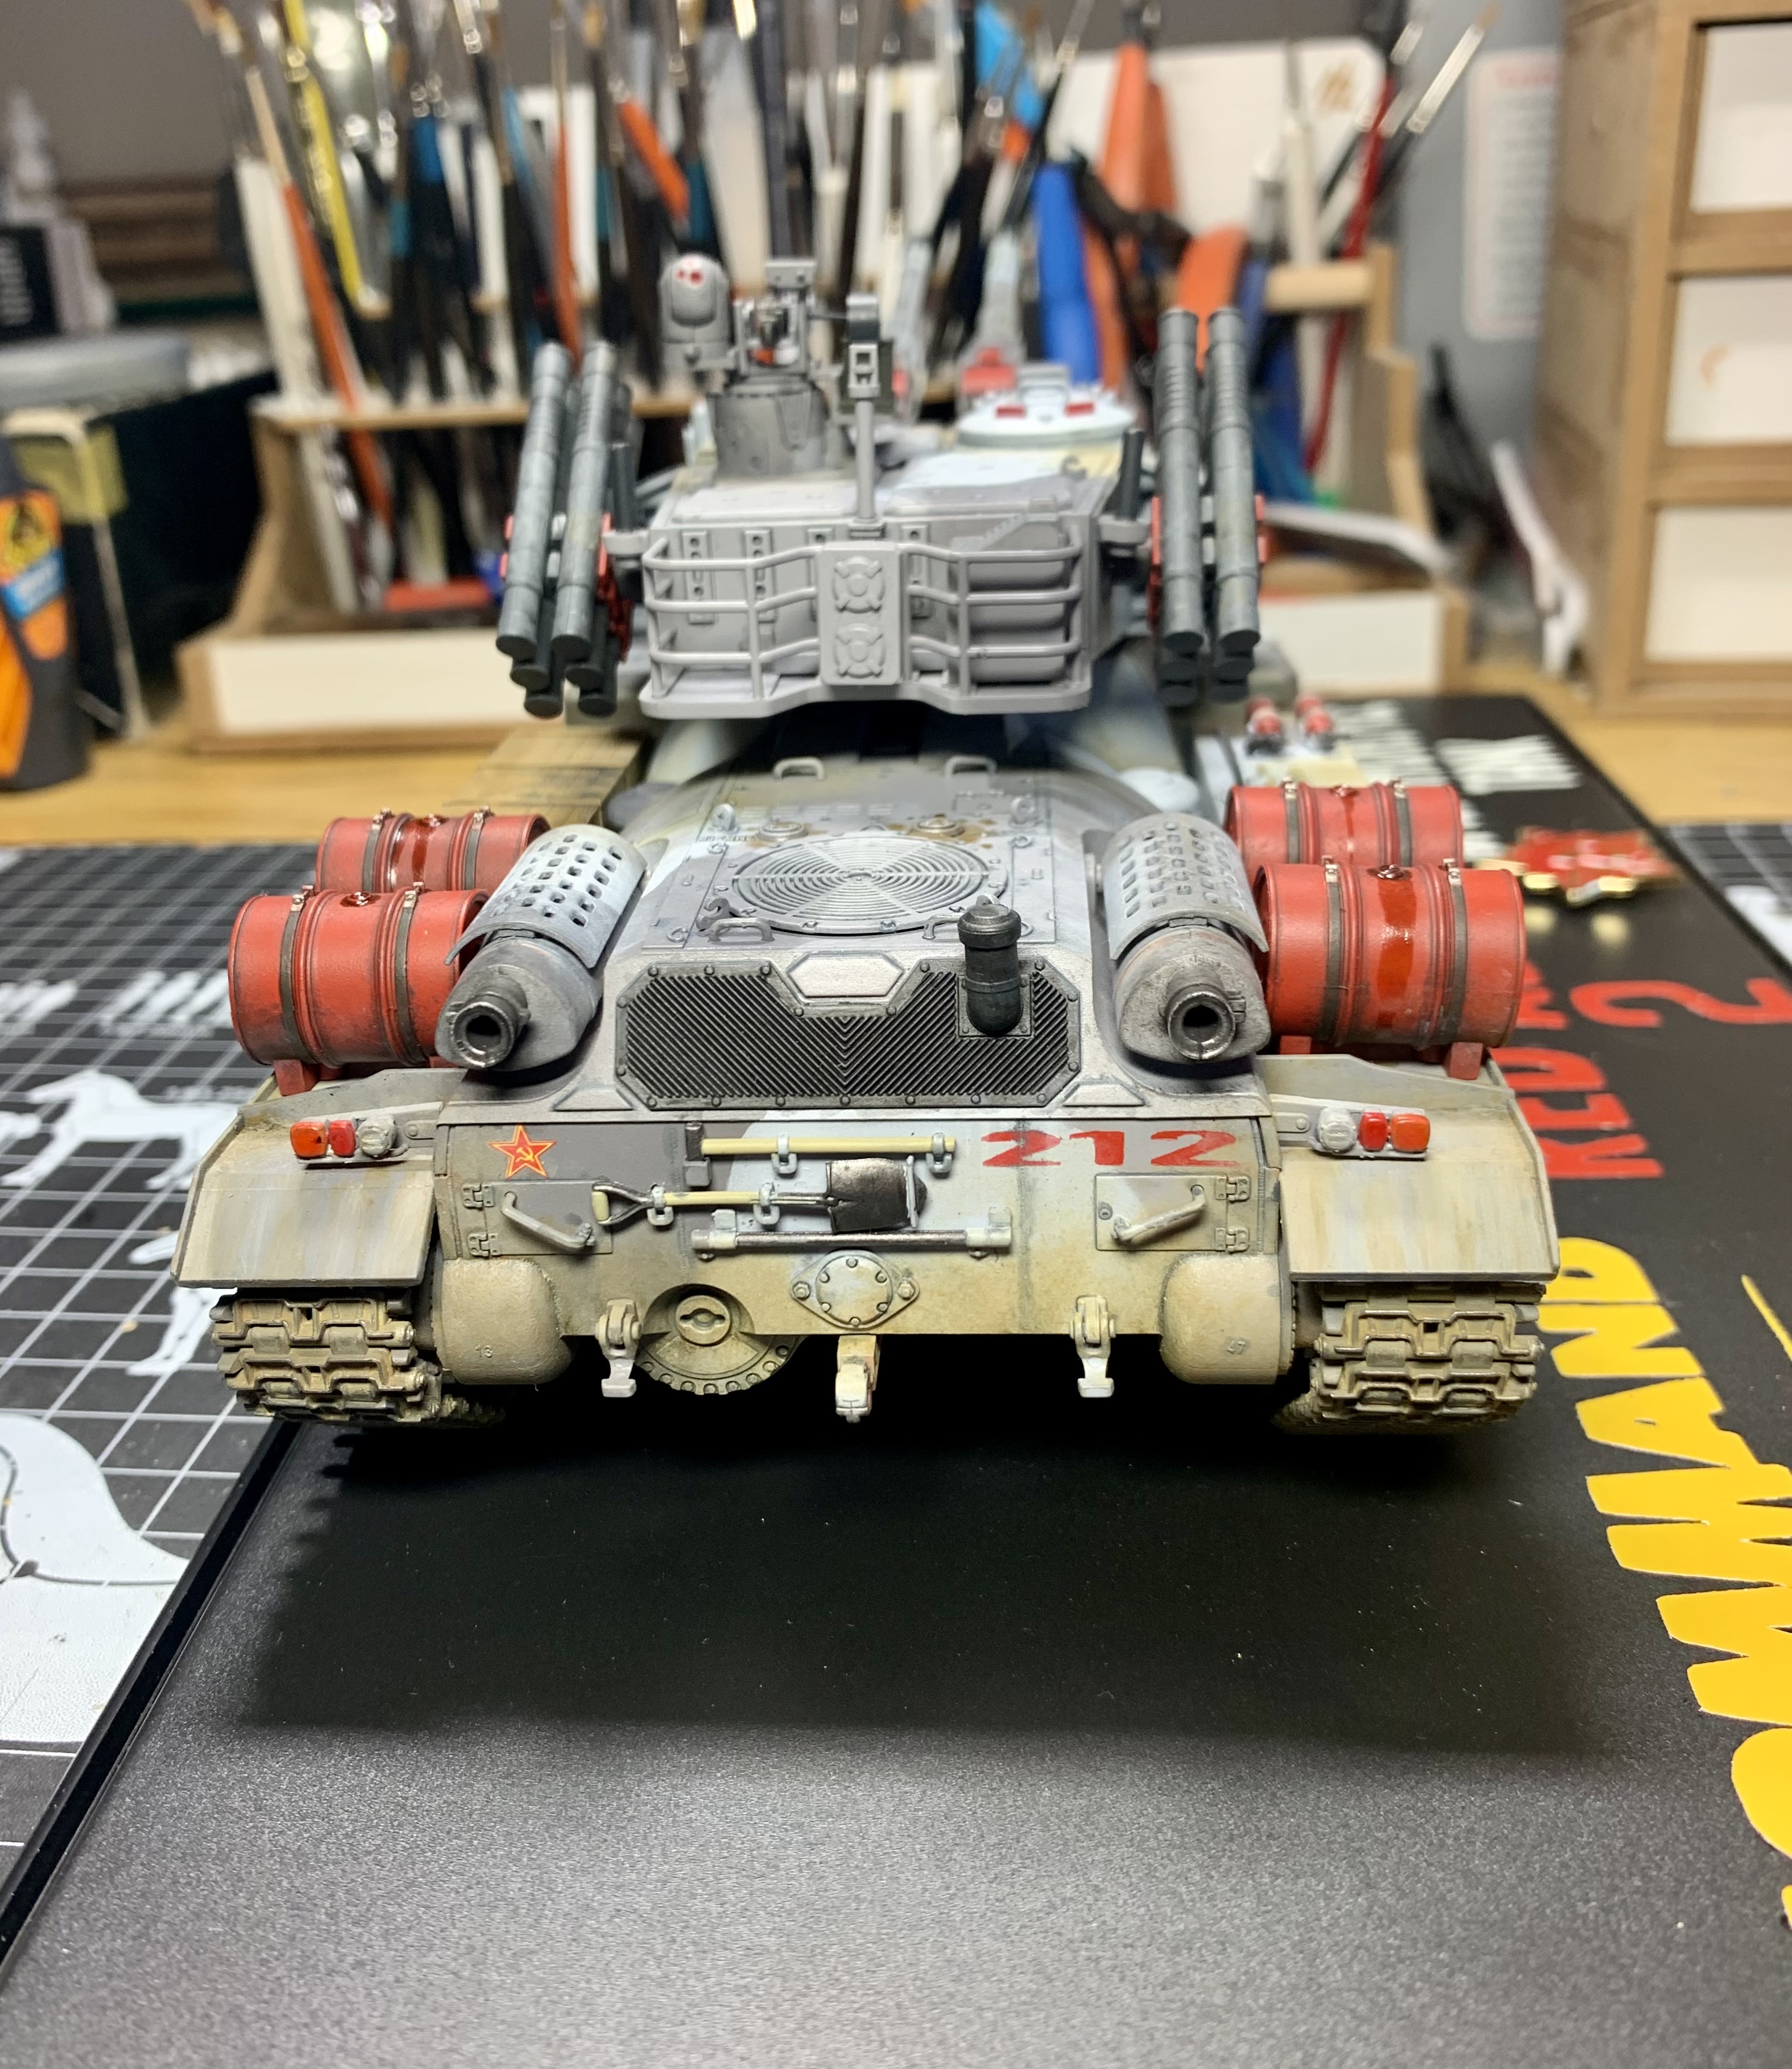
A similar ‘Oil Stains’ product was used on parts of the rear deck. Oils and pigments were also used to weather the exhausts.
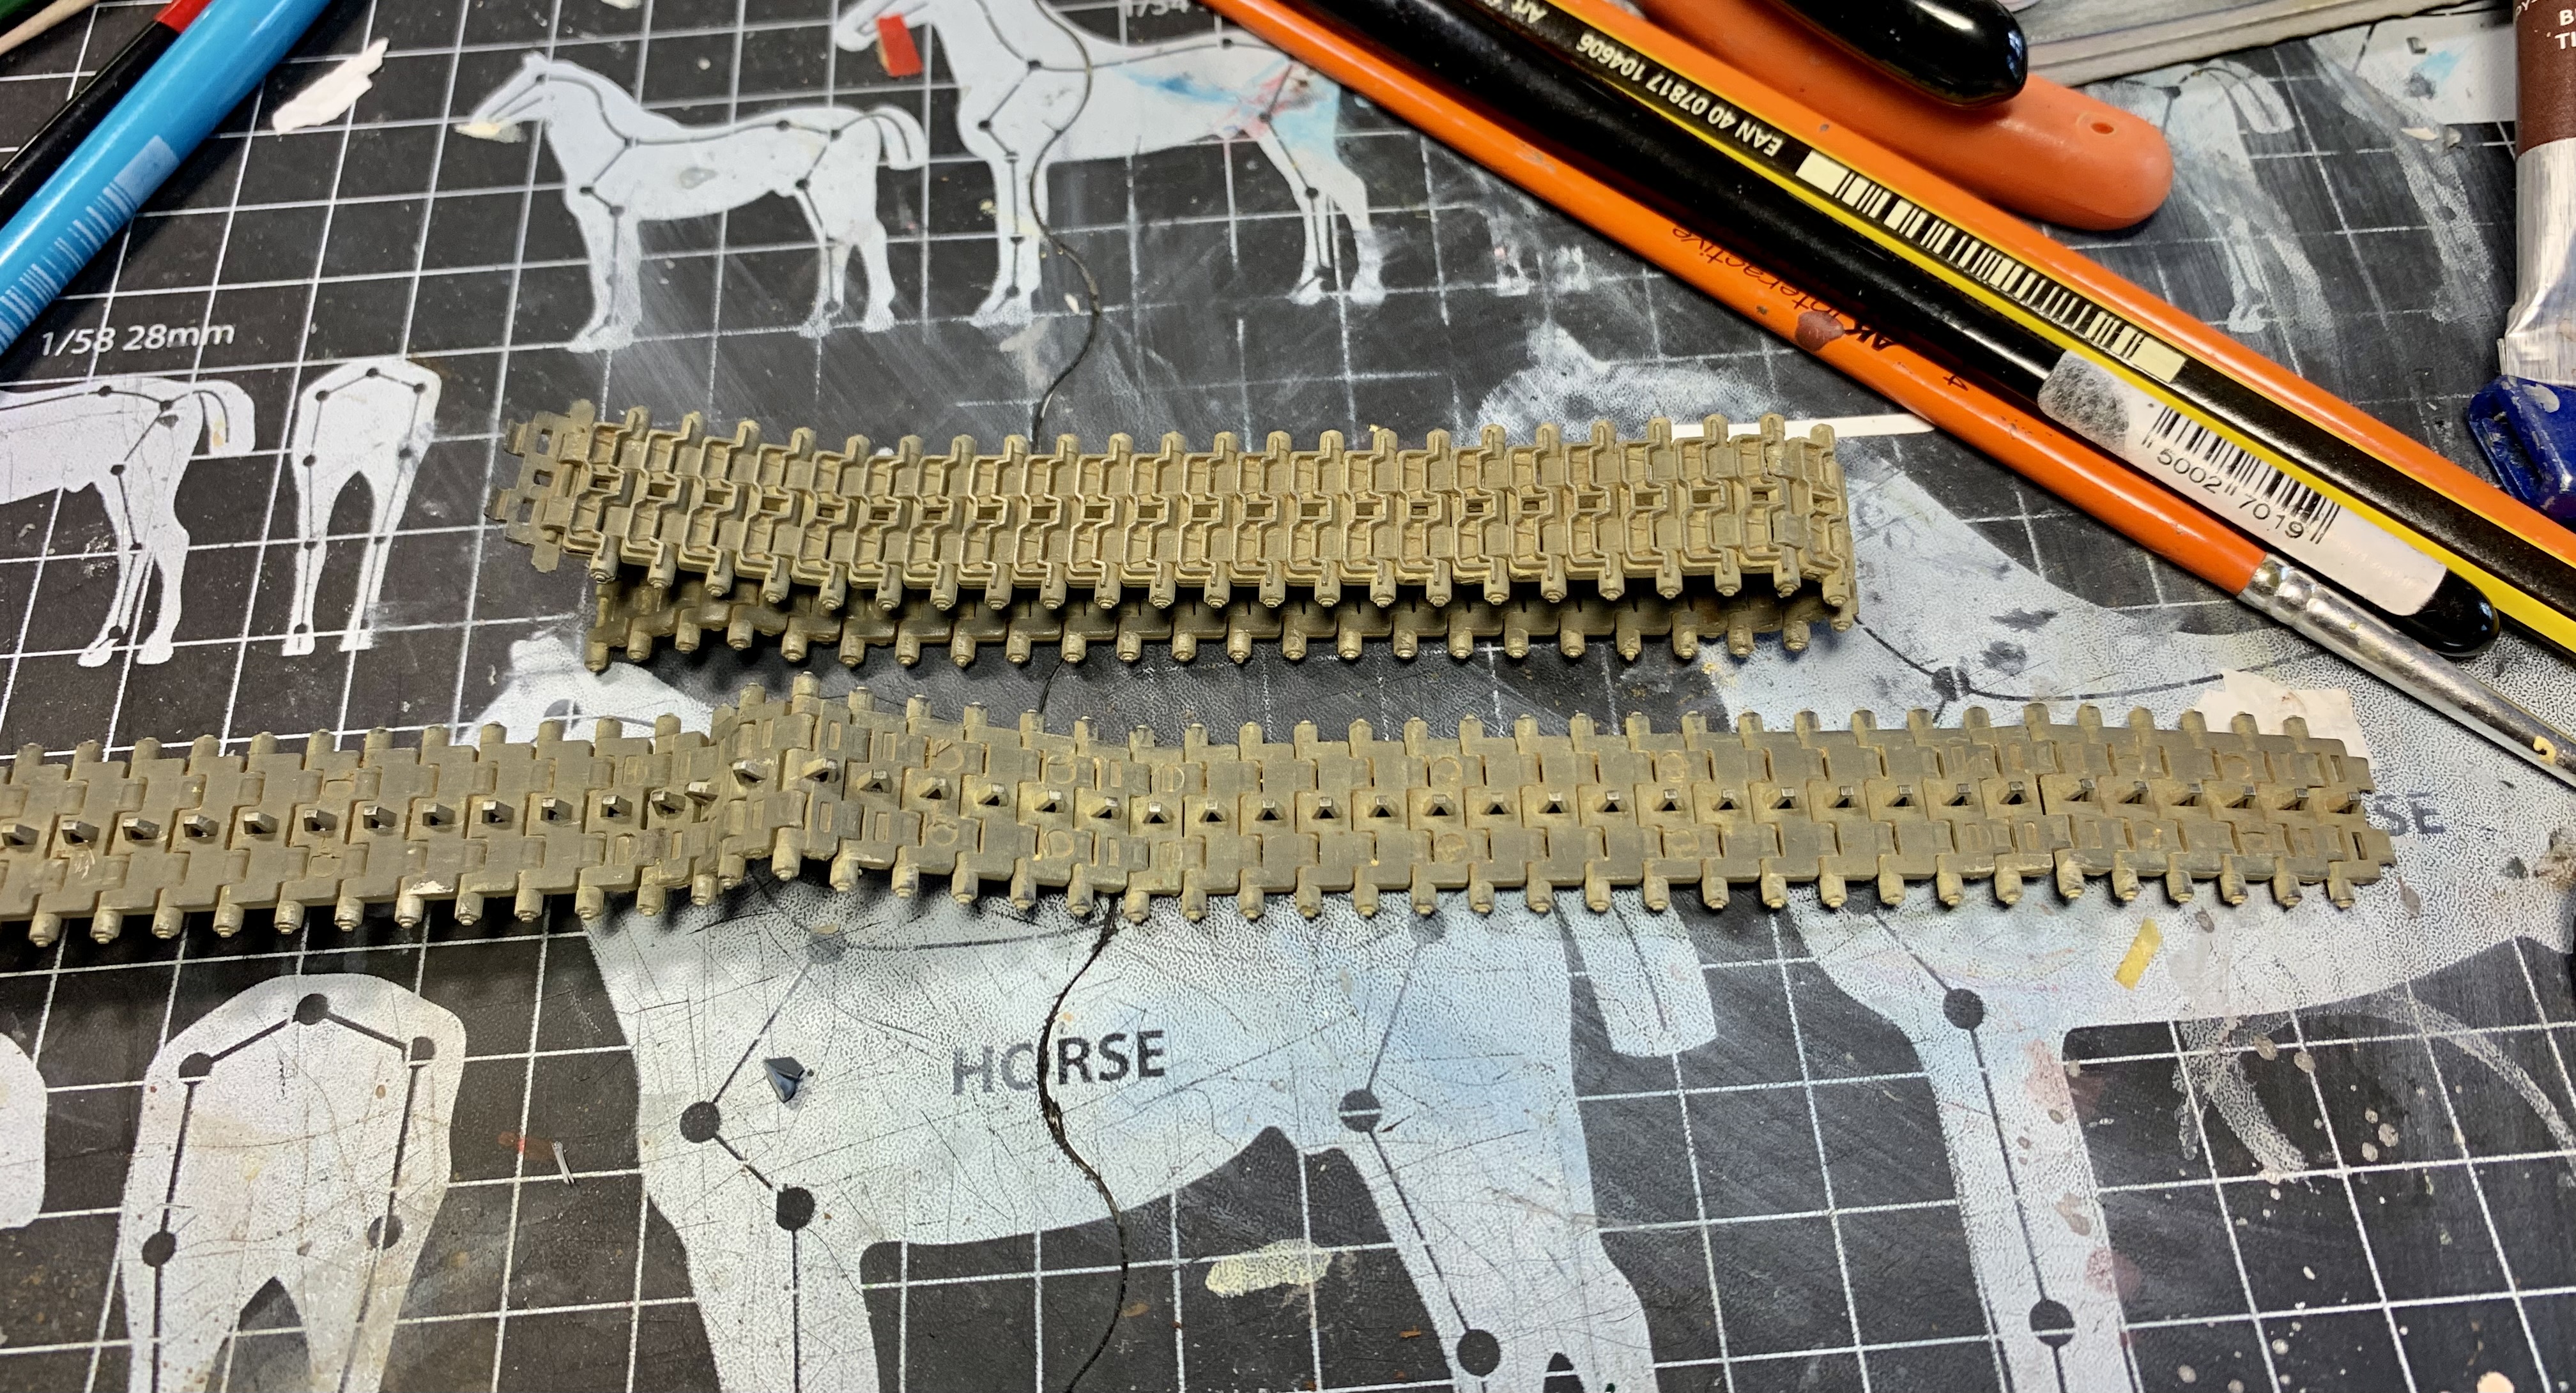
Then I used pigments again for the tracks, matched as close as possible to the oil paint colors.
Aaaaand now the tricky bit- track assembly! Actually it turned out not too bad at all- pretty much exactly as I wrote earlier.
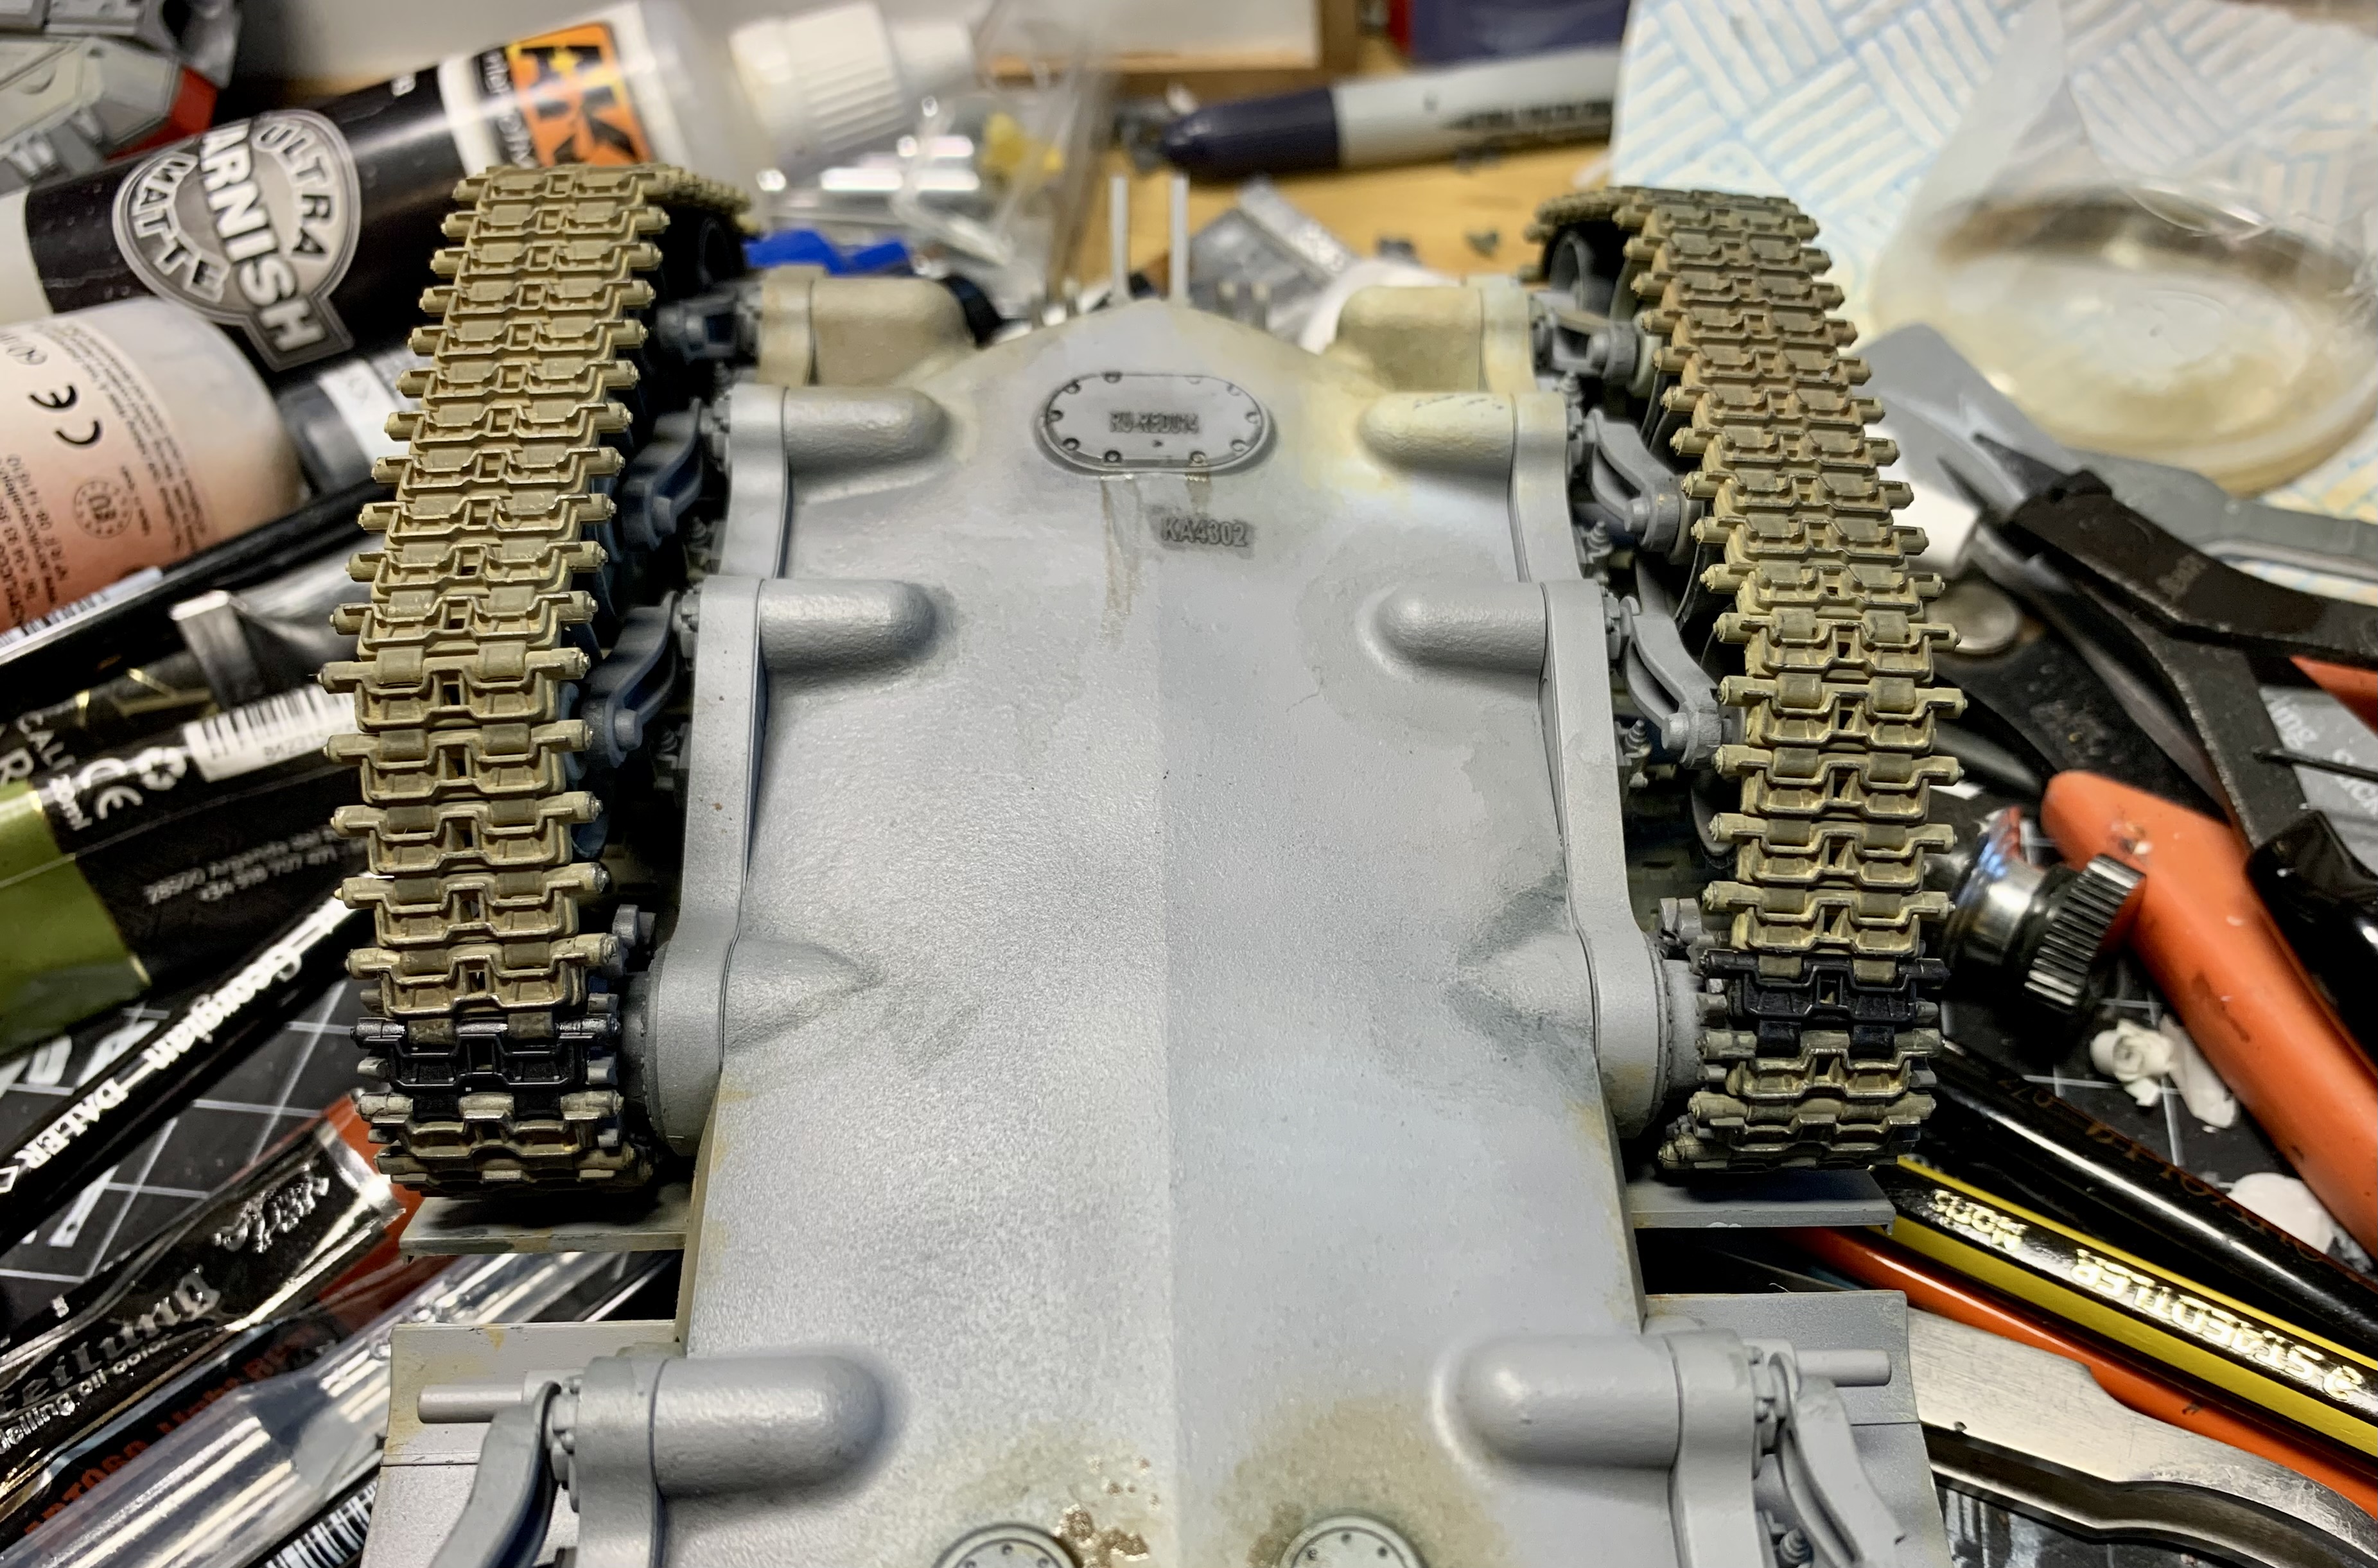
For the front tracks I placed all three roadwheels on plus the idler (no glue needed) and fed the track end through until just before it would meet the sprocket.
Putting the sprocket on at this point allowed me to use it to grab the track and gently turn it, pulling the track round to meet the bottom run just below the sprocket. The tracks were strong enough to be pulled together, glue applied and the remaining half link put on to complete it. I didn’t even need to hold it until the glue dried- it held just fine.
The rear track solid length sections were too big to repeat the above technique. What I fid here was to fit all the road wheels then put the sprocket and the idler into the tracks and then lower this carefully into place. It’s simply a matter of getting the sprocket and idler onto their mounts and easing the upper section of track past the return rollers.
They were then fixed in place the same way as the front sections.
When I finally had them on I realised they were done in the opposite direction to the instructions but luckily it didn’t affect the assembly and, even more luckily, it makes little visual difference. Phew!
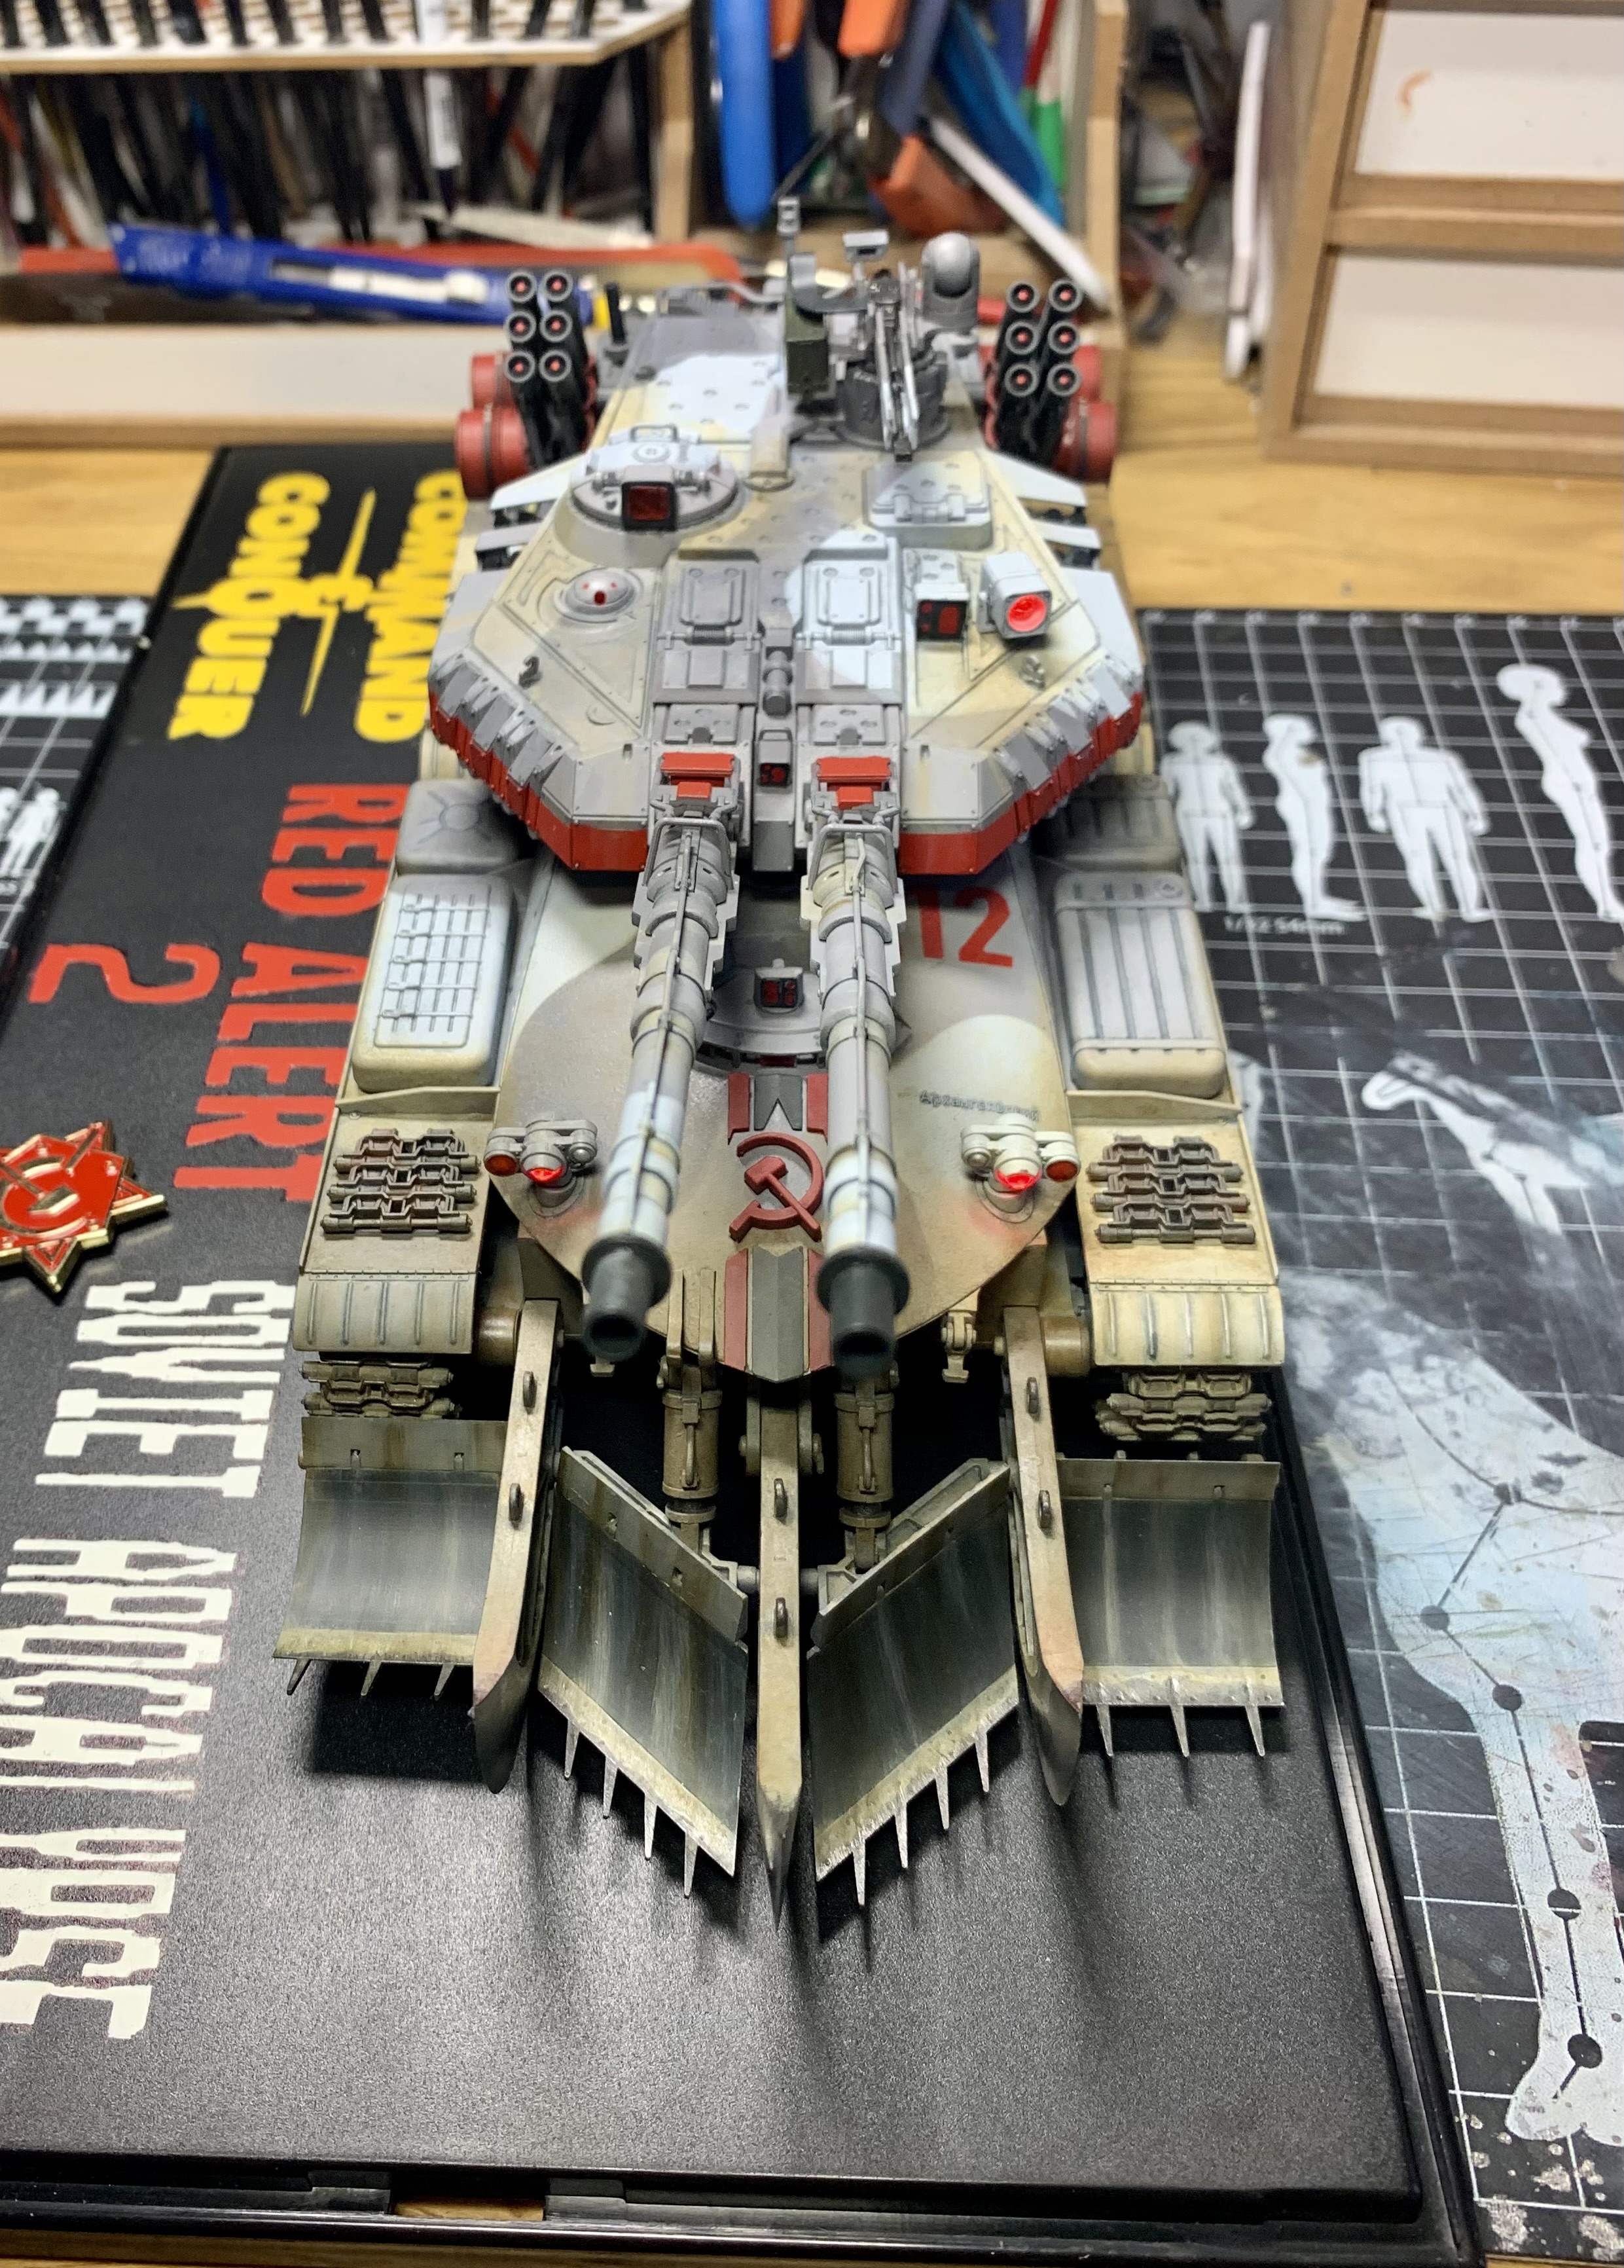
Next up was another tricky bit- attaching the mine plough. Not quite as fiddly as the tracks but I was sure glad to get it done!
Thanks for reading!
A few updates ago I showed you the Soviet insignia badge from the game that I found online. Getting that started me thinking about how to display the tank.
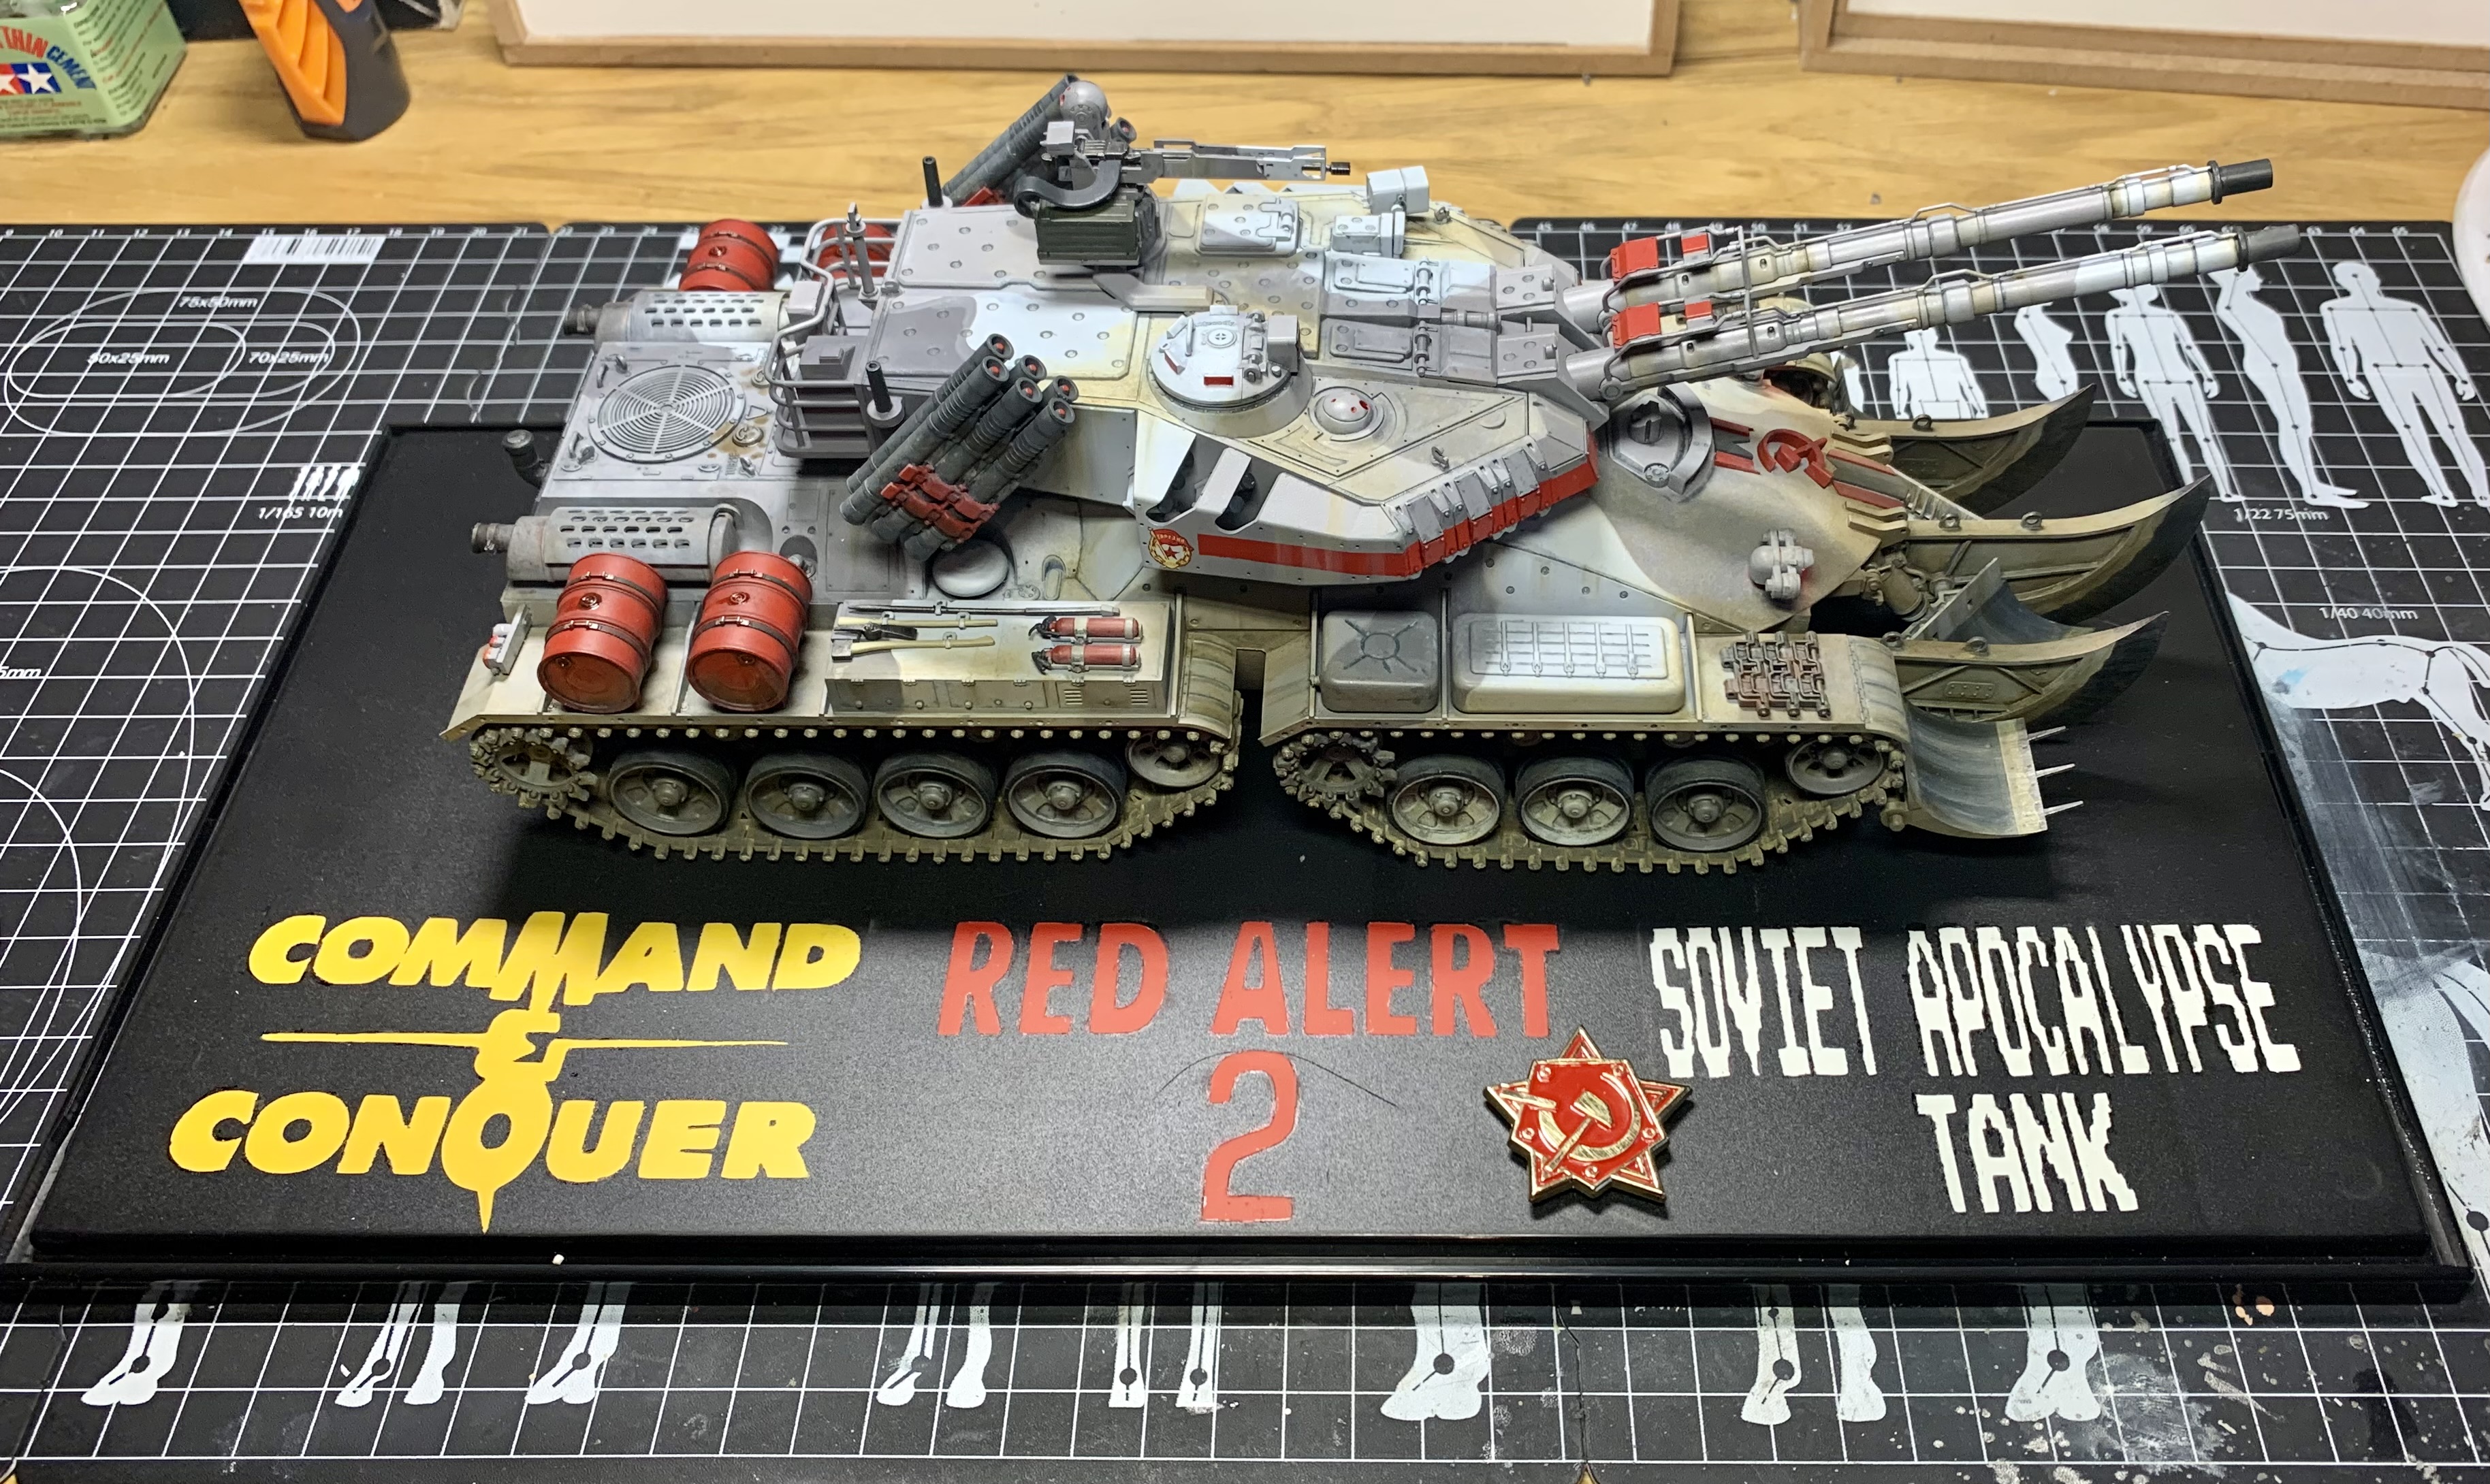
Eventually I decided a nice Trumpeter display box would be a good fit and would also afford me the opportunity to do some logos.
Yes, you’ve guessed it comrades- we’re going back to the People’s Cricut!

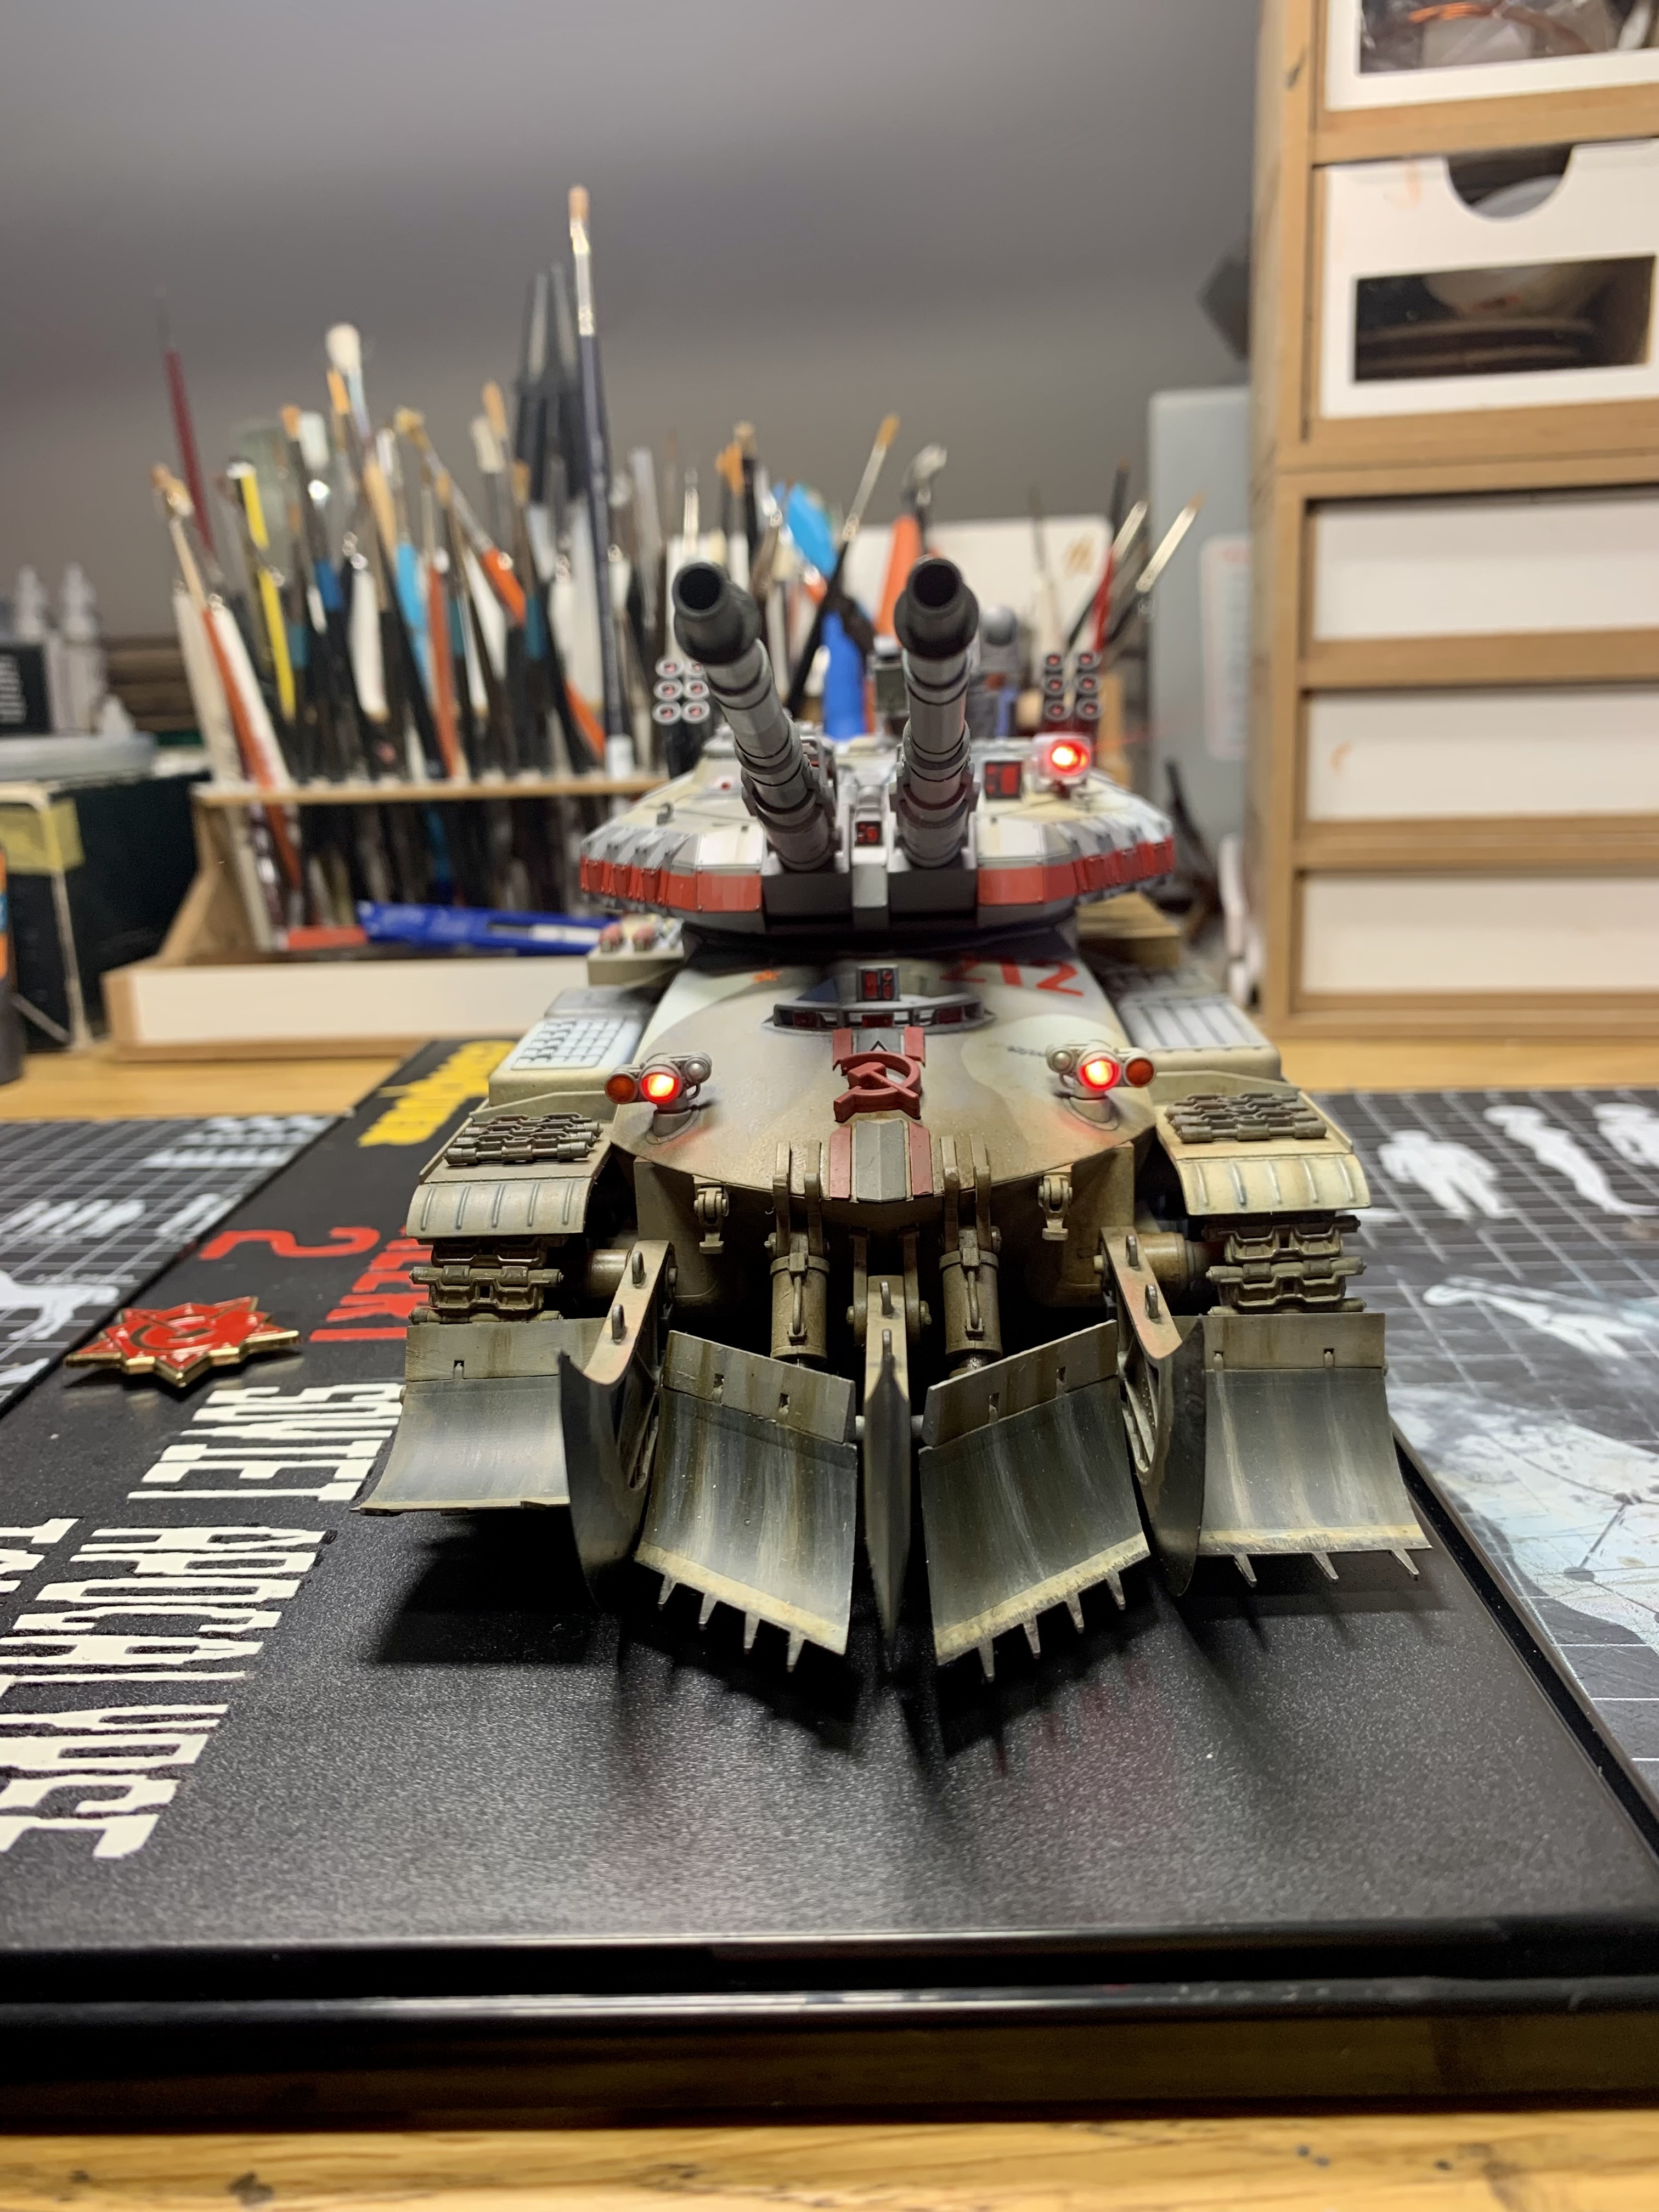
But just prior to mucking about with the Cricut I had done the final assembly and was very pleased that the lights were all working!
It was a real pleasure to finally get it all together and see how it looked.
So, now that the Red March is victorious there remains only two things to do.
Lay me down a beat Nicky.

Altogether now comrades ![]() !
!
Soyuz nerushimyy respublik svobodnykh…

And the second thing is to say thank you for your encouragement and support during the build. I really enjoyed doing it as it allowed me to basically share two of my hobbies with you, modelling and gaming, and I hope it was enjoyable to follow along.
Very nice finish and it sits perfectly on the display base …great work all round. ![]()
Outstanding! Fantastic build of a very eye catching subject ![]()
Very fine finish and an outstanding display base for a fantastic build. Excellent use of color that makes this AFV pop while looking the nightmare tank from hell. Great model Karl, and you had fun!
Outstanding! And thank’s for providing the catchy tune! ![]()
![]()
![]()
![]()
—mike ![]()
@Johnnych01 - thanks bud- those Trumpy bases are great for tanks plus plenty of room to add bits like flags and badges etc.
@Armor_Buff - Cheers Wade- the eye catching red is one of my favourite aspects of this build.
@SSGToms - Glad you like it Matthew- as you’ve said it was a fun build and I enjoyed every minute of it- the way the mine plough looks on the tank really does make it look faintly nightmarish. I’m thankful to fellas like yourself and others who’ve followed along and the encouragement and comments have been awesome to read too- just made the whole build that bit more enjoyable.
@justsendit - Many thanks Mike- I don’t think they had this in the original game actually which is a bit of a shame as its one of the more catchy national anthems!