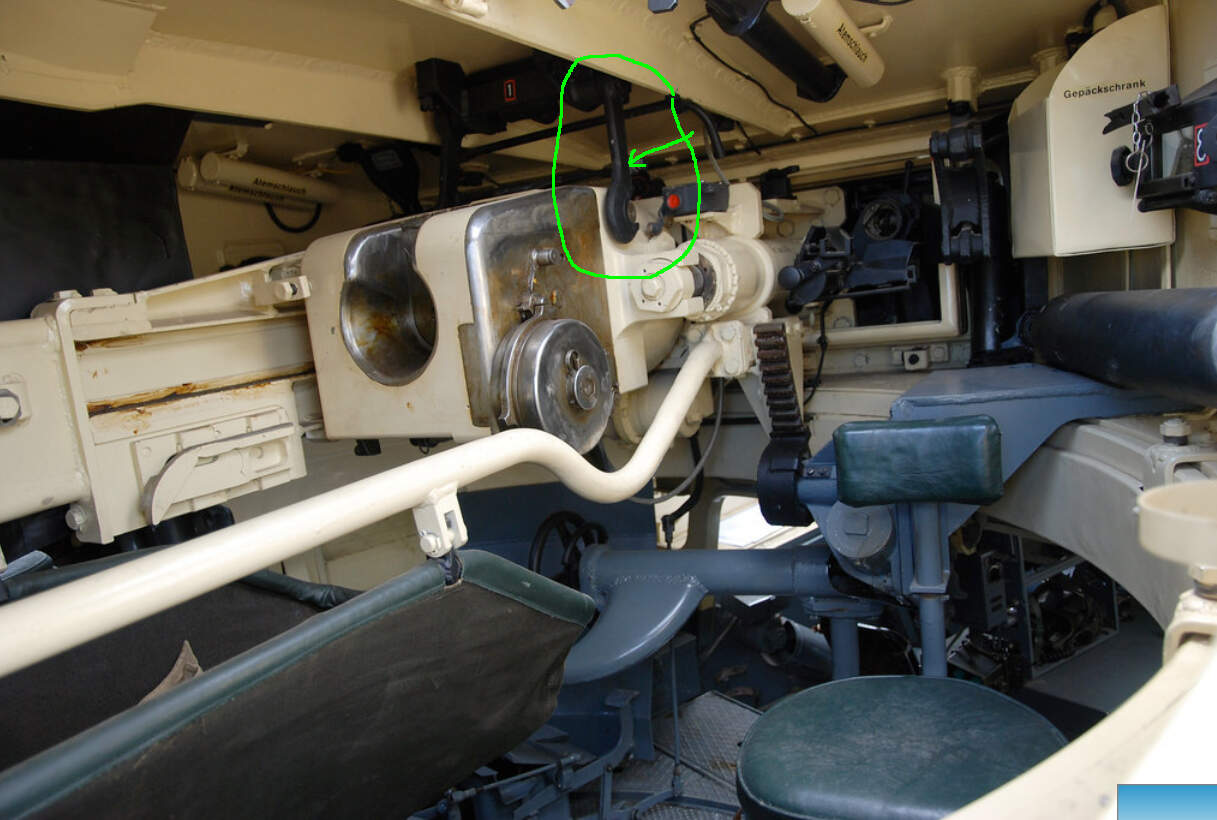
OK I’m building a RFM Tiger 1. Early. There are 2 hooks hanging from the ceiling of the turret. They hook onto the gun mechanism. If I hook them up the barrel wont go up or down. So the question is - what are these hooks for? Are they used just during transport or is there something else I’m missing?
I want the barrel to move up or down so do I just glues these out of the way?
I believe they are part of the travel lock mechanism. The T-54 has similar mechanisms on the turret roof, with a bar that locks onto the gun breech. I am not 100% certain but I am fairly sure they are for a travel lock.
On the T-54 kit I am building you can glue them to the breech or turret roof if you want the gun locked or not
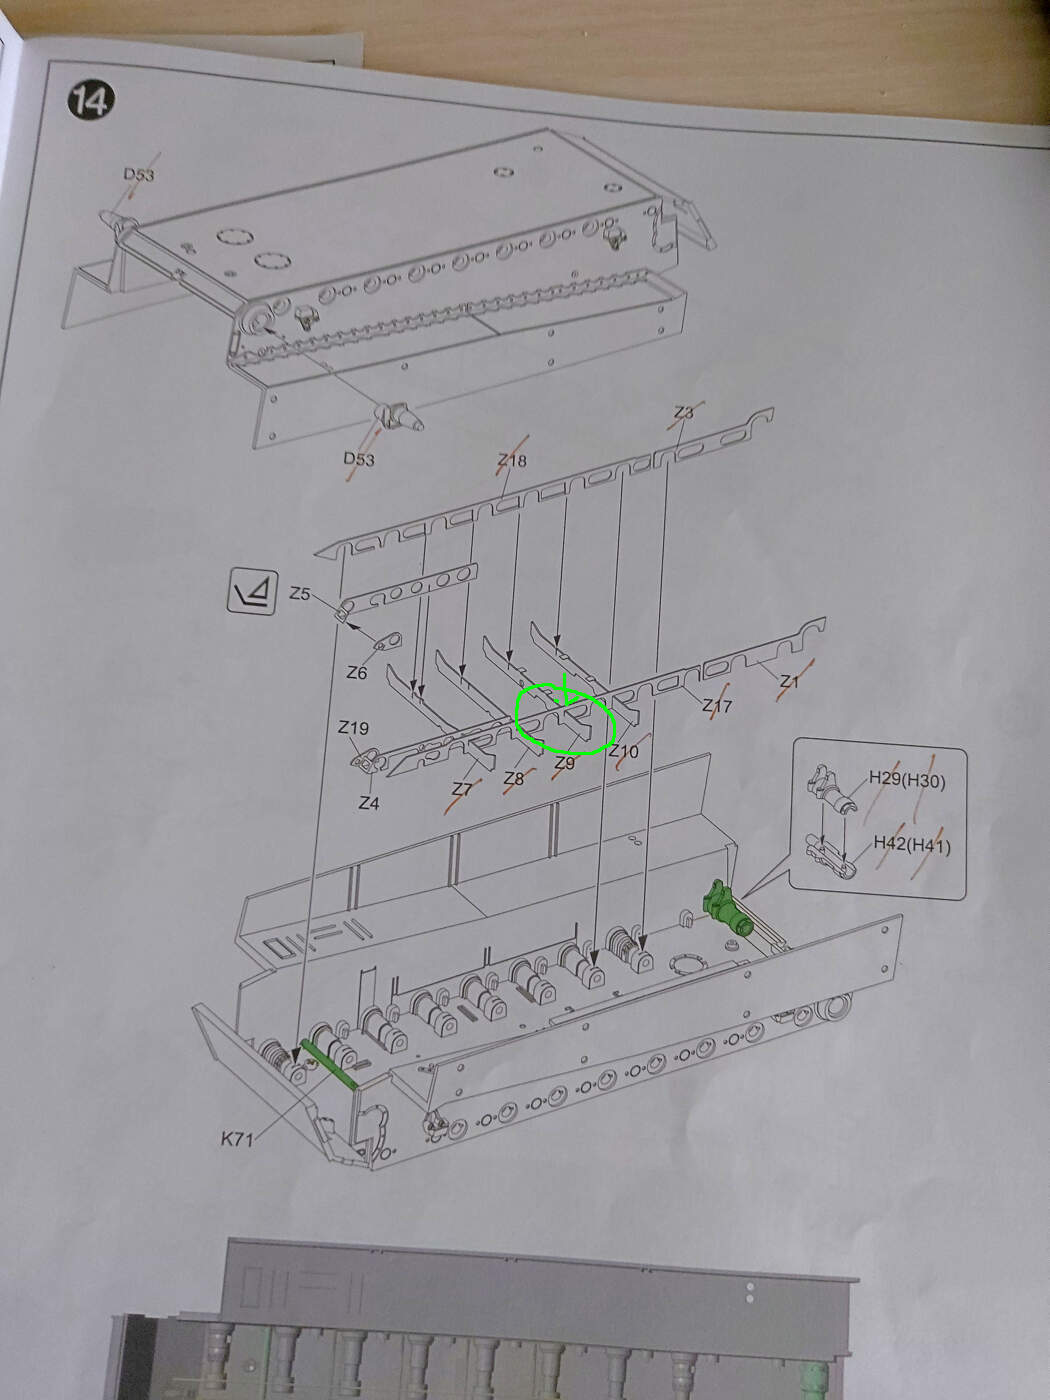
One more question. Has anyone here built the RFM early Tiger 1? Kit #5003. I’ve come to the PE that is in the bottom of the hull. I’ve got it together ok. Yeah after some ‘fun’. But I’m now worried I have put it together wrong. There are 2 longitudinal PEs and 2 short longitudinal. Then there are 4 cross braces. My problem is this - should the top of the cross braces be level with the top or bottom of the longitudinal PEs? I have them level with the top but I’m worried that that option will come back to bite me on the #@$s. If I keep building as is it may interfere with future parts. Yes I’ve studied the instructions but they are very vague.
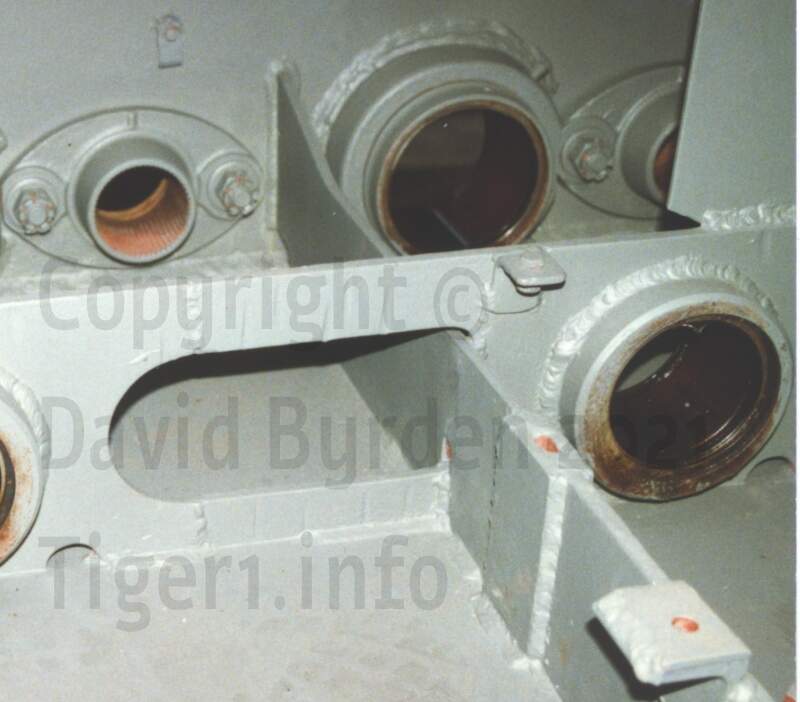
The image below shows one of the joints. It looks like the cross memeber should be bflush with the bottom. But is it?
The cross members should sit on the hull floor. I’m not familiar with the kit or the Tiger interior, but if this means they sit slightly lower than the top edge of the logitudinal spars, then so be it.
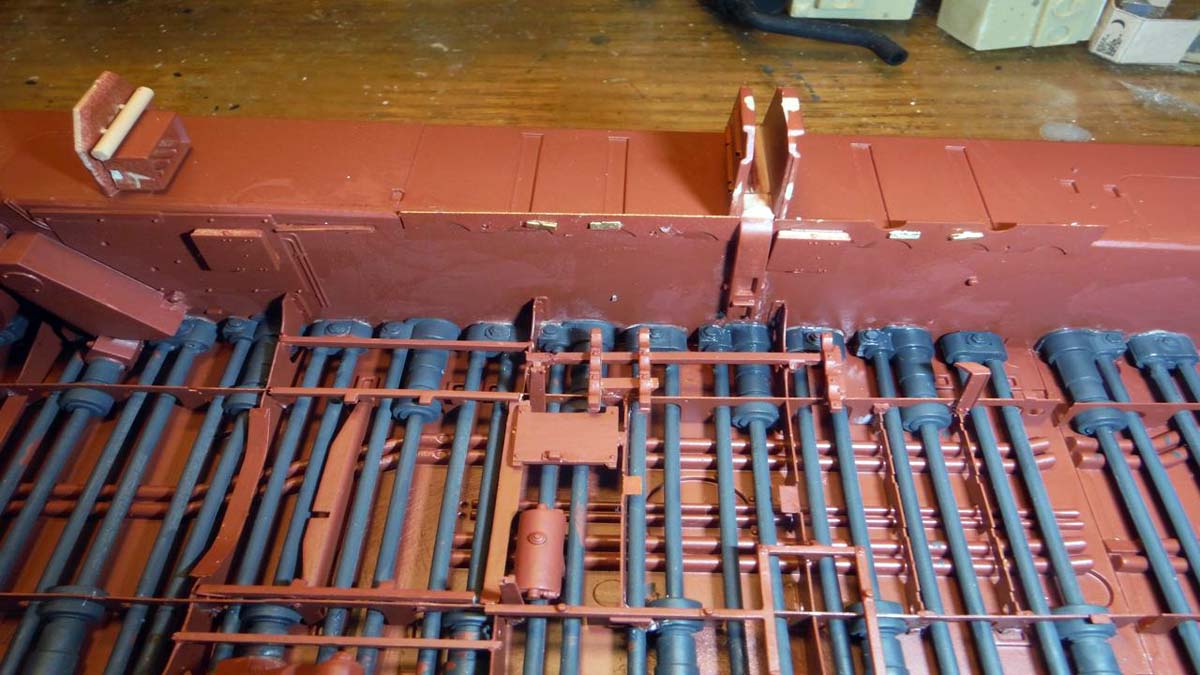
This isn’t the same kit, its the RFM Panther G, but you get the idea - note how the cross members sit slightly below the longitudinal spars because they sit on the hull floor. These would have been welded to the floor to add strength.
Thanks guys. Just what I wanted know. David that;s exactly the photo that can help me. No idea where you got it from but thanks.
FWIW I have 2 glued in at the top of the longitudinal frame and then I chickened out thinking it didn’t look right. So just 2 to fix. No big deal. I use tacky craft glue on PE and I can un-glue it with water.
I’m at the stage of painting the interior. I’ve been on the internet looking but I doubt I have seen two Tigers painted the same inside. I’m building RFM’s early Tiger 1. I was wondering if there is a timeline available that will tell me the various phases of interior colors. I could make something up as only I will know. But that’s not the point. I want it to depict as accurately as possible what the kit is meant to be.
Another question for the experts. RFM #5003 has the options for Tiger #321, 331, 311, 314 or 323.
Ive Google these Tigers and can’t find an answer so question is - on the rear, radio operators side, meant to be a box. All the images I find show what I assume are air filters. (These parts aren’t in the kit). But the instructions are vague as to where this box goes. Top corner? Above the line of the deck? Below the deck line? Or in the trash bin!!!
Any one point me to an images of the rear of one of thee Tiger?
I love these kits but boy the instructions can be somewhat vague at times.