Neither of which are great as Dutch names. The Dutch verb keilen means “to throw, typically in a careless manner” so I doubt the army would want a tank’s name to have that connotation. “Eber” sounds distinctly German, so I suspect it would have been replaced by its cognate Ever — German Eber is a wild boar, which in Dutch is called everzwijn (the second word in which is cognate with English “swine”) but I also kind of doubt that would have been chosen as a Dutch name for a tank.
2 Likes
No, I did some experimental Google-translating (never a good thing really!) to try and see what was what. I suppose some of the German big cat names might work, but then one is treading on Wehrmacht-ness and one never quite knows where that will end.
Of course, the equipment may just have gone down the British route whereby some pieces of kit never received any name at all, and were simply known by their abbreviations/numbers combo, eg FV 432, AS 90.
As a whimsy, I thought that given the sort of almost squat, thick-set appearance of the MBT-70, that “Bear” might have worked but even that doesn’t really sound right!
2 Likes
The Dutch Army tends to use equipment under the designation of the country of origin, or that of the manufacturer, or some hybrid. For example, the Leopard was, well the Leopard — using the German name, because the Dutch for that animal is luipaard — and the M113 was the M113. OTOH, FMC’s AIFV was the YPR 765 — YPR being a DAF letter code (AFAIK) with 765 probably (is my guess) stemming from the American XM765 that the AIFV is a commercial derivative of. And then there are exceptions, like the PRTL, which only had a Dutch Army letter-code designation (until they gave in to popular opinion and began calling it Cheetah as well).
3 Likes
Looking through the photos on my iPad just now for something, my eye was caught by this photo I took in 2023 of an article in the local newspaper about greatly increasing expenditure on armament following the Russian invasion of Ukraine. It fits nicely in this topic, I think ![]()

3 Likes
Hah! I suspect the pictures editor wasn’t well versed in AFVs and Googled “MBT” whereupon he ended up with that particular image. Priceless!
2 Likes
There’s an illustrator credit at lower left. My guess is he asked Google for pictures of tanks and missiles and things, and picked some he liked the look of.
2 Likes
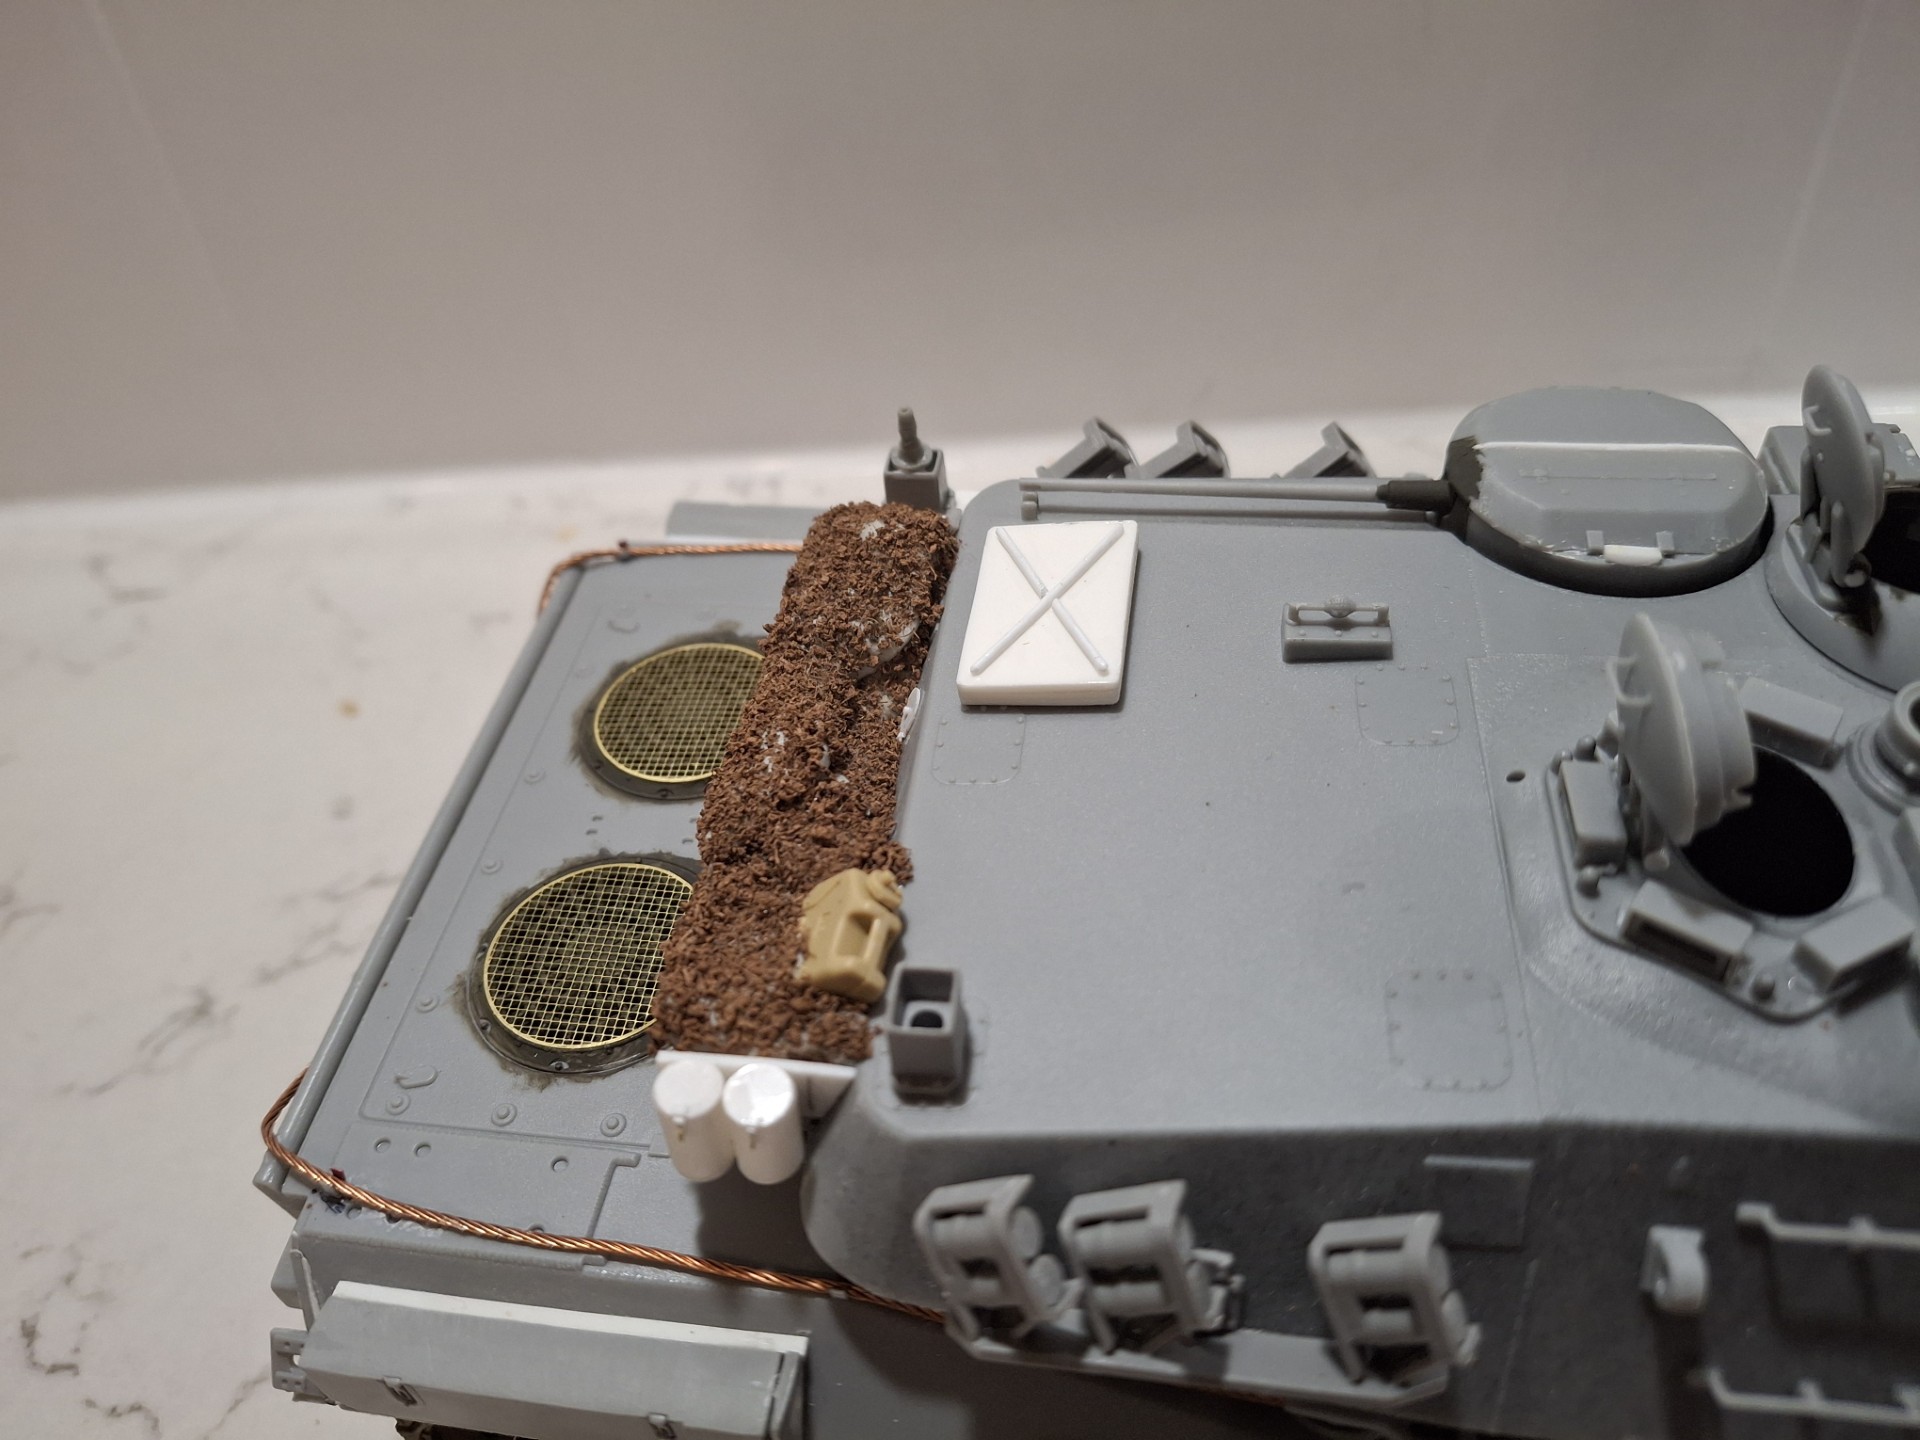
Soooo, more progress and as it’s highly likely followers of the campaign are getting a bit bored of this, I might open up a separate thread as I normally do when a project gets a but protracted. Anyway, first off a stowed cam net in the stowage rack; I thought a water jerrican was required too and found after a bit of extensive Googling, (and Google Translate) that Dutch Army water jerricans from the 70s were very similar to the US pattern, so that is what I used, just making the “US” indistinguishable on the Tamiya component I used:

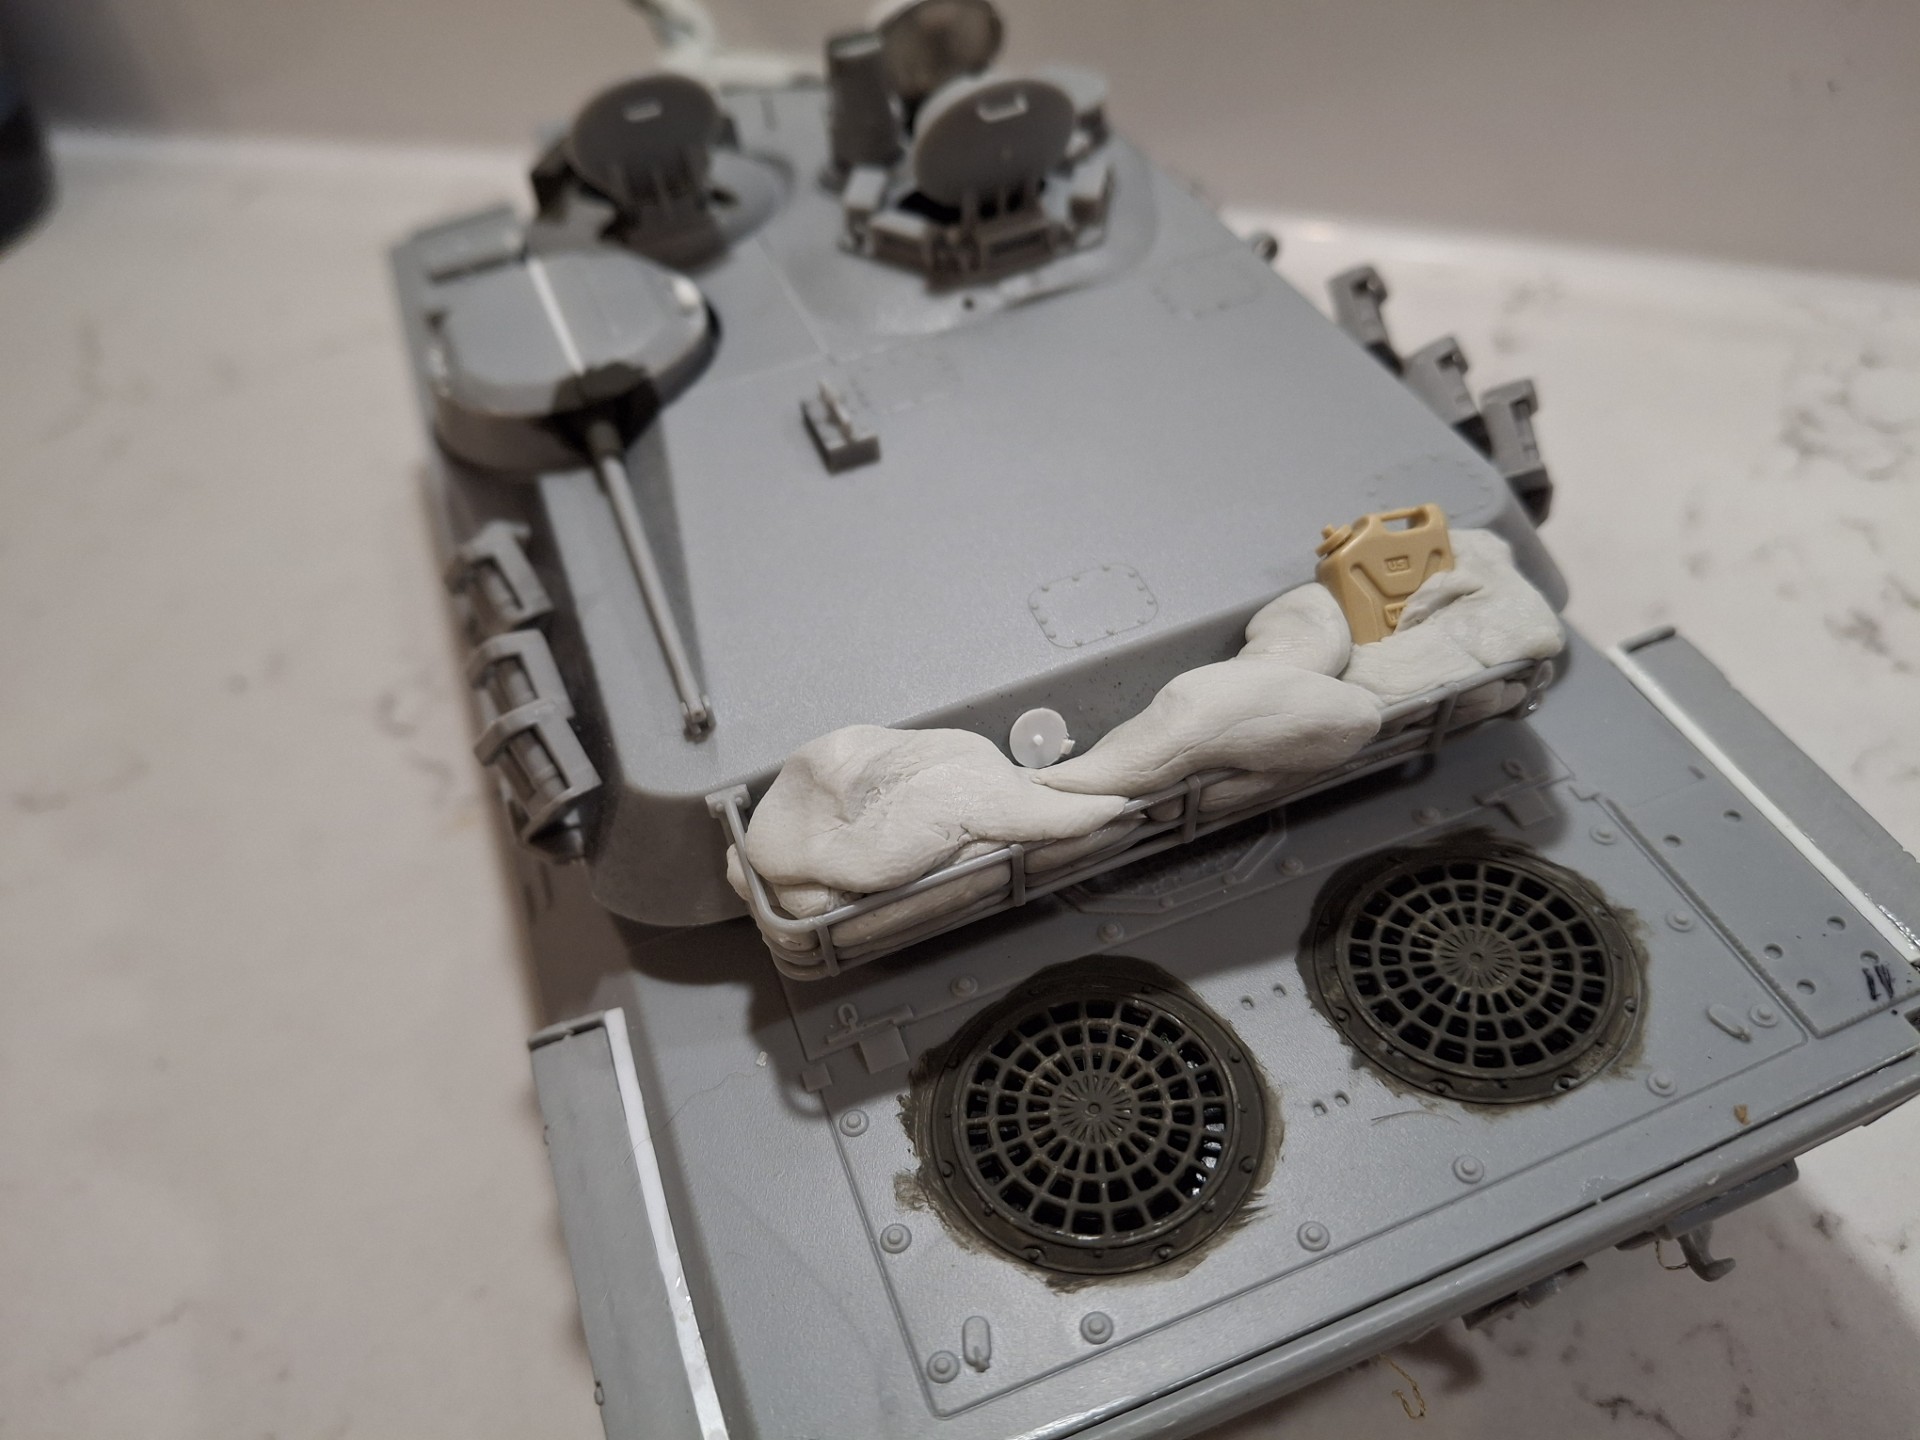
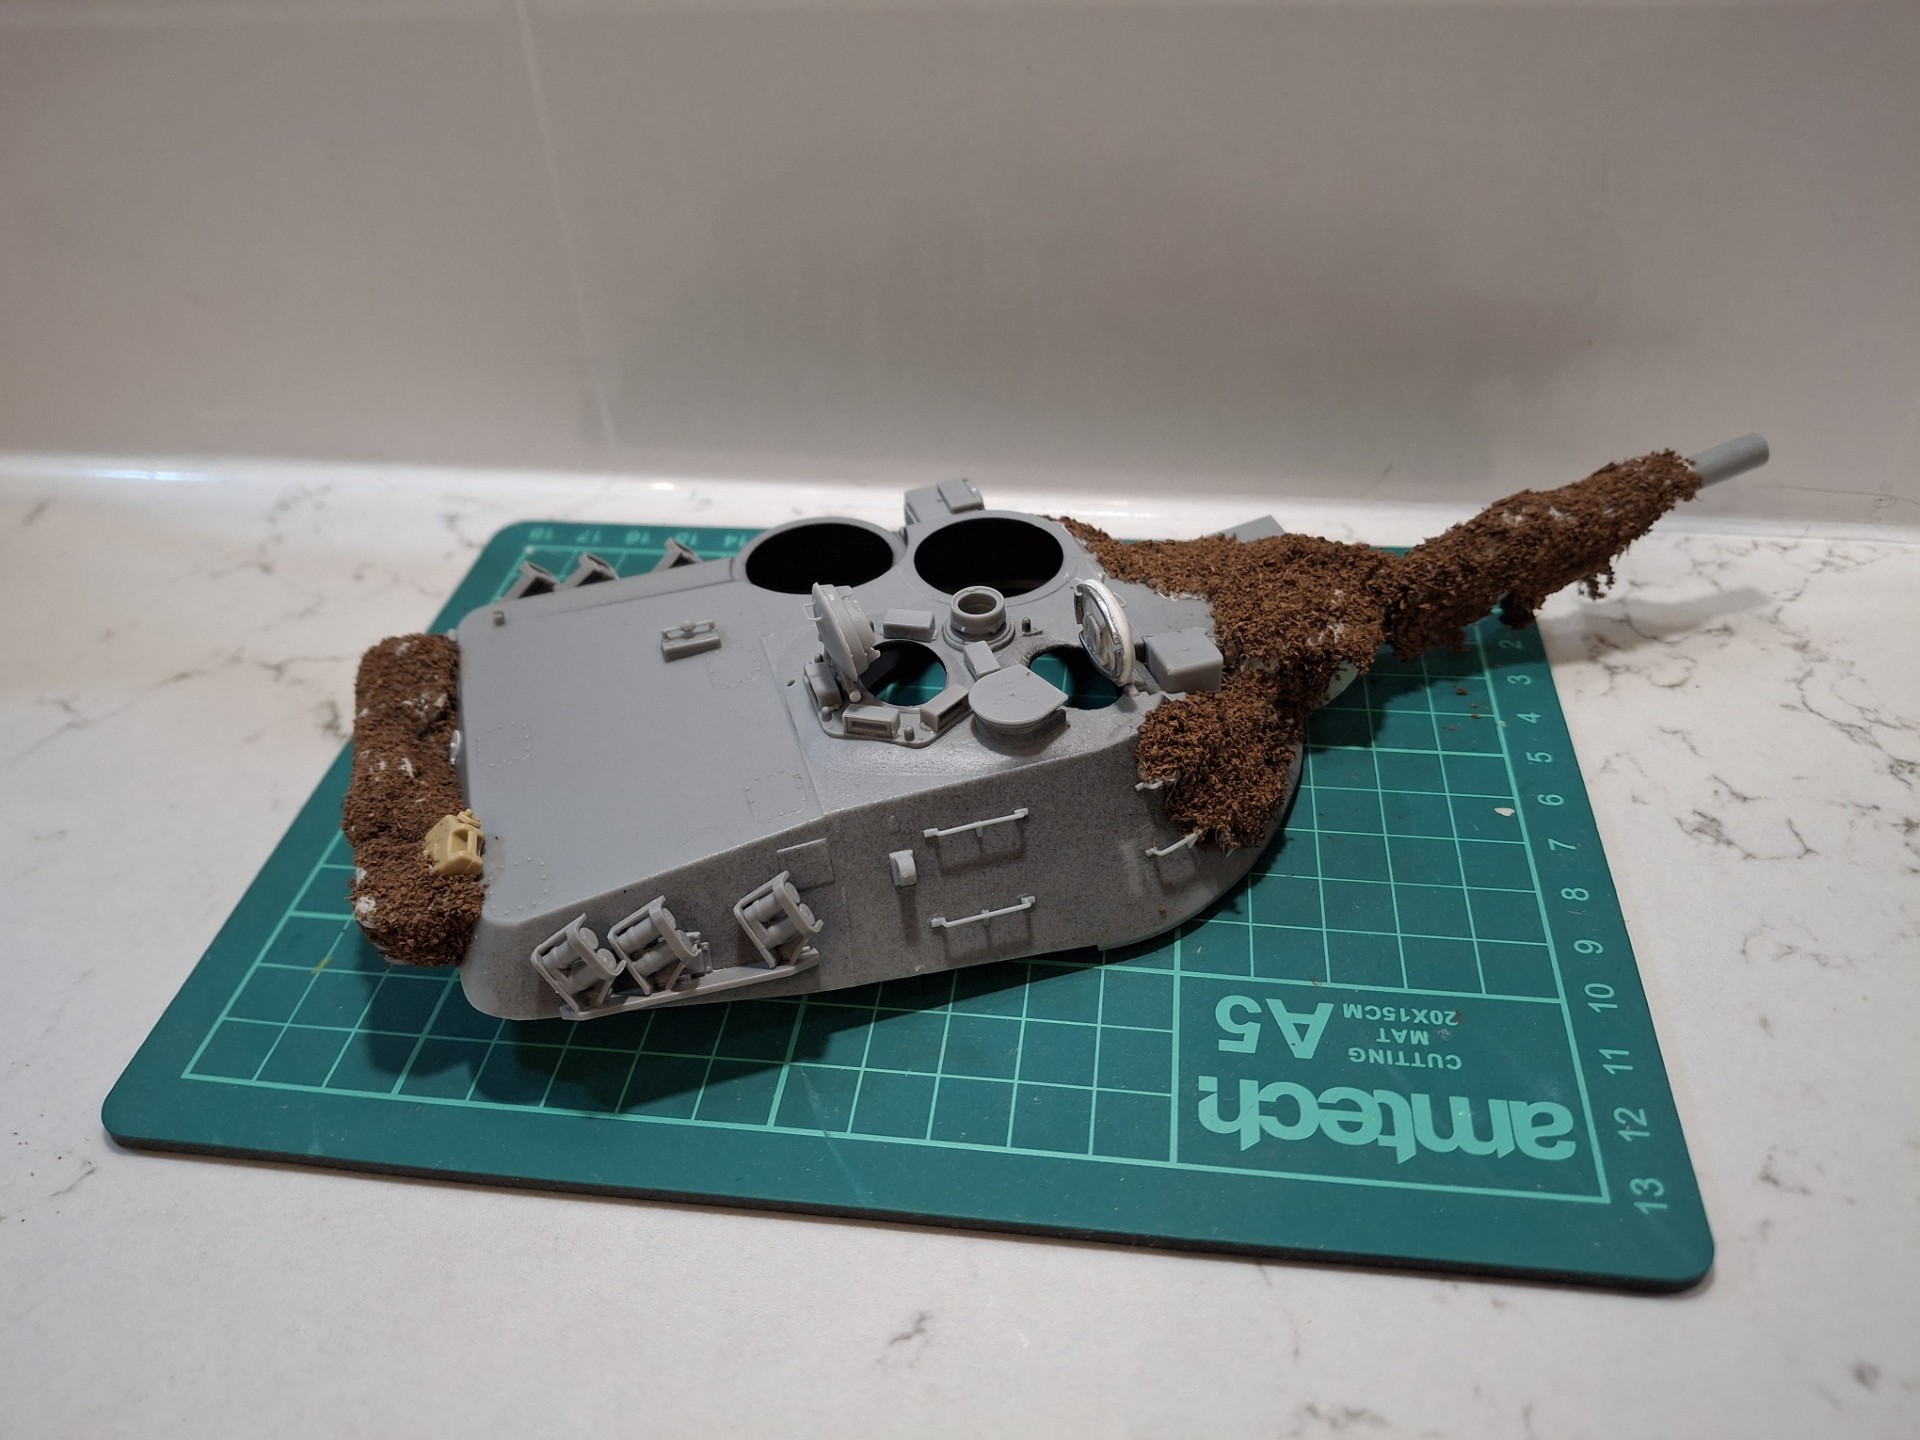
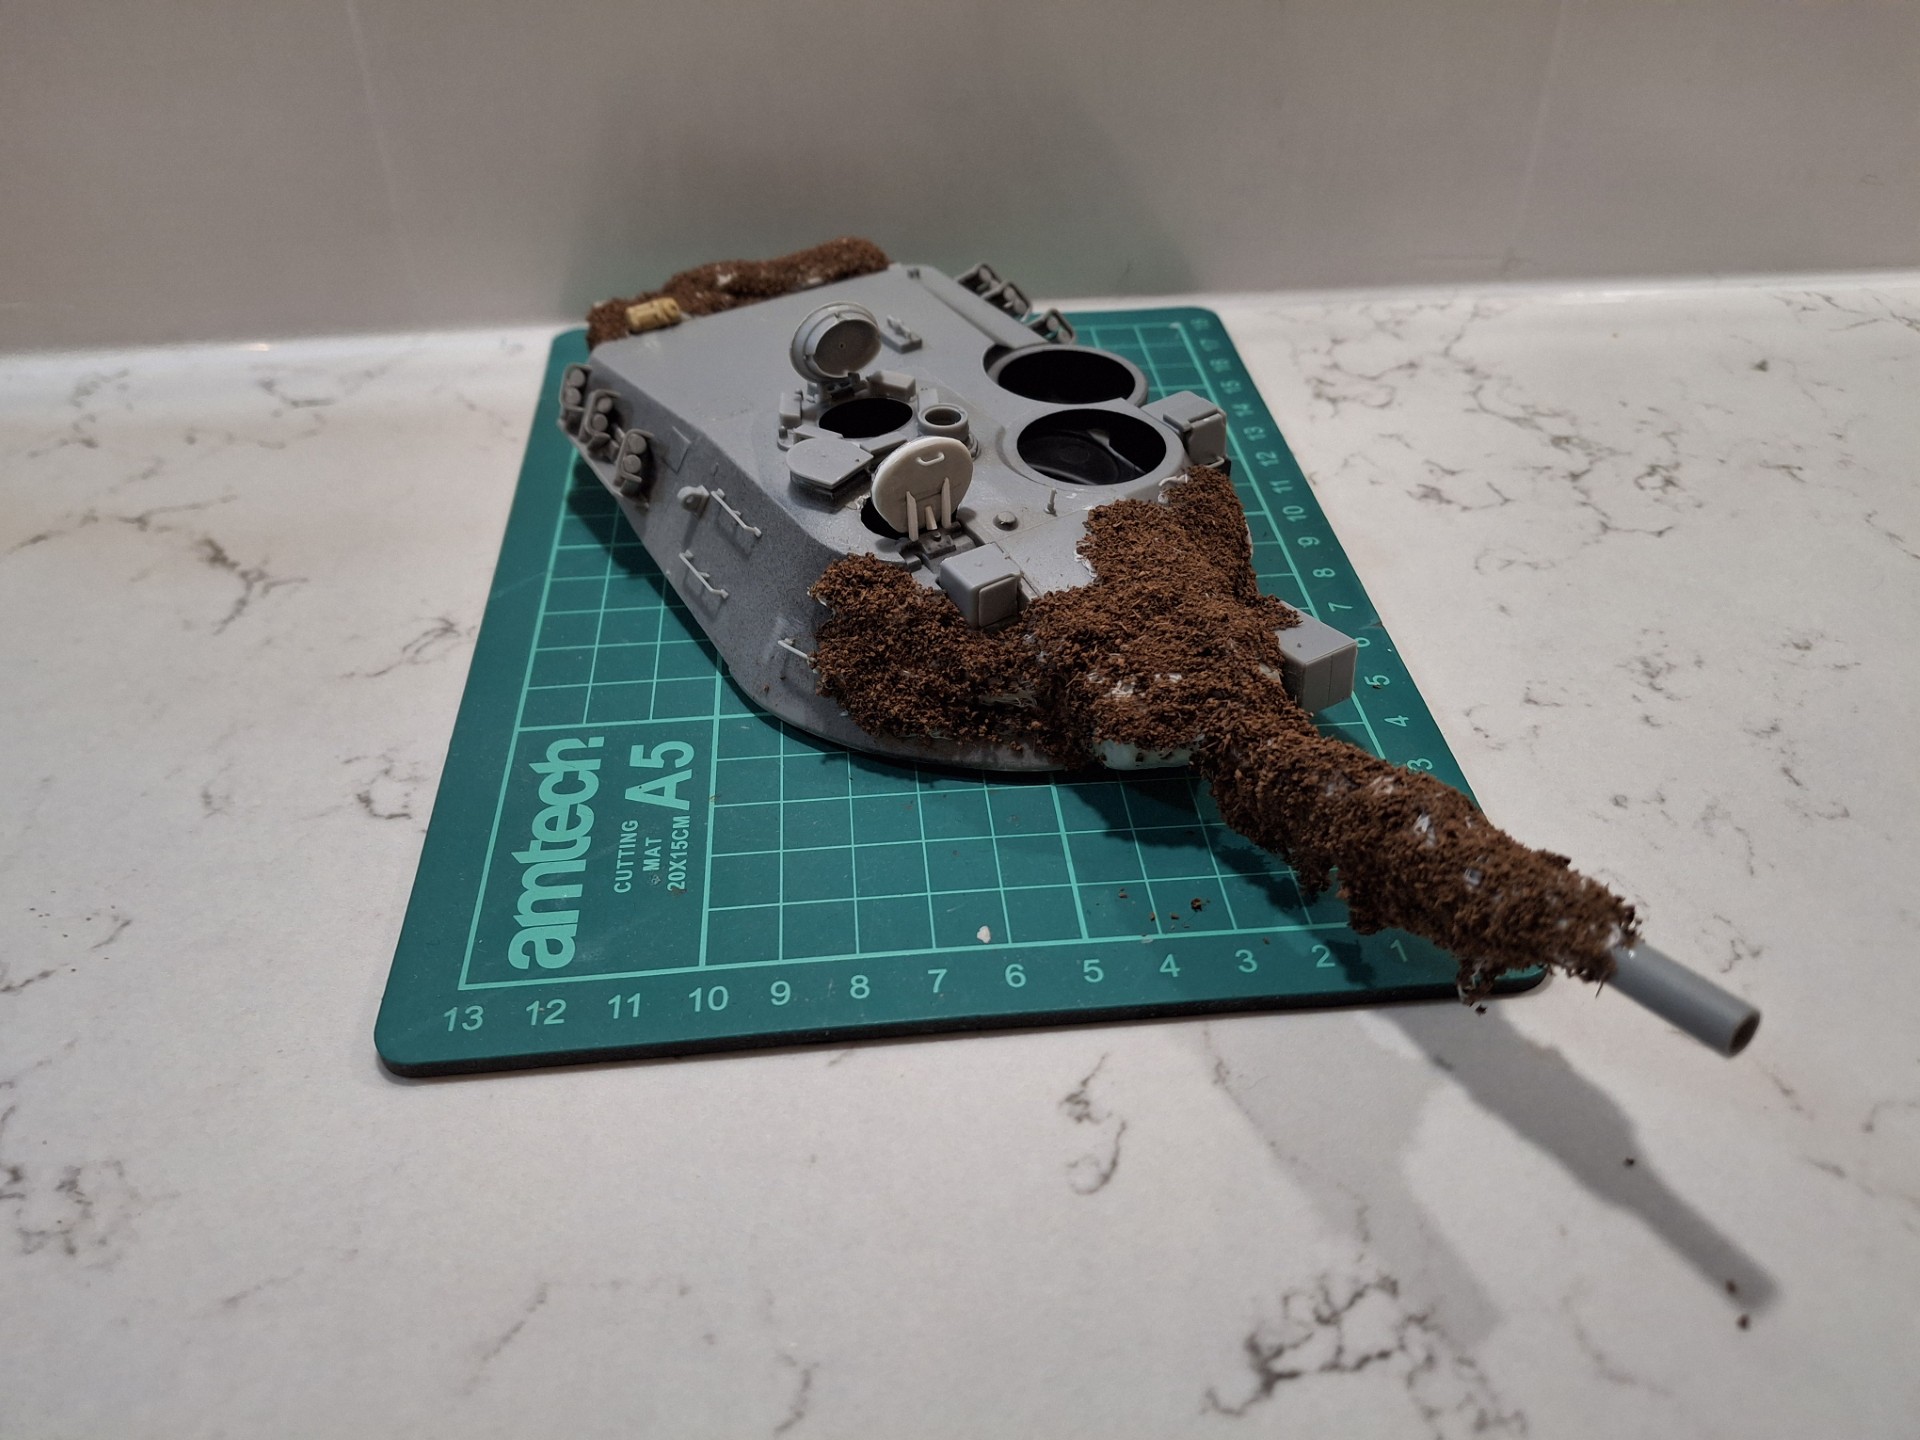
If this all looks a bit crude, once dry I will then cover it with used tea leaves to get the effect of a rolled camouflage net. When stowed the nets are so compressed that no, or hardly any, netting is exposed.
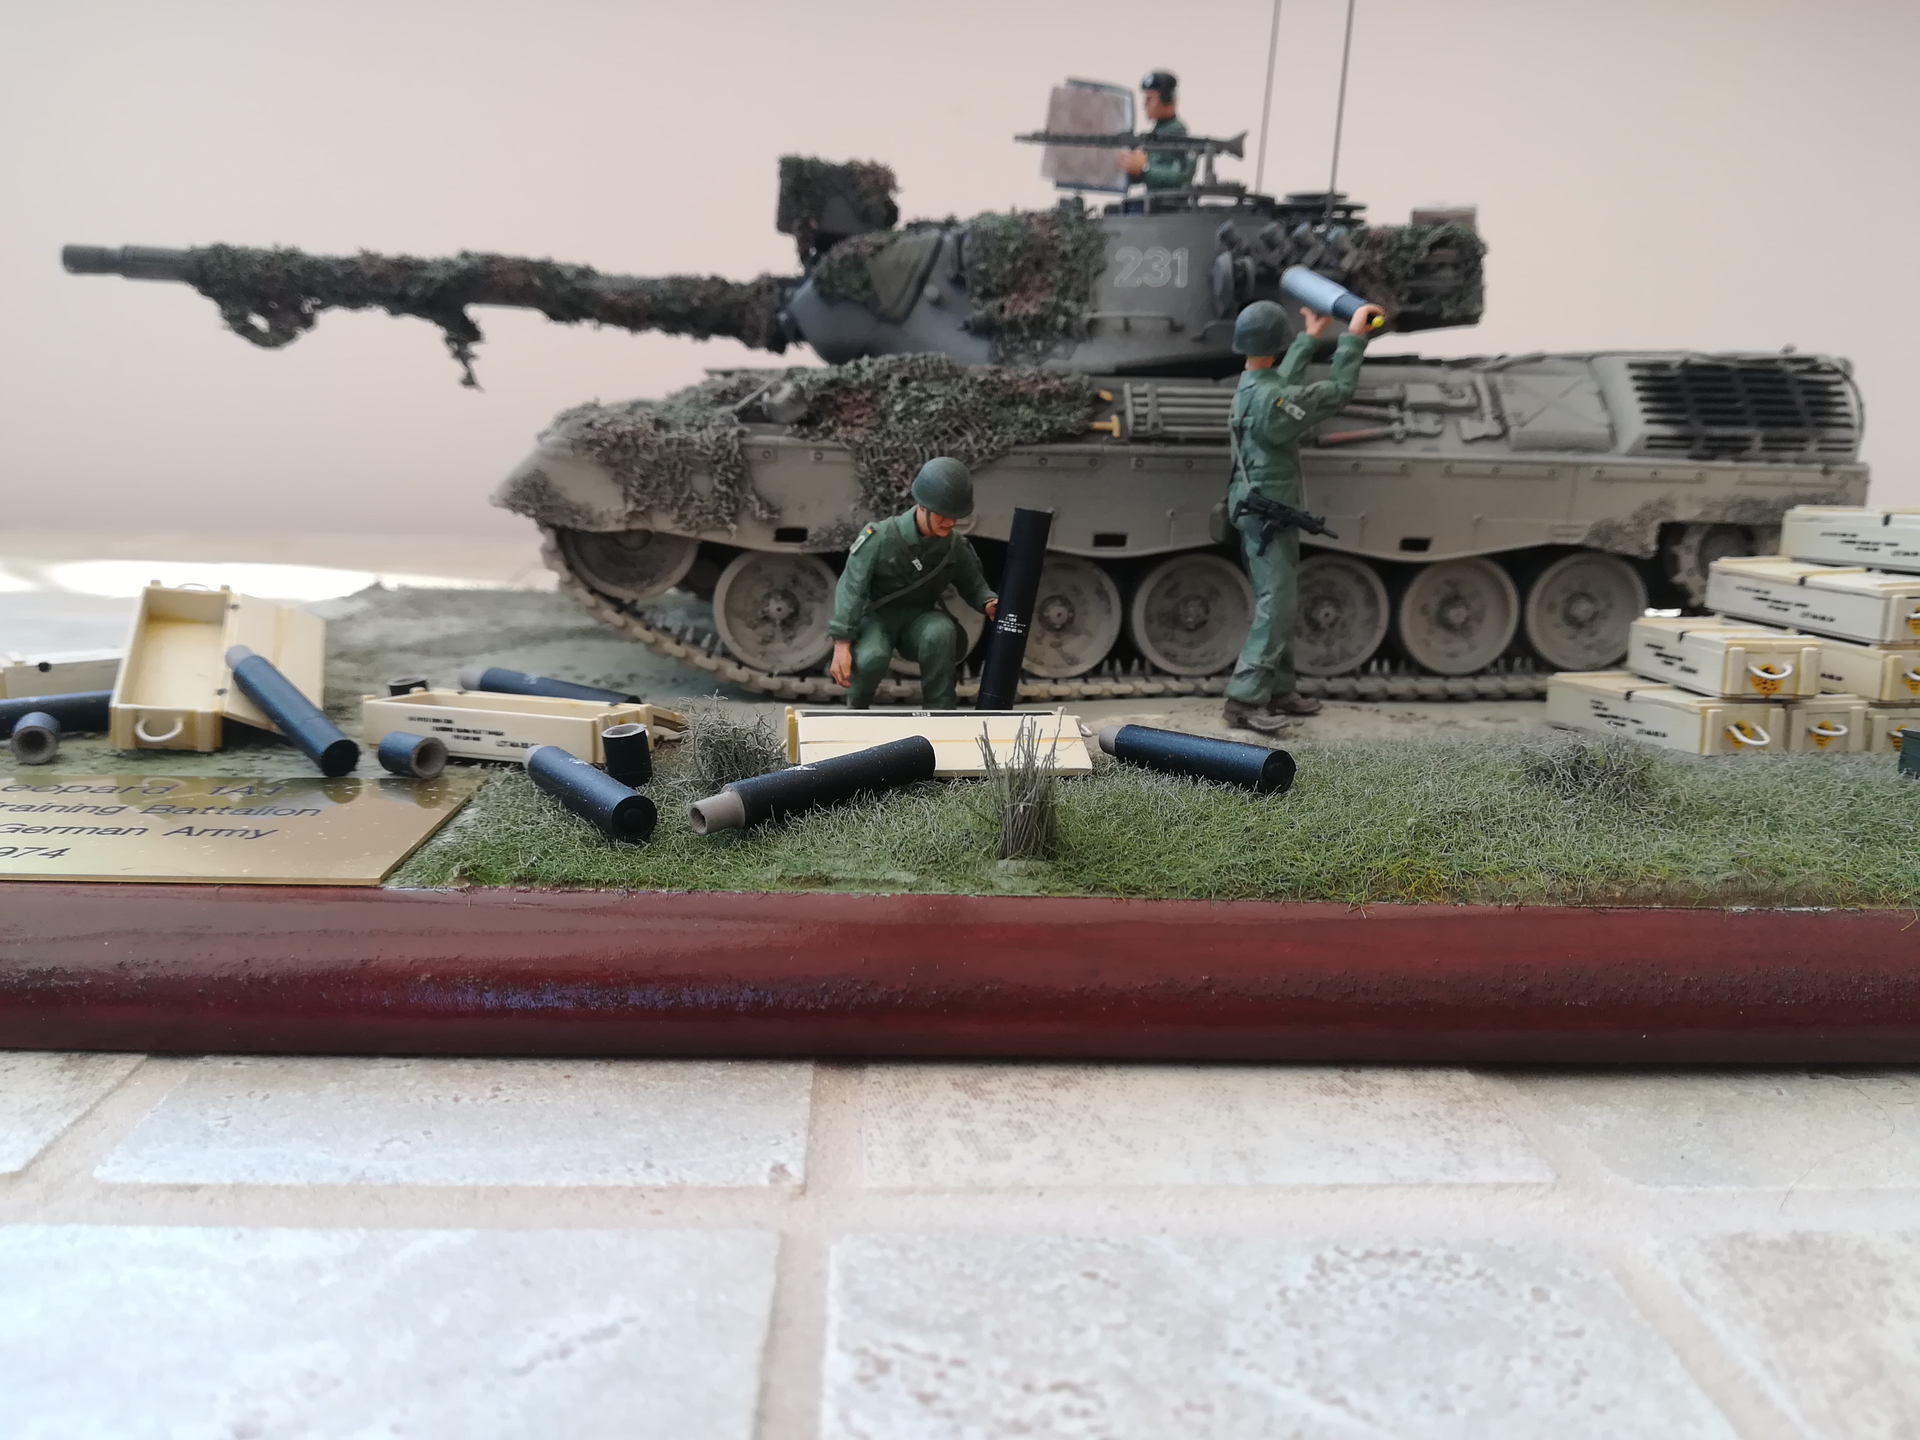
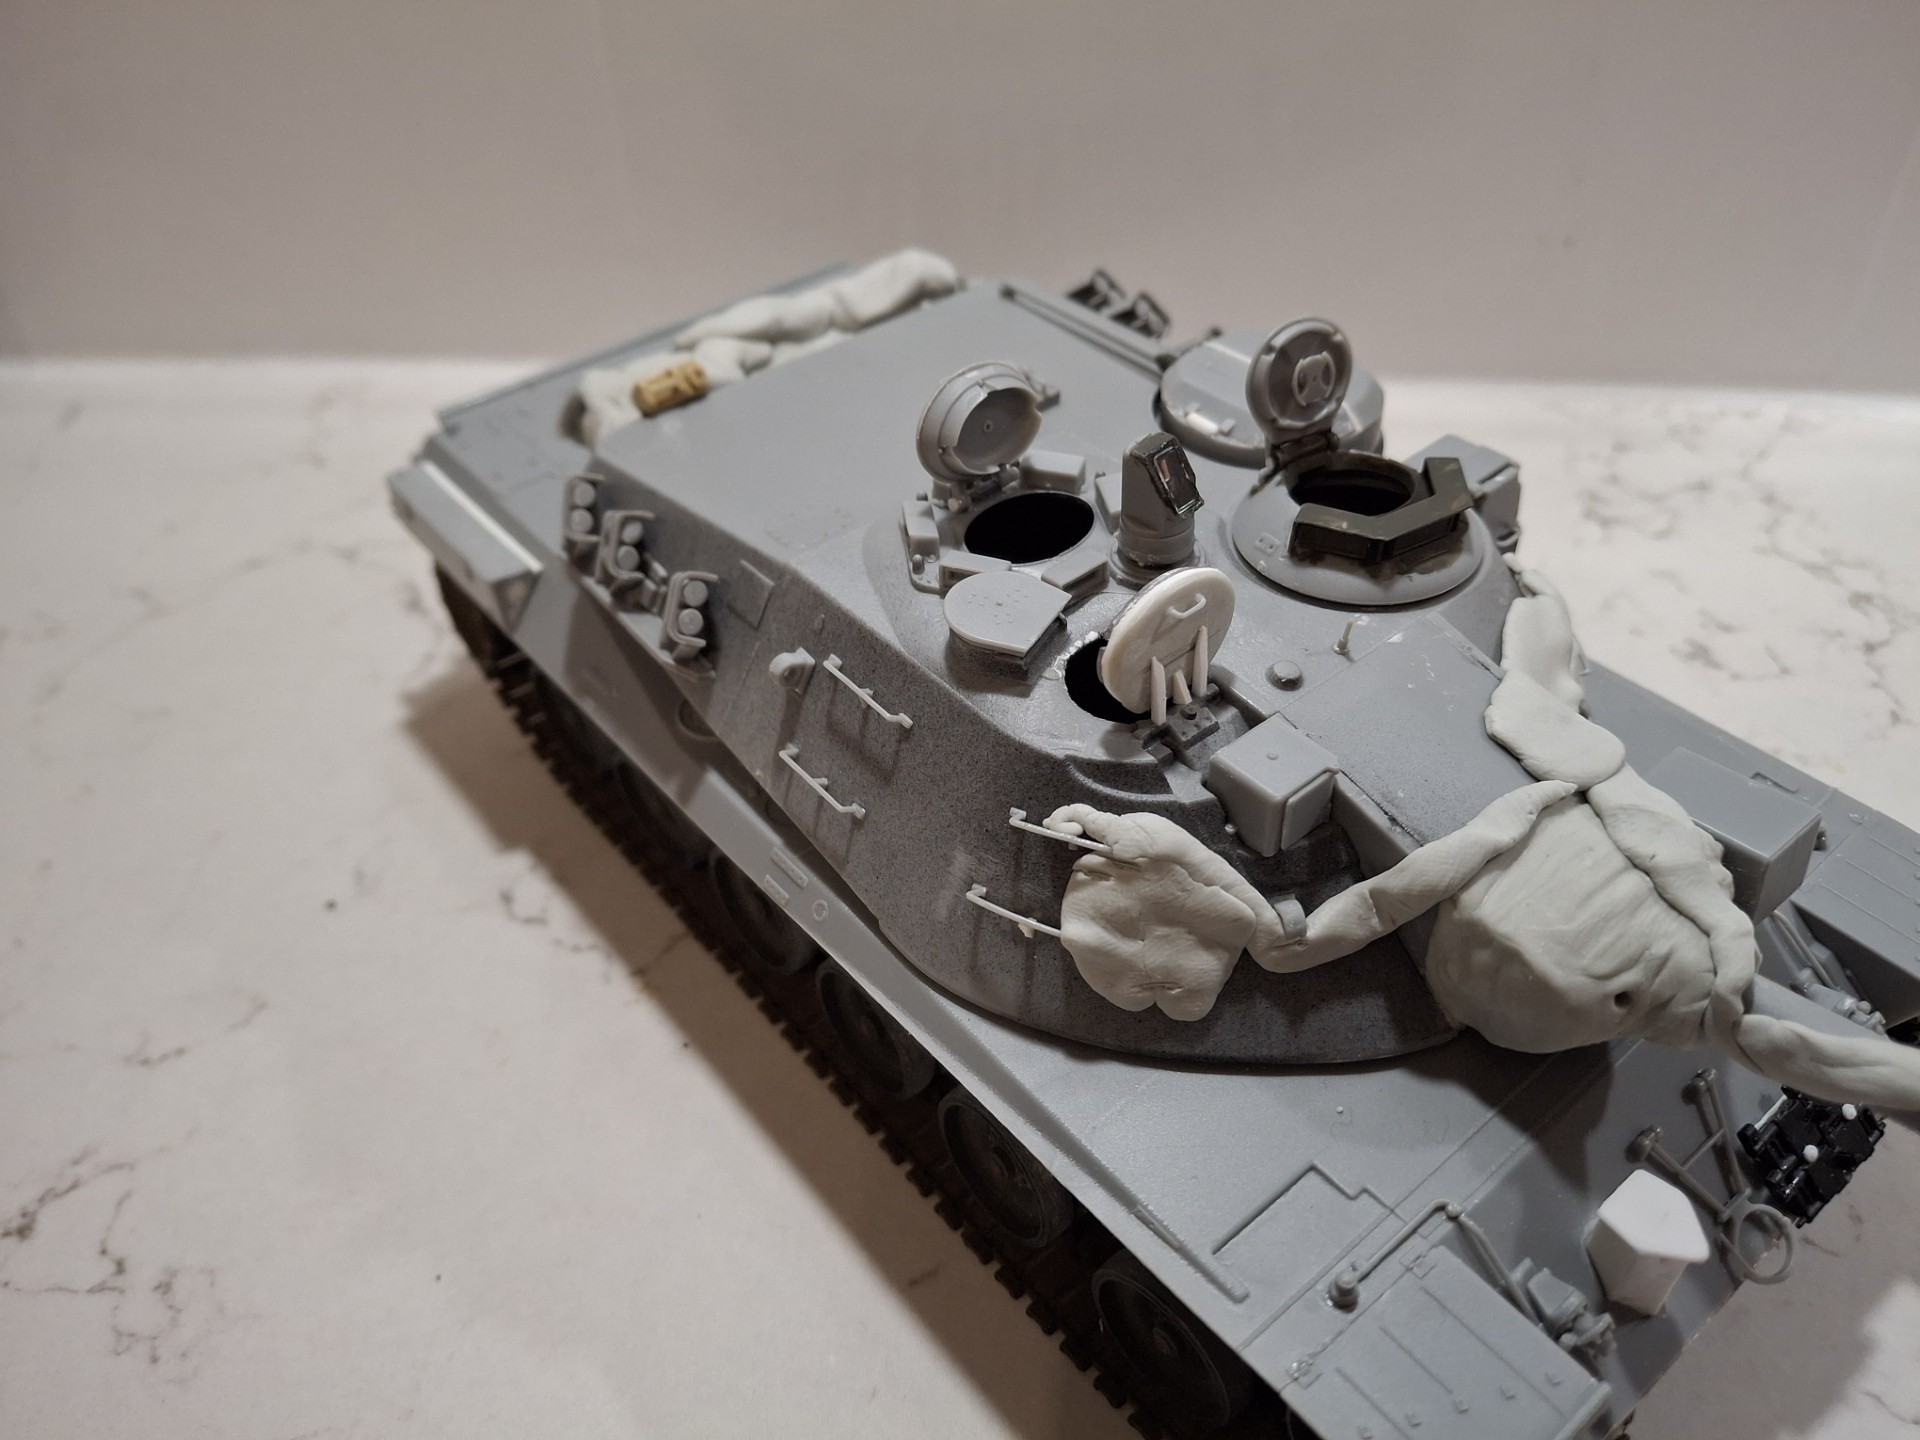
Now, this is where most modellers will think I’ve taken leave of my senses; all that lovingly installed detail, covered up with more apparently random, lumps of Magic Sculpt. Well, again, I wish to portray the model as an AFV on exercise, so am keen to portray draped cam nets. In this instance, there will be some netting visible, so I will model that using gauze bandage, and then add the tea leaves. This will, hopefully, give me the effect I require. I’ve used this methods before and to my ancient eyes, it works - as seen on my Leo 1A1 here:
So then:
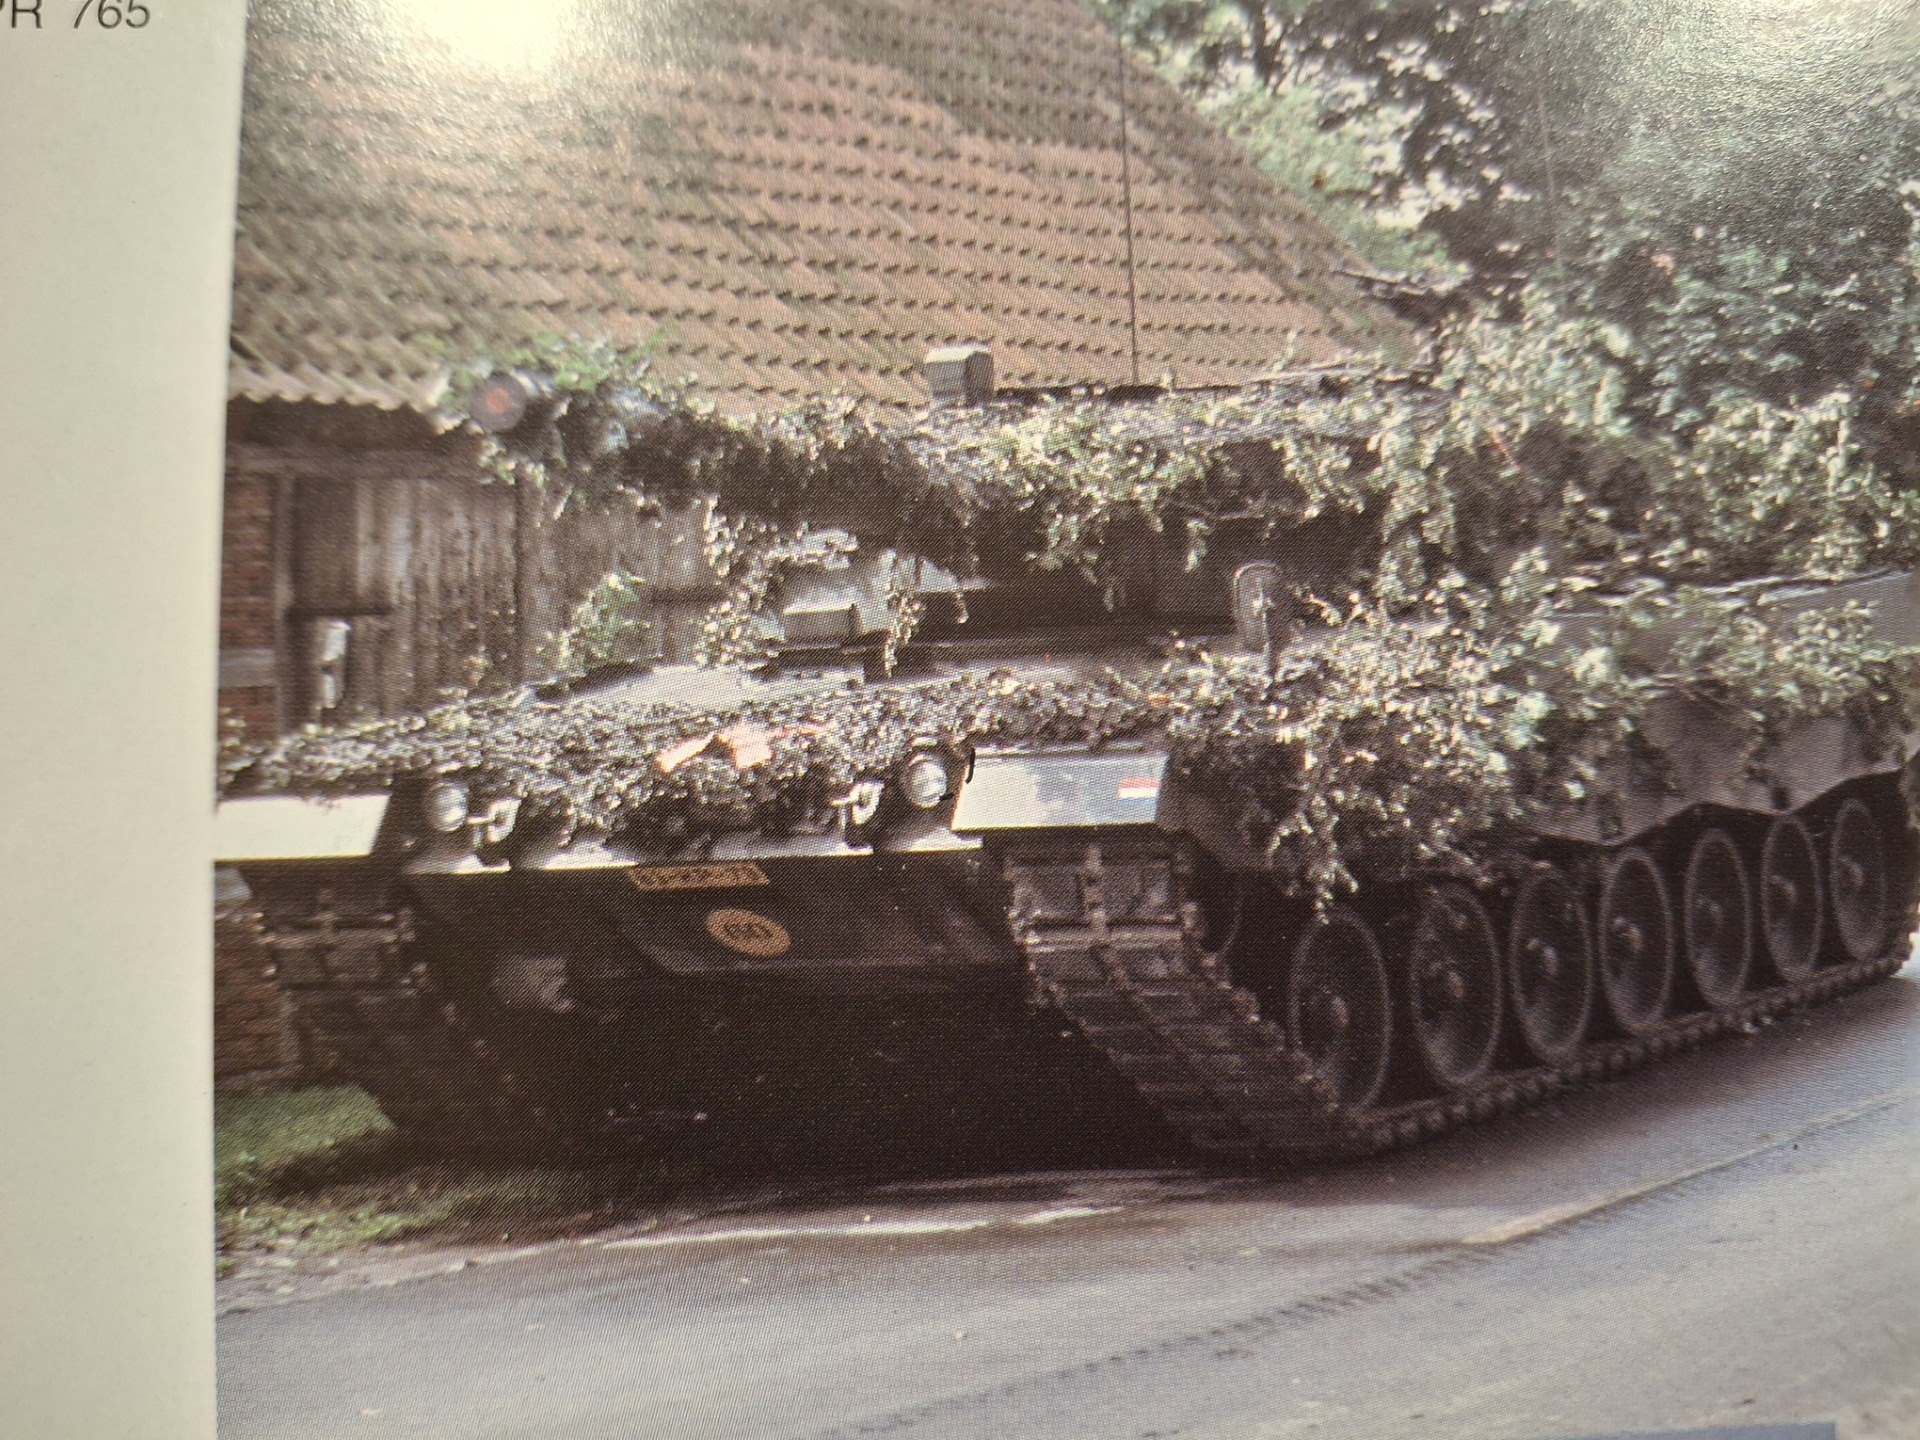
The effect I’m after is evident in these two, indispensable to Cold War modellers I feel, publications covering NATO’s Central Region:

and the images therein (of Dutch Leo 2s):


7 Likes
That’s coming along nicely, Brian! Can’t wait to see more…
1 Like
Thanks Tom.
1 Like
Nice project and not boring at all ![]()
![]()
2 Likes
Right onwards! Now time for my method of adding camouflage nets to the vehicle - or draped cam as we used to call it.
First the components:

PVA glue - diluted and placed in a shallow dish - I use a saucer; gauze bandage cut into roughly, 2” squares, and two sets of tweezers; paper towel ready to drain-off excess glue.
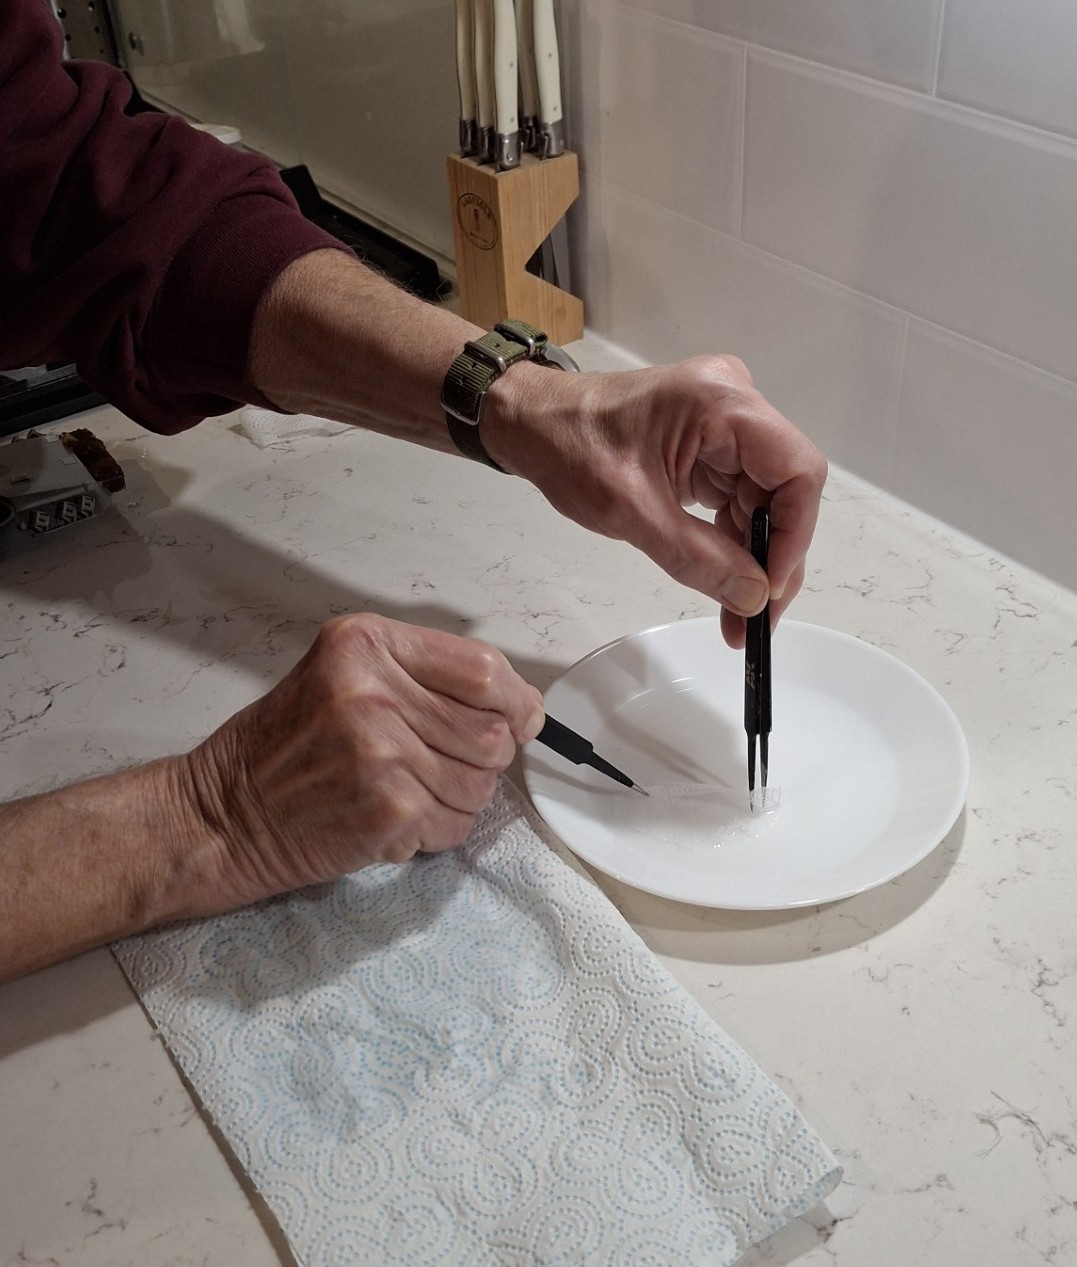
All taking place in my kitchen(!()
Place section of gauze into diluted glue; a bit difficult to discern in this pic I admit. It will immediately lose its shape as if sort of slurps up all the liquid (which if you think about it, is what a bandage is designed to do).
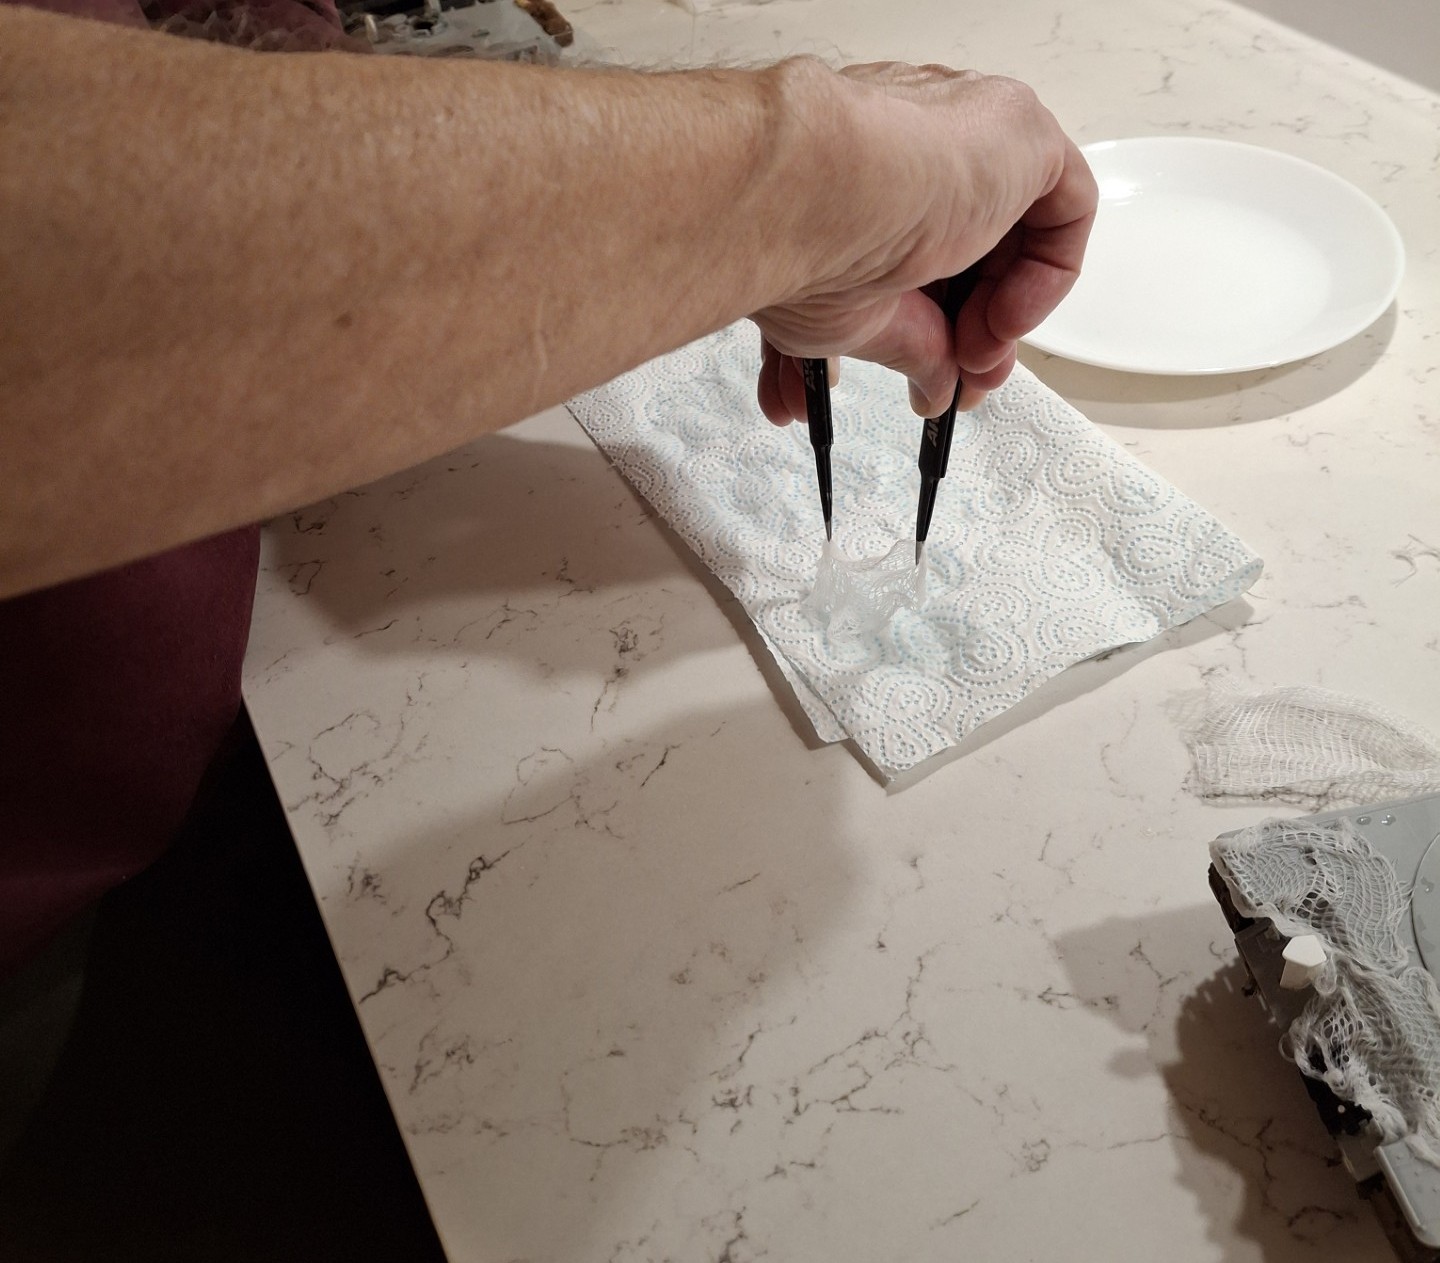
Remove as best as you are able using the tweezers, and drain on the paper towel.
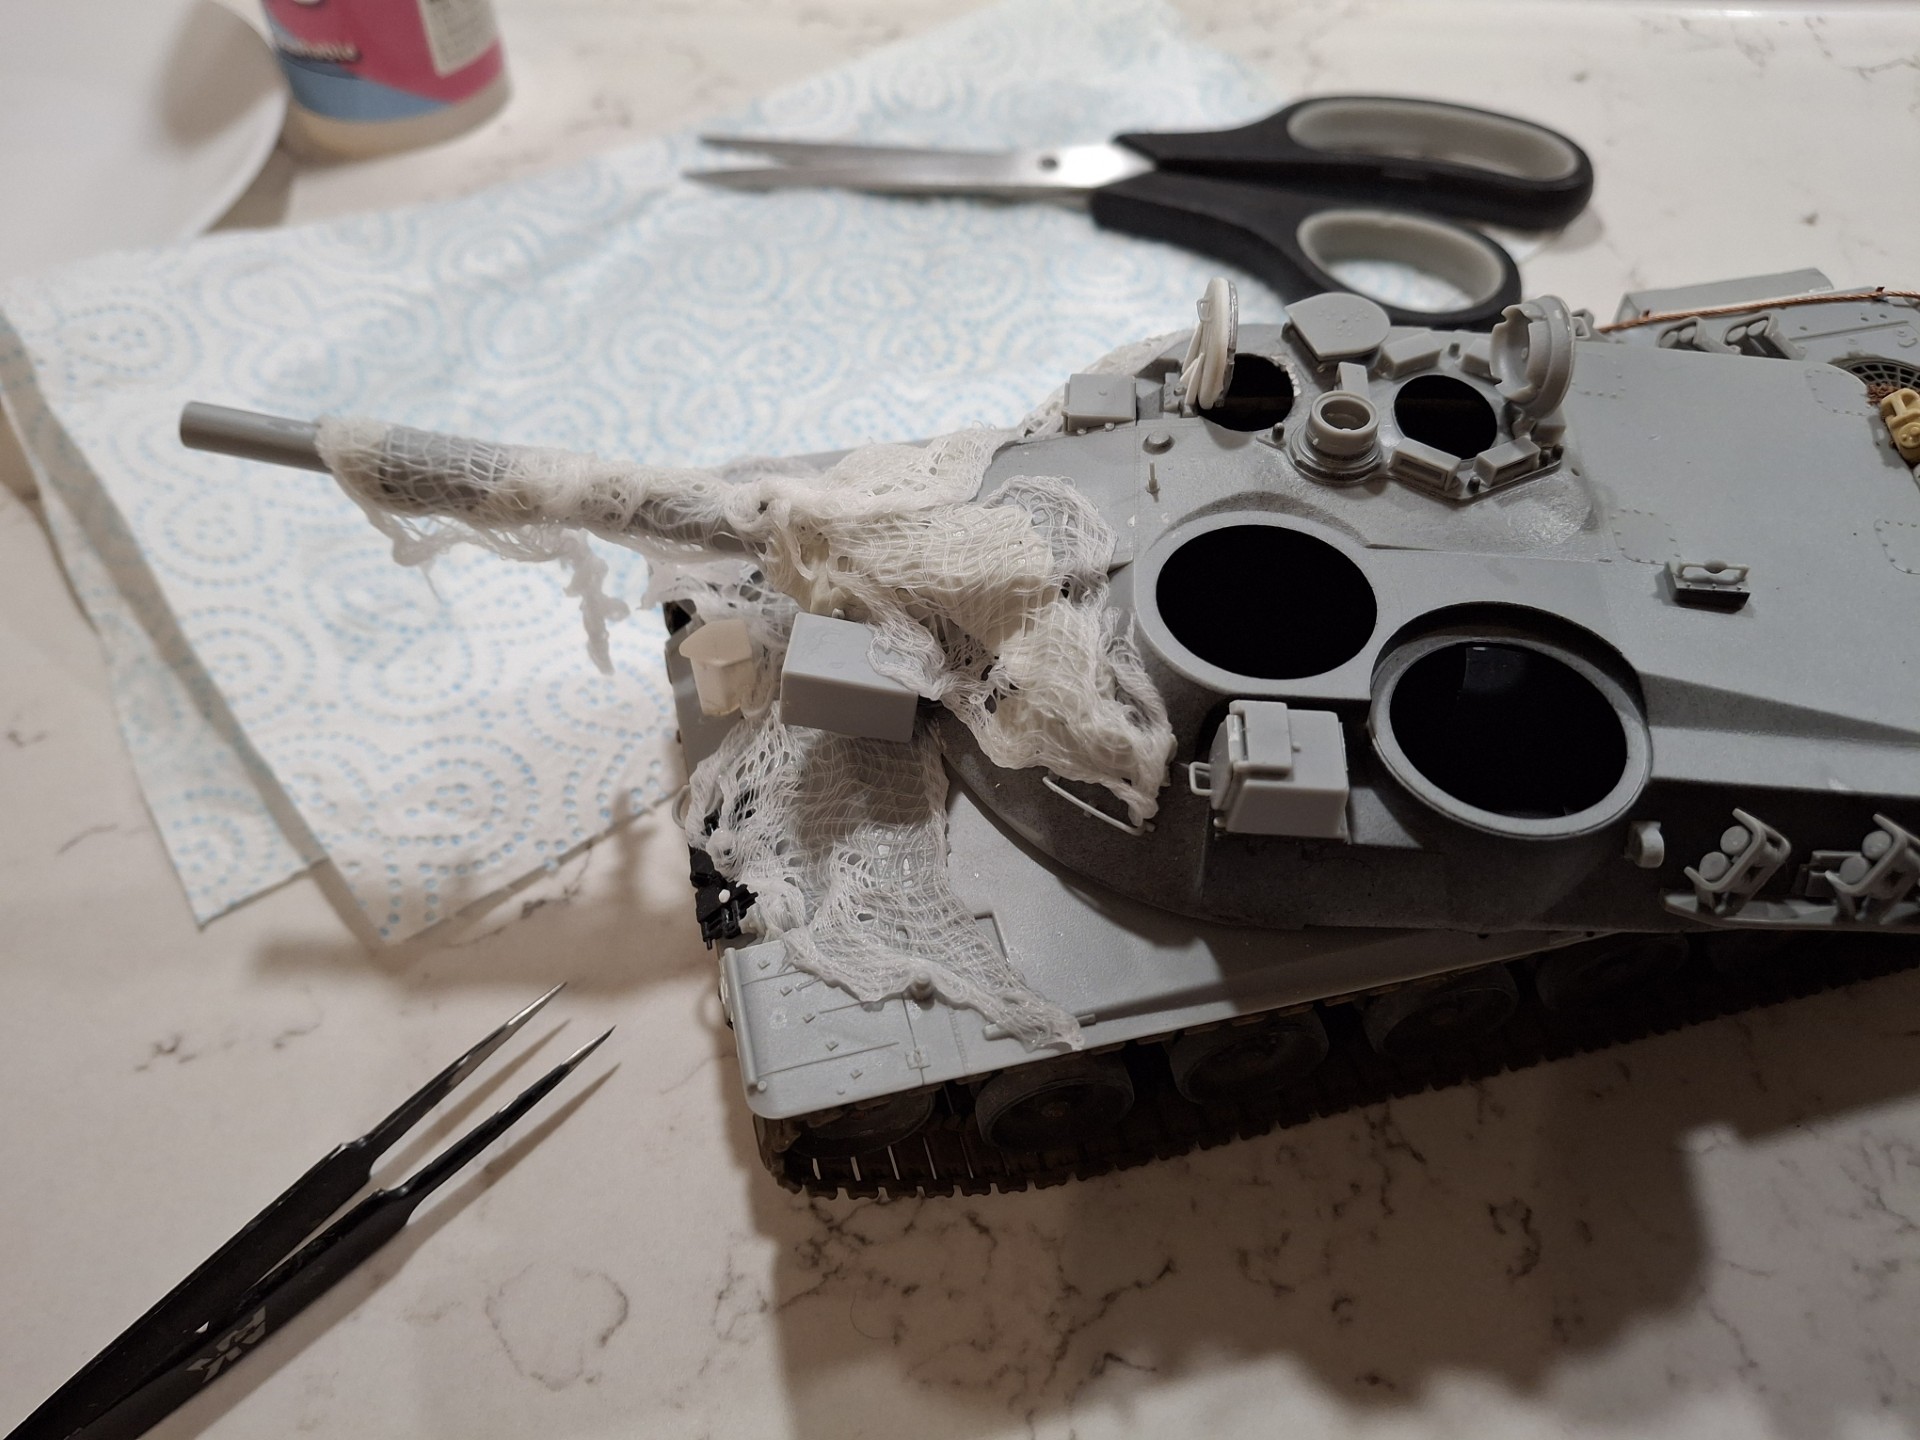
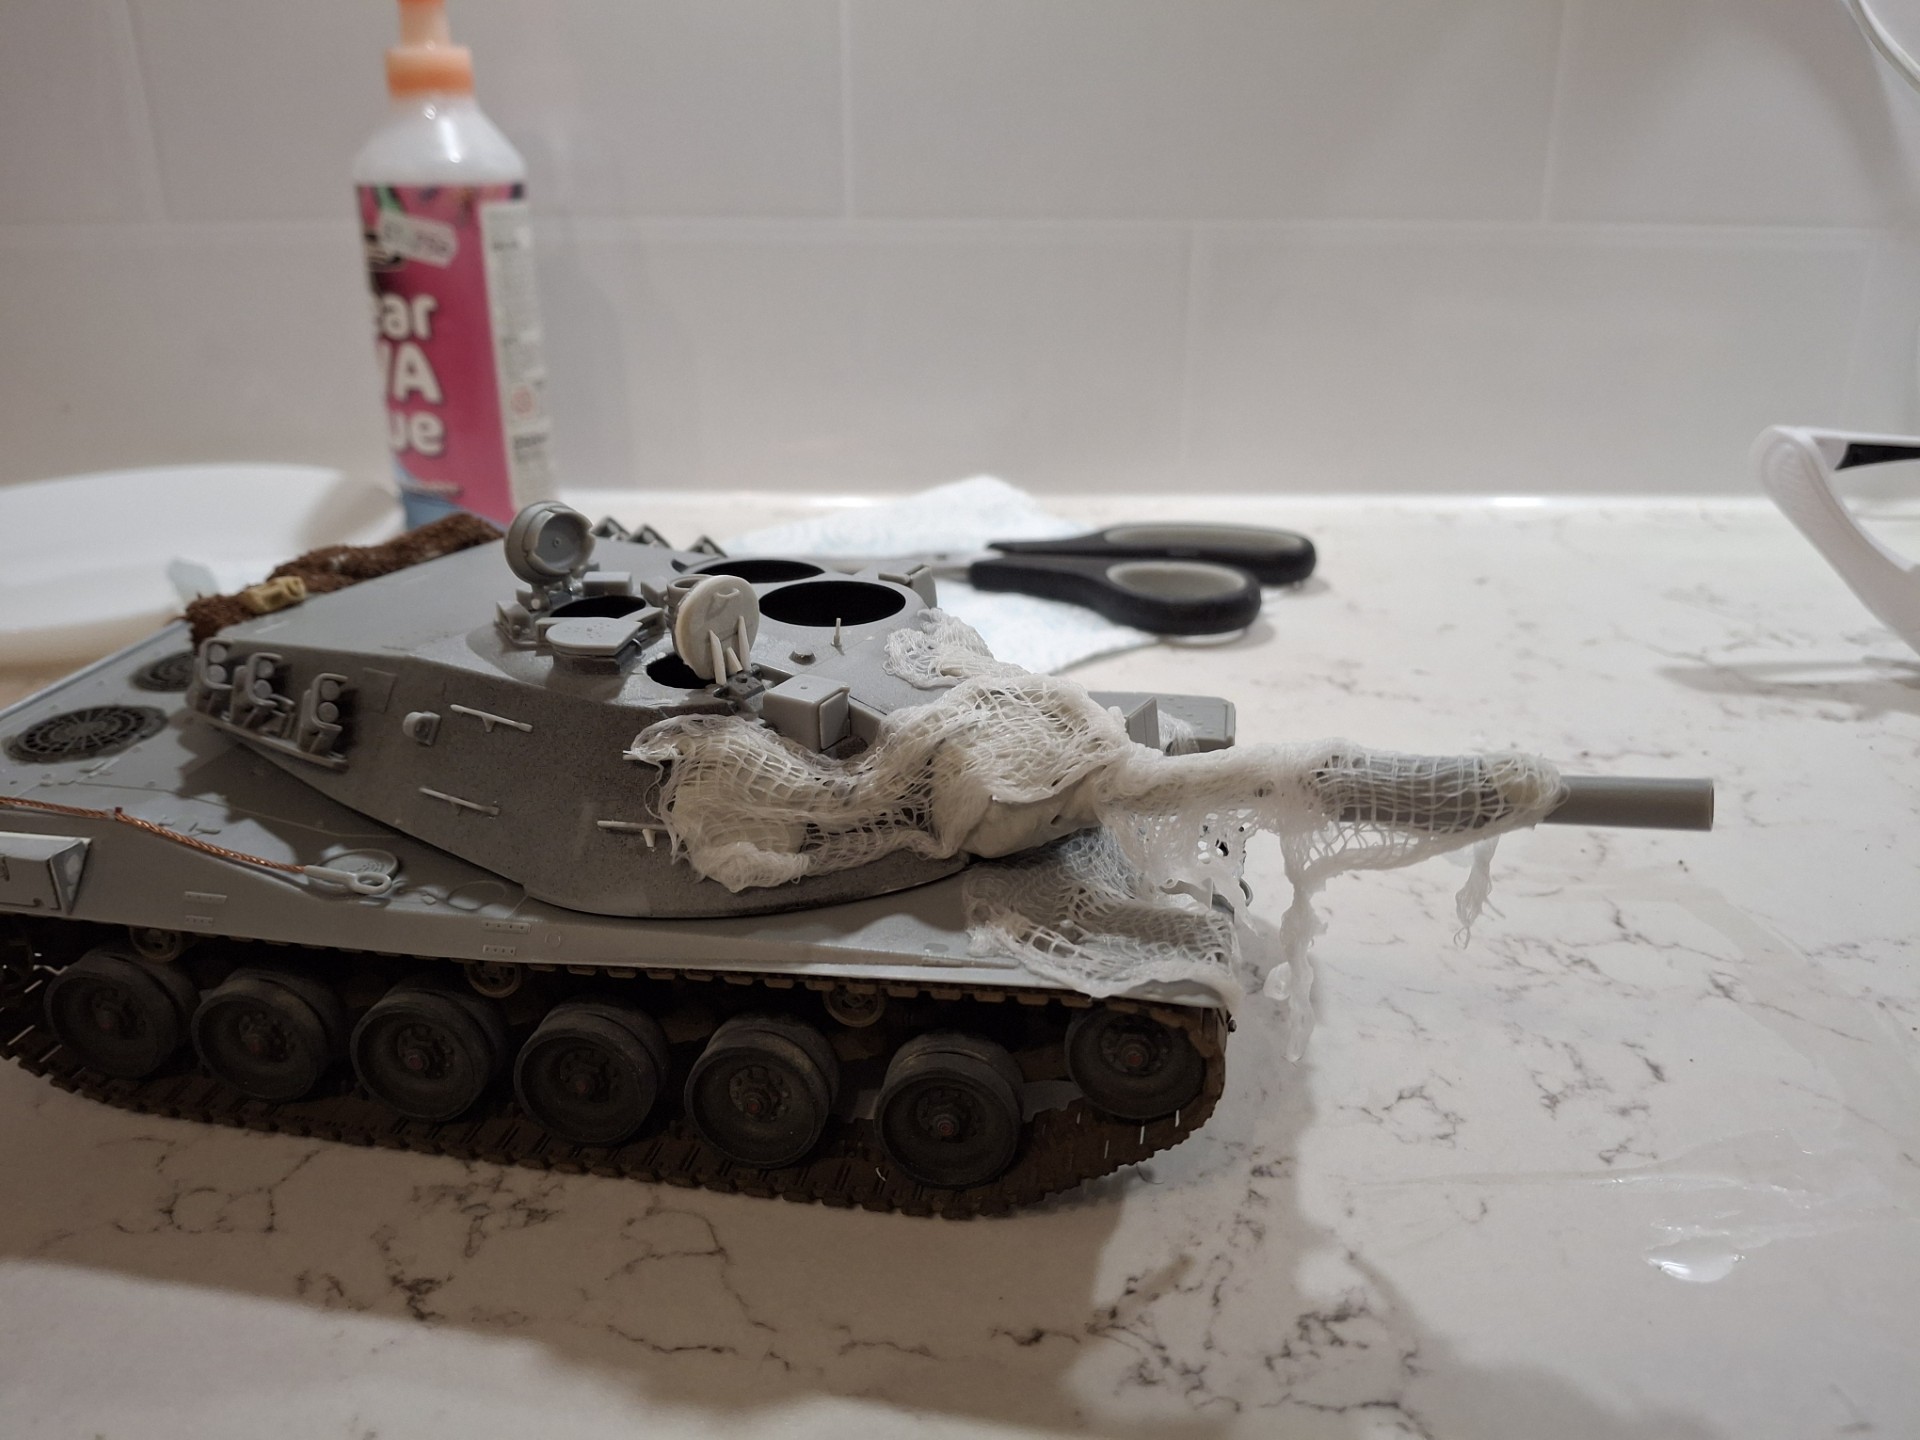
Place on to model where you desire the nets to be; it will still be difficult to retain the square but that doesn’t matter too much; prod and poke into shape as necessary. Don’t worry about the shape too much, it can always be trimmed with scissors once dry, talking of which, an overnight stay in the airing cupboard is now called for.
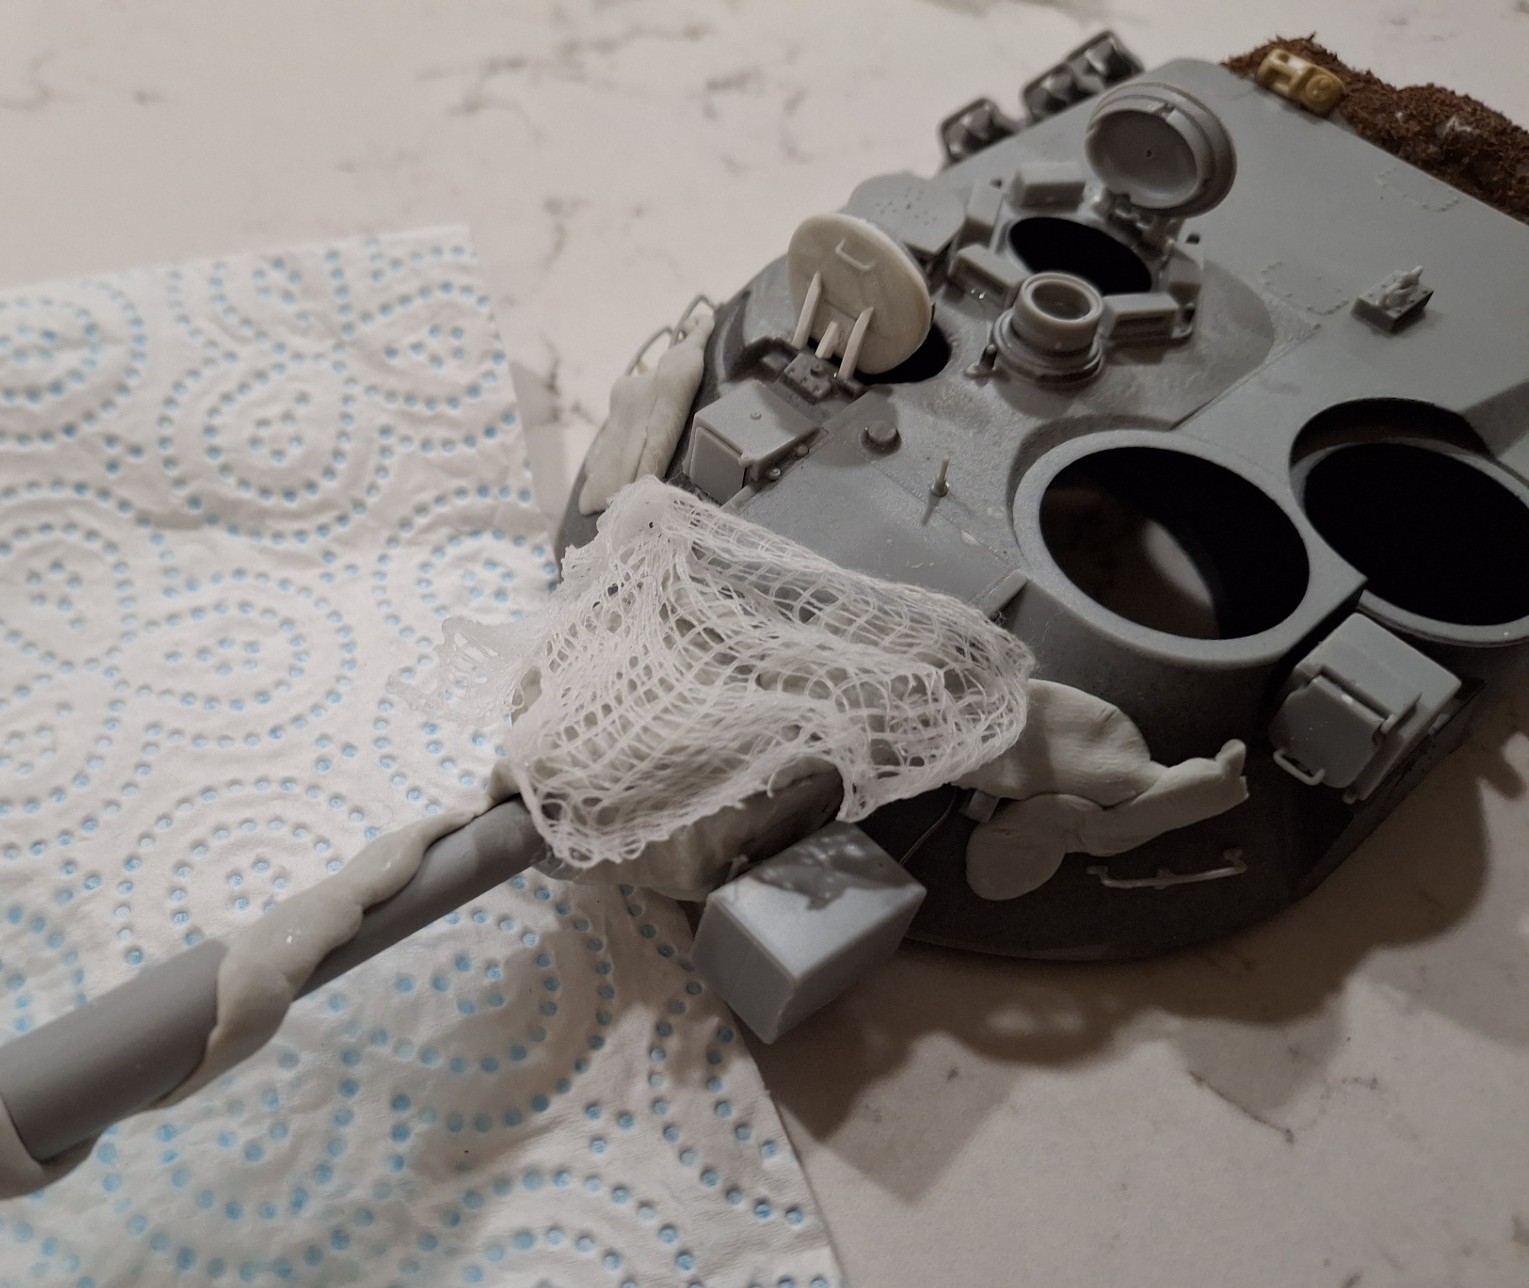
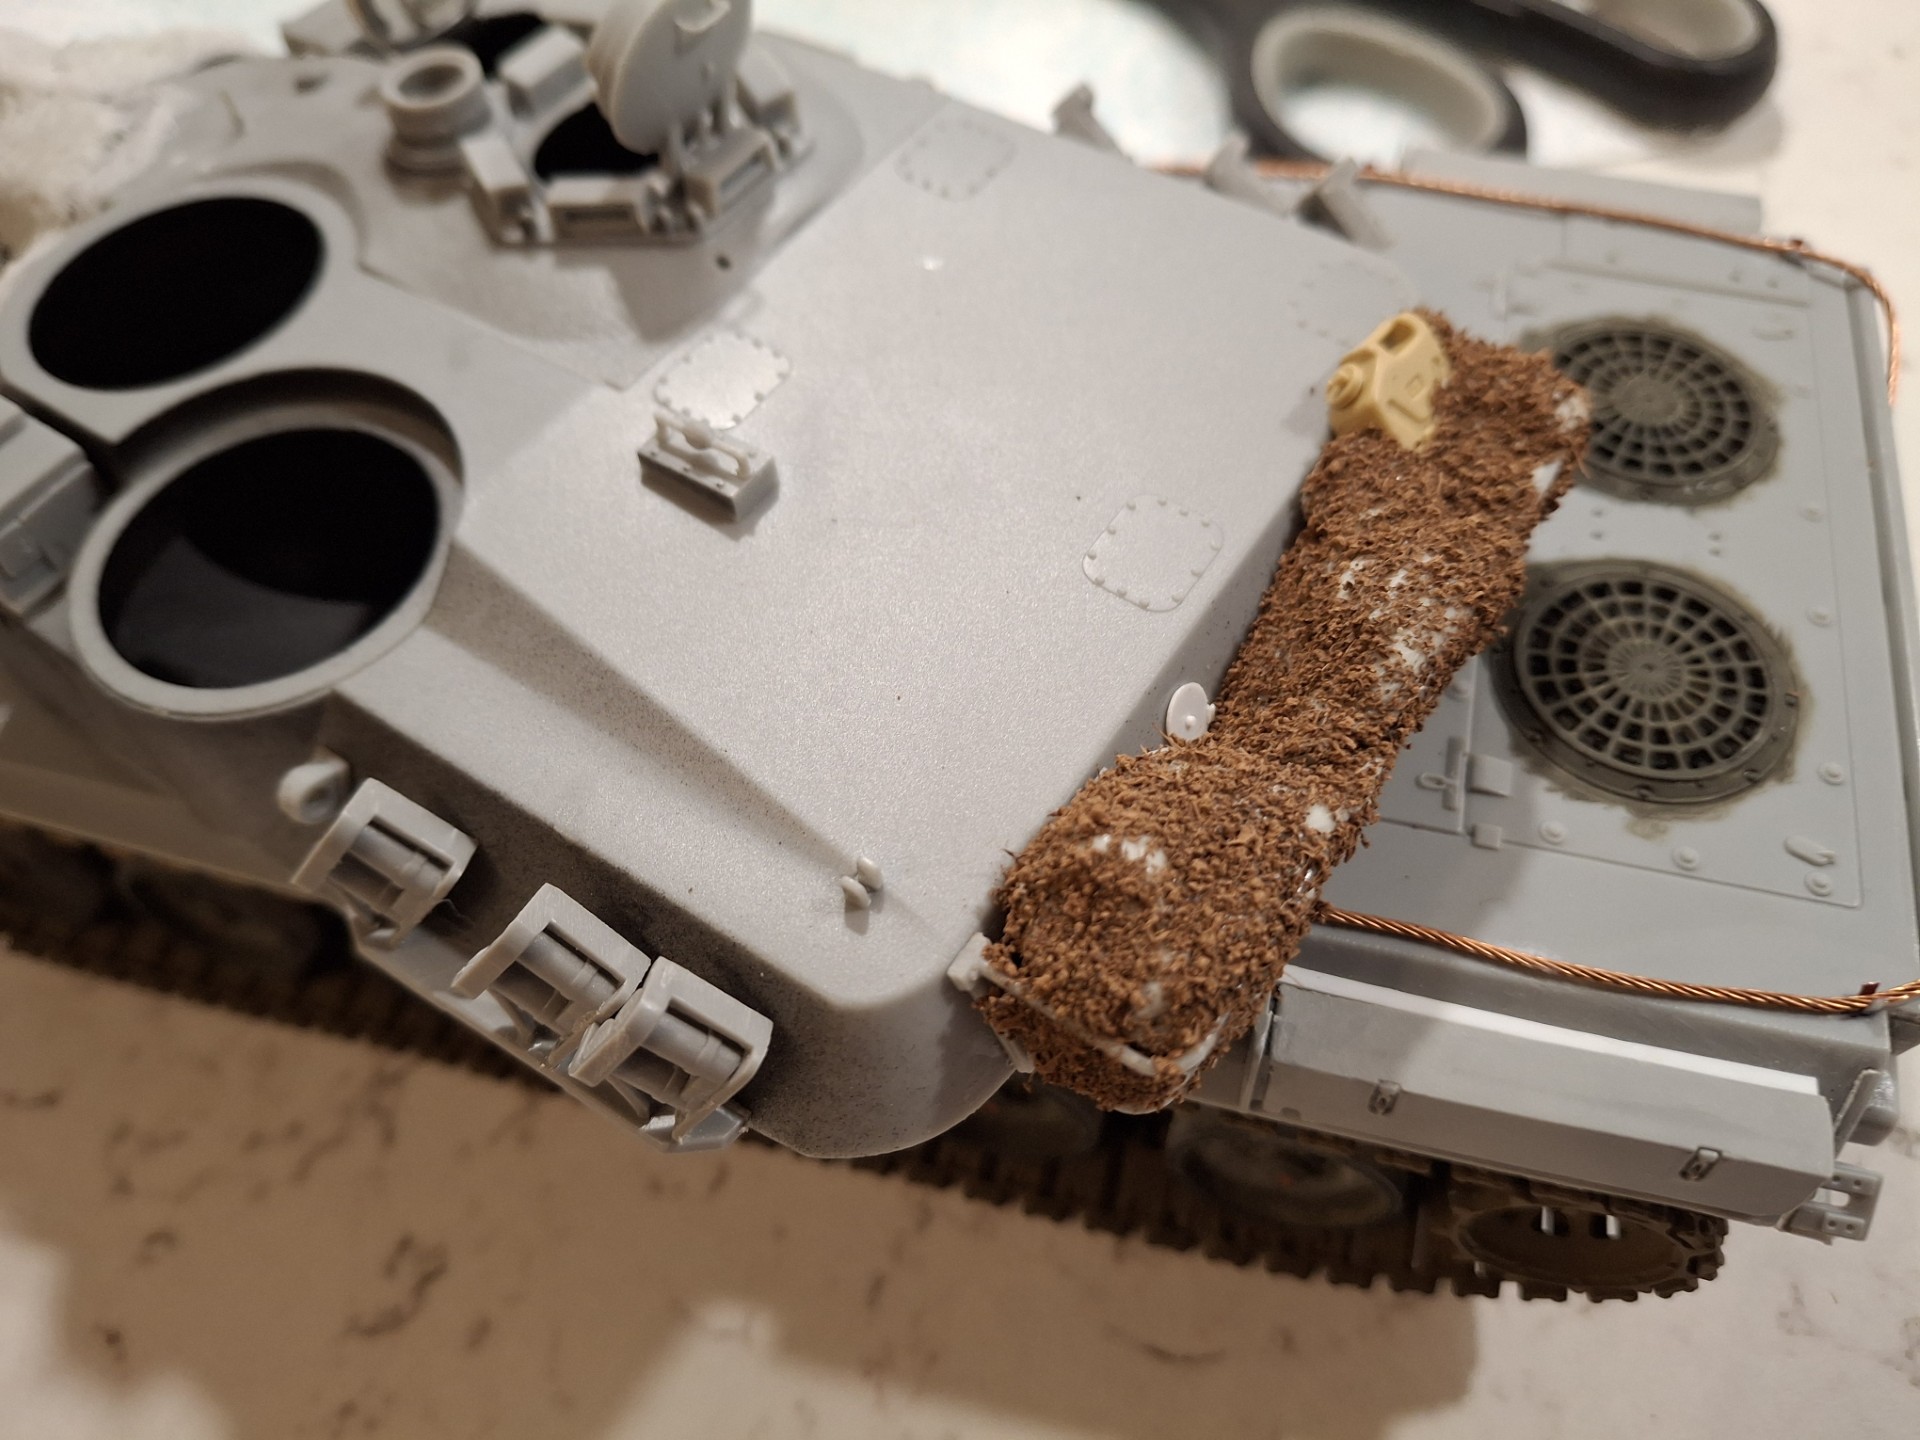
Remember, this is just the netting; the plastic scrim patches on the real thing, will be replicated by used tea leaves; talking of which, here’s the first application replicating the packed camouflage net in the rear stowage rack. Some touching up to do but that’s an easy fix.
5 Likes
Did you read the tea leaves first to see how it would turn out? ![]()
Seriously though, do you have a preferred brand of tea? I suspect different teas will have different-sized leaves etc that would affect the outcome. That stowed net is crackin’ by the way!
1 Like
The tea of course, is crucial, though I understand the same effect can be gained by using commercial model railway flock if it’s of the right size and consistency. It does take a bit of experimentation; I found a brand supplied by Tesco’s which has, more or less, a fairly even consistency of size, so I use that. I must just stress - across the generations here - that I’m talking about fresh tea, not tea bags. So, the English faff of pre-warming the pot, adding tea (“one for each person, one for the pot”), pouring the hot water, letting it brew for 4 minutes exactly (at least to my taste), then pass through a tea-strainer (clue’s in the name chaps), then adding the milk, to taste. Do not, ever, put the milk in first; why? Because the scalding hot tea will caramelise it and spoil the taste. So now you know.
So, after partaking of a fairly decent brew, then decant the tea leaves from the strainer onto say, a paper-towel covered plate, place in the airing cupboard, and lo! And Behold” Instant cam-net effect, more or less.
Probably easier to track down some railway flock(!)
Lastly, a bit of product placement:

6 Likes
Thanks! The important step of course is enjoying the cuppa…
3 Likes
And now for the application of tea leaves using a slightly thicker mix of diluted PVA glue (to be honest, any adhesive would work). This can be a bit laborious as the leaves don’t always adhere, and some will fall off, so quite a bit of re-application can be required:

7 Likes
I’m gonna copy that, for sure.
2 Likes
Tow ropes now installed à la Leopard 2 style:

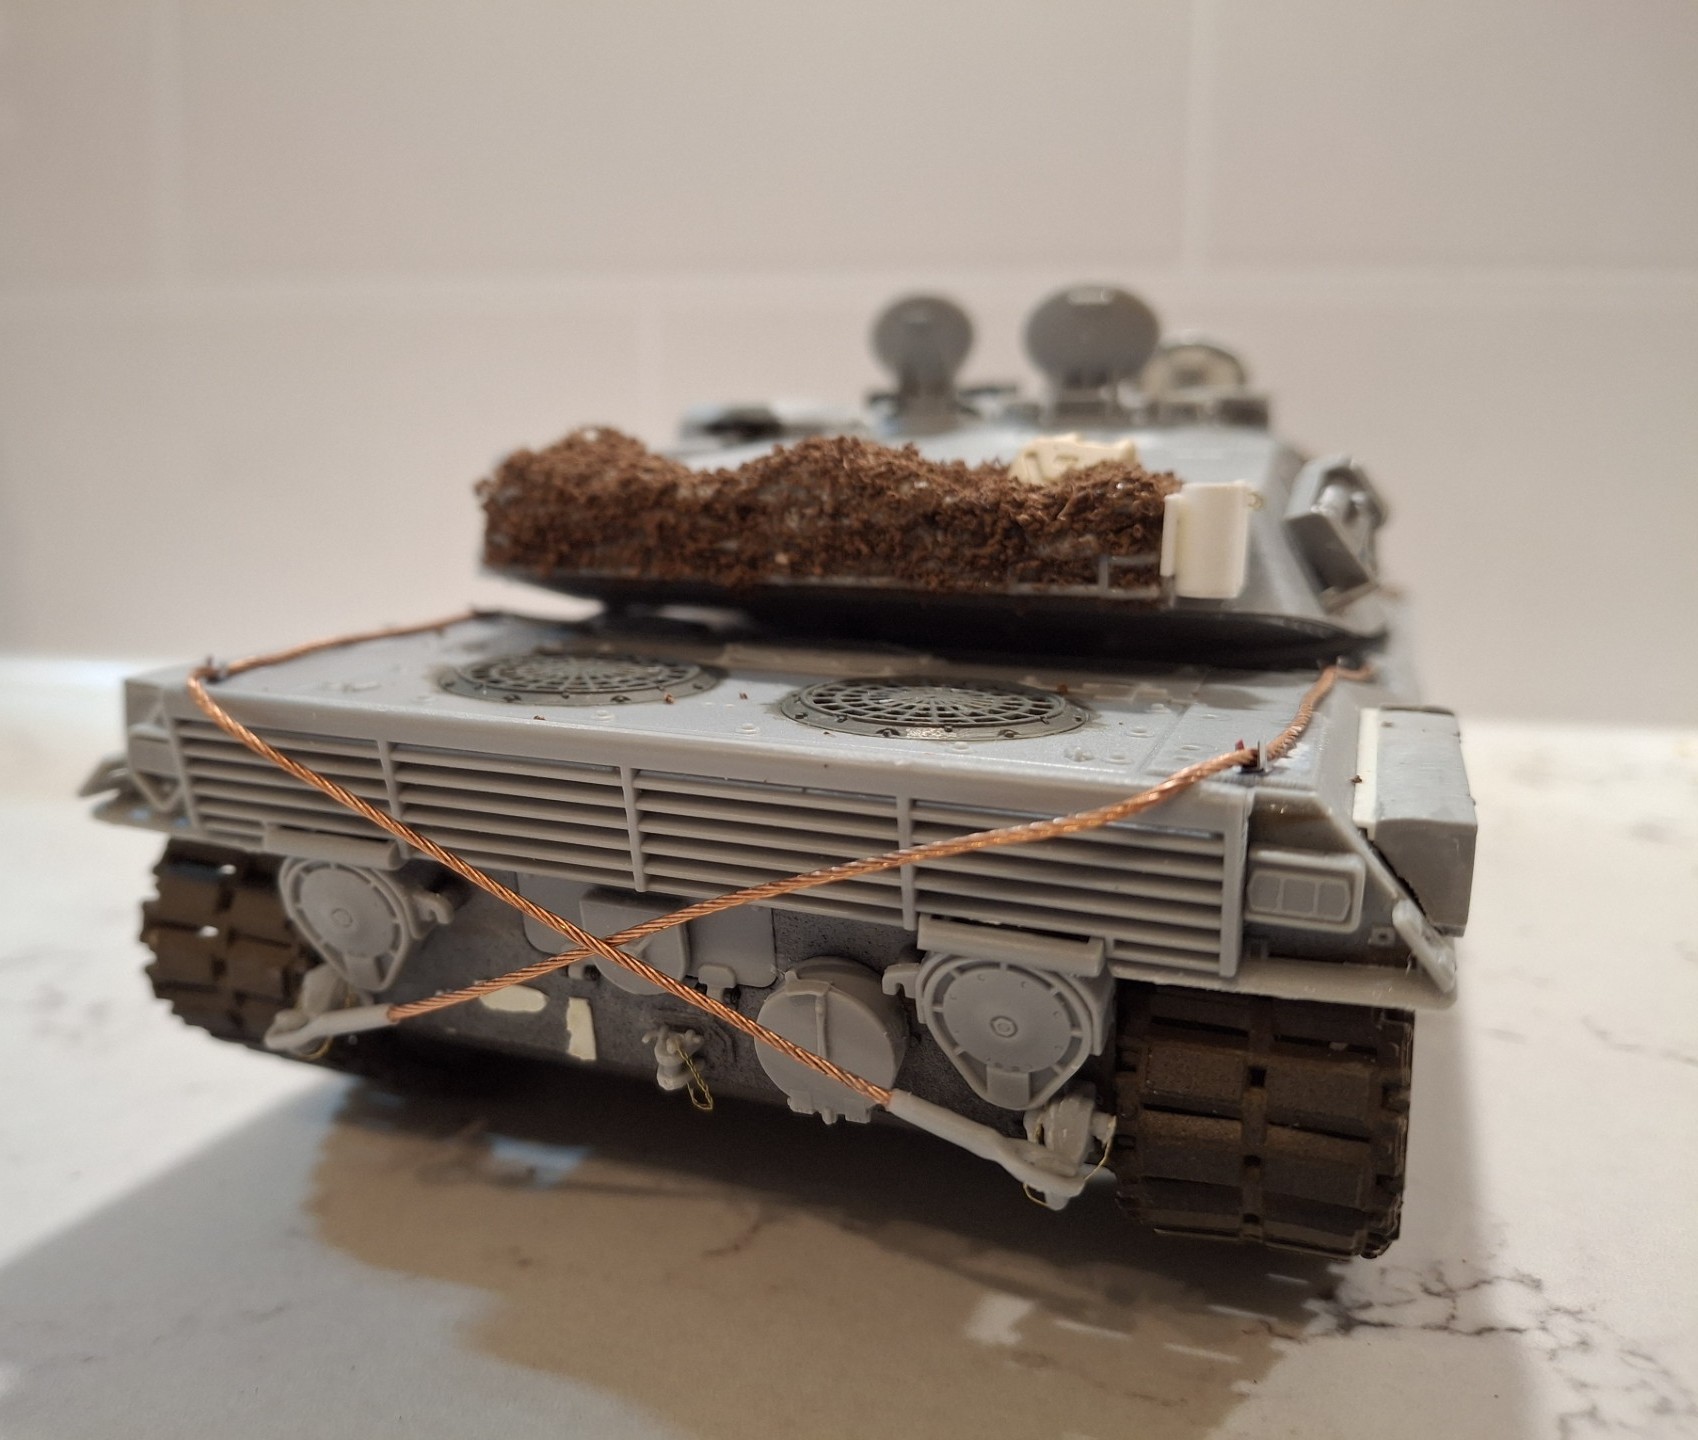
And whilst overthinking all this, I decided that 2 x containers for the bore-cleaning brushes should be added - larger than say, Leopard types due to the size of the main armament:
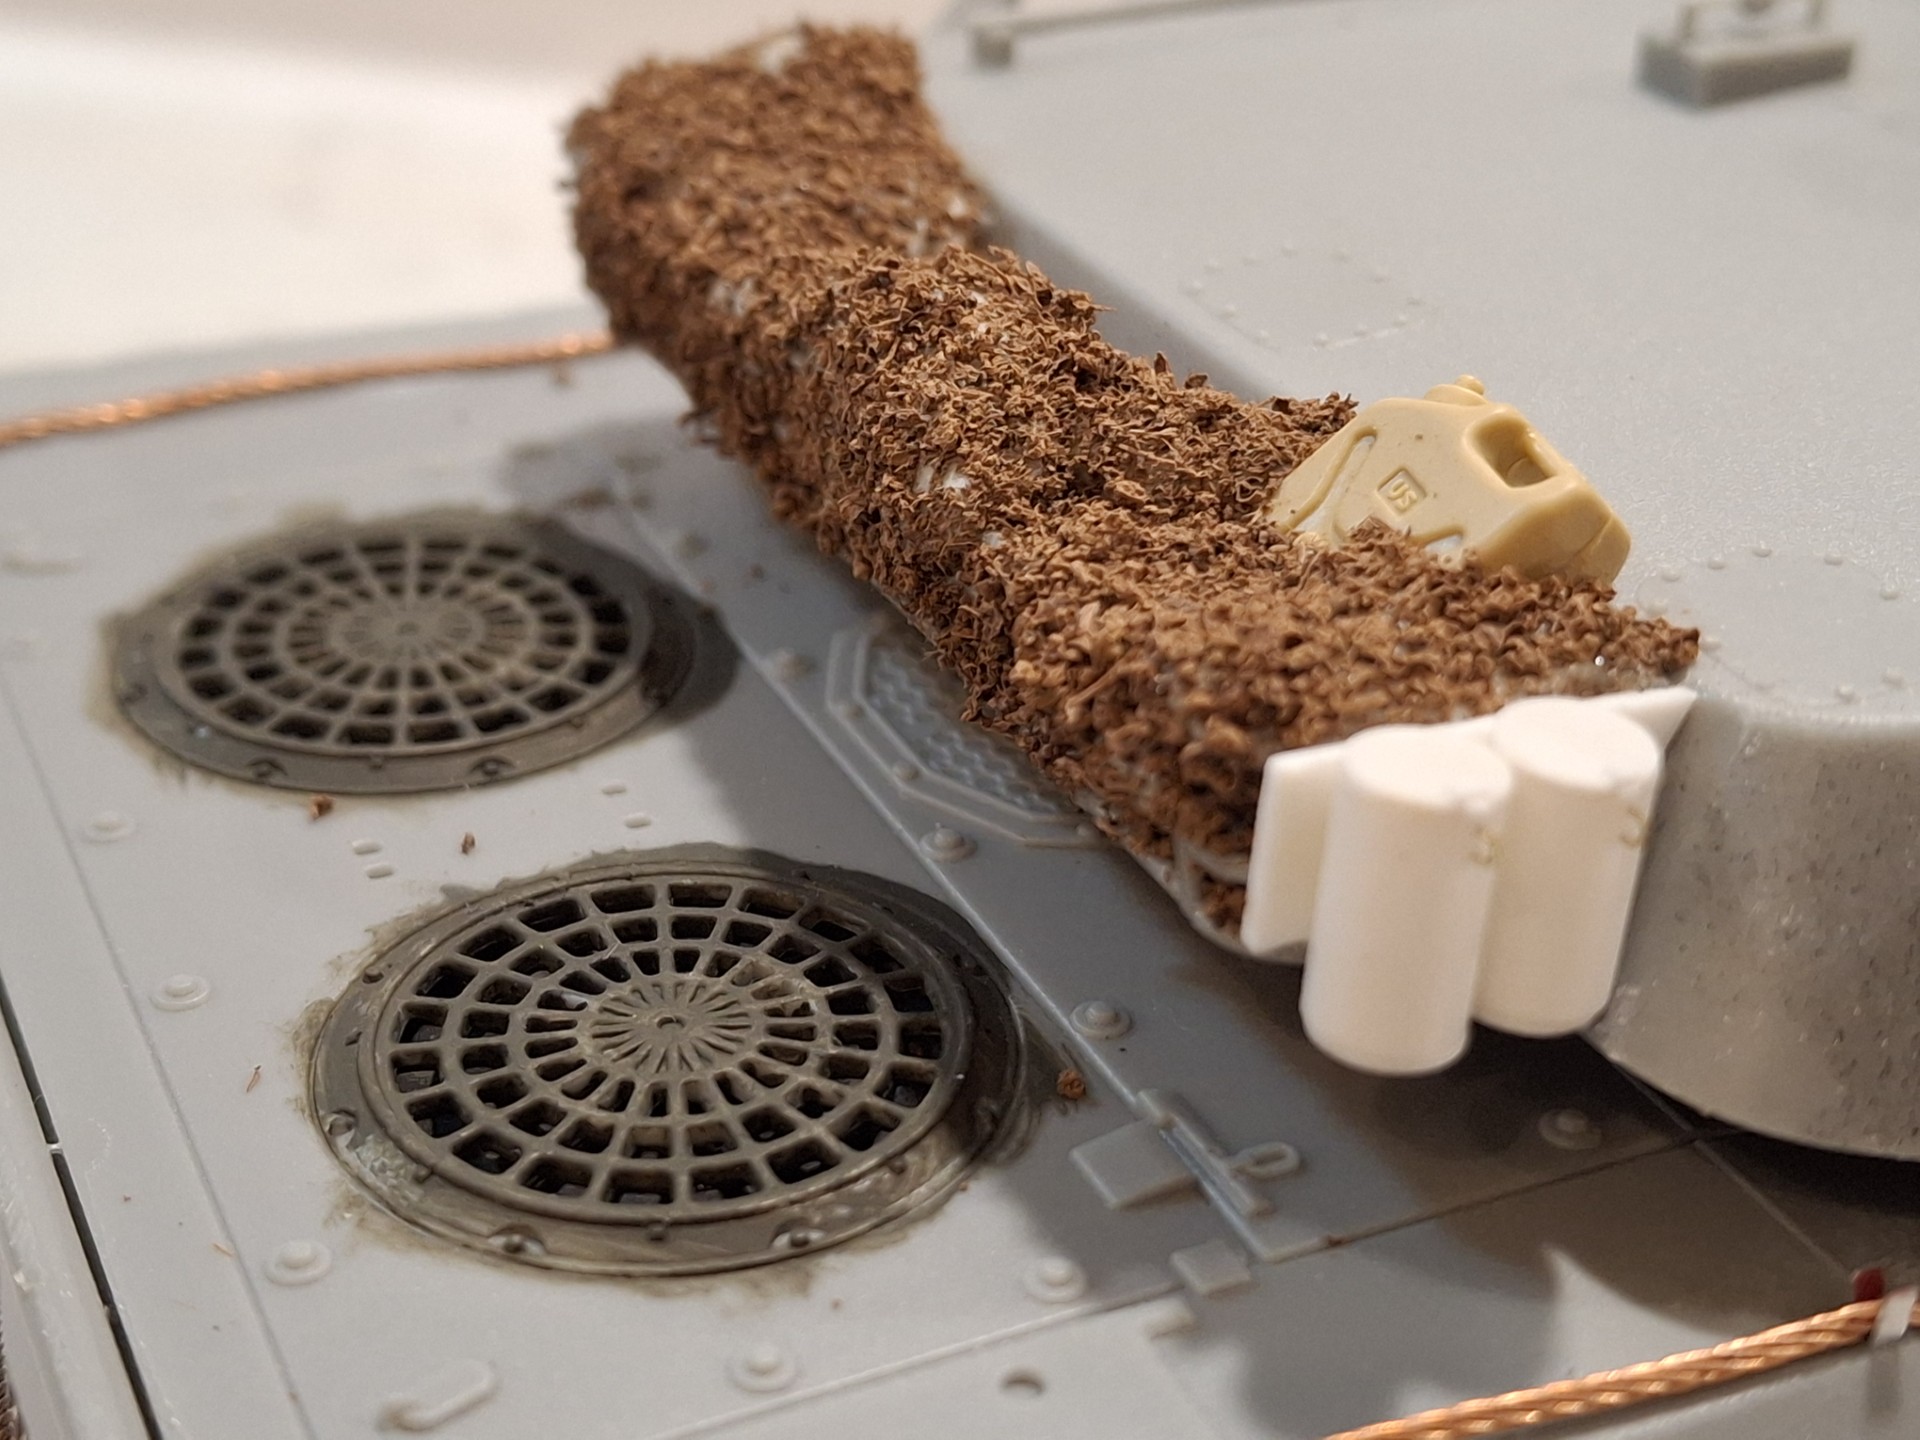
Fitted to the stowage rack as I couldn’t find anywhere else for them to go!
Note that the “US” impression on the water jerrican has still to be obscured; if I could find letters that small to facilitate me replacing them with “NL” I would try and do so, even though my eyes are punished enough(!)
Next stop: antennae, and possibly a stowage box for a collapsible fuel funnel and traffic sign. Hmmm.
Beginning to get there perhaps - how many times have I said that?
7 Likes
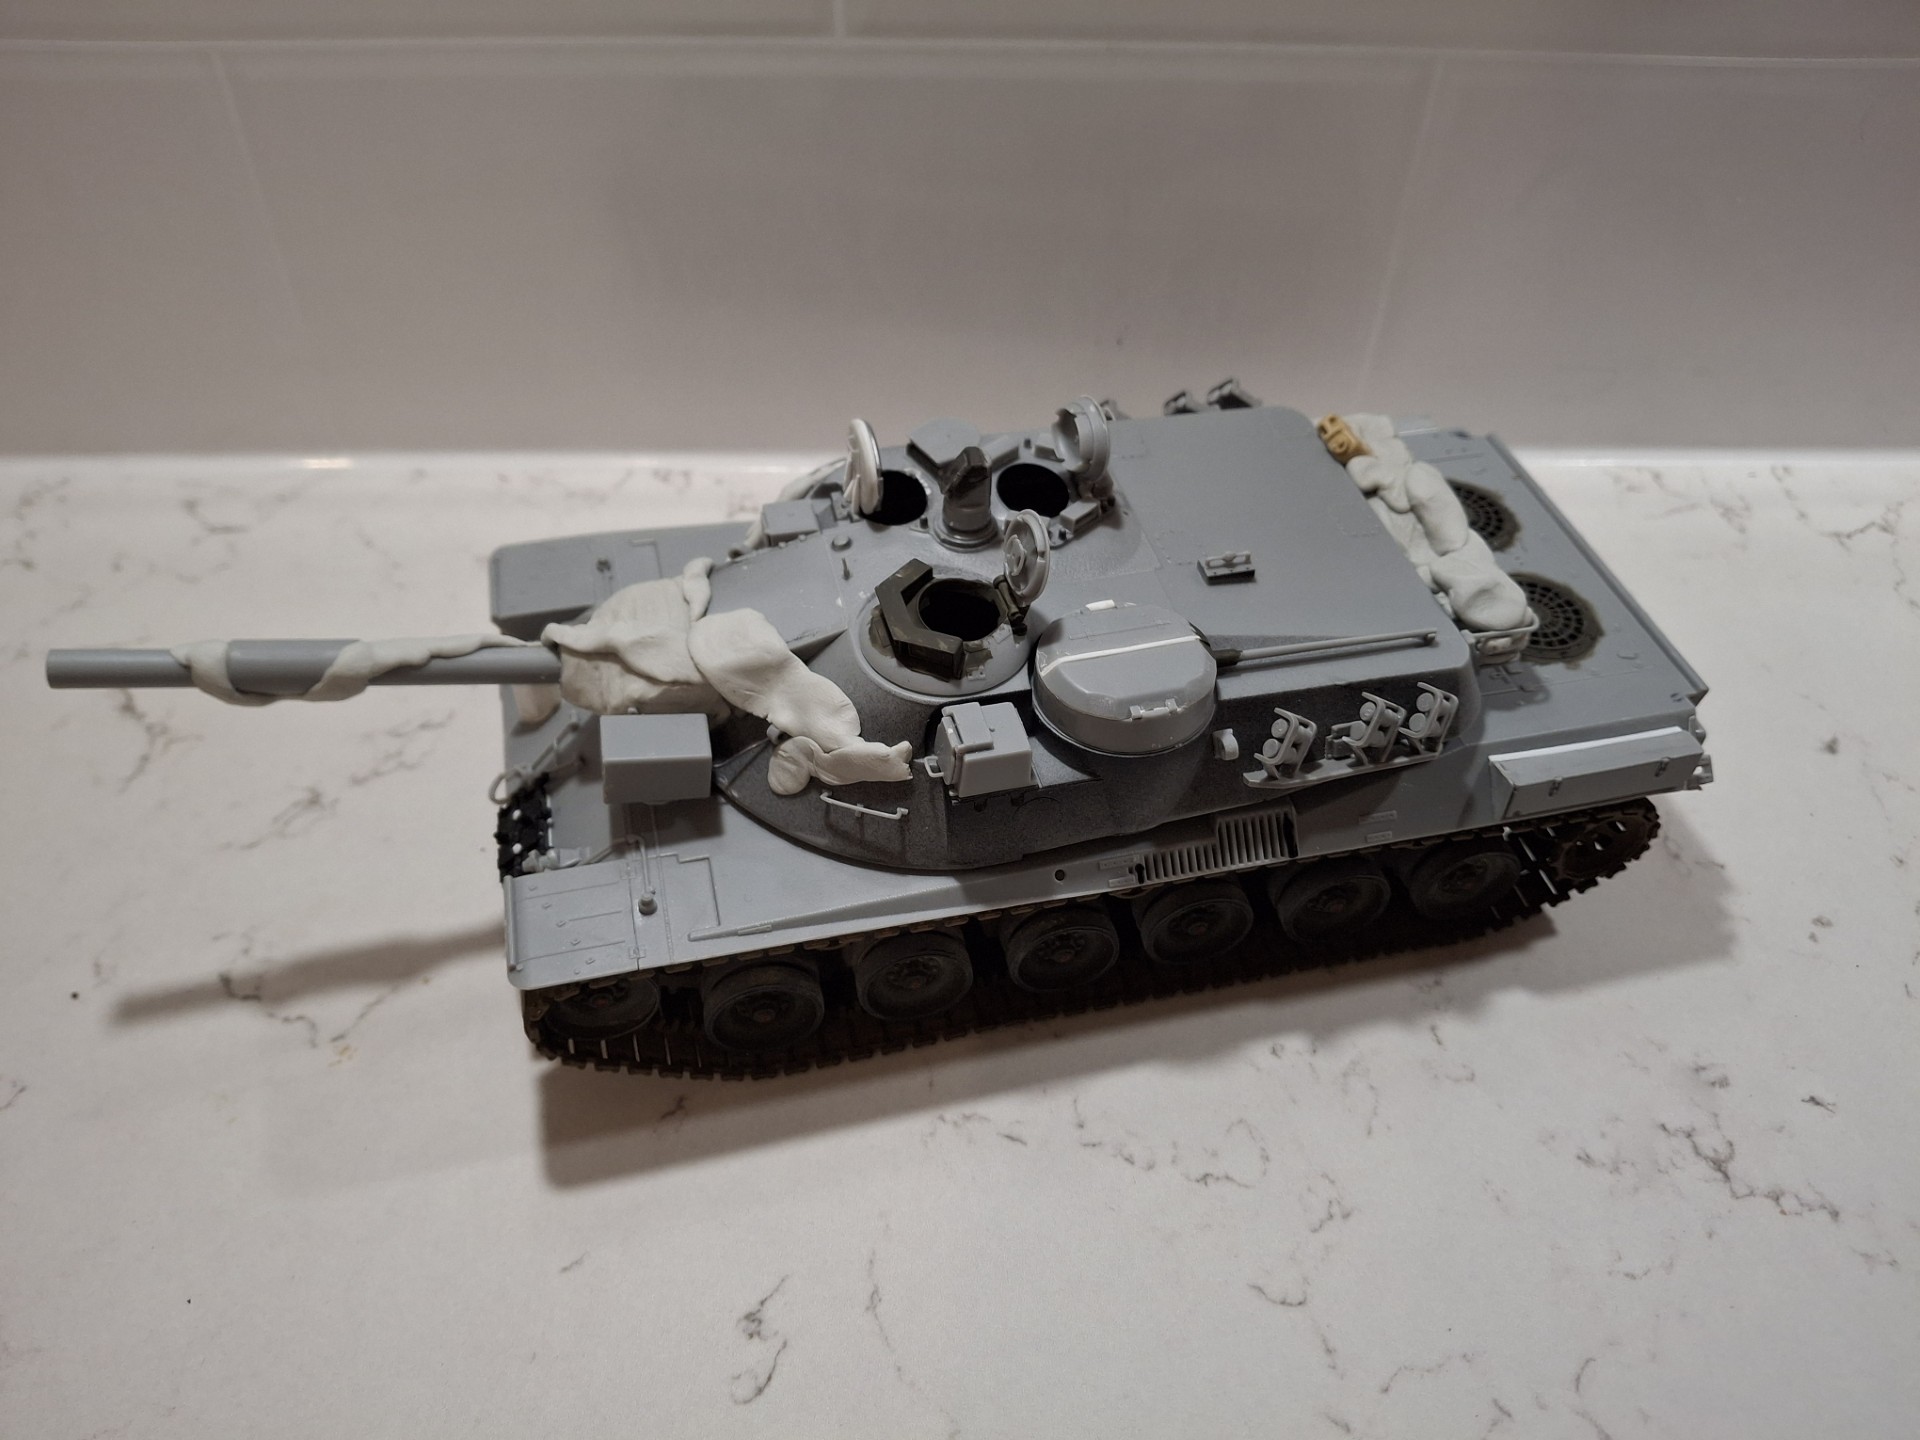
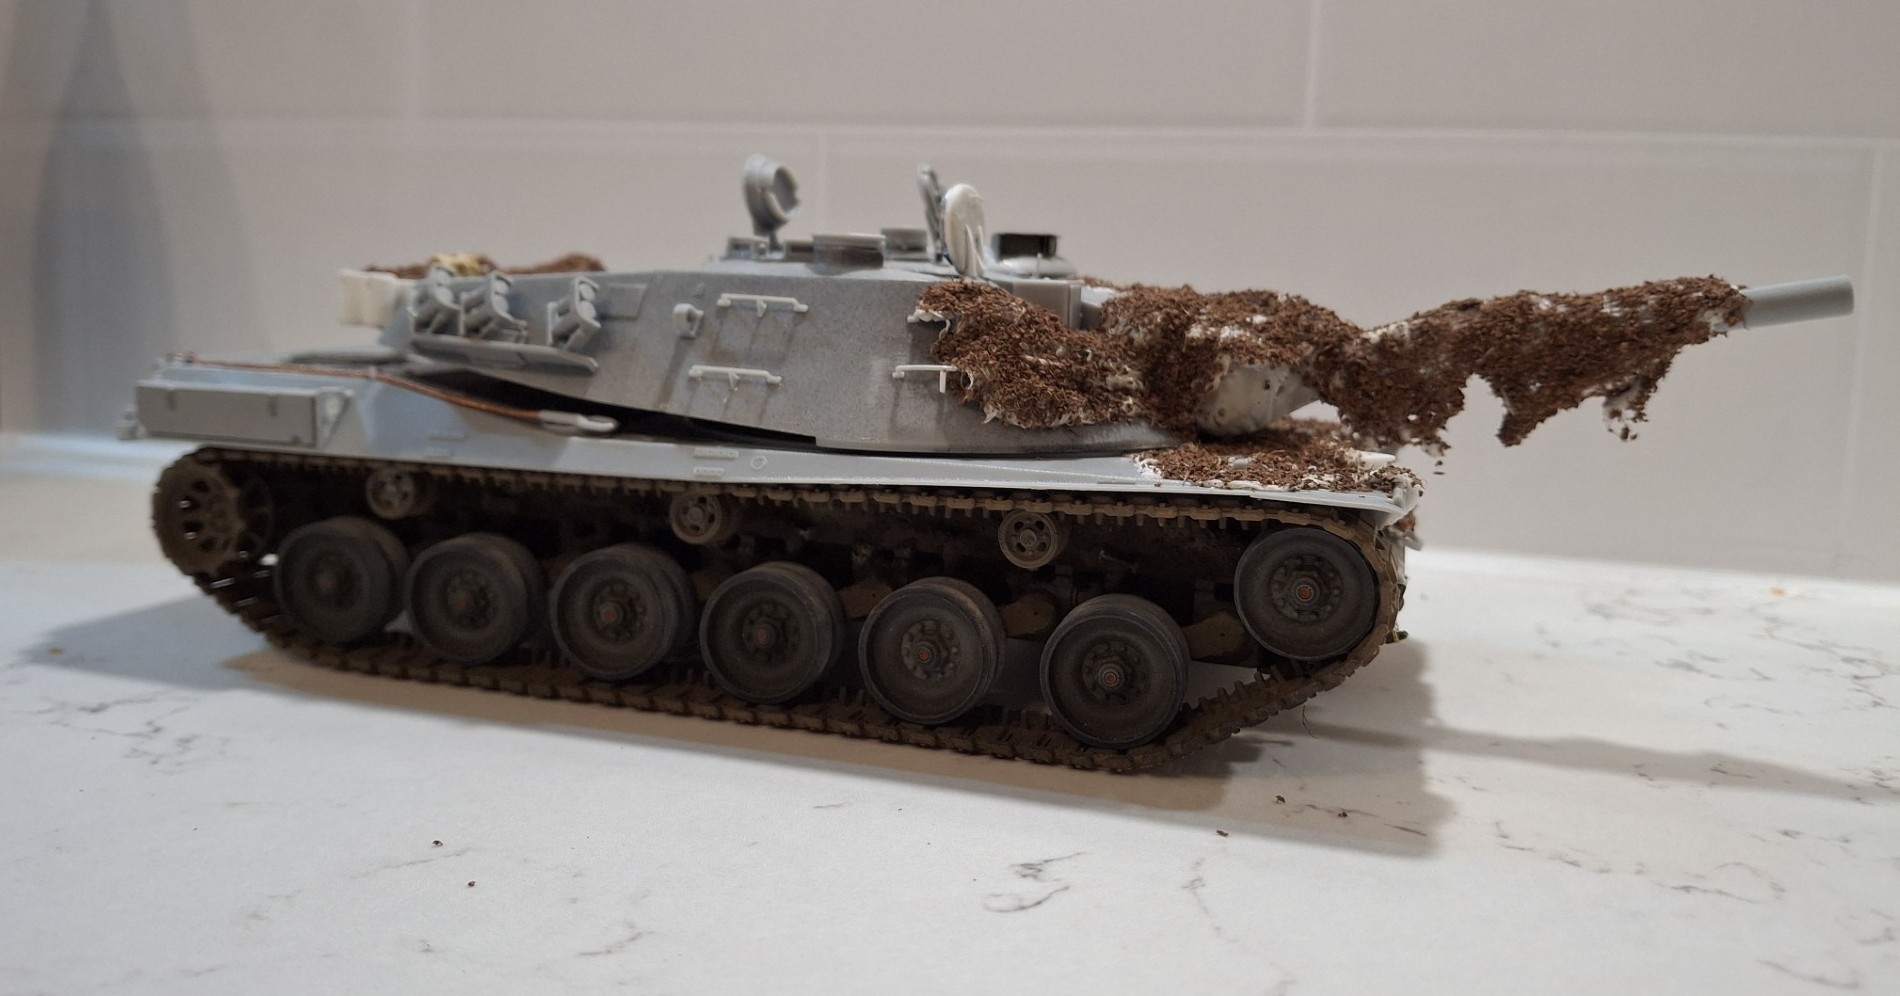
Right this is where we are with the Dutch version of the Kpz-70, or rather, as I envisage it. For the sake of argument I’m assuming that the first tranche of deliveries meant that the tank was still equipped with the 152mm gun/launcher; in due course, these may be retro-fitted with the German 120mm gun (As will any German versions - when I get around to building any). As these are German built, I have considered that they will come with the full CES – as we call it in the British Army – the Complete Equipment Schedule ie all the ancillaries and tools etc. However, going from what I’ve gleaned re Dutch Leopard 1s, they opted for closed tool boxes along the hull side; due to the contours of the Kpz-70, I’ve only been able to fit 50% of similar boxes, ergo, I will have to secure some tools elsewhere. To that end I may fit some on what’s left of the hull sides, and possibly on the turret top – well – there is all that space(!) However, I need to guard against clutter as it were, otherwise the lines of this tank will be disrupted a bit too much.
I’ve already added some cylindrical containers for the bore brushes; I think for the sake of argument, the cleaning rods will be deemed to be in one of the boxes. That sort of leaves me with a long crowbar, and possibly a bush saw to place. I’ve assumed that a pick and a shovel and some tools for the track are in the other box. I have also added a collapsible fuel funnel and traffic warning sign box to the turret top. I haven’t made this to replicate what is on Leopard 1, as this was a new venture and a differing design, including stowage methodologies, may prevail. This is a new piece of kit, and not a Leopard variant, although still German.
So, to throw this open a bit, not least to Jakko perhaps, does the above make sense? Specifically say, a bush saw and a crowbar on the hull sides? Anything I’ve forgotten? Probably loads, not that I wish this to be a model built by committee I assure you!
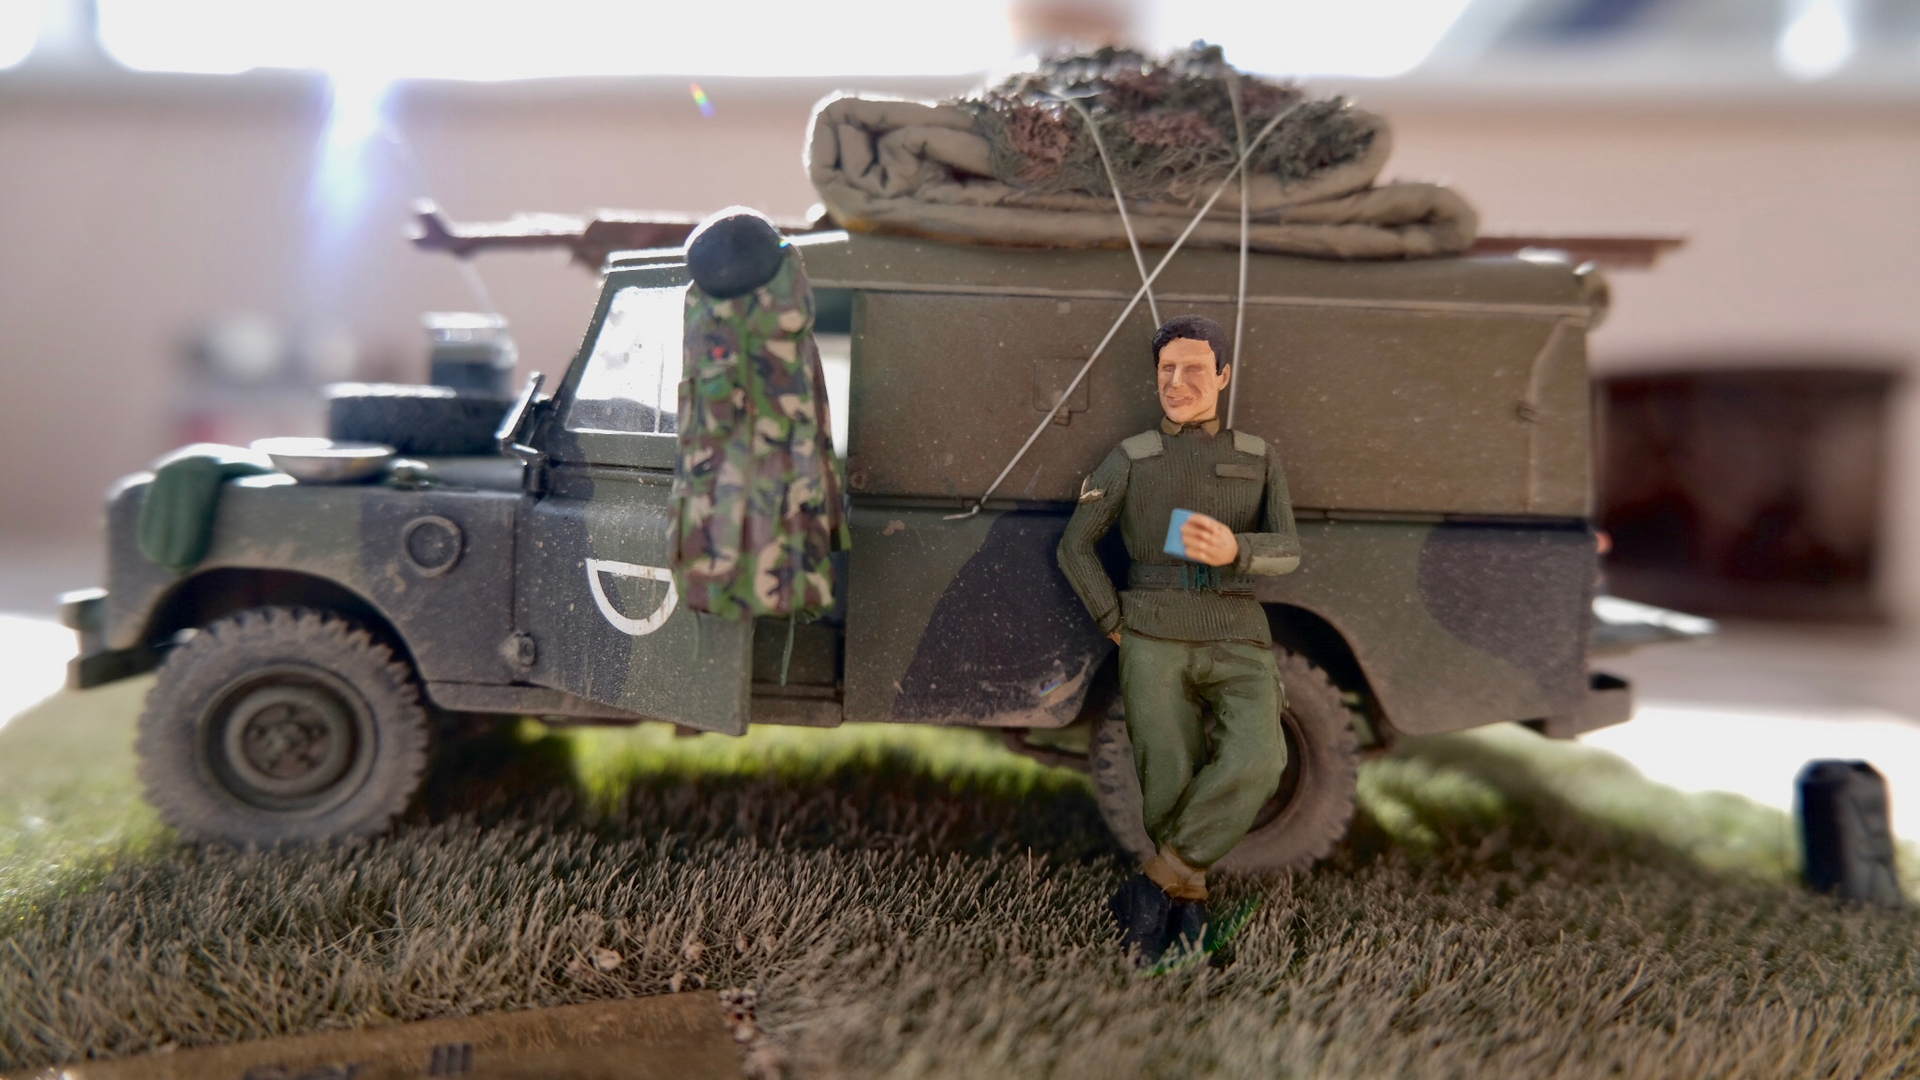
You may also wish to note the specific Dutch antennae fit now installed. I purloined the “boxes” from the Revell Leopard 1 (they provide options for a Dutch version) but the antennae themselves were far too bulbous so I utilised some Bowman ones from Accurate Armour, and I think they’ll work. I’ve chosen inconsistent locations for a bit of variety, and am aware that one will obstruct the Commander’s vision should he wish to look aft!

Lastly, etched brass mesh covers also fitted – about the only etch I used from the very comprehensive Voyager Model set; sigh.
6 Likes
I’m just plain-old floored! This is a real piece of art taking shape and it’s almost a shame to paint it.
1 Like