It is a very nice kit to build hey Pez. The different sprue colours reminded me of an old Matchbox kit when I built it.
Thanks Jakko. I saw the post earlier, it was one of the reasons I chose this kit.
It is a very nice kit to build hey Pez. The different sprue colours reminded me of an old Matchbox kit when I built it.
Thanks Jakko. I saw the post earlier, it was one of the reasons I chose this kit.
I love the VT1-2! First time I saw a pic of t I thought it was a photoshop fake…
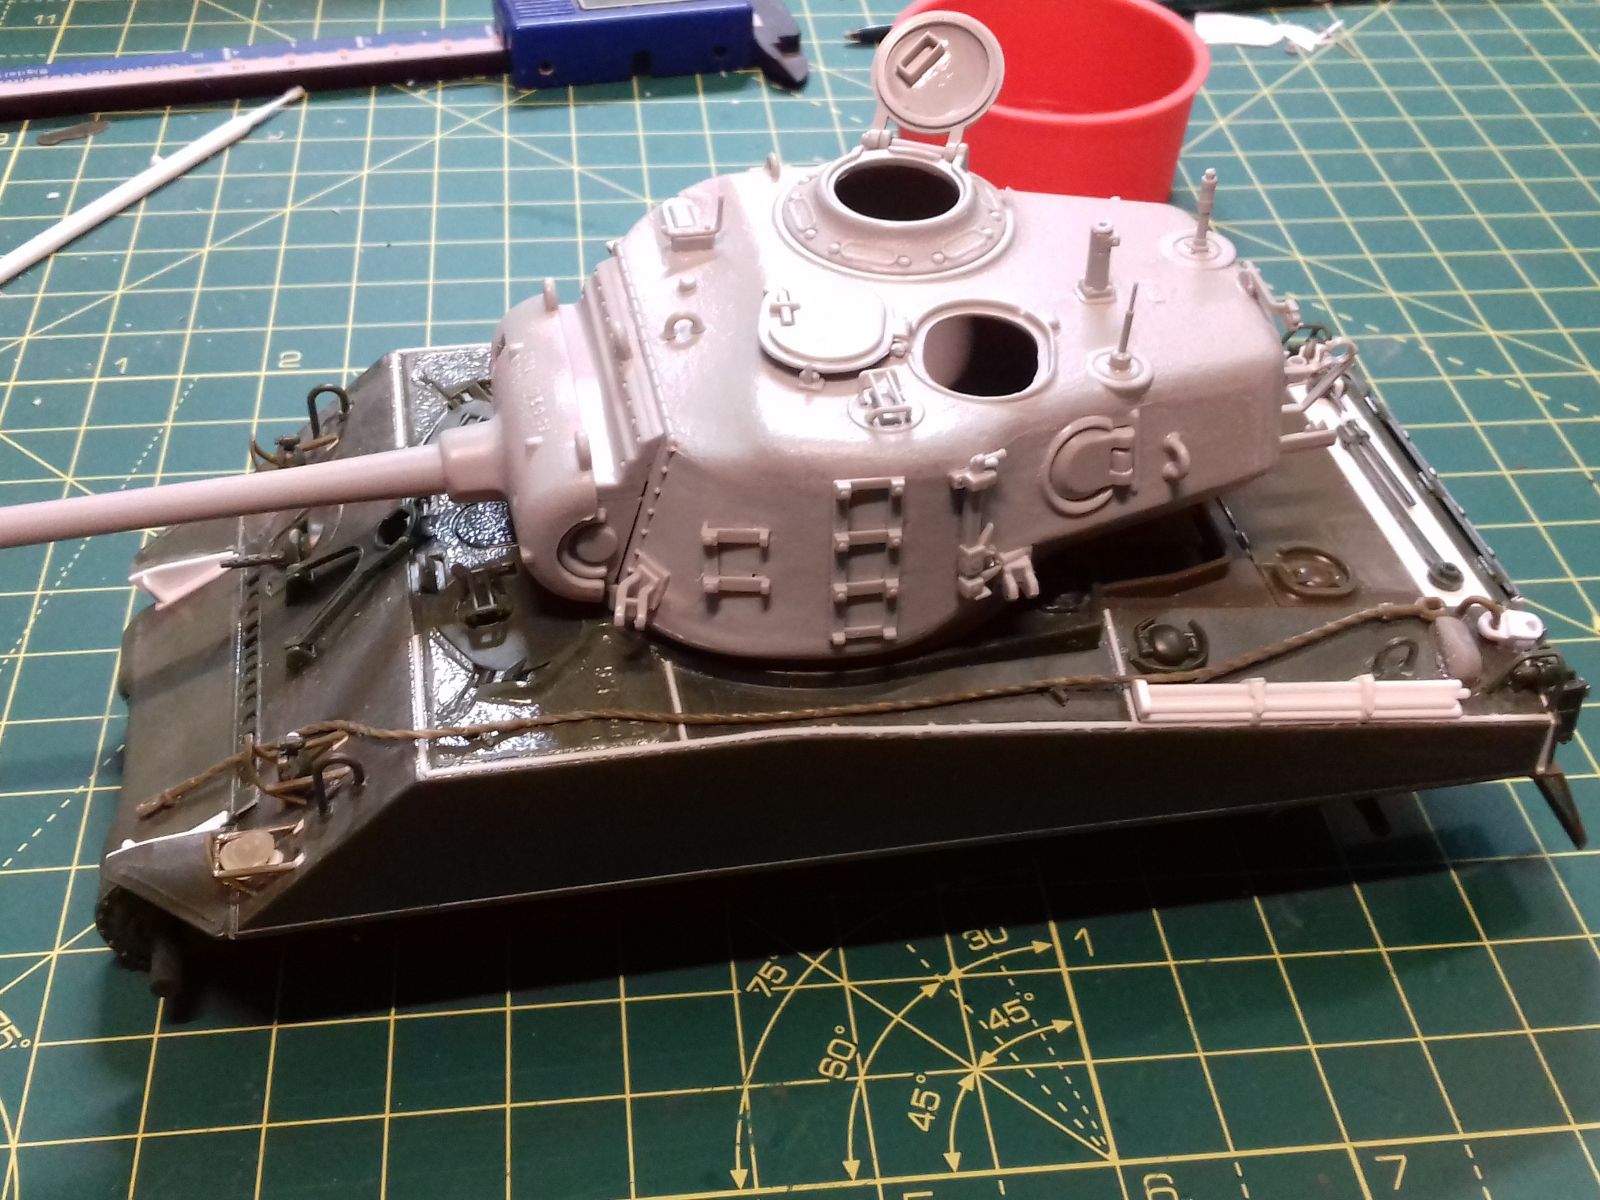
I realised I hadn’t posted pics of my own build when it was shelved at the end of August so I could go away on fieldwork! So I took some tonight…
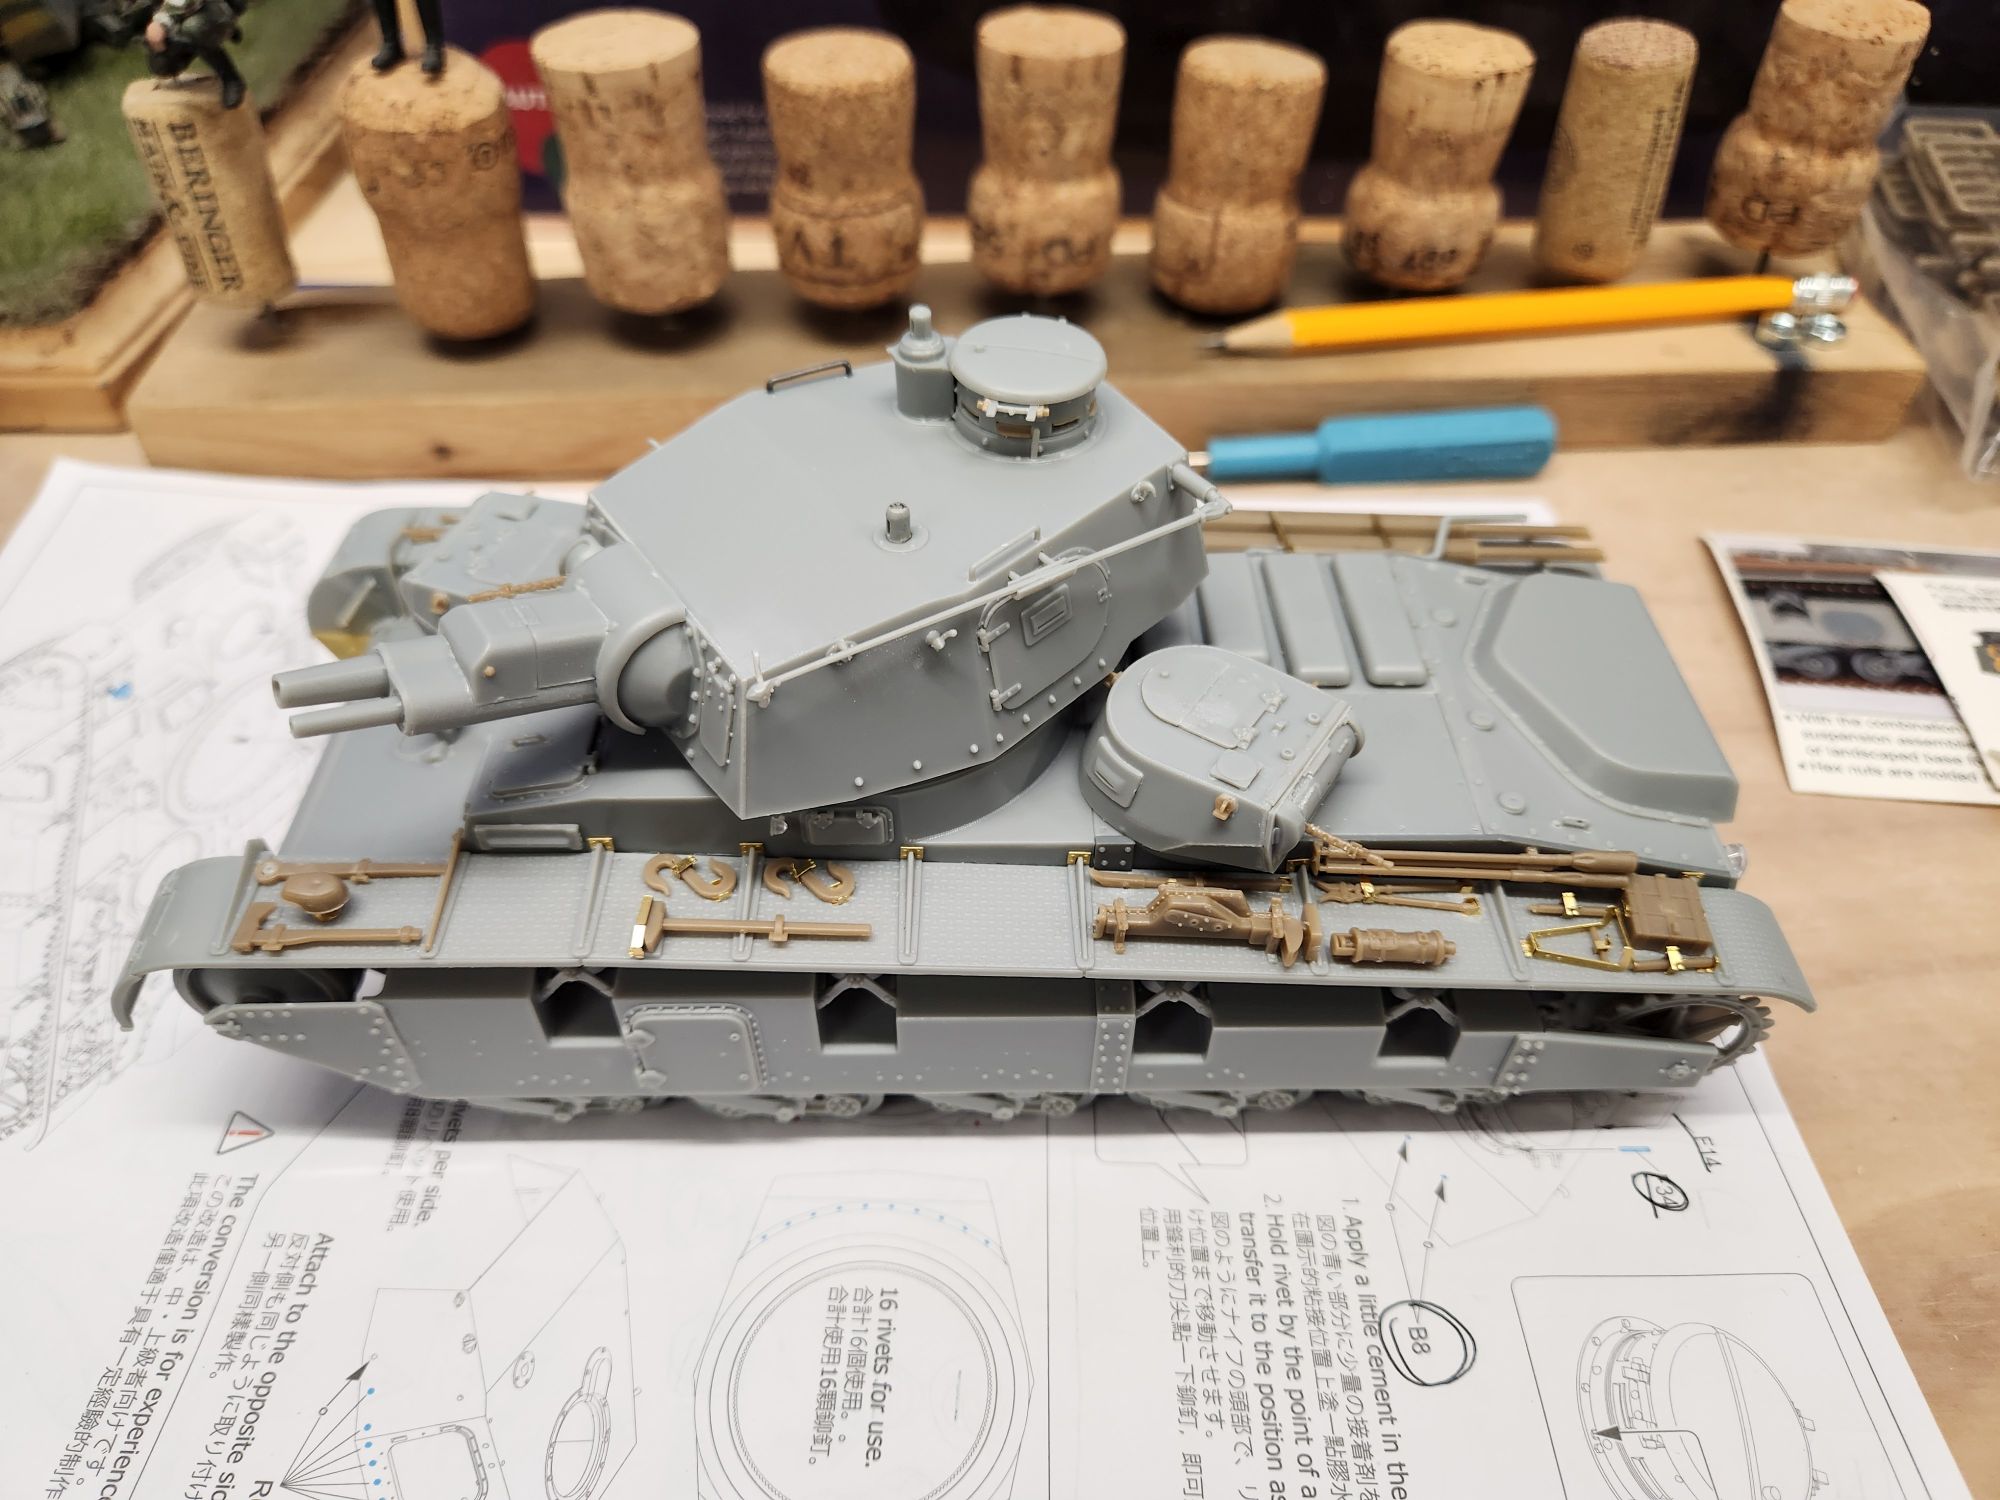
Slight snag on the NBFZ. I have everything built except the tracks at this point…HOWEVER the periscope that sits atop the turret ahead of the cupola and one of the hand rails have disappeared. The handrail is no biggie; easily scratched from wire. The periscope will require more work to replicate if I don’t find it. I have a plan that will fool novices but likely none of you lot so keep quiet. The jackets surrounding the coax MGs on the panzer IV’s kind of look similar, having cooling vents that resemble the lens opening (on both sides but I can just fill one in) but the jackets are cylindrical not slightly conical. Careful sanding can probably get me there. But if I can’t find the part that’s the route I’m taking. Opinions?
This represents the mock-up from the real-world photos, right? As you have an M4 (105 mm) hull with a T26 turret.
For anyone wanting to build a what-if in-service version of this, here’s some points based on having built something similar myself ![]()
Hi Jakko,
Yes mine is a model of the 1:1 mock-up photos based on an M4 (105mm) hull, and has all the “real world” flaws you pointed out as they appear in the pics. No doubt they would have addressed these issues if they ever got beyond the “I wonder if this might work?” stage of full-scale kit-bashing!
If you have some evergreen tube you might be able to cut a piece off and put it in a drill bit. To drill the slot, drill a hole at the top and bottom of where the slot is to be when you taper the piece, then scribe a shallow groove between them. That groove will then be the guide to keep the drill bit in alignment to keep remaining holes straight when you drill them. Trim the slot sides with a sharp blade. Then at lower speed, sand the Evergreen to the taper you need. You should have plenty of material in the tube wall to allow for the taper.
Drilling the slot first means you have not wasted time on the taper if you mess it up and it keeps the outside face smoother!
I didn’t see your response until after I made the fix but that was a good idea – I don’t have any Evergreen tubing though. Here it is using the MG sleeve:
I think it is good enough, and hope to find the original part very soon now that I’m done.
Looks good enough for me.
I just found the missing handrail…
….not even a foot away from the work area.
Periscope is still AWOL, so hopefully that effort wasn’t in vain.
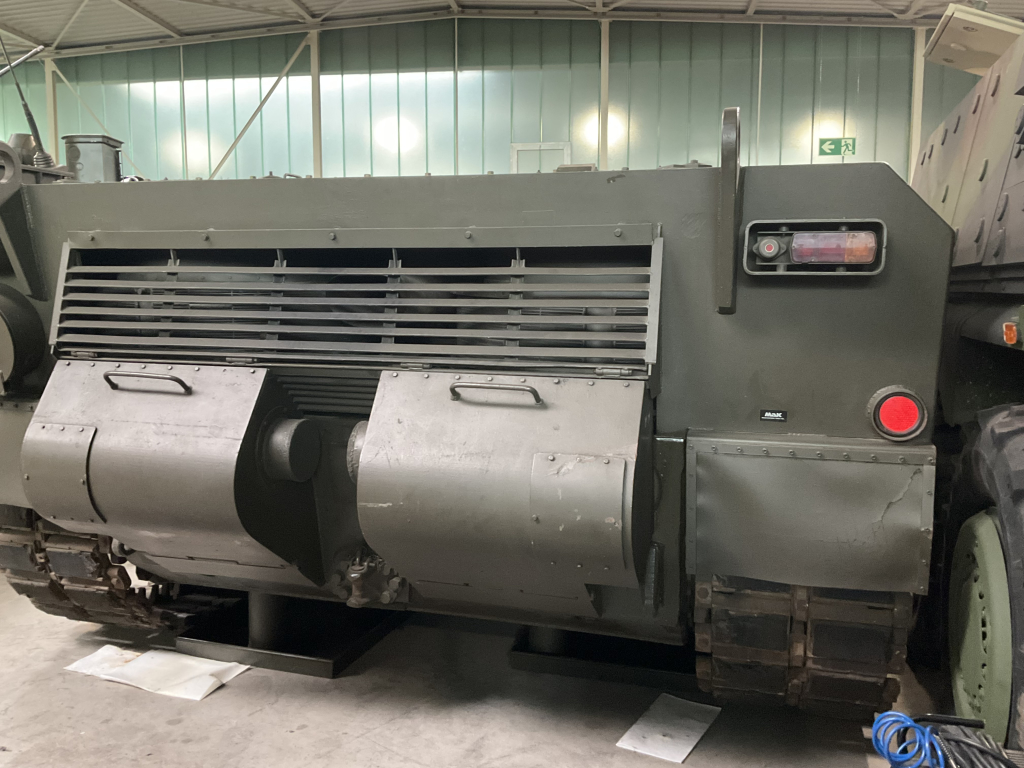
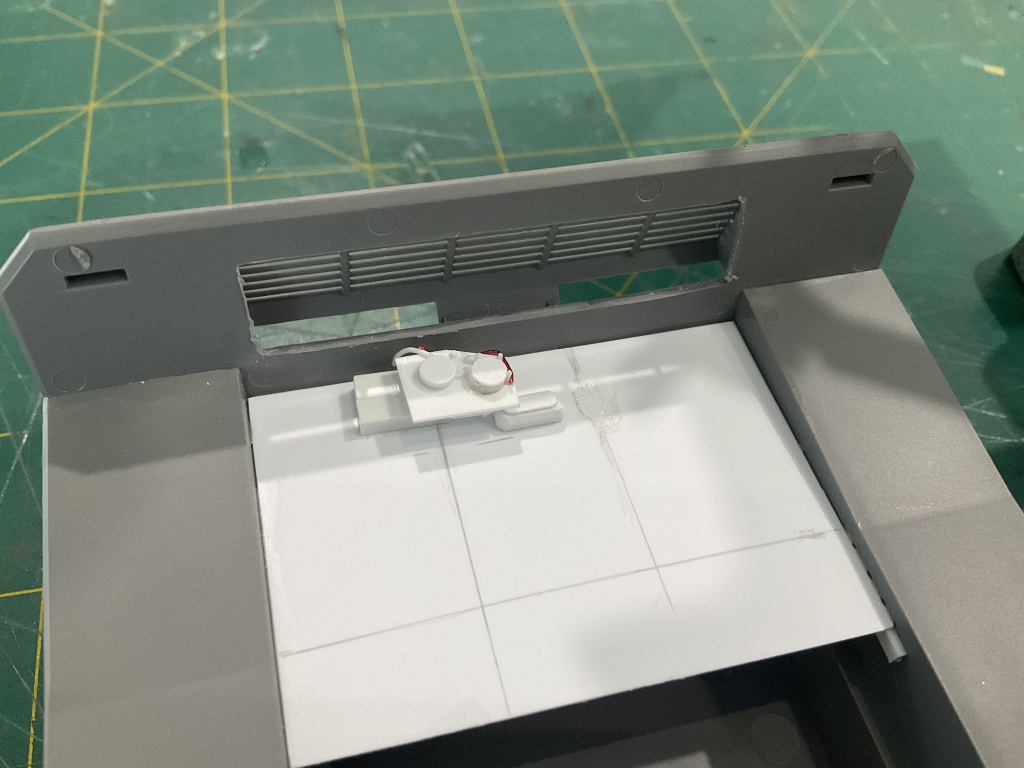
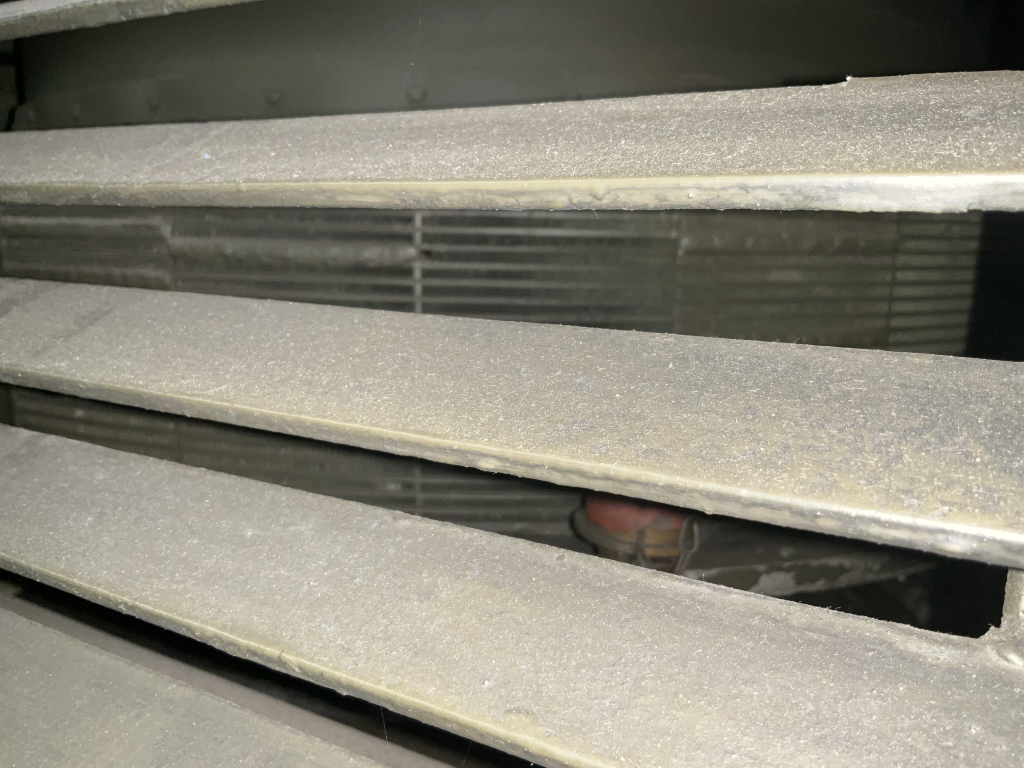
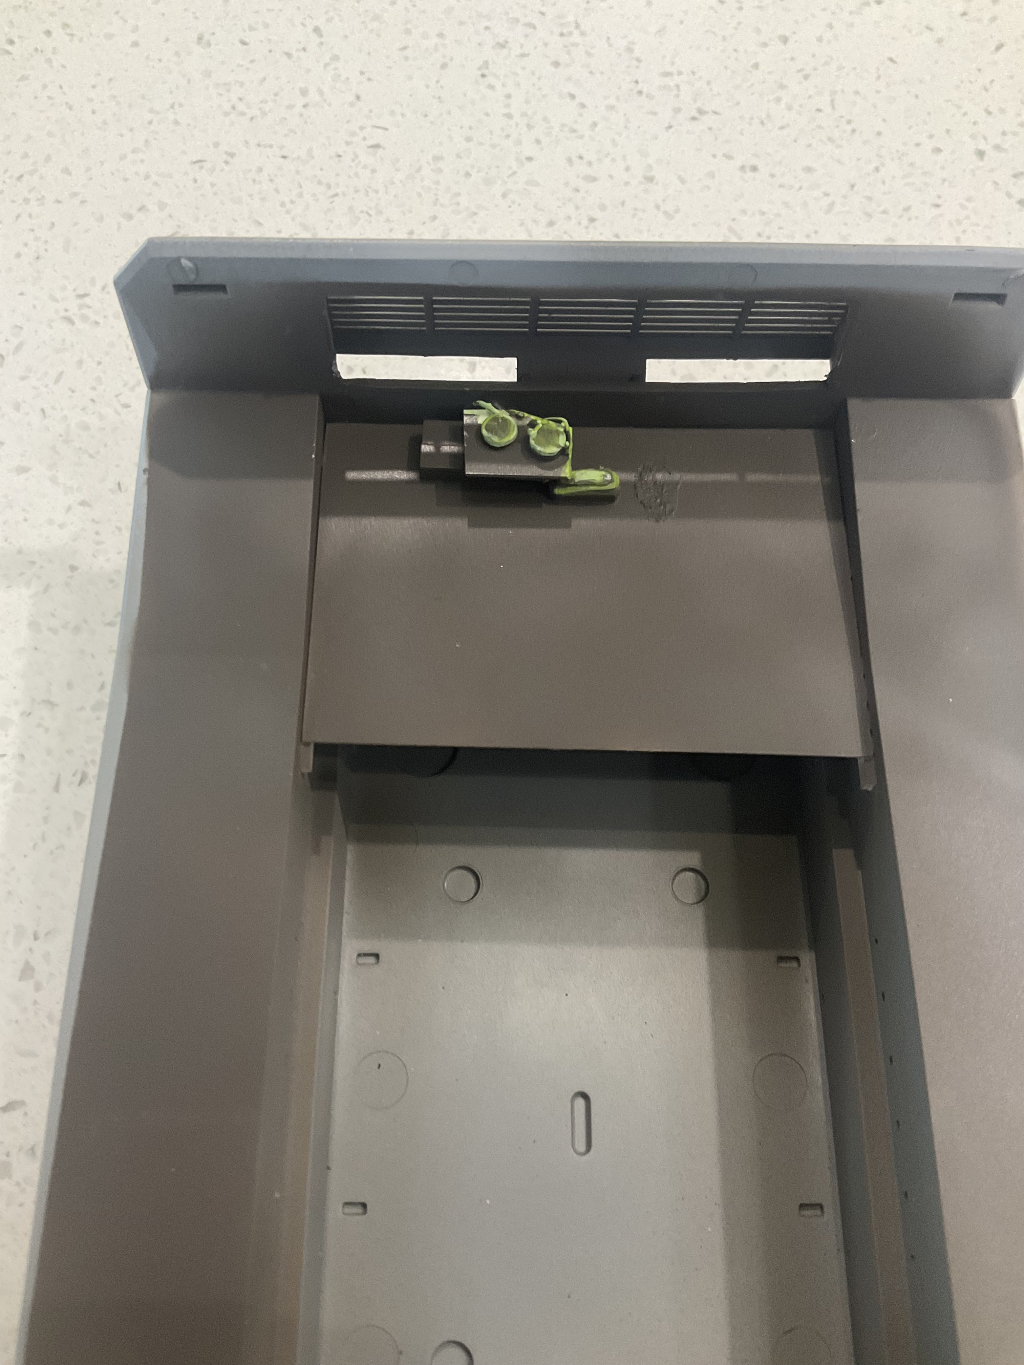
Okay. The Takom Vt 1-2 kit just has the area behind the rear grill blanked off, so the slab of plastic is easily seen through the grill. This area is clearly open on the real deal.
This did not go well with my modelling OCD type opinions…. so a bit of scratchbuilt interior was required. On the model, most you will see is shape and form for everything other than the fan assemblies. Because they are so close to the grill, you will see a lot more, so detail was important for those bits.
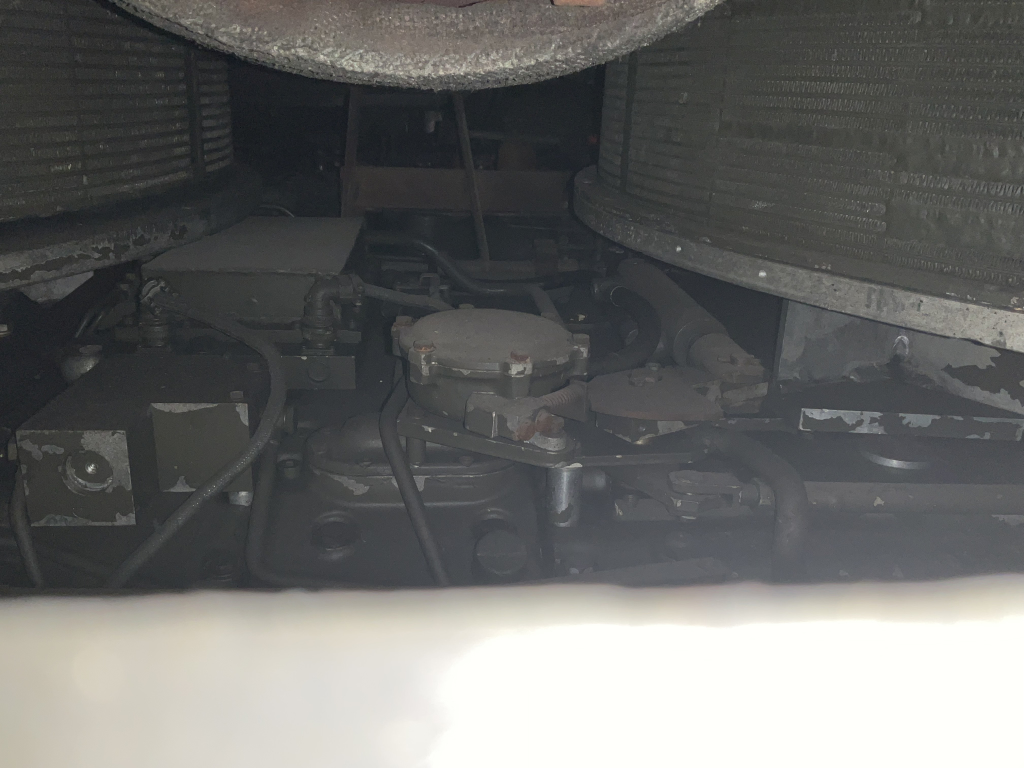
References:
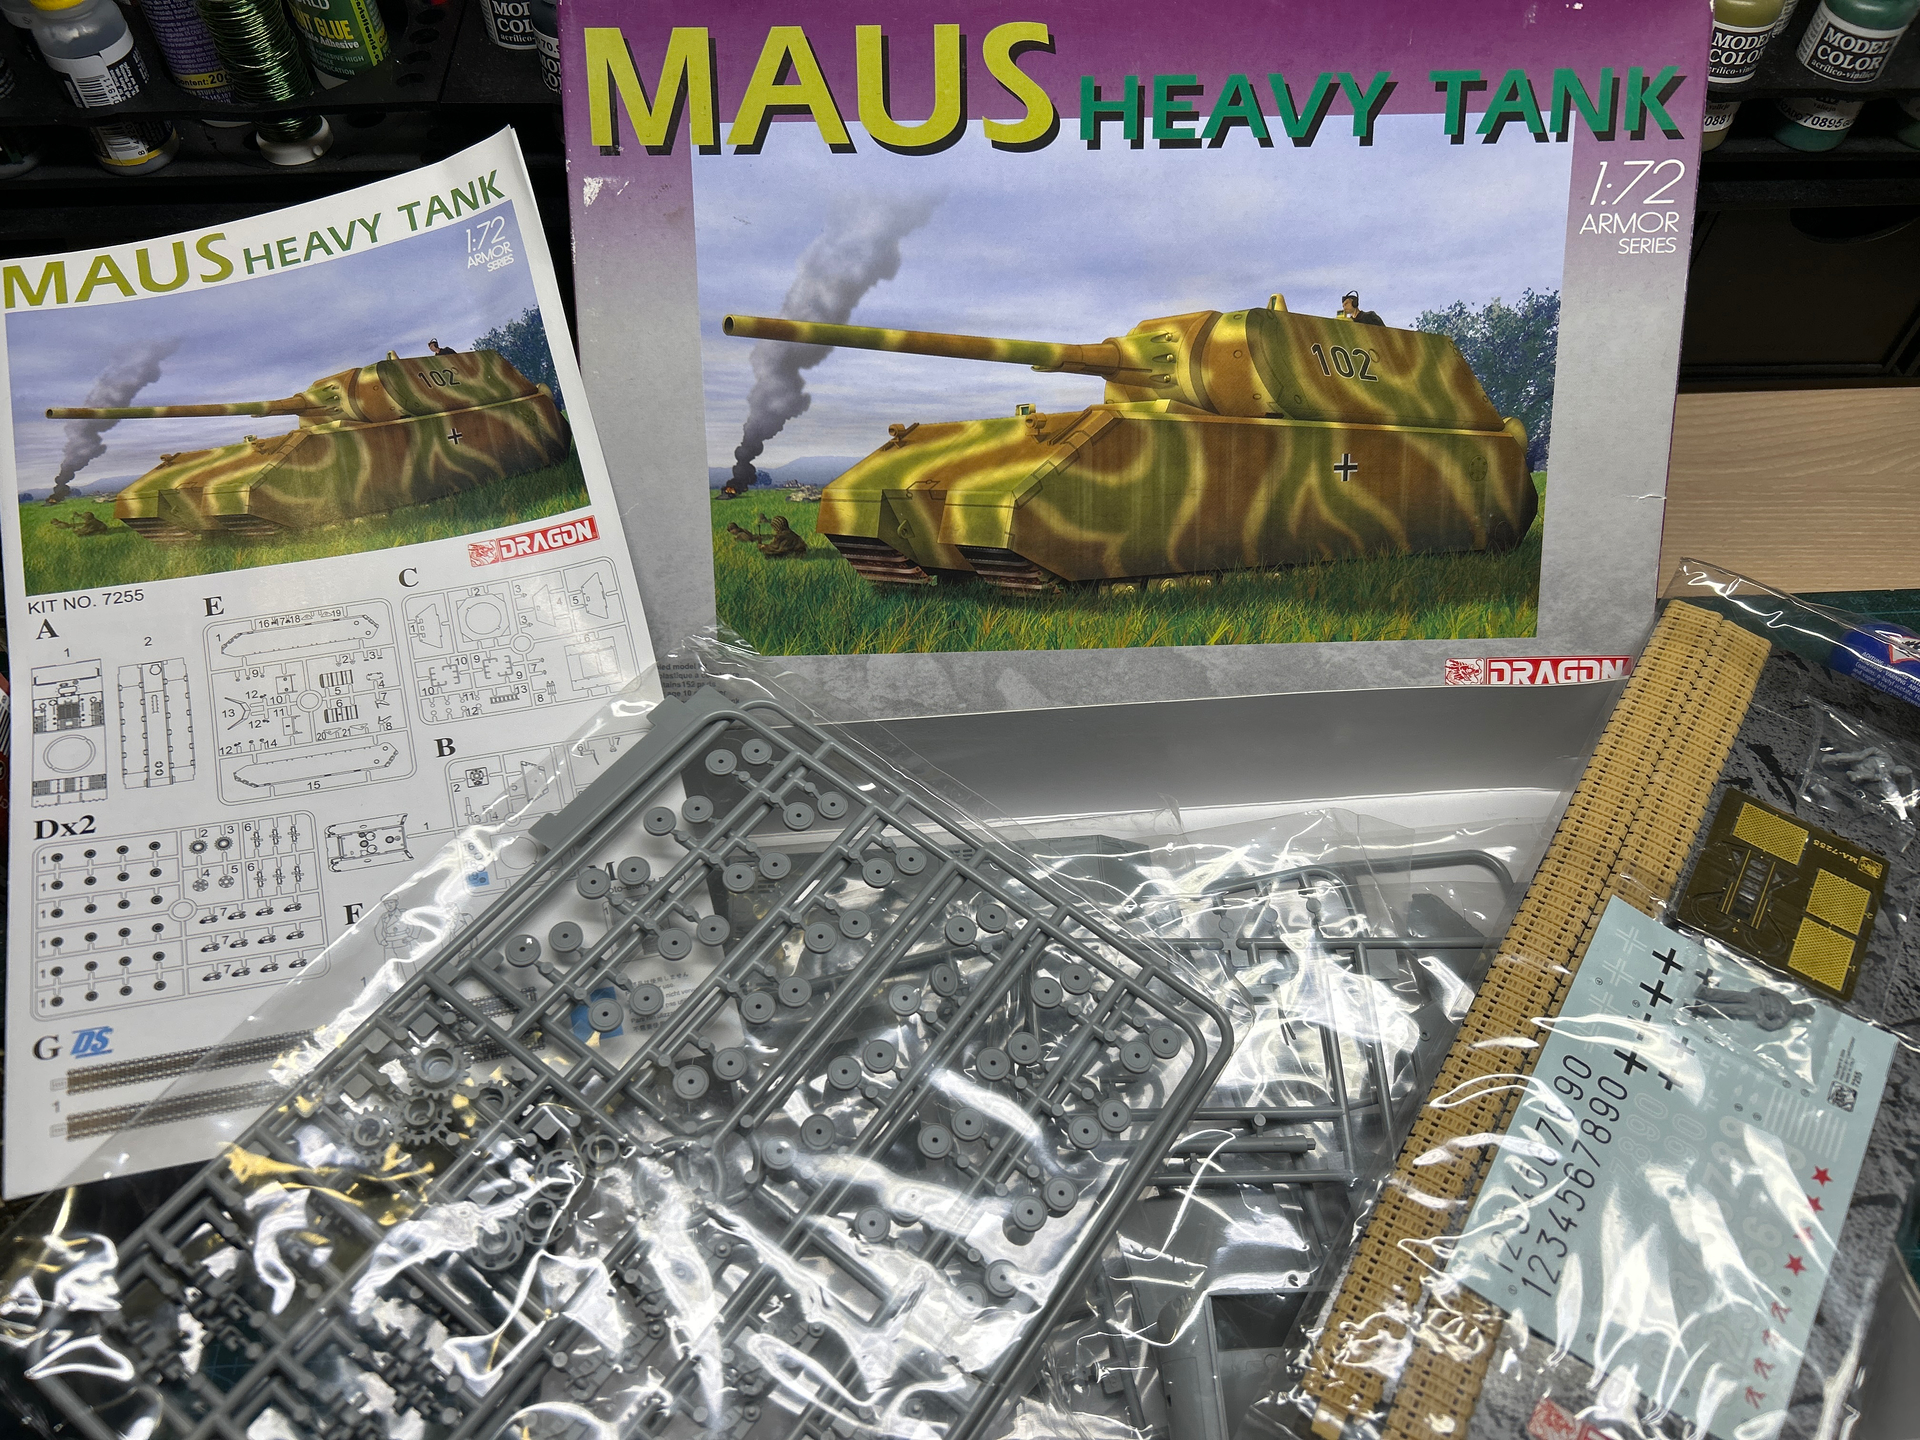
I am starting my build for this campaign - the Dragon 1/72 Maus. Looks like a great kit.
More to follow ![]()
The Maus looks interesting. Better get the glue flowing - we’re in the final stretch!
Thanks, Tom. The campaign runs until 1st June, right? Plenty of time ![]()
Speaking of the glue flowing - very well engineered kit so far. A bit of thought needs to go into mounting the tracks, but otherwise very straightforward.
More to follow ![]()
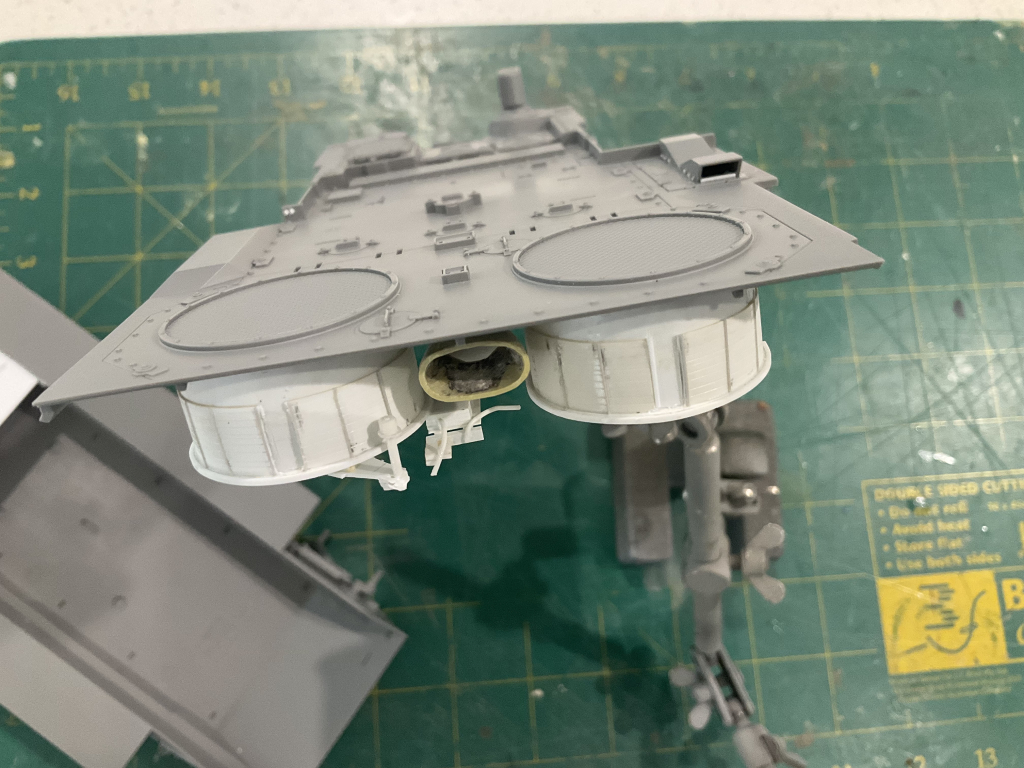
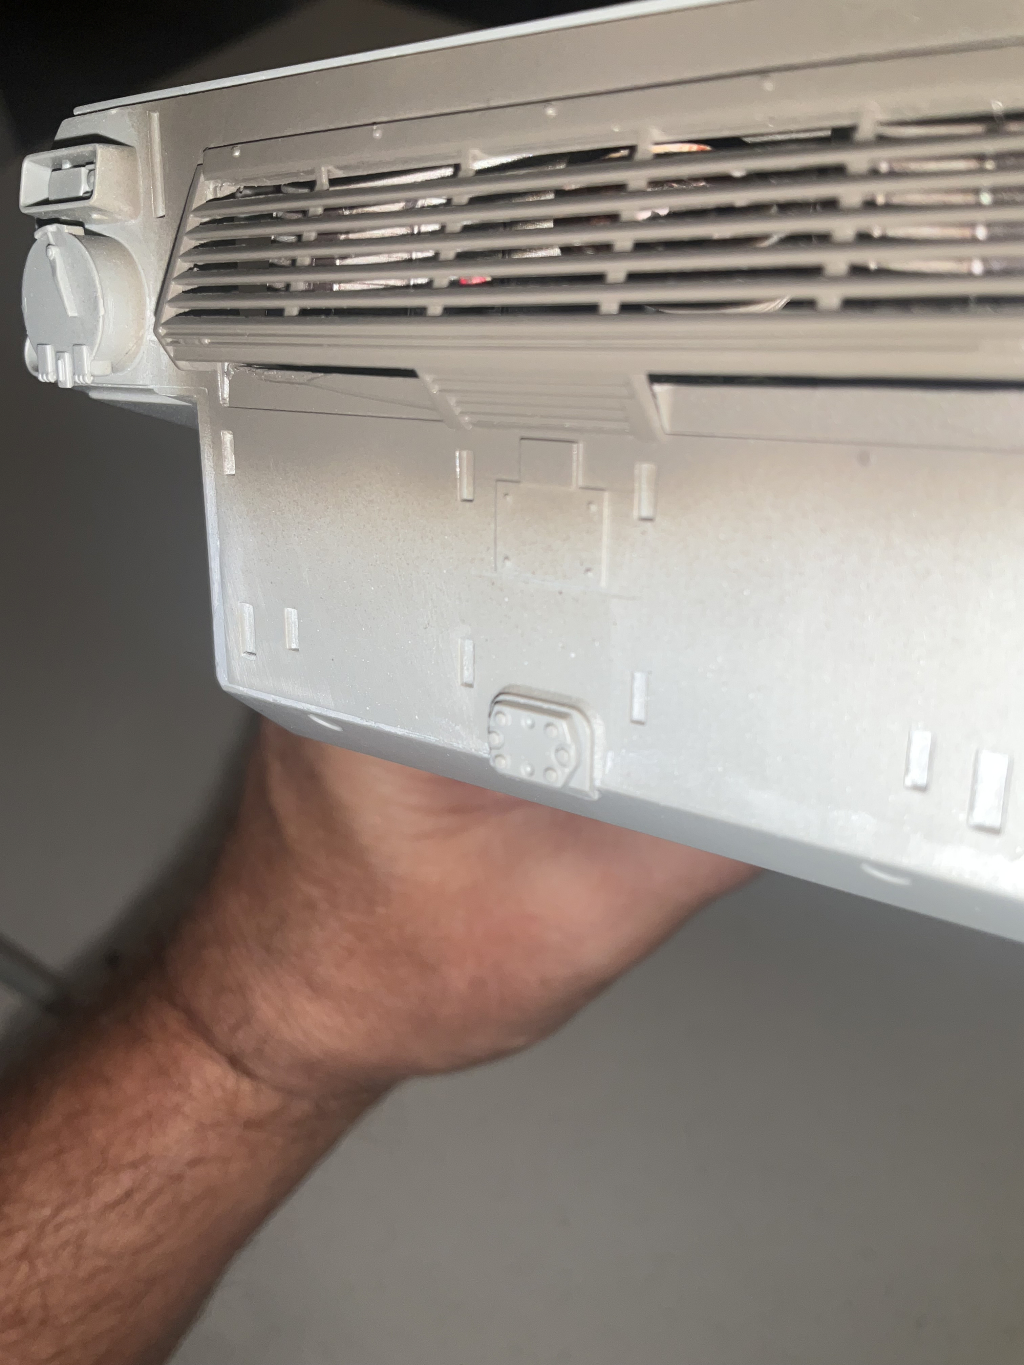
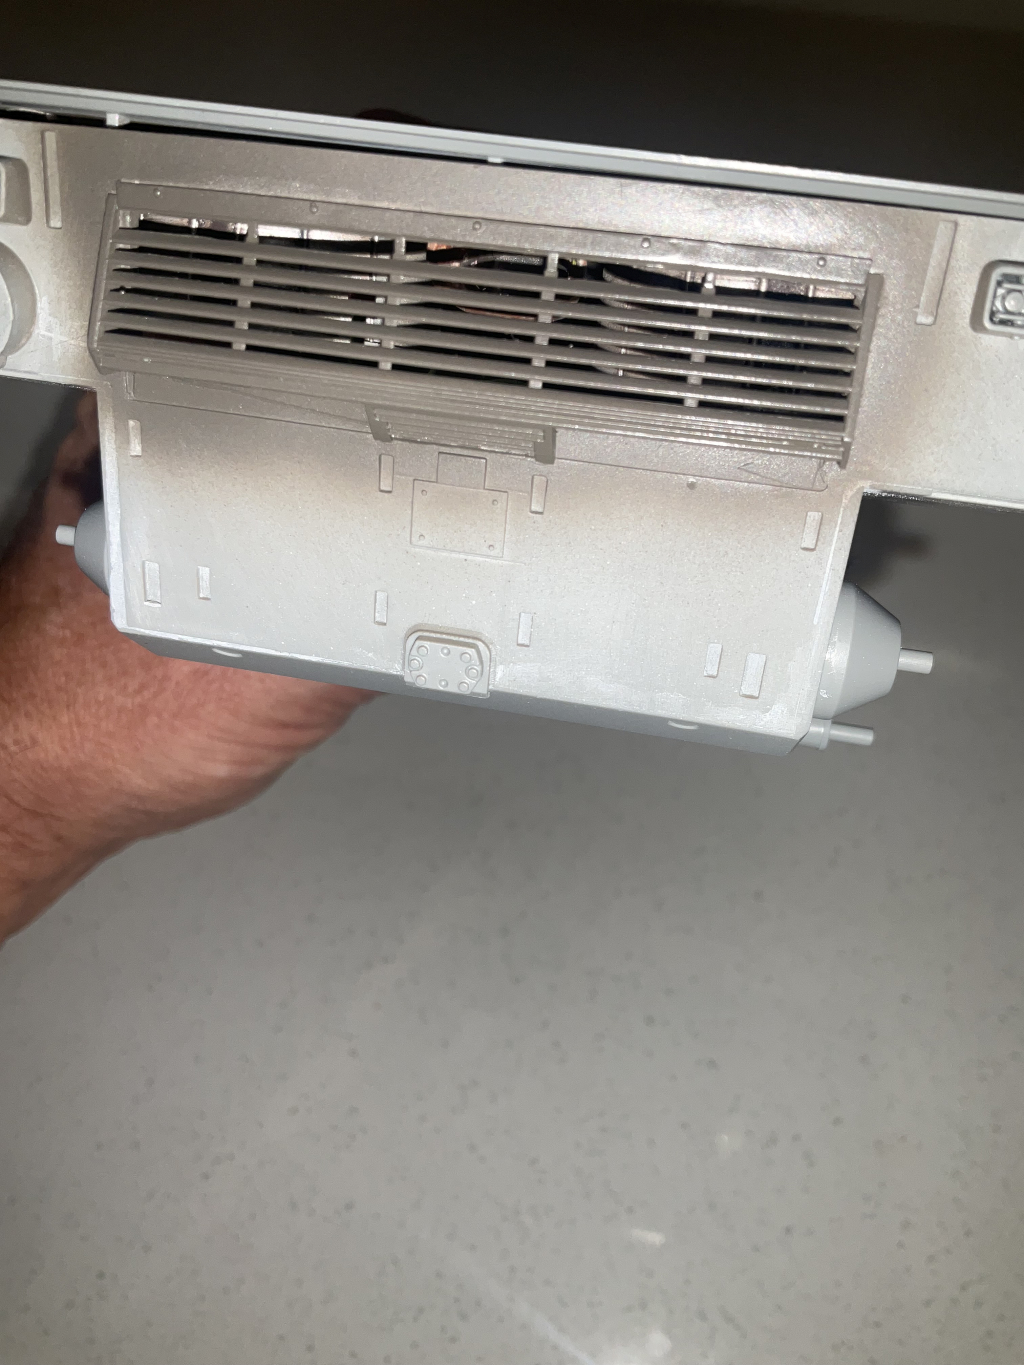
Some paint down on the VT 1-2 interior:
I tried something new - I painted the parts further away from the grill a very light colour. In the dark and with shadows, this means you see the shape at the back, instead of just a dark void. Worked for me.
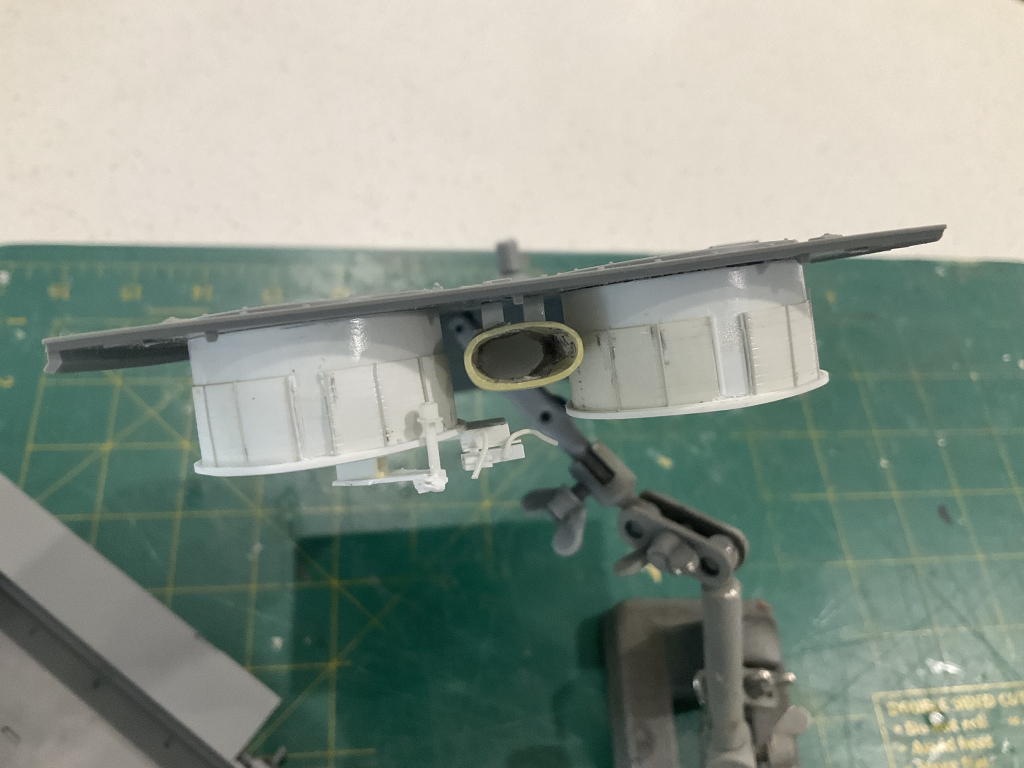
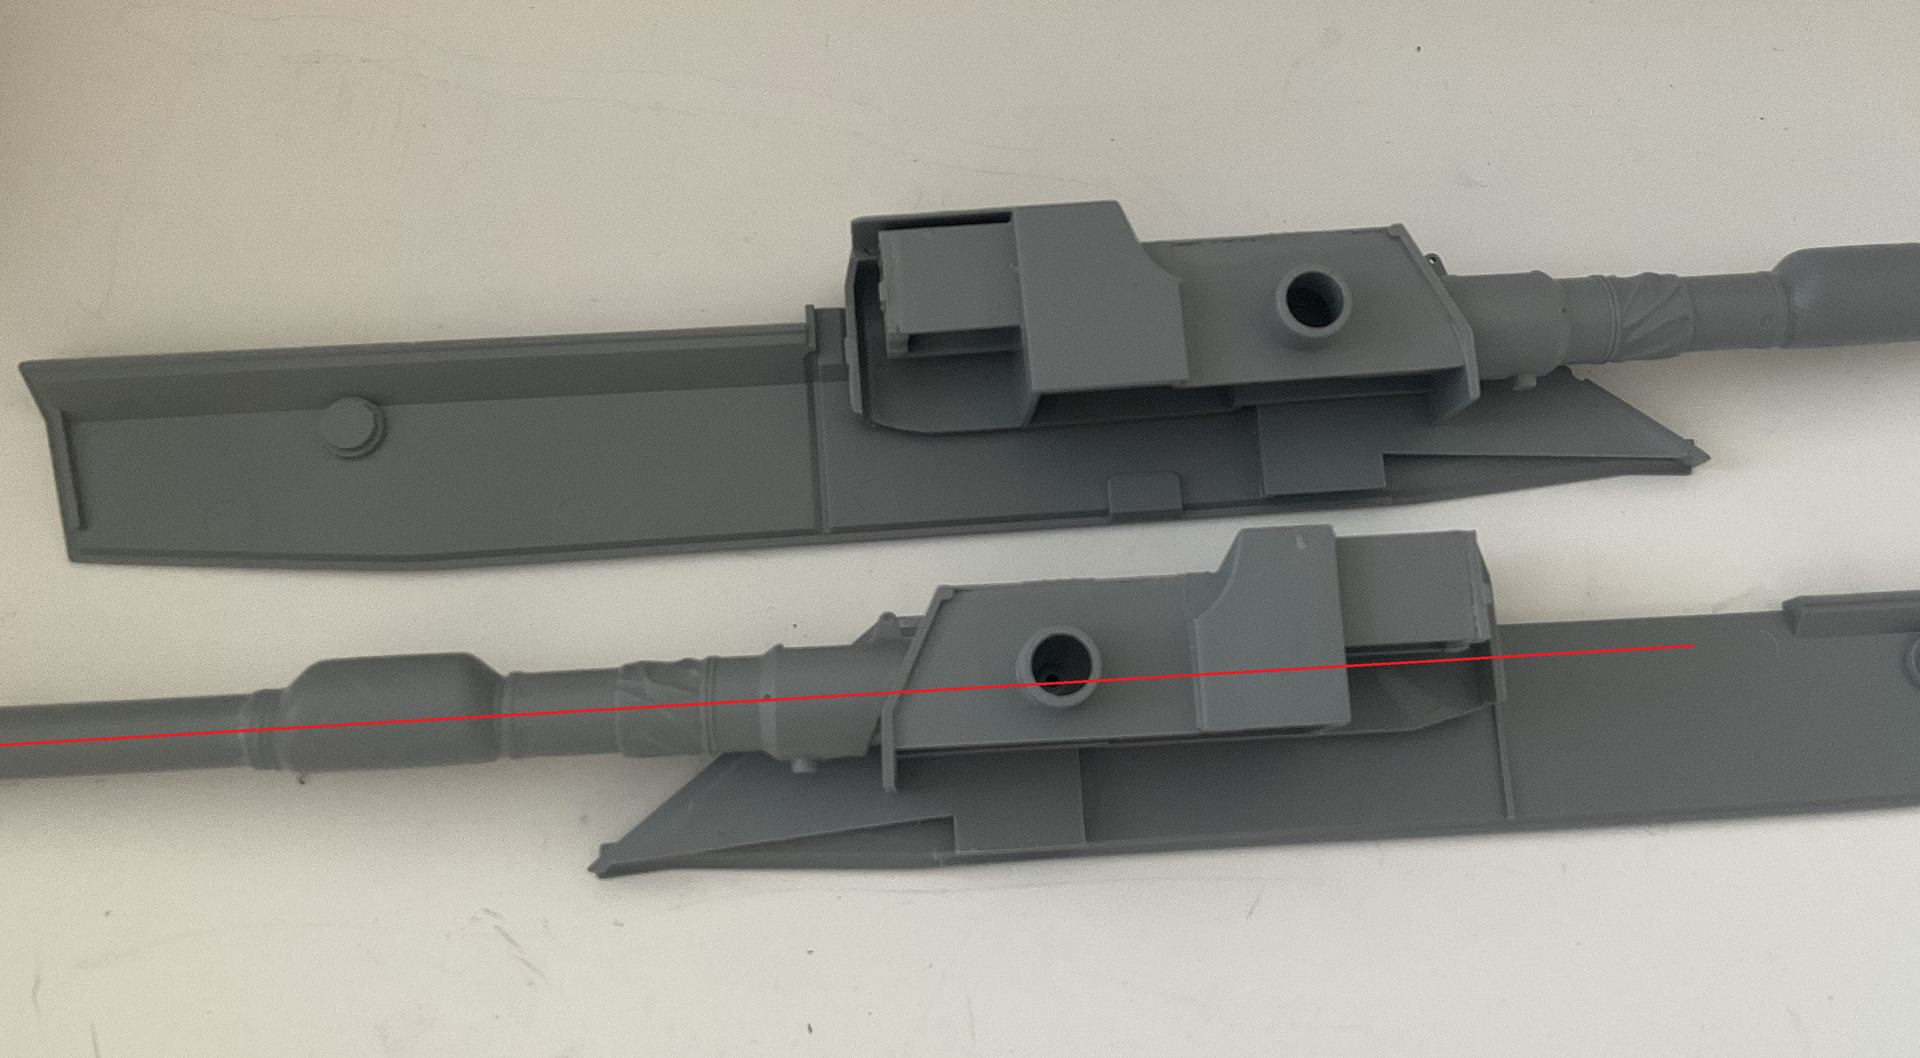
Then onto the next issue. The Breech - anything seem odd to you guys too? ![]()
I am beginning to thing the engineers for this kit were from Dragon’s Black Label team ![]()
Breech removed and realigned where it should be:
In the outer hull side is a small open port (moulded solid in the kit - that will be drilled out) through which the rear of the gun system gun be seen, which clearly shows the breech down low , and which confirms it is in line with the barrel, not offset in some weird way:
the beauty of being able to slide your phone into a cavity for interior shots!
Main construction done - and of course I forgot to install the PE screens on the inside ![]() Hardly noticeable so I am not going to try to cut up the bottom.
Hardly noticeable so I am not going to try to cut up the bottom.
More to follow ![]()
Nice work so far Jesper. A big hunk of plastic even in Braille scale.
That VT-1/2 sure has a few issues! But the breeches look better in line with the barrels!
And I’m impressed with the Maus! Are the DS tracks OK?
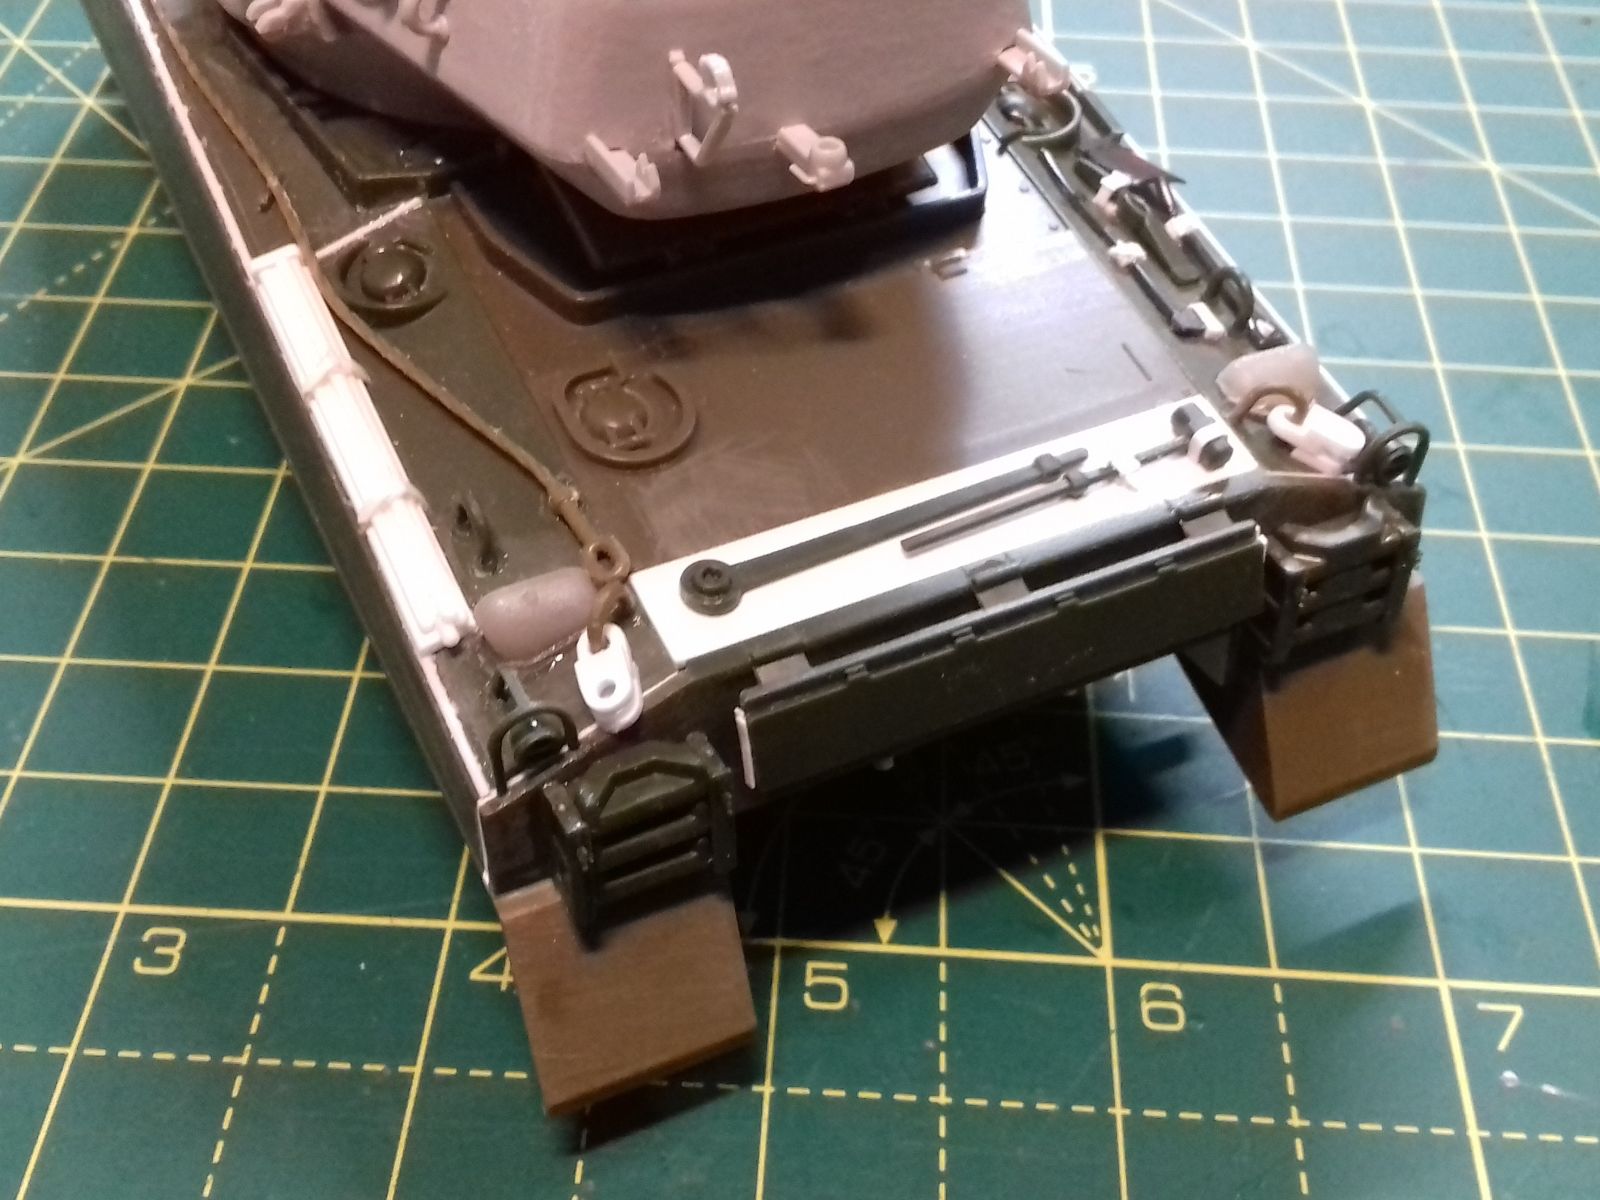
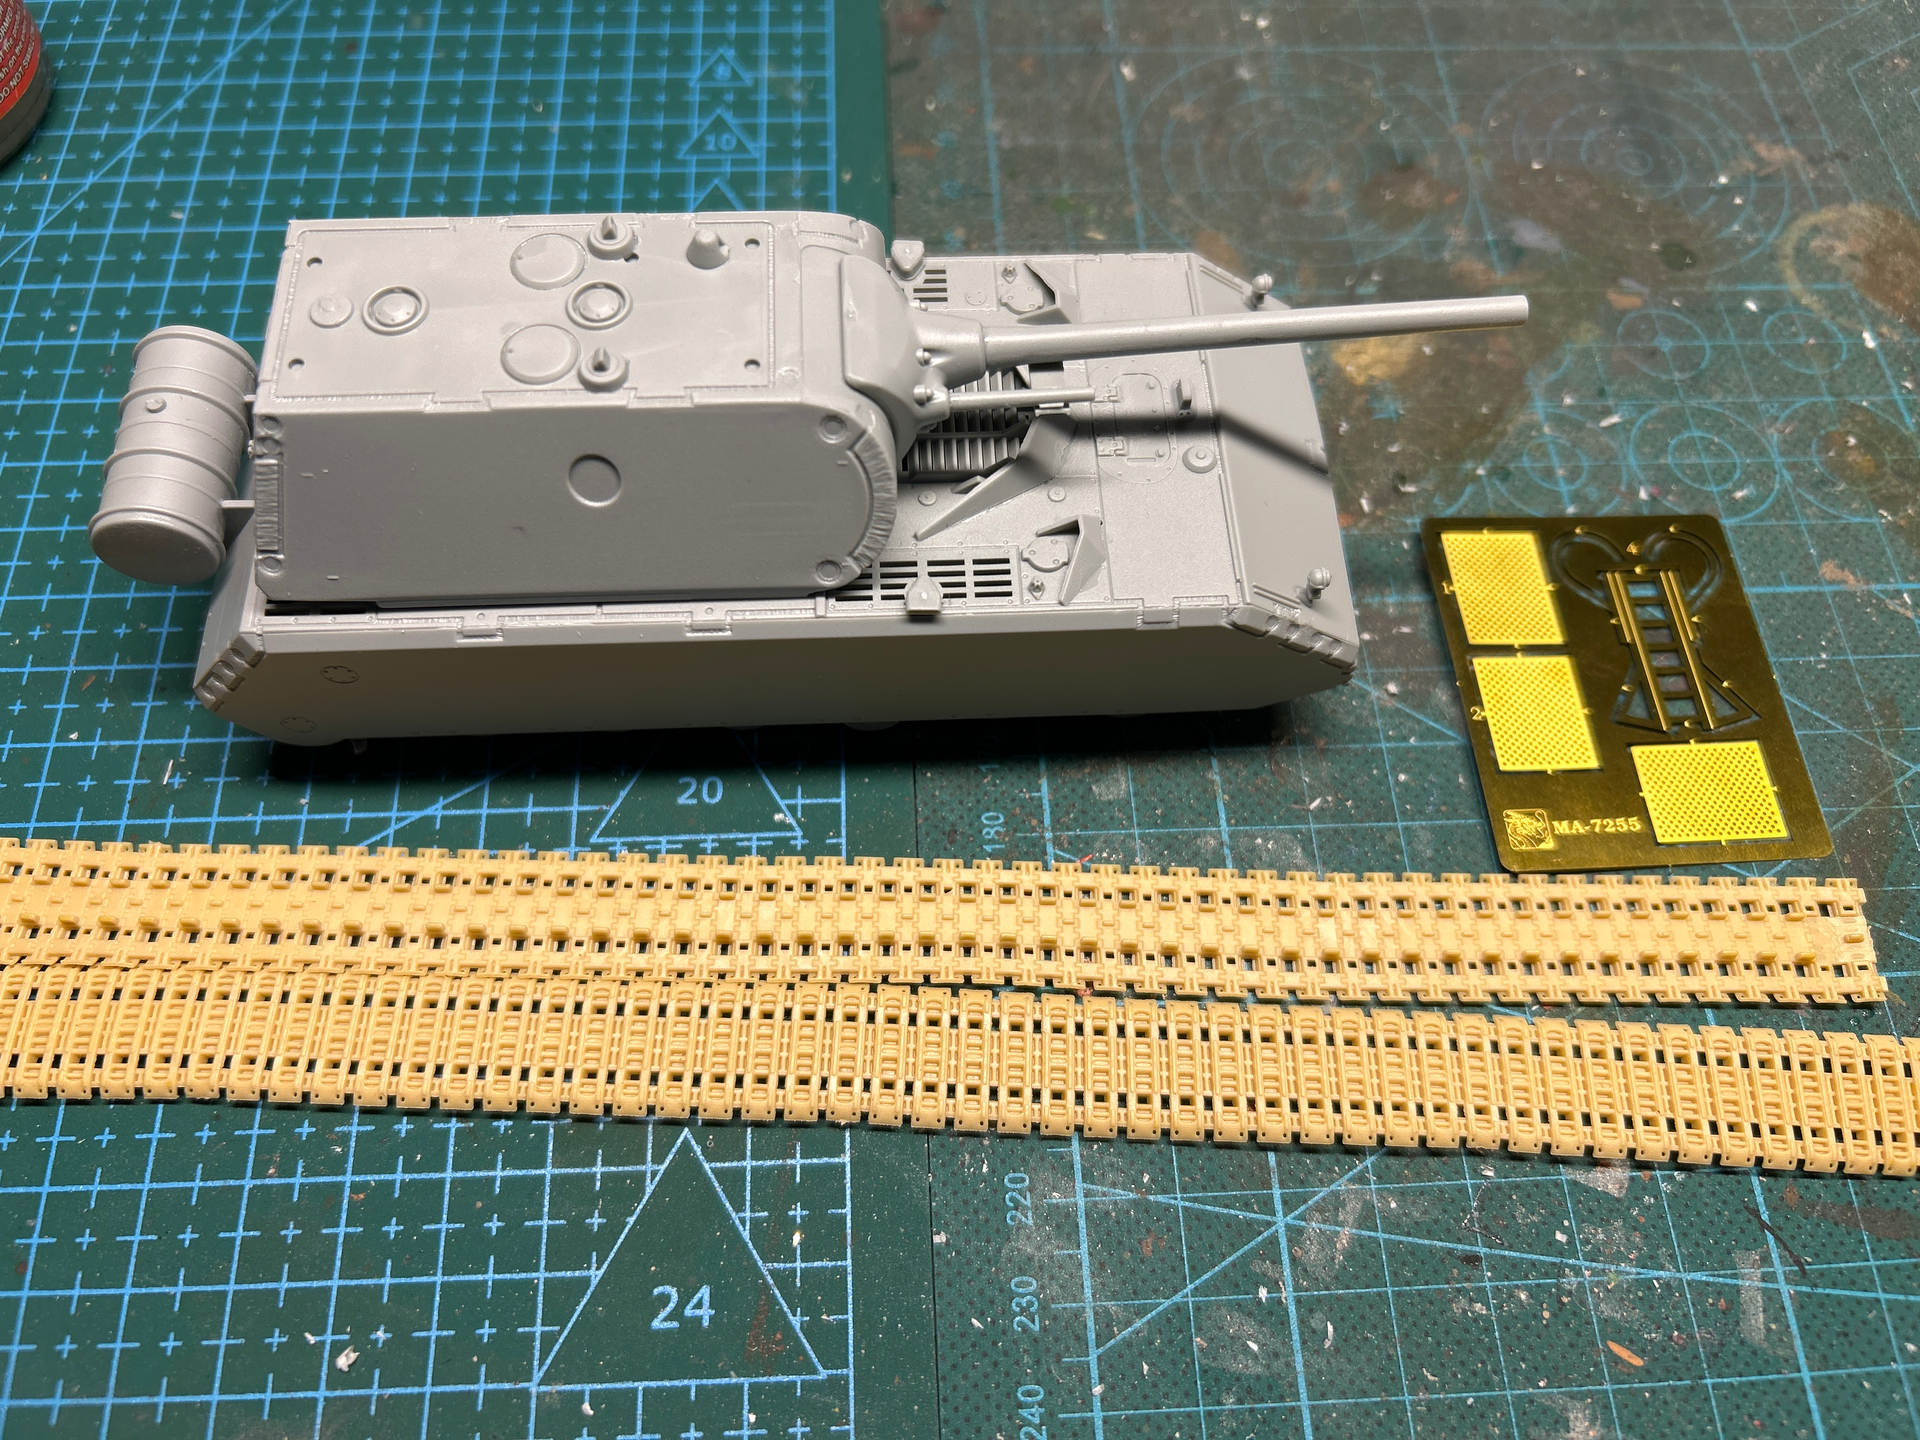
My own build finally got some OD on it tonight, so it’s well on the way. Lots of painting yet to go, and of course sorting out a set of tracks for it…
It is a beautiful kit with a two person resin crew, good decals, PE and excellent fit of the plastic. However, the tracks look like they are too tight - by almost a cm. I might have to do the old trick of super glueing them to the top top of the suspension. It will impossible to see, so I guess it is alright, but annoying they are short.
Is it the rubber shrinking over time in the box or is Dragon just incapable of measuring the distance in a proper way?
It seems like DS tracks are hit or miss and I suspect it might be the rubber plastic shrinking that causes the issues. I have used them before in 1/35 with no problems, but these tracks seem short.
We will see - I still believe it is a great kit despite the track issues.
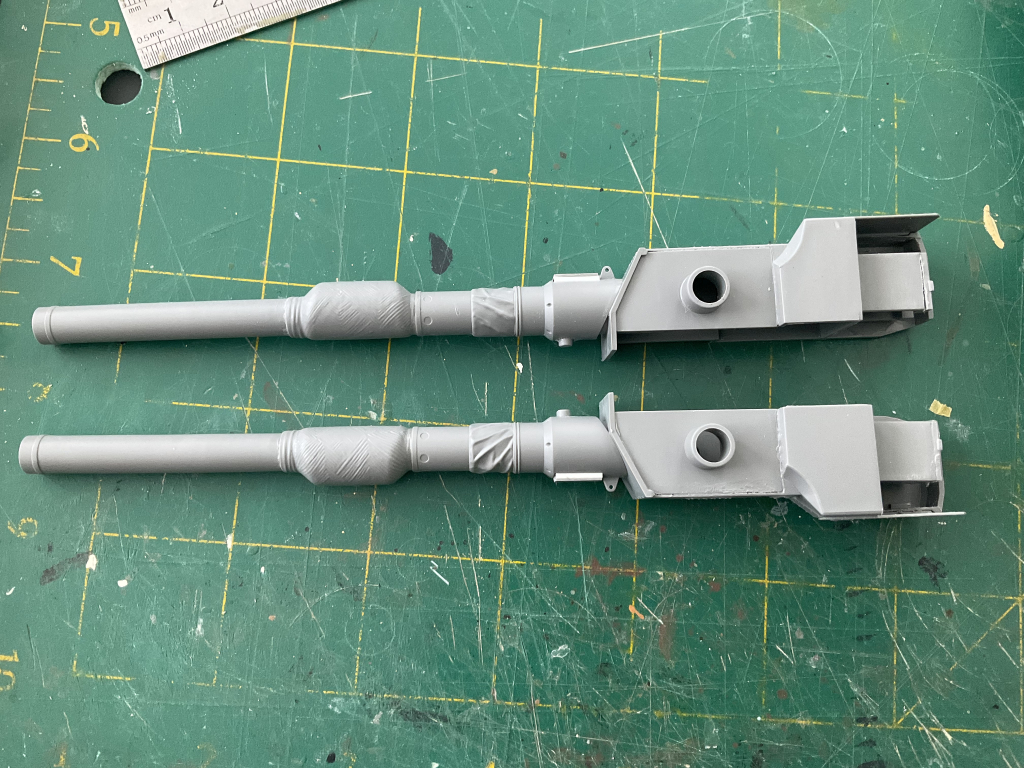
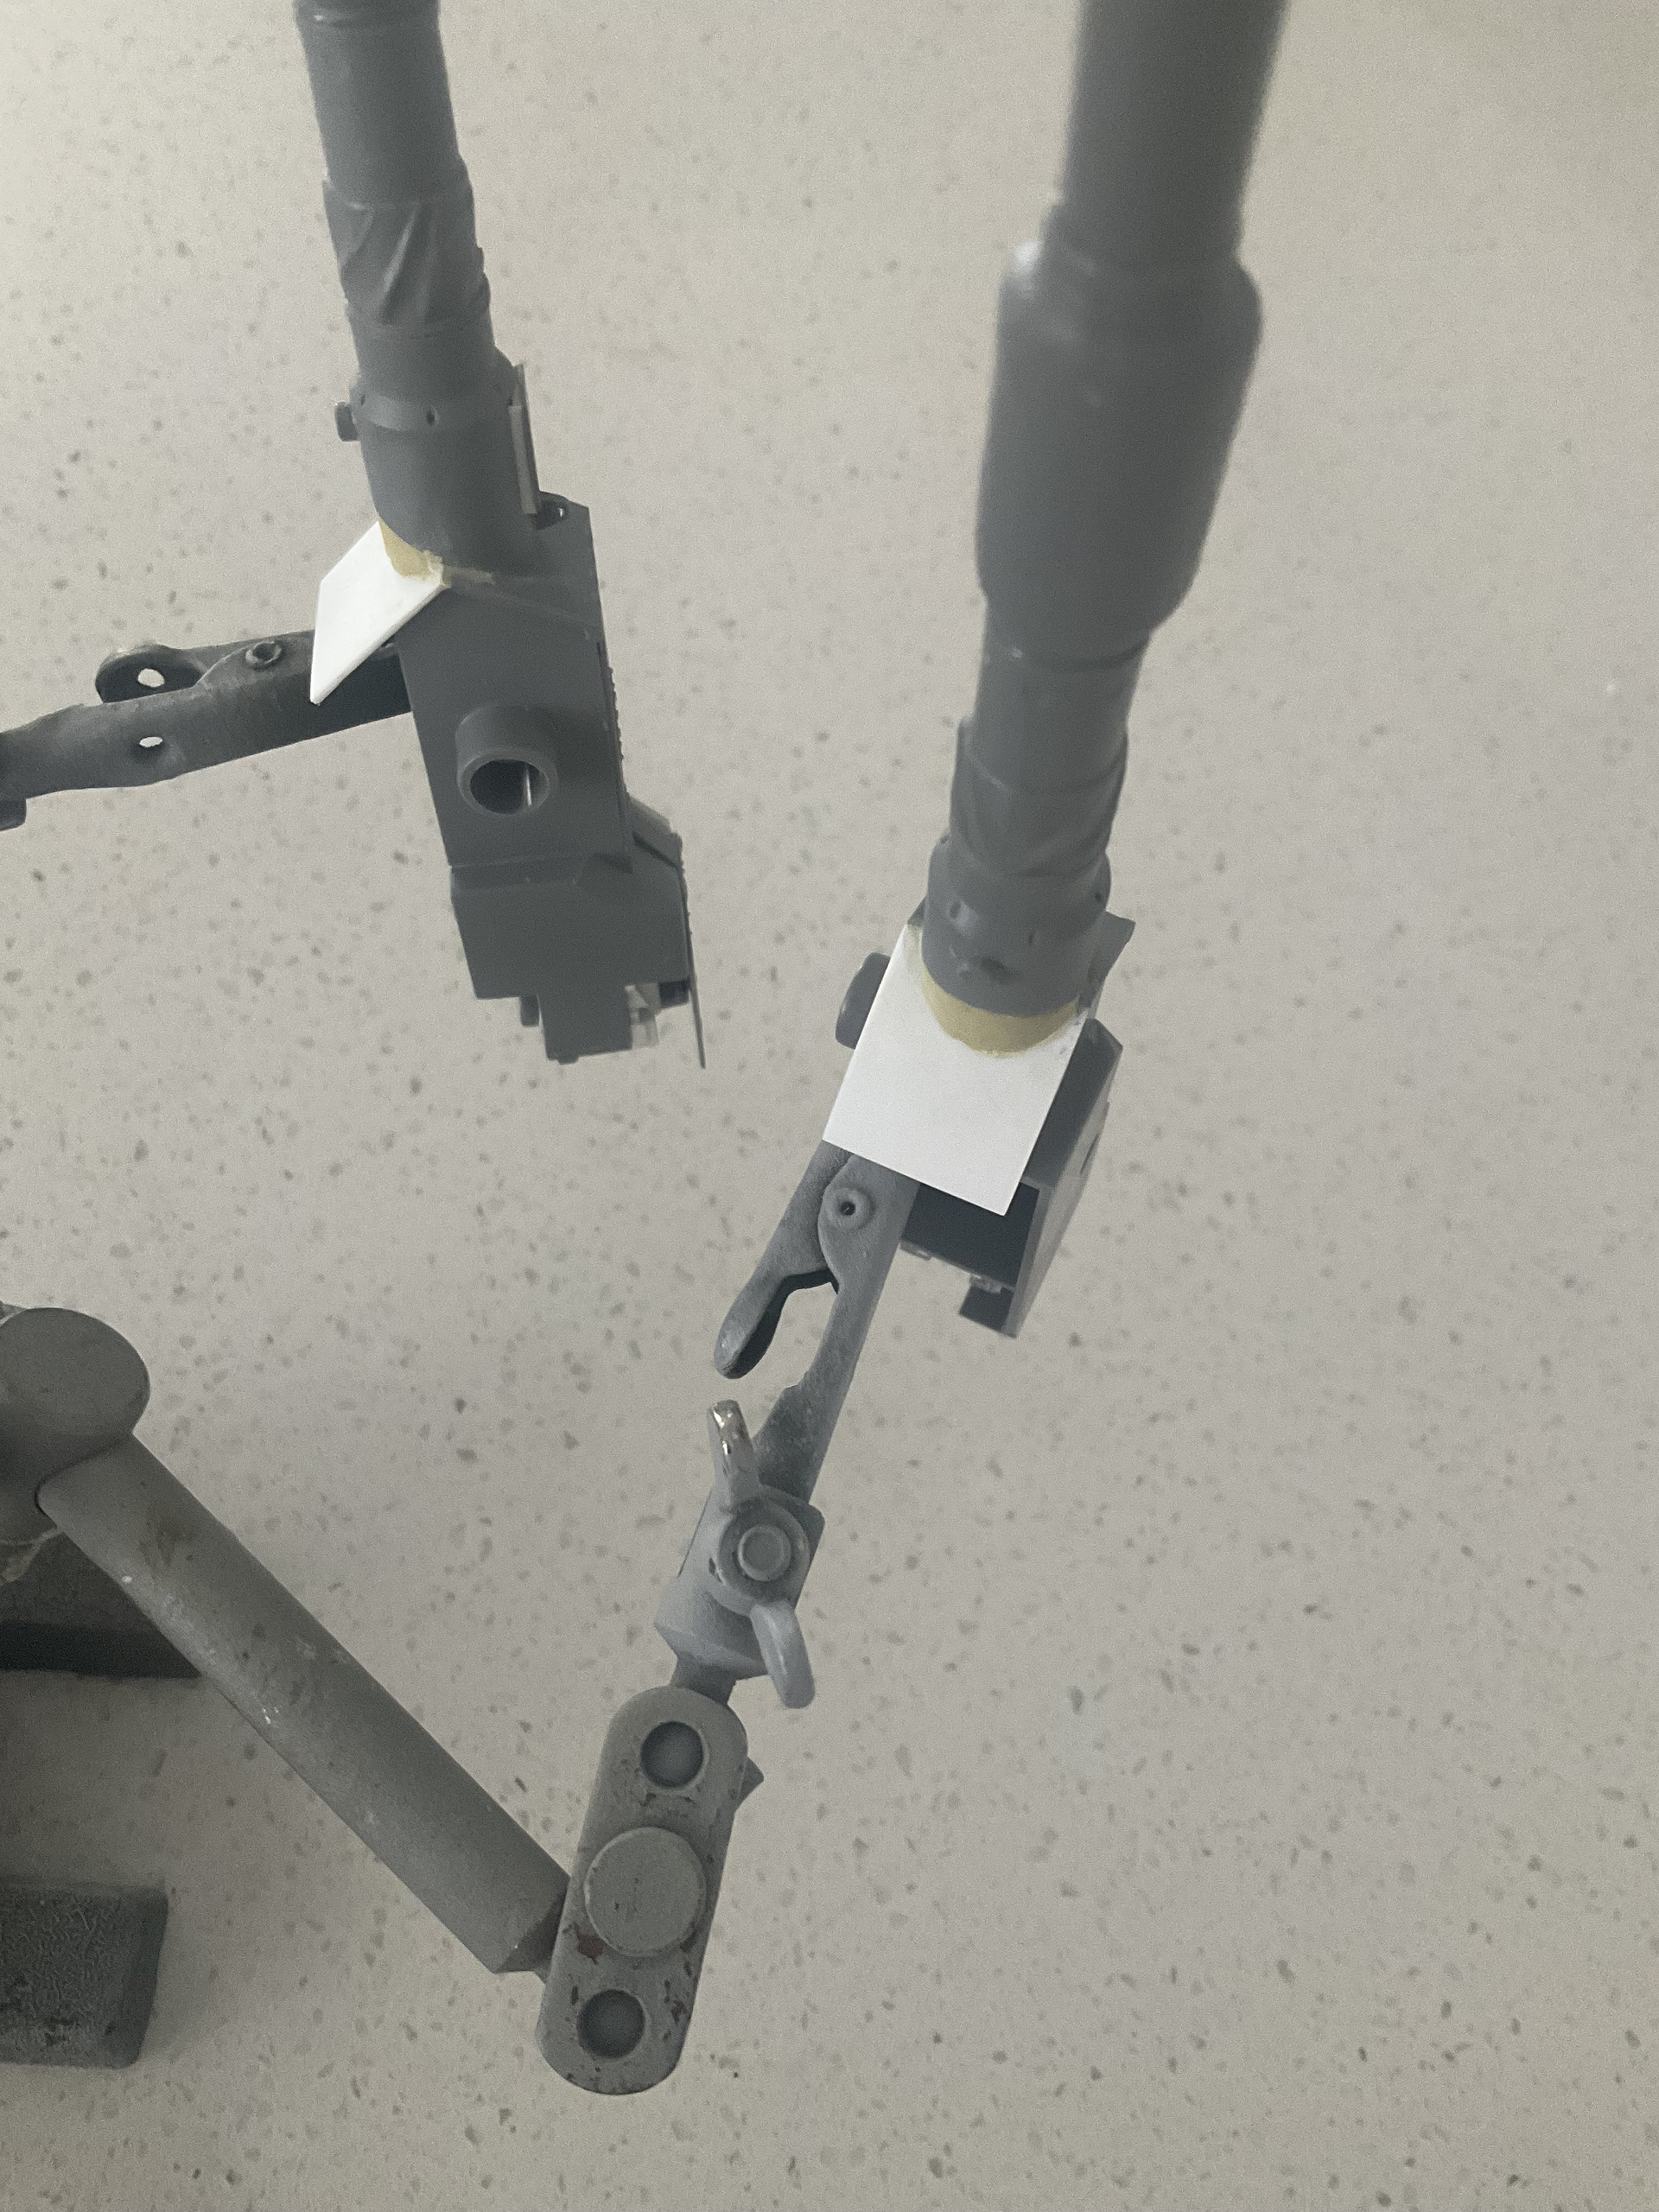
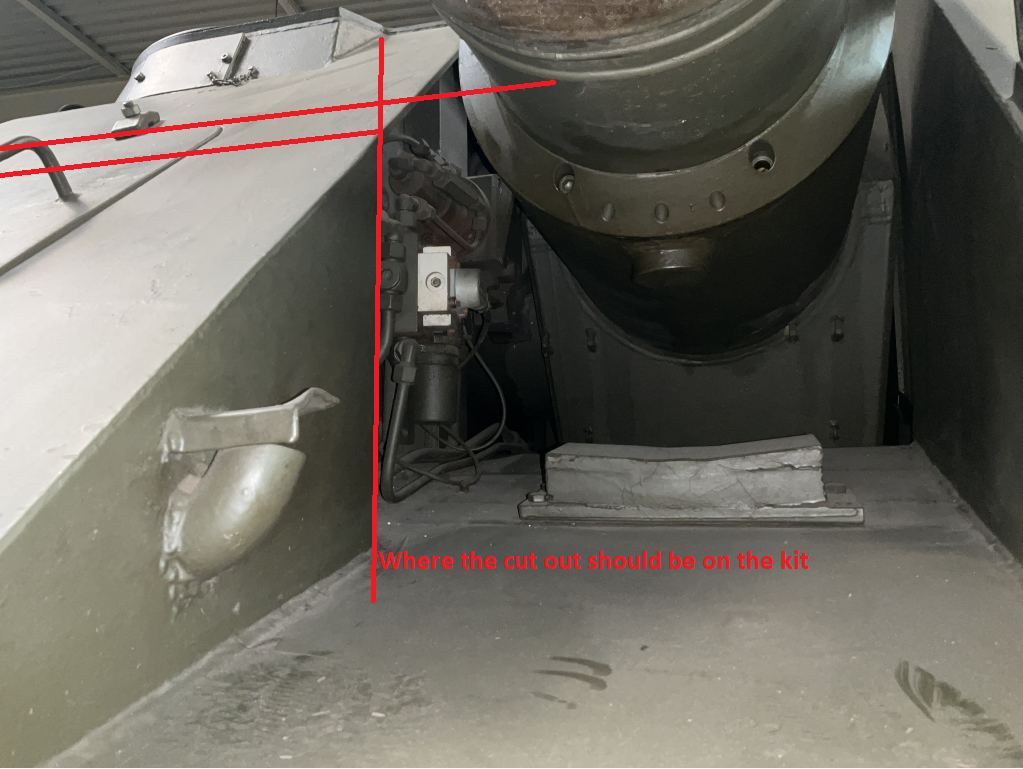
Okay more work done to the gun assemblies. First off, the ‘cover’ and shroud. If you look at my earlier pic where the breech were corrected, you will also see Takom has a cut out in the shroud in front of the cover and the cover is 90 degrees to the barrel. It is also short so as not to foul on the fender, which means there is a very large gap under the cover when the gun is elevated above neutral - all wrong!! There is no cut out and the cover is at an angle away from the barrel and much longer.
The cover actually slips in behind the forward fender section so there is no gap in any elevation position for the gun. For this reason it has to be angled backward to be long enough. My solution- Milliput and plastic card.
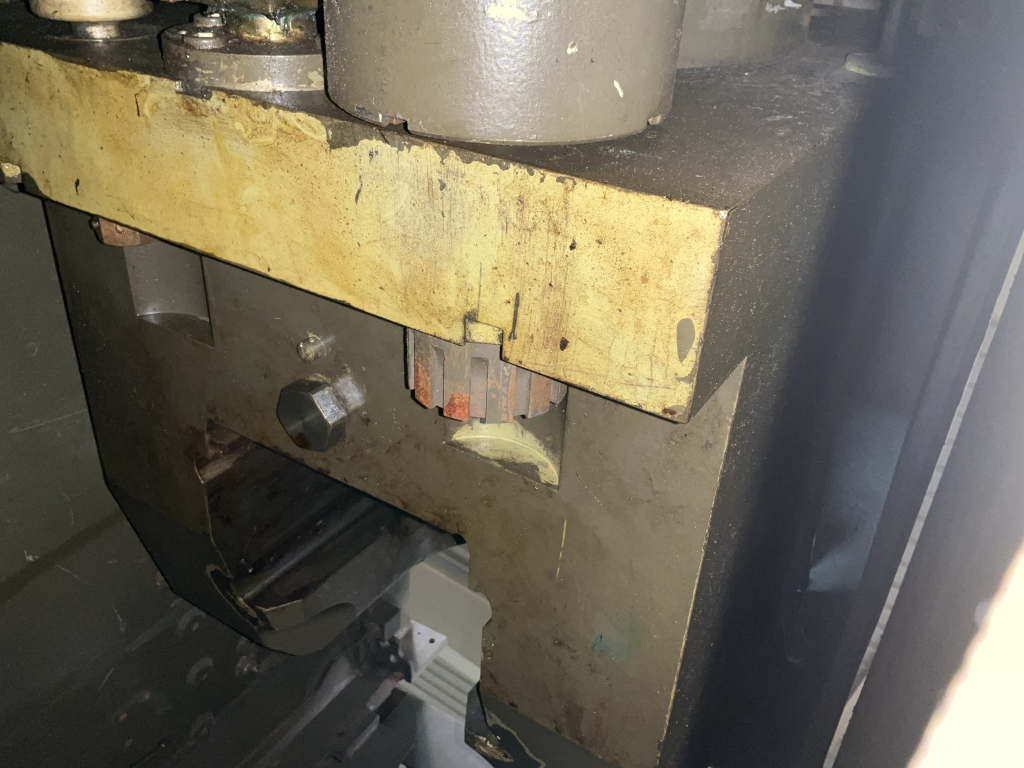
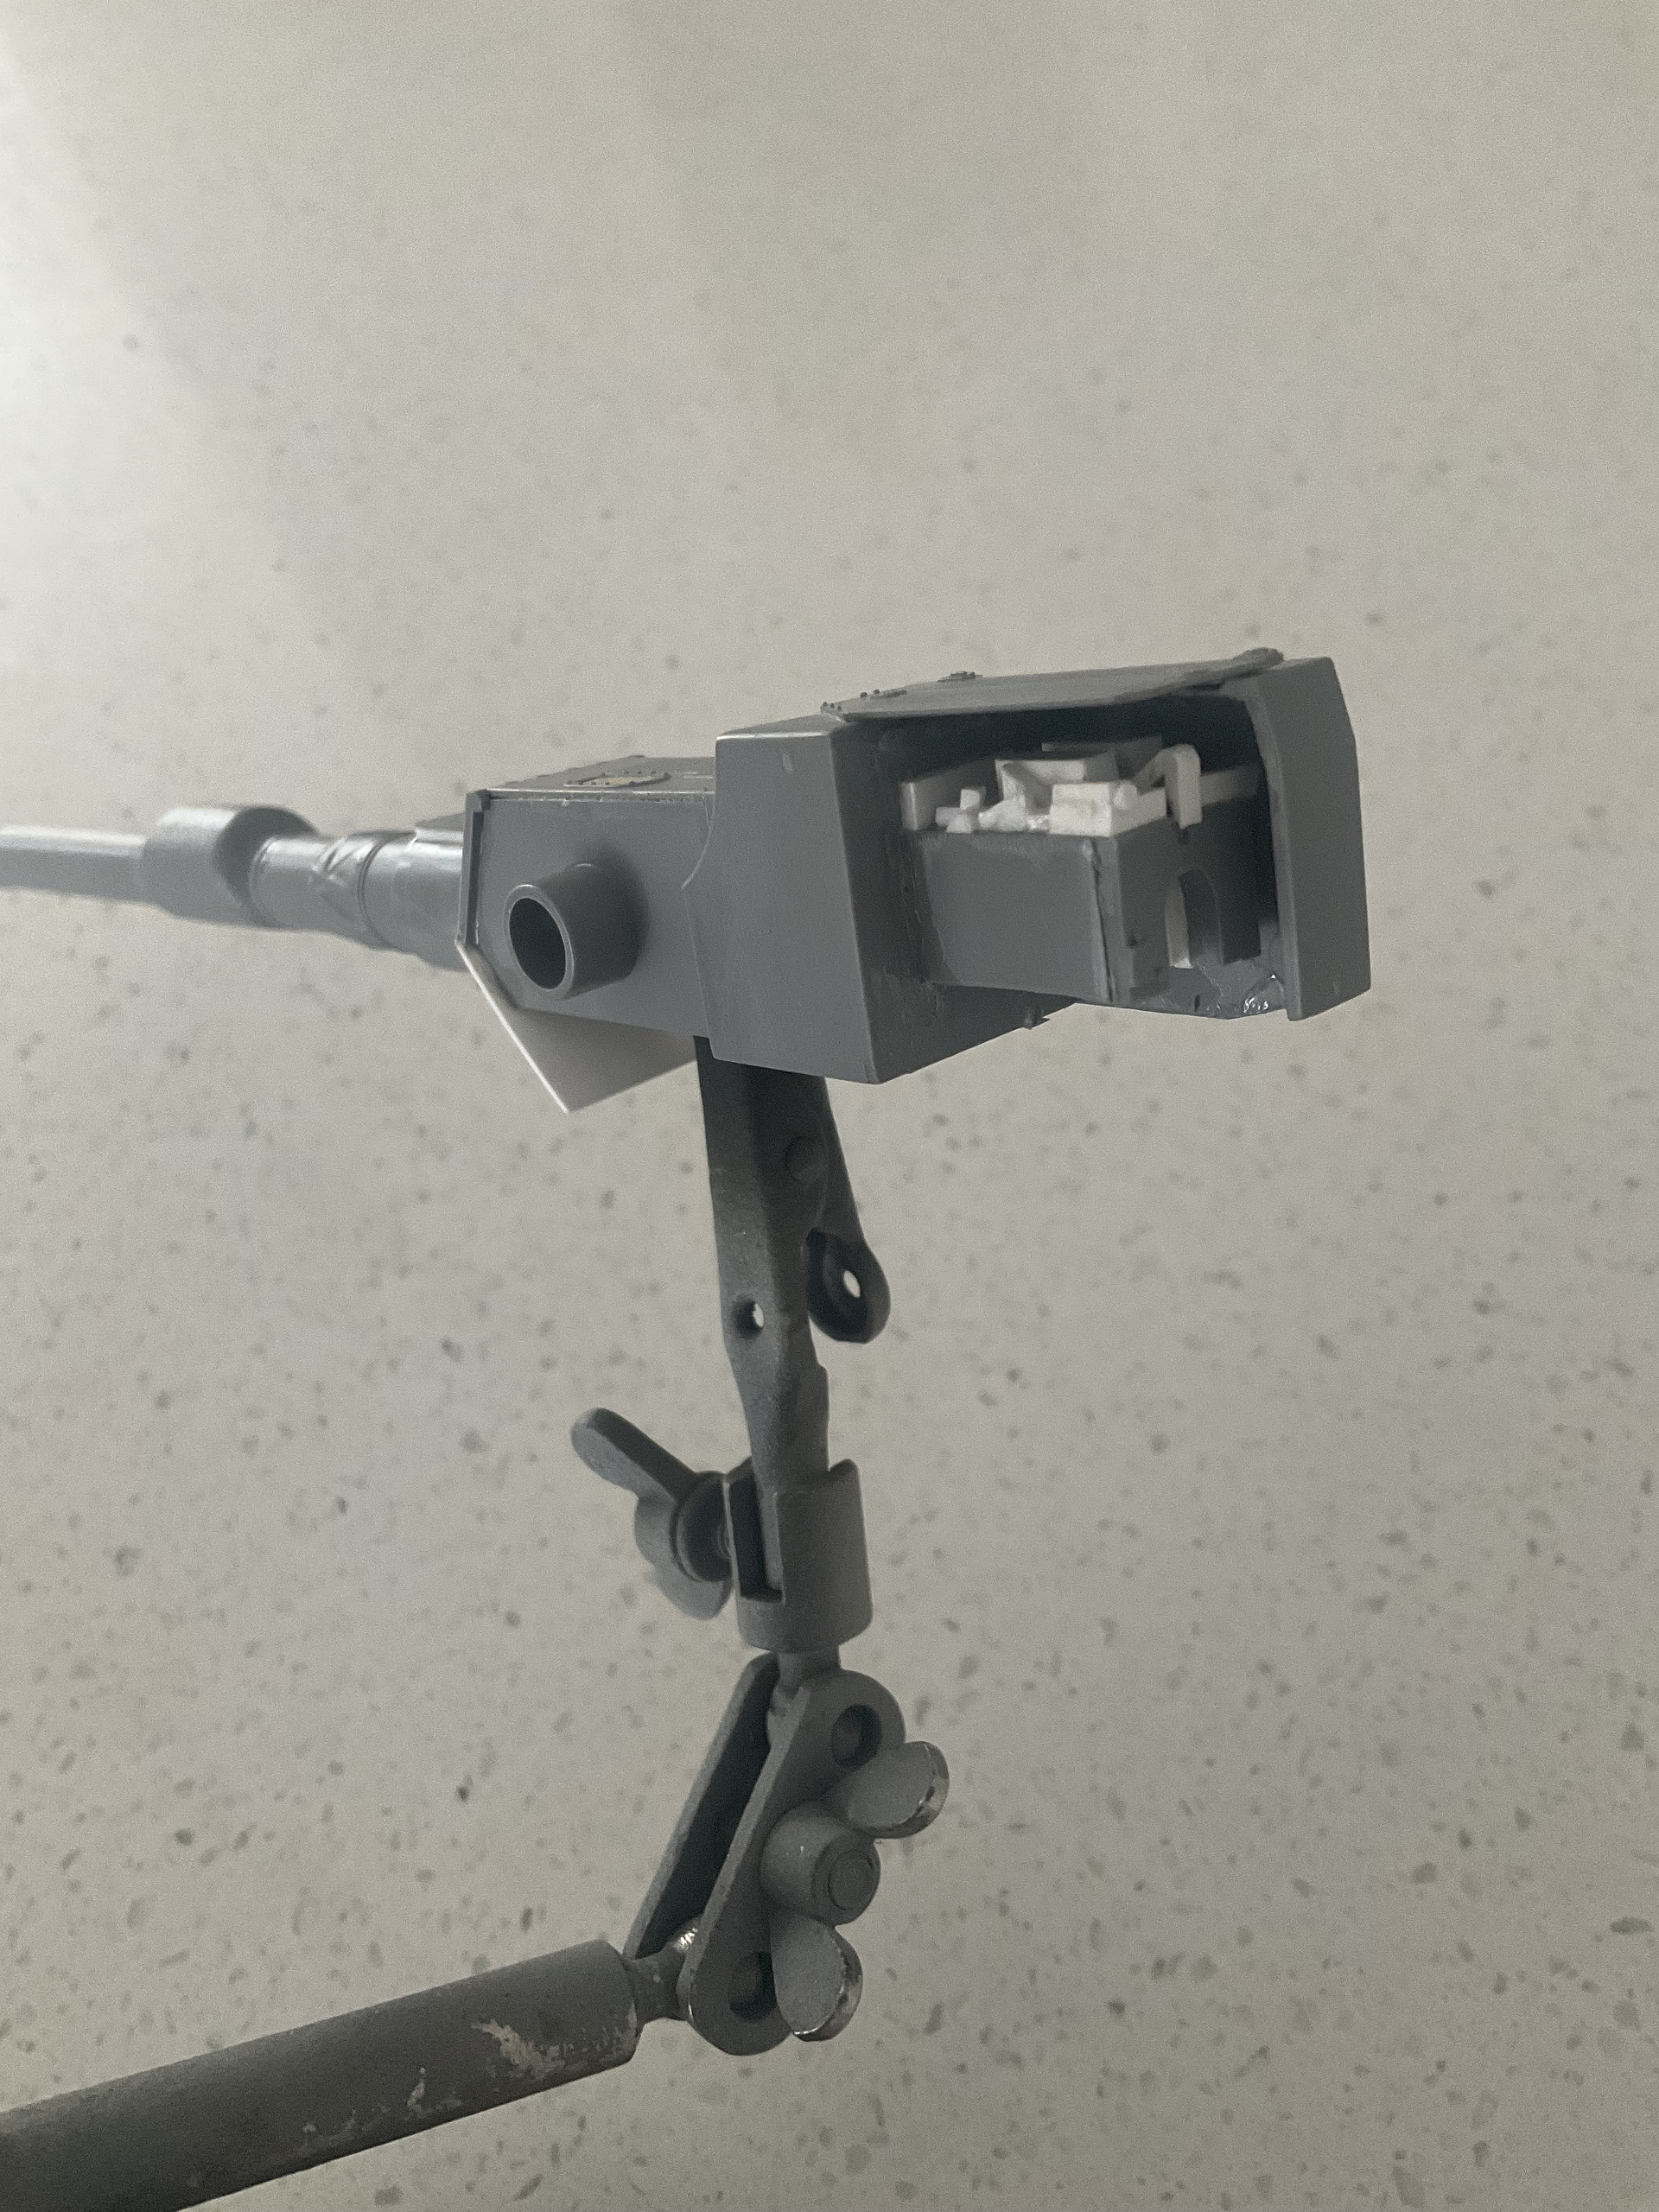
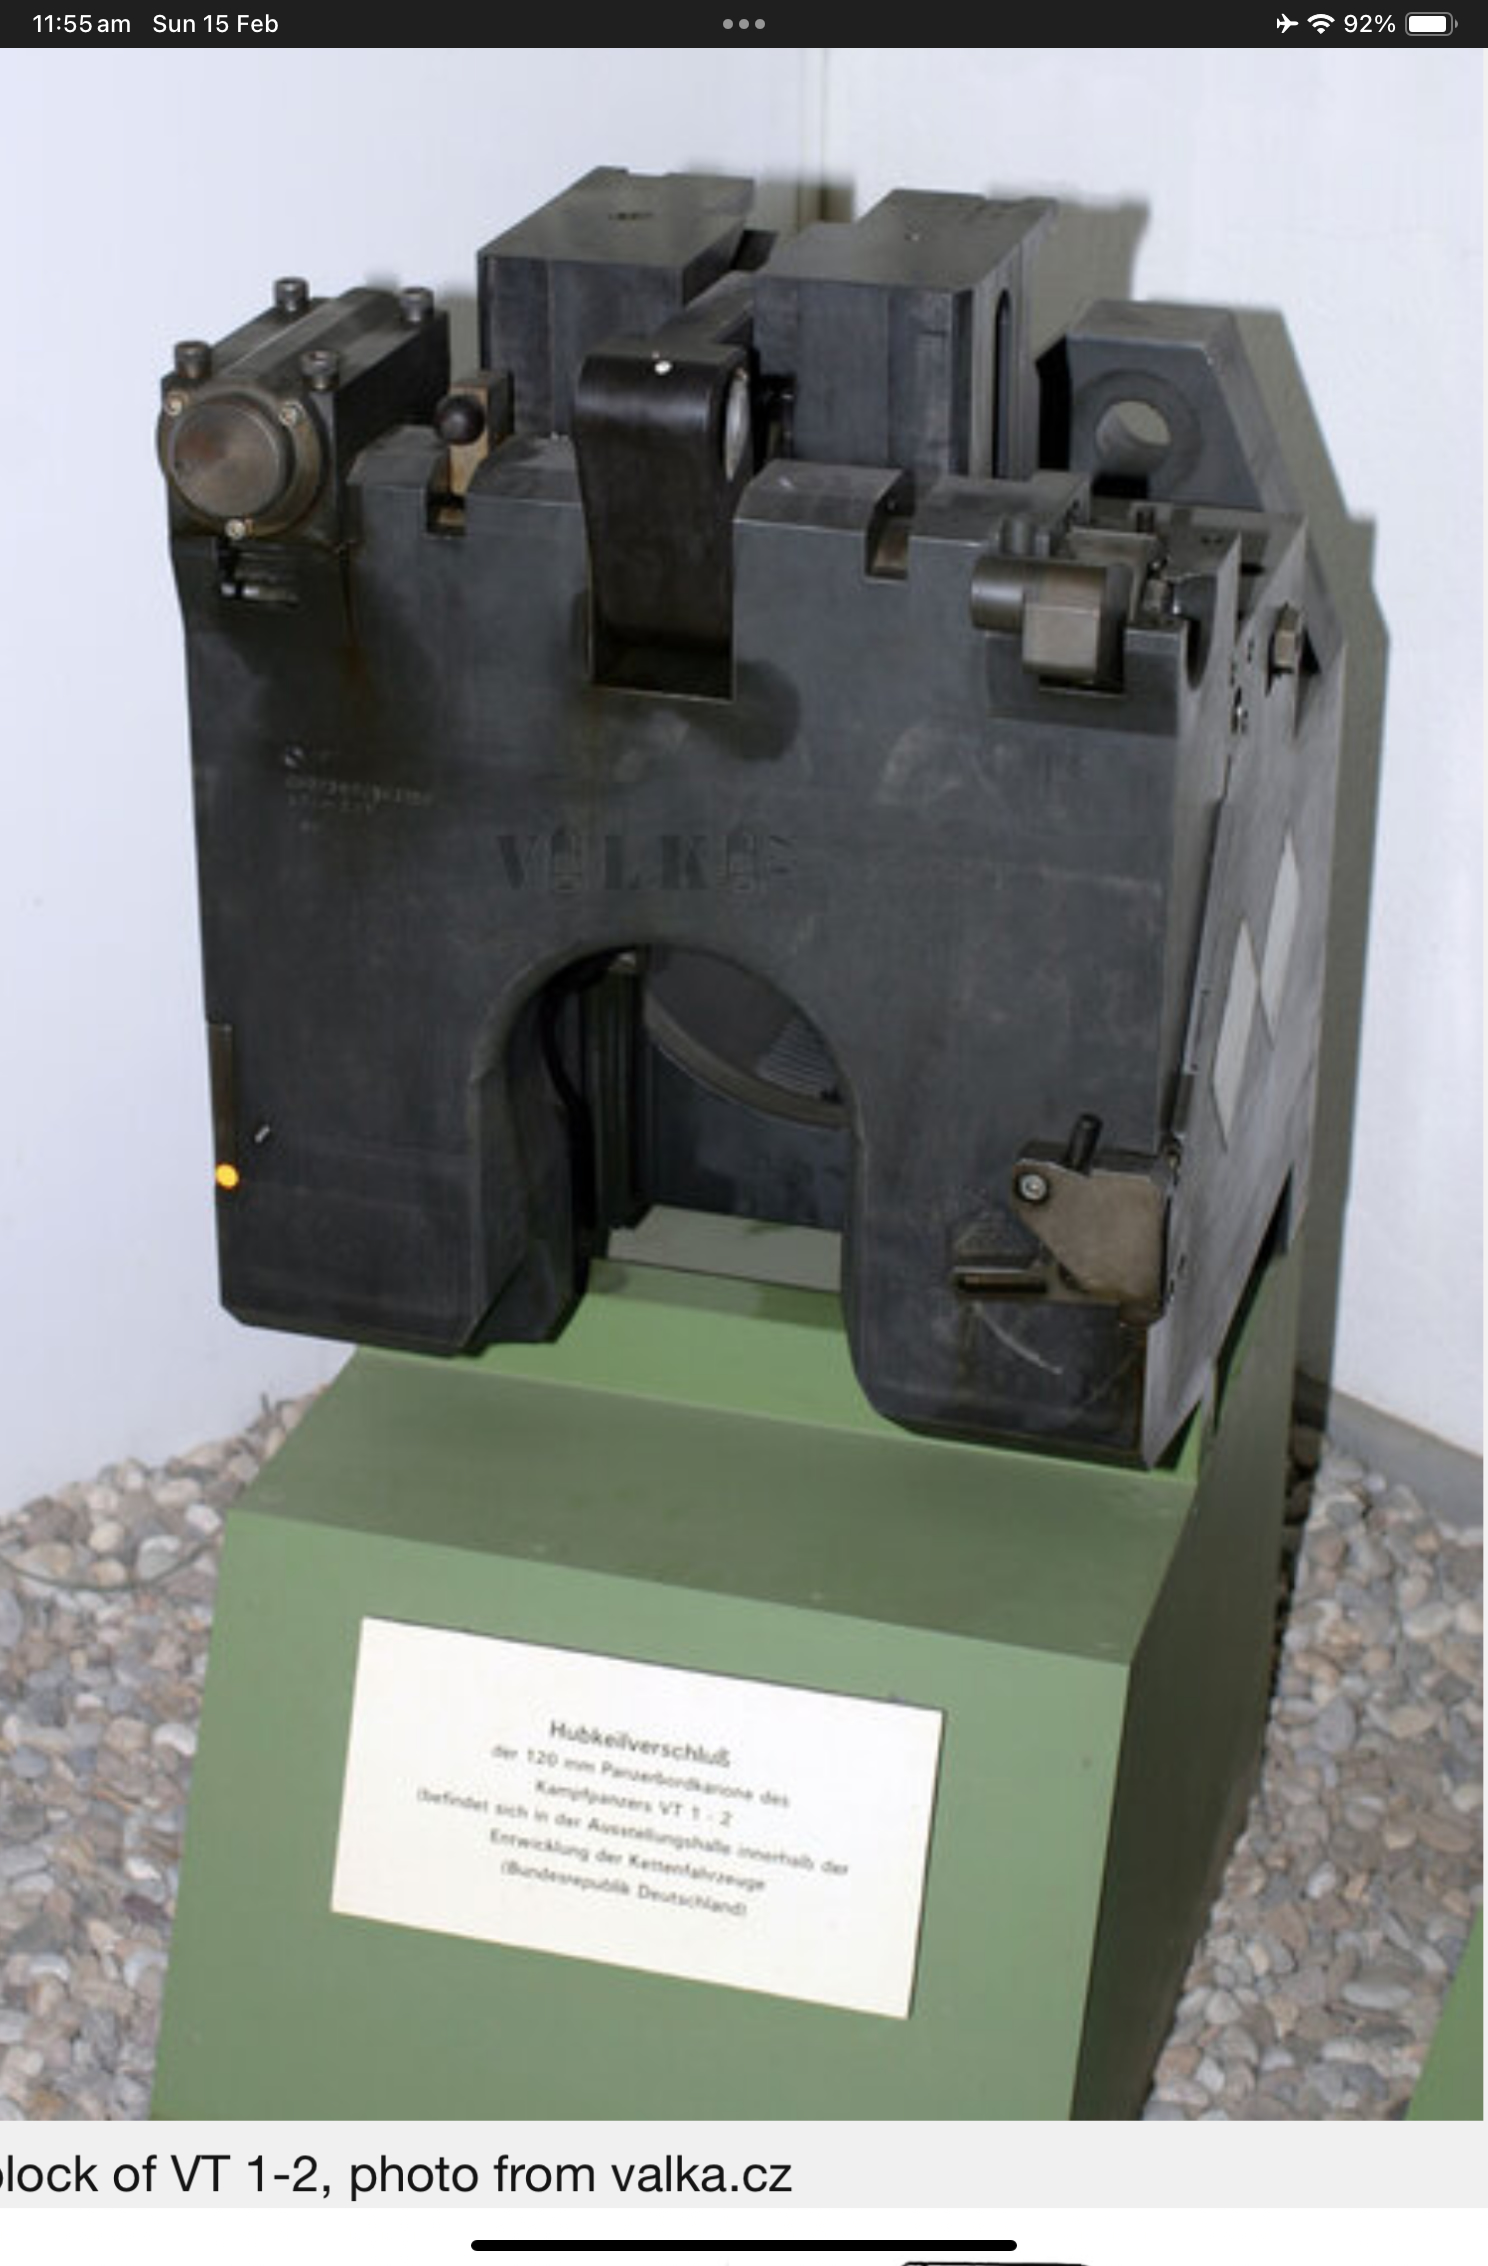
Then I moved onto the breech - a simple flat rectangular box with a face showing the shell loading aperture and a bit of detail. By realigning the breech lower down, there was a large expanse on top of the breech…. so I added the missing detail for that:
Reference:
Not 100% but good enough. Onwards…..
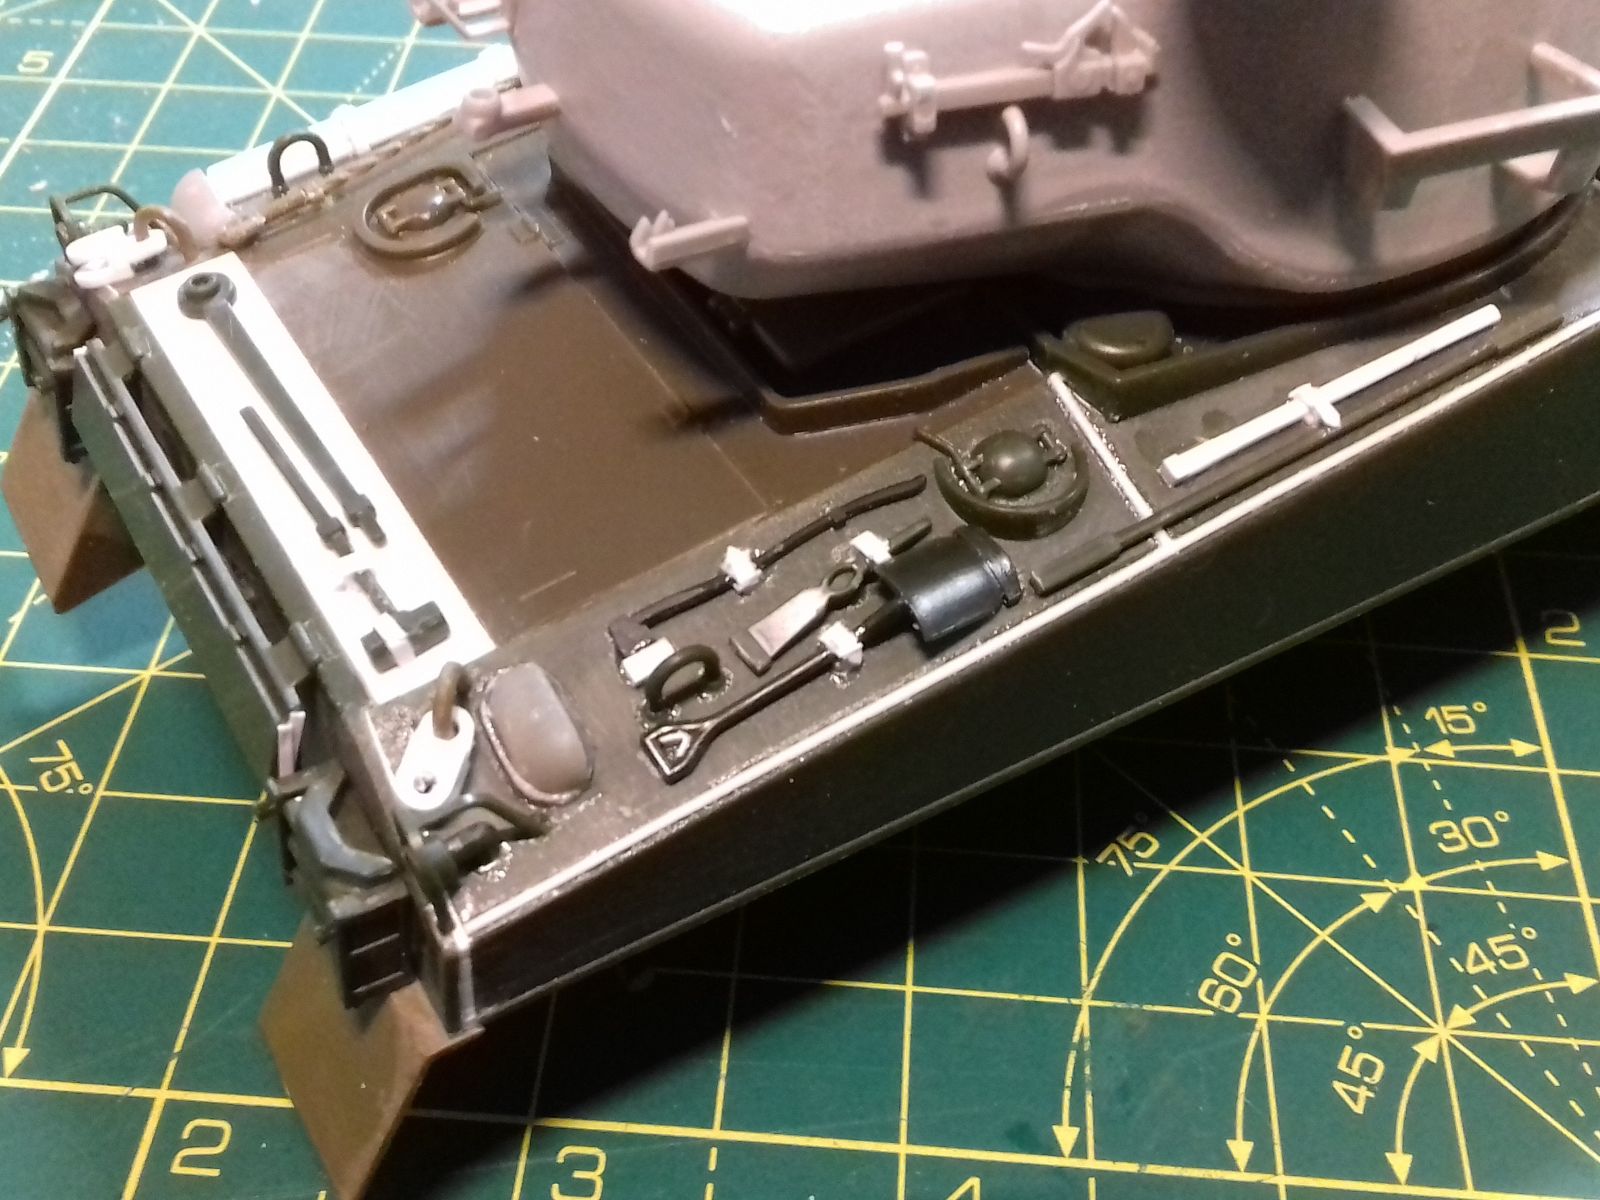
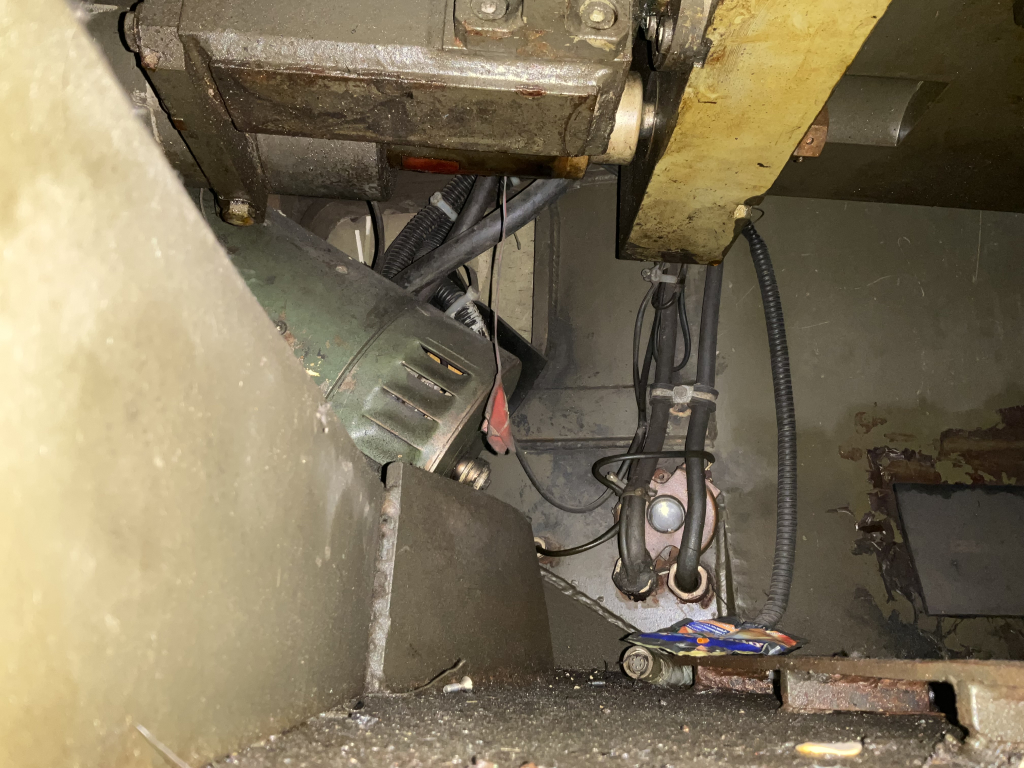
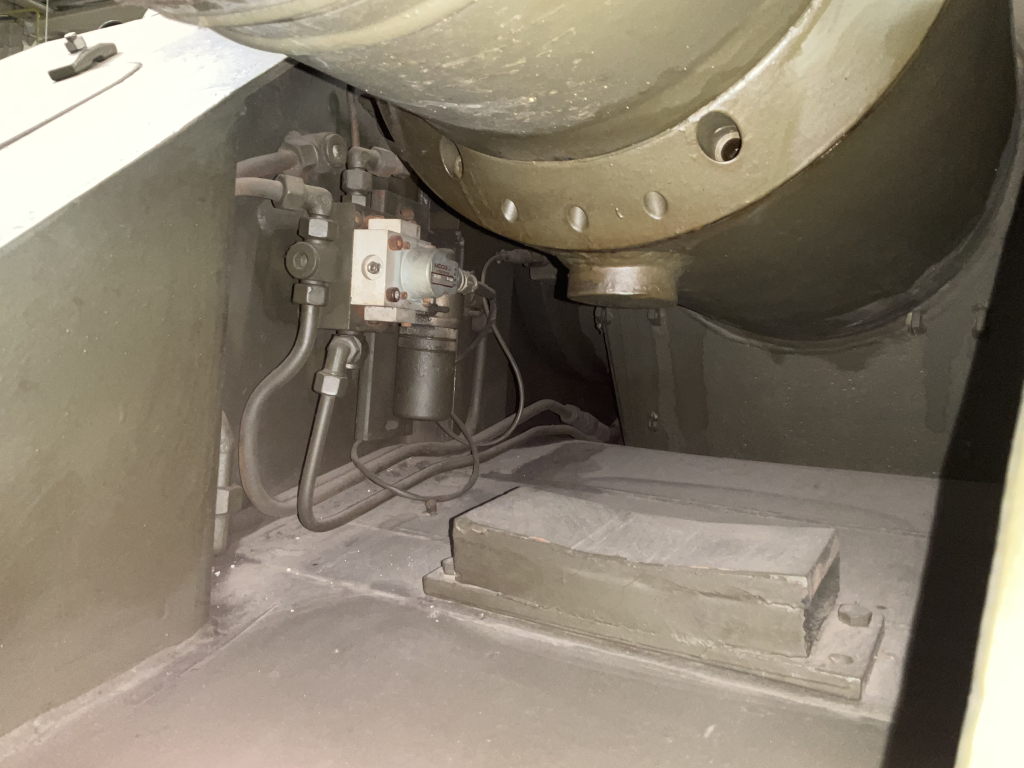
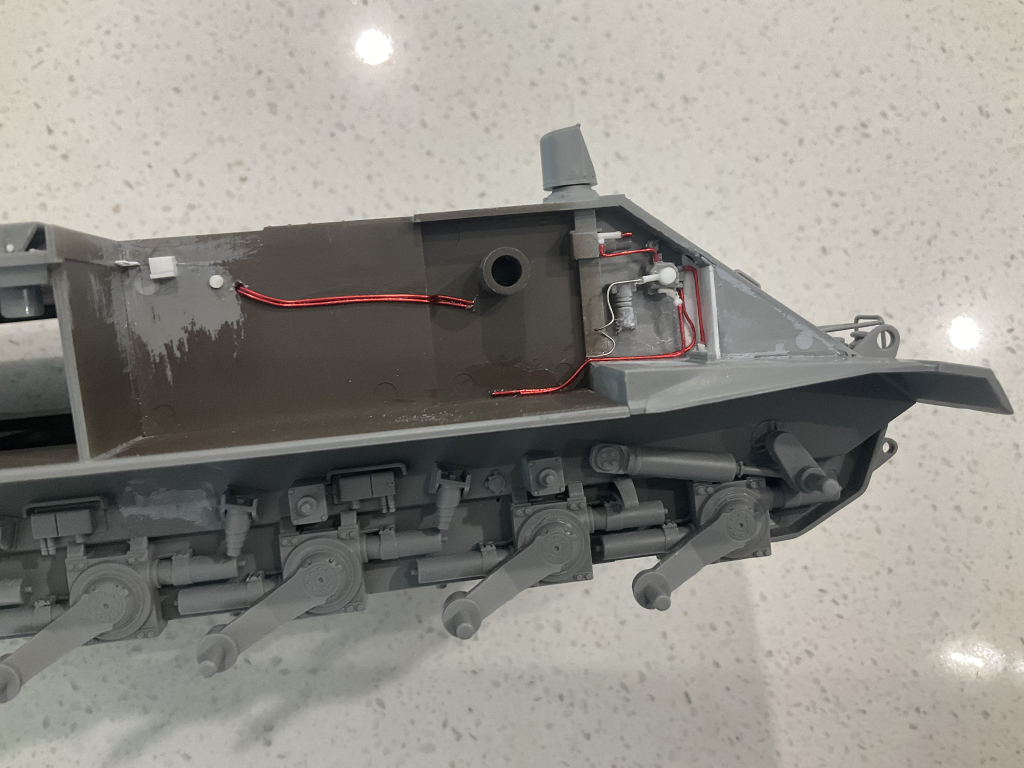
More work on the VT 1-2. I have corrected the size of the inset area in the inner hull sides and added the detail and pipework/cables missing in the kit. I have also started on the hydraulic lines and electric cables to the Hydro-pneumatic suspension.
References:
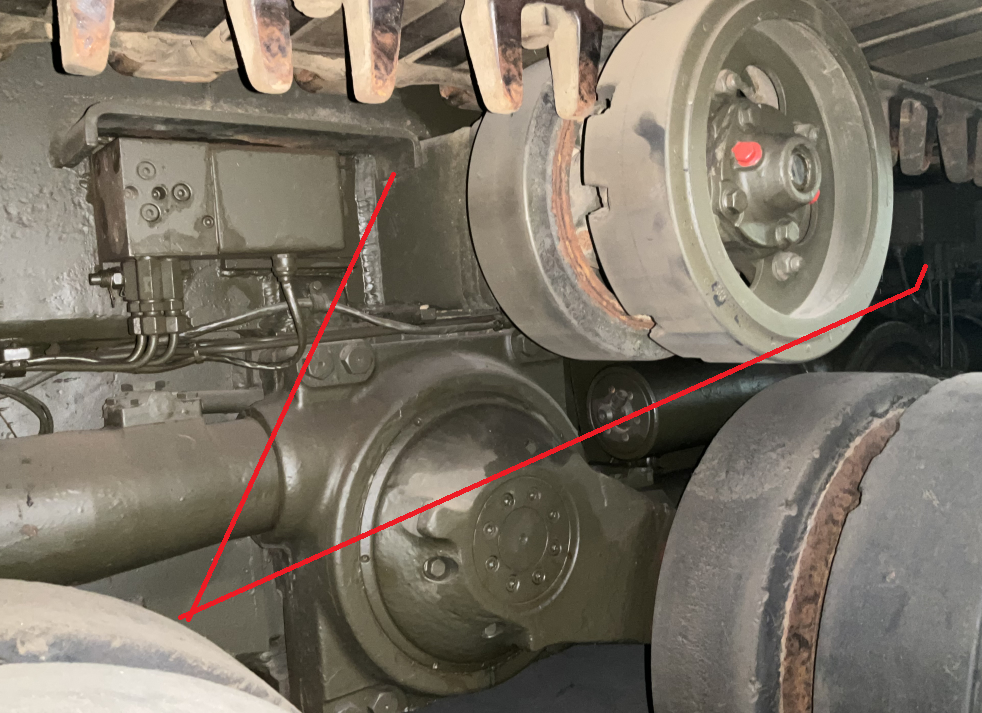
Note also that I have relocated one of the junction boxes on each side. Takom has you place the two provided, side by side, however one needs to be closer to the front of the hull, with the cover butted up to the return roller fitting:
Unfortunately, the pic files of the photos I took of the centre section are damaged and will not open. However, based on what I have, and the way the lines are fitted, I am assuming there are actually three junctions each side, with the front and rear servicing the first and last two suspension units and the centre one servcing the centre suspension - this is because the pic above shows only two lines coming from the junction visible on the right.
I’ll scratch build a central junction box. Oh, and the road wheels hide the lines at the bottom, so placement is just for convenience, not accuracy…