In theory PE could be better as many aircraft have streamline wires not round ones and PE will better represent this
3 Likes
That is true though there is zero tolerance for error when using the PE flying wires.
3 Likes
@Btwosan Very interesting method! I have never seen this before and look forward to see the result on the model.
I am getting ready to rig my aircraft which is otherwise done.

6 Likes
So frustration builds with the Wapiti.
Initially I had misunderstood the angle of the struts for the wings. Lukgraph only mention the cabane struts at 70deg so I had assumed the same for the wing struts. Having set them in place and then attempted to attach the top wing, that clearly didn’t work. Further research showed the wing struts required a 75 deg angle. So off with the wing struts and a reset. I also fixed the left wing dihedral which has sagged about 4mm at the wing tip. All good so I thought.
The kit came with two sets of wing struts, printed and resin. I used the printed struts because they required no clean up. Just pop some brass wire in each end and attach to the wings. So the second fitting work. Everything looked good but a couple days later it became obvious that the printed struts were not rigid enough to hold the weight of the resin wing and they have started to bend.

Now the printed struts were a late addition to this kit I think because it does provide resin struts which brass wire through the entire length of the casting.
What to do, what to do? Take the wing off yet again and use the resin struts. This will almost certainly damage the cabane struts, also printed, which have proved quite fragile, or should I just think, xxxxxx it and rig it as it is?
Any thoughts?
cheers
Michael
4 Likes
Good to know, as I’ve heard EZ Line deteriorates and discolors relatively quickly, requiring replacement or ruining the model.
Yet it seems popular. Is that just the internet talking?
I like the well work look of your model. Many aircraft were stored outside in the weather and rapidly aged. I’m looking forward to seeing how you rig it.
Paul
That is tough news! Your Wapiti has taken a lot of time and care to get to this stage and I hate to see it torpedoed at this point. I have not heard of printed (PE?) struts before, they seem like a lot of trouble. The resin with wire seem a better bet.
Paul
The only thing I have heard bad about EZ Line is that it deteriorates in direct sunlight. This is not a problem for me as I do not like any models in direct sunlight which can fade and yellow paint & decals.
This is all hearsay for me as my actual use of it only dates to about two weeks ago on that Flamingo airliner.
Paul
1 Like
There is nothing wrong with ez line over time. I have used it for ship rigging for the last twelve years and there has been no sign of deterioration with the caveat of course I don’t keep any models in direct sunlight.
And in planes, this kit is 9 years old and the ez line rigging remains the same today as then

2 Likes
Sorry, by printed I mean 3d printed.
I will think about the resin struts today and whether I have the energy to stick with this or migrate to the shelf for a while. Could be a future hangar queen.
That is a tough one, Michael!
I would rig it as it is - it seems like a worse option with high risk of total failure by removing the wing and replacing the struts.
Looking forward to see more on your build.
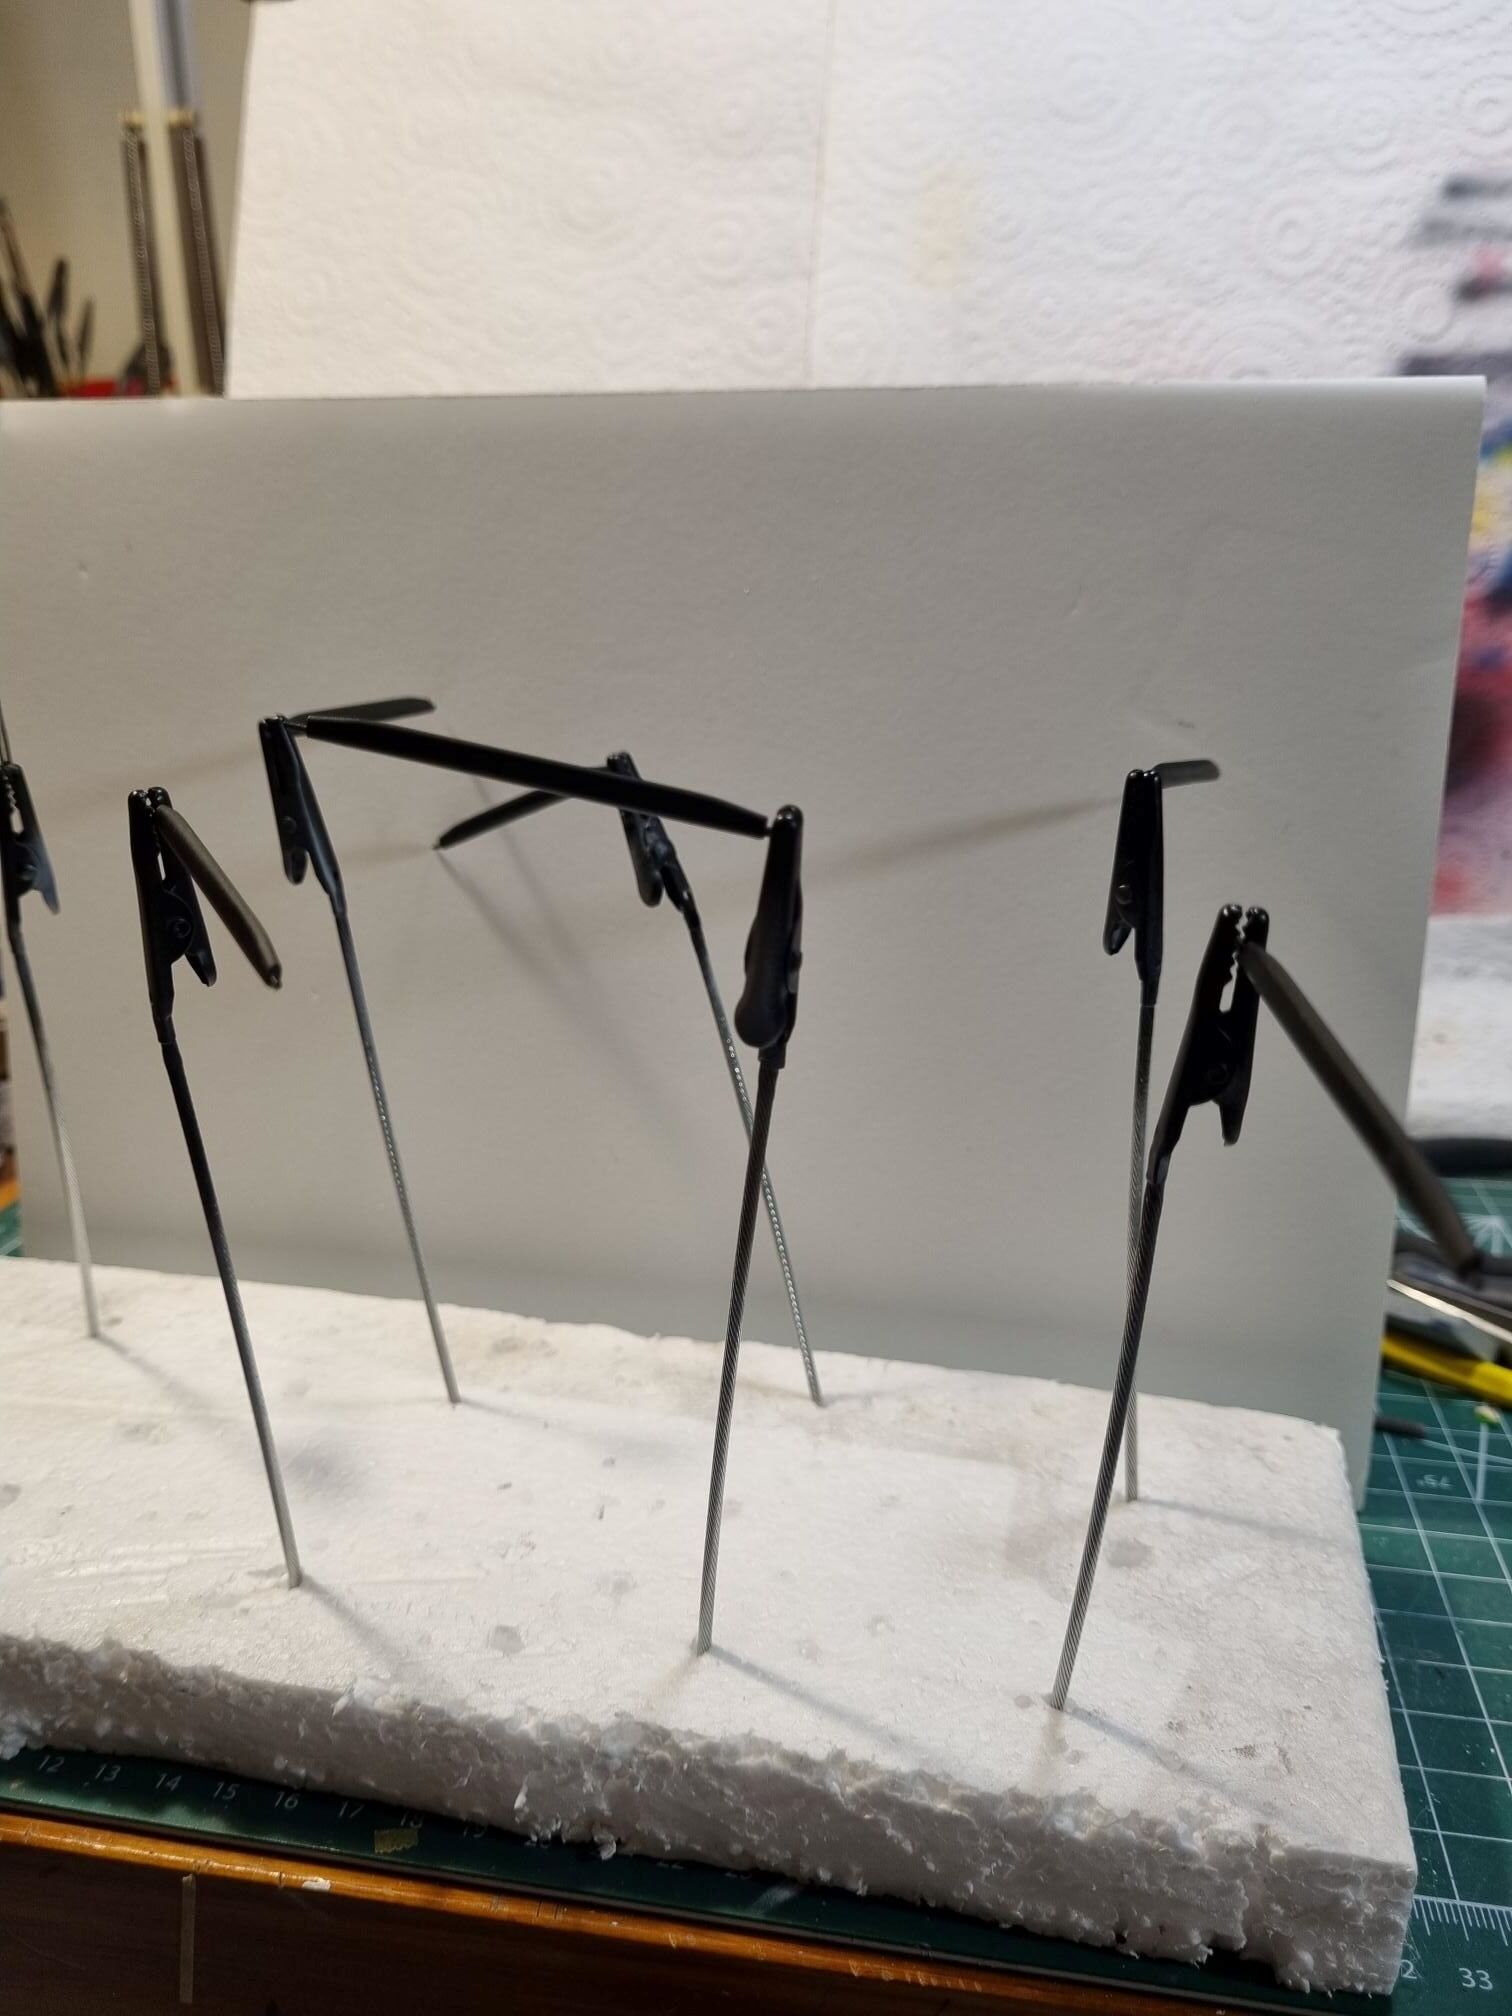
Thanks Jesper, that was my initial sentiments but when I sat down at the desk at the weekend I thought I would give it one more go, but with a different approach. I would leave the wing in place and replace each strut one by one, a sort of transplant operation.
This is the starting point

A resin strut versus a spare 3D printed one. In this kit the 3D struts required no clean up which is why I went this route, but note the resin strut has the wire all the way through. The 3D strut required about 4mm of brass wire slotted in at each end. By the end of the weekend, the resin struts were cleaned, primed and painted.
And while all that was happening it was a fairly good weekend for the ancillaries. I got my first rigging in on the Lewis gun and scarf ring putting the bungees in place.

The side mounted gun, radiator and airspeed indicator also finished.

And the load out


I originally tried to paint the stripes on through masking but that was too messy so I just went with a colored pencil and hand drew them.
Last piece to complete is the windscreen. This 3D printed

Cleaned up but you still have to cut out each pane to fit. Luckily there is plenty to practice with.

so time permitting this week we will see if the patient survives the transplant.
cheers
Michael
5 Likes
Beautiful details, Mike. I am sure all will come together as a great model in the end!
I am calling this one finished. I tested some different techniques that did not work as I hoped. So never using them again.
Not entirely satisfied with the result, but it is what it is.


7 Likes
Looks pretty good to me, if for no other reason than the fact you got it to the finish line which is my challenge at the moment.
1 Like
What did you try that you were not pleased with? You did get it rigged somehow, what worked for you?
Paul
1 Like
That’s how we learn and grow! In the middle of a build just like that at the moment.
It is a very unusual aircraft, one I can’t even put a name to. I’m very pleased to see it finished and presented here. This is a great place to try something new and share it with your building buddies who are also struggling with our own projects.
Paul
Decal Disaster 1
When I purchased this Hasegawa 1/32 Boeing F4B-4 kit on eBay I wanted the newest one I could find. Normally I prefer the oldest kit made when the molds were fresh. In this case, I was concerned about older decals being bad. When the kit arrived the decals did not look good. They were fuzzy like they were out of focus. Not only that, the red was printed off kilter.
I found a set of insignias on eBay that at least solved the later problem. They were from a company called Yellow Wings and were of very high quality. Looking the set over, I found the company also makes a complete set for this kit!
I had already started the build for one if the Hasegawa options, a Marine F4B with a blue tail. I had already had enough adventures with painting issues with the blue and now had another paint job on the tail feathers that I was happy with so it was decided to just stick with the original direction using the kit decals for all but the roundals.
It was a nice plan but was scuppered when I found that the Hase decals were useless! They would not separate from the paper backing even after being soaked in water for 24 hours.
What to do? The Yellow Wings sheet offered on their website offered a marine F4B but not the one I was trying to build. The least awful solution was to buy that set and use the needed decals from it and make a custom 8 decal to replace the kit 8s which were useless.
Happily, I quickly found a typeface that was a dead nuts match for the Hase 8s. That was ordered from a custom decal maker I have had good luck with in the past. They came after just a bit over a week and look great on the model.
The Yellow Wings decals came and were applied to the model. They too look good save a fold on one of the U.S. MARINES decals. Ah well, nothing is perfect with my builds & I wasn’t going to spend more time & money on that fold.
Other decal sets used included instrument decals and two sets of placards.
My references did not show any top wing chevrons on any Marine F4B-4. Just the same my references are rather thin, just one very good book on the aircraft. Yellow Wings has a chevron for the other Marine outfit their decals were for and I liked the extra color so I chose one of the chevrons for a naval F4B with a deep red that matches the color chosen for the cowl & wheels.
It needed an 8 on the top wing and I found one in the decal collection from an old F-80 sheet.


4 Likes