Lights, front & rear, are on. Driver fitting - could be interesting with the hatch as far as fit/placement, but that’s for later. I have two or three other figures that will probably go with this build down the road.
No “live” ammo on the back end - I’ll save the brass for the dio.
Time to work on the back end.
Mike
9 Likes
Will there be a guy climbing the turret rungs, say halfway up?
1 Like
I don’t have a figure quite like that, but I do have one climbing up onto the fender.
Mike
p.s. If I could find one doing that, I’d certainly add it!
1 Like
I won’t suggest he should be carrying a tiny Fay Wray, and batting away some biplanes! 
A fig on the rungs, or maybe sat on top with legs dangling, would emphasize the height and “scale” of the turret.
2 Likes
Made a start this afternoon. Got some cockpit parts cleaned up and assembled and checked the fit of the gun. Lot of flash to clean up! And I’ll fill and sand out those gaps in the joints too.
The kit has an old relic of the past, moulded on markings! Think a little Mr Surfacer brushed on should solve it, then rescribe the lines and rivets. It’ll be tedious but will look much better for it.
4 Likes
I’ve been working on a '61 Pontiac Catalina (early, early stages) along with the KV.
I just set the ammo crates and fuel drum. The “rope” (E-Z Line that was dipped in very thinned khaki paint) is running through the engine deck lifting hooks. Once the glue is set, I can tie things off.
Mike
9 Likes
Make him one of those old-timey Alpine climber guys with the pennant and hat with feather in it.
1 Like
I decided what I’ll build for this campaign.
Had several kits in mind, some of them resin ones.But…
I’m a big fan of Bronco’s overcomplicated multipart hard-to-build kits- I have 15 kits in my stash and built 10 of them over the years.
I’m currently finishing their Panzer 35(t) and while enjoying it, I recalled I have their MaxxPro kit too.
It fits the campaign guidelines perfectly-I chased it for 3 years and once I bought it, I took out the instruction, looked at the building steps and put the MaxxPro in the storage area- it looked as an extremely complicated kit to build.
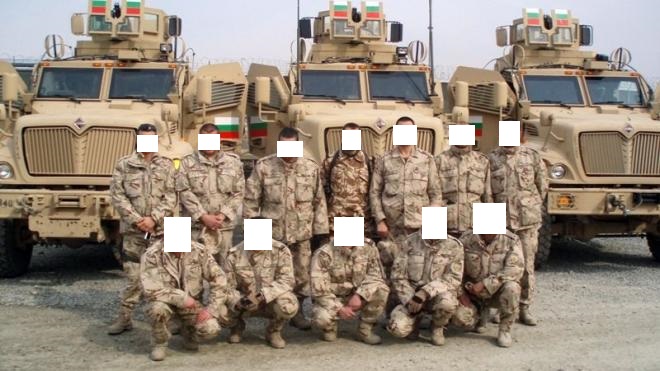
I’ll start it in mid October and will build it as an vehicle, used by the Bulgarian contingent in Afghanistan:
Cheers,
Angel
5 Likes
Finished. I decided to paint the Ferret «UN-White». I did some research on 5th Airborne Brigade in Cyrus in 1974, but did not find much info. Therefore I painted the paratroopers in somewhat close to their uniform (I’m not a very good figure painter). I have no Idea if they used their maroon berets but the color looks good in the vignette. This one took less than a week to build and the Ferret is an enjoyable build even though the details are a bit soft.
15 Likes
Indeed! Date stamp in the wings is from 1966. Not many fit issues from what I can see from test fitting. It’s got some nicely detailed parts for the age too. Full set of engines with the bearing mounts in the cowling for example.
I found a few builds of Hasegawa’s more recent Ki-109 and it still stands up against it despite the slightly smaller scale. Hasegawa reboxed the standard Peggy kit with a new resin nose and plugs for the dorsal turret and side blisters. Some surgery of the plastic and puttying is needed to make them fit. They didn’t change the cockpit or include the gun breech though.
While the scale of the LS kit is a bit off, I can live with it. I’ve also got a couple of the Arii reboxes of their Nell bombers.
Which reminds me, somewhere I do have Hasegawa’s Peggy. Must see if I can find it.
3 Likes
I had this really nice “knot” set up on the first rope and went to trim the end and managed to cut through the entire rope. So, Keep It Simple Stupid - basic knots. 
Mike
7 Likes
Got the first coat of paint down today. After brushing on some Vallejo white primer, I put down some AK acrylic Mitsubishi interior green. Thinned slightly with Vallejo’s airbrush thinner. This was a bit of a gamble as I wasn’t sure how it would react. Fortunately, no problems. Happy to say it brushed quite nicely. Will need another coat I think.
7 Likes
Vacay time! Going to see the last two of my brothers in Michigan for a bit. Enjoy the building all!
Mike
3 Likes
Enjoy your holiday.
I made a few improvements to the 75 today, based on some photos of the gun in its original A-A role. So, scratched the breech block and added a wire opening handle. The rectangular strip is just to hide some nasty sinkholes. The kit gun assembly didn’t look like it had much to support it on the left side, so I added some U-channel plastic. Total educated guess on my part as there’s very little available on this aircraft. It should all look ok under the canopy.
9 Likes
Finally got all the bits of (terrible) plastic together ready for painting
14 Likes
Very cool!
I’ve always wanted a decent model of TB2. I’m looking at image and trying to remember all of those pod vehicles. I recognise the Mole, Firefly, TB4, the magnetic recovery vehicle they used to pull out the Sidewinder. And of course FAB-1 and Alan’s racing car.
2 Likes
Getting started on this one now 
7 Likes