HG, your PE is amazing! That lens cover spiral … 
You’re lucky, I haven’t eaten all cookies yet after Russell has caught me … 
HG, your PE is amazing! That lens cover spiral …
You’re lucky, I haven’t eaten all cookies yet after Russell has caught me …
Real nice HG ! I don’t have any cookies and even worse I may have to cancel out beer as well - blood sugar issues- boo hoo .
Yet… LOL
OMG! Let’s say heavy on the “hope” word. Thanks for the kind words.
OH and Thank you!
You definitely get a cookie for some excellent PE work HG 
Thanks Pal 
To feed the wing rabbits!
Great progress report, a huge amount of detail there for anybody who wants to follow your lead and detail-up this kit. Very nice work indeed.
Cheers, D
Thanks Damian! Certainly right, anybody can do these things to have a cool result.
Hi All,
After further inspection of Rowan’s awesome pictures went ahead with a few details.
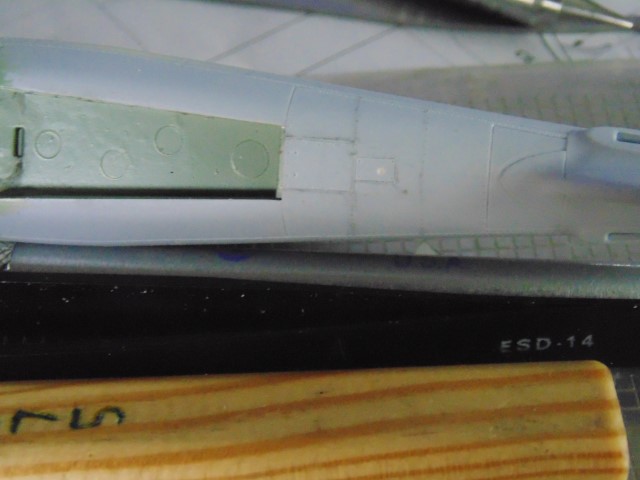
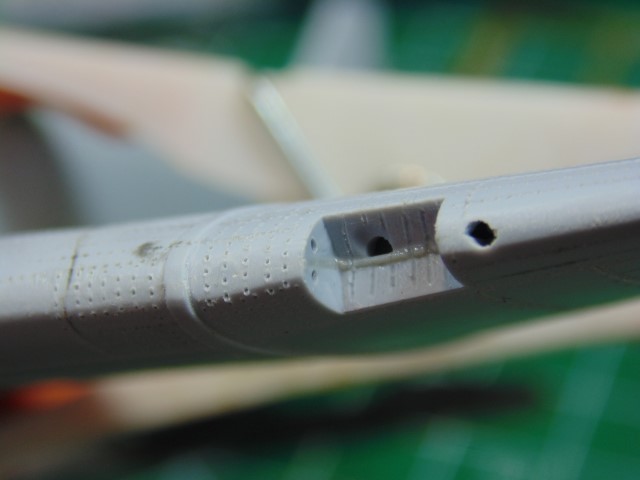
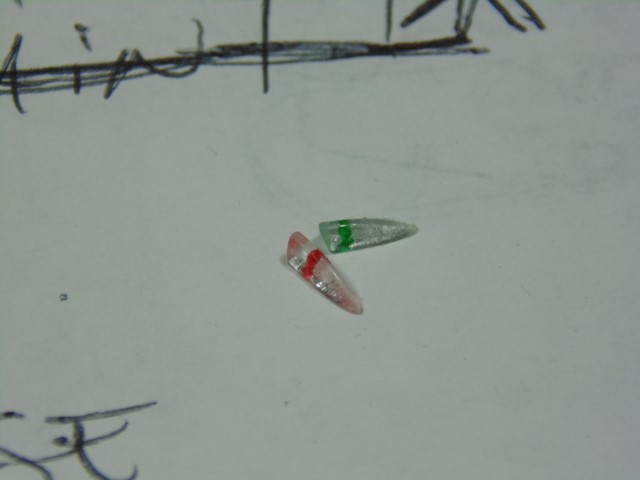
The smaller square holds a white light. Rarely content with a Nav. light being a white painted bit of plastic I’ll instead polish a clear bit and drill a 0.1 or 0.2mm recess to get that effect. Not as hard as it sounds. You drill to get the bulb look first, of course, then sand down the clear plastic surrounding it. Drill the same way to make green and red in wing Nav. clear parts.
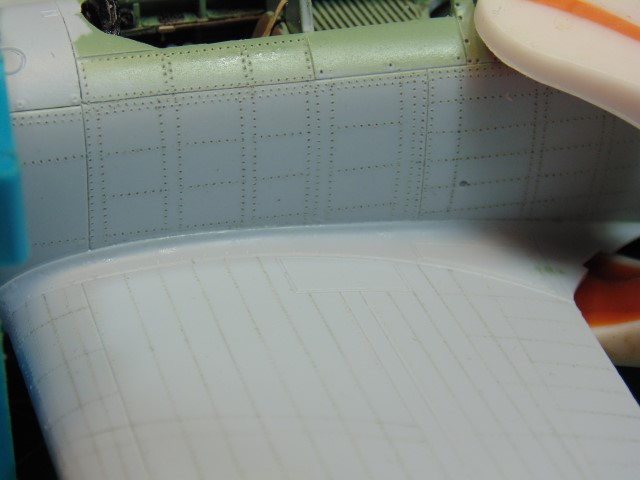
I made rivets just aft, but then noticed that this entire section looks to be stretched fabric. Please tell me if this is incorrect, yet to me when there are no rivets on ribs that means fabric. I’ve figured if decals could be doubled up or stacked it might give that effect.
Comment and let me know your technique for making pronounced ribs on smooth plastic.
Thanks Everyone.
Hi,
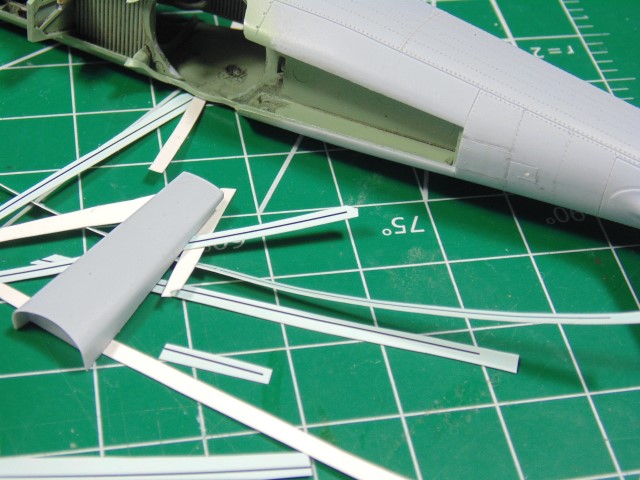
The rib effect update. Sure I know there are decals made for this but I don’t have any. HA HA.
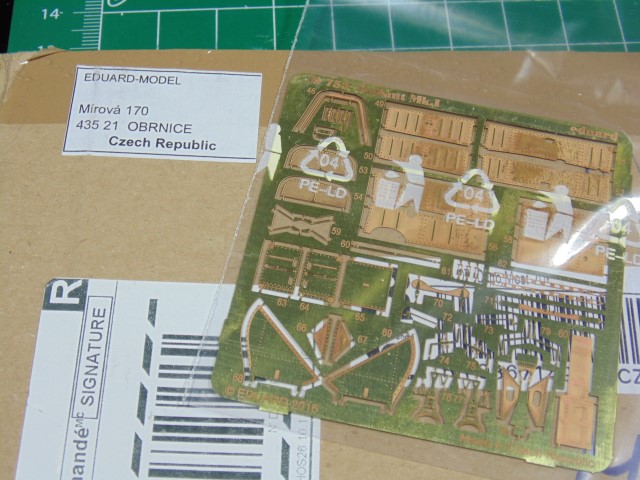
I do, however, have spares and the dividing lines have a carrier film.
Spared no expense on this one for you guys, they’re Cartograf no less!
Yeah, who cares. As mentioned they’re just stacked, hence the white and black. Leave a like if you wish and for sure share your thoughts and tips on you dealt with getting this effect.
Thanks All.
@HGBARNES this will be one of the best Defiants I’ve seen built
Thanks… I think. Nuttin as a bit of pressure eh? HA HA. Will do my best.
I’m late to the party but this is looking really good. I’ve built one and really enjoyed the experience, even though I “only build in 1/32!” So much so that I have another, for a night fighter. Mine is built OOB so none of this very good extra detail. So very nicely done and I’m looking forward to seeing this completed.
Just wanted to Thanks a bunch … been watching this from the start and have the kit sat in waiting pile …However I’ve now purchased the full photo etch to go with it … love the build and watching with great interest…
Terry
Late or not the whisky is still warmed for you the way you like it and the seat is over there with your name on it.
Hey Terry,
Thanks for the kind words. Man the fit is so good on this, well save for the right upper wing half… carve the front flare, and that’s what makes it fun. So you’ll have the same.
HG
Thanks mate much appreciated
Hello Defiant Ones,
Quick update.
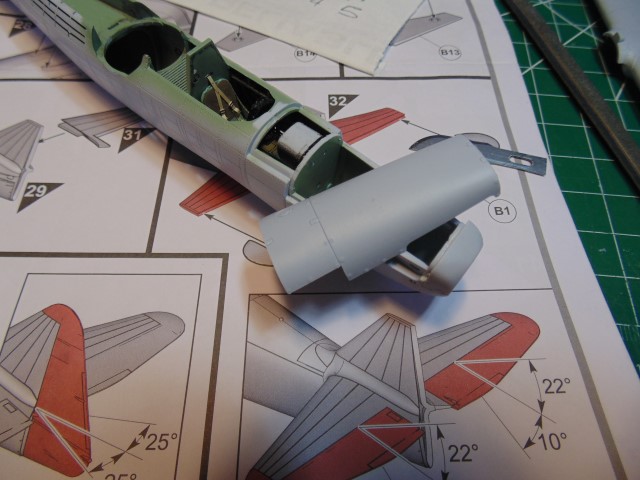
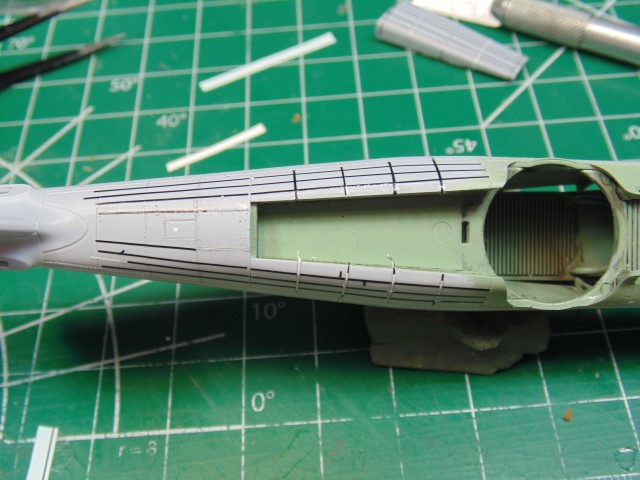
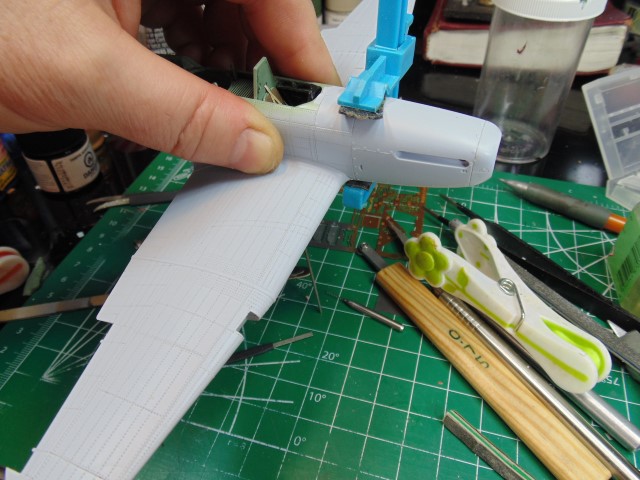
Putting some parts on.
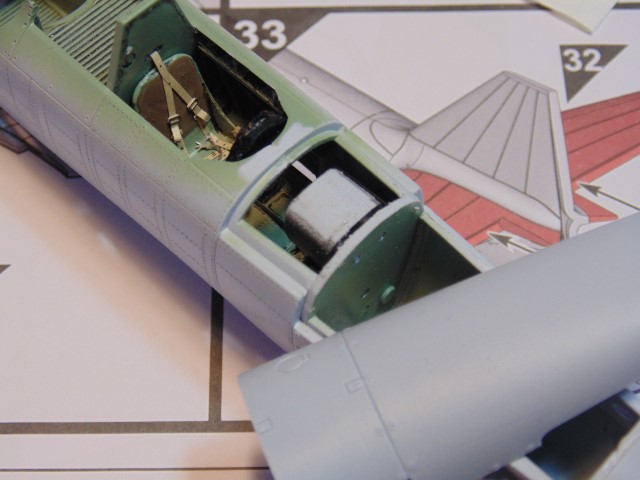
You may not have this issue of the engine cover sitting down all the way.
Not putting an engine in “this” one, so sanding down the tank and bulkhead solves the problem.
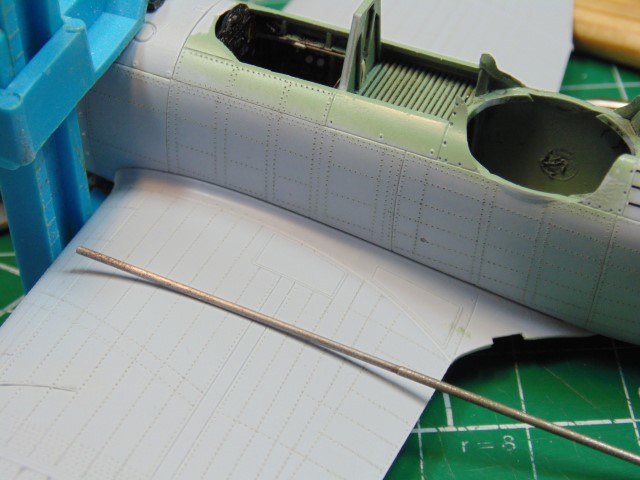
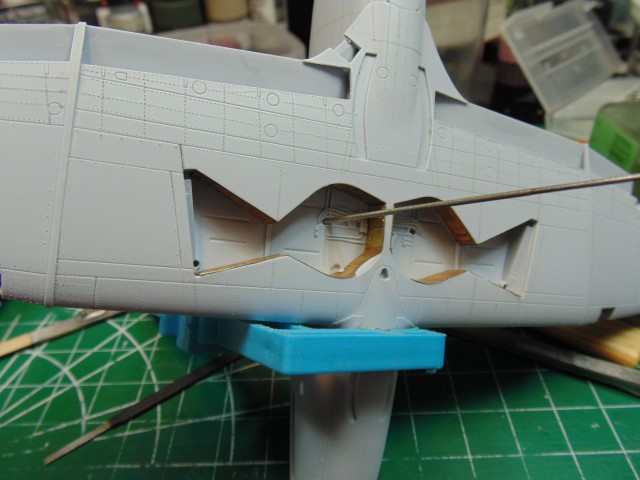
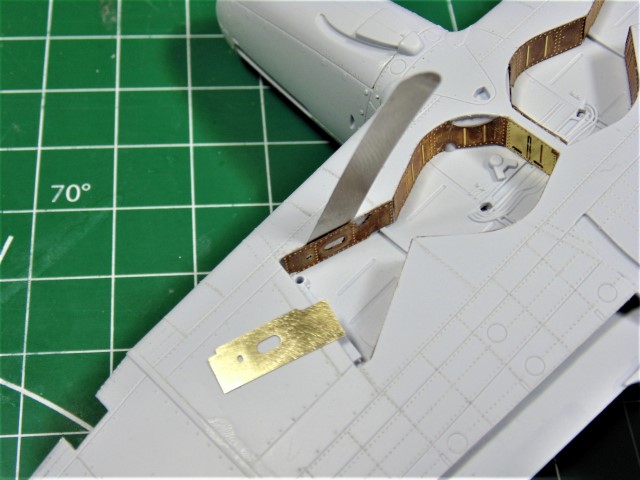
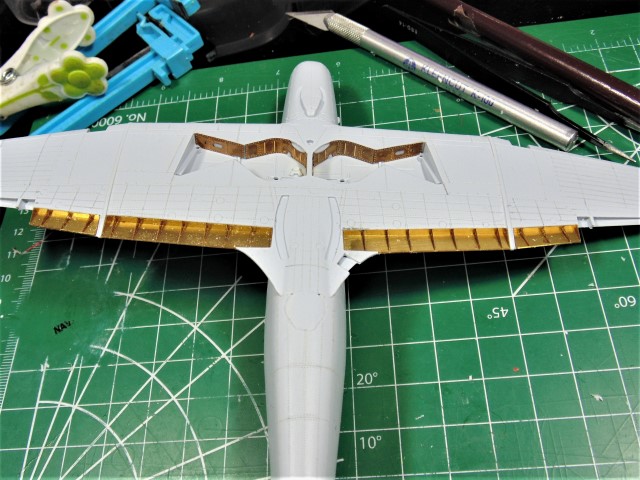
Can’t forget to rivet the belly. The 0.65mm double wheel was used for the center and aft of the radiator.
AK xtreme gunmetal for the rad grills and the black will be dry-brushed with a buffable metalizer to give some additional depth.
Thanks for having a look.
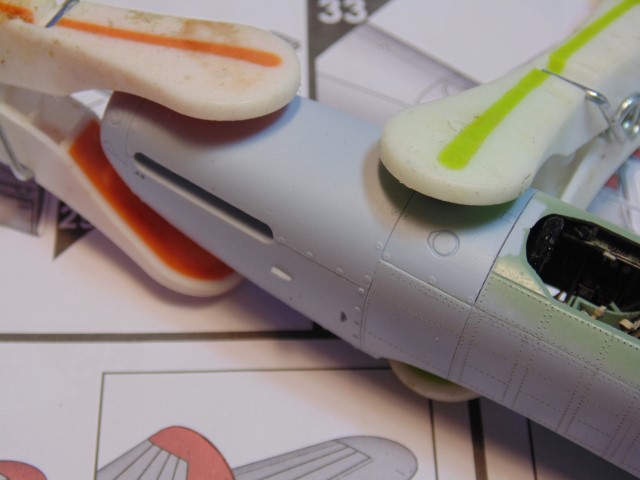
Hi Guys,
Hope you like this update.
It’s not a stick LOL.
What could it be for???
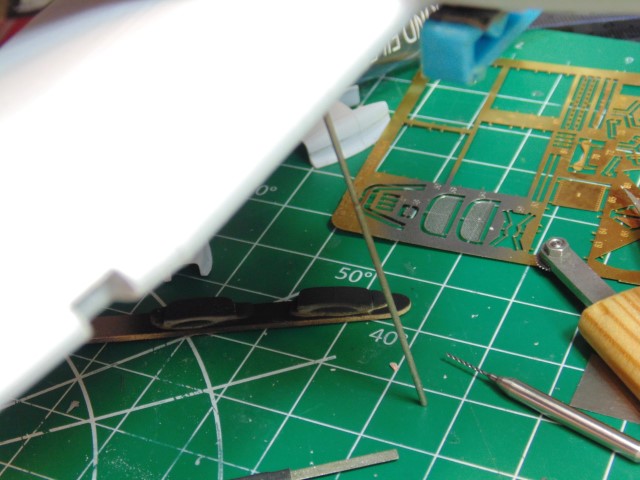
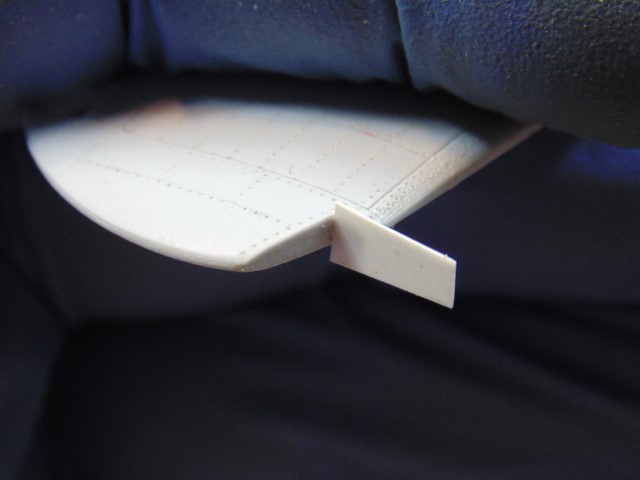
I’m not squeamish about drilling holes in the model to make something better, they can always be plugged. The rod is my “Hobby Elements” 0.75mm file placed in the recess of the hollowed out main landing gear connection point. By pushing that rod up it joins the parts.
It’s a slim fit, but it pushes up the upper wing half perfectly without otherwise, using filler.
Looks even better on the other side, as you’ll see later. Shame there are so few modelers who have not riveted this model. Seriously lads, it’s easy at 1/48… sigh. AIRFIX, send me one!!!
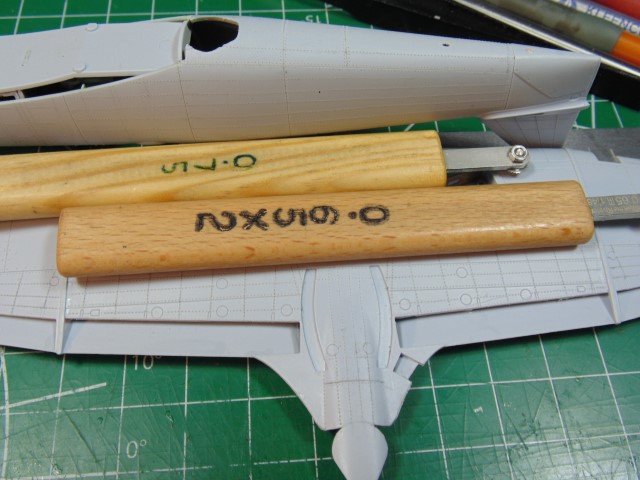
Told you the landing light areas were going to be done. Hinted at it earlier, yet there’s so much to do when you have good pictures (I hate you Rowan LOL).
On this, or any A05128, the clear part of the Nav. lights are a bit short. Short after you clear the micro flash and make it butt up proper to the wing. A 0.3mm bit of styrene will solve that. Otherwise you’re sanding an already shaped wing.
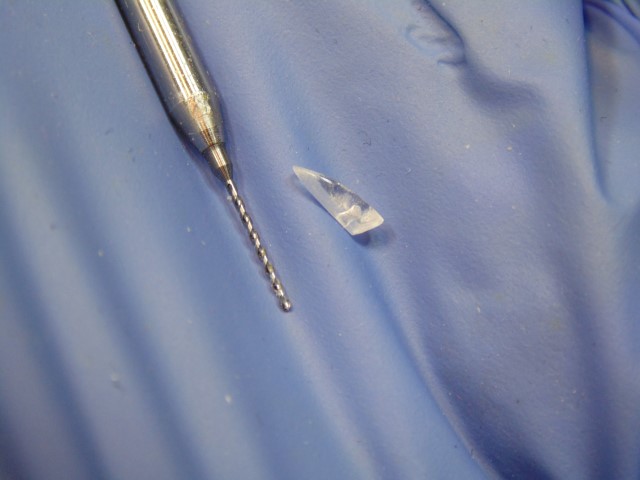
With a needle a hole was put in the place I wanted then a 0.5mm hole drilled in the NAV. light frame part. Hmm… could have been written as, “It’s a model HG, call a doctor, ha ha”.
HUGE THANKS!!!
I told you about the messed up part from Eduard. Yes, I’ve been critical of Eduard in the past, BUT (huge BUT). The way they answered my question, “Please advise?” was amazing. This came in the mail fast and in perfect condition. Thank you!!! (Yes I said “thanks” twice…")
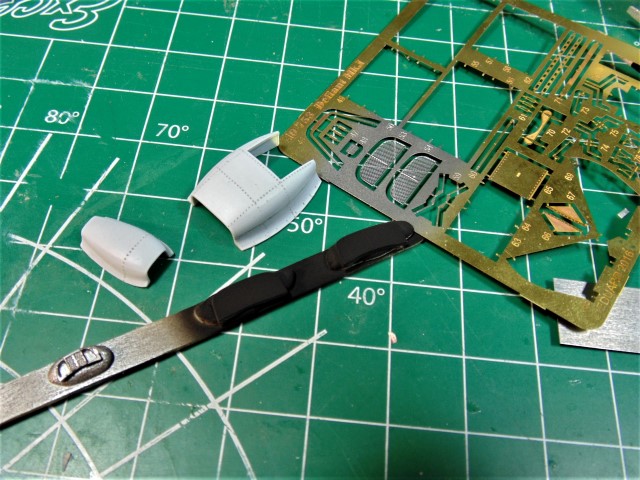
Don’t know about you guys, but I use a PC chip remover to get my parts free. They’re ridiculously cheep and are 0.1mm to 0.06mm thin.
I like the aftermarket parts to make up for the model’s, and my own skill, detail.
You saw my drilling of these parts, yet not the result. These are fully clean. Should I use white or silver as the backing? I’m leaning to mixing white and silver to make a dope.
All the best. PLEASE comment and LIKE.