Thanks Tim. It’s great to know there’re so many Armorama guys lookin in and doing the same… quietly 
More soon.
Thanks Tim. It’s great to know there’re so many Armorama guys lookin in and doing the same… quietly
More soon.
*** NEWS FLASH ***
It’s still not done! HA HA But it’s getting there.
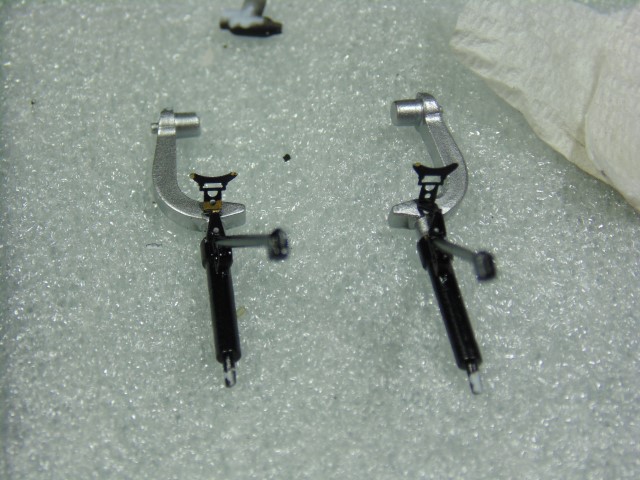
Nothing special to report. They fit great.

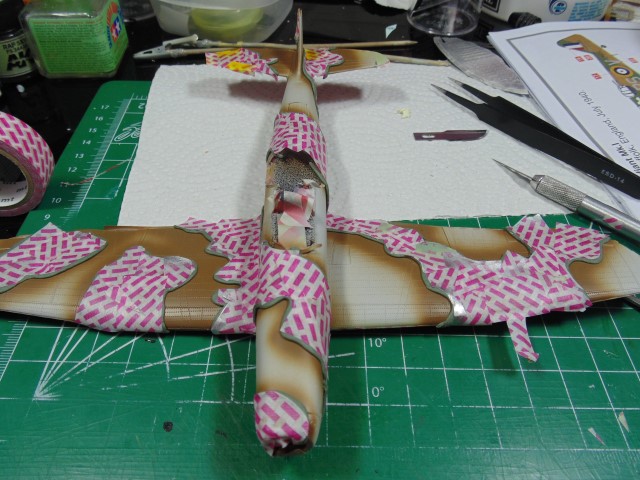
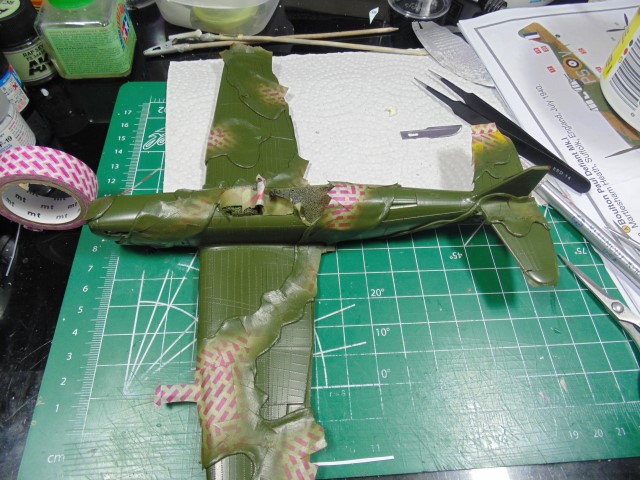
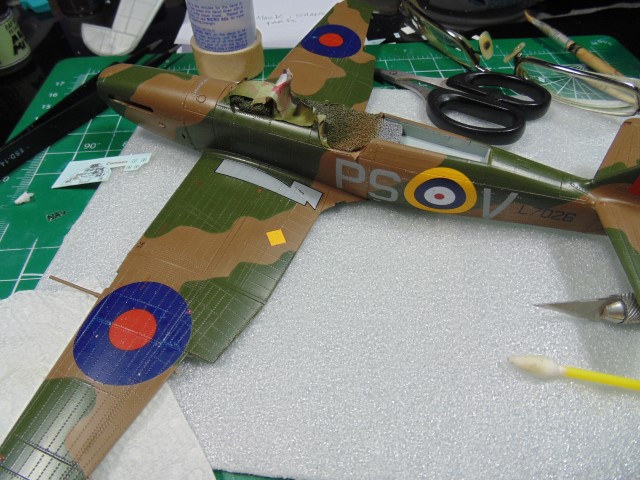
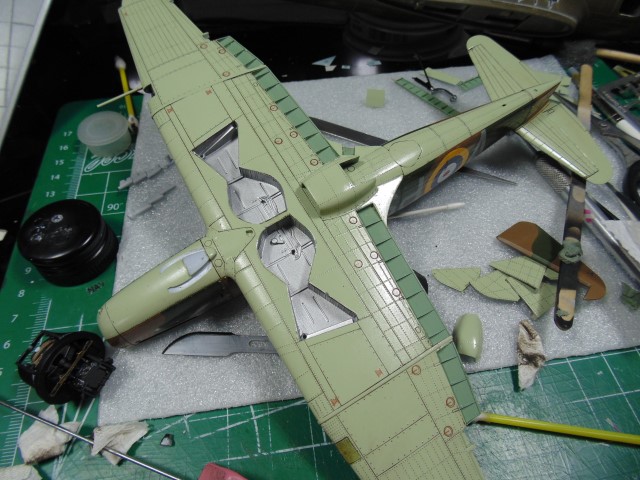
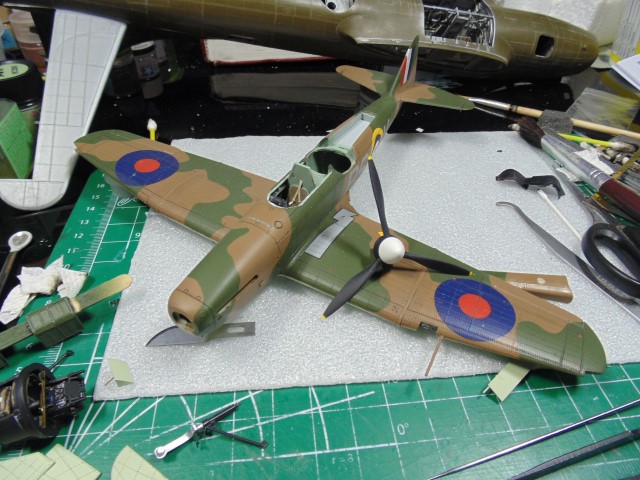
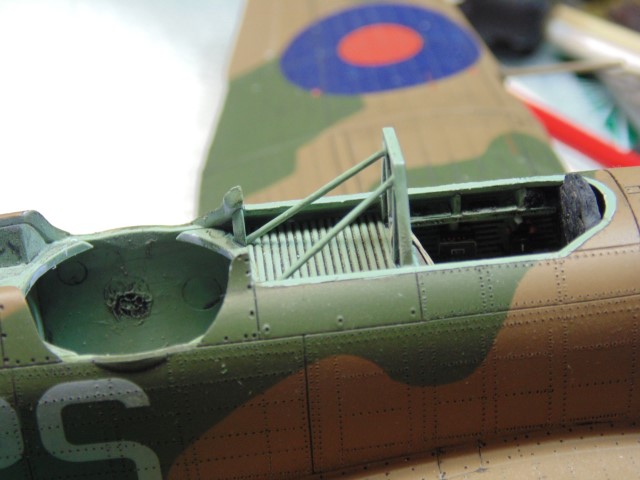
As usual, put the interior color down first. I could not find any pictures of this AC having an green interior color for the turret, so I went with black. Was forced to use the three part open turret due to the nasty spider lines in the one piece.
Meh!
The covers are fixed with PVA, so when the PE spirals come in these DIYs will be replaced.
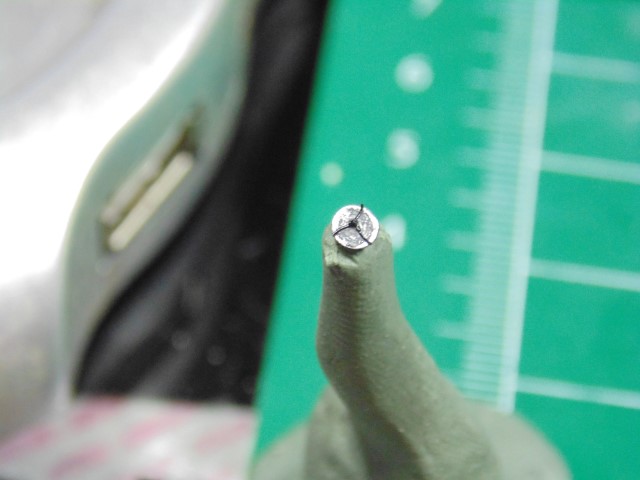
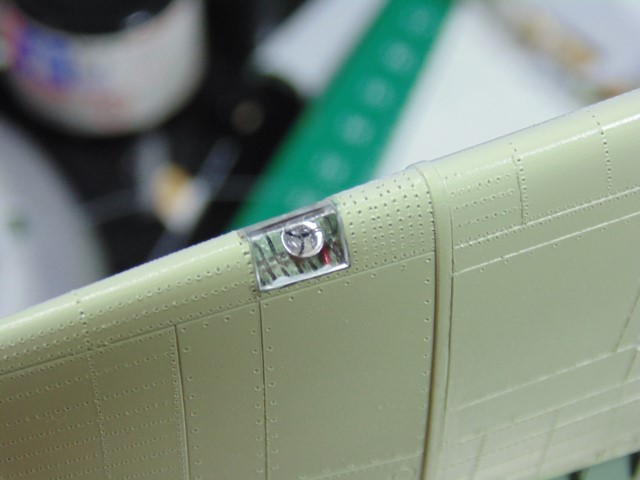
The camera does no justice to this little light and cover. It’s super clear, retardedly tiny, and will have a white bulb when the time comes.

Insignia white masked with a thin strip of tape then coated with Mr. Sol. Love this stuff for masking small parts.
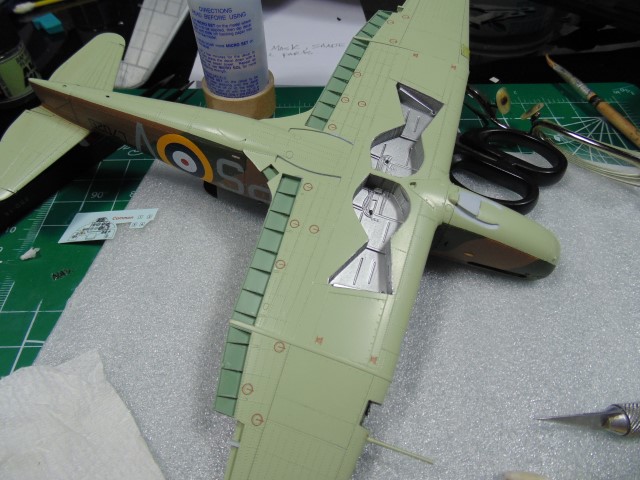
I would have liked thinner blades, but credit to Airfix (gosh I can’t believe I’ve said that so many times in one article) they don’t look bad OOB and the fit seriously 1st class.
Same with the two part, pressure fit weighted tires. They only go in one way and with light pressure the wheels come to the idea spot on the tires, plus they’re super easy to paint!
That’s it for now my fine fellow friends of flight. Forecaste foretells feathered flocks of frolic.
Hi There,
Speedy (I just popped a brain testicle) Mac Splaterson here with another quick update. Yeah, that was a bit goofy HA HA. I have work on the B-17 that needs doing as well as this one, so that burning the candle quote comes to mind. Besides everyone can function perfectlee numeral on 4 horderves of sleet.
Looks like an ice cream truck up-chucked on my model airplane.

Hey Dummy, you forgot a few bits!!!
WOOW! Coffee cream swirl flavored.
With candy sprinkles.
Then a cloud of nausea covered the over indulged body.

And that’s how the Mac Splaterson name came to be.
Please leave a like and comment if you enjoy the occasional pi$$ poor attempt at comedy.
I mean seriously, you all don’t need a numbscull’s explanation of what went on above, nor the many many hours that went into it.
Thanks guys.
Loving the comedy HG 
Whut… I drank whut?
The colors look great!
Love the comedy, keep it coming. 
Thanks Ezra. I’ll roll with deprivation more often. Wow, took me 55 years to get it.
Hey Guys,
Normally I take Saturday off, but a couple of you want an update… I can feel it… it’s an inner sense… it’s another pull from the vinegar jar… It’s the bacon and beef gravy that smelled so good it’ll make your tongue slap the backside of your brain, hello coma… IT IS A RITEUOUS CALL COMMANDED BY… eh em.
Or it’s decal stuff… sigh.
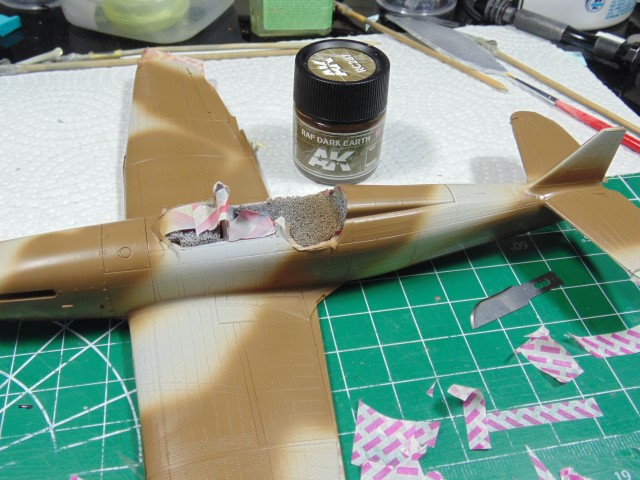
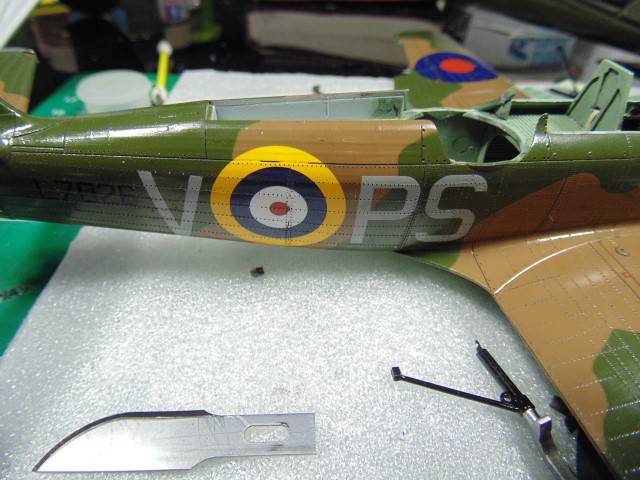
Airfix did some really good things and some bad things with these. I feel like whistling the theme to the good, bad and ugly. Oh, here’s one of all time favorite quotes. When Ennio Marricone was offered a lifetime achievement award from hollywood he replied, “I’ve got better things to do.” hollywood is as important as a boil on your deification cushion.

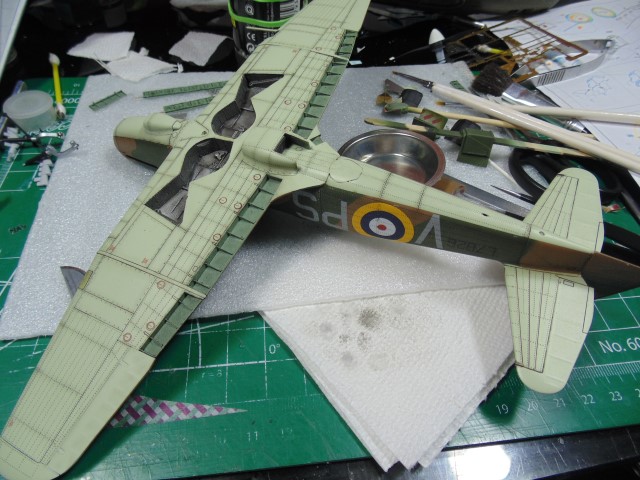
They removed most of the carrier film, but not all of it in important places. This model is riveted so you know there will be silvering. I made a jig to help let the decal setting solution do its thing. If this were a regular build these would have been fine. They’re thick and easily workable on a smooth surface, yet not on a porous one.

@Redhand send me a bottle of this some time ago to replace a jar used to finish off one if his projects and you can’t get it in Canada currently. I’m on the second application and we’ll see if several more will pan out.
I’m not griping at the model or decal maker. I guess they factored in that very few people would take this kit to the next level. After all, Carograf decals are pricey.
See you in a week.
Greetings Defiant Ones,
A little bit of progress.
First a teaser about a new product I’ve recently purchased. The lesser indent is with the old method.
Had to run my rivet and panel lines again in order to get the decals to behave. The box says Cartograf and who am I to question that.
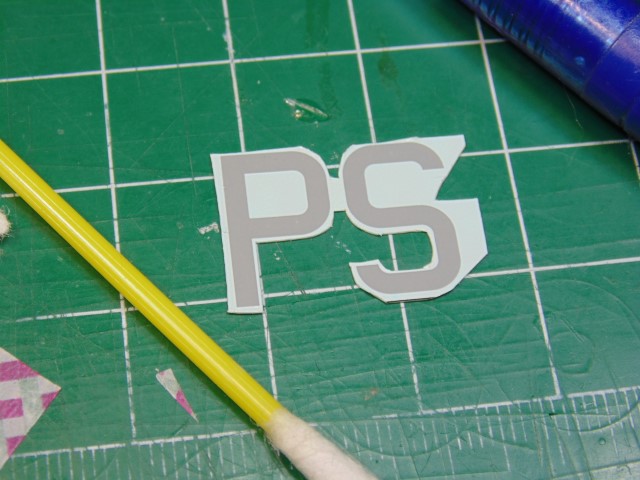
Stencil data was nice to see and really adds a lot to any model.
Some parts will be washed with oil while others with clay/pigment. The oils can be modulated and give a better shaded or feathered look.
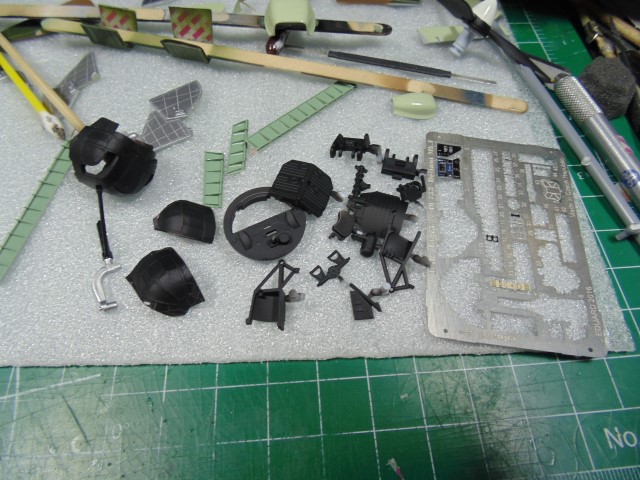
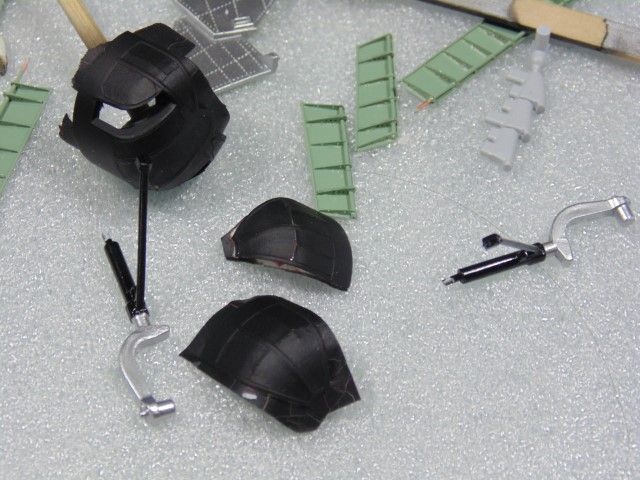
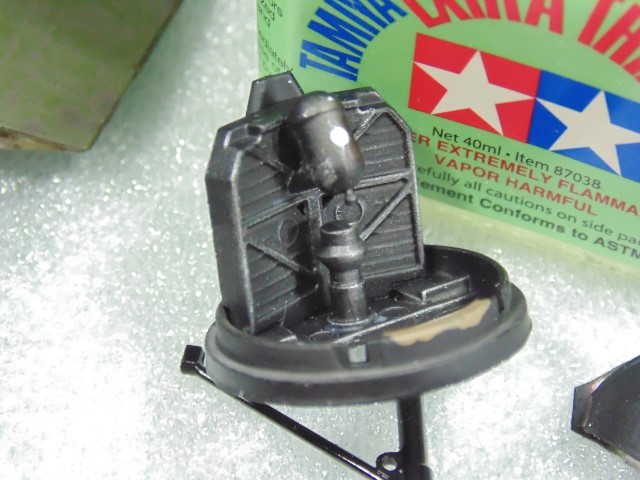
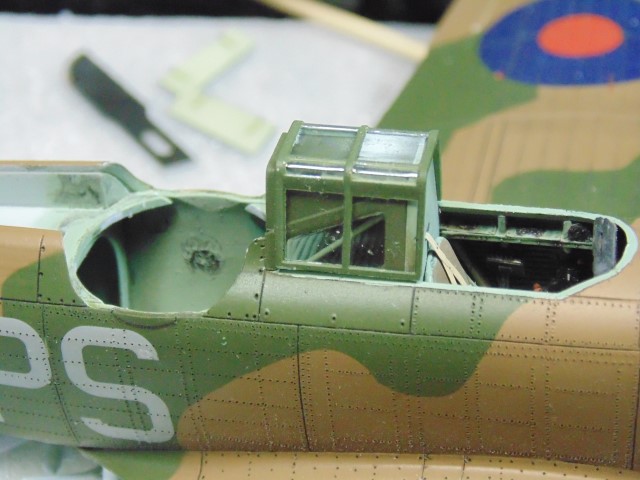
Some work done on the turret. Boy oh boy there’s a good amount of detail in this here rock thrower, even without the PE. The Eduard set just makes this thing sing… rat tat tat tat!

Clay wash is on and over a gloss clear coat. It’s easier to remove or leave a hint of it on by using gloss.

That’s all for now, but next time there will be some major progress.
Thanks Everyone. Please leave a comment if you have any suggestions and like the post if it was helpful in some way to your build.
Yuck! 
What happened? I thought only tanks look like that coming from a rainy summer exercise …
What tool is that in your first pic, HG? That looks very useful also for my works …
Coming along nicely HG - Am I the only one who is troubled by the pre- shading and panel line accent phases ? I can’t wait to move past them because the model always looks sloppy until all is covered up or wiped off .
It’s a high speed burr tip that came with my new David Union rotary tool. (See Pictures) The “yuck” is a clay wash to fill in the rivets and panel lines. It’s water based with no smell and after it dries wipes away with a slightly moistened paper towel or cloth. The excess can also be sanded away, depending on the look you want for your project. New post will show the after result.

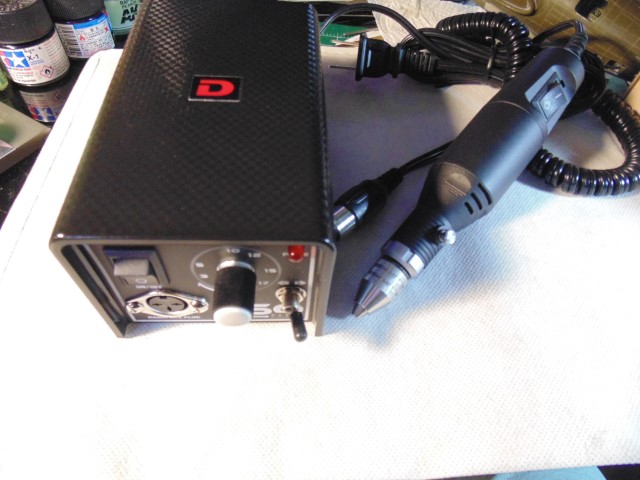
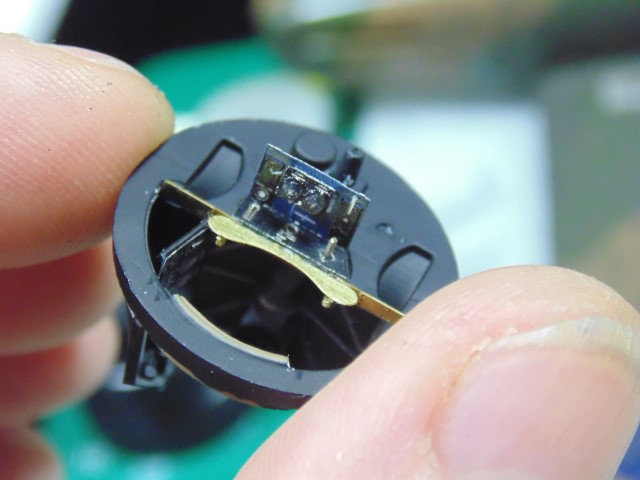
Very nice piece of kit! And you’ll be shocked, but the hand unit is made of metal!!! Remember that stuff?
Hi,
A more extensive update on this plastic model kit. Let’s bring it to life a little.
Yeah, yeah I’ll touch up the black, but look what dry brushing does! And I mean have the paint DRY on the brush. This way the pigment looks like mini scratches.
For quick detail work this products comes in handy.
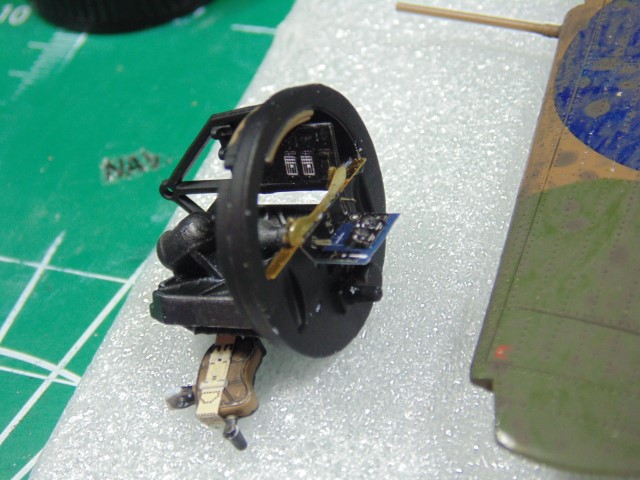
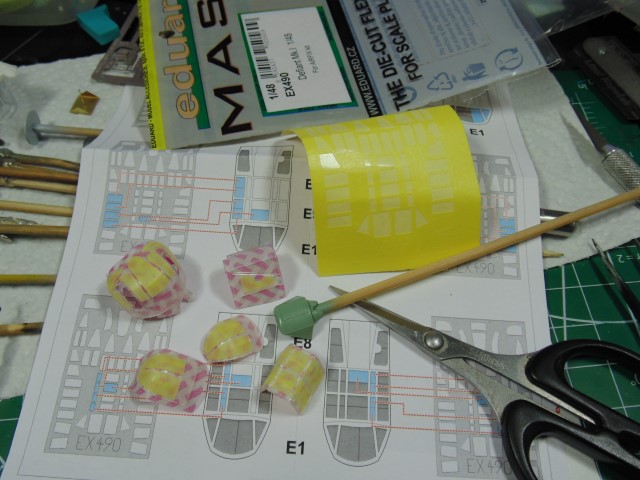
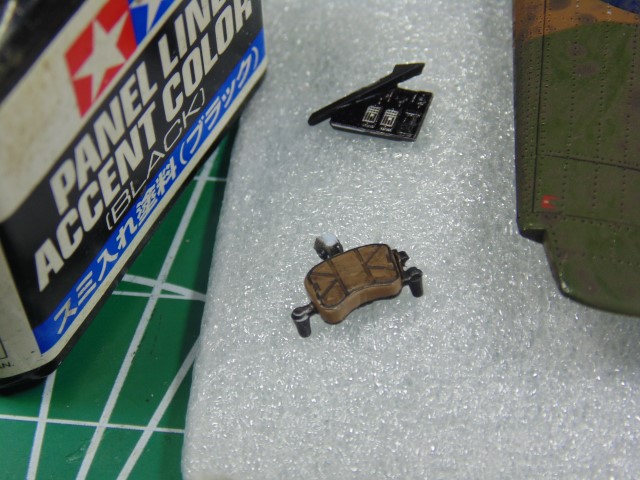
Working on the PE.
Just waiting for the krystal klear to dry.
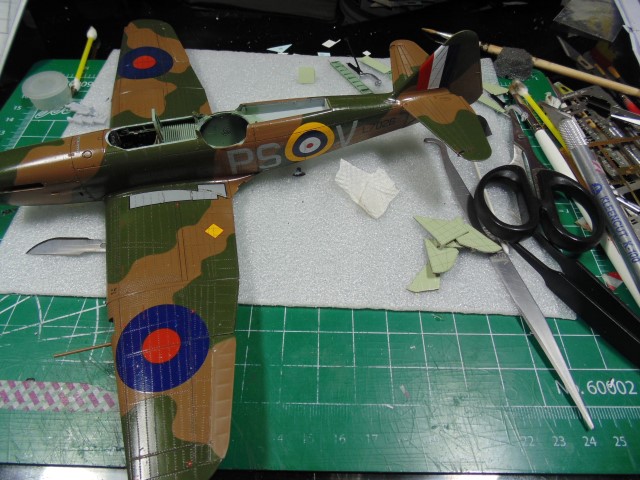
Clear coat on. Looks great shinny… should do a race plane soon.
My rib effect looks way better on the back. Meaning, it’s more subtle. Hey, it was my first go at it… be gentle
Note the rivet holes. If you angle the wheel in such a way, knowing where the camo changes, you’ll get a different effect.
PE for the struts. Yes, more touch ups. When bending the paint flies off.
Mr. Color 182 flat clear.

The beginning of the shade effect on the right of the picture.
Real simple, just dry brush some smoke oil on the lines with a fine brush. Use a brush with light colored hairs so you can see how much dark pigment is on the hairs.

Try to make it look as organic as you can because the eye likes that.
You have to make these align up. See the grey pigment in the struts? Still on the fence about some grease oil for the pistons though. Sometimes it can be too much.
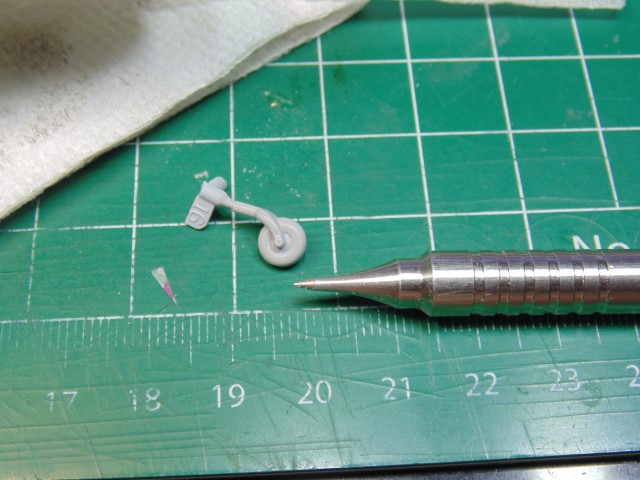
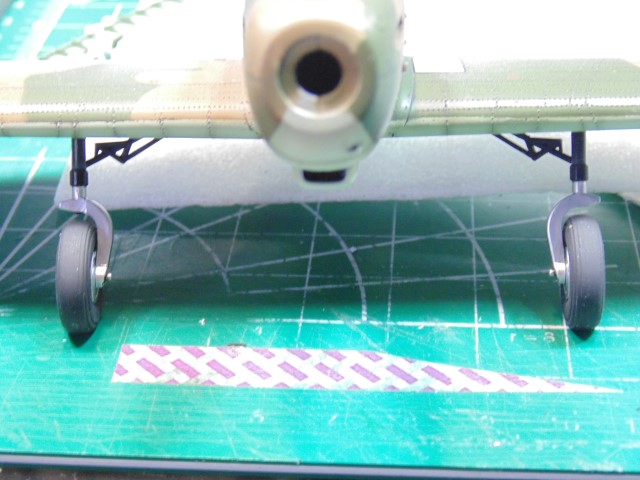
Airfix, please do a three part tail wheel. I mean you did a stellar job of the interior. Had to scribe rim and tire to make painting look better.
They didn’t add these bars, which are easily seen in pictures, since they are not in the kit.
Definitely worth the ten minutes to make and paint. Don’t you agree? Should I clean the windows?

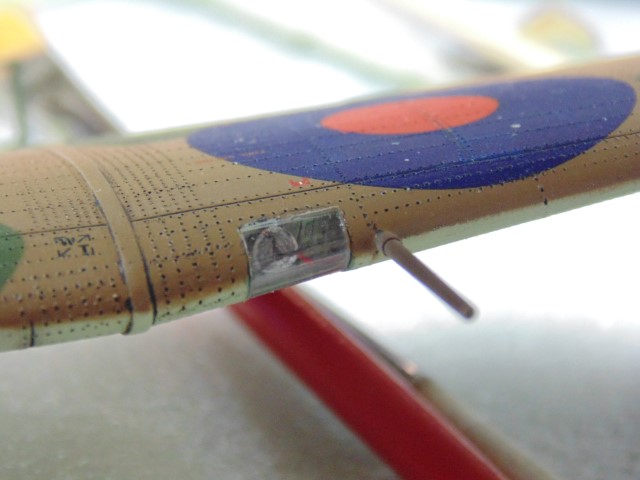
Some tiny dabs of white on the back of the nav. lights I mentioned a while back. Let those clear colors dry completely or you risk making them turn milky with the white. Silver does not work here.
It’s a micron off in places when you get that close. Not changing it. Yes, I sanded the roundels… please forgive me. HA HA.
Thanks all.
Looking awesome with a flat coat HG!
Thanks Ezra!!!
Slap me upside the noggin man! Sorry I missed your comment and kind words. All I can tell you Richard is to put it on list of things to do and then complete the task. I know that sounds mechanical and not much fun, but it helps me throw a blanket over the “ugh” and revisit some nice old classical music. Hope that made sense. Thanks again Sir.
Outstanding work! Now I know, what I could have made different on my Defiant some years ago … 
I hope, Brian’s “Lucious Lady” didn’t make a crash landing on your work bench, HG …
Thanks Brother, the encouragement really helps. This is my 1st Defiant and I suspect another is in the works. Brian’s B-17 is just fine and will be getting new windows. The hope is to make them flush with the skin. Not only that, but make the process easy for others to do the same. That’s Brian’s blog and I do not want to step on it.
HG
Thanks again Rowan @Merlin for the walk around you did.
Cheers HG 
This is a great build! I definitely need to try some Solvaset again (it’s got to be 20 years since I had a bottle), because the way it’s snuggled the decals down over the rivet detail is phenomenal.
I’m glad the walkaround’s proved useful - we’re just discussing behind the scenes how to save things like it from disappearing along with the old site’s gallery and keeping them available in our new format.
All the best
Rowan