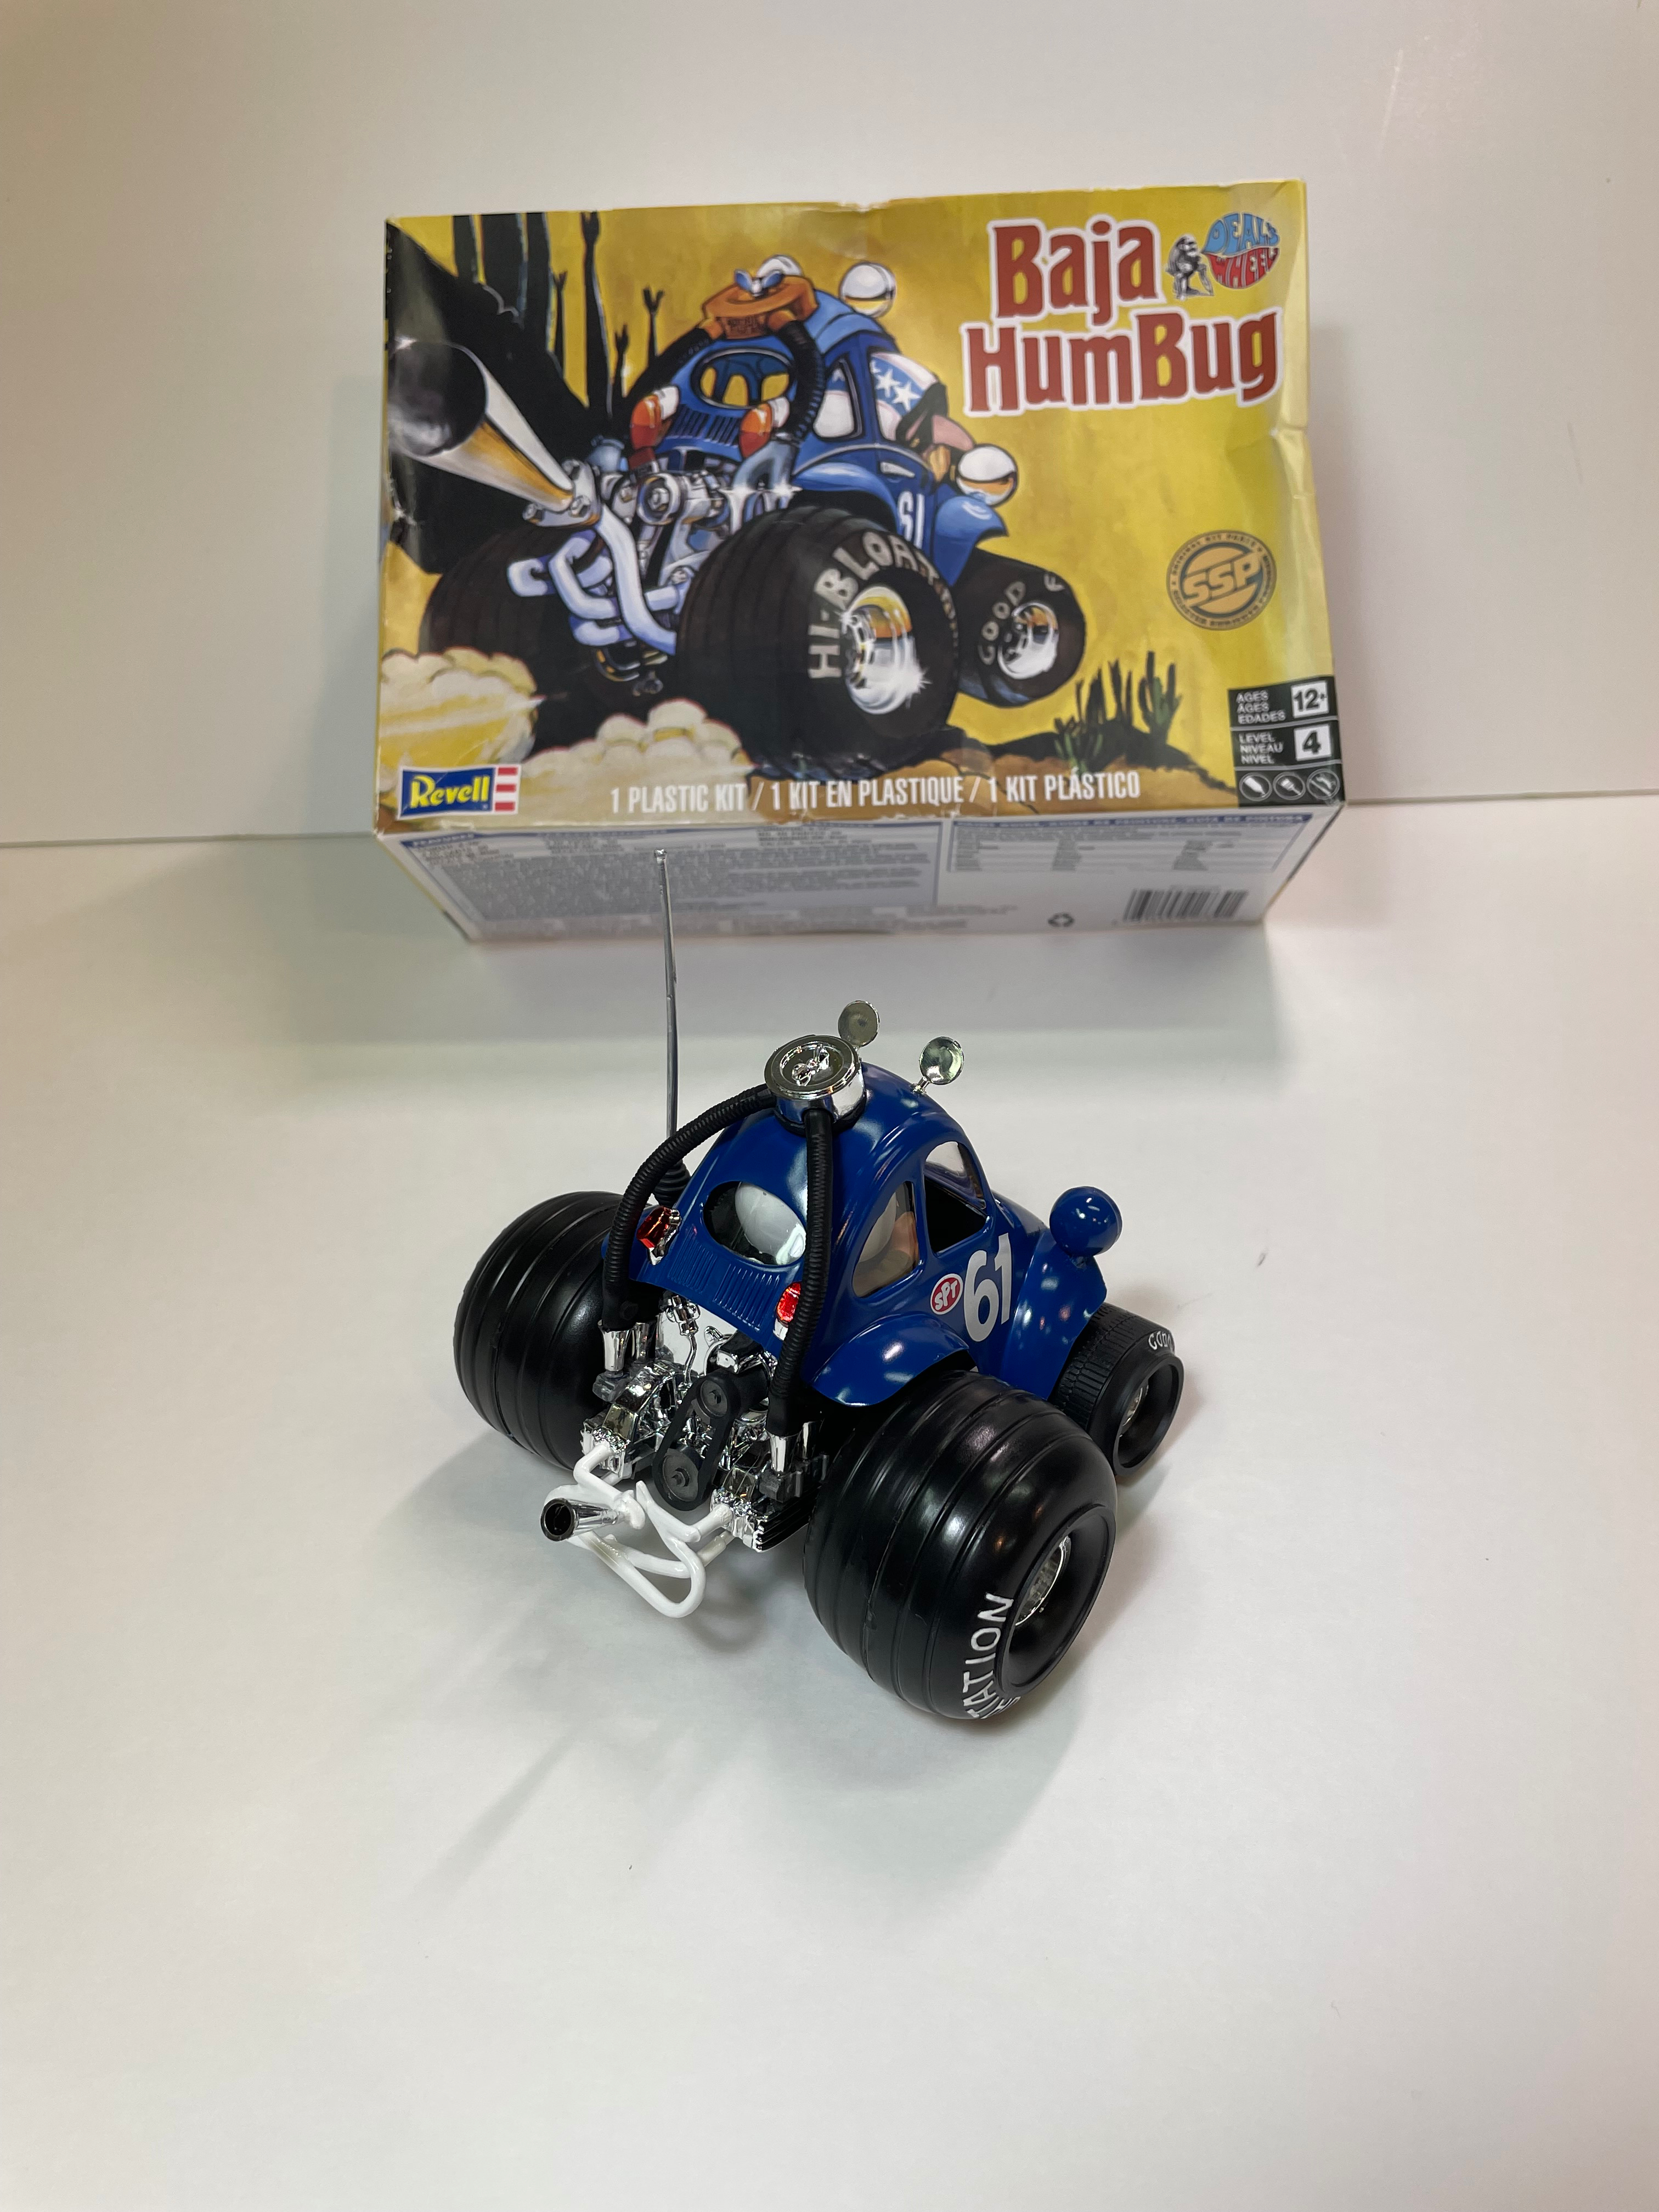
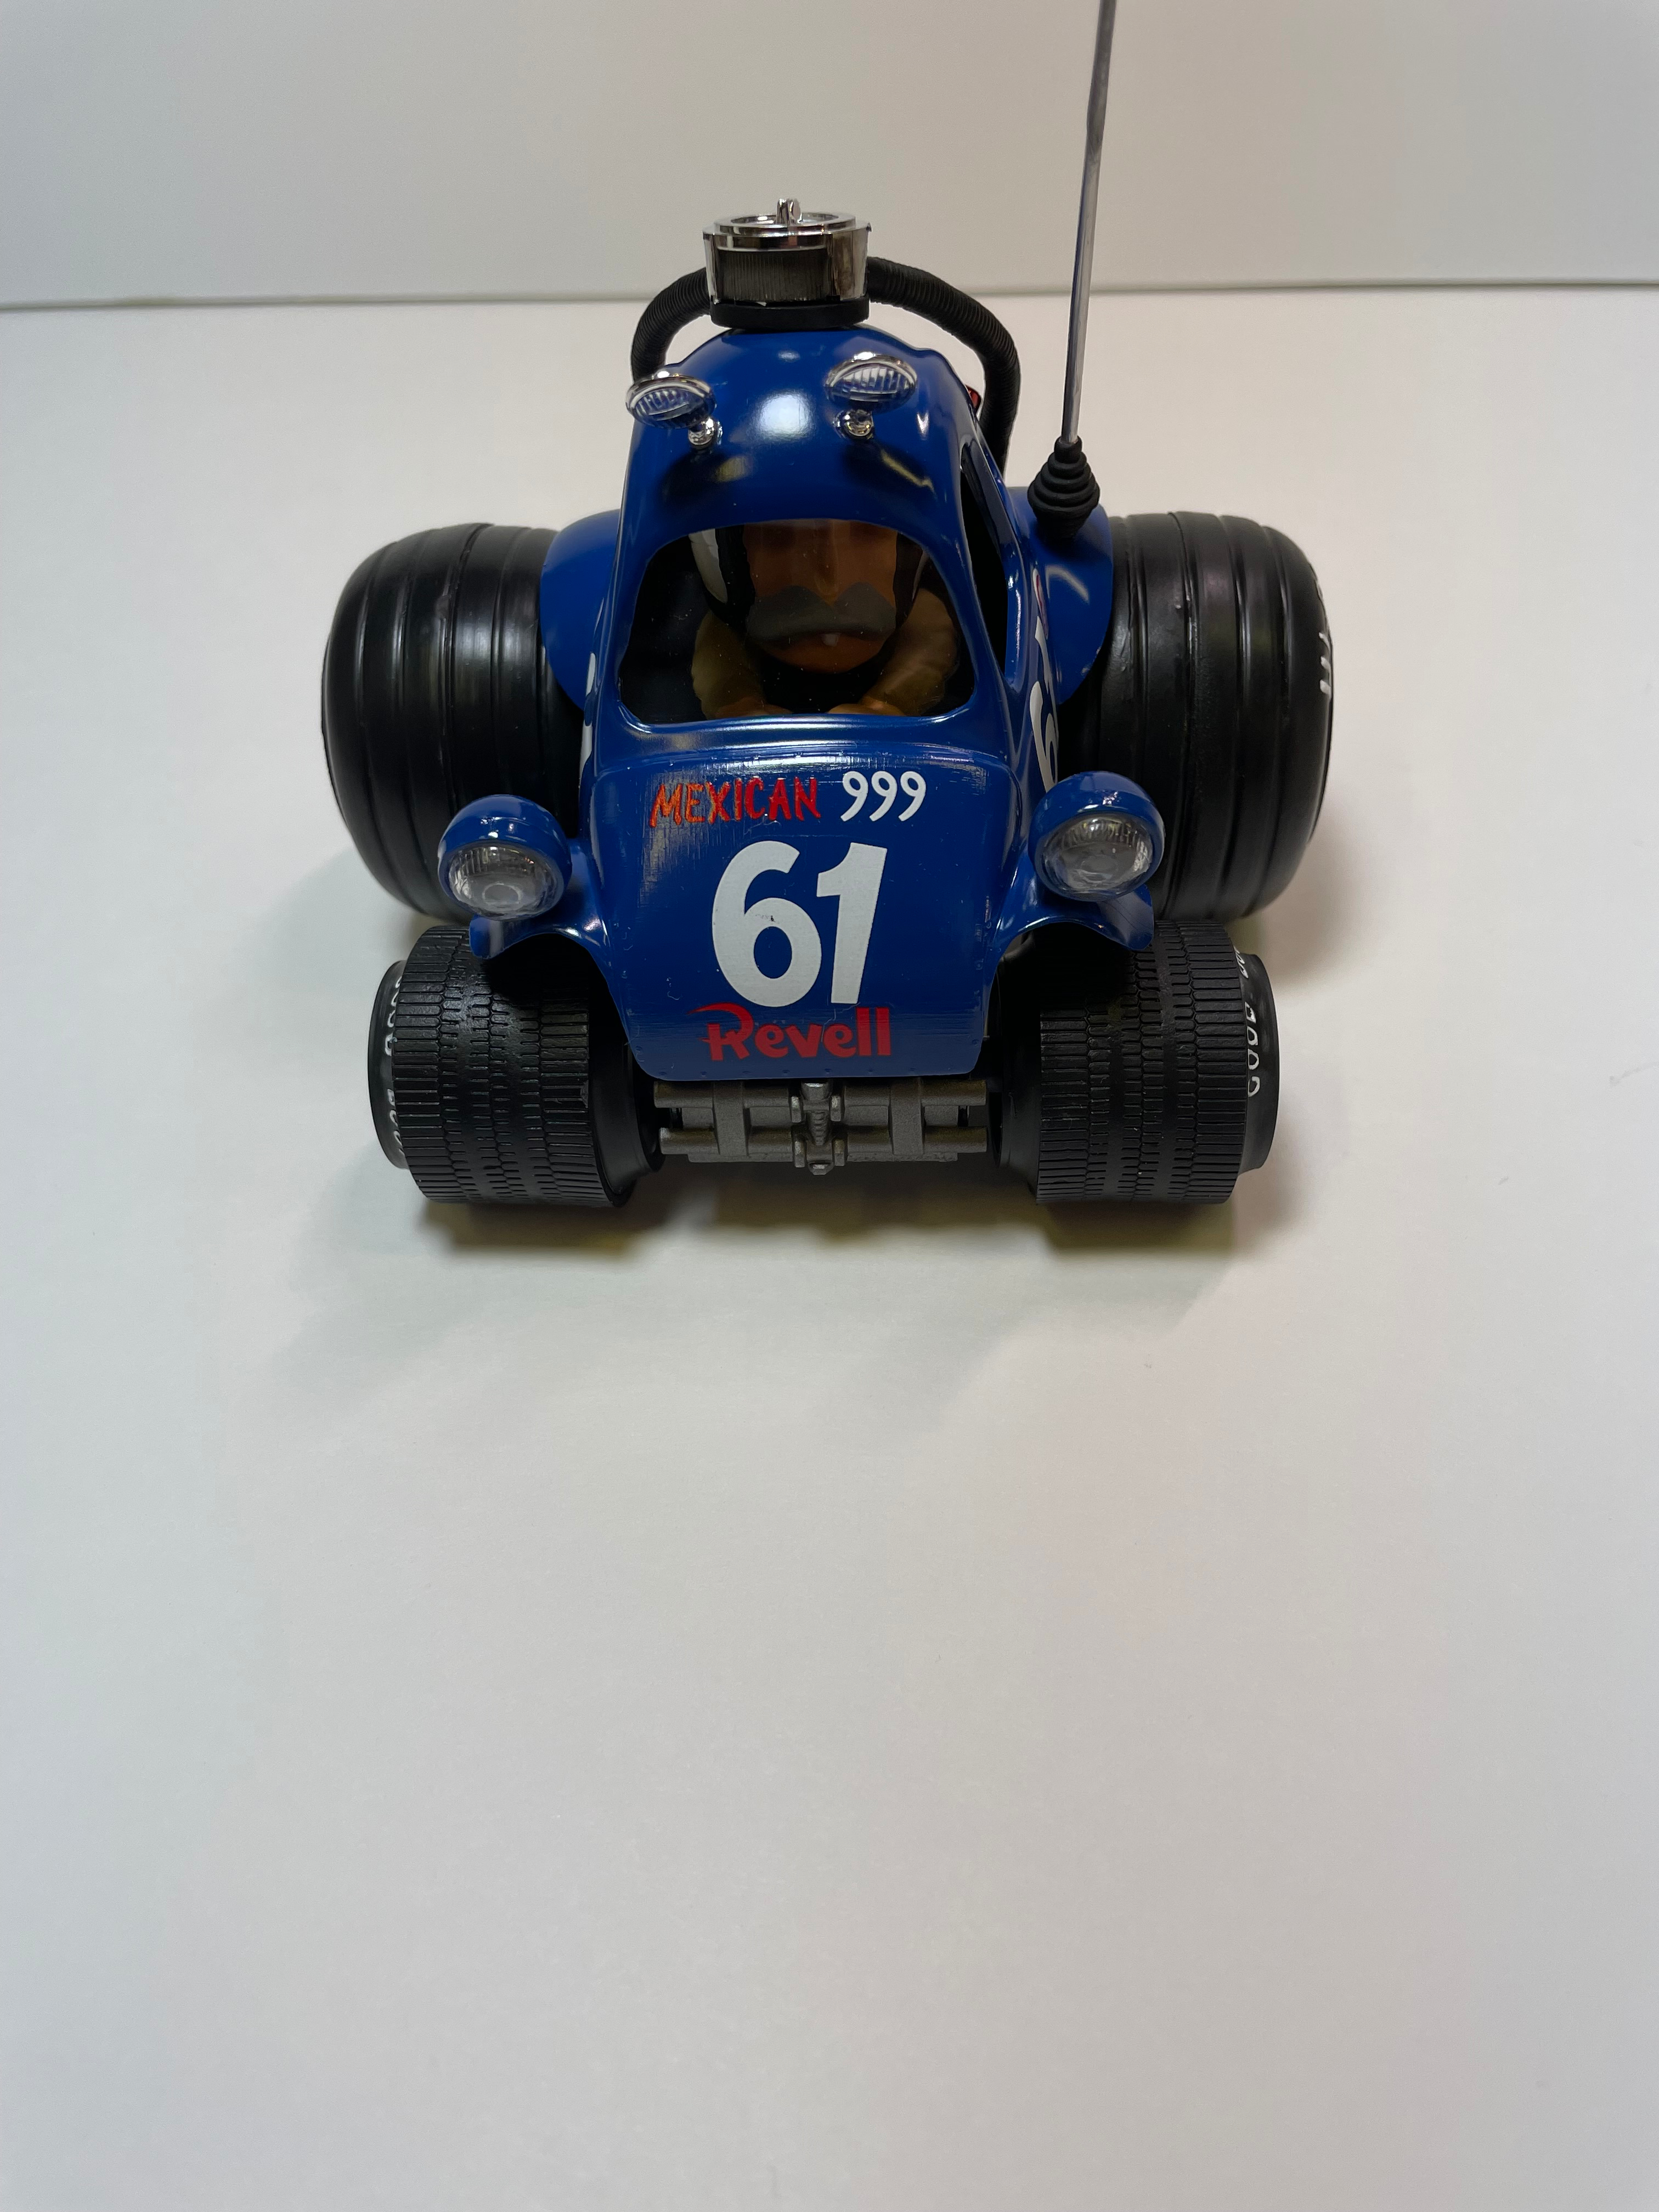
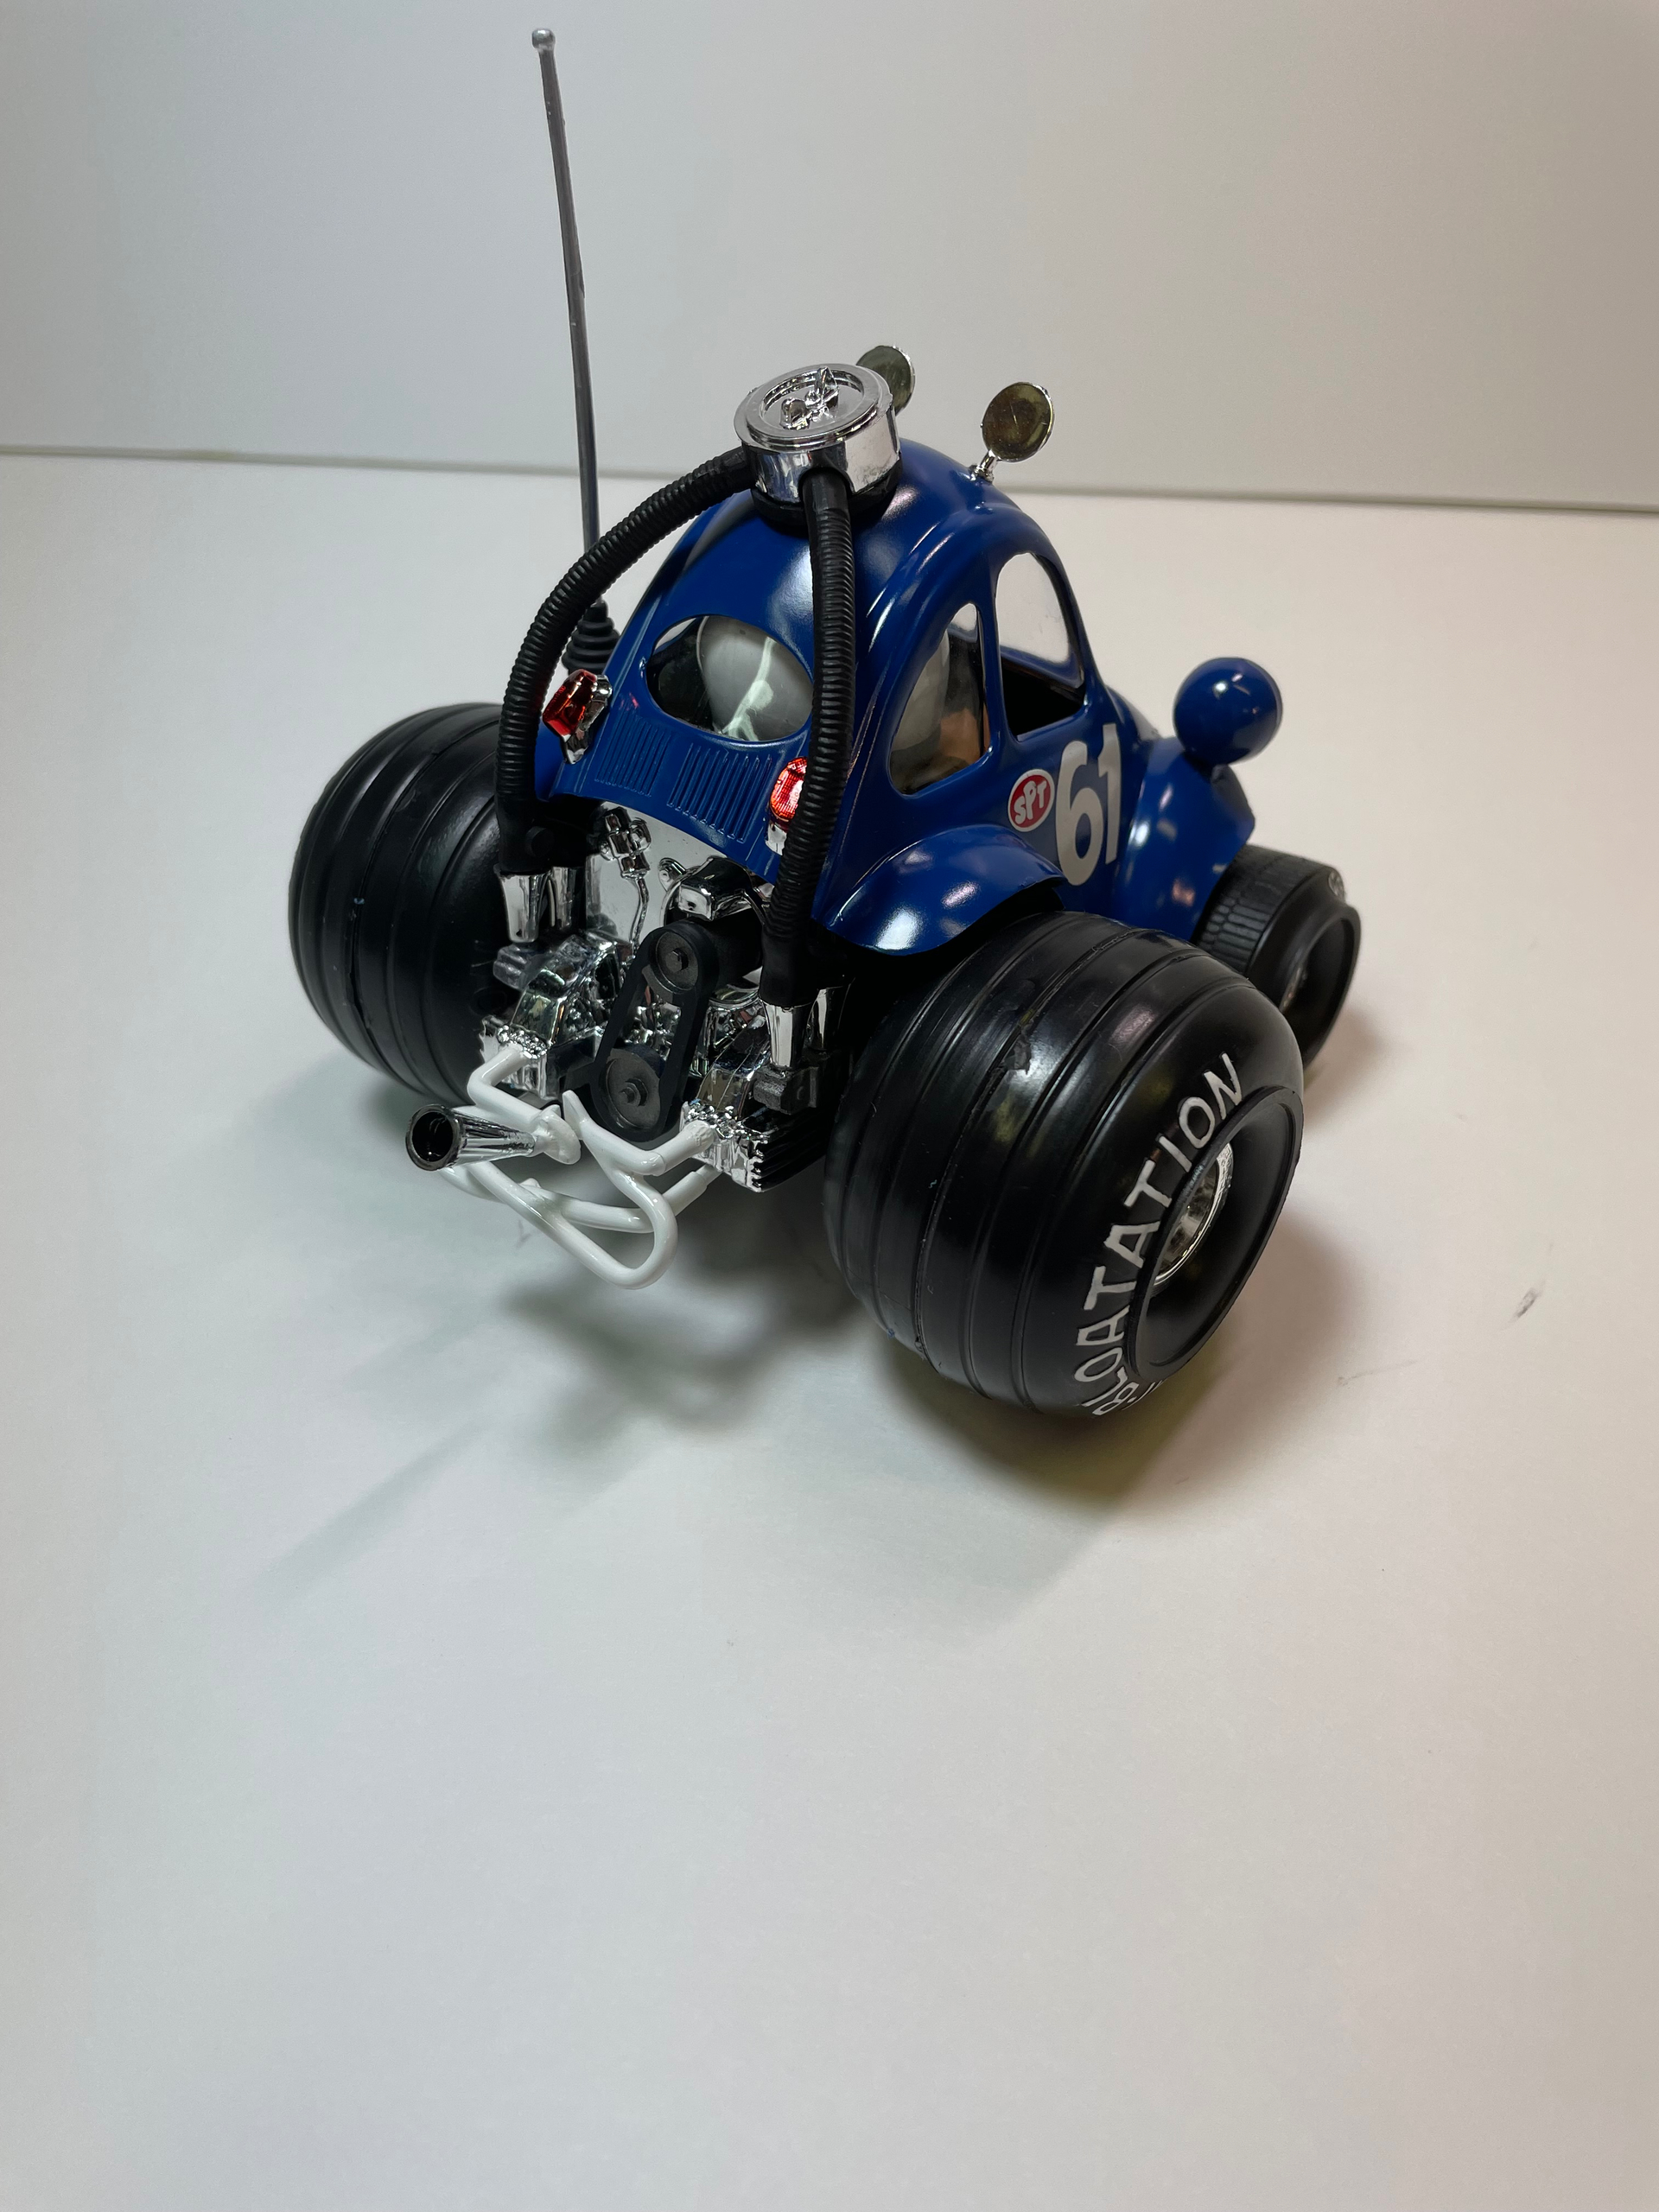
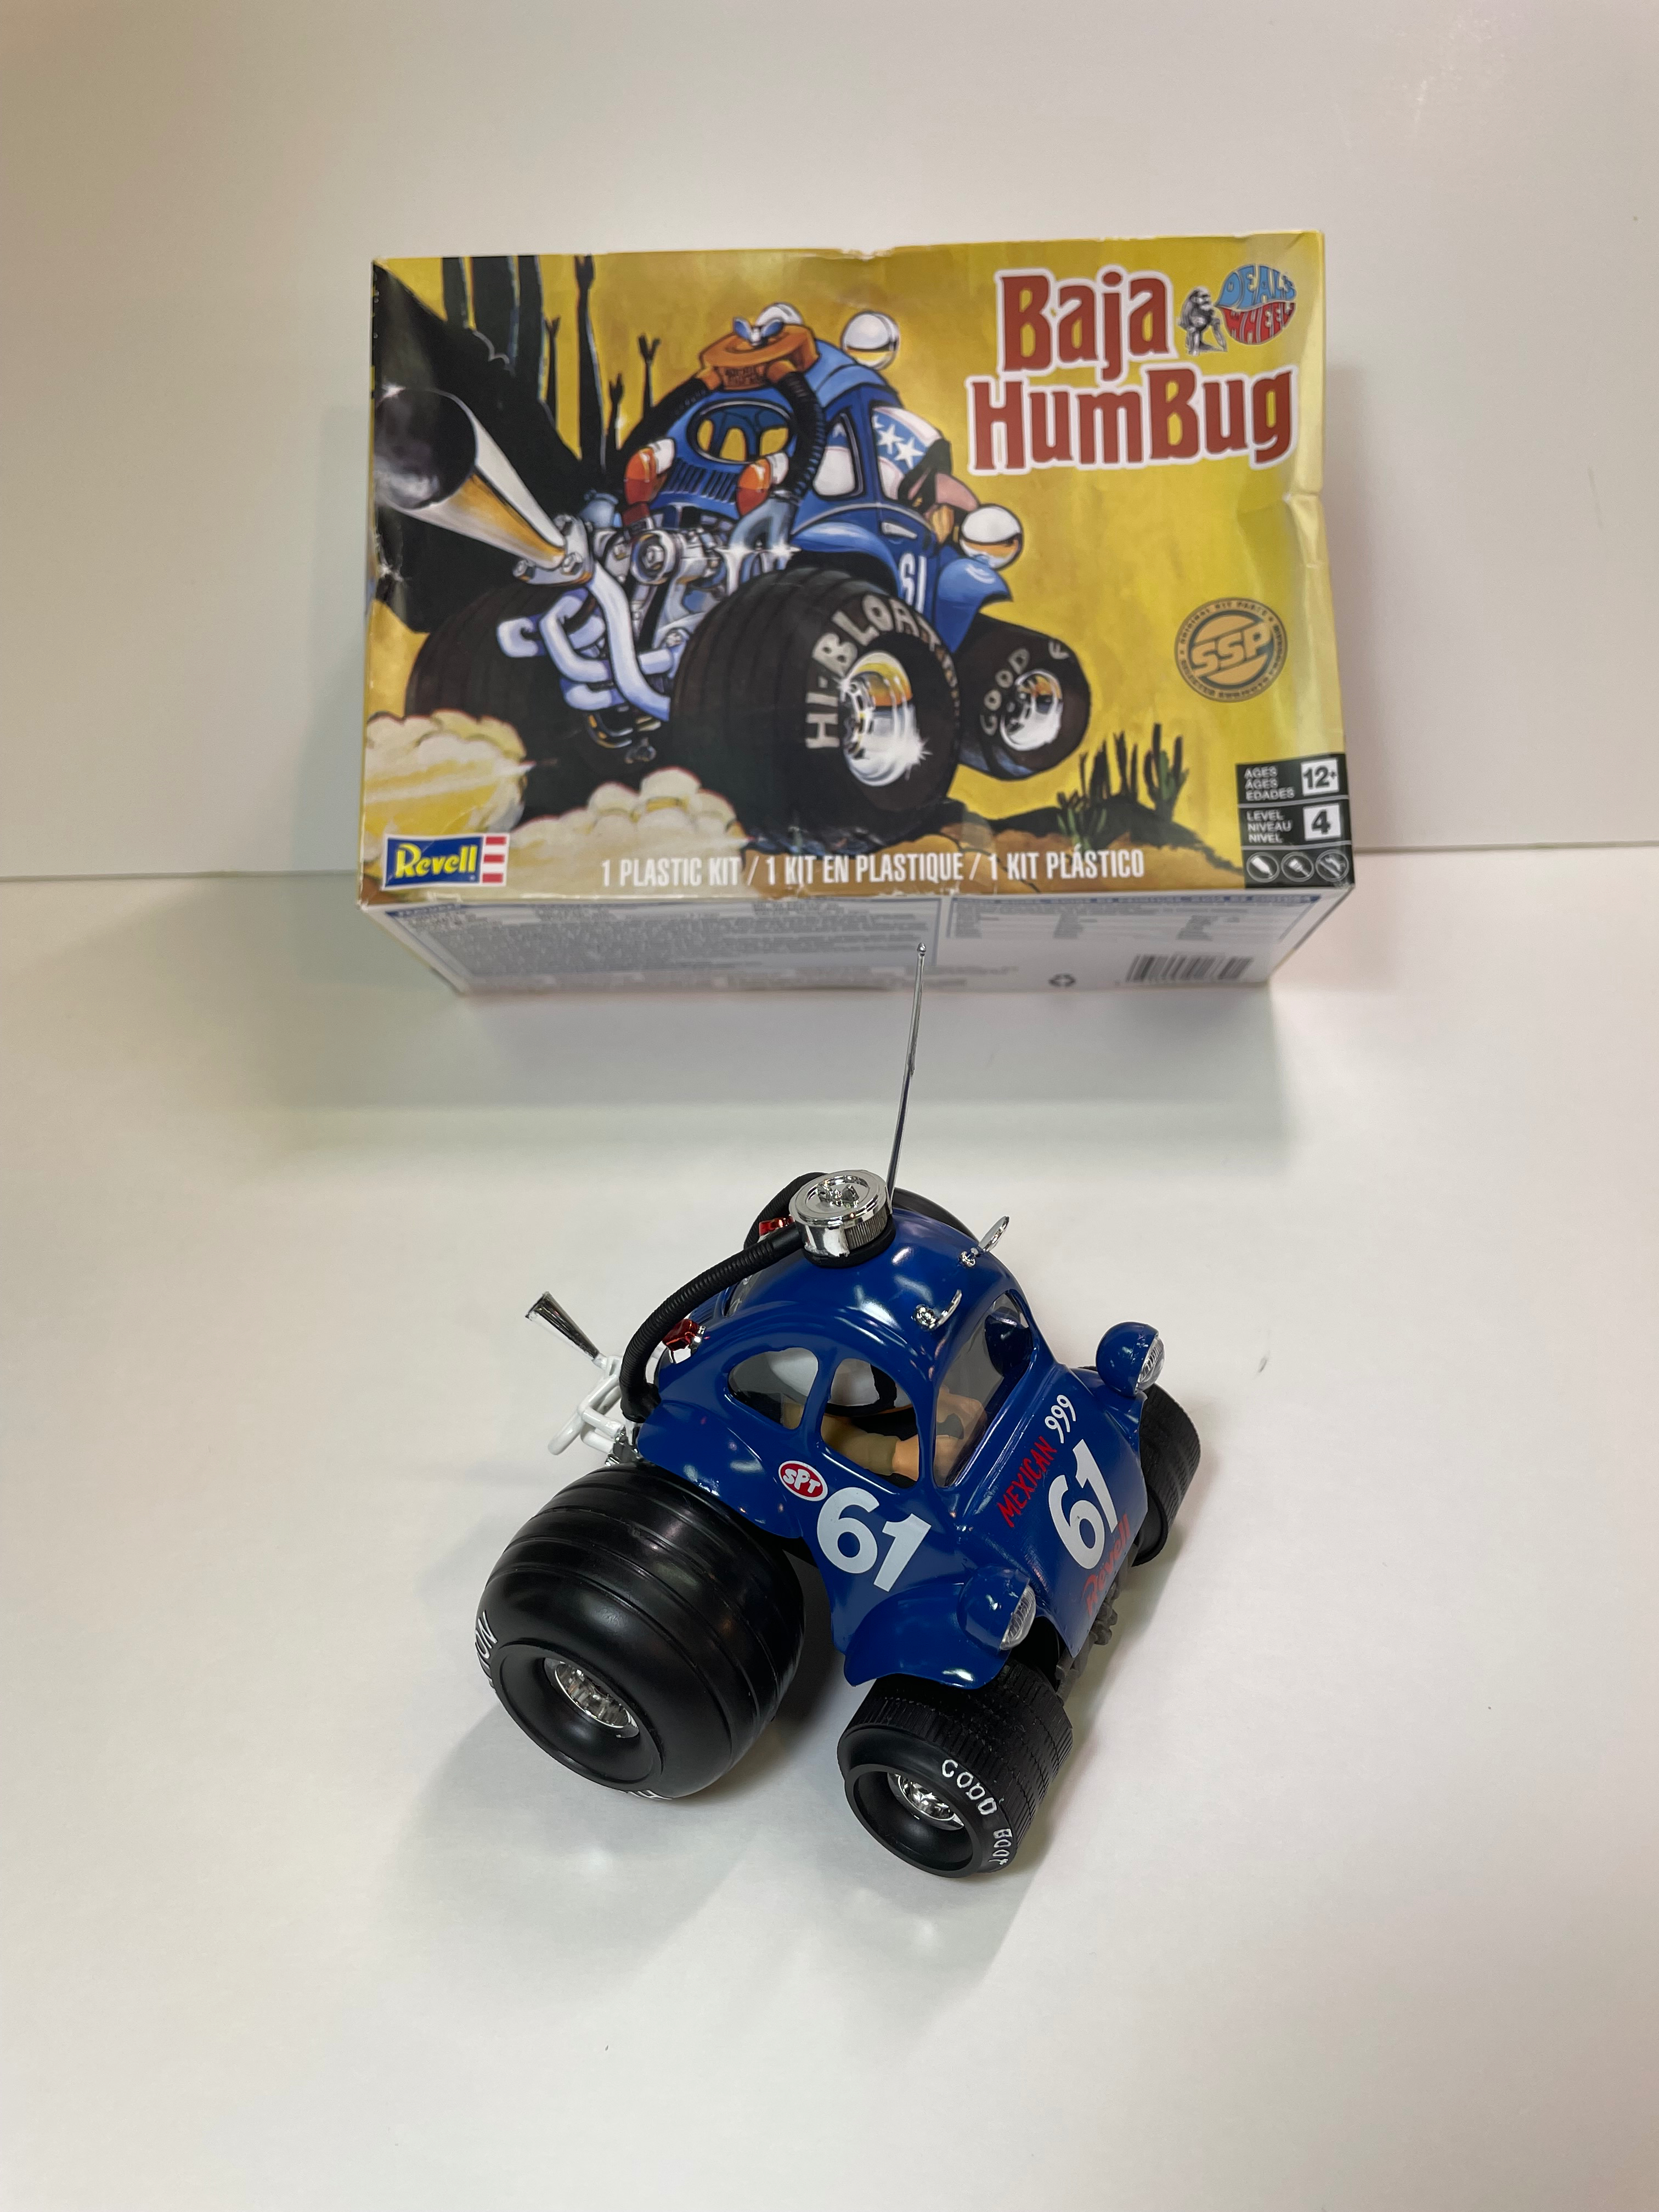
I have that Kit packed away with my stash with some AM pieces and some extra decals Looking forward to seeing your progress with it
TinyDog01
I have that Kit packed away with my stash with some AM pieces and some extra decals Looking forward to seeing your progress with it
TinyDog01
I really envy your ability to design your projects.
Good work!!!
The Hasegawa Super Hornet in 1/72 scale is my choice to start this campaign. I'm not sure if it's feasible to build it in a Growler version. You can tell me if it's possible.
 IMG_20251116_082231 by Shaky962, en Flickr
Nice, Wig. Can you let us know when you started that kit?
Michael ![]()
![]()
I started this build in June of this year.
Michael, can’t you cut the noobie some slack? He may have kicked off a couple of weeks early, but at best he can’t have completed until early August (two-month build) and didn’t arrive here until near the end of September. We’ve always been a friendly group and relaxed towards completion dates, at least, and tolerant (even to the sh!t I post, which isn’t confined to the photos of mutilated lumps of plastic I occasionally inflict on these boards).
Regards,
M
Gentlemen, I did not intend to cause such a ruckus. I was simply posting something that I had managed to complete and sharing it here. I was not attempting to enter any group build. That was suggested to me. It really doesn’t matter if it is included or not. I appreciate the support that has been given but it’s not worth all this trouble.
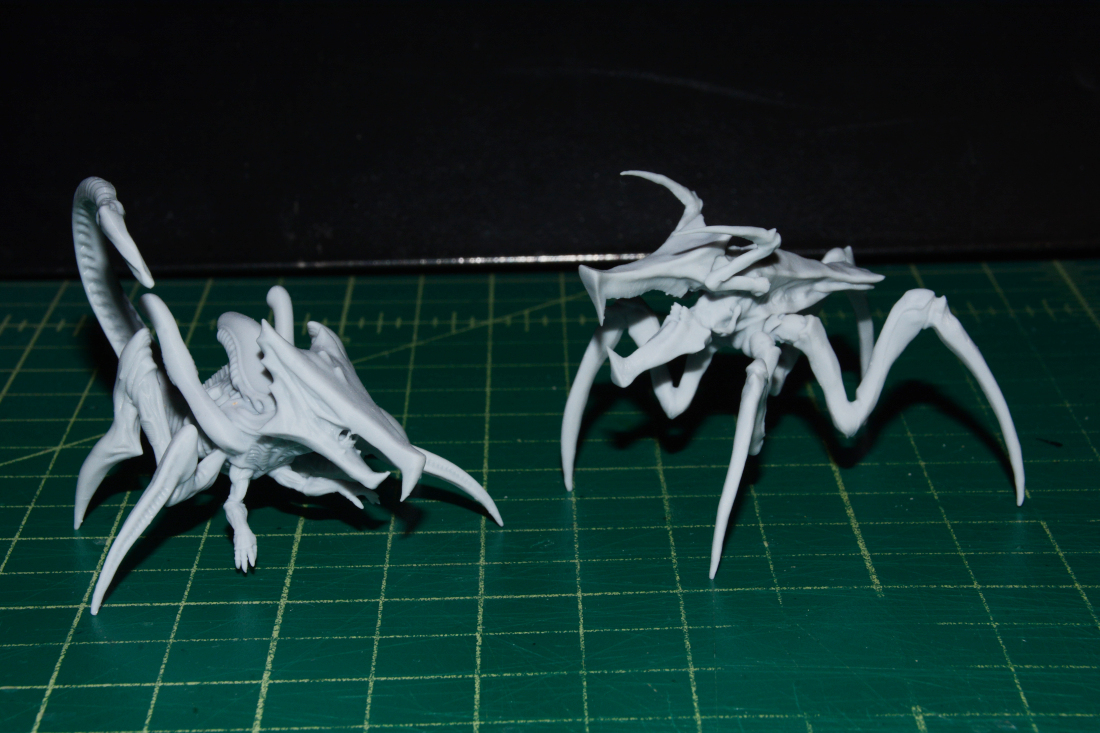
I have a couple 3D printed bugs that were advertised as 1/35 but they look closer to 1/72. As you can see in the second photo, they are posed with a 1/35 figure and they are quite small. I suppose they can be used as 1/35 as baby bugs.
Wow, those are a bit small.
Easy there, pardners! I never said no. I’m good with it, and it’s a very cool addition. Welcome to the group!
Michael ![]()
![]()
Well said!
M
You didn’t; it’s not a ruckus, we carry on like this all the time…
Cheers,
M
We enjoy ruckuses. Keeps us on our toes!
Michael ![]()
![]()
Going by the picture with the soldier, they’re 1:56th scale to match 28mm wargames figures. I have one in plastic in that size which I’ve assembled for this GB but as yet haven’t tried to paint, it’s long OOP. I’ve also got a lot of GW Tyranid leftovers which might turn into something else alien…
Cheers,
M
Thanks for the info.
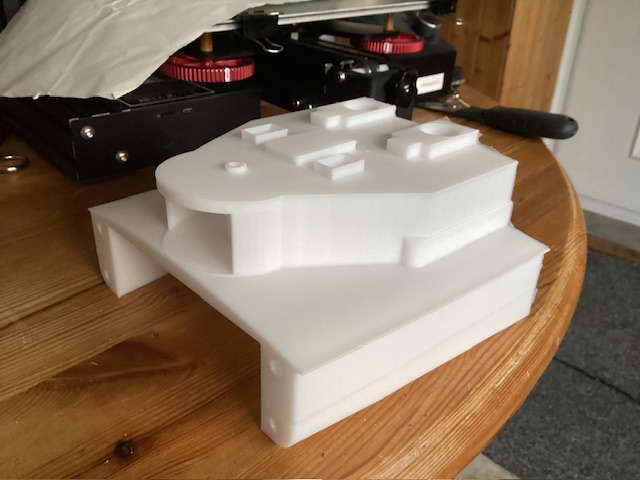
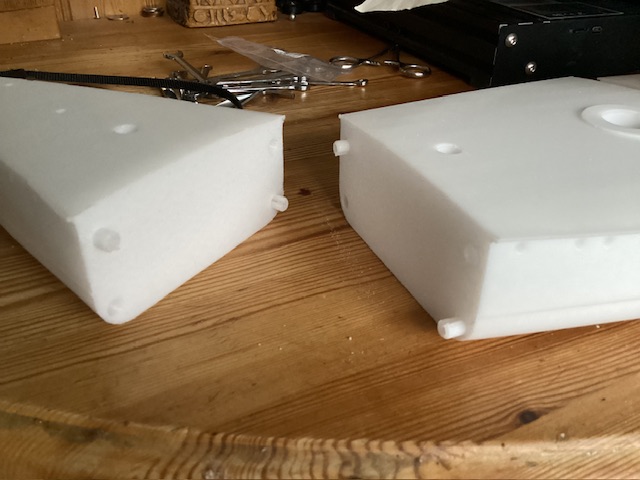
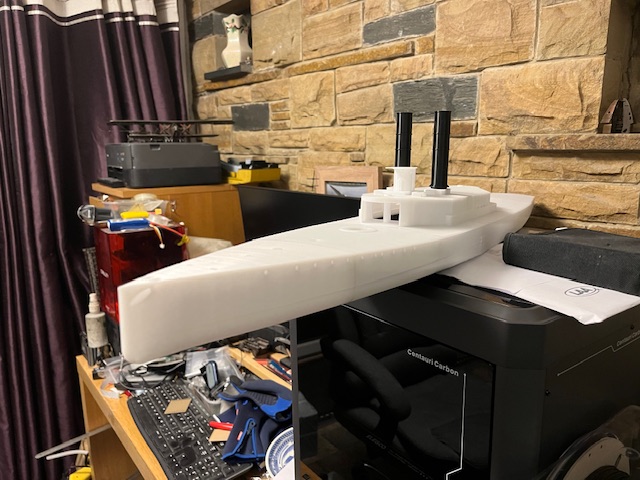
Finally printed the hull over the last 3 days. I changed my mind a few times about how it should be divided for printing finally going with the simplest method. I think the prints have come out well, I’ll join them together on Monday. I have put this to one side after I damaged Jackal badly when I dropped her putting her in the car and have been repairing, still not finished.
Wow! i like!
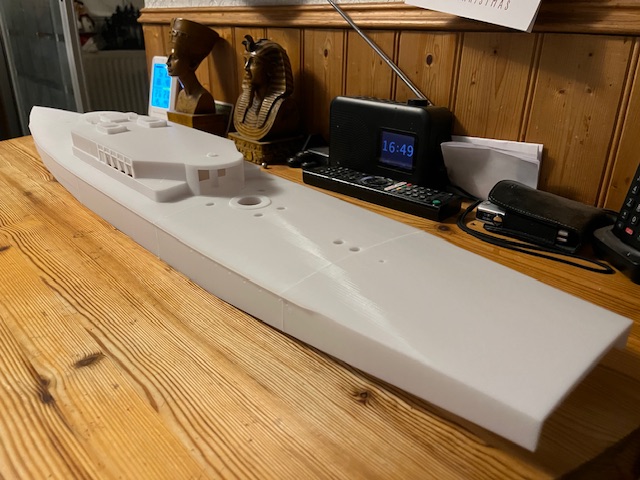
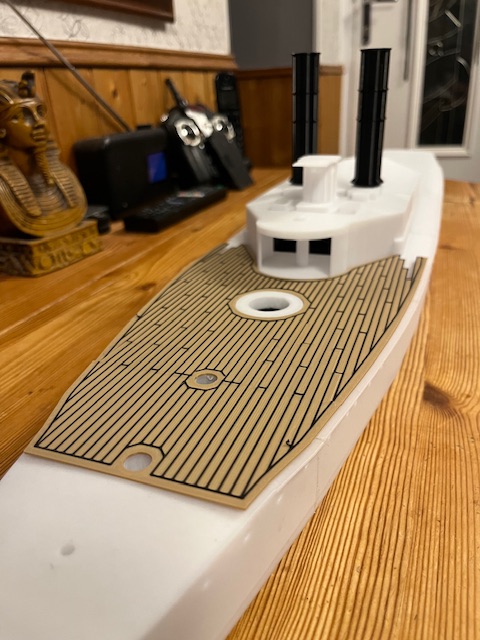
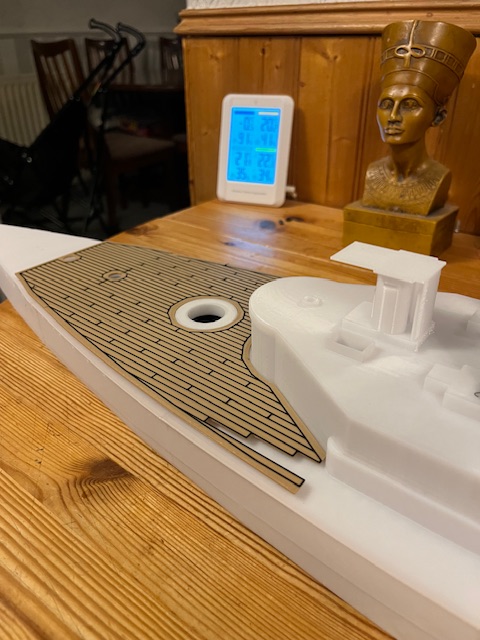
Playing with printed wood decks, I hate planking decks. Drawing them isn’t easy but I think the results are worth it. The 1mm thick deck is printed in two interlocking pieces, it will be bonded to the hull and match the deck curvature. The base print is wood PLA with black caulking lines printed as the last layer of the print, these are test pieces, finished prints have far more detail. Also printed conning tower and funnels giving a better idea of Scarab’s rather antiquated appearance, even for 1915!
Hi Everyone,
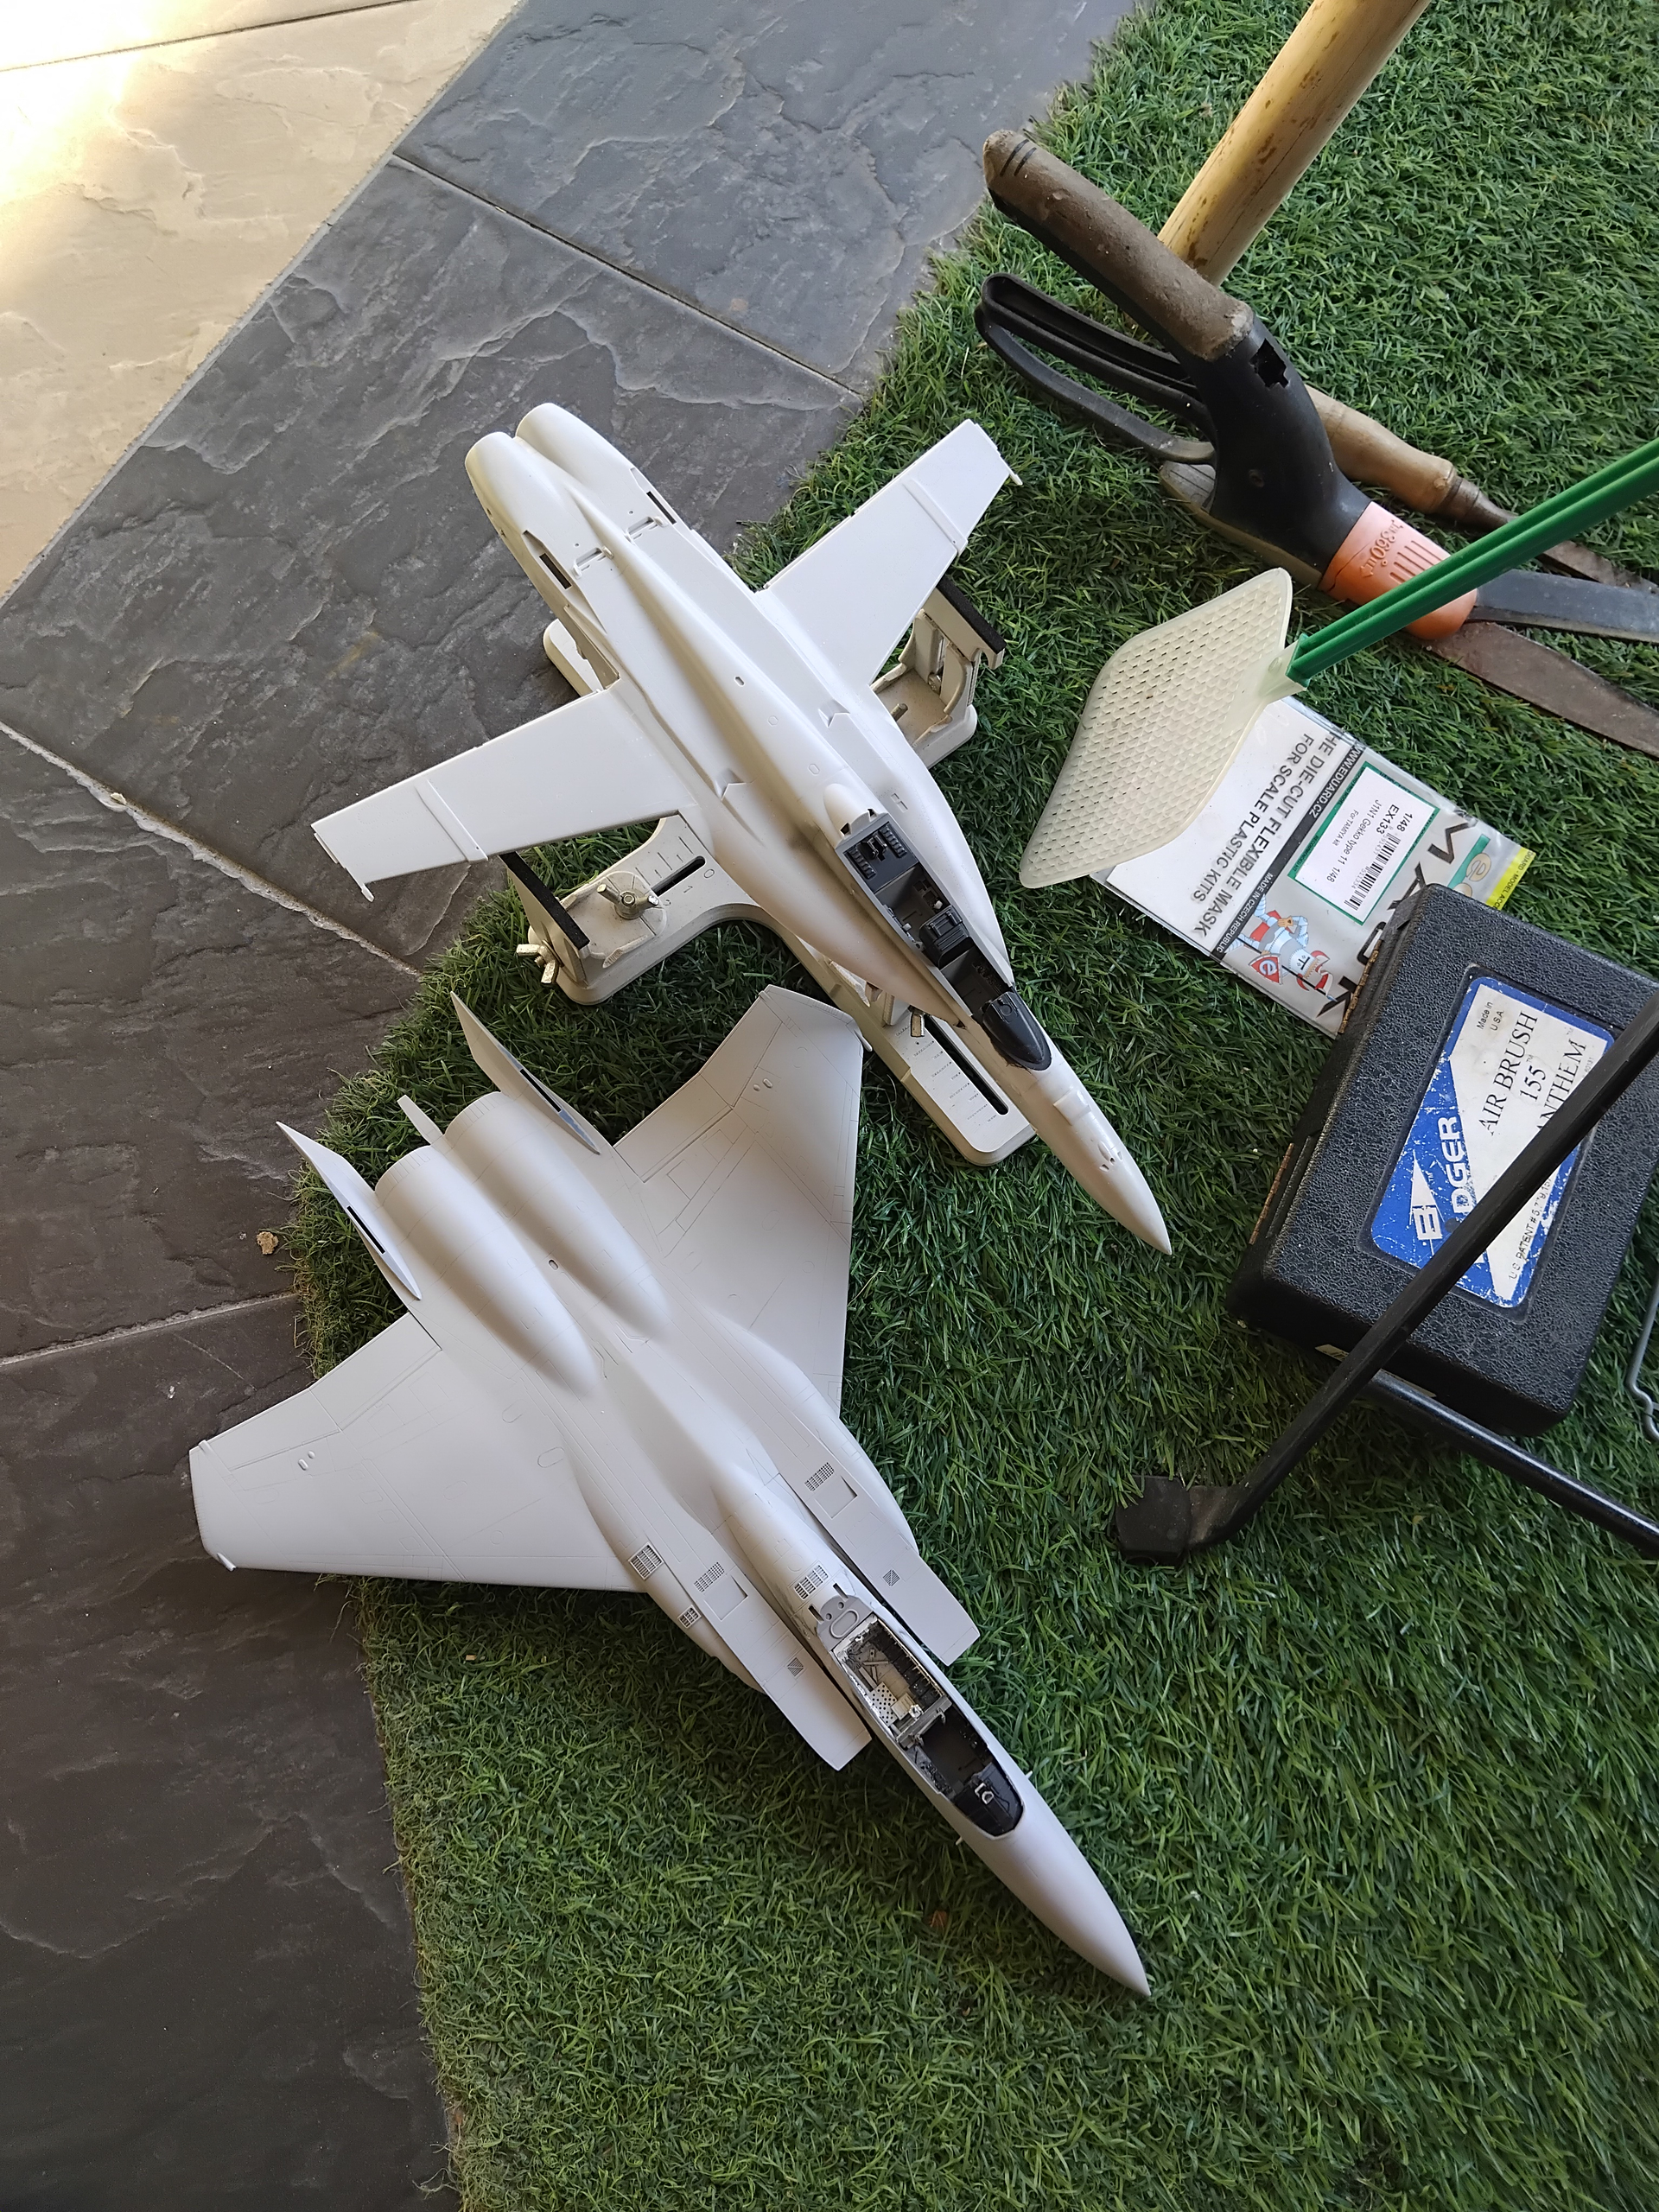
Lots of interesting builds going on here, best of luck to complete them! Well it’ time for an update on my Super Hornet build. Here we go!
Unlike most builds, I began this one with the intakes. Without using aftermarket parts, I glued the pieces together and smoothed the interior using some plastic putty. This was then painted using copious amounts of white and allowing it to dry while vertical over a paper towel. This is a well documented procedure and works quite well.
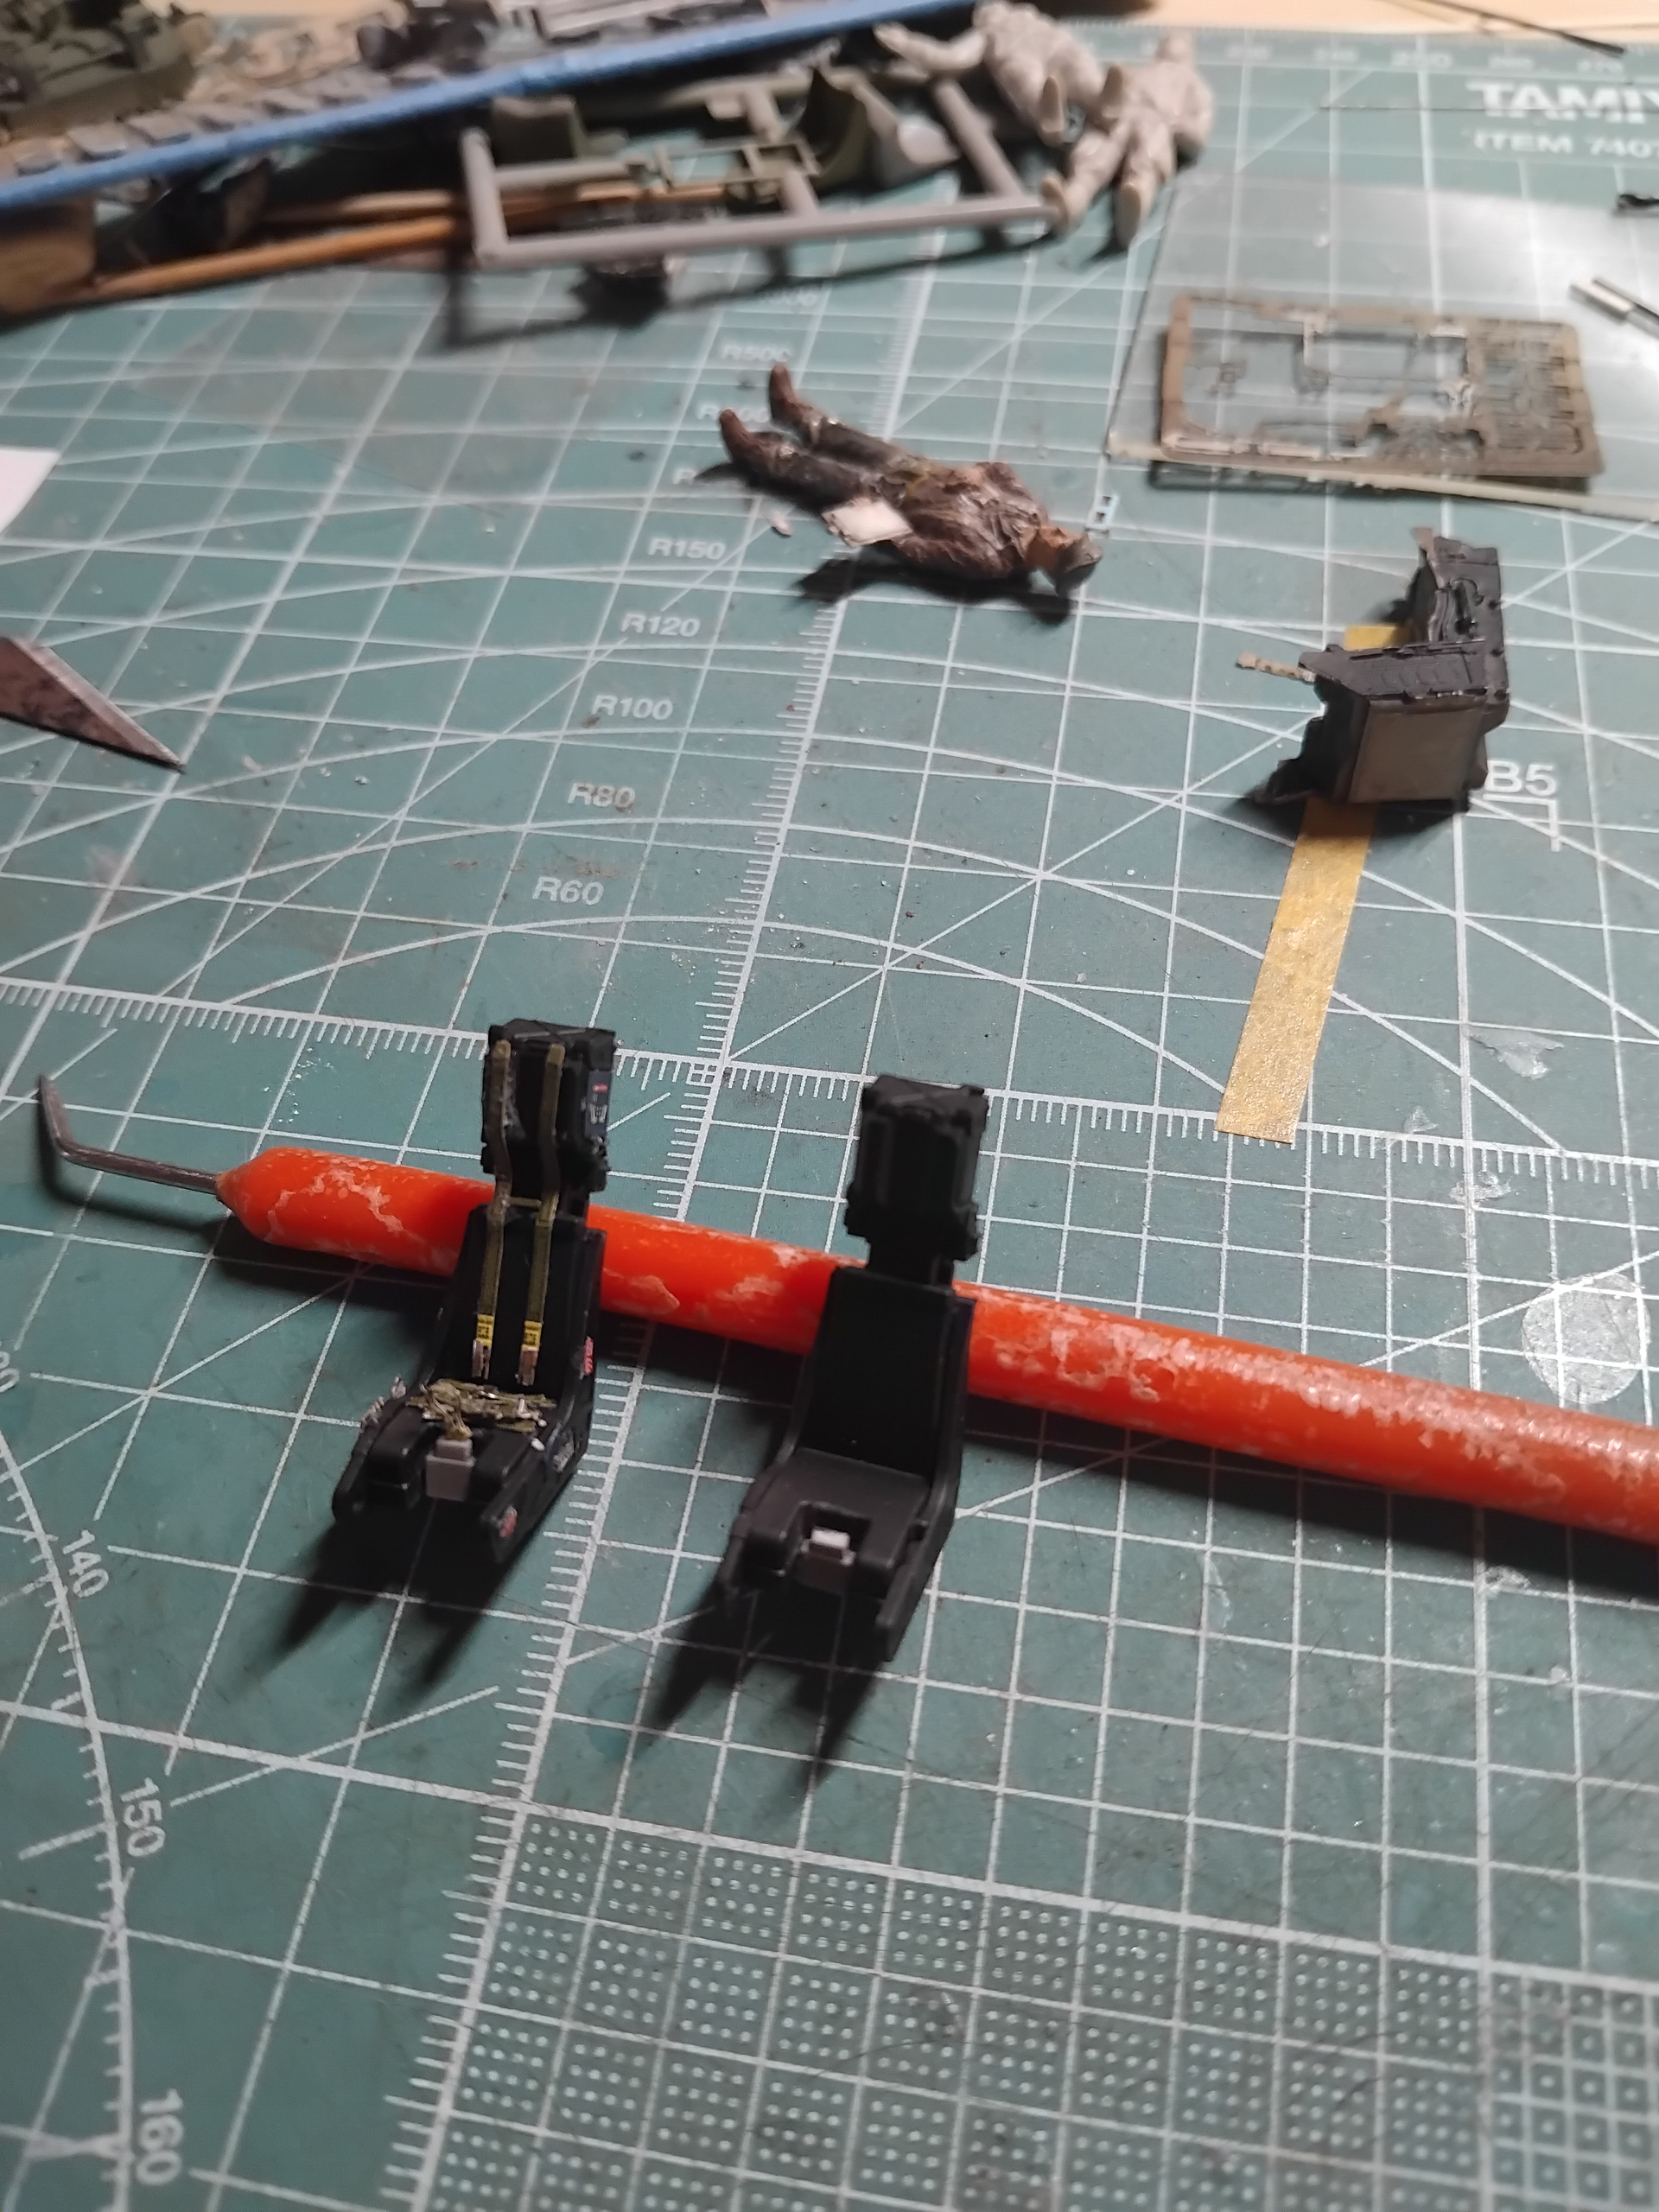
I did purchase an Eduard ejection seat set for the seats. Having used them in the past, they do enhance the cockpit area. The set consists of belts, placards and other miscellaneous things to draw the eyes of the viewer.
Leaving the seats out, I proceeded with the cockpit construction following the instructions. Initally, I was going to use a “Dream” photoetch set, however, this was a huge mistake. I will not be purchasing anything from this company again. Everything from the wonderful looking photoetch peeled off creating a major headache. Never again! I reverted back to the original kit decals and a lot of hand painting all to achieve a plane with the power off. Test fitting with the seats in showed that things turned out ok.
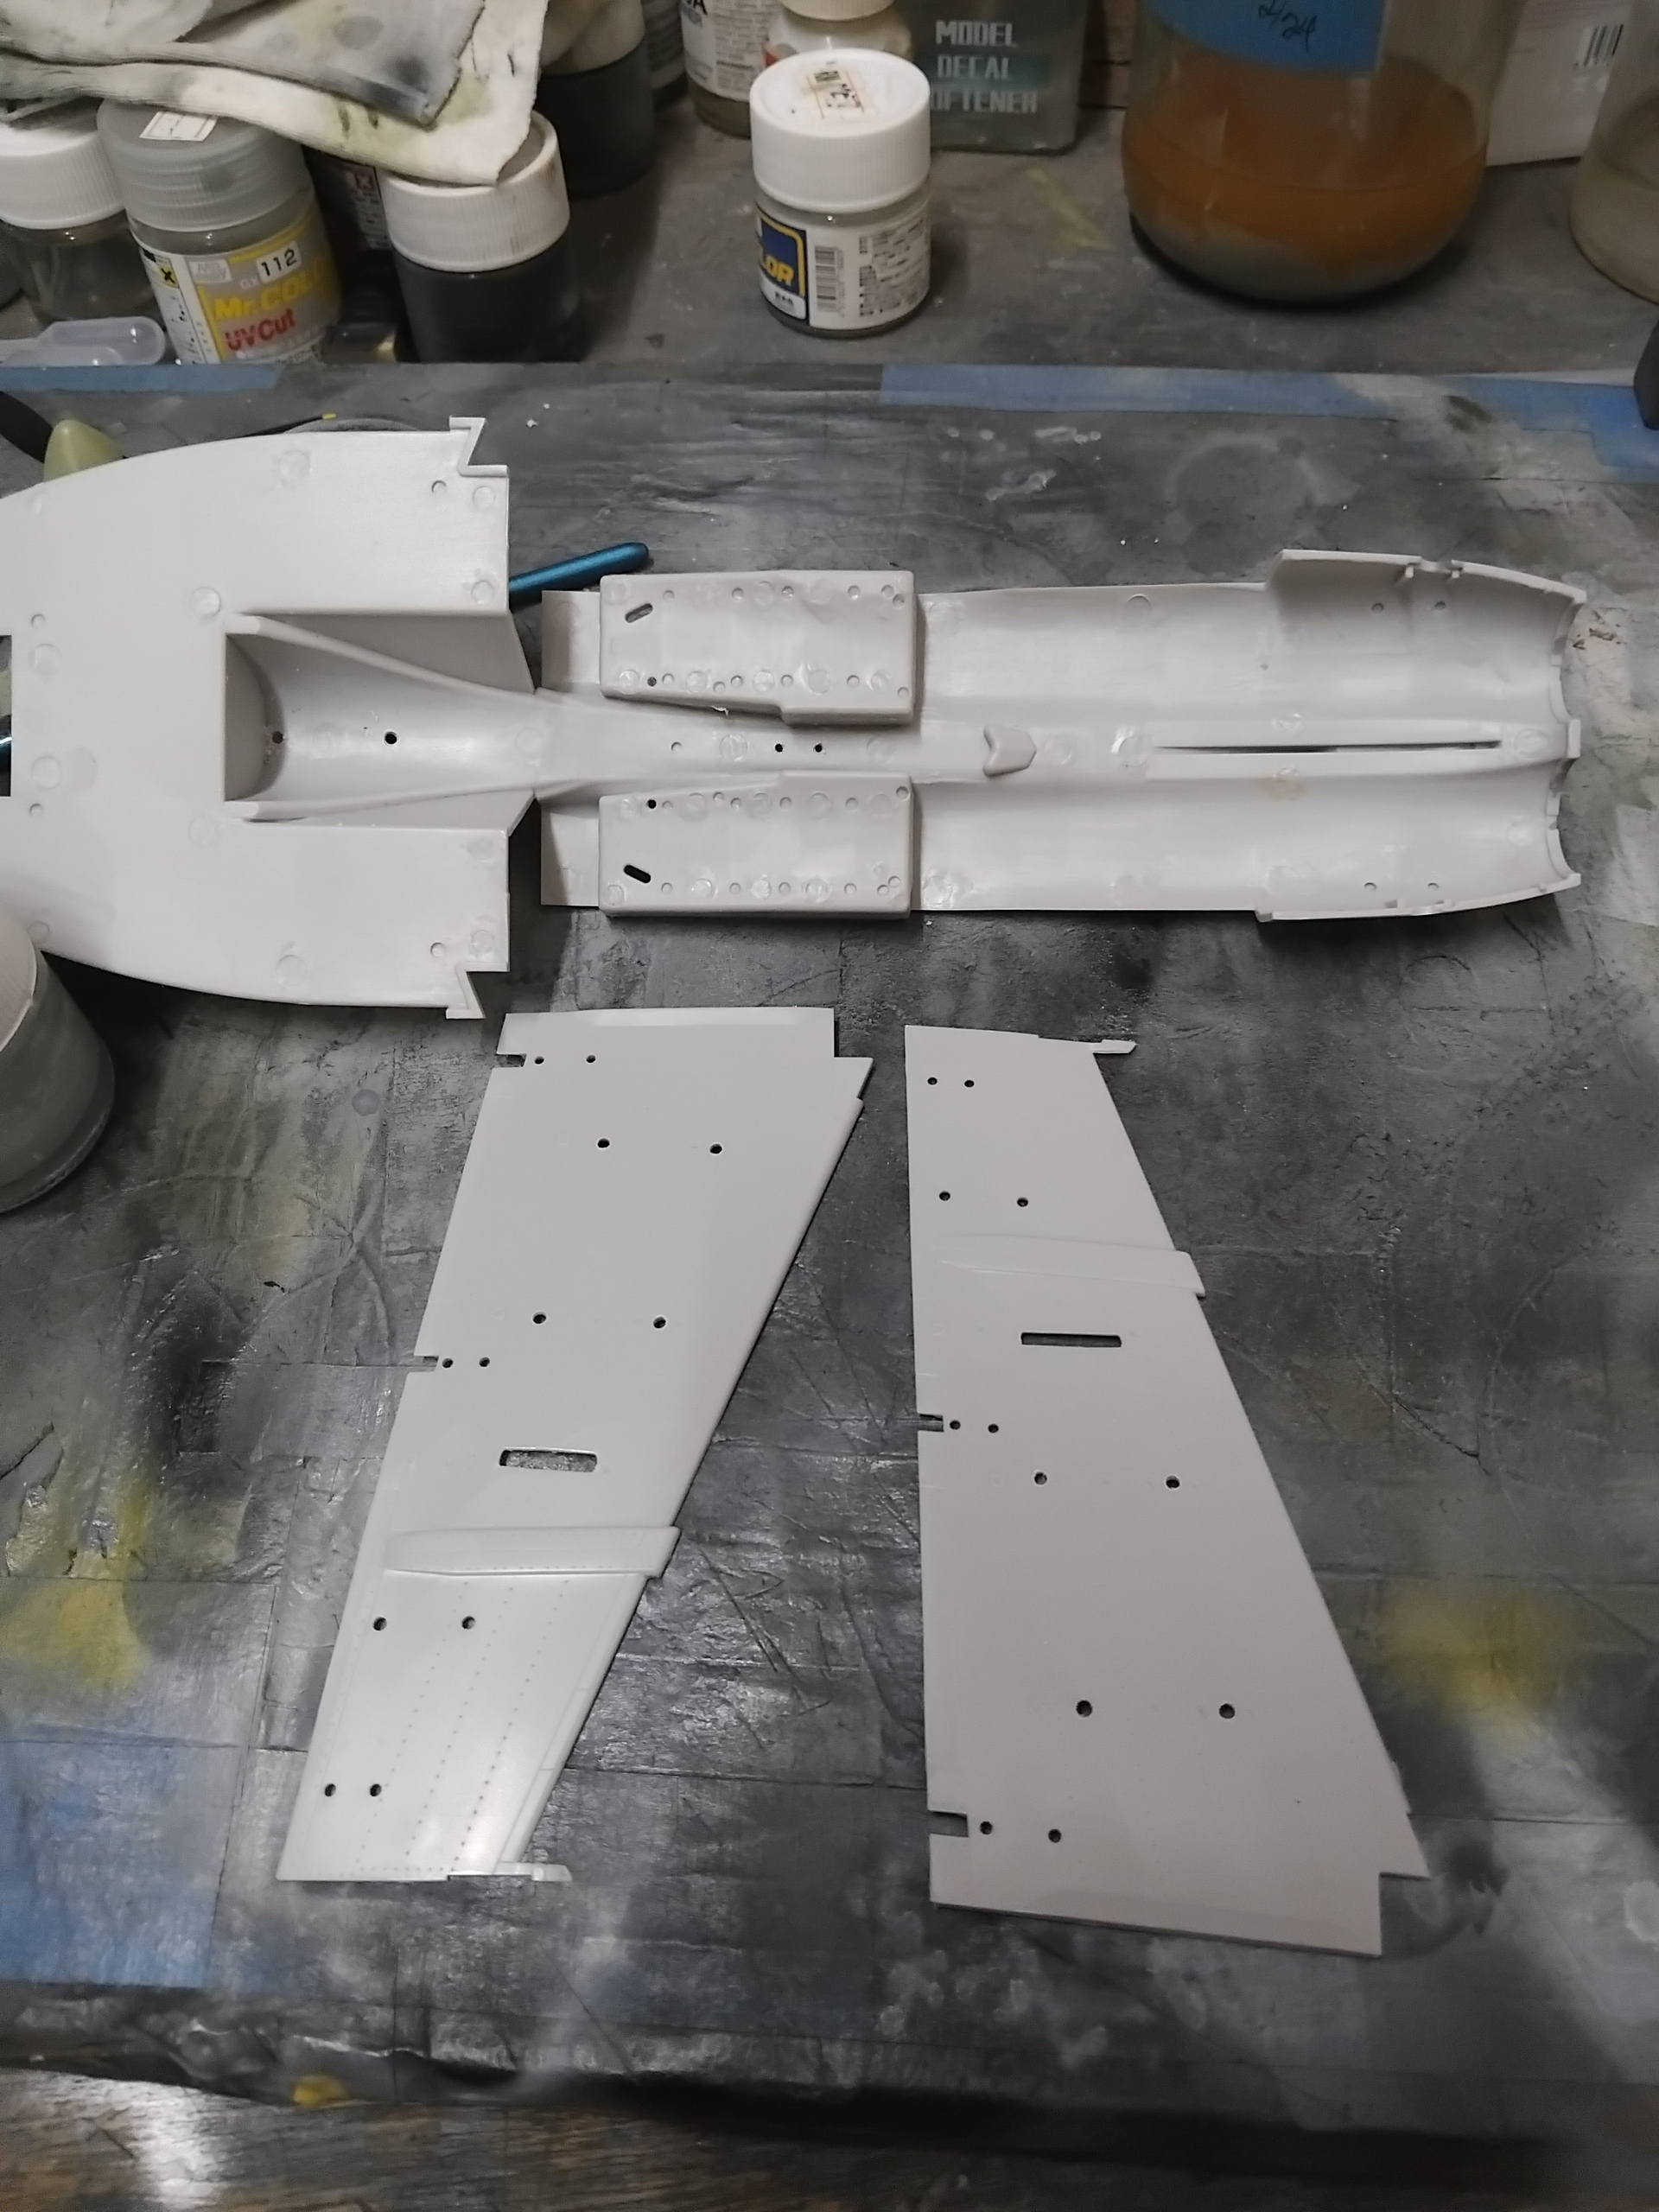
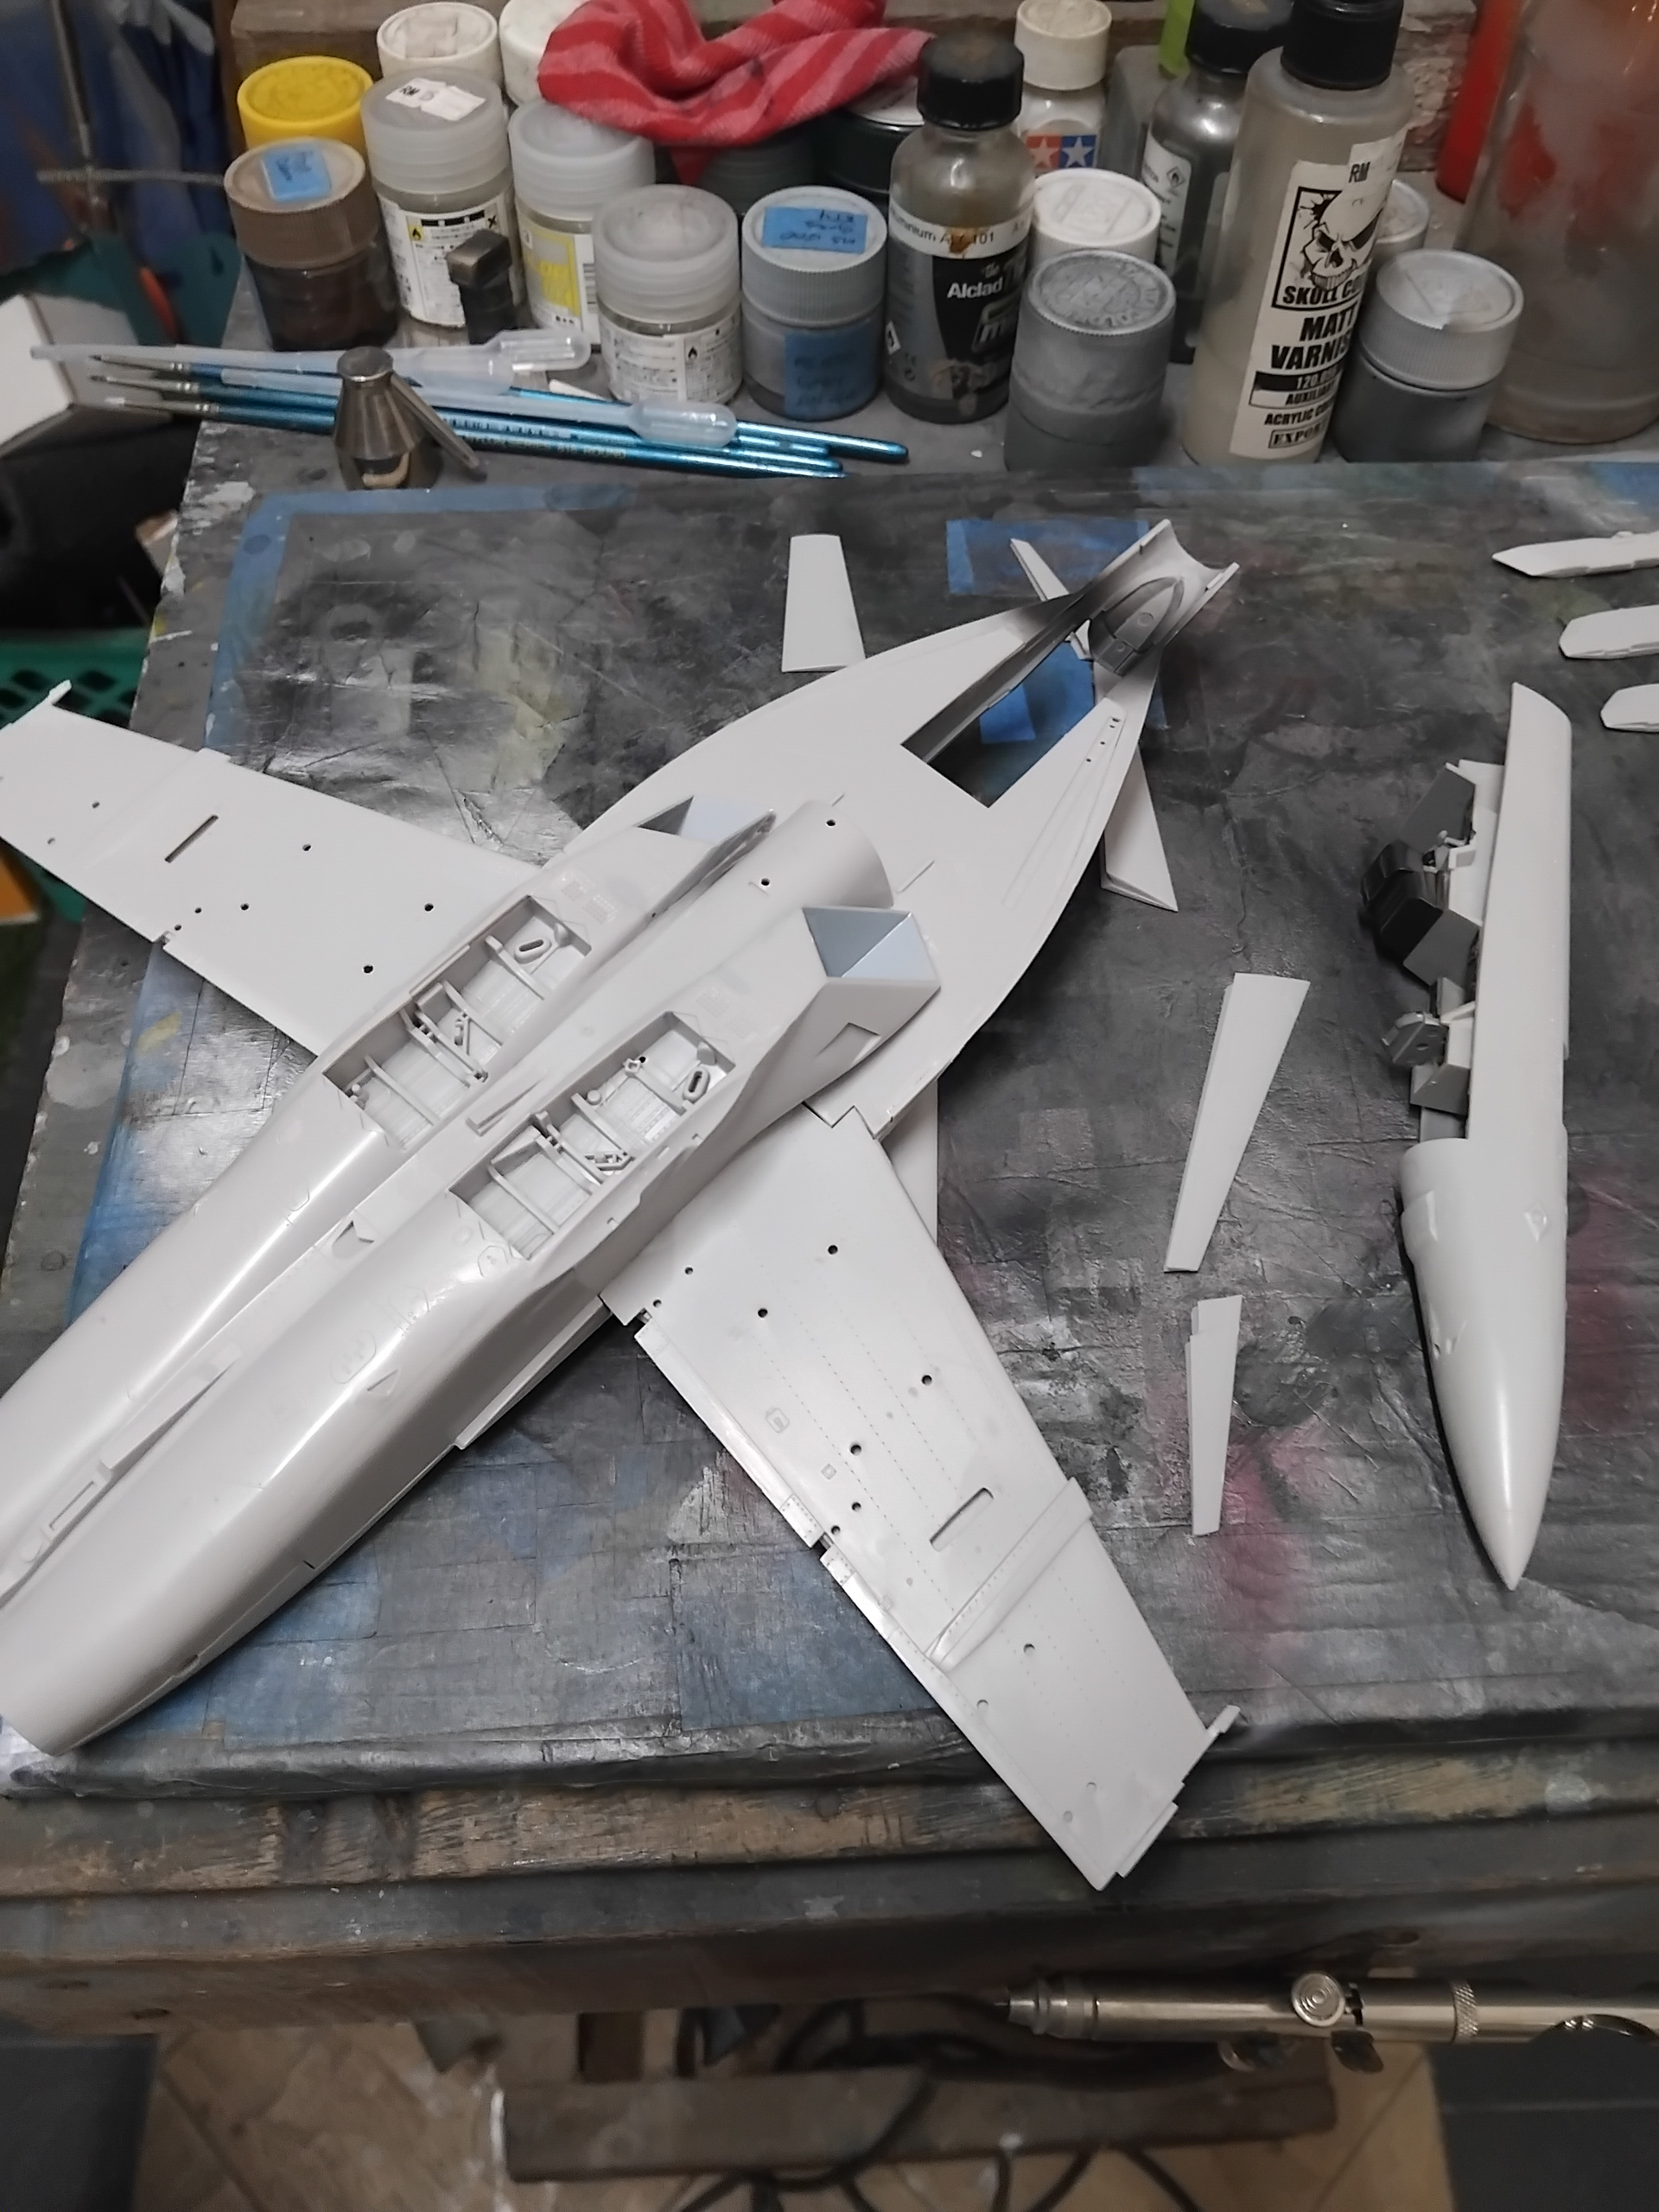
Construction continued with the attachment of the wings, completion of the front end, and cleaning up the lower half of the bird.
Holes were drilled out.
I took a break from the main build to assemble and make seamless drop tanks, along with the wheels
With the wings attached to the upper fuselage, minor filling was needed. Using Mr. Surfacer 500 They disappeared
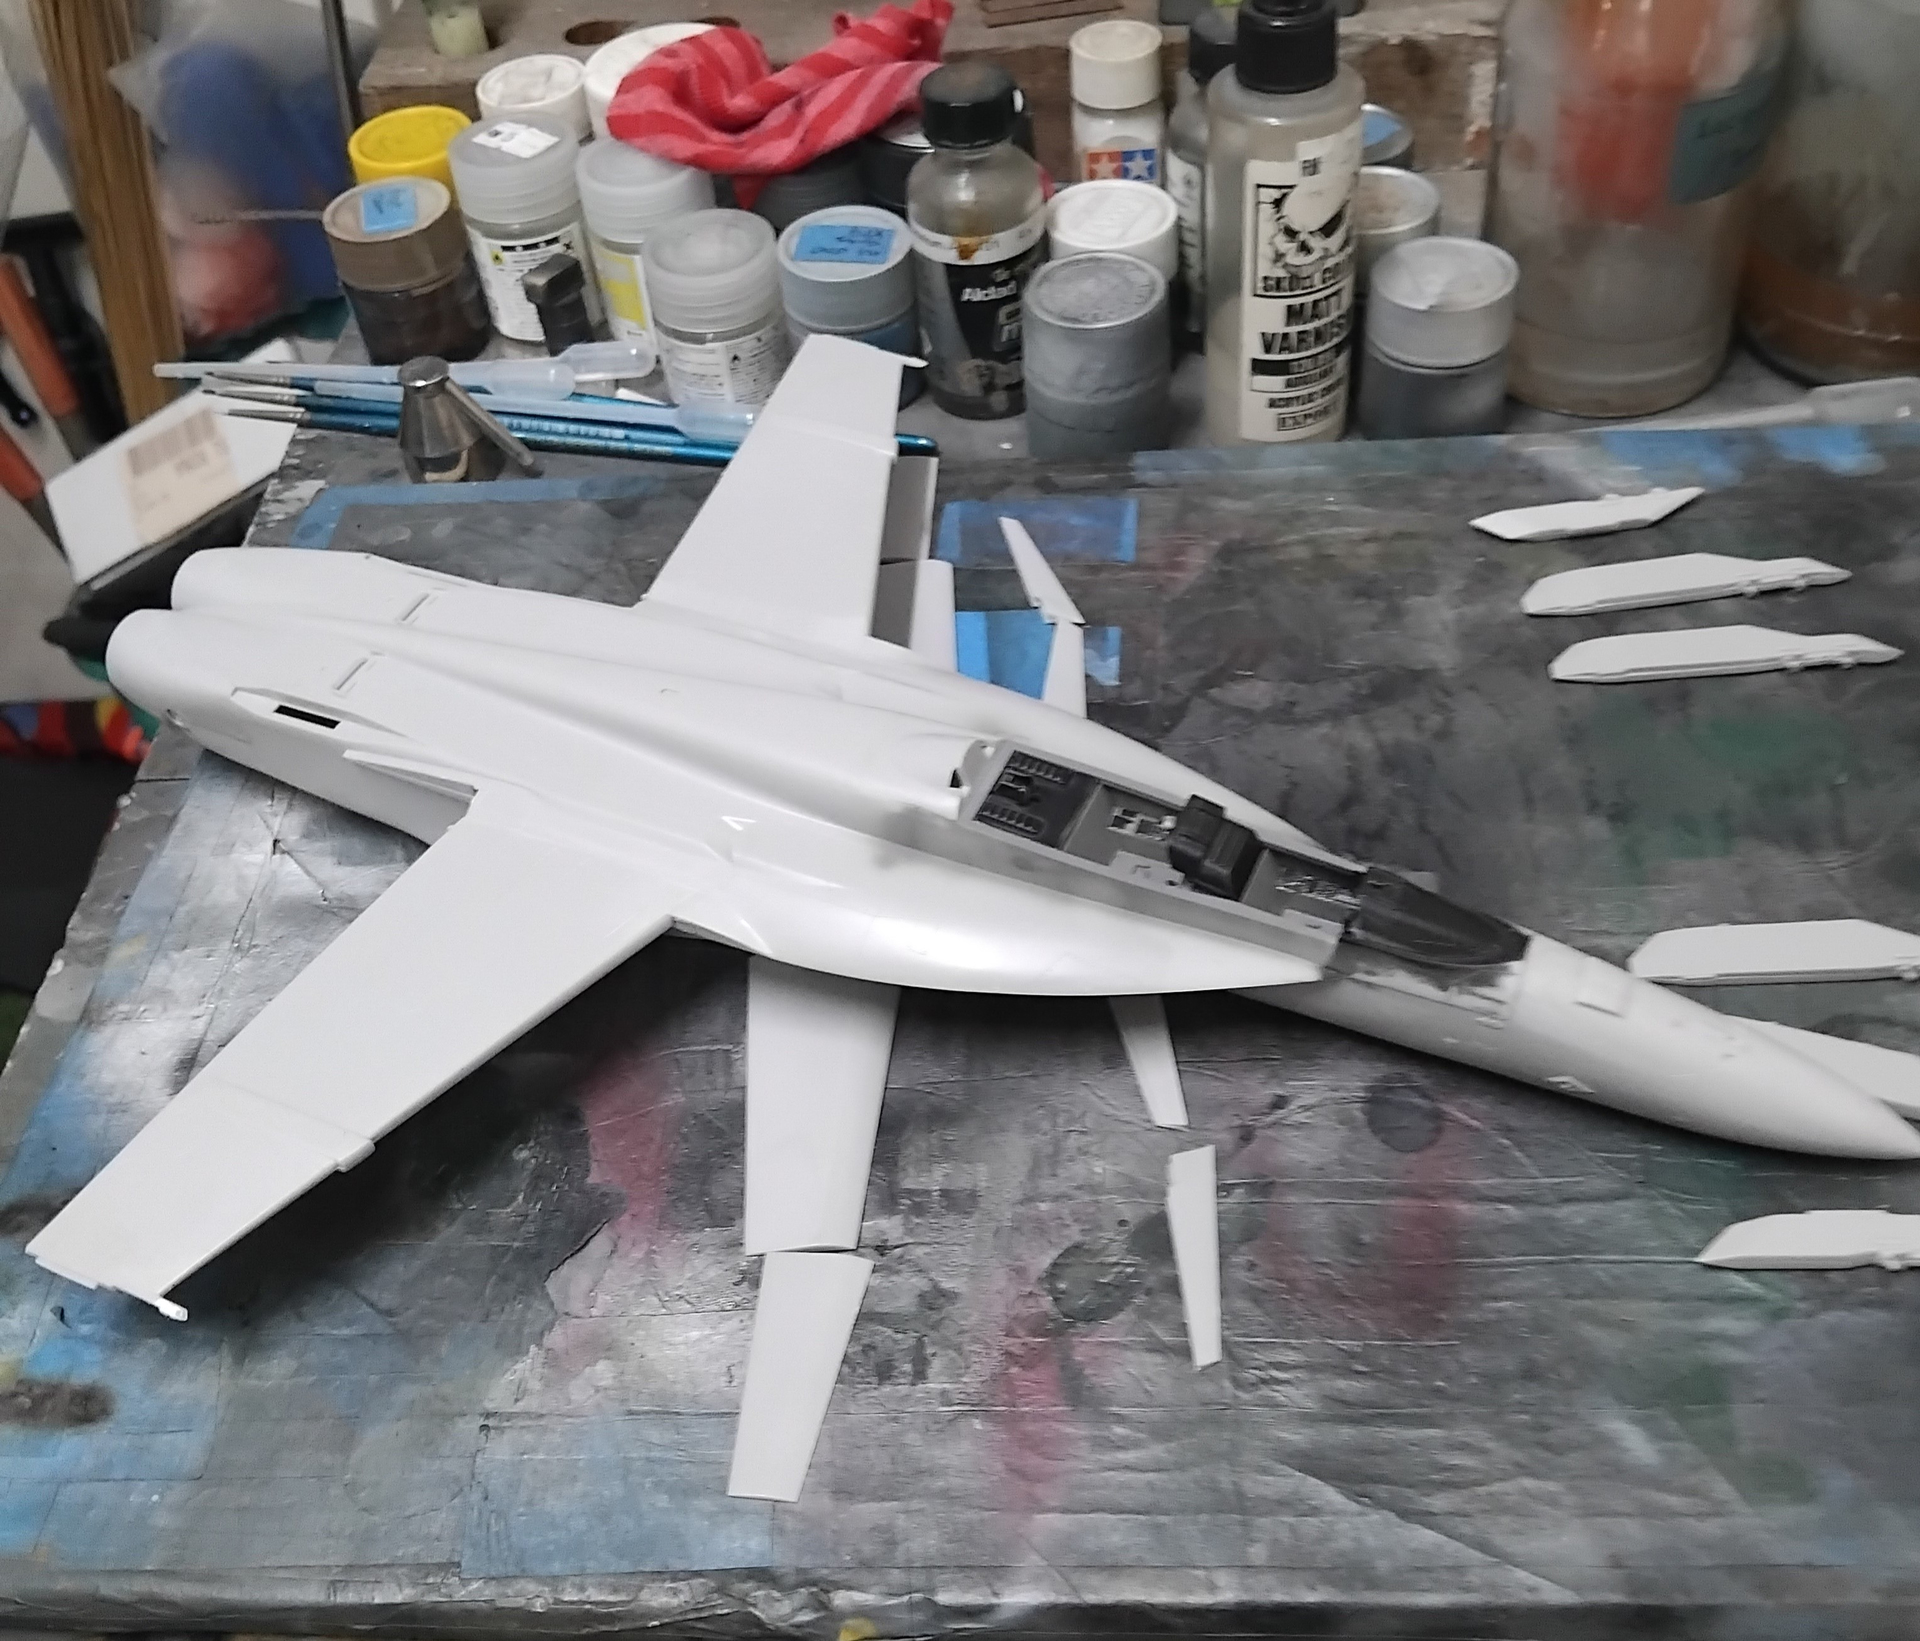
With things looking good, it was time to assemble the main components of the Hornet.
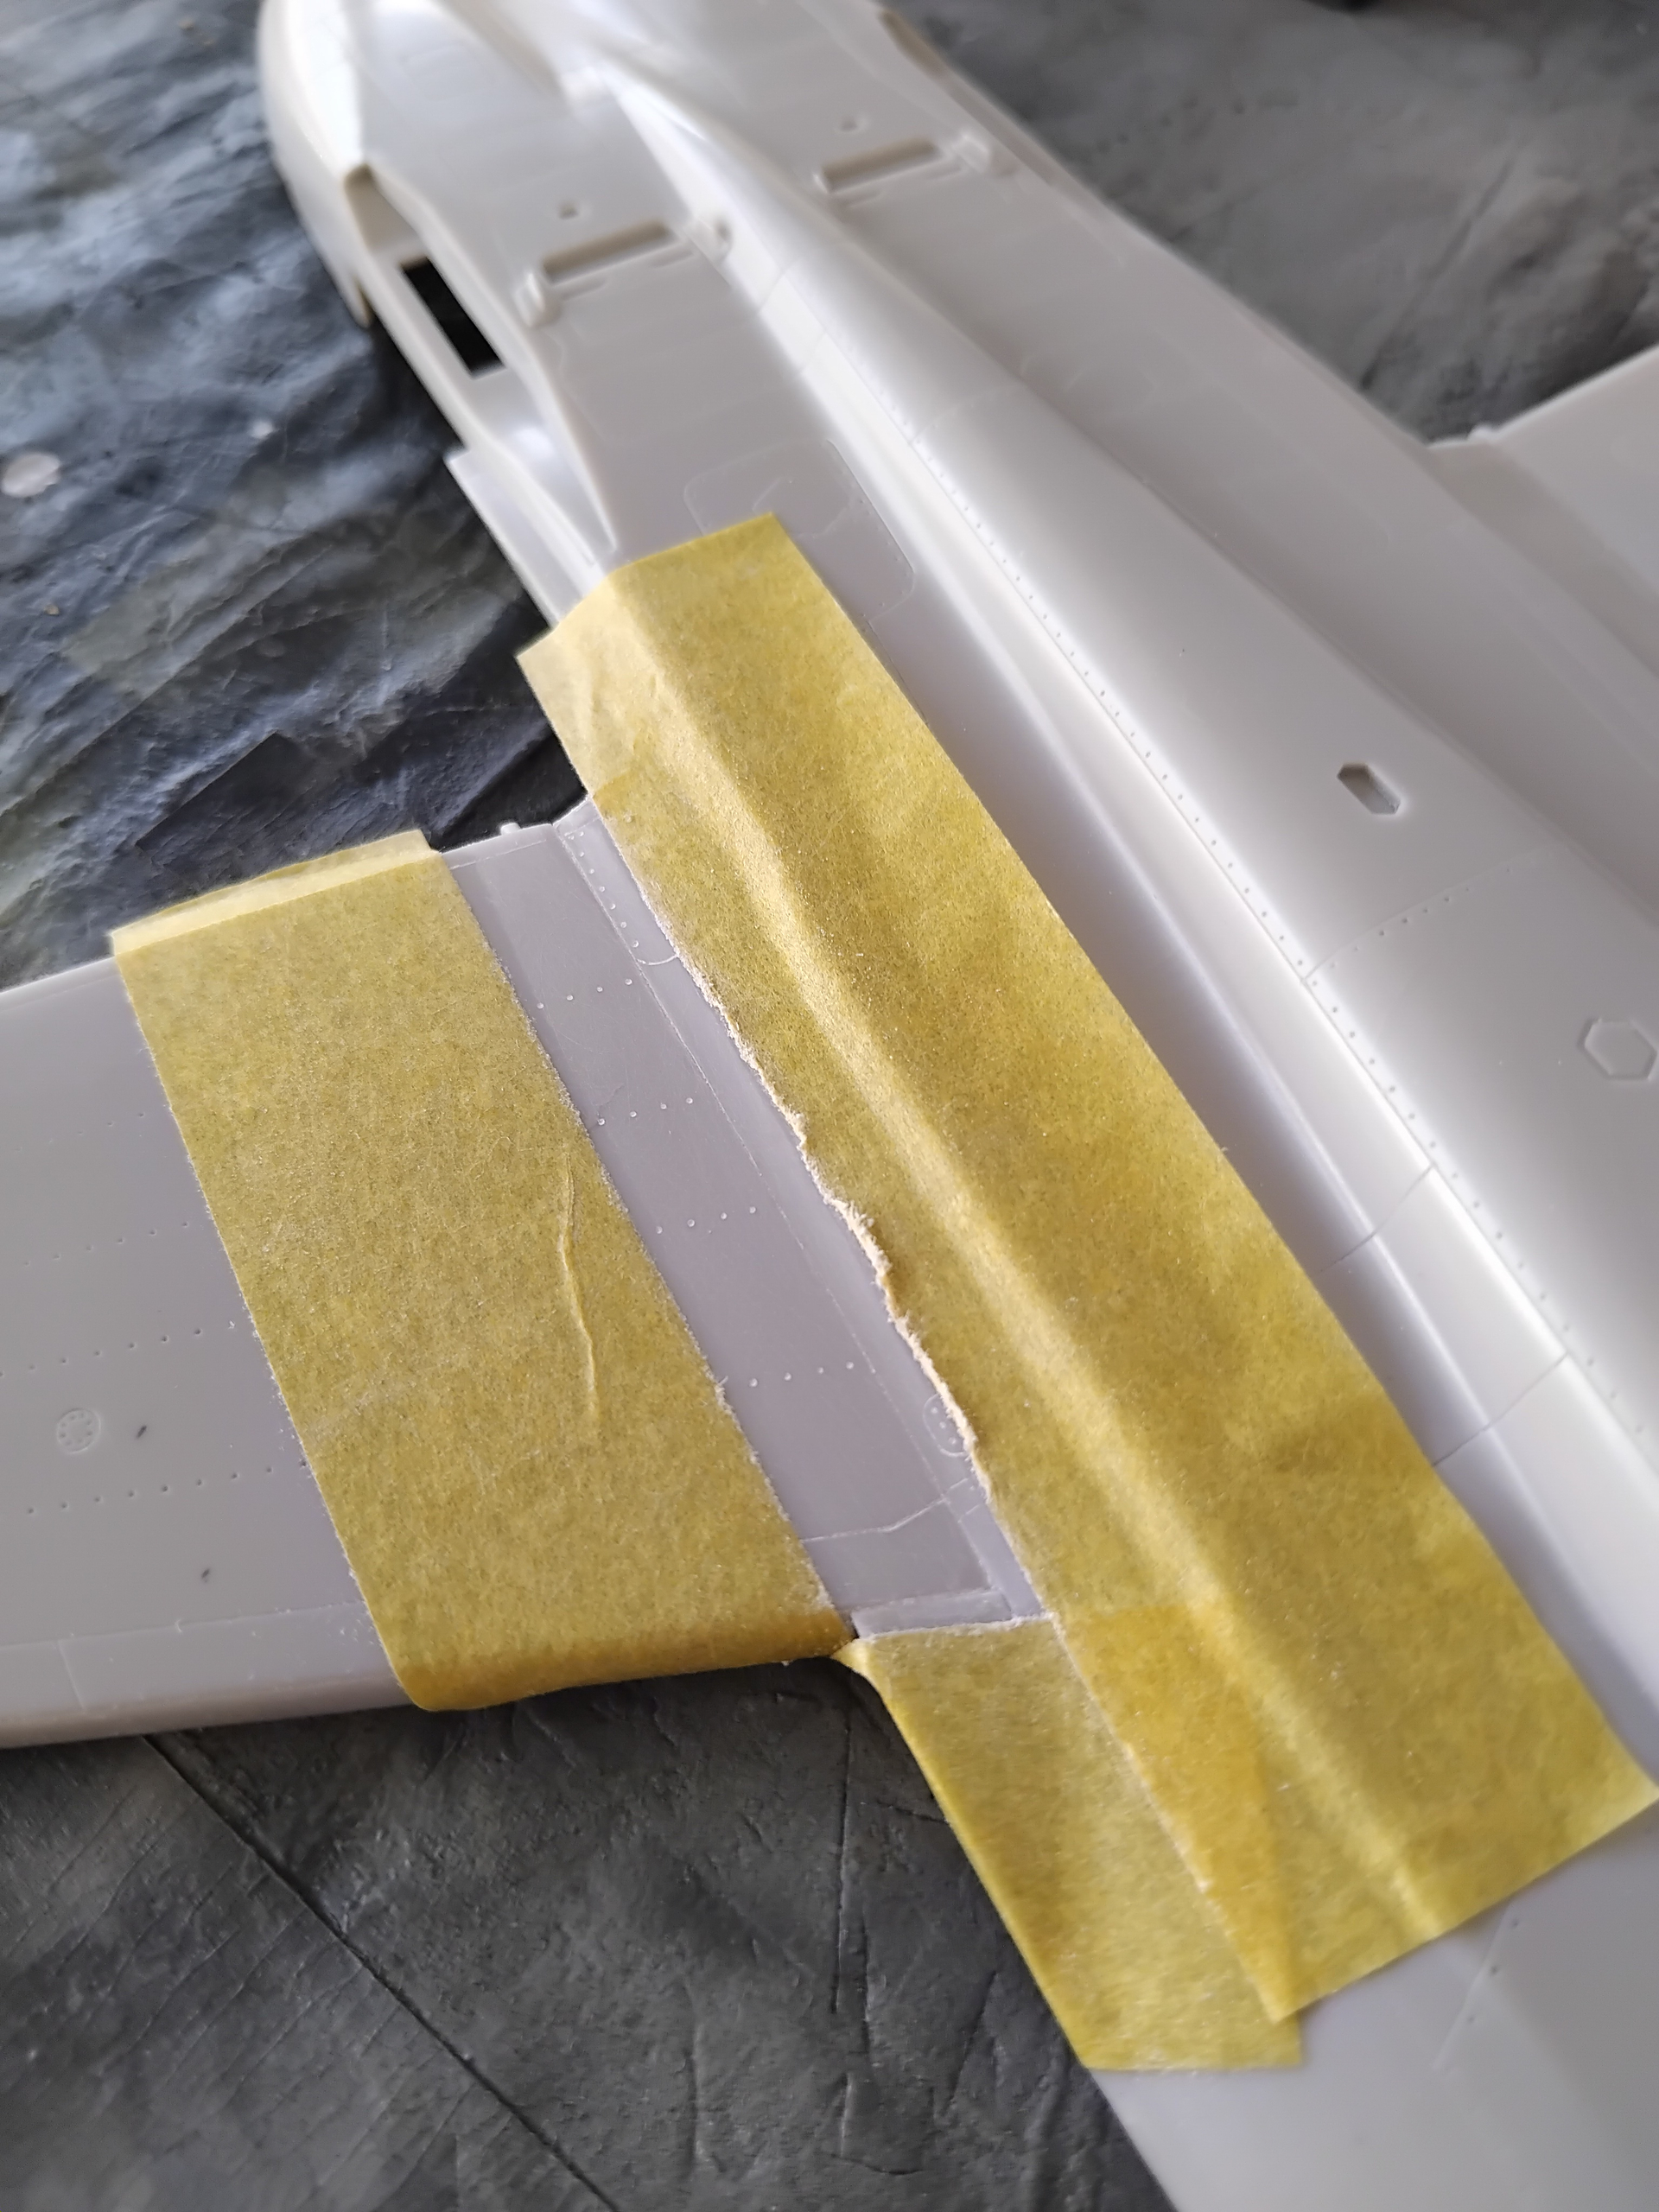
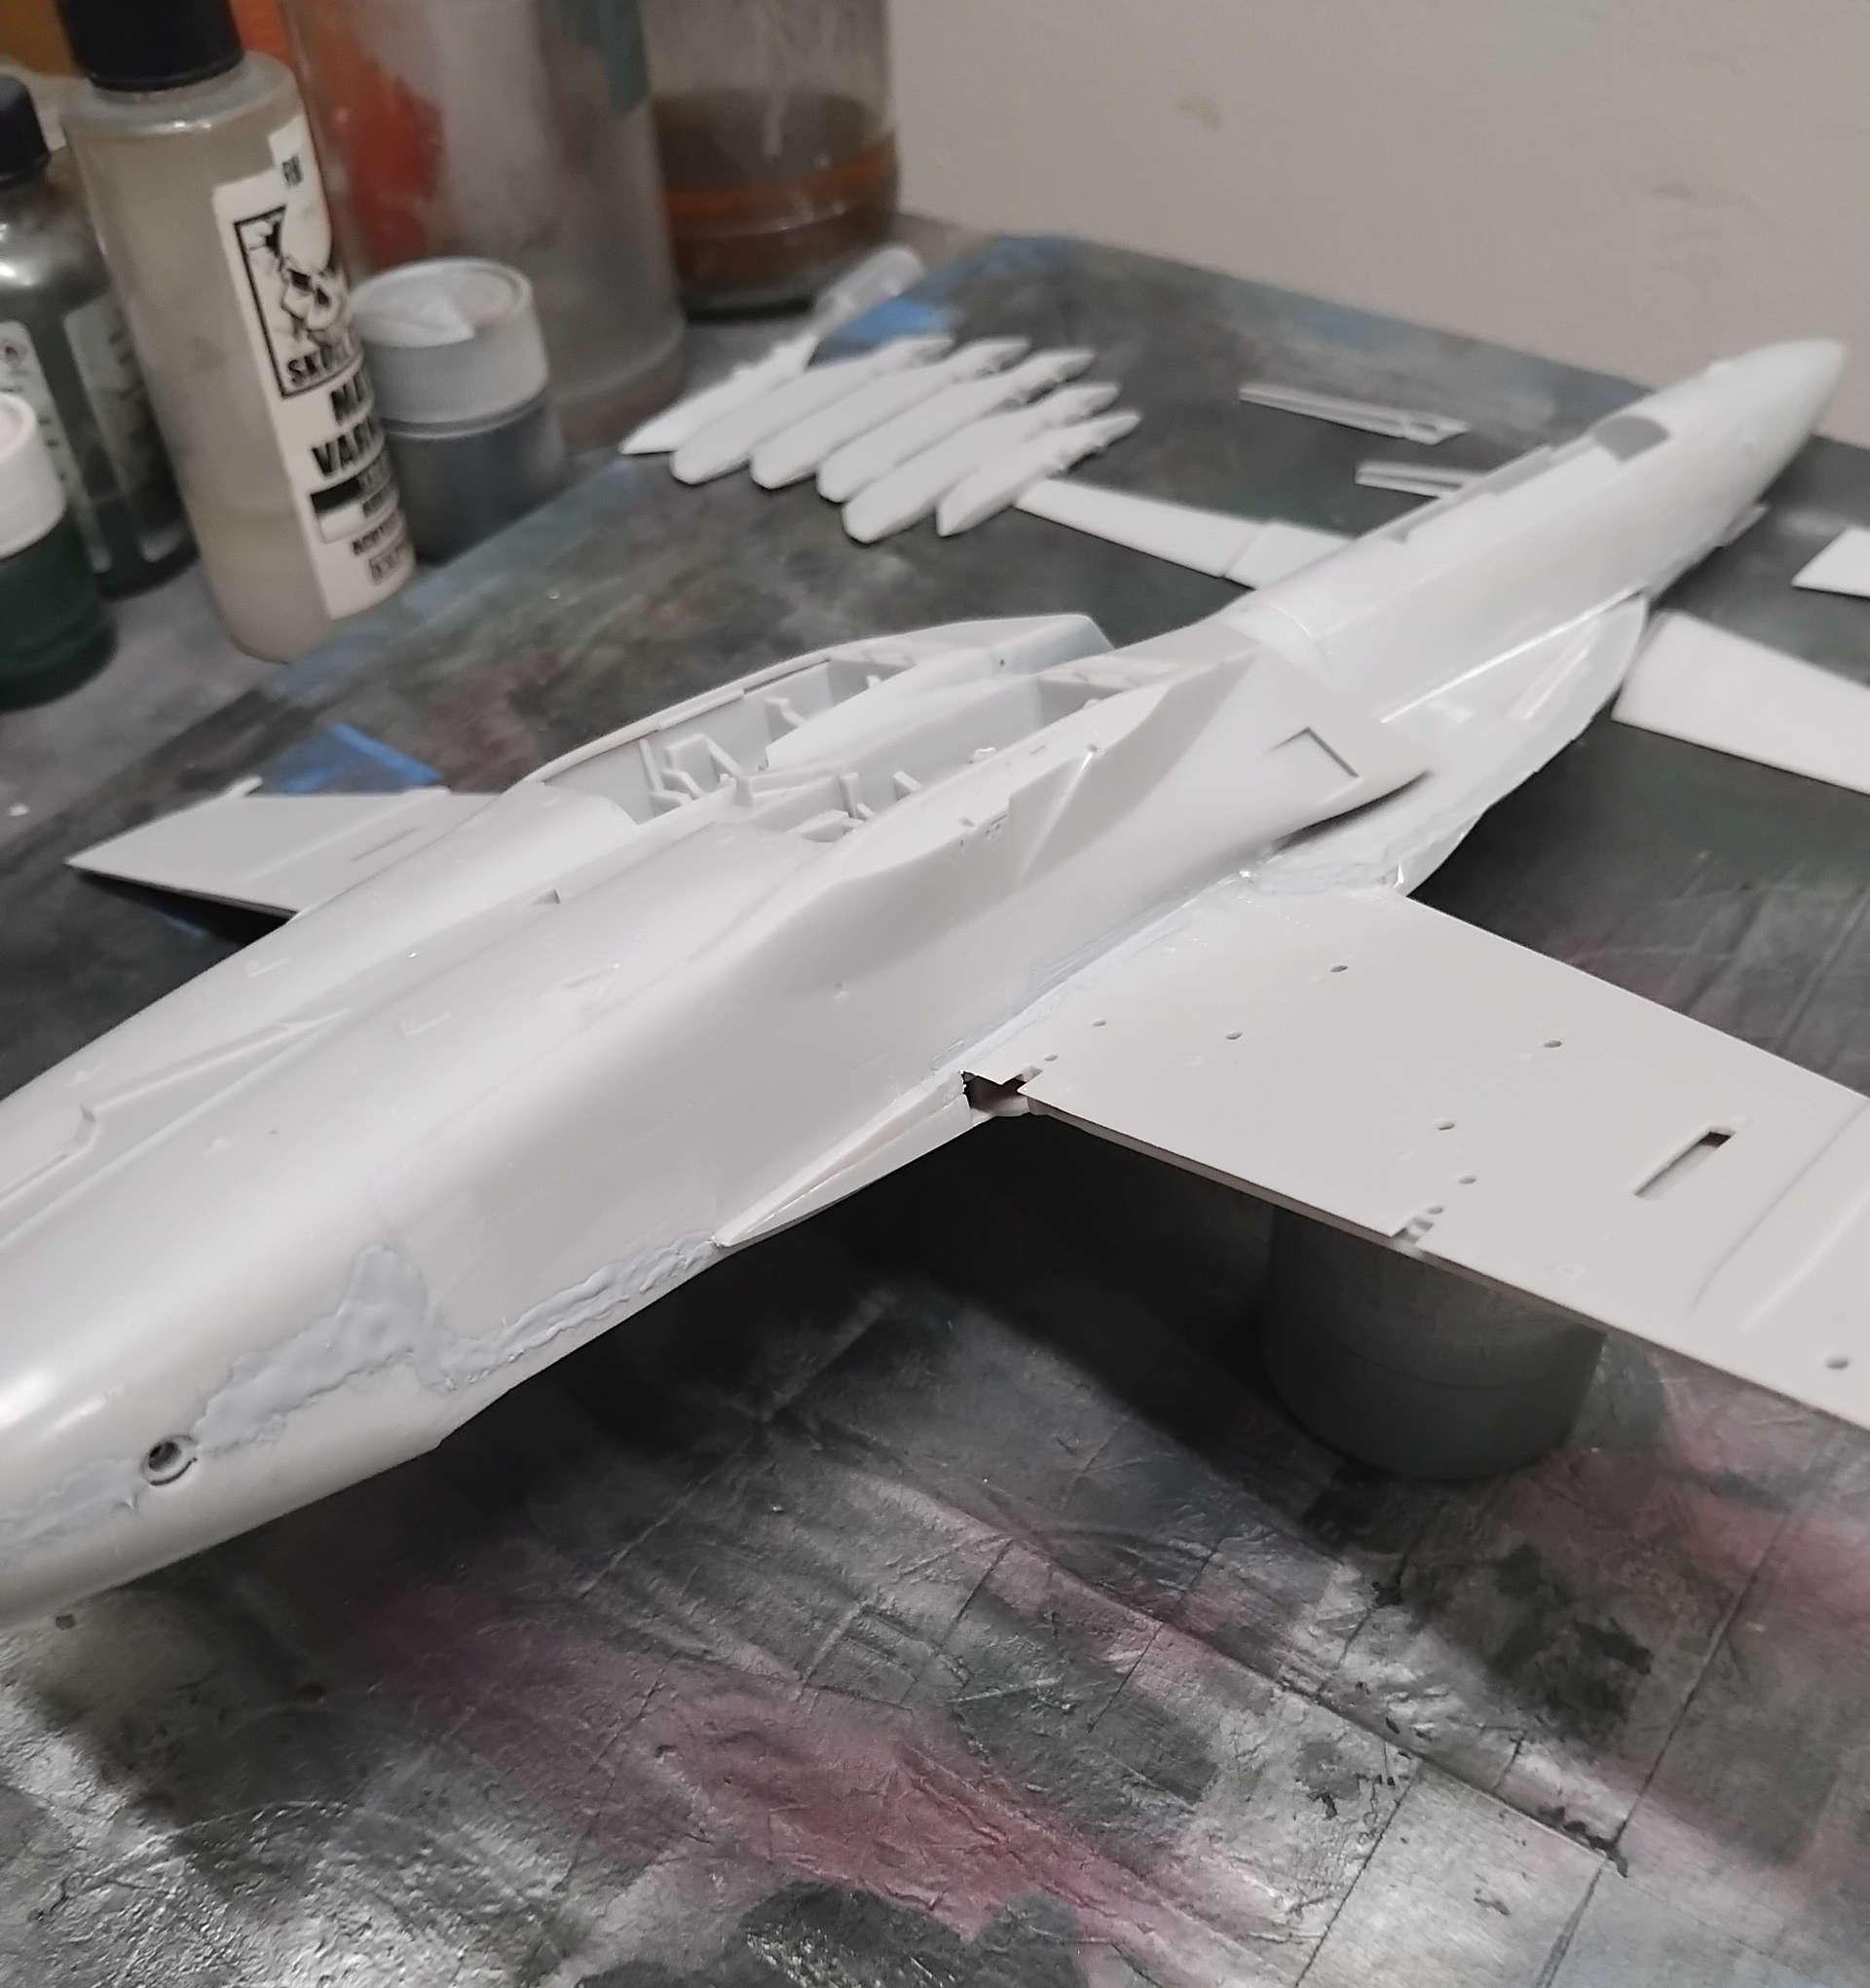
It should be noted, that while a very nice kit, it is plagued with minor fit issues. Hence, the need for continuous test fitting. light sanding and test fitting will assure about 90% of the potential gaps from never coming to life. Yes, there are a few places where filler will be needed. However, patient test fitting will alleviate most.
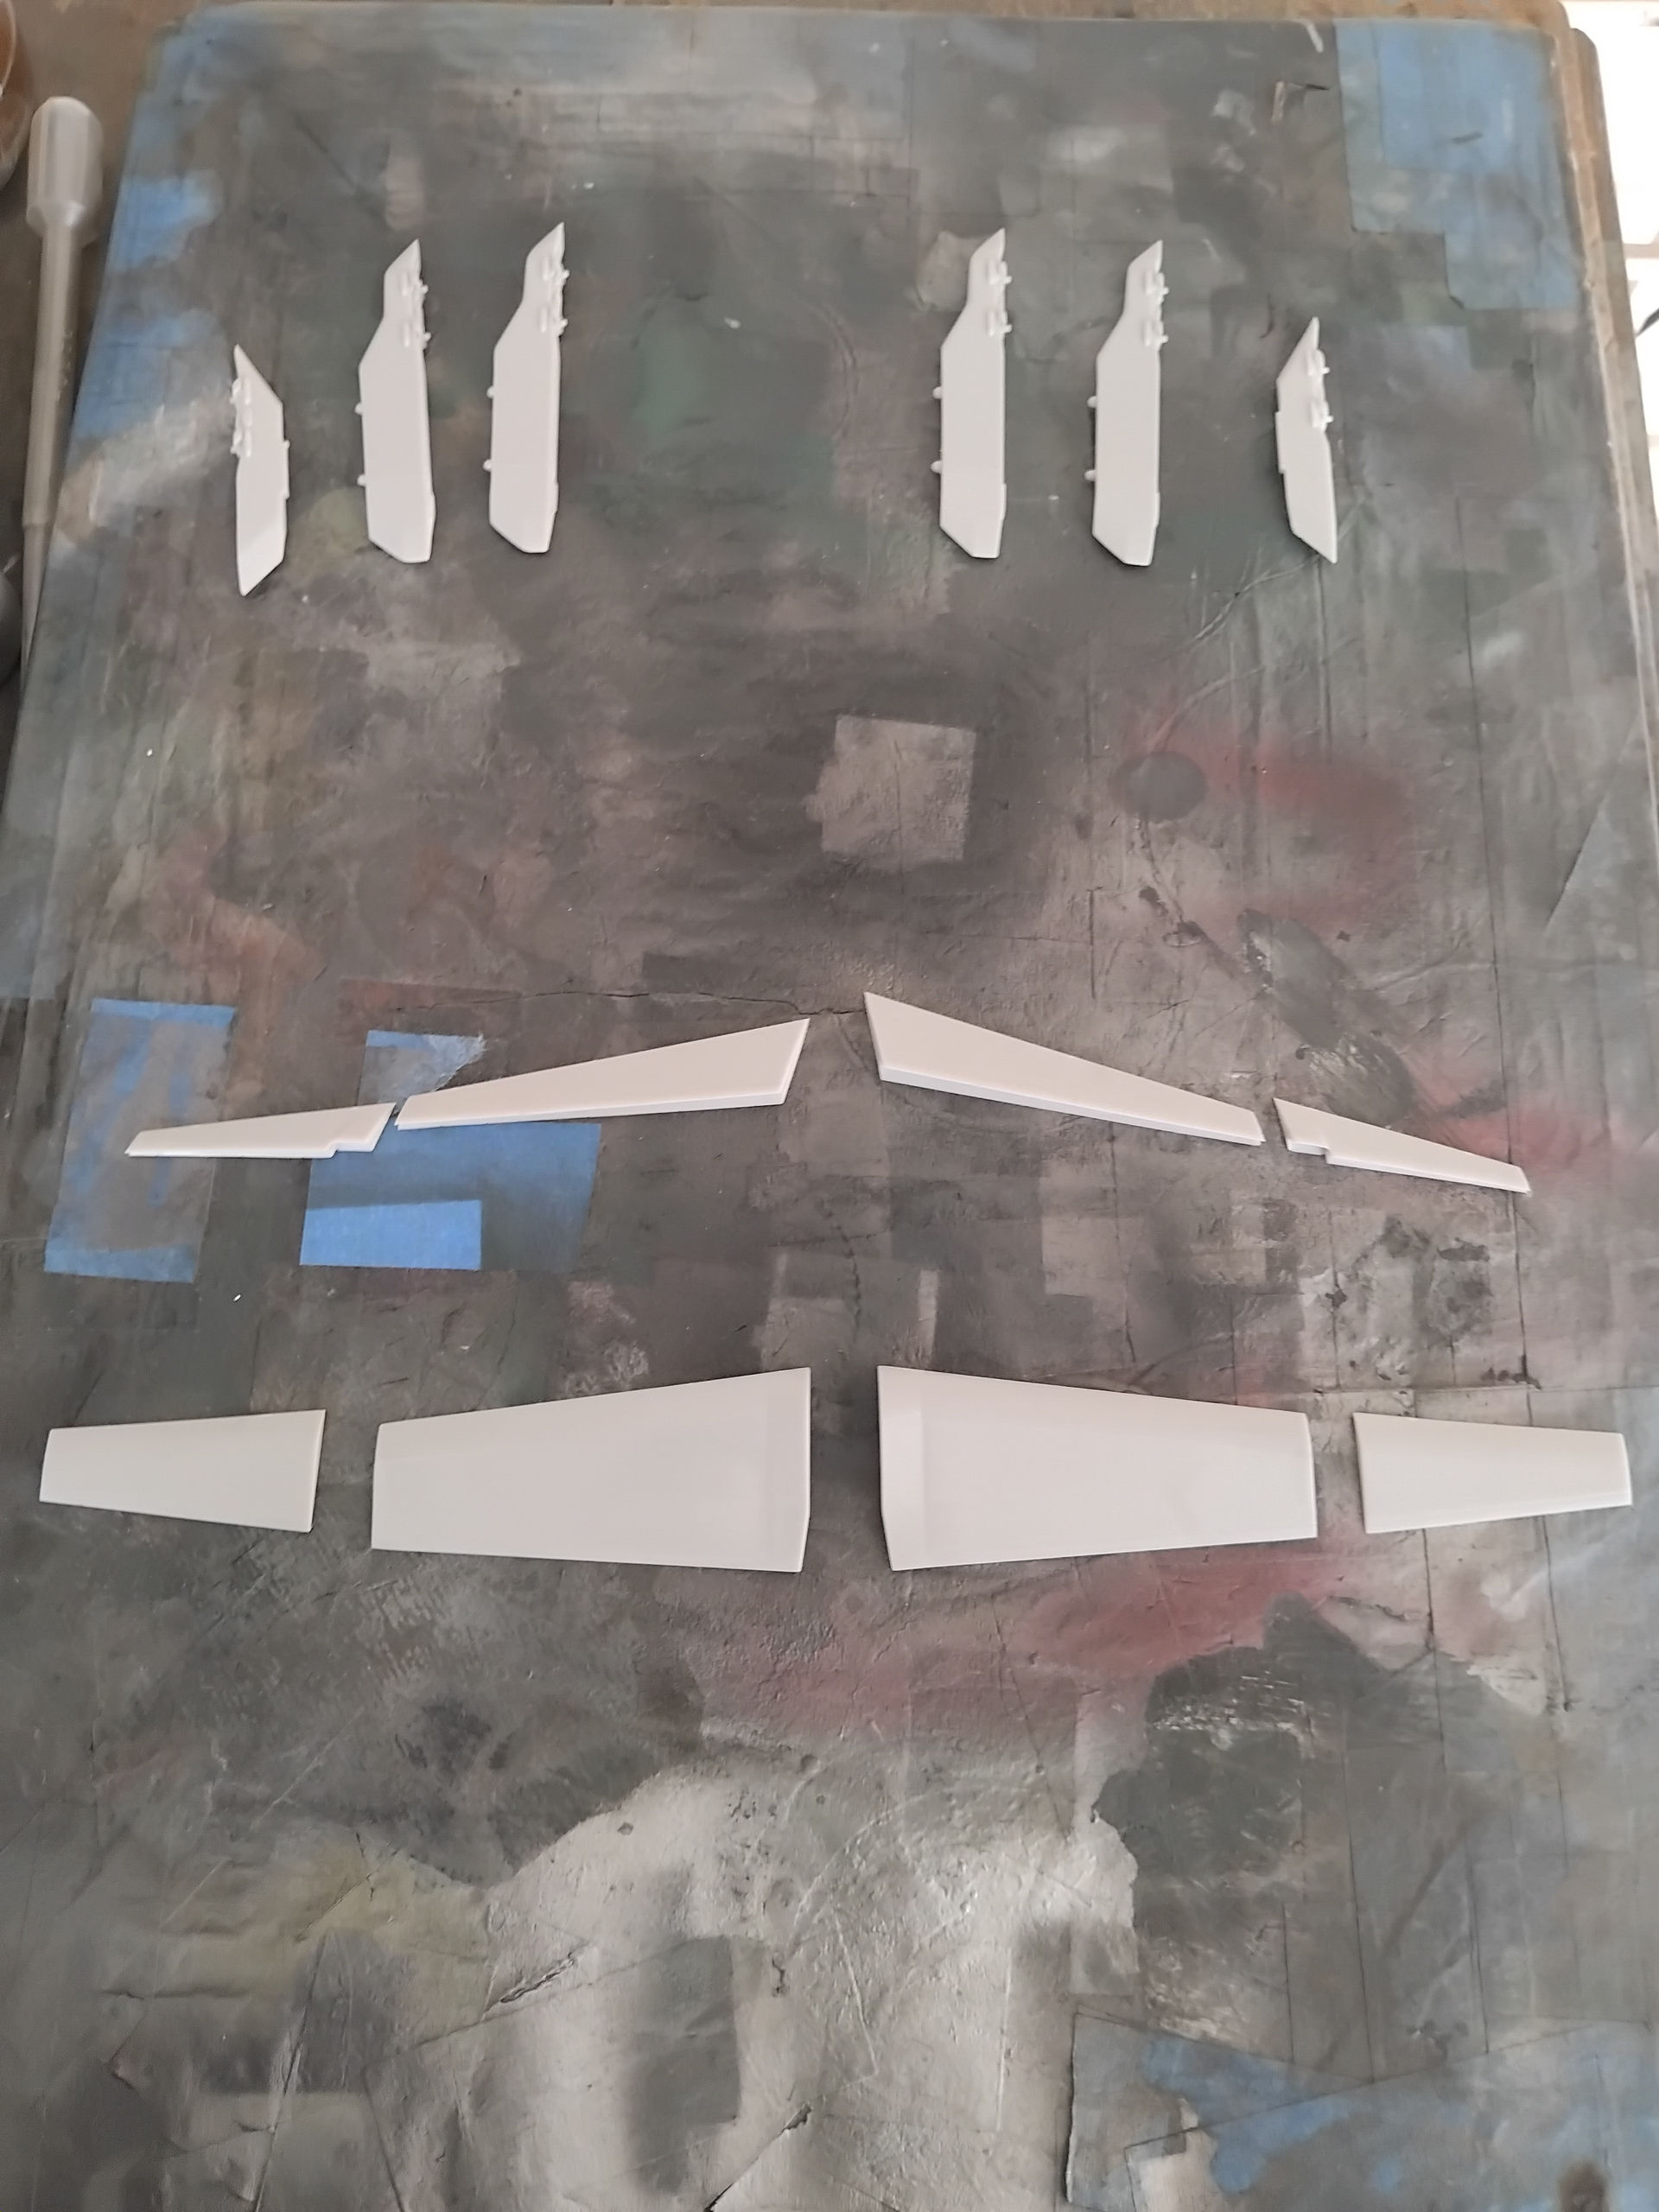
That said, the main components went together with little fanfare! To begin with all of the flaps, ailerons and flaperons were cleaned up.
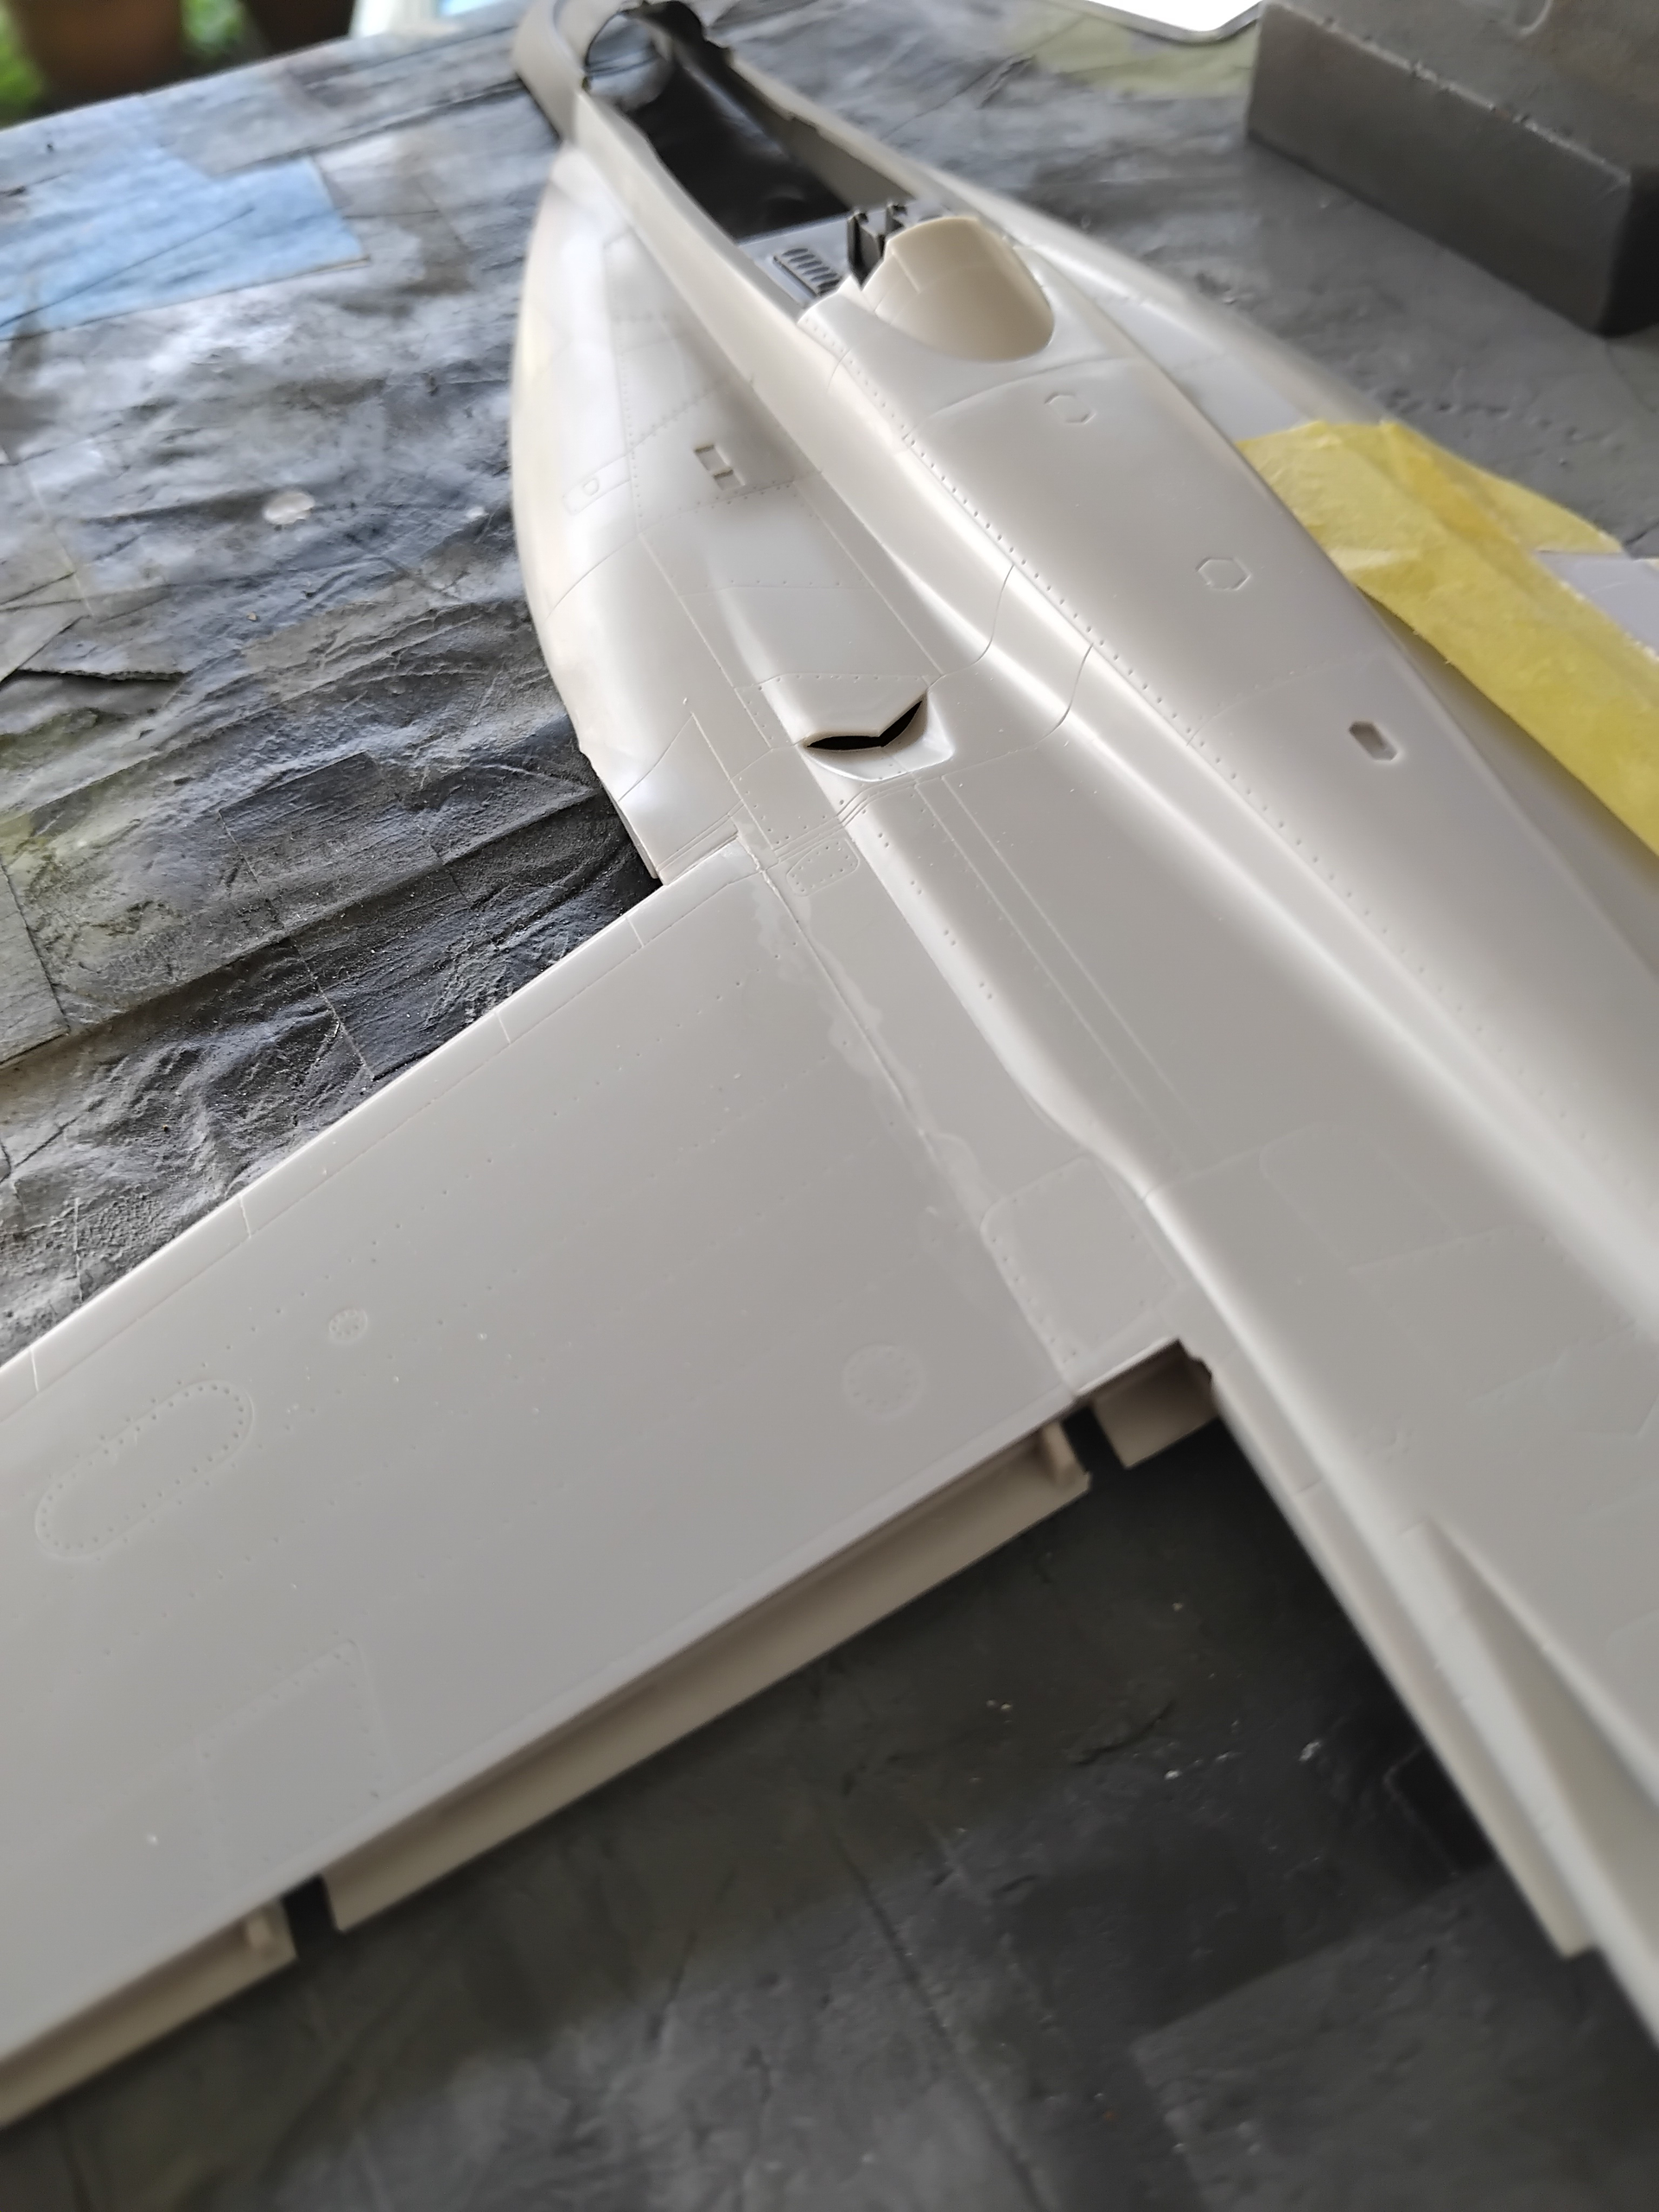
Next up came the mating of the upper and lower halves.
This was followed with the attachment of the nose section, again, test fitting eliminated any gaps.
With the airframe taking shape, any suspected gaps and seams were delt with using Mr. Surfacer 500, fine sanding and superglue to make things look smooth.
Once all things were sanded and polished, it was time for the next step prior to painting, the attachment of the flaps, flaperons and ailerons. Overall, I’m feeling pretty good about this kit!
Till next time, be safe, wash your hands with soap and water and above all have fun!