You said a mouthful here, mate!
And that’s a great start of your build!
I am away from home for 3 days, thus no progress to report so far.
Am considering to buy a reference book from WH-Versand.de- Robert Jan used both the D 692/41 “Einheitsanhänger 5t Baumuster E5/Gerätbeschreibung und Bedienungsanweisung” and the “D 692/42 Einheitsanhänger 5t Baumuster E5/Ersatzteilliste” for his builds.
I might end up using very few of the parts, provided in the kit.
Because there’s no way I can accept a less than perfect job for this build either.
Hello, gentlemen!
I remember some time ago, Robert had built a wonderful model of Sd.Kfz.251. I think it was a pioneer version. It had a trailer full of luggage, and most interestingly, it had a Kraftrad attached to the trailer.
This should result with the interior after the conversion.
Robert did conversions often, so I’ll try to do something like that.
Kind regards and cheers!
Kalin
Angel, wonderful way to remember our late modeling friend. I miss his contributions and conversations. If it is not to late, I would like to participate.
Hi Fred. This is not an ‘official Group Build’, just a joint build by a few guys in memory of Robert Jan, so it will be never too late to participate. Glad to have you with us.
Nice choice Kalin. Love the idea of the conversion too - nice touch. Welcome.
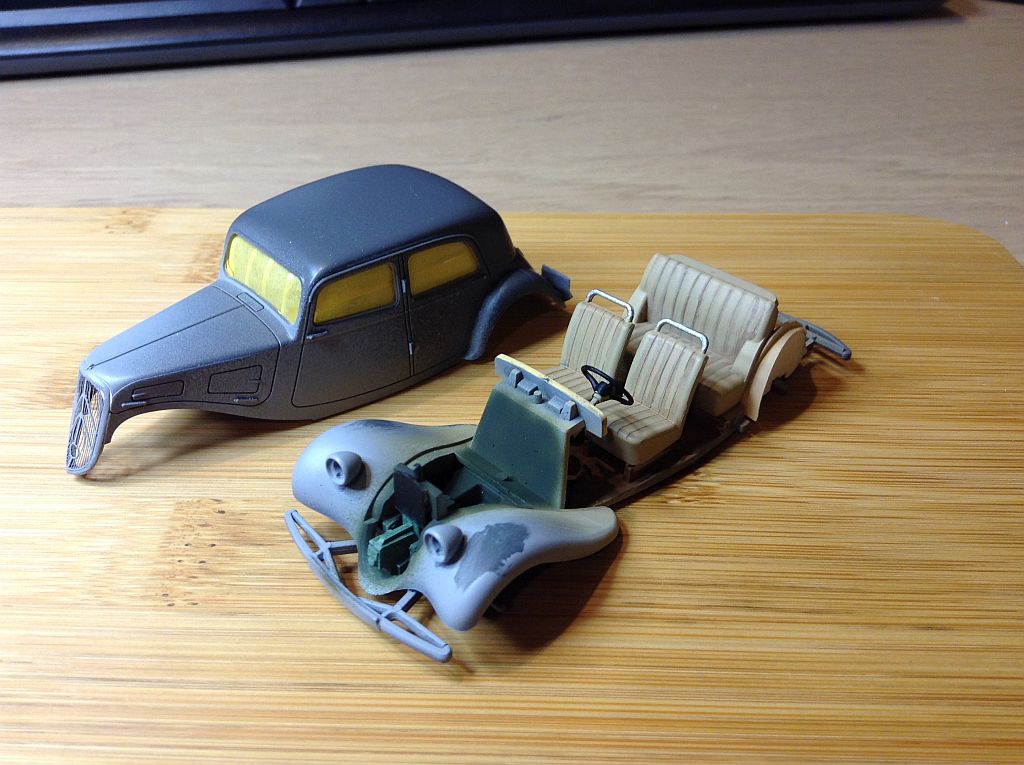
Ryan, Tamiya rarely adds foot pedals to their kits. Usually it is a nub of plastic if it is there at all. Their Simca has two pedals moulded in, a long vertical rectangle rising from the floor, with a triangle between that and the firewall, but they are missing altogether from this kit too, but Eduard supply them. To be honest, unless you cut out the doors and pose them open, you are unlikely to see in the footwell. After I have added Eduard’s one and painted the interior I’ll let you know what is visible.
Robin, those pedals look a bit flimsy to me. Would be hard to march all over Poland through to France without ruining the pedicure. But maybe not…
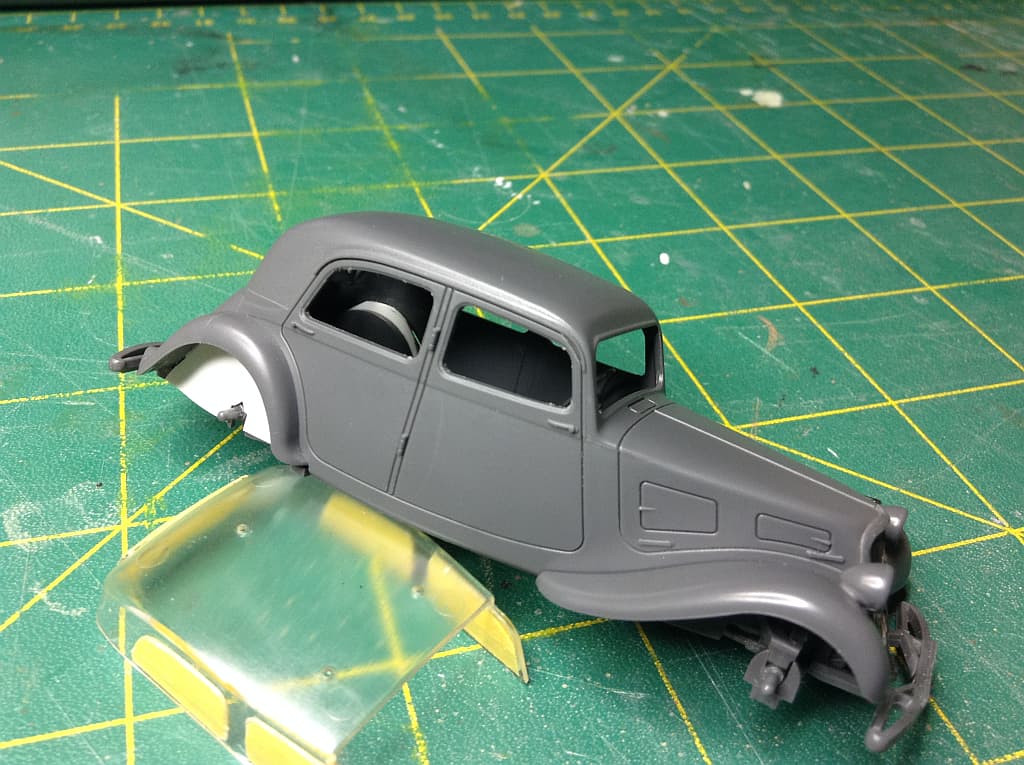
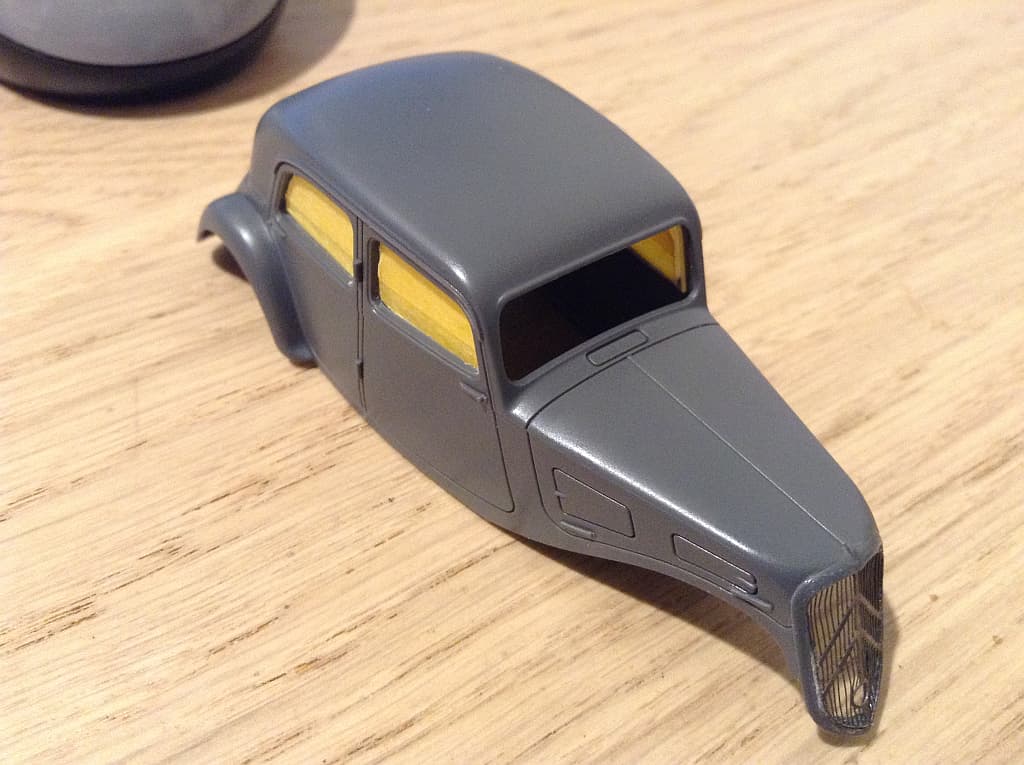
Spent a bit of time at the bench over the last couple of days. Added the scratch built mechanicals, fillets in the gaps over the rear wheel arches and added PE. I have decided against the PE handles on the outside as the kit ones look fine at this scale, but will add the inner ones as there are none in the kit.
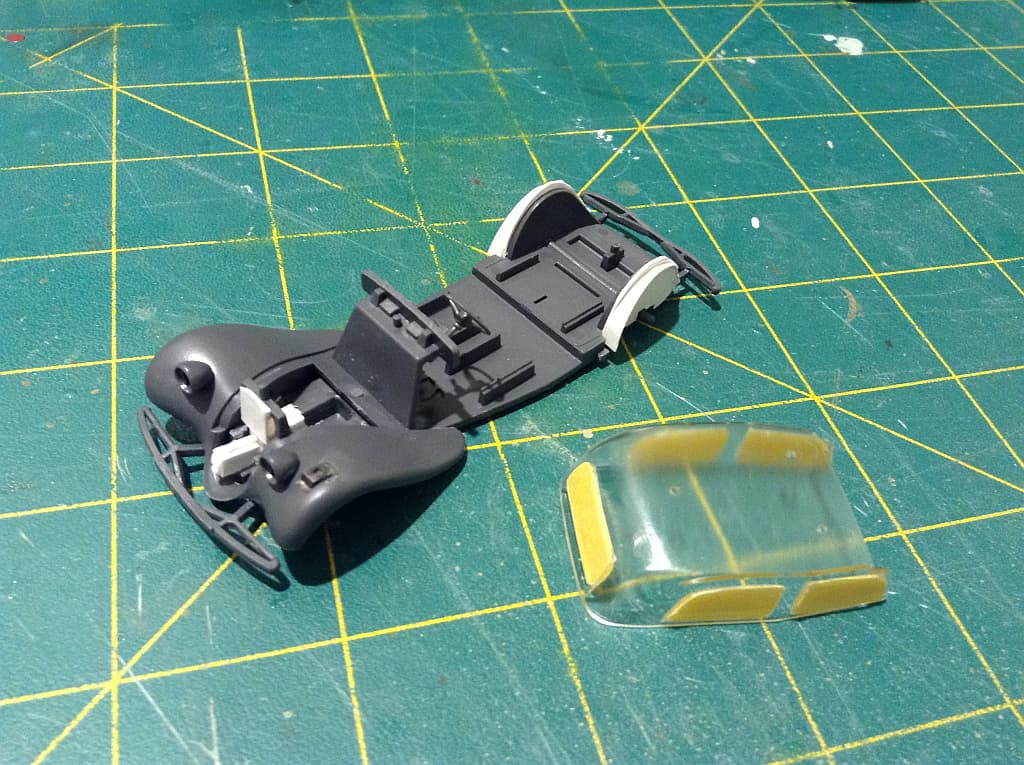
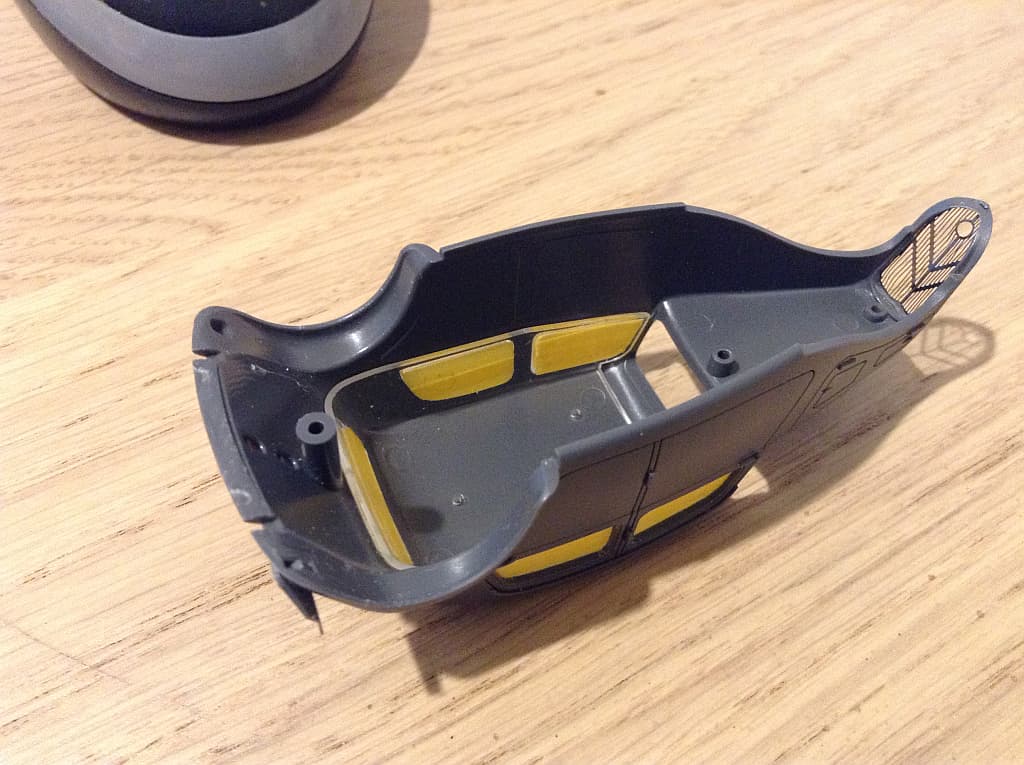
Decision to make… do I cut out the windows and fit them inside the door frames, or leave them in one piece… Had masked ready to add paint, but the clear parts sit inside the doors and I think you will see the huge step out over the door inner panels. I am leaning toward surgery. What do you guys think?
Cut out the windows and get them in their proper position. Using that clear tub will look hideous…
Maybe even replace the flat windows (is the windscreen flat or curved??) with thin sheets
of clear styrene sheets.
What they’ve said Peter, that chunk’s only good for making one half of a pair of 1950’s-style swimming goggles. It’ll be a pain to…look out…make panes out of transparency sheet or whatever, and equally hard to secure them in position. I gave up on PVA trying to do that, instead extremely fine Evergreen strips glued top & bottom with spacers to allow sliding each pane into position, then fit end strips to prevent movement & hold them flush against the inside panels/pillars
I would think it appropriate to make new windows. I wouldn’t mess with cutting the plastic and save as a back up plan. I would make templates from thin sheet or thick paper and then cut out from clear plastic and attaching as Tim said.
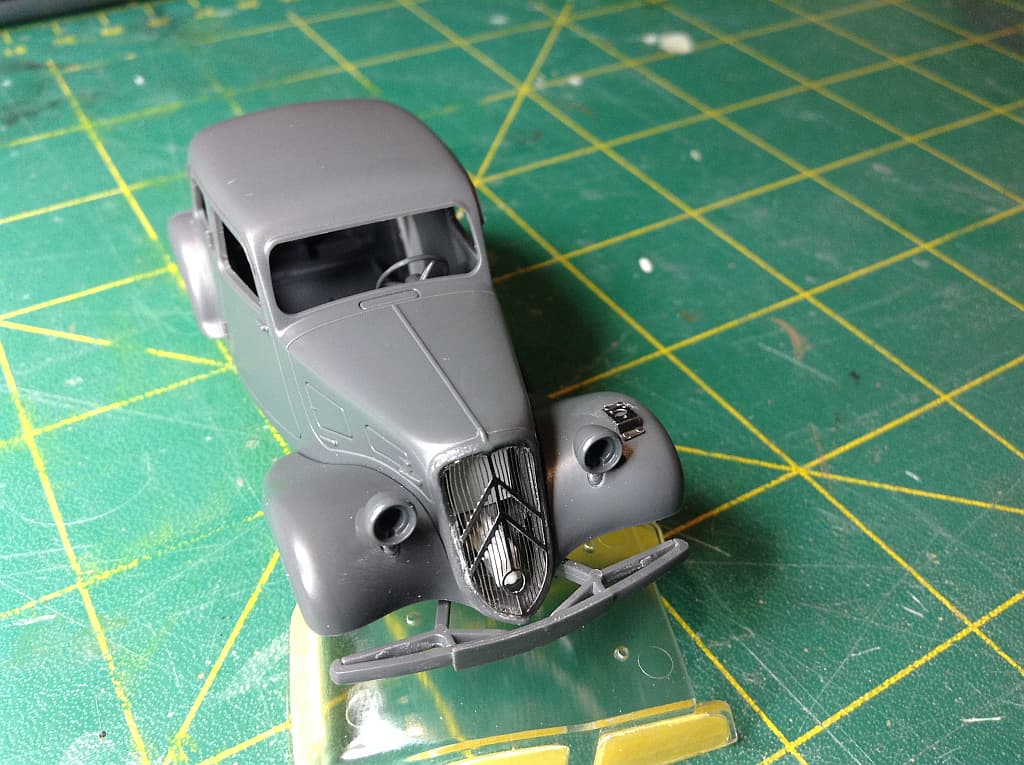
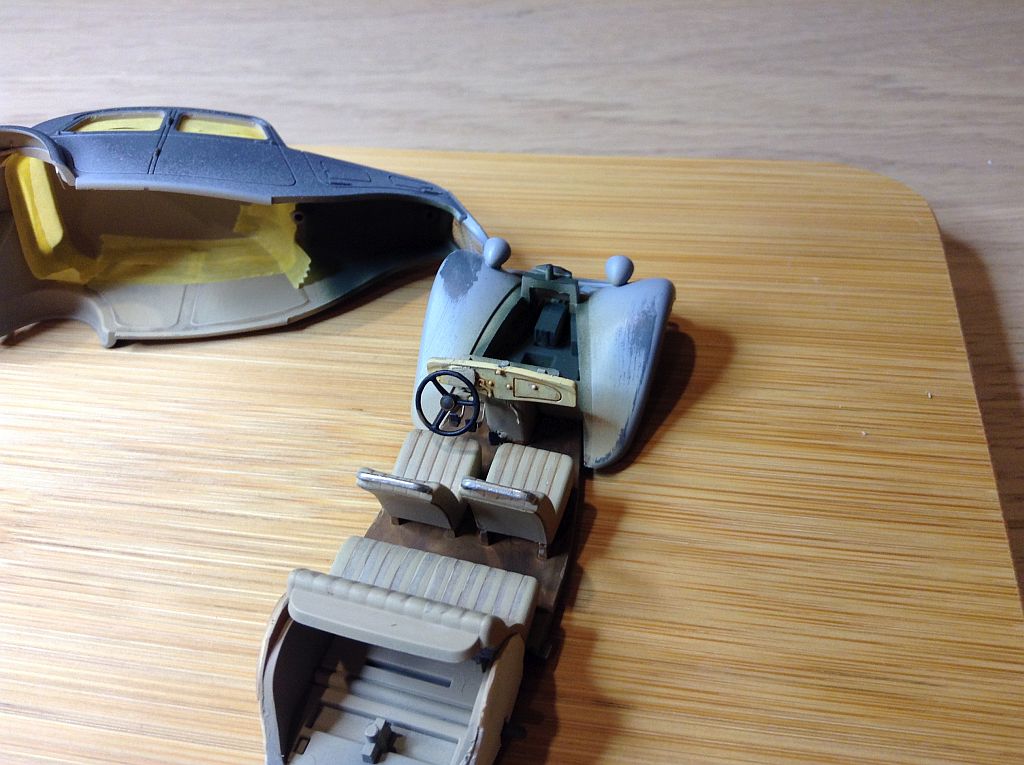
Managed to get a coat of paint on the inside and some detail painting started. I had hoped to spray the outside on the weekend, but the regulator on my compressor collapsed. Waiting for a new one to arrive.
Here is where it sits at present - A little tidying up after the pin wash and it will be ready.
Oh, Ryan @Tank_1812 , A test run suggests you cannot see the pedals when it is all together.
My ole laptop crashed 2 weeks ago, so I lost access to my modelbuilding refference pool, incl. all materials I gathered through the years on the 5 t. Einheitsanhaenger…
It took me some time to sort things out- to find a new laptop that suits my needs and arrange memory disc from the old one to be extracted and installed in the new one.
In the meantime I started my build.
I’m using as refferences whatever pictures I could find on the web plus the Spare Parts Manual I bought last month.
Now, honestly, the kits content doesn’t match the Manual too much!
That’s strange because both the Manual and the kit assembly instructions mention one and the same type of Einheitsanhaenger 5t.(E 5).
I decided to trust the Manual.
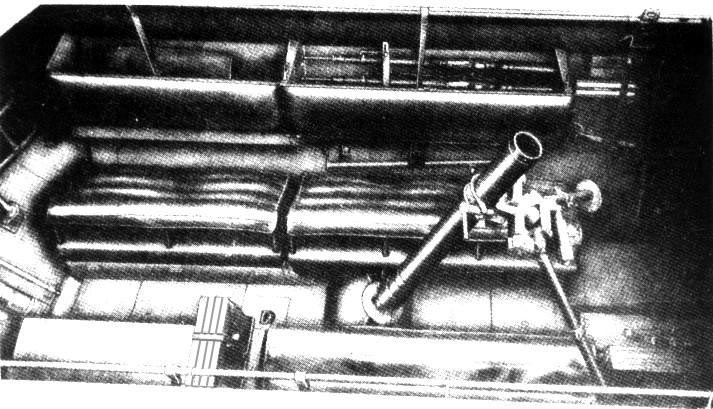
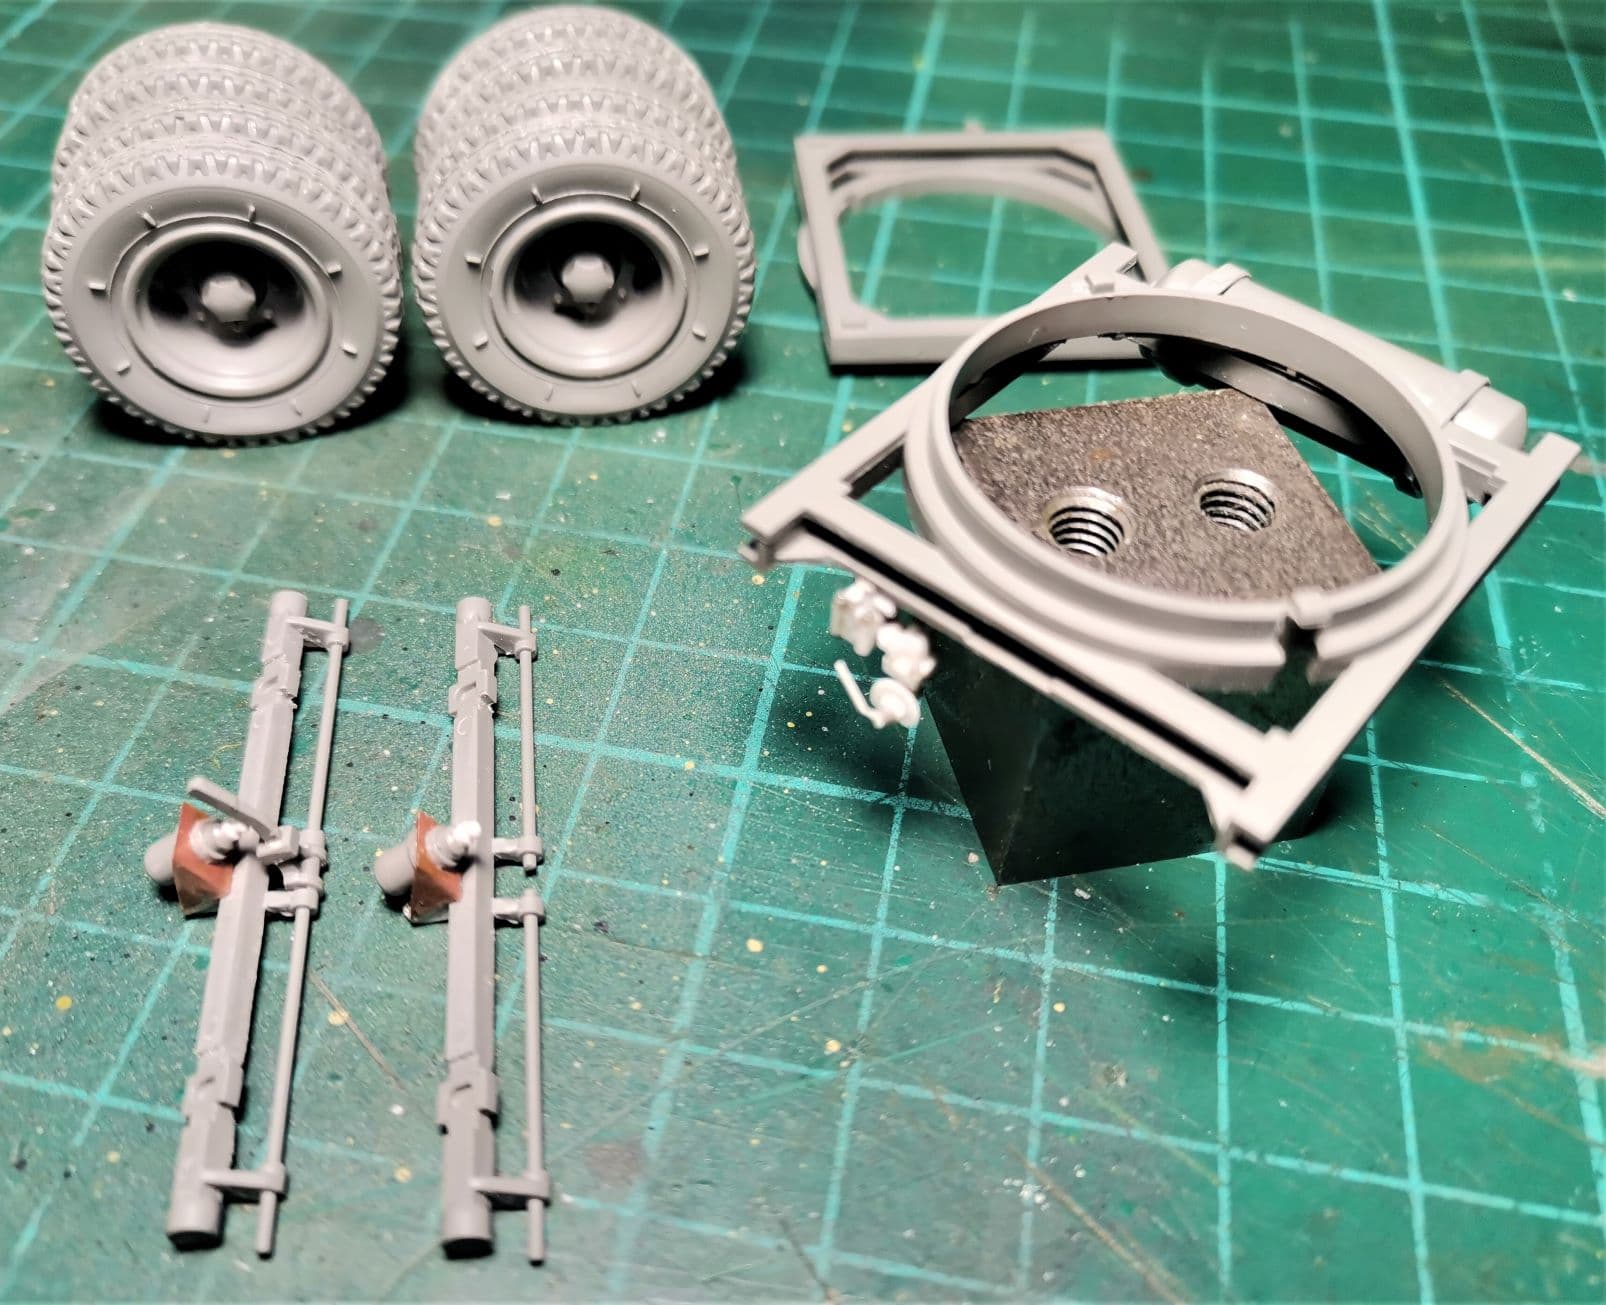
So here is my progress sofar:
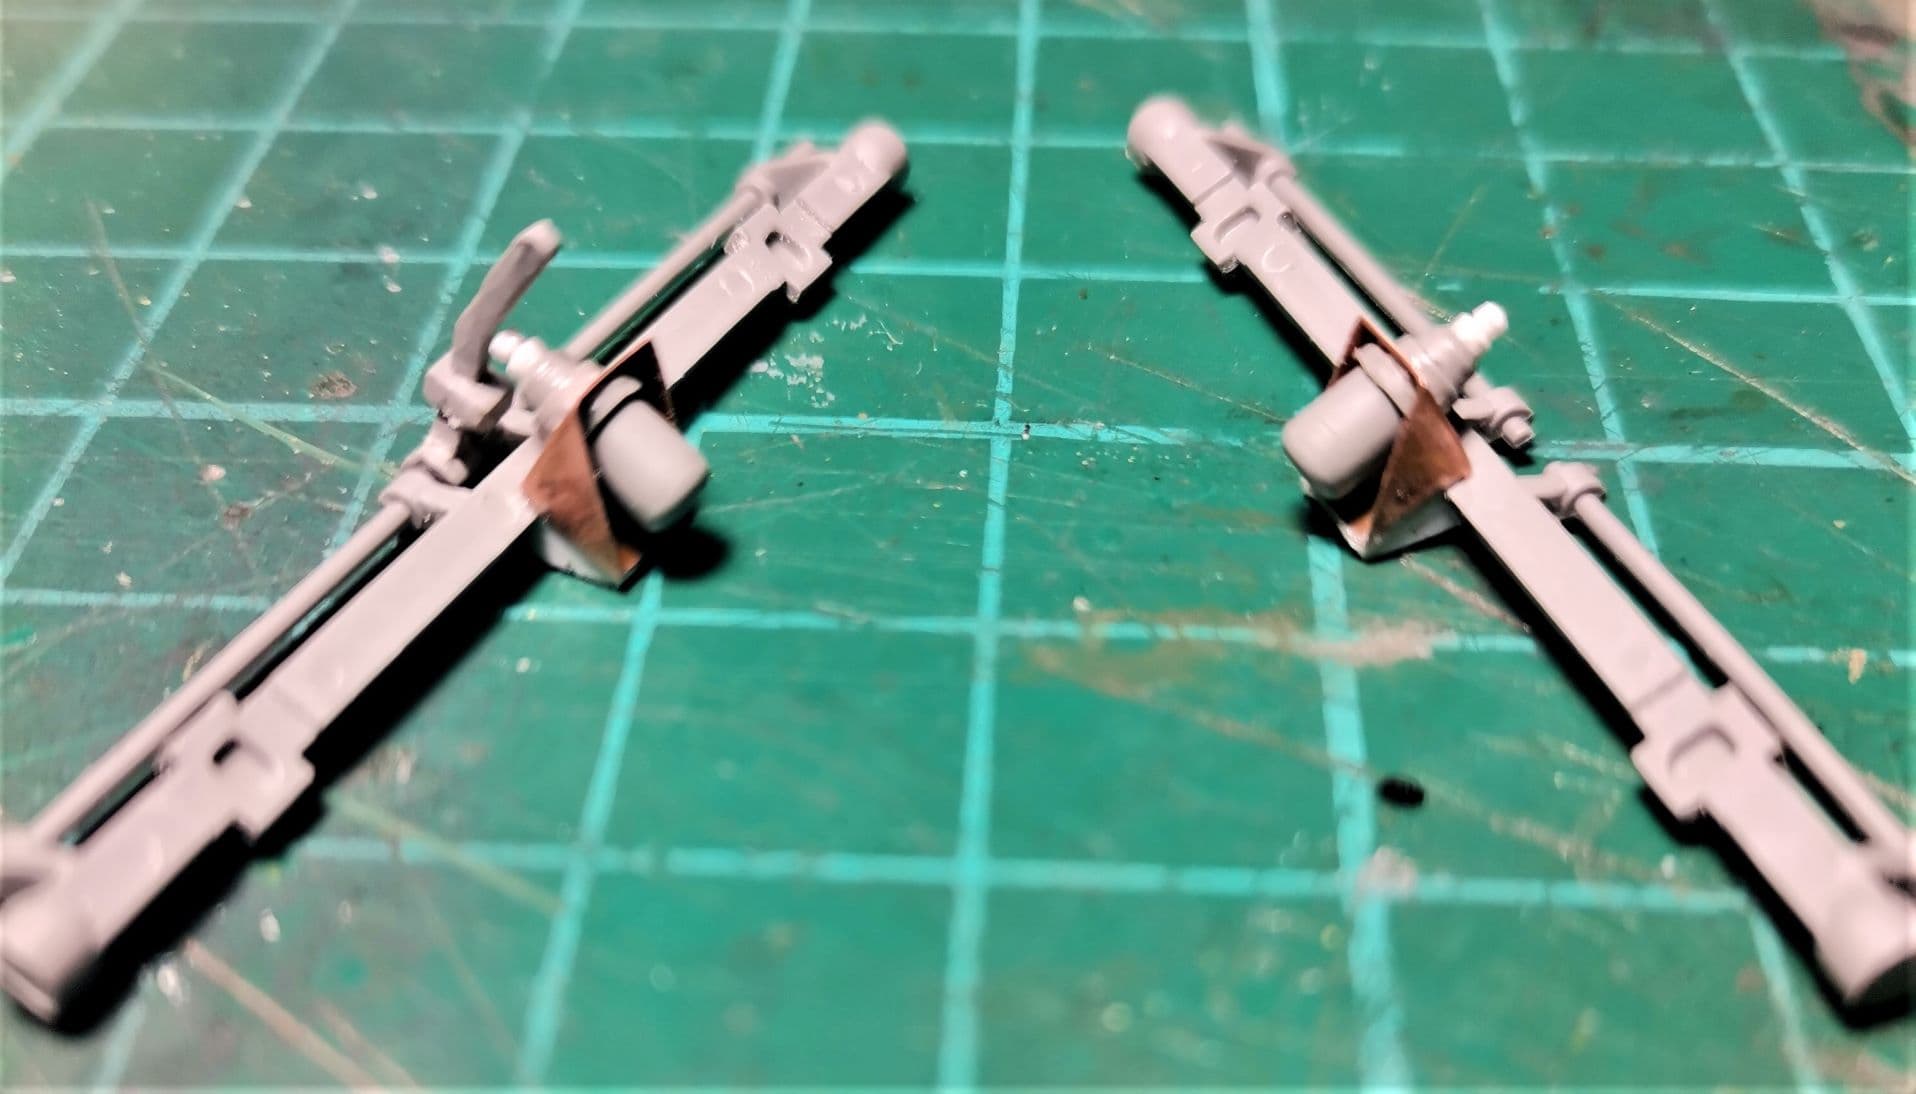
I’ve built all 8 sagged wheels, both axles and the frame of the front suspension.
Digged for several days in WWII braking systems info and choose to depict the brake components of Fa.Grau/Heidelberg (the Einheitsanhaenger used braking components from one of the following three companies- Knorr, Grau or Westinghaus).
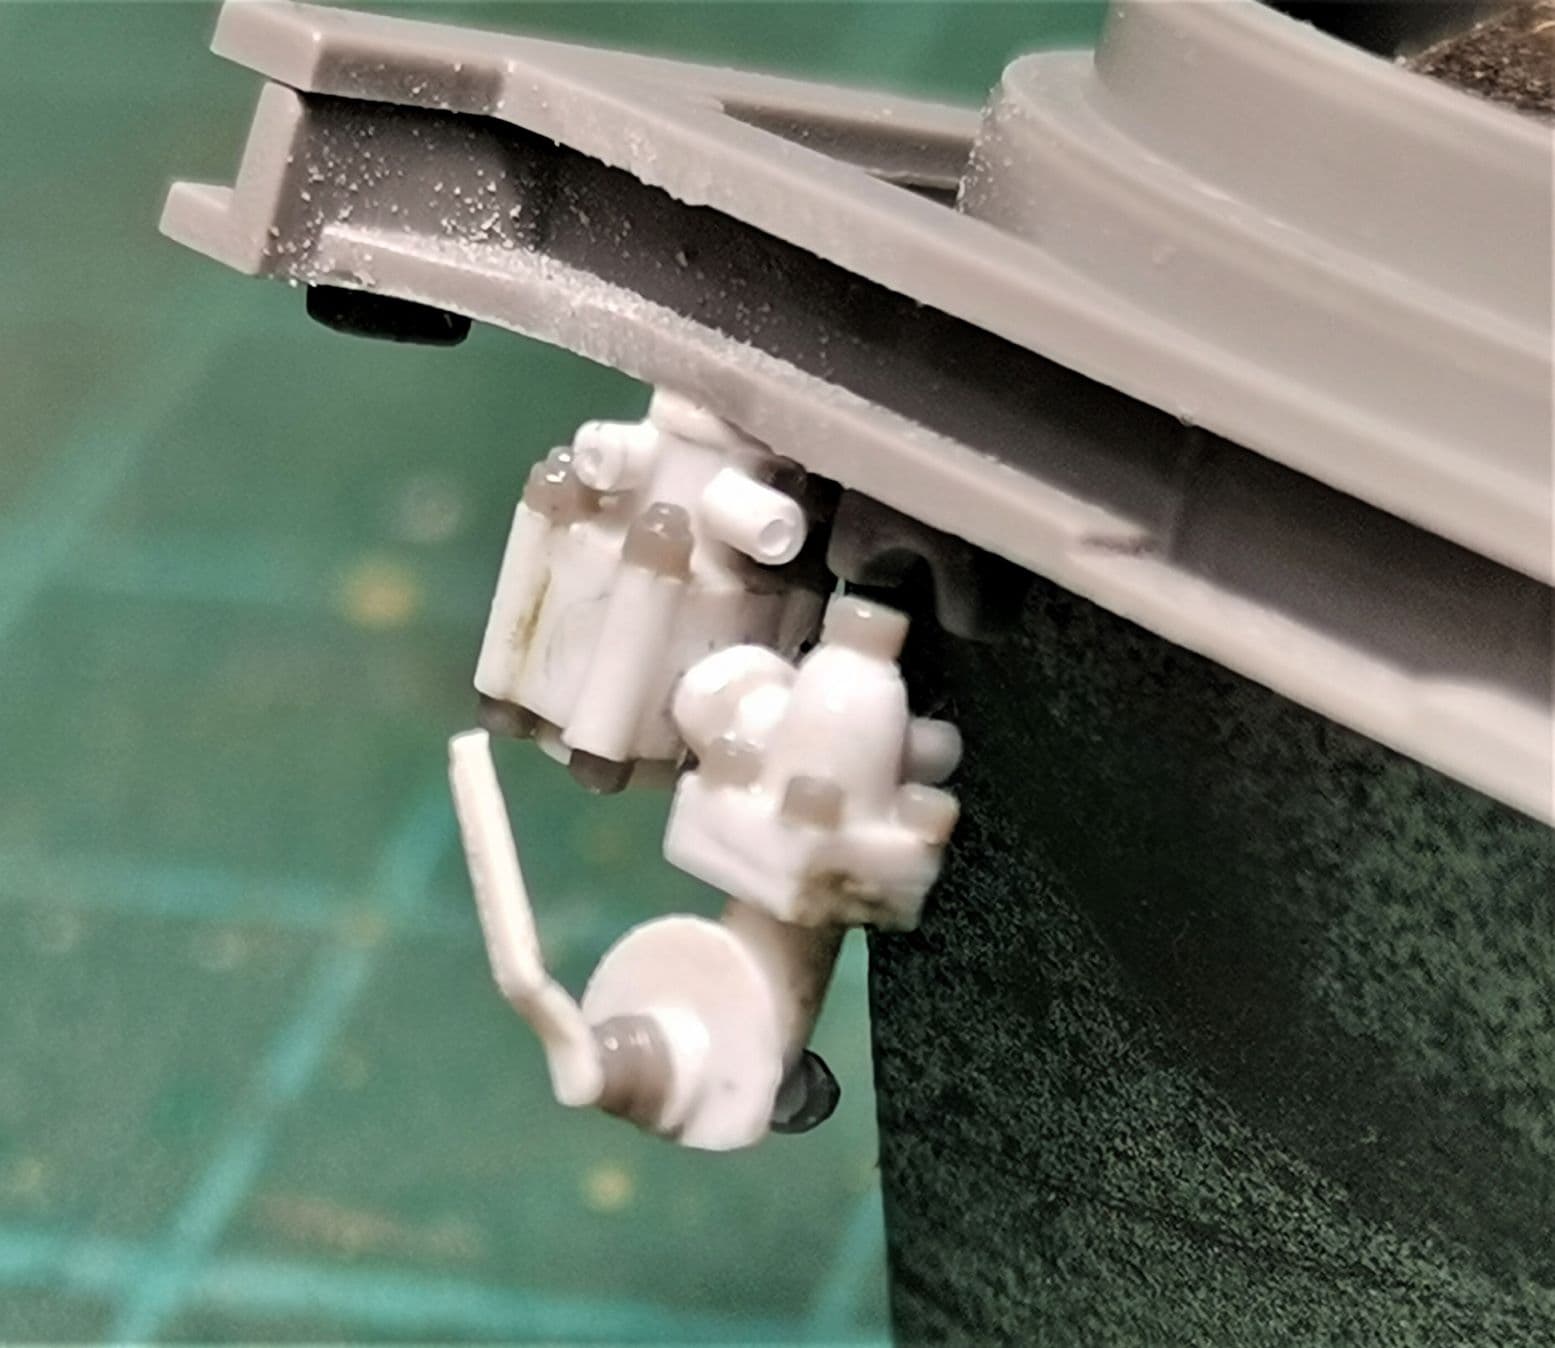
Built the trailer control valve and the brake compensator:
Great start Angel, and you certainly didn’t keep us waiting long until you cheered everyone up with those amazing little scratch builds, the trailer control and brake compensator look brilliant…and I love the cages for the cylinders … Well done
Maybe it is caused by the different manufacturers? Manual based on one manufacturers product and the kit is based on a trailer from another manufacturer? You already mantioned the different brake systems …
Standardisation doesn’t always mean that all parts are identical, sometimes it is only the critical parts/dimensions/specifications