Thanks for your kind feedback John, Dan and Peter!
@Uncle-Heavy: From what I see, DW used for their kit the D 692/41 “Gerätbeschreibung und Bedienungsanweisung” dated June 1944, whereas my D 692/42 “Ersatzteilliste” is dated March 1943, thus describing an earlier version.
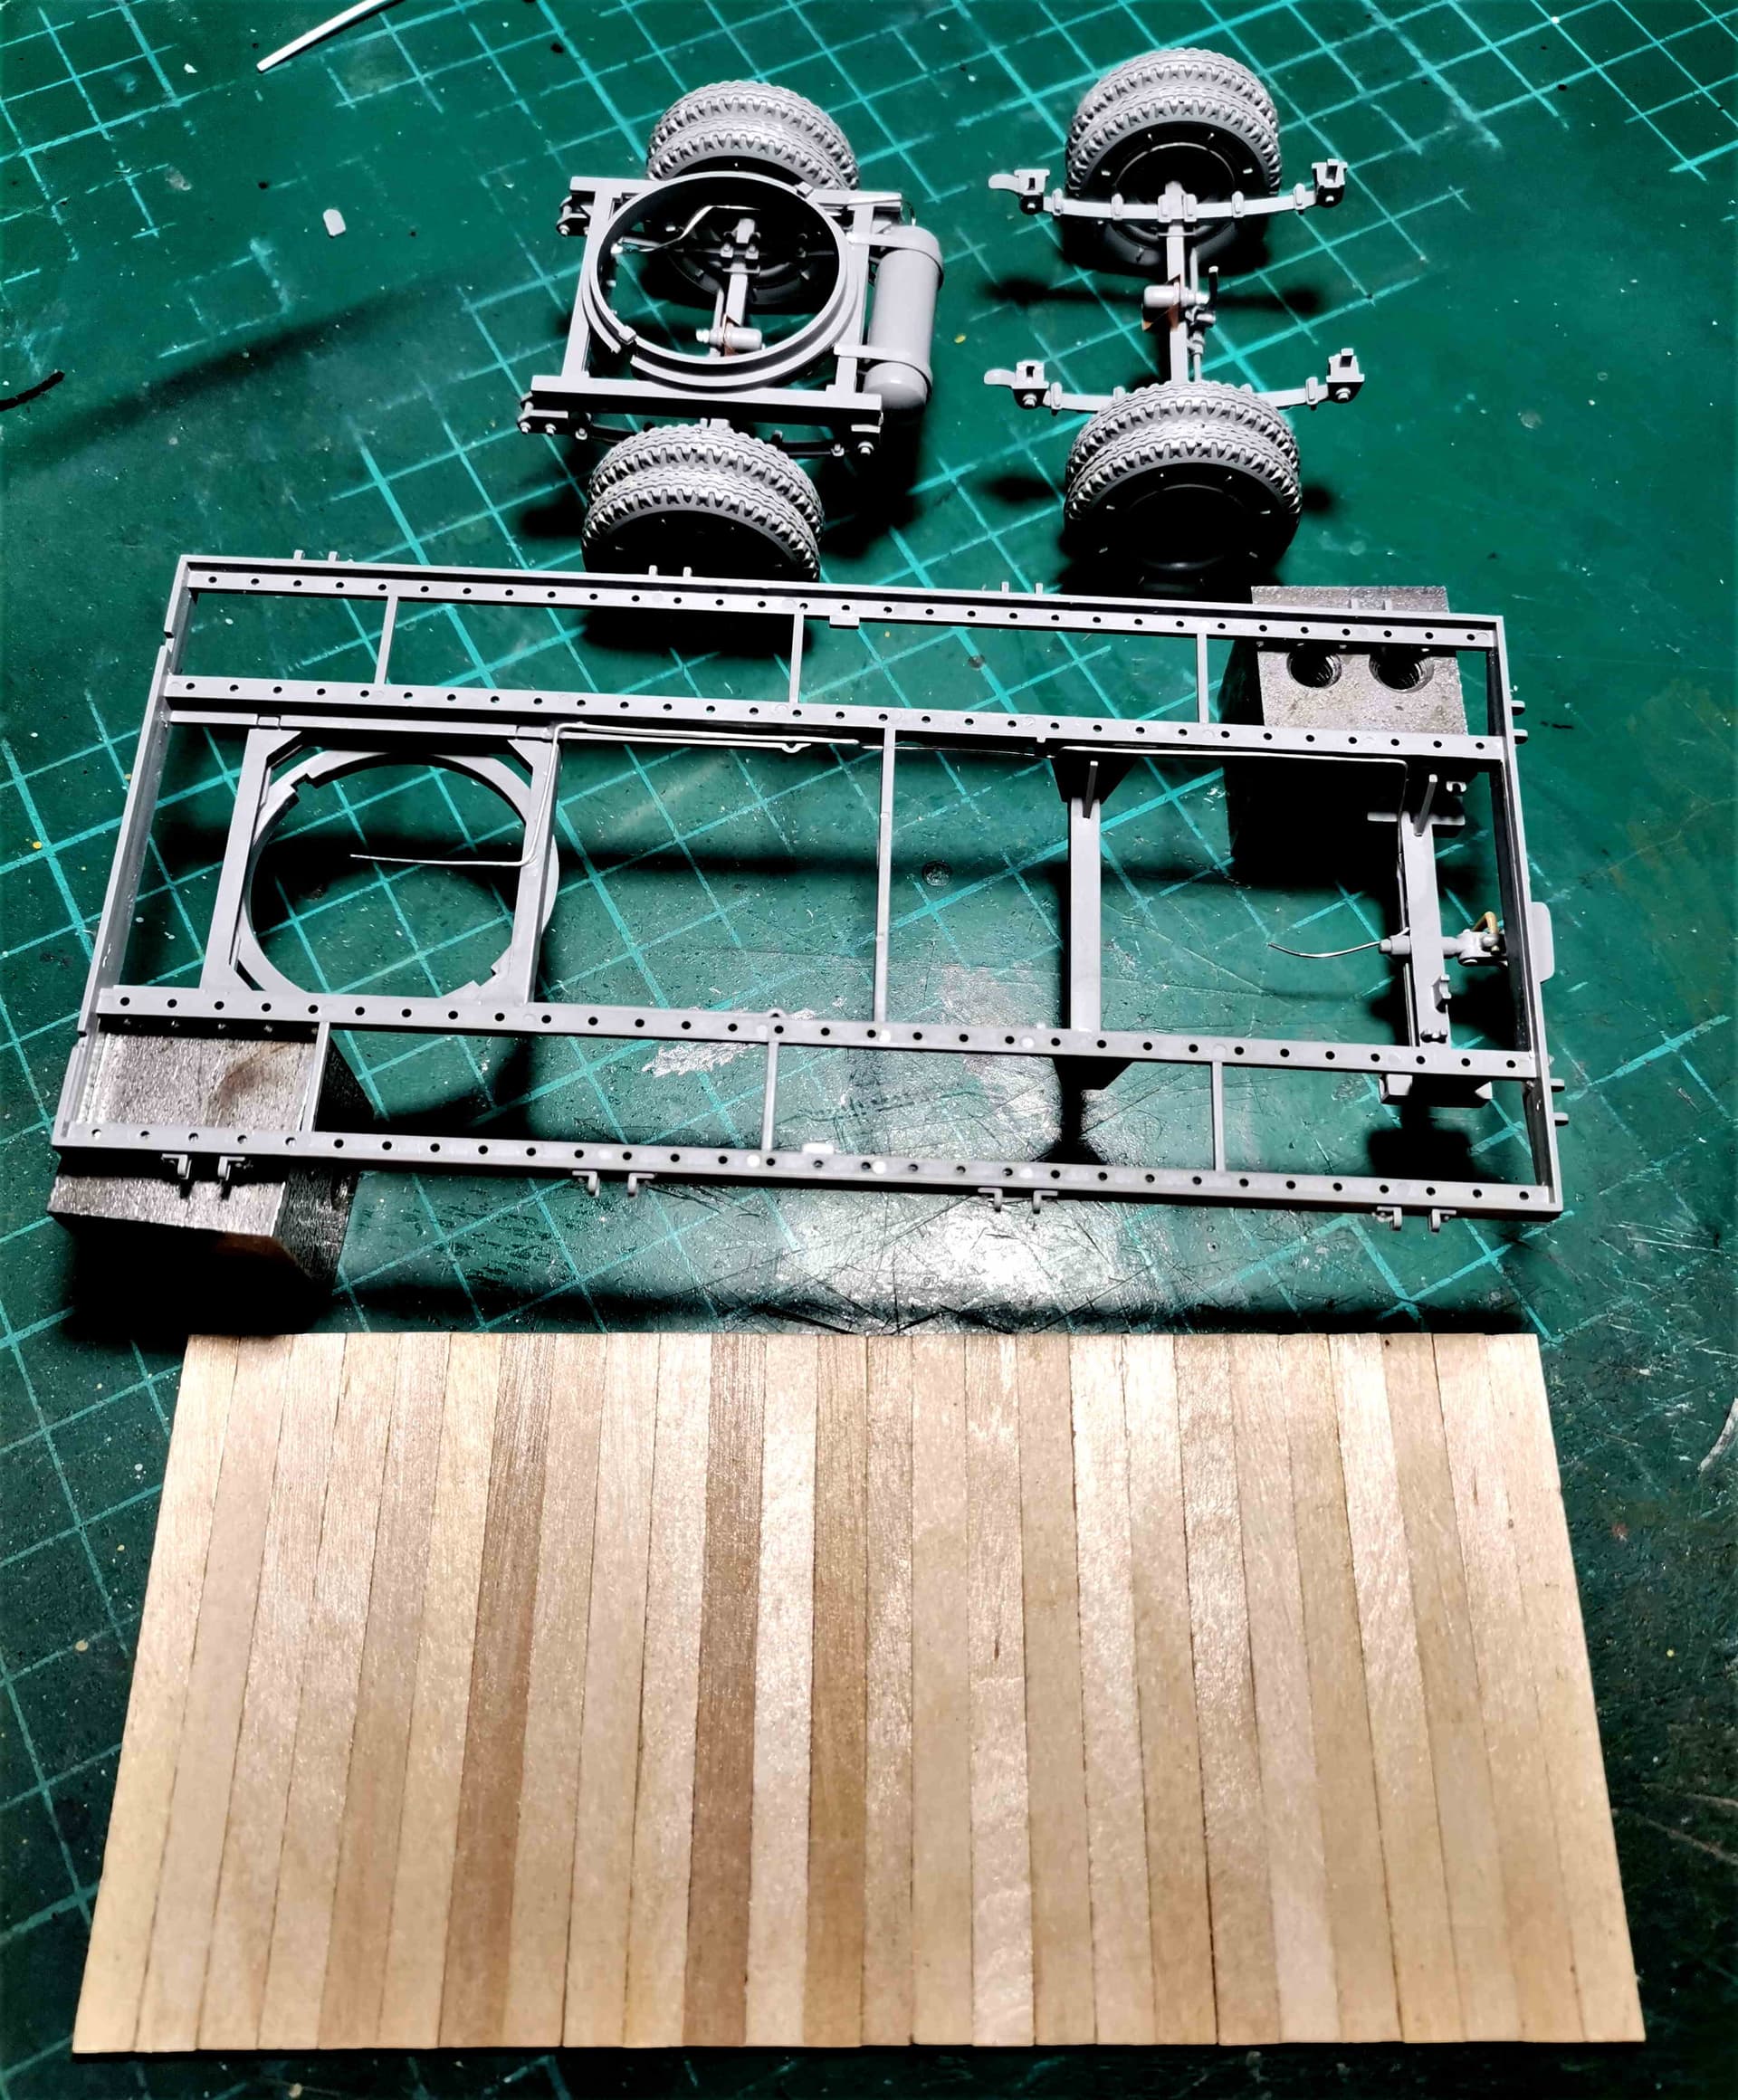
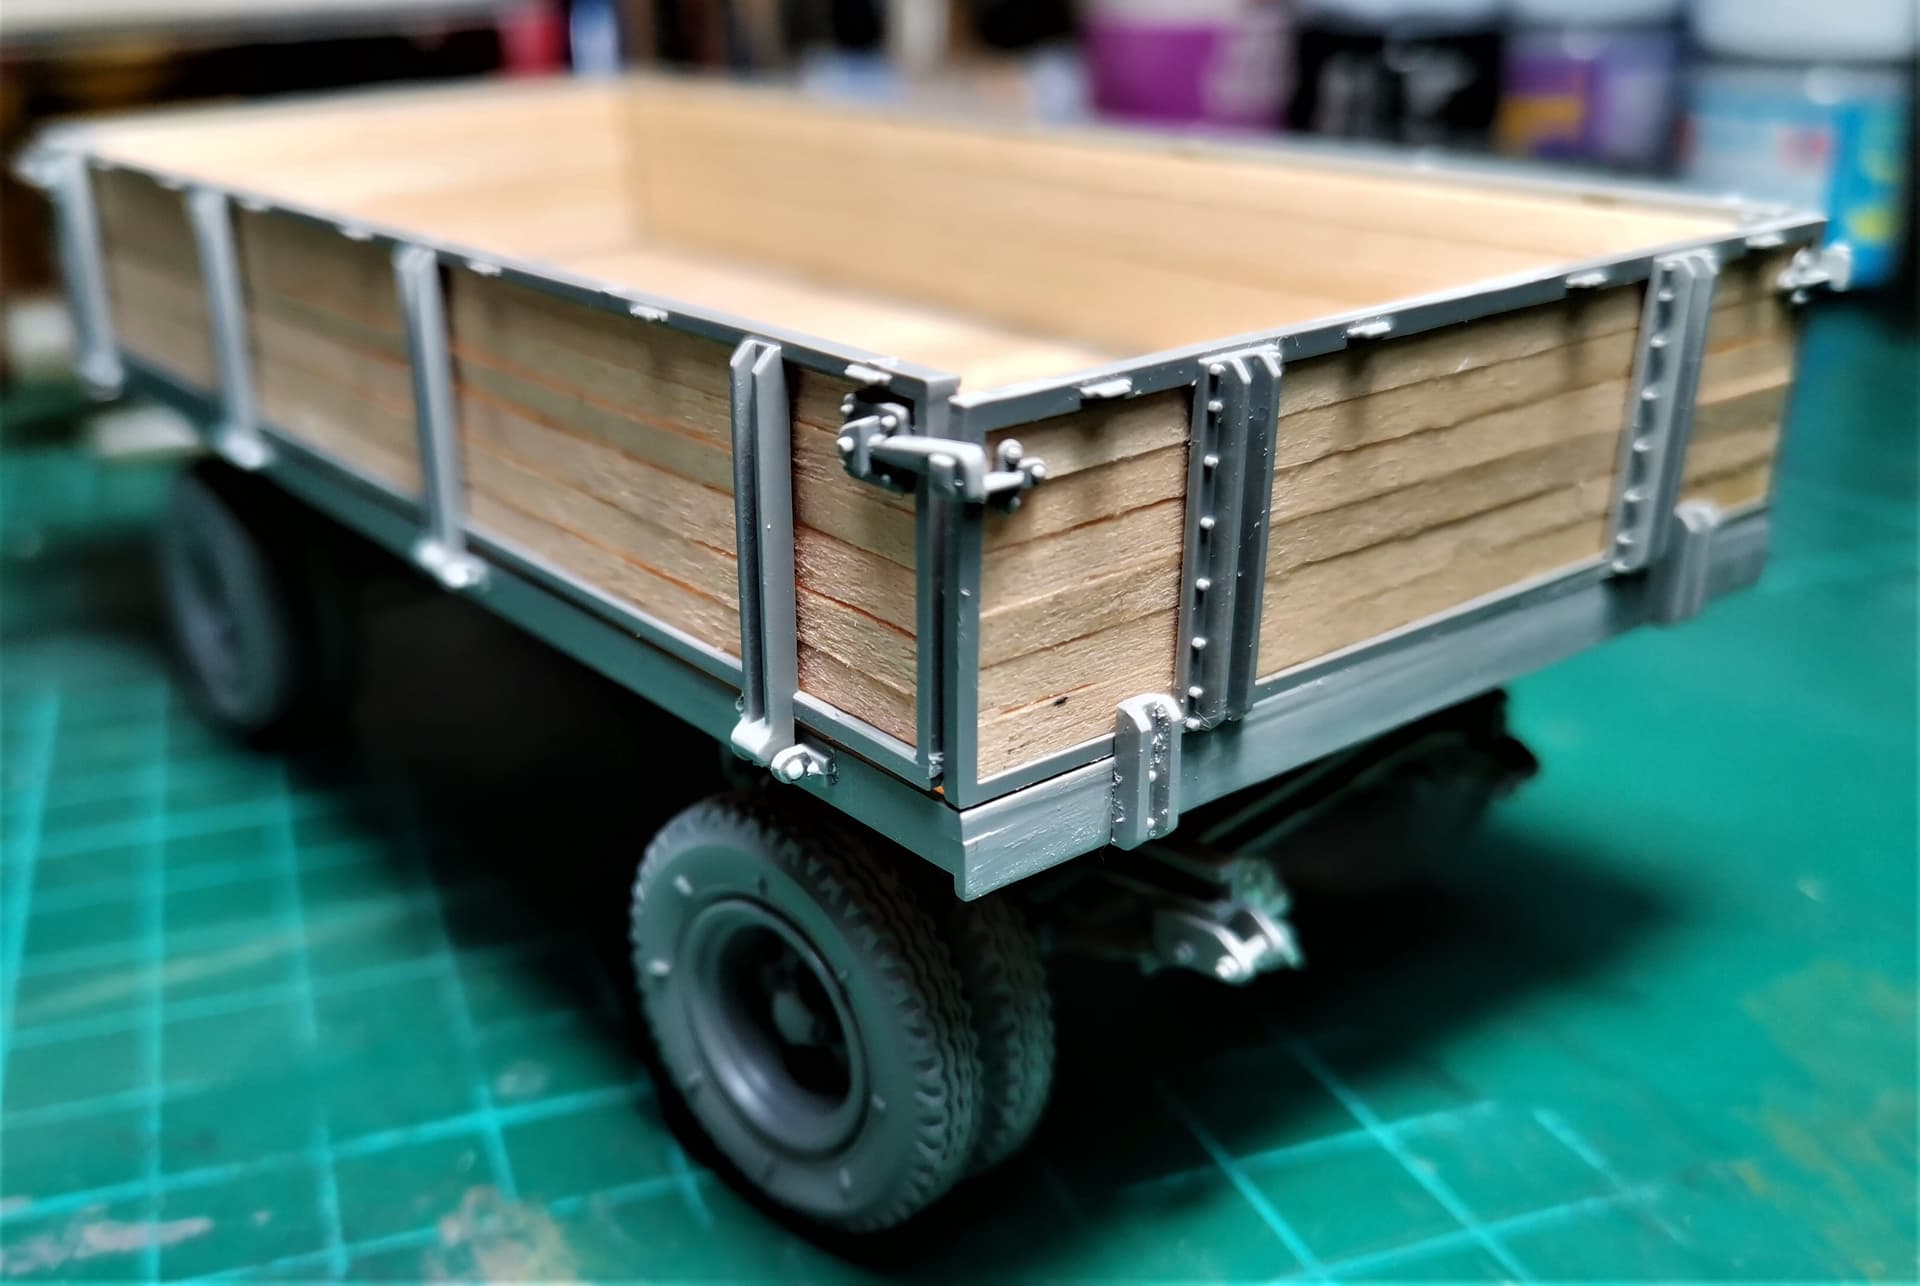
I decided to load the Anhaenger with the Supplementary Material of the Heavy Pontoon Bridge Type B (mainly wooden planks&poles, some Uebergangsschienen 8t and a small dinghy(kl. Flosssack 34)) and ordered a Buessing-NAG 4500S truck to tow it.
This will be another combo from Bulgarian WWII Pioneers inventory
Looking good Angel. Love the floor boards. You can’t beat real wood.
Hoping the capacitor for my airbrush comes this week, then I can get back to the Citreon (and the Steyr). Australia Post says it is ready for delivery by Tuesday…
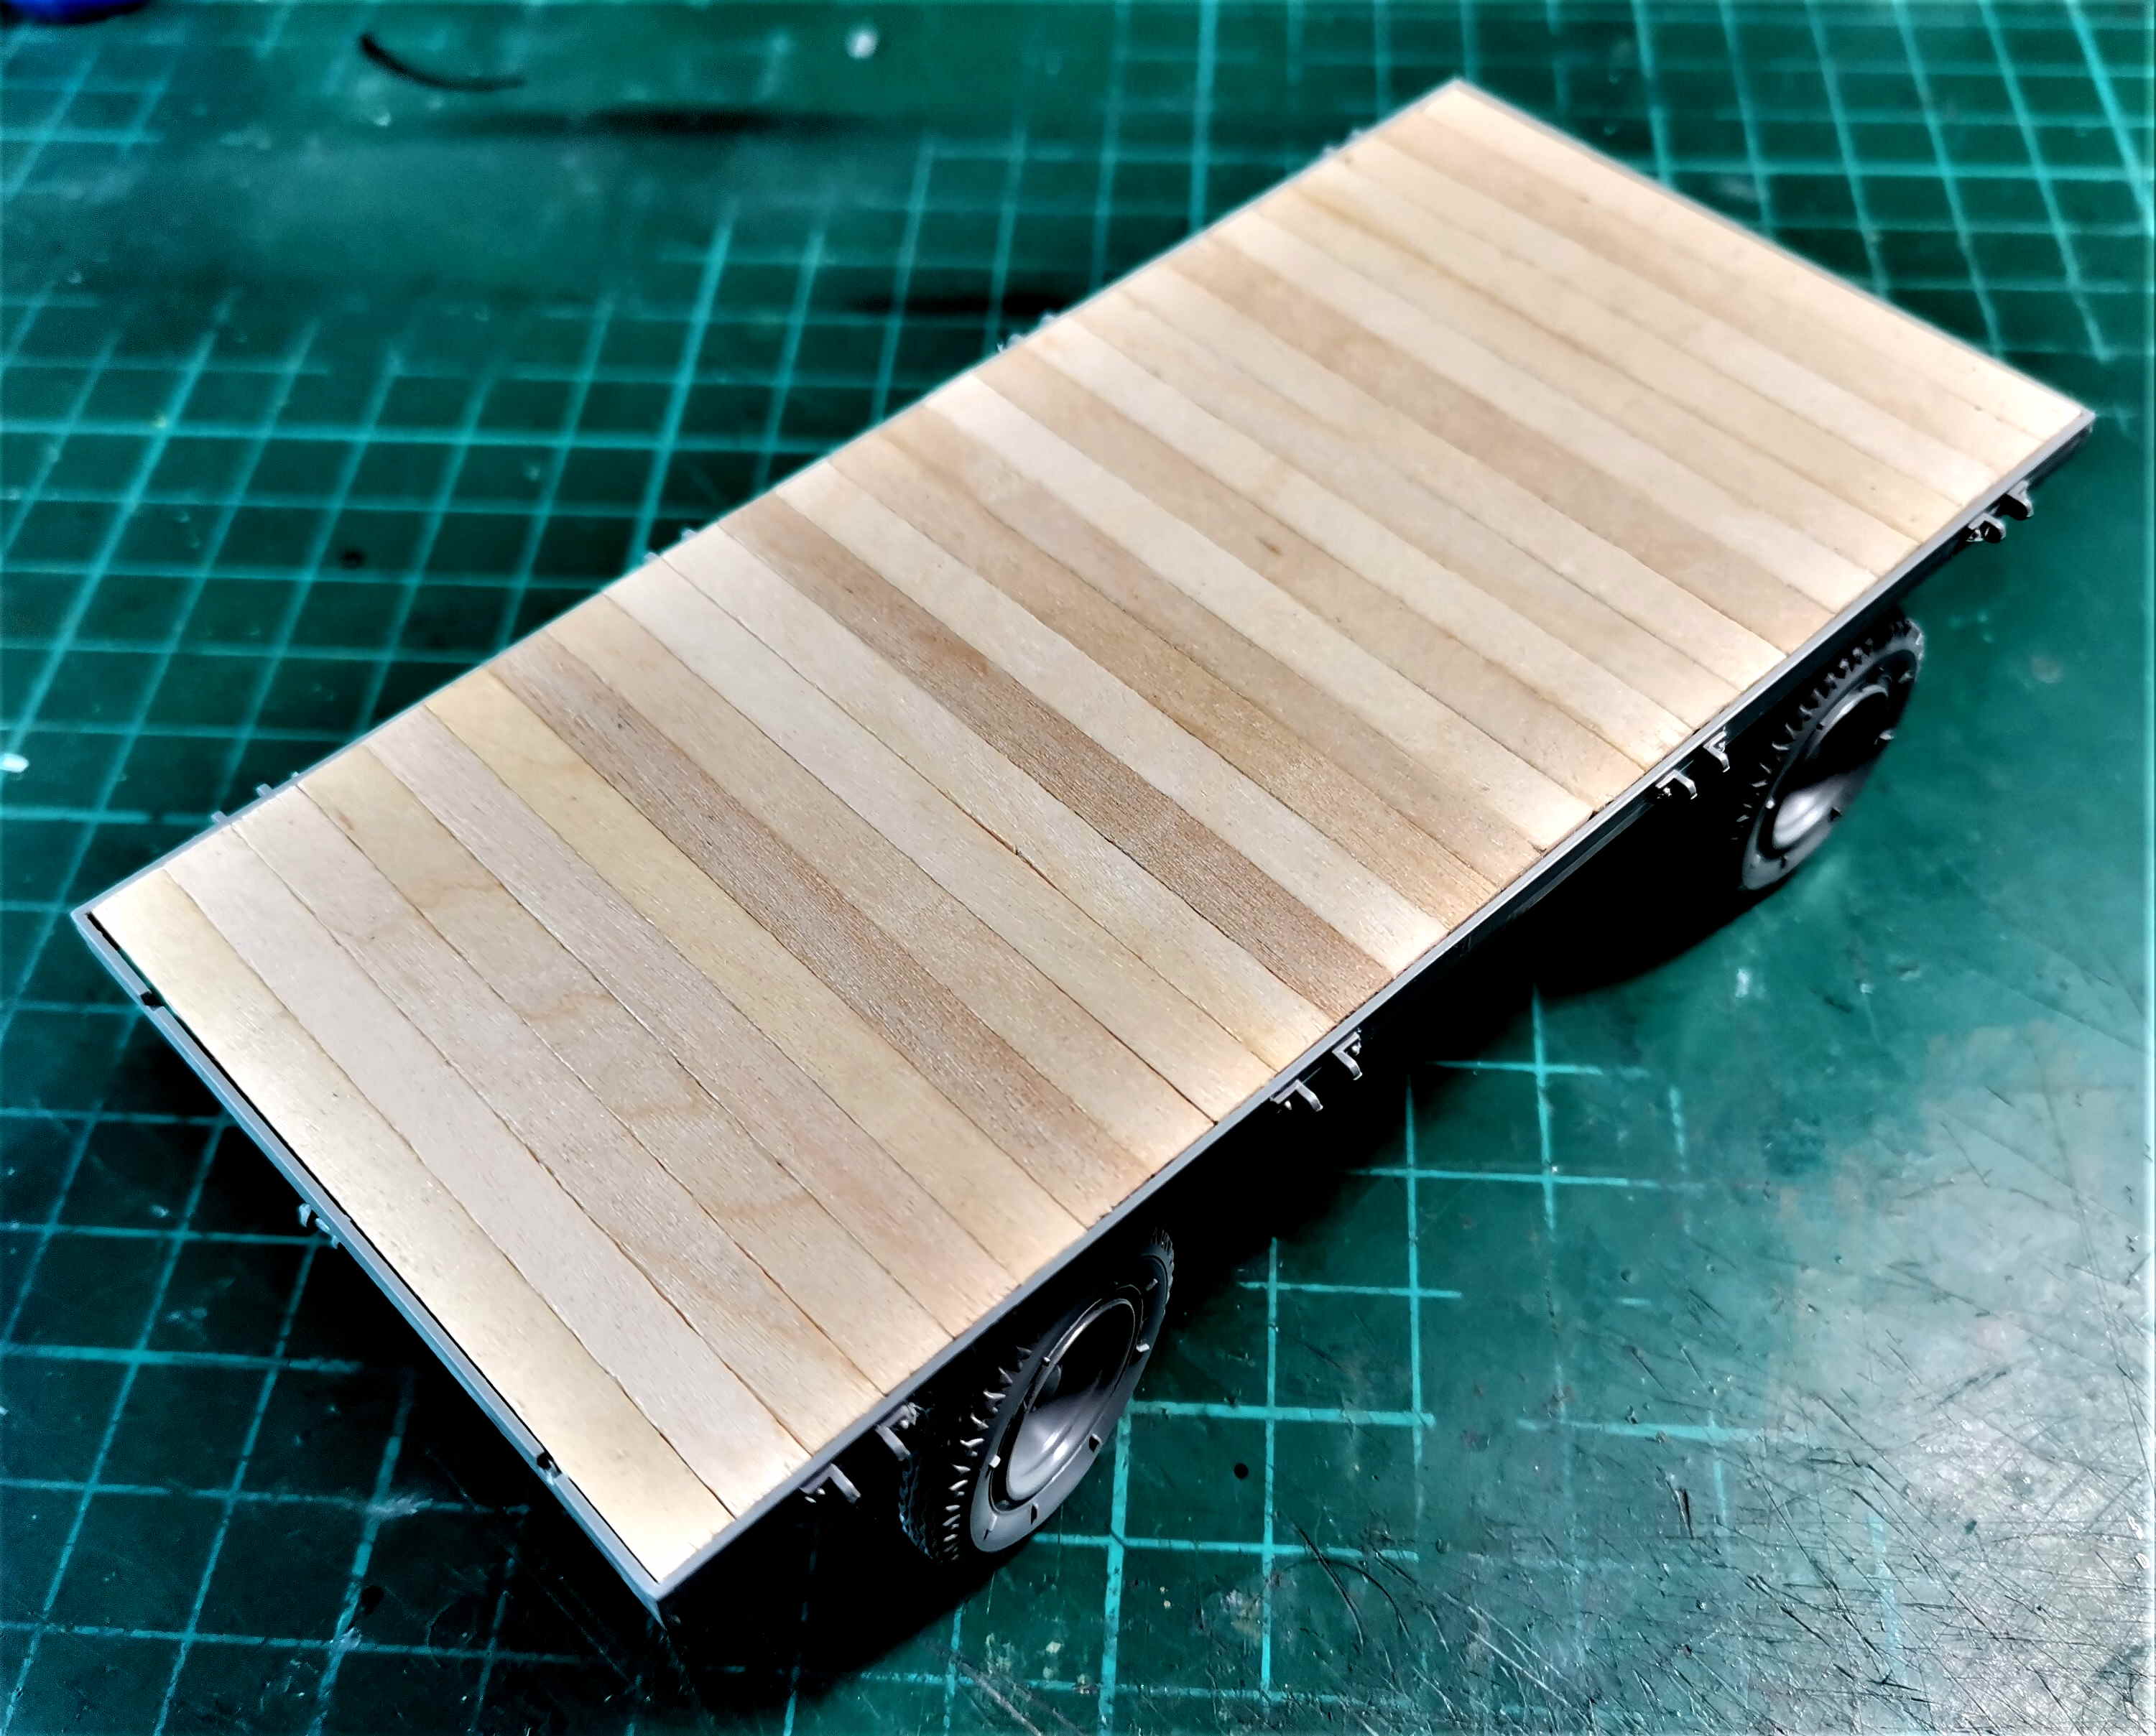
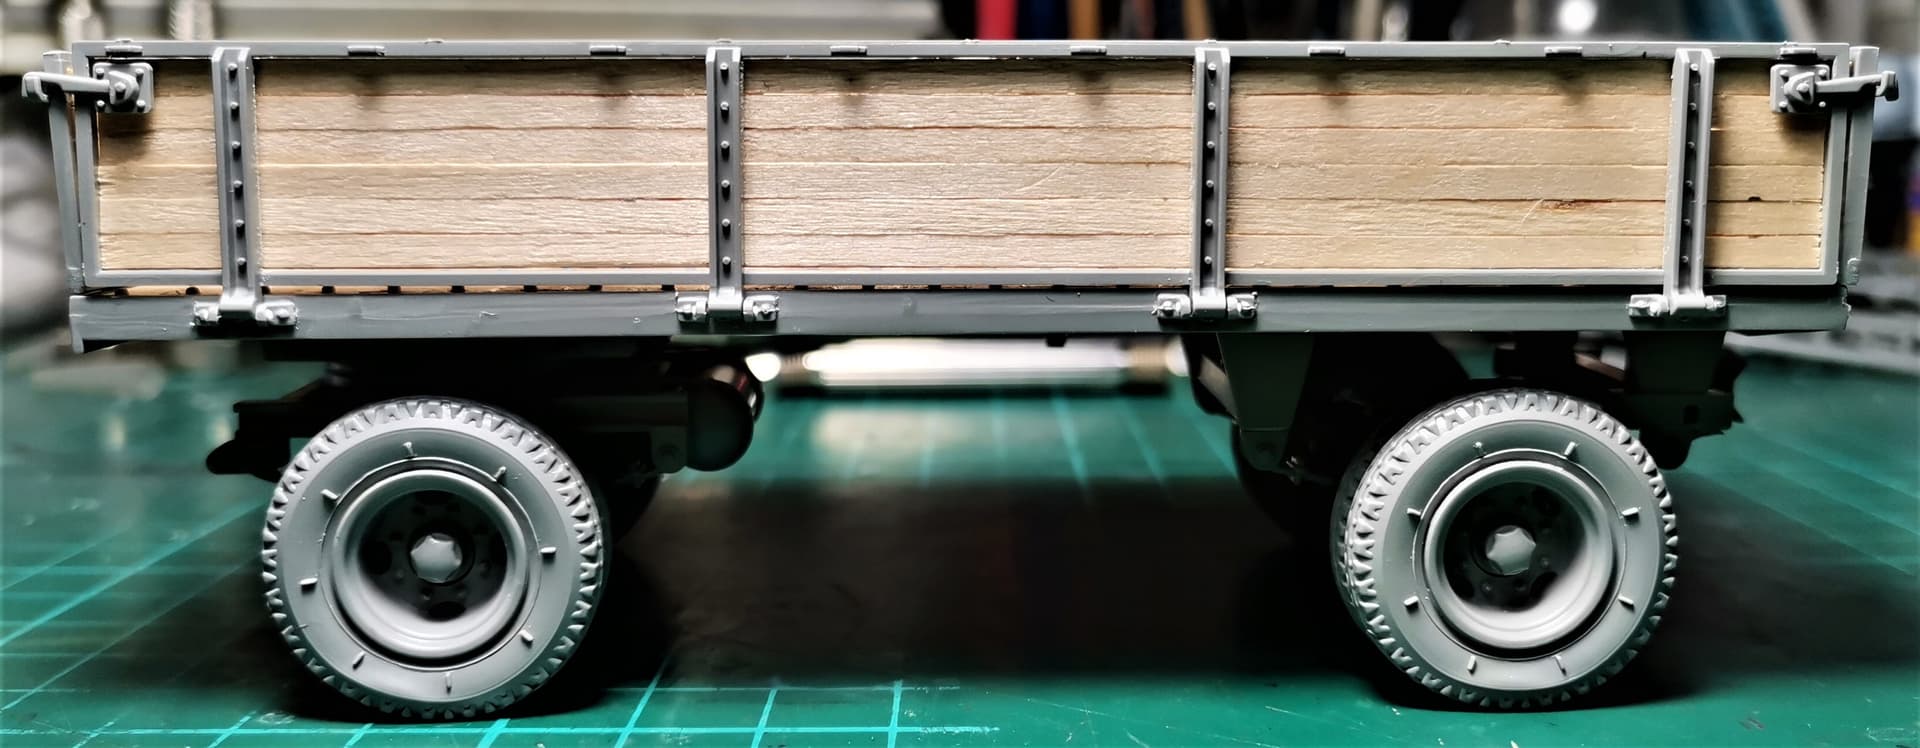
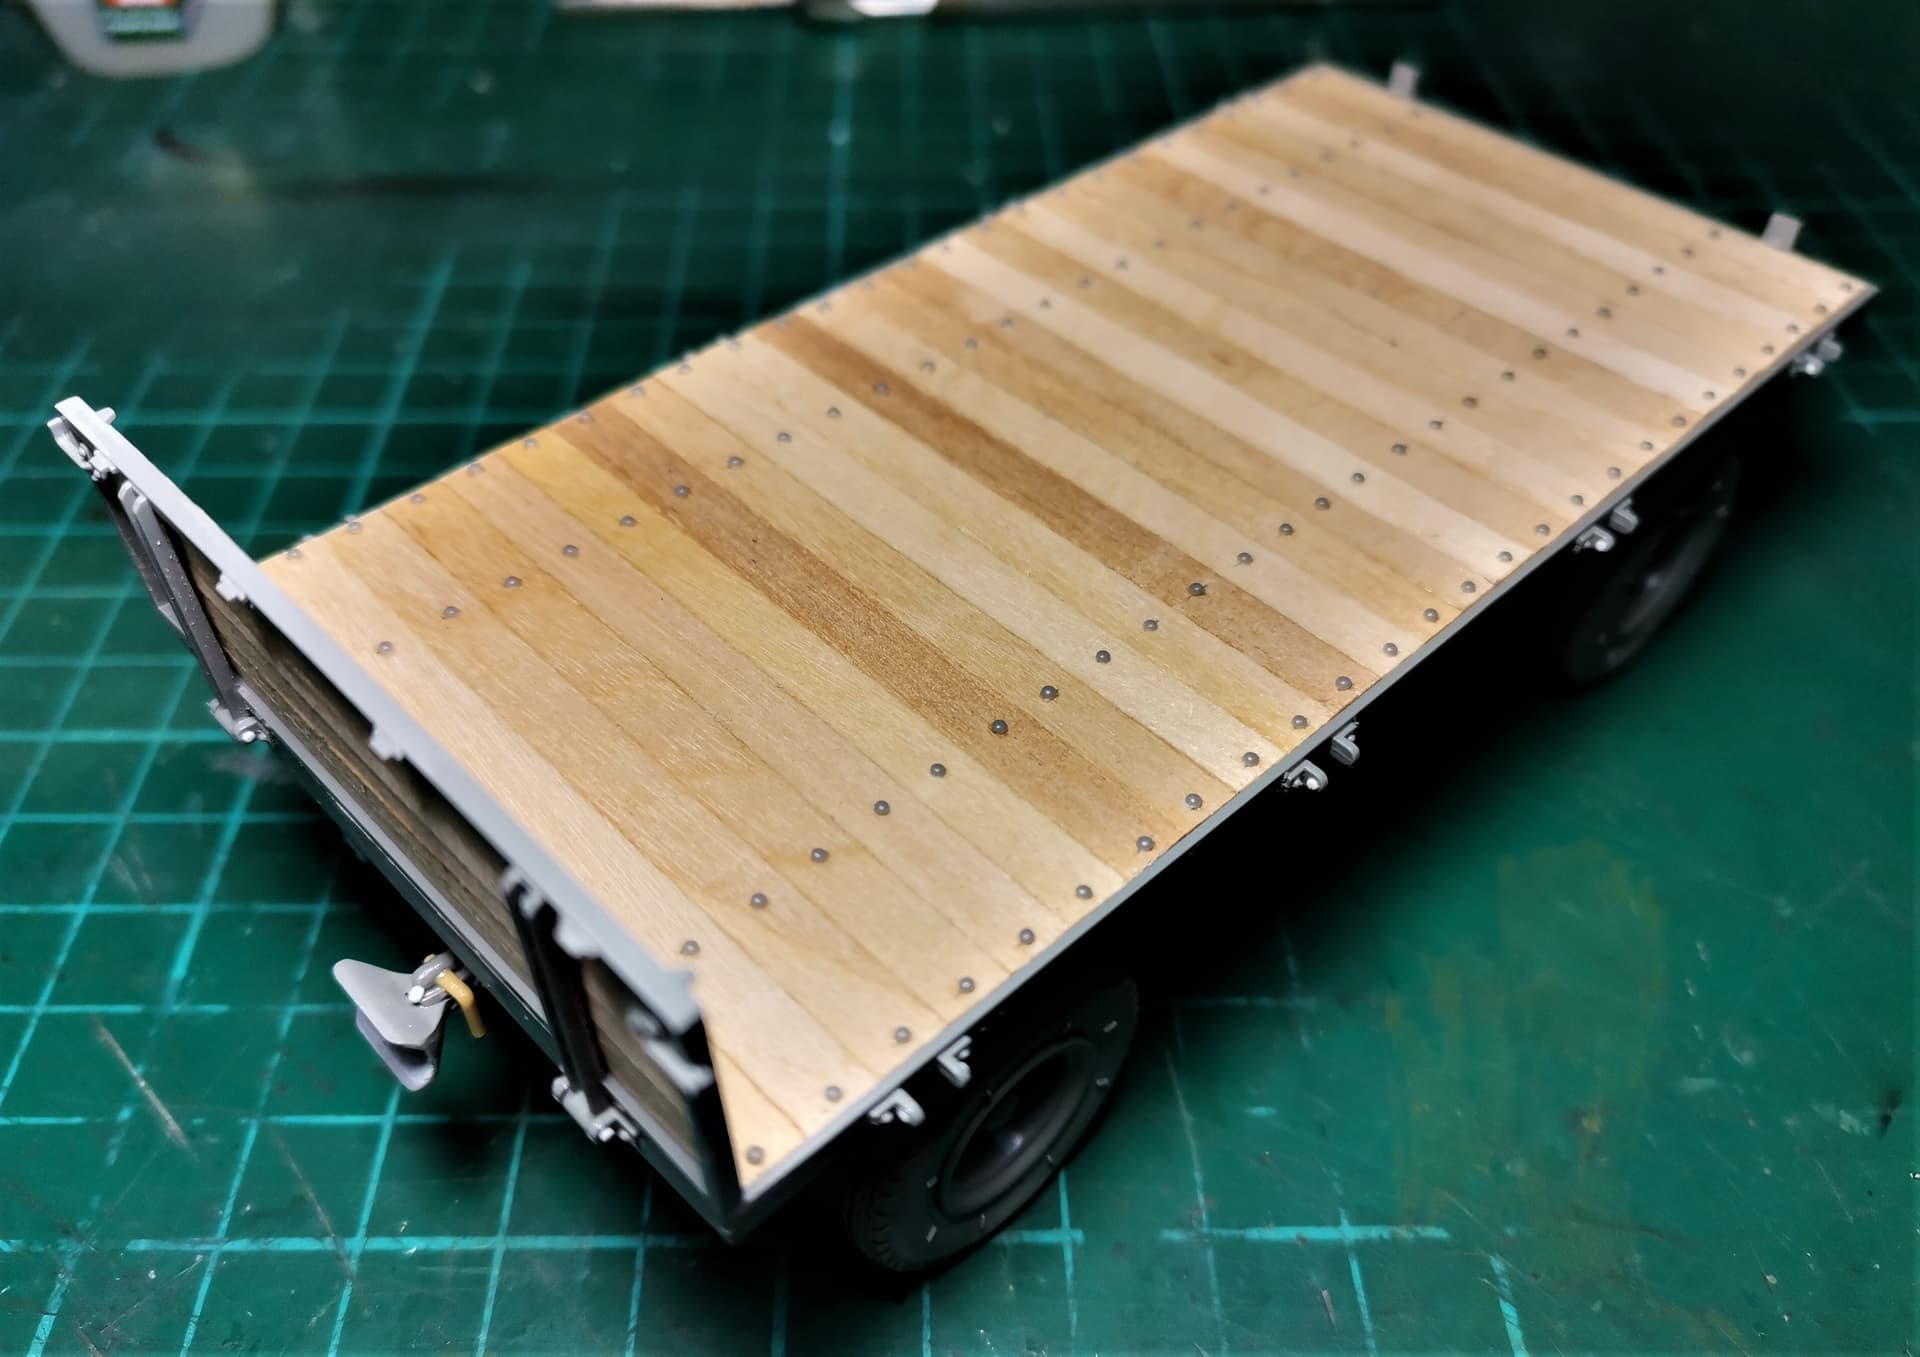
Robert did use real wood for his Einheitsanhaenger build, so I just couldn’t use the styrene molded parts provided with the kit.
Besides, I love woodworking and I strongly believe there’s no better scale representation for wood than wood.
And thanks John!
Using wood opens up the door for a plethora of challenges and probable solutions I will be happy to dive in soon,
After today’s dialogue and after seeing the photos, I would recommend the following. Airbrush the boards with matt lacquer lightly colored brown. The different shades of wood will help you. Use the hairspray technique and do a light chipping.
Success!
Kalin
I will definitely try your suggestion along some other ideas I have and then will decide.That won’t happen untill I finish construction…
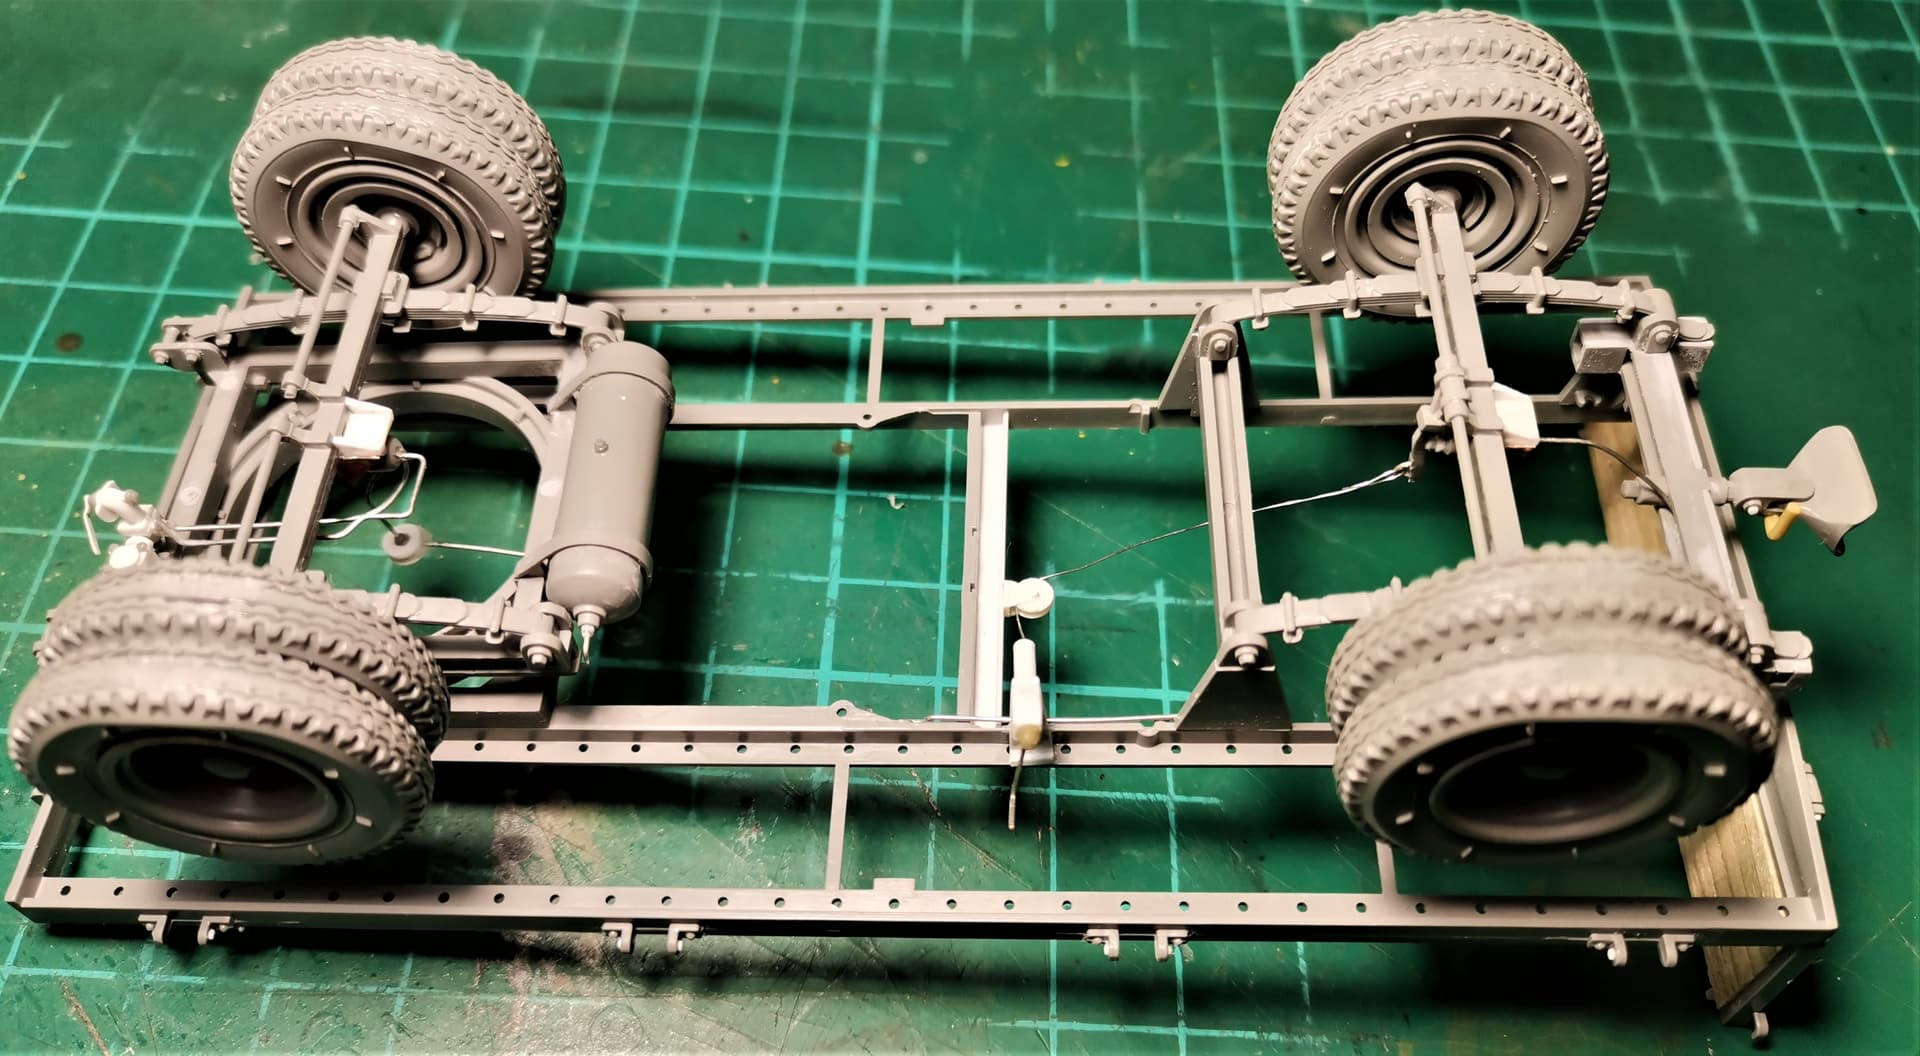
…which might happen sooner than I thought- I have some progress to report:
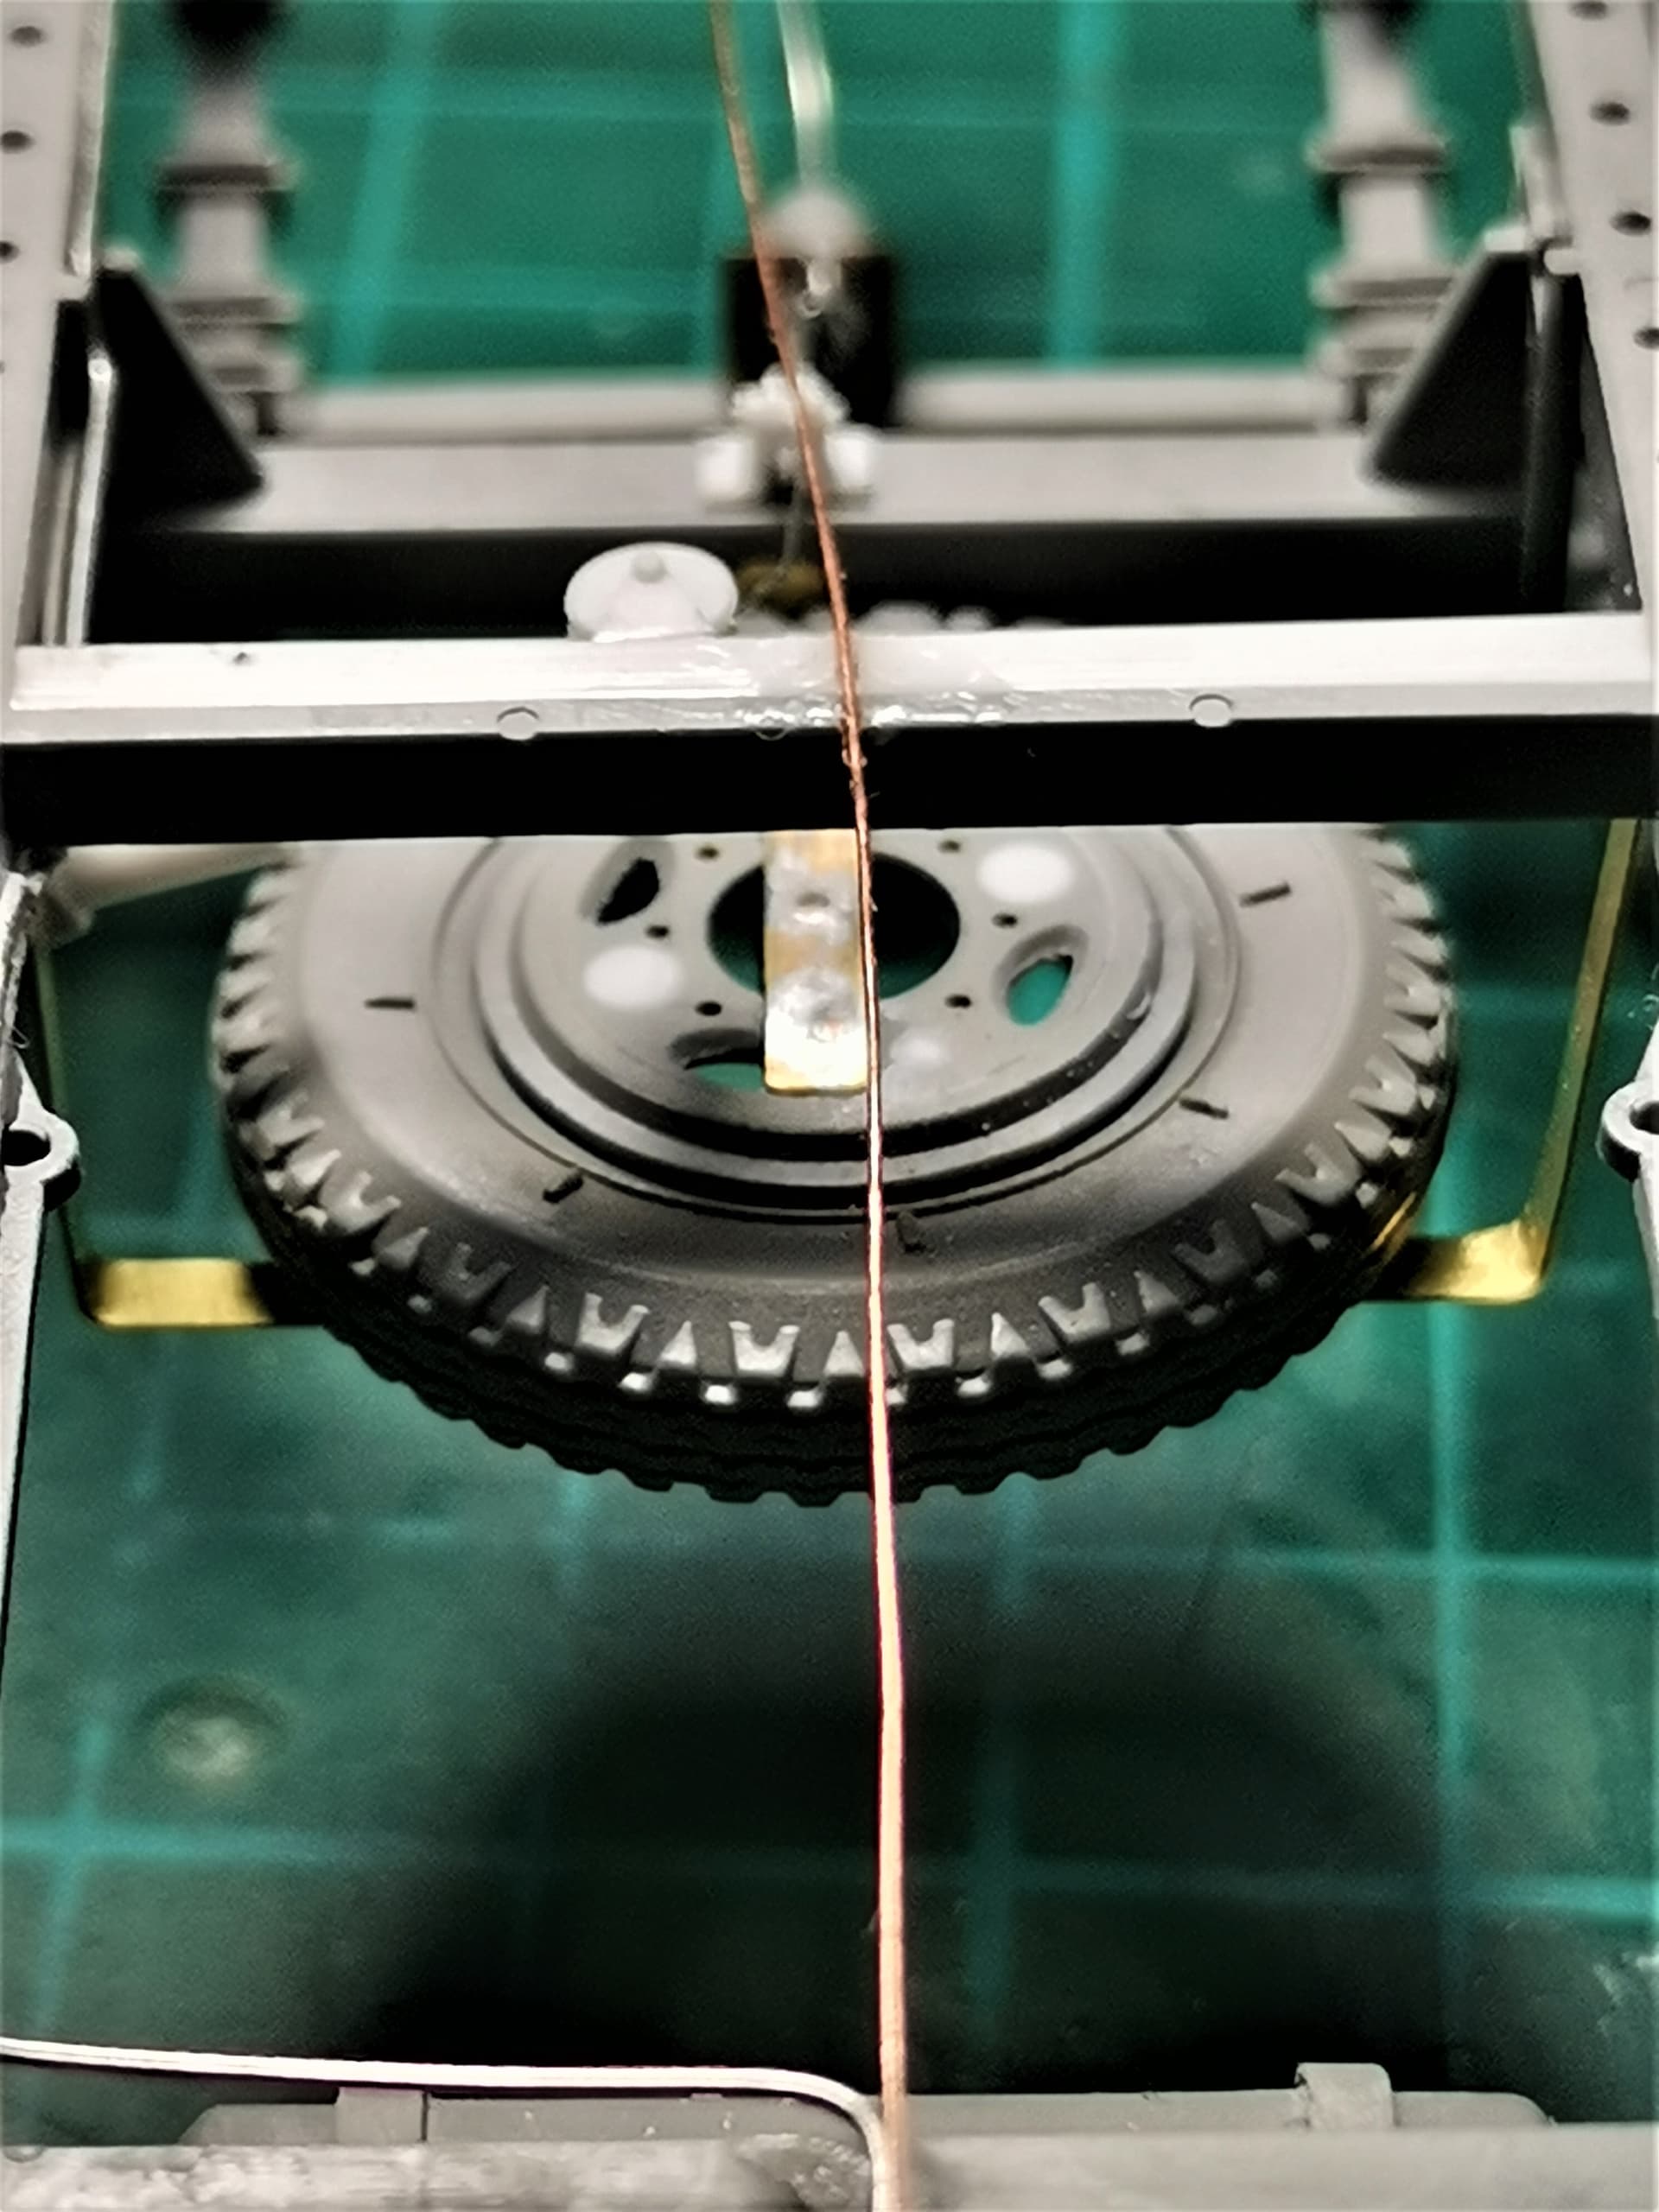
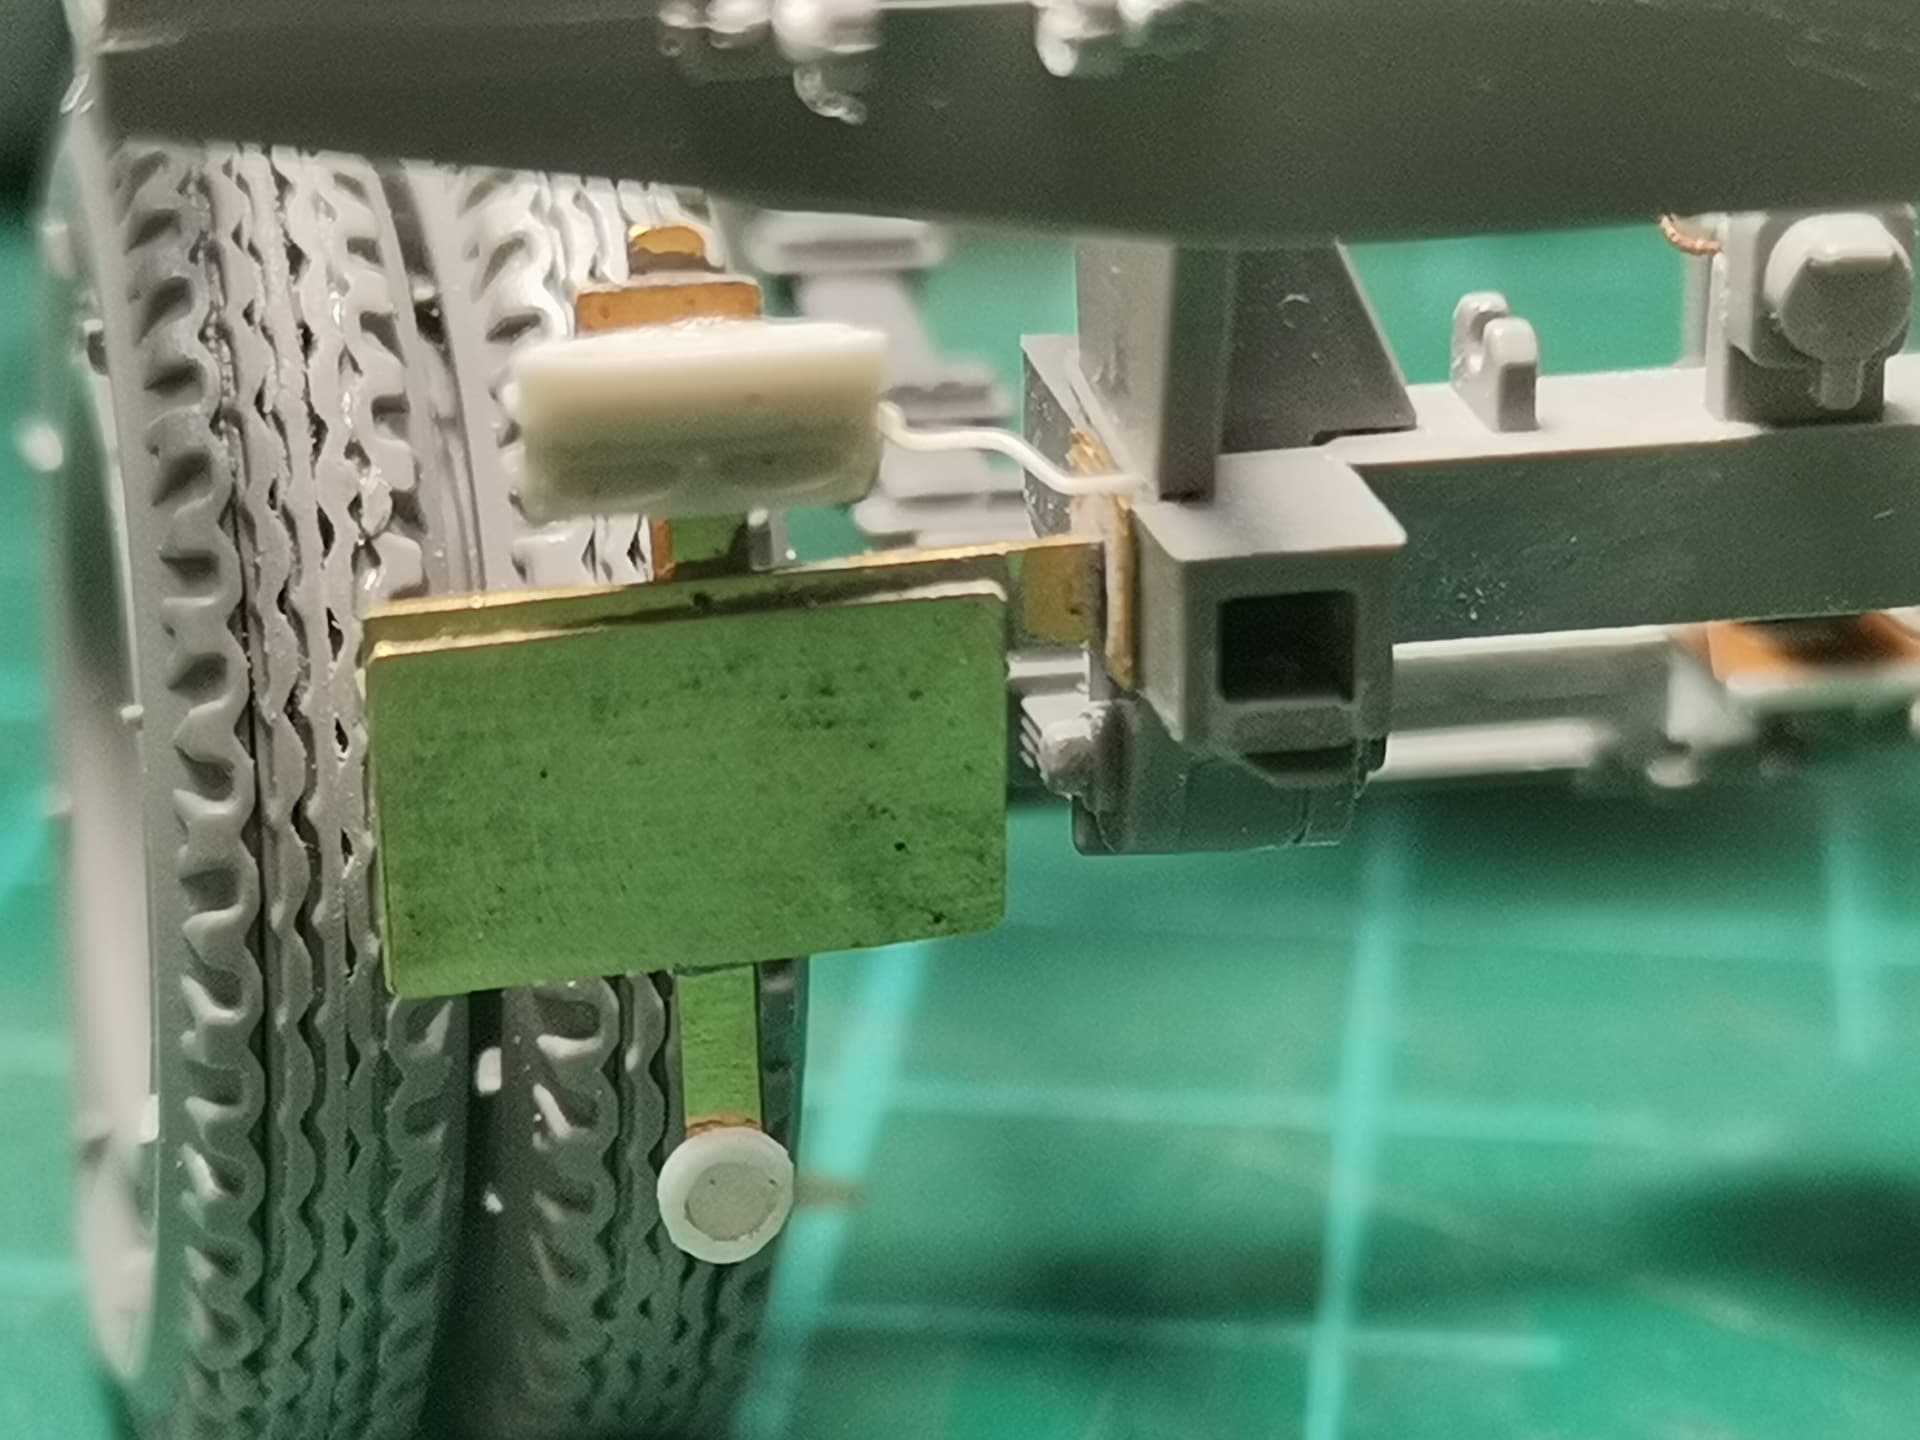
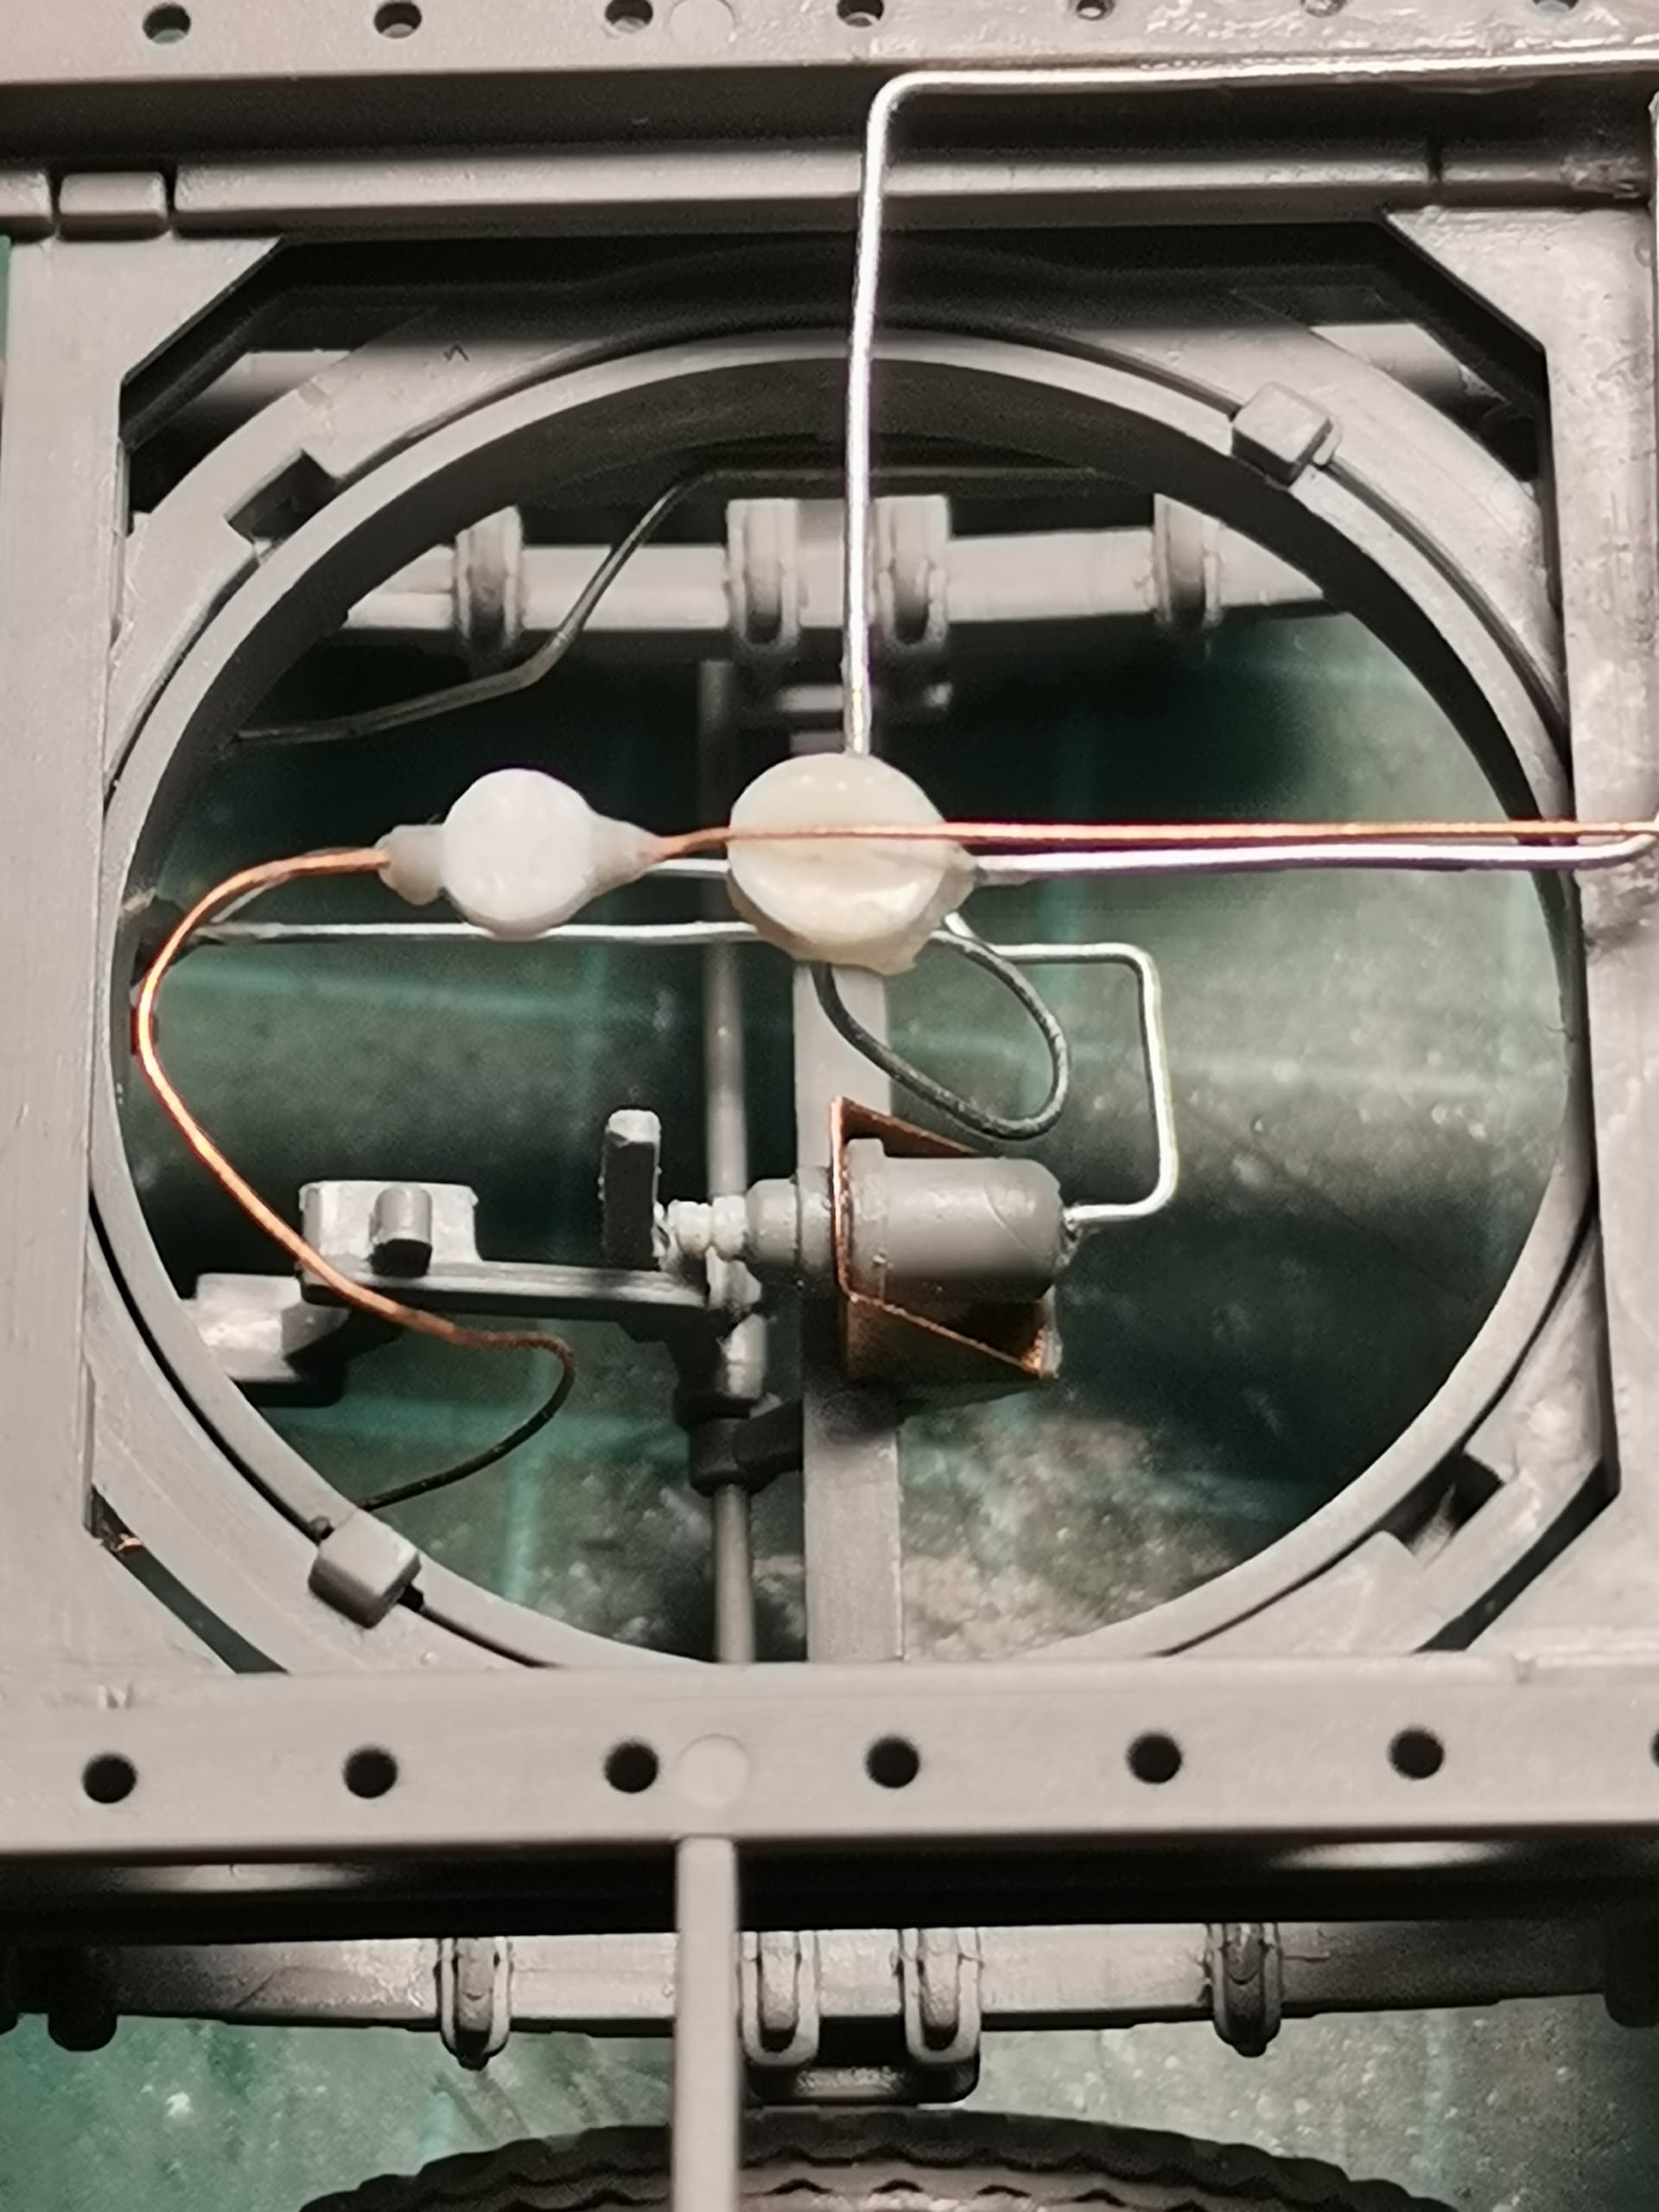
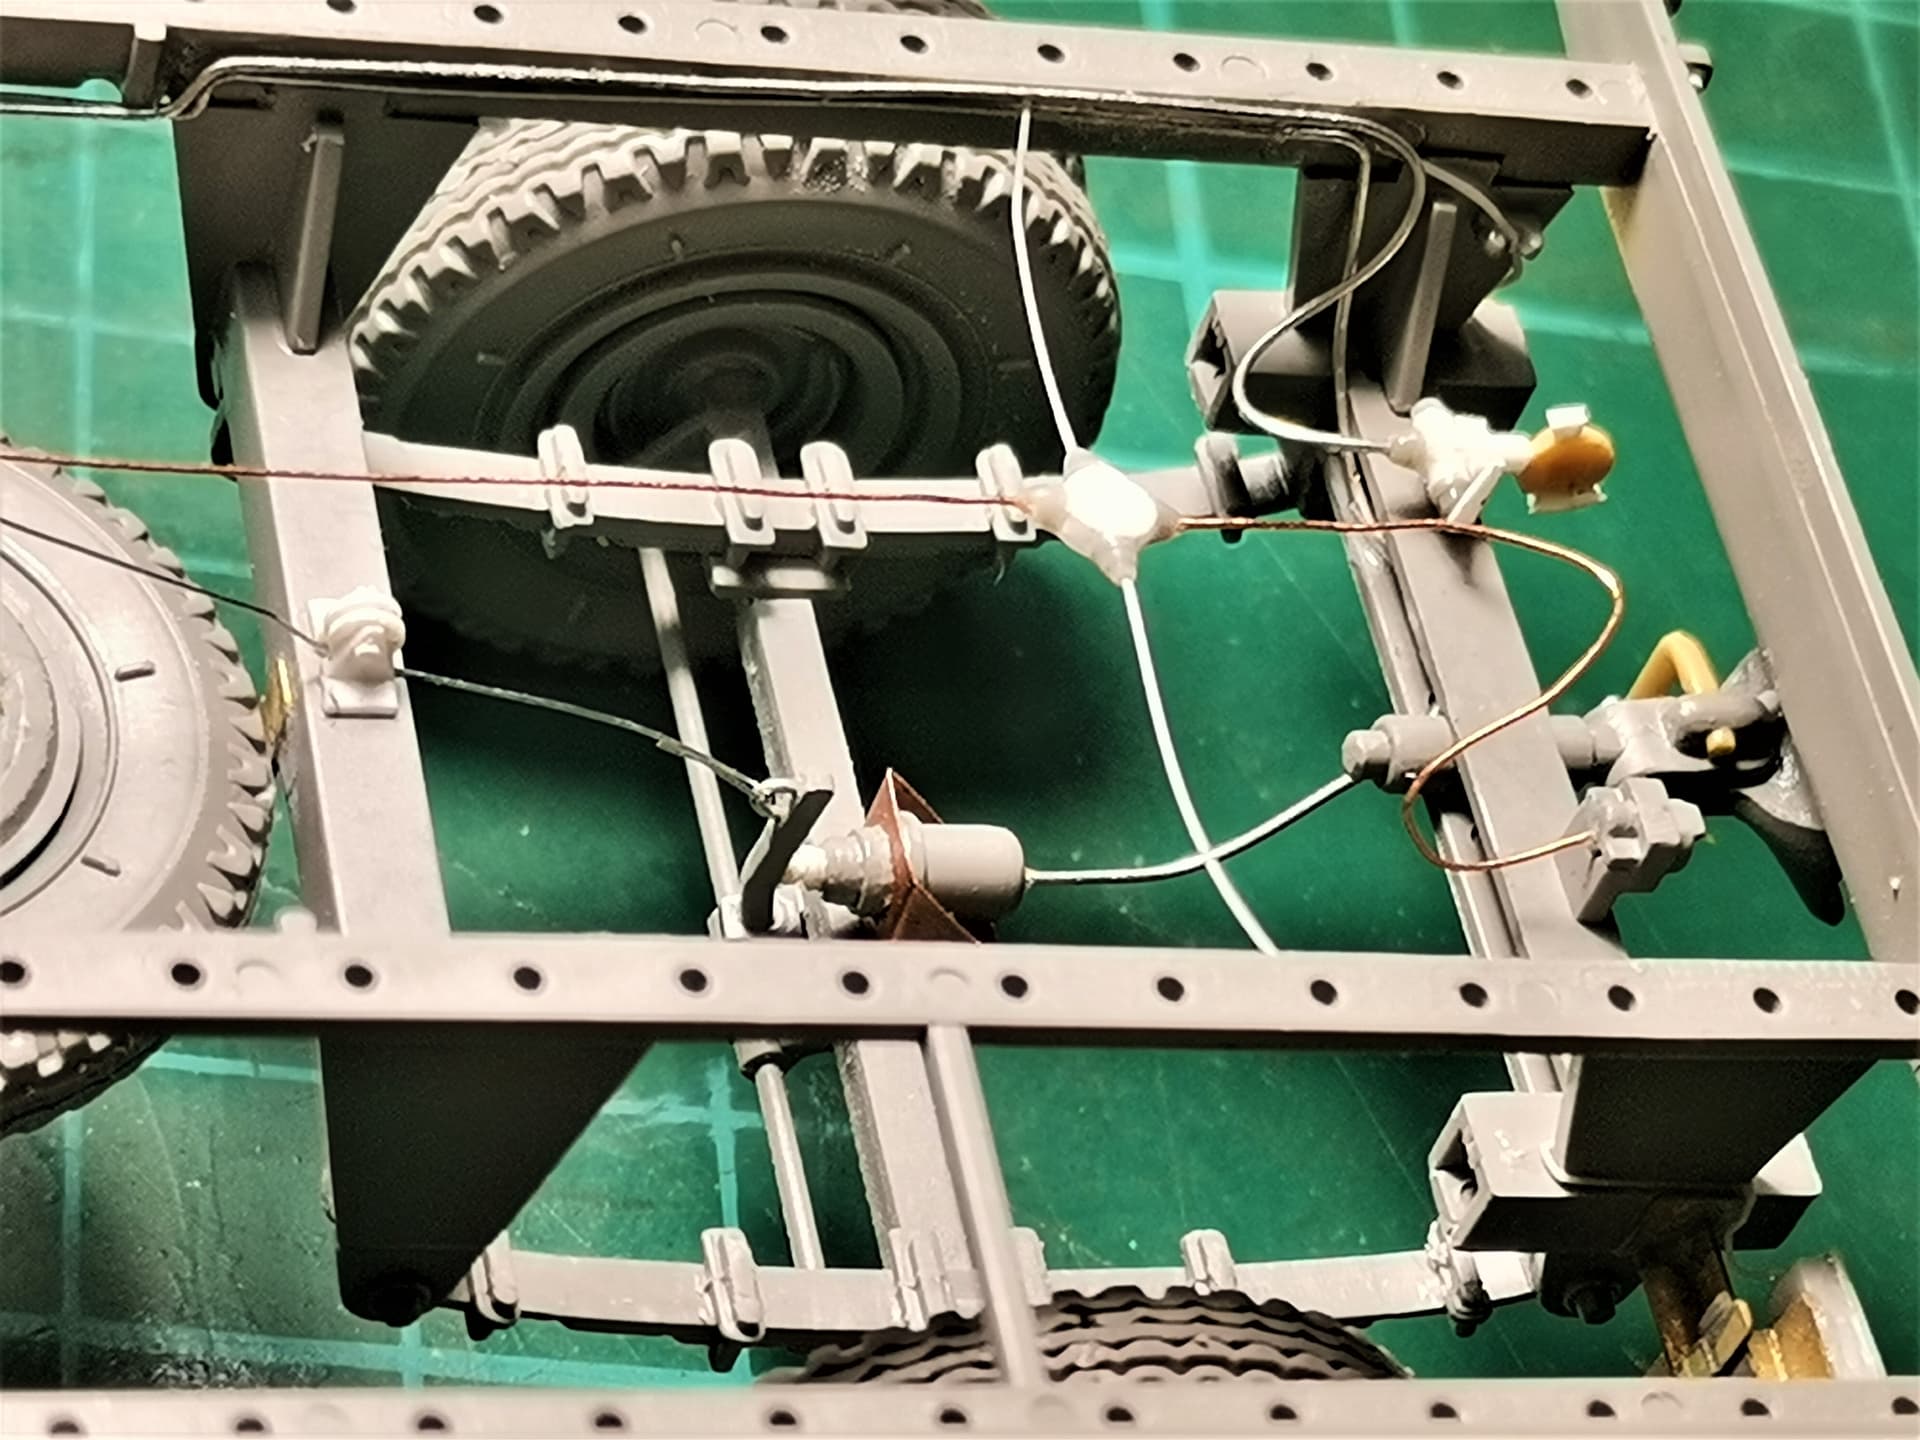
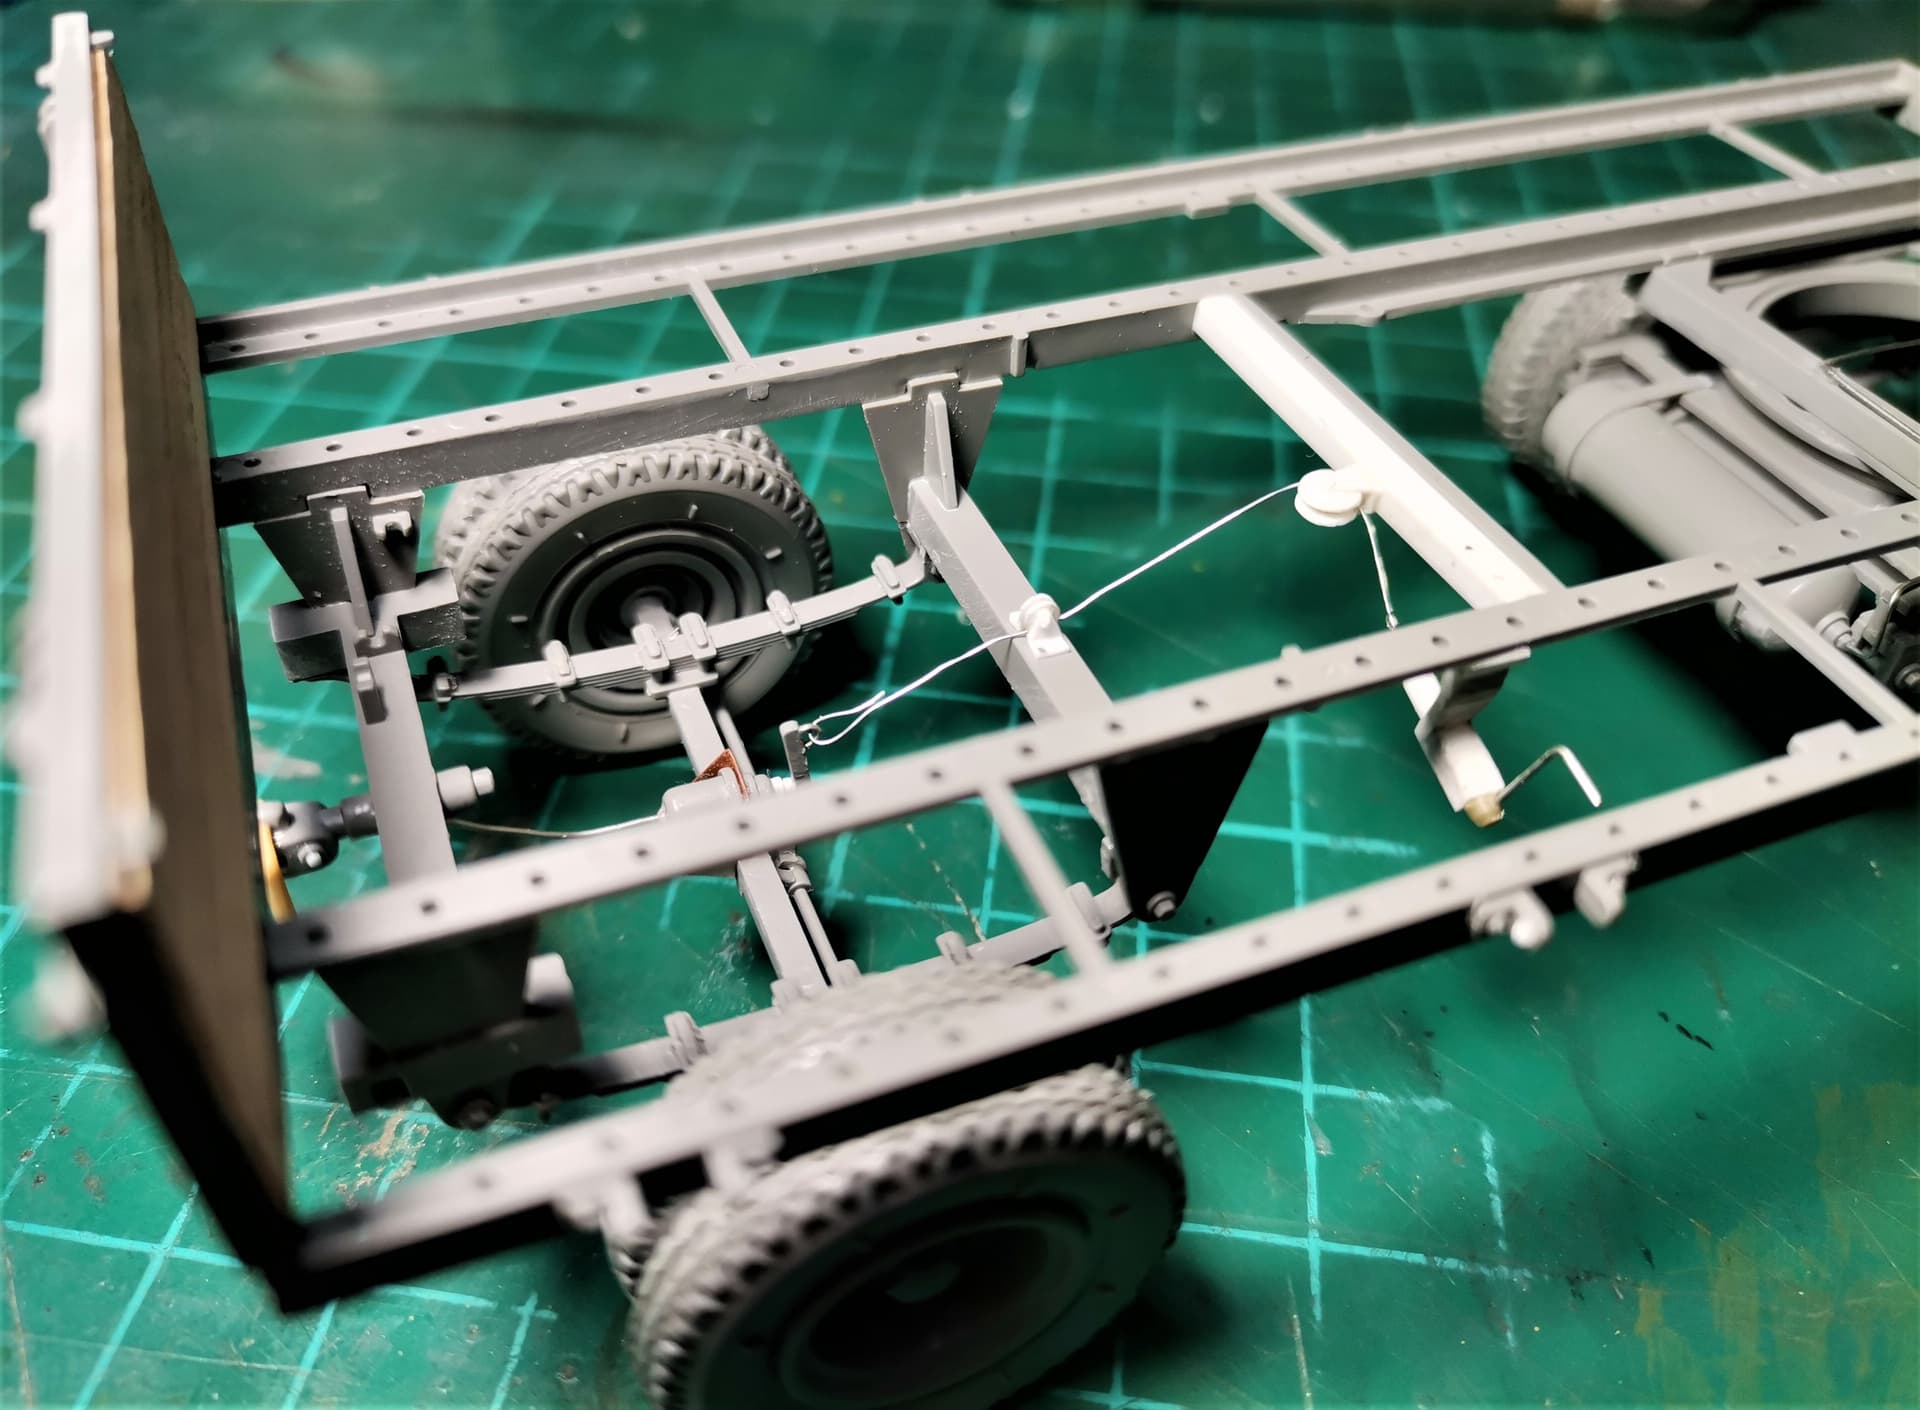
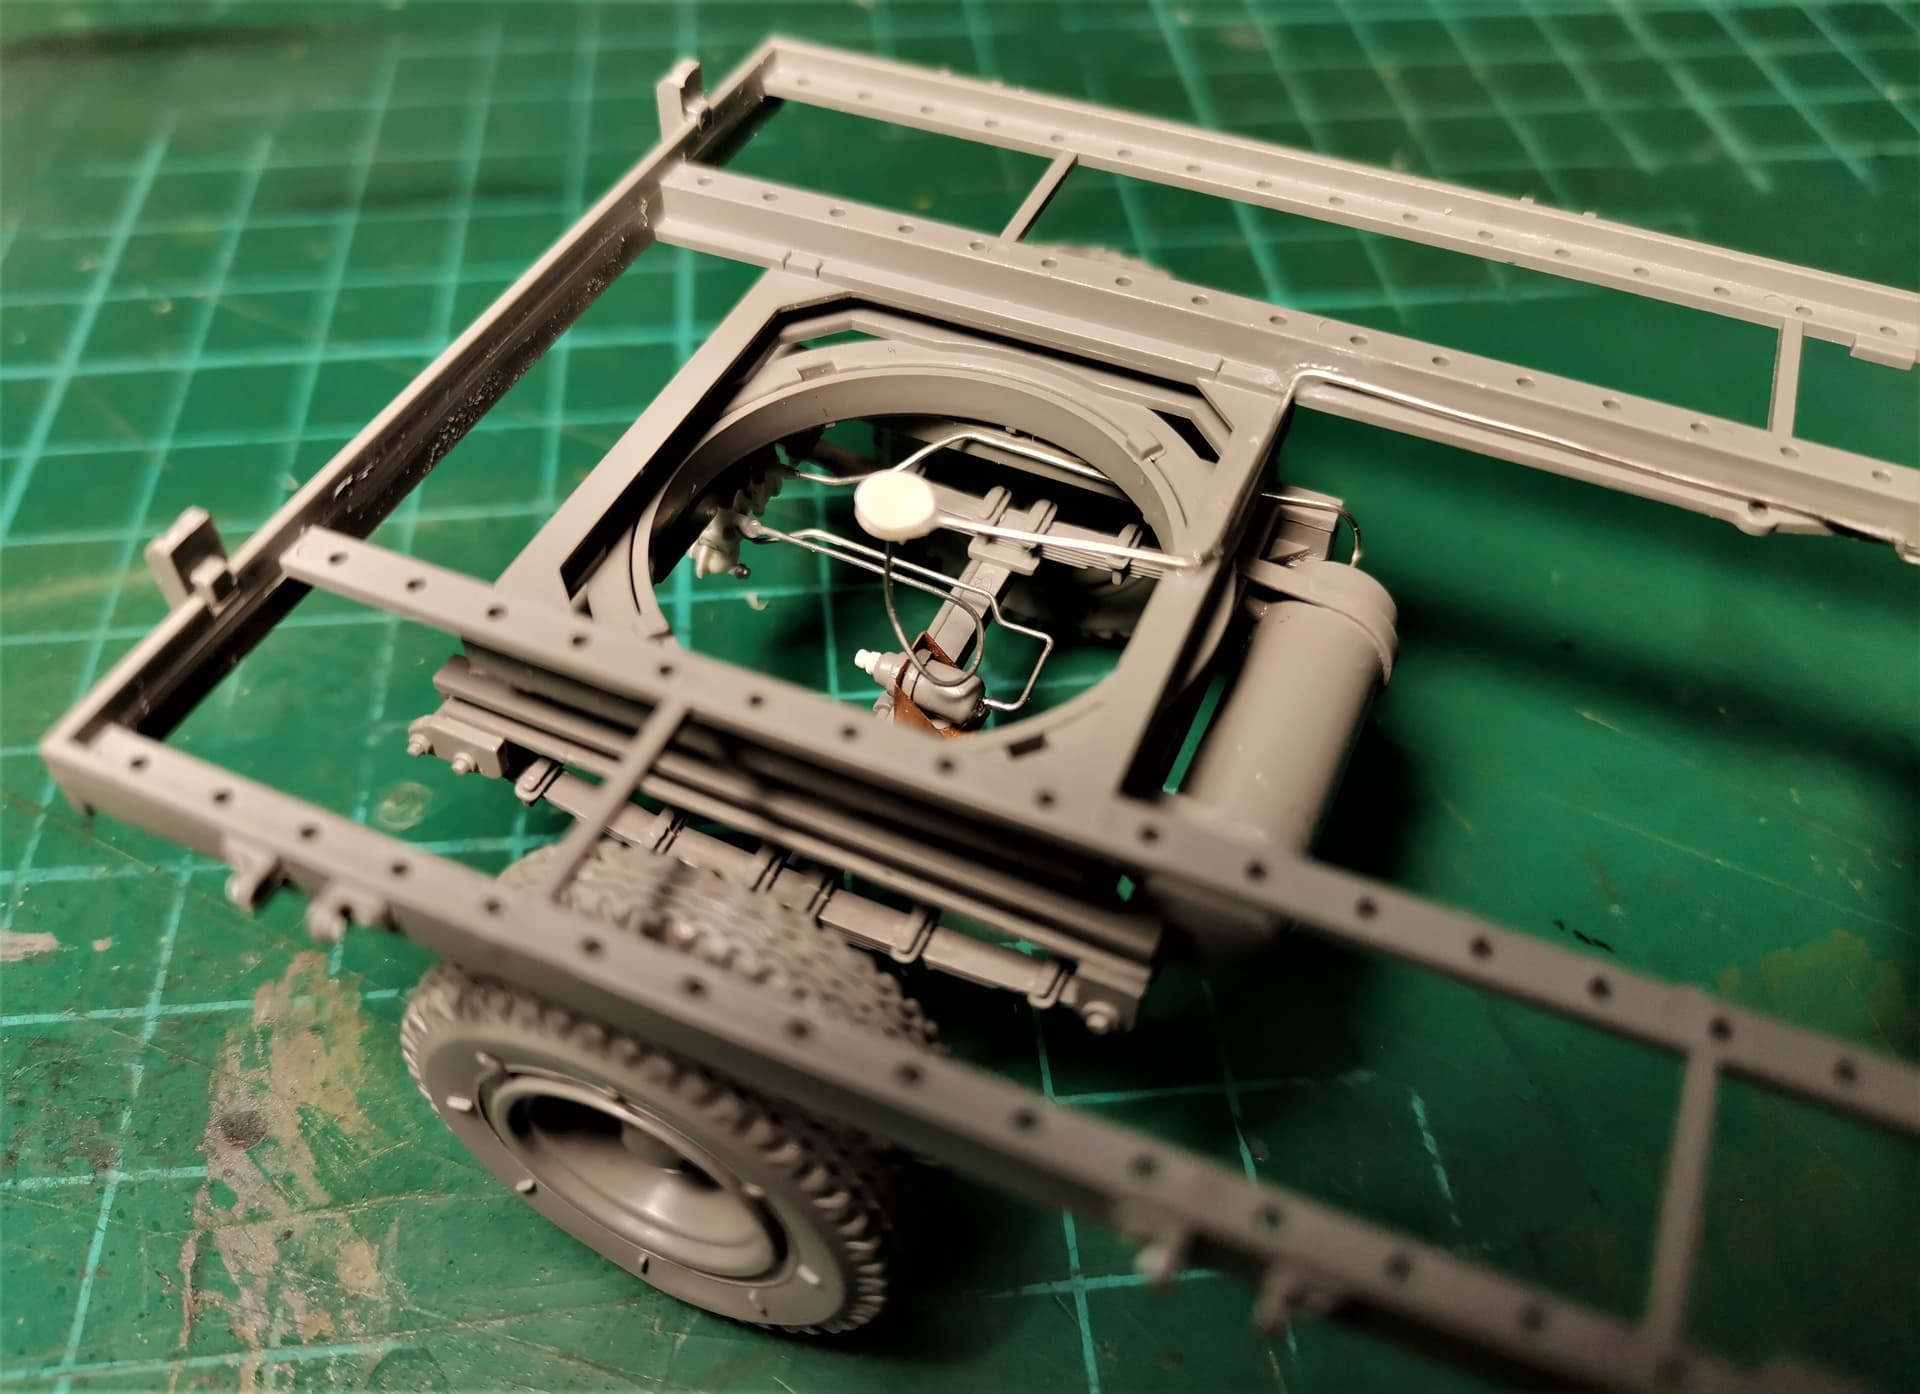
Need to run the electrical lines and decide whether I’ll build the drawbar according to kits assembly instructions or according to 1943 Spare Parts Manual.The spare wheel mount will be built according to the Manual for sure,
Once again Angel … ( I wonder how many times I’ve said that regarding your engineering masterpieces ? ) … you have built a standard kit but elevated it into something unique and brilliant. The detailing jumps out straight away and this another beautiful build to add to the already many you have delighted us all with
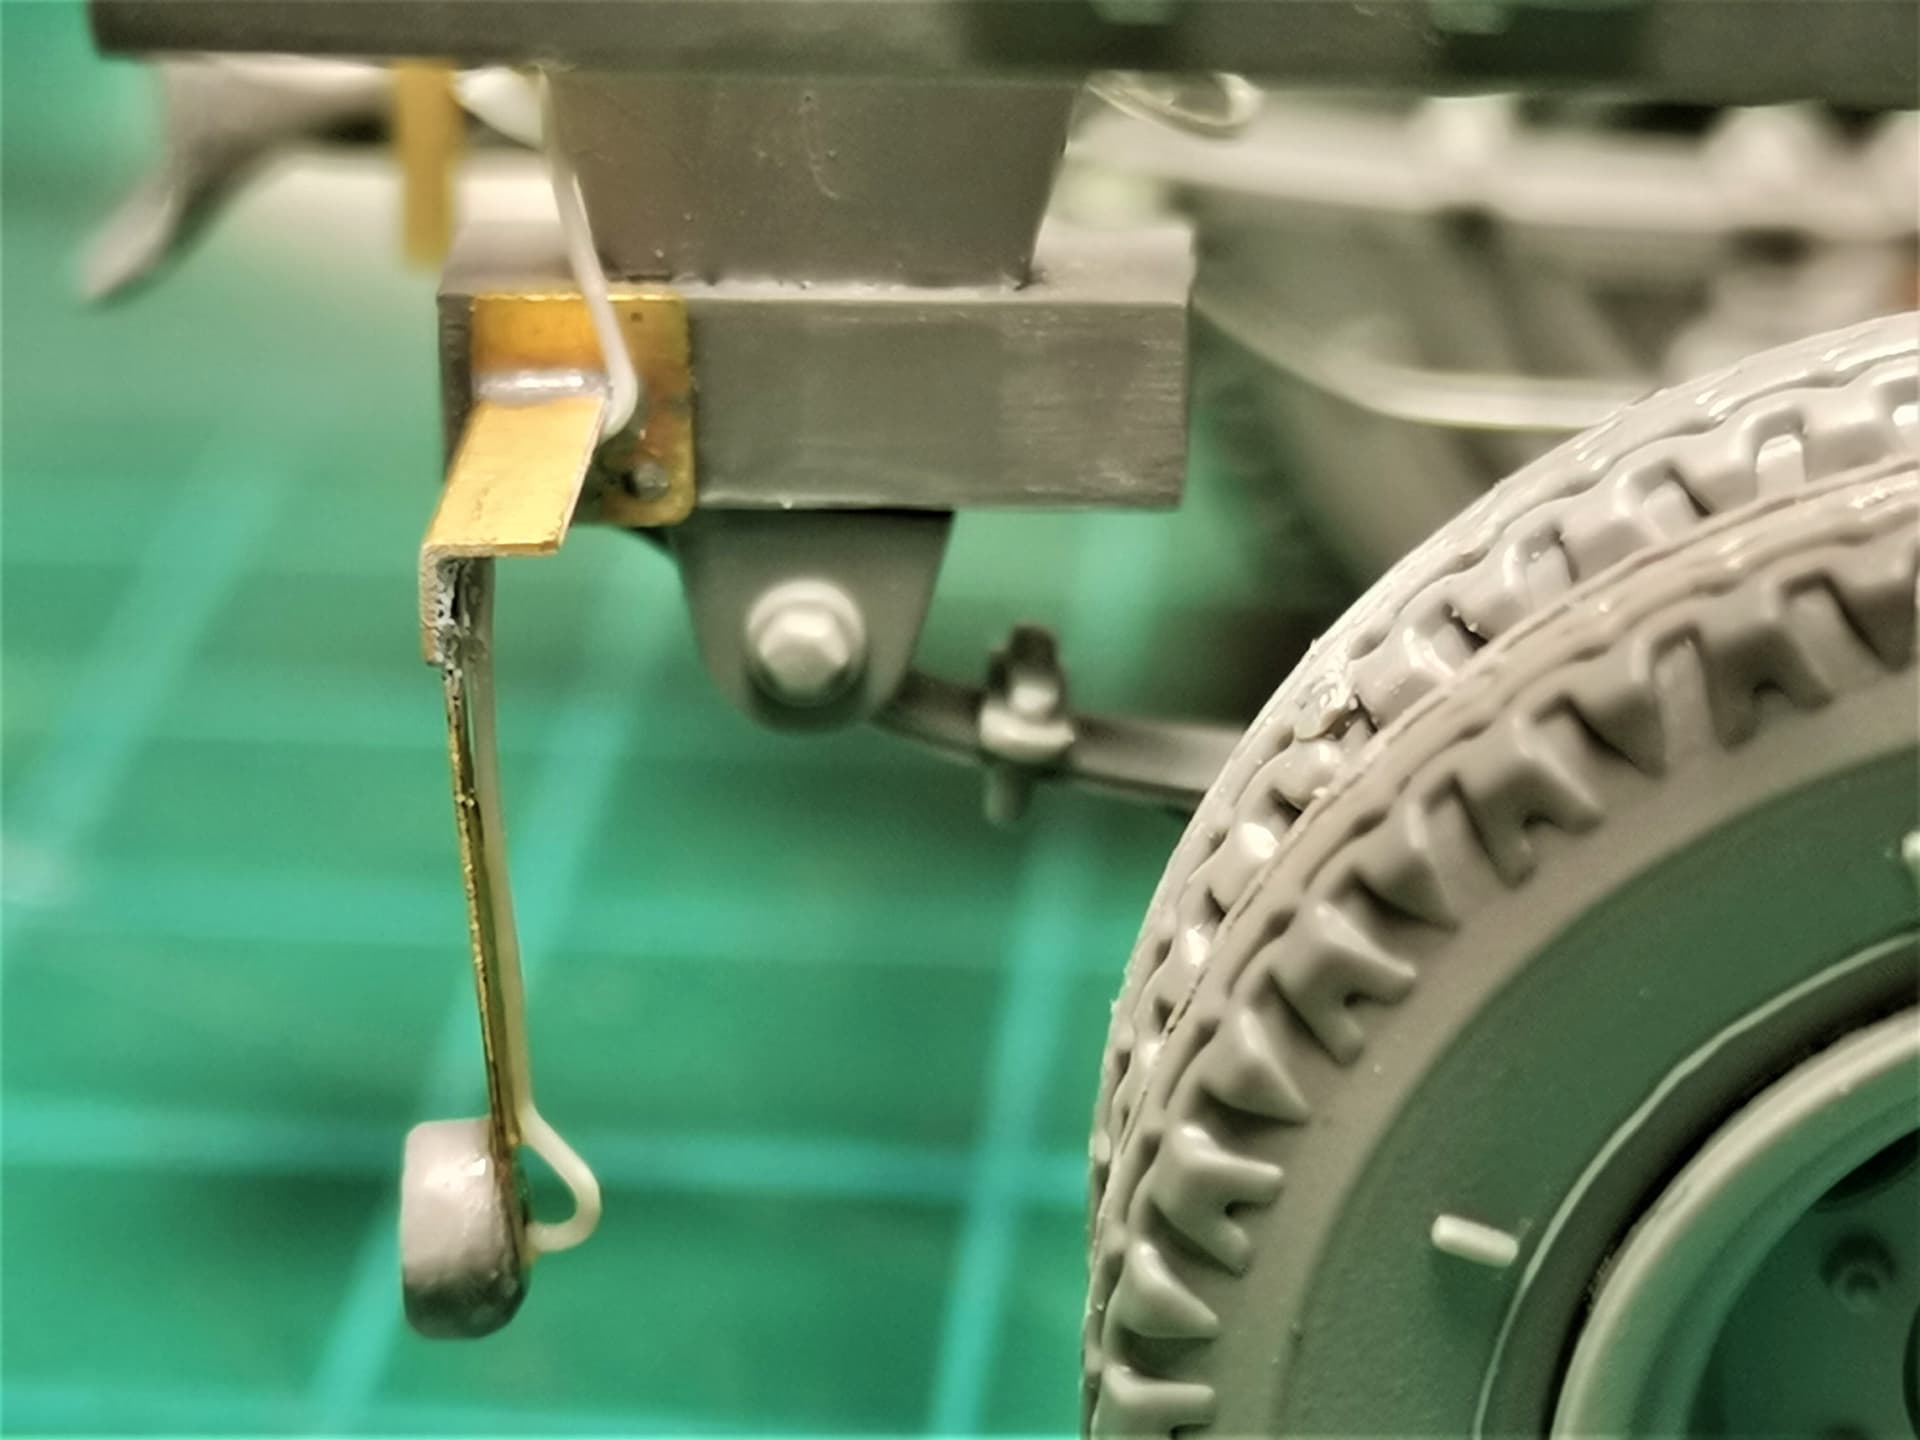
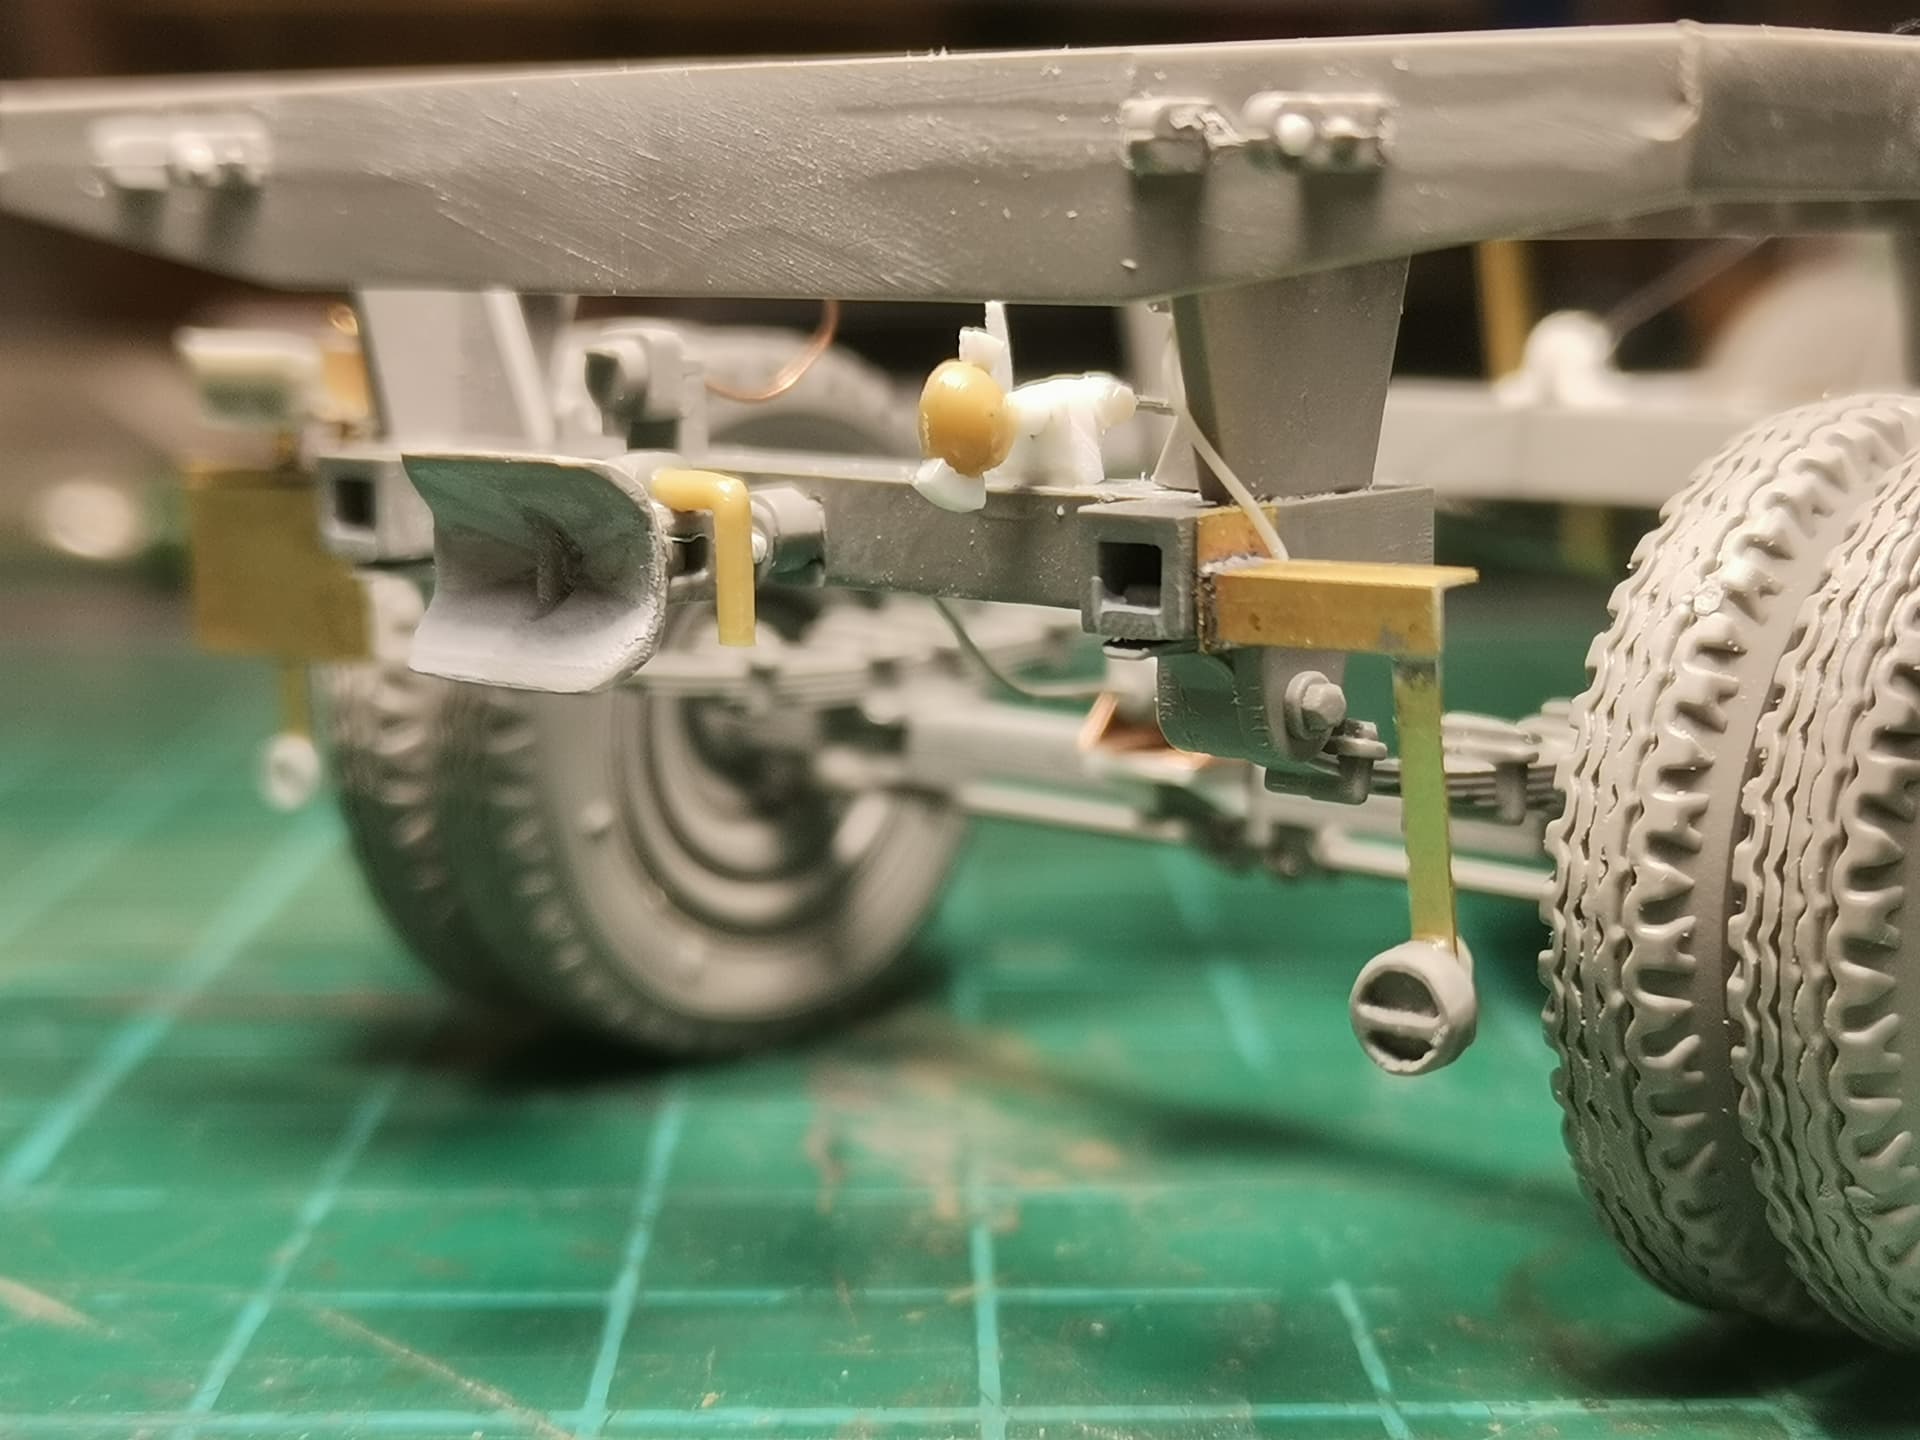
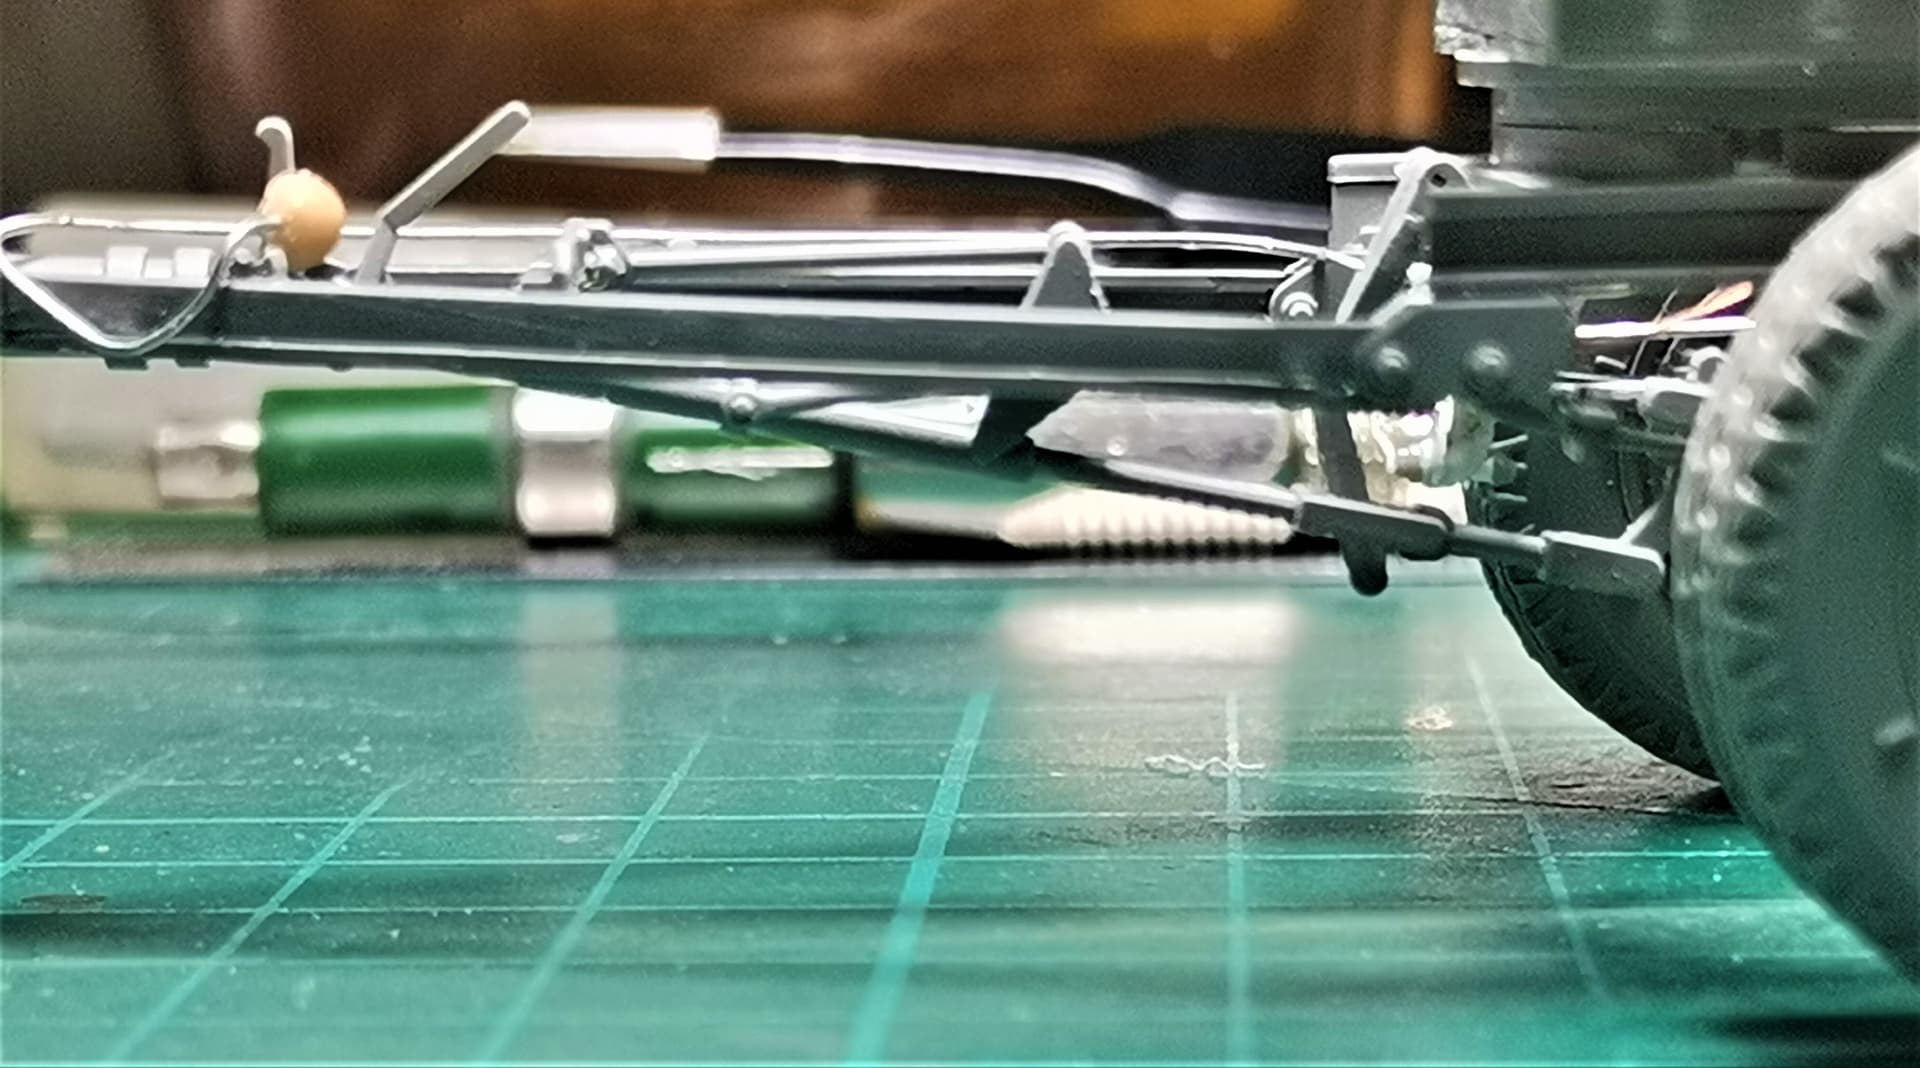
Decided to build the towbar as offered in the kit.
The one described in D 692/42 is very unappealing (lacking not only the overrun brake, but also the roll back lock).
Kit’s parts are a bit rude in shape, so I applied some scribing and sanding to make them look the part.Added the brake line with its connector for the towing vehicle too:
Blimey Angel … what can a person say … that is some really beautiful work. What makes it even better is the minute detail and size you have gone down to
Hmm! Angel, obviously your weekends have a positive effect on modeling. Another project in which you invest all your energy.
Congratulations!
Now about my project.
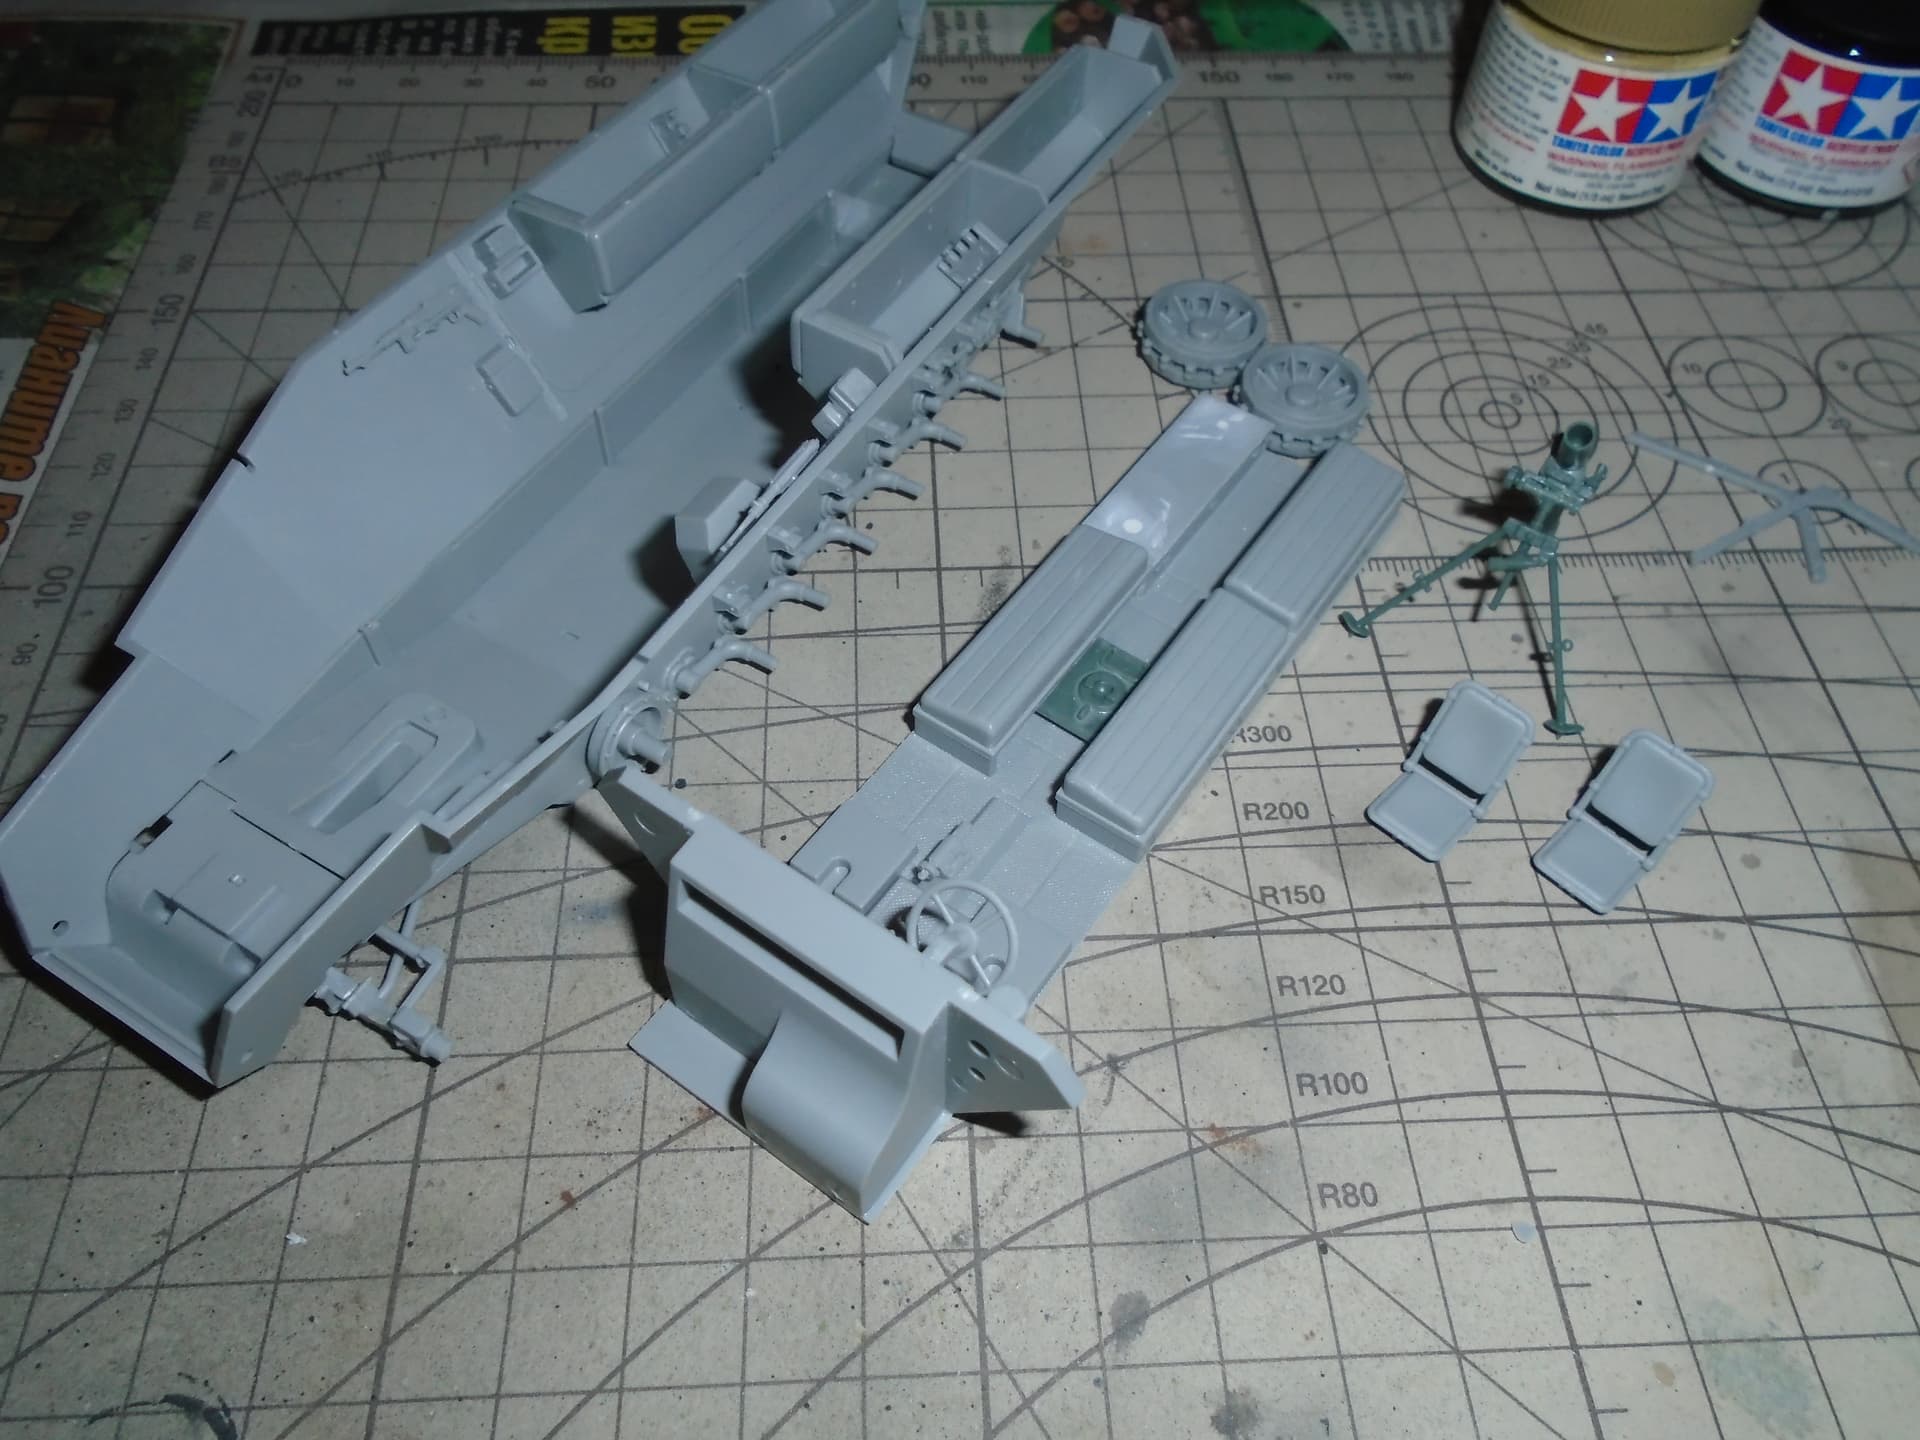
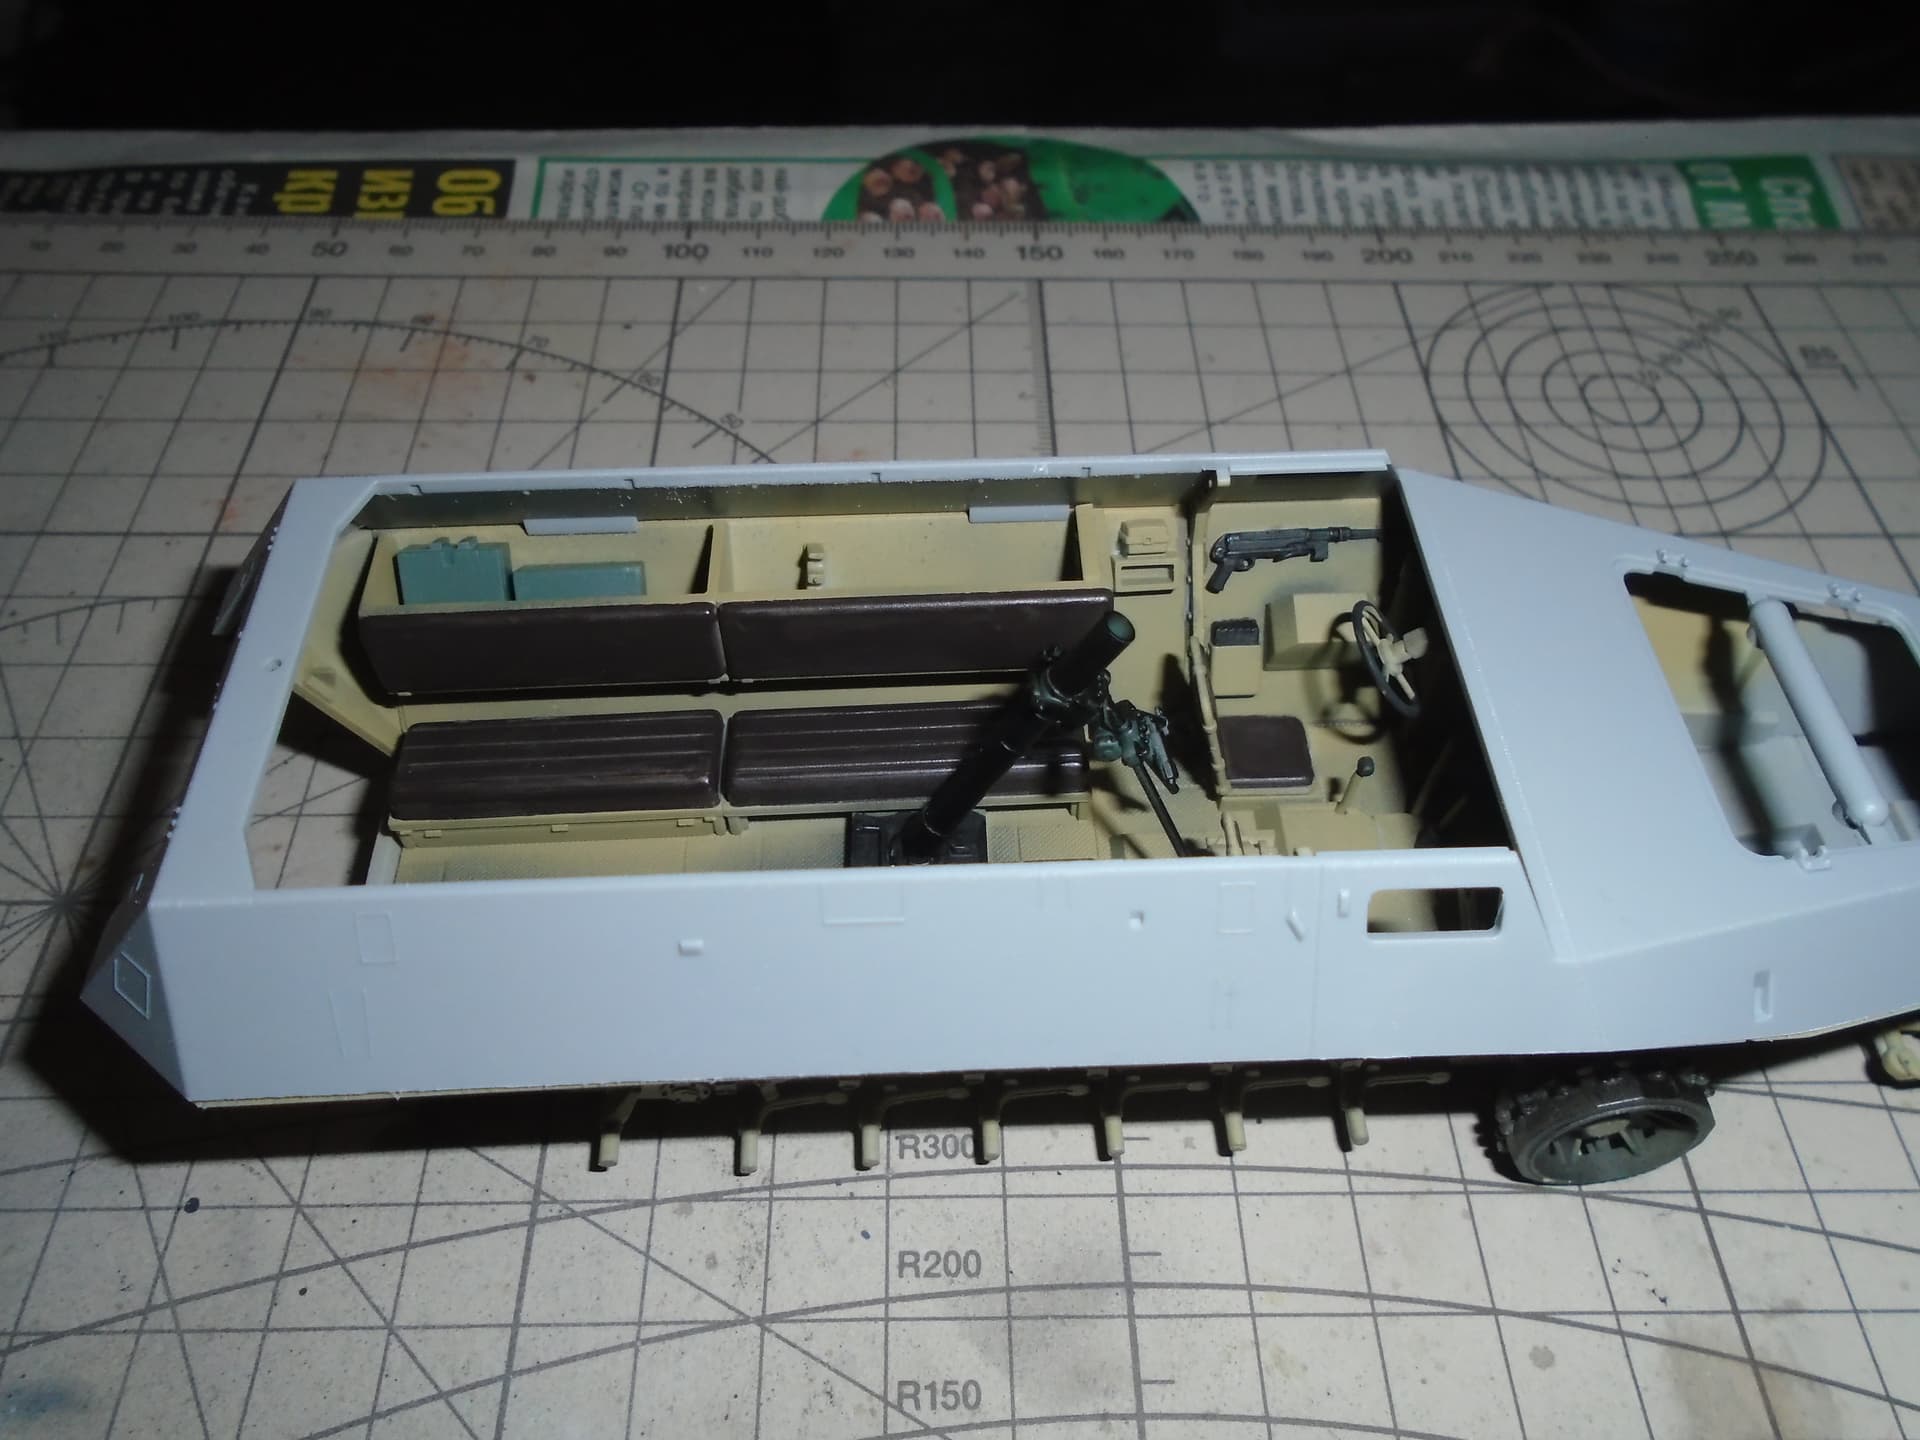
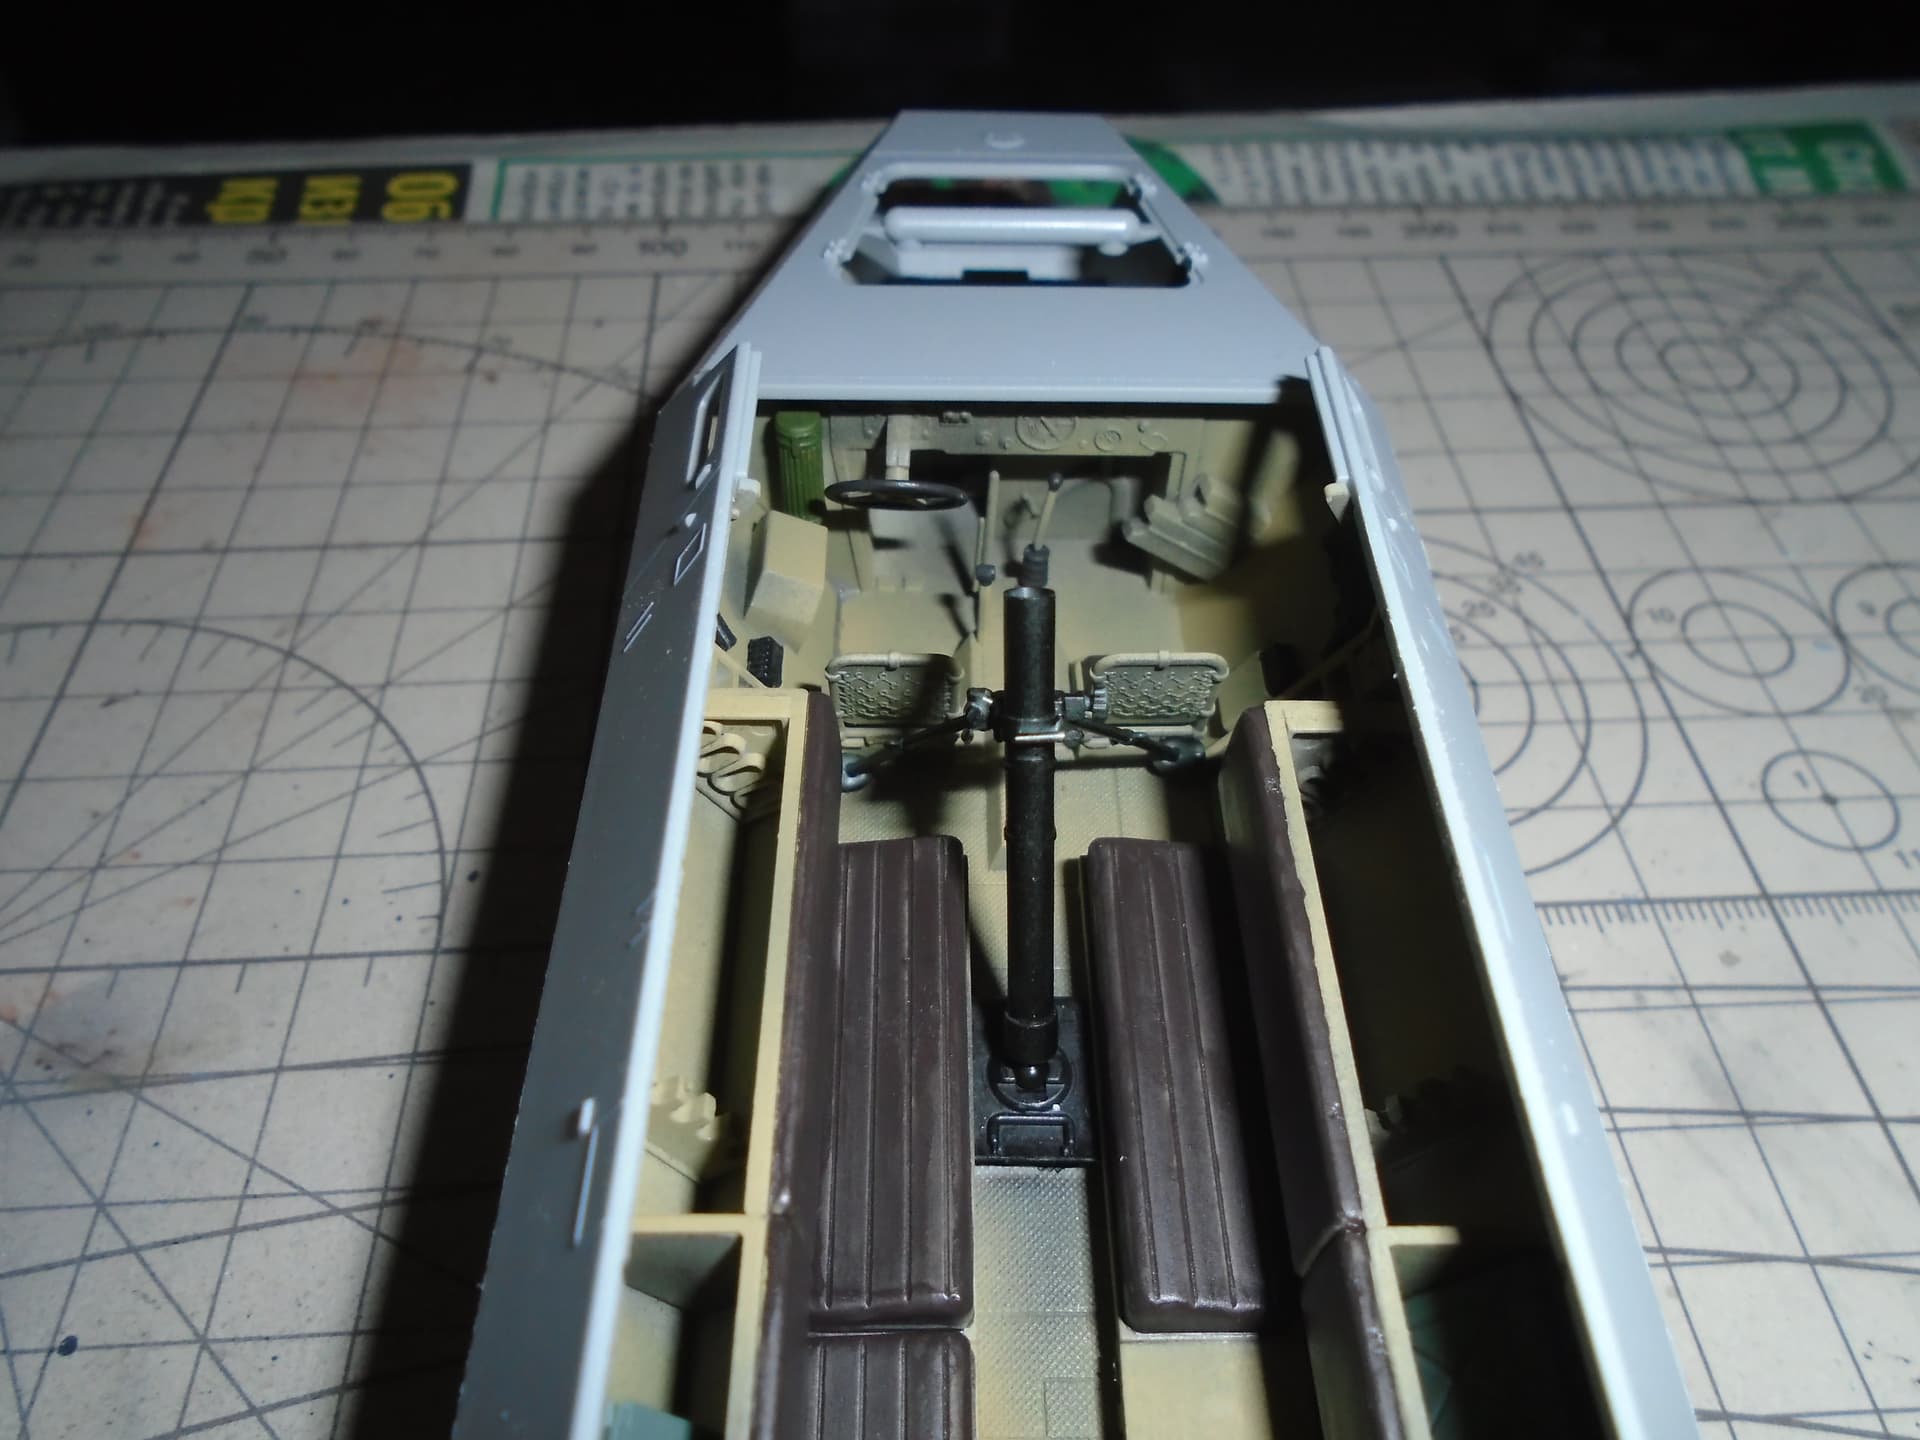
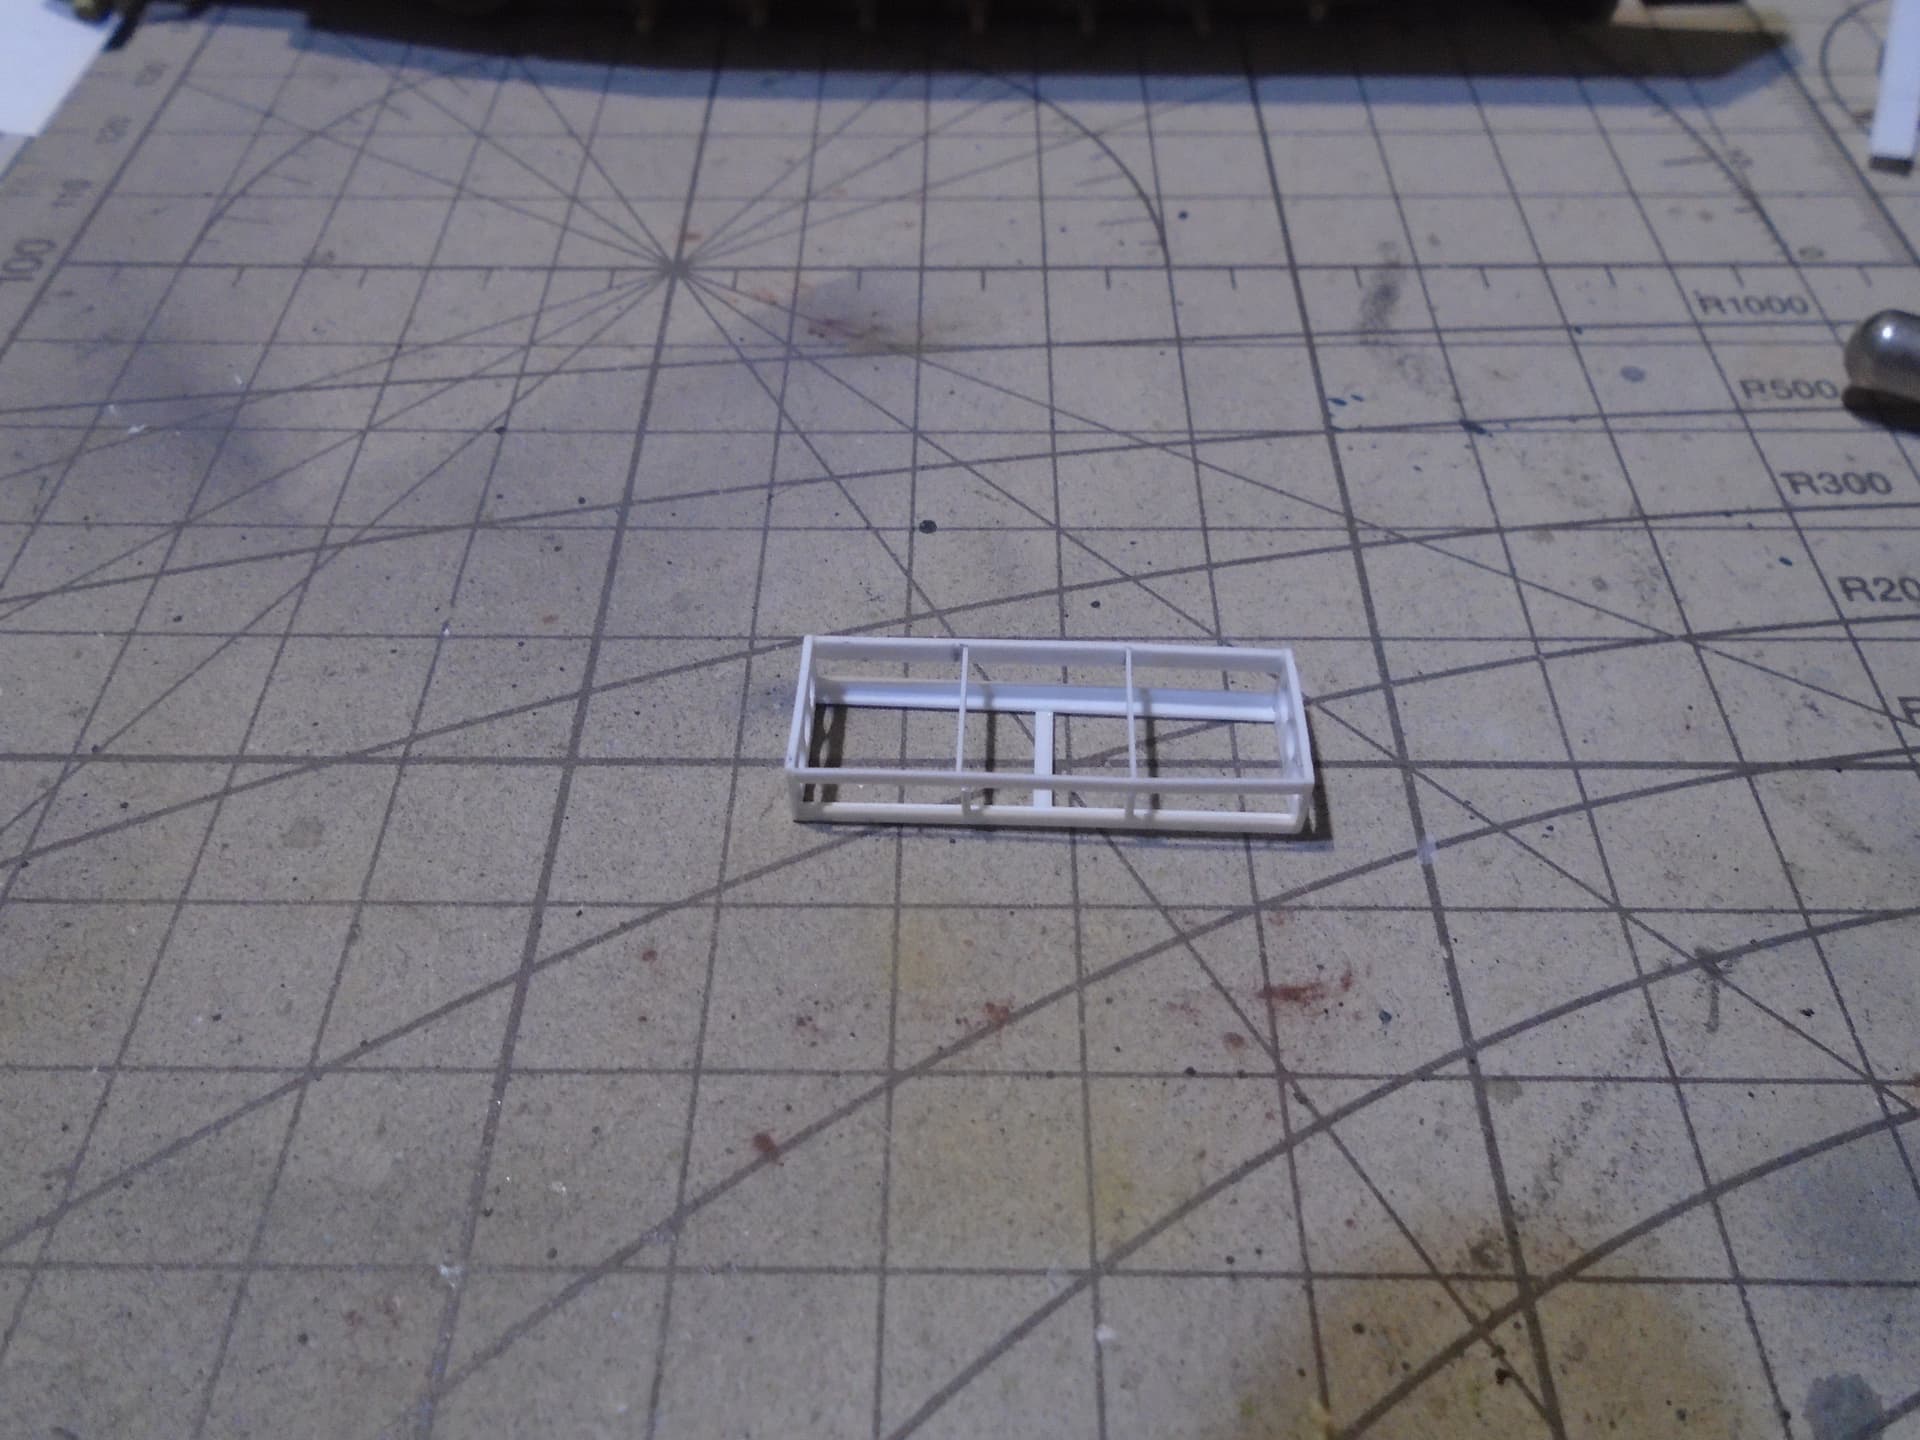
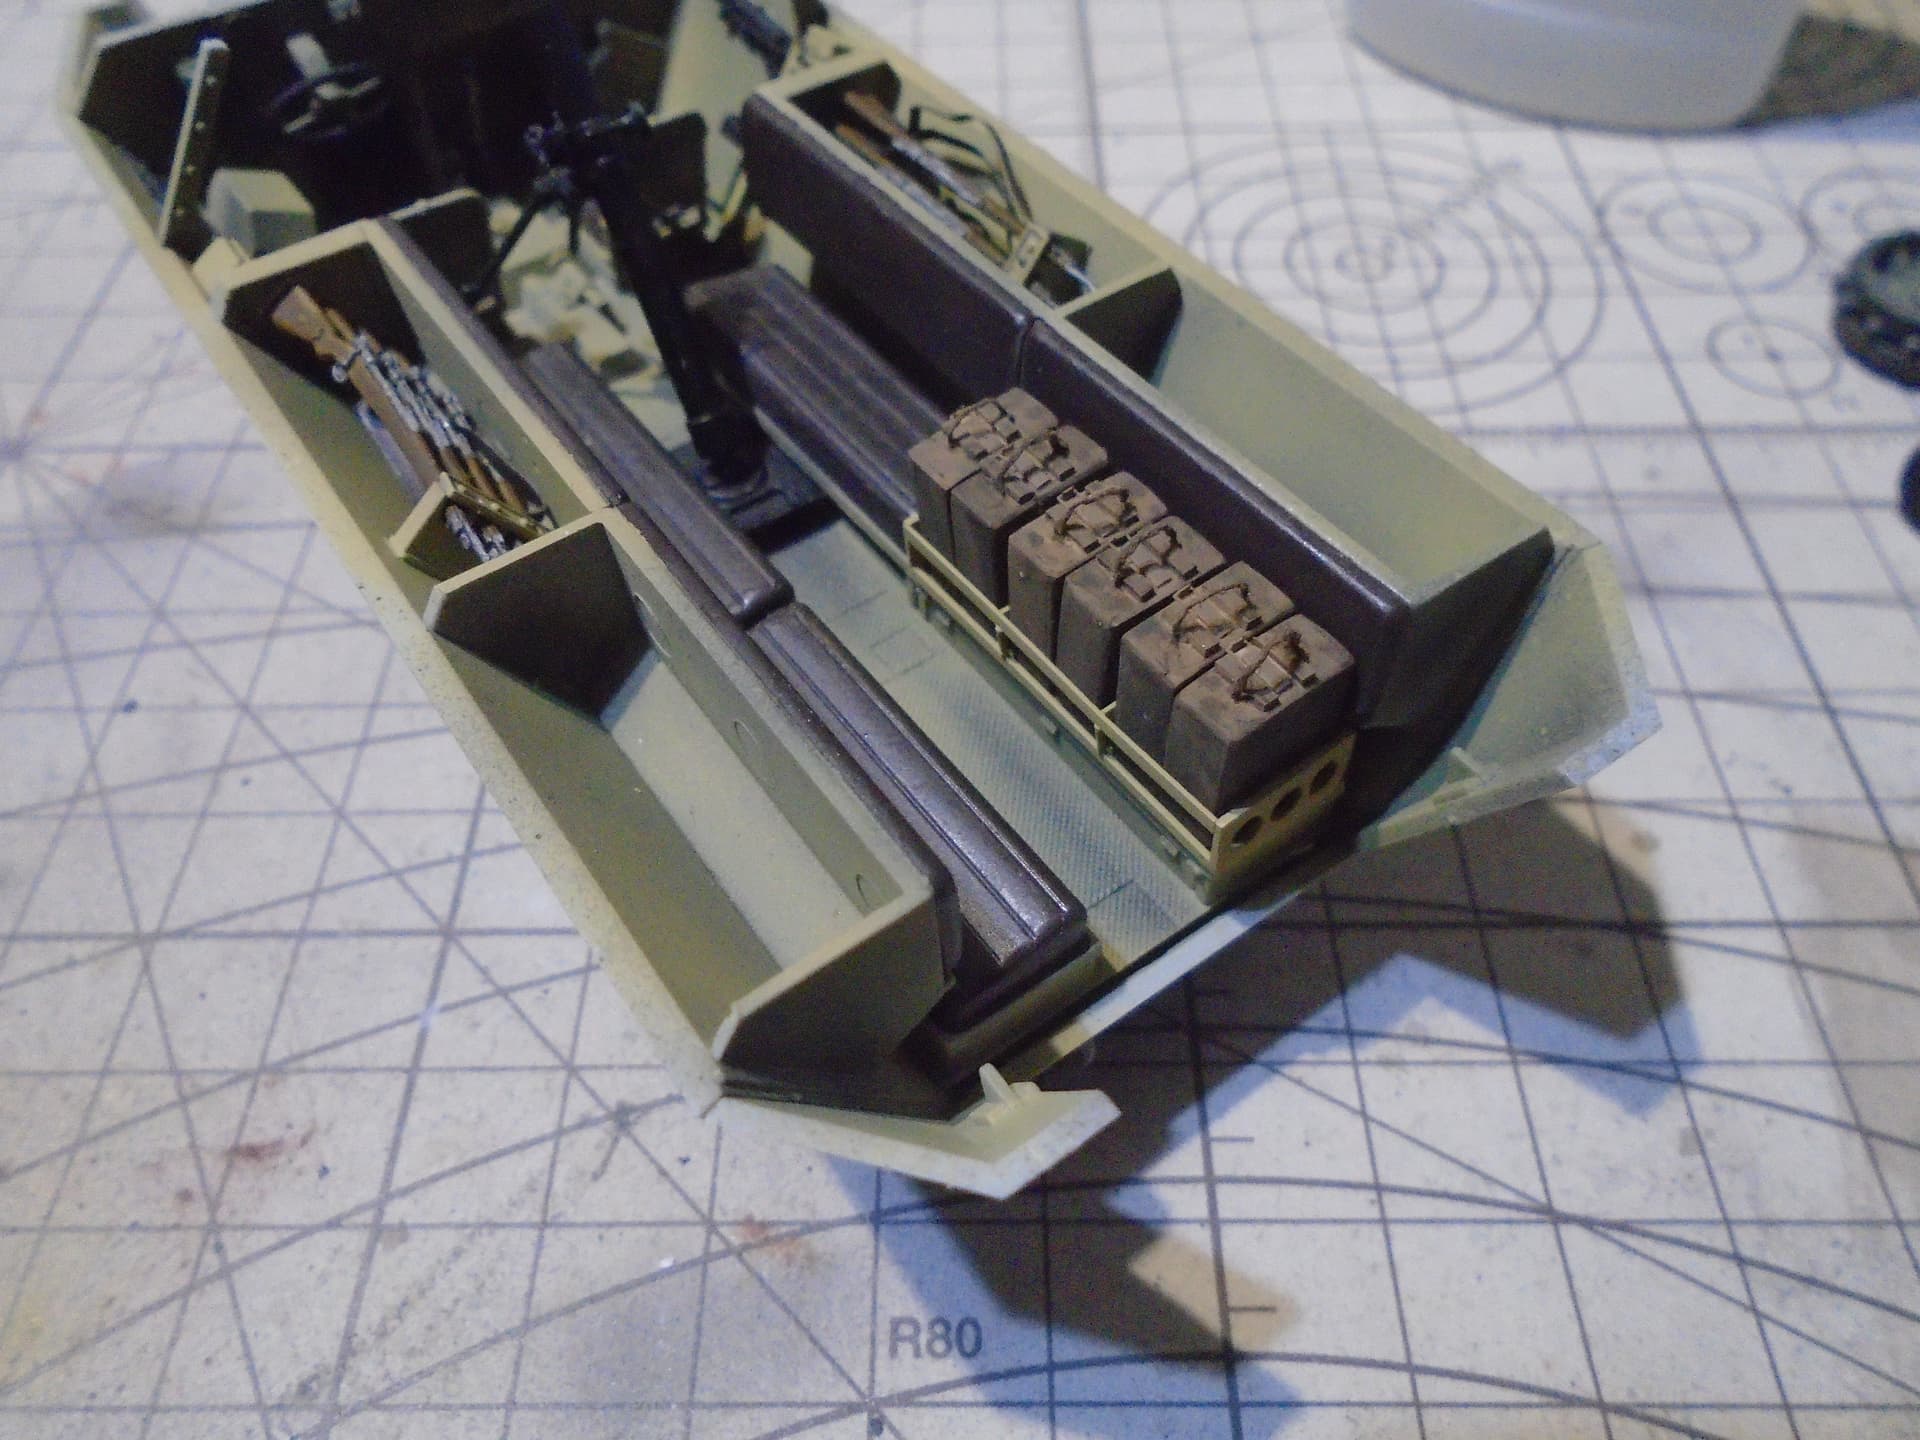
From the Cyber Hobby model I built the body of SPW Sd.Kfz.251 / 2, and from an old Tamiya model I assembled the mortar (8.1 cm Gr.W.34). Luckily for me, there are several boxes of ammunition in the model that I need to multiply.
Here are some photos.
It’s time to build the interior of Sd.Kfz.251 / 2. I also want to attach a trailer, but I’m having a hard time choosing.
This is from me for now.
I wish you a successful new yaer and be healthy.
Kind regards and Cheers!
Kalin
Hello!
John, Peter, thank you for the nice comments!
Slight progress in my work.
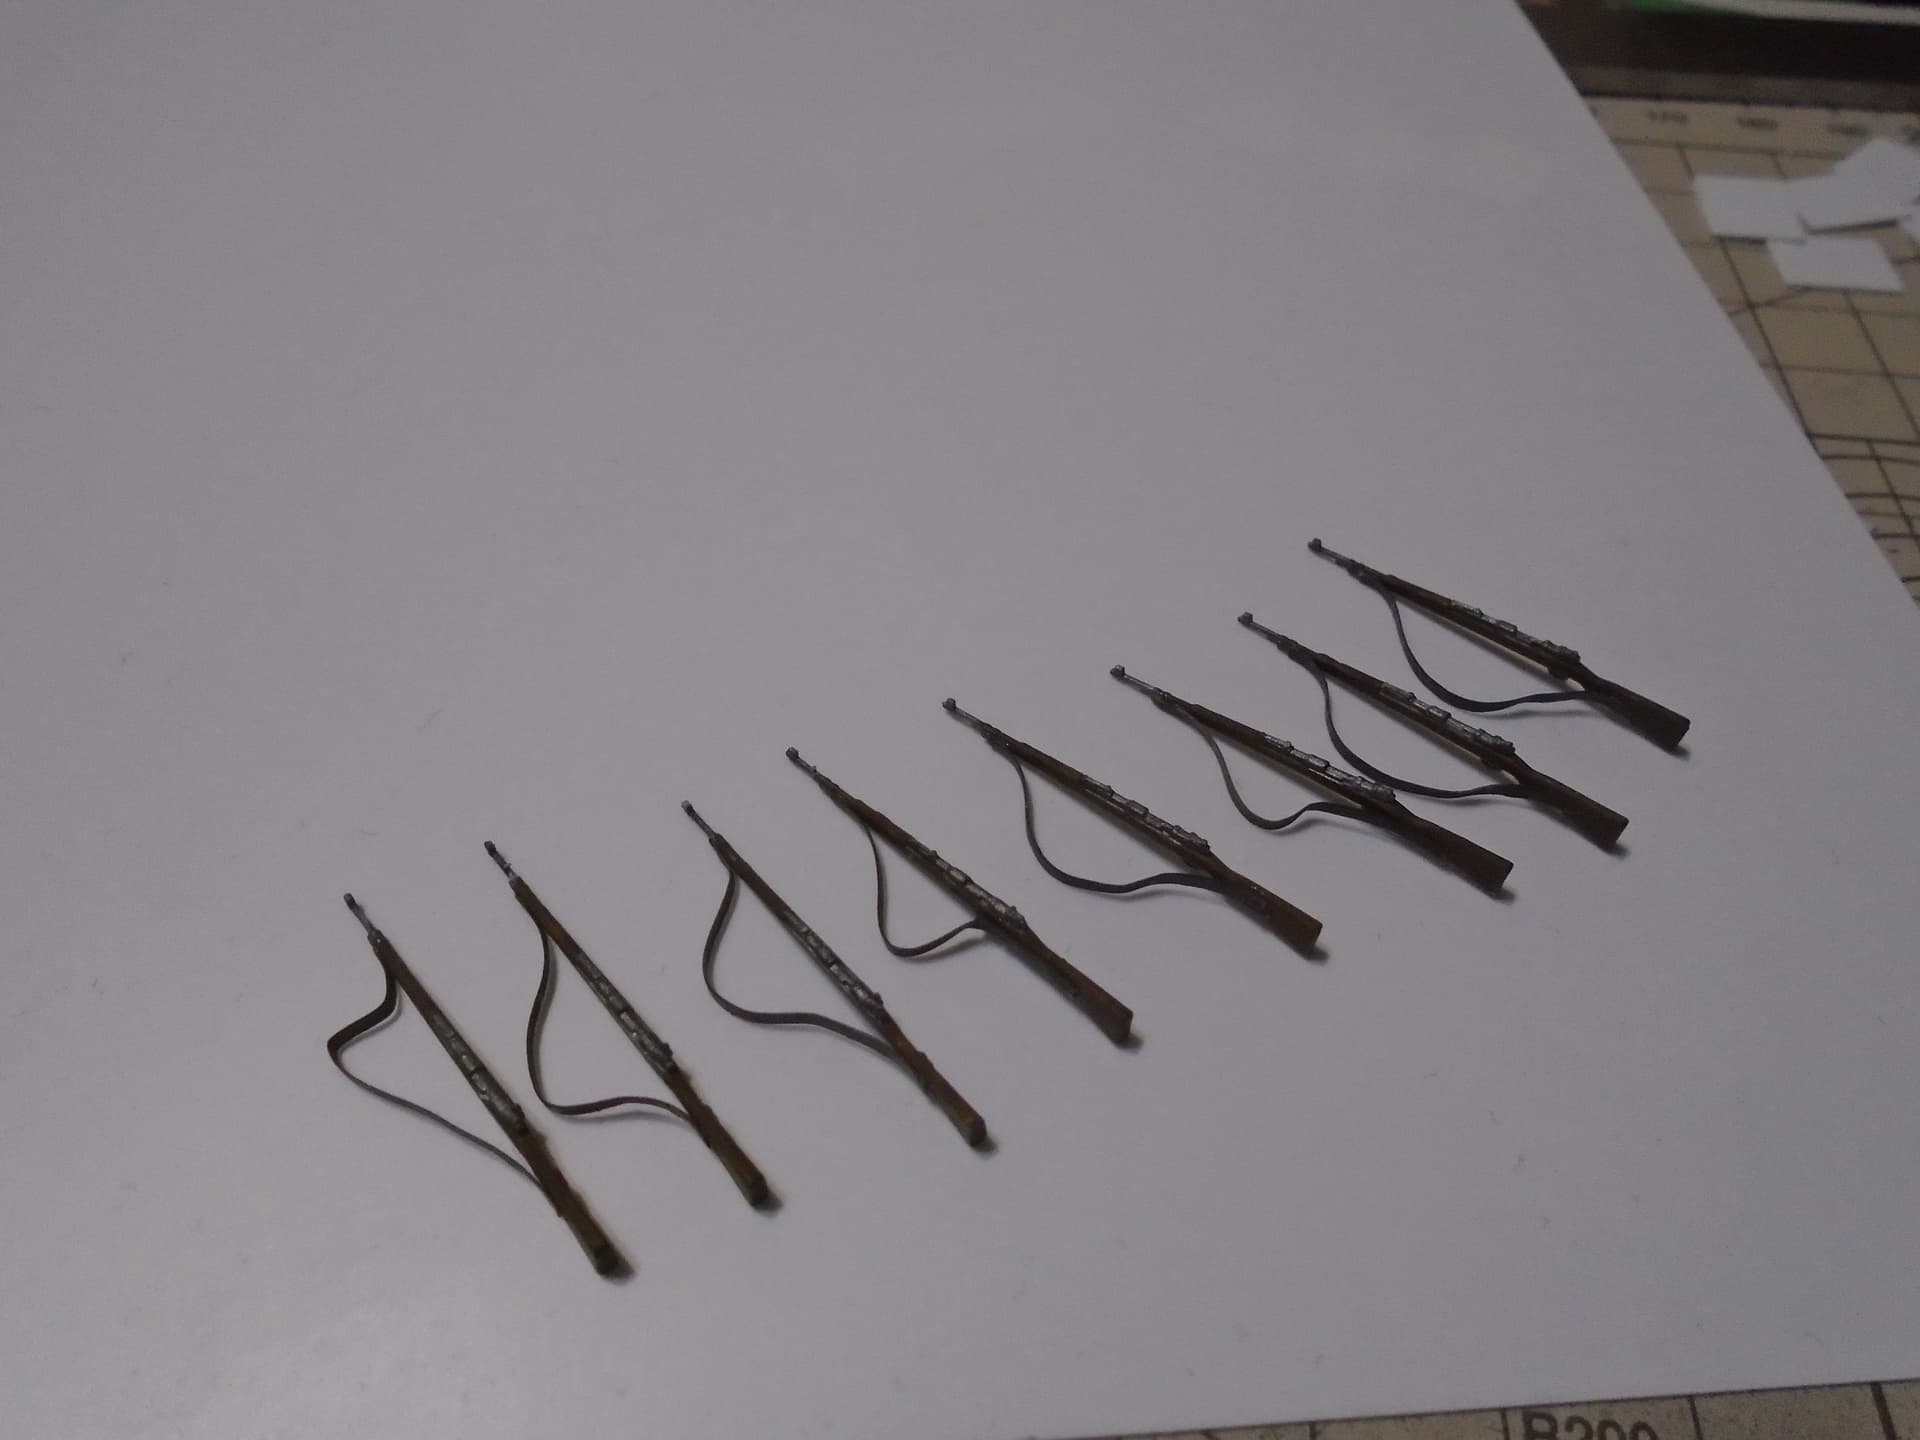
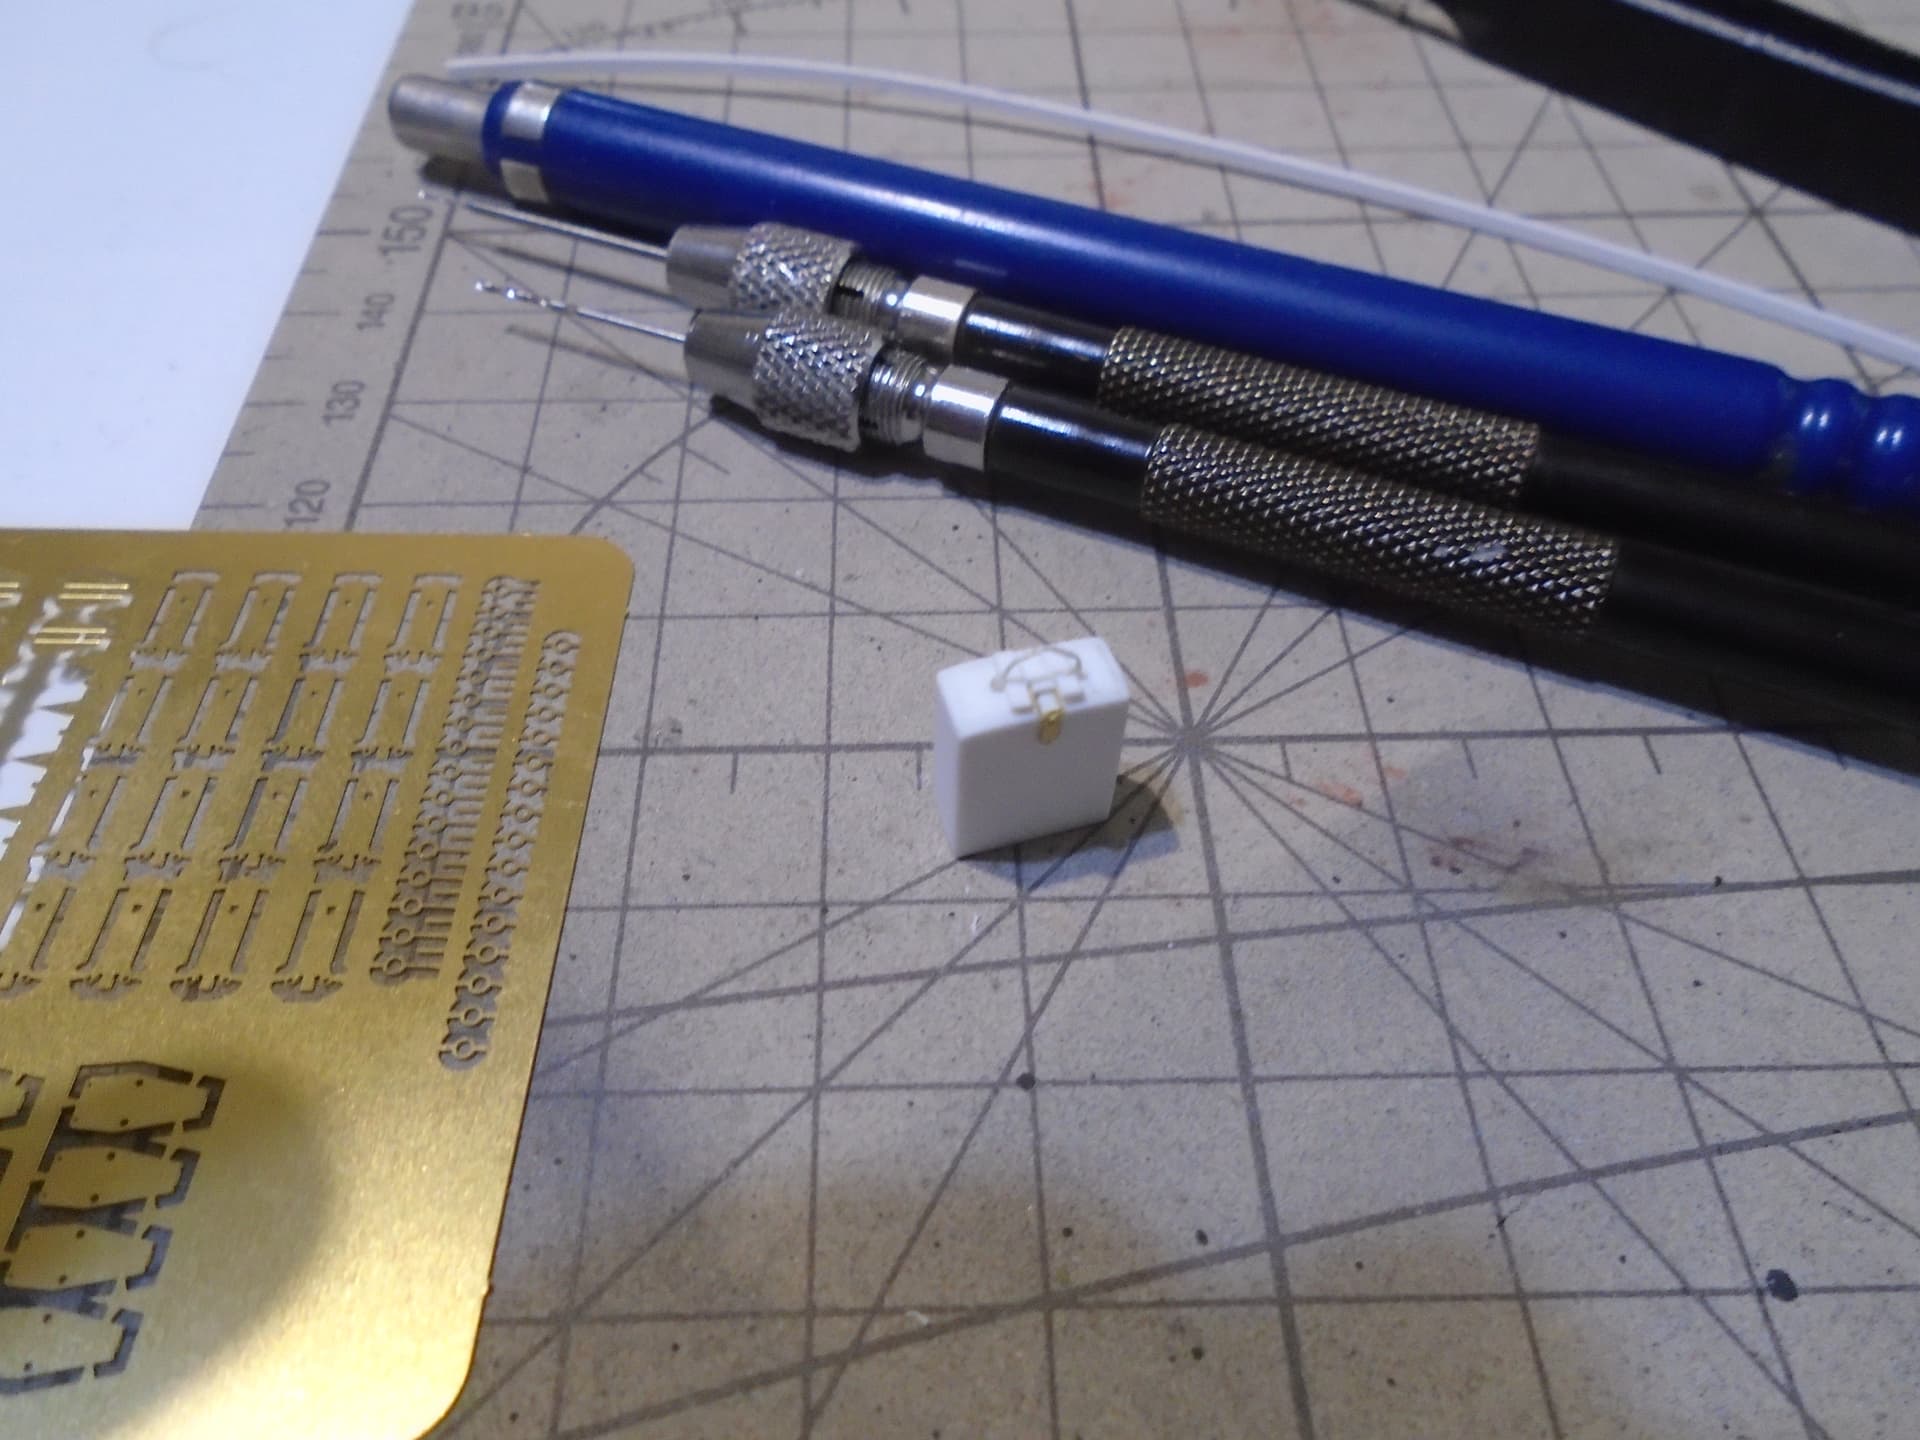
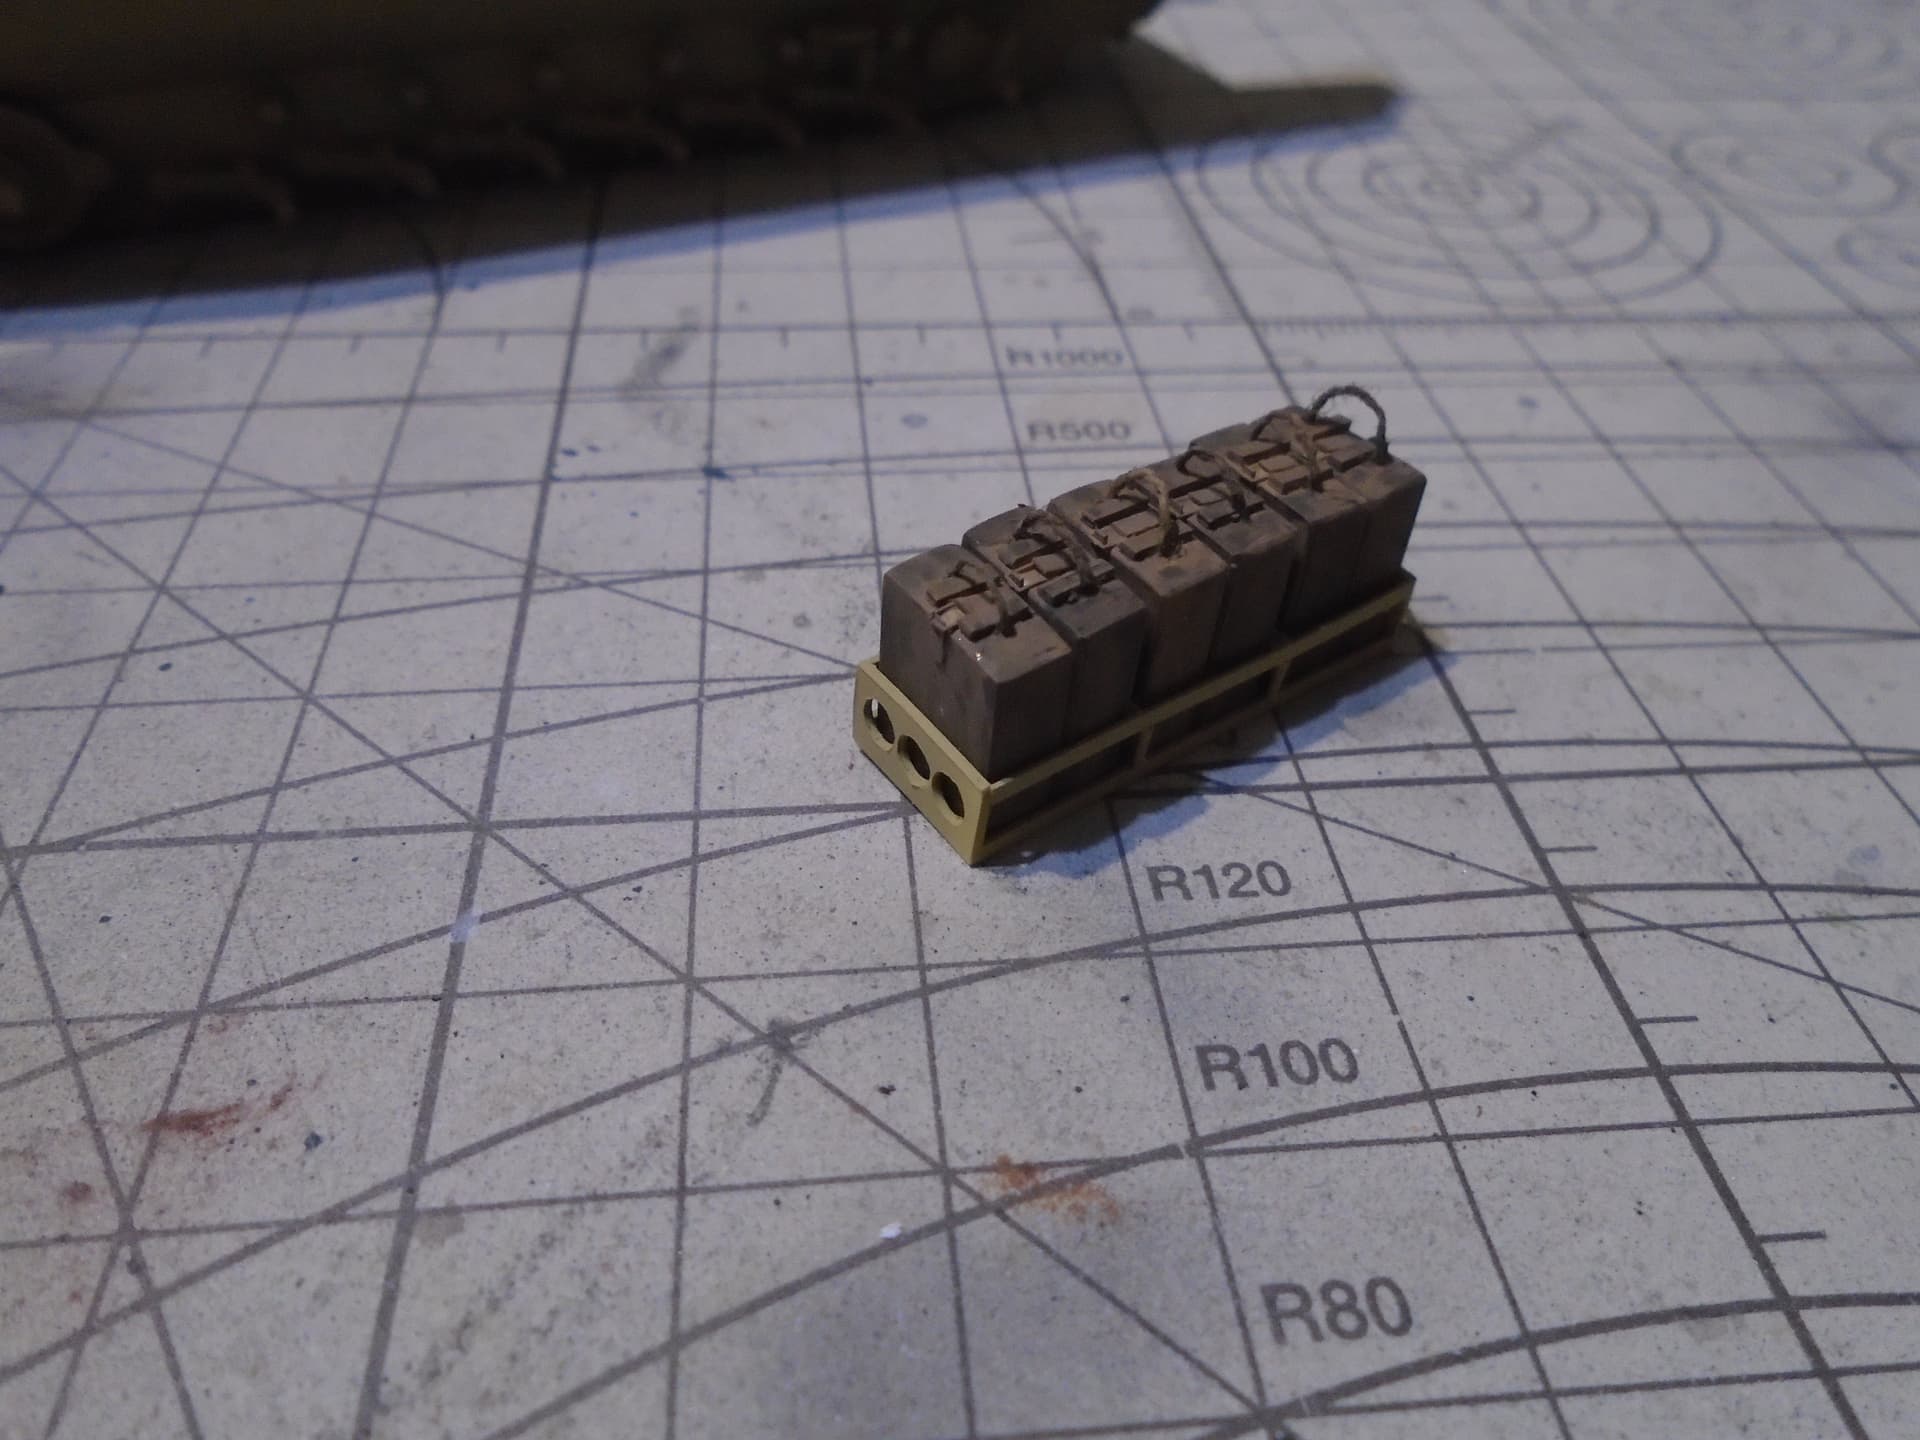
I managed to make carbine straps and multiply the ammunition boxes to the six I needed.
That’s a great bit of work Kalin. The ammo boxes although time consuming to make from scratch are really worth it as they add loads of extra detailing to the inside area. And the slings on the rifles are very neat … Lovely
Awesome job, Kalin!
The rack, the mine crates, the 98k slings are splendid tiny details that give life to the interior- well done!
And a special tip-of-the-hat for the wooden look of the mine crates!
I know who I should contact when needing wood weathering advice


 ) … you have built a standard kit but elevated it into something unique and brilliant. The detailing jumps out straight away and this another beautiful build to add to the already many you have delighted us all with