Thanks for those pictures, Luc!
They remind us once again how annoyingly brilliant Robert Jan was!
Cheers,
Angel
Thanks for those pictures, Luc!
They remind us once again how annoyingly brilliant Robert Jan was!
Cheers,
Angel
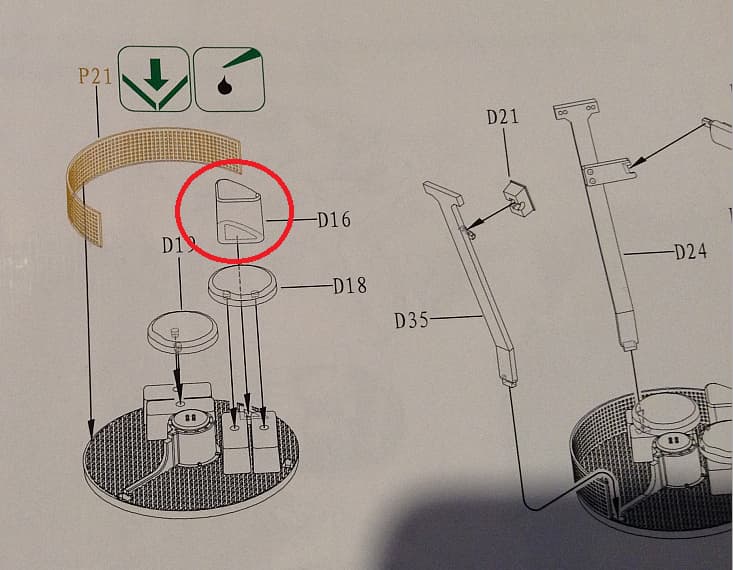
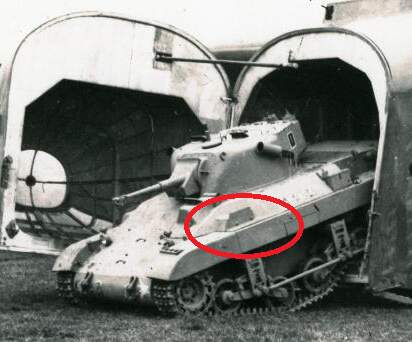
I remember now, why this kit went into storage. I had intended to paint and detail the interior to add to what Bronco gives you, but I discovered the turret basket and interior components are completely out of scale. The instructions:
The circled part is supposed to be the 14 round ammo box for the 37mm gun. The longest of those rounds are almost 15 inches long, which when converted is about 10mm in 1/35th scale. Bronco’s part is 5 mm high. As to width and depth of the triangular part - you would not even get 5 rounds in the box provided. Basically, it is less than half the size it should be. This then indicates the basket floor is around 2/3rds of the size it should be, which is right when you then look at other things. The gap between the basket floor and the mesh basket for the side of the hull is too wide in the kit, plus there is no way, with the seats mounded on the storage boxes, a person could fit with their feet inside the basket floor and the perimeter mesh. The seats should be mounted a little higher on the basket supports as the back rest would be at the back of the head where Bronco has the seats. Then these three supports are made to be equally spaced around the turret ring. Again wrong… the two at the rear are closer together.
I expect they used this official picture as a basis to guess the layout… but made no effort to determine sizes.
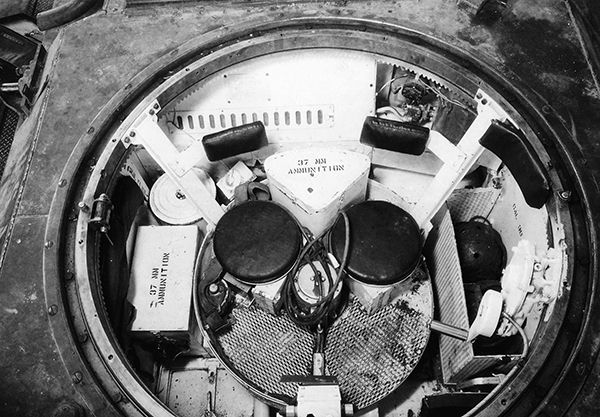
Furthermore, in the pic you can see a rectangular Ammo box. Again Bronco give you one woefully undersized for 24 rounds and is also just 5 mm high! This is the same for the cylindrical air filter which is too short. The grenade boxes on the wall are placed well low of the actual place close to the sponson. Then there is no radio for the turret rear bustle…the list goes on and on, but you get my drift.
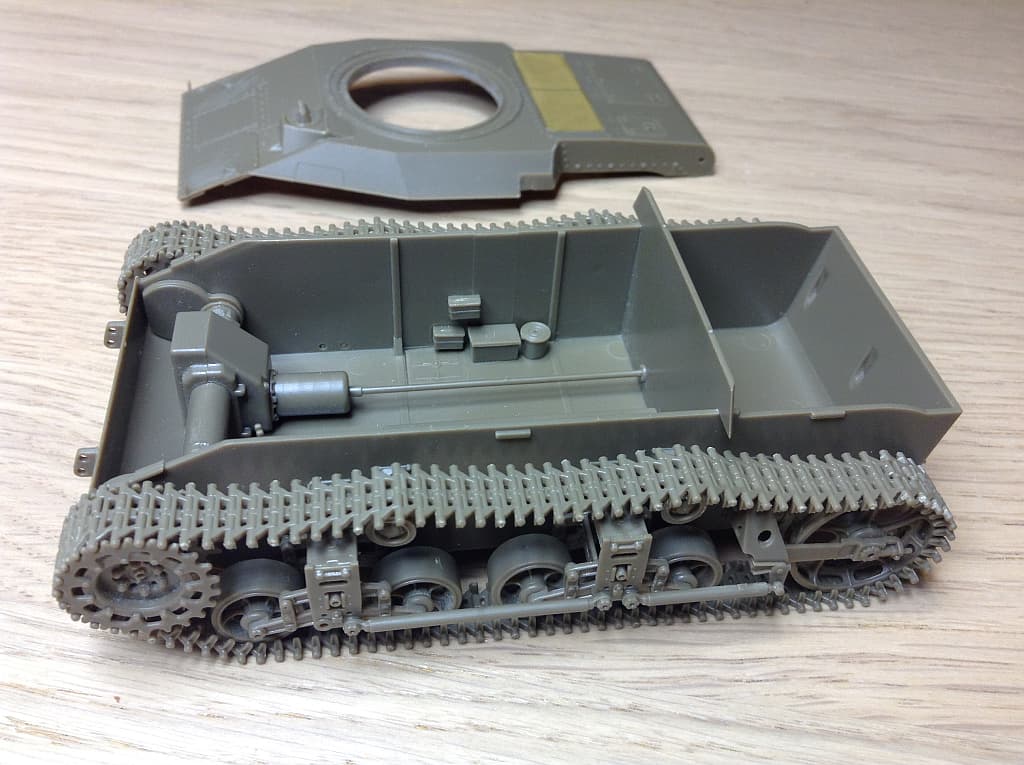
So, given there is so much work, and in the end it will barely be seen, I decided to button it up instead. Last night I added the tracks. I don’t normally fit the tracks before painting, but the axle pins Bronco give you are very fine and I can see they will break easily, so I gave myself a future painting challenge and glued it all together for strength. You can see the undersize ammo bin in this pic…
Great! I’m not a fan of this type of track painting, because you always see unpainted places.
I expect the development of the model.
Cheers!
Kalin
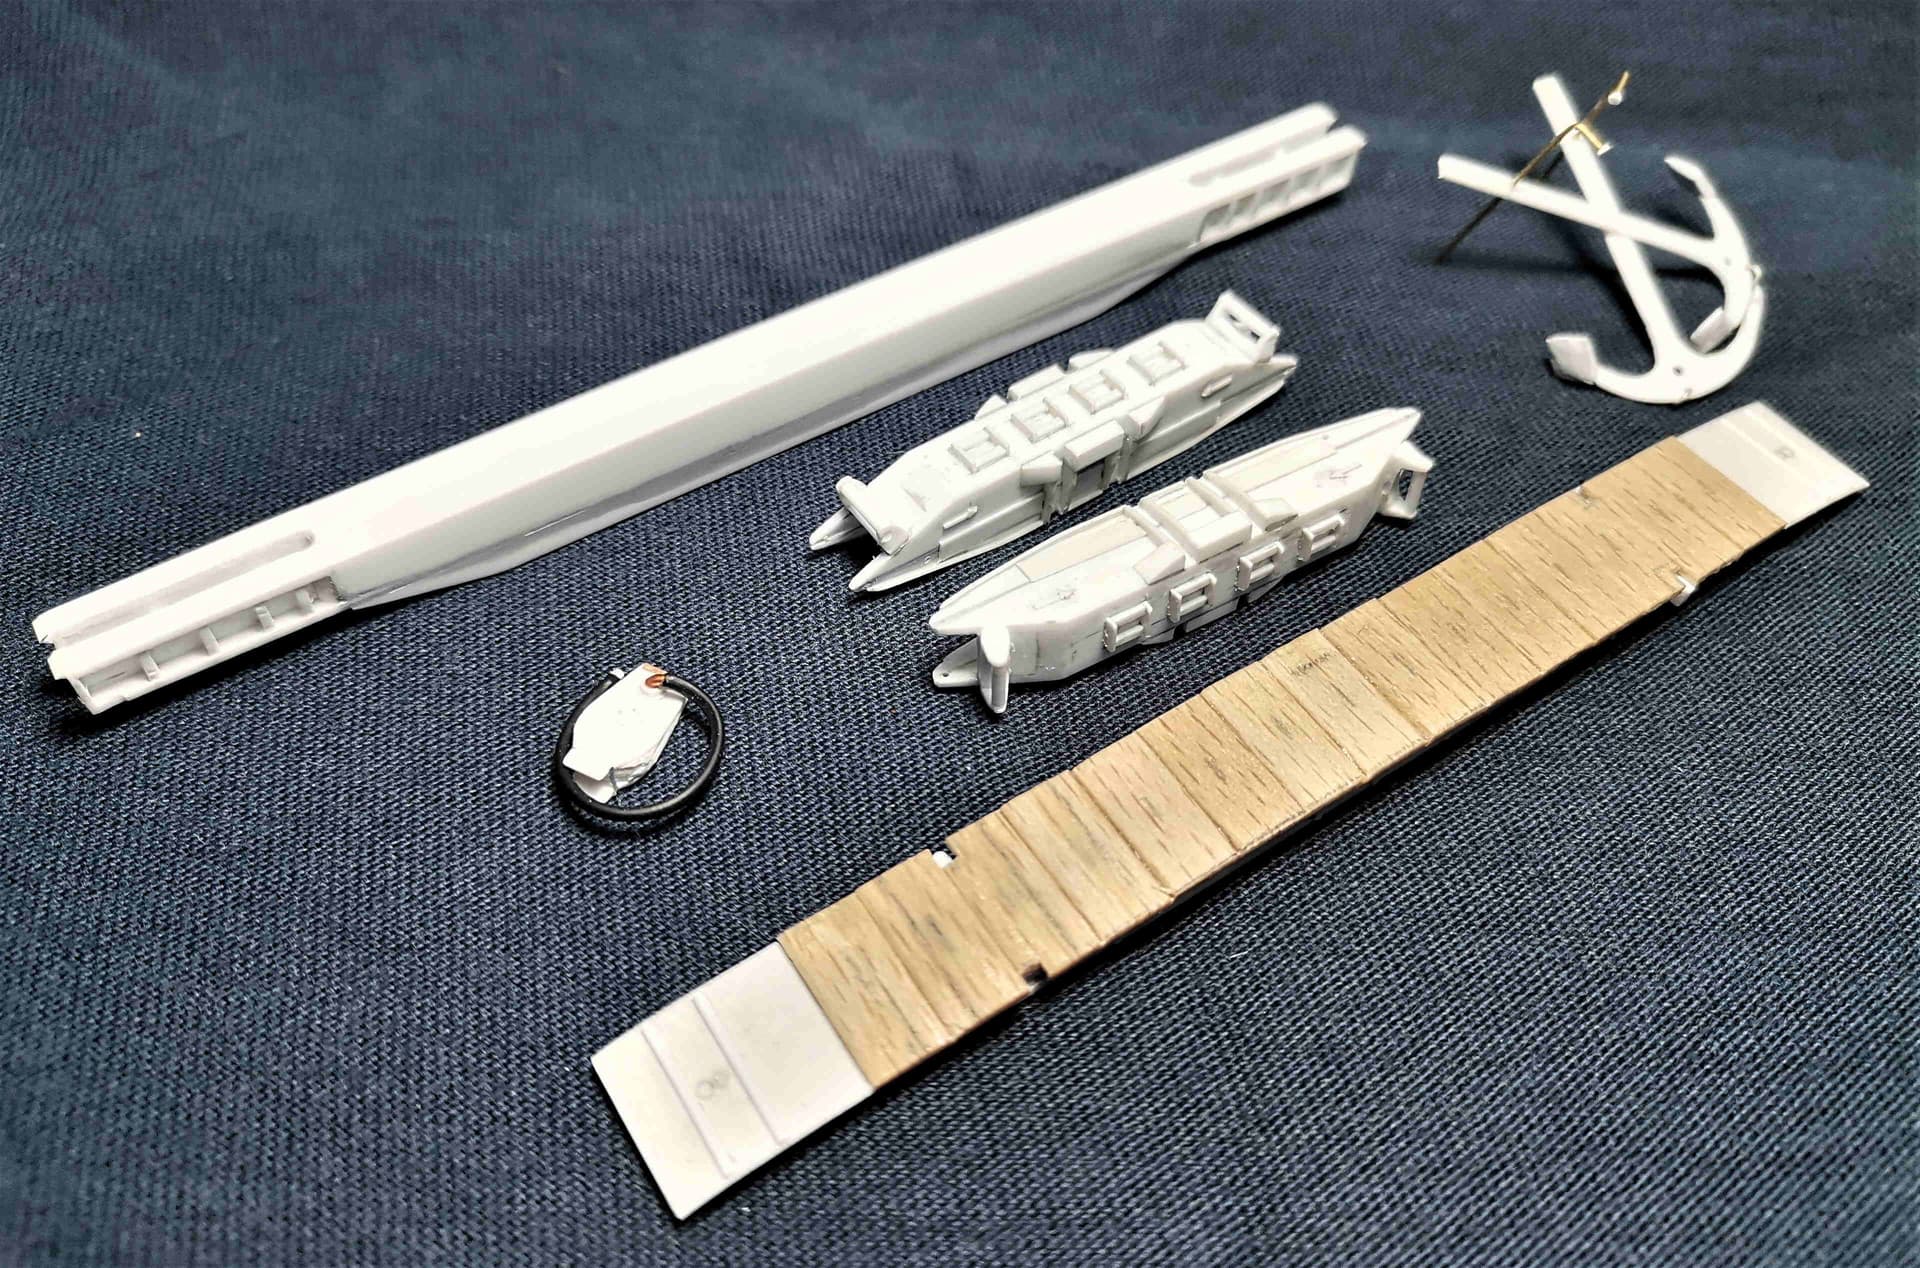
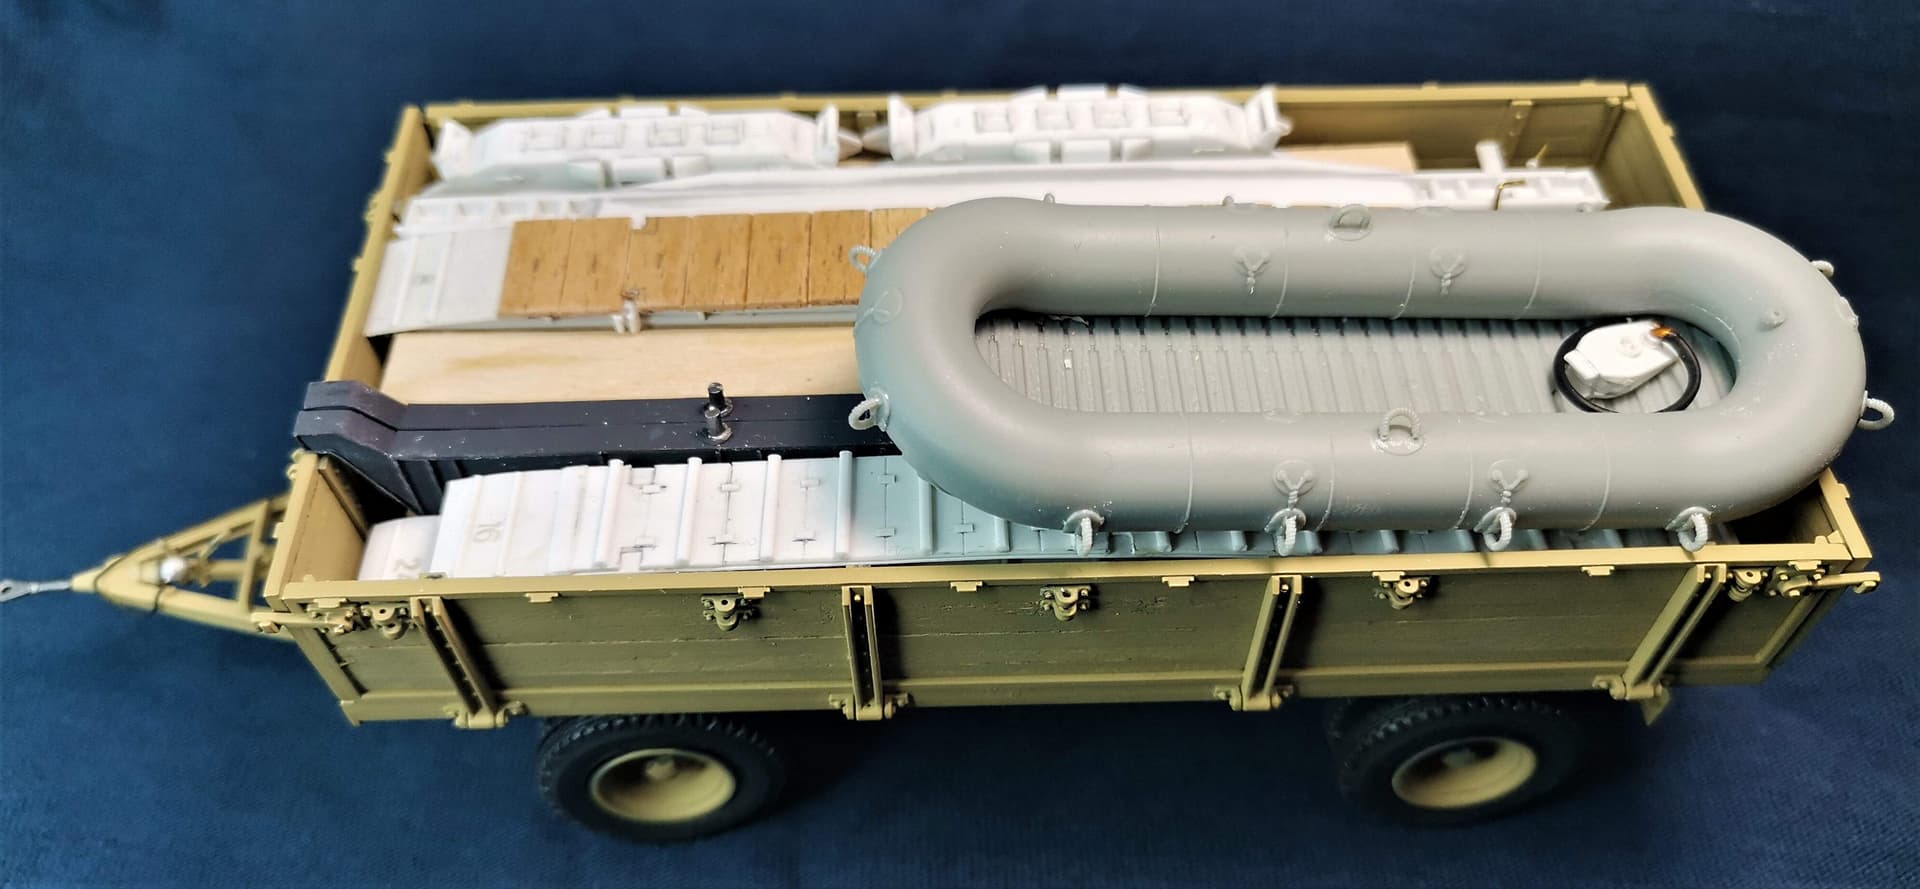
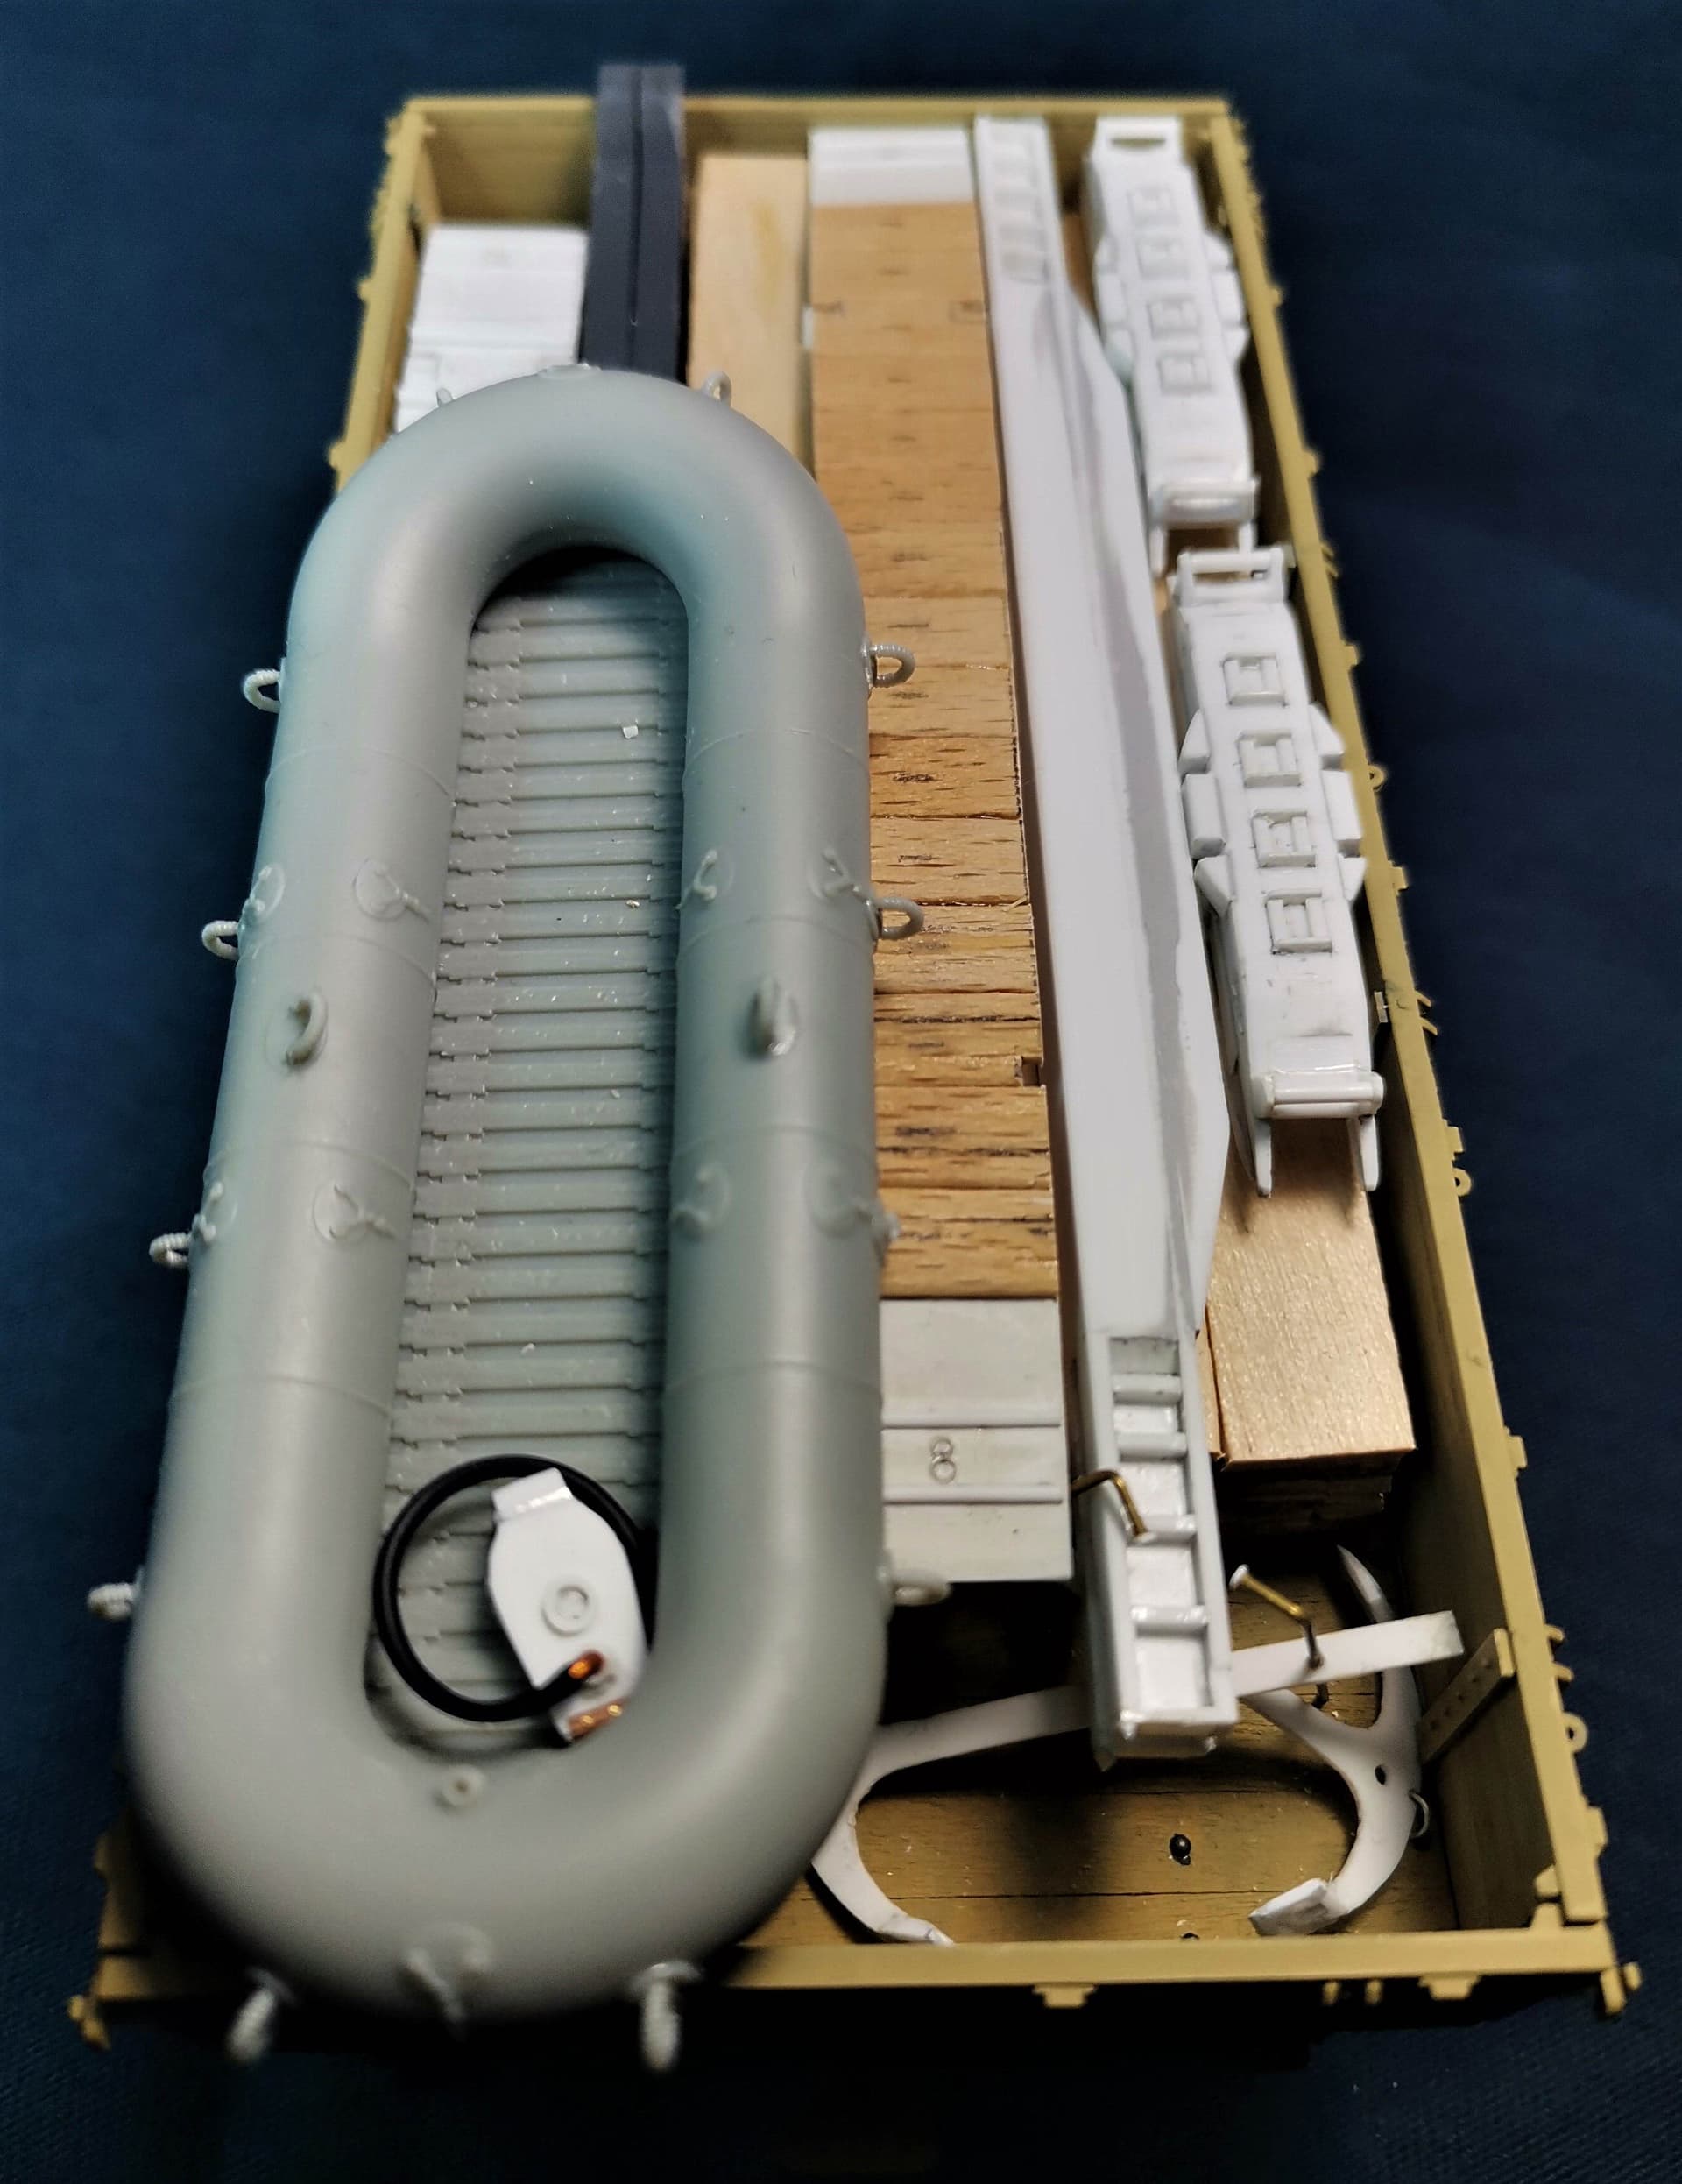
Time for update on my Einheitsanhänger 5t. build!
I scratchbuilt some bits for the load like:
I’ve built Bronco’s Small Rubber Raft(kl. Floßsack 34).
I still need to finish all 3 transition ramps- they need some handles(4 per piece) and some buckles(6 per piece).
And build 2 halfbeams or Rüstungsträger.In the pictures that follow I use some “borrowed” from my Pf.11 Pontonwagen model.
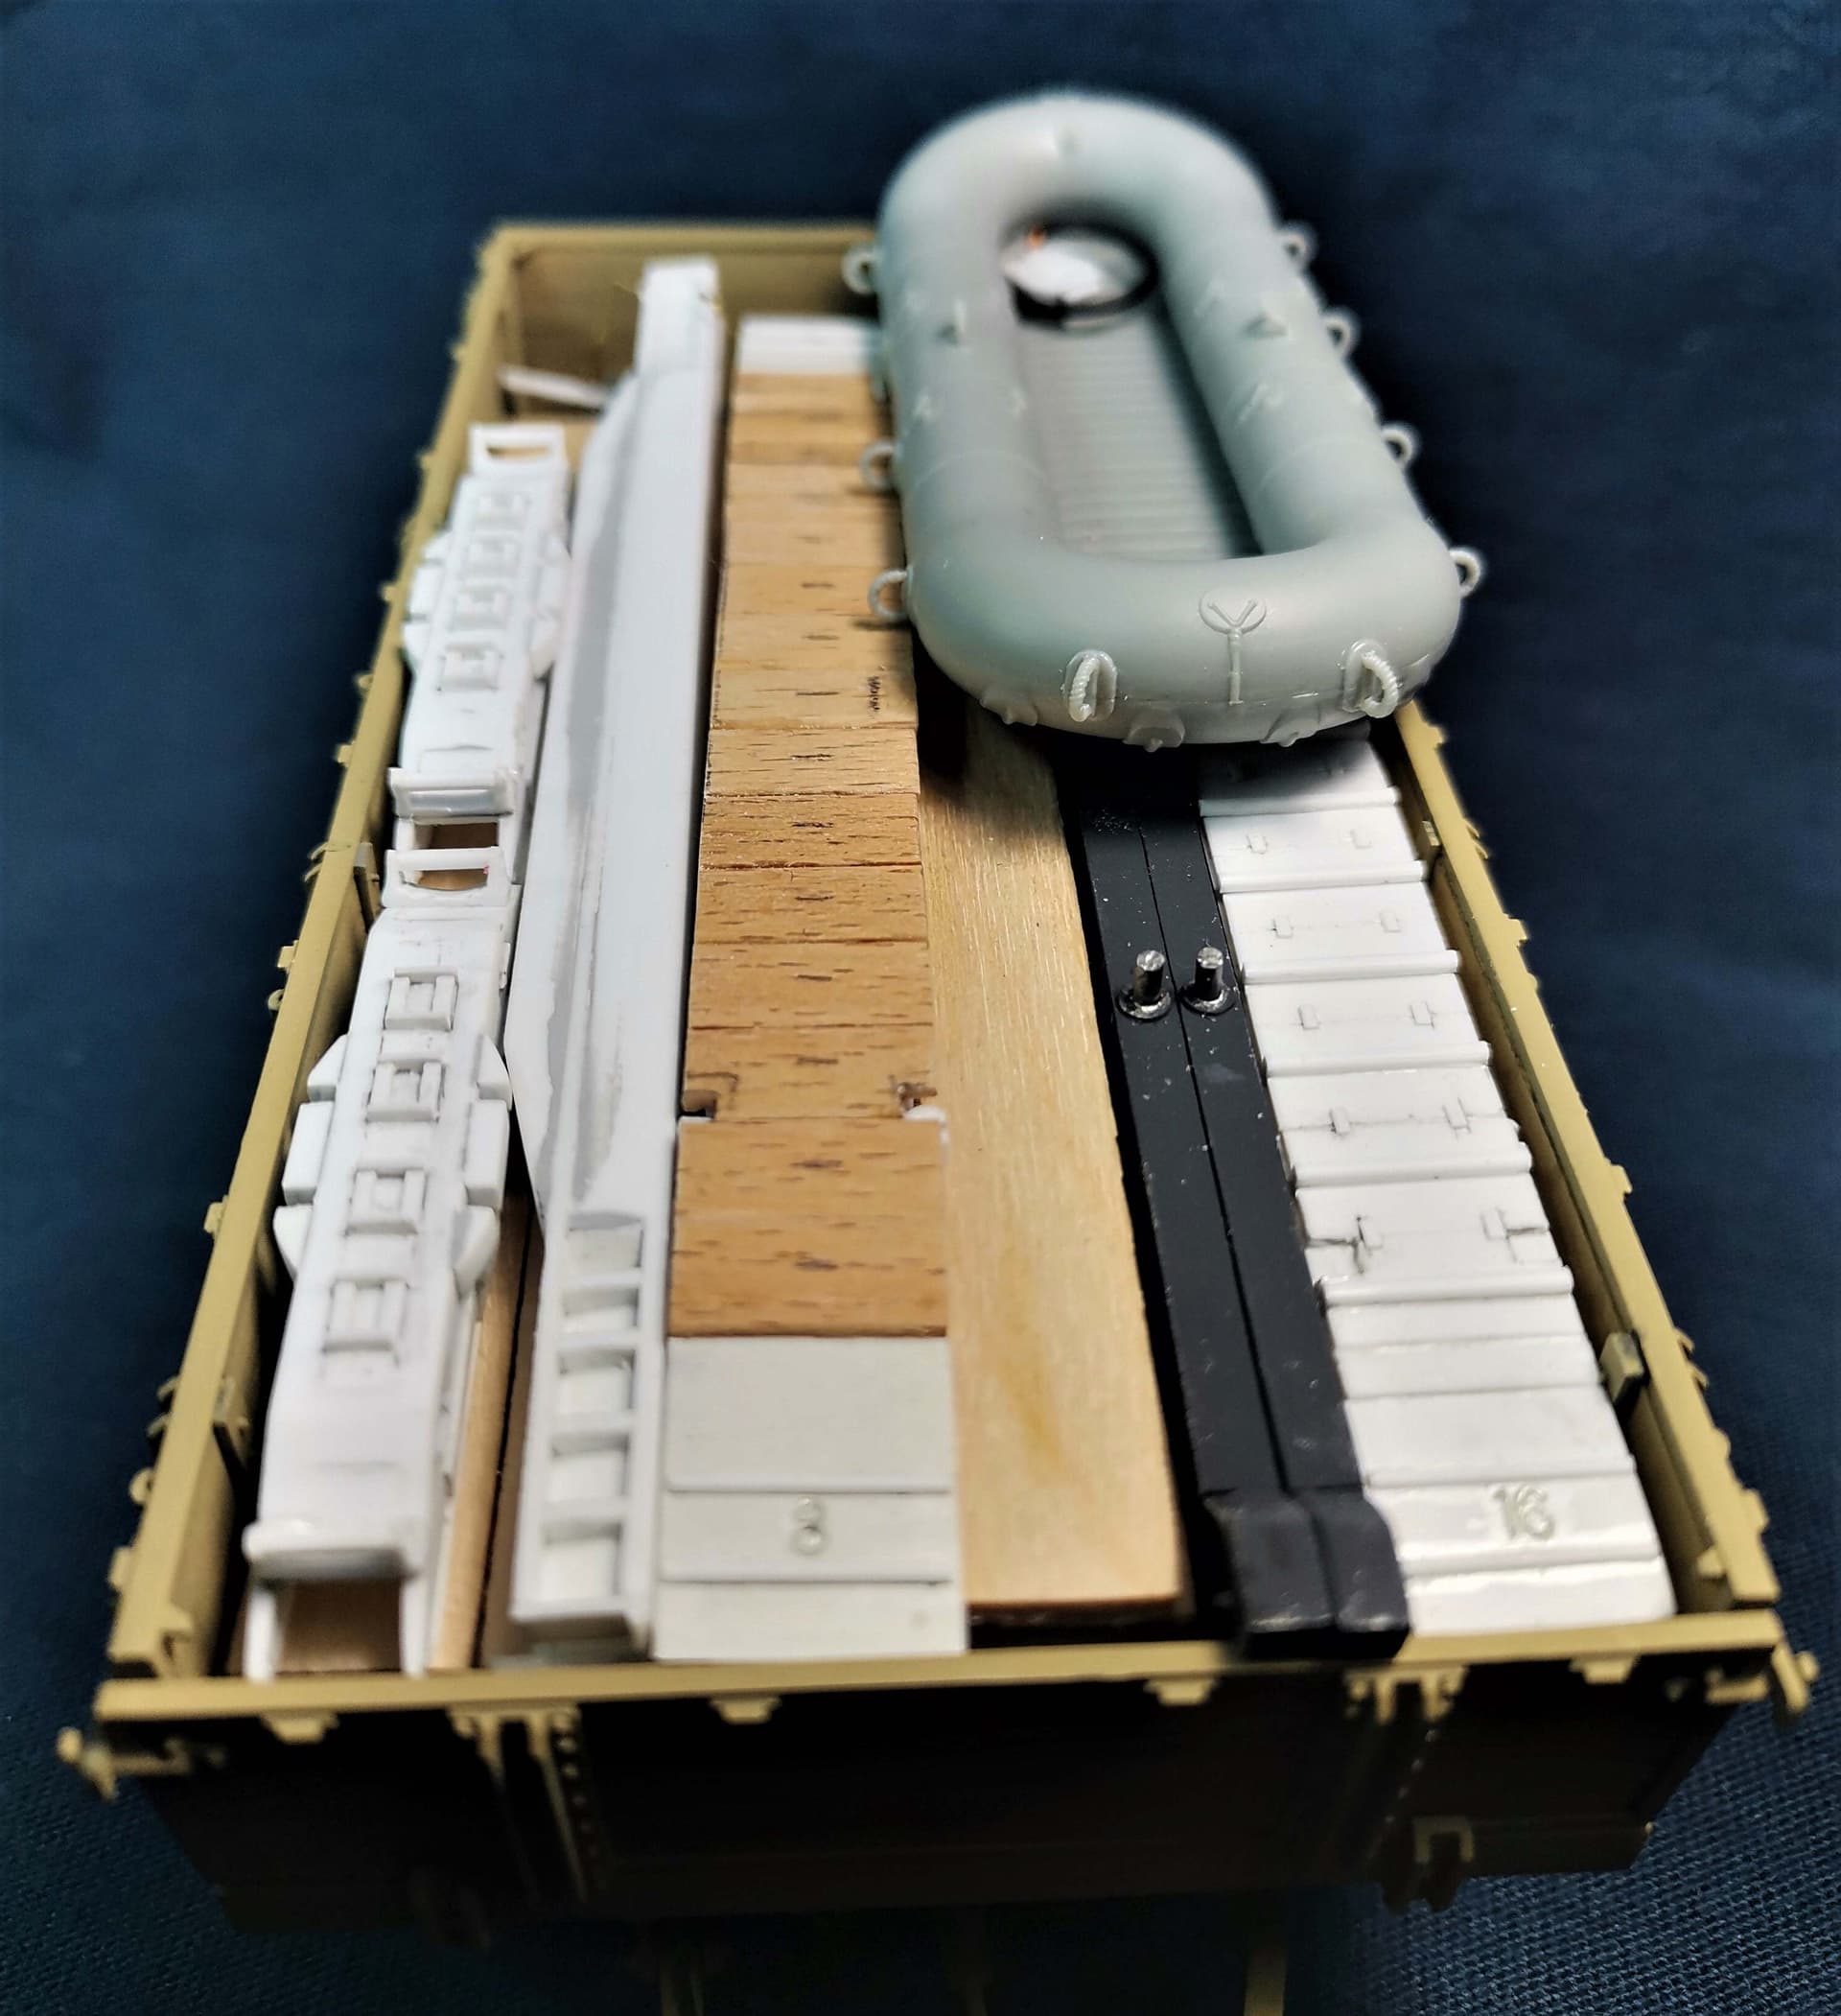
Here is a possible arrangement of the load:
Cheers,
Angel
This is just superb craftsmanship. I so envy your skill.
Great work as usual Angel. I am told my kit ships Monday for this campaign.
That’s real dedicated skill Angel. It’s just lovely watching your builds materialize…
Thanks Peter, Ryan and John!
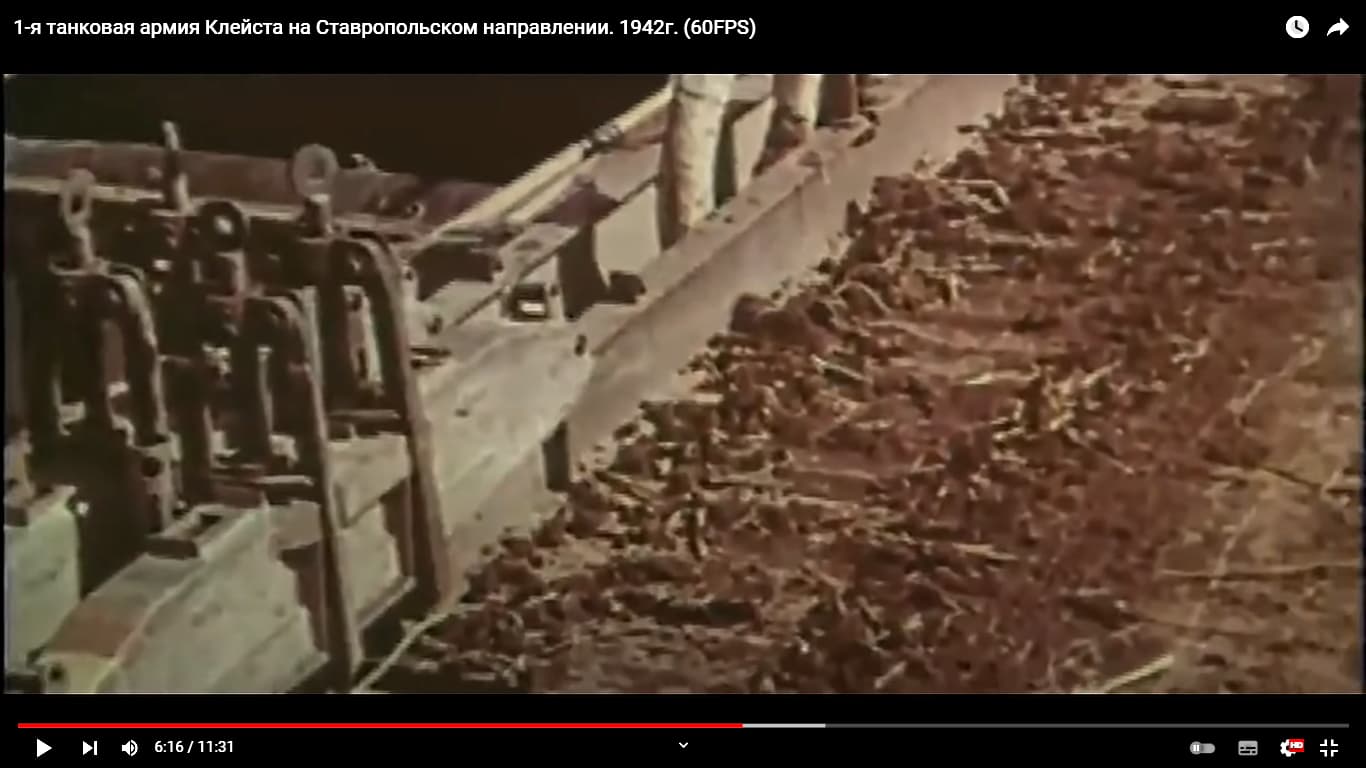
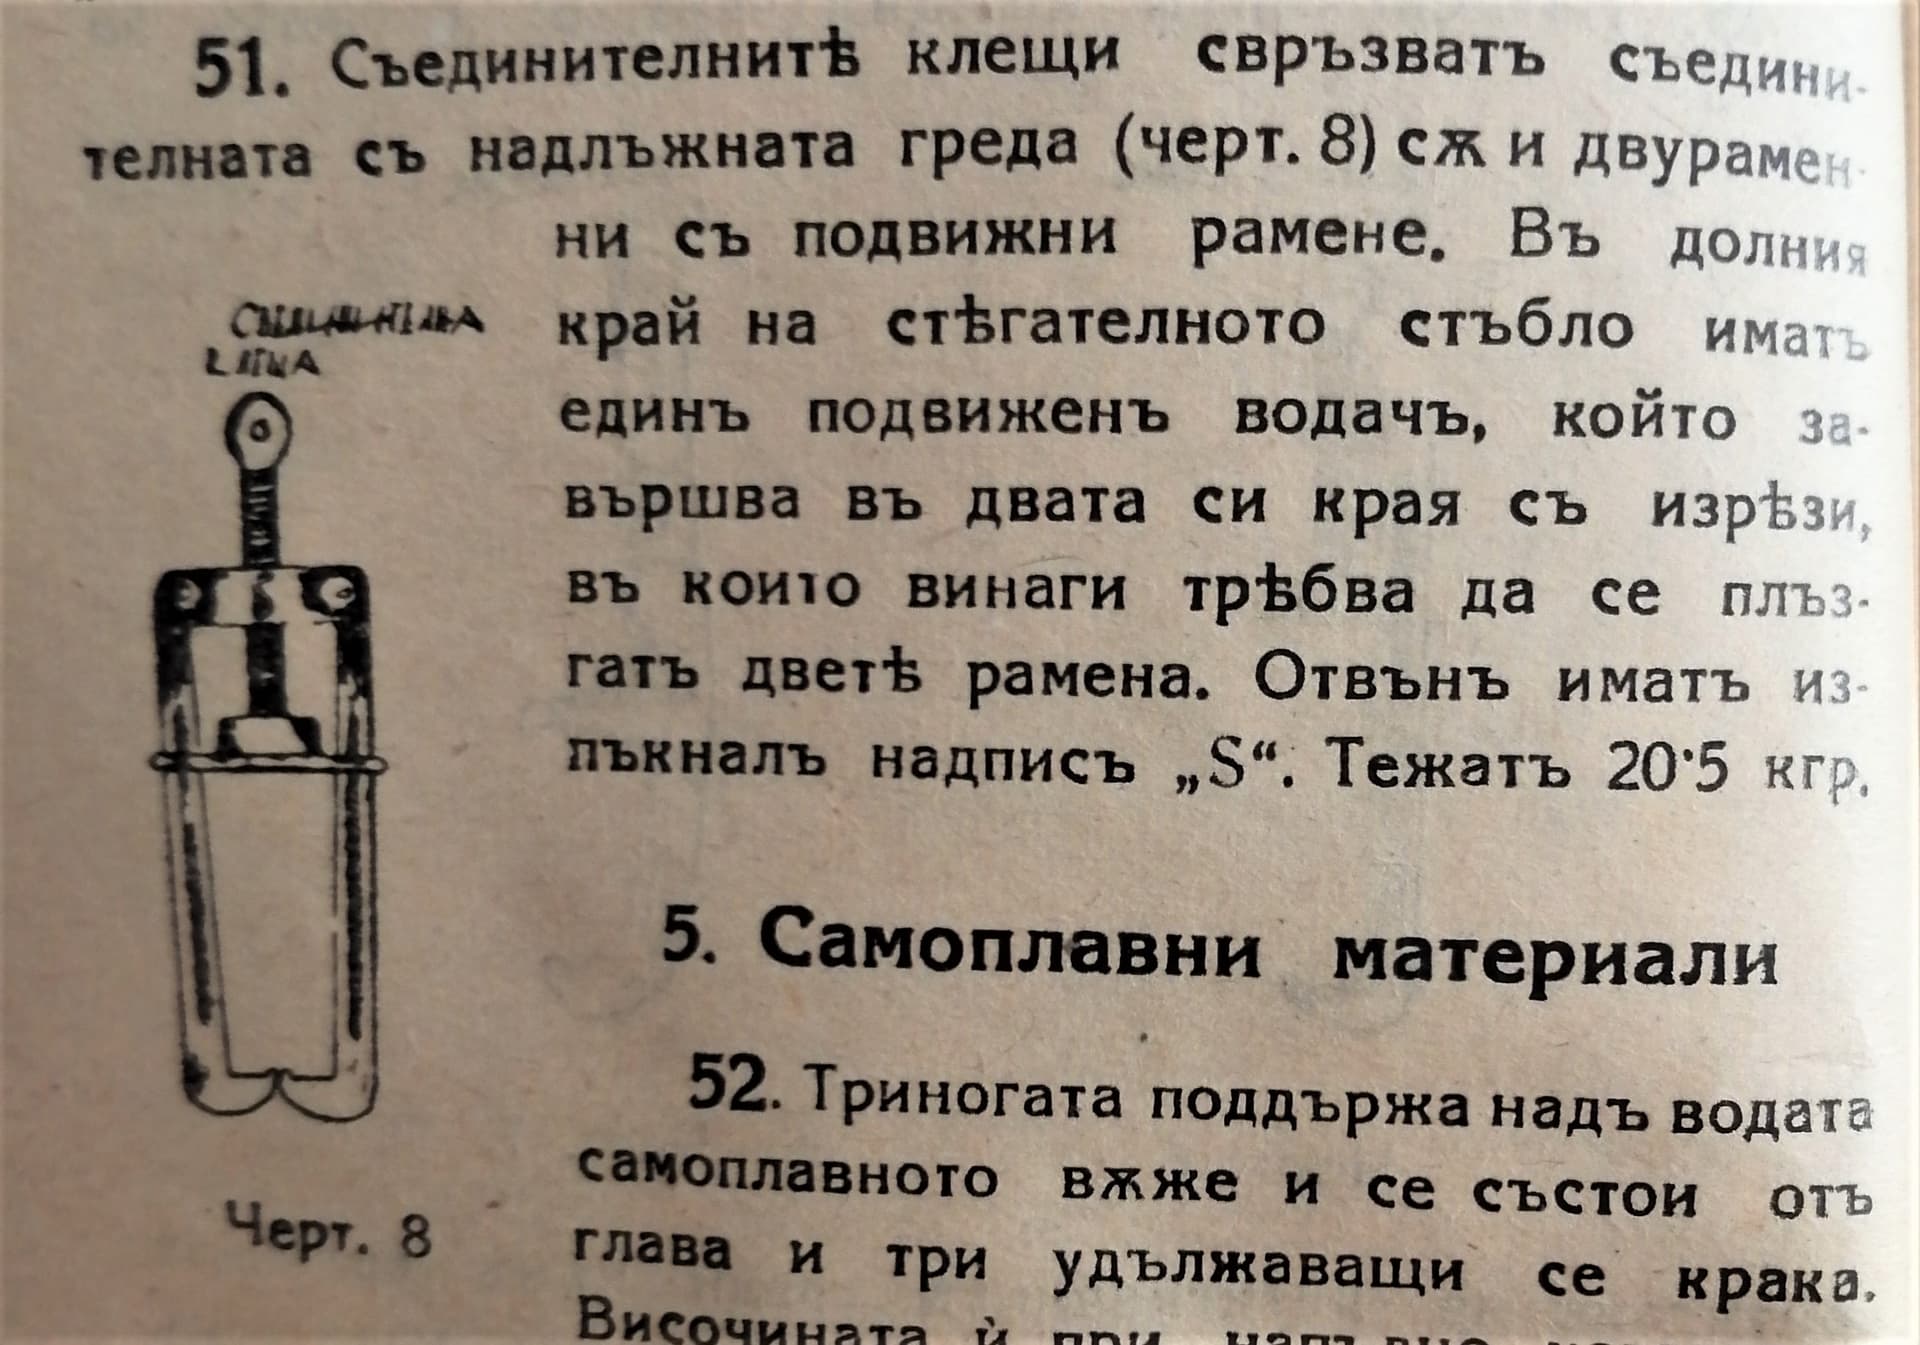
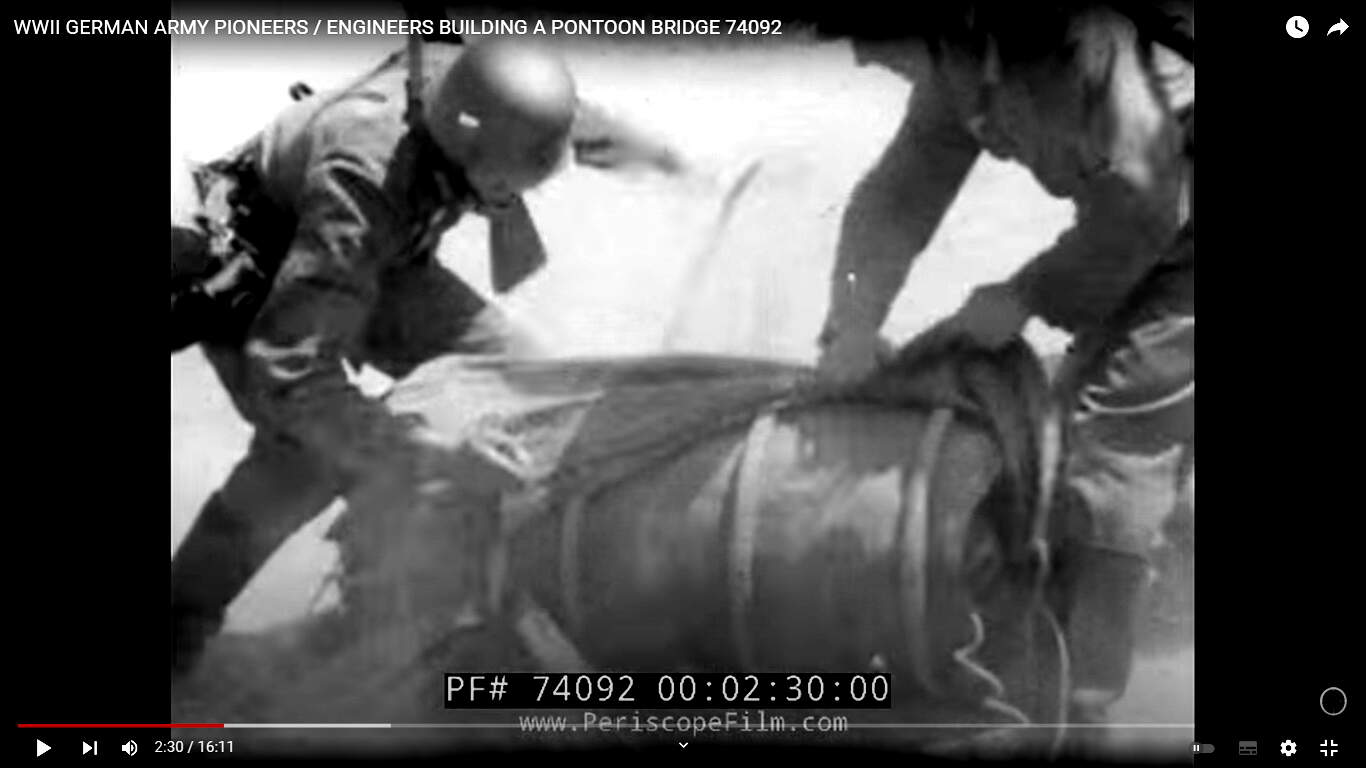
Seems I switched on continuous drive with this build- I made today a still from a WWII documentation, showing 2 connecting pieces with their clamps mounted:
I have combined the image with the drawing and description (I have the B type Bridge Manual):
Ryan, that’s a great news, I’m eager to see the Breuer built!
Cheers,
Angel
It remains to put a lying Bulgarian soldier in the boat.
Maybe wrapped in a blanket.

…
Well done, Angel!
When do you start Bussing-NAG?
I was curious what kind of equipment you would put there for cargo. 
Cheers! 
Kalin
No, there will be the 4 paddles. that belong to the kl. Floßsack 34
Моторен Копер-набивач ДЕЛМАГ /Pile Driver DELMAG:
Some wooden planks and beams,
Some bridge building spares(still not decided which ones exactly).
Couple of packed small rubber dinghy’s like this one here:
And I’m trying to score a Dragon’s #6135 German Pontoon Set, should I be lucky enough then there will be an inflated Gr. Floßsack 34 in the load bed.
Endless opportunities my friend!
BTW, my first clamp is ready:
Cheers,
Angel
Very nice. You have so much skill in your scratch building Angel. They are little mini kits in their own right …
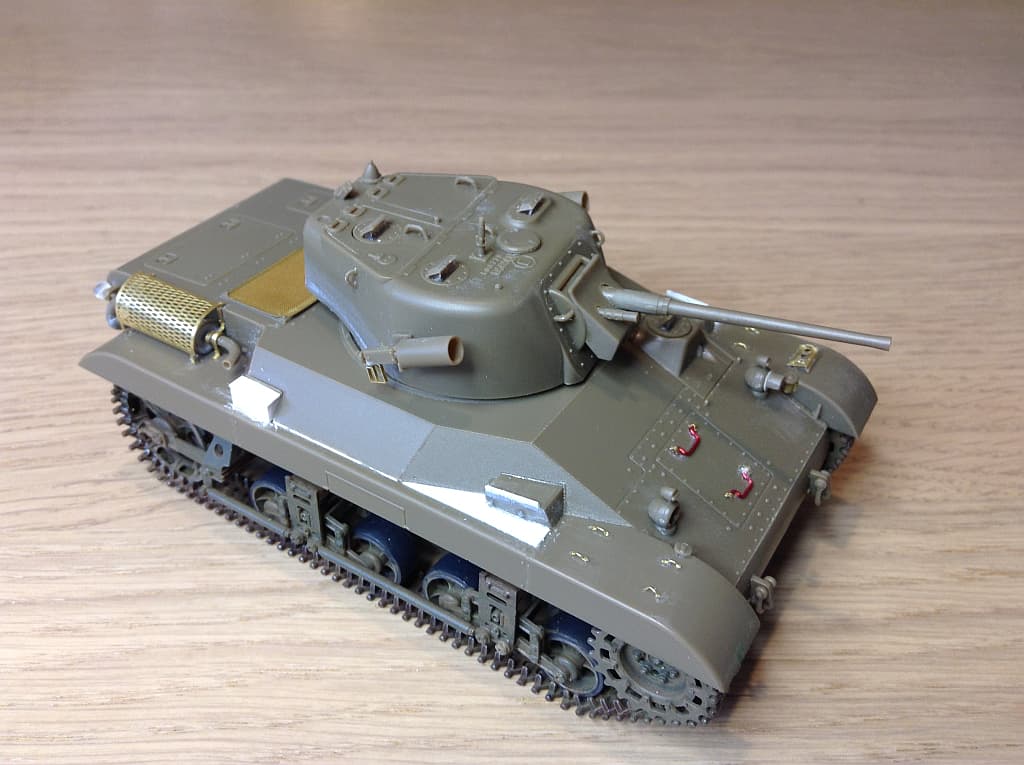
Okay, I have finished the construction on the Locust. Having read many reviews and going over video footage of the trials for Operation Varsity I have had to do some alterations, improvements and additions. I feel it is a much better result overall and more toward a suitable tribute to Robert.
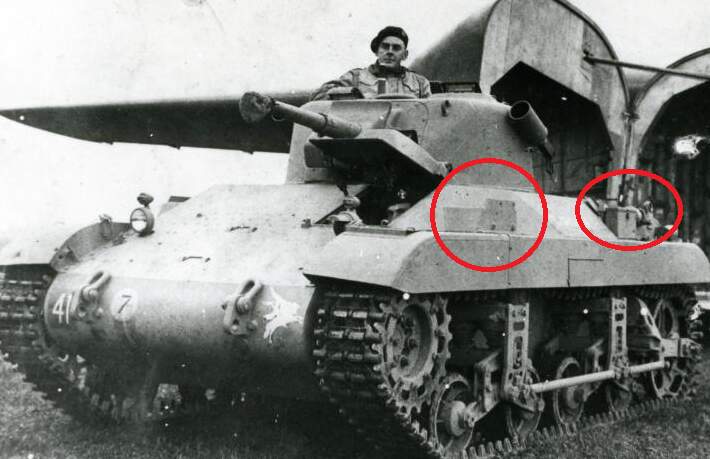
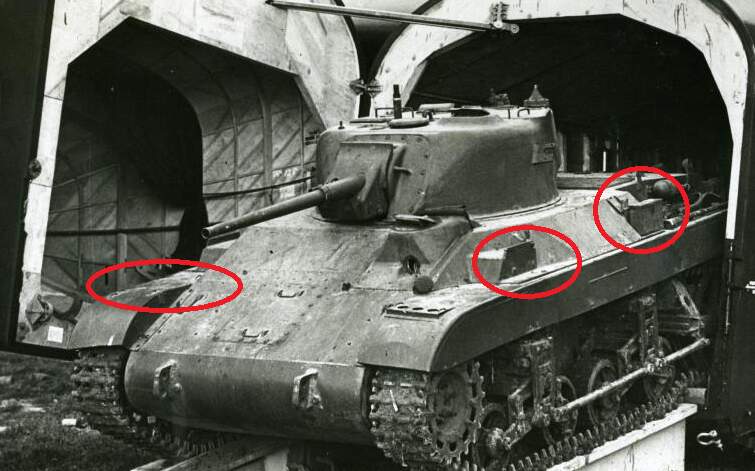
Something missed by all the reviewers, and those modellers that have made an effort to correct the kit, is the Storage boxes where the rear lifting mounts were removed, plus the prominent raised section on the fender near the front. Also missed is the fact that the front lifting plate face extends higher than the rear section:
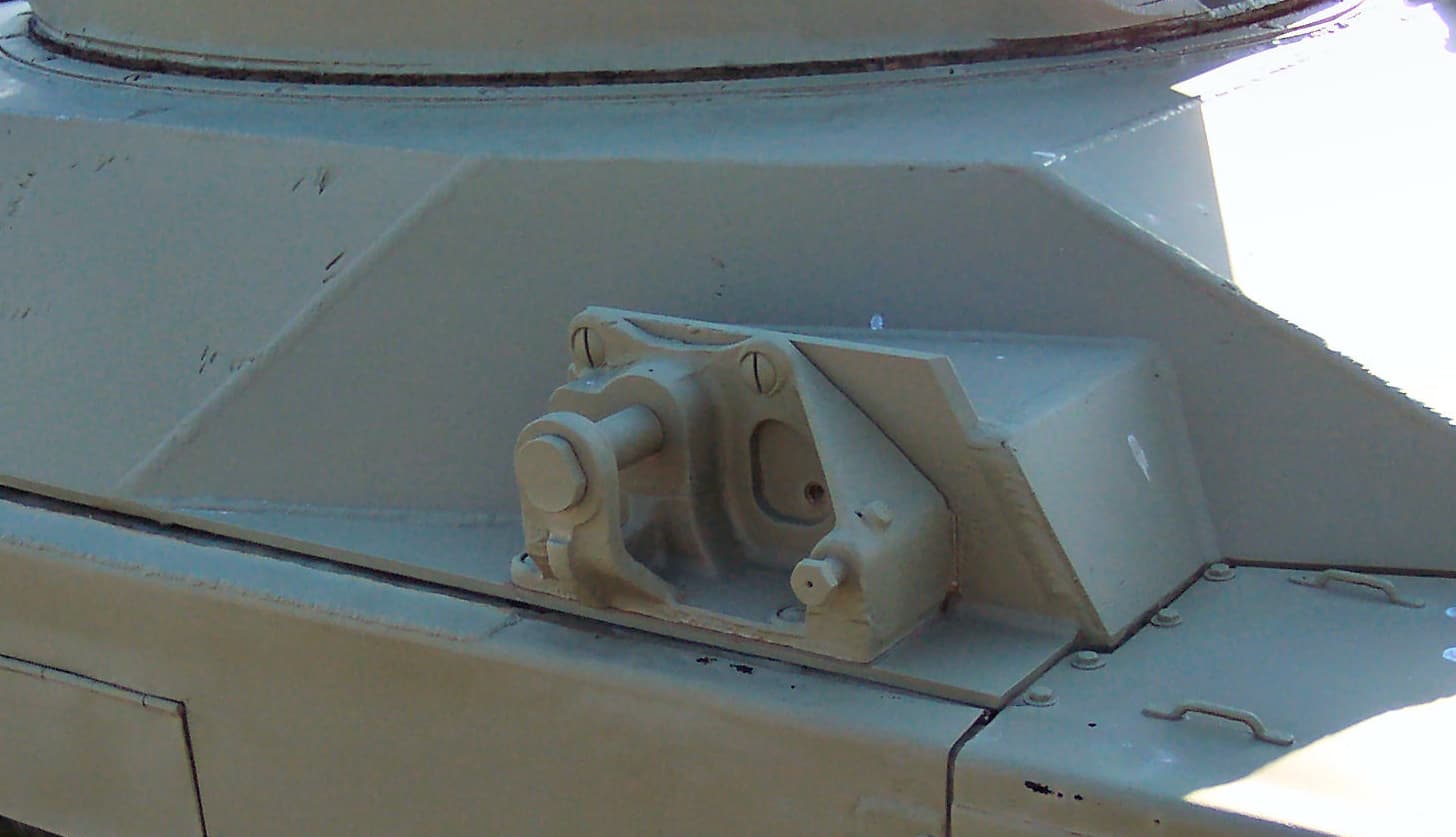
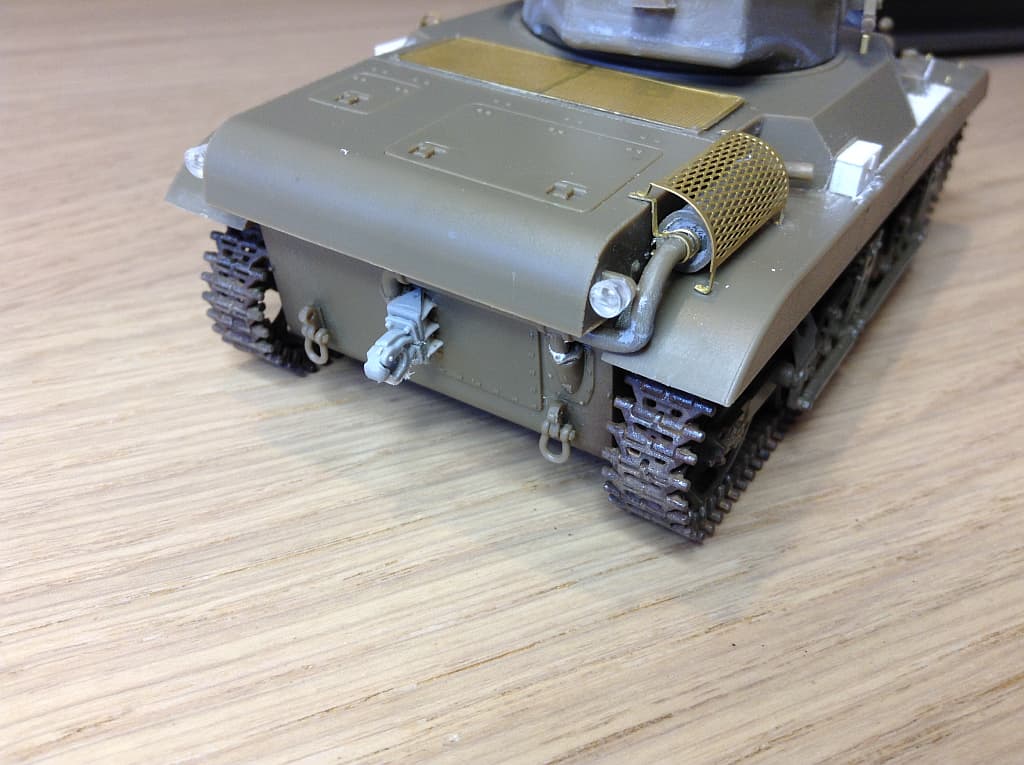
A close up of the mount and the fender section I am talking about. This is the US version.
One other aspect is the rear tow pintle seen in the video, taken from behind the tanks as the leave the gliders. This is a reworked Sherman one (same idea as Terry Ashley did on PMMS)
Great, Peter! I like it a lot. That’s behind the exhaust, what a light they are?
Kalin
Peter, that stinks. Thank you for warning us.
What did you do with the ammo? If my pitiful math is correct, they might make a stand-in for 1/72 40mm, or larger rounds at smaller scale. They might look okay as background detritus.
I’ve seen around the site some guys are building 1/100 tanks.
@ayovtshev Angel, you are an inspiration. I never dreamed I’d see such a model subject. Beautiful workmanship. Are you a swiss watch maker?
Nice progress, Peter!
Nail these storage boxes and mounts!
Cheers,
Angel
Thanks Fred, I really appreciate your words!
I’m not a watch maker, I just love scratchbuilding and working on interesting/obscure modelling subjects.
I was lucky enough to buy 2 Bulgarian bridgebuilding manuals printed in 1943, thus I have enough refferences for a decade of German B type bridge related builds.
Cheers,
Angel
Nicely done Peter. Looks lovely and the saves you made on it really add to it and take it up a level. Lovely job
Thanks guys.
Yes Kalin, they are the standard US tail lights just like on the Sherman, etc. Bronco like many others, gives you them in clear styrene. Pointless really as they are not see through, and being clear, it is hard to see the mould lines.
No ammo provided, just the blobs for the stowage boxes. They went in the spares box. Might come in handy one day. (Unlikely)
![]()
Thank you, Peter!
Good luck in the next steps with the model.
Kalin