Well I finished the M10 yesterday and was going to start this , but I’m not shure that you are really interested in it ?
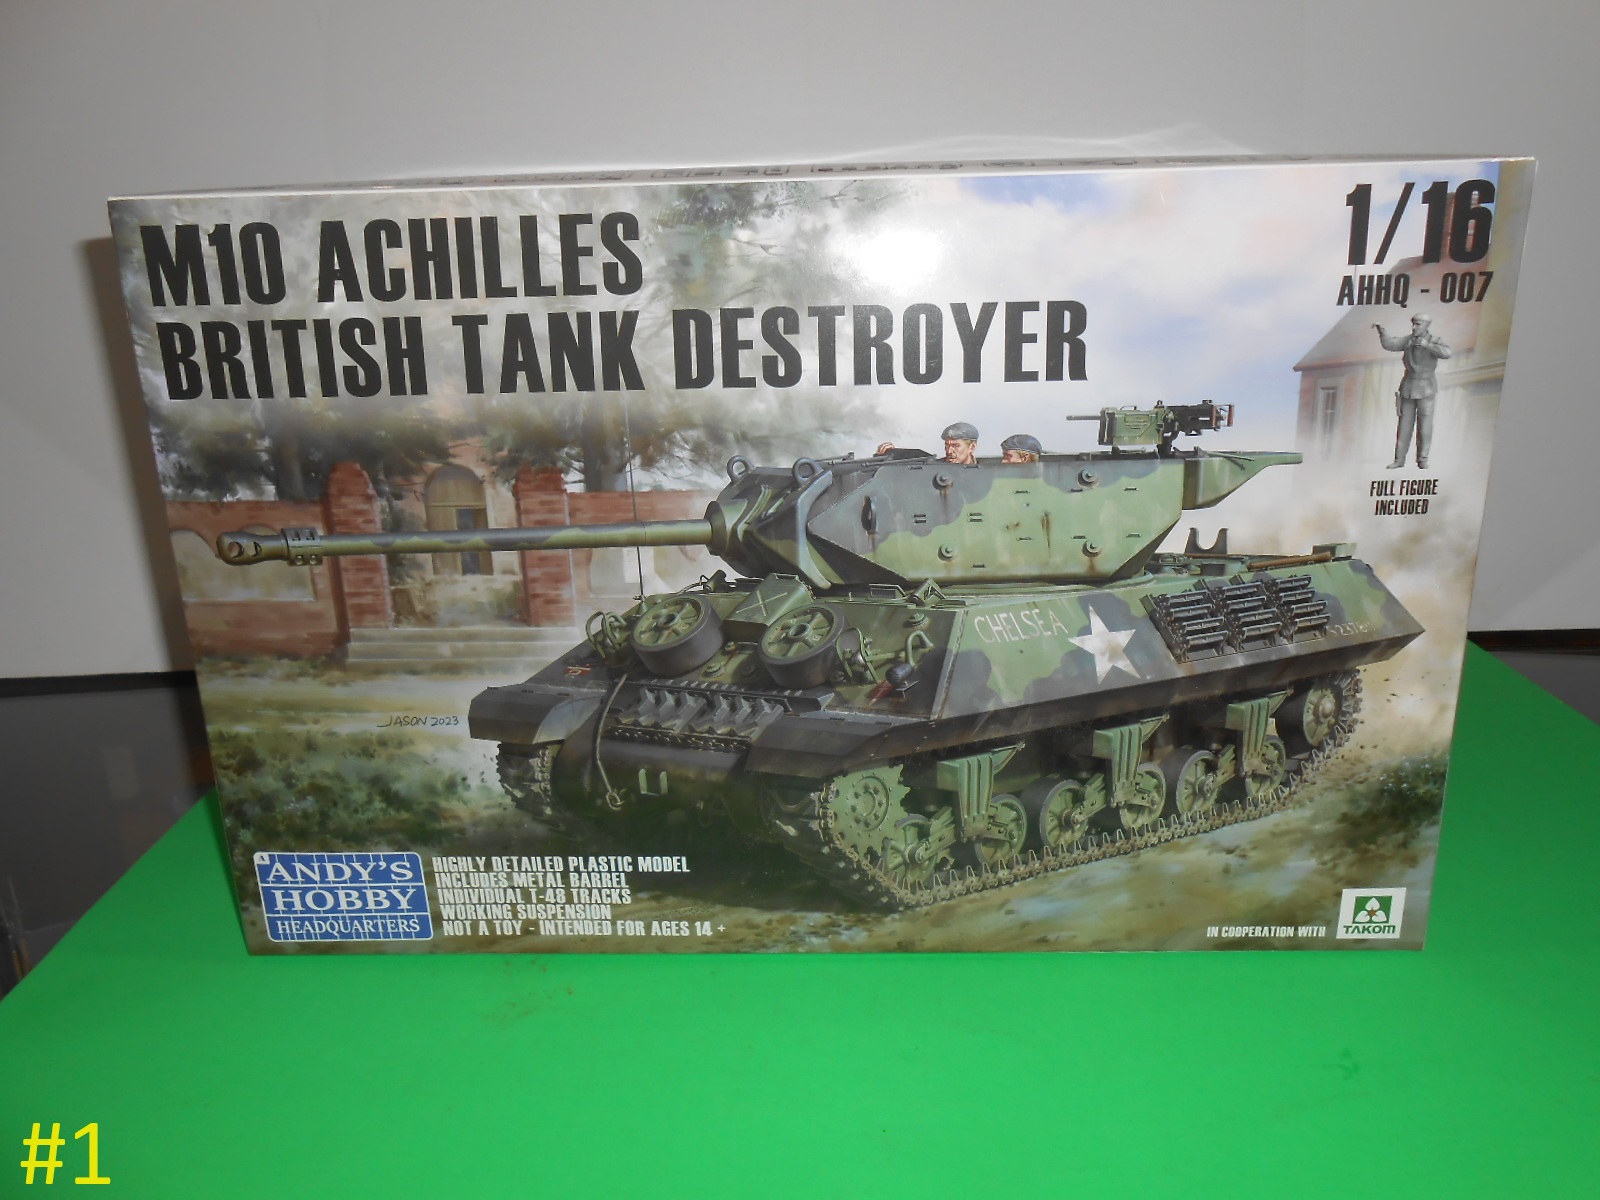
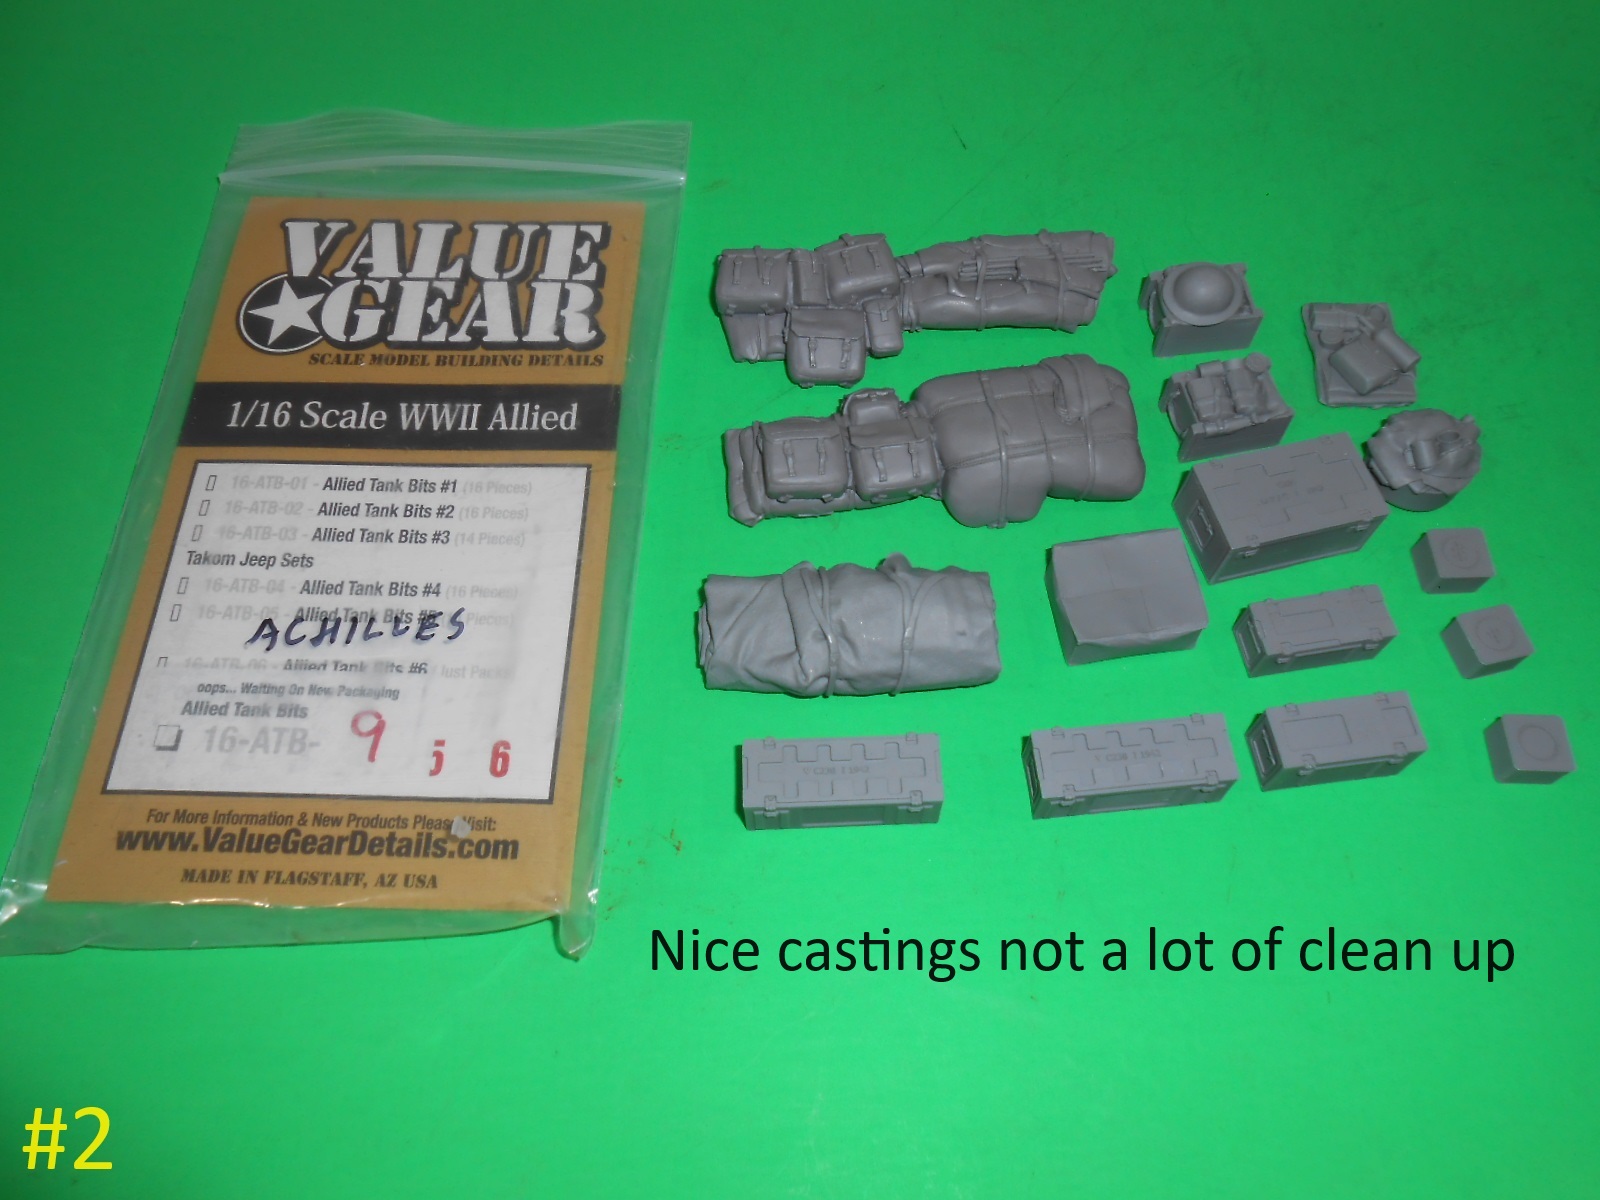
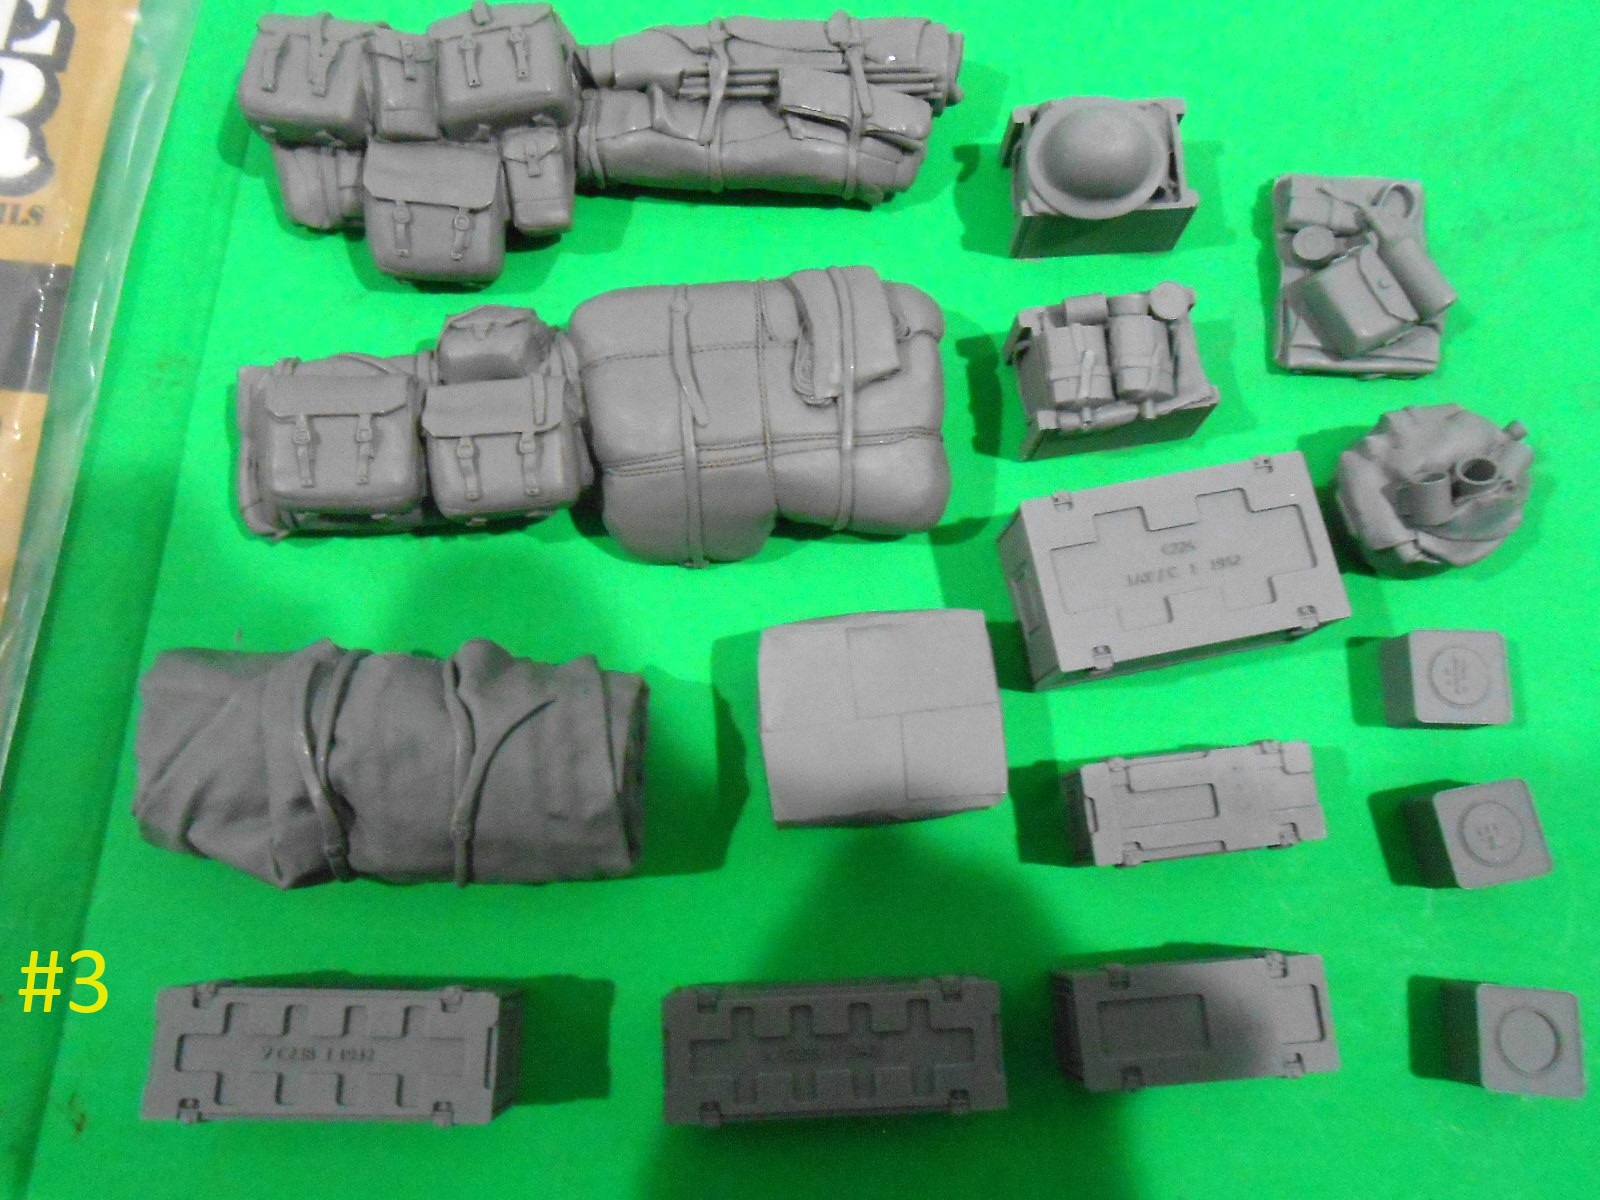
I’ll start off with the Box Art and Value Gear parts and see how it goes.
Regards
Donald
11 Likes
They look very nice ![]()
2 Likes
Donald, it’s always interesting to see your builds. Many of them are projects I’d like to do one day. I also enjoy following the big 1/16 builds. They are beyond my wheelhouse but otherwise I’d never see how they build.
2 Likes
Nice shots of the value gear, not yet available here in the UK but I think worth waiting for.
Happy new year to you
Keith
2 Likes
Donald your builds are always worth watching. Please proceed.
2 Likes
Hey Keith , If you have access to Andys web site you can order them from him.
Regards
Donald
1 Like
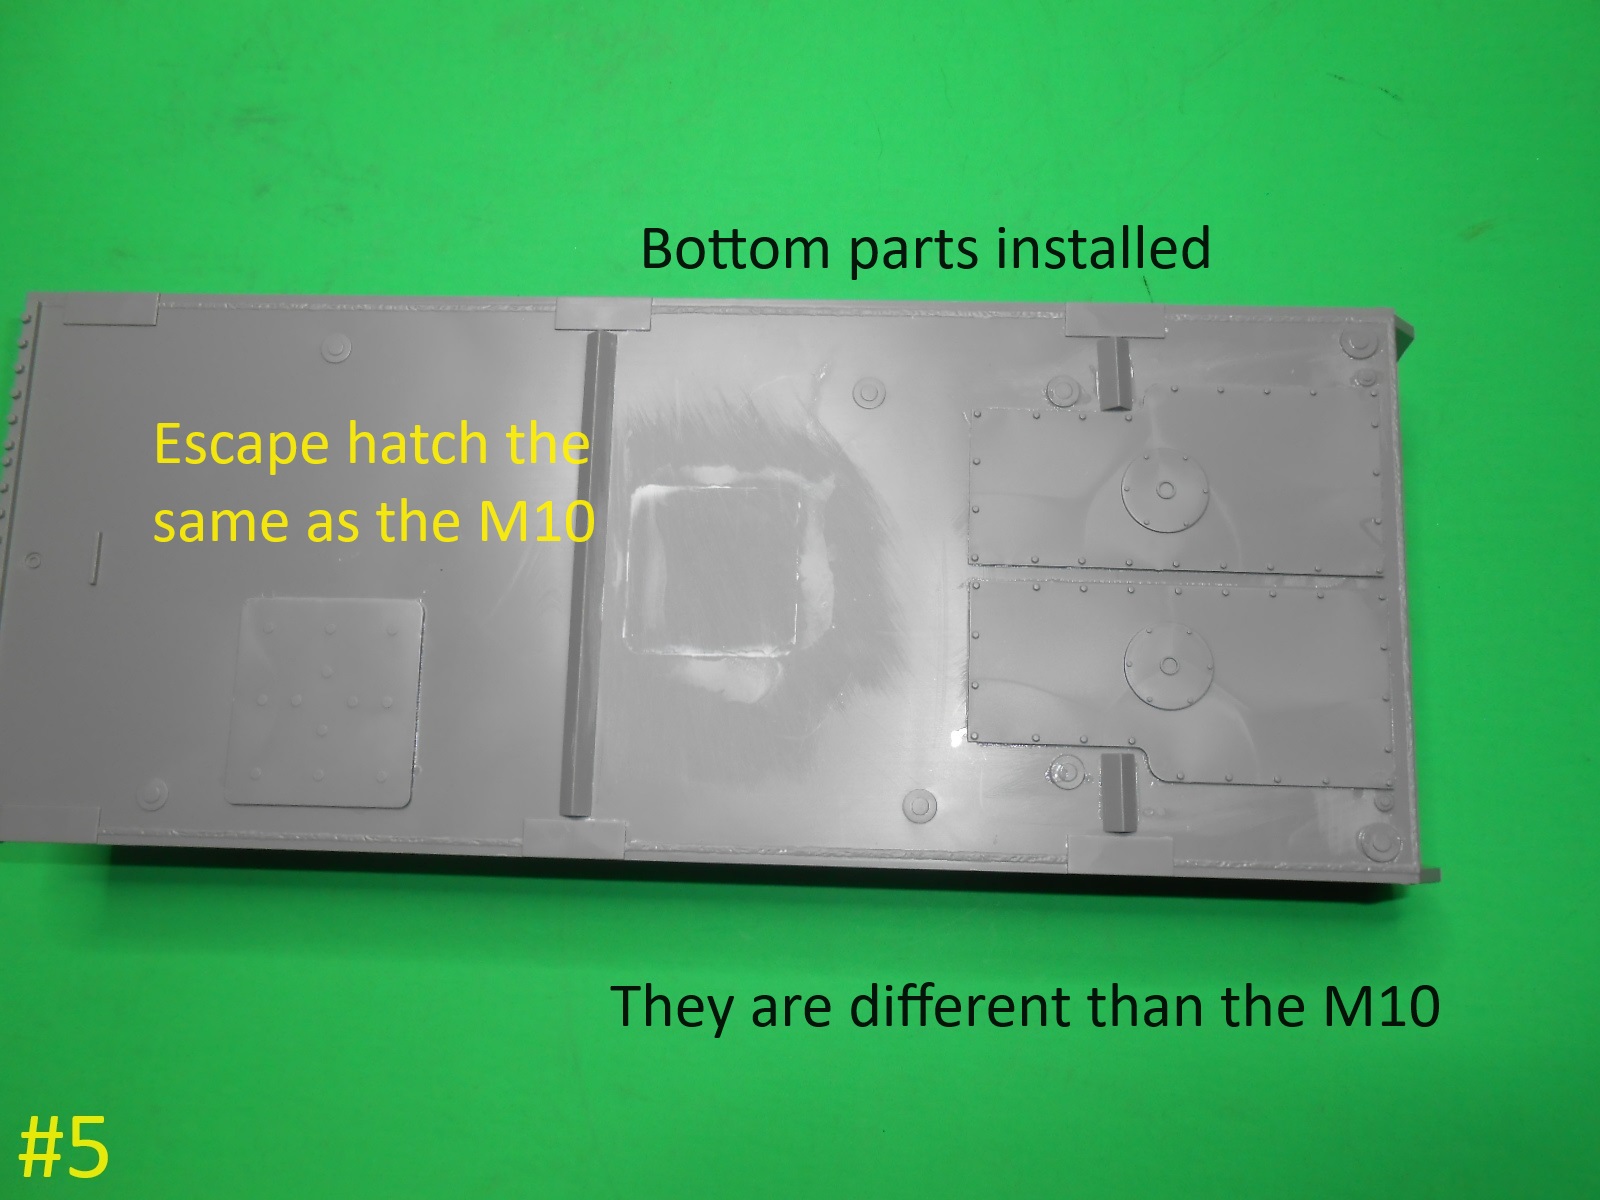
I have the bottom of the Hull finished , just be shure to drill out the right holes.
The bottom hull is the same for both the M10 and the Achilles , just different fittings on the bottom .
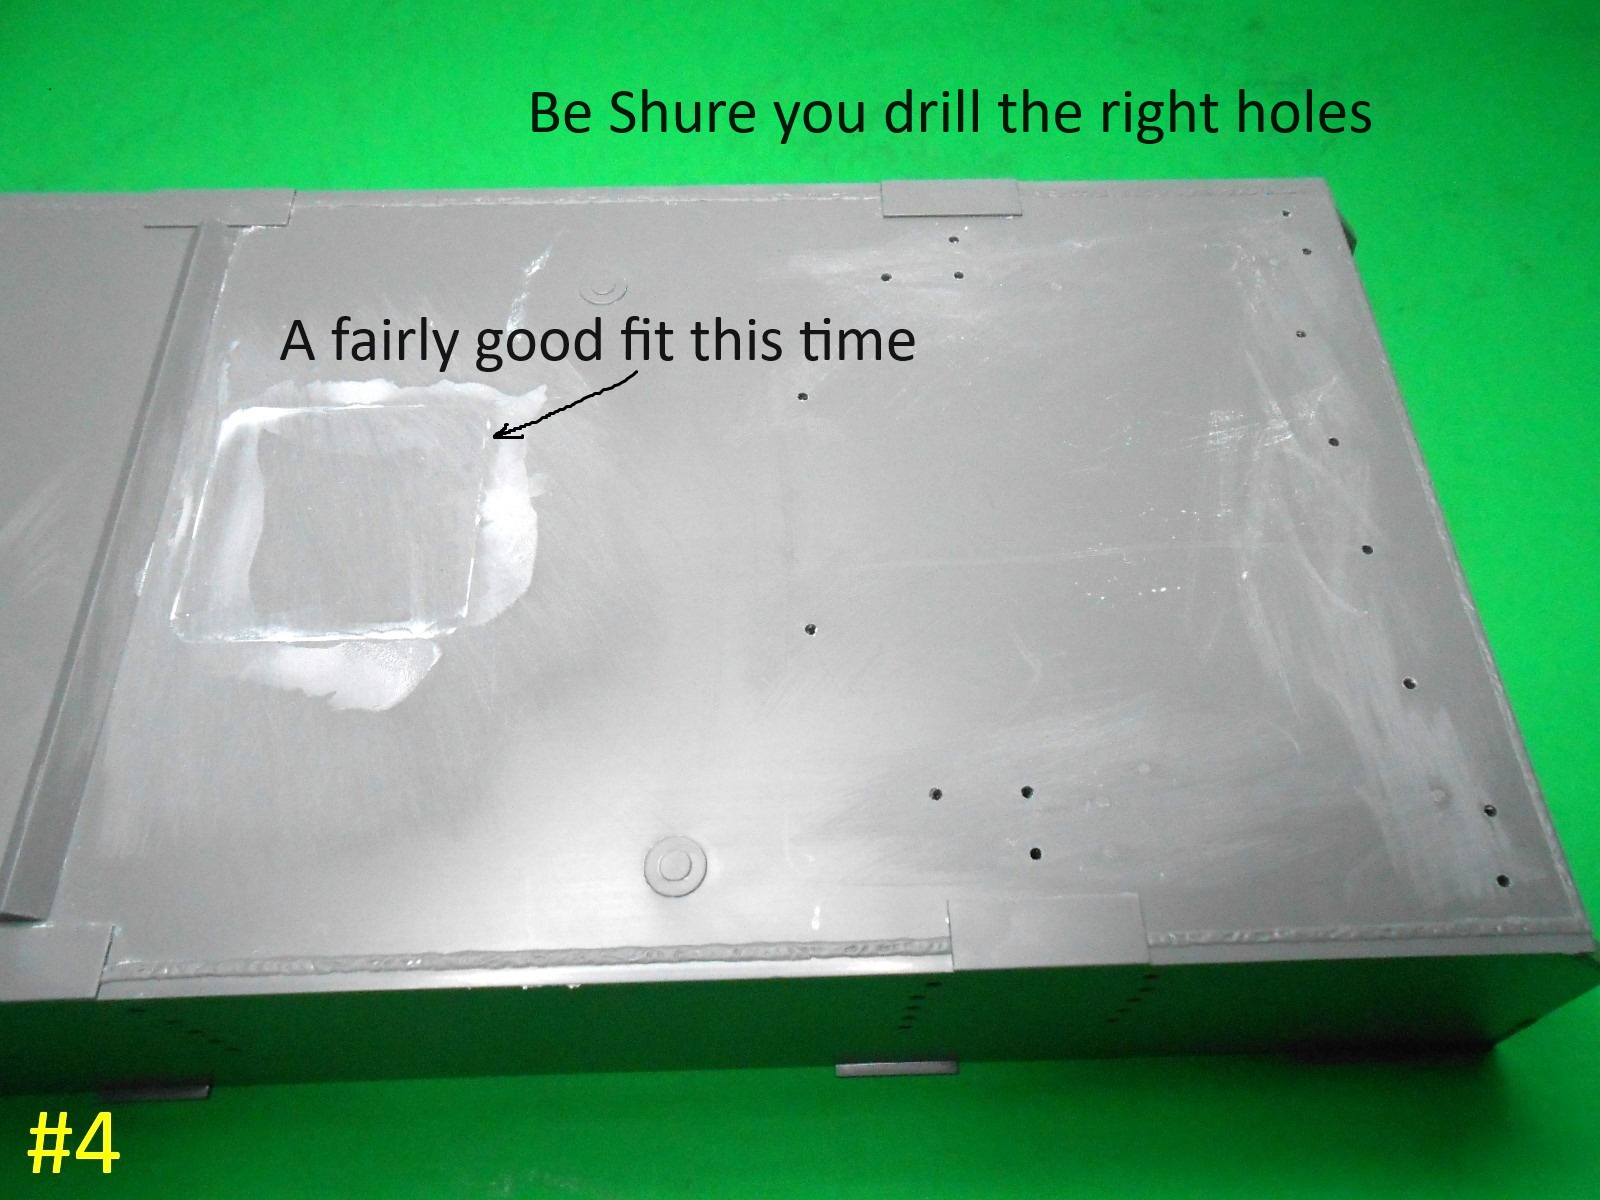
More coming soon.
Regards
Donald
The M10 Bottom
6 Likes
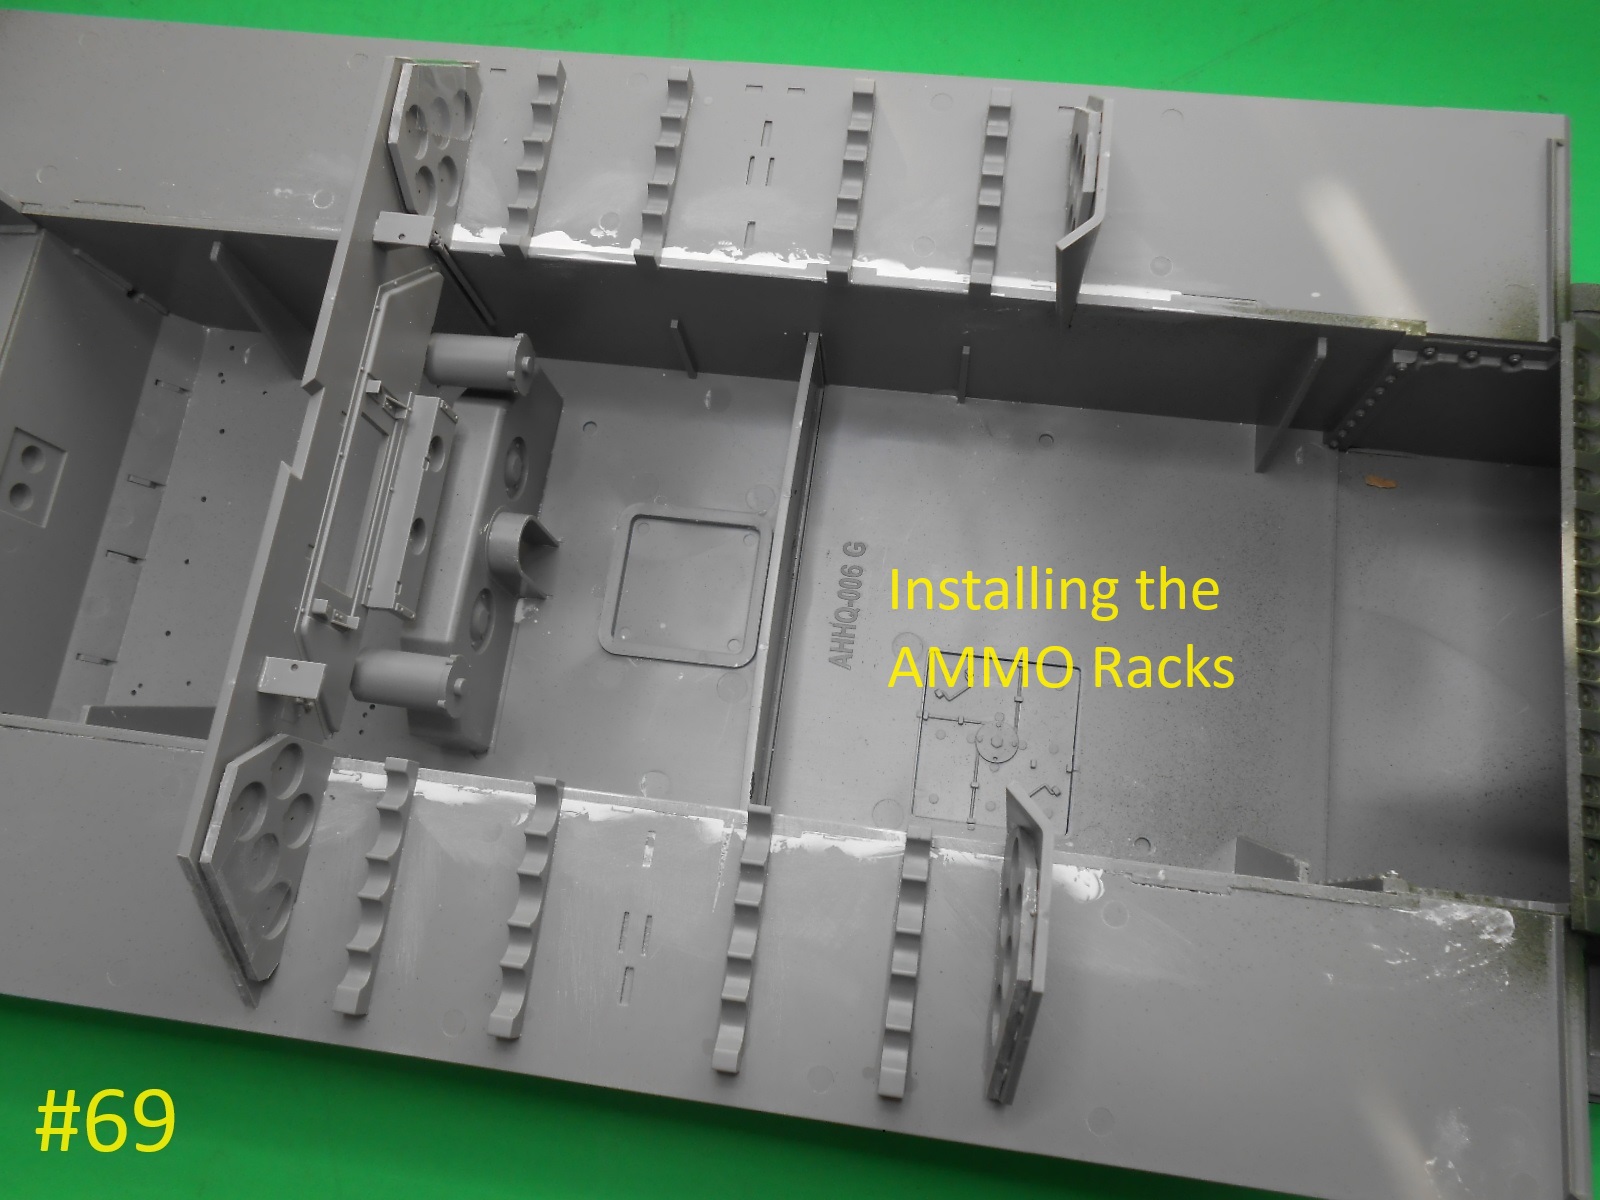
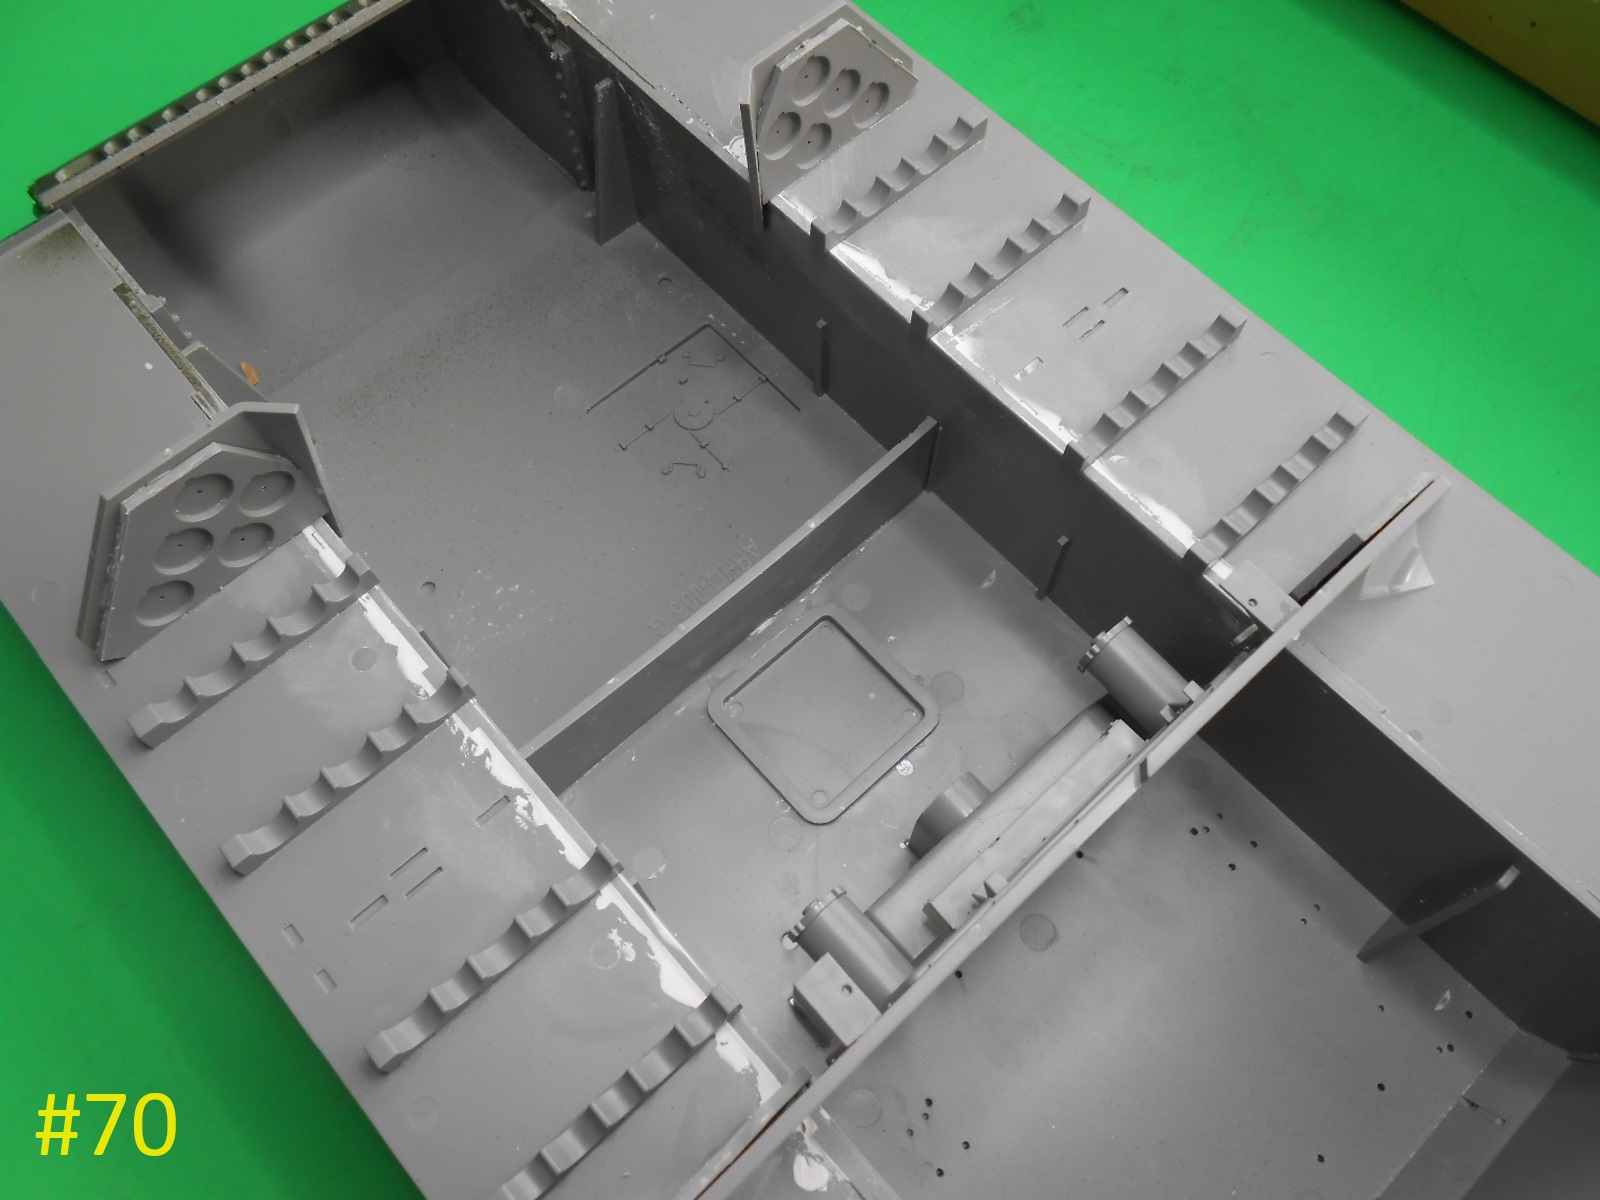
I have some more finished , I’m doing this build like I never did the M10.
Most of it is mostly the same but some I think save the whole build.
This will save having to look back and forth for the pics.
I am also trying to put the relevant info. on the pics. themselves.
Ok enough talk on to the build.


Finished for now.
Donald
9 Likes
These are some of my favorite build threads.
I really like the text you always add to the pictures.
![]()
![]()
2 Likes
Wow! Hex bolts that look like hex bolts! Love the look of these 1/16 scale builds!
2 Likes
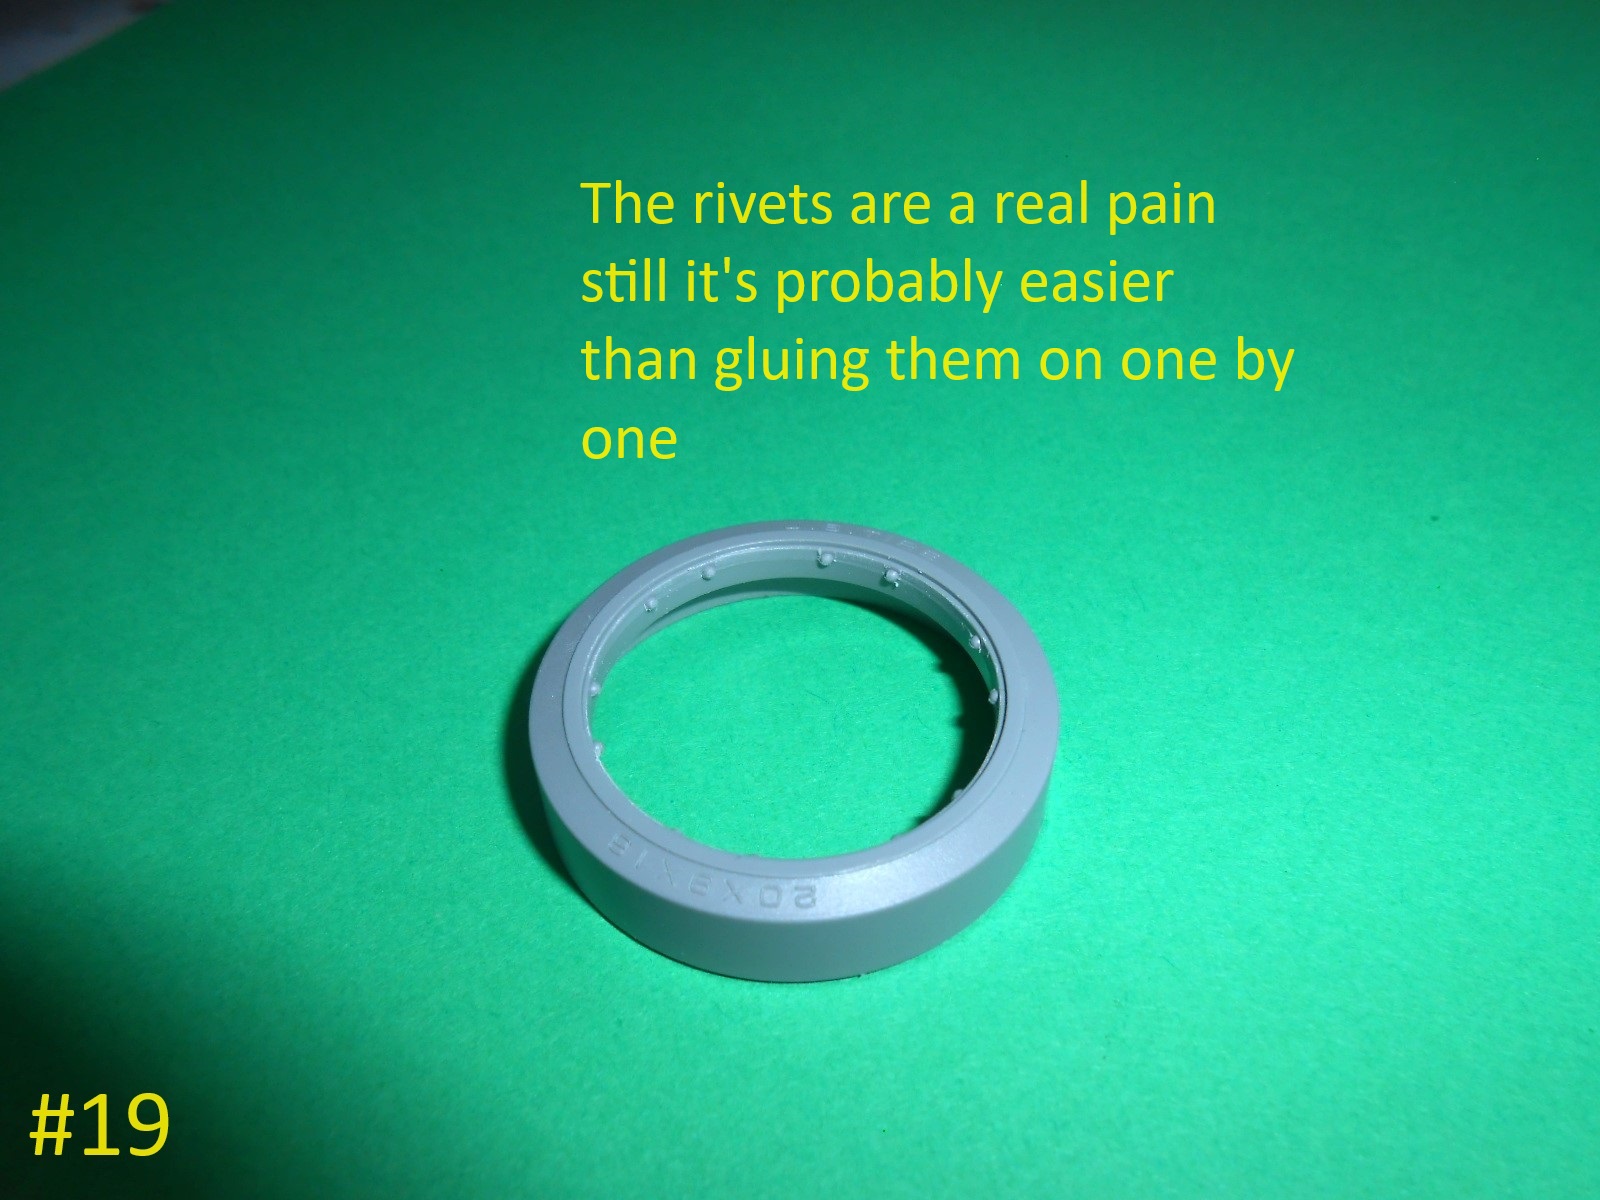
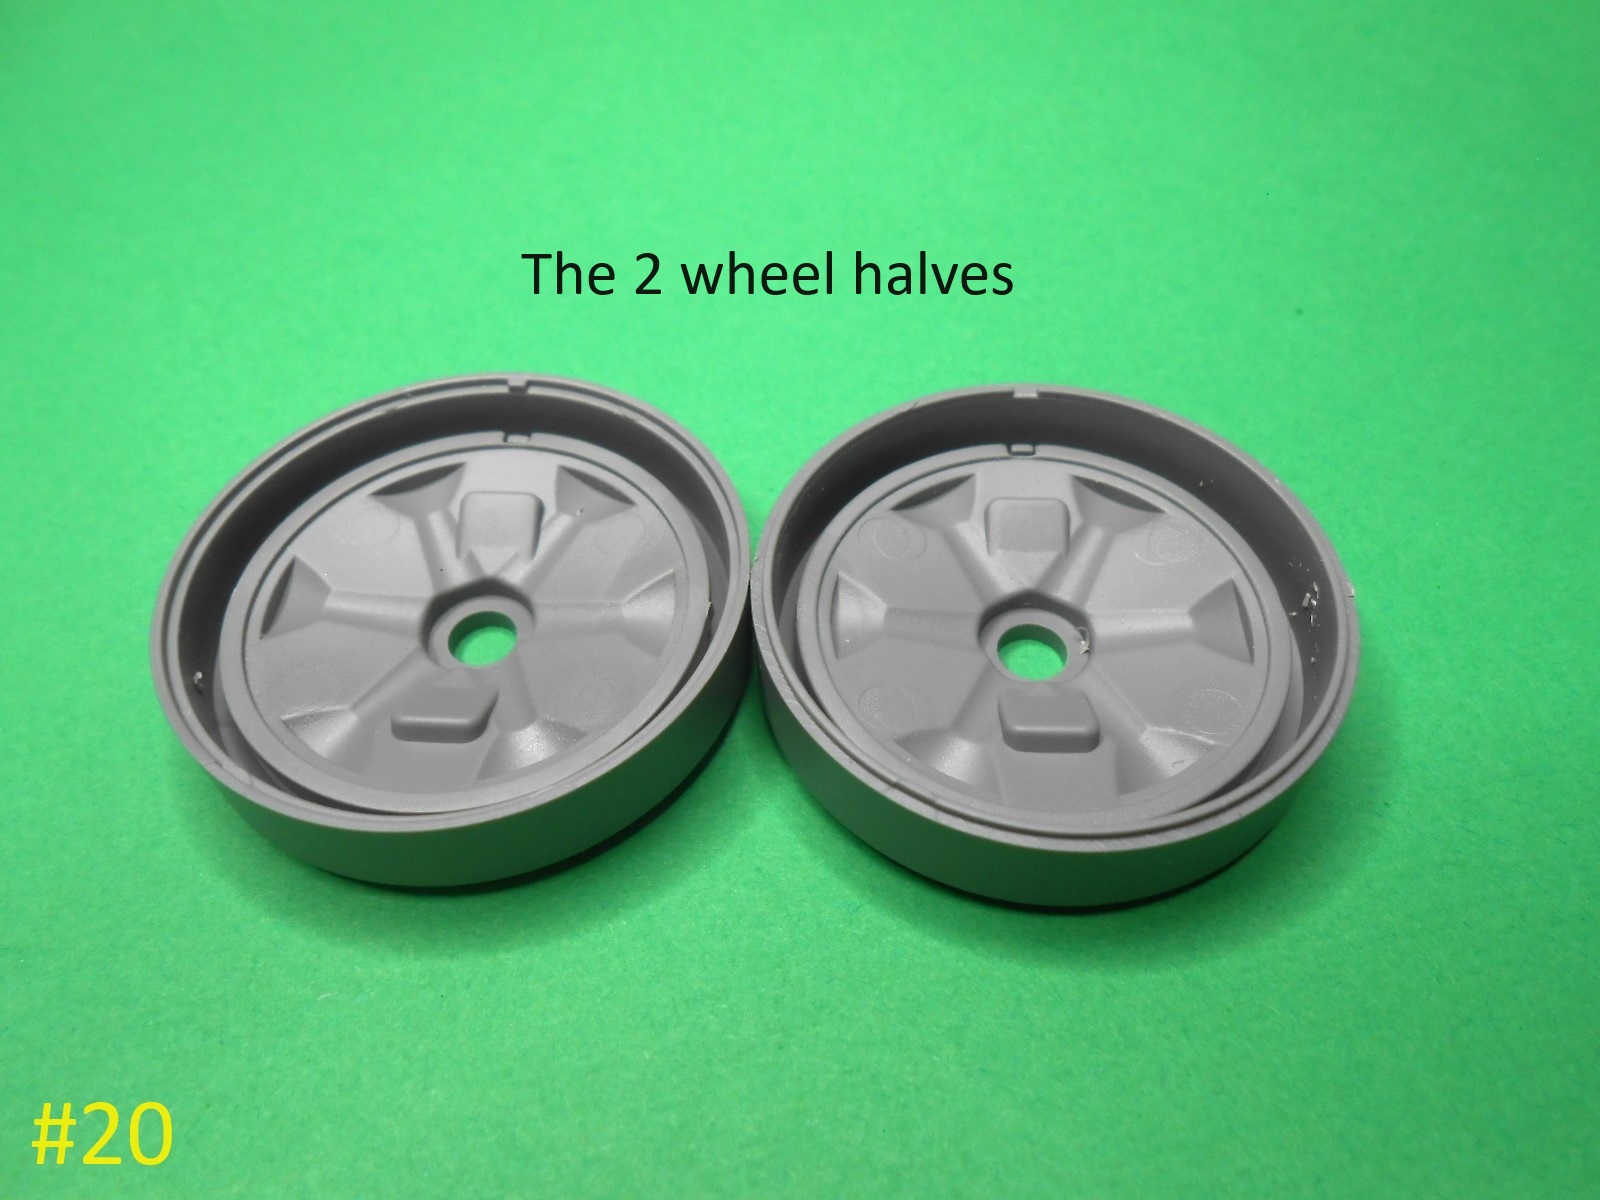
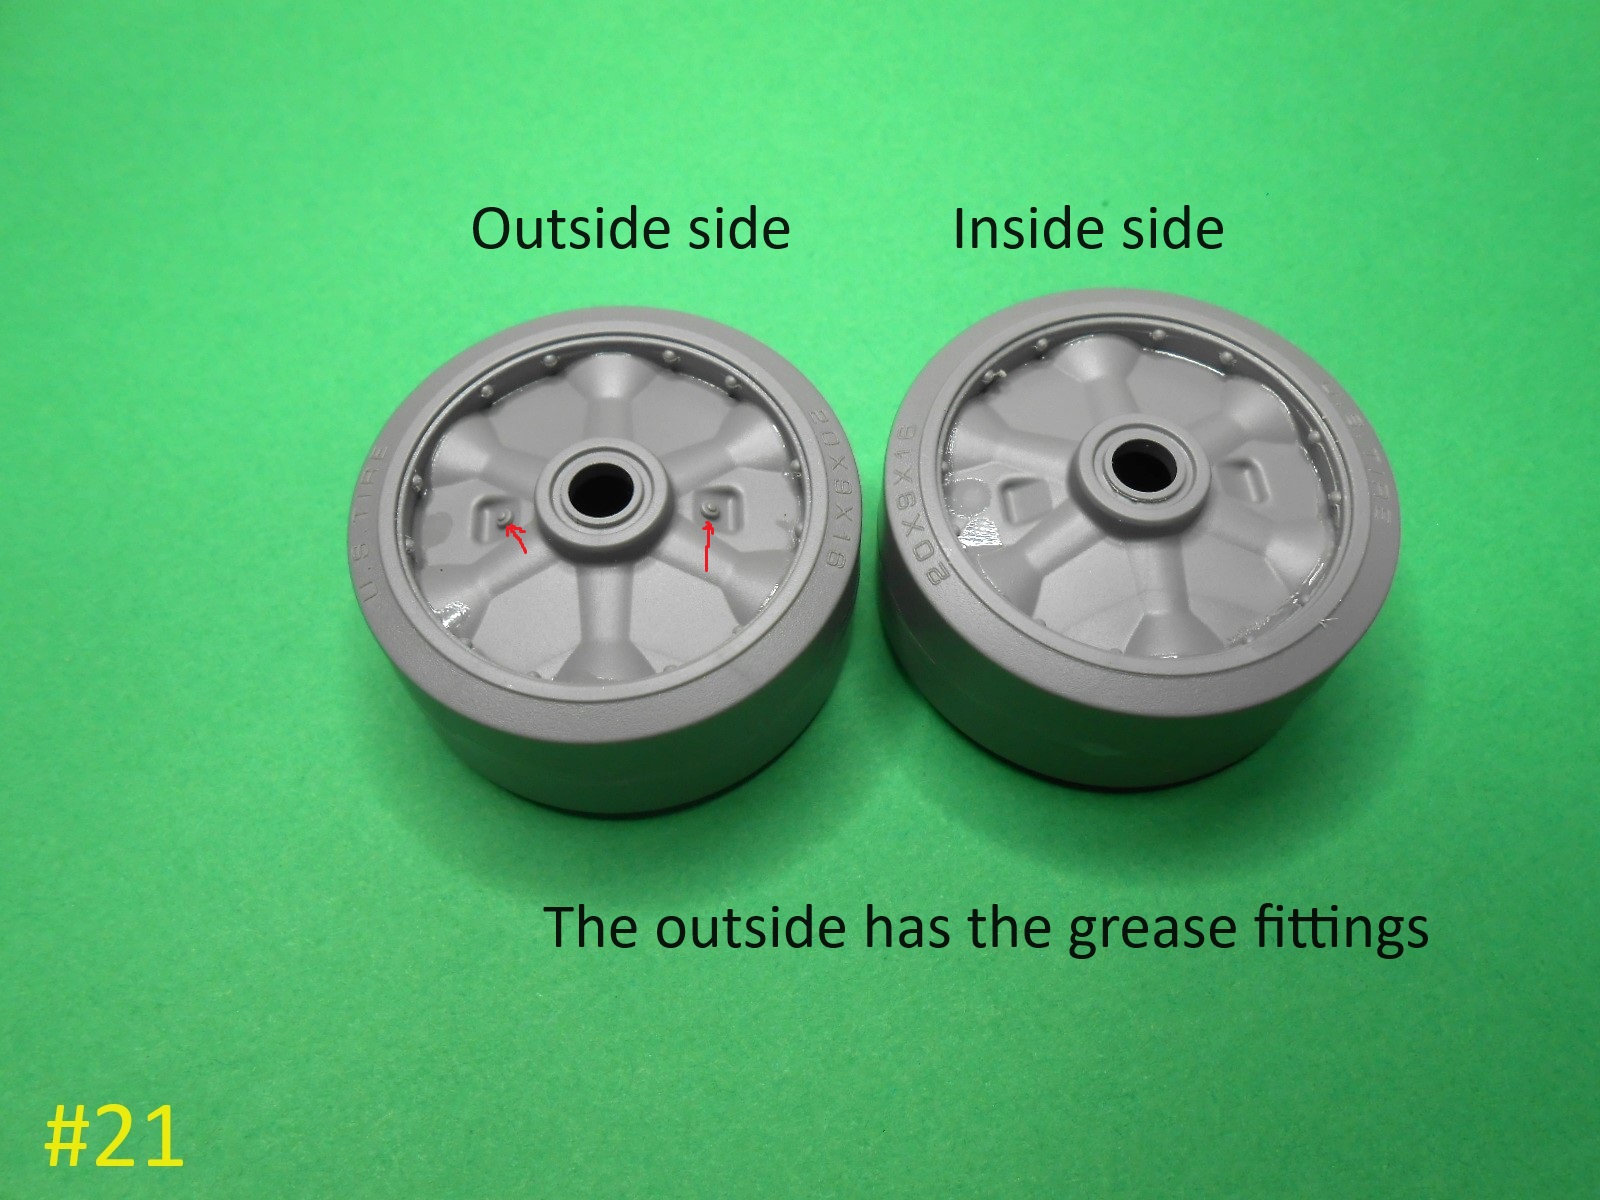
I’ve been working on the road wheels , it’s a real job cleaning the seam around the rivets
on the edges.
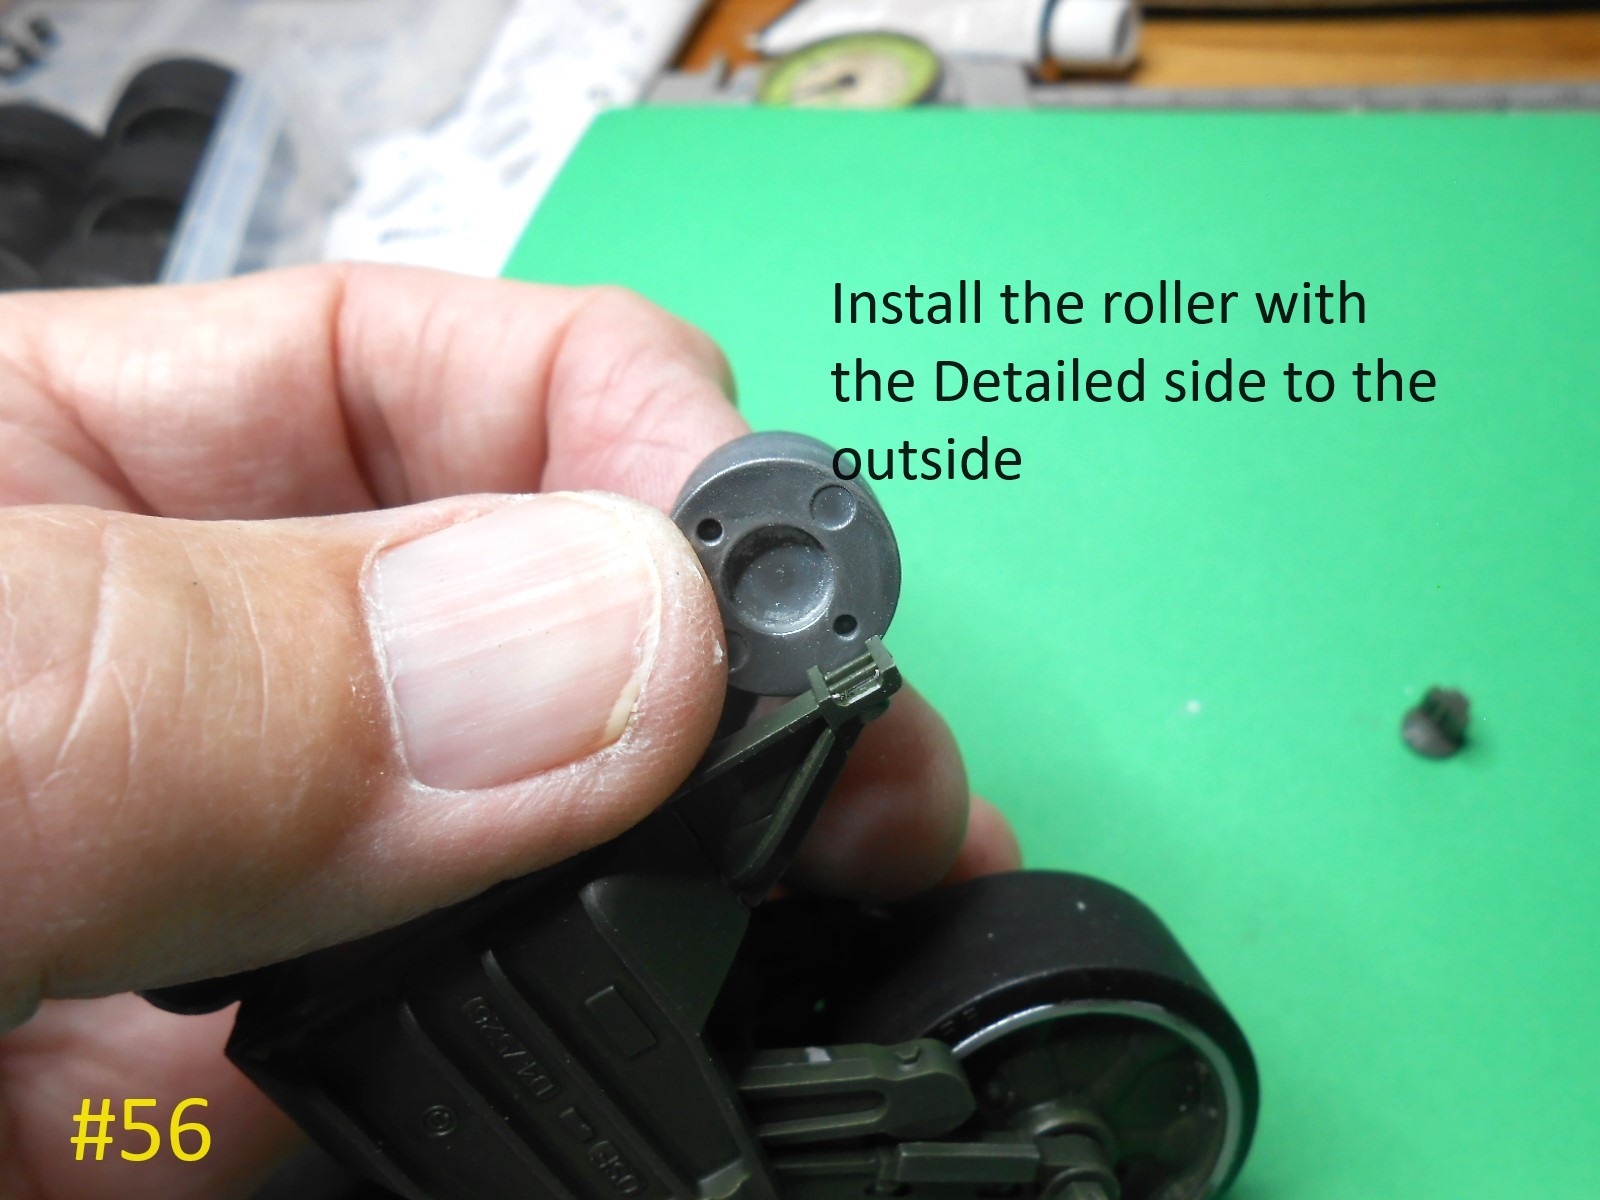
Be shure you have all the same wheel parts in the same tire parts so the grease fittings are all on the outside and the tire parts match.
Finished for today
Donald
7 Likes

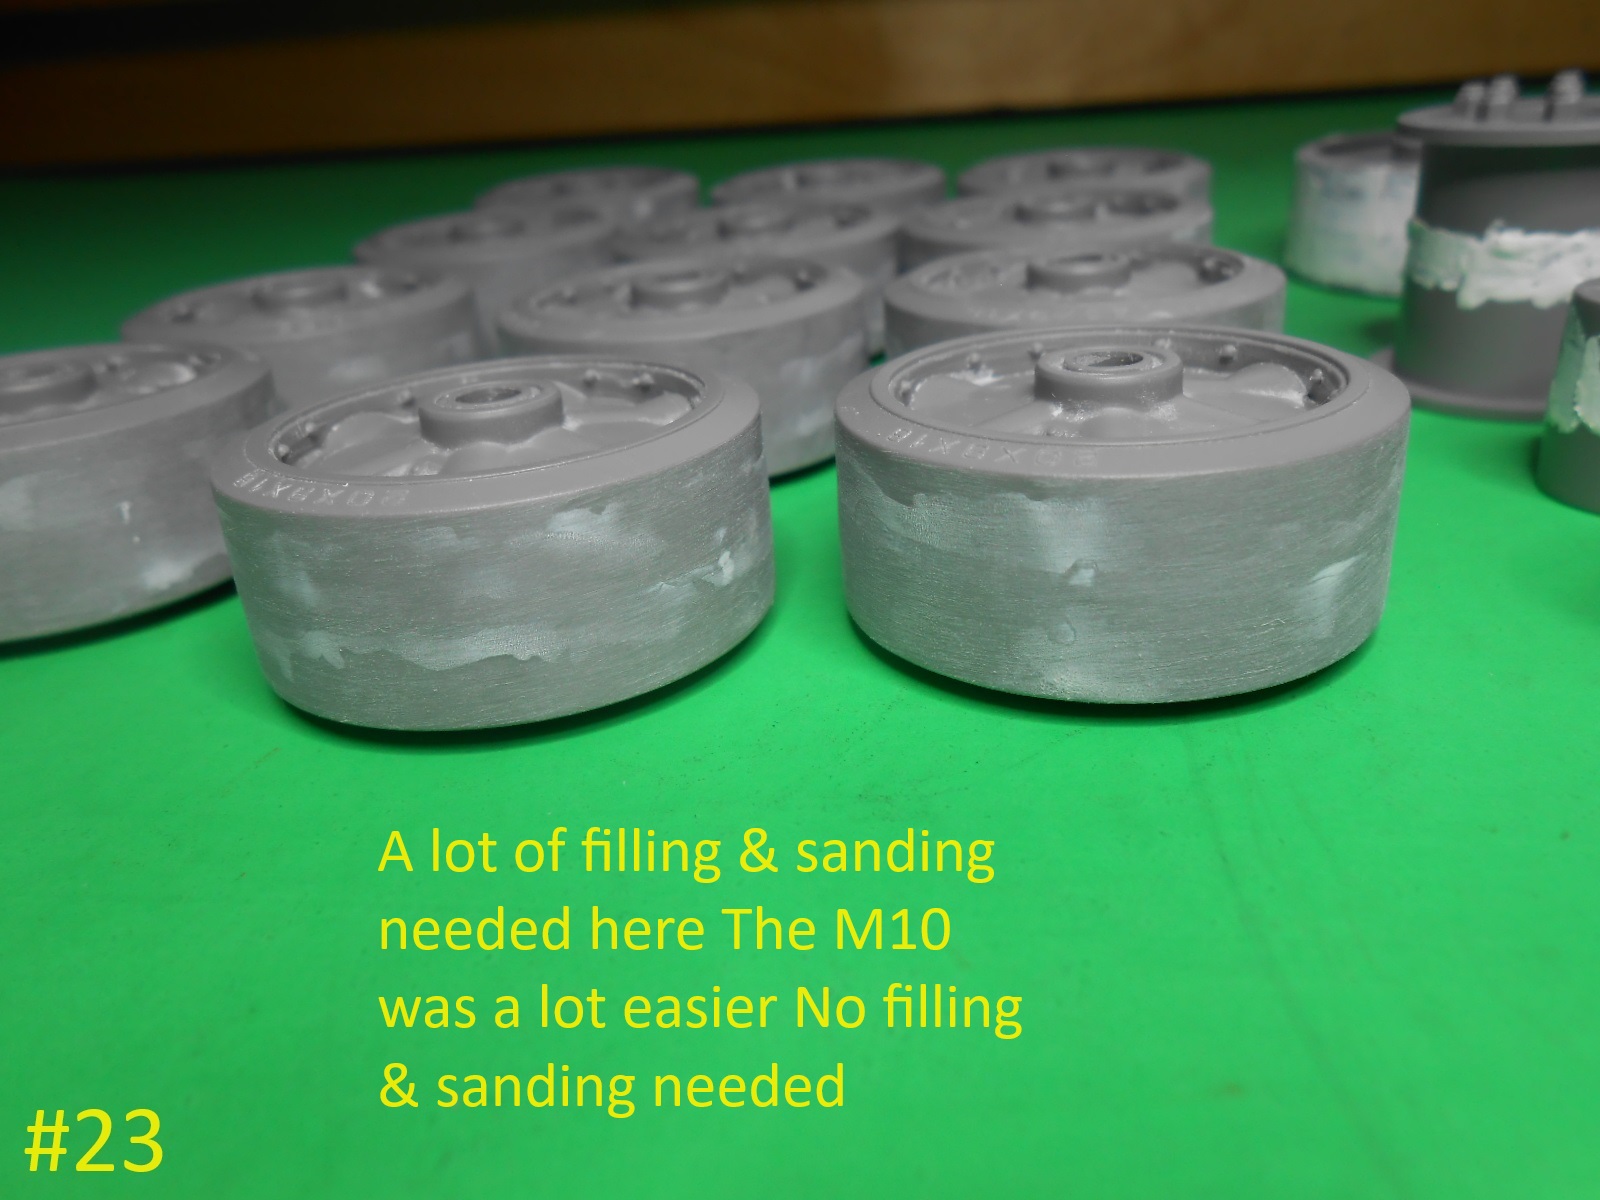
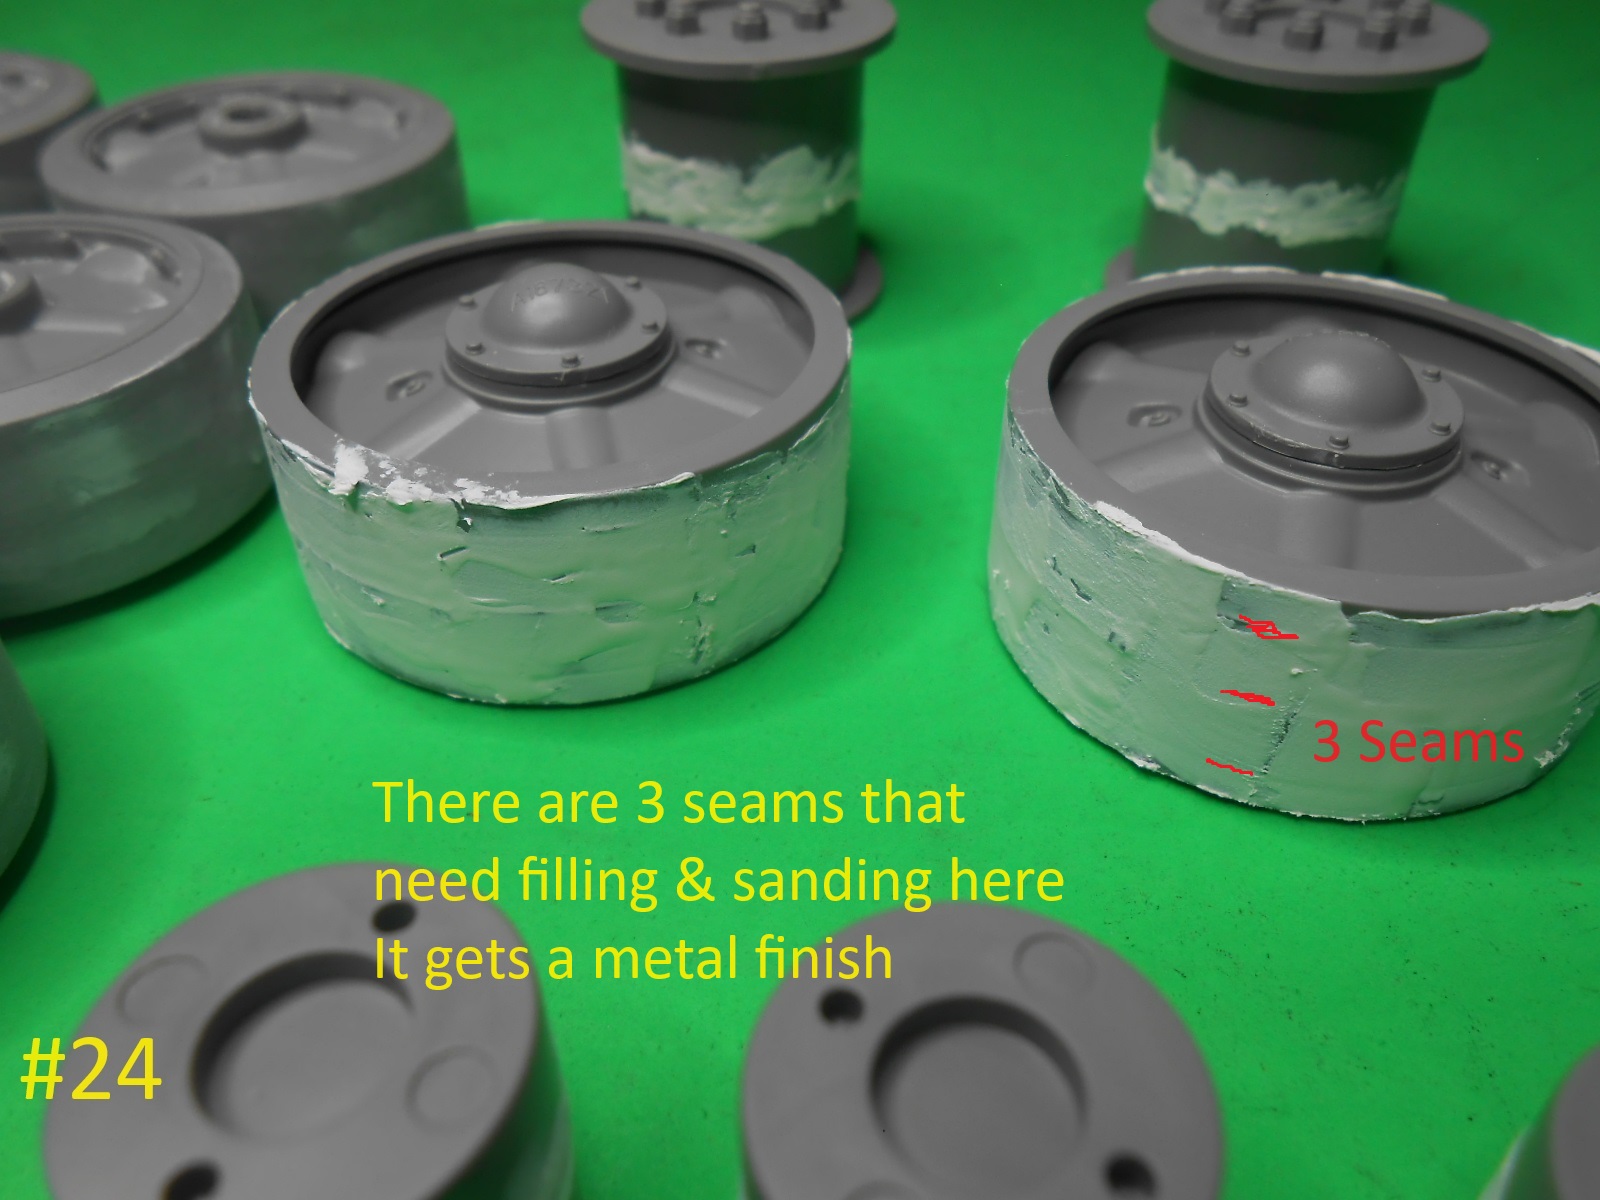
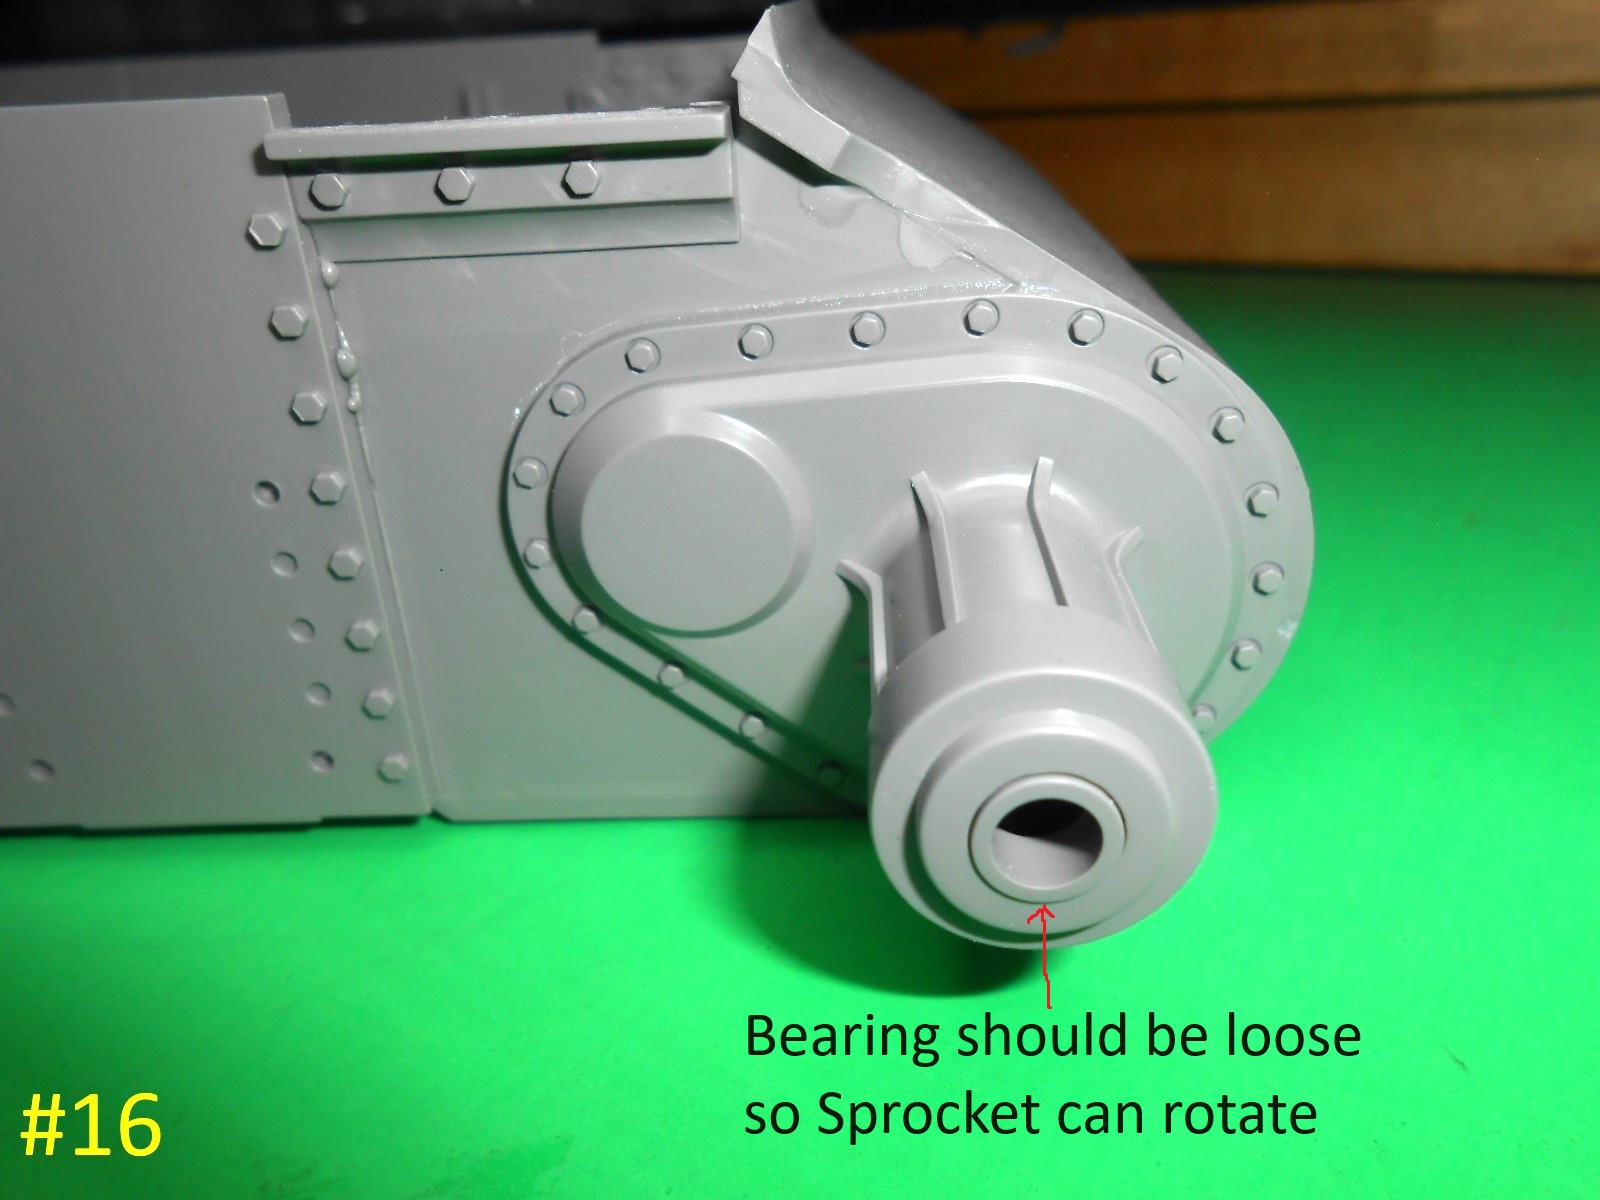
I have some more finished well assembled anyway.
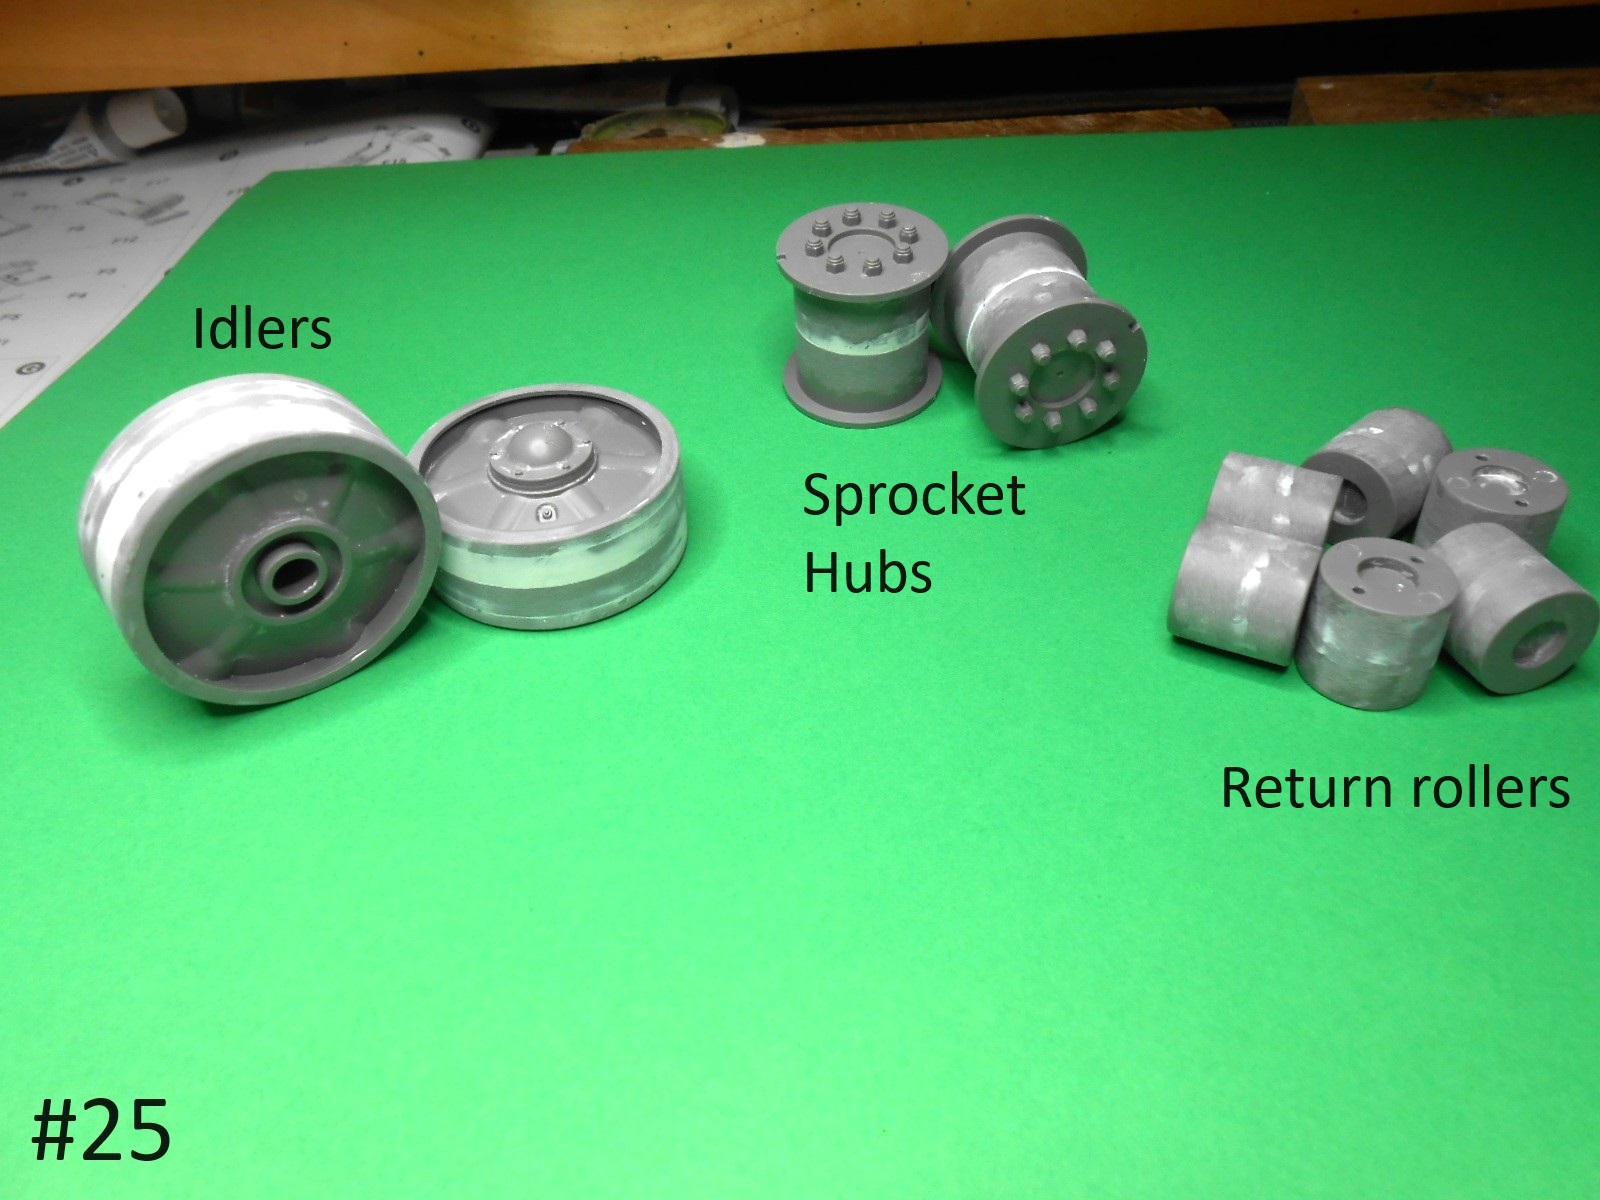
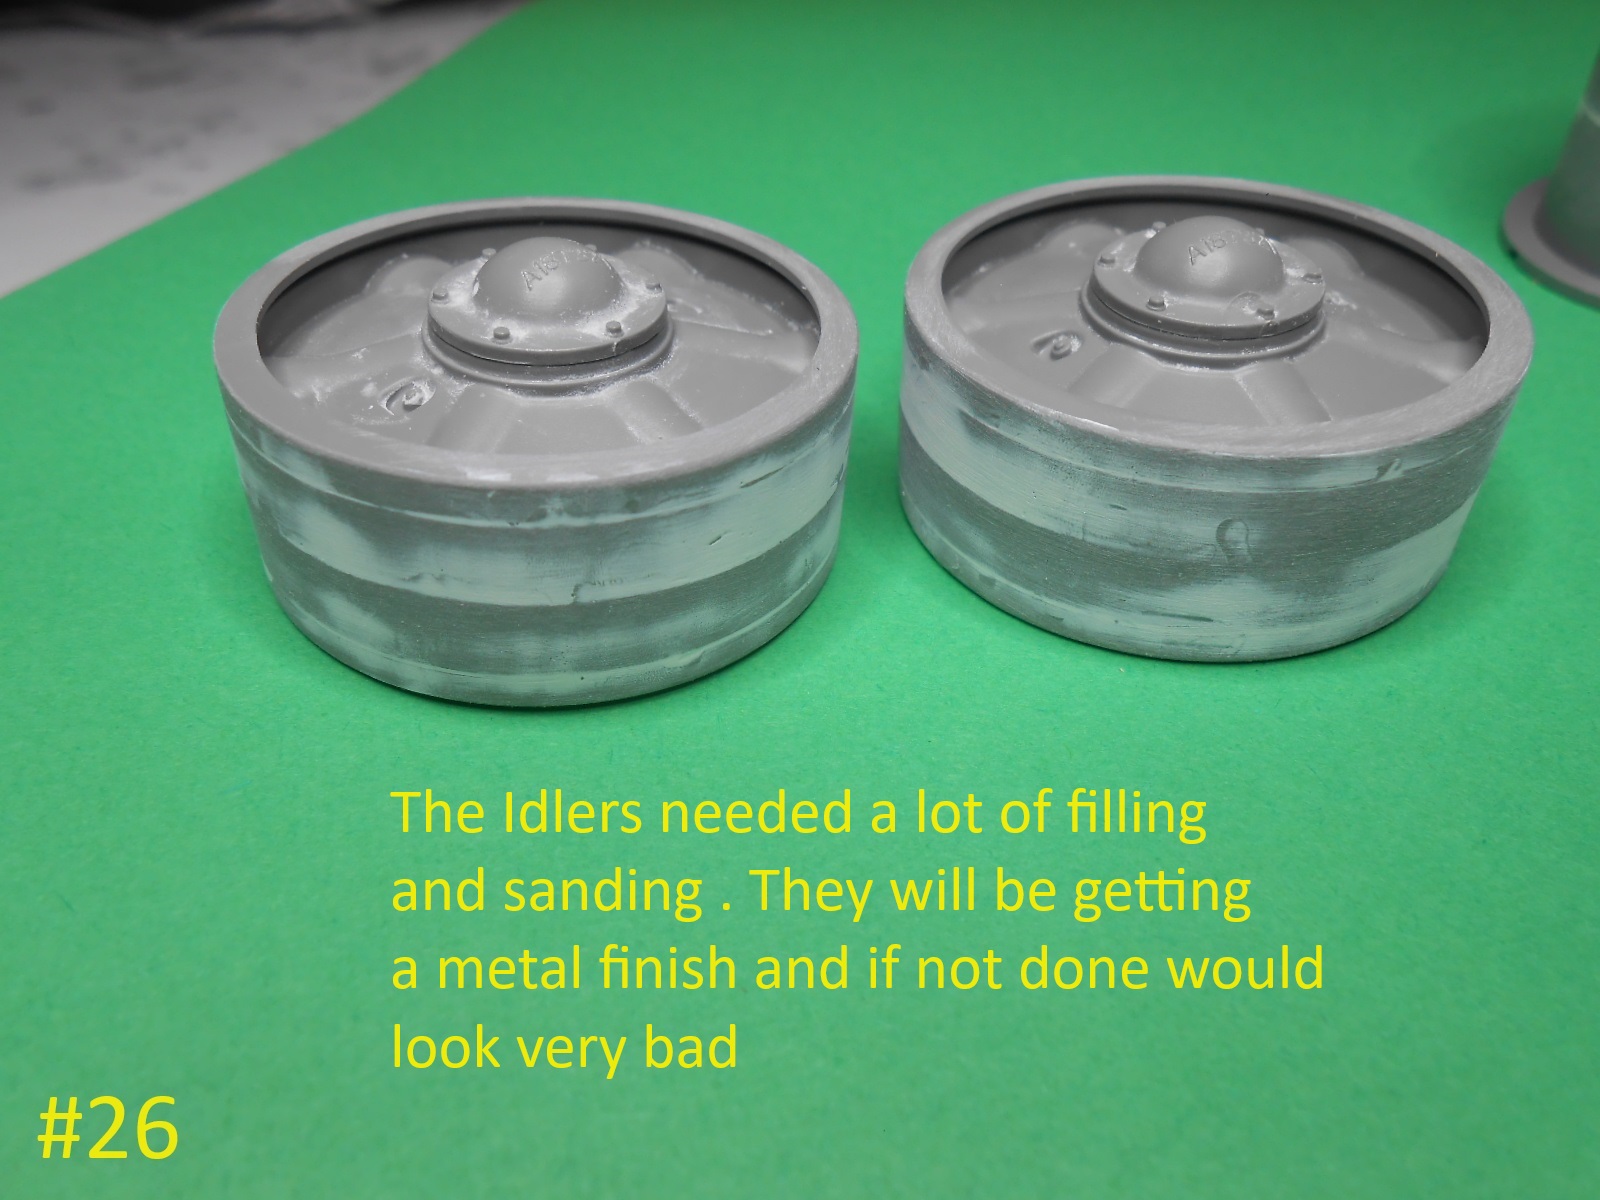
Each Idler not counting the Hub has 4 pieces that don’t quite line up and so they need a lot of filler and sanding.
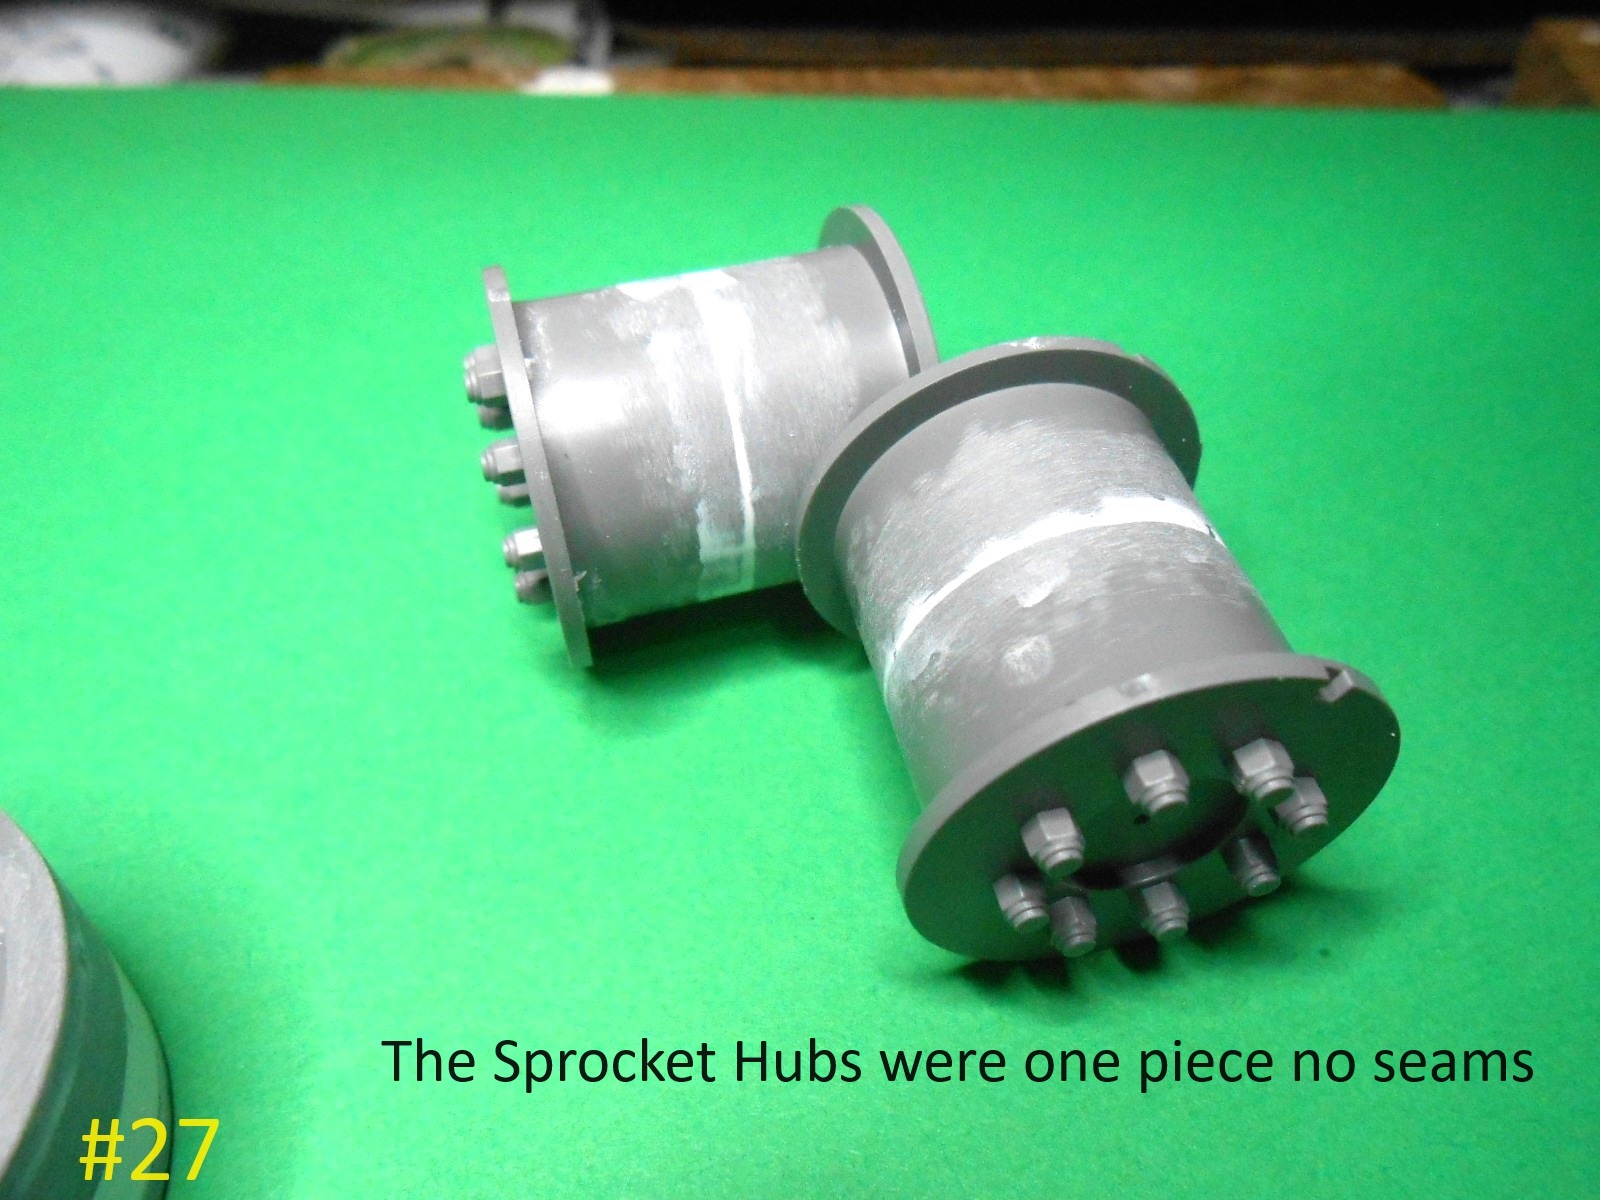
The Sprockets are supposed to be one piece so another seam to fill.
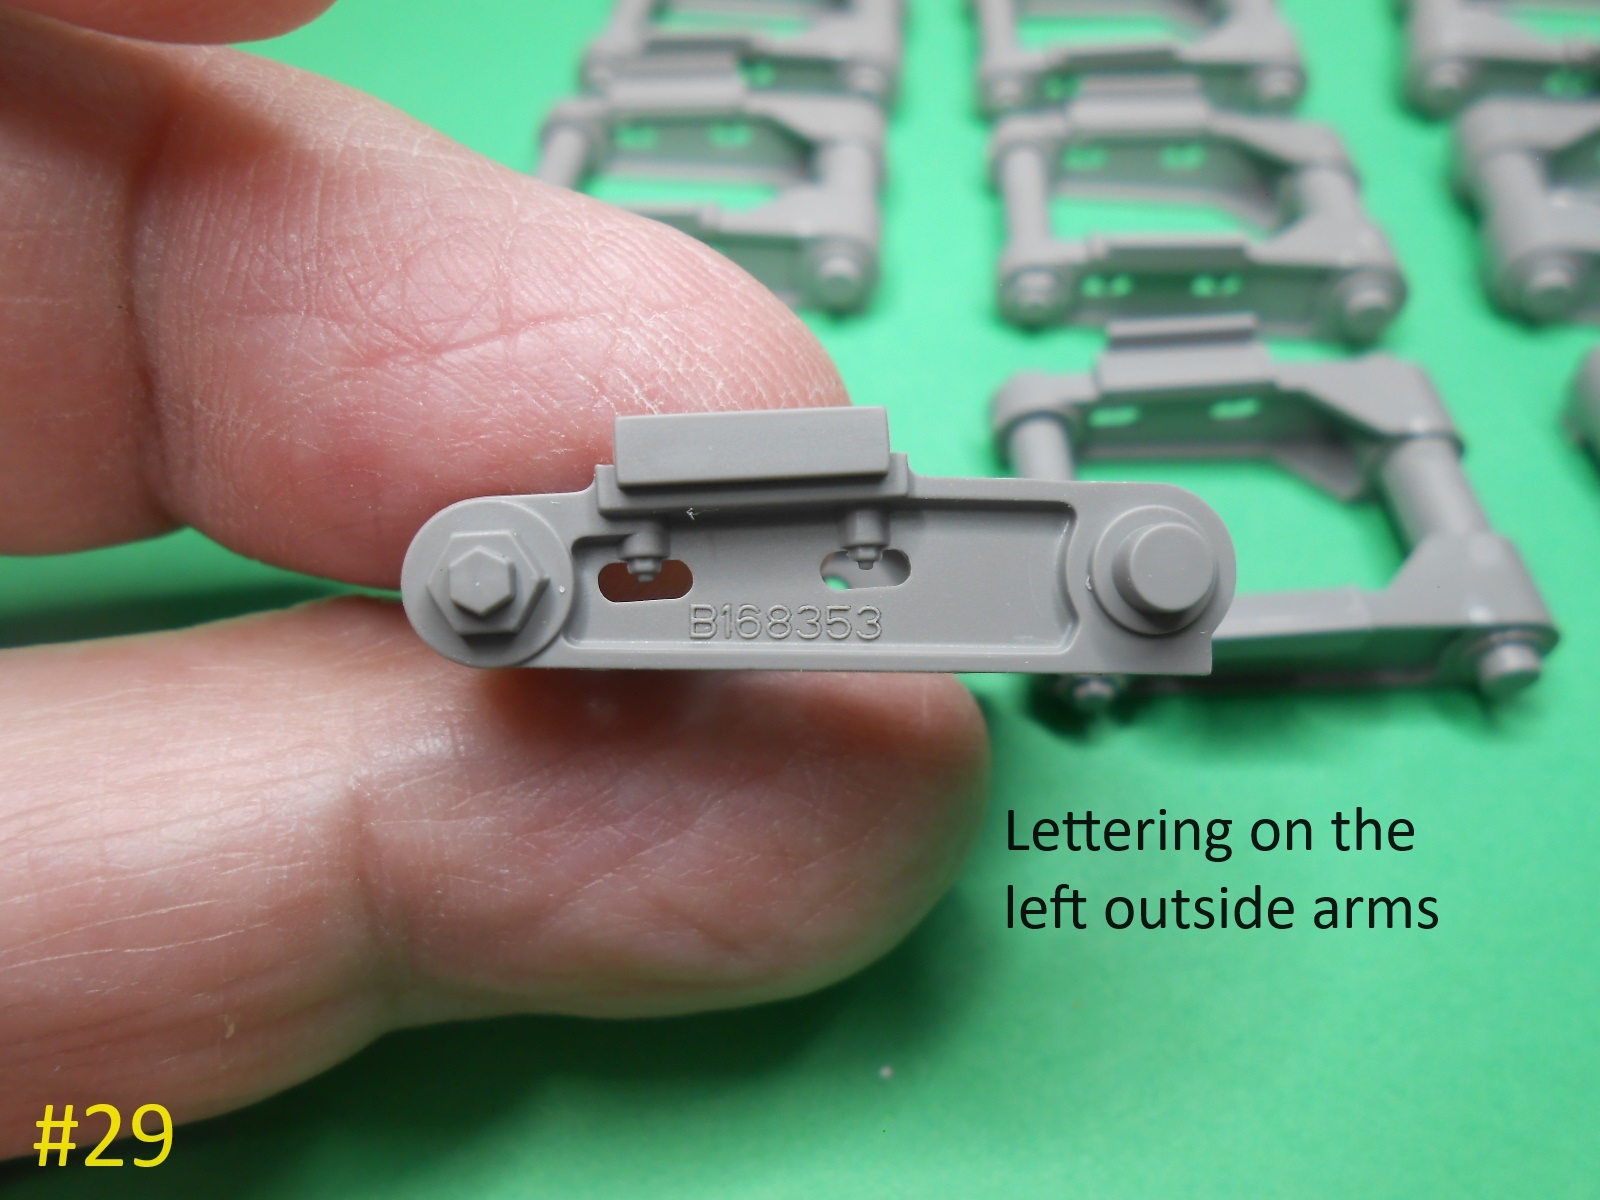
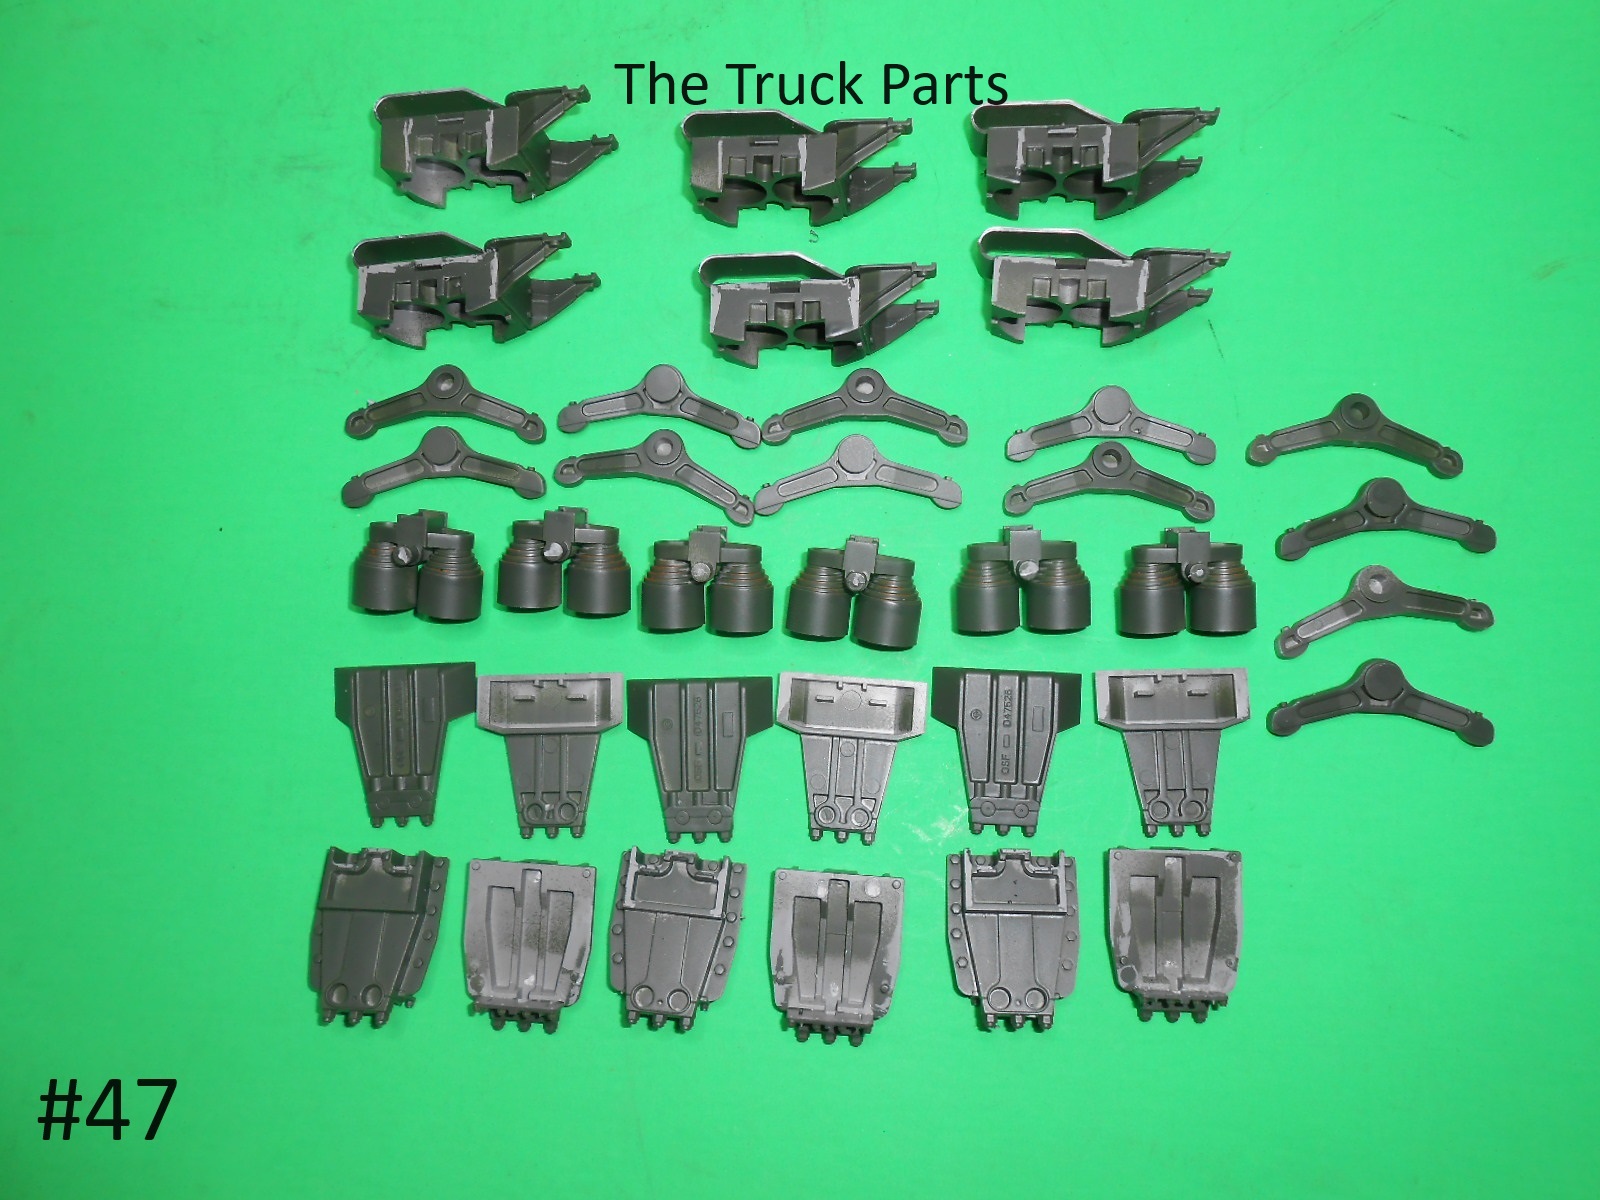
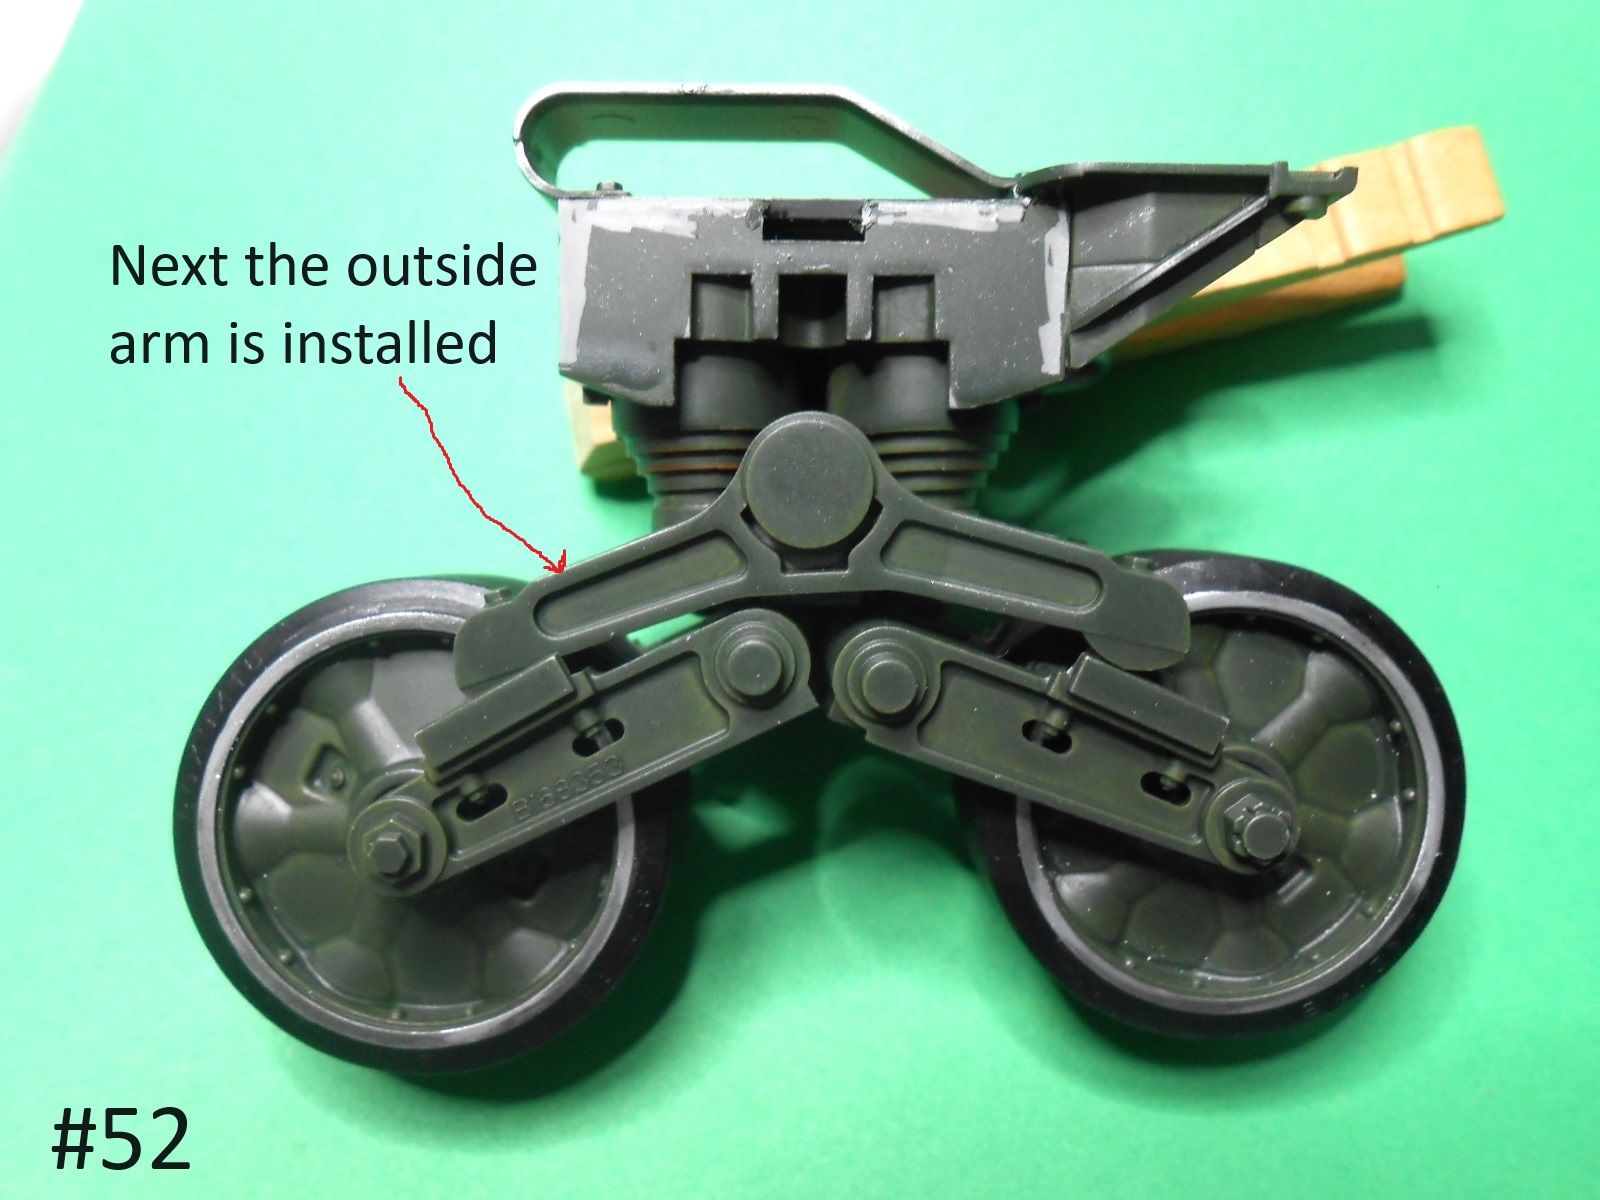
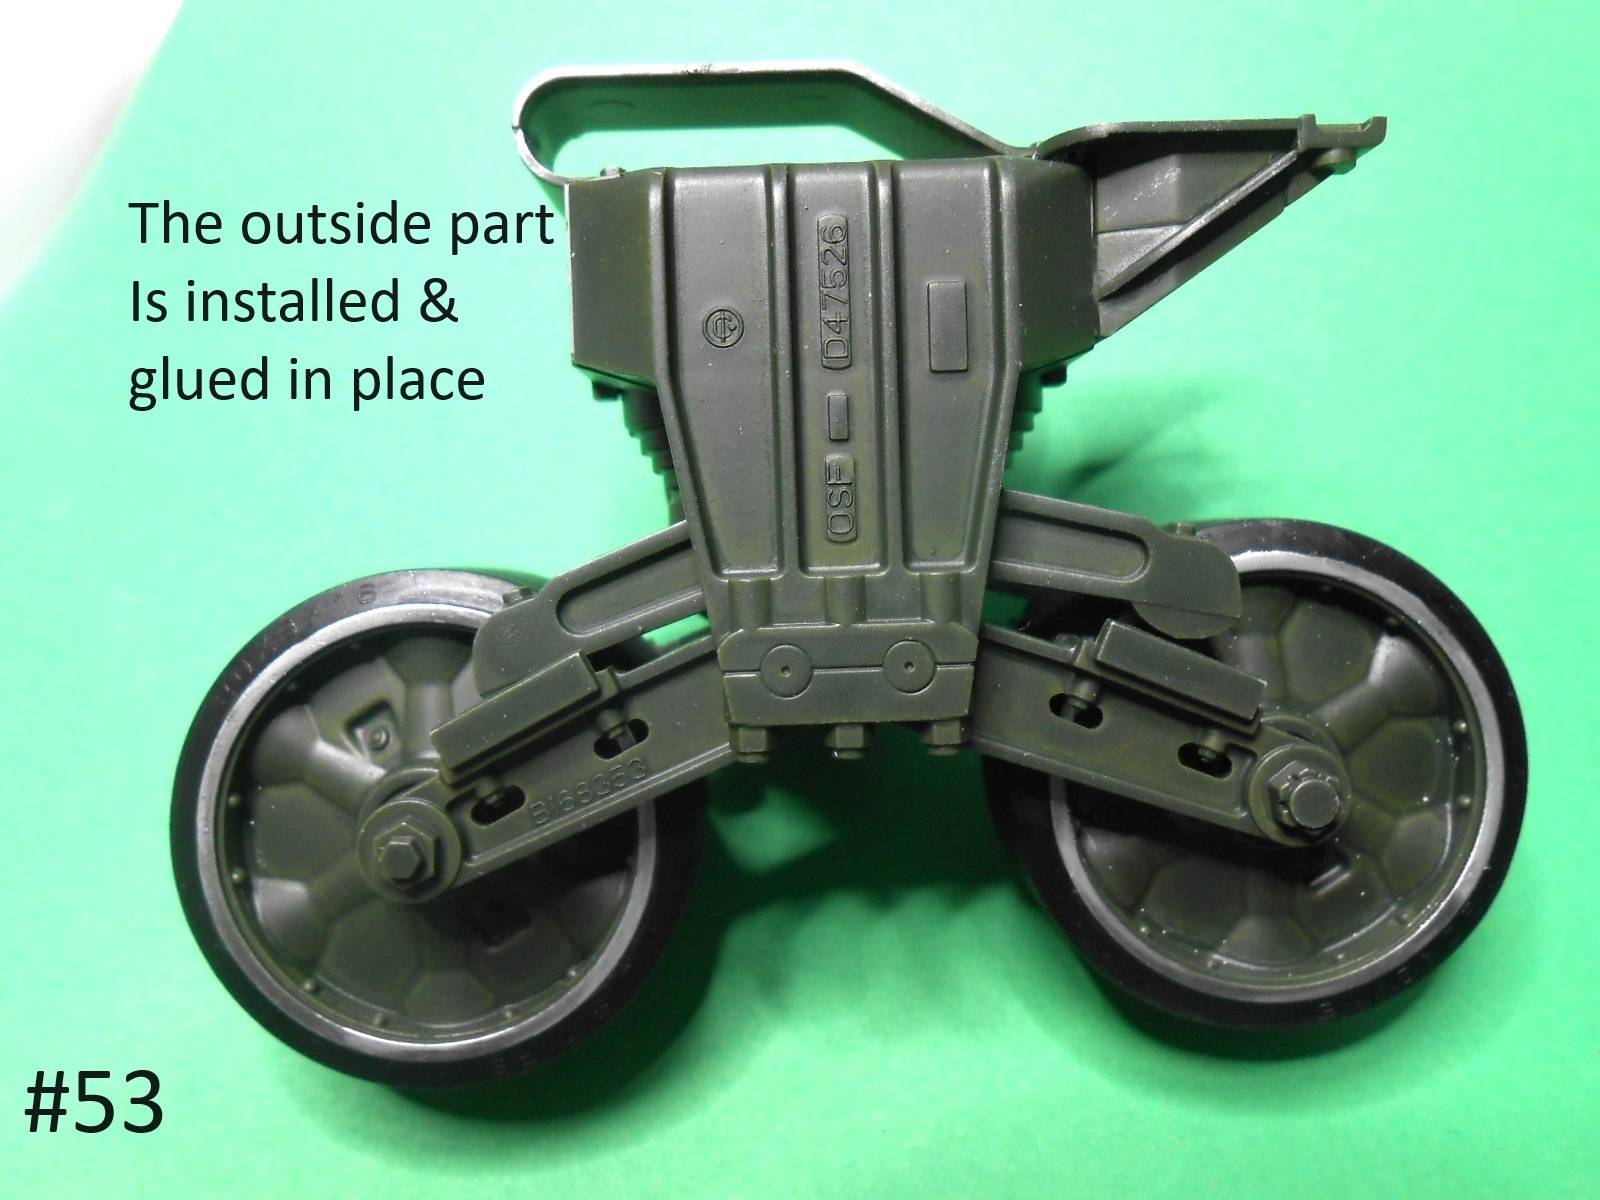
Here are the arms for the road wheels , the axles aren’t glued in, just to keep everything straight ( Press them against a hard flat surface when gluing.
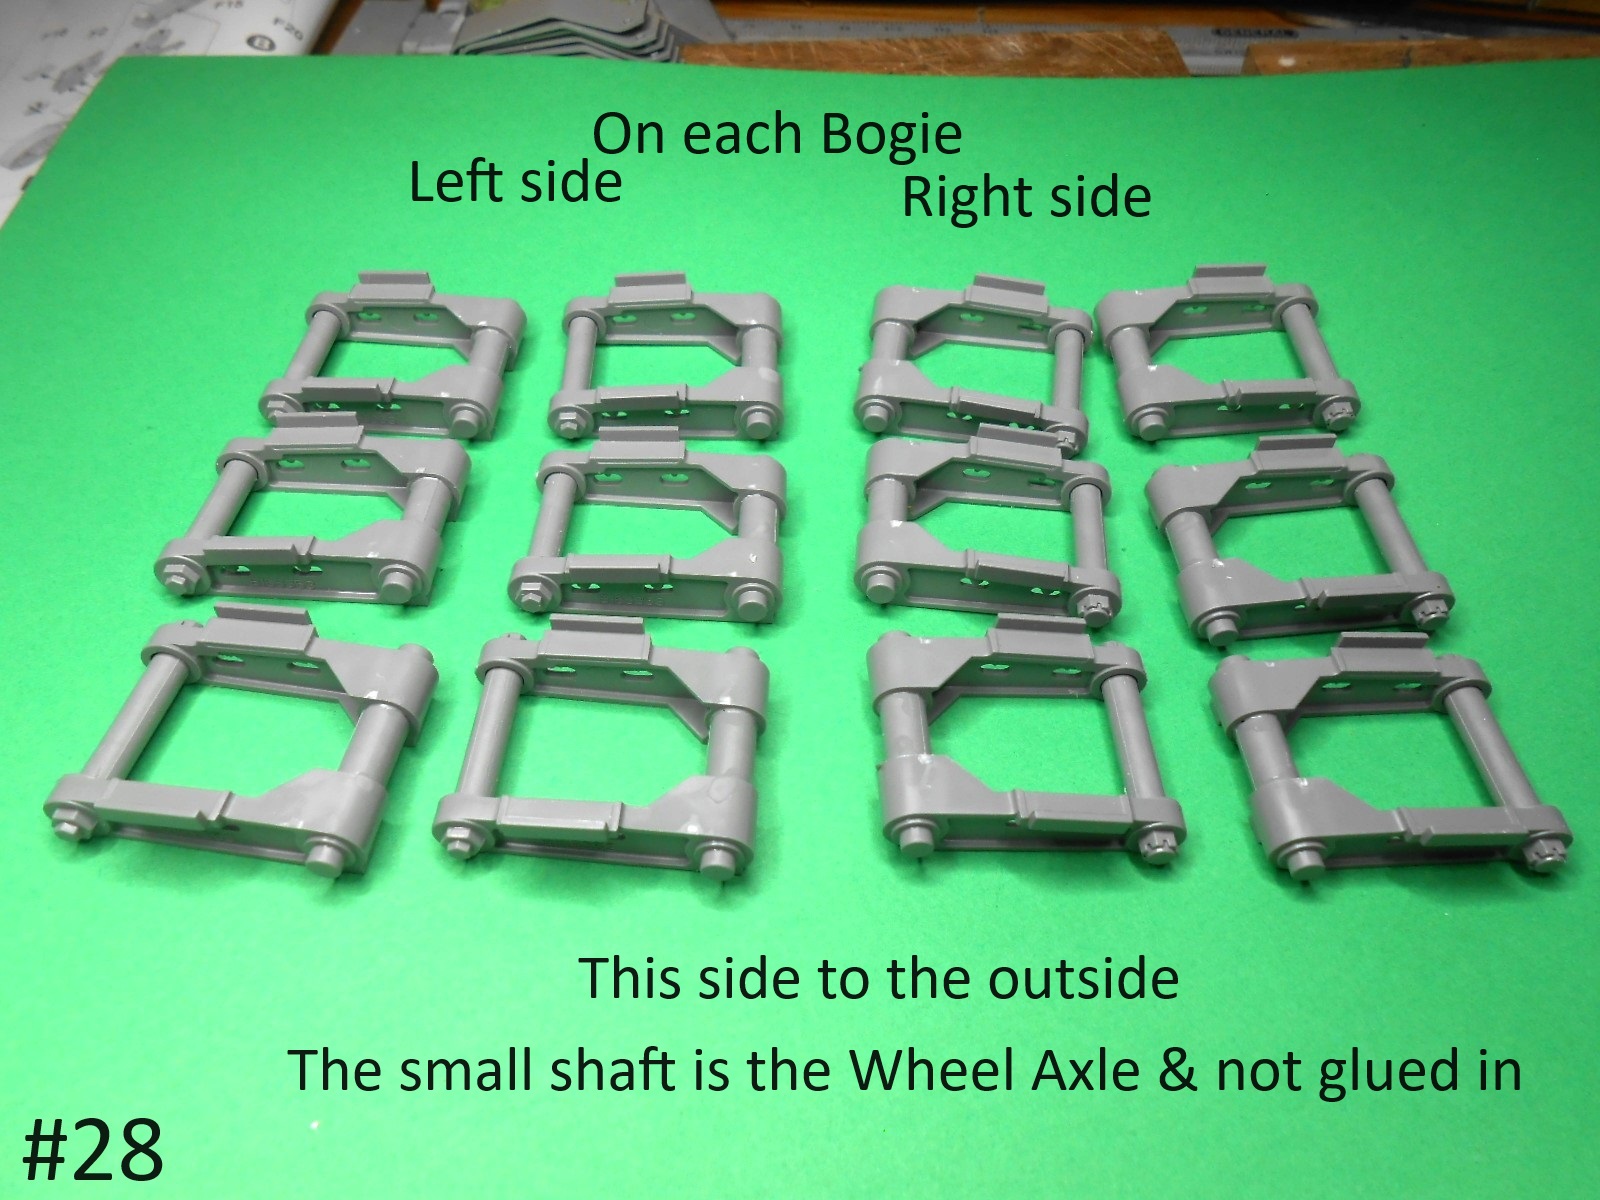
There are markings on the left outer arms as shown.
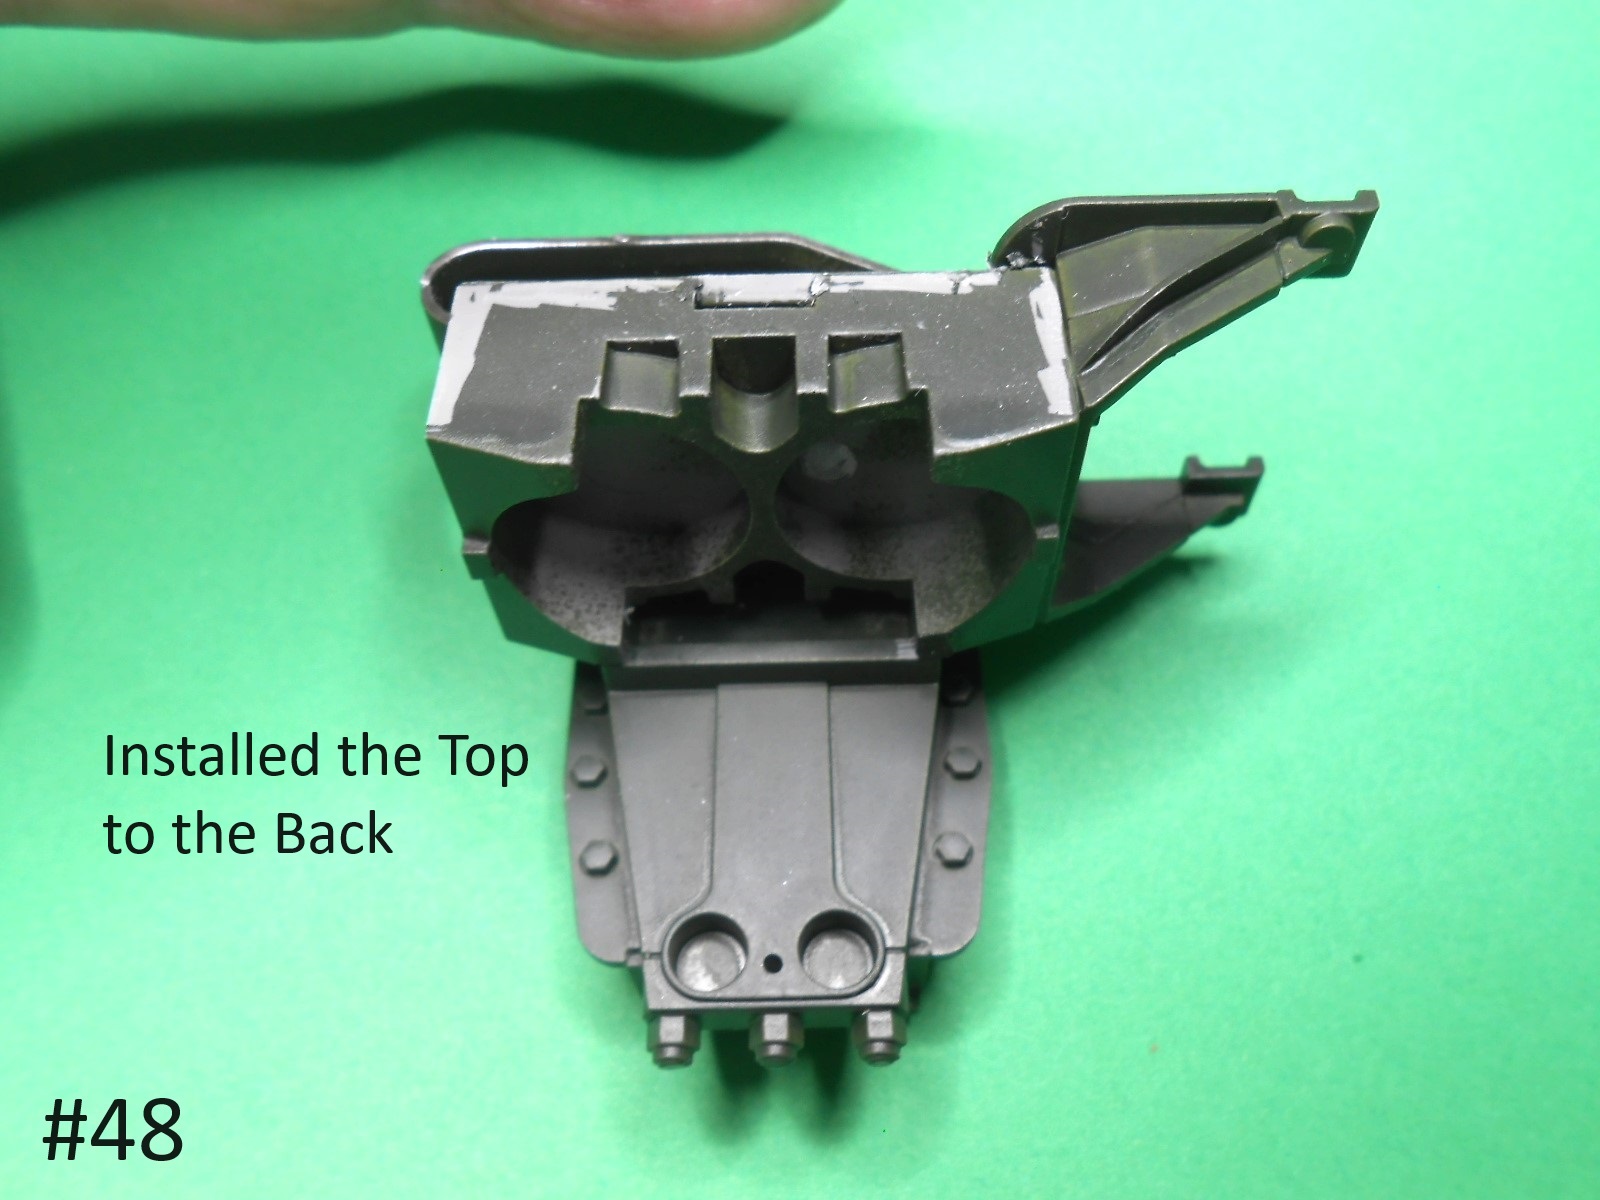
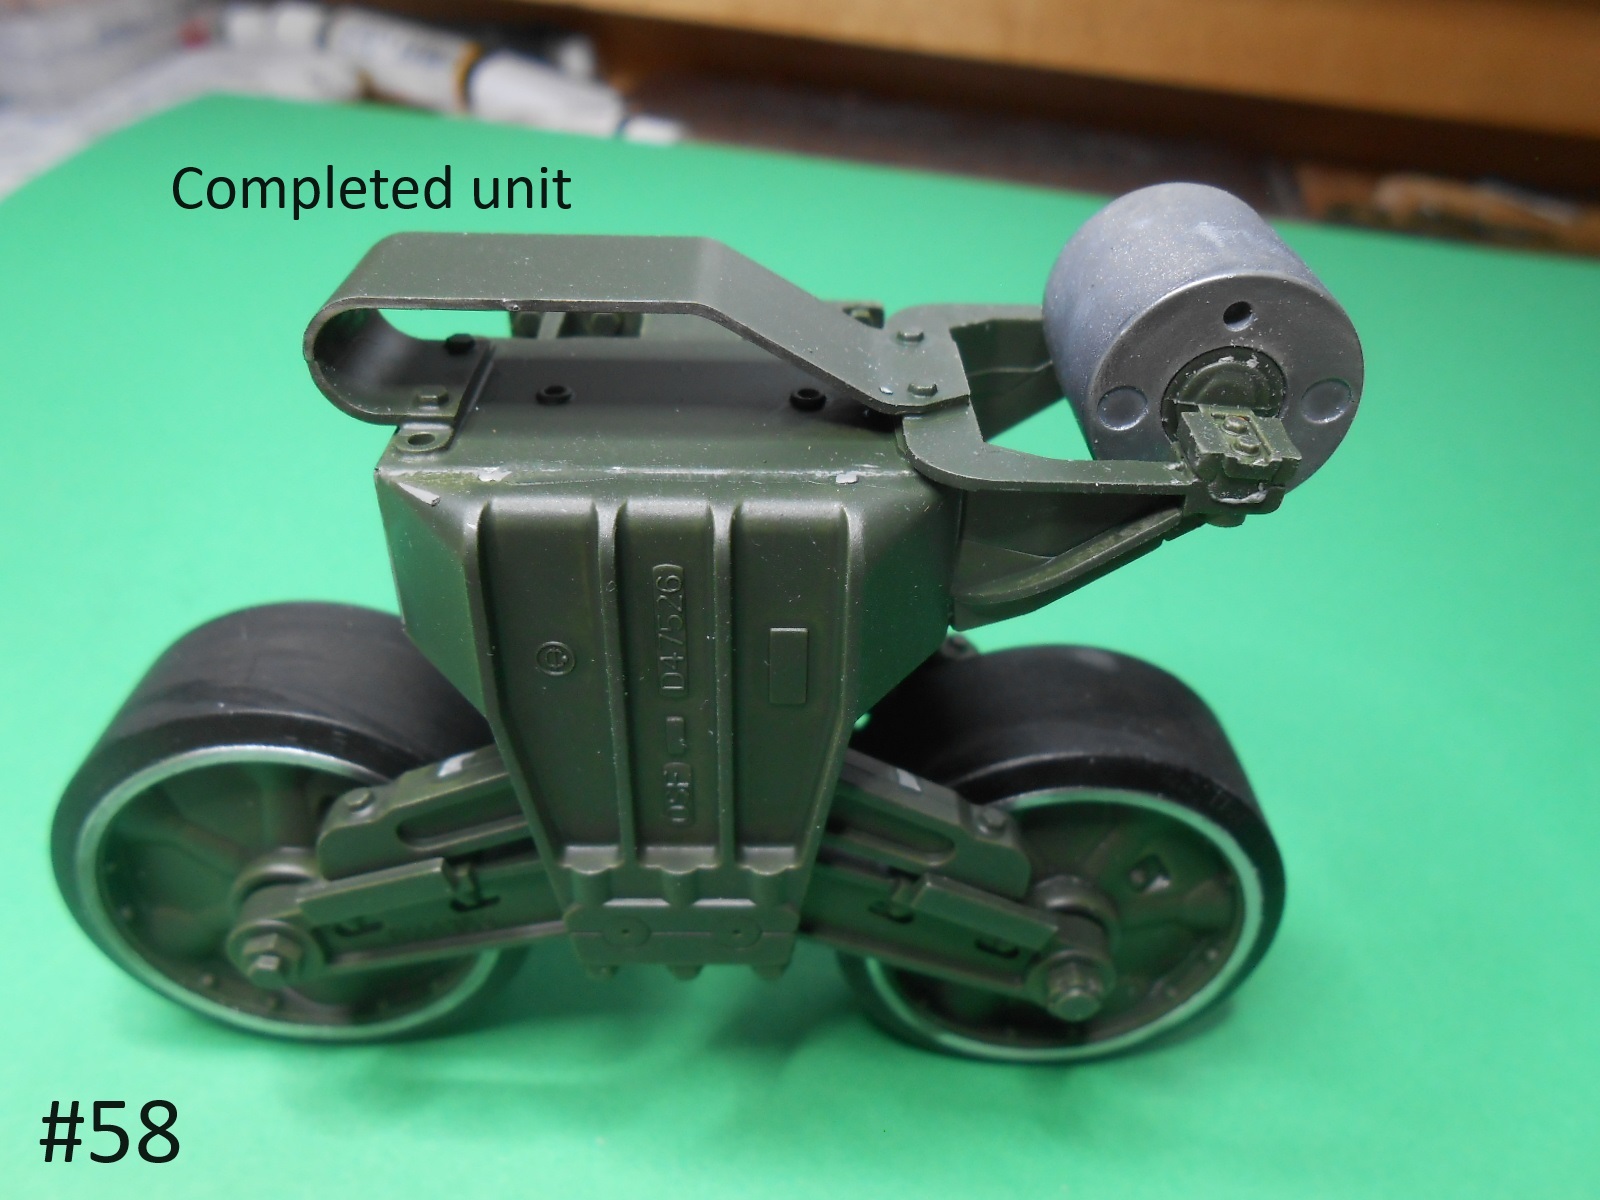
Here’s the main upper block with the insert installed.

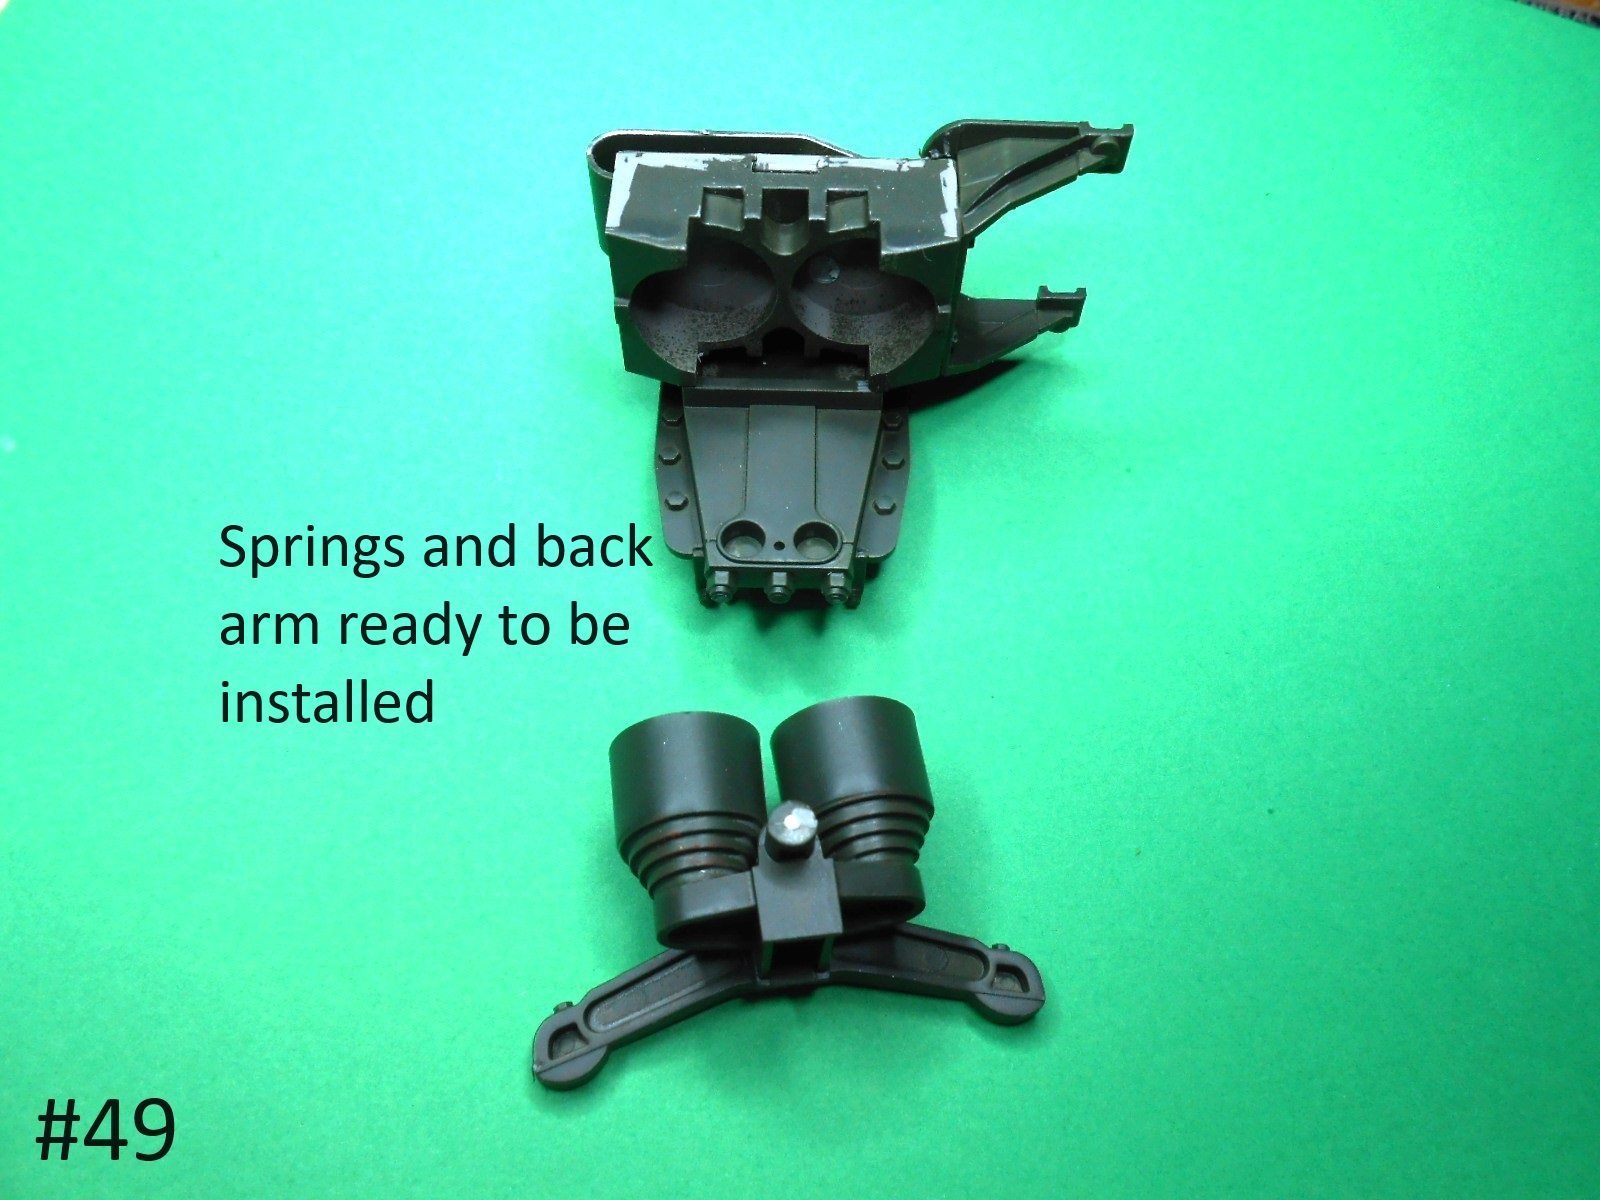
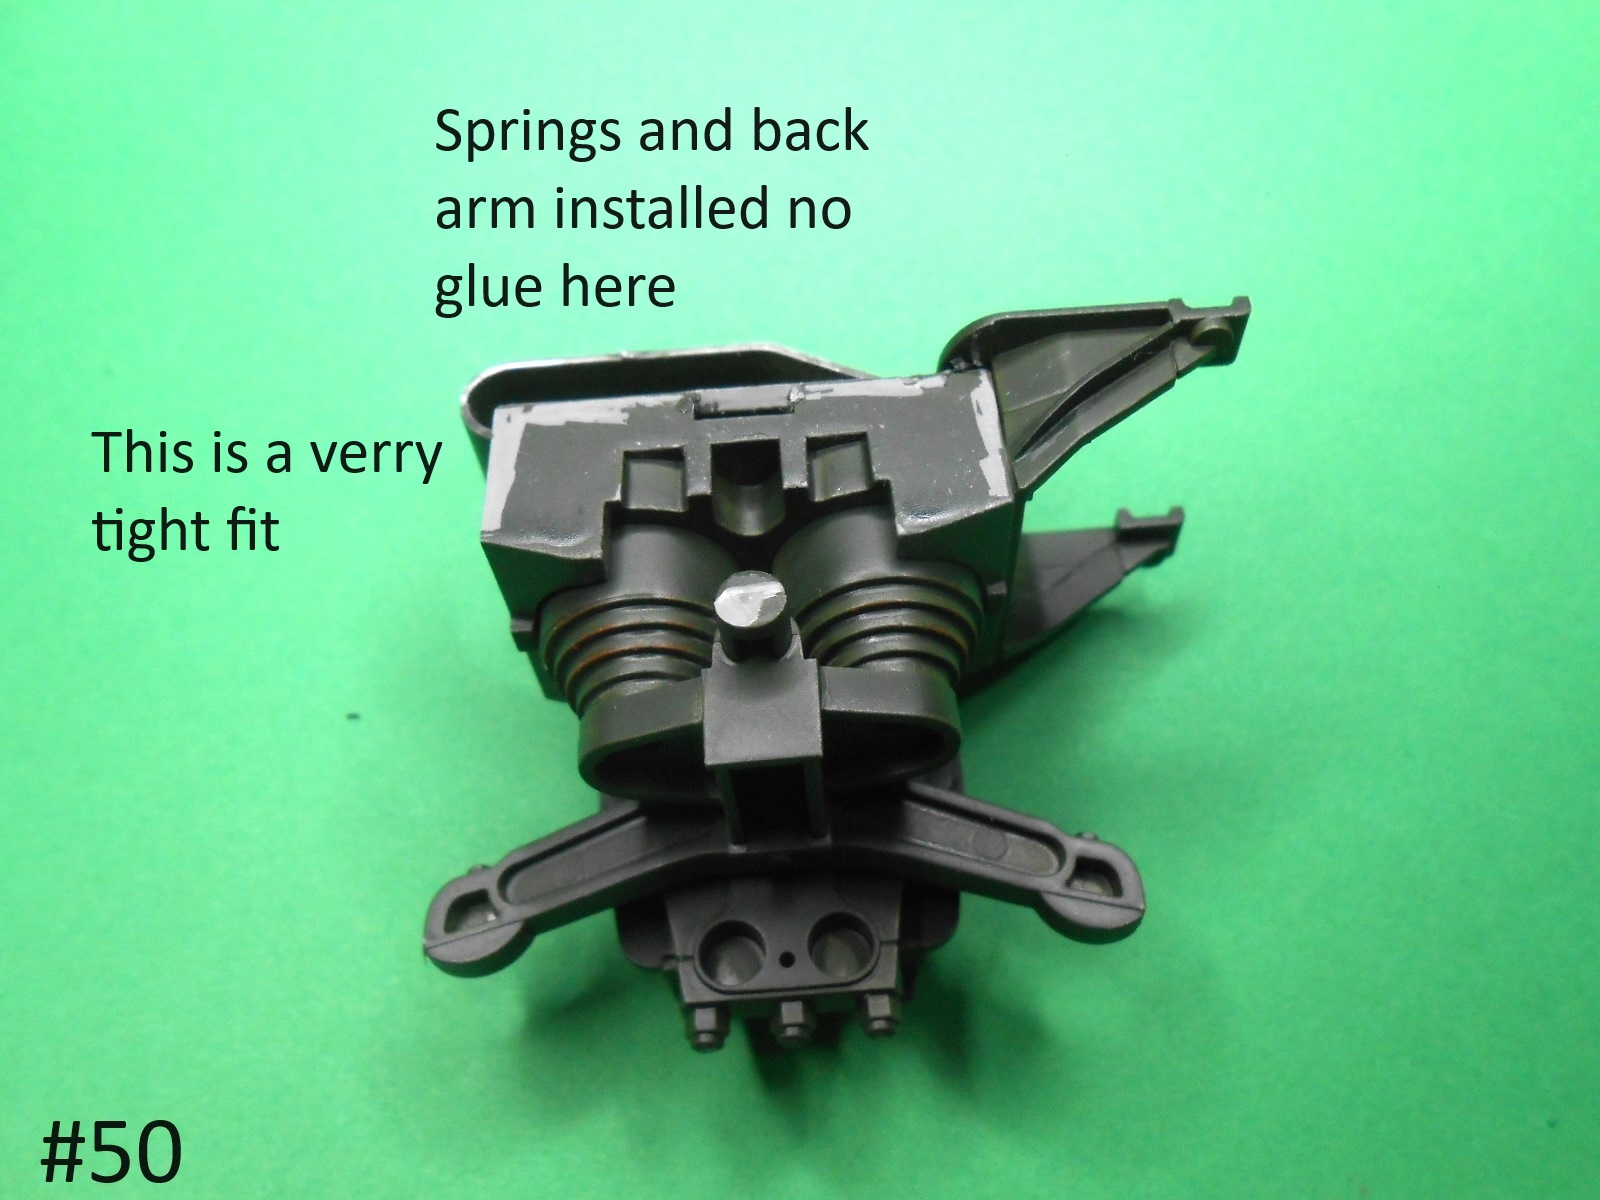
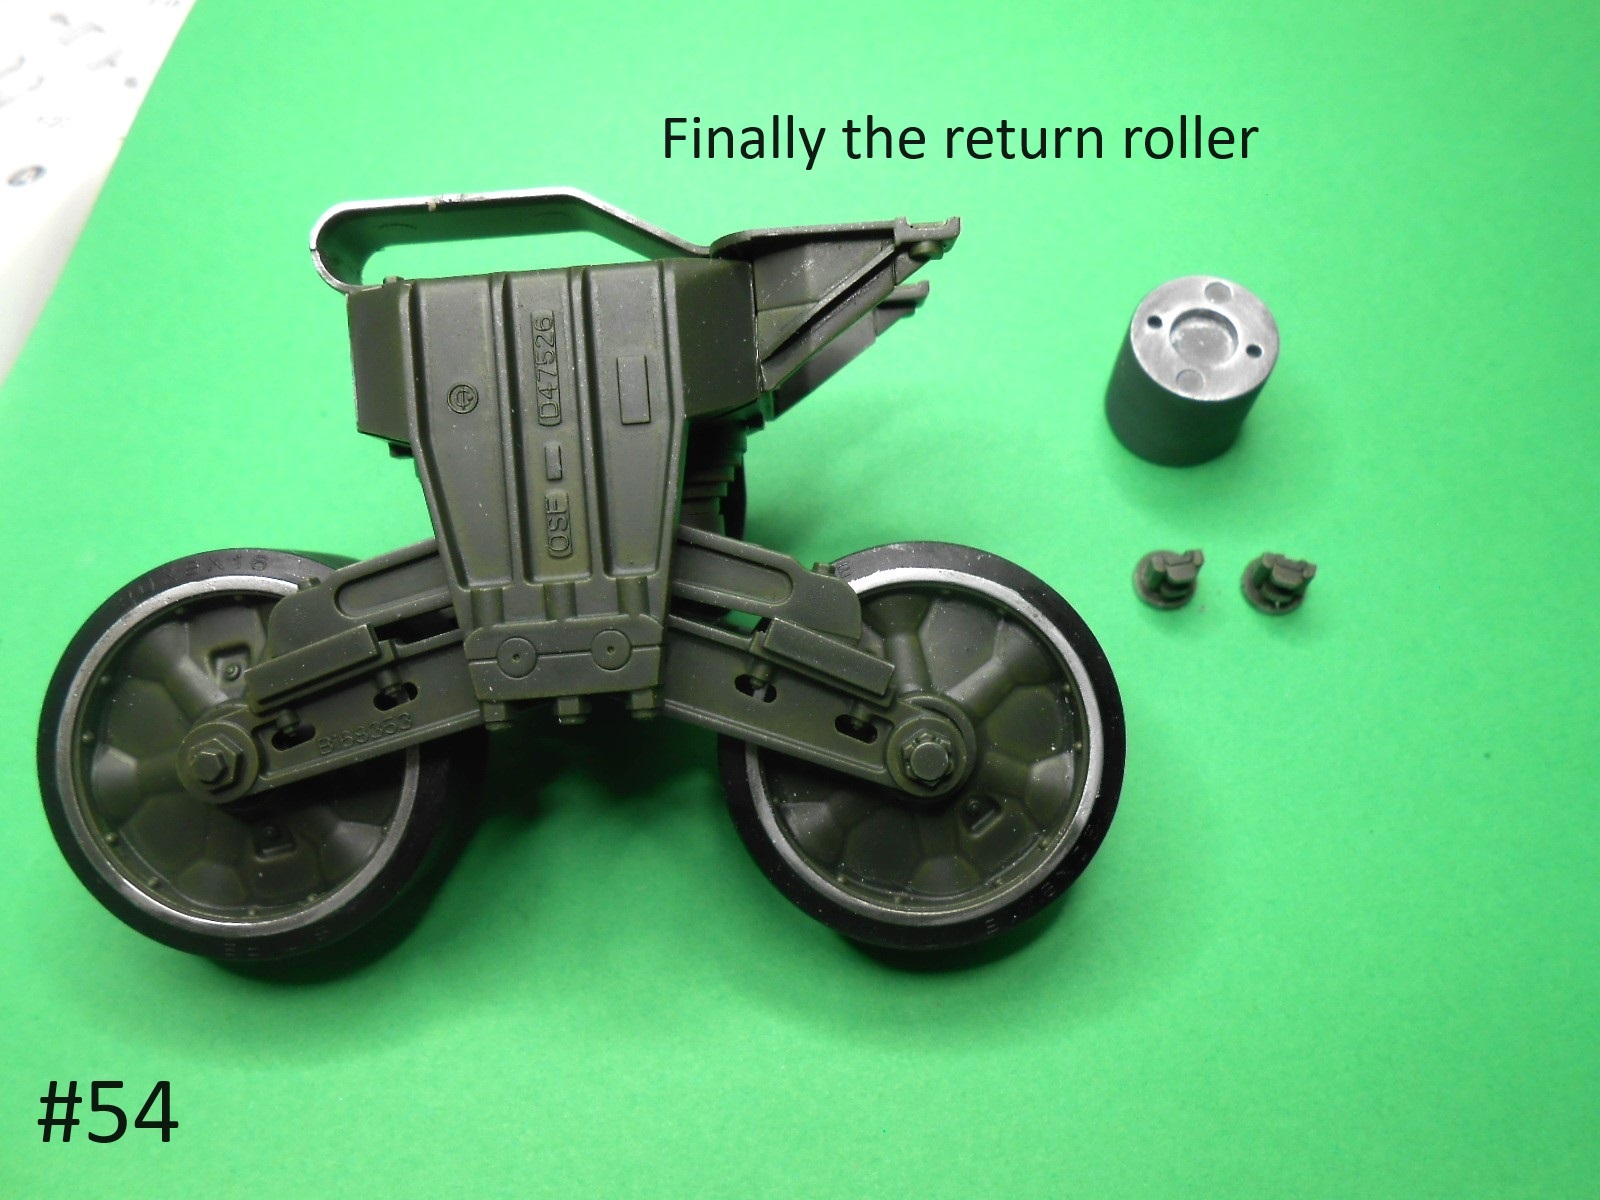
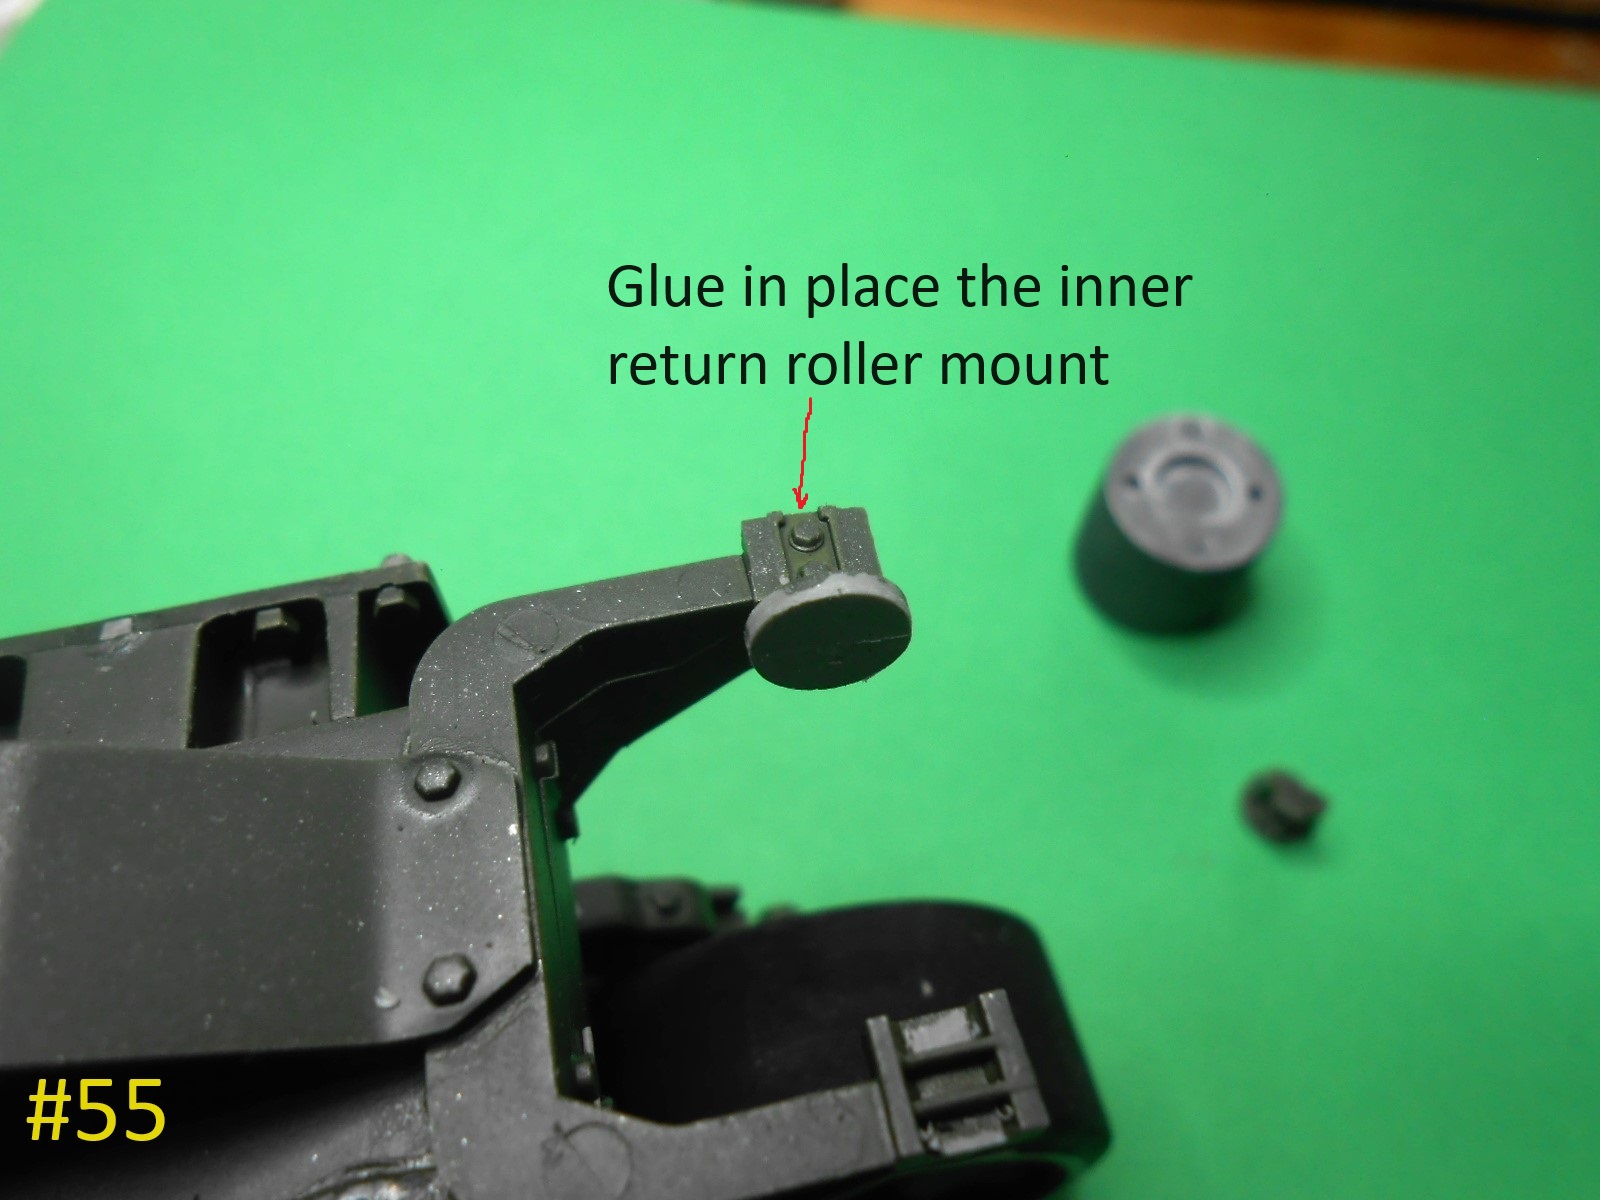
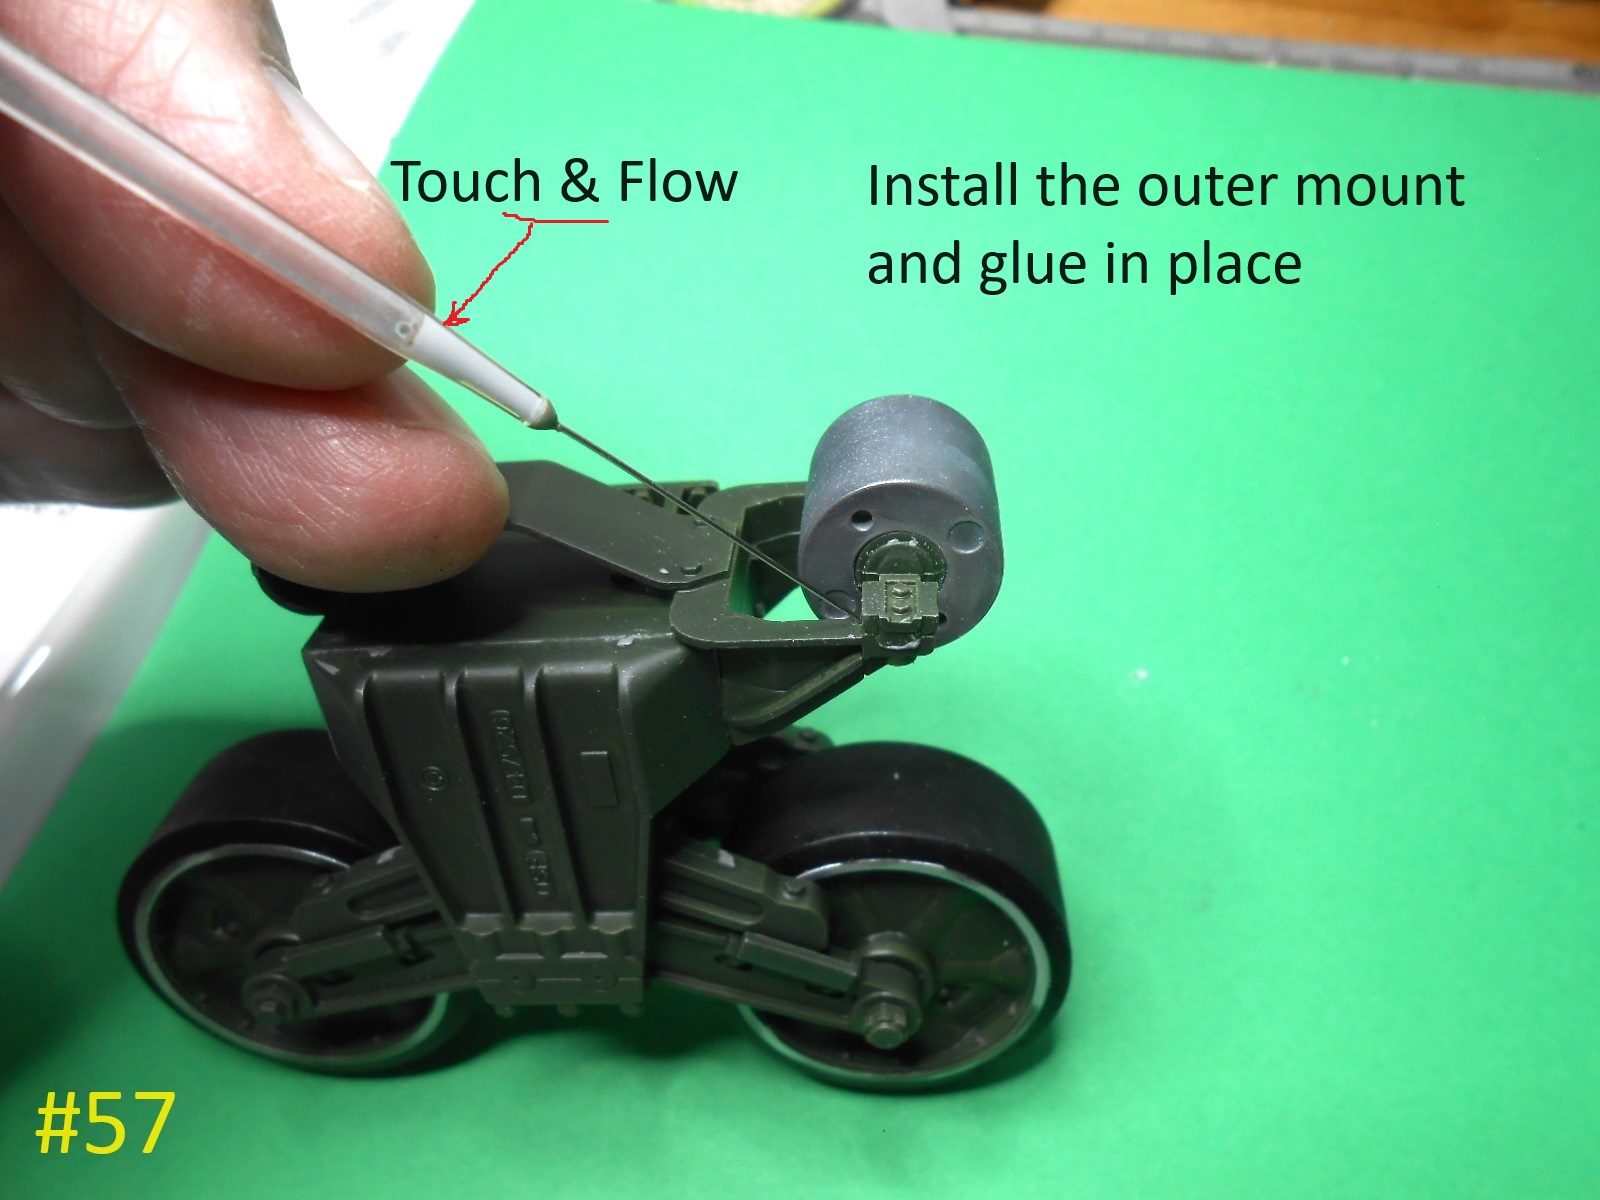
On installing the Return Roller supports I glued the upper part to the end without the holes.
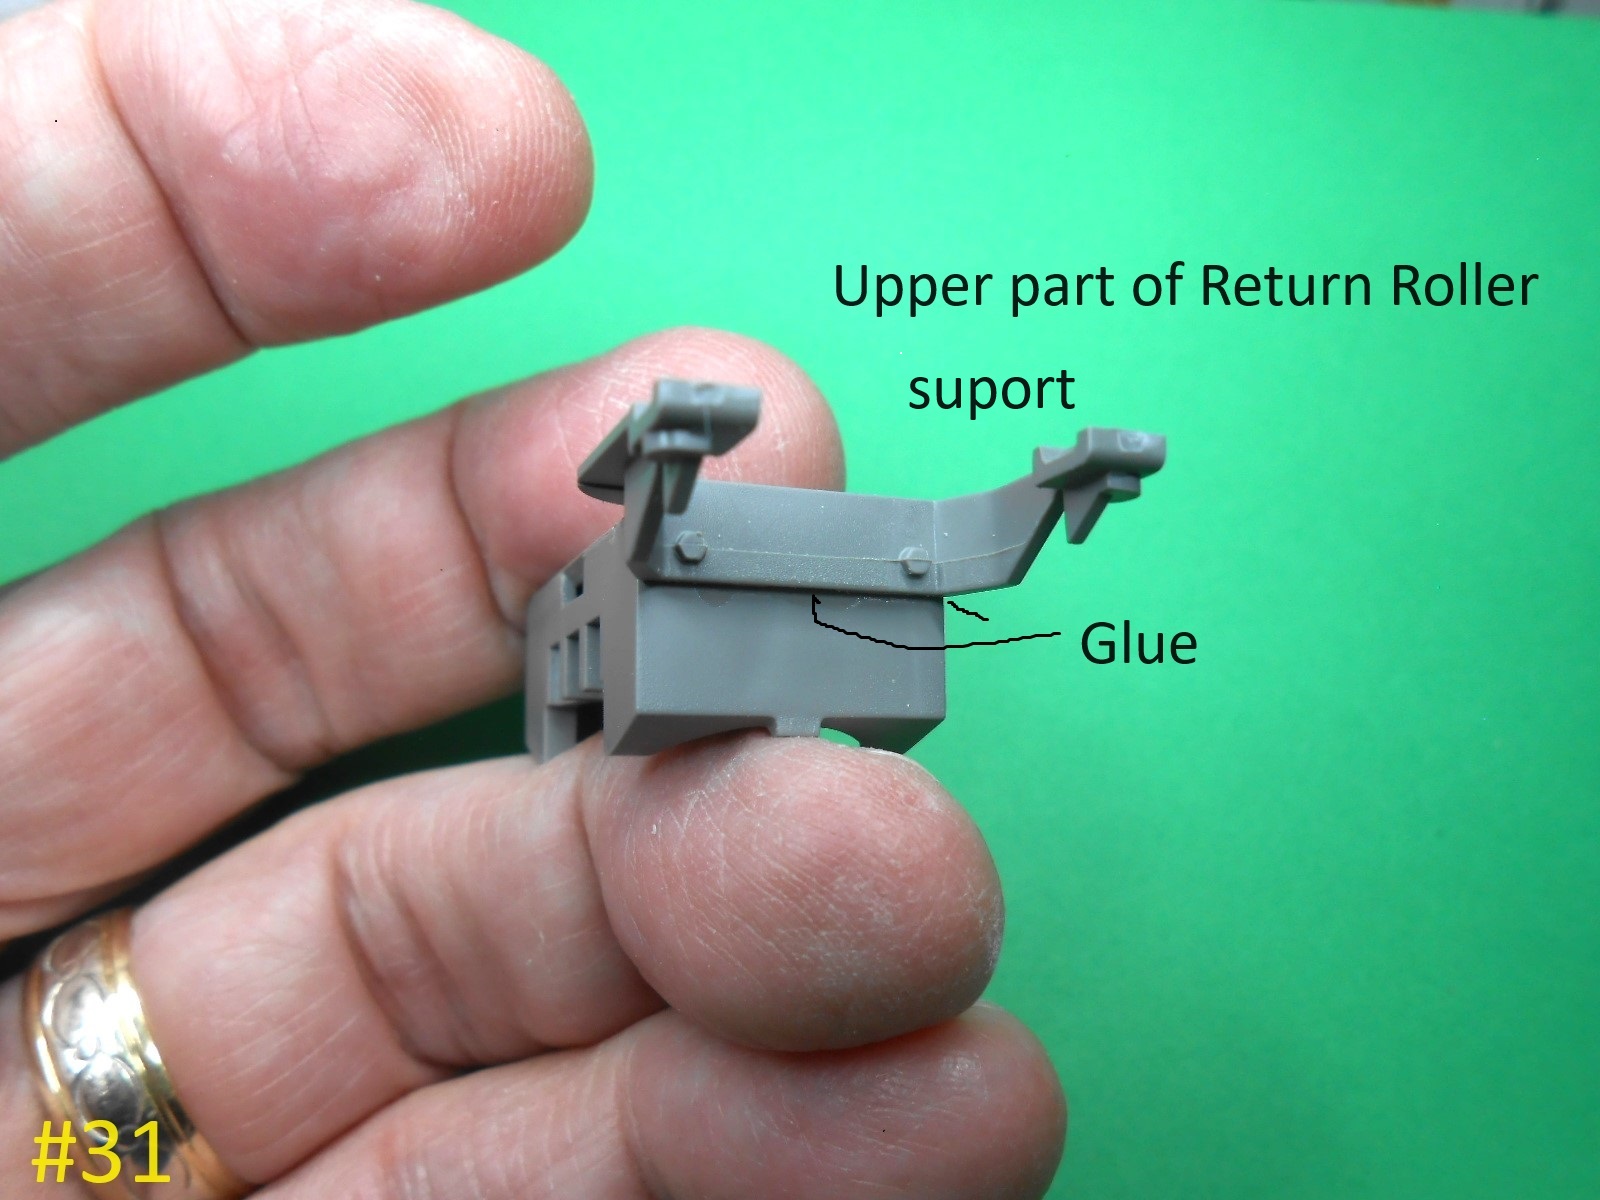
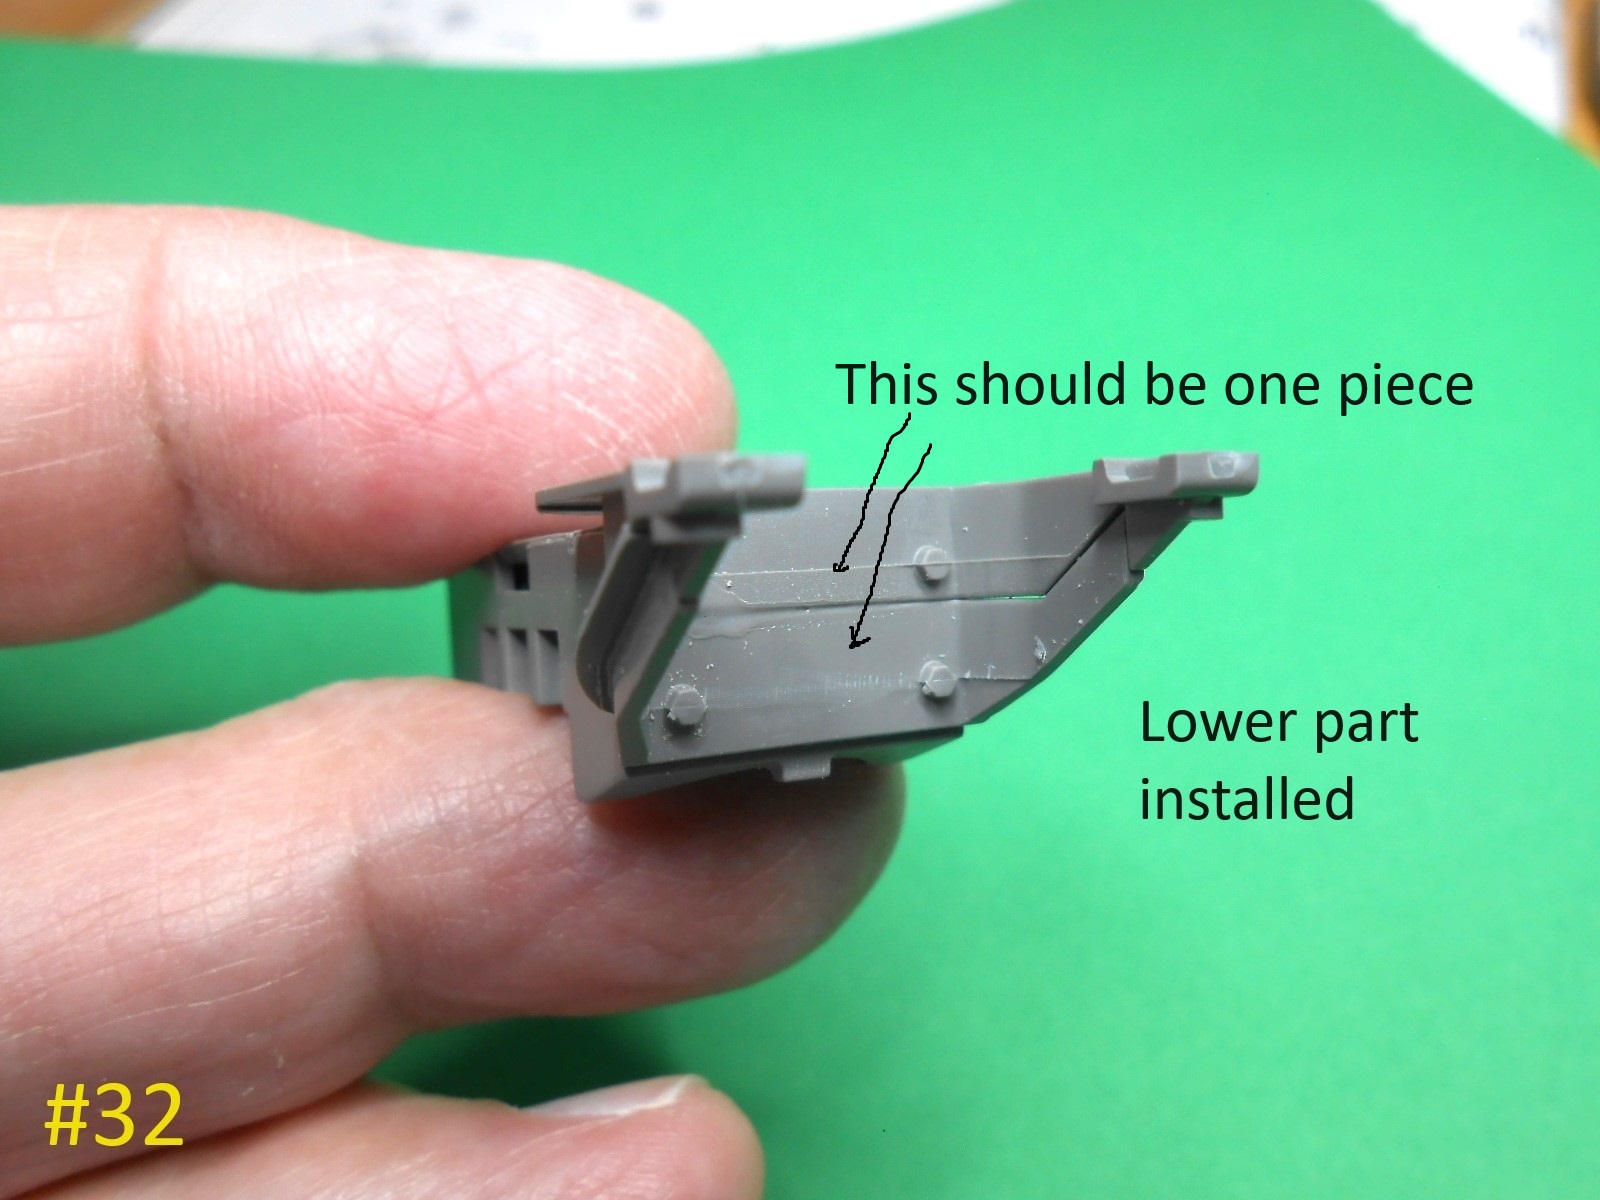
Next inserted the bottom support and glued it in place.
On the real part it is all one piece.
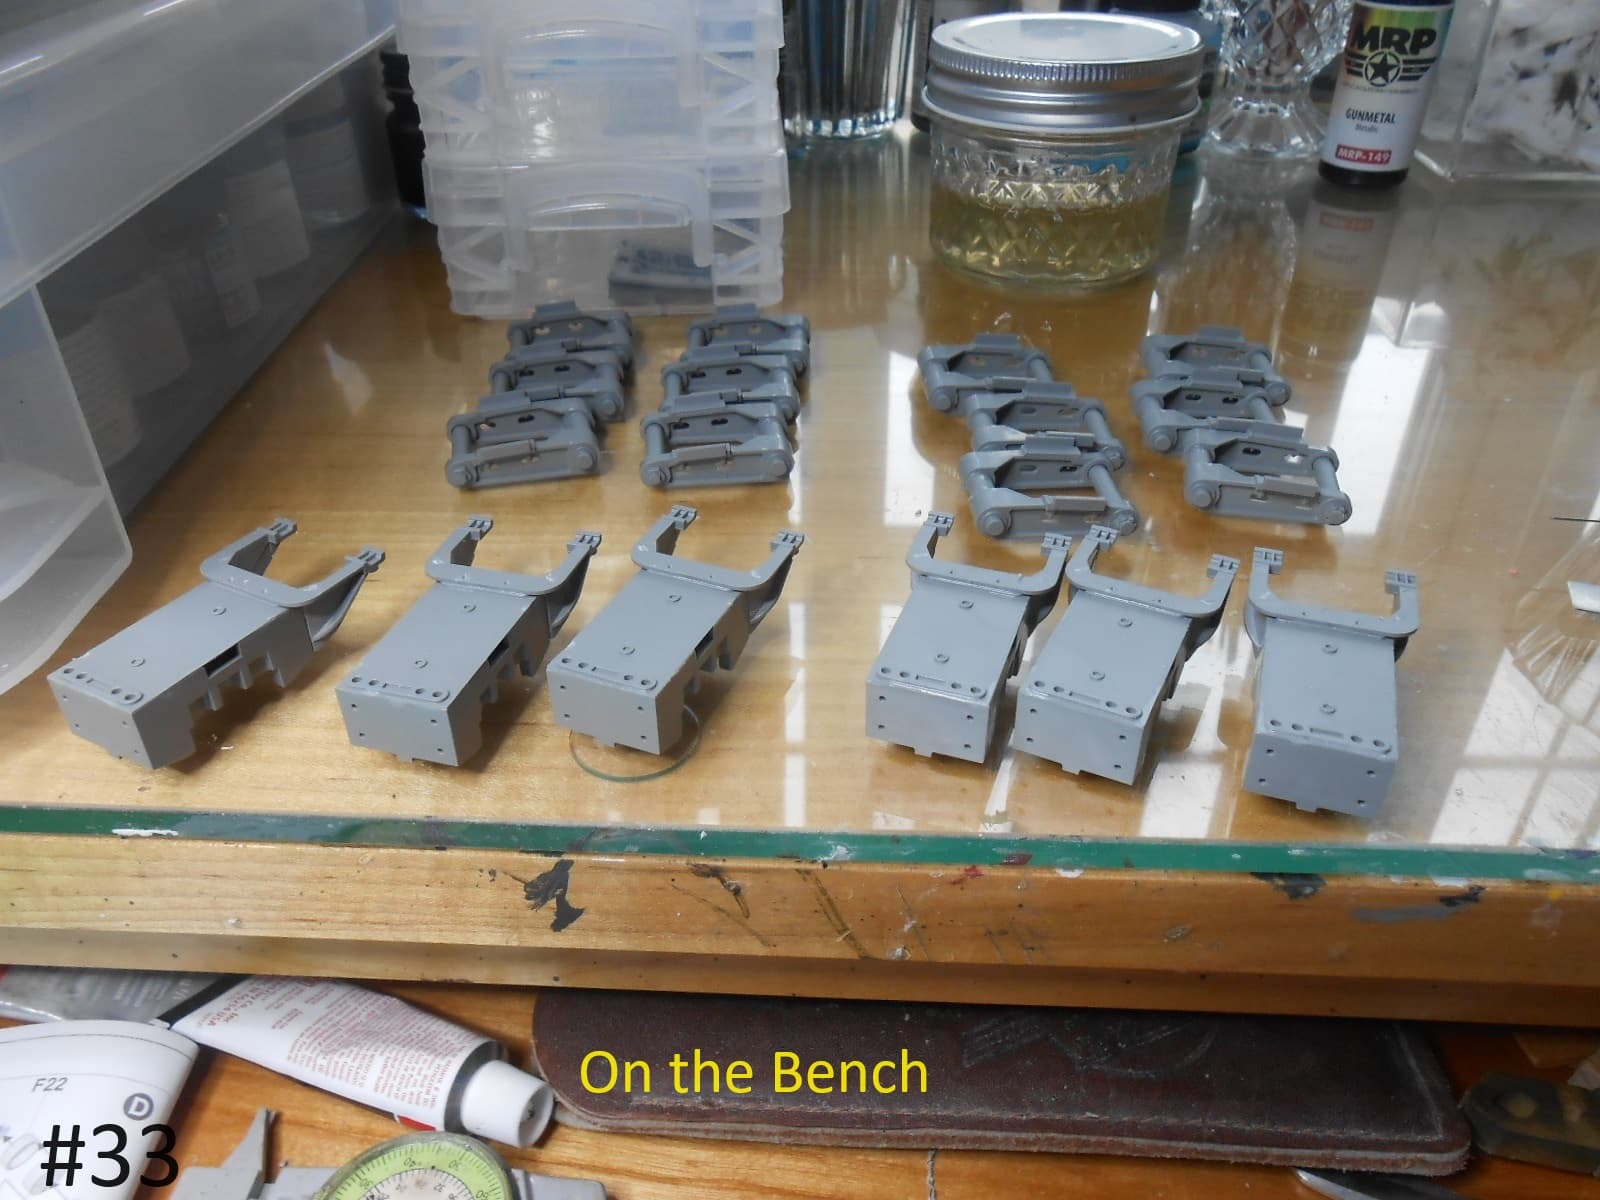
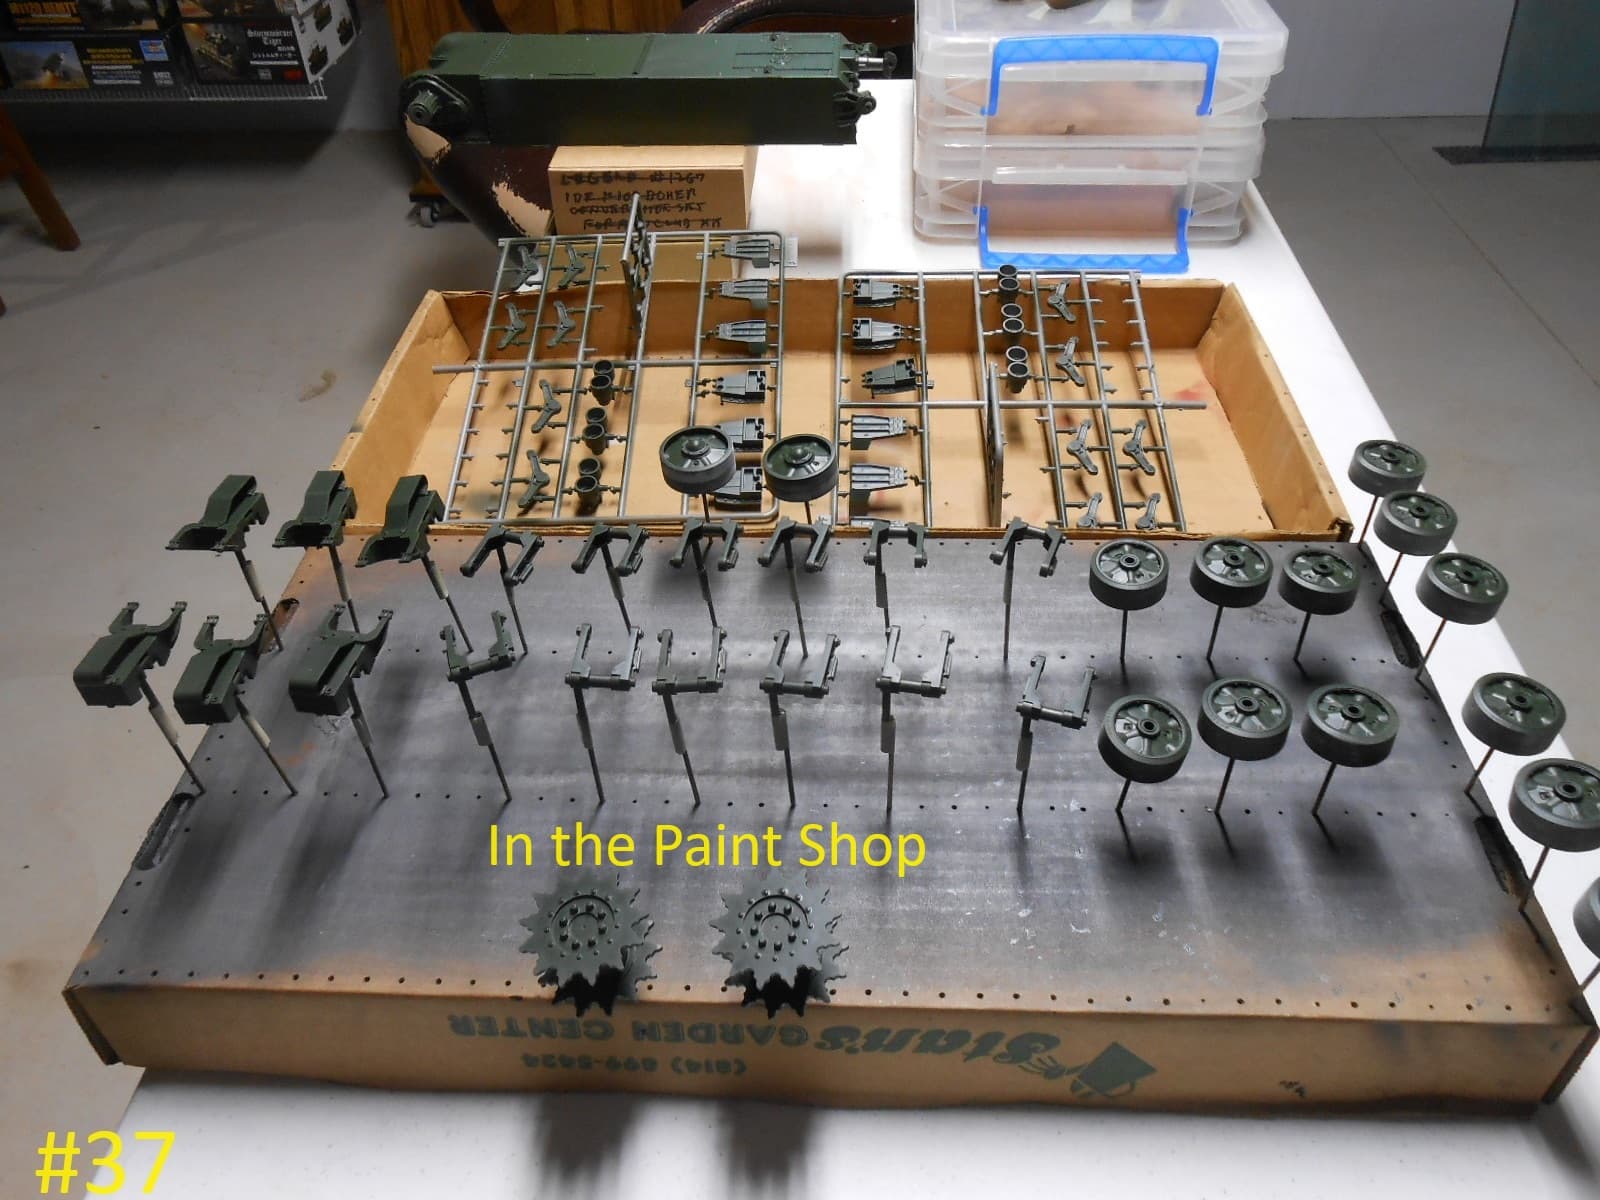
Parts on work bench.
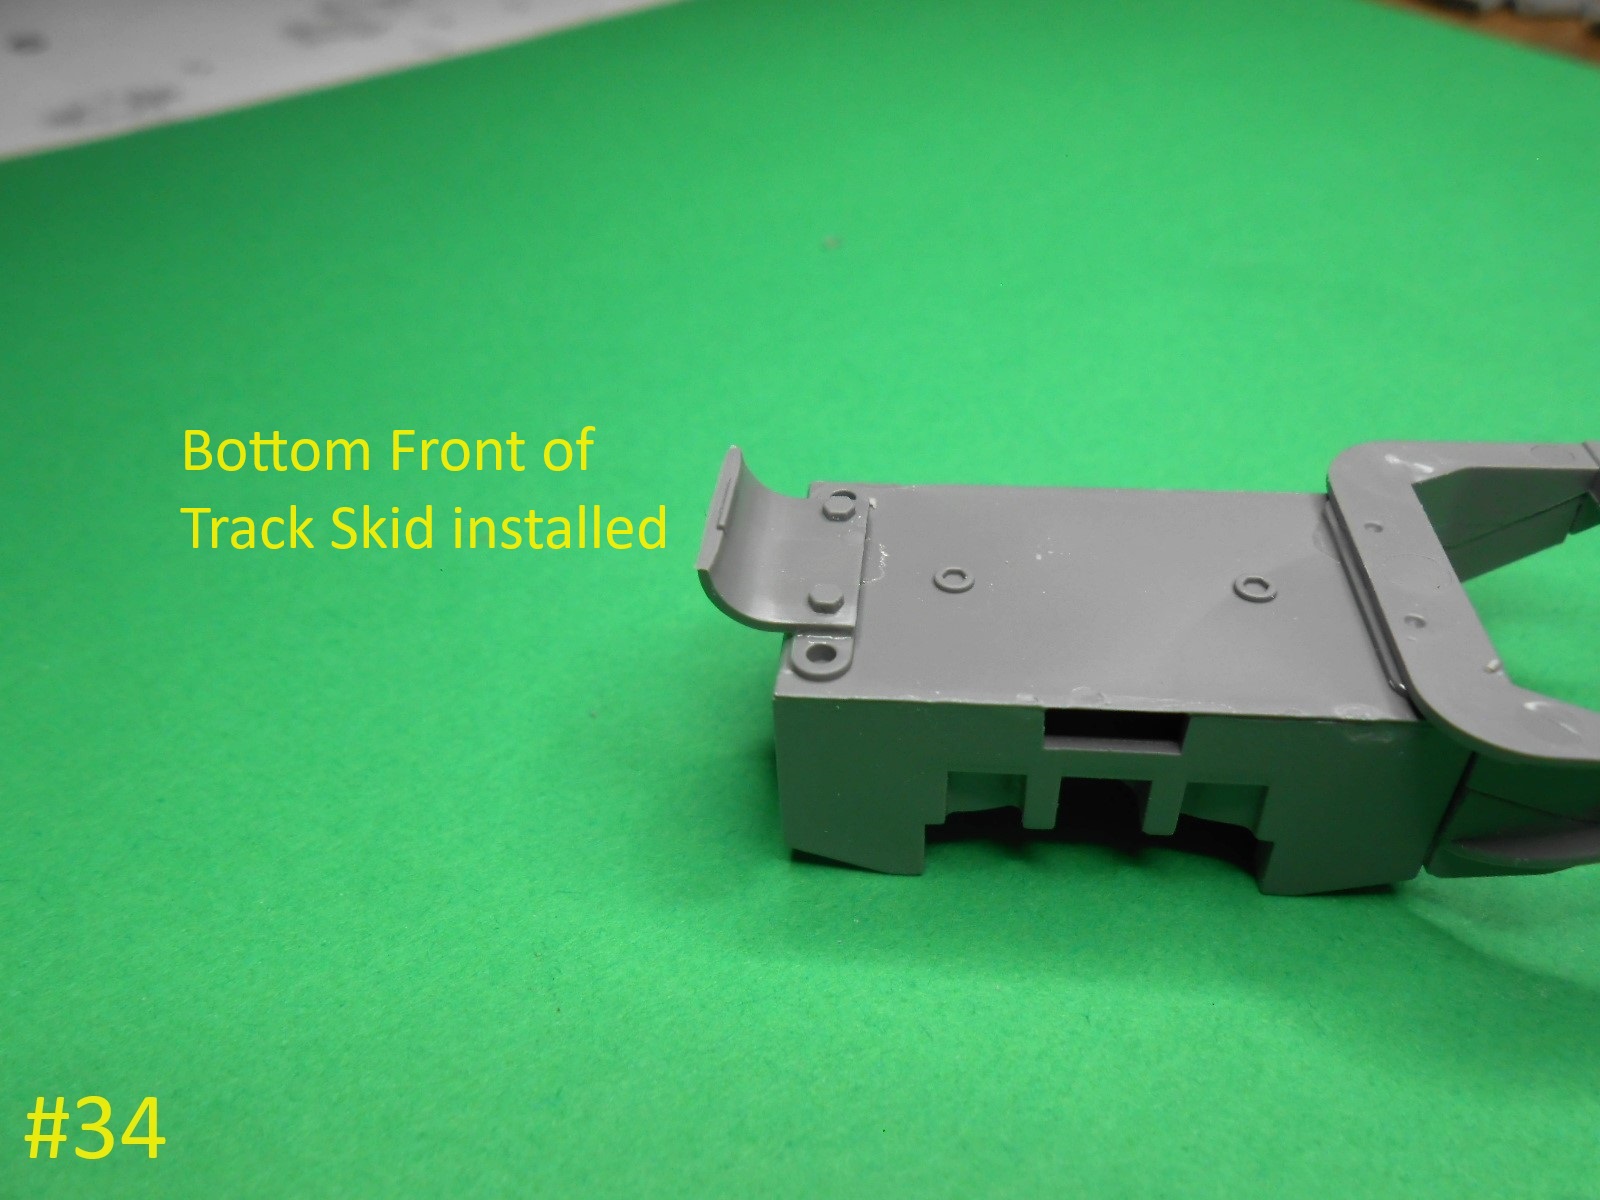
On the Track Skid I glued the lower front to the block as shown.
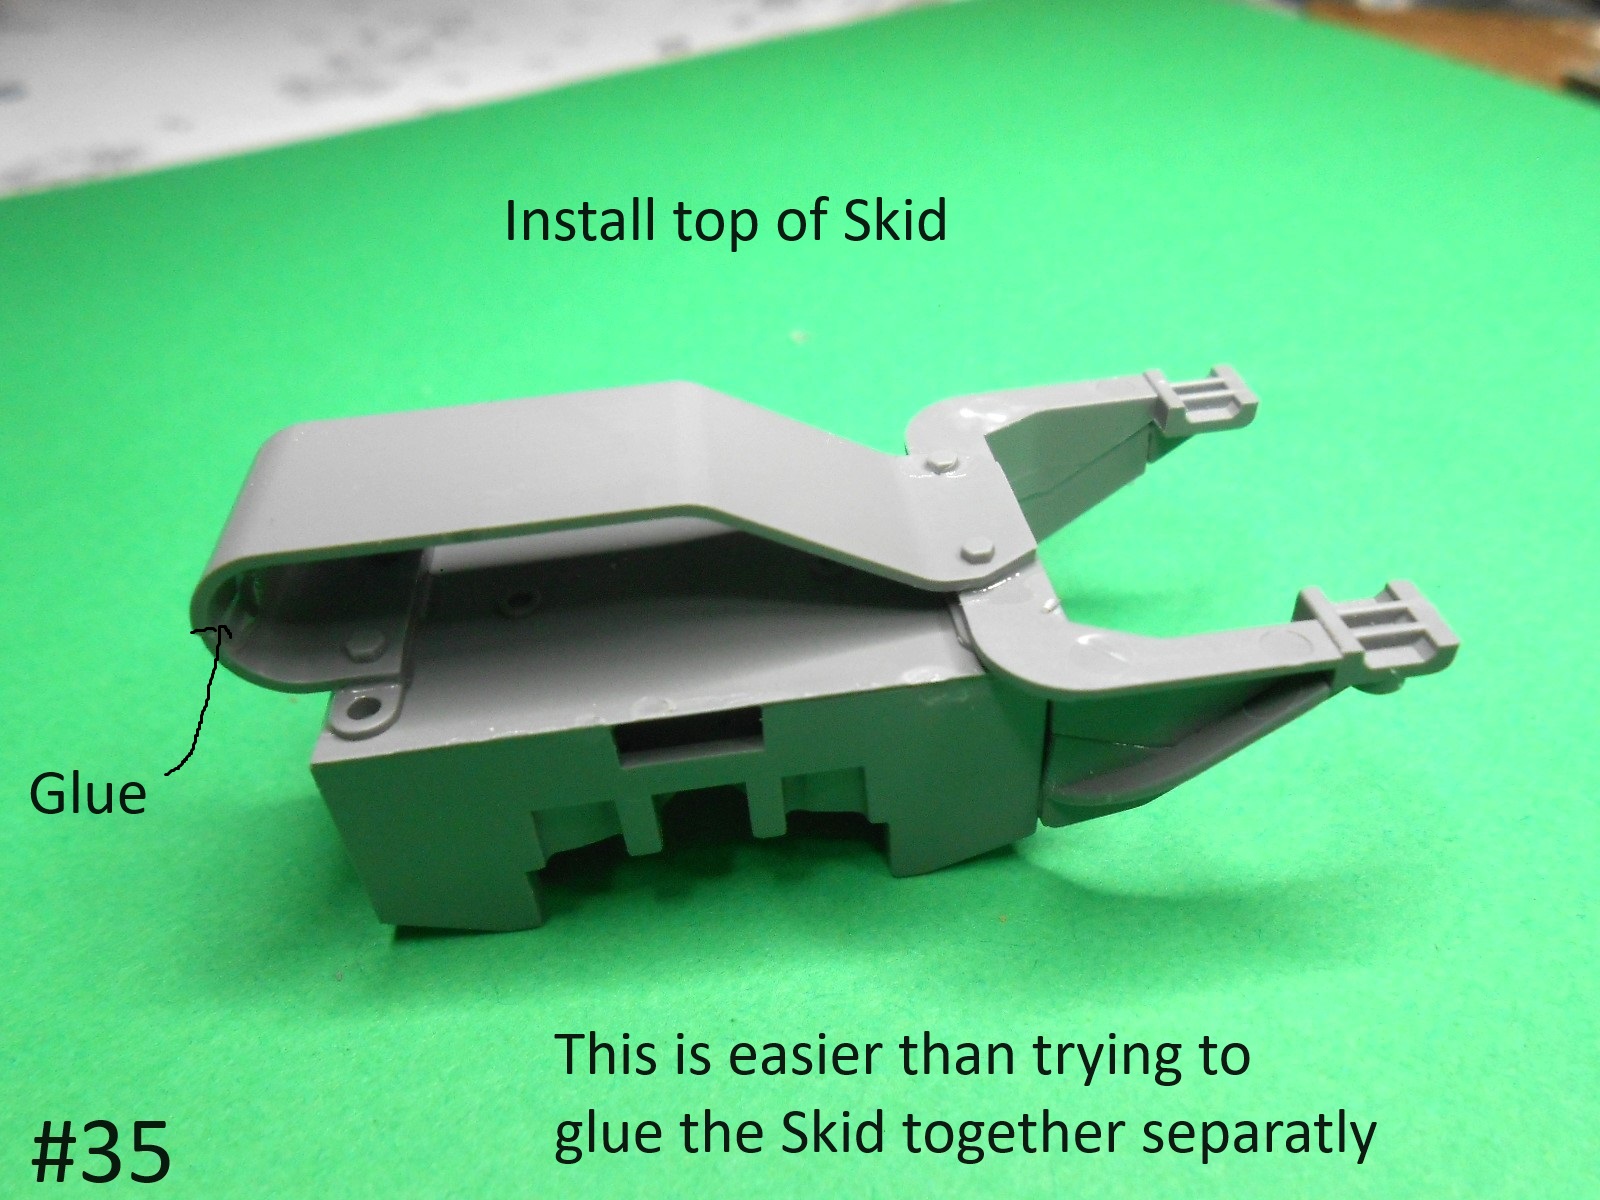
Then fitted the rest of the Skid and glued it in place.
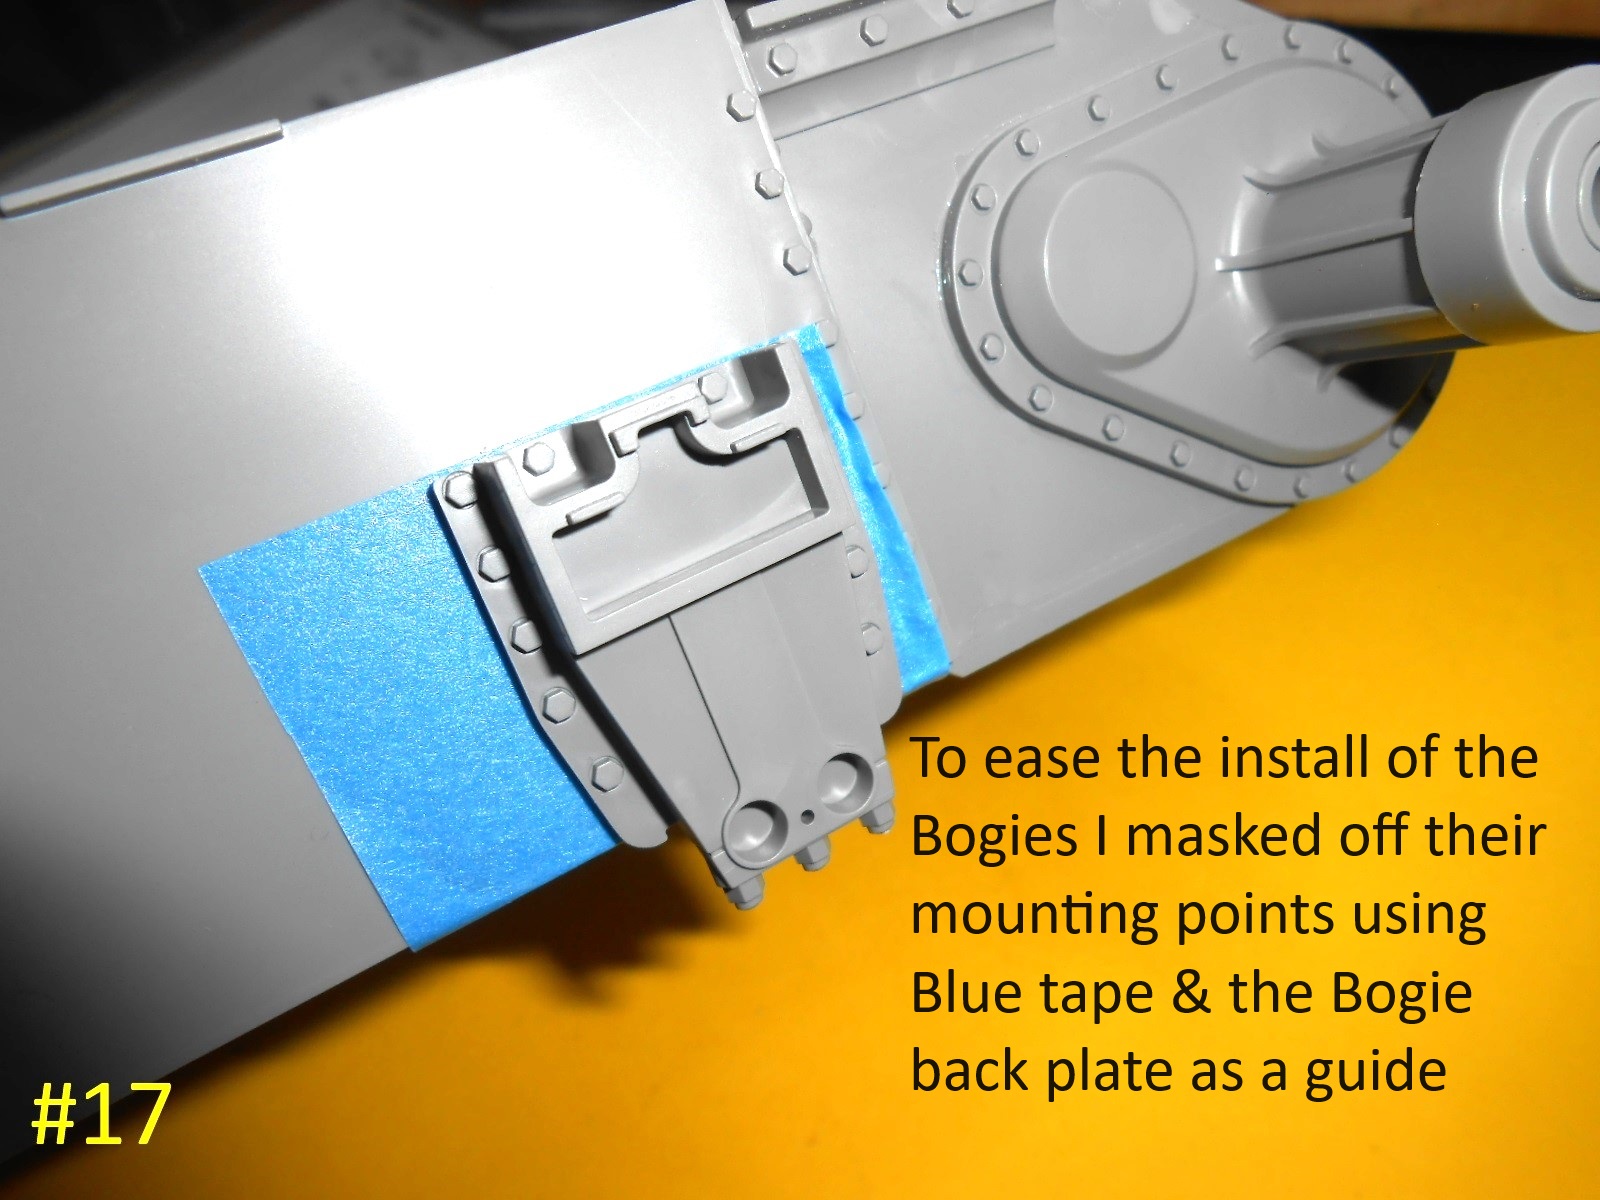
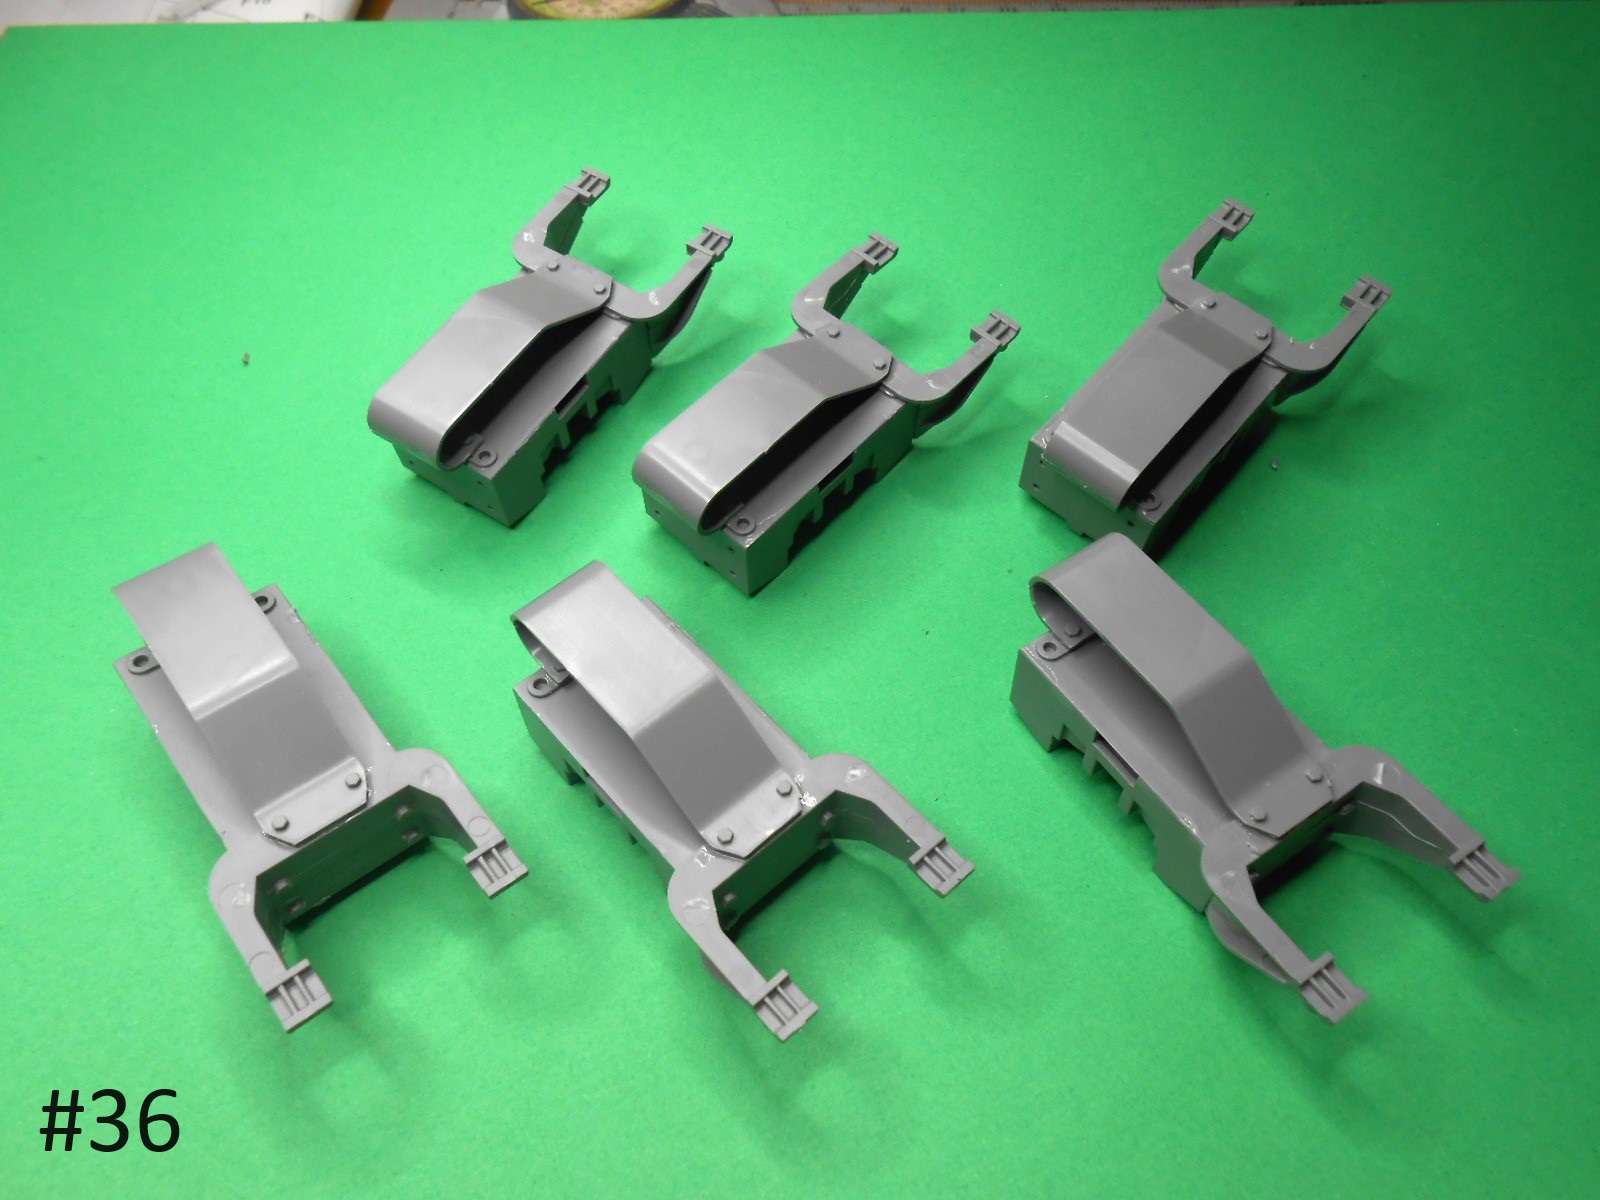
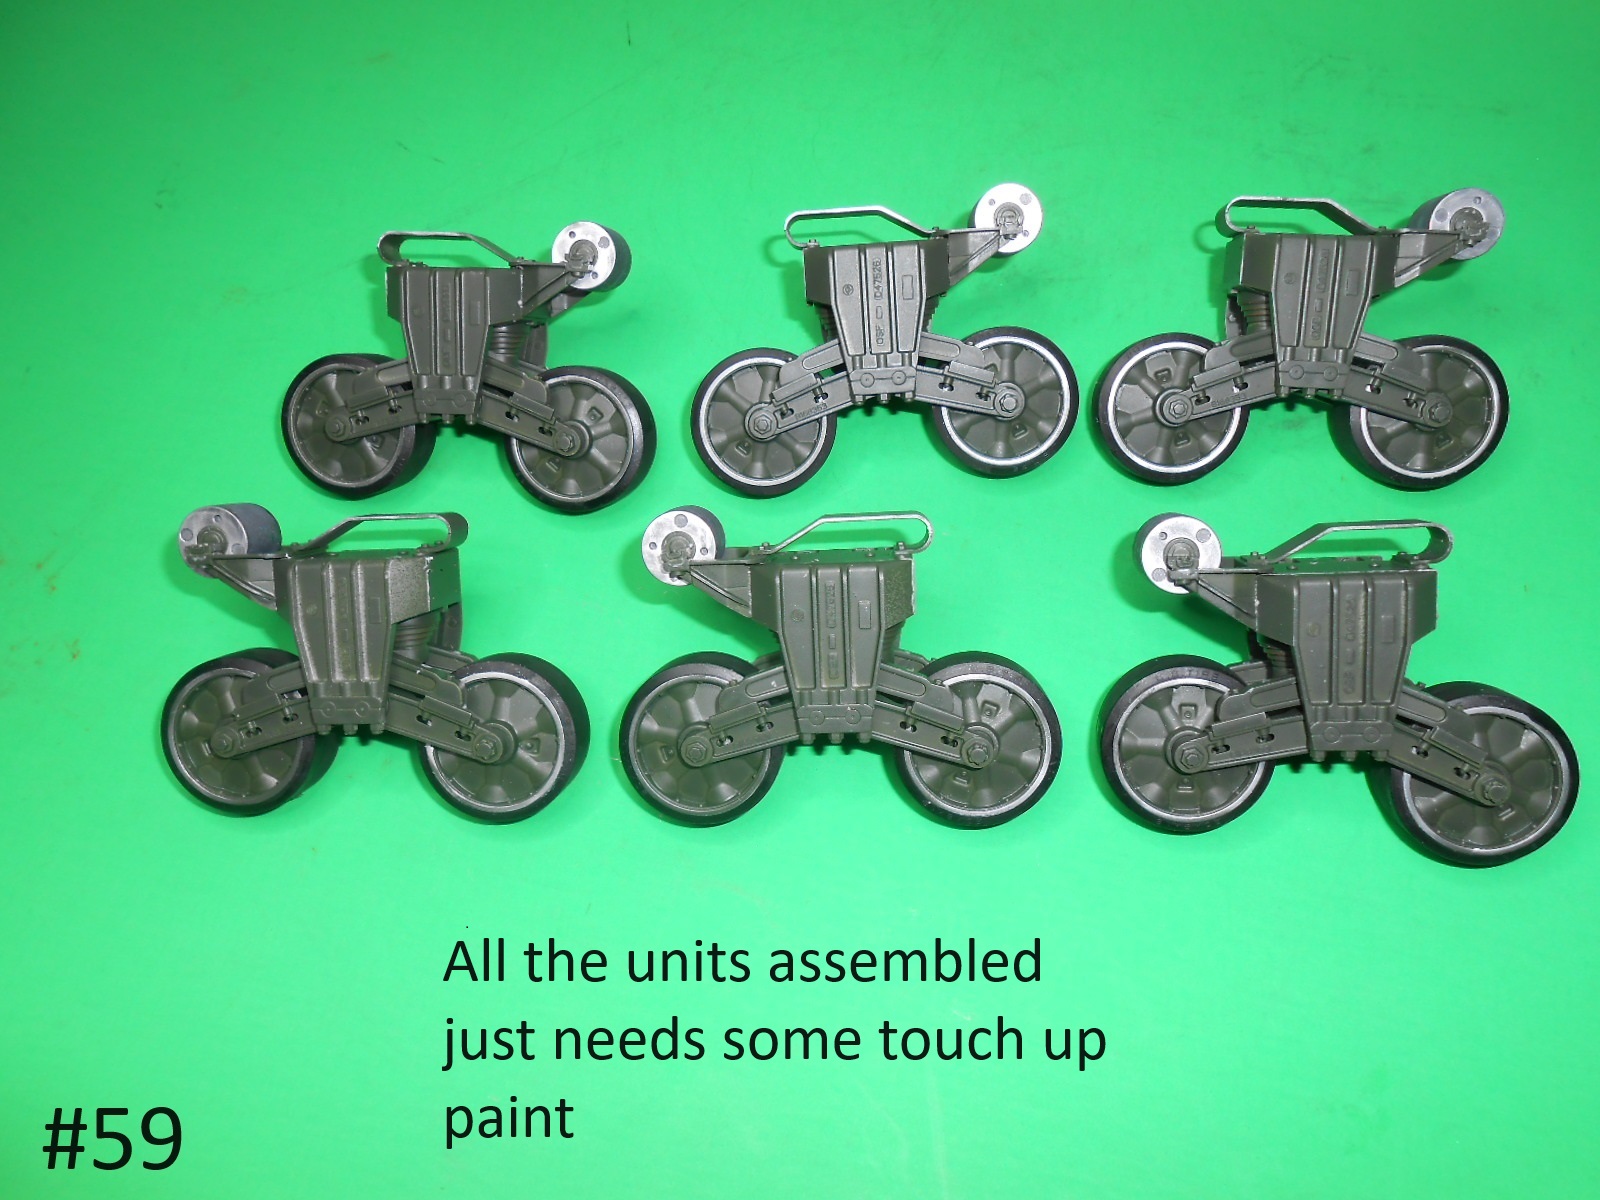
Here are the 6 top Bogie parts.
Well I’m finished for now.
Donald
6 Likes
Wow get out out the mega-tube of filler!
1 Like
I have the base color coat finished , just waiting so see if there are any problems with it.
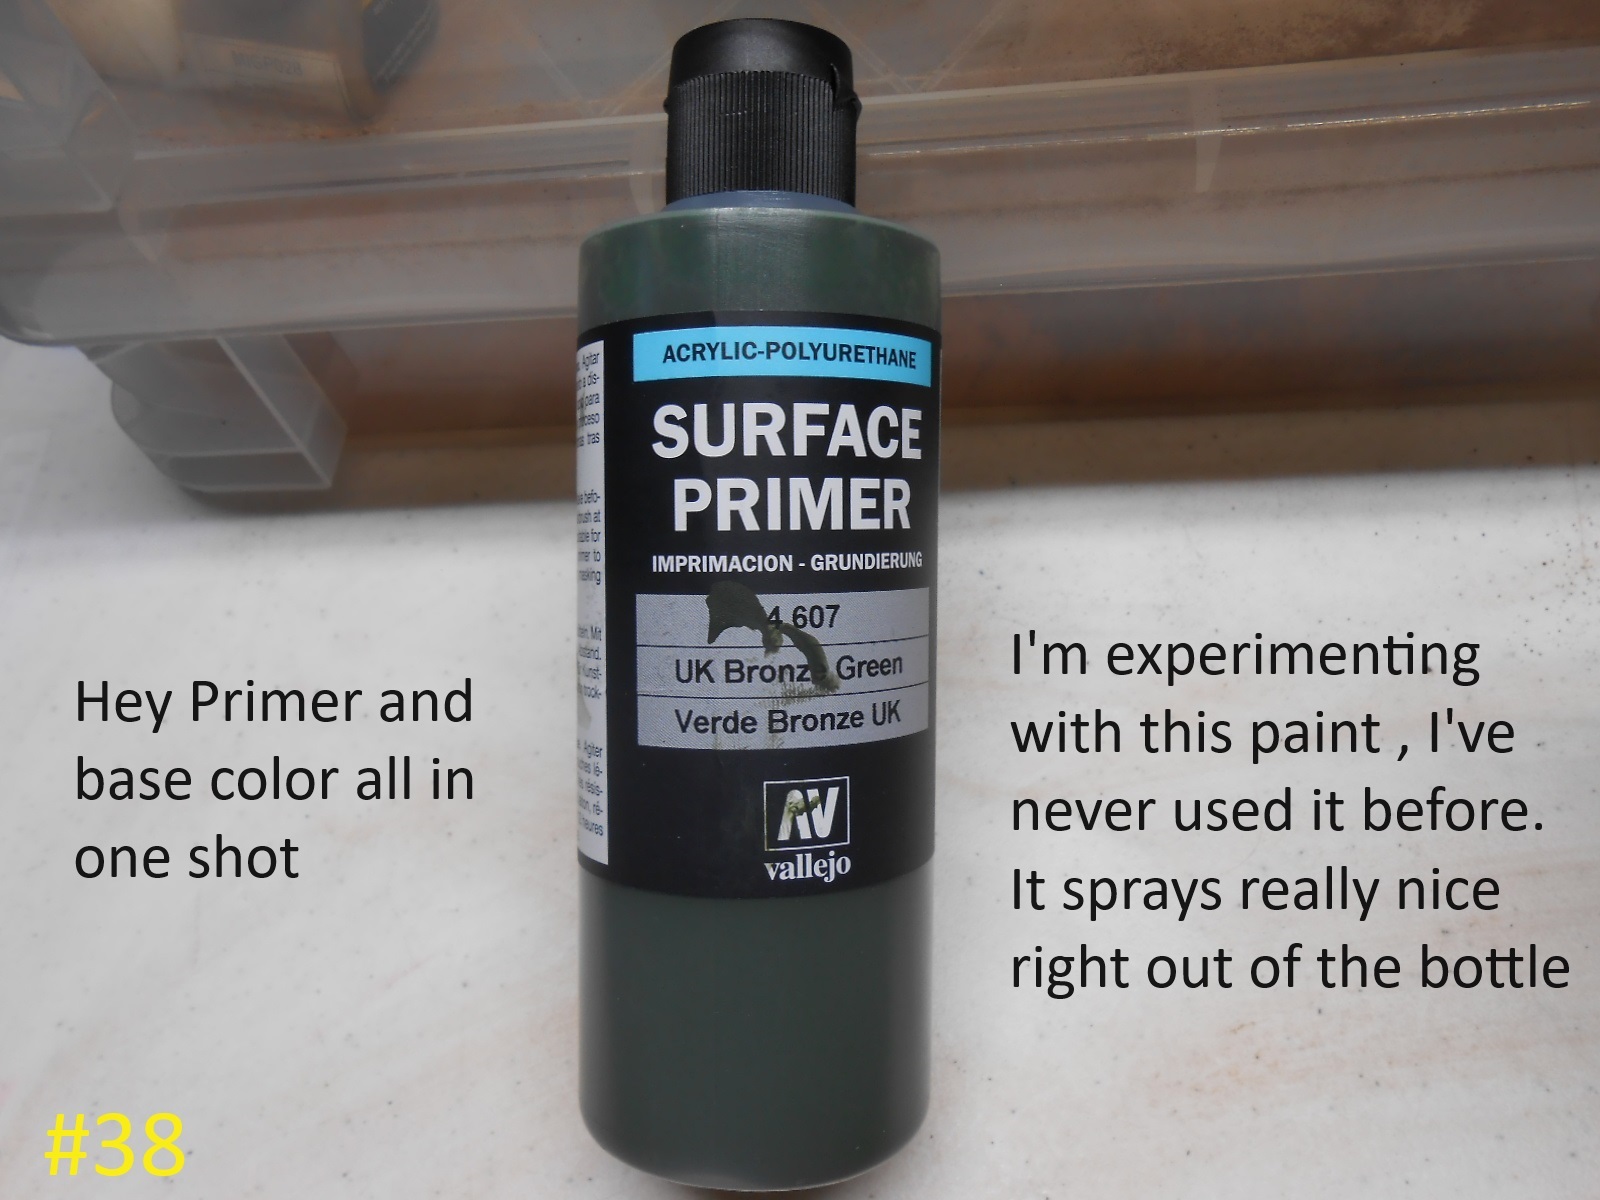
Regards
Donald
5 Likes
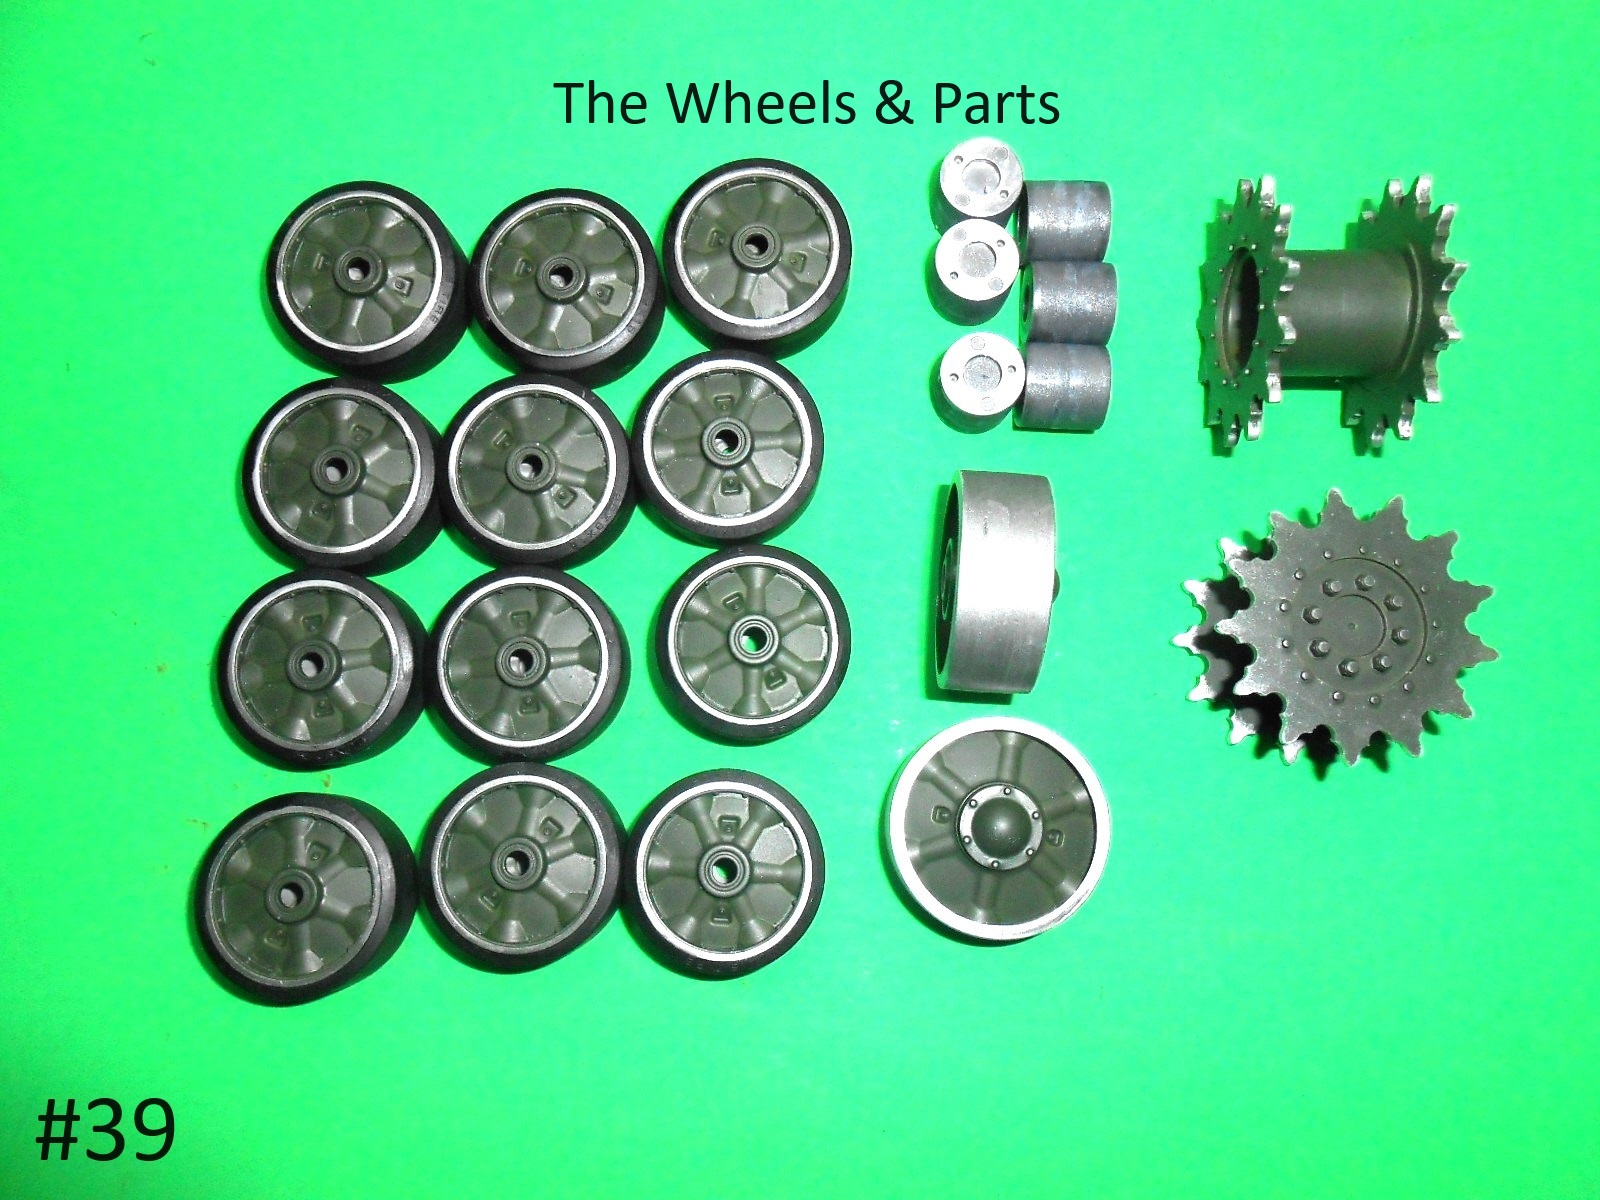
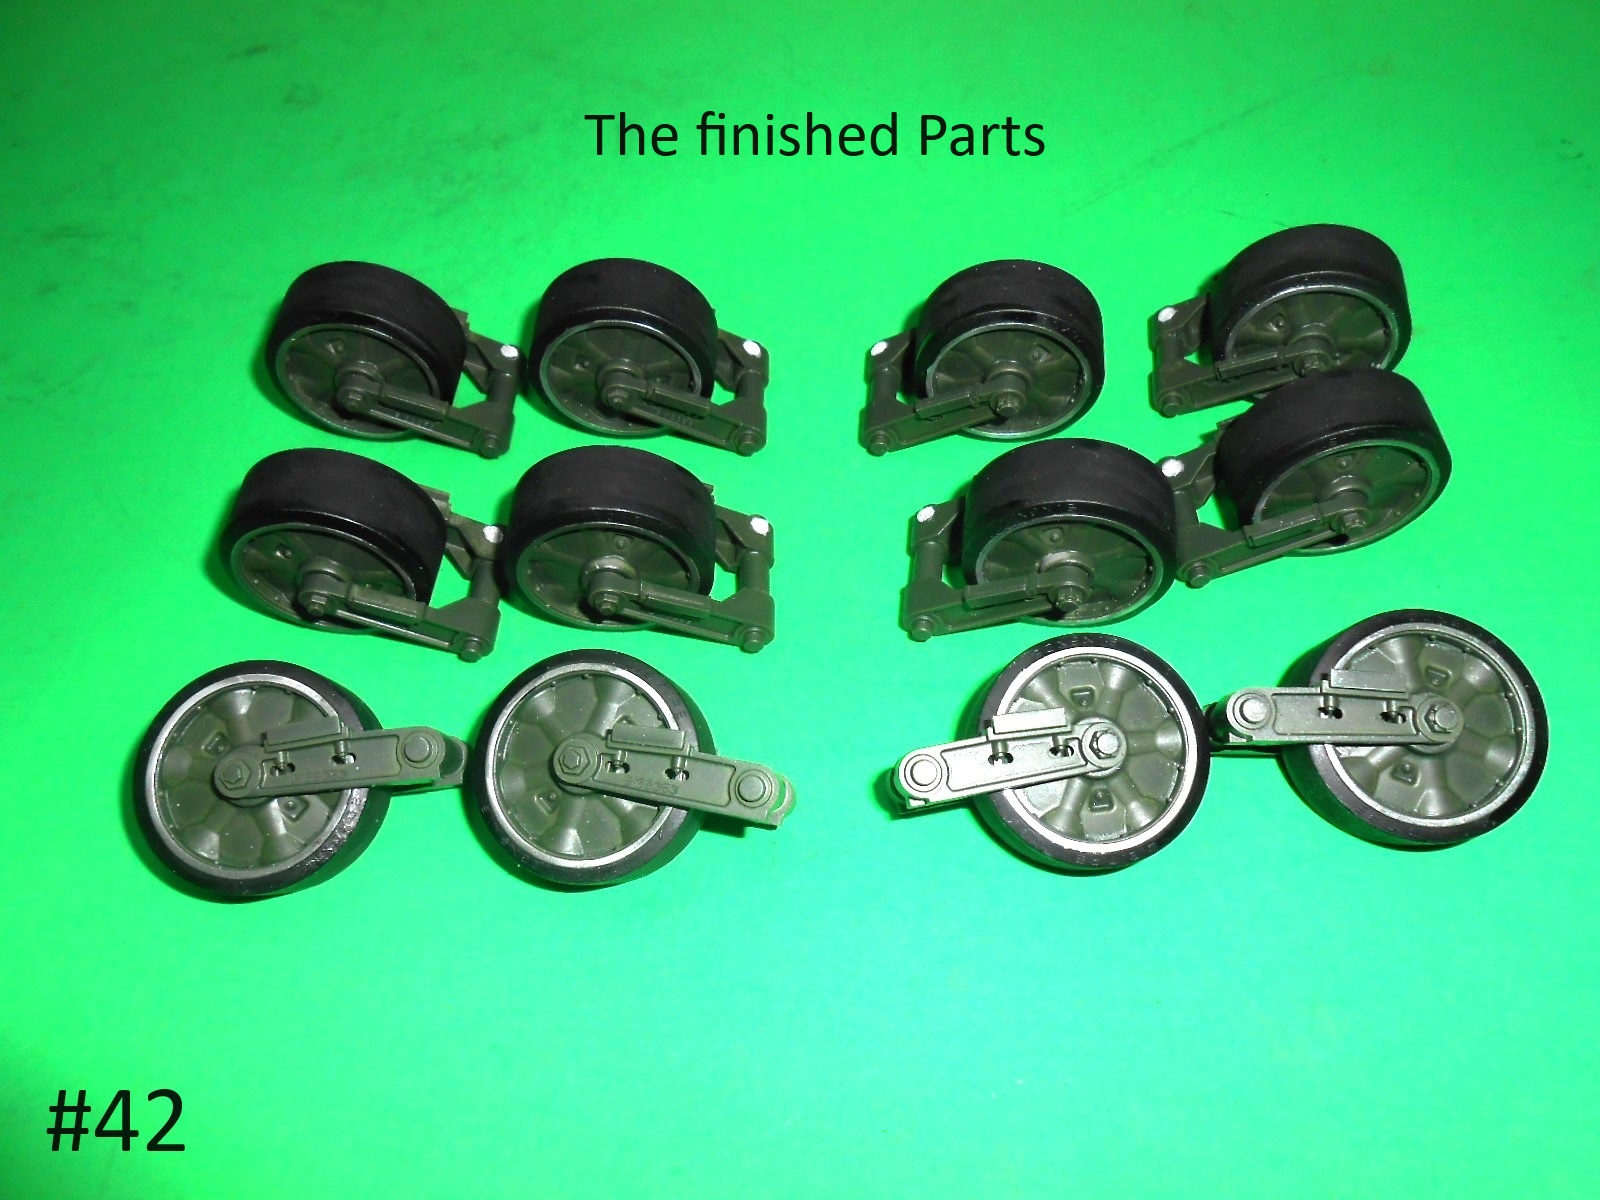
I have a little more finished , man is this slow going.
Here are the finished wheels and other related parts.
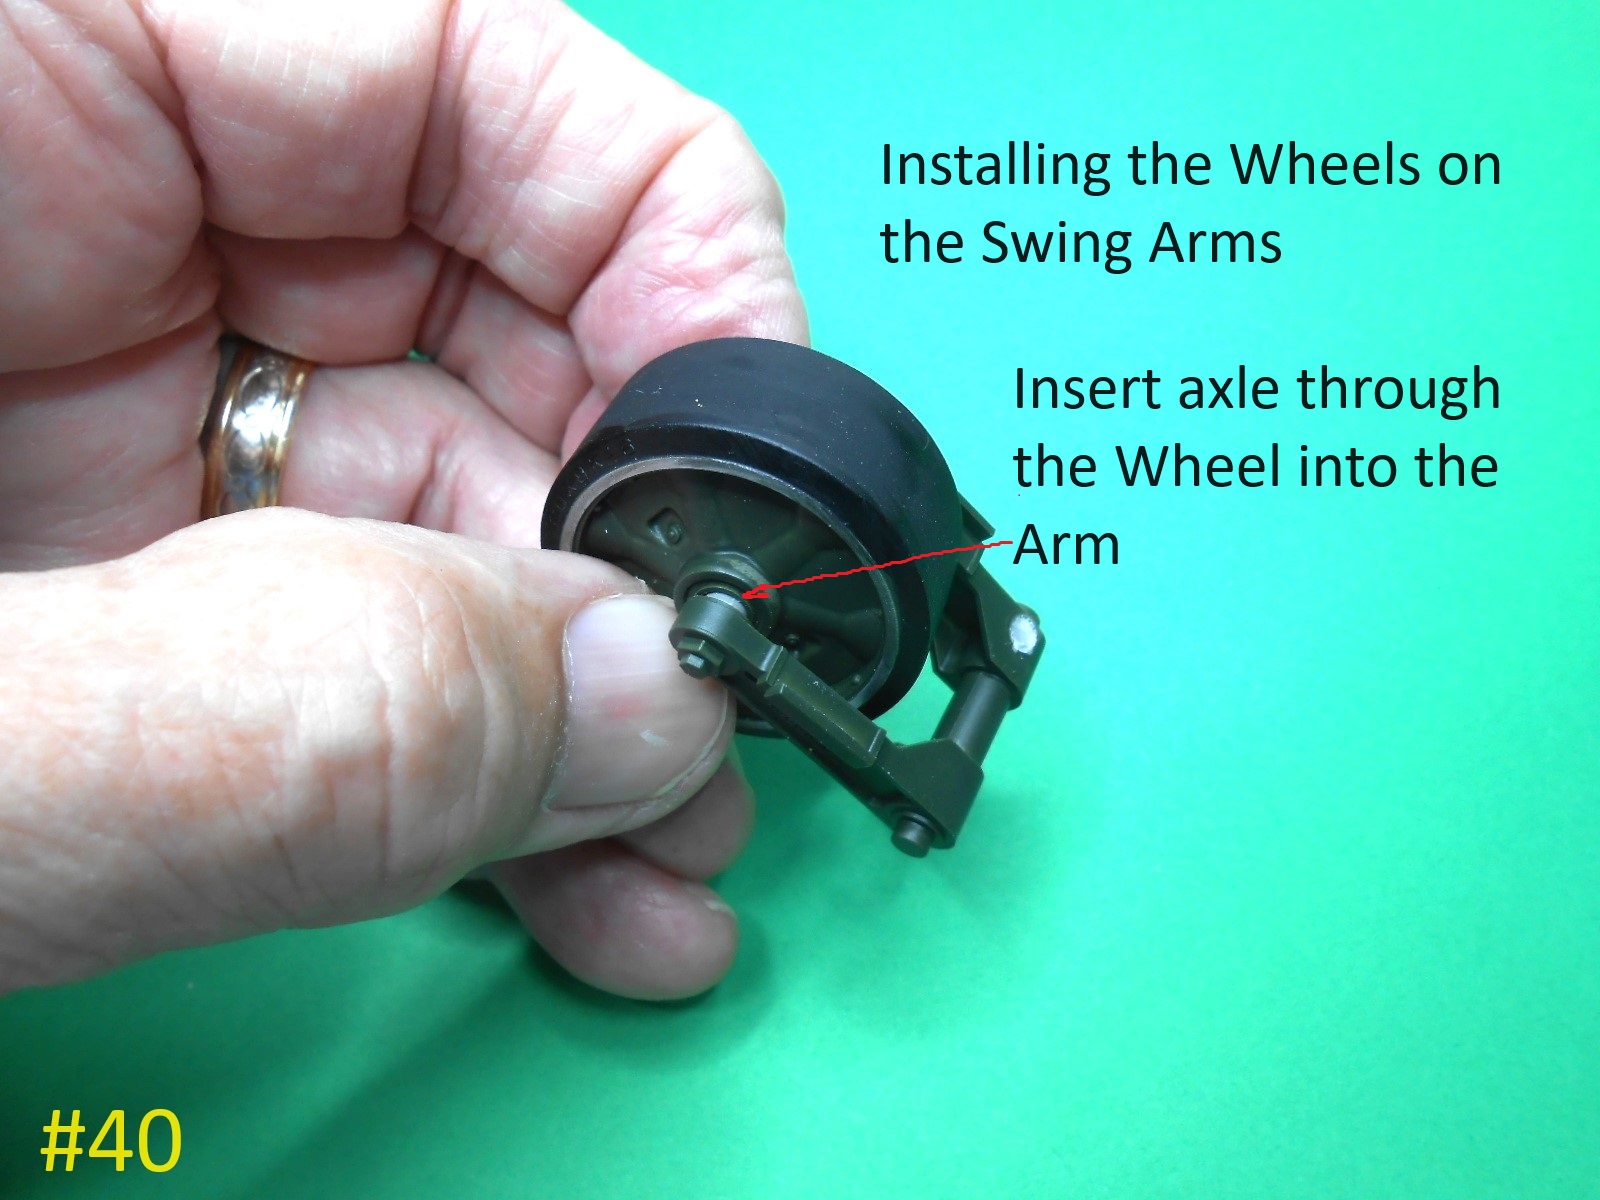
Here installing the Wheels on the Swing Arms.

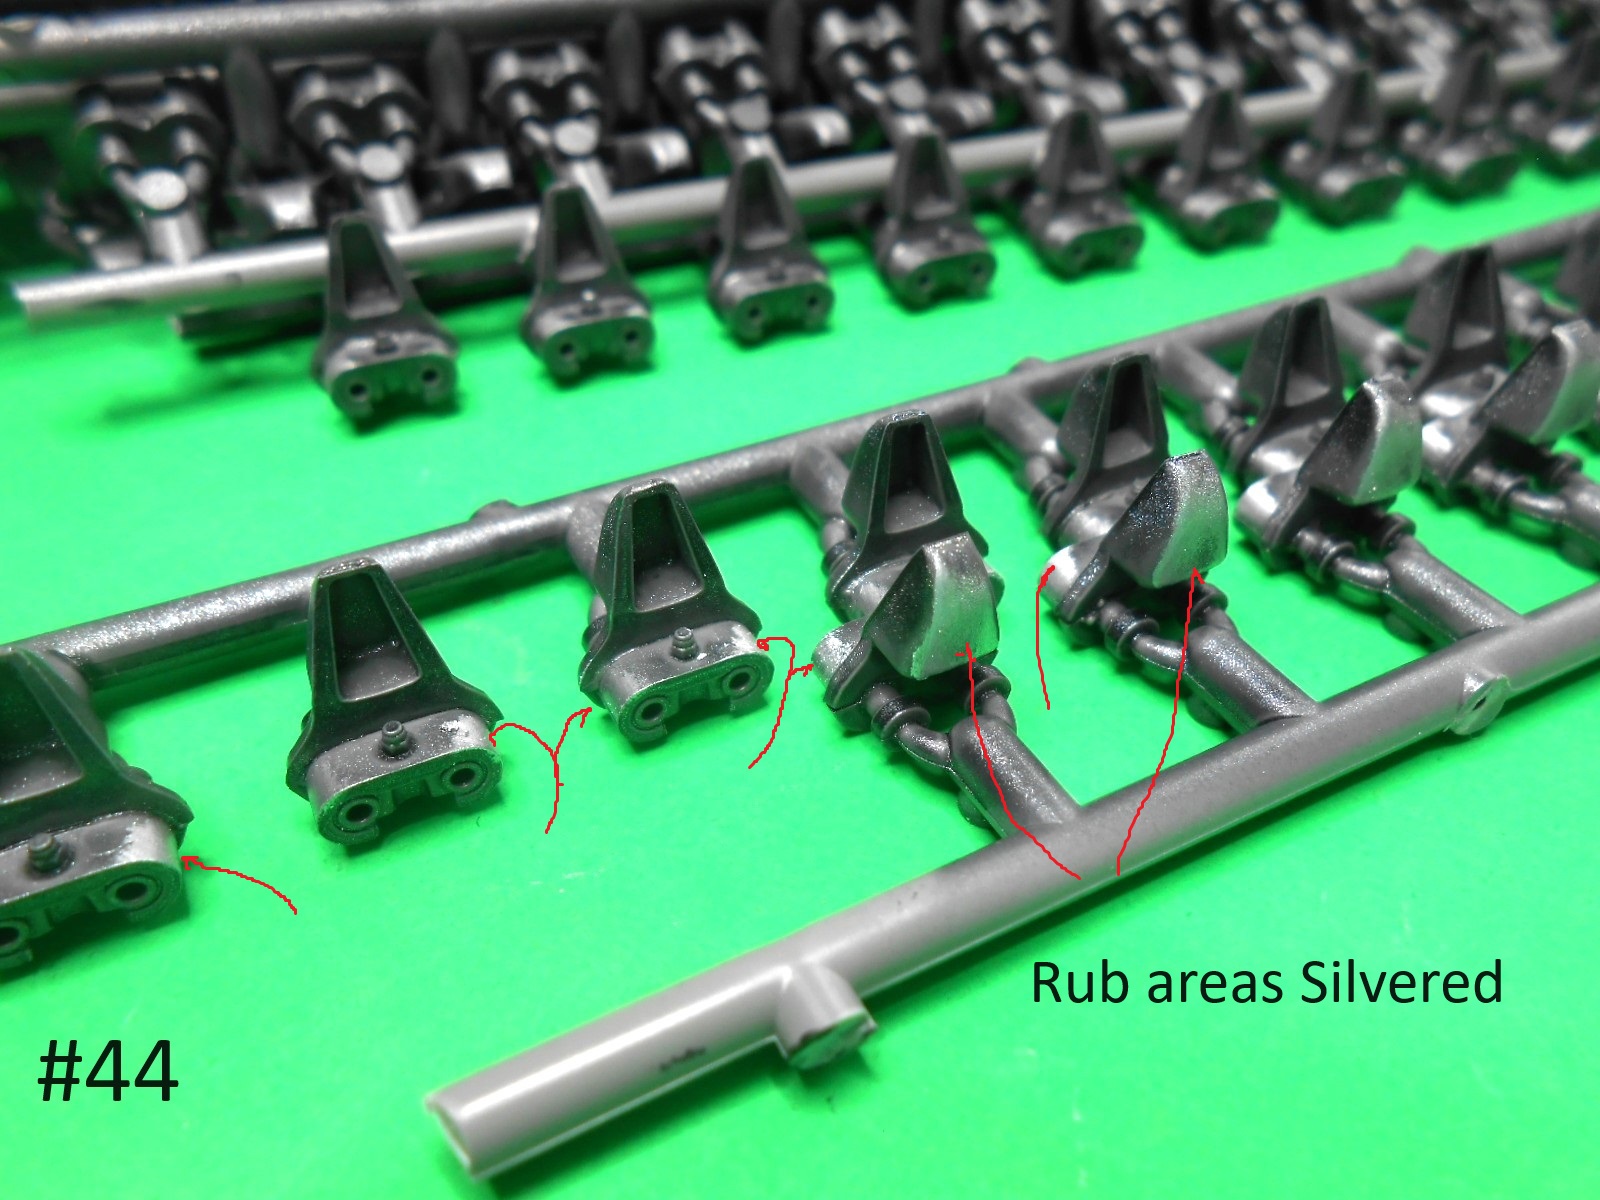
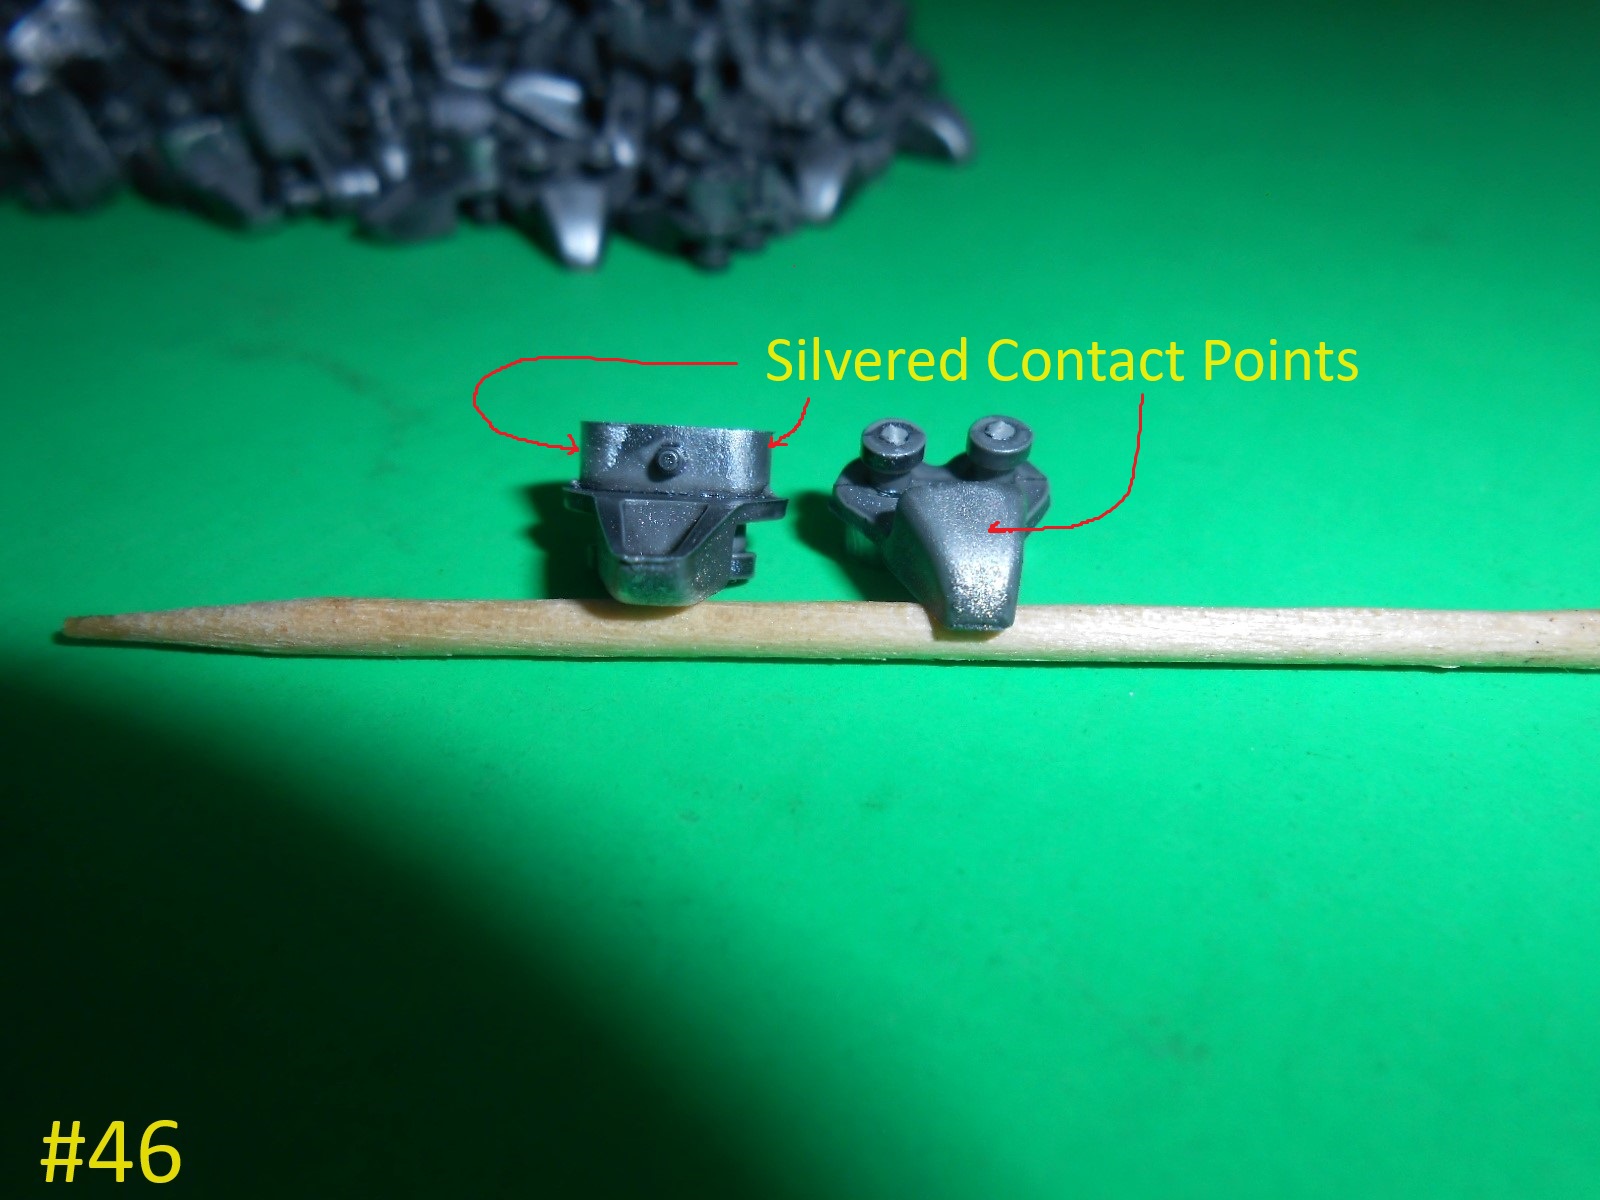
I installed the Guide Horns on the End Connectors , this way I won’t accidently glue them to the Track Pads.
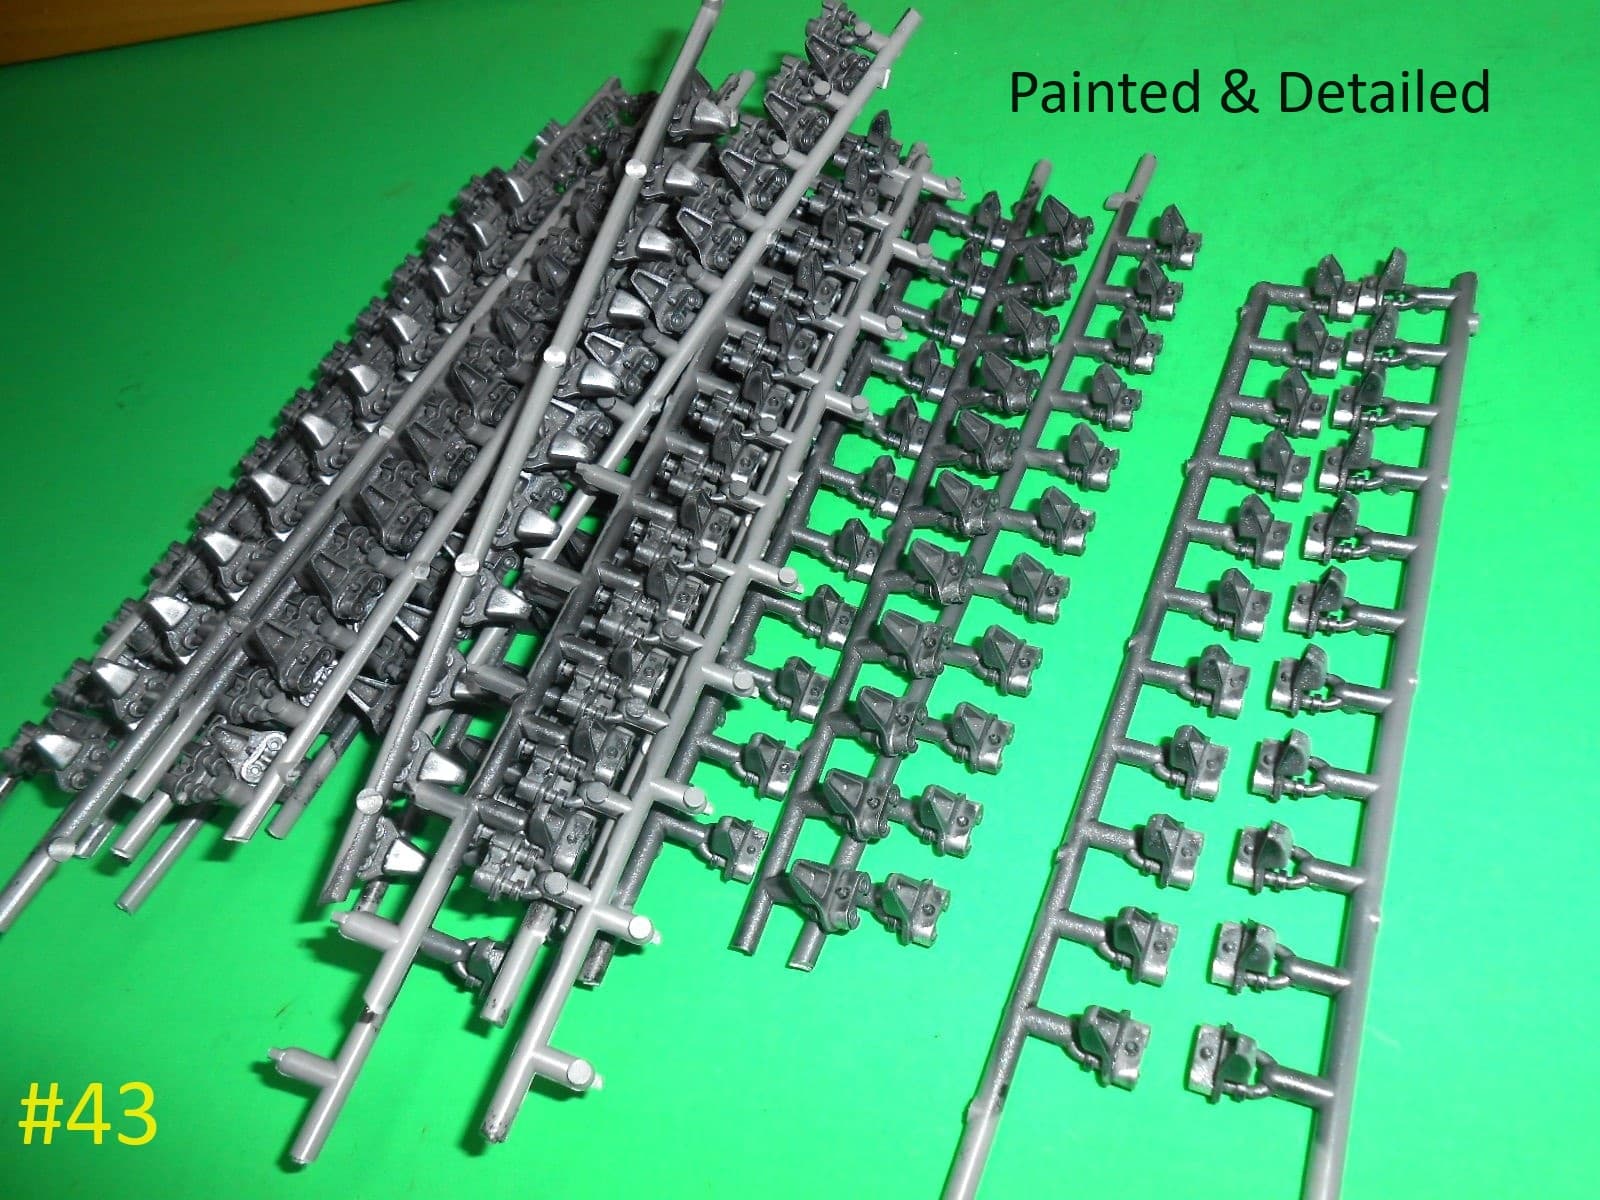
Just a little Silver Rub & Buff on the Wear areas.
Finished for a while.
Regards
Donald
6 Likes
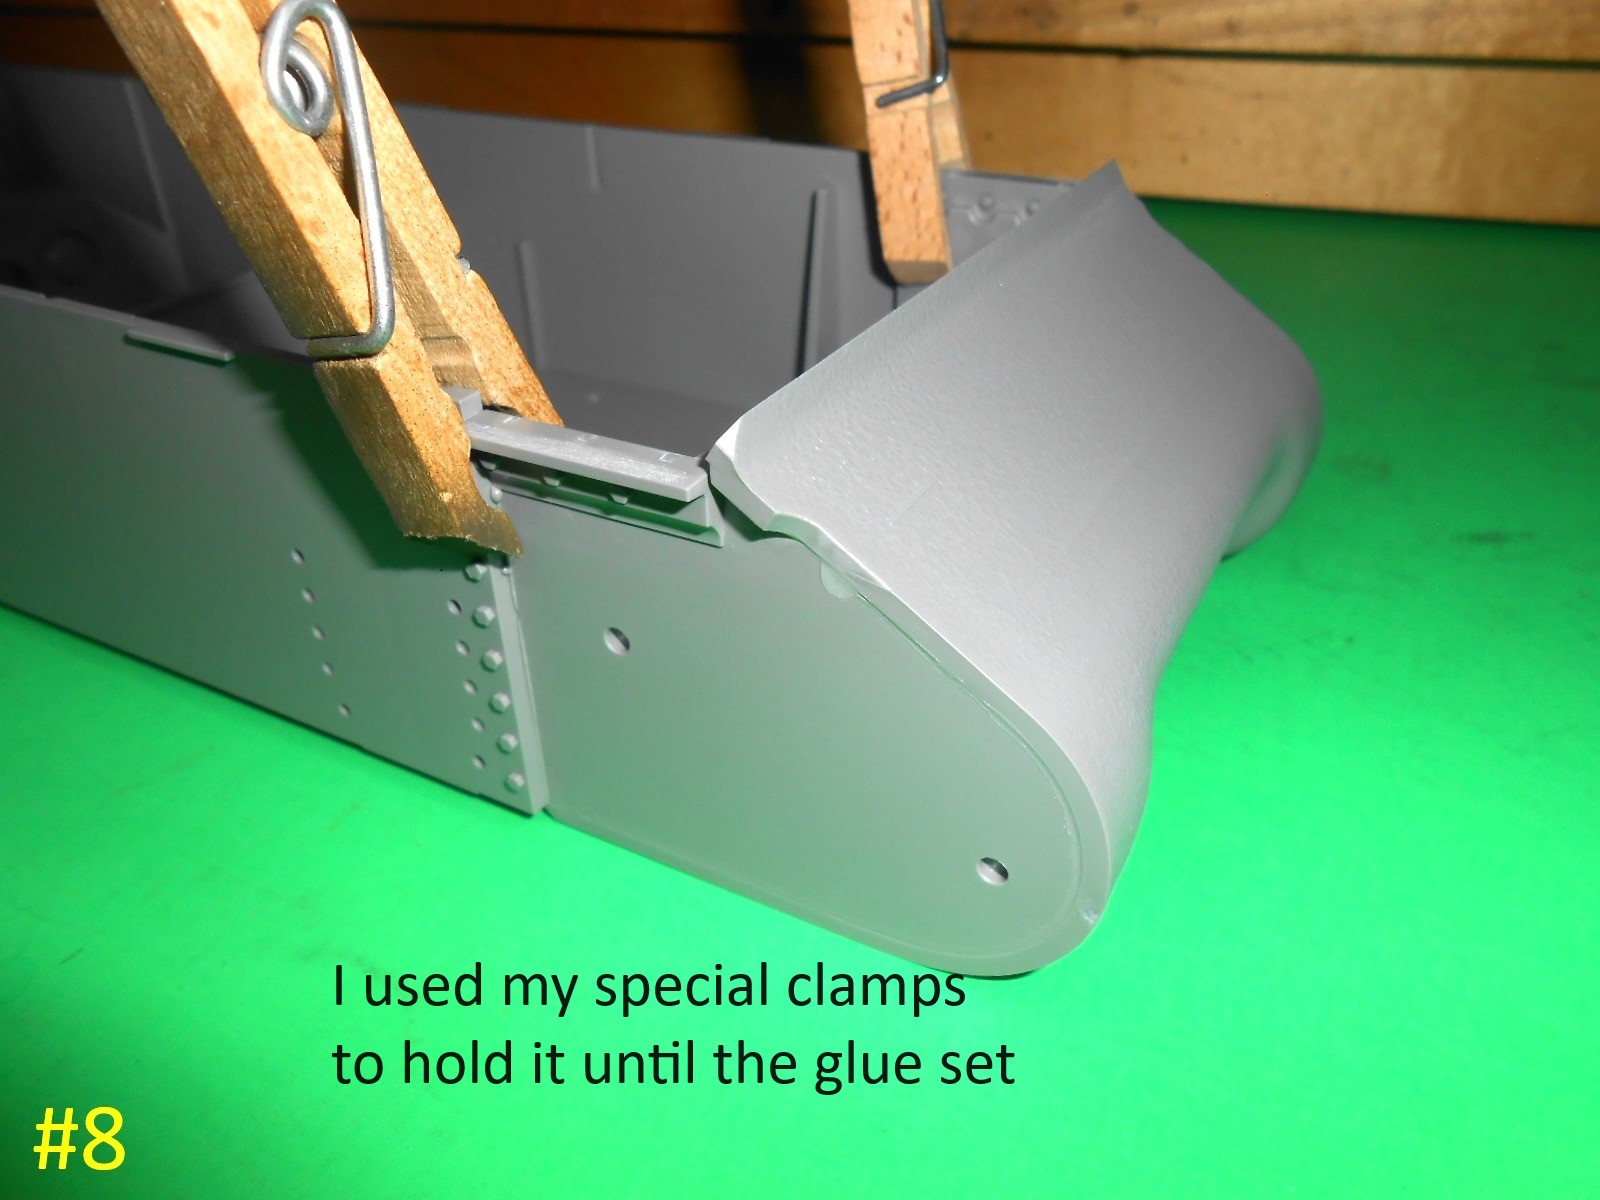
Great work! And I love the “special clamps”…
1 Like
Assembling the Trucks , to some this might seem more detailed than necessary .
I’m doing this this way to help the under experienced modelers out there that might want to build this kit.

I’ll be working on getting the Hull together next.
Regards
Donald
7 Likes
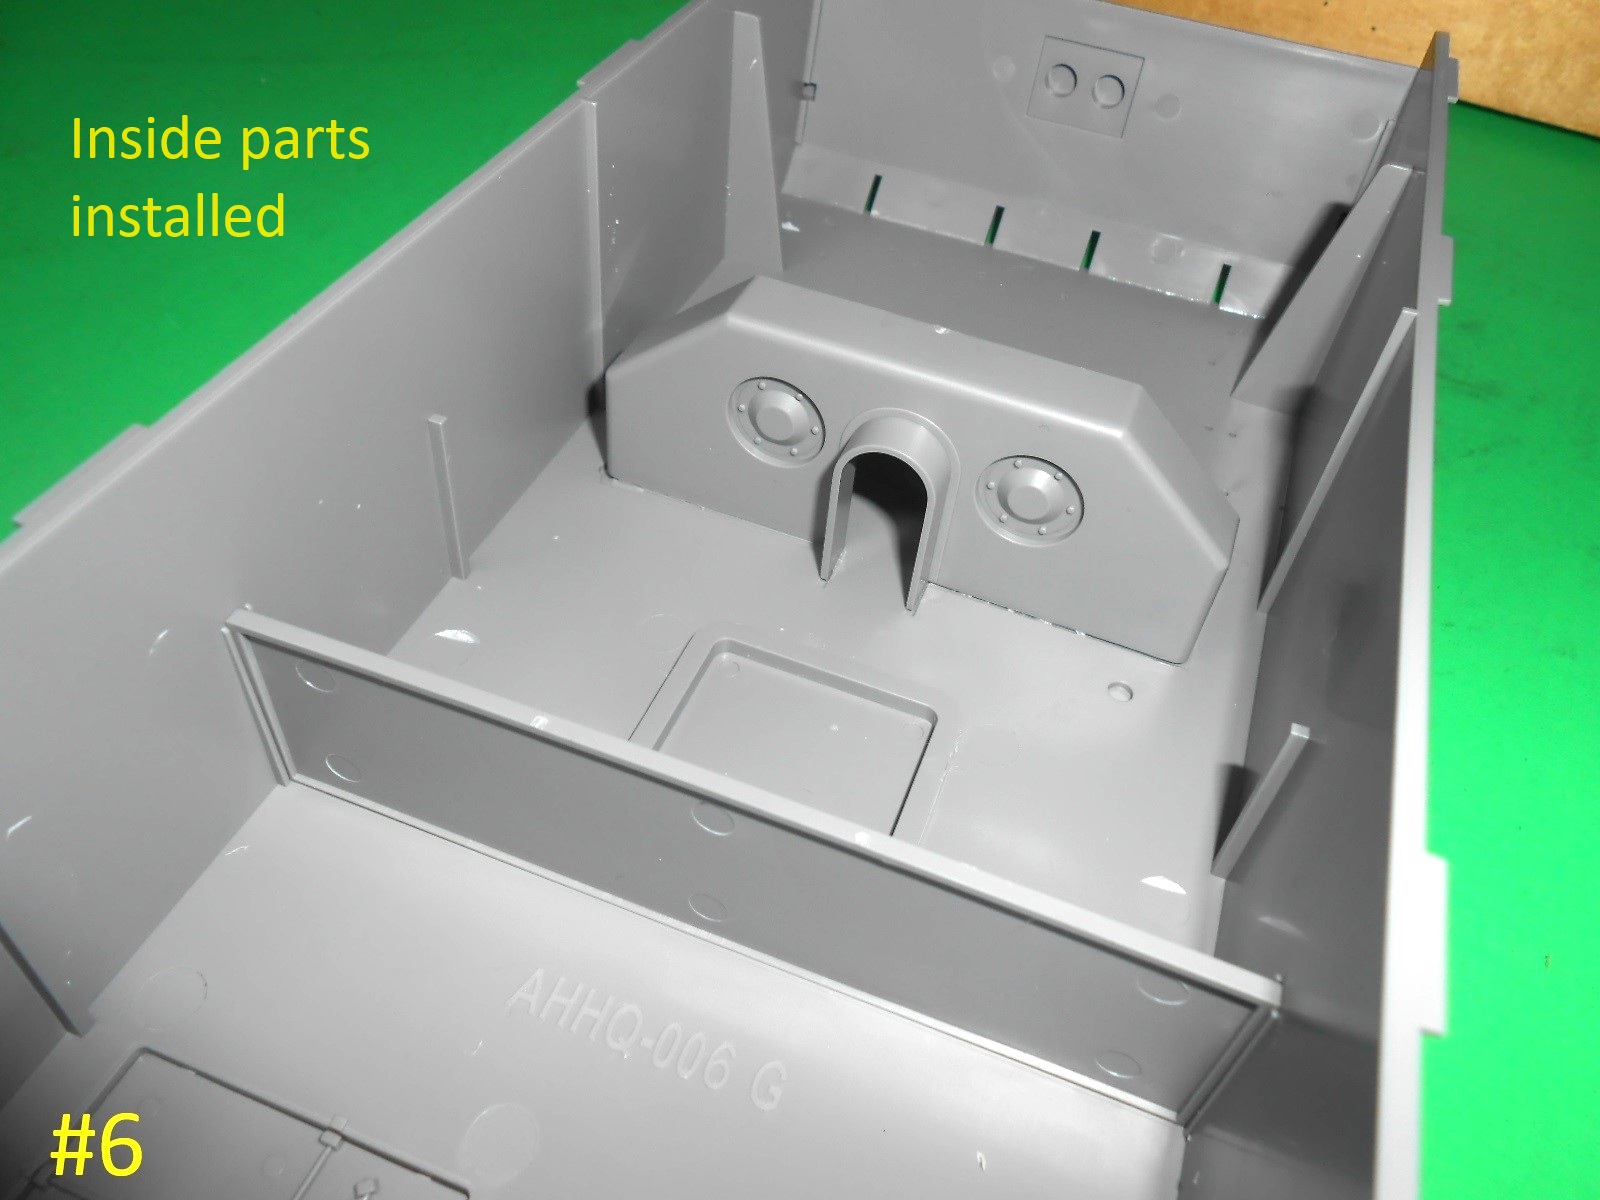
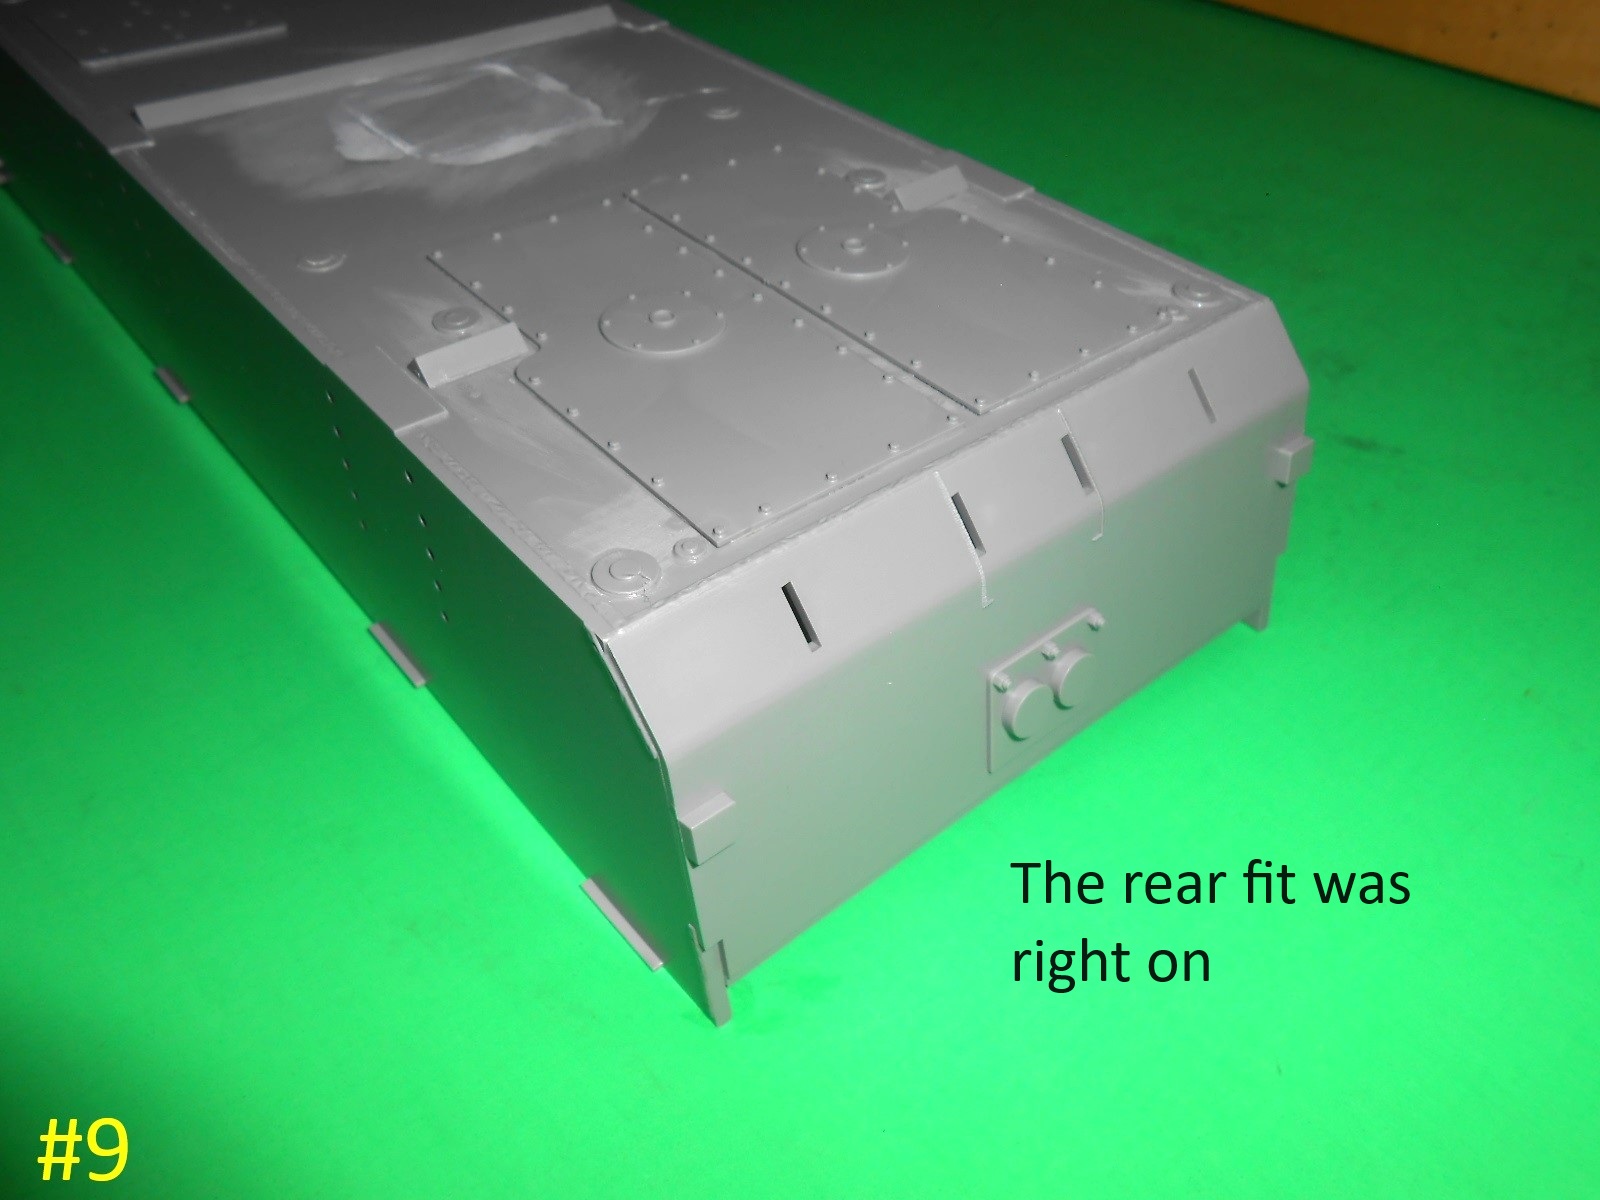
Everything is going nicely so-far on this build.
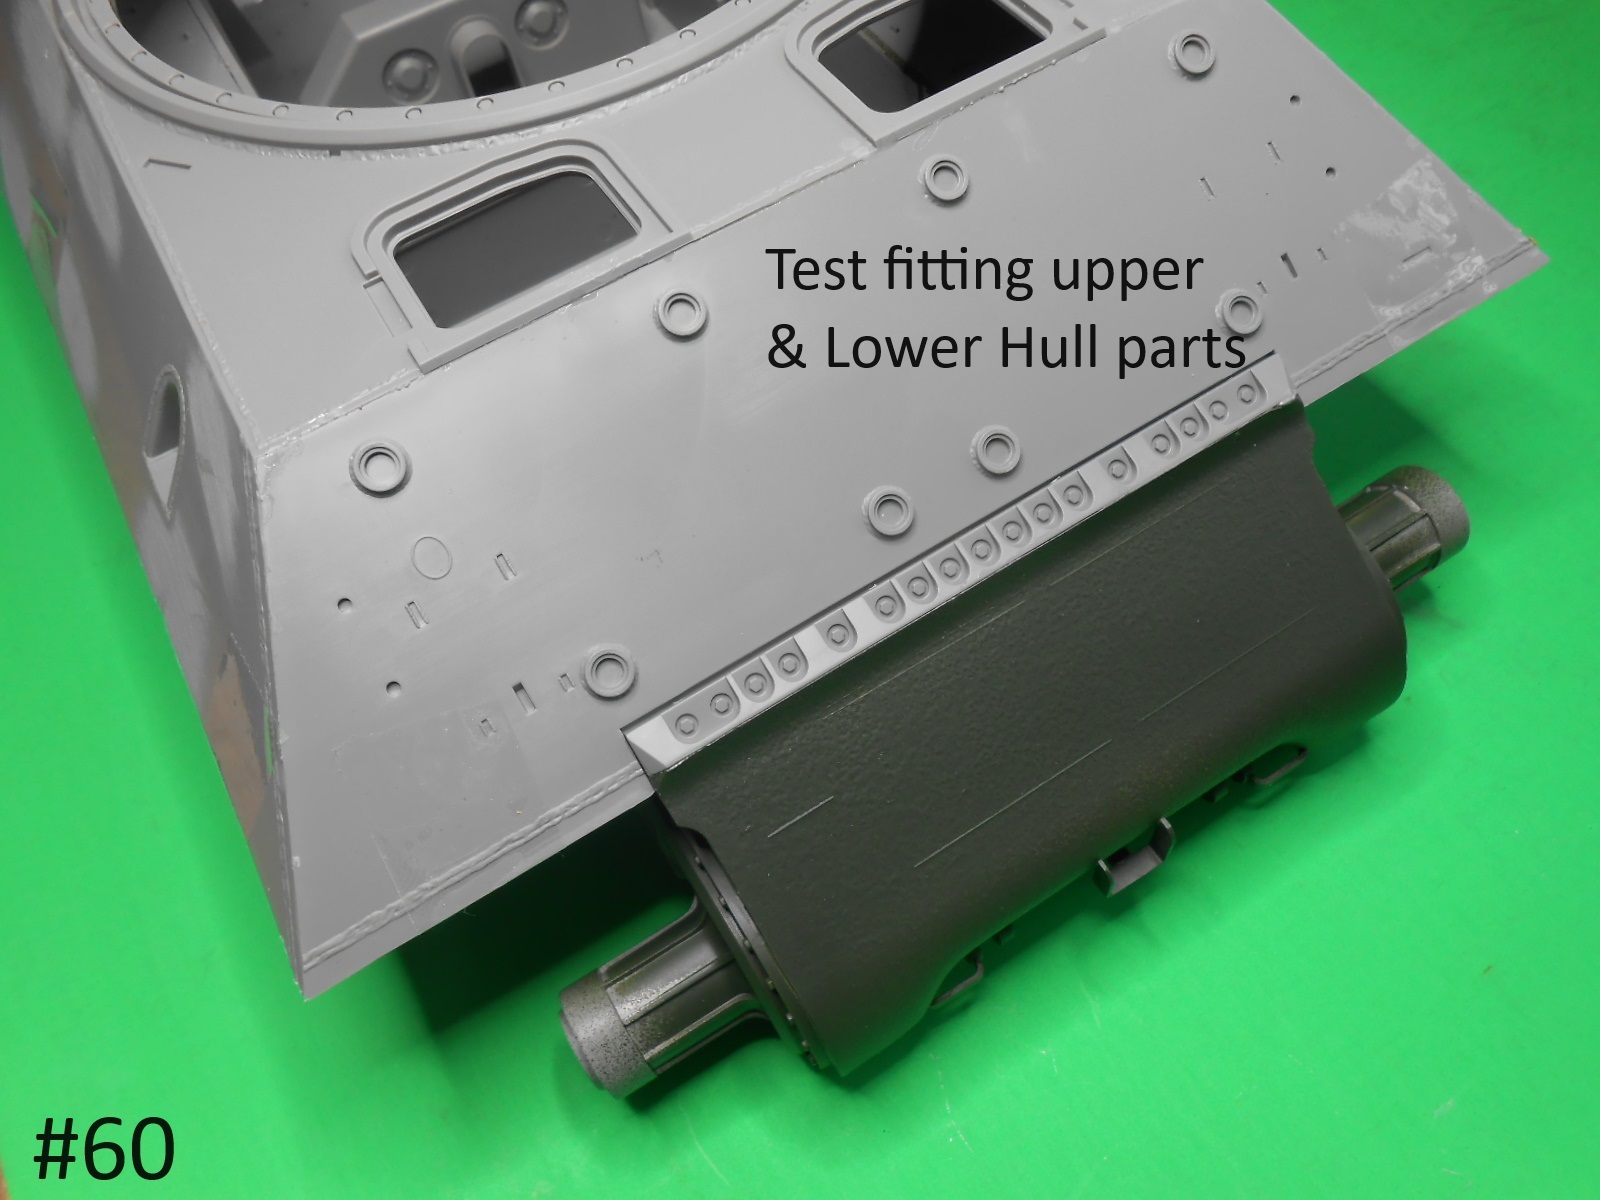
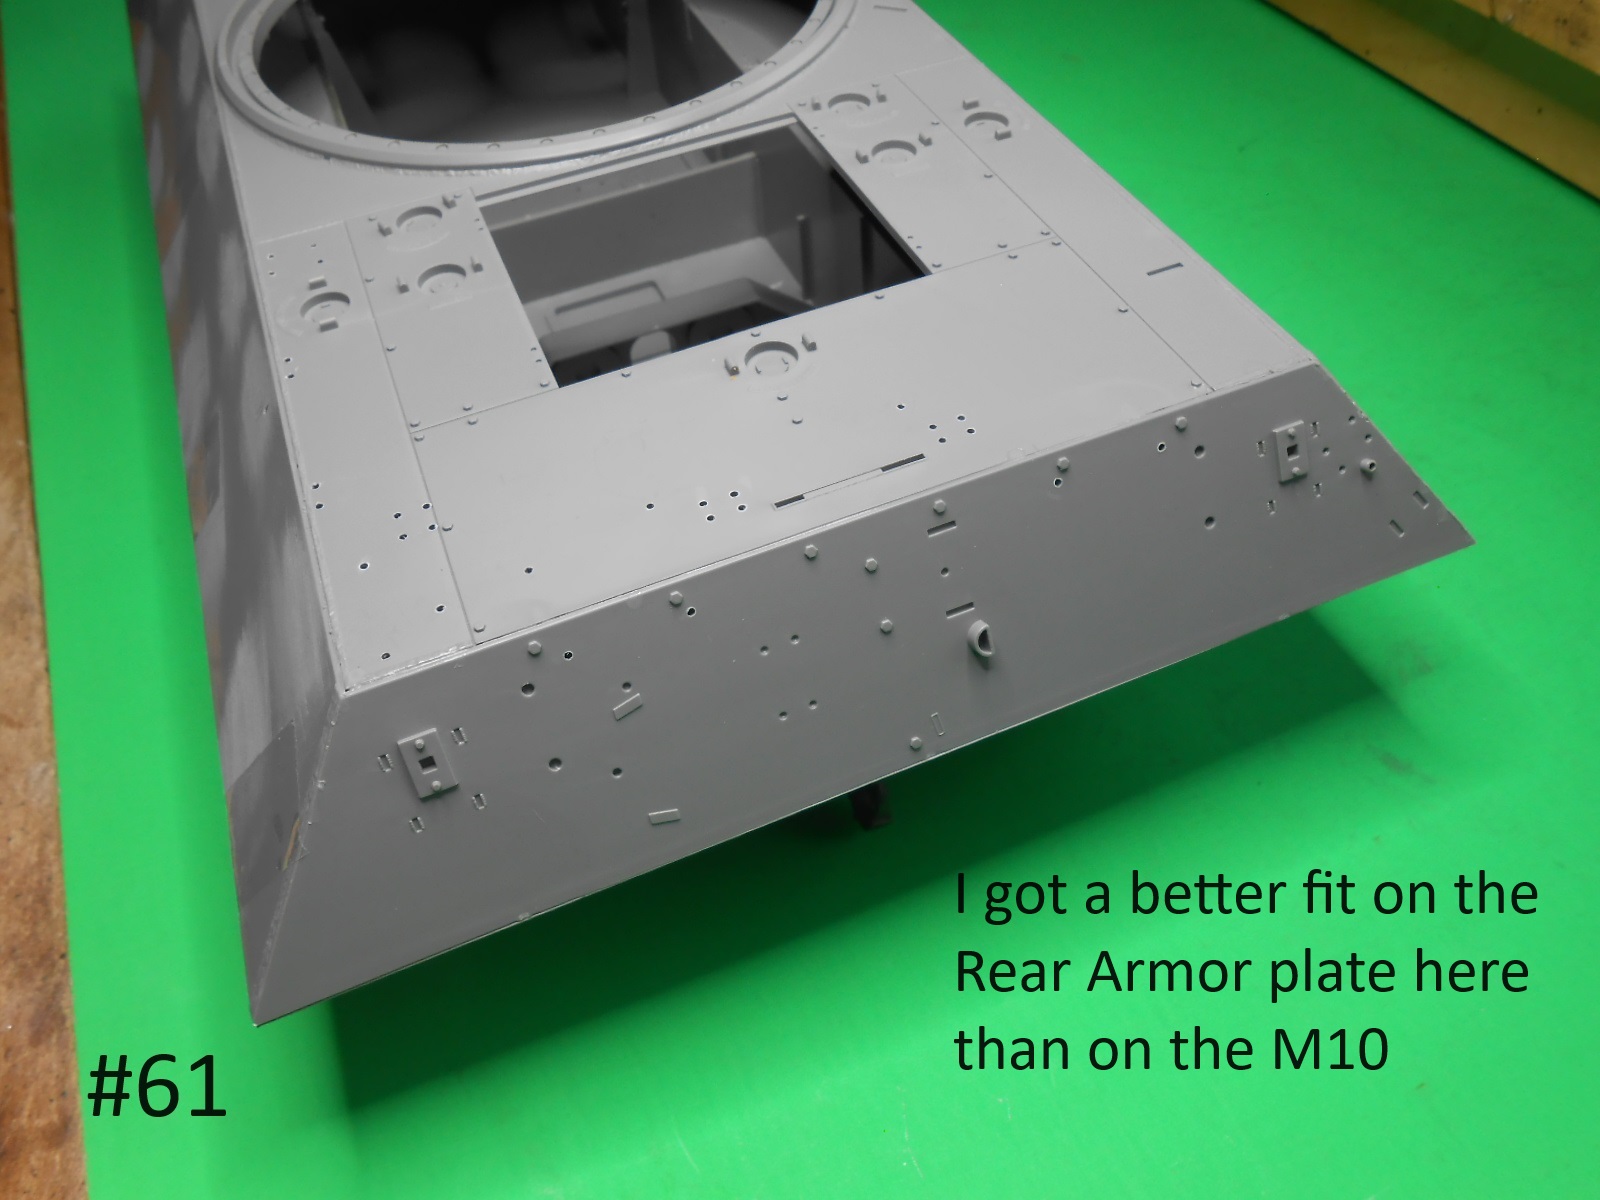
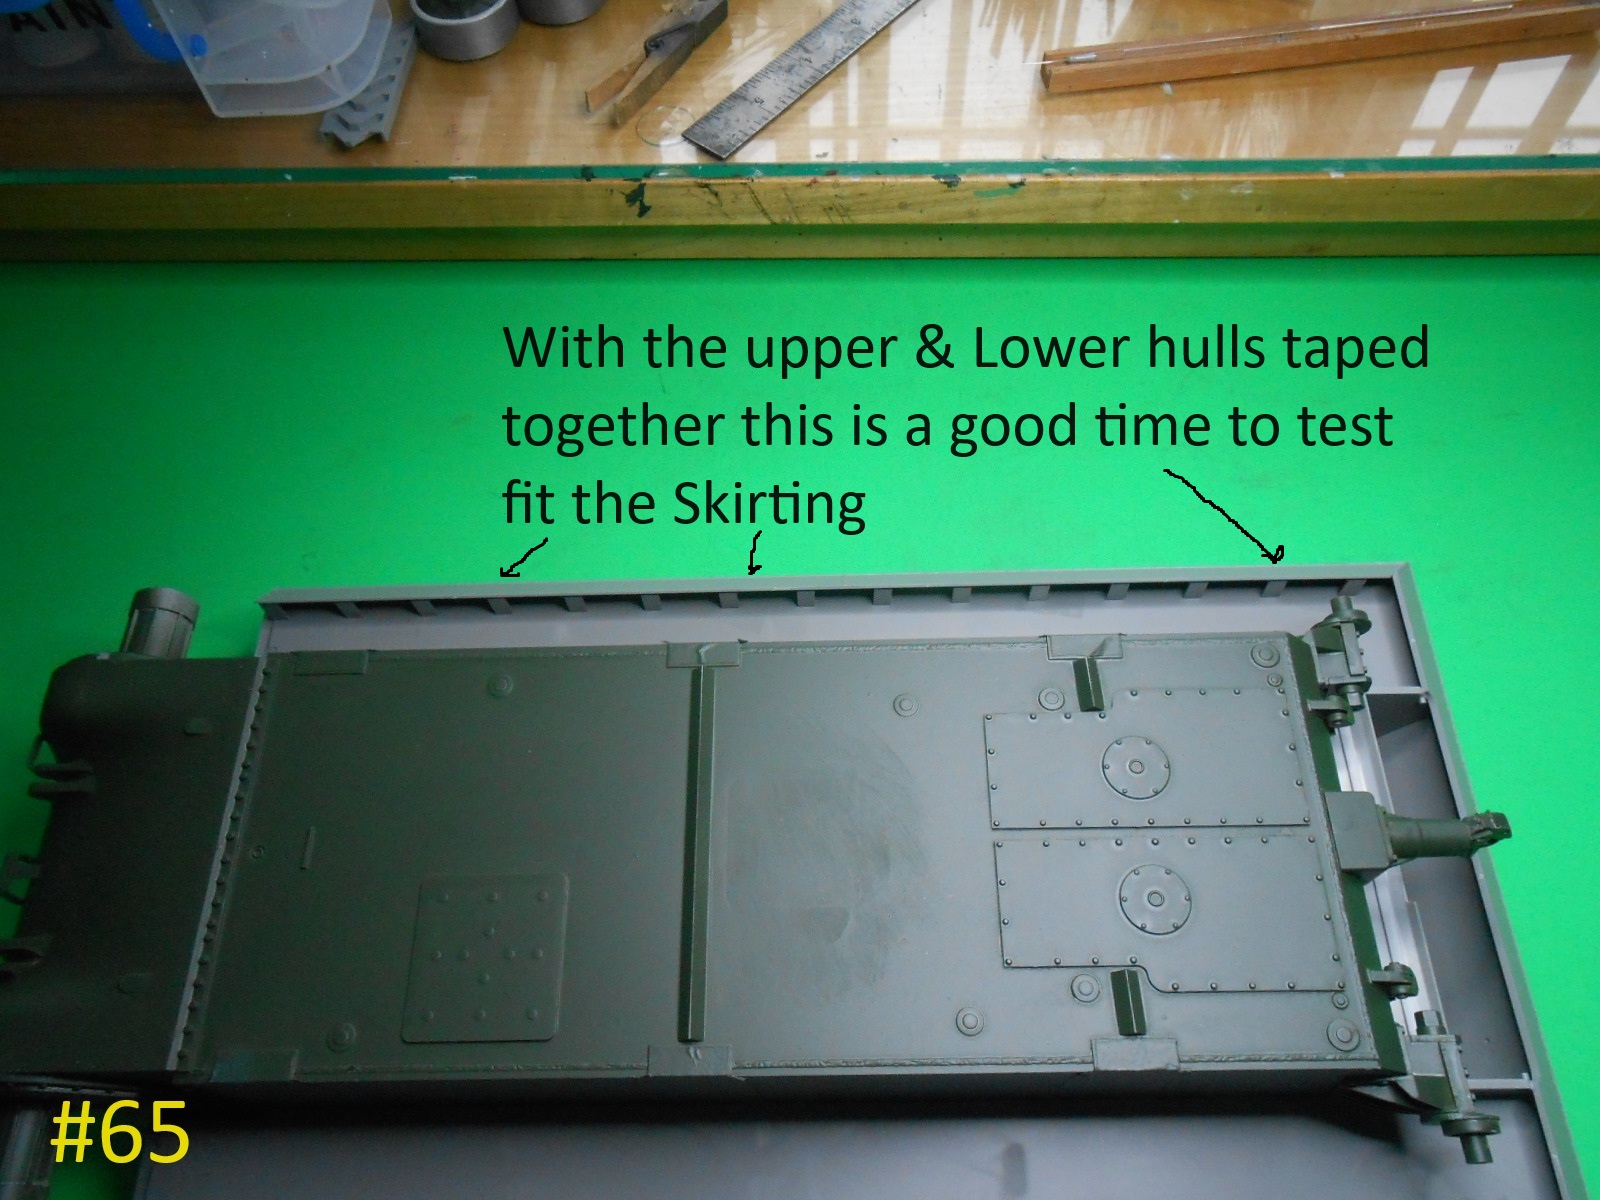
I taped the Hull parts together and got an excellent fit.
I glued the Radiator unit to the lower hull this eased fitting the Upper Hull.
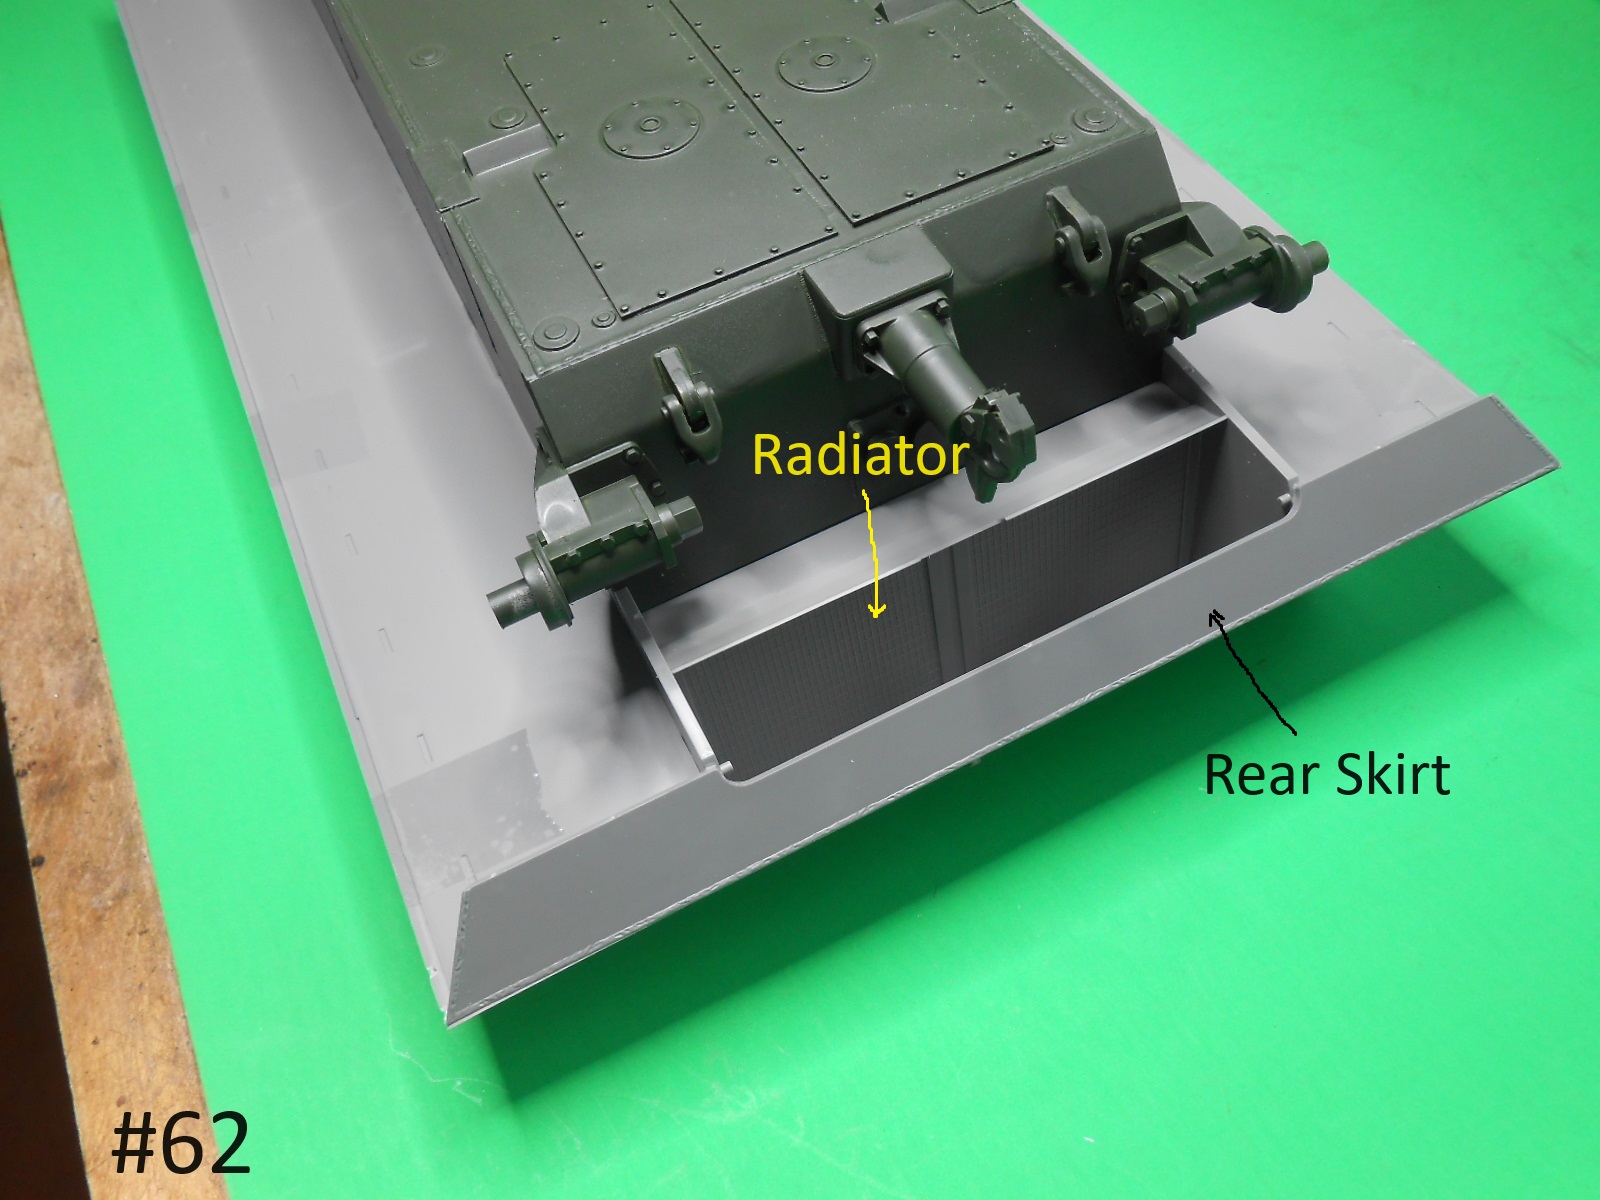
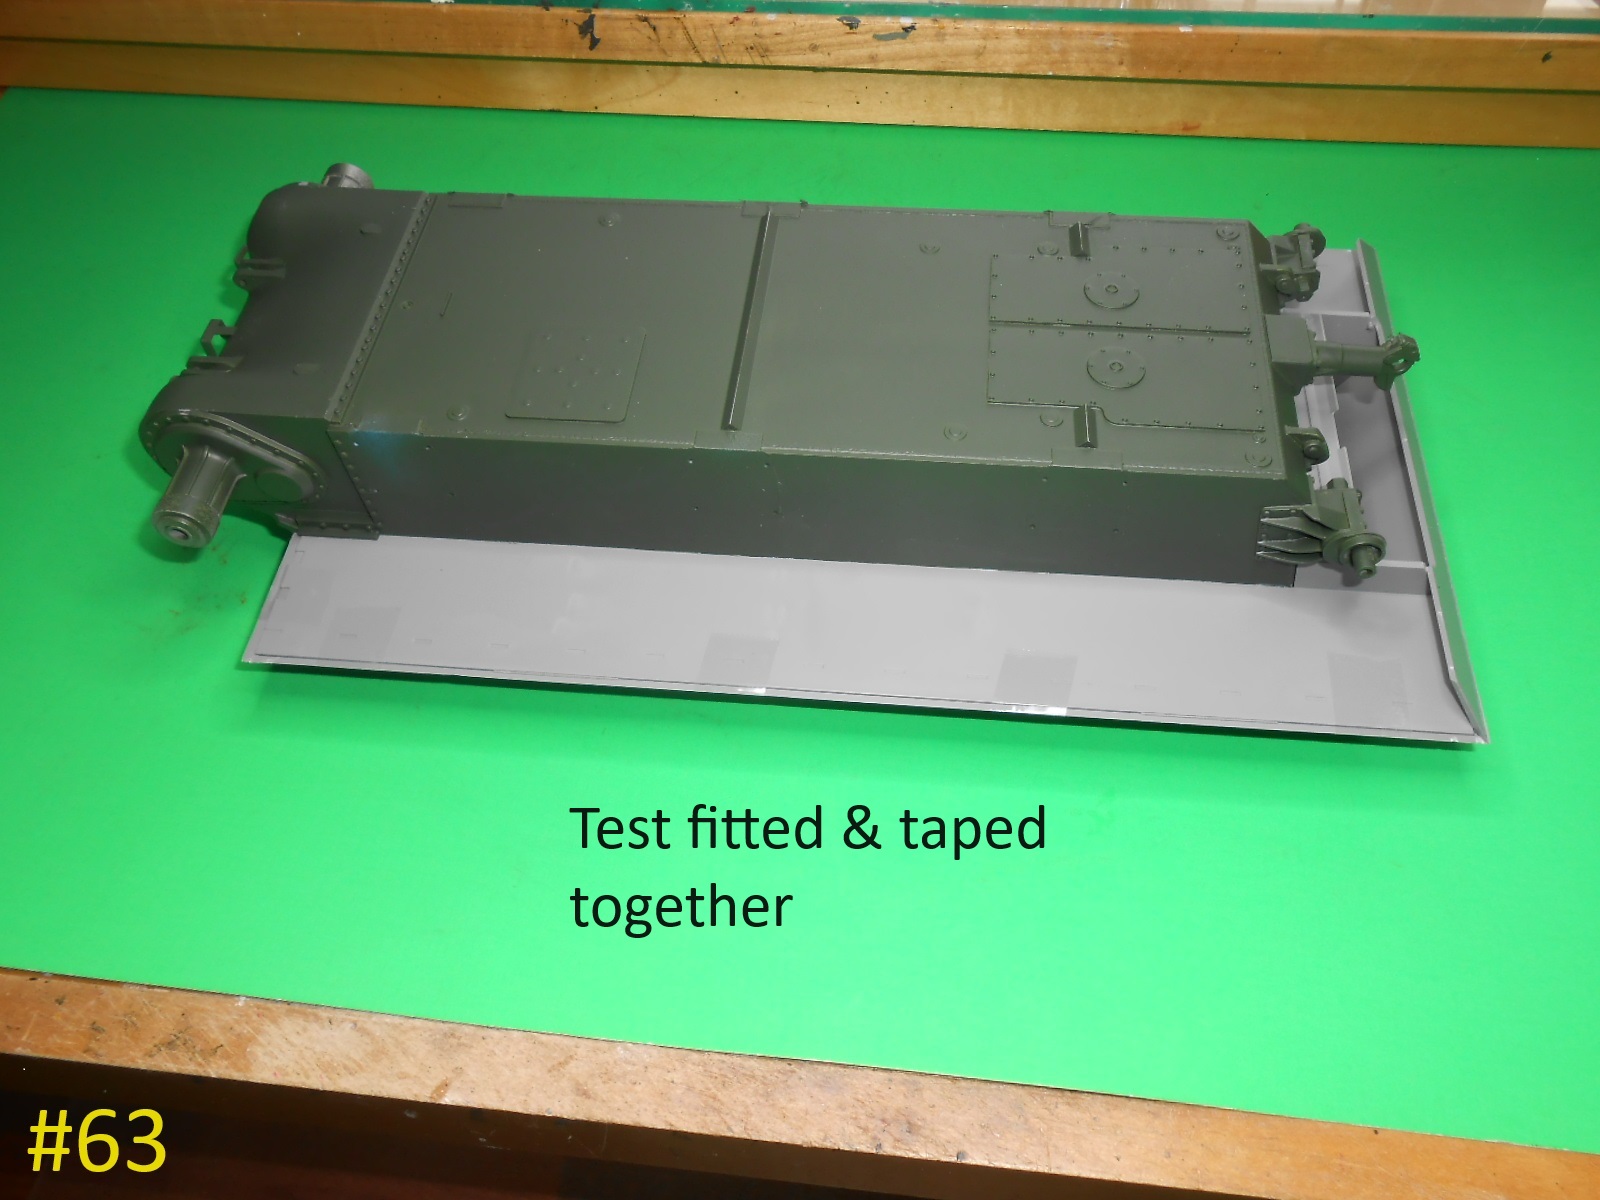
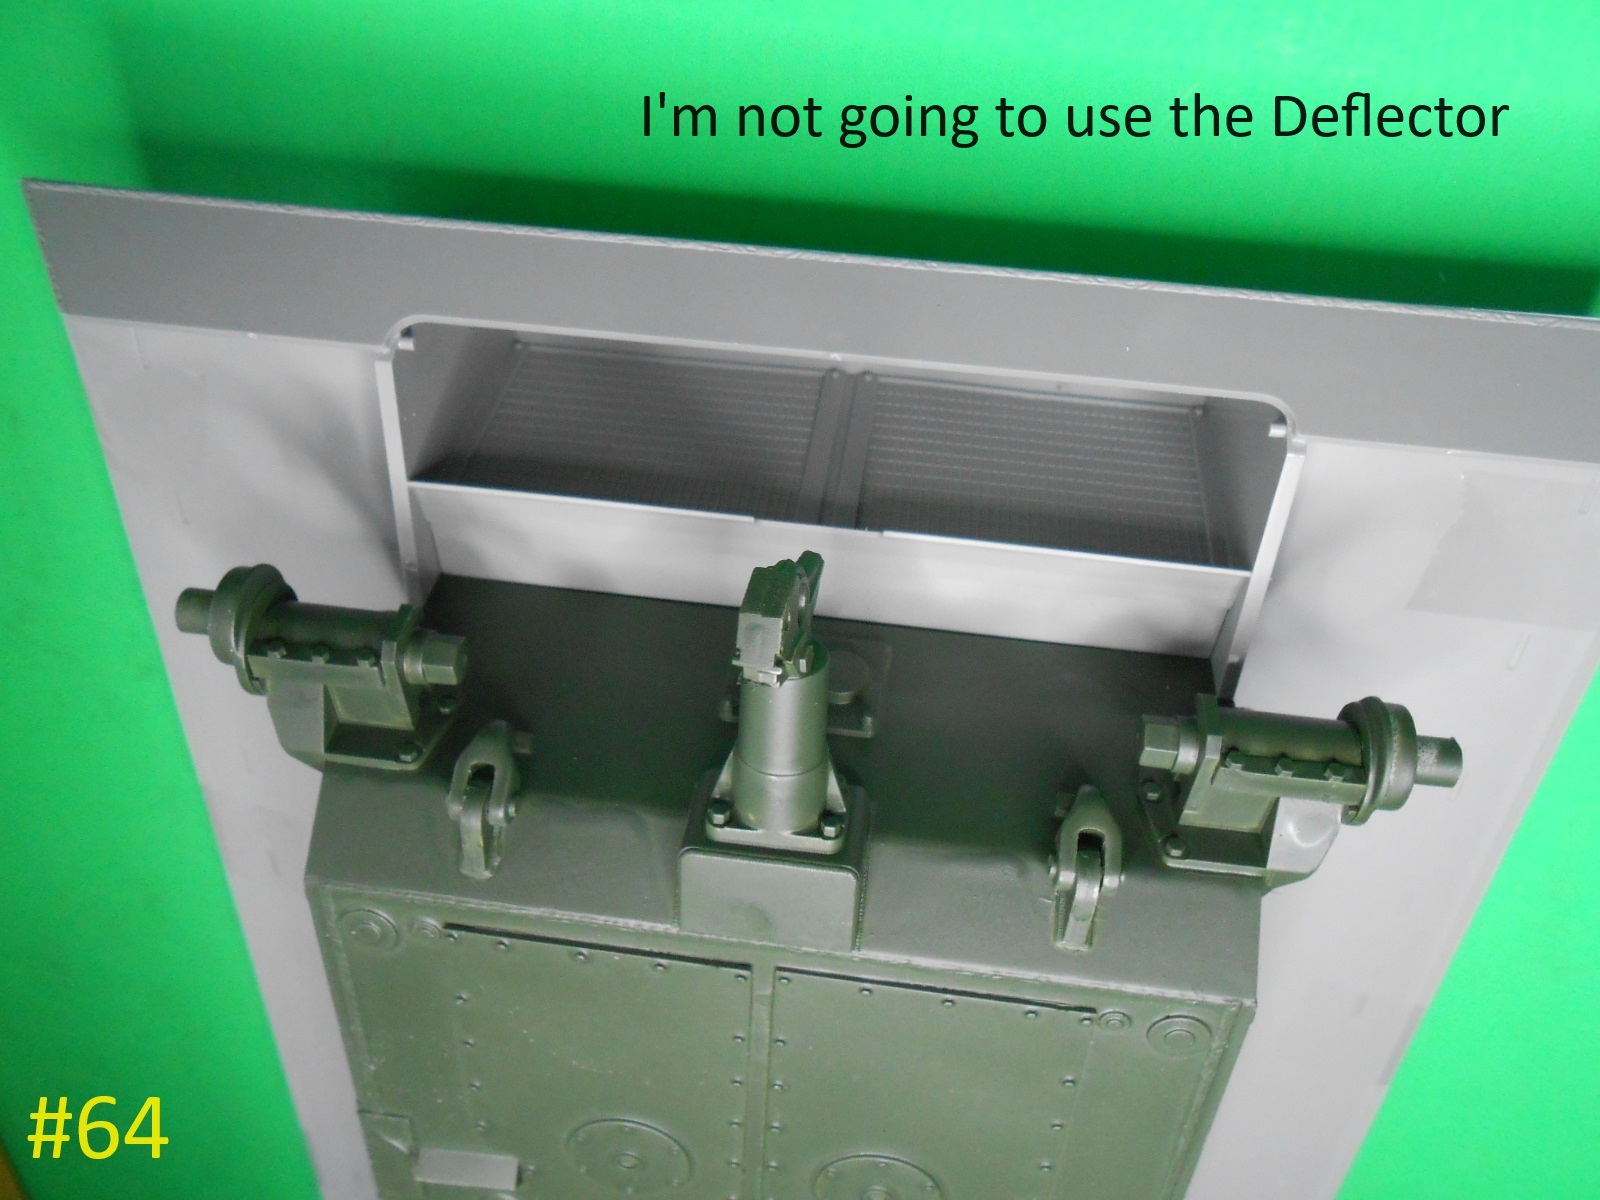
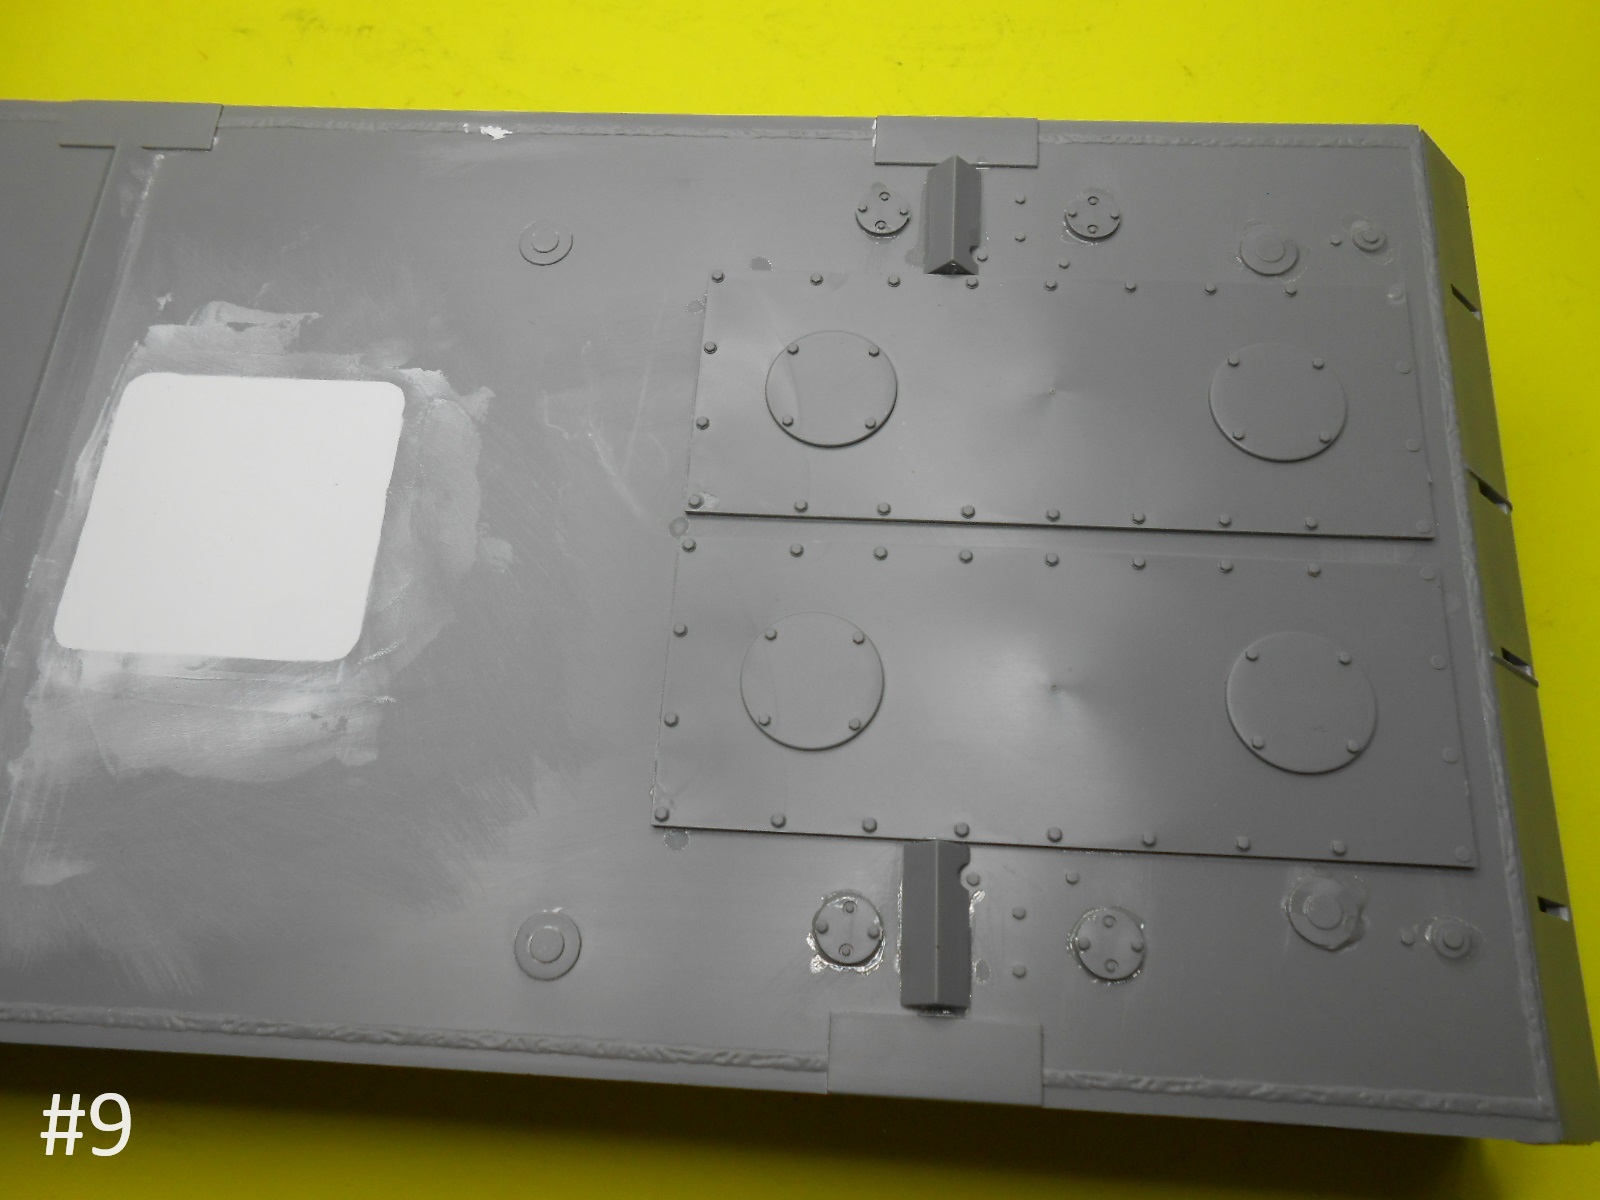
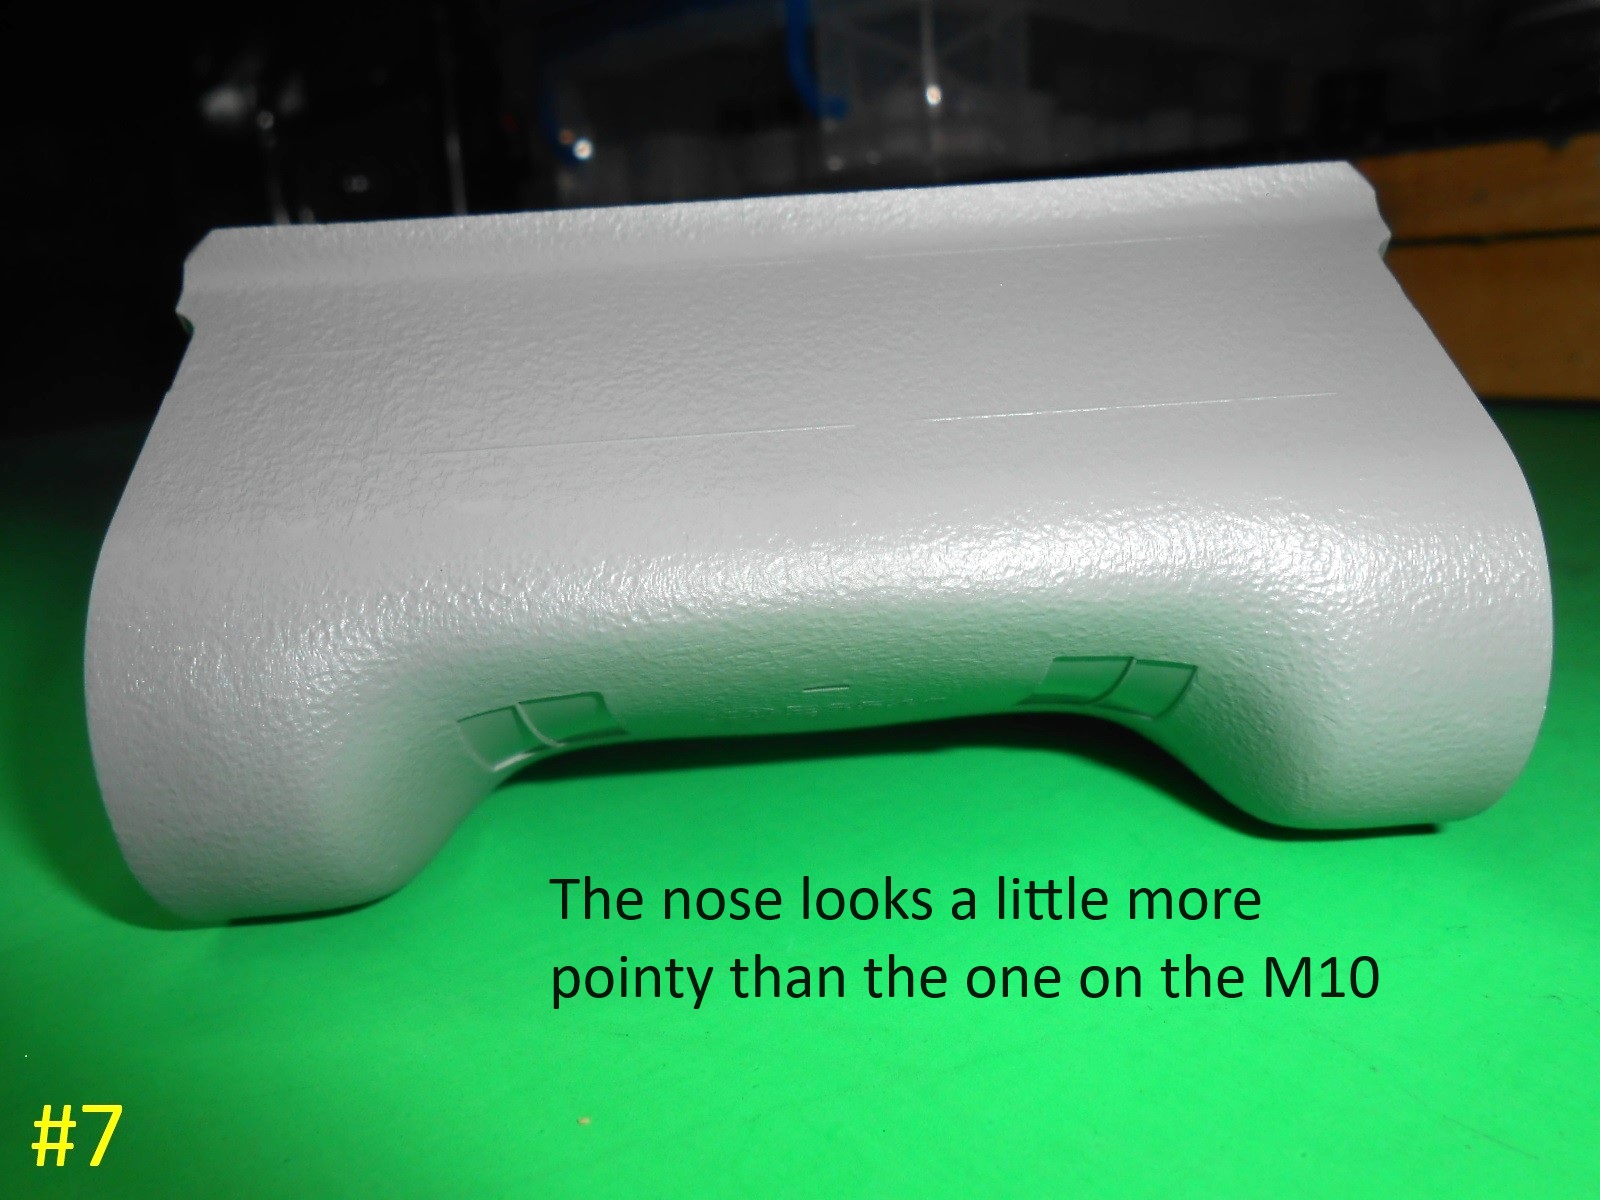
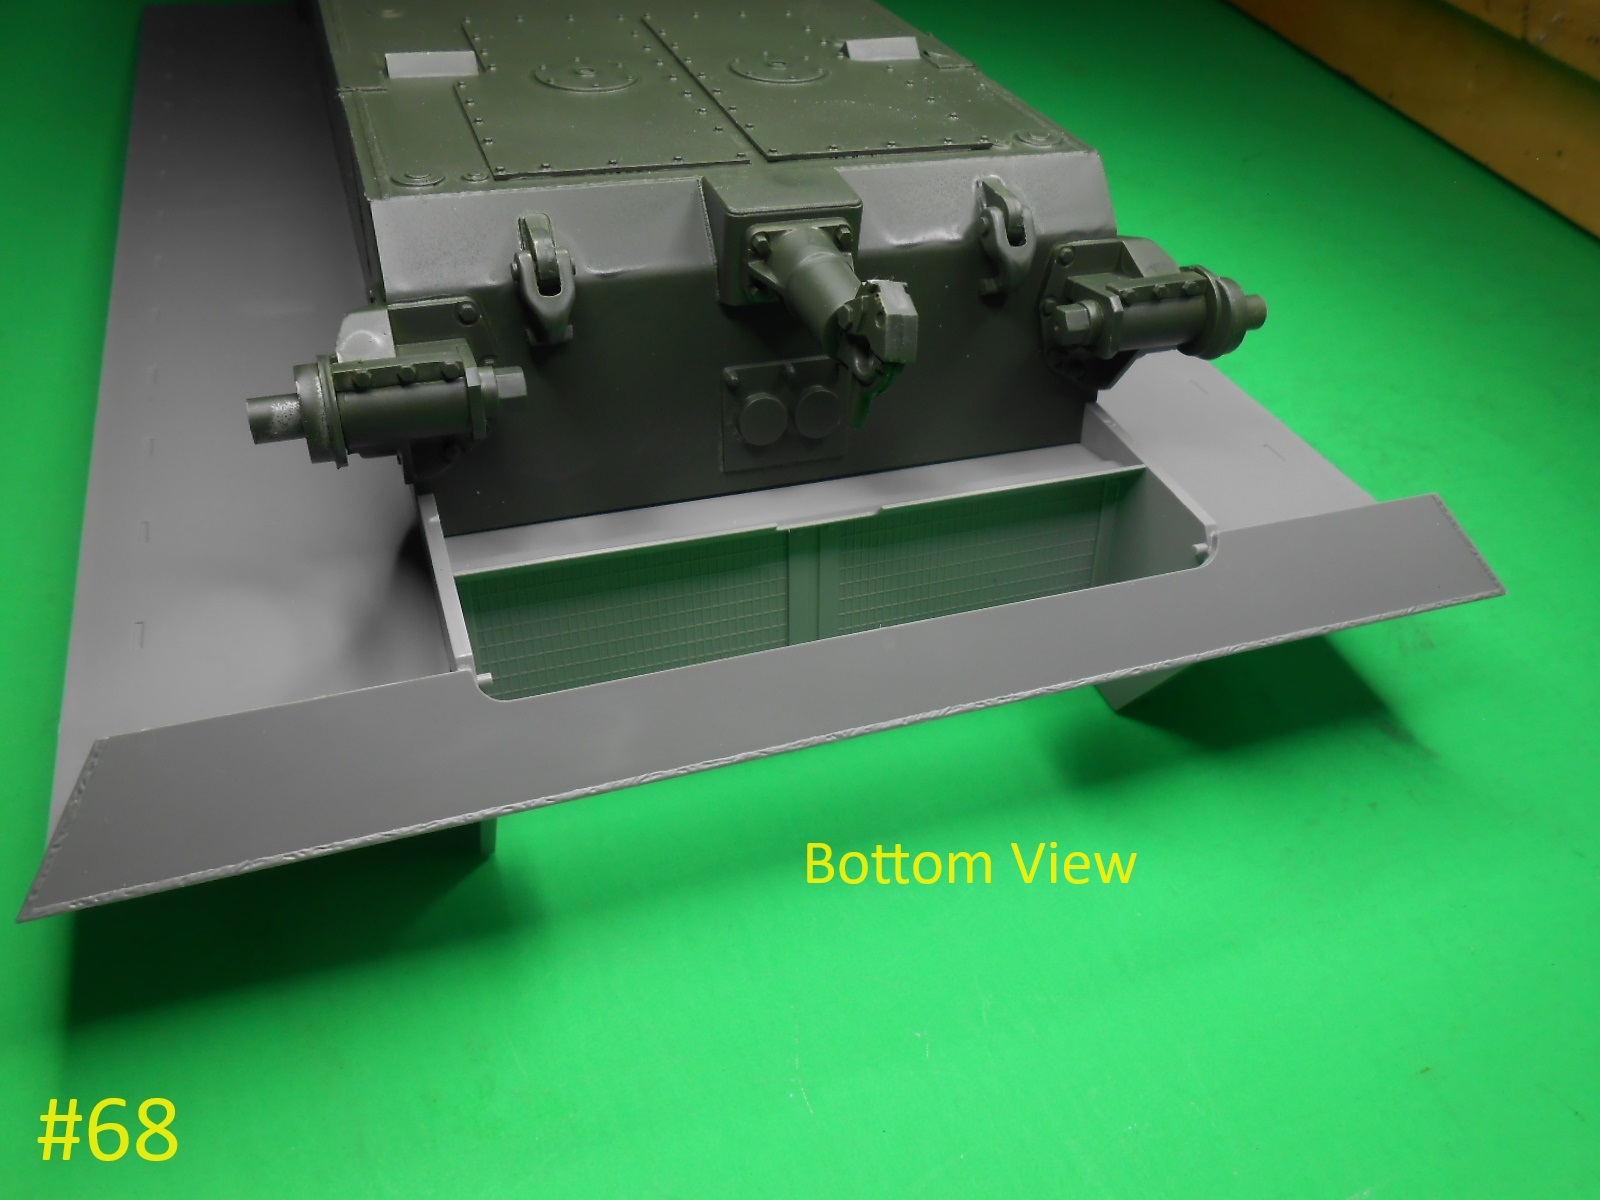
With everything taped together I thought that it would be a good time to assemble and test fit the Lower Skirting , no install yet.
The Front Bolt Strip on this kit is completely different than the one on the M10’
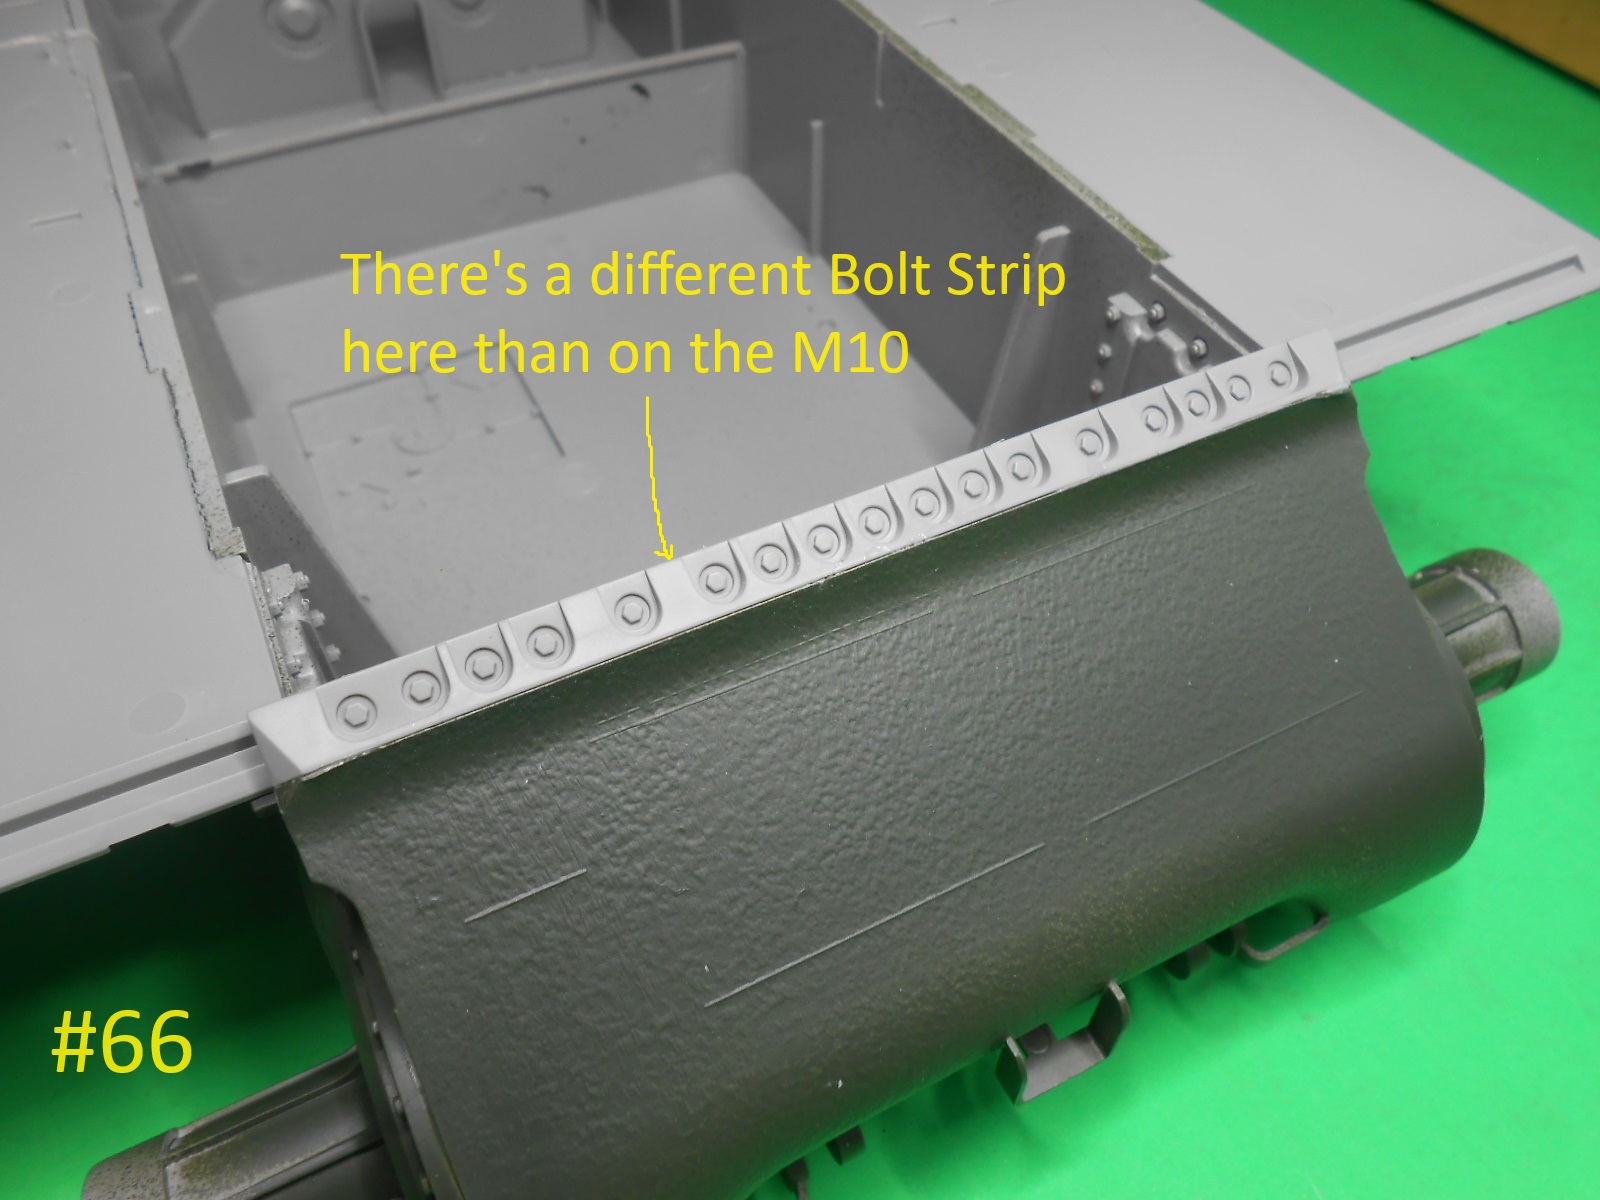

that’s all for now.
Regards
Donald
7 Likes