Very nice. No question looking at it that it’s a willow.
Two queries if you will.
1-what kind of fixative are you using ?
2. Have you seen the gent from years ago that used to be a frequent poster here that did a WIP on his dio showing the Belgian town of Clerveux during WWII ? Sadly I forget his name but he did a willow that was just spectacular, amounst other things.
Anyway, love watching this “bloom”.
J
2 Likes
Claude Jochiem , spelt his last name wrong fer sure …
2 Likes
Thanks to all those that continue to support this build, ![]()
![]() .
.
The fixatives I’m using are diluted white glue for securing the plumbers hemp to the wire armature, and then the hemp is sprayed with cheap hairspray…not mine I hasten to add as I don’t have enough hair left, ![]() …over which I sprinkle the flock. This is done multiple times until the canopy is thick enough.
…over which I sprinkle the flock. This is done multiple times until the canopy is thick enough.
I do recall seeing the build you’re referring to, again it was many years ago, and I remember being truly amazed. I’m sure the guy published a book about the project…but I could be wrong on that bit, ![]()
![]() .
.
G, ![]()
3 Likes
Hi all,
Some small progress, I’ve started the carcass for the barn and started covering it with DAS. This is going to be a dilapidated structure, overgrown and battle/weather worn. It’s also going to be a partial masonry/half-timbered affair.
I’ve also added some retaining boards to the steps leading down to the river.

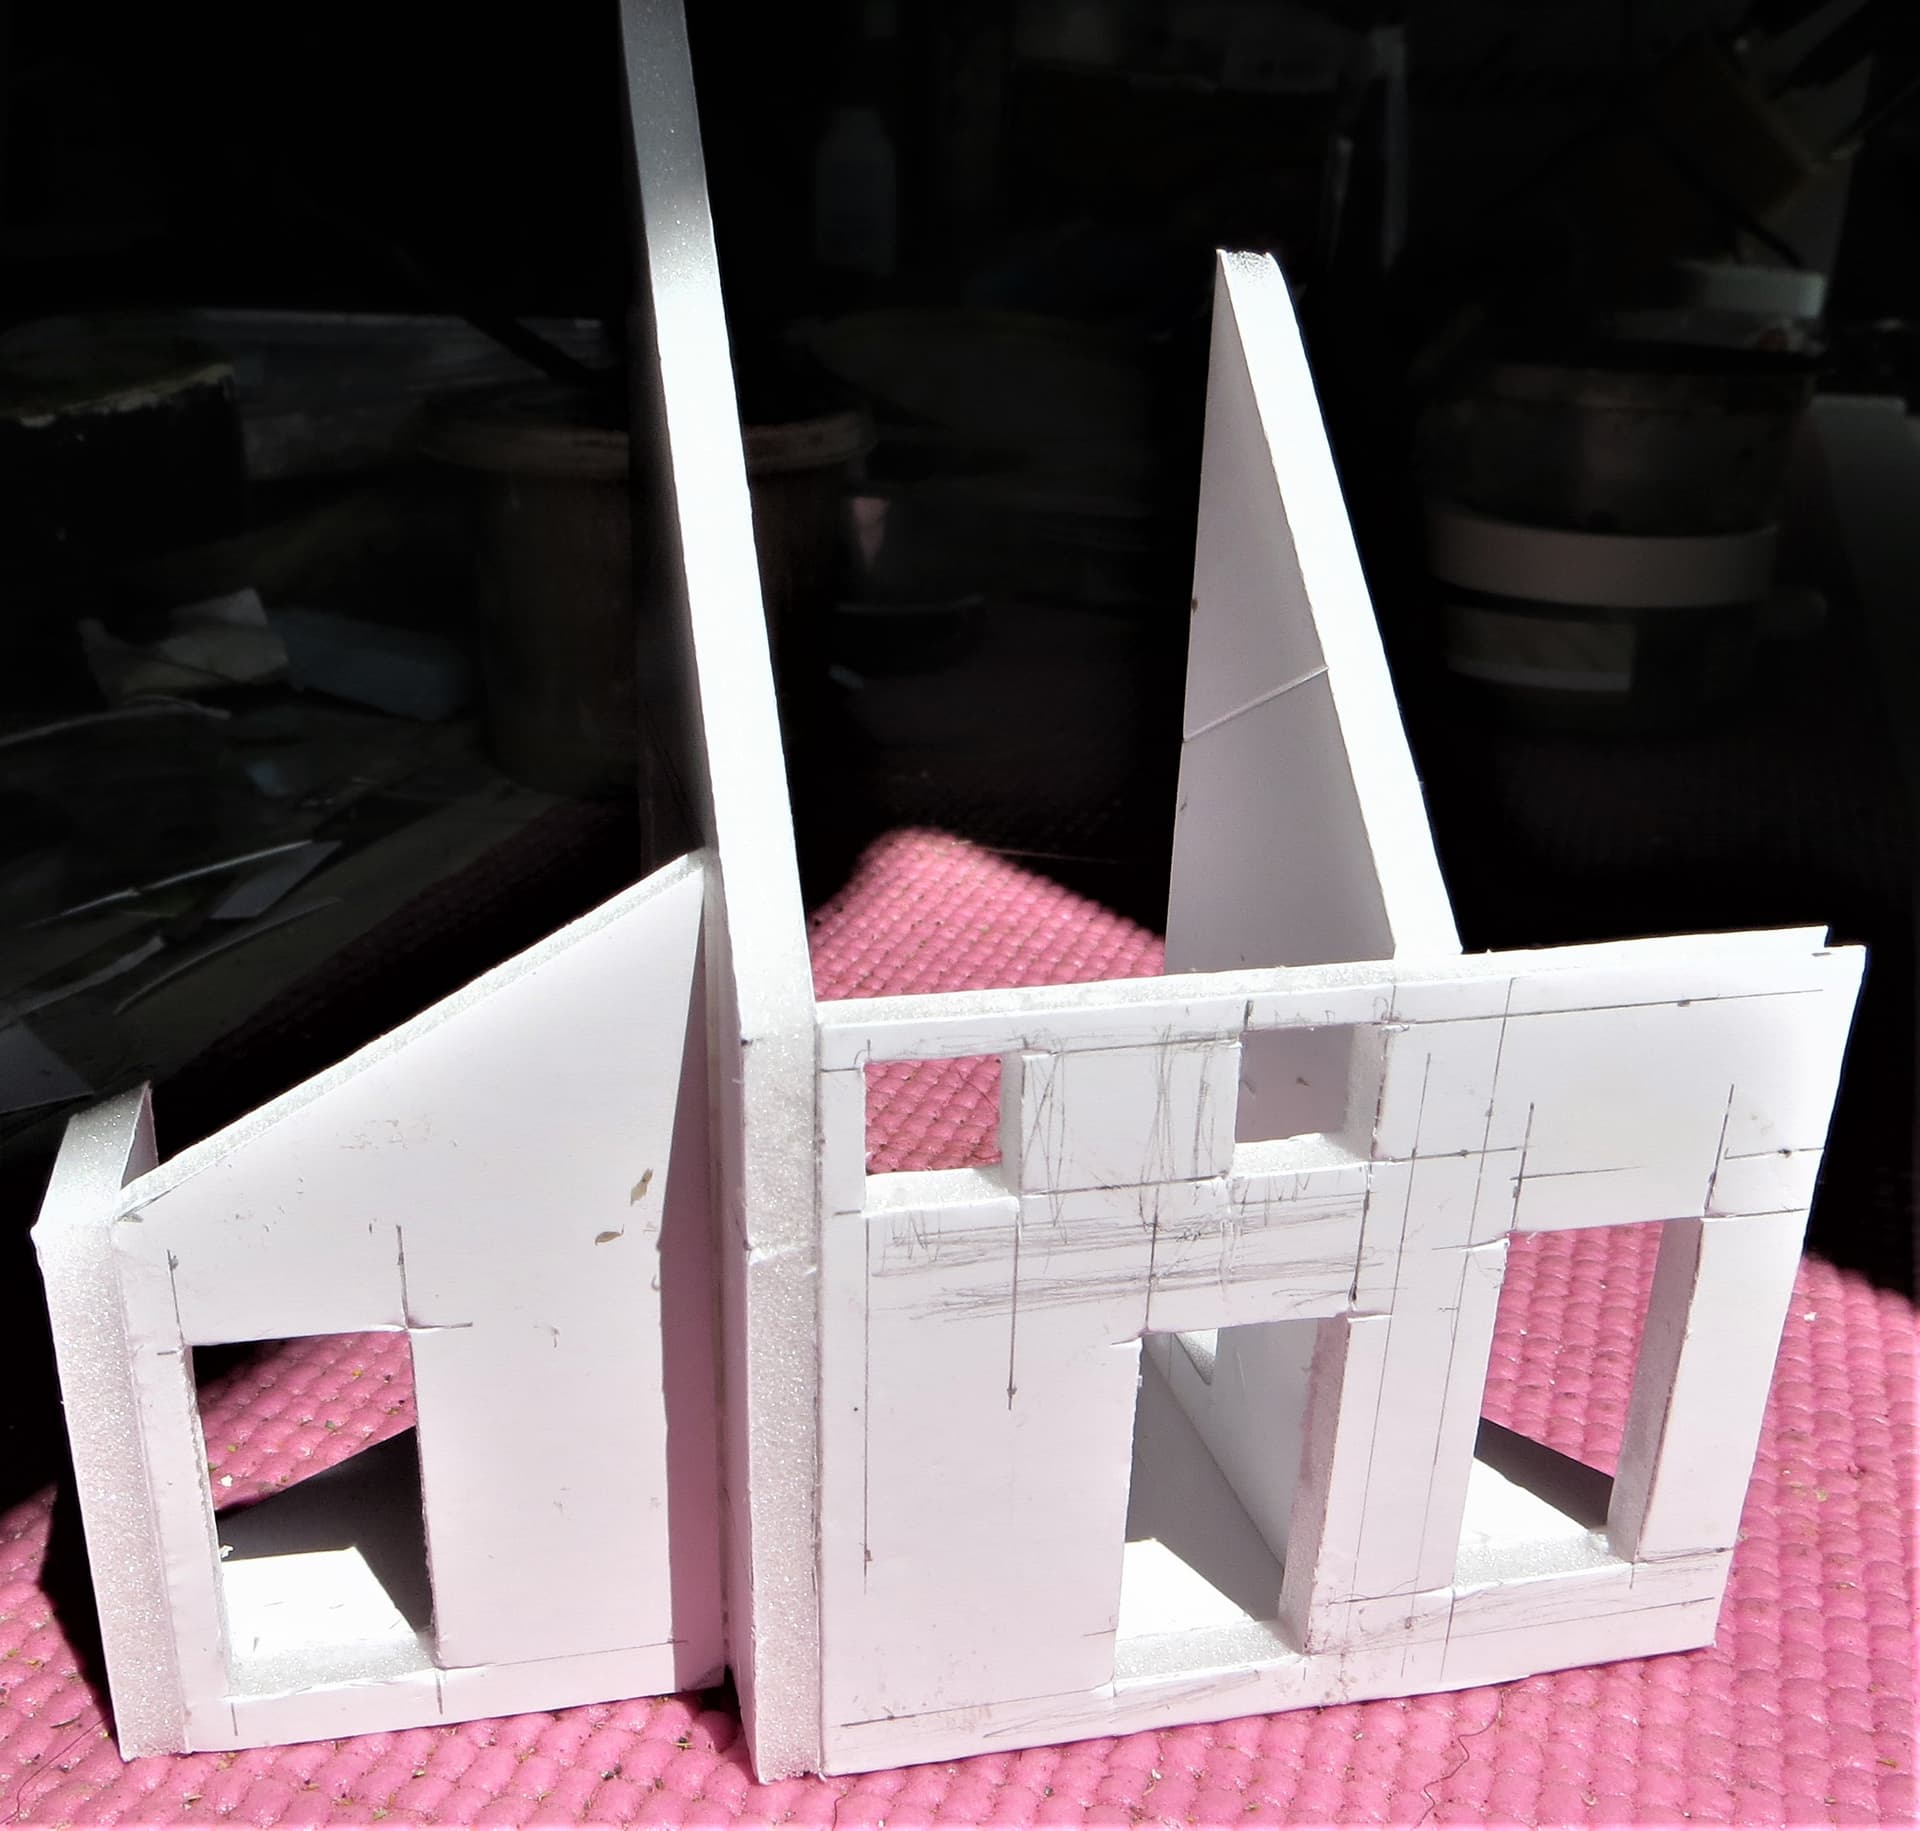
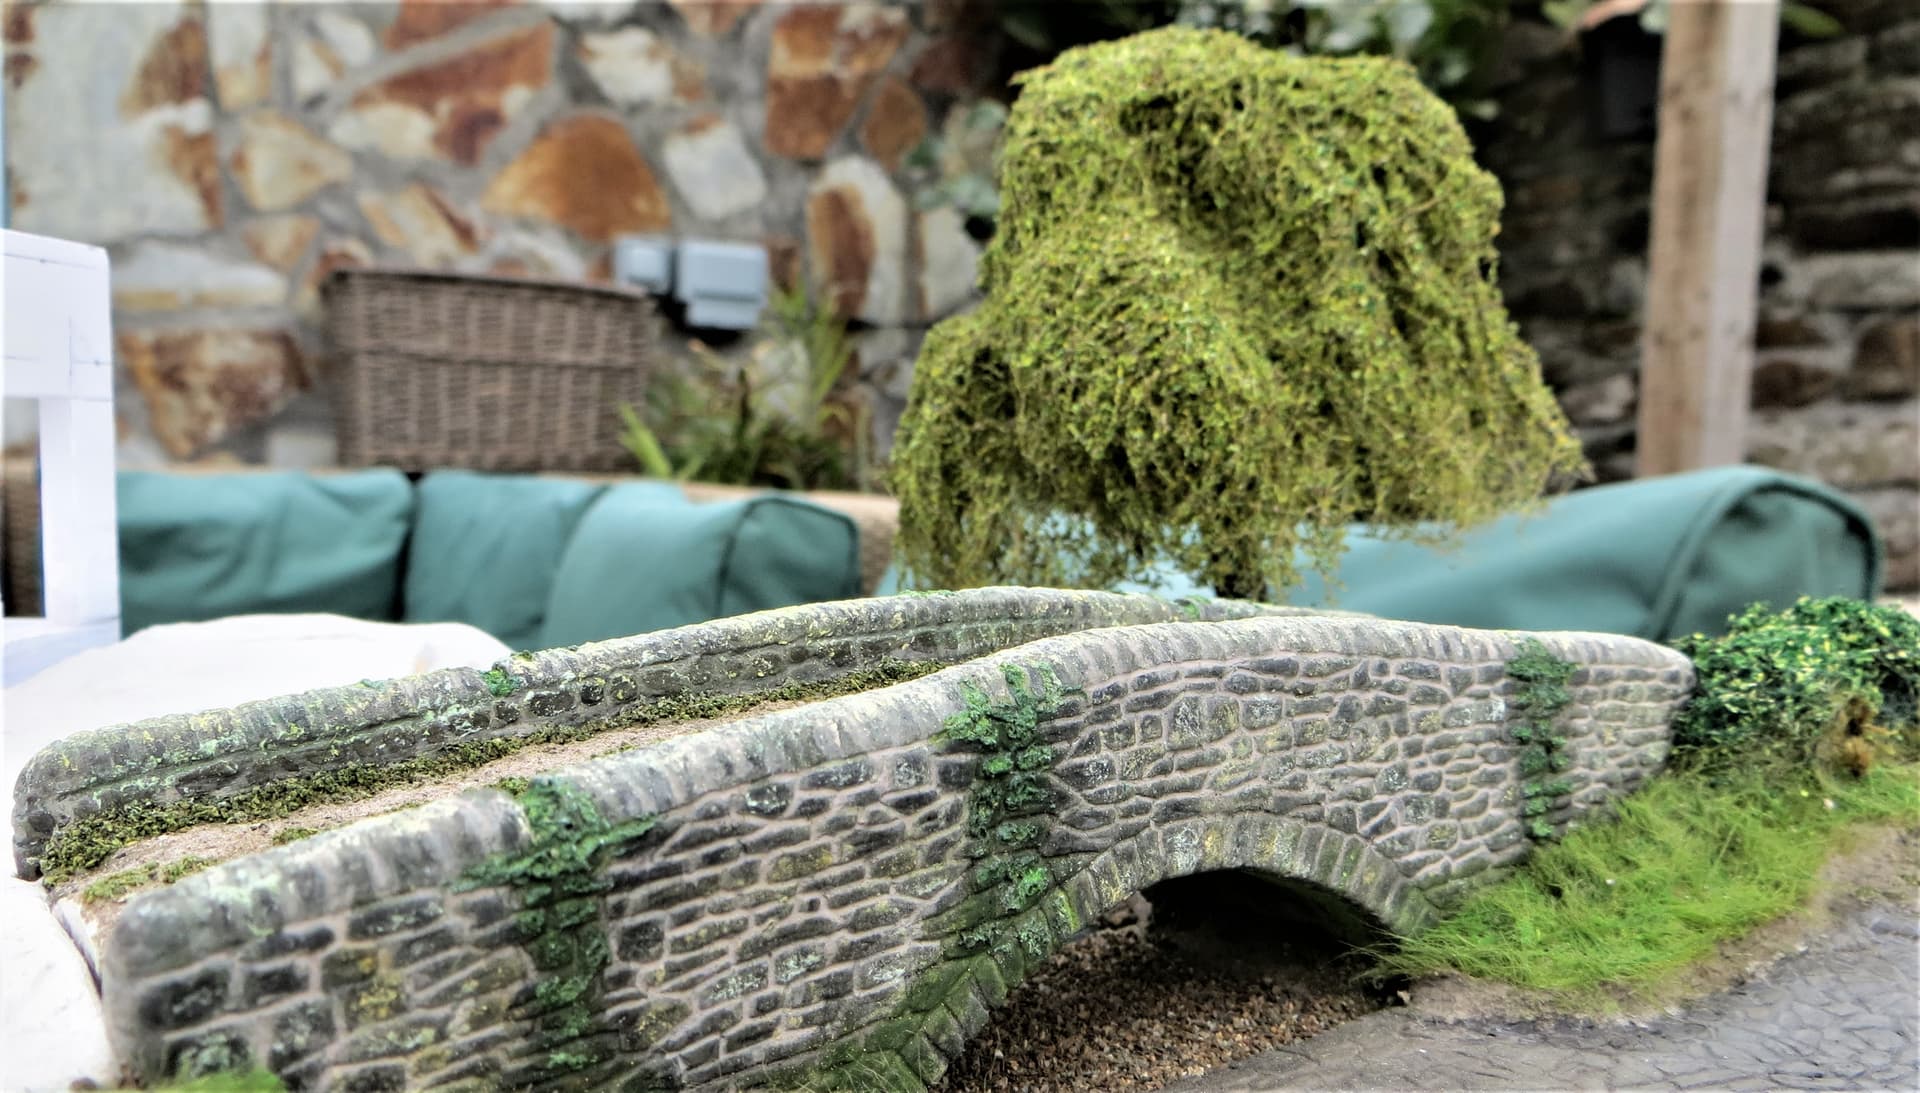
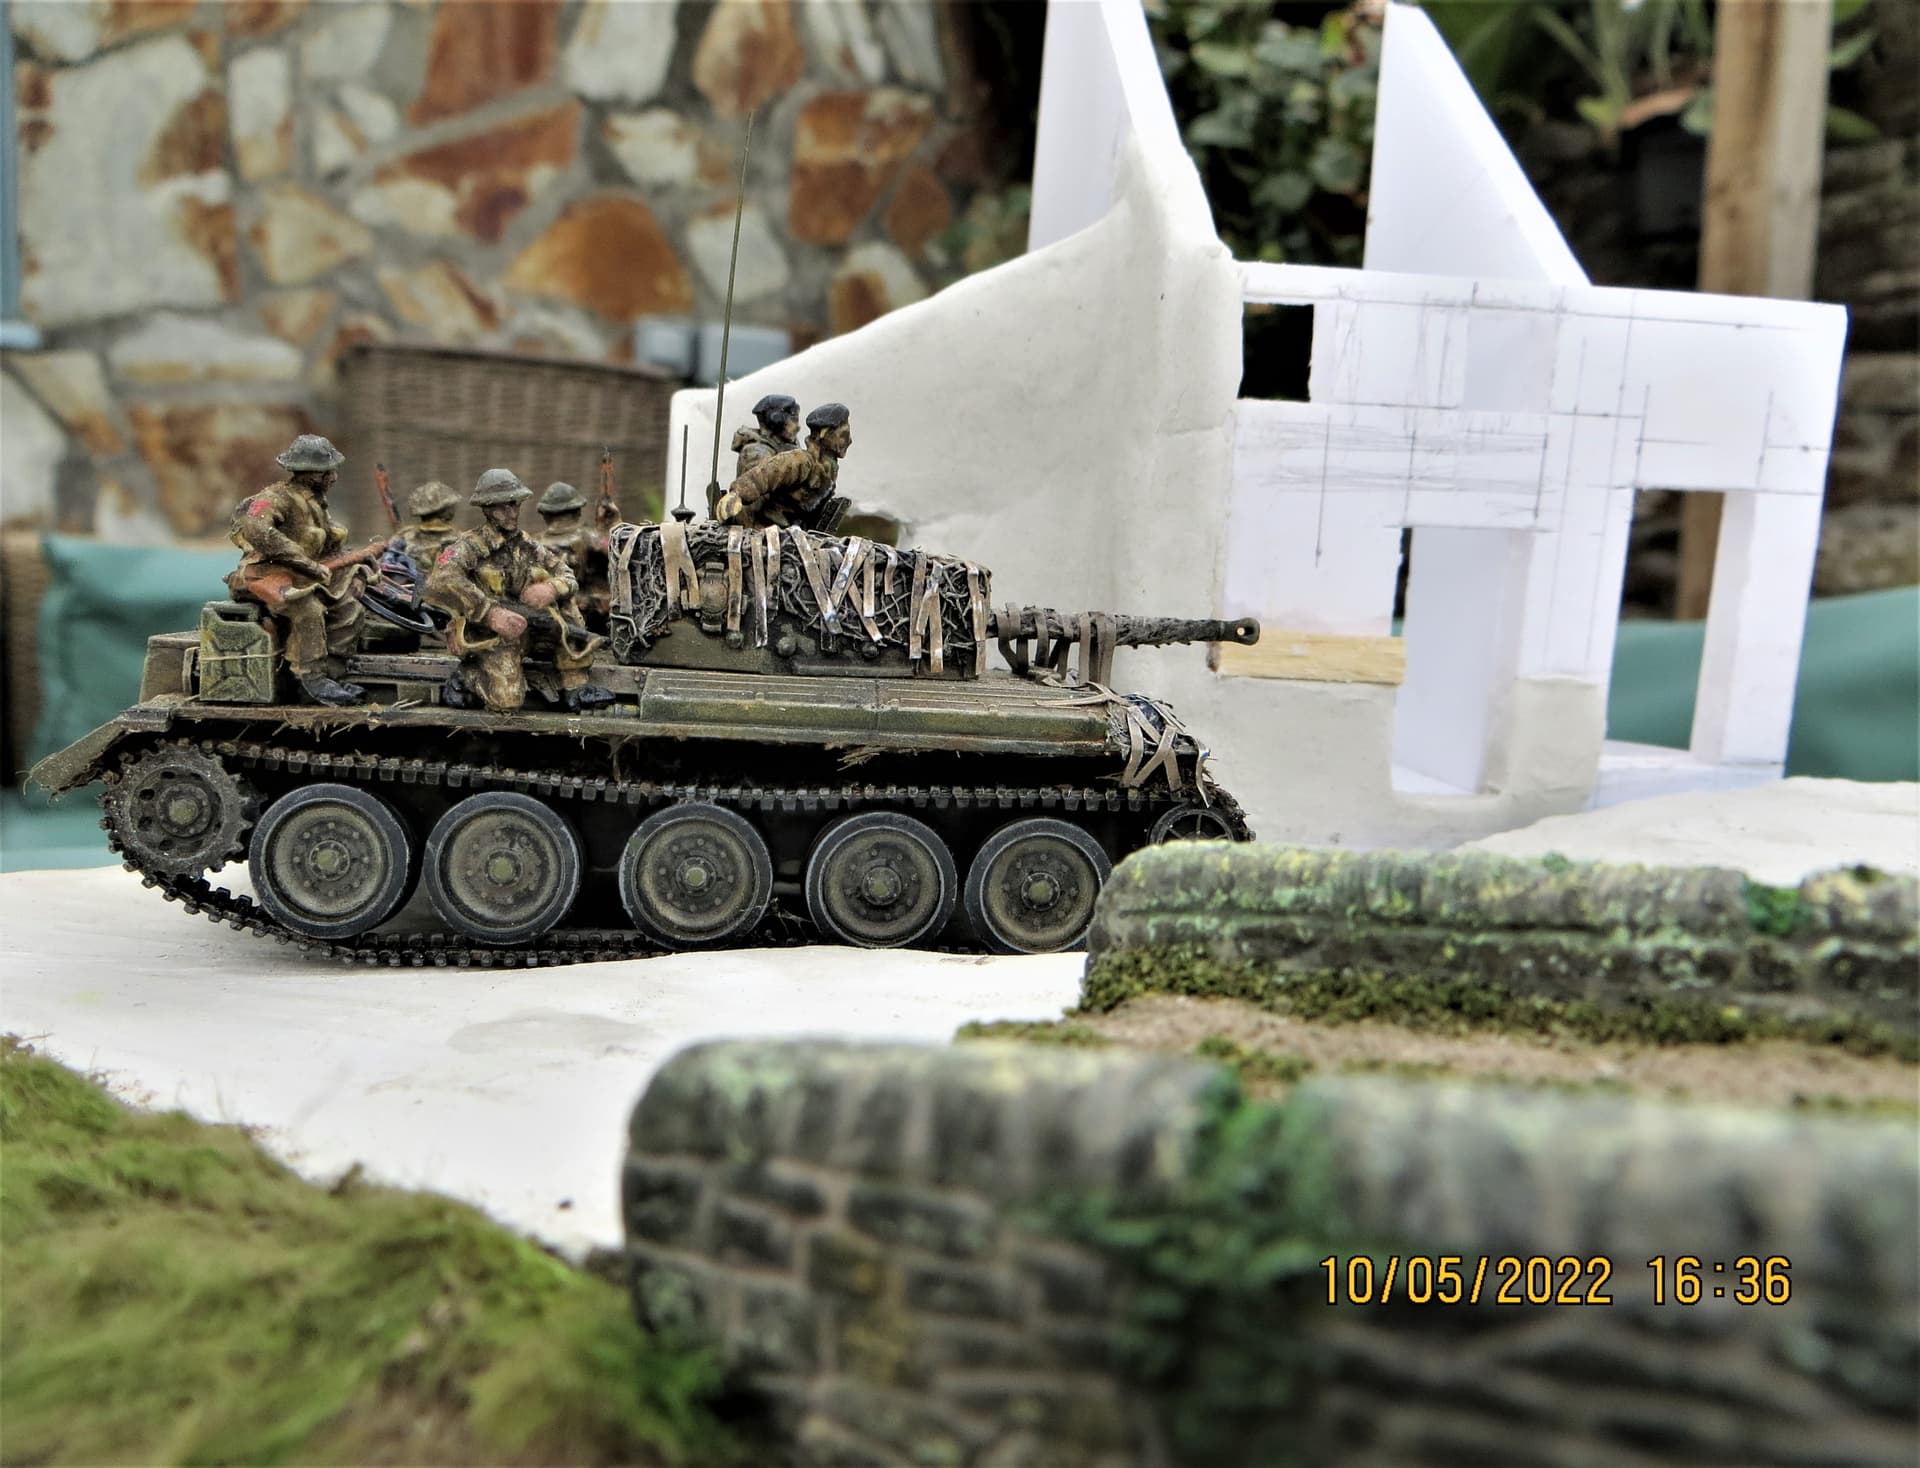
Below are some images of the barn alongside the bridge and tree.
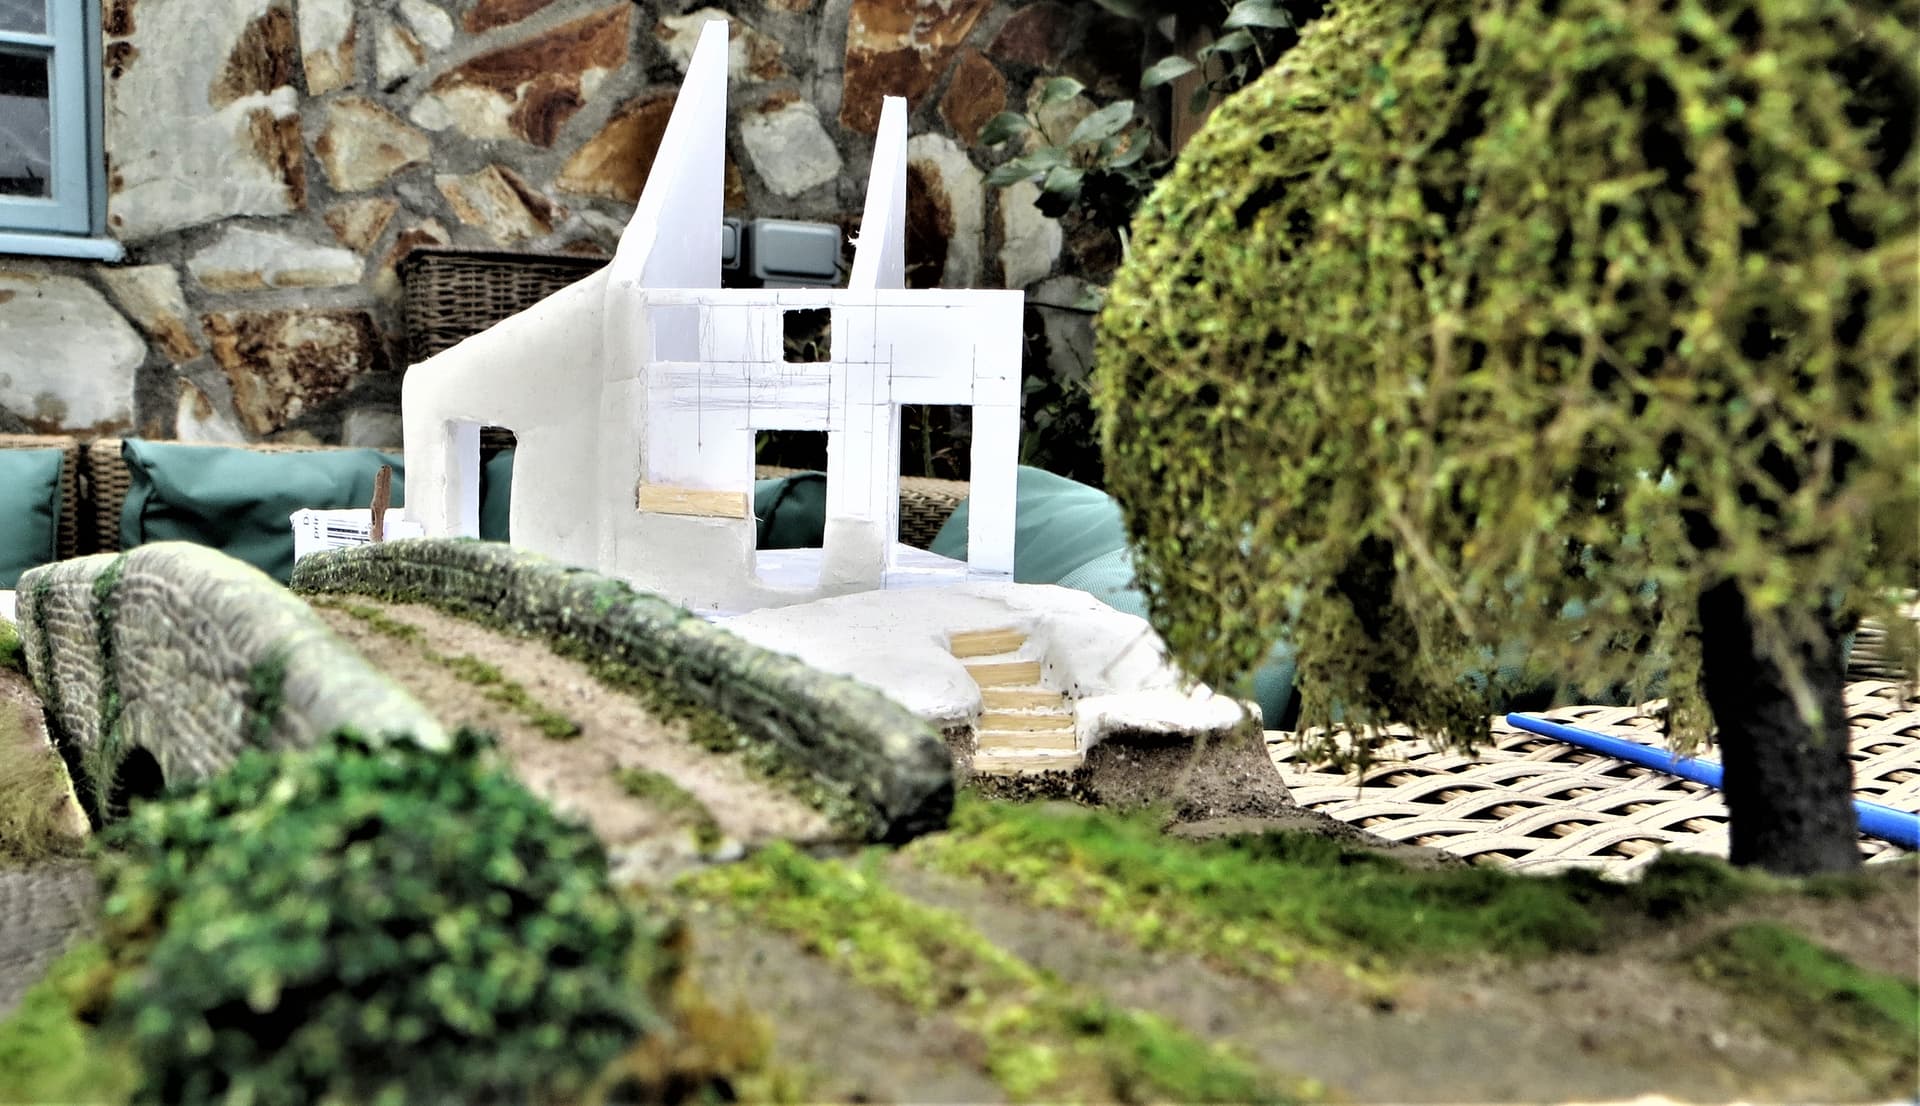
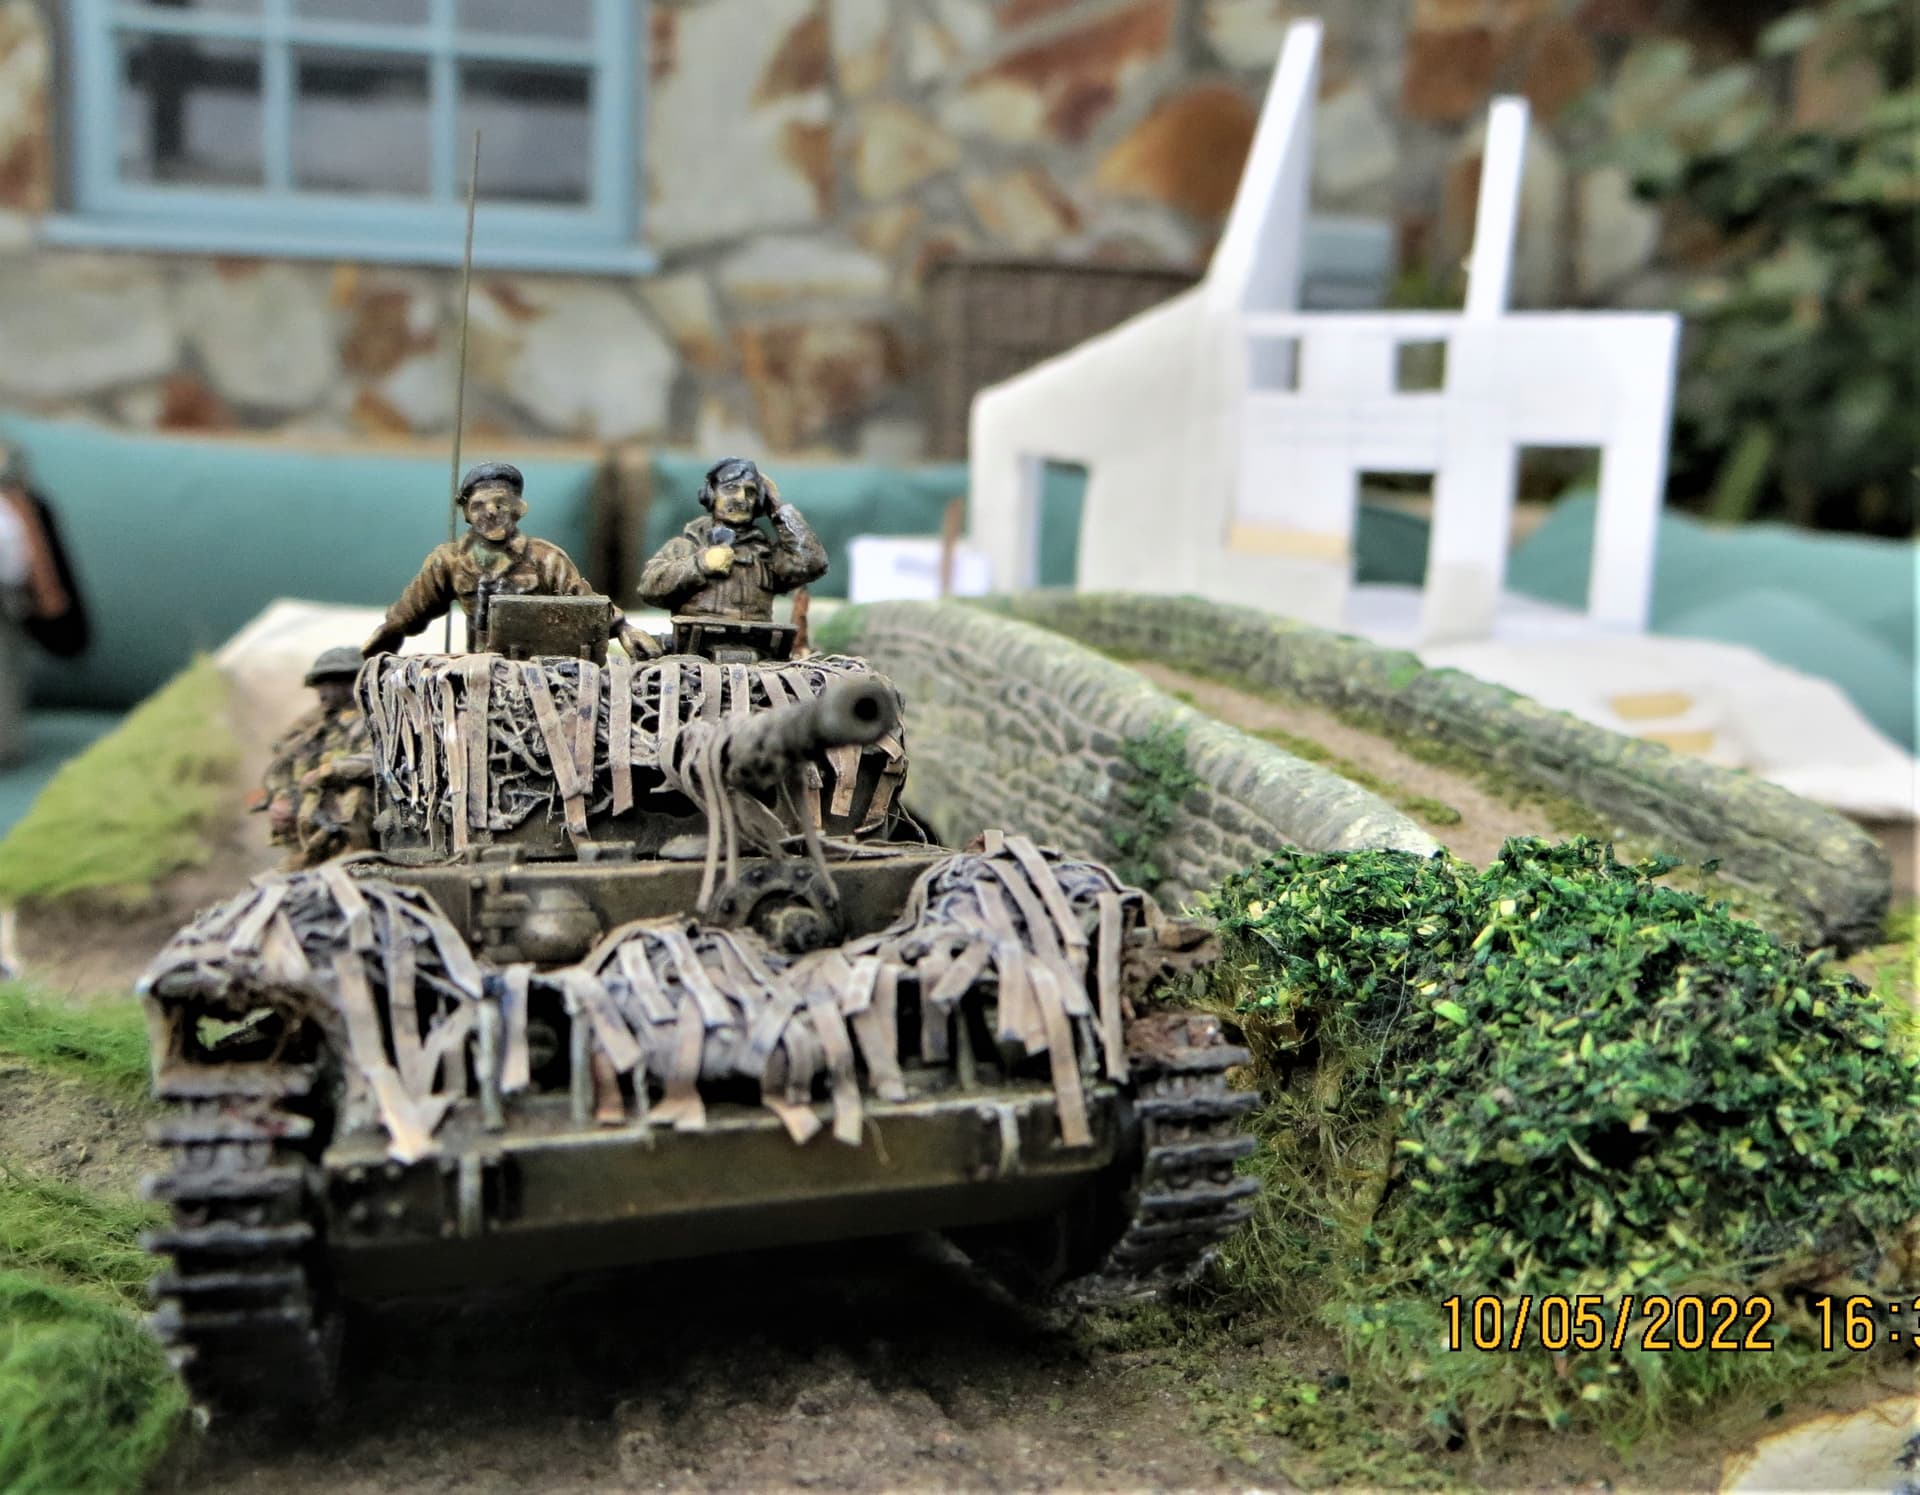
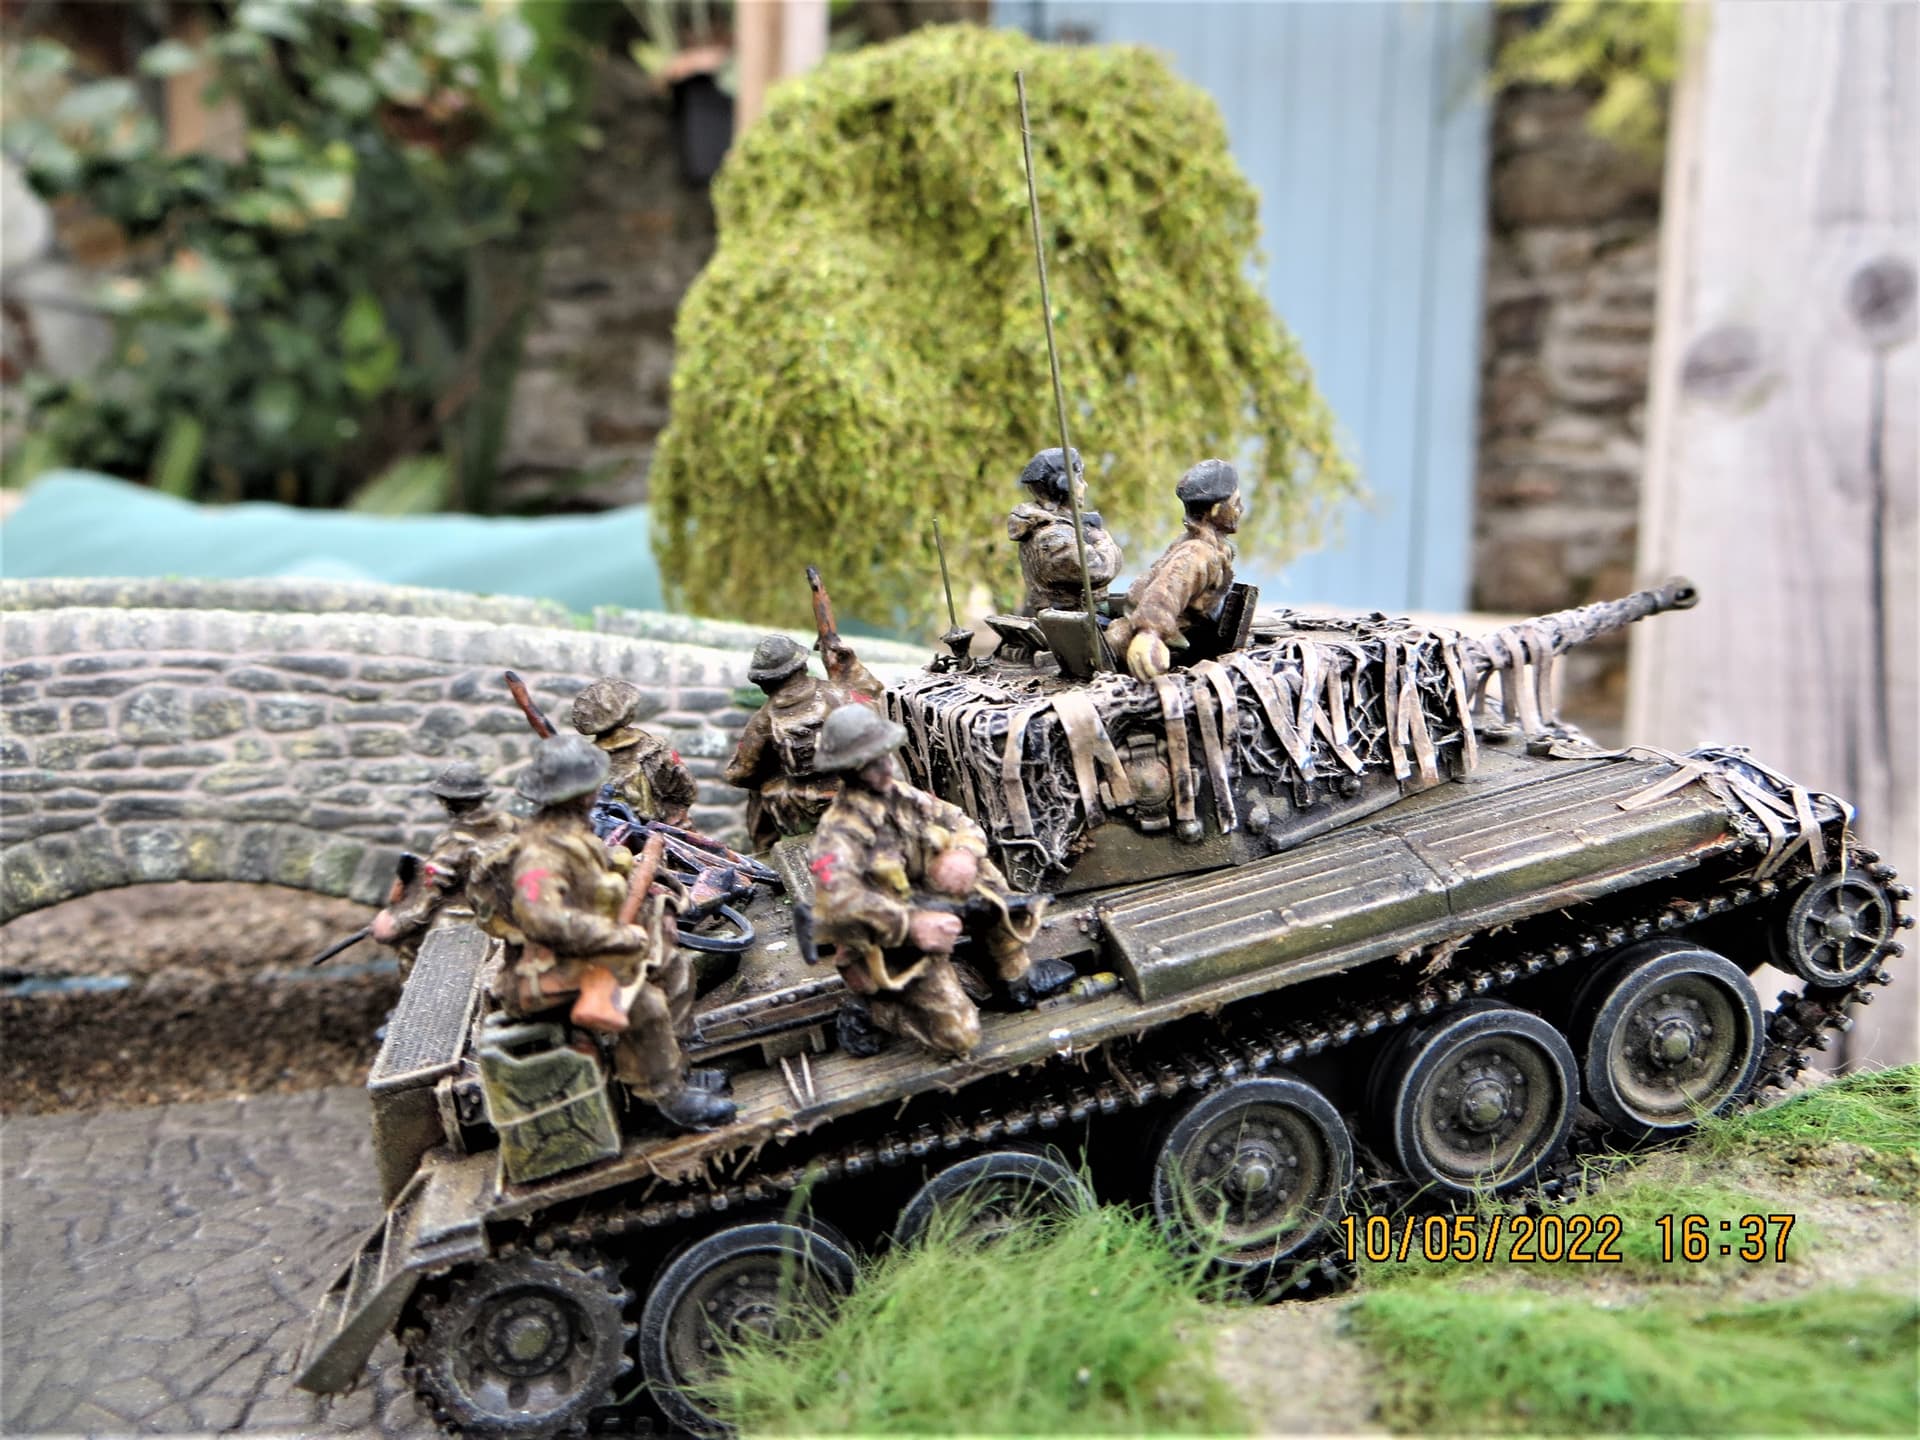
And a few with the 1/72nd Revell Cromwell with HaT British Tank Riders to give a sense of scale. This vehicle belongs to a previous build so won’t actually be used, though a the new-ish IBG Cromwell will be, but it has yet to be built.

Cheers, ![]() ,
,
G
8 Likes
You really do know how to smash these DAS buildings out G. That is a great start and looks nice and not to dominating. The steps down are a nice little touch and the wagon and troops show the scale off nicely so you have a good idea how the finished article will look. ![]()
3 Likes
If I had the permissions I would have changed his user name to DAS King.
3 Likes
G , the building makes a beautiful addition , very cool !!!
1 Like
I agree, great addition. This project is coming along nicely, G-man!
1 Like
Ok now you are tempting me with Crommies. Not fair.
Looks good man,
J
1 Like
Thanks chaps, much appreciated, as always, ![]() …though I’m not so sure about DAS king, gives a vision of grandeur that’s sadly lacking,
…though I’m not so sure about DAS king, gives a vision of grandeur that’s sadly lacking, ![]() .
.
The Cromwell is one of my favourite tanks Jerry, it would be good to see you model one and crew it with some of your outstanding figures, ![]()
![]() .
.
G, ![]()
1 Like
Hi all,
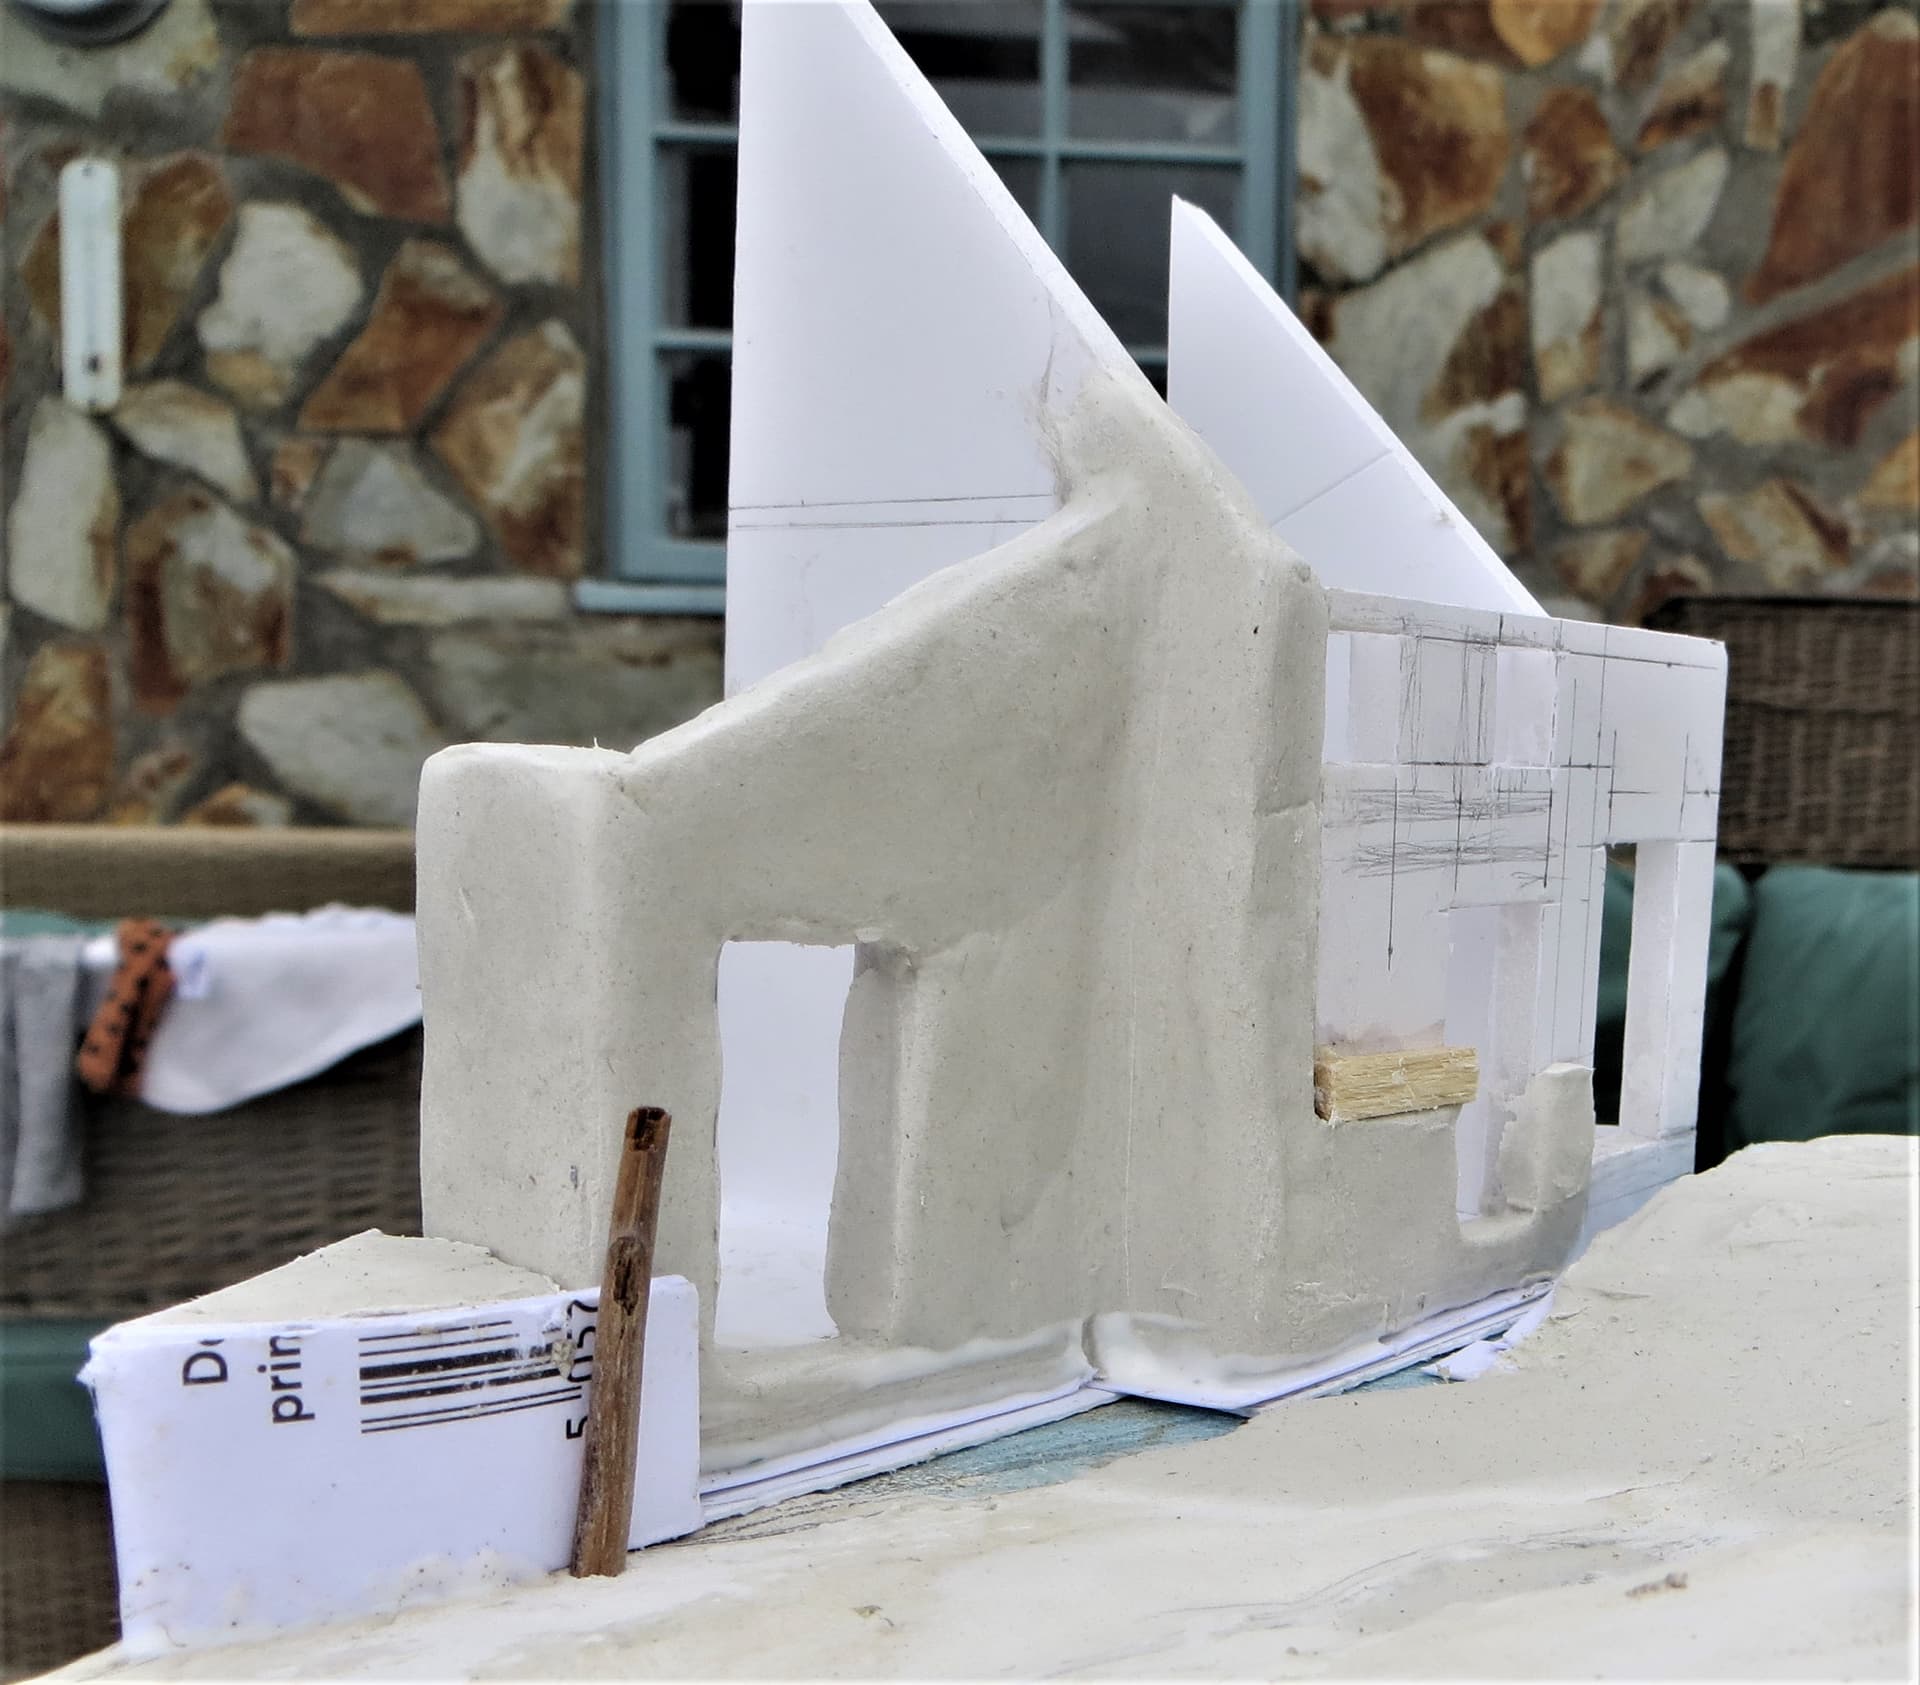
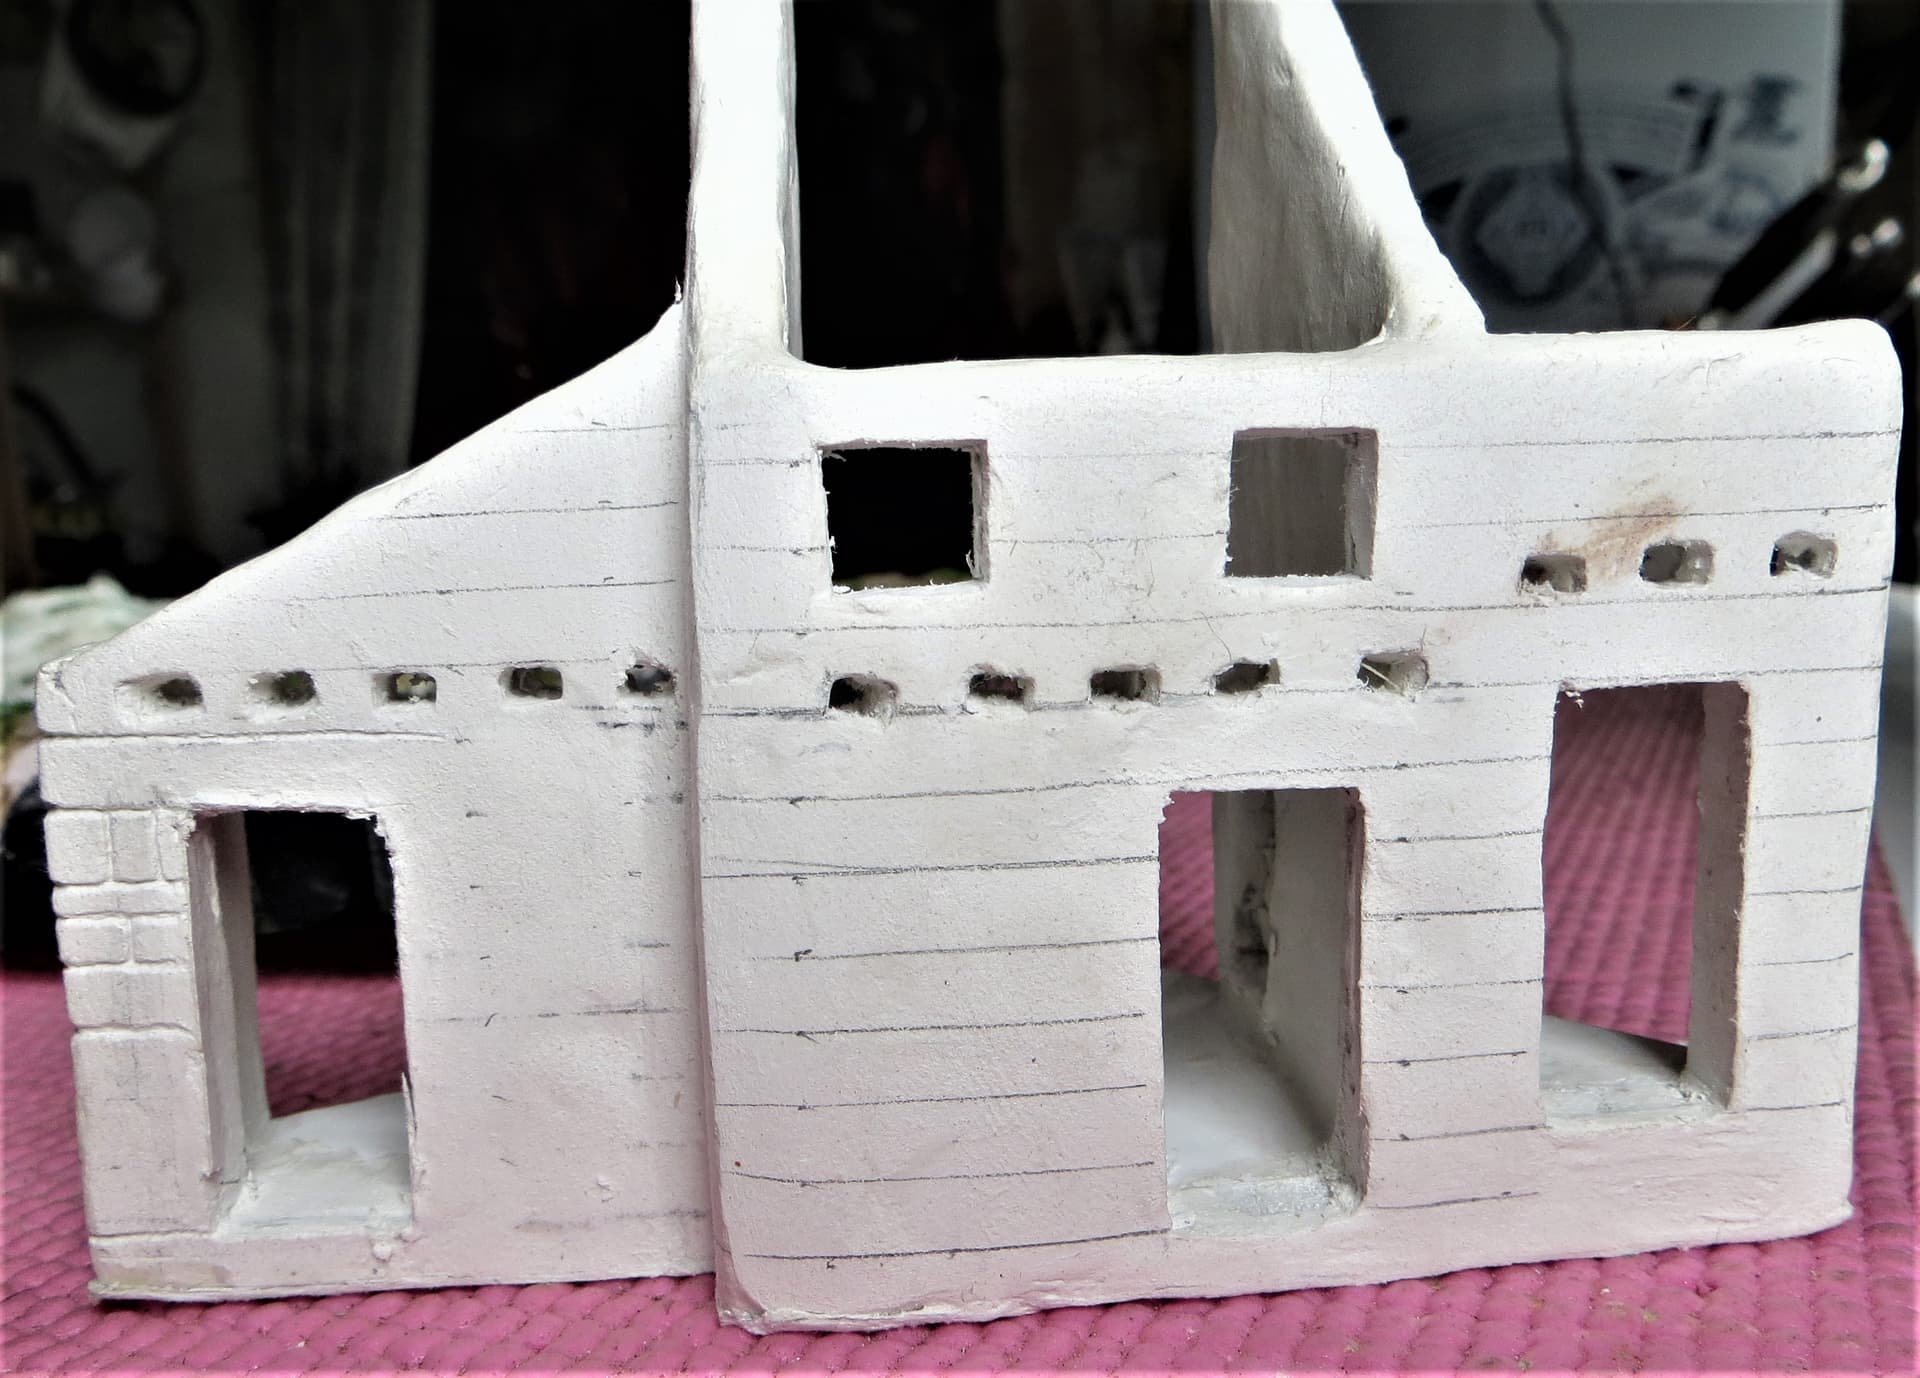
Finally finished coating the carcass with DAS, decided against the half-timbered element as it didn’t look right, think I would need to do it on a larger structure, and plan it better.
I’ve given both the outside and inside a coat of DAS as there will be some internal elements, the holes are for the floor beams.
On my previous two buildings I wasn’t happy with the door and window apertures so I’ve constructed a former for the doors, hopefully this will give a more squared and uniform look, and can be used on other such buildings. Not done this with the windows as I’d end up with lots of different formers.
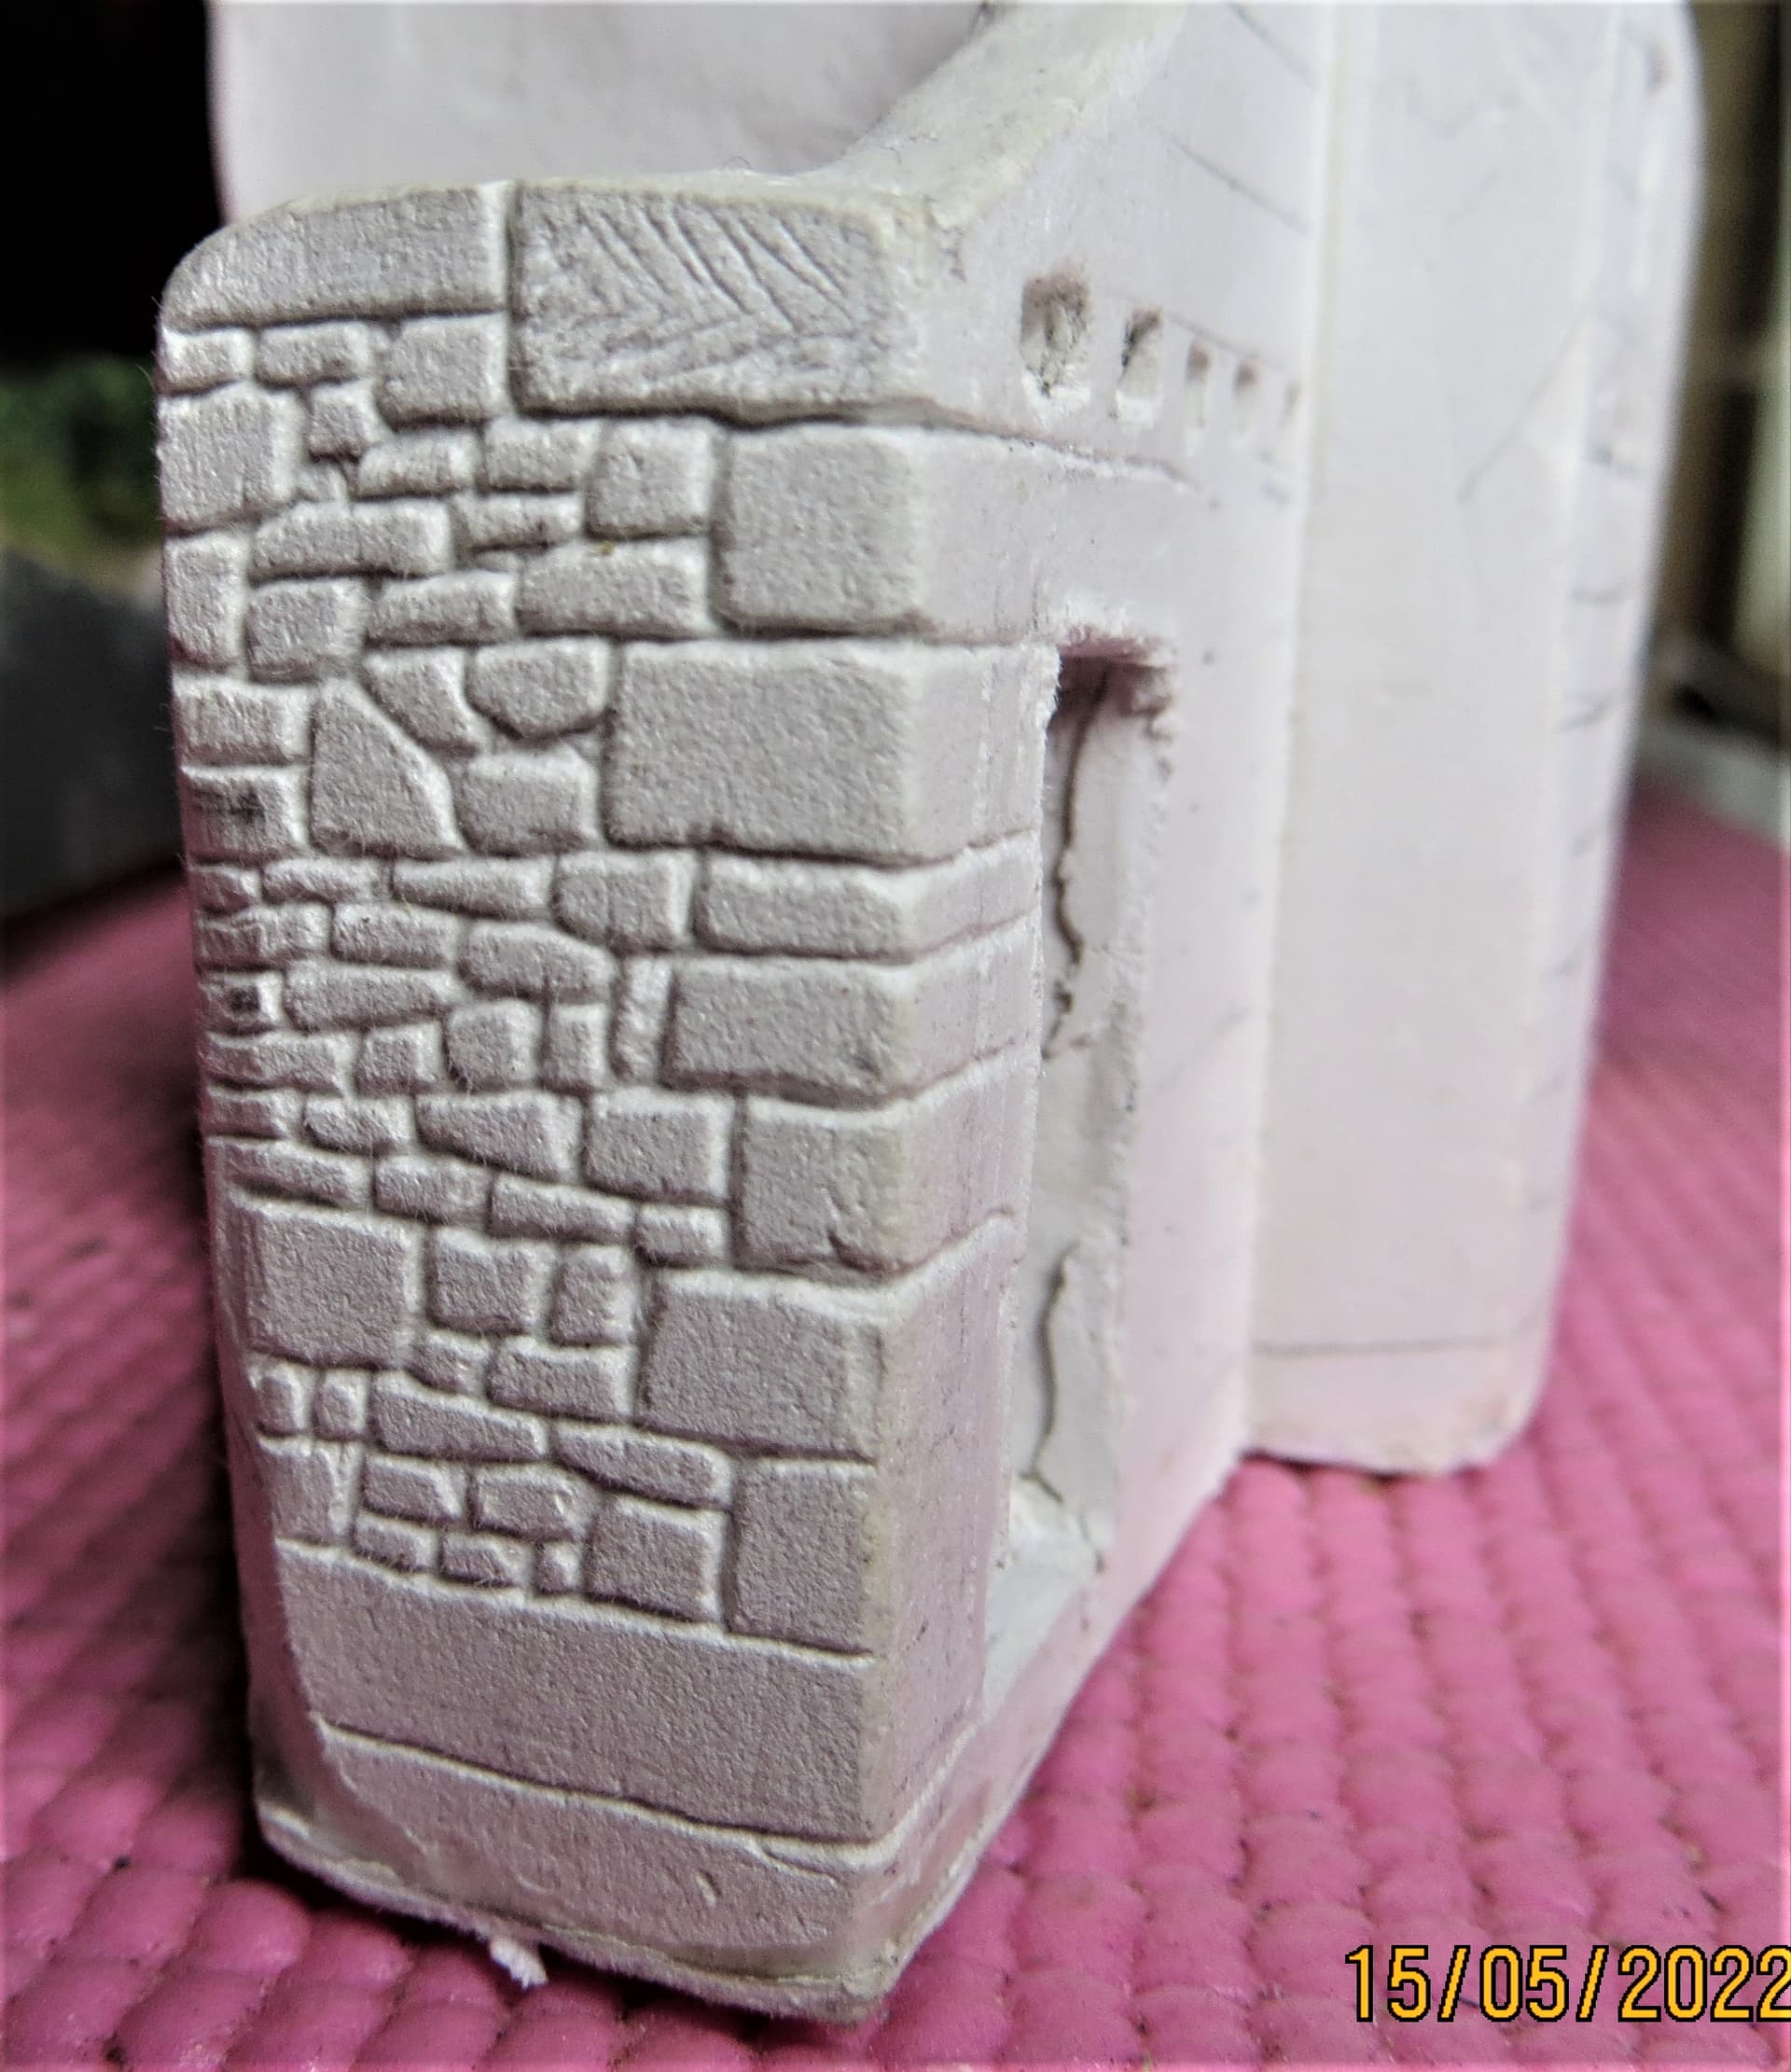
I’ve also started scribing the stonework, as the building will be dilapidated I’ve scribed slightly deeper than usual to give the impression of mortar falling out.

Cheers, ![]() ,
,
G
6 Likes
Very nicely done. Door former was a good idea. Stonework looks as good as always. Nicely done G ![]()
Coming along nicely.
BTW I already built a Crommy a while back, with th crew.
J
I love it! Coming together really fine. /Erik
1 Like
Thanks to John, Jerry and Erik for the kind words, much appreciated chaps, ![]() .
.
Jerry, please could you provide me with a link to your Cromwell pictures if at all possible?
G, ![]()
Hi all,
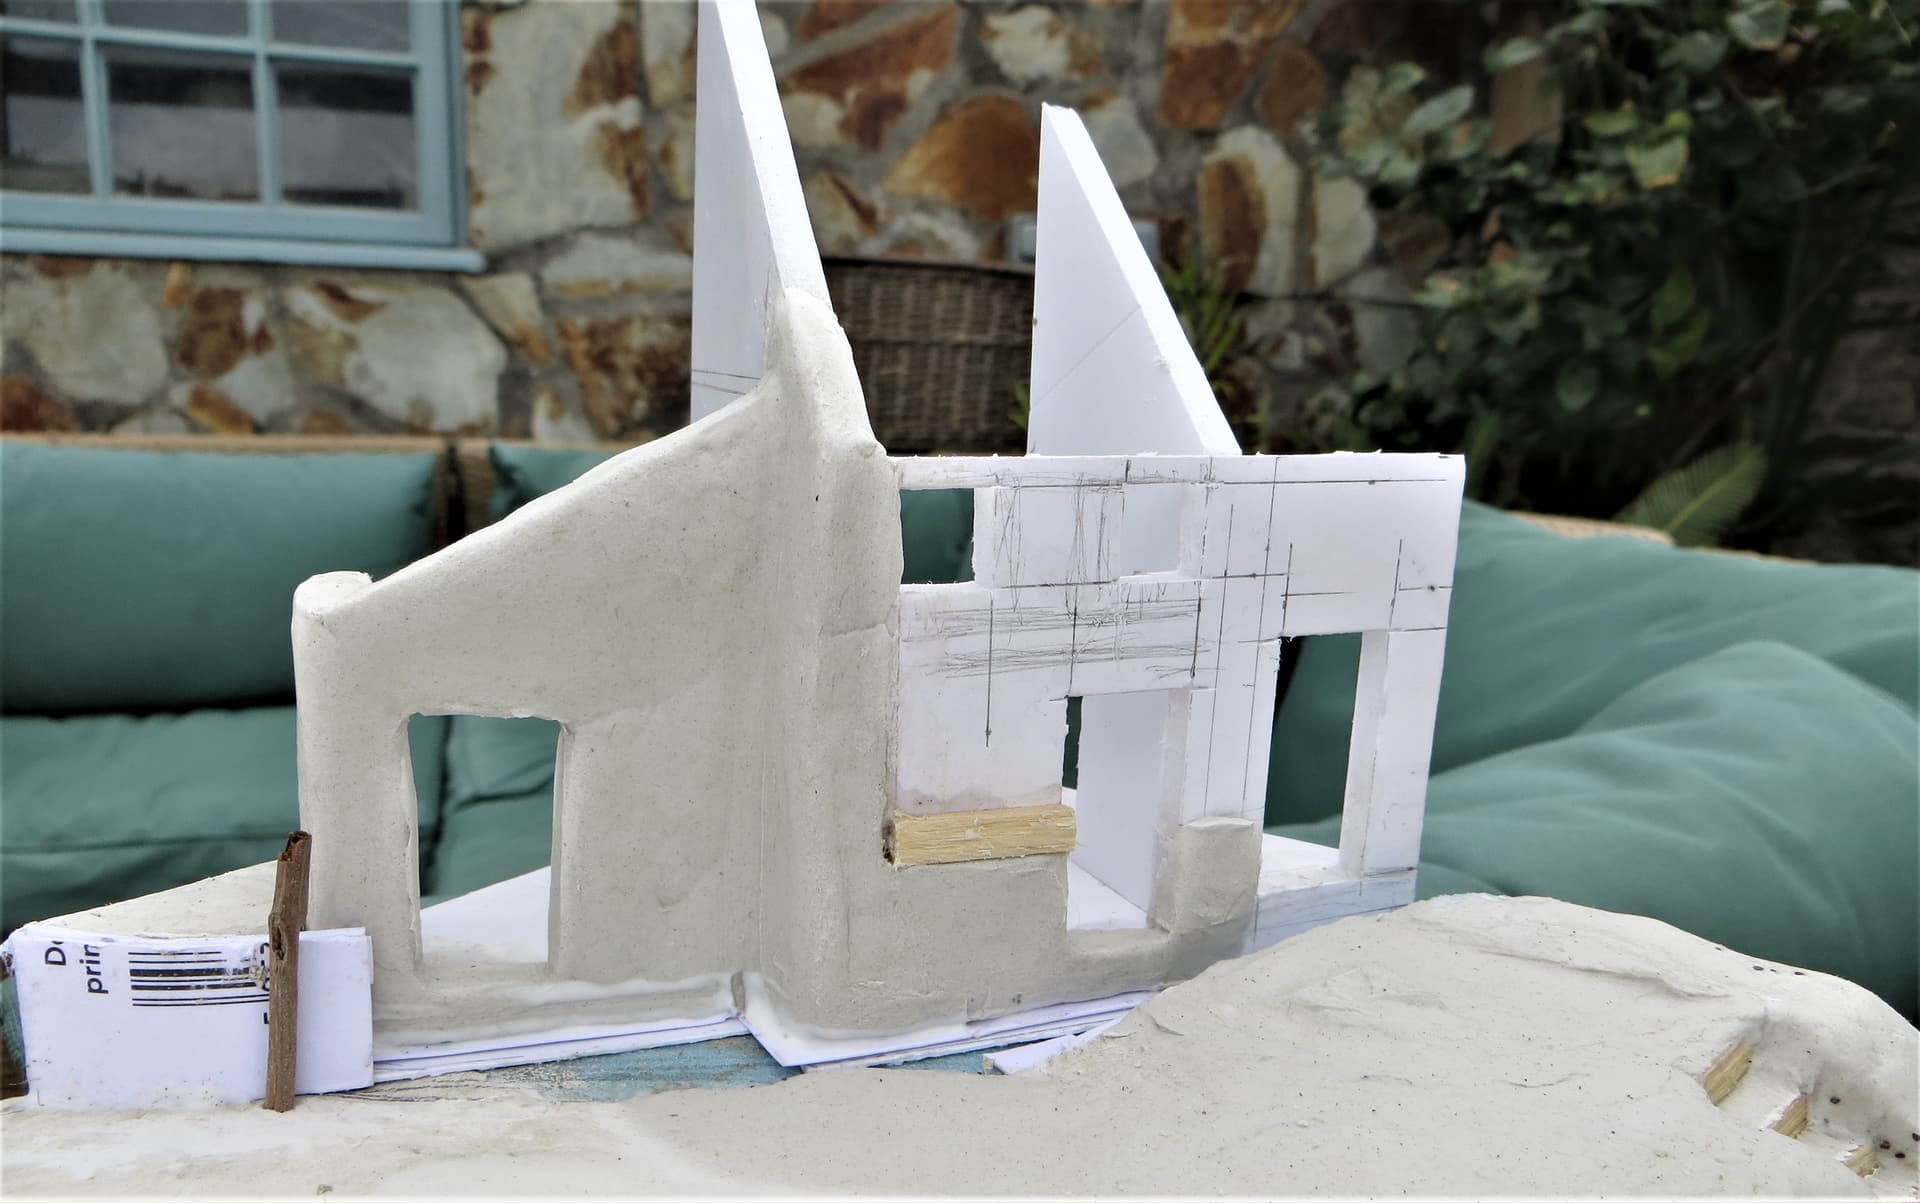
Slow progress, I decided that I was going to detail the inside of the barn, so started on the lean-to side…big mistake, ![]()
![]() …it’s only a space of 35mm width, getting in there and scribing the stonework has been a right royal p-i-t-a.
…it’s only a space of 35mm width, getting in there and scribing the stonework has been a right royal p-i-t-a.
I’ve blocked in some rough colours and started to add floorboards and roof beams.
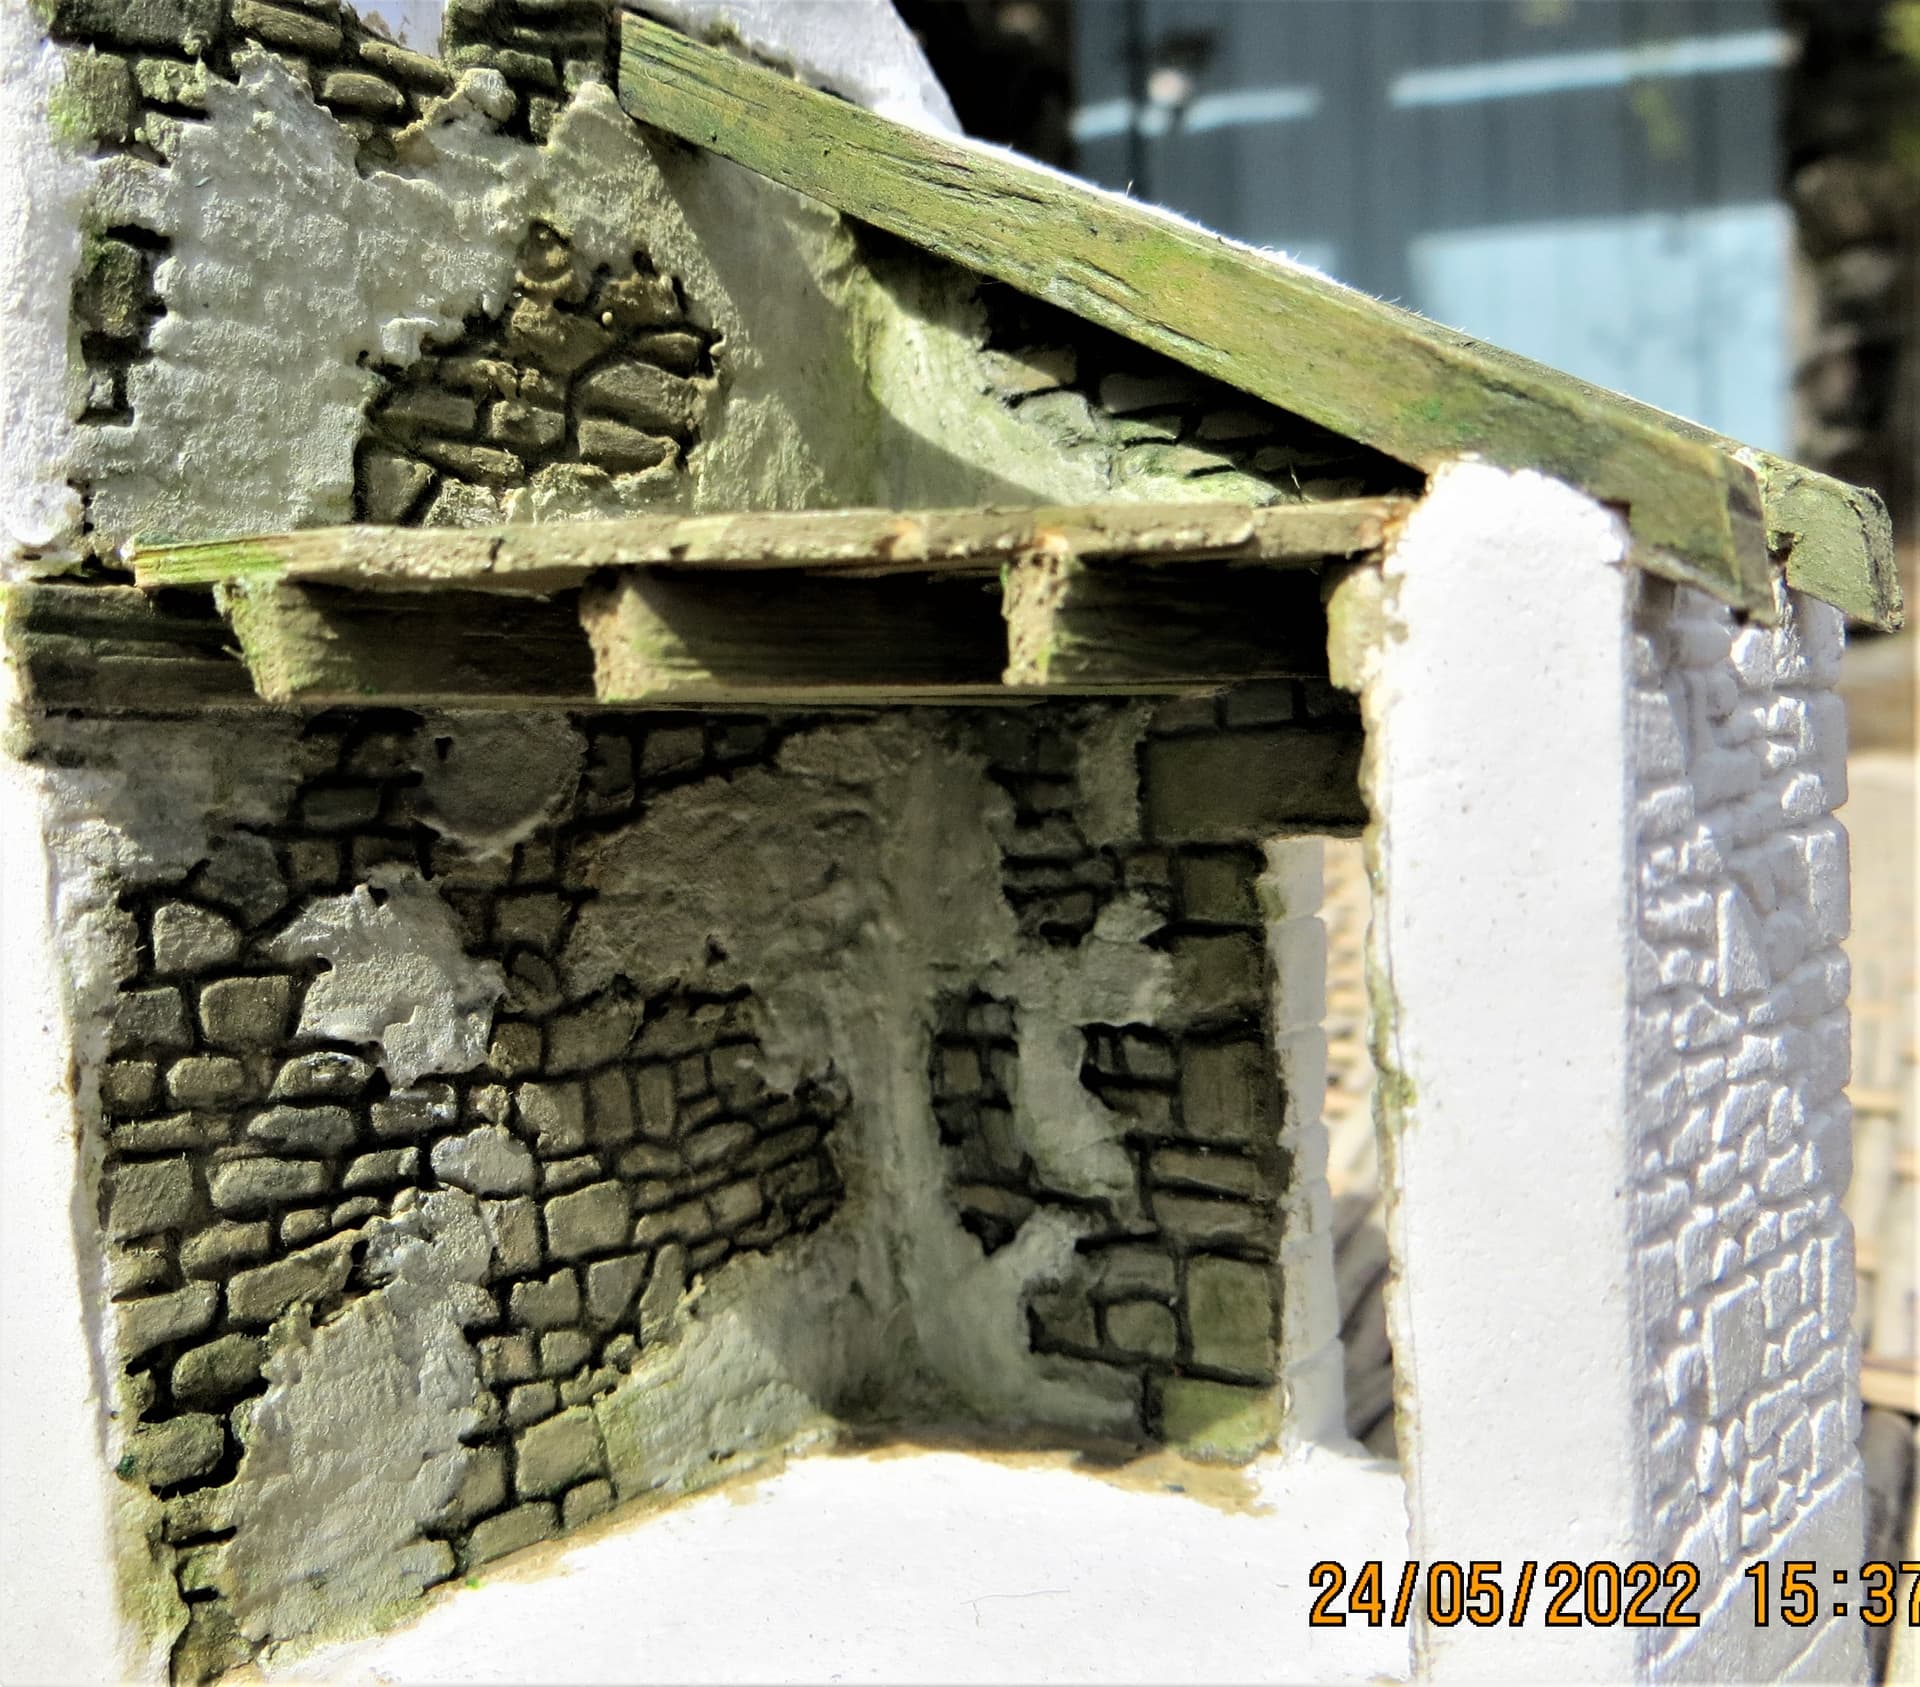
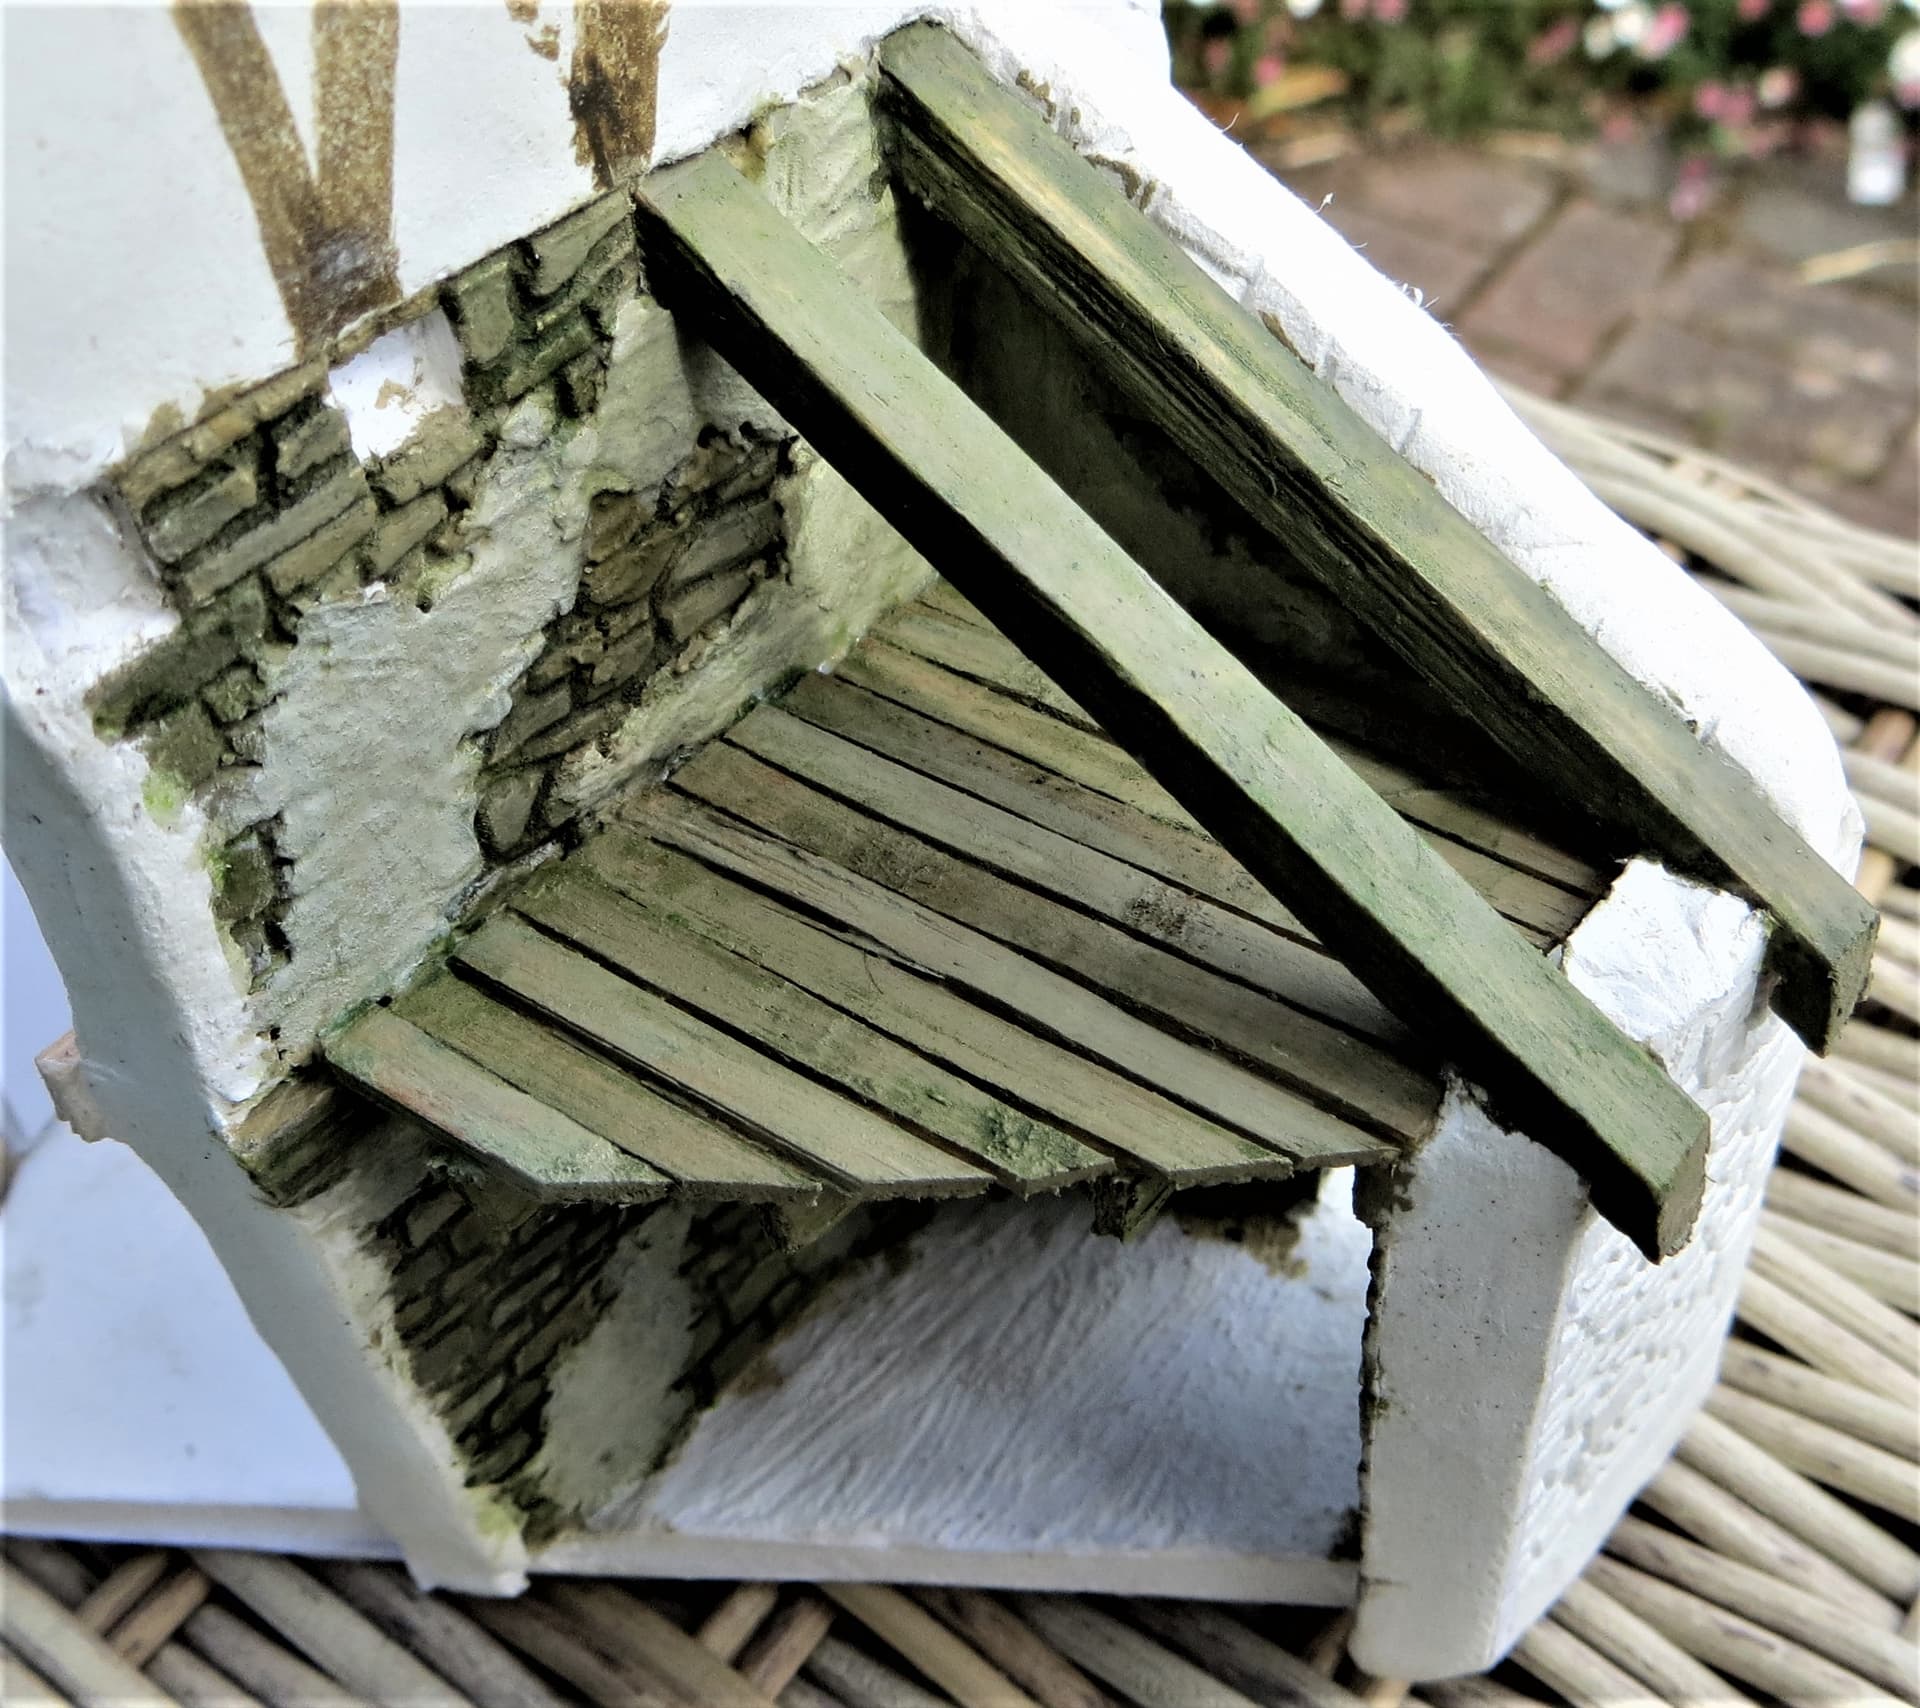
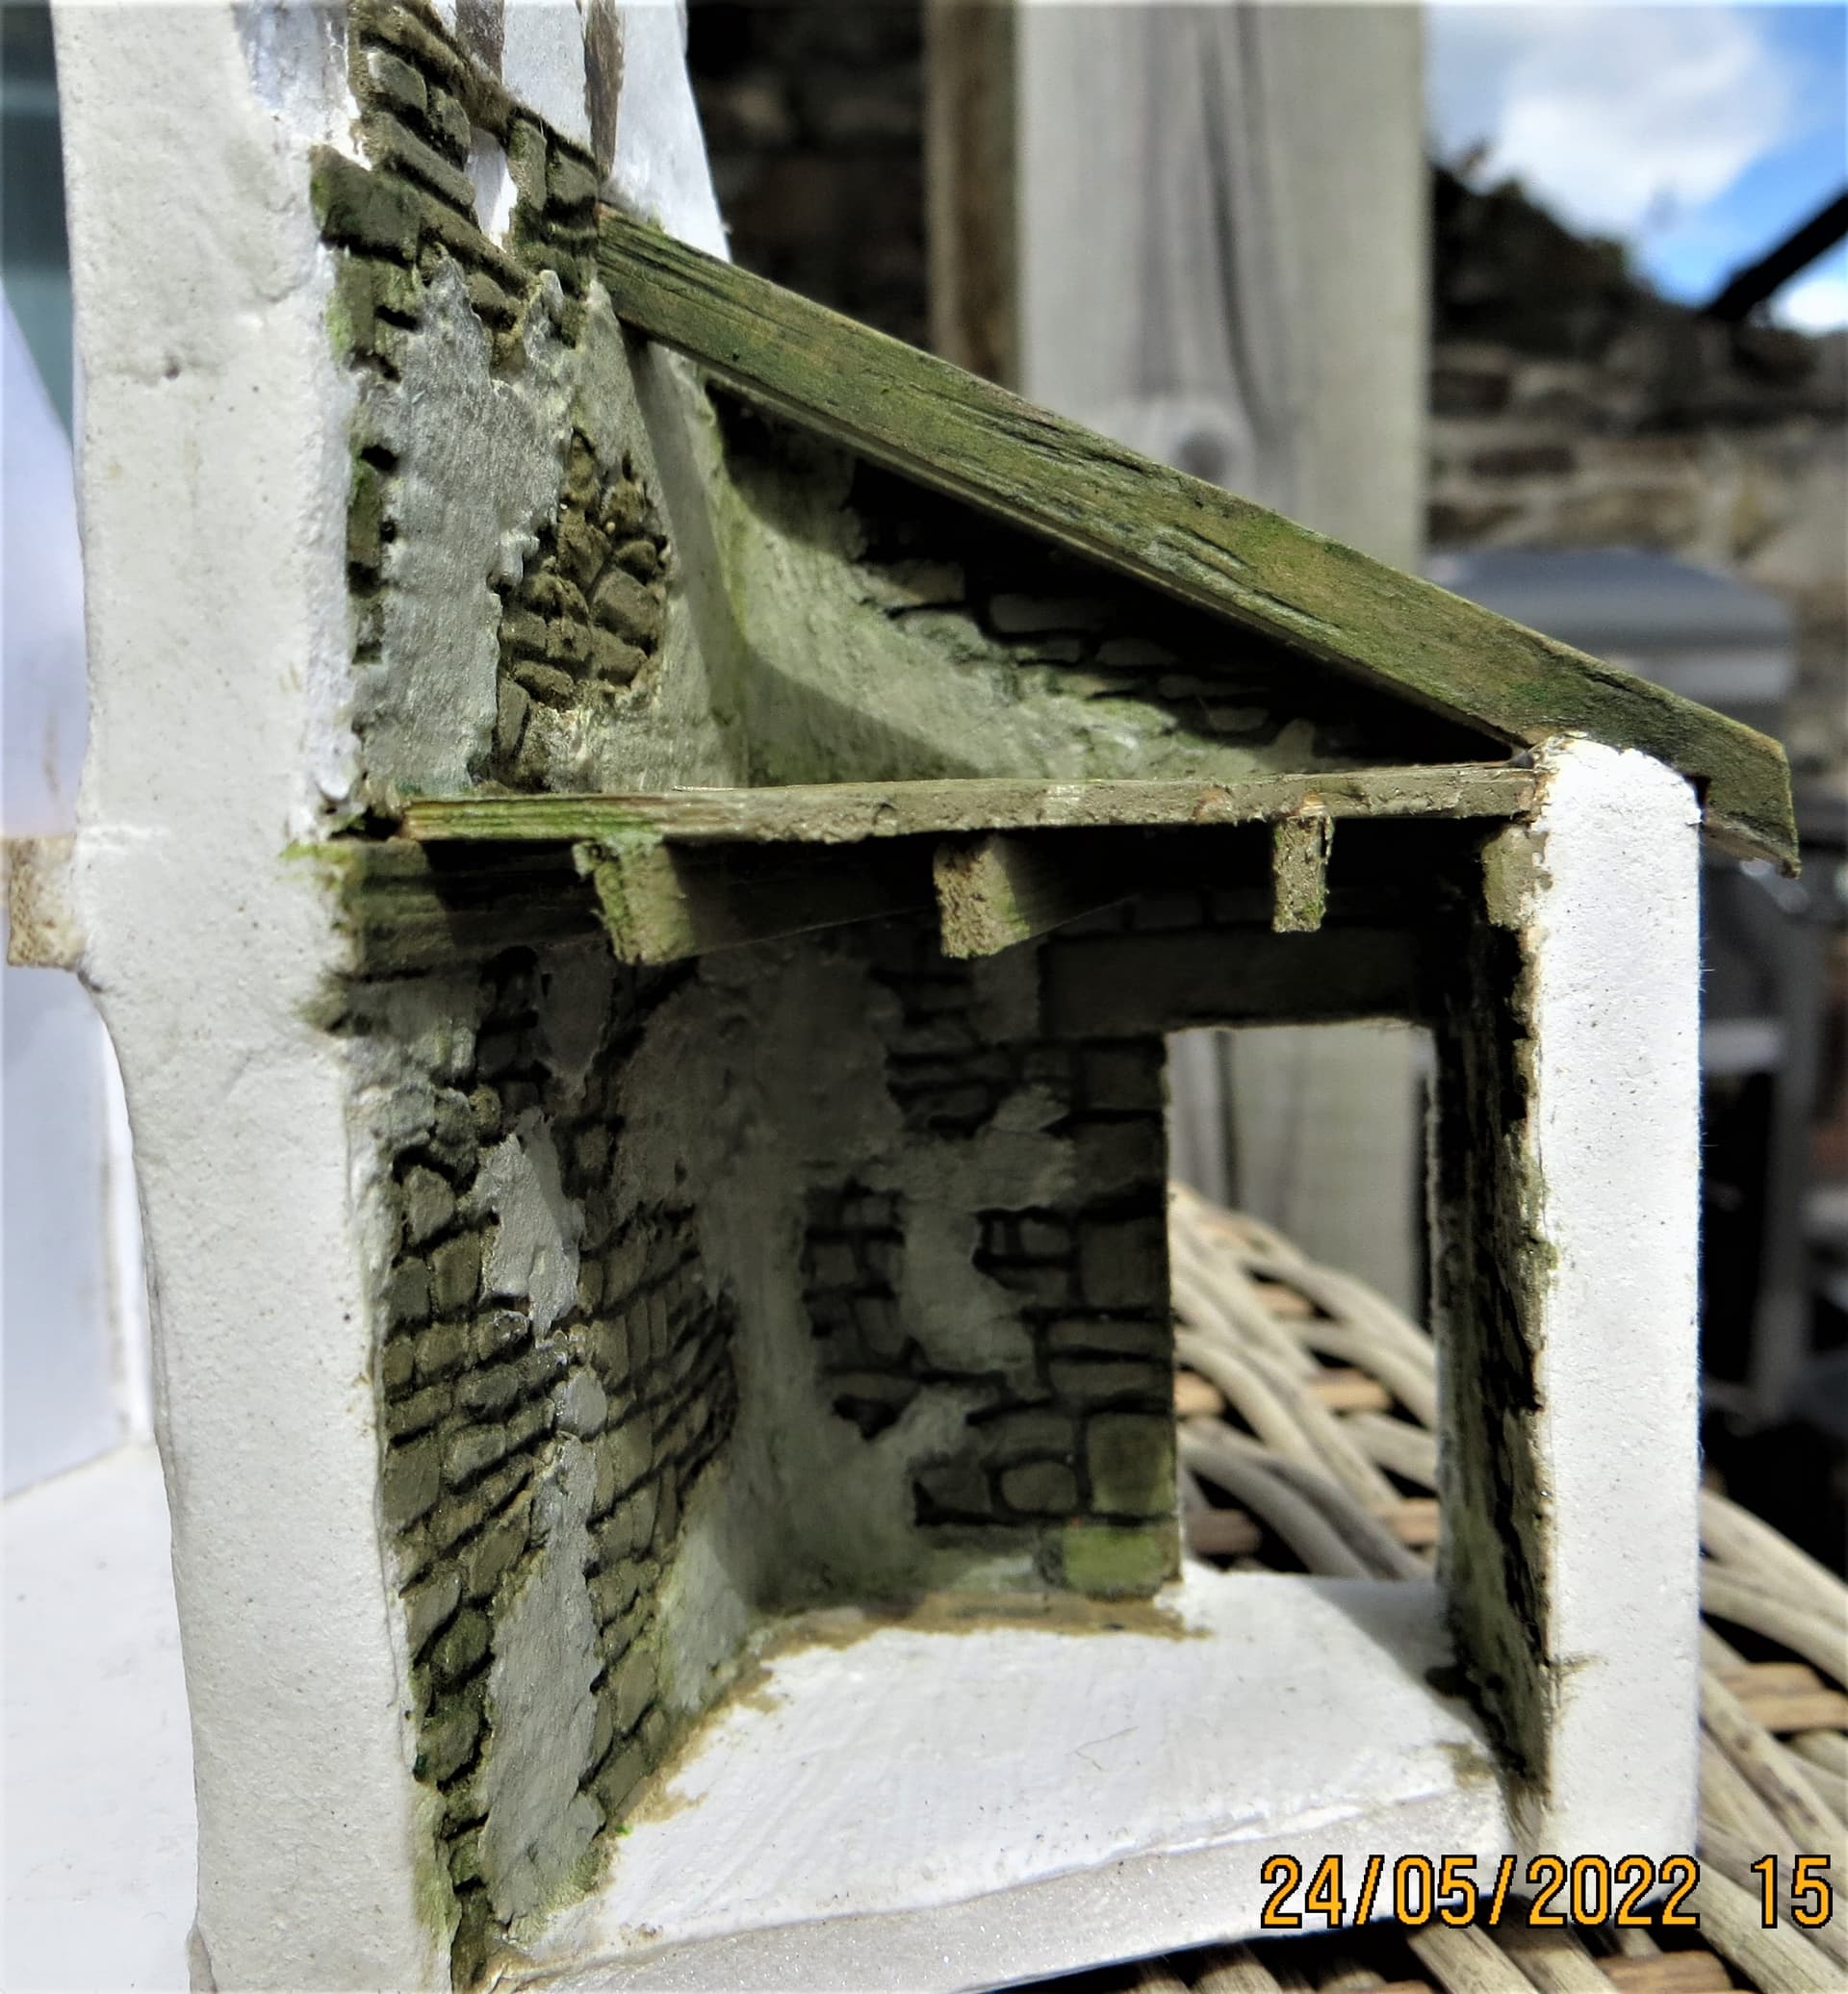
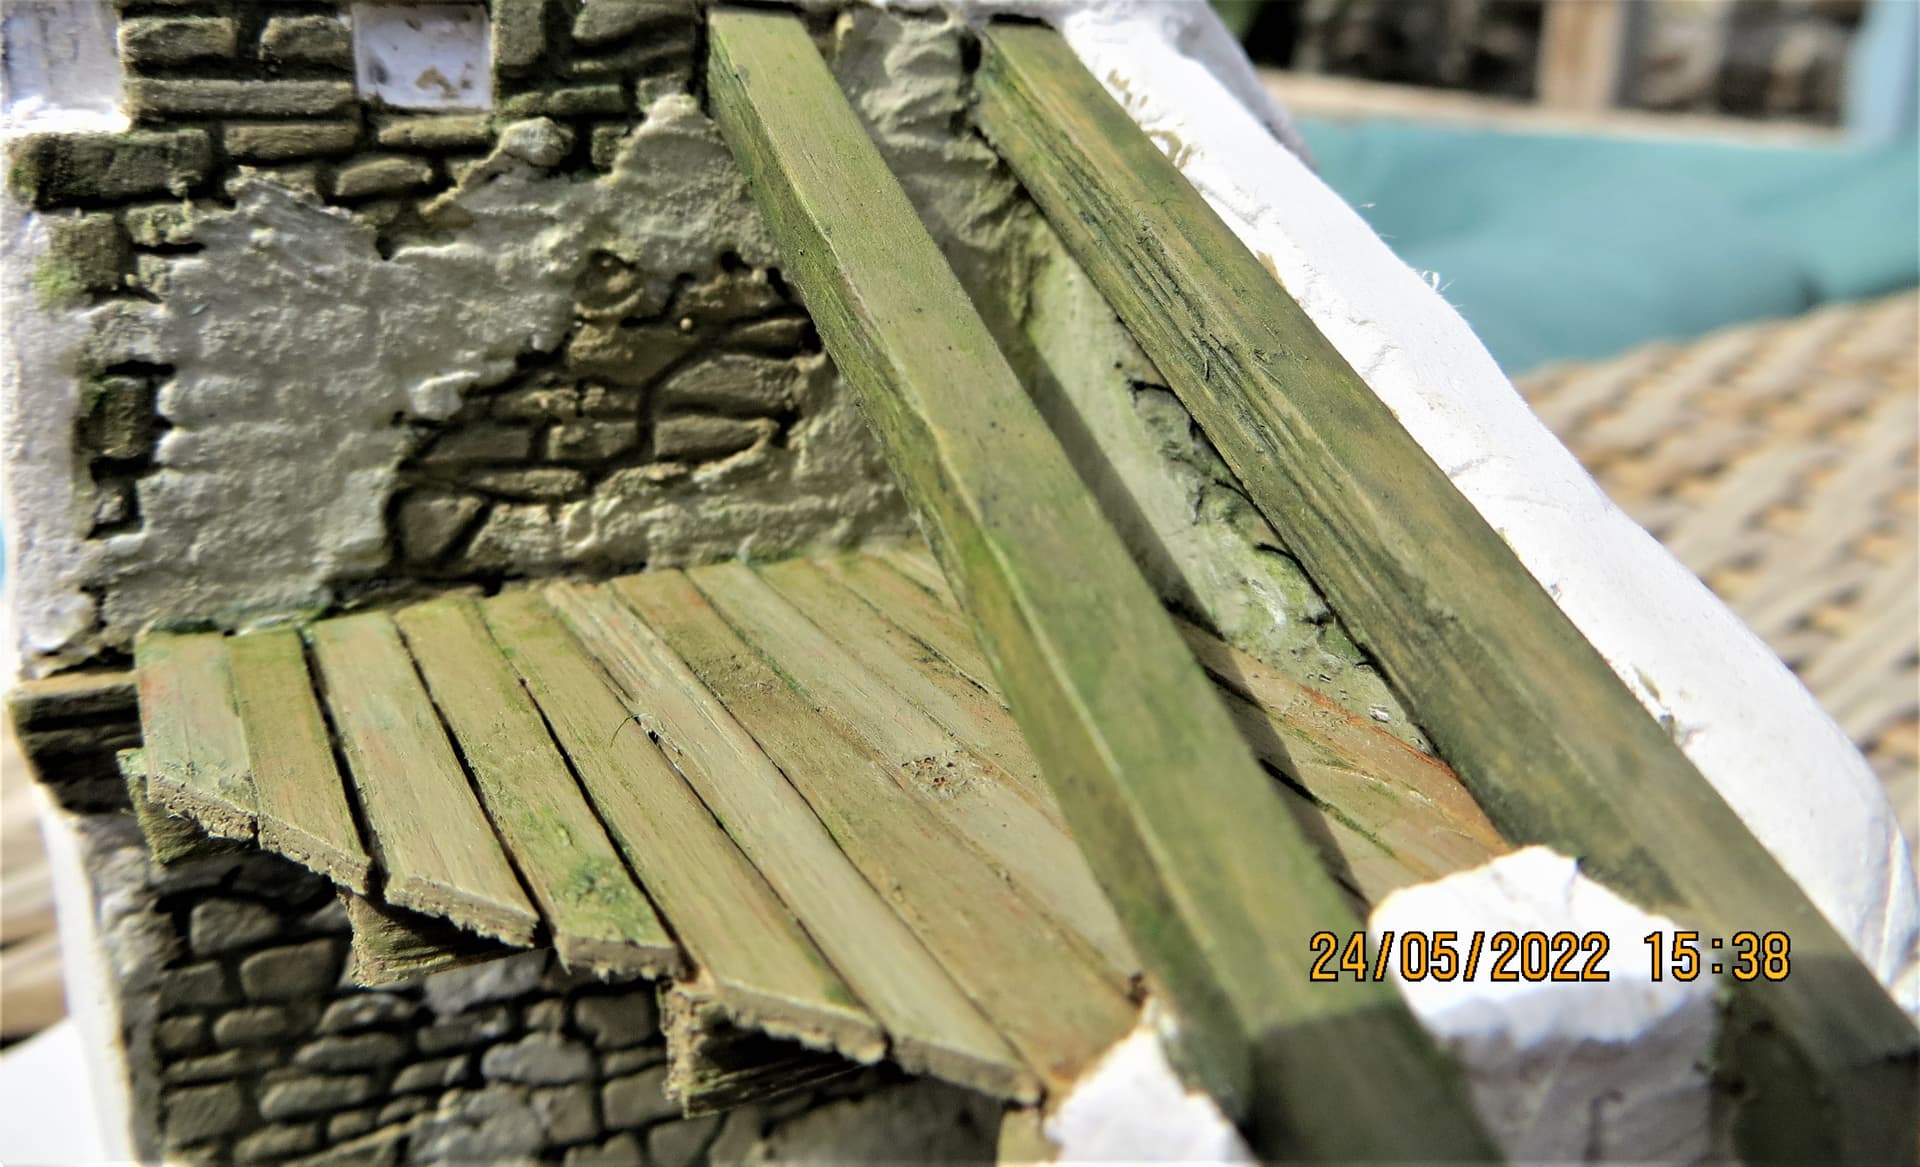
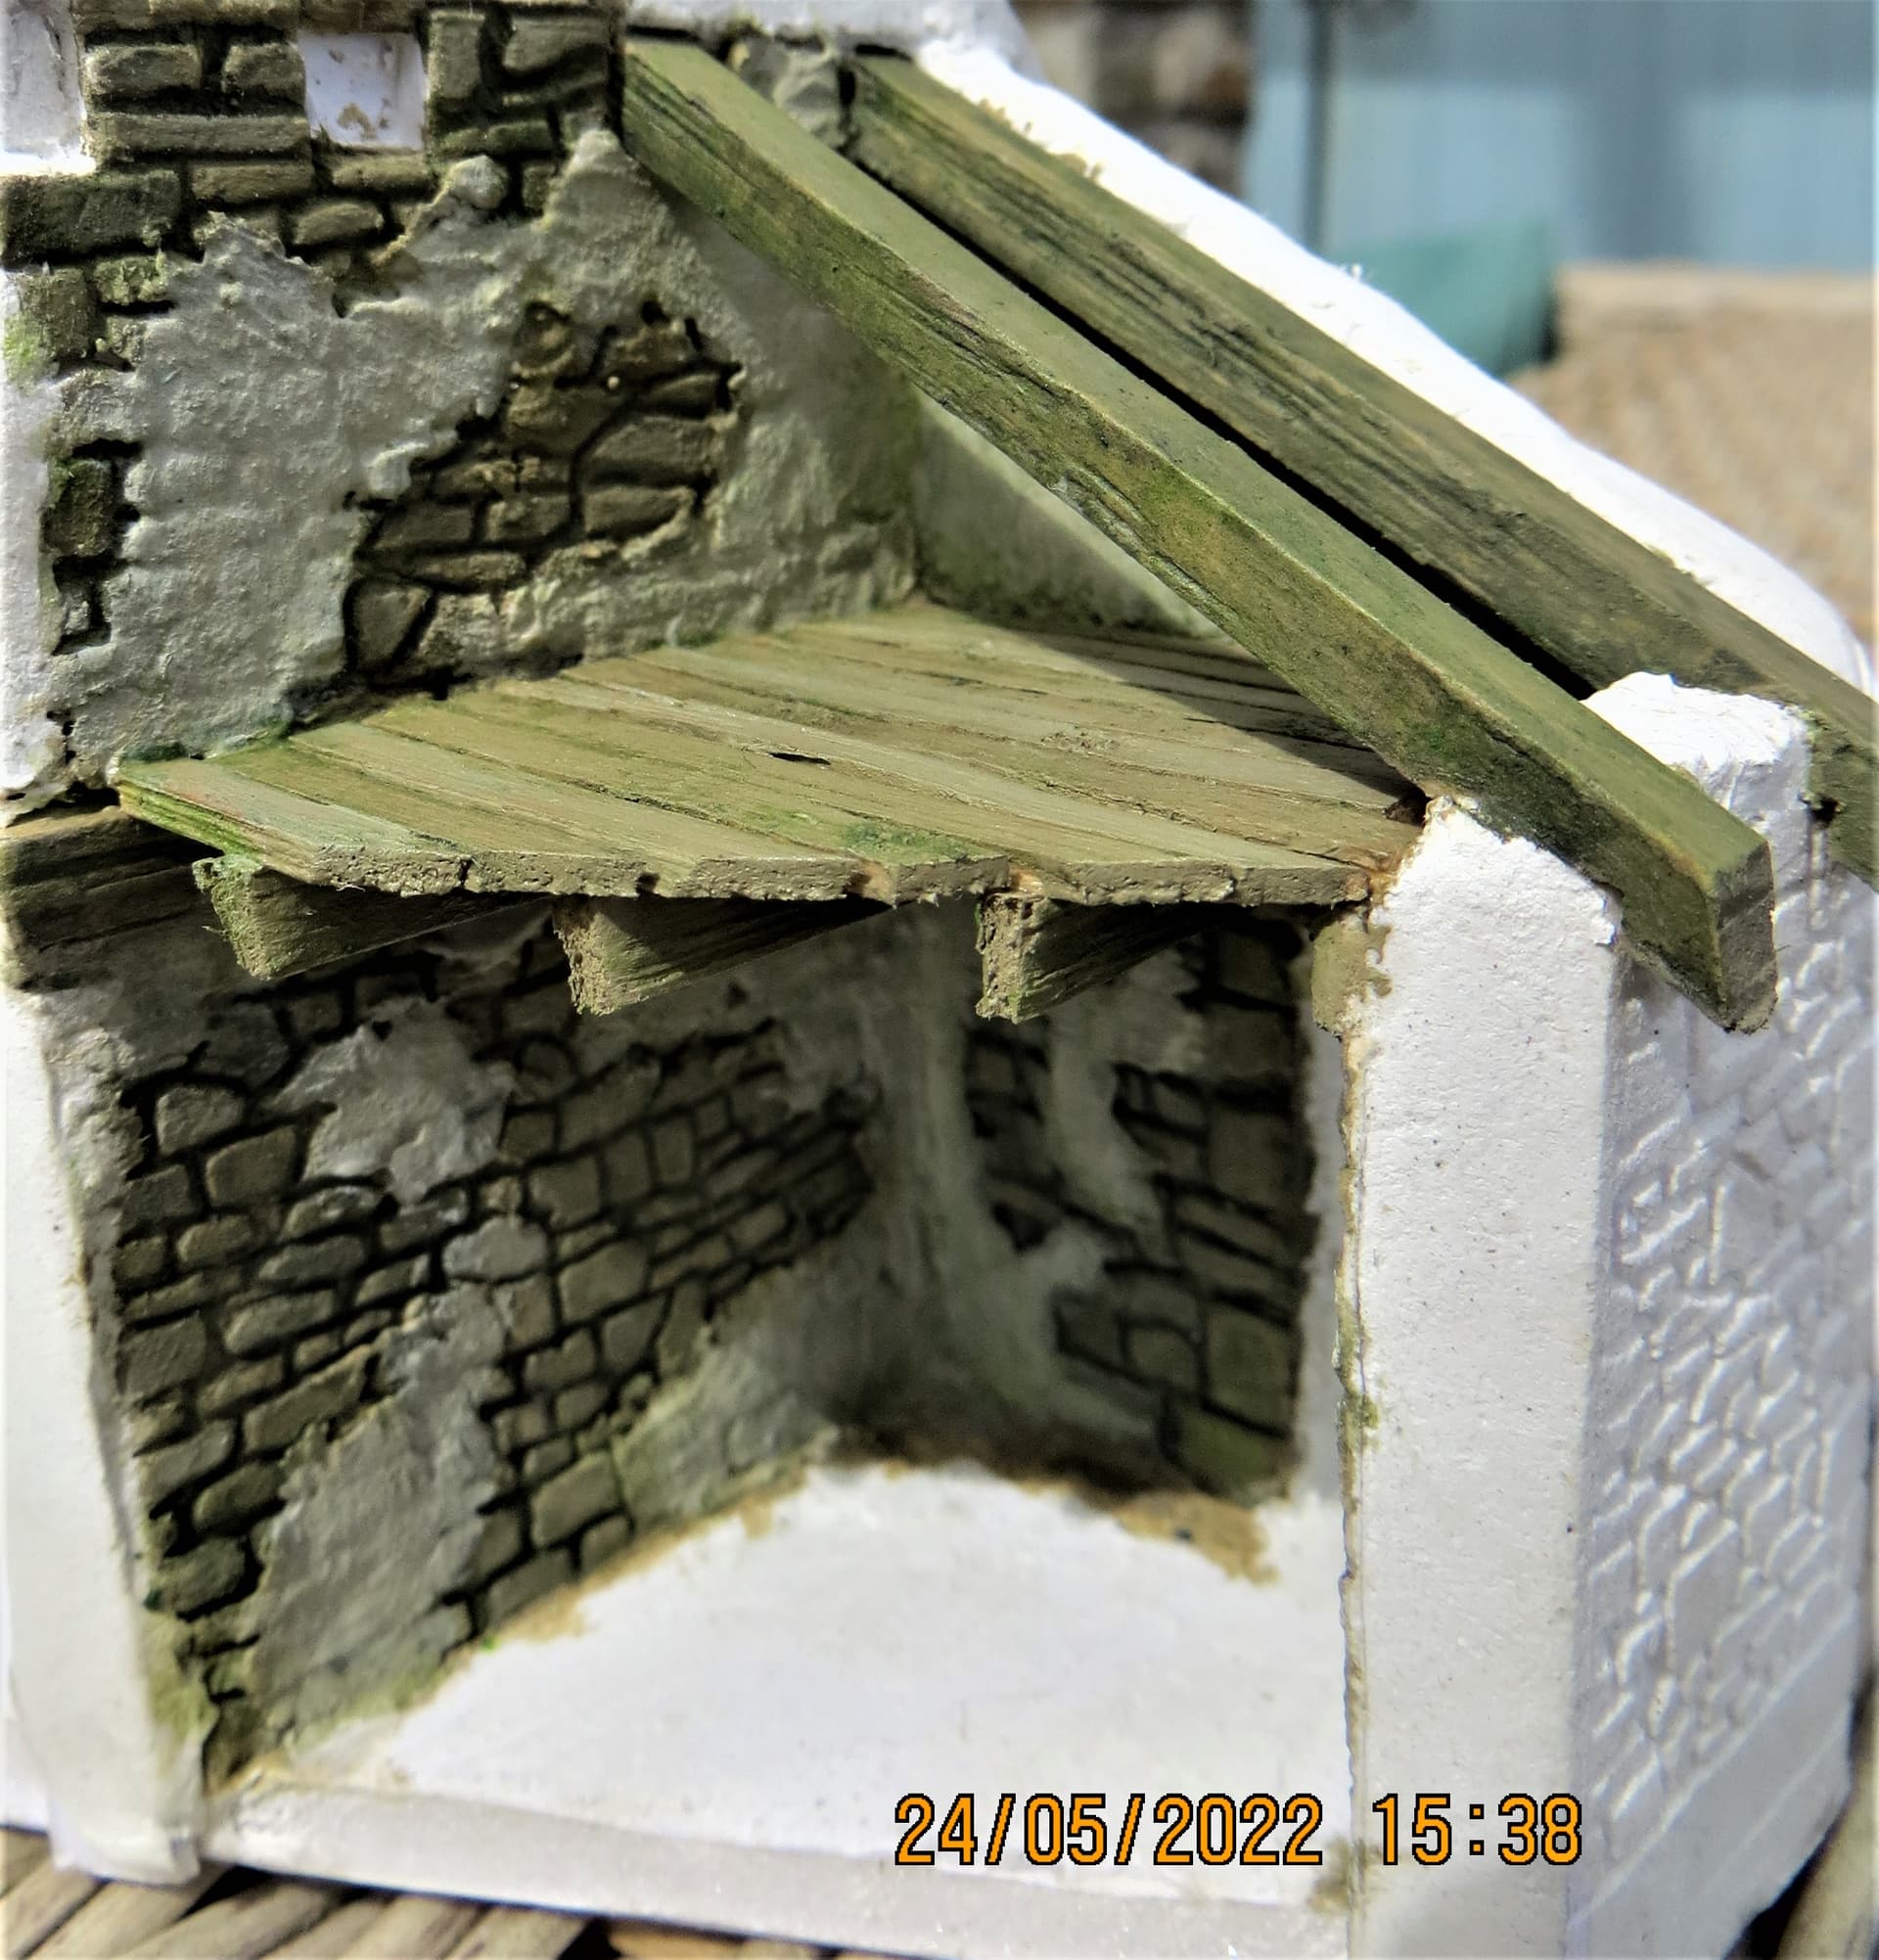
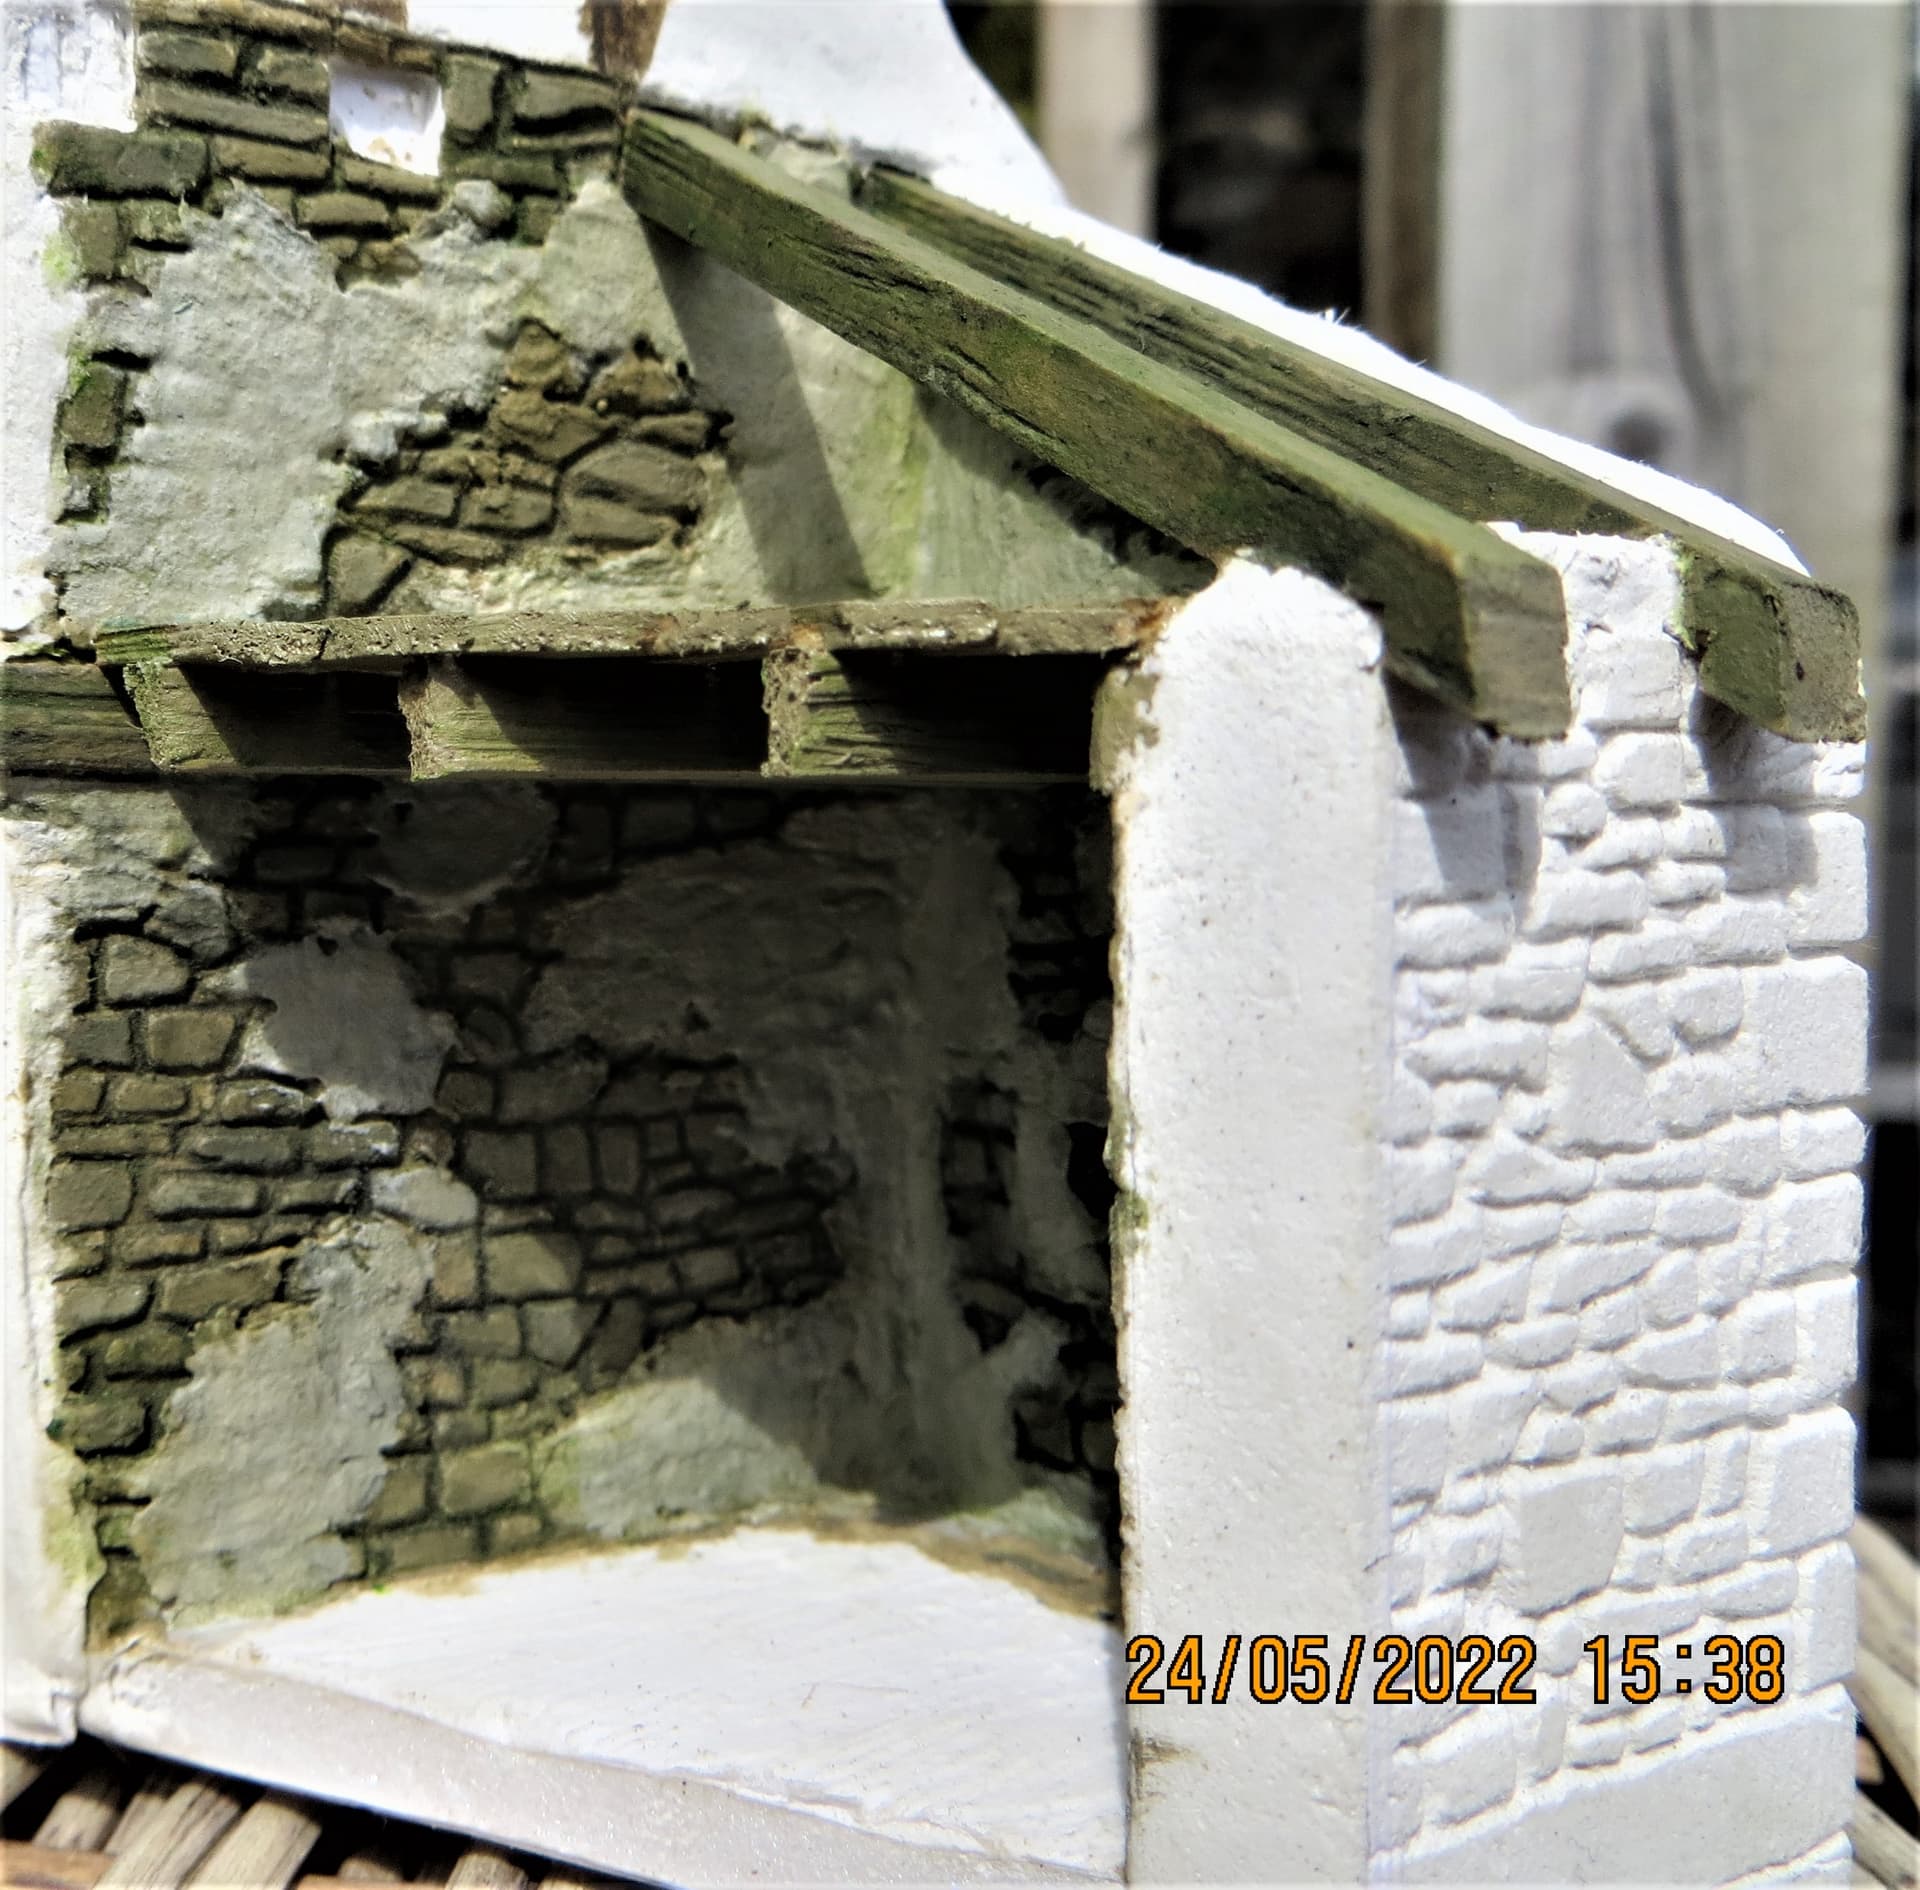
Most of the roof tiles will be missing and all sorts of debris and vegetation need to be added and weathered in…after that, only two more areas and the exterior…joy, ![]() .
.
Cheers, ![]() ,
,
G
7 Likes
Keep up the good work G looks great !!
1 Like
Making a mess out of things again, are you??? But it is certainl worth it!!!
1 Like
I can imagine it went well beyond a p-i-t-a , but my oh my… It was worth it G… It looks superb mate. First rate ![]()
![]()
Thanks to Glenn, Erwin and John, always nice to get feedback from fellow hobbyists, ![]()
![]() .
.
I’m nothing if not a mess maker Erwin, ![]() .
.
G, ![]()
2 Likes