Continuation of Build blog of Heller's HMS Victory

Thanks for the word of encouragement, Jan. In fact, I found a little motivation today to finish gluing the last shroud into place (that’s the last shroud of the port topgallant shrouds - still have plenty more shrouds to go!). If I had put a little more effort into it, I probably could have these shrouds finished a couple of weeks ago!

Thanks again, and I hope all is well with you.

1 Like

Keep at it Tim! You’re so close, that you’d not live with yourself if you quit now :cowboy_hat_face:

1 Like

Yes, you’re so right Russ!!

Haven’t been working on Victory much lately, as the woodworking guild I belong to, we had a chance to go to an old bowling alley and get some of the cut-up bowling lanes. It’s nice maple wood, but when lanes were built, staples were used to secure the boards together (in other words, the staples are put in horizontally). So it’s been hours and hours of work to not only get the boards separated from each other, but also to pull the staples out, and that’s where I’ve been putting a lot of effort into.

So far Victory goes, I’ve installed the last two upper deadeyes, and done some touch-up painting. Need to do a little more touch-up painting, glue the lower deadeyes in, then rove the lanyard through. Sounds like about an hour or two’s worth of work!

Thanks to all who continue to check my blog, and support the effort!!

3 Likes

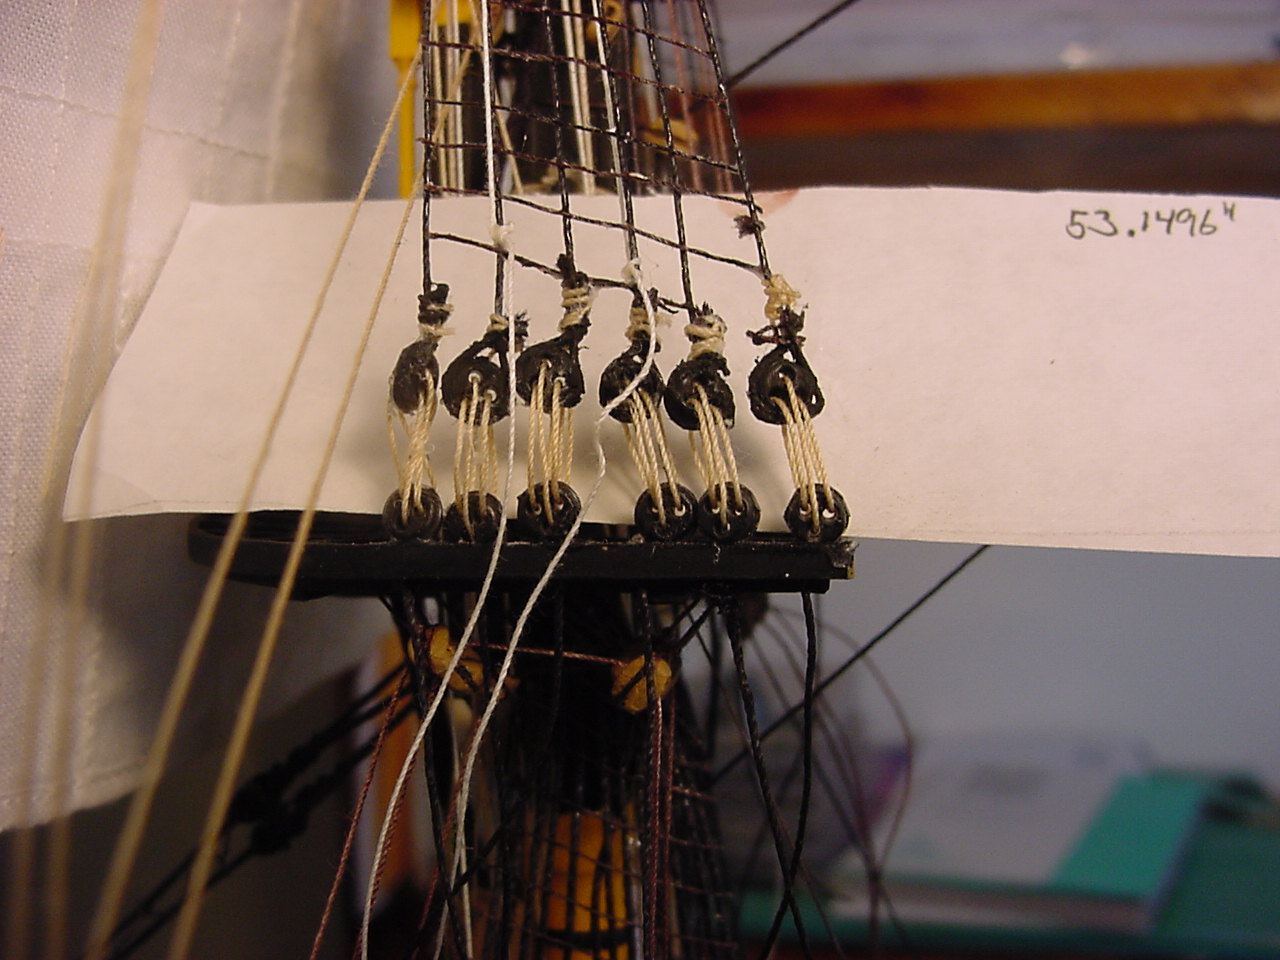
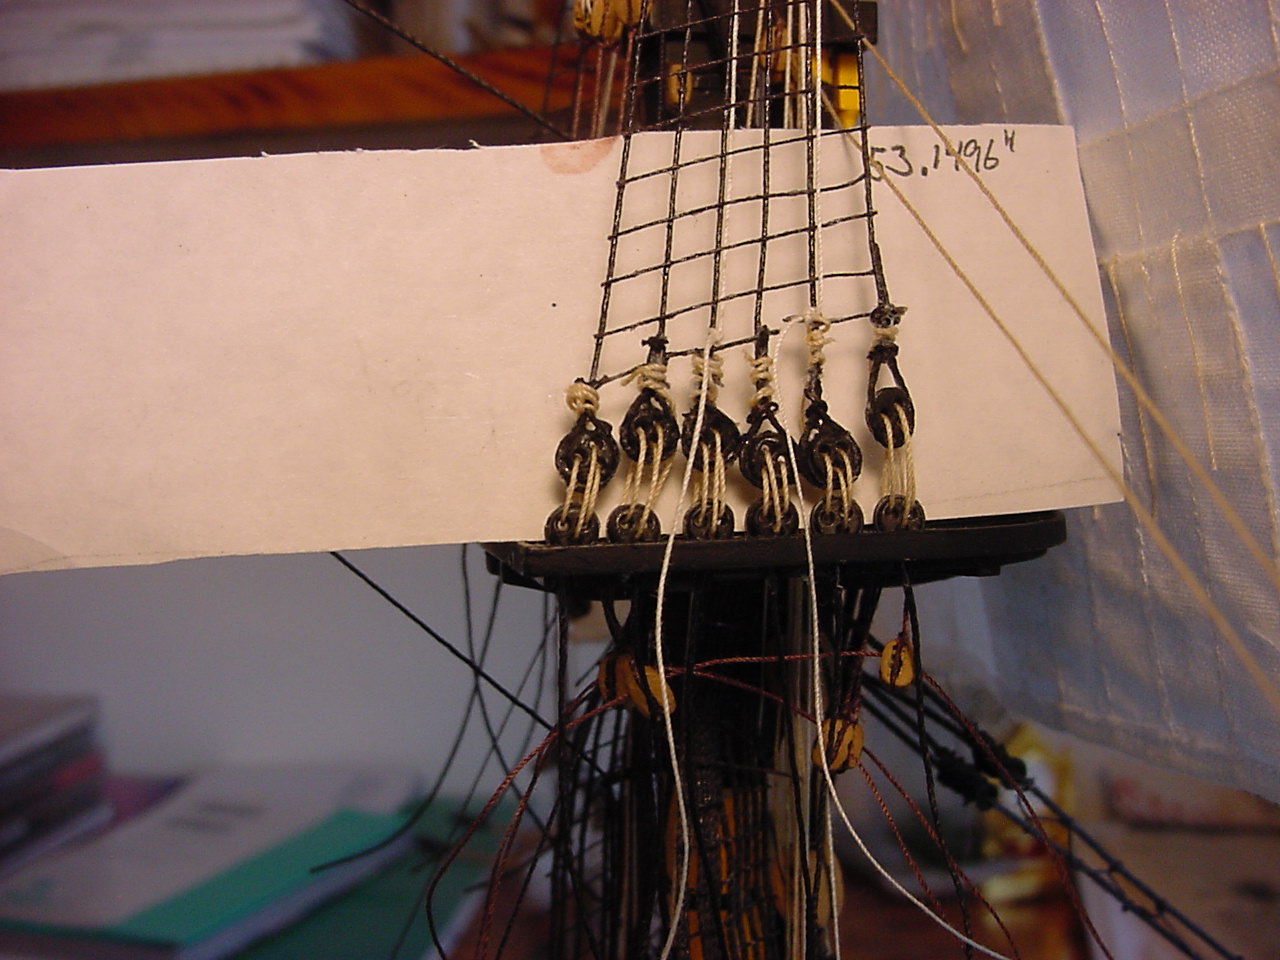
So I finally got myself in gear, and finished the foretop deadeyes stuff. One thing I’m learning here, is when I use my little jig to try and fix the deadeye in the right place, is to try and put even tension on the shroud as I pull it around the deadeye. This will keep the height of the deadeyes even, without giving the an up-and-down look to them. I also like how the lanyard, on the last pair of deadeyes, went in. It doesn’t really look like it, but I think that lanyard looks the best.

So with those shrouds & deadeyes finally emplaced, I tied off the port side buntlines to the foretop and foretopgallant sails. The question, of course, was where to tie them off to? Longridge’s book talks about the topgallant bunt belaying to a round deadeye in the top, and the foretop bunt belaying to a “shroud cleat on 4th lower shroud”. I understand the deadeye thing, but I’m not sure what, or where, the 4th lower shroud is, as the shrouds run vertical, not horizontal. Besides, the 4th lower shroud as measured from where? And don’t count on Heller to clue me in (oh, Heller) - their instructions (30C) show that I should refer to instruction 20C, and instruction 20C shows I should refer to instruction 30C. And round and round we go!! So in the end, I decided (in keeping with what I did on the mizzen mast) to belay the topgallant bunt to the 2nd shroud of the topmast shrouds (counting from fore to aft), and the foretop bunt line I belayed to the 4th shroud (again, counting from fore to aft). Of course, on the foretop bunt, once I had it knotted around the shroud, I noticed that the thread was crossing over the shroud (that is, the thread comes from a block and tackle that is inboard of the shroud, but I tied it off on the outboard side). So it was pick the knot apart, run the line all the way on the inboard of the shroud, then belay that thread around the shroud, from inboard to outboard. It’s no wonder progress is so slow!

I also found, since I put in the futtock shrouds, the knot I used to help secure them to the top, gets in the way of the deadeye seating itself correctly in the top. So the last couple of deadeyes I put in, I put a notch in the bottom of the deadeye, to accommodate the knot. Worked out pretty well.

I’m going to try real hard to get the main top shrouds finished before May is over. One of the reasons in trying to get the deadeyes finished, besides the fact they need to be done, is because I’m belaying the buntlines into the shrouds, so really, to get any good progress, those shrouds need to be completed.

I also finished rigging V38 and V39, some block and tackle that hangs from the mainstays, and belays down into the waist. I installed the blocks for this stuff a couple of months ago, while I had the open space before installing the staysails.

Hmmm, ok, I think that’s the current update. Thanks for reading!

Tim

3 Likes

Hey Tim,

good to hearing you are making progress! Sounds like a lot of rather tedious work… Probably not really much to show other than more deadeyes and lines, but I’m looking forward to some pictures with your next update, your Victory is a really fine model already!

Cheers
Jan

Hi Jan,

Thanks for reading the latest post! You’re right - the deadeye rigging is rather tedious, but it needs to be done. I’ll try and get some photos of the port & stbd deadeyes that I just finished, to better show the inconsistency of the upper deadeyes height, especially on the stbd side.

The latest update: I cut the pieces for the main futtock shrouds, have knotted one end on each piece (12, altogether), and am waiting for the glue to dry around the knot, before I trim the end off. So yeah, a lot of tedious work!

Thanks again.

Tim

1 Like

I think you are right about 4th from the bow, and a “shroud cleat” sounds like one seized onto the shroud. Gee, this makes rigging the full-scale ones sound easy! Great job.

Hey Danie,

Yeah, I’m sure the shroud cleat is a cleat seized onto a shroud. Unfortunately, not that many cleats came with the kit, and I think the remaining cleats I have are earmarked for other places. I tied off the buntline leads to the 2nd & 4th shrouds, both port & starboard, and will do the same on the mainmast. If nothing else, at least things will be consistent!

Well, I think rigging a full-scale vessel would be easier - you have plenty of room to move around, and you don’t have to worry about bashing into something and knocking it loose/off! Nowadays, installing the deadeyes on the mainmast, I keep hitting the main top yard - it’s probably only a matter of time before I knock it completely off!

Pretty much. Except I kept getting so absorbed I’d forget to hang on and have to catch myself before falling off. You are doing great; one of those models I’m happy to see.

I think I’d be so absorbed in NOT falling off/out of the rigging, I wouldn’t be able to do much else! :grinning_face_with_smiling_eyes:

1 Like

Having worked on tall ships, this brings back memories. Memories of how filthy they were HA HA. Lovely work Sir. Thanks for posting.

Thanks for looking at my blog, Mr. H.G.! It gives me a place to brag, and more importantly, castigate Heller for having such poorly written instructions. More importantly, I hope any other modelers can use it as a “lessons learned” thing, so they don’t/won’t pull their hair out!

Thanks again!

Tim

1 Like

Pictures! I got pictures!

Well, yes, but they’re not that interesting, just some of the completed deadeyes on the foremast, and the current effort on the mainmast. And these pictures, because they were shot up-close with the macro setting, really shows the relative un-tidiness of things.

So this first pic is of the port side fore top deadeyes. The left-most deadeye, I followed Heller’s instructions about putting the lanyard in place before attaching the shroud; unfortunately, once I put the shroud in place, it twisted the lanyard between the deadeyes, so it looks out of place. The two white threads that are attached to the shrouds are the lead line for the block & tackle that the buntline is attached to. (This is the whole reason I started work on the deadeyes & shrouds - I needed a place to get the buntline rigging belayed).

This picture is of the starboard foremast foretop deadeyes. The alignment on the upper deadeyes is horrible, but that’s because, when I was installing the upper deadeye, I didn’t realize the upper part of the shroud was getting caught in the rigging, and that caused the deadeyes to be unequal in height, relative to each other. Again, the white thread, on the 2nd & 4th shrouds, is the belaying of the foretop buntline tackle.

This next pic is of the little jig I made to line-up the upper deadeye. It’s of the port side main mast top shrouds. Unfortunately, the camera focused on the heads of the sewing pins.

And lastly, another out-of-focus shot, but this is of lines V38 and V39, of which the double-sheaved blocks hang from the mainstay.

So that’s all for now. I started the third deadeye today; my goal is to, at a minimum, get the port side main top deadeyes finished by the end of the month, and here it is, already half-way through the month. I guess I gotta get to work!

Thanks for reading, and any comments/questions/etc. are welcome.

Cheers!

Tim

8 Likes

Wow, Tim! I’m still staggered by your attention to detail and your determination to complete this beauty! :clap::clap::clap:

Thanks, Russell.

1 Like

Tim,

what Russ says! And well, I very well know how unforgiving those macro pictures are, but as soon as you just take one step back, it all looks fine - a really busy arrangement of standing and running rig, created with lots of passion and patience and lots of love for detail. Great job!

Cheers
Jan

Thanks, Jan. You’re absolutely right - taking a step back makes everything look alright! And most observers will be too afraid to get too close, for fear of bumping into something! Still slogging away on those deadeyes…

Have you considered doing the deadeyes off the model on a jig? Rig something to hold them firmly in 2 parallel rows, allowing you to do the lanyards evenly, then attach to the rail and shrouds. Some even do the whole shroud assembly on a jig, then attach it to the model. Fewer chances to knock off other pieces. :slight_smile:

Hey Danie,

Heller makes some noise in their instructions about how the deadeyes are molded to have the correct spacing between the upper and lower deadeyes. However, I tried their method on one set of deadeyes, and once I got the shroud wrapped around the upper deadeye, it twisted out of shape really bad, so I decided not to go with that route. Thanks for the advice, tho.