Thanks, Dio. For your “permanent scarring”, did you go to therapy? Of course, drink would be an easier cure: it’s cheaper, no appointment needed, and you can talk all night long to the television!
1974…I turned 14 that year. I think I was building Revell’s “Thermopylae”, while watching episodes of “The Streets of San Francisco”.
Well I was 17 & rigging it was challenging enough, but the kicker was that the metal folding table I used as a workbench on which the ship rested up in the attic space mysteriously collapsed around a week after I’d finished…my brothers swore innocence but the faintest of smirks told a different story, forever unproven. I don’t want to give you nightmares so won’t elaborate on the aftermath, I trust you’ve prepared against any such catastrophe…
I think I don’t have to worry about the table collapsing, either on its own or through some nefarious means, but the bigger danger is not paying attention when I turn the ship from one side to the other, and bashing the ship into something on the table!
Bitts, betts, batts, butts, botts. You know what I mean!
I took some time yesterday writing down, for the foremast, the line number (i.e. A24), where it starts, what block(s) it goes through, and where it belays. Having that sheet handy will be a lot easier than flipping through the instruction booklet, using a magnifying glass to read that oh so tiny print.
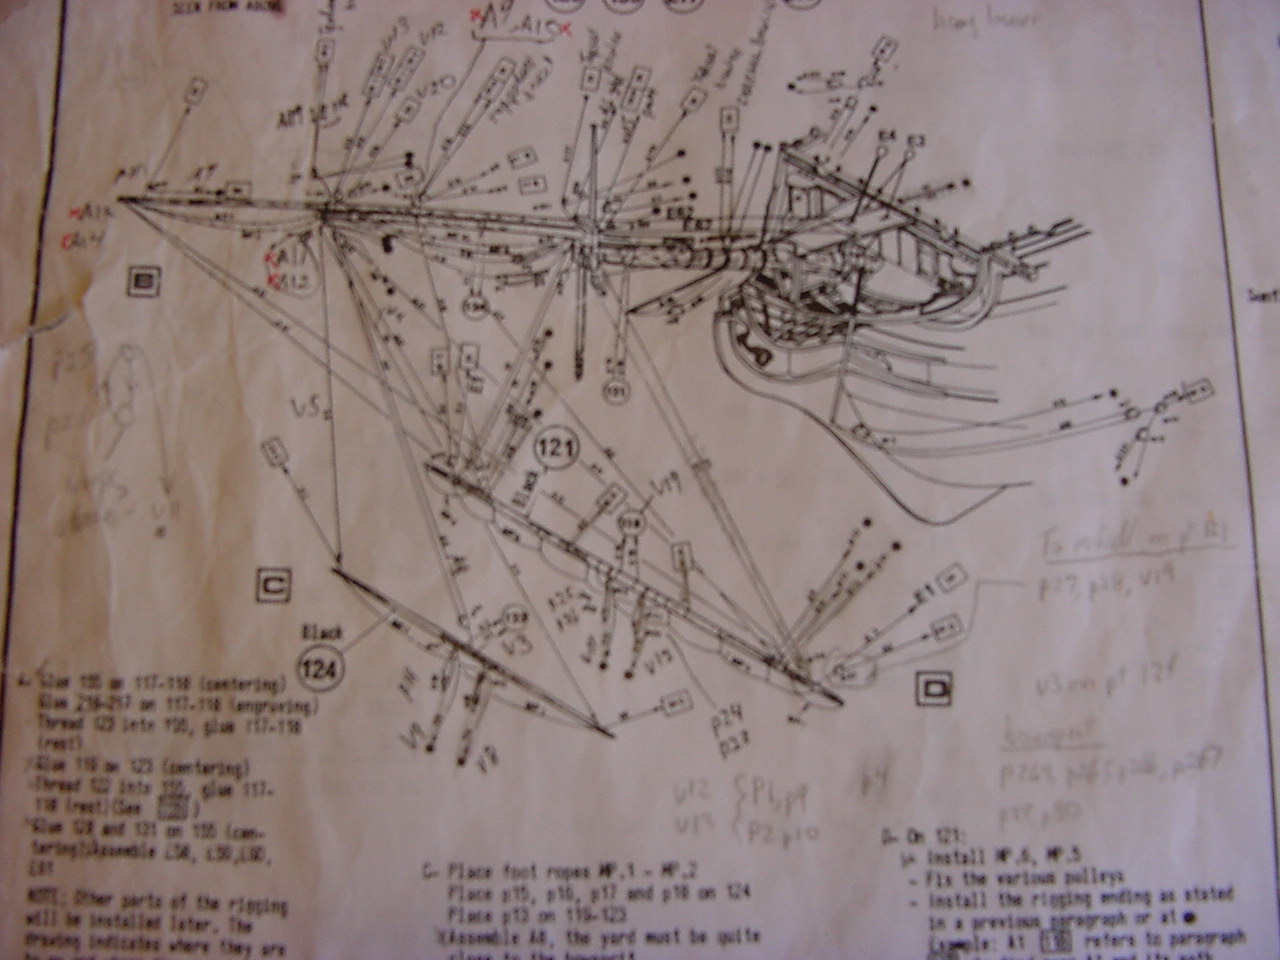
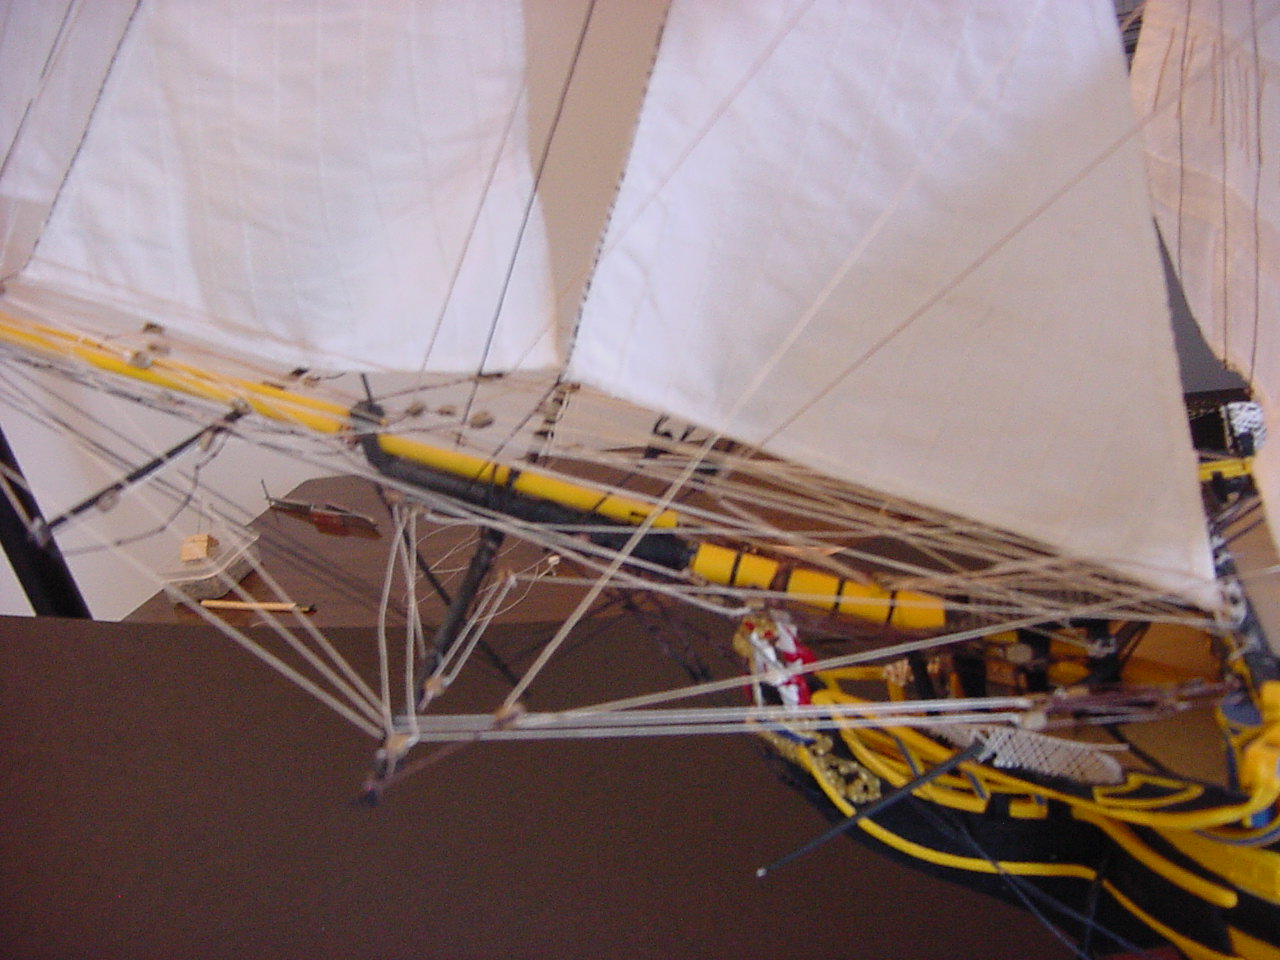
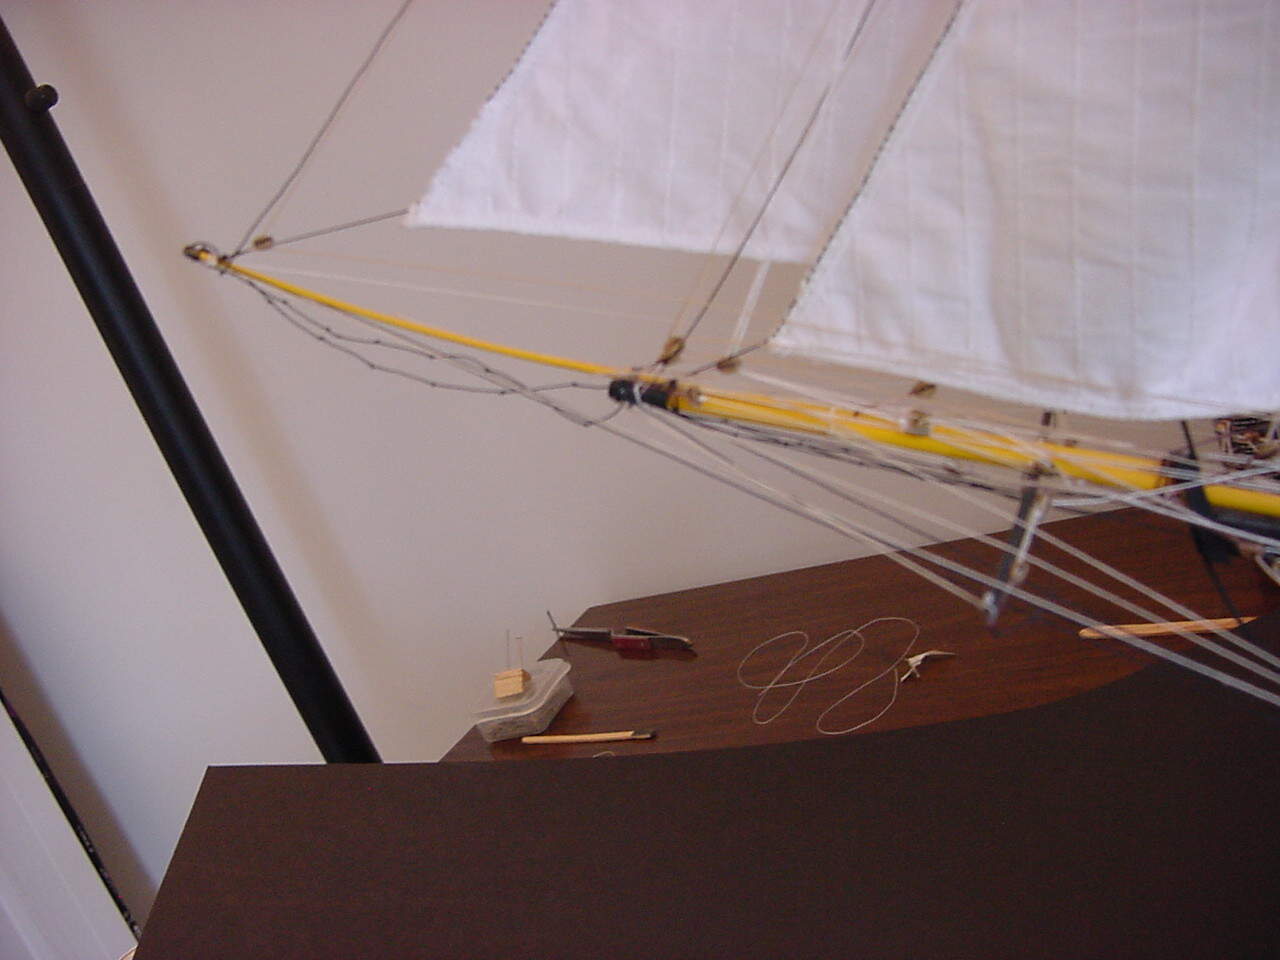
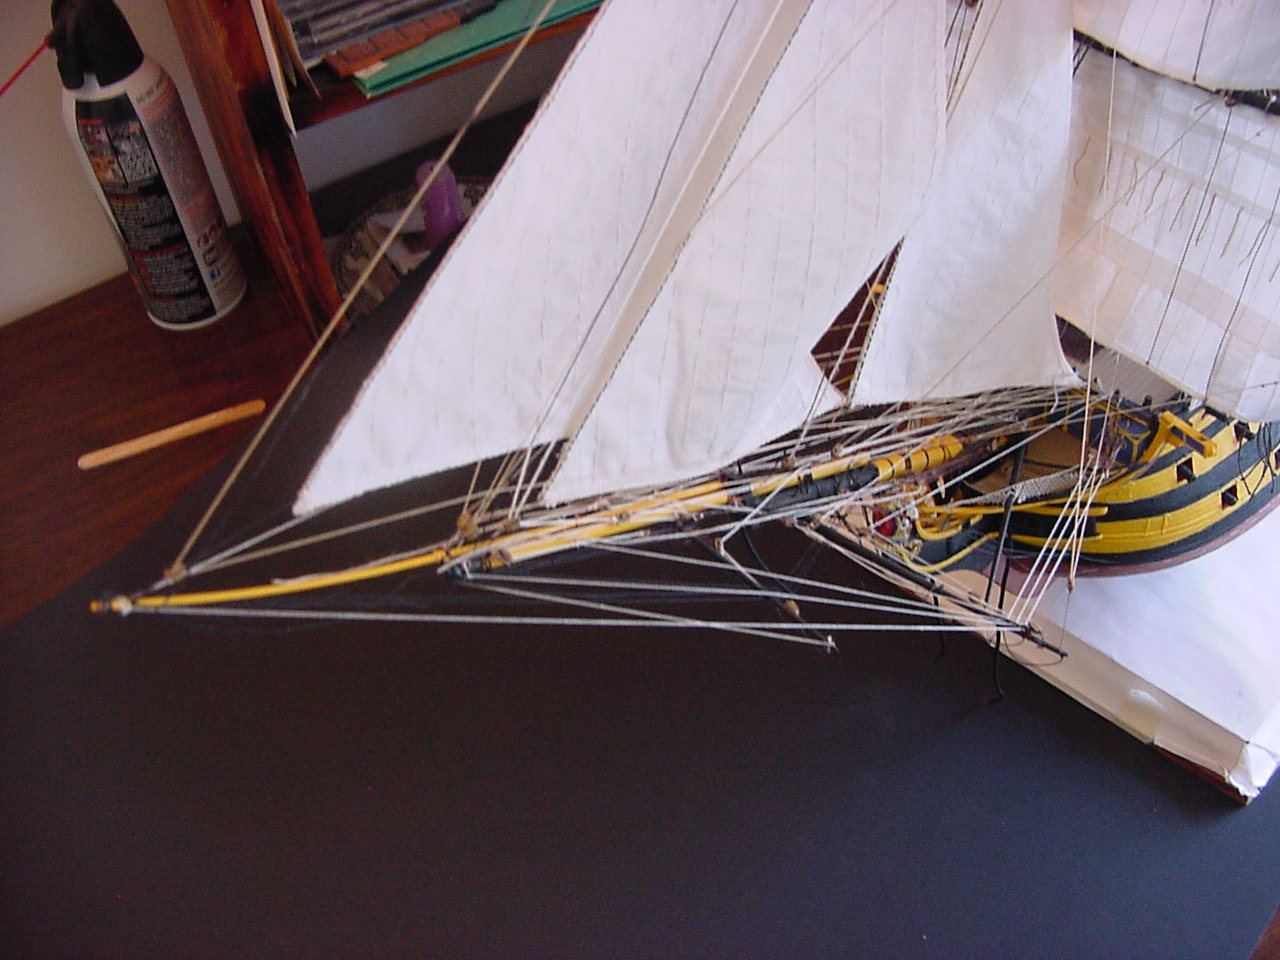
The good news is, I’ve just about finished all the rigging for the bowsprit. Here’s some pictures, the first one is of Heller’s instruction on assembling & rigging the bowsprit (sorry for the blurriness), and the rest are pics of how everything went together. Some of the bowsprit rigging includes the bowlines from the foremast.
Hope you enjoy the pix! Hope everyone had a good Father’s Day. The weather has been absolutely delightful the past couple of days - we went from the mid 90’s on Friday, to the mid 70’s yesterday and today, with the low temps tonight down in the 50’s. I think I’ll be sleeping with the windows open. But fear not - the heat & humidity is coming back soon.
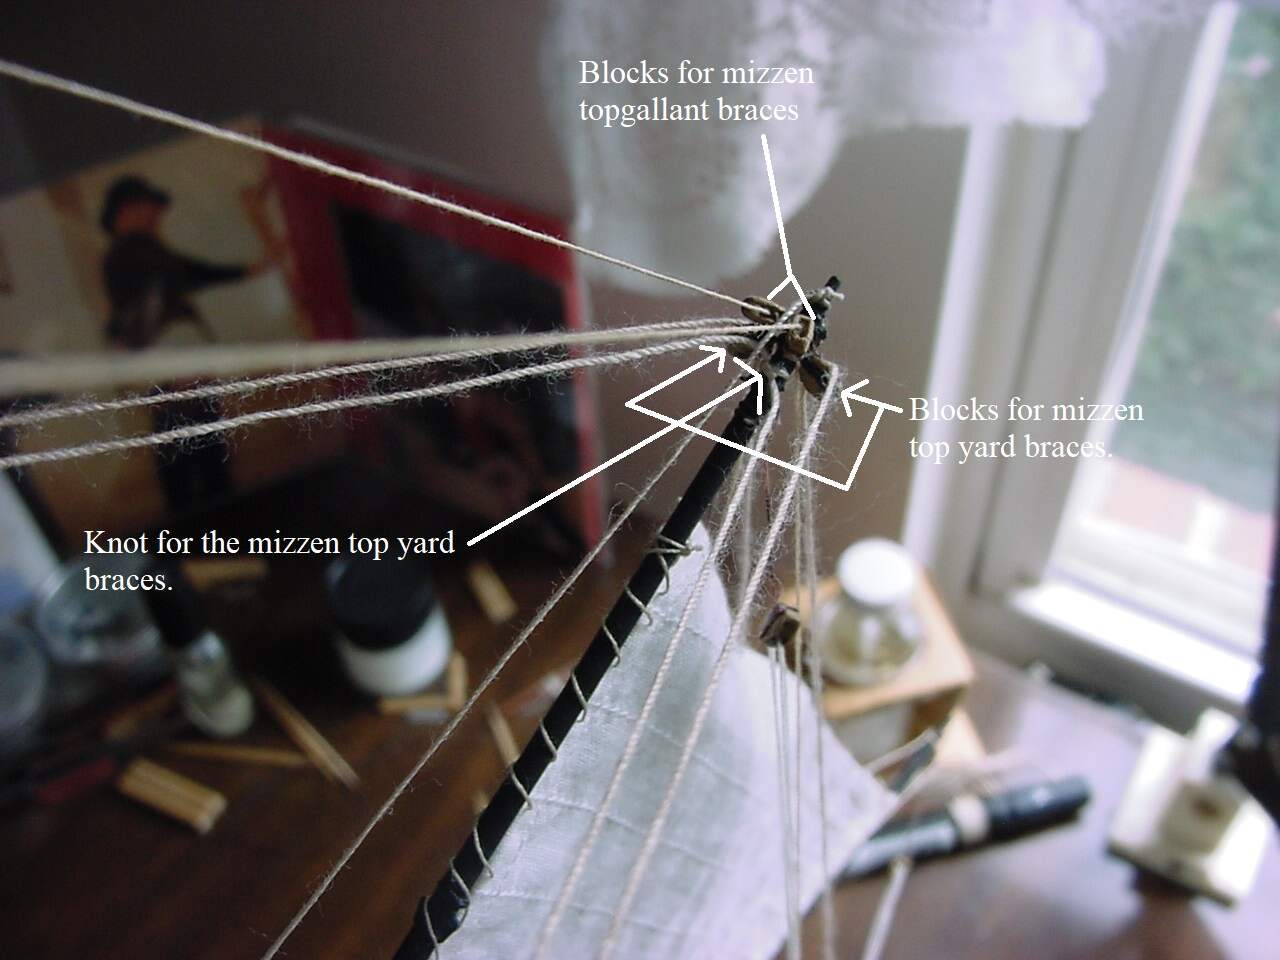
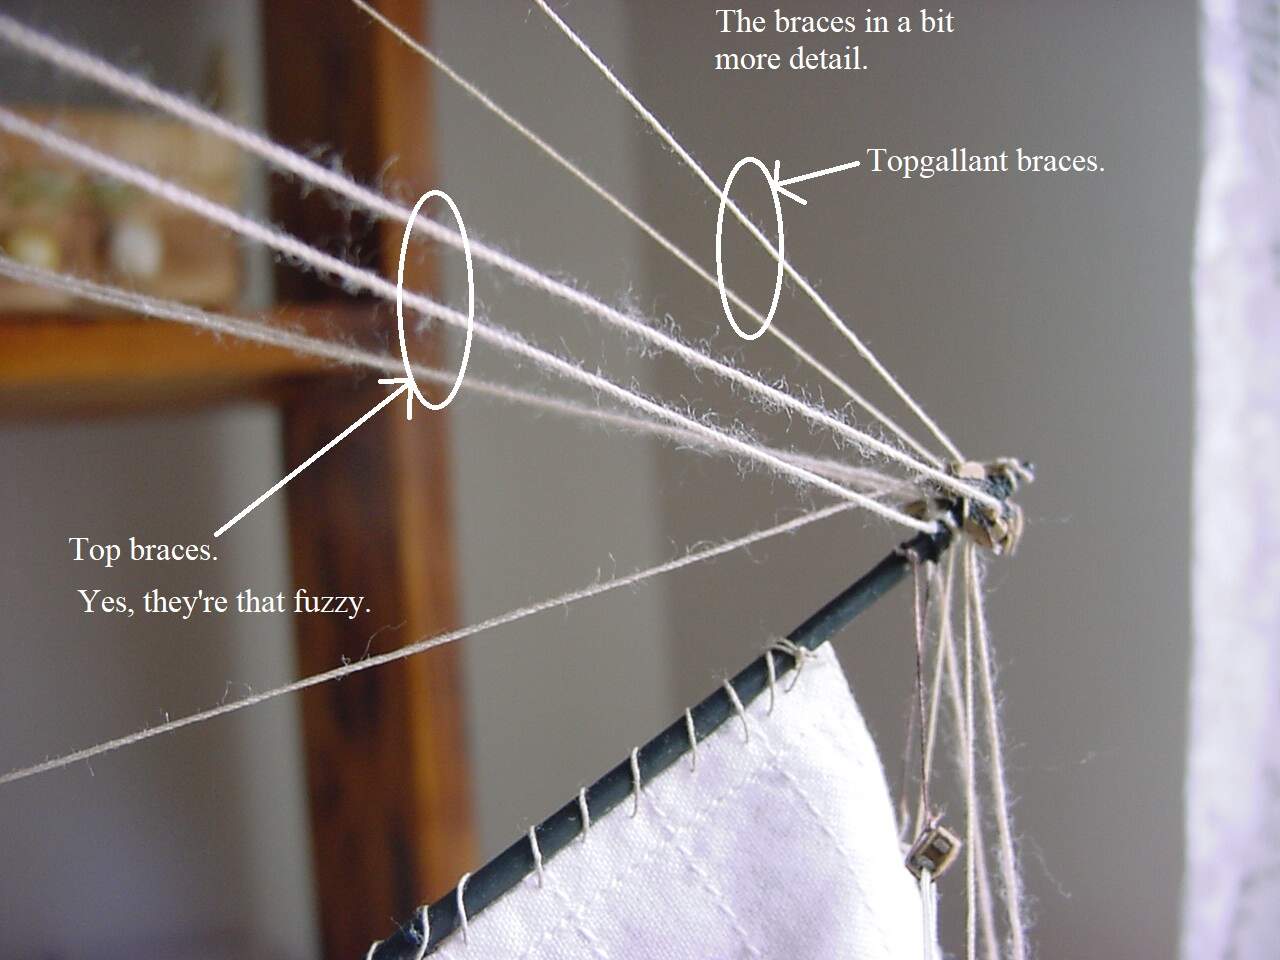
So not in any order, but my next steps will be to finish the bowlines on the main & mizzen mast, and install the mizzen yardarm braces. That should keep me busy for a while.
Soooooooooooooooo, my self-imposed timetable has been right on target: I wanted to get all the bowlines attached to the sails, and get the mizzen yardarm braces installed, by the end of July. On the topgallant starboard brace, I had some difficulty getting the line through the eyebolt on the deck, as the eyebolt was right up against the signal flag box…in the end, I snapped the eyebolt off, slid the brace line through the eye, then glued the eye back to the deck. Things worked out pretty well, as I guess I got some glue on the signal flag box, and that spot of glue is keeping the brace line taut, more so than pulling it through the eyebolt. The port side went in a little better, as I had more room between the eyebolt and the signal flag box.
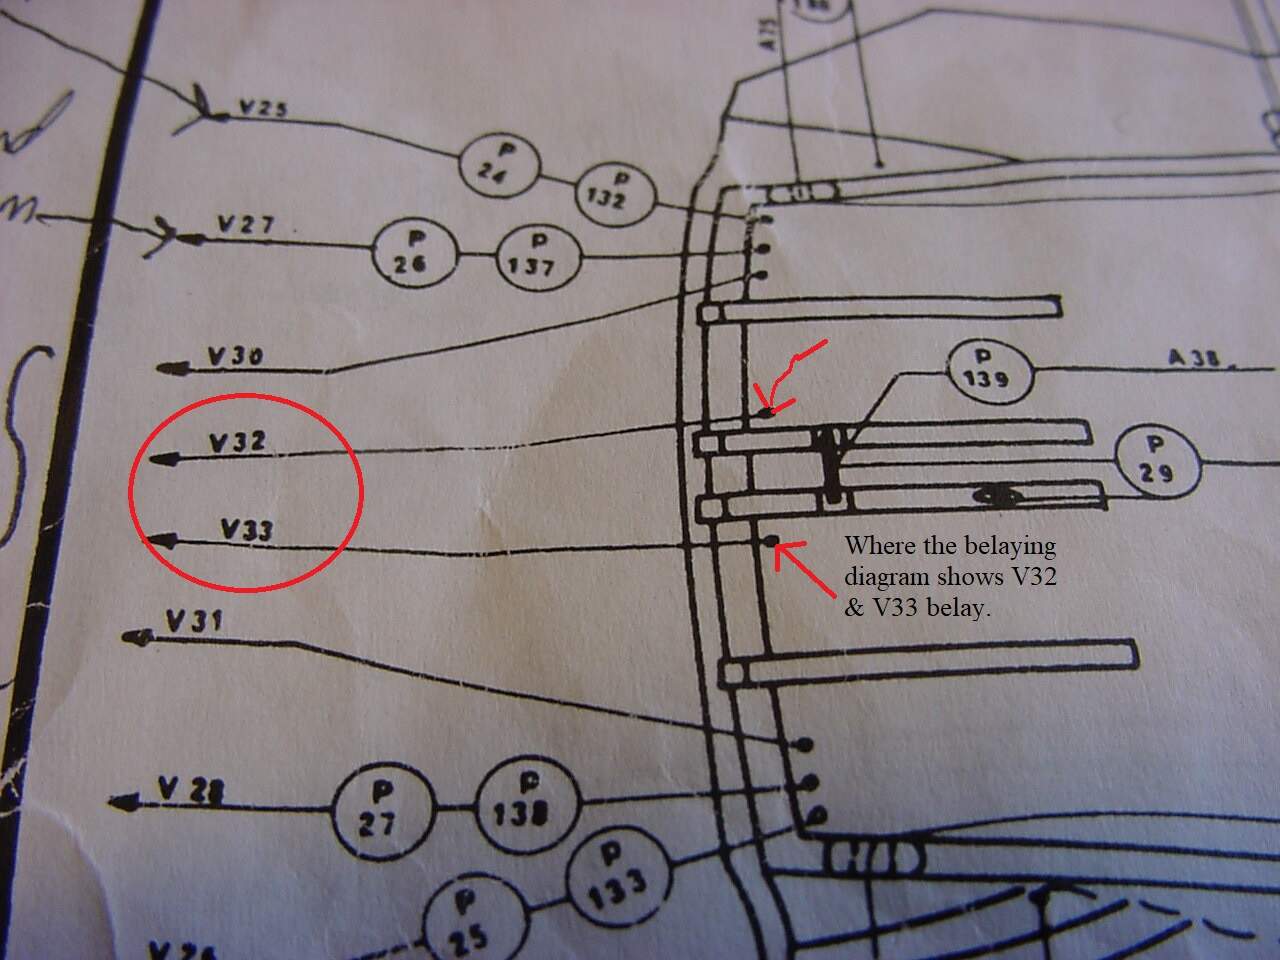
Of course, nothing happens with Victory without a hitch, and here it is: as you can see in the belaying diagram, the eyebolts for the mizzen top yard (V32 and V33) are supposed to belay to eyebolts on the deck, and those eyebolts are supposed to be on the outside of some timbers on the deck:
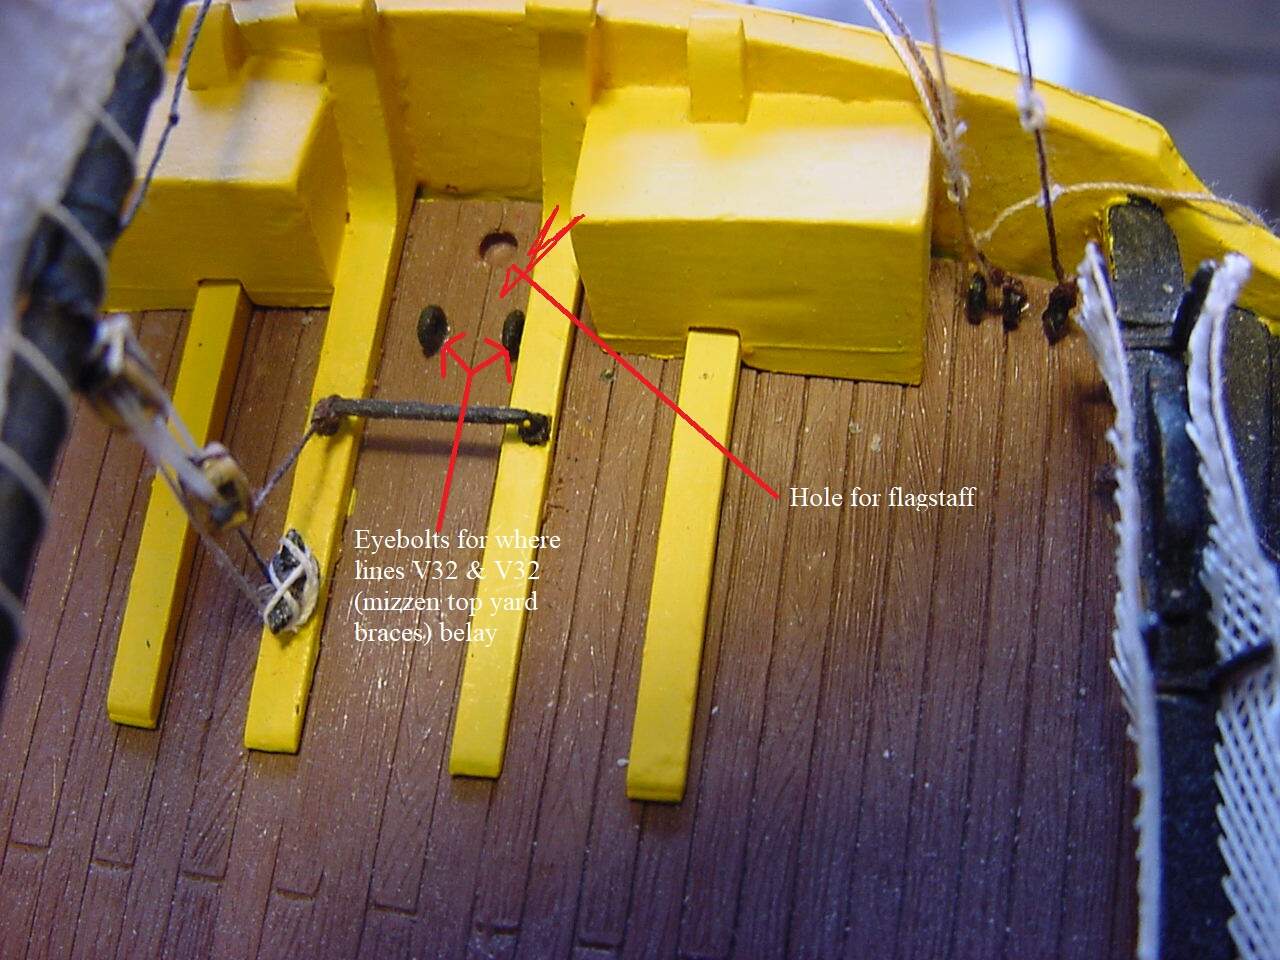
This could probably work, except that the spanker boom (might have the wrong name) is slightly angled to the ship’s starboard, and to bring the brace line down to the current eyebolt, the brace line would be rubbing against the boom, and it would just look…not good. So I’m thinking maybe to just break off the eyebolts, and re-cement them to the deck, between the first and second timbers, and the other eyebolt going between the third and fourth timbers. Or maybe keeping one eyebolt in place, and fabricating a ring out of some metal rings I have, and glue that metal ring to the deck. That option depends on how easy it will be to bend the metal ring down to size.
Tim, … I just jumped over again from my very very very ( you get the picture) low detail levelled mundane offering of Victory to have another look at yours.
I really wish I hadn’t lol…I feel a bit ill when I think of my efforts…
The detail on yours is simply phenomenal… And you know all the nautical terms lol… Some of the levels you are delving into are mind blowing. It’s breathtaking work and real model making mate. Beautiful work and skills…
Thank you for your comments! It’s been tough at times to find motivation to keep going. And believe me, I’ve thought about taking a hammer (a LARGE hammer) to my Victory more than once.
WRT to wearing underpants on our heads…if they were women’s underpants, would that be considered weird?
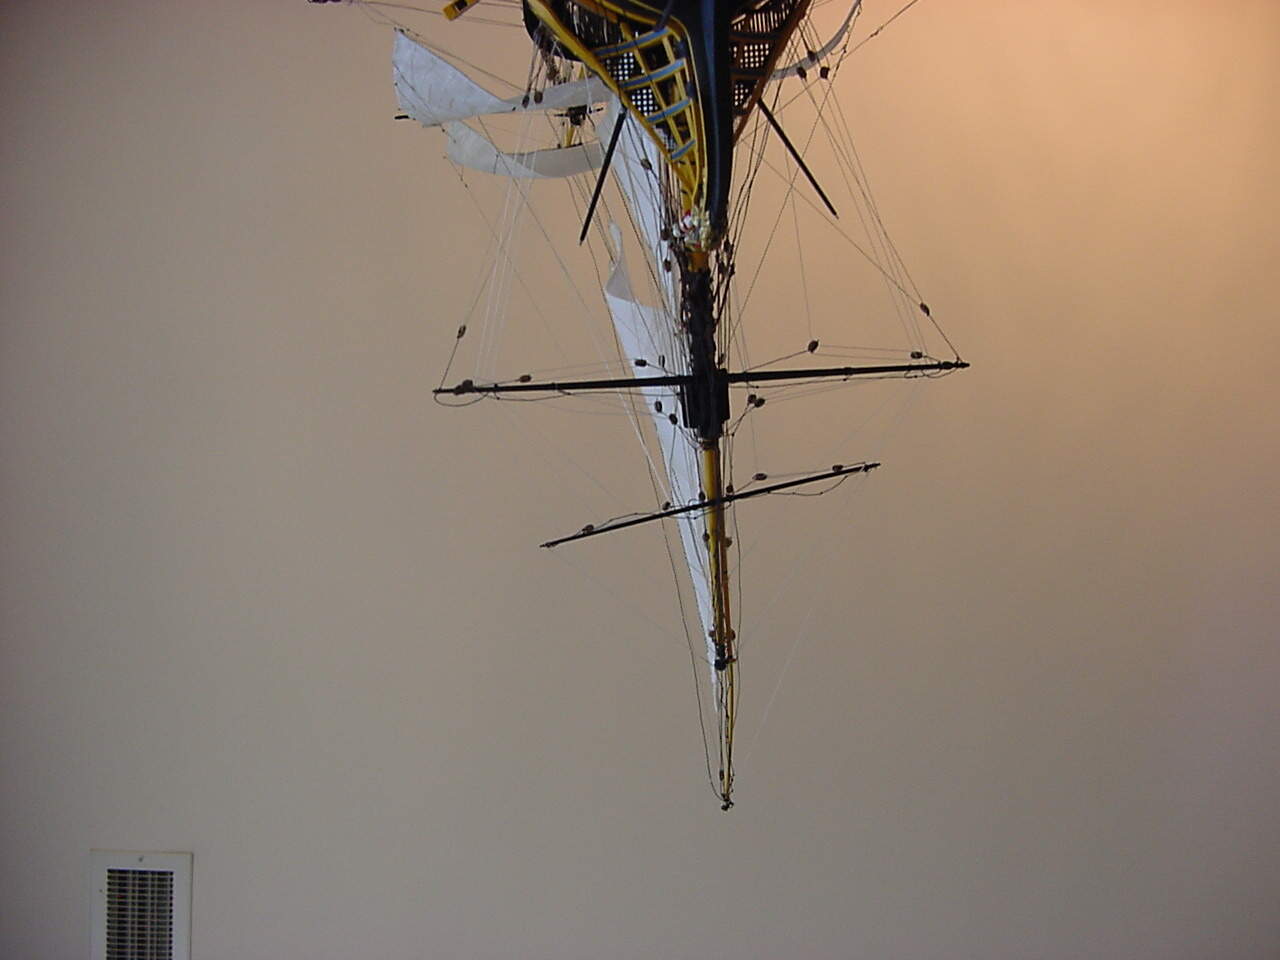
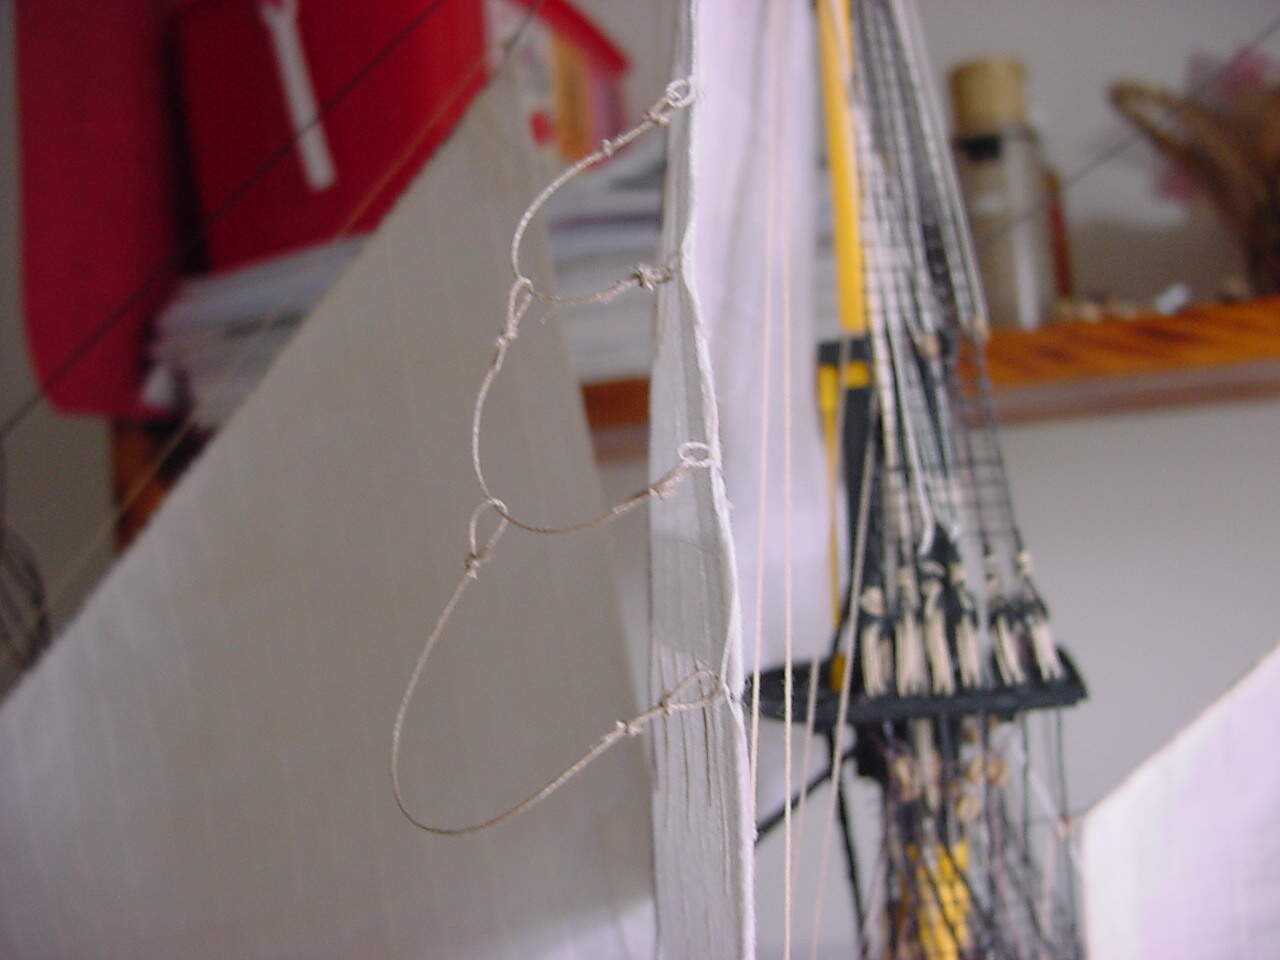
Some more pics that I forgot to take yesterday. The first three photos are of the various rigging that are at the top of the horn. The last one is of the bowlines, this photo being of the main top sail bowlines.
I was thinking (and with no underwear on my head!) last night, about how to get the mizzen top braces belayed to the deck in a decent manner. I came to realize that if the crew needed to shift the spanker boom from one side of the ship to the other, those braces would be in the way, and the crew would have had to take out the brace line completely from the eyebolt, shift the spanker boom over, and re-install the brace line. So I’ve decided to just bring both brace lines down from the horn, and rather having them be split (that is, one on each side) across the boom, just have them both on one side of the boom. It’ll make things easier all around. (Does anyone understand what I just wrote? )
So I’ve installed the main topgallant braces and one of the main top braces. Just for grins, I measured the approximate length of the main top brace - 25 inches minimum, so add enough for knot-tying, and it comes around to maybe 30 inches. So multiply that by 2, and 5 feet of thread is used just for two lines! I hope I don’t run out of that particular thread - it’s some 0.6 mm diameter thread that came with the kit. I want to use that thread for the main yard, the foremast top & fore yards, as well as the sheet & tack lines for the fore and main sail.
Anyway, here’s a picture of the main topgallant & main top braces:
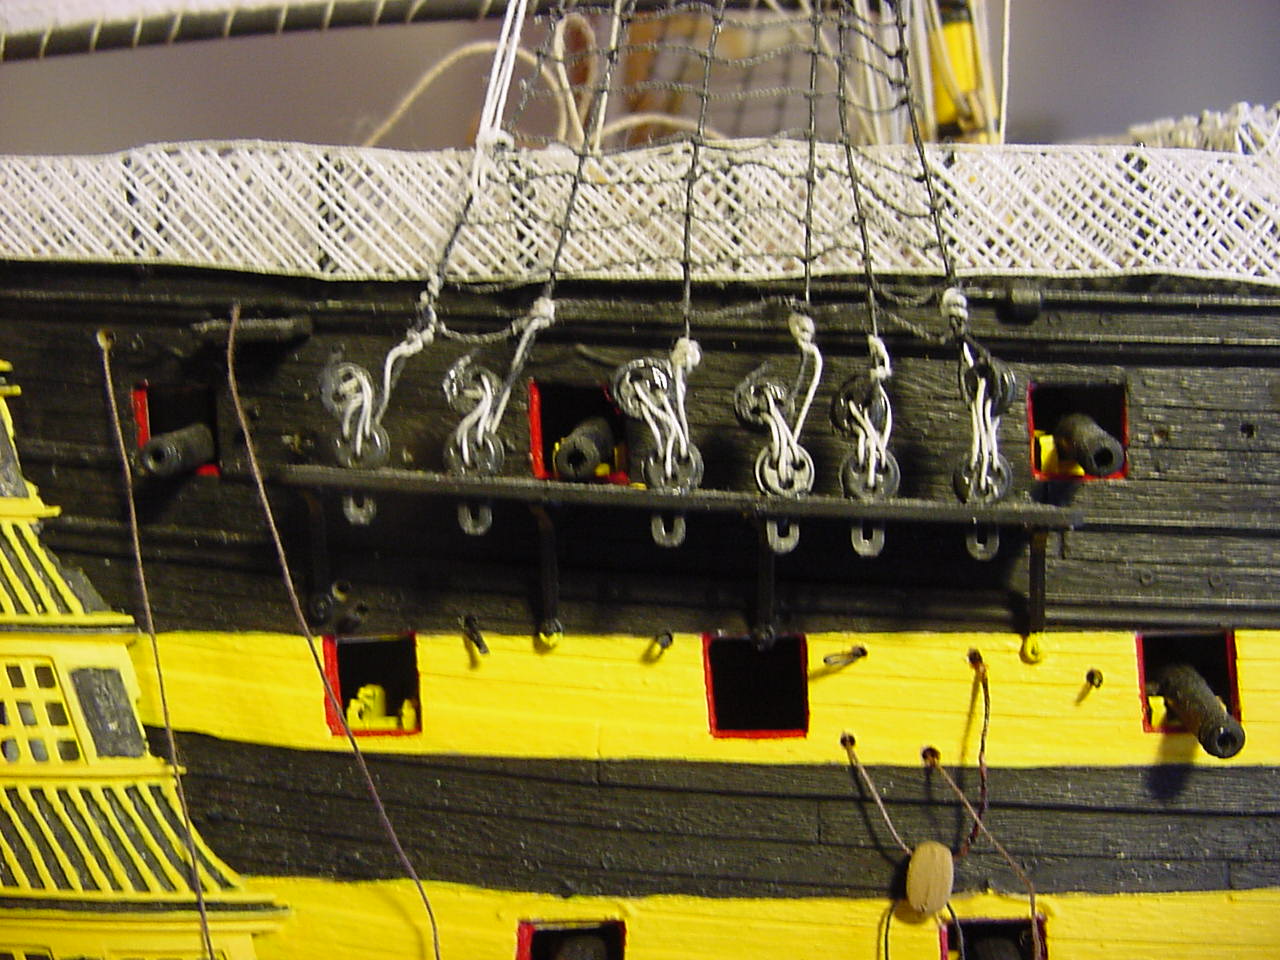
And since getting those braces installed went quite well, I took another look at the deadeyes for the mizzen shrouds…and decided to re-do them. Here’s a picture from the starboard side:
As you can see, the lanyards (the white thread) looks like hell! I couldn’t stand the thought of having the fore and main shrouds looking pretty good (well, I hope they come out looking good!), and then have the mizzen shroud lanyards look like this. I’m also going to use the same type of thread, but I’m going to color it with my coffee solution, so there’ll be some uniformity to the lanyards. Of course, this now means I’ll have to re-do the mizzen top shrouds & lanyards, just to keep everything consistent.
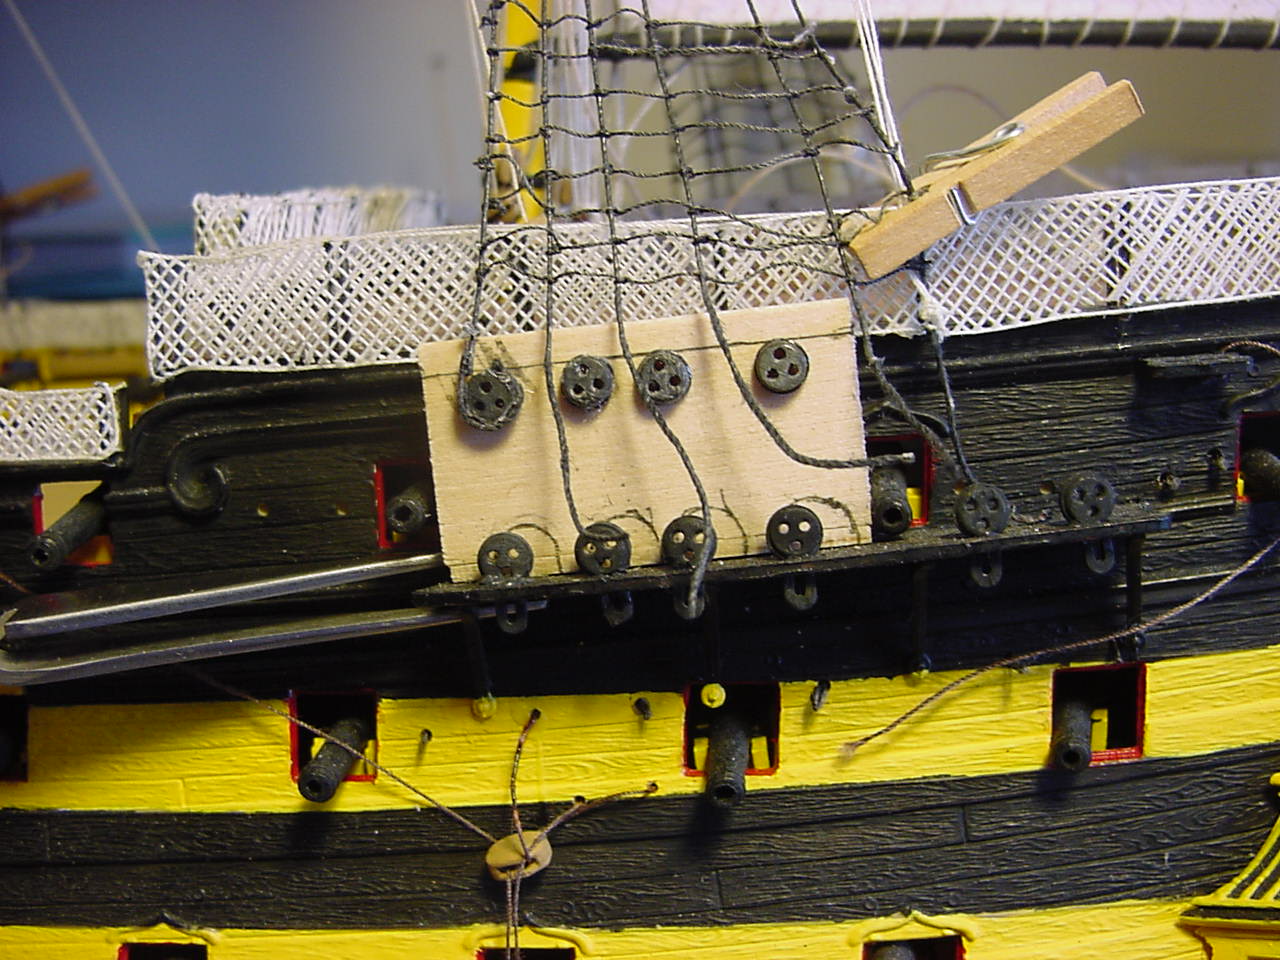
So lastly, a picture of the jig I built to get the upper deadeyes fairly aligned to each other. I’m also gluing the deadeyes to the jig, so I don’t have to worry about using needles or nails to try and keep the deadeye in place.
And BTW, in that last picture, I managed to knock loose the entire cannon carriage of the right most cannon. Hopefully I can get it glued back in place, before it winds up lost in the hull!
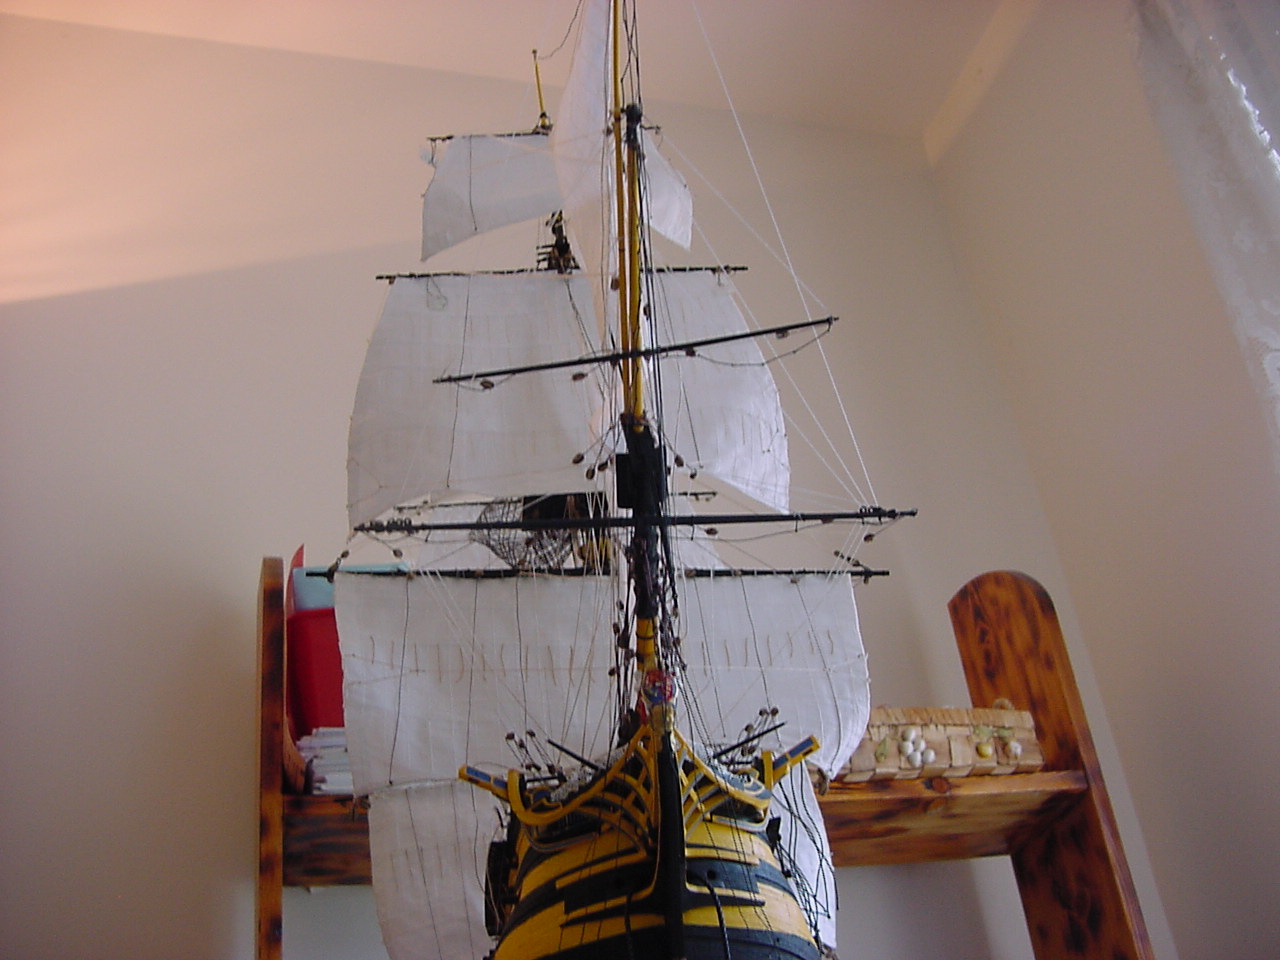
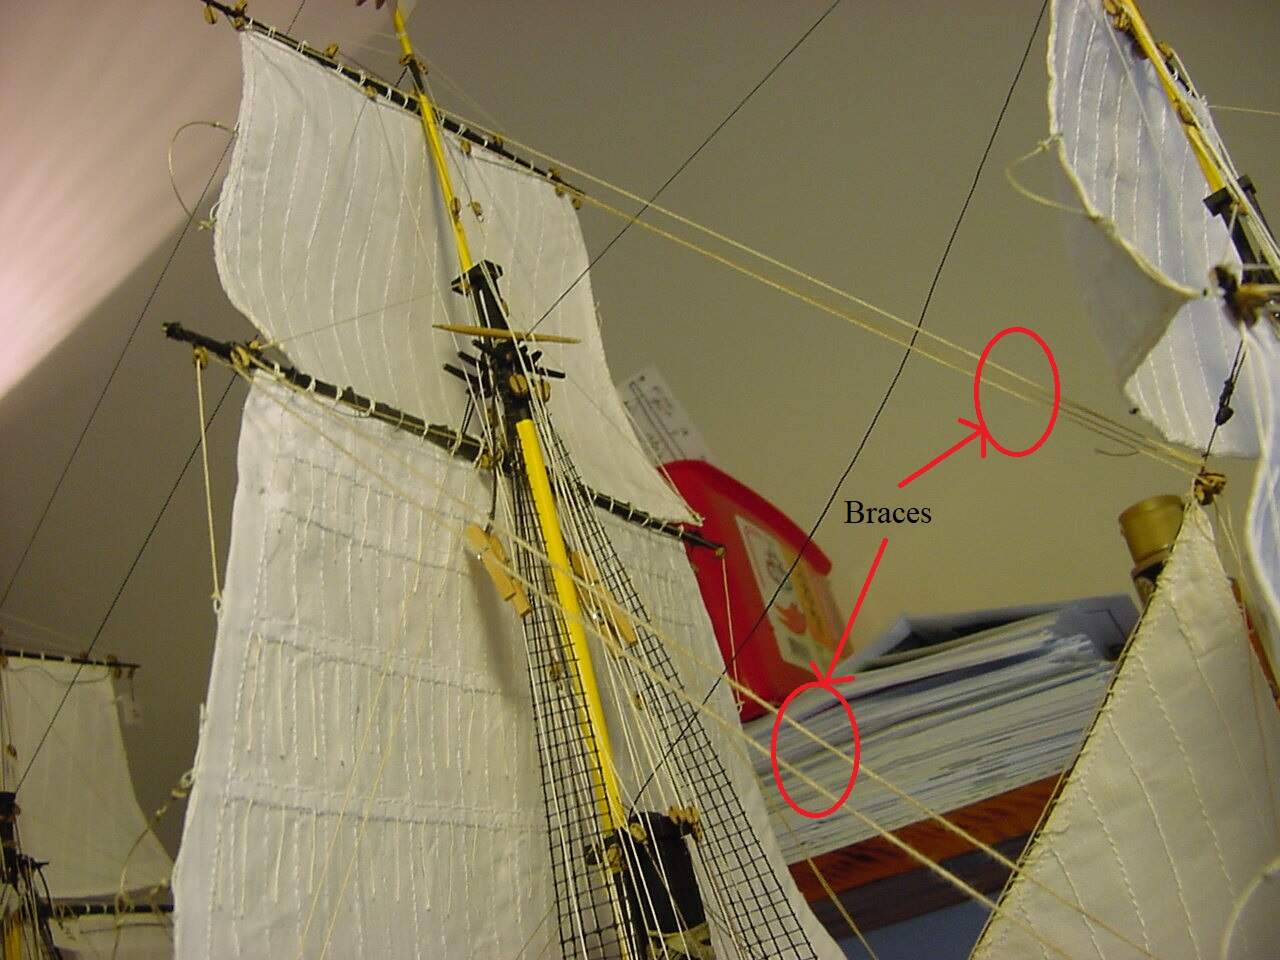
wow, the picture with the main sails taken in an upward angle looks really impressive - this is one massive model!
And your patience redoing the lanyards - of course I see your point - but still, this is adorable, I don’t know if I had the energy to redo all that. But of course, in the end you certainly will be happy for going that extra mile, it will show!
Great work, keep your motivation high!
OMG! As an occasional and very casual sailing ship modeler, my admiration for your relentless devotion to getting things right is boundless! It isn’t much fun to re-do work, but your commitment shows everywhere on this awesome build. Full respect!
Hi Jan! Long time no hear from you. You’re right - that picture with an upward angle really does show how big this model is. But the only reason the picture is oriented that way, is because I wanted to get the brace blocks of the main top yard in the frame, and that was the only way to do it. And then I got to wondering, well, how far above the deck is that main top yard? By my calculations, it’s about 71 feet (21.6 meters) above the deck.
Actually, re-doing the deadeyes is actually keeping me motivated - maybe I’m getting my technique perfected? But yes, I’m quite “fired up” to do this “renovation” work!
Thanks again for taking the time to read this blog, and leaving your wonderful comments.
Hello, Mr. Reynaga!! Thanks for looking at my blog. Actually, having a do-over on those deadeyes is enjoyable, as I’ve had some practice elsewhere on the ship in making up the deadeyes. I guess I finally sort of know what I’m doing!
Your line about “relentless devotion to getting things right” - well, you know, this model is so huge, I think any errors are going to stick out like a sore thumb. And speaking of relentlessness, I’ve been watching your construction of the motor launches on your Hatzazuki build (sorry for the spelling!). I can’t imagine trying to construct the props and deck cleats the way you have for those launches. Those thumbnail-size launches! Simply superb!