Tim, I was looking at this one on scalemates and it says the kit has just over 2100 parts … Is that right ? And if so, with all your tweaks and add on’s and refinements… What do you think the ball park figure for parts is now as it stands uncompleted ?
1 Like
Hi John,
Yes, that’s correct, this kit has 2100+ parts. But a third of that number is given over to the cannons - 6 total pieces for the carriage & barrel, plus all the gun port lids. So just the cannons alone account for about 725 parts, plus a couple of spares, then you have all the various blocks (maybe another hundred?), as well as the deadeyes (maybe another 80 or so parts), plus all the clear parts for the cabin windows, and this, that, and the other, it all adds up. As a ball park figure, I’m guessing there might be about 200 parts to go (and that’s counting the gun port lids).
Like your Victory, I’m pretty much building this OOB. The only tweak/refinement was getting some aftermarket cloth sails - I just couldn’t use those vacuum-formed sails that came with the kit.
2 Likes
Thanks Russell! I’m getting so near the end, I can almost taste it!
I see the flag you use next to your name isn’t the Aussie flag…did you move away?
2 Likes
Ah, yes the flag change: in recognition of a family vacation in Czech ![]()
1 Like
That’s actually quite impressive how much detailing comes in the kit… Going that extra 30000 miles with the tweaks on the sails will really be worth it…
Once the full rigging goes on they look so impressive… A real masterful job you’re doing on it… Pleasure to watch …
1 Like
Hi Tim,
following along silently all the time!
It’s just that real life/job/moving etc. was way more time consuming than I expected, so commenting here and my own workbench have been neglected. But we all see those times…
I hope to be more frequent again, with commenting and build progress, even though there will be another few weeks in fall where I will be pretty busy with non-model-related stuff…
Looking forward to see your progress, all your rigging and working with thread in general continues to leave me in awe!
Cheers and thank you,
Jan
1 Like
Oh boy, moving! One of my least favorite activities.
Hopefully I can give an update in a day or two.
Tim
So, in trying to think up a way that I could attach the upper deadeye to a jig, so that the upper deadeyes would all line up in a straight row, I got to thinking about drilling a hole into the jig, and I could set the deadeye into the hole, and then wrap the shroud around the deadeye. Well, of the two drill bits I used to drill those holes, one is too small, and the other is too big. So doing some more thinking about it, I came up with the idea of using some double-sided tape. I tried it out on the last 2 deadyes on the mizzen mast set, and I’m quite pleased with the result. In the picture below, the jig with the double-sided tape is in the center of the photo:

And this picture shows 4 of the 6 deadeyes completed. The fourth deadeye didn’t turn out so good.
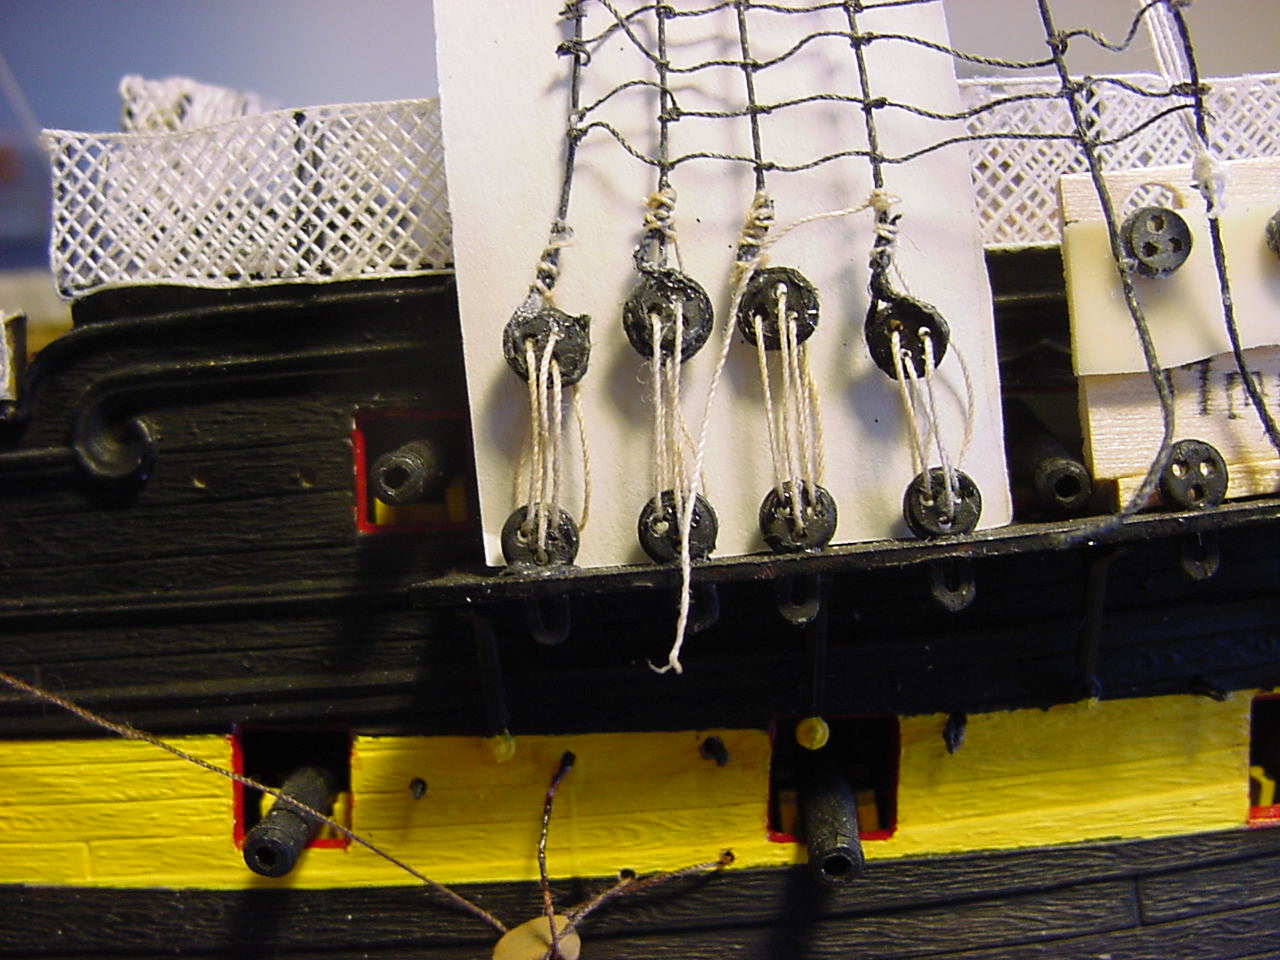
So, since taking those photos, I finished the last 2 deadeyes, so now I’m going to tackle the deadeyes on the mizzen top.
Cheers,
Tim
4 Likes
Very nice work and good solution to aligning the deadeyes. Looking at yours and the detail and work you’re putting into it Tim, I’m so glad mine is only a 180 scale lol…![]()
1 Like
Well, I’m only a month behind schedule, but I finally got the last of the mizzen deadeyes re-worked a week or two ago. Here’s how the starboard side turned out:
And the port side:
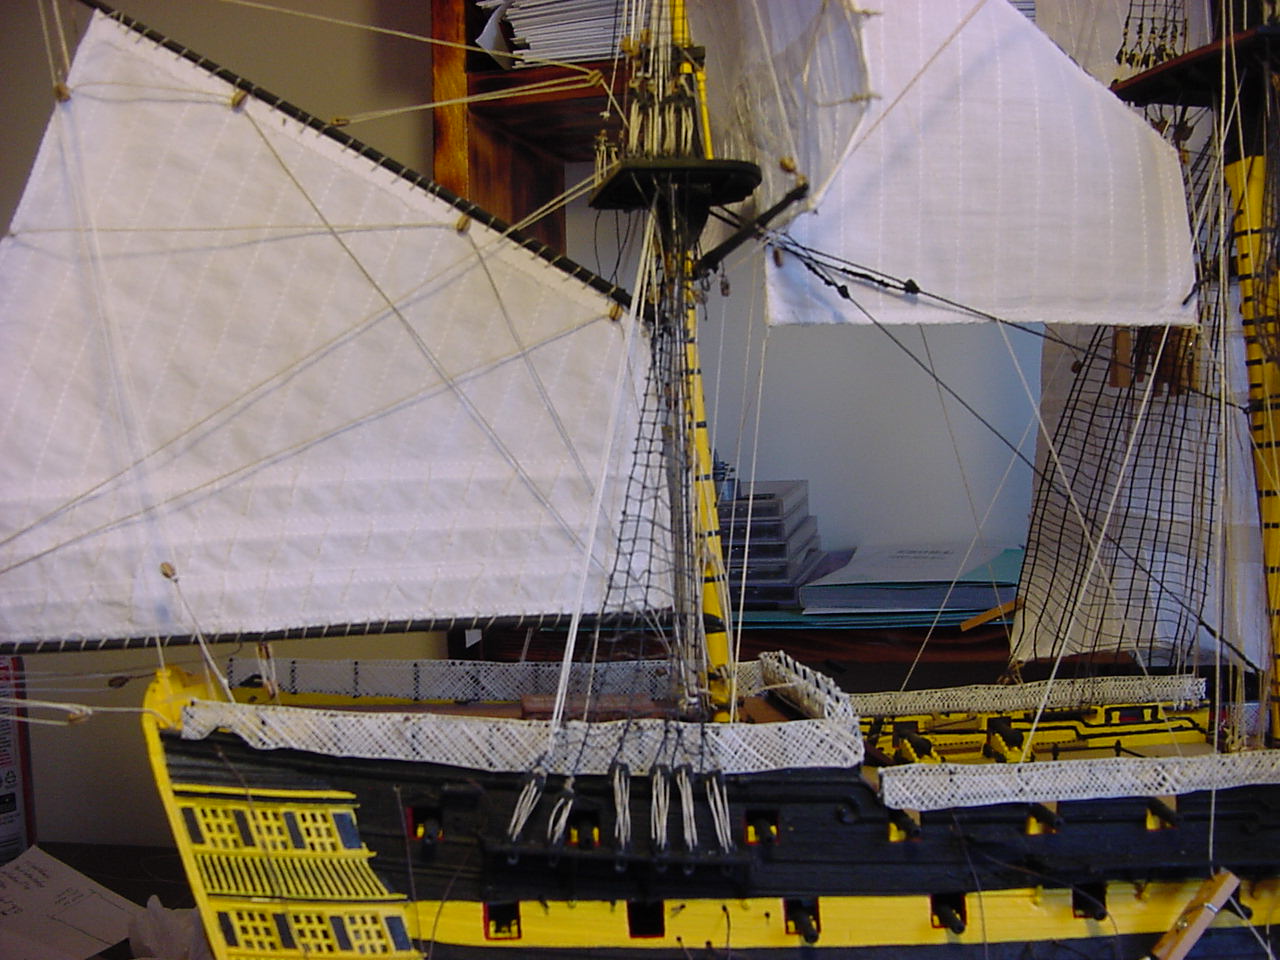
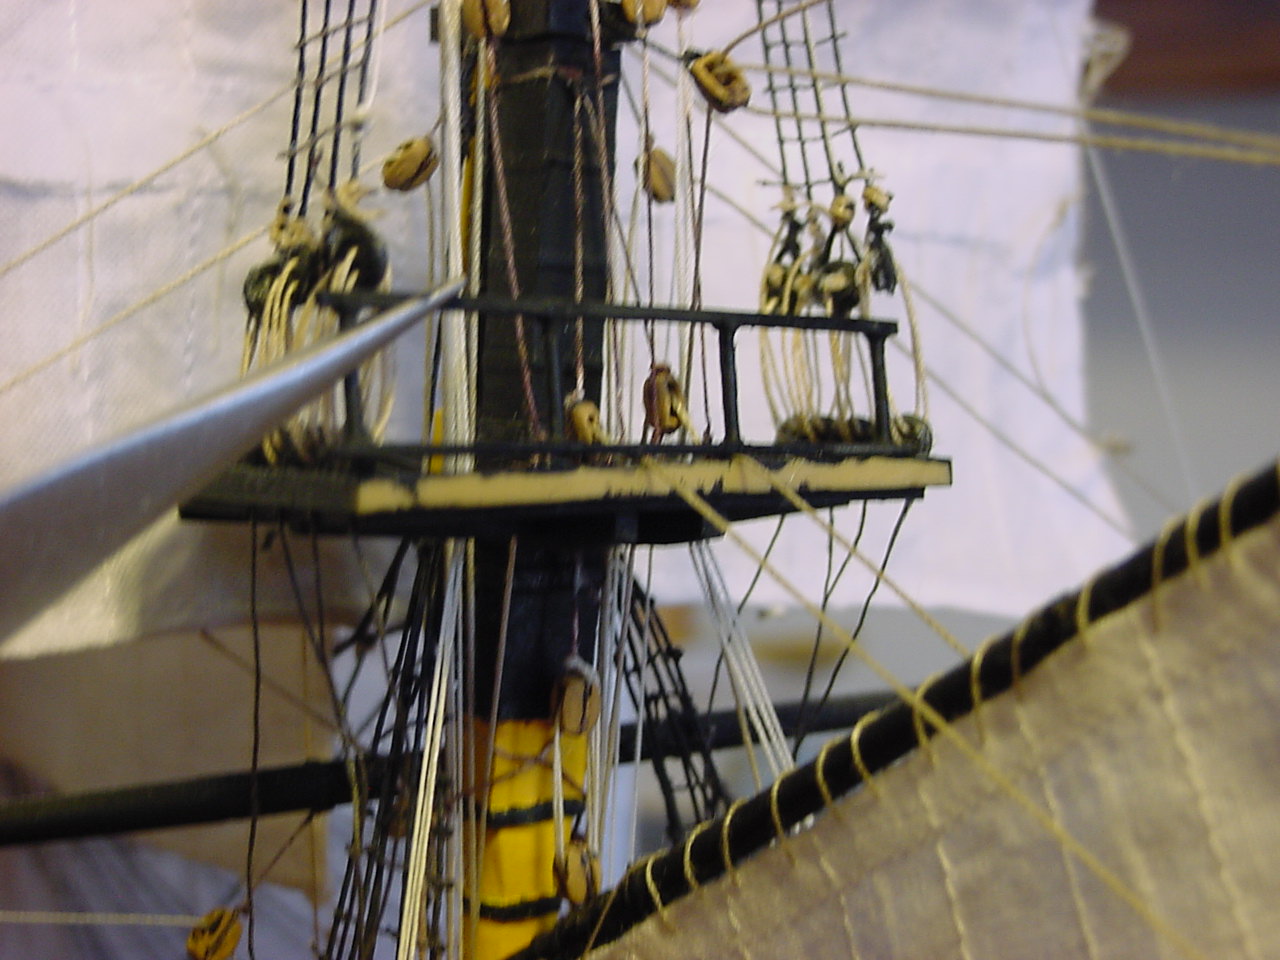
This is a pic of the mizzen topgallant braces (the horizontal thread) and the topgallant bowline. Both of these threads go into the same block that is under the mainmast trestletree.
And here’s a problem I discovered a while back that I was going to have: The two lines coming from the spanker boom lay right against the mizzen top. Well, the railing still has to be installed, and those two lines are in the way! My plan is to just slice through the bottom of the railing, slide the railing around those 2 lines, and glue it back together. The other problem with the railing is, do I glue it to the top of the top, or glue it to the backside of the top? There’s no spacing on the top slide the railing in, and the top itself is thicker than the bottom part of the railing. I’ll probably just glue it to the “backside” of the top - that’s the unpainted light tan section of the top that’s in the photo.
The lines that are in the way:
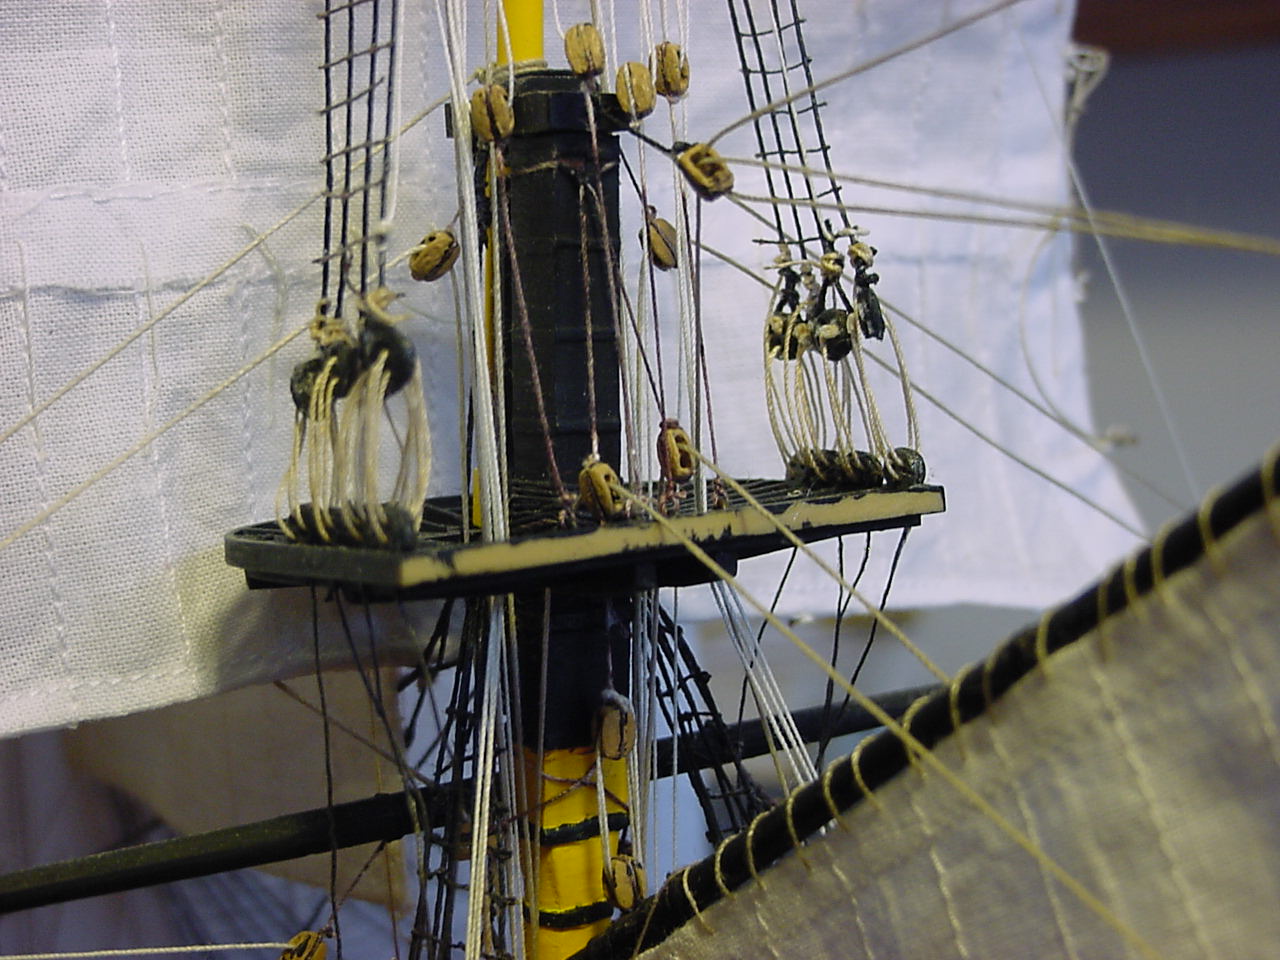
And the tentative position of the railing:
I’m close to finishing the bulk of the rigging - I counted about 10 pairs of lines still to install (not counting the fore and main sail sheet & tack lines), then tackle the lower deadeyes on the fore and main mast. Maybe that’ll get done by Christmas? ![]()
As always, thanks for taking a look! Hope everyone had an enjoyable Halloween!
Tim
5 Likes
Painstaking work Tim… But it is looking terrific… The rigging is really outstanding … I am so glad mine far easier attempt is now finished… Will be good to watch yours now ![]()
1 Like
Thanks John. I’d probably be able to get more done each time I work on Victory, but my fingers keep cramping up!
2 Likes
No need to rush her. I think these sort of builds have to be paced out and done properly to do ships the justice they deserve and show off the builders skills and dedication.
1 Like
I agree, no need to rush these things. There have been plenty of times when I wanted to work on Victory, but just didn’t “feel it”.
From looking over my own construction notes, it looks like I have one more rigging line to put in (the main sail bowline), then I’ll have to start work on the lower deadeyes for the fore & main masts. The last bit of rigging can’t be installed until the mainmast deadeyes & shrouds are in place, as there are multiple lines that start on the shrouds, go aft towards the mizzenmast, then come forward again to a block on the shrouds. The only negative thing I see there, is that there won’t be much room to belay the lines to any of the fife rails, since the shrouds will be in the way. I guess I’ll just have to wait and see how things turn out!
Here’s the dream: get the shroud/deadeye combinations completed by the end of the year!
2 Likes
You are so right! I do all sorts of things at my job that I don’t necessarily feel like doing, and that’s ok… but to do that with our hobby would just be wrong! It’s like that with my IJN Hatsuzuki build… when I feel it, I enjoy working on her, but otherwise she just has to wait until I feel inspired again.
Anyway, I’m glad you are feeling inspired to plug away on HMS Victory once more. I’m in awe of the work you are putting in on her - she’s coming together wonderfully, keep it up! ![]()
![]()
1 Like
Hey Tim R.! Thanks for your comments. I must admit, you’re one to talk about being “in awe of the work…” - those little 20mm cannons you’ve built for Hatsuzuki are incredible!
I tried working on Victory today, but wound up having my fingers cramp up on me straight away, so I only managed to get one line tied down…maybe later this evening I can work on her for a while.
I see, too, it looks like the last post you had on Hatsuzuki was back in July - I hope nothing major is slowing your work down!
Thanks again for your words.
Tim
2 Likes
Naw, just distracted with the little Pyro Santa María ![]()
1 Like
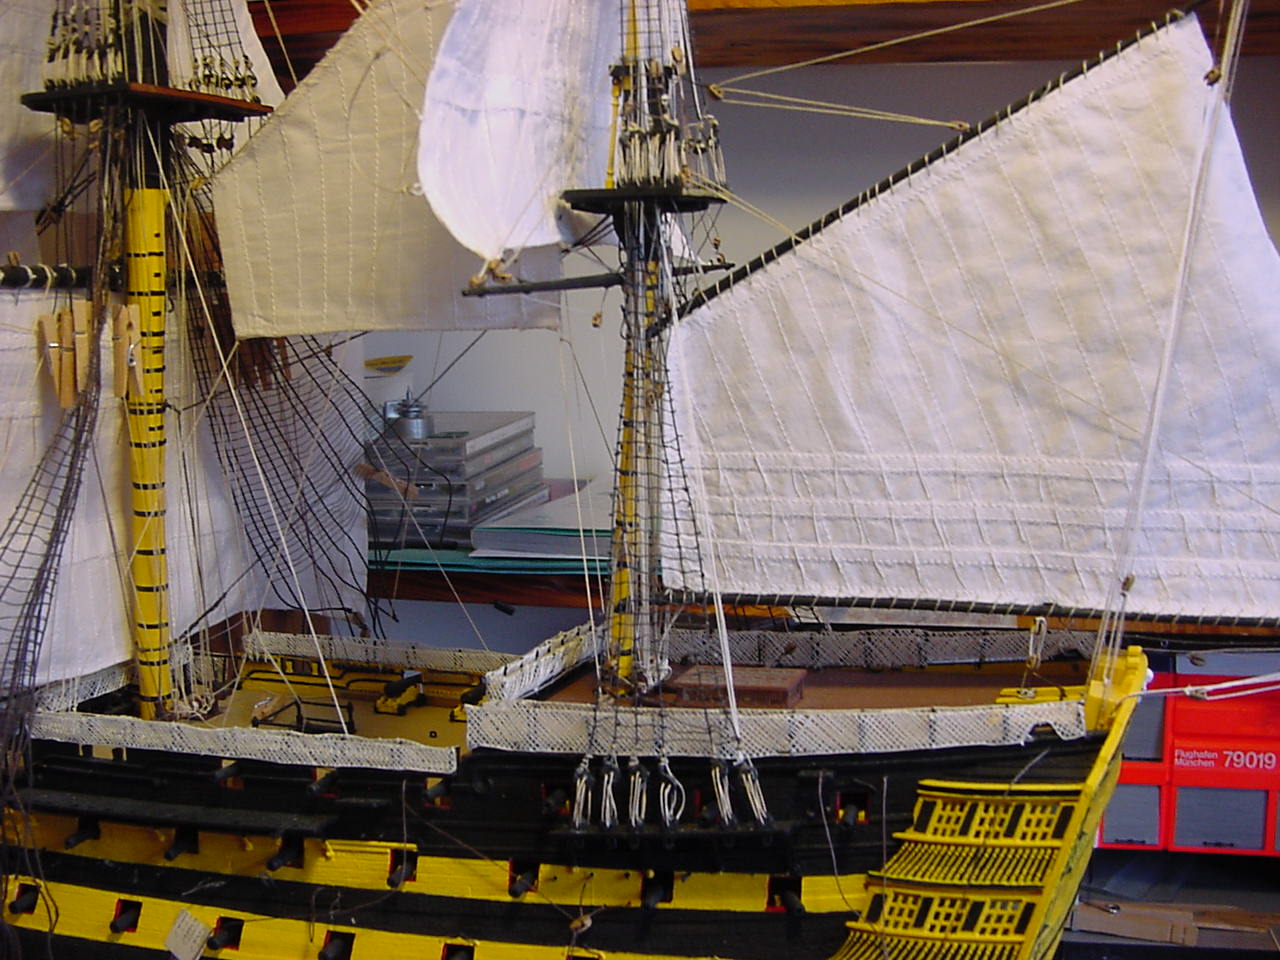
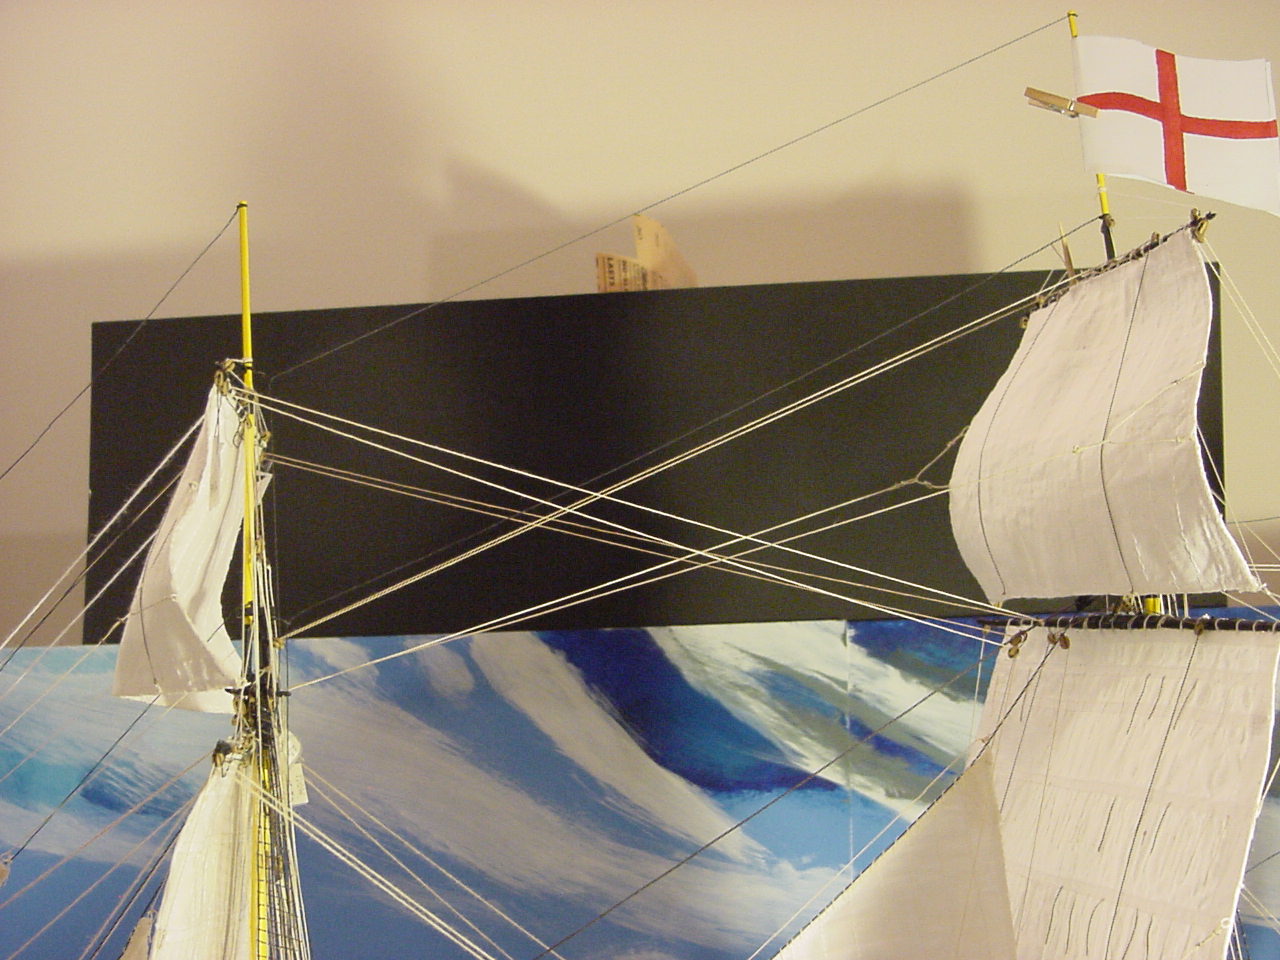
Well, pretty much done with the bulk of the rigging. I figure there’s about a dozen lines left to install, but that installation depends on getting other things done first.
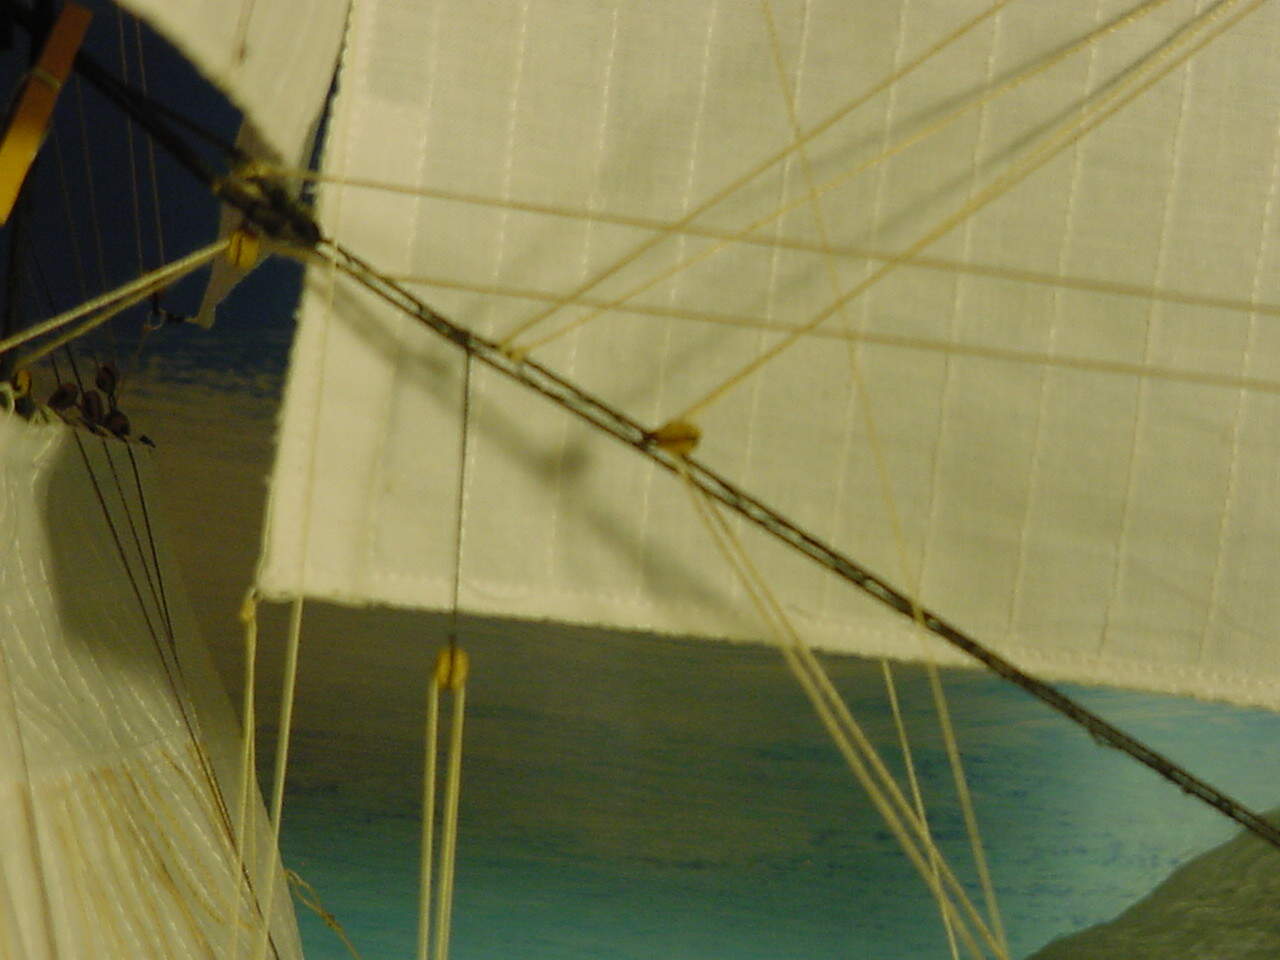
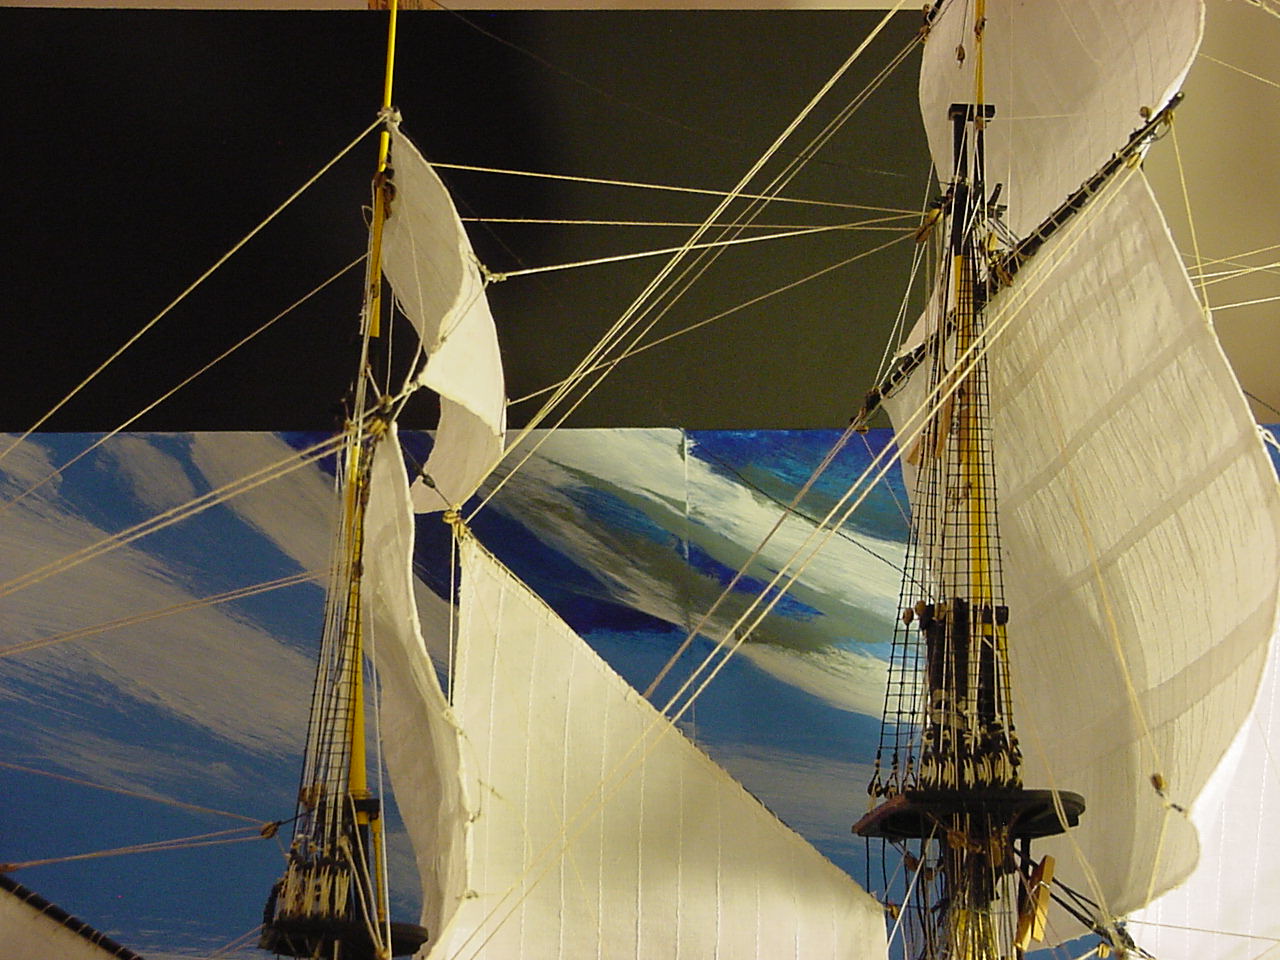
Here’s a semi-clear photo of the foresail buntlines belayed - they’re the six dark brown lines tied down to some timberheads. In between the buntlines you can see the ship’s bell and its belfry (that’s the chocolate brown structure), with a line tied to a cleat on the belfry structure. Oddly enough, Heller, in their instructions, just had one cleat being put on the structure, even though there’s a mating hole on both parts of the structure for a cleat. So I went ahead and added the other cleat, just to make it look symmetrical, and to give me a place to belay that particular line.

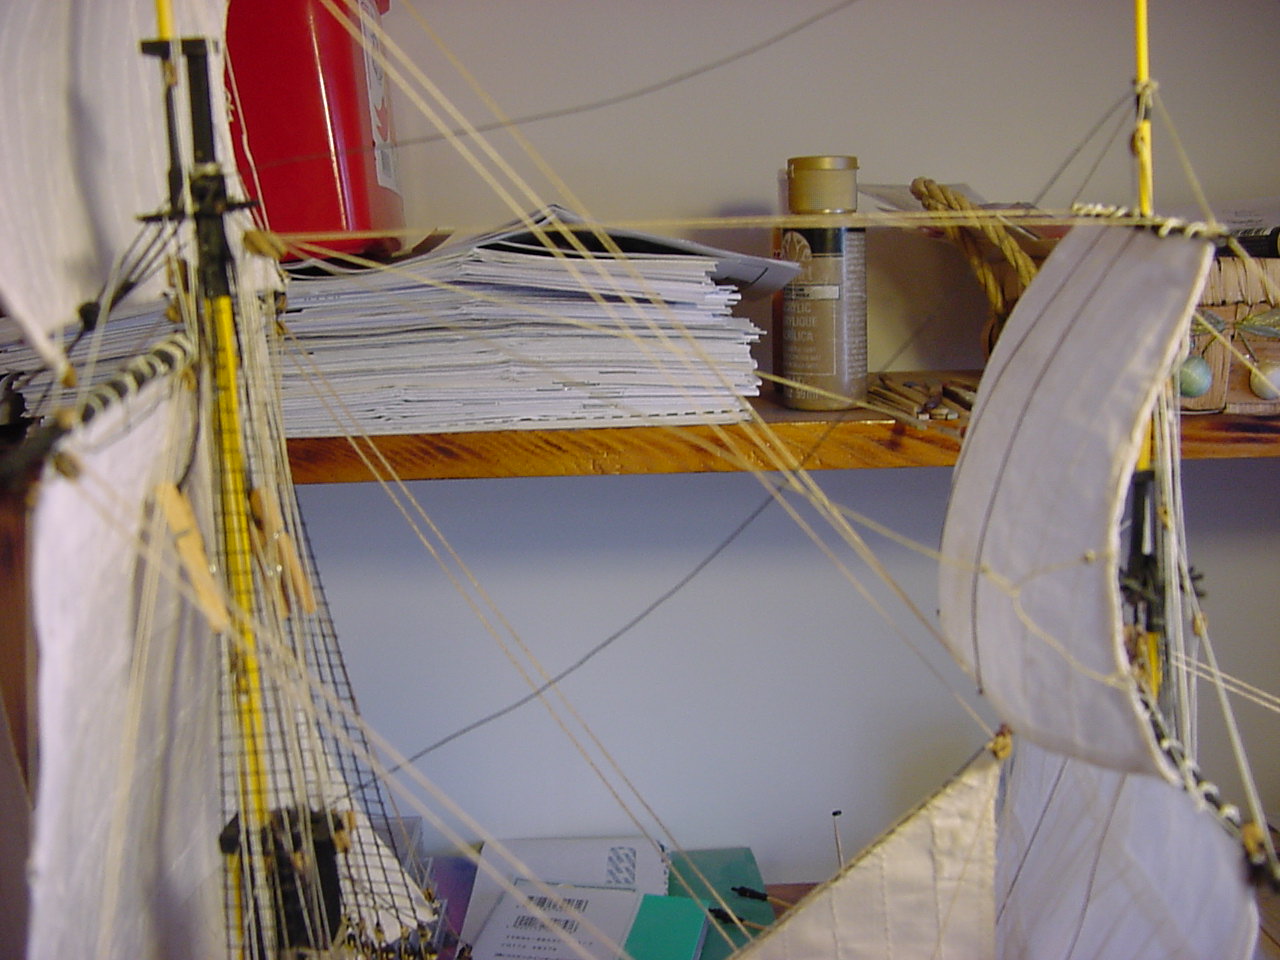
The next pictures are just some close-ups of more rigging, and how the lines started on a stay, go off to a block somewhere, then come back to another block on the stay, then down to its belaying point.
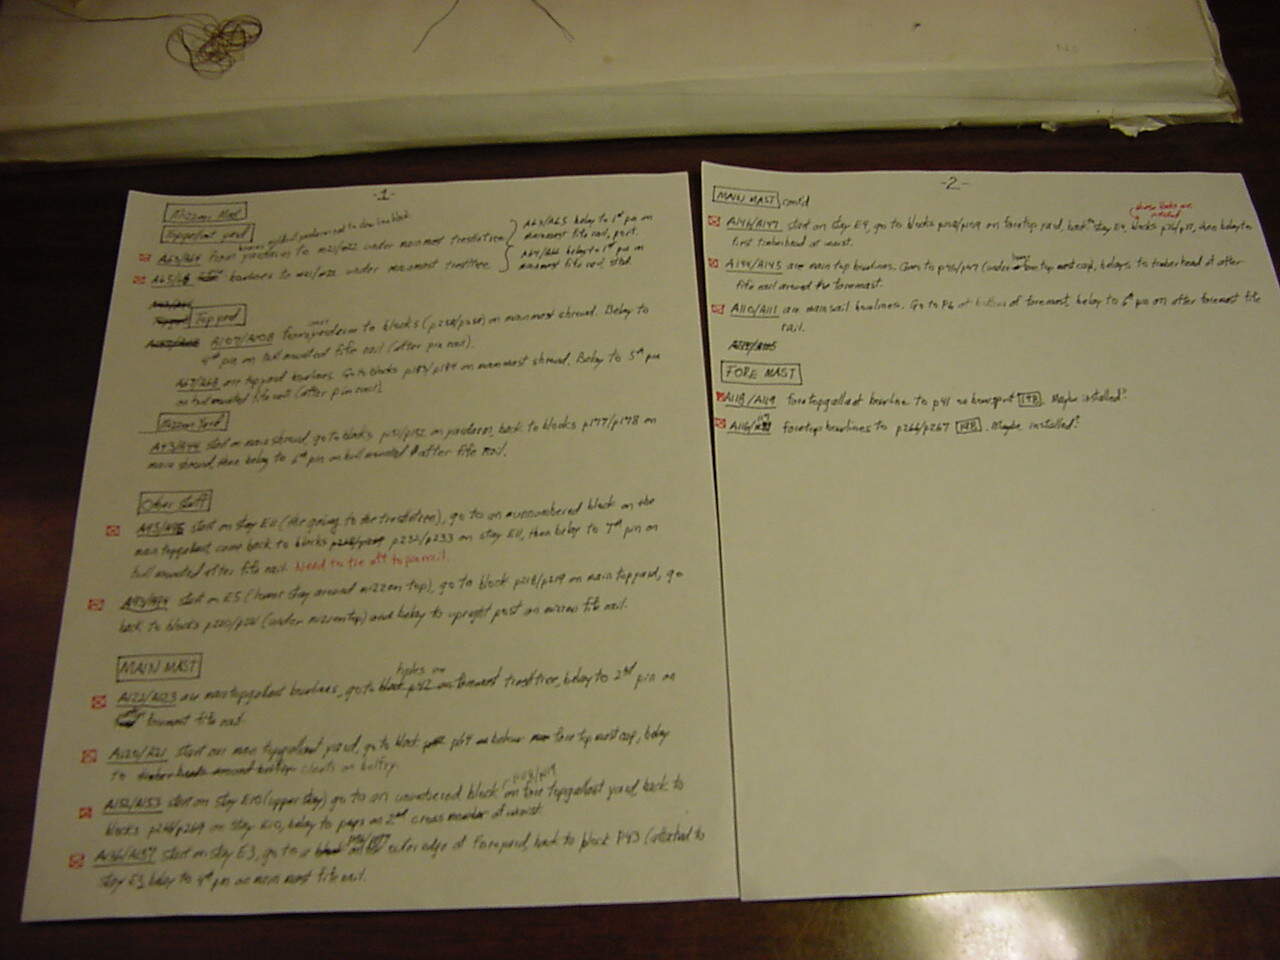
This last photo is showing my handwritten notes about these final steps of the rigging. The important thing here is not what’s written, but the little red x within a box alongside my notes - the red x means the rigging has been installed & tied off.
In the near term, I can probably finish painting and get installed the railings for the fore and main mast tops, and get the lifeboat davits put in a place. Actually, I’ll probably use those items to forestall having to get the lower fore and main mast shrouds put in place.
So with that, I wish everyone a Happy Thanksgiving. I already cooked my turkey breast roast, and made a mincemeat pie. So that just leaves making some stuffing or potatoes tomorrow, and figuring out what frozen veggies I want to eat.
Thanks for stopping by!
Tim
5 Likes
Fantastic work Tim. Really does look amazing with how that rigging has turned out. ![]()
![]()
1 Like
I love seeing properly rigged buntlines and running them all the way to the deck is a bonus.
1 Like