Convoy!

Lovely work on your Vomag, Mike! I wouldn’t call it ugly, that was more or less the design of the 1930’s/40’s. Though it has indeed a large cowling. I imagine it was a huge truck.

I go some numbers smaller than Mike, not in scale but in size of the real deal. This will be my builds … :slightly_smiling_face:

I have opened up a build blog at the Automodeller Truck section where I will post my progress in detail.
Tempo A400 Lieferwagen + E400 Hochladerpritsche - Automotive / Trucks - KitMaker Network
But of course I will show here the main steps. I will start tomorrow and hope to have finished both builds for our model show in early May … :shushing_face:

Torsten
:beers:

8 Likes

Chop. File. Sand. Grumble some.

The mount for the “Organ” has been modified to fit the bed of the MM. I also assembled the rails for the rockets. And, as I’m trying to figure orientation of all the bits, I realized the gear was not supposed to be TWO pieces, but ONE! So, that’s been repaired. Fun stuff. The “box” in the clamp is, I assume, for the sight parts (that can be assembled on it’s tripod). I don’t plan to assemble that, but will put the legs in the back somewhere along with the box.

I have to make a “hootch” (canvas tent) for an M577 with Milliput in the very near future. I’m sure I’ll have enough left over from the scraps to make four sandbags to cover the feet of the frame.

Mike

10 Likes

Well guys, still at it on the panel van:

Trying to blend kit parts and evergreen - so far so good. I’m sort of considering leaving the back doors open. It turns out the bed on these trucks was wood panel, which just seems interesting to model - but, not as interesting is this is being built as a complete unit, so not sure if I want to try and prime and paint interior walls with it closed in. And of course, it seems pretty likely I’ll snap the panel doors right off along the way… :thinking: Of course the bed is wider than the doors, so I can’t make up a removable subfloor.

So a guy will keep pondering this. Maybe I can make the roof a piece that I can attach post painting? I’m not sold on this because I am assuming that I’ll need some putty and sanding to bring it all together - guess I need some more coffee :thinking: :smile: I haven’t given up on the idea just yet as it might just look cool enough to be worth the effort.

Cheers
Nick

14 Likes

Great save with the legs and feet… And the sandbags will be the perfect fix. :+1:

1 Like

Looking good. Some nice scratch building as well to get it where you want it :+1:

1 Like

So, a post apocalyptic heavily armed truck would need extra fuel.
So that needs a fuel tank and mount.

And a 200 ltr drum which the survivors modified.

Needed to add some details for the filler cap and fuel feed pipes to the kit fuel tank.

And the added fuel line piping from tank to engine.
Made fuel tank mount.

And kit fuel tank.

Stay tuned truckers… :+1:

9 Likes

@ Angel. Always love seeing your special diet of three basic food groups… PE, copper and Styrene! Awesome!

@ Torestan. Thank’s! I’ll pass your approval along to the ‘Ministry of Ugly German Wagons.’ :tophat:
Looking forward to your Tempo!

@ Michael. That works, and no foot loops were hurt during the procedure. :hocho: Looking good! :+1:

@ Nick. The van is taking shape nicely — cool! Another food group worth noting, for sure… Styrene, putty and plenty of coffee to wash it all down! :coffee: :coffee: :coffee:

@ John. Nice fuel modifications! … Staying tuned on whatever channel this is… SQUAWK! :studio_microphone:

––––––––––––––––––––––––––––––––––––––––––––––––––––––––––––––––––––––––

Cover me! I’m goin’ in! …

Here’s today’s effort on the VOMIT… I mean VOMAG :laughing:

Since the tailgate will be posed down, I hacked-off the rear of the canvas cover. Then, I added the bows to the inside. I’ll add tissue paper to the top edge later to resemble this reference photo.

D1292BE7-F073-47B2-AEB5-BF3568701CBE_4_5005_c

.

Kind of unnecessary detail, but maybe it’ll give the illusion of supported canvas instead of just a chunk of Styrene. :tipping_hand_man:

• Evergreen Styrene Rod (218) .020” (0.50mm).

Inspector 172: Das Boot? :face_with_monocle:

No, it’s for the VOMAG.
Inspector: It would not float anyway with these sinking marks. :face_with_monocle:Ach! I’m getting seeingsick! :nauseated_face:
Do you mean seasick? :bucket:
Inspector: No. I’m growing sick of seeing your substandard work! … Where is the bomb?! :bomb: :face_with_monocle:

I seriously need to find a large body of shark-infested water for the Inspector… :ocean::shark:
—mike :man_facepalming:

9 Likes

Nice frame work detailing Mike… Looks a load better now :+1:

2 Likes

Your going need a bigger boat.

4 Likes

Wow - I can’t keep up with all the cool posts here! Between Torsten’s truck with 25% less wheels than average, Nick’s panel-beating, and of course Mike’s super-bomb transport I’m stunned. Still no nearer to starting mine, but great to see everybody getting really stuck in!

6 Likes

What’s that about “a load?” … Okay, here you go! :bomb:

Keep on Truckin!’ :grin:
—mike

9 Likes

Thanks Ryan, Matt, Johny, Peter and Mike!

Plenty of nice builds here and I especially like Nick’s deep surgery session!

To wrap up a week, when I had both desire and time for modelbuilding, I filled some holes on ICM wheel rims:

While the KHD S3000 used 8 holes wheel rims, the Magirus S330 had wheel rims on front and rear axles with only 2 holes:

To be honest- I did see some pictures of S330 trucks with mixed wheel rims(front-2 holes, rear-8 holes), and on the pictures of Bulgarian S330 trucks the rear wheel rims are bit obscured. But as I mixed plenty of Miliput, I decided to make all ICM rims 2 hole ones.

Will use some Mr. Surfacer 500 and sanding to make them look the part.

Cheers,
Angel

9 Likes

A lot of people (me) would of not noticed that if I was building it …

4 Likes

I was told about that difference by a modelling buddy of mine(Ilian Filipov a.k.a. ilfil, a.k.a. The Modelling Gestapo).

Not that I had noticed еither…
:wink::joy:

:beer:
Angel

6 Likes

What he said :wink:

Great work all, I hope to have an update myself at some point.

Jimbo

Wow, you guys are all doing some great work.

1 Like

So this is my project for the convoy build as stated before the starting point.

I think it’s basic little truck. Simple art work, but gets to the point.


Low parts count, but lots of small parts. Clean molds, the usual ICM quality.

So I am adding some detail parts. Model Trends 3D printed wheels and Microdesign Photo etch parts with real wood storage boxes. Time to brush up on my Russian (instructions are all in Russian).

So this is the engine. Simple, easy and small. Only two of the photo etch parts so far. The spark plug wiring goes to the firewall, so I will do that once I get the frame and basic body together.

And that is all I am going to be able to do for right now. I am leaving town and eventually the country and will not be back till the end of March. What a way to start this build group. I will keep tabs on the builds and look forward to seeing the work you guys do. Maybe if I get a chance to visit a hobby shop overseas, I will pick up some things for the build. Or maybe something else cool. I will keep watch and in the mean time, keep that convoy rolling!

11 Likes

Good morning gents,

@justsendit , you know Mike, that framing does the trick! Hopefully you’re trying my more coffee technique!

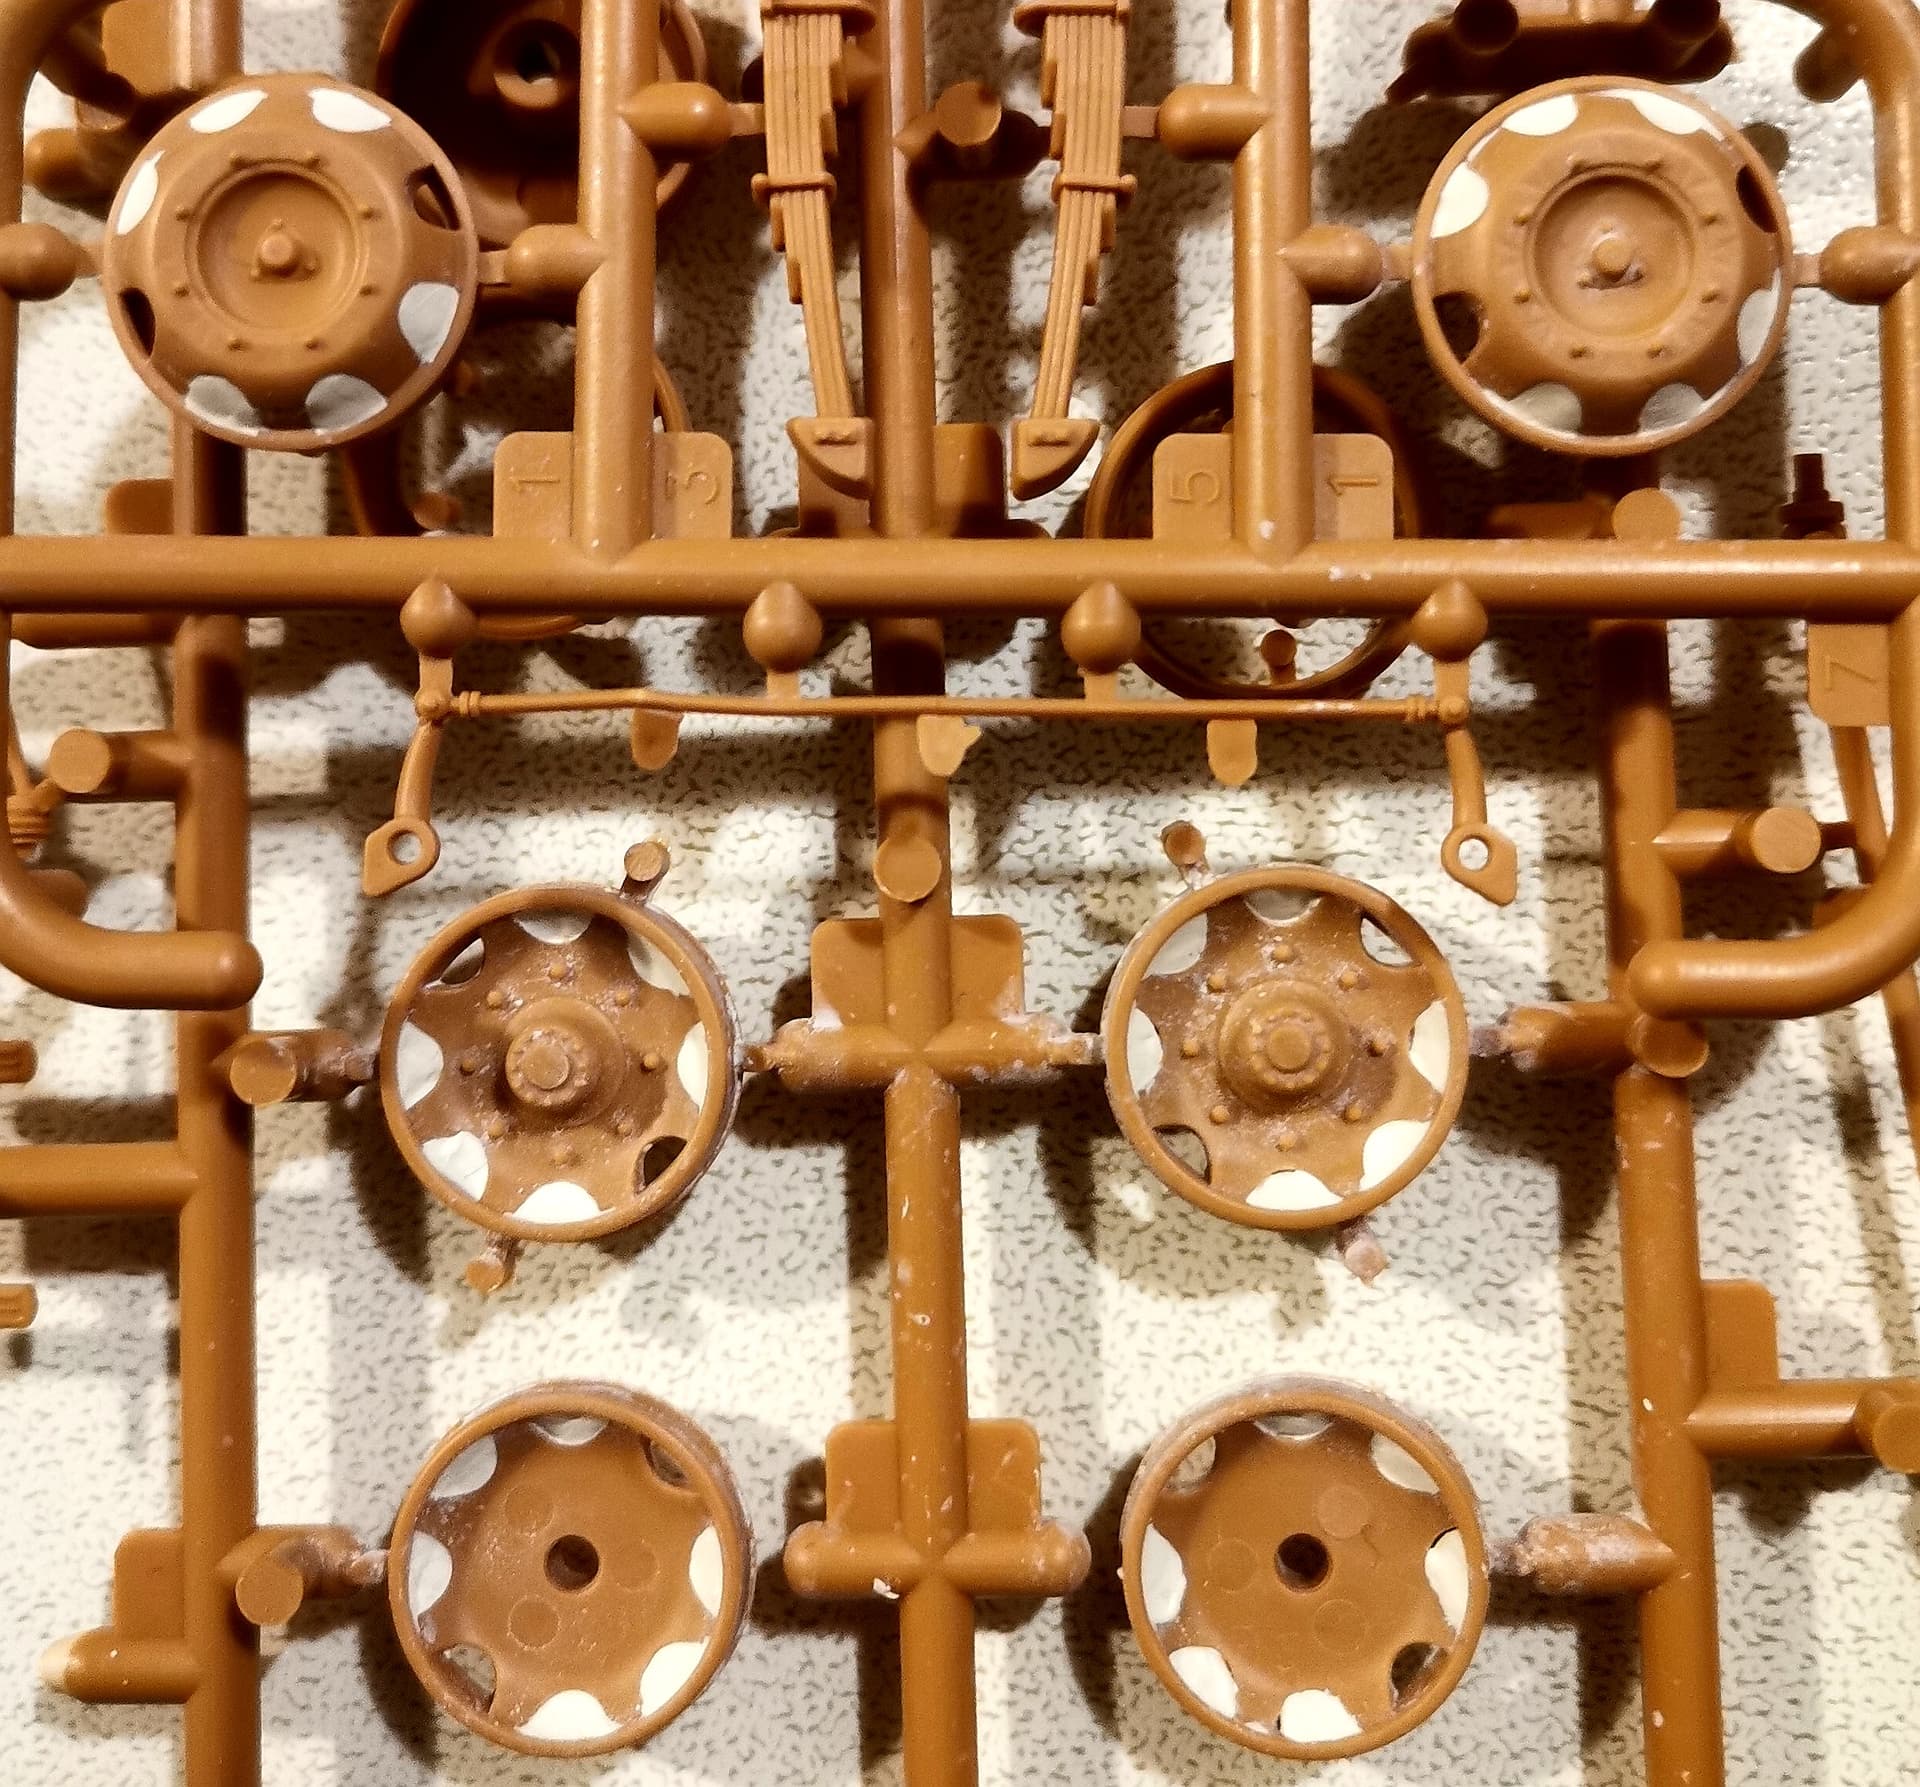
@ayovtshev wow Angel - you are dedicated! and I’m surprised you didn’t know, right off the top of your head of those wheel variants! :smile: I think we are taking different approaches on our builds - for this one, I am quite willing to allow for some artist’s license!, as you will see below:

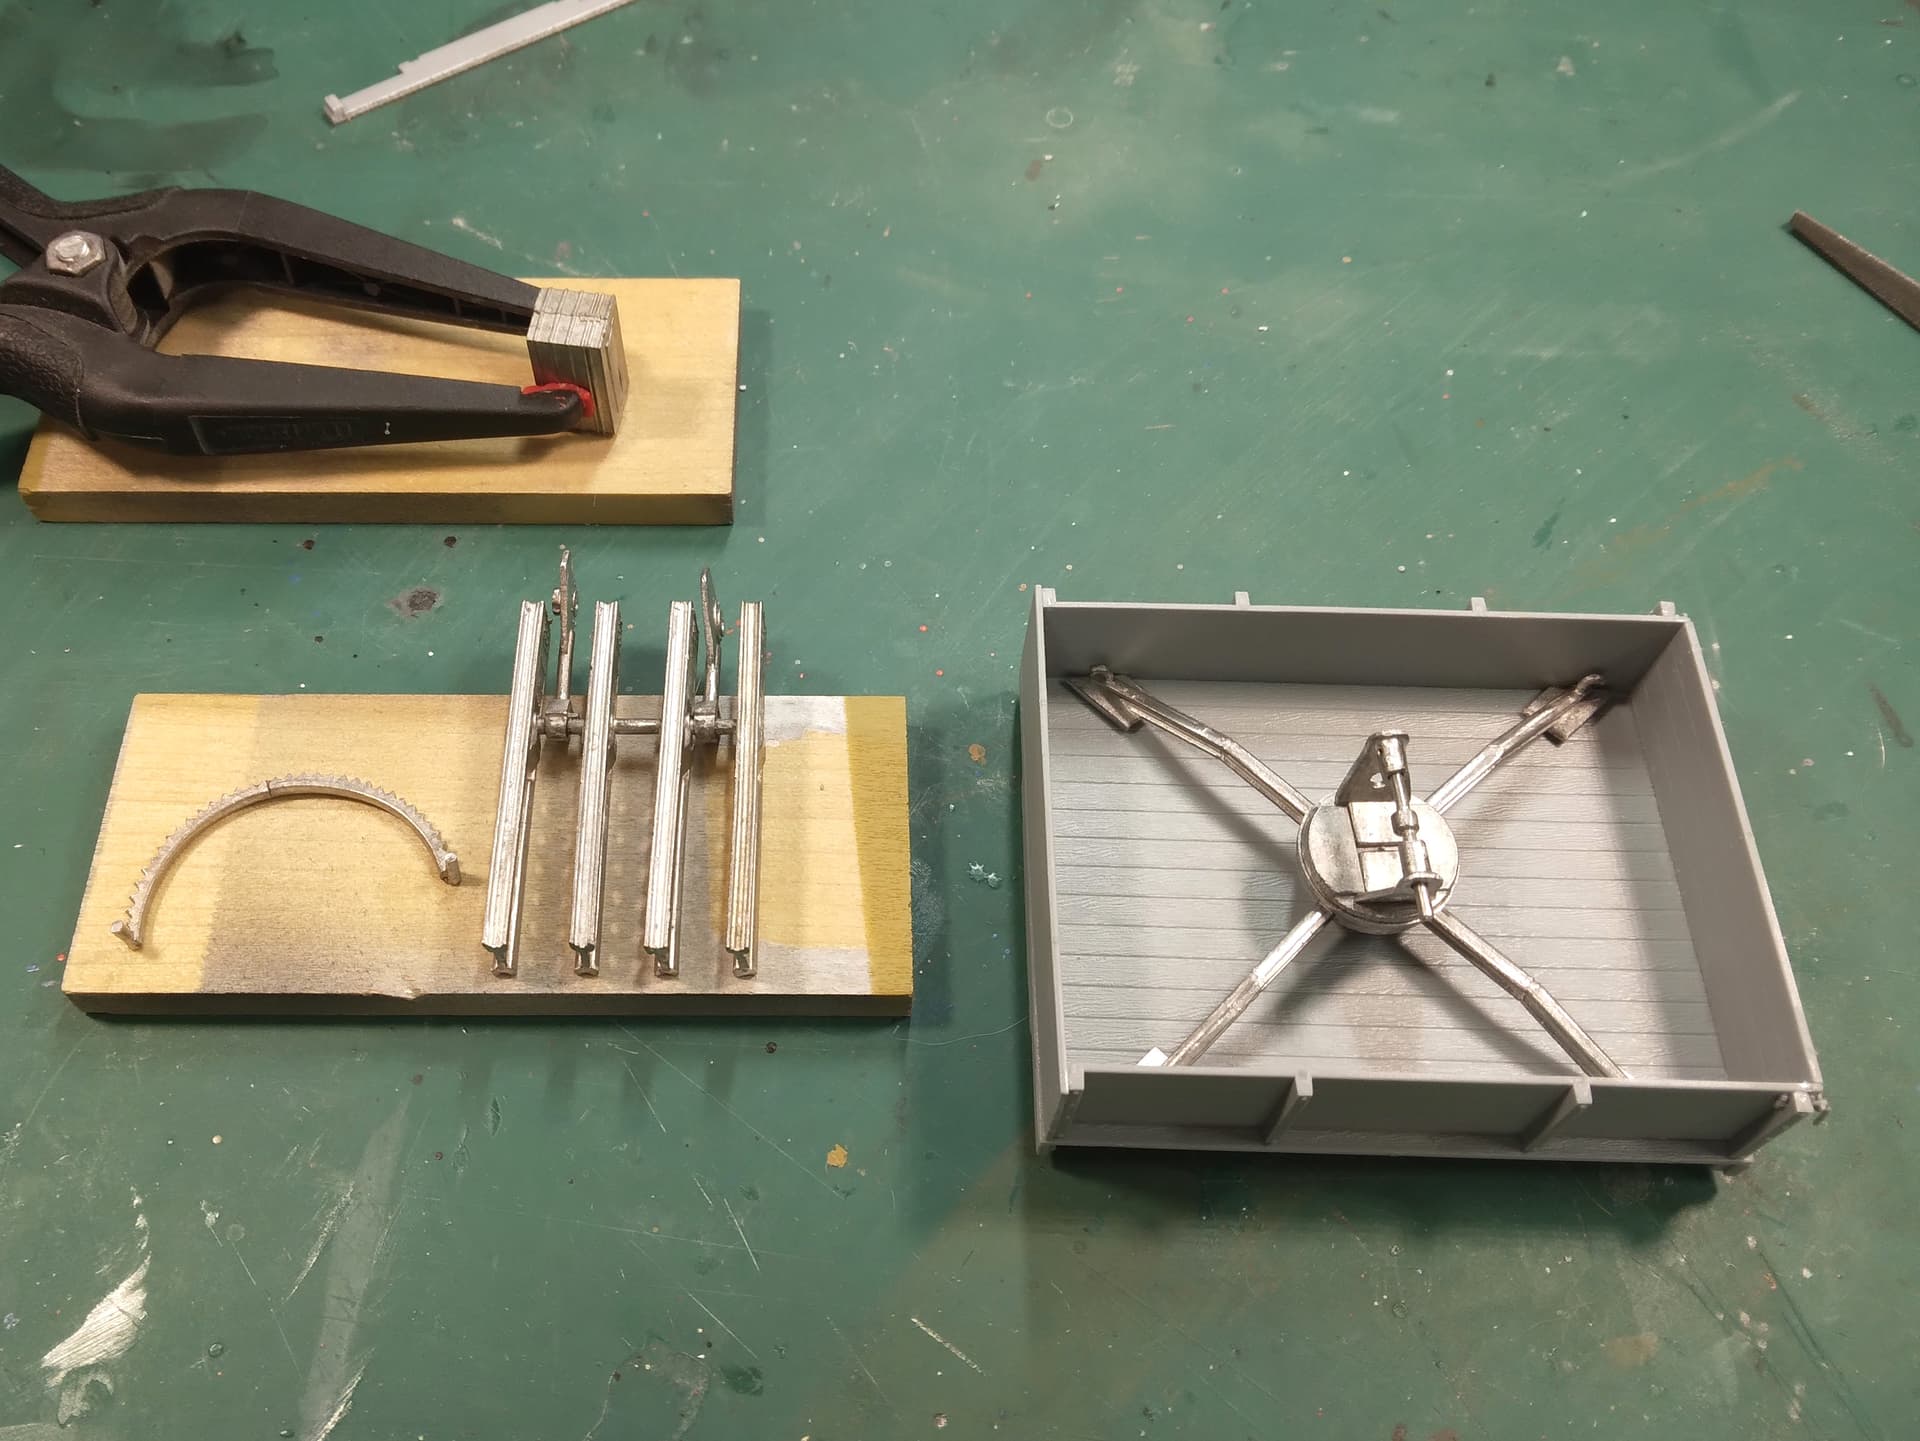
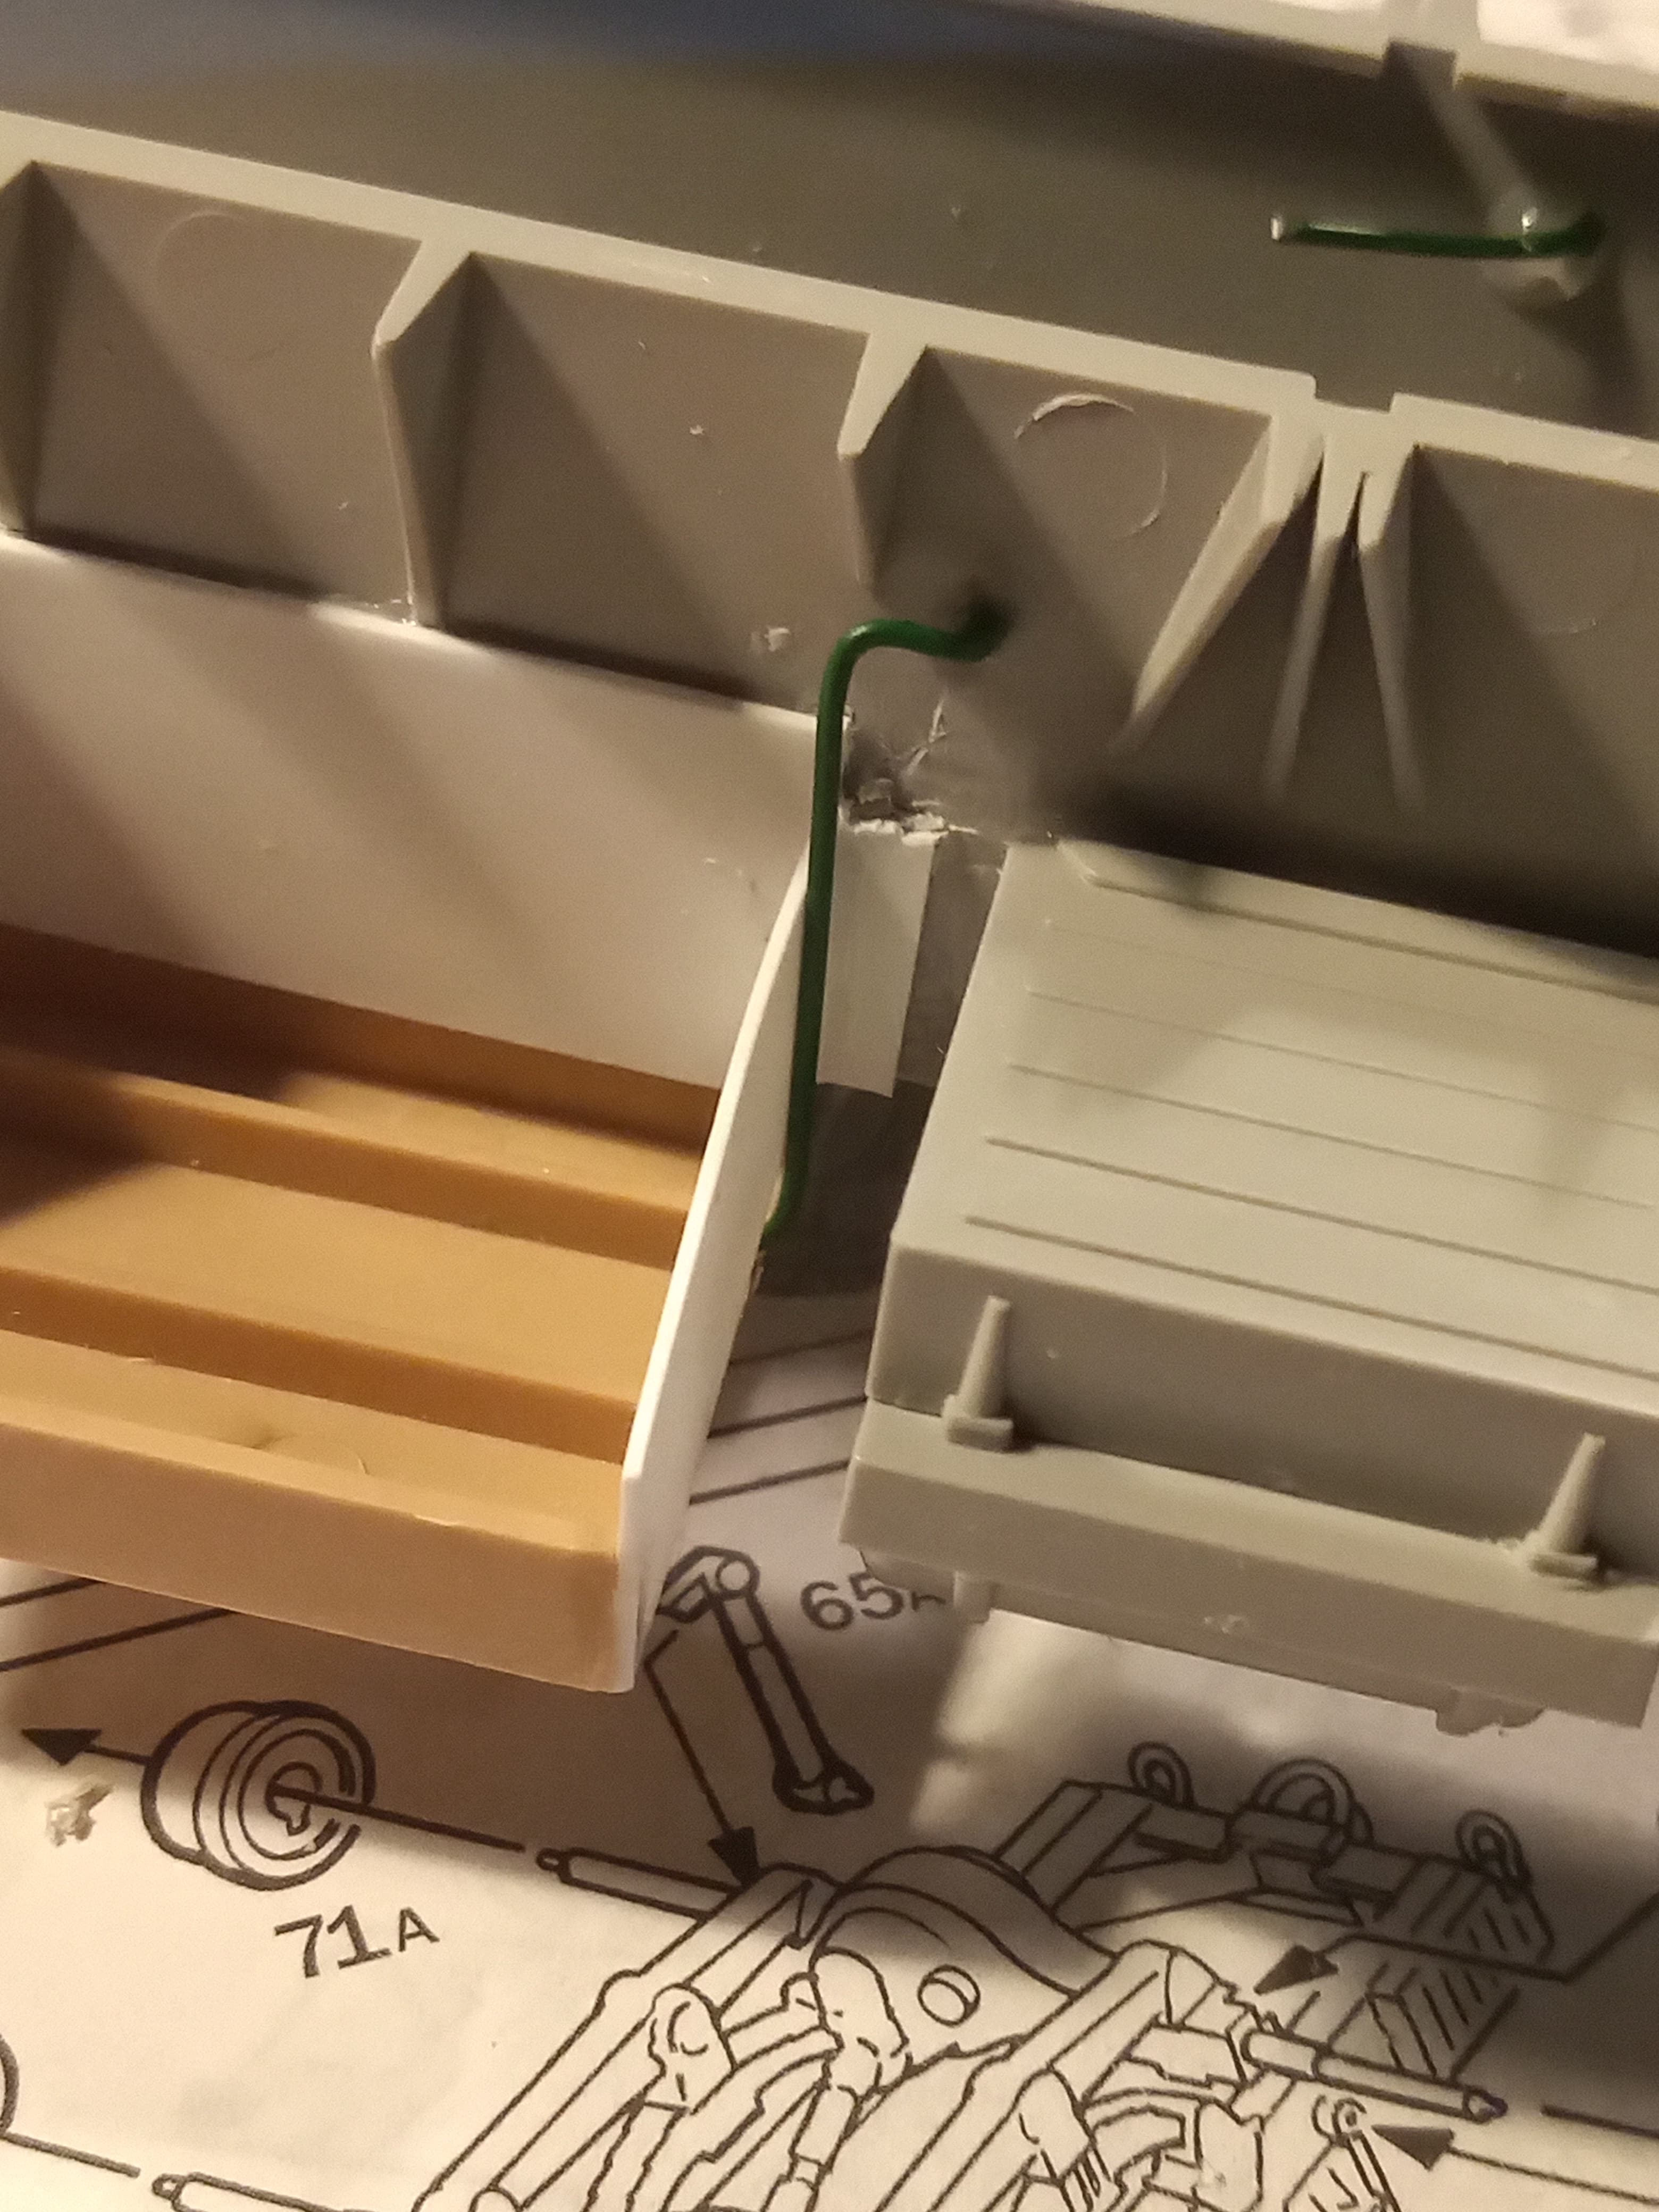
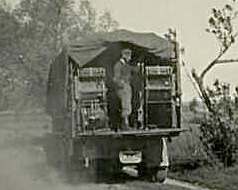
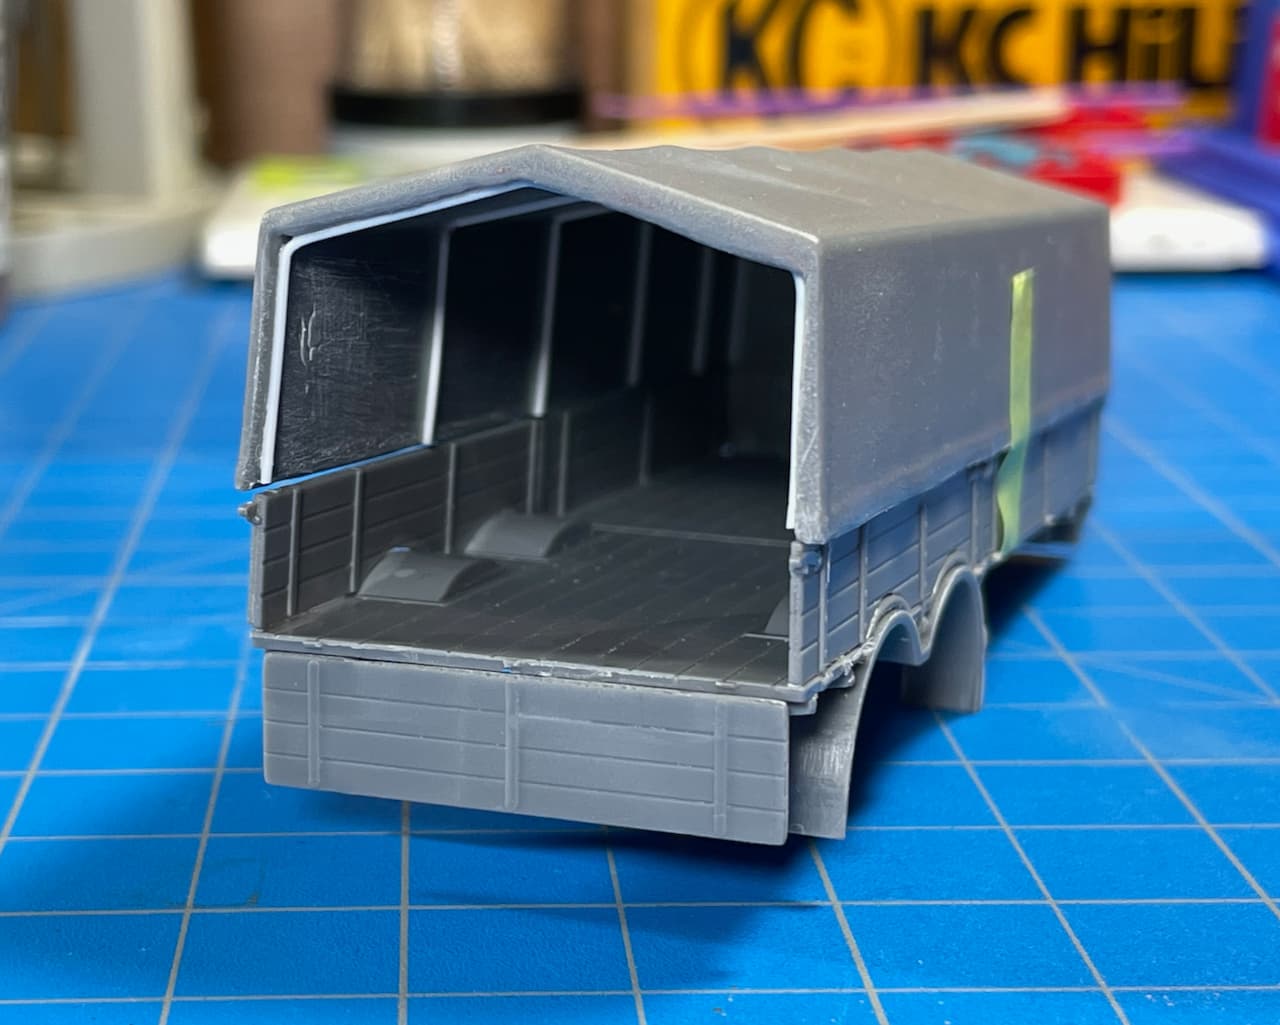
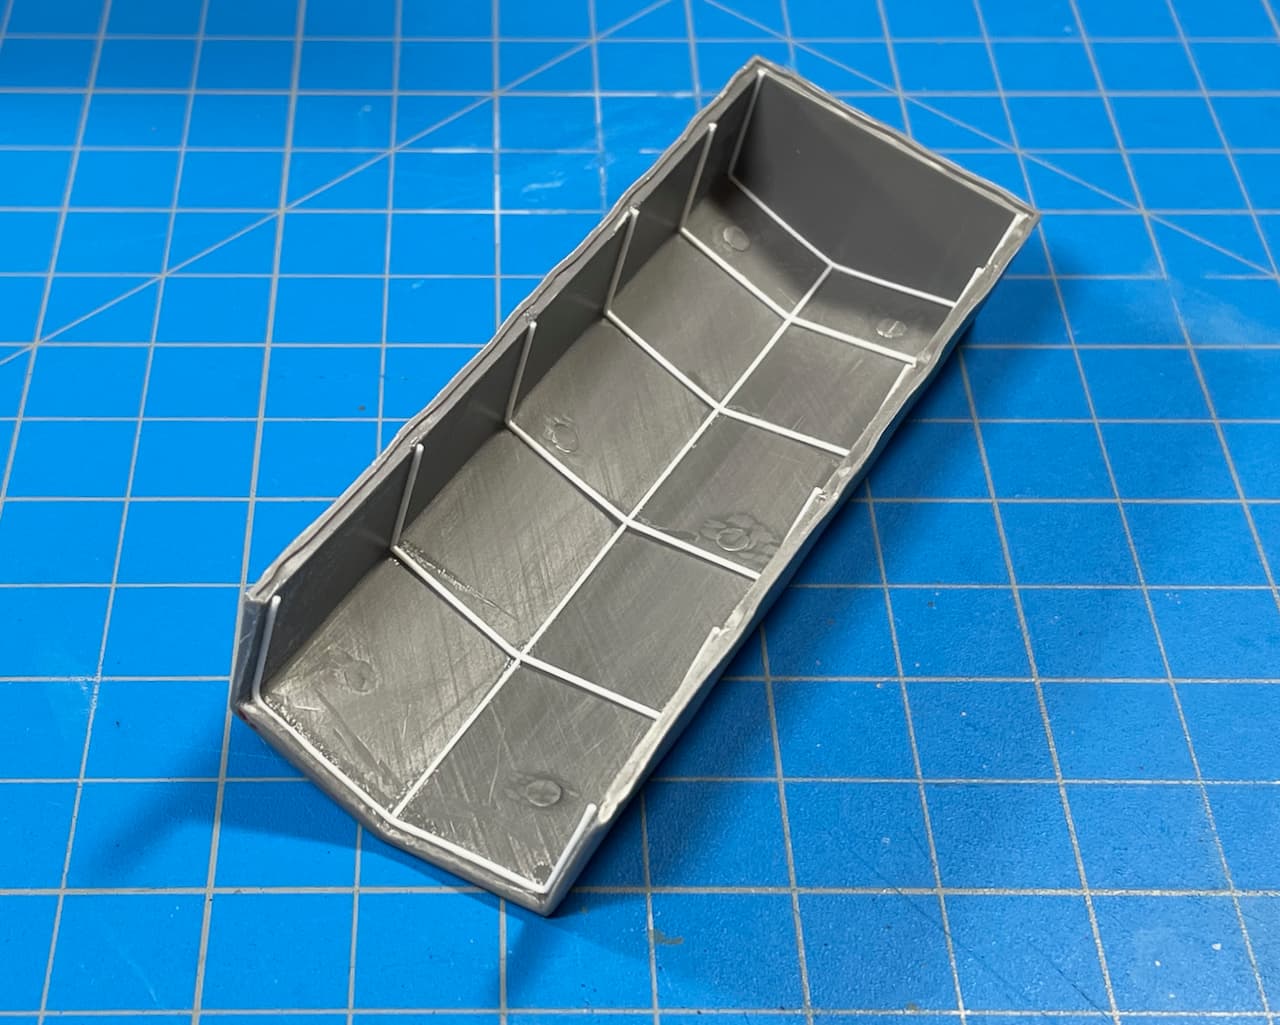
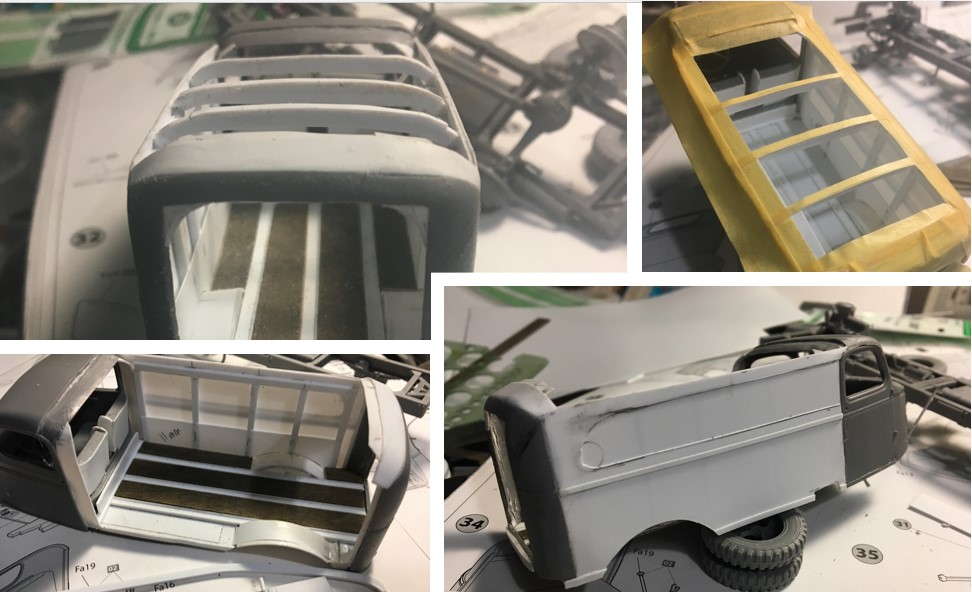
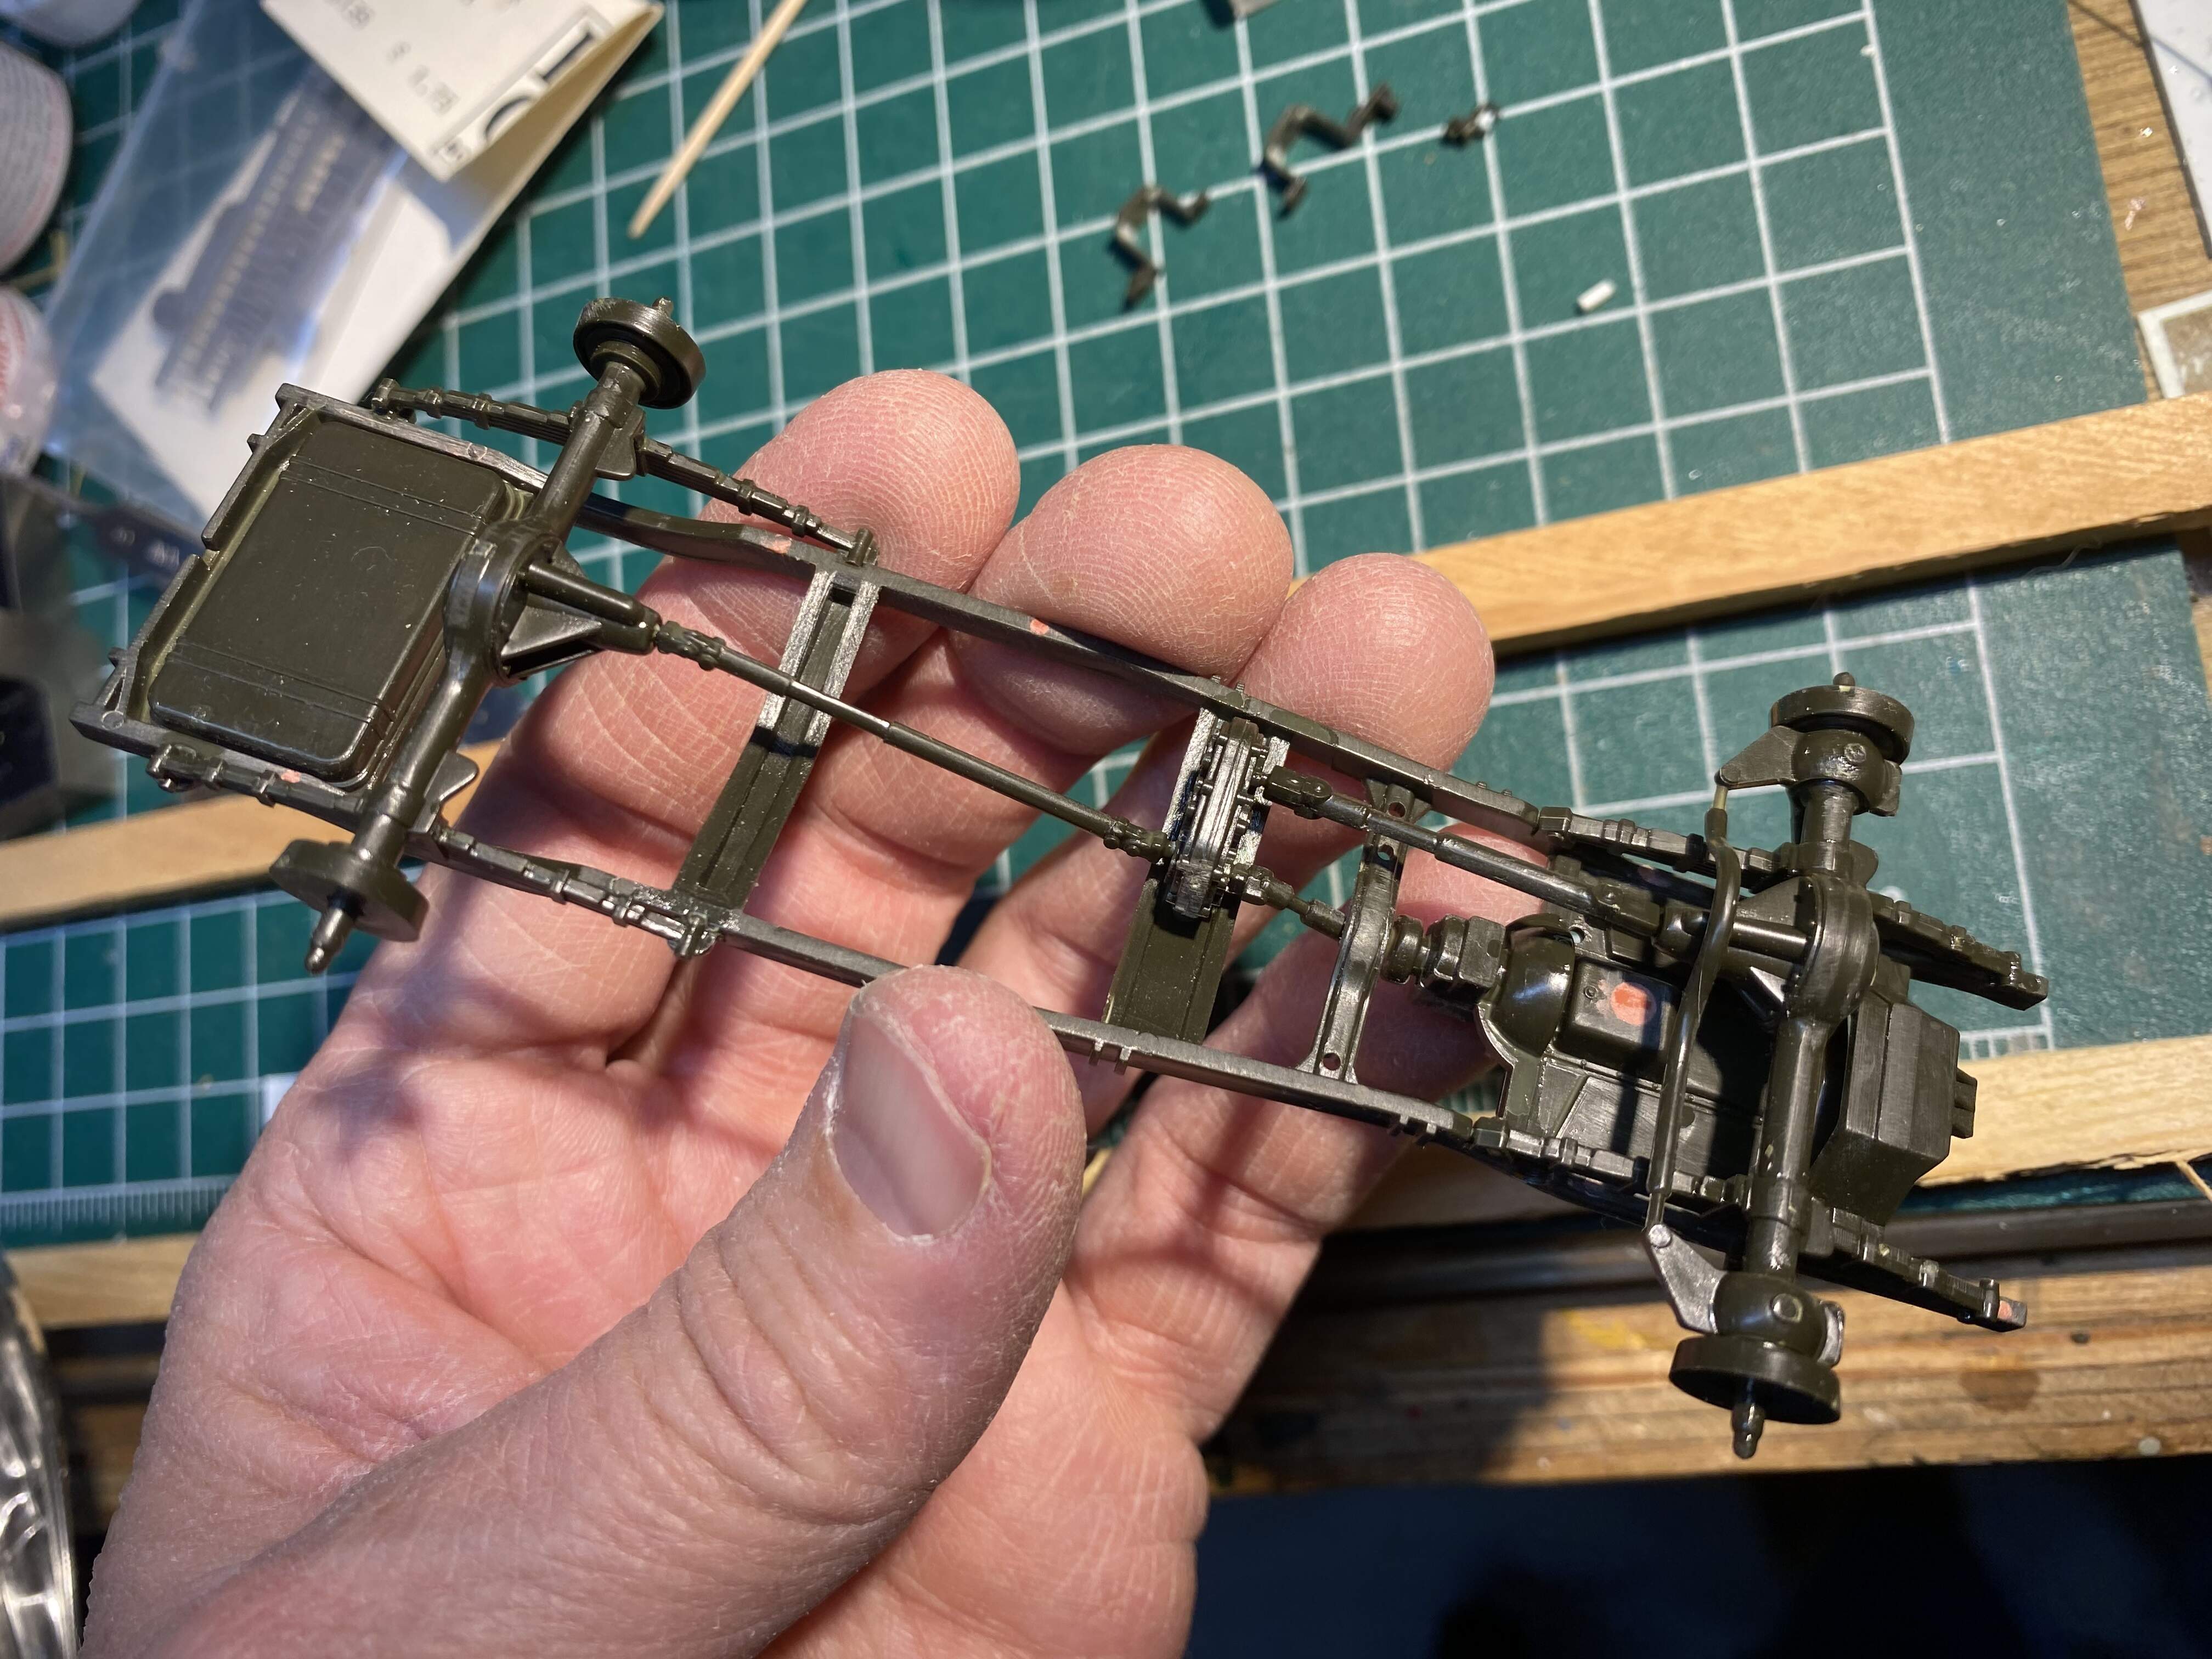
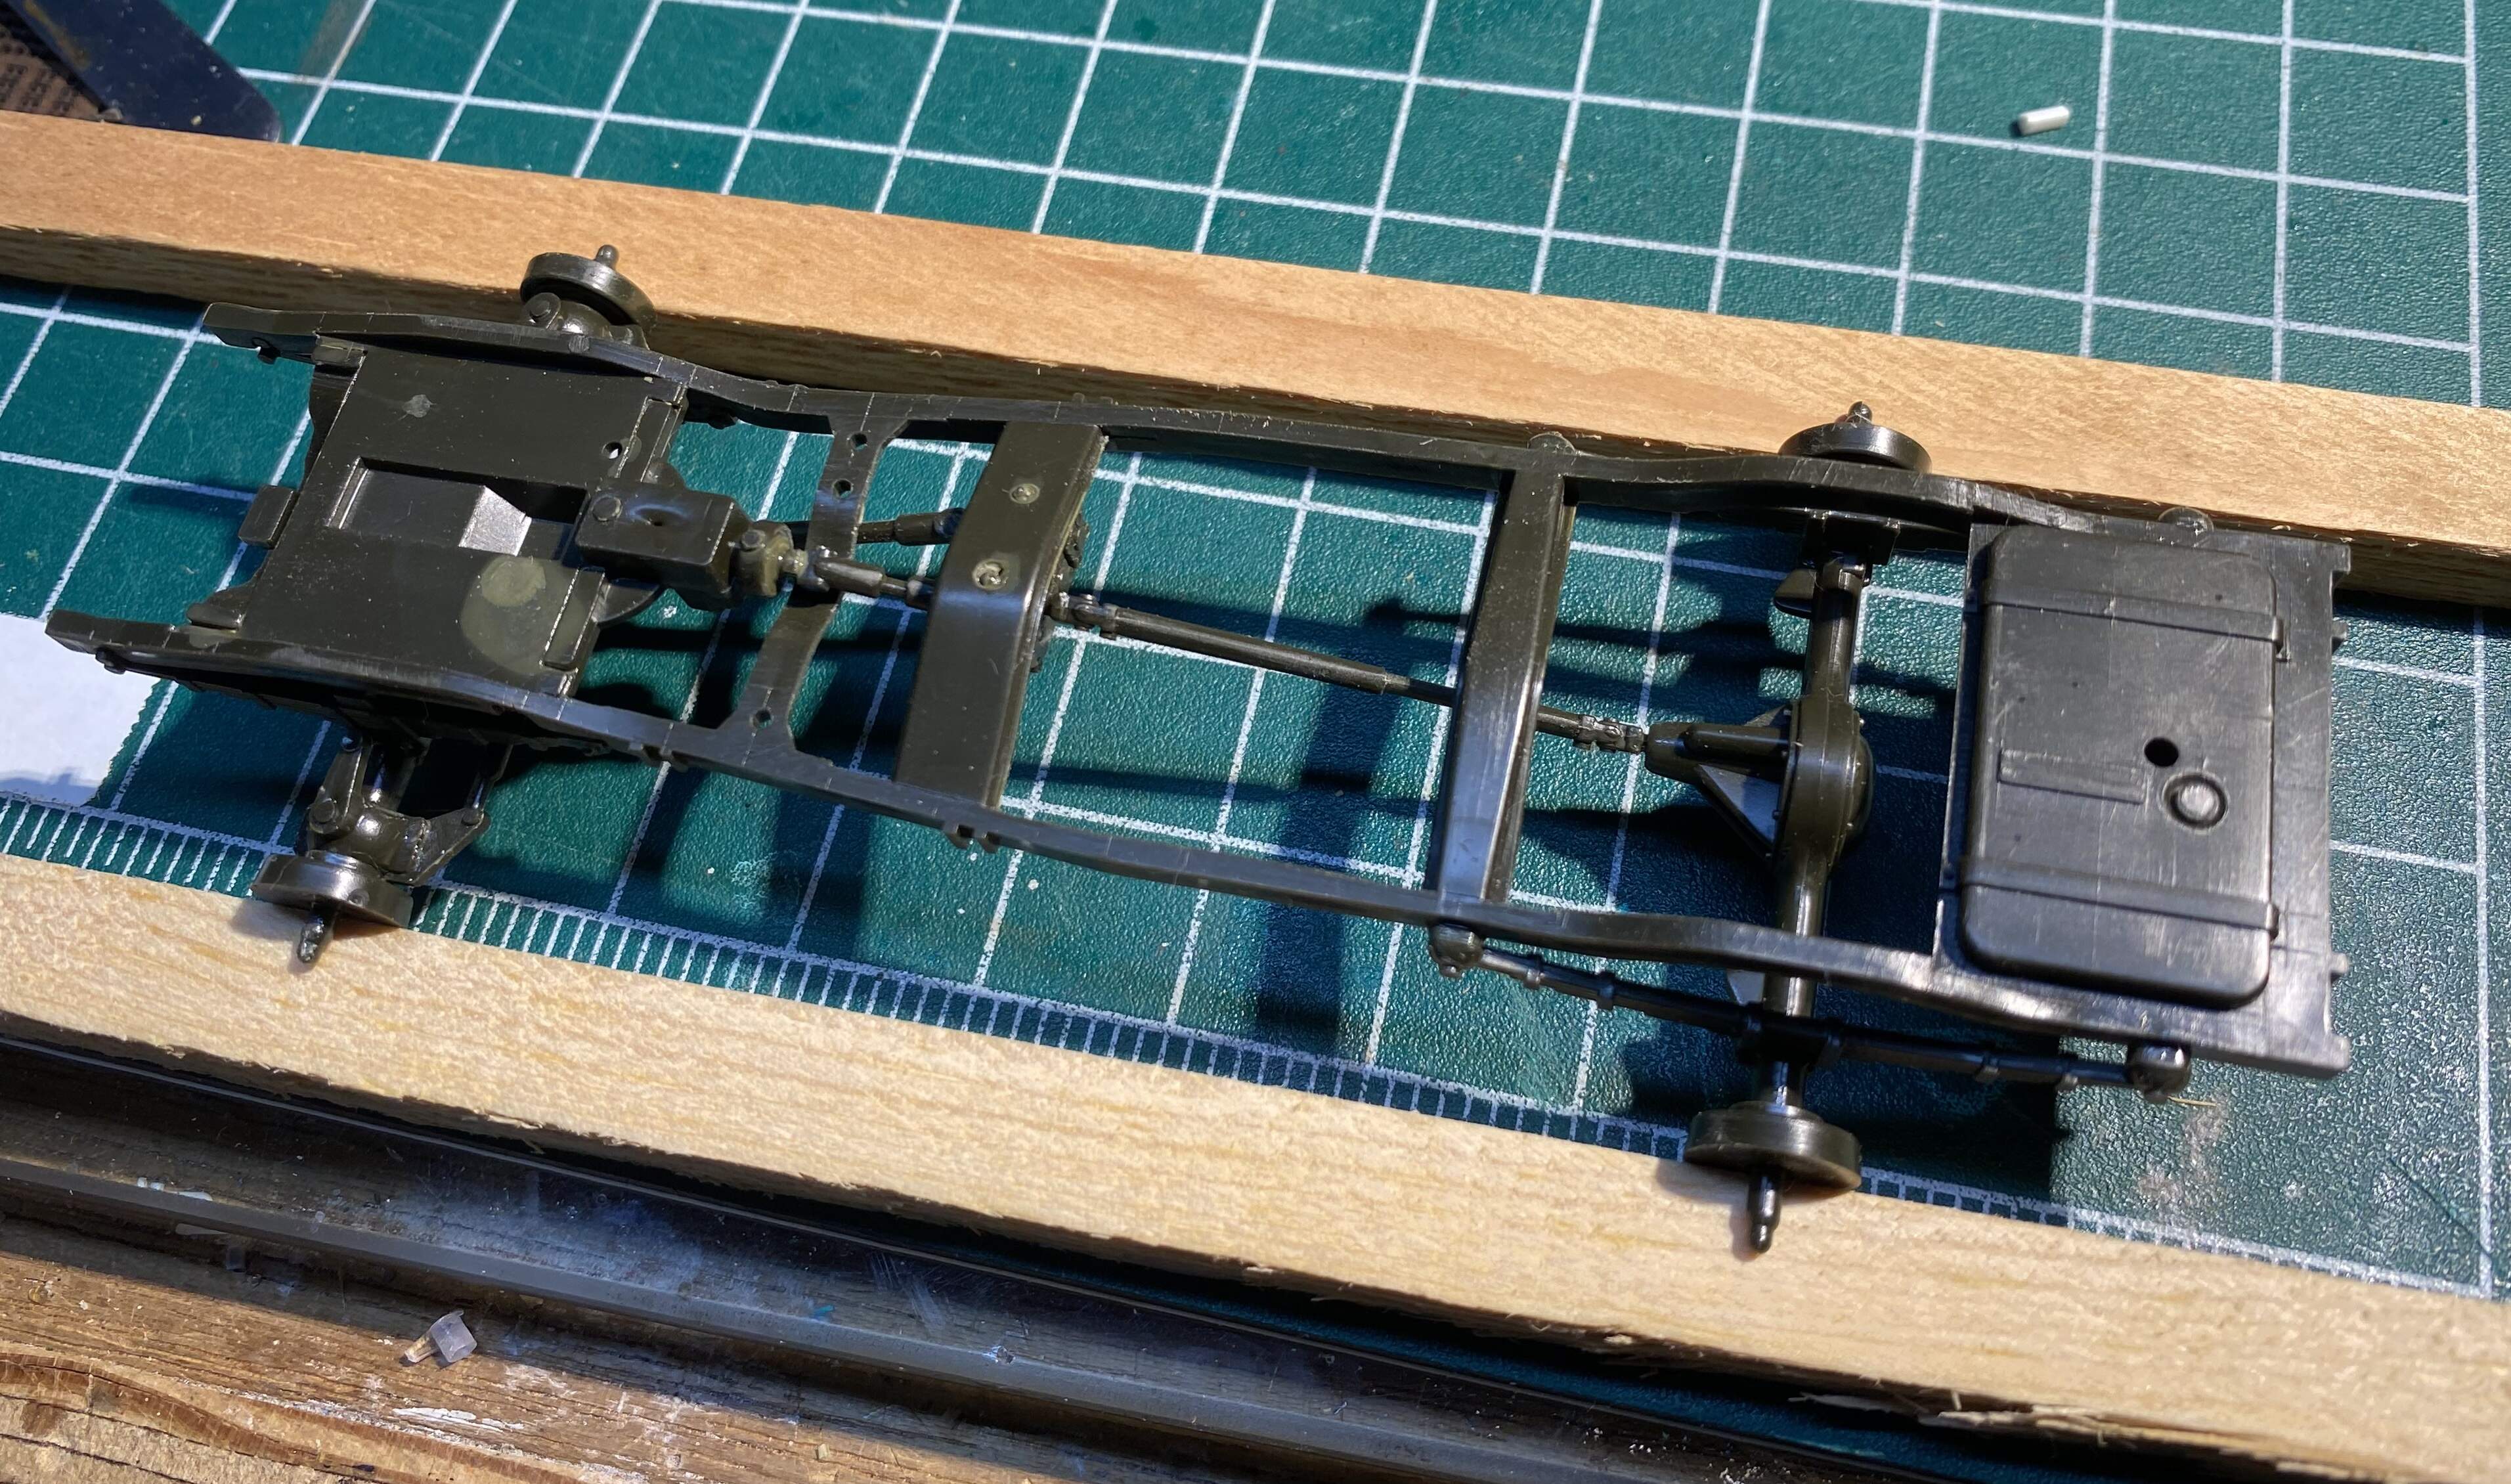
So, this is coming along, and yes, I decided to add some detail to the interior. Just like the bed of a standard pickup, the panel van in real life includes a wood deck, with metal spacers. It turns out I had some left over thin basswood, that I already stained, so, into service it will go. The width of this material is not correct, the planks are too wide, but, so are the small pieces of channel I’m using as spacers. I’m calling those pieces close enough!

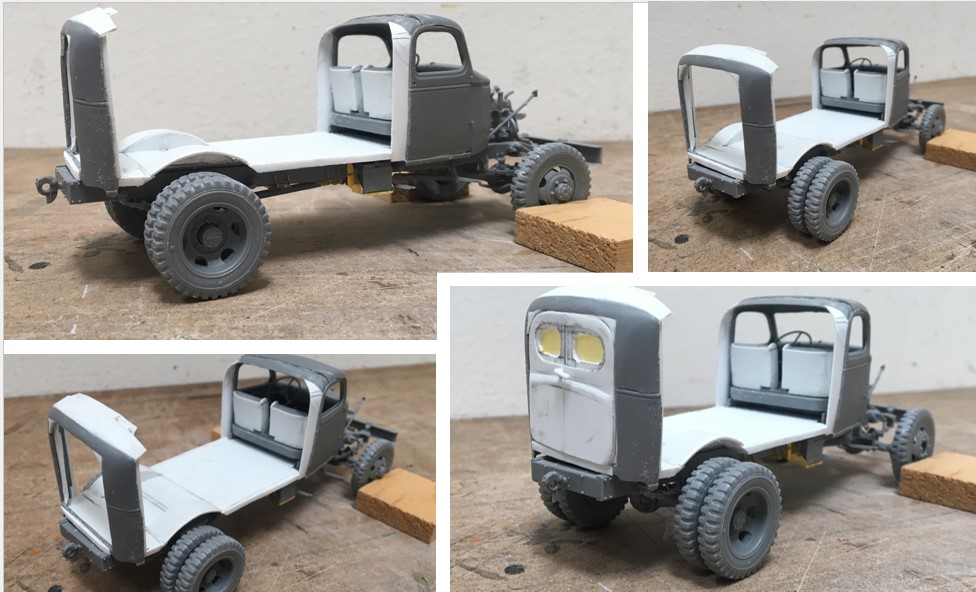
The body sheet metal is composite of .020 and .010 evergreen. As we can all see in the pics, my cut curves aren’t what I would call masterfully executed! :smile: guess where you’ll eventually see some rust?!

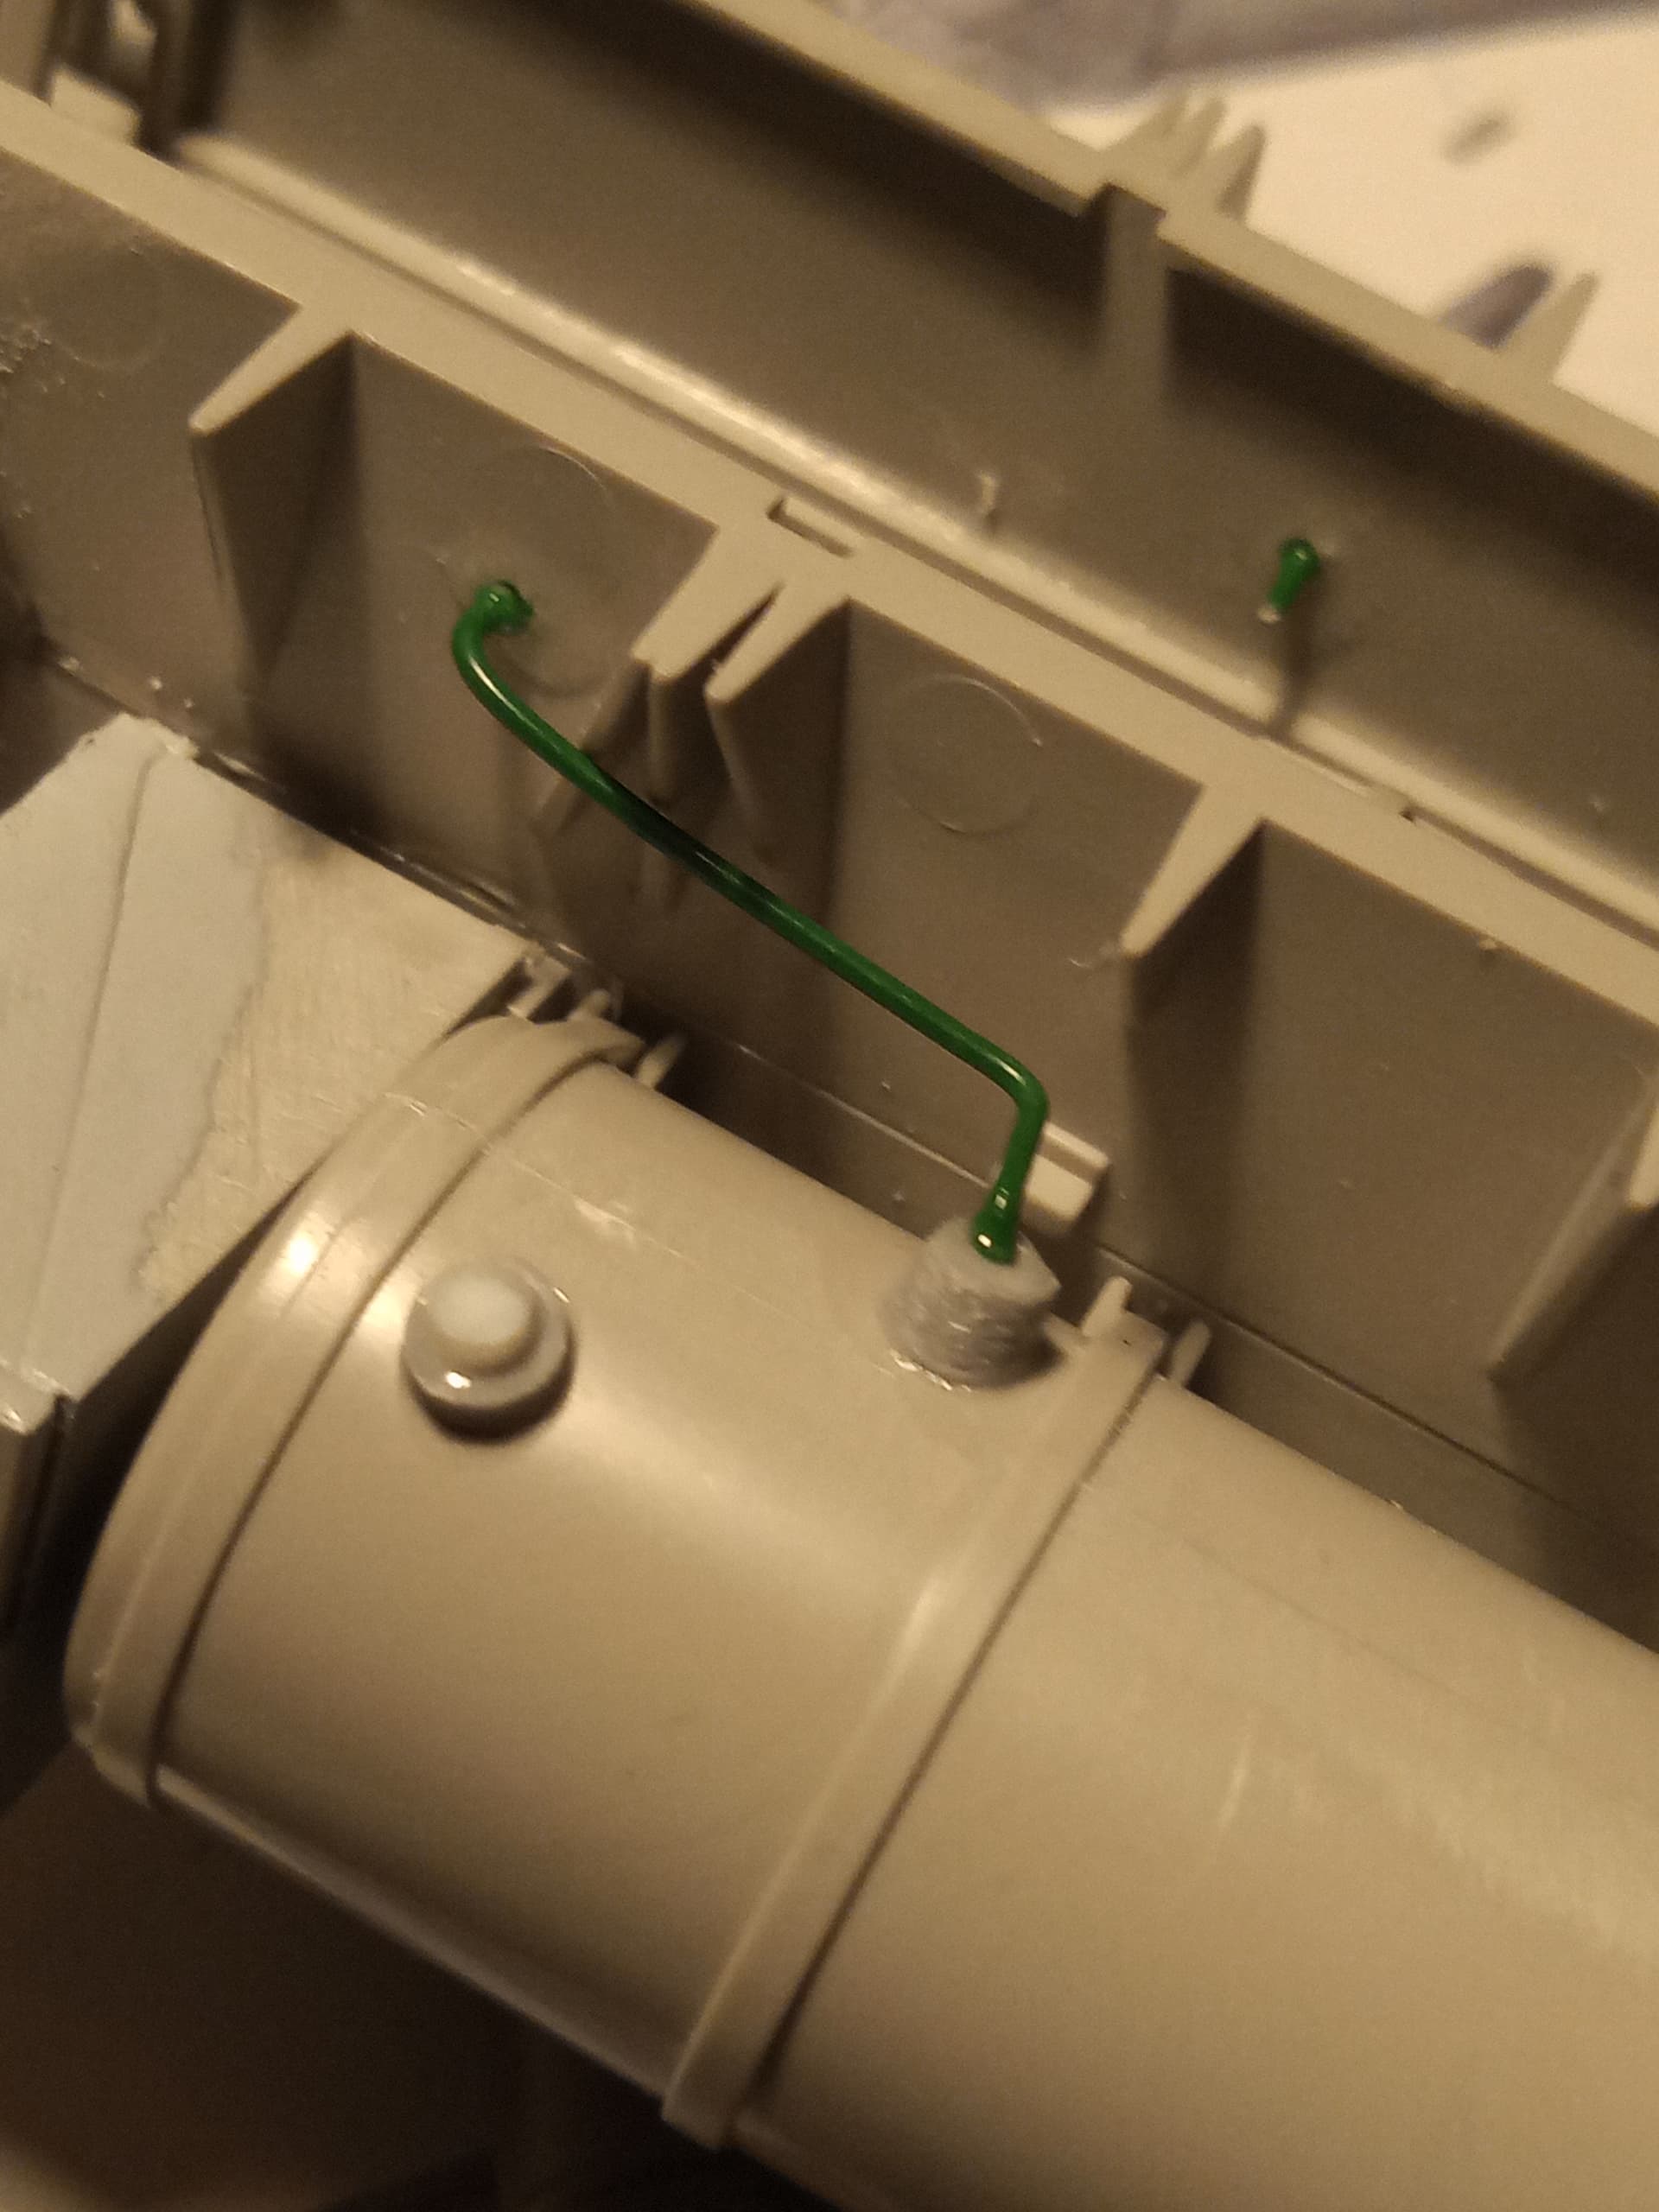
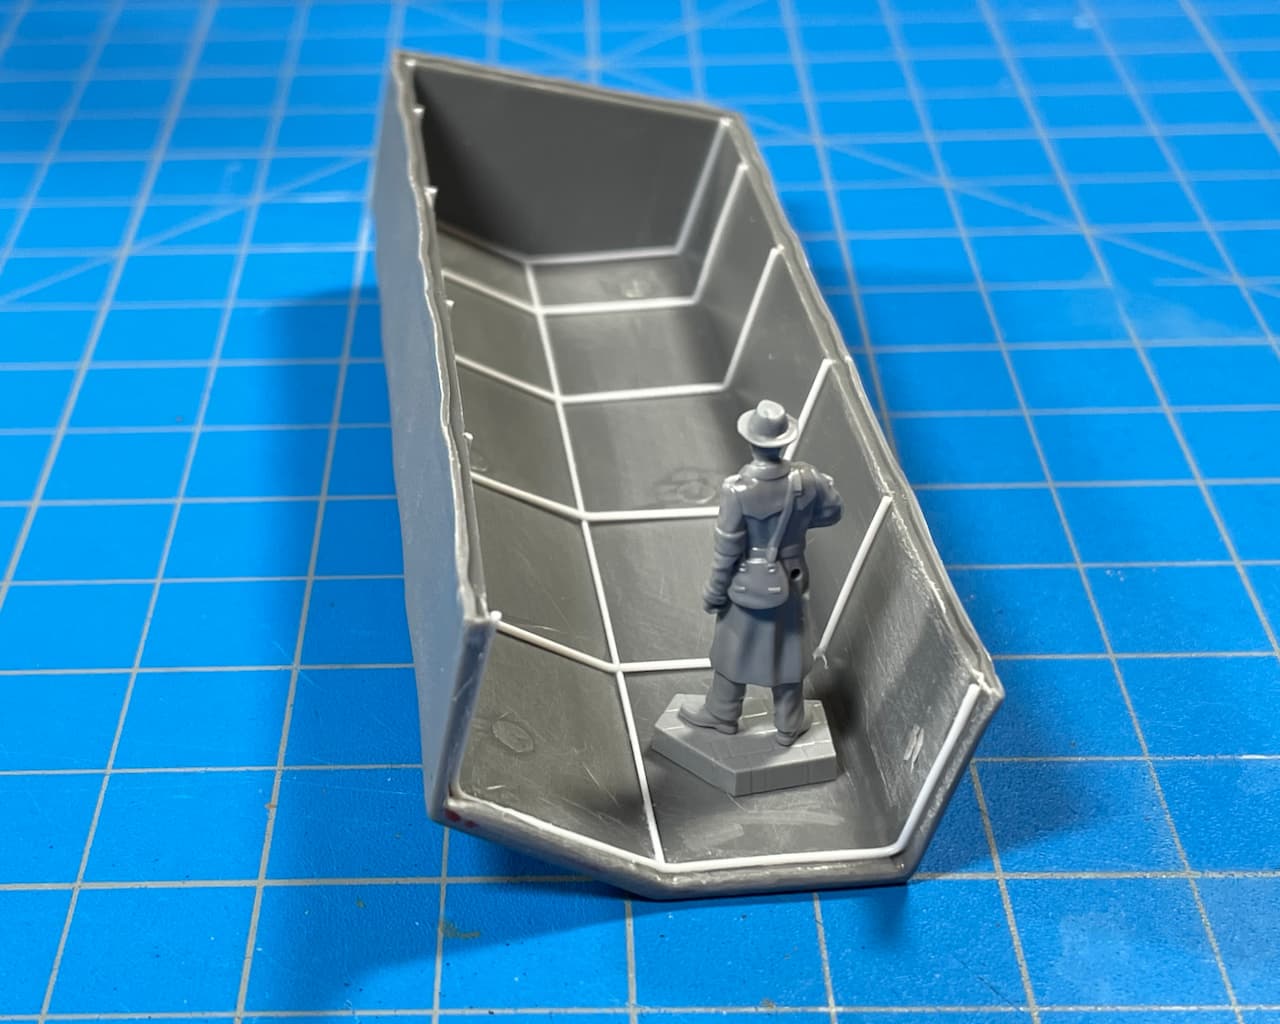
Like the real truck, I added vertical supports, sheet along the base, and some ribs across the top. The ribs were a pain to make - the styrene kept snapping as I bent it so, several inches of .060 x .080 quickly made their way to the scraps pile. In addition to looking better, these pieces sure helped stabilize the body - it was pretty wobbly before.

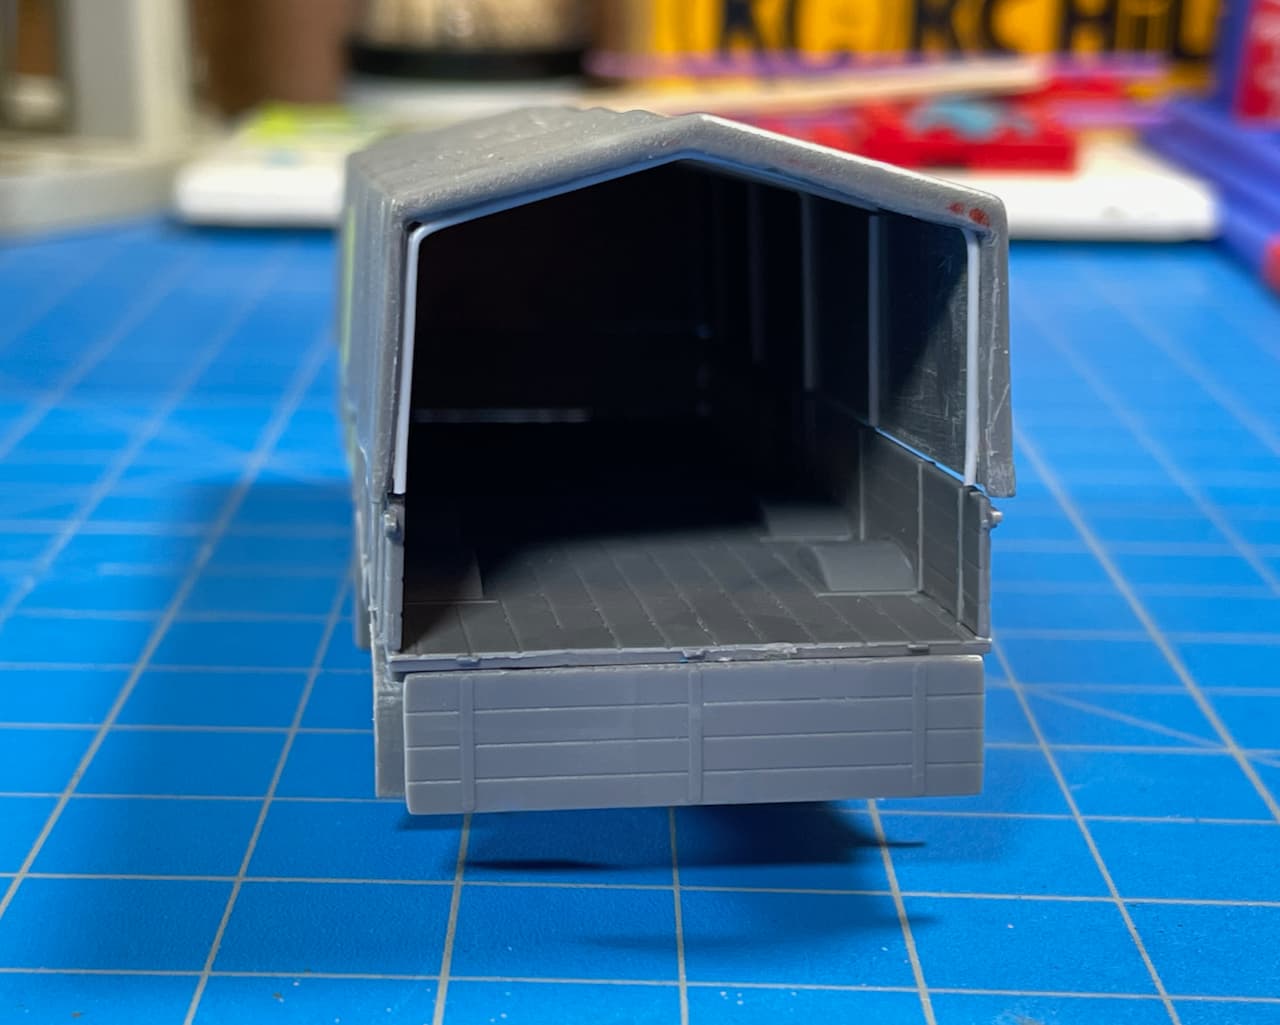
I shot the inside with primer, and will paint it. Will then put the wood decking back, and close it in.

As work is slow this week, I’ll have some time to work on this instead!

Cheers
Nick

13 Likes

Nice start Mike. Safe travels.

Music to a modeller’s ear. Looking fantastic Nick.

6 Likes

Chassis and drivetrain coming together on the WC-54, set it on blocks to cure nice and level, but couldn’t help posing it on its wheels, too. Not going crazy with any detailing underneath; a few pin marks filled, May scratch some fastener details here and there. But just wanting to keep moving along.

Also trying to improve the bumperettes, they’re too square. So I filled the inside corners with styrene stock and filed a bigger inside and outside radius. Also thinned the edges a bit. These, and the absurd excuse for a towing pintle, are the worst kit details so far.

Jimbo

9 Likes