I honestly don’t know, hence the question. We have some experienced modelers who have probably built this kit and know.
2 Likes
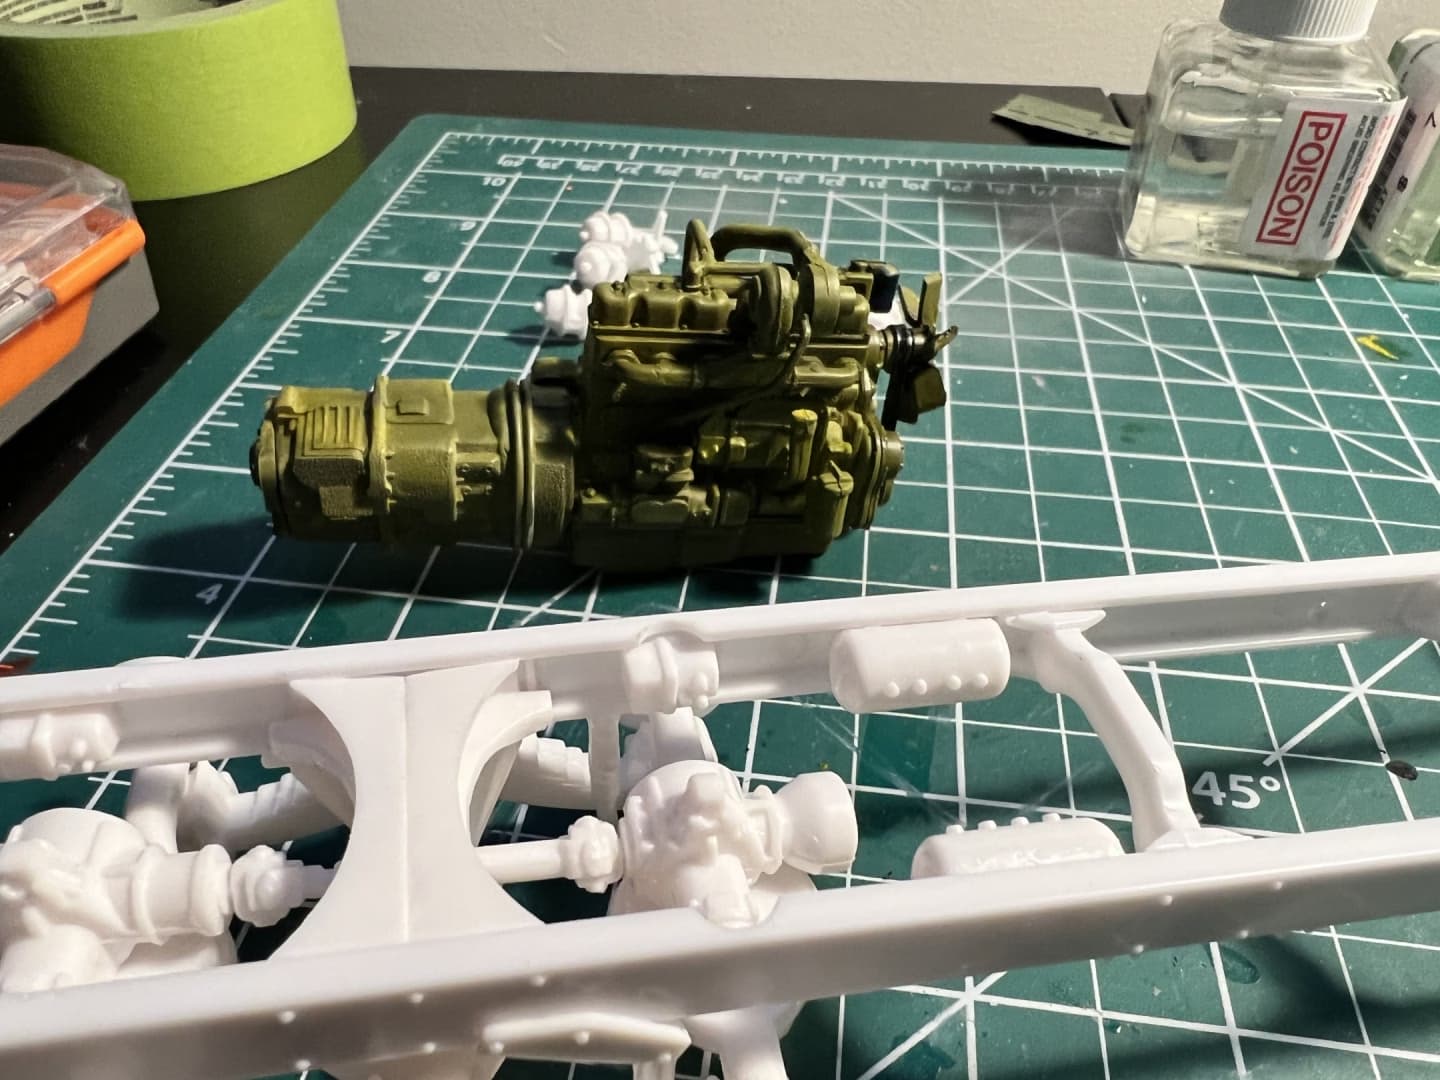
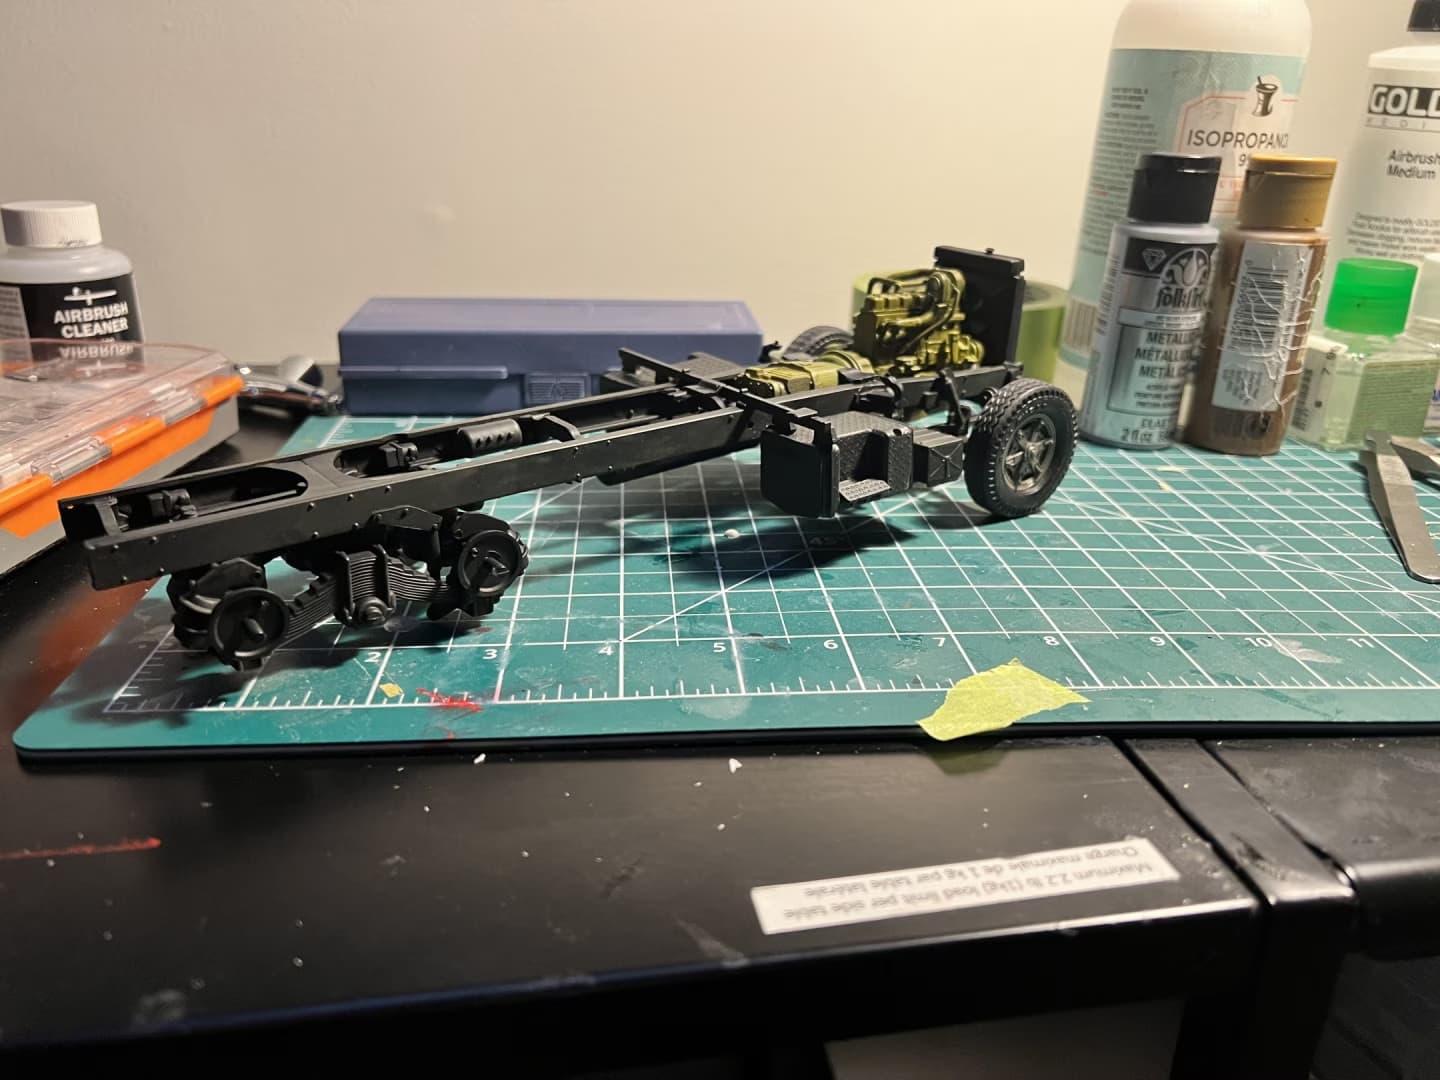
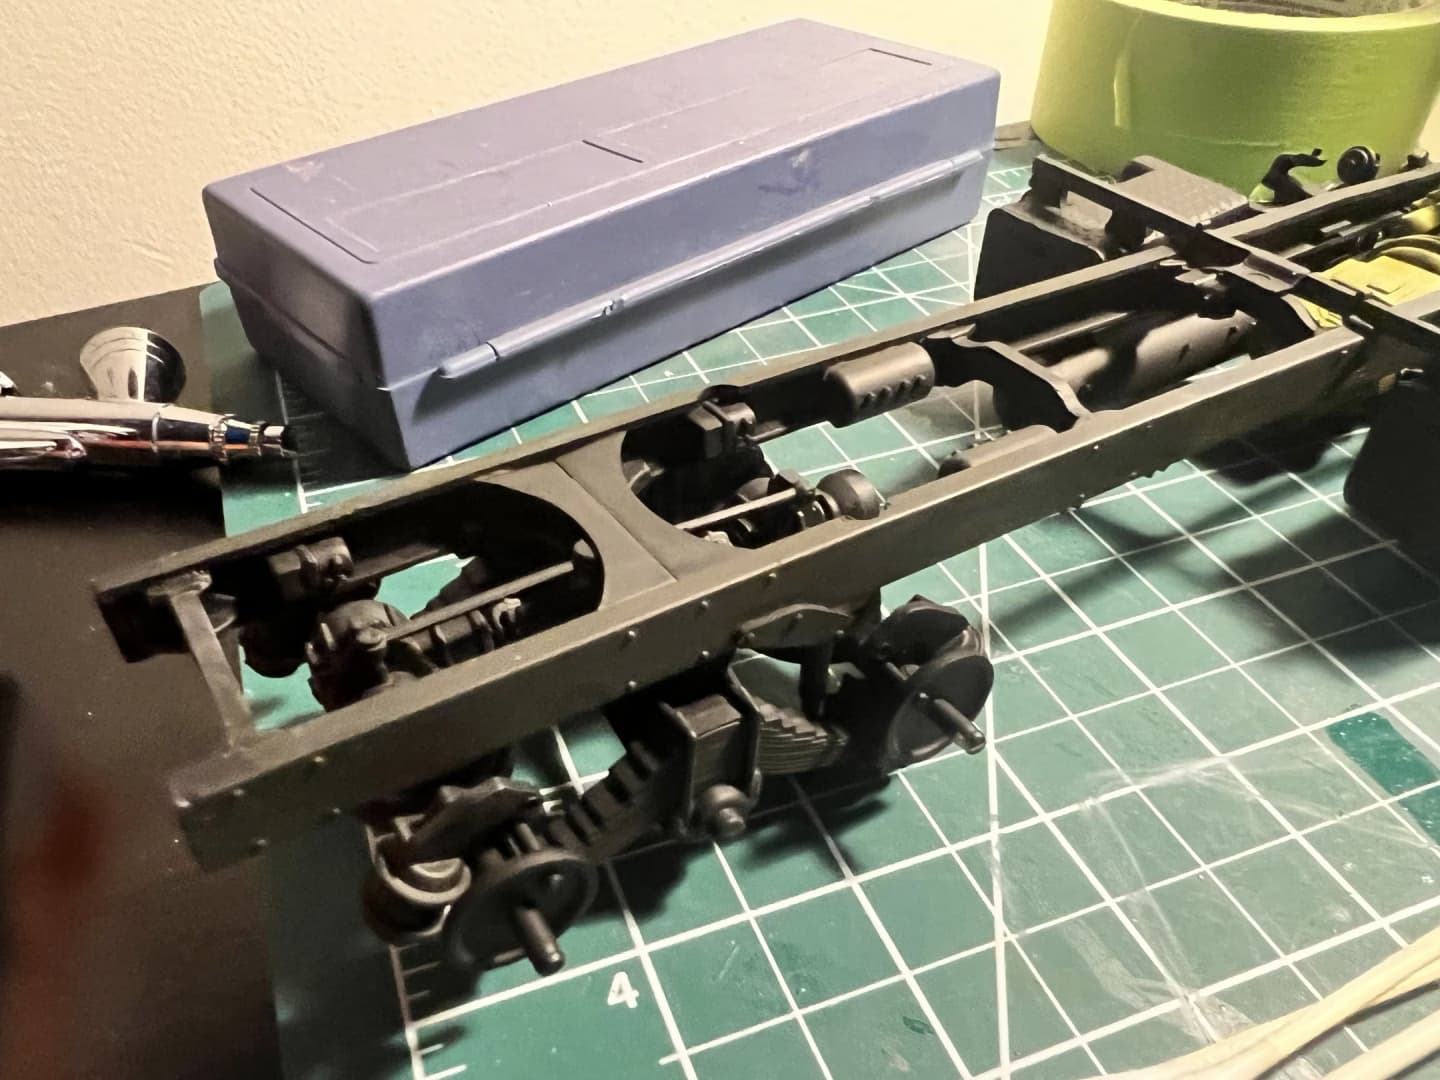
Looking at the instructions, it seems like the only very exposed areas are between the crossmember parts 6 & 7, from behind the cab to the start of the 5th wheel assembly / 1st of the rear axles… I would concentrate on that area, and its more accessible as well.
3 Likes

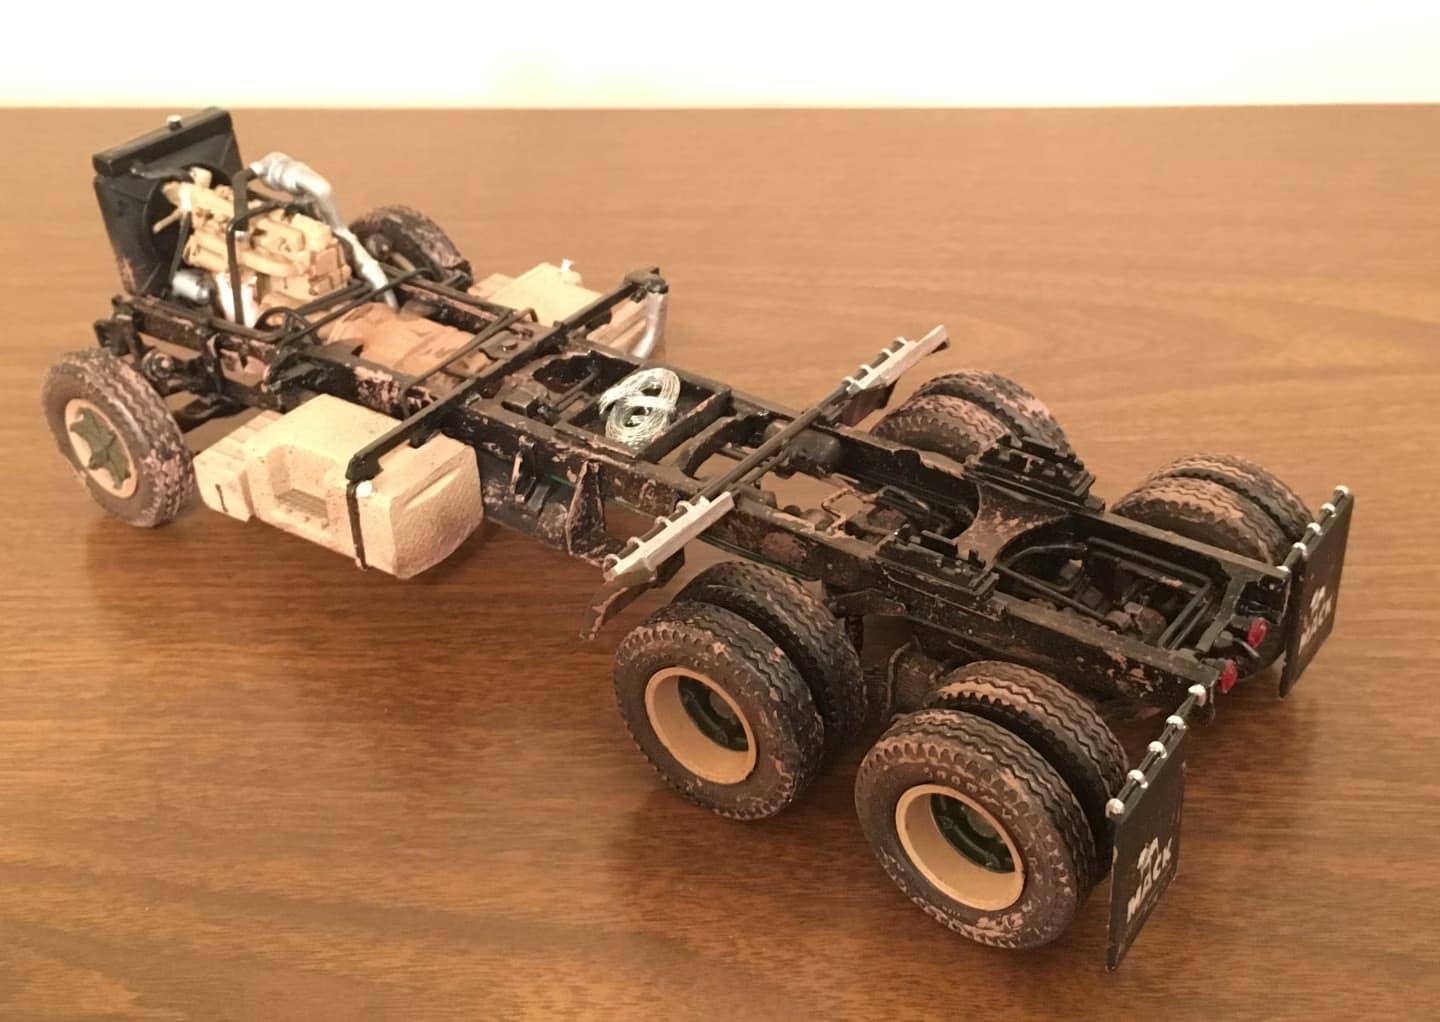
I’m with John here; unless you’re in the habit of picking your finished models up to scrutinize the inner bits of the frame, I wouldn’t bother. That said, it probably would bug me too knowing they were there ![]()
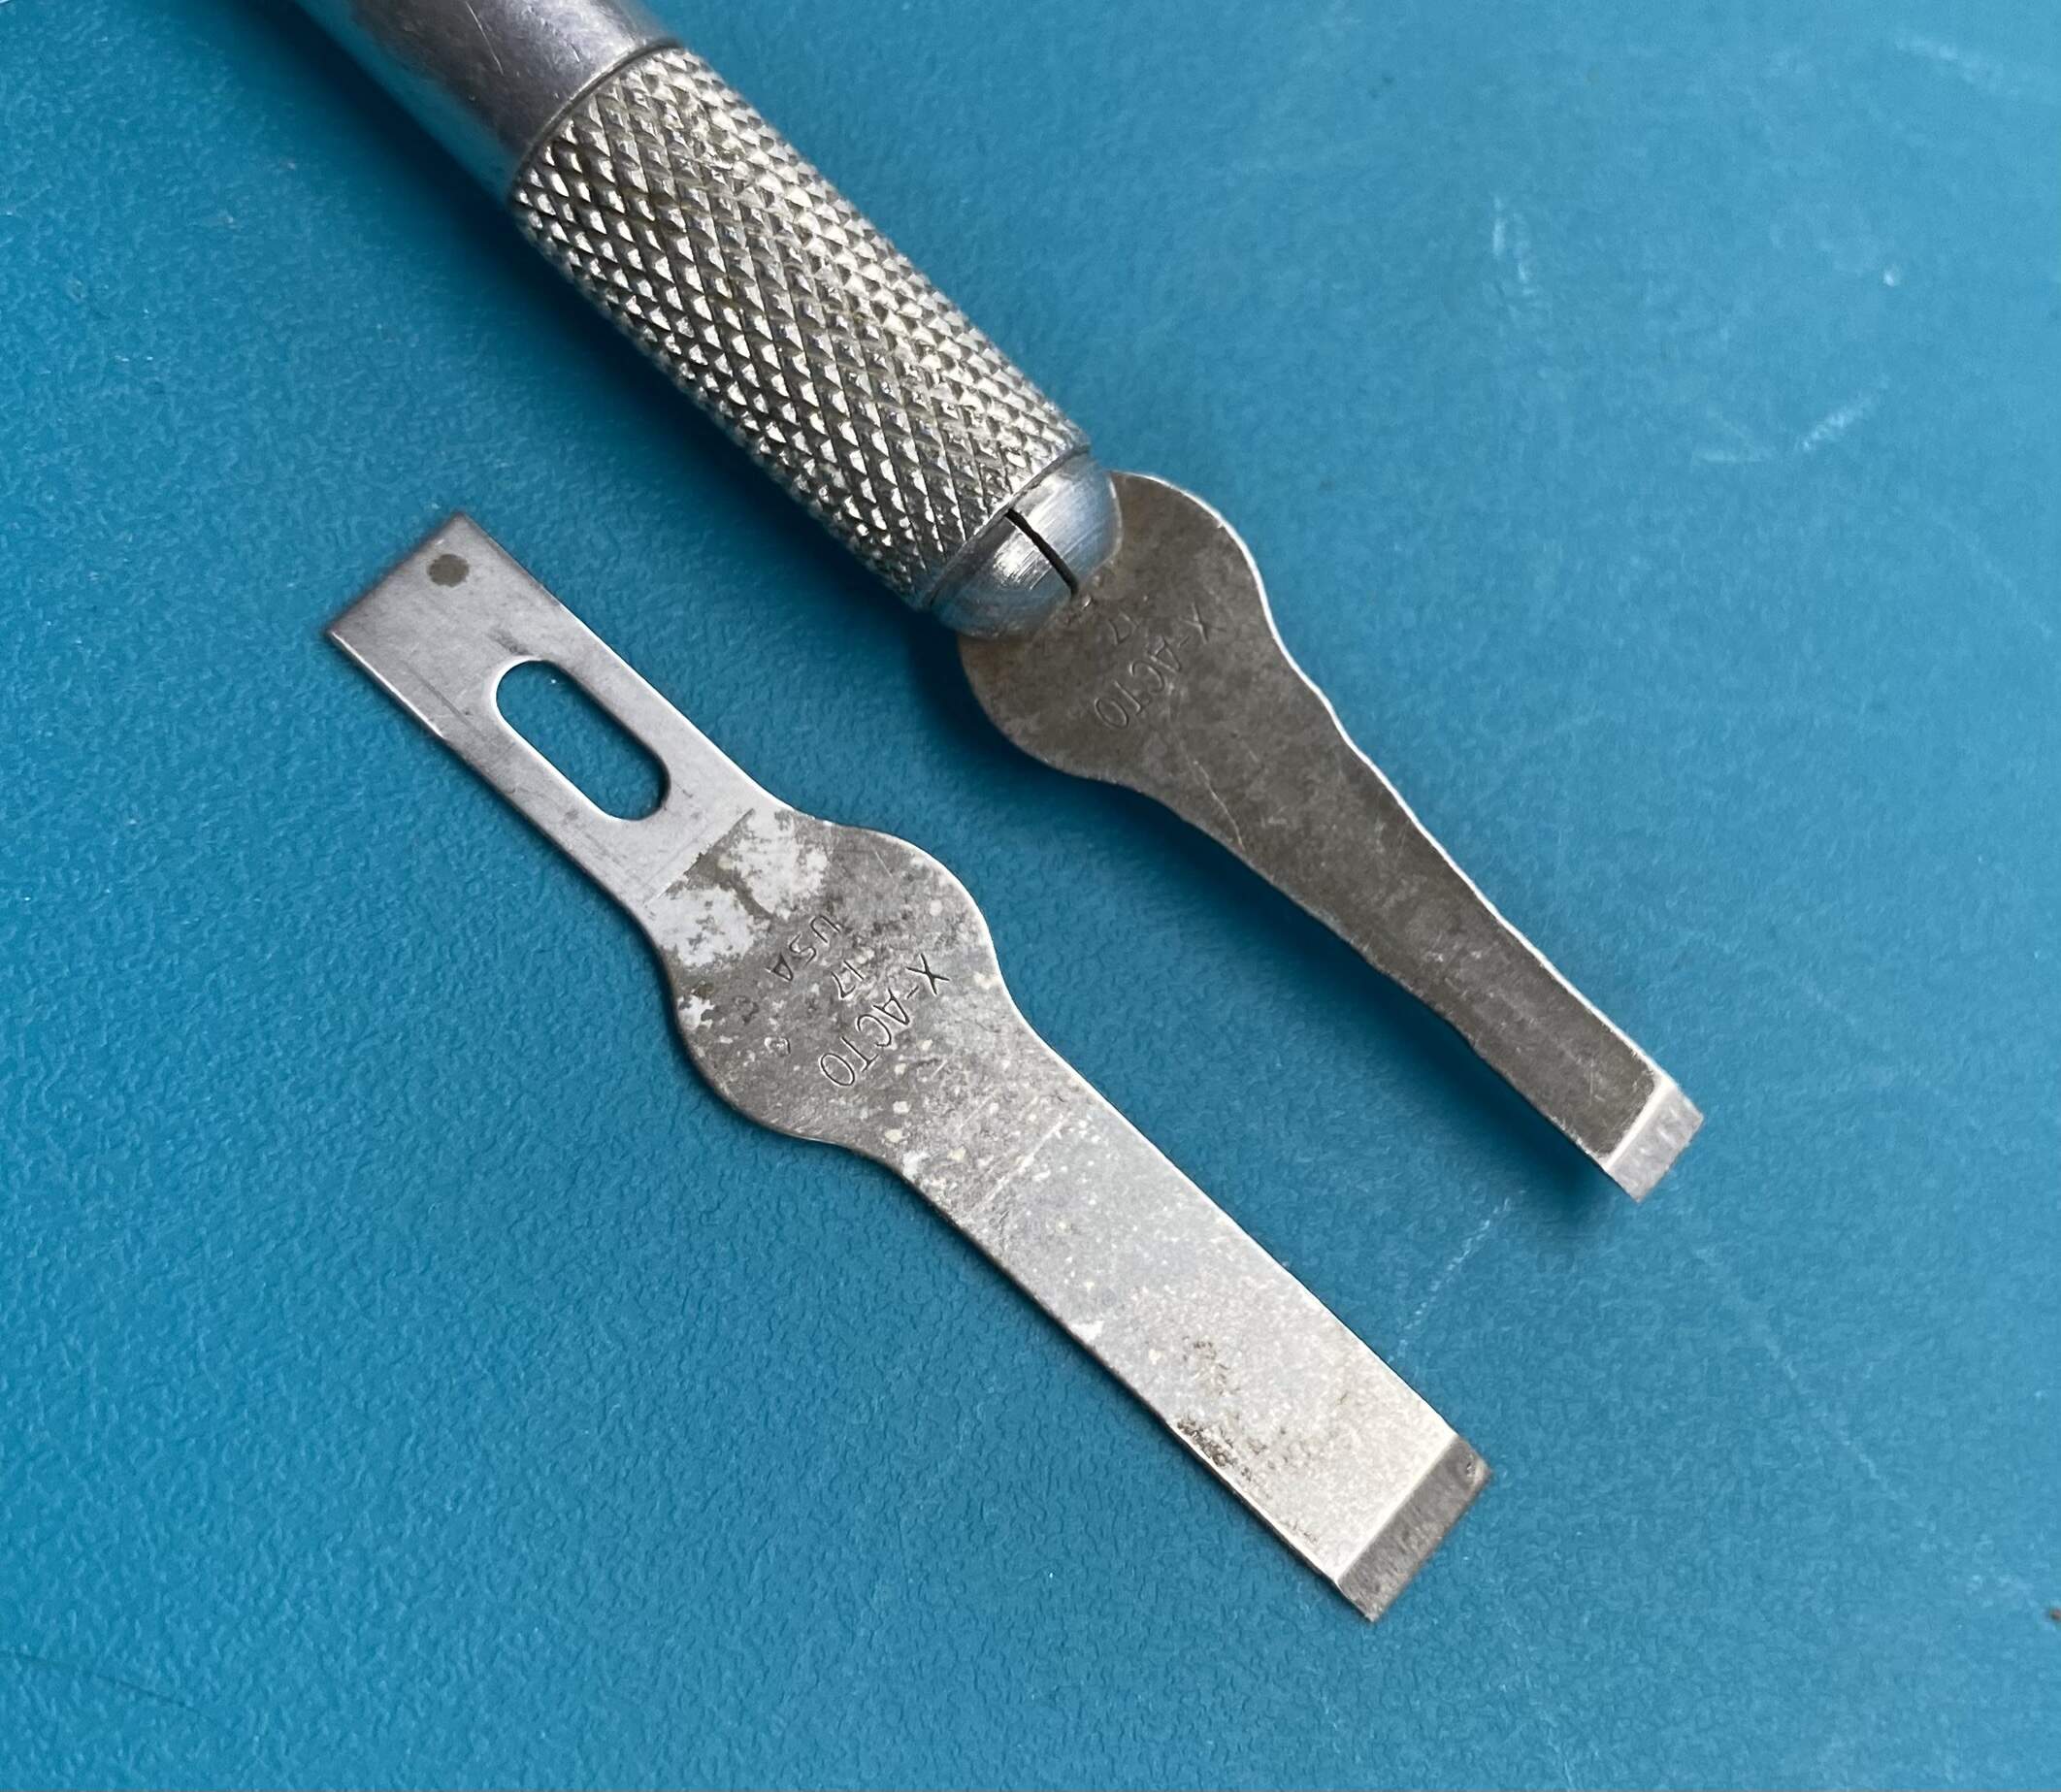
Here’s a tool that never strays far from any build I have going on. Years ago I ground an X-Acto chisel blade to a much narrower width. I’ve sharpened it constantly and it gets into tight places like these frame rails. Shown with a normal chisel blade. Also works as a fine putty knife if there are “innies” instead of “outies”…
Jimbo
8 Likes
Good stuff John. You have a link to the build? Like to see if they mentioned problem area before I get to them.
2 Likes
I agree with the guys. If you’ve never had to deal with poor moulds before and just want to learn how, then it’s chisels for sure. Otherwise, just soldier on to the more visible issues at hand. ![]()
HONK! ![]()
![]()
—Mike
4 Likes
[quote=“Jimbo, post:344, topic:25834”]
That said, it probably would bug me too knowing they were there[/quote]
Being a contest judge does have its cons. It’s the little stuff like that I look for in others builds that makes me pause about skipping.
The tool idea, is a good one. Thanks again for all your help on this build Jimbo.
4 Likes
Sorry bud, it was only images … I dragged them from the Scalemates for the AMT Mack, they were just completed builds I think and build images … nothing written I dont think … Soz
2 Likes
I will track that down, thanks. ![]()
1 Like
this is the new box version, but it should be pretty much the same badboy
2 Likes
Ahh, being as they’re raised no, glue wouldn’t do the trick, possibly shave them down in that case but, if they’re barely visible I wouldn’t stress over it. It’s for issues like this that I need to get a couple chisels, but just haven’t put out the cash for any yet.
Cajun ![]()
2 Likes
I’ve used ground down X-acto blades for years. Modified a #11 with a broken tip into a small chisel blade and cut down a #17 into another slightly larger like Jimbo did above. Had to buy a couple of cheap handles.
3 Likes
Hi Ryan,
Regarding the dots on the frame rails, have you tried using a sanding stick? you know the 1/8" x 1/8" x 5 or 6 inches? they usually have a coarse and a finer side. I’ve had pretty good luck using these to sand things down in tight spaces.
If you decide to make your own frame rails, you might consider splicing the front horns and area that tapers from the kit rails to yours, to keep the geometry/spacing and engine and hood locating points intact.
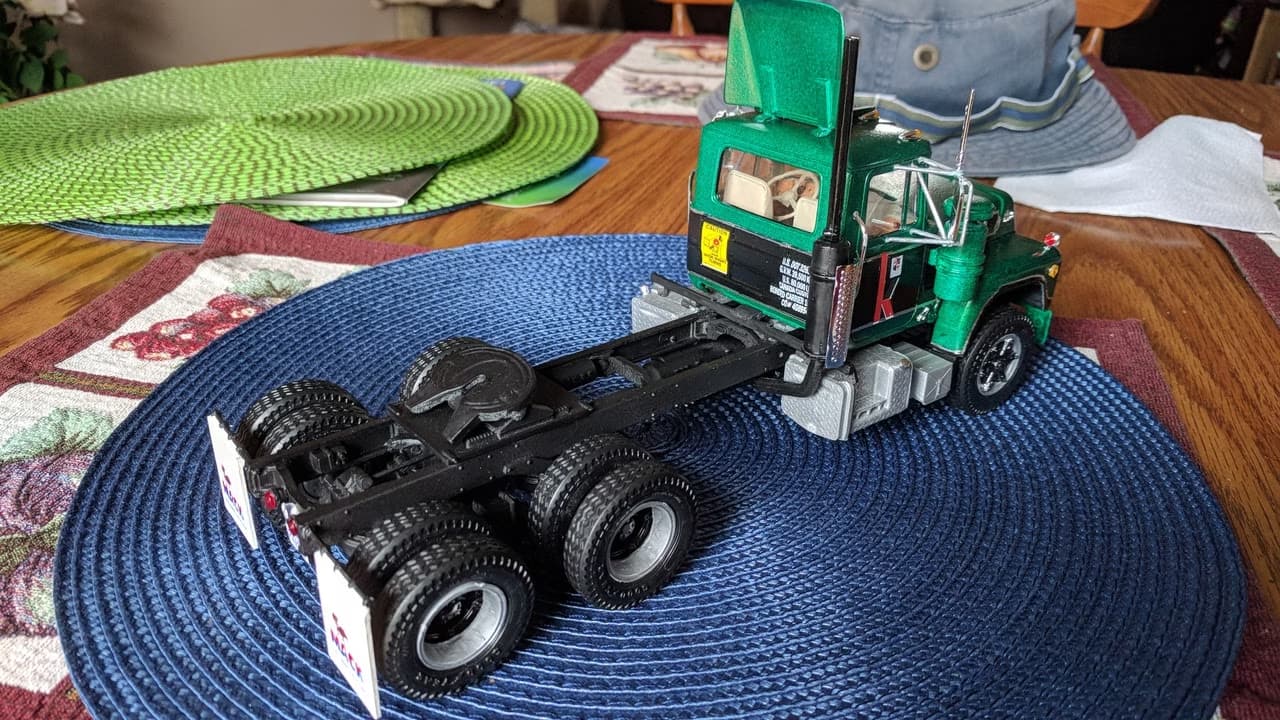
In relative terms, the fit of the cab would have me more worried than the dots! ![]()
![]()
![]()
Cheers
Nick
5 Likes
Oh that hasn’t escaped me yet, it does concern me… a lot but I cannot worry about it til the frame is built and I can see what it can take or not in fixing the cab. Trying to handle one problem at a time.
3 Likes
I appreciate all the help guys. ![]()
![]()
![]()
3 Likes
AHA! You’re the judgy type! That splains a lot! ![]()
![]()
But seriously… I know your spending habits buddy, so break down and buy some 1/4" Chisel Blades and you’ll be hooked with the first chomp. ![]()
If you need to take your self-induced pressure off, just roll-back through this thread and see if you can spot the glaring error I made on the VOMAG. ![]() Trust me, you’ll feel better about those somewhat invisible little pin marks when you do. … And leave your magnifier at home!
Trust me, you’ll feel better about those somewhat invisible little pin marks when you do. … And leave your magnifier at home! ![]()
![]()
![]()
Chisel ma’ nizzle! ![]()
—mike
5 Likes
So you know I am a tool whore. ![]()
![]()
Just realized I had a mission models chisel…maybe I will use it on this project. ![]()
![]()
3 Likes
The GAZ got it’s socks on (hubs and brake drums) today. And the trailer will hold five crates of rockets.
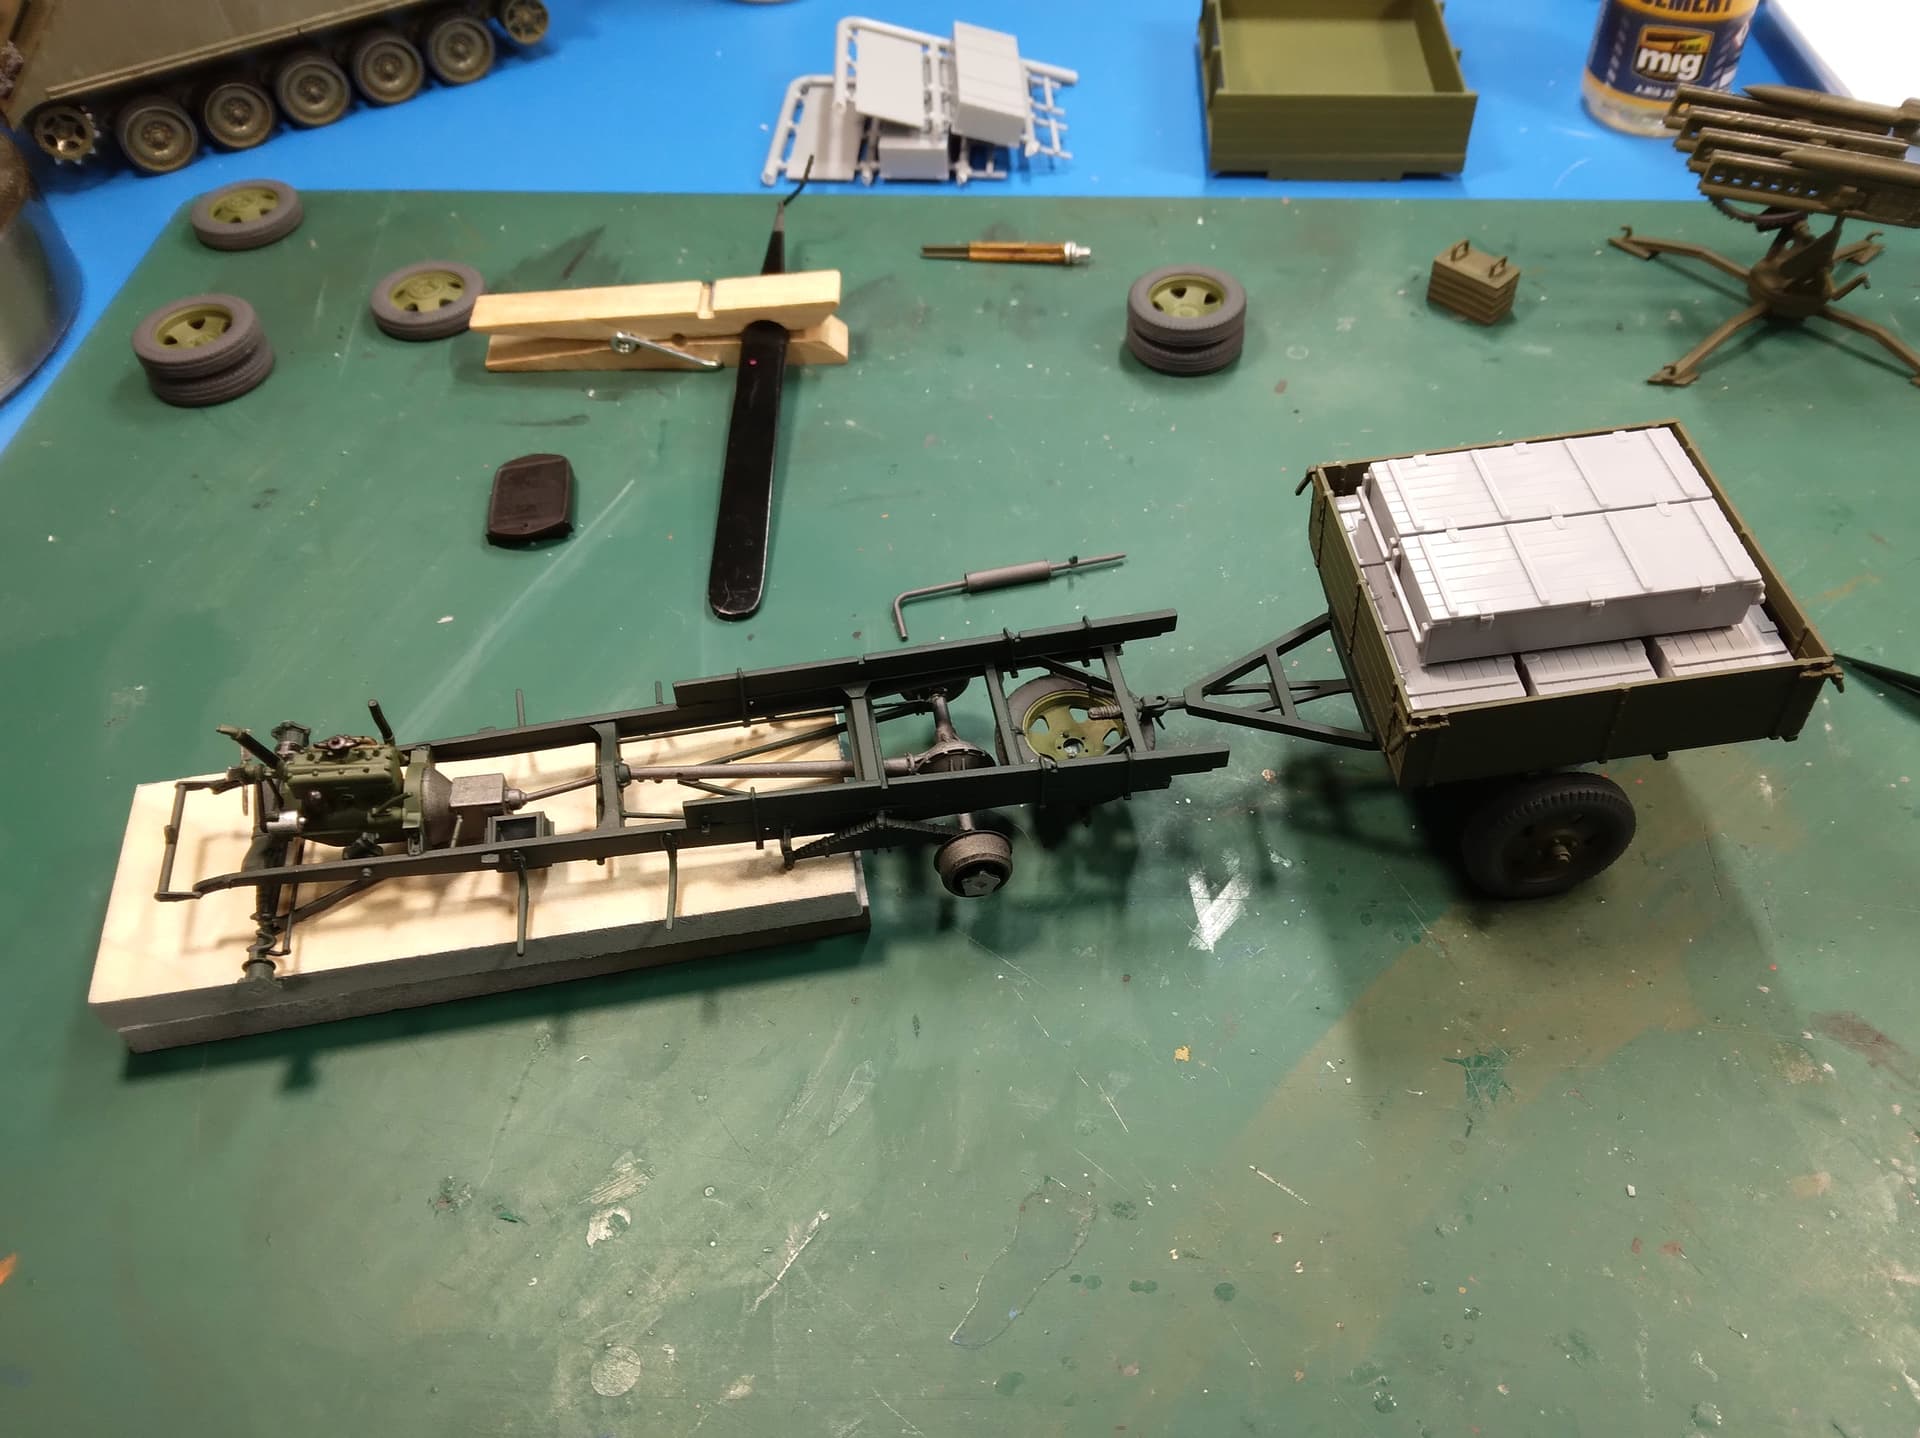
The cab is partially painted and will be ready the the “canvas” roof painting soon.
Mike
9 Likes
Thanks for your kind words, gentlemen!
Tom, plenty of time ahead, so no rush for starting your build.
Having a prolific builder like Nick onboard, I’m sure this GB won’t follow the usual patern of decline in builds and posts!
Mike, bining your build is the least I would like to see!
AMOF, I’ve opened once the box of the trailer you are building and upon looking at the sprues, I realized I lack the stamina to tangle with a dog that old. I know from a modelling buddy of mine, that MiniArt’s GAZ line are difficult kits to build.You are doing an excellent job!
John and Peter, nothing special really, just my usual crap of digging out uselles features, straining eyes, brain and fingers to somehow build them… and cover them with panels!
Nick, I enjoy every build you do!Looking forward to the RG-33
Adding a bit more of my usual nonsense:
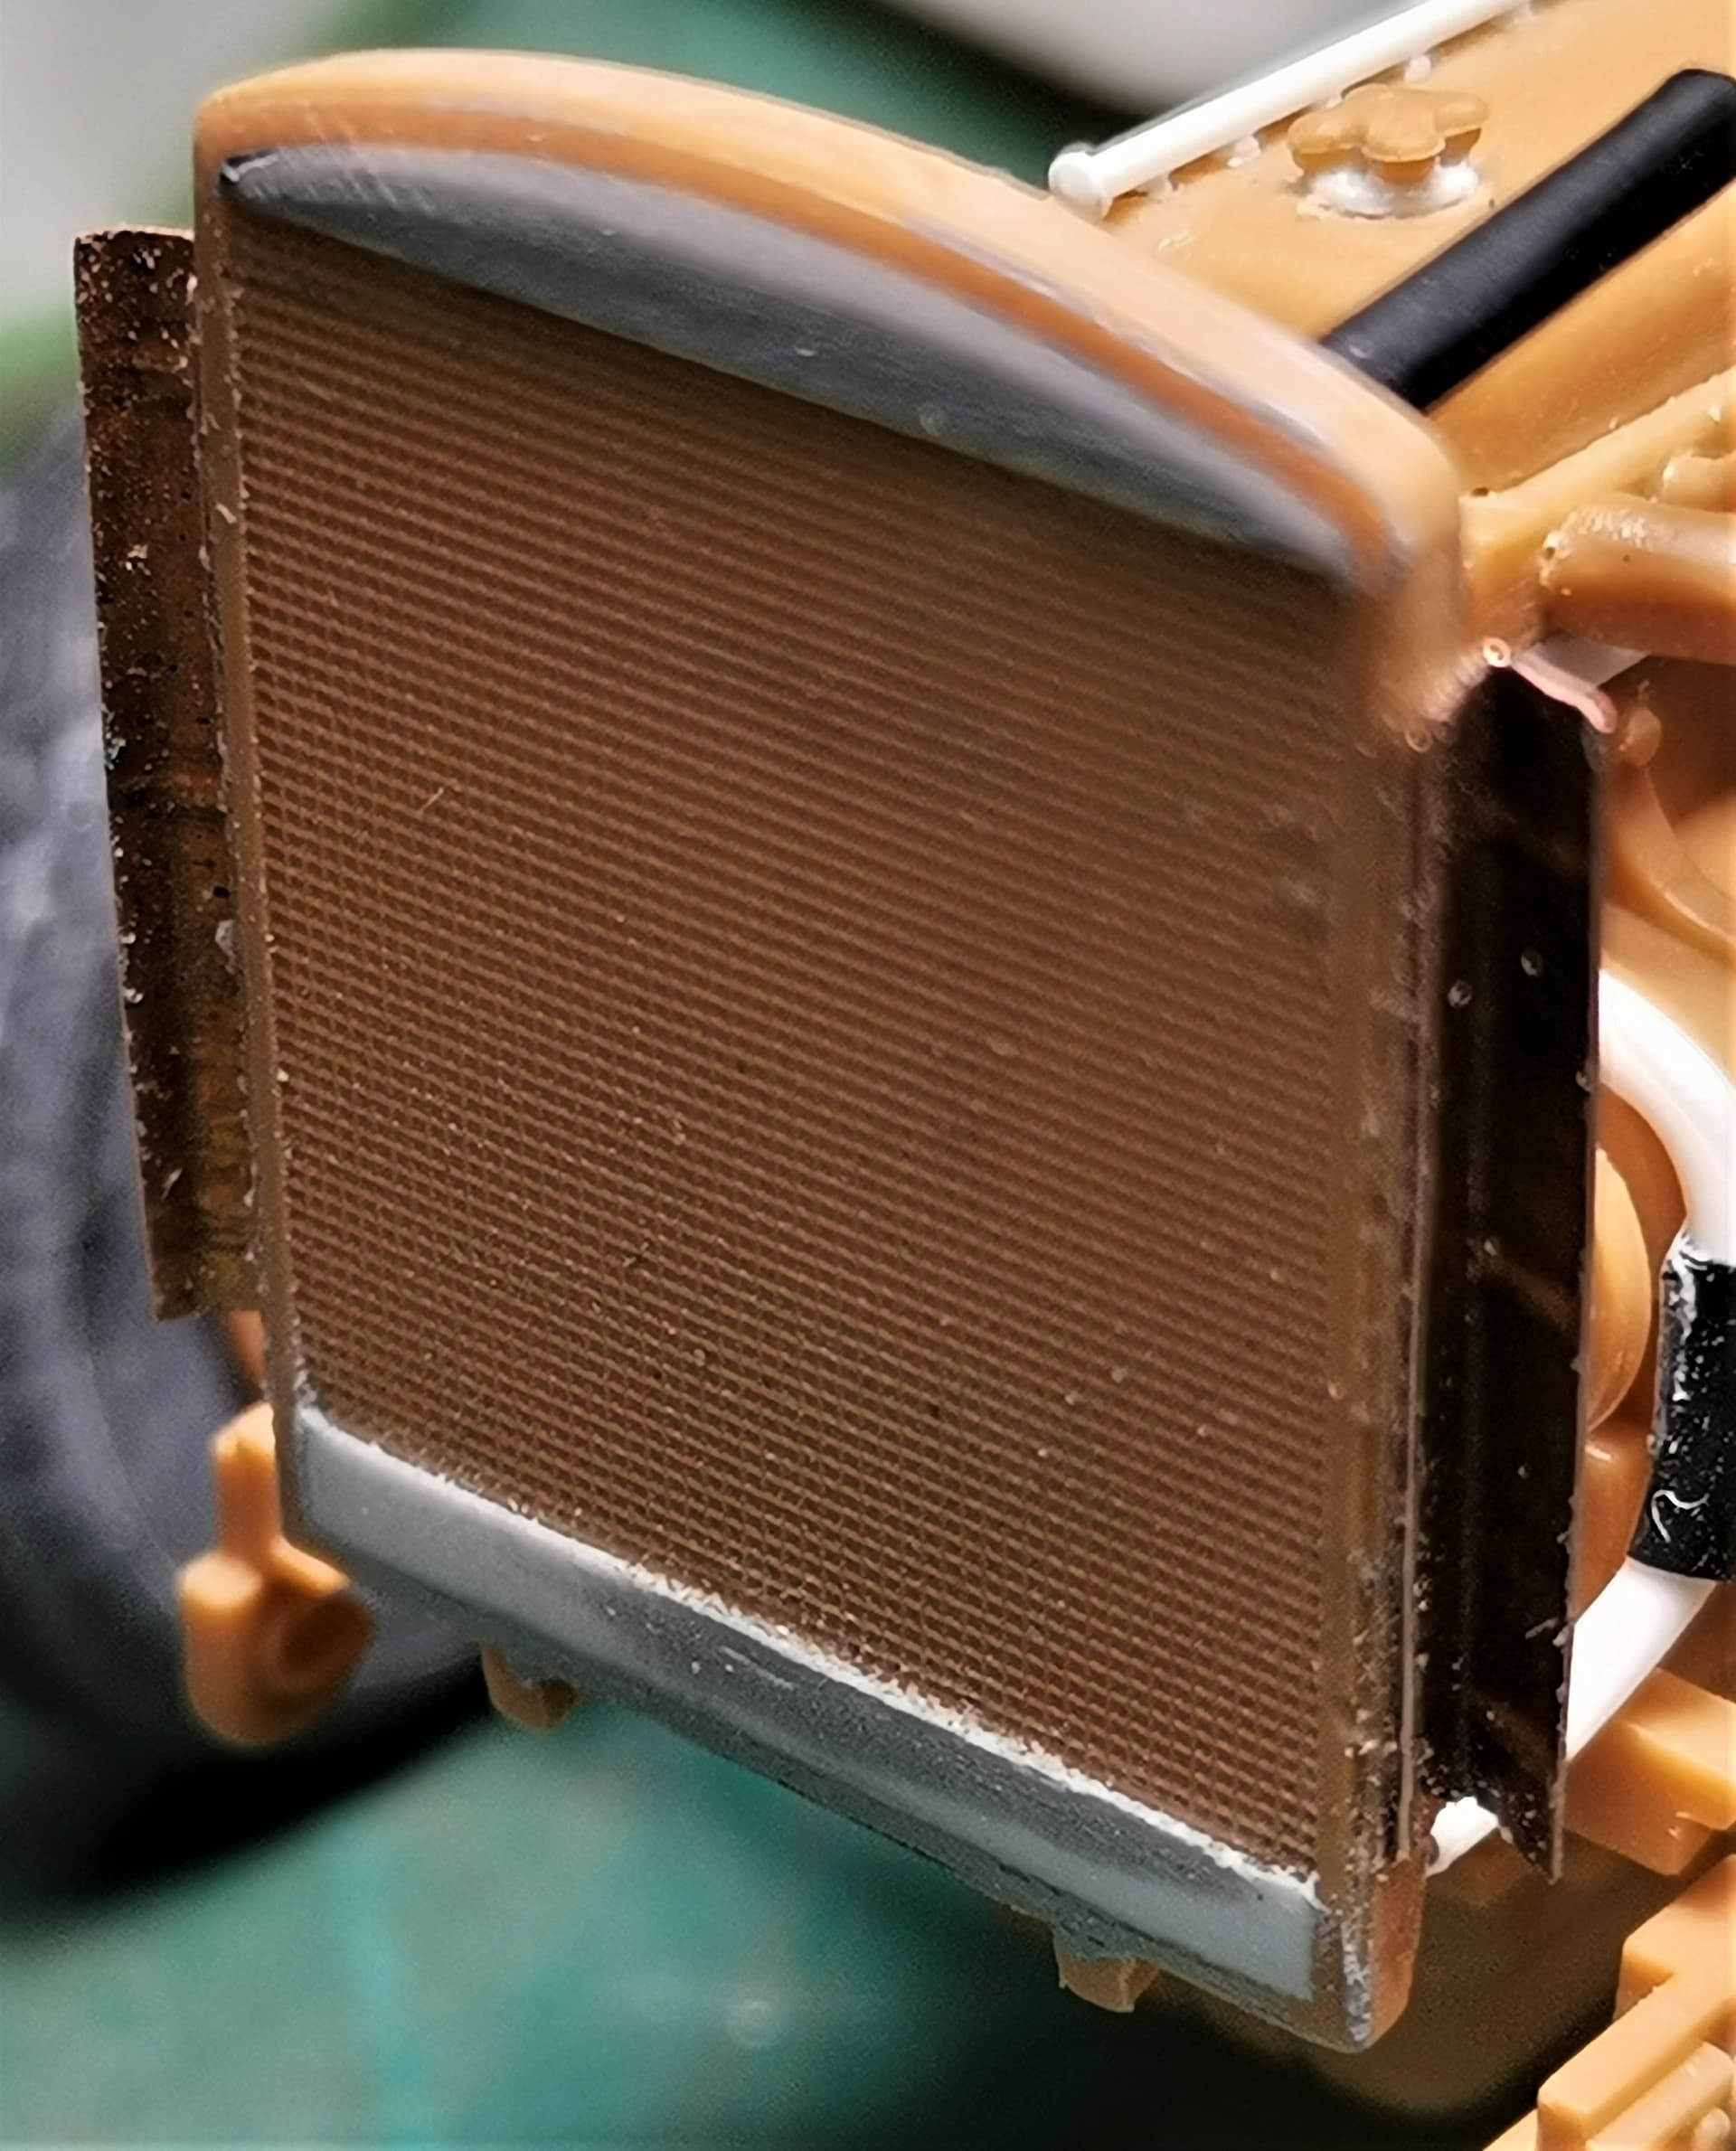
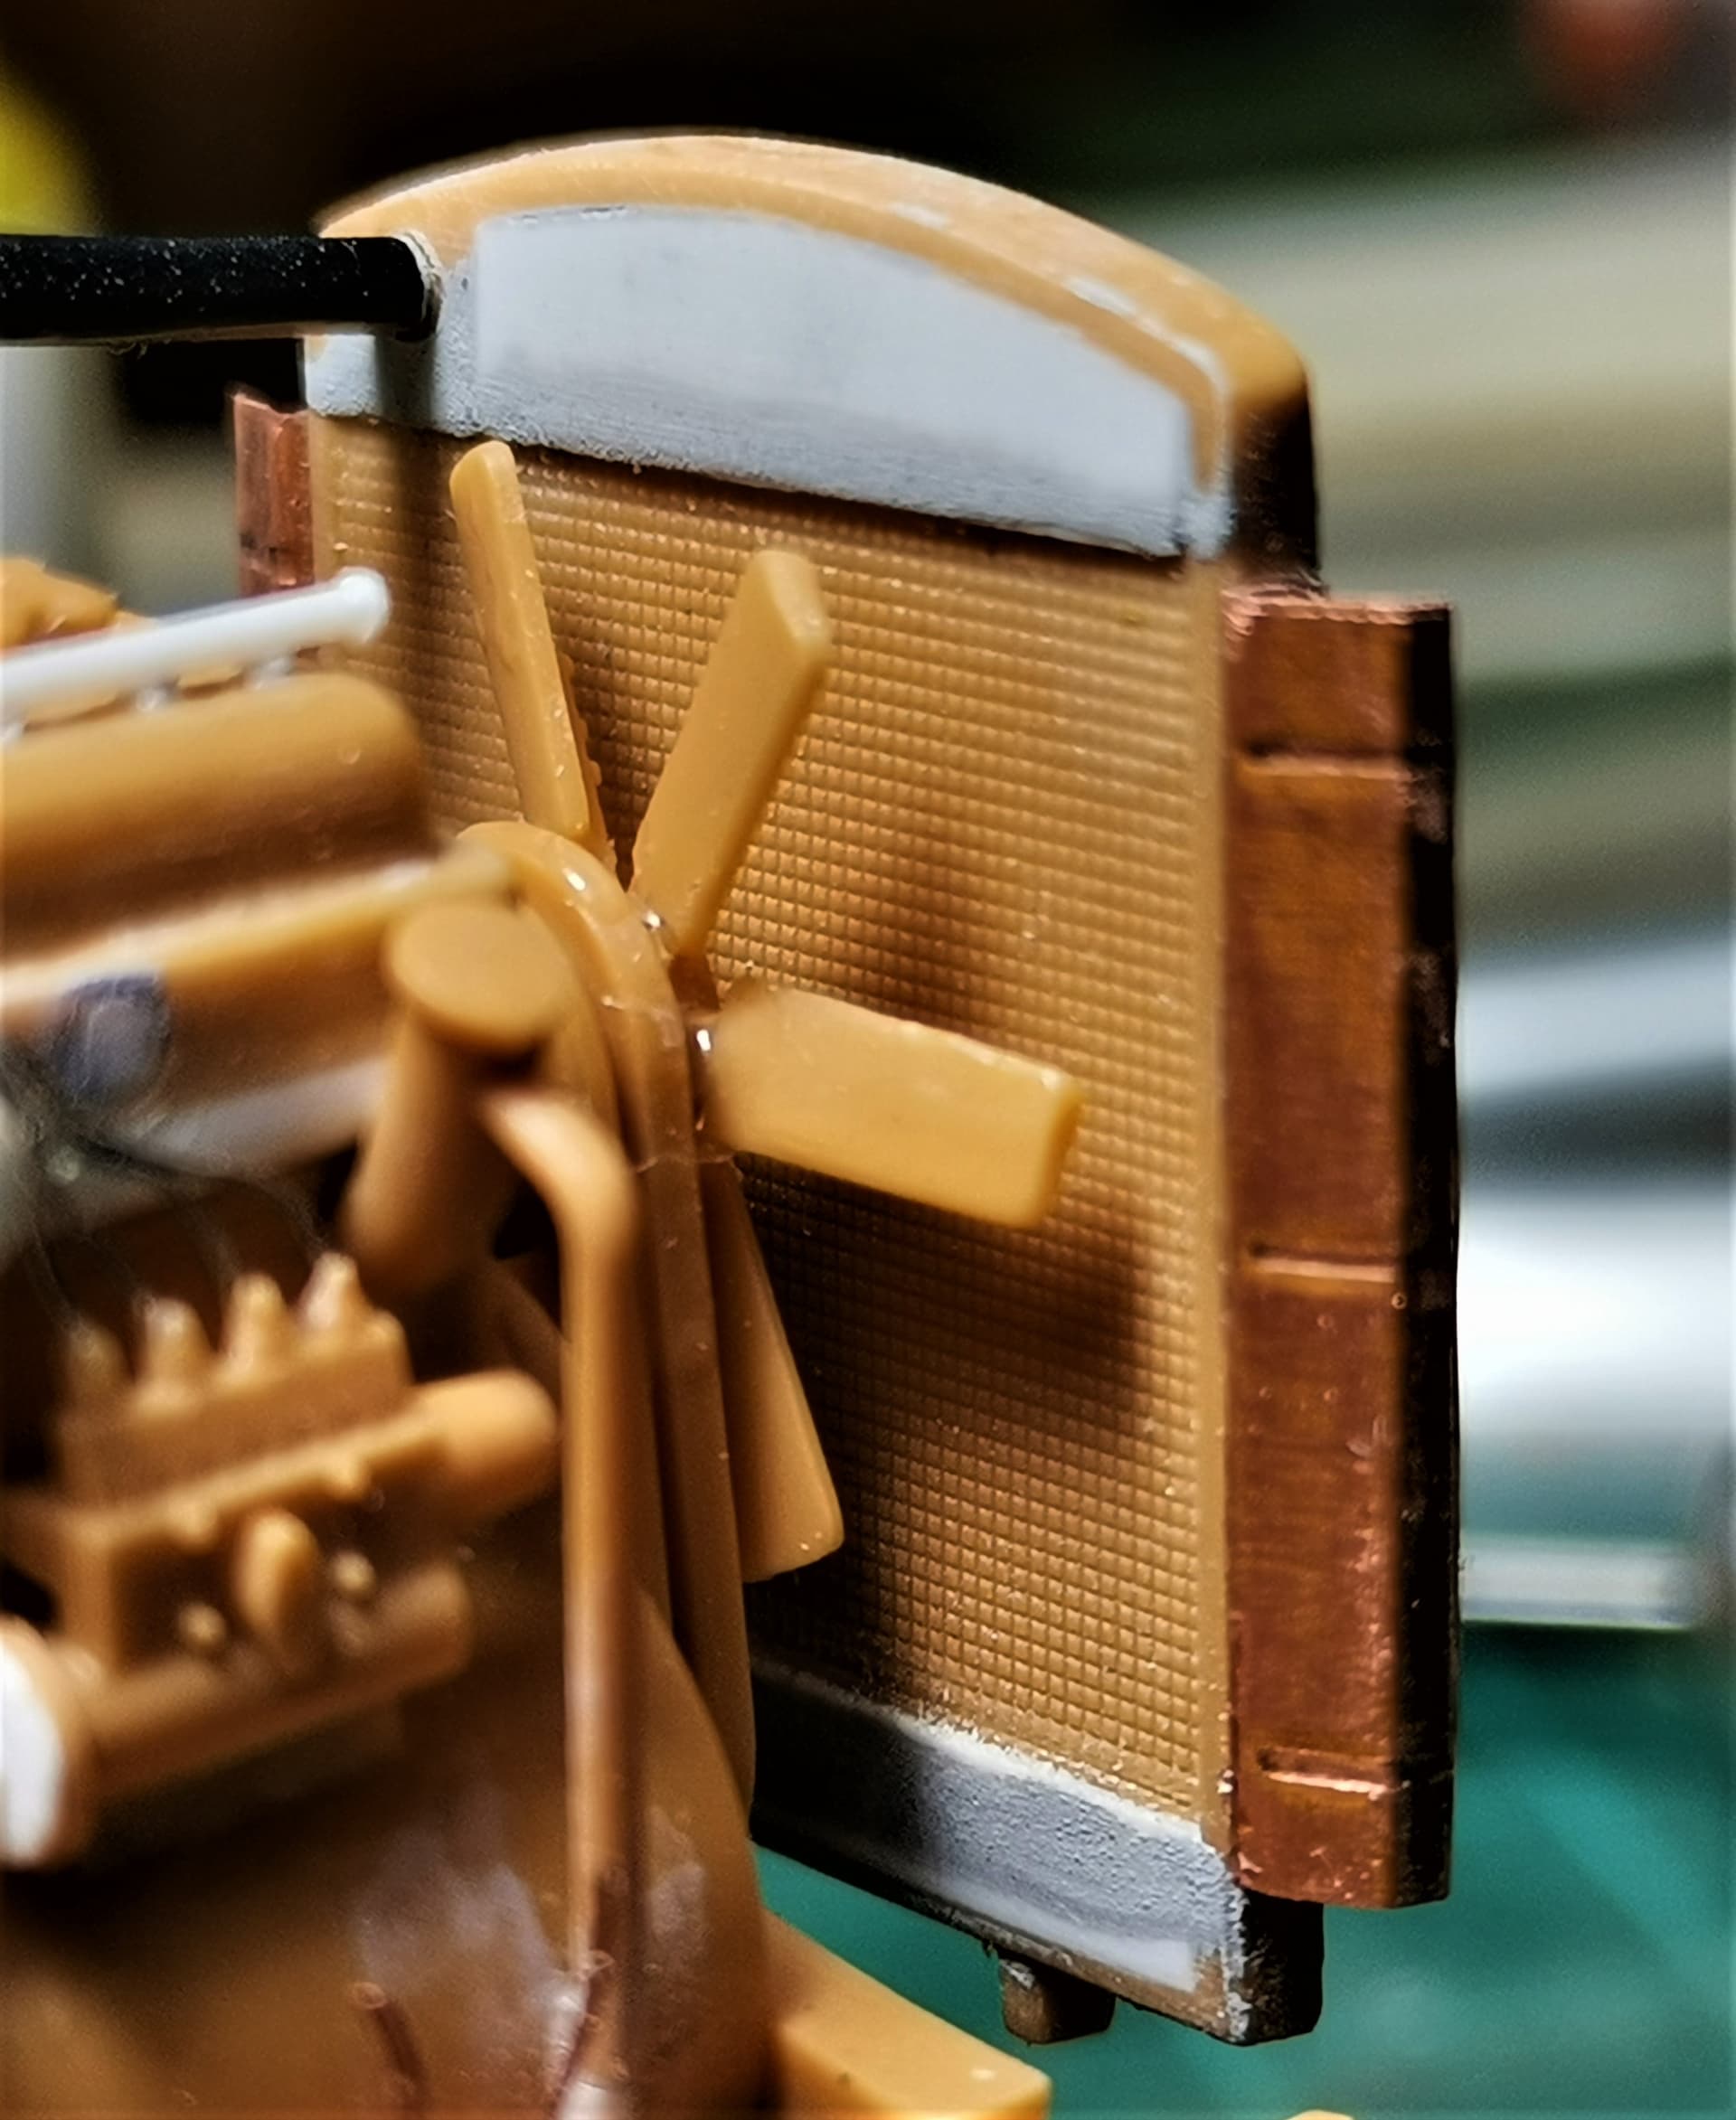
I was not verry happy with the radiator ICM provide in the KHD kit.It looks dull and has 3 deep pin marks on the inner side, in other words- the side that will be visible on my truck.
I lacked a refference, till yesterday, when I found this picture:
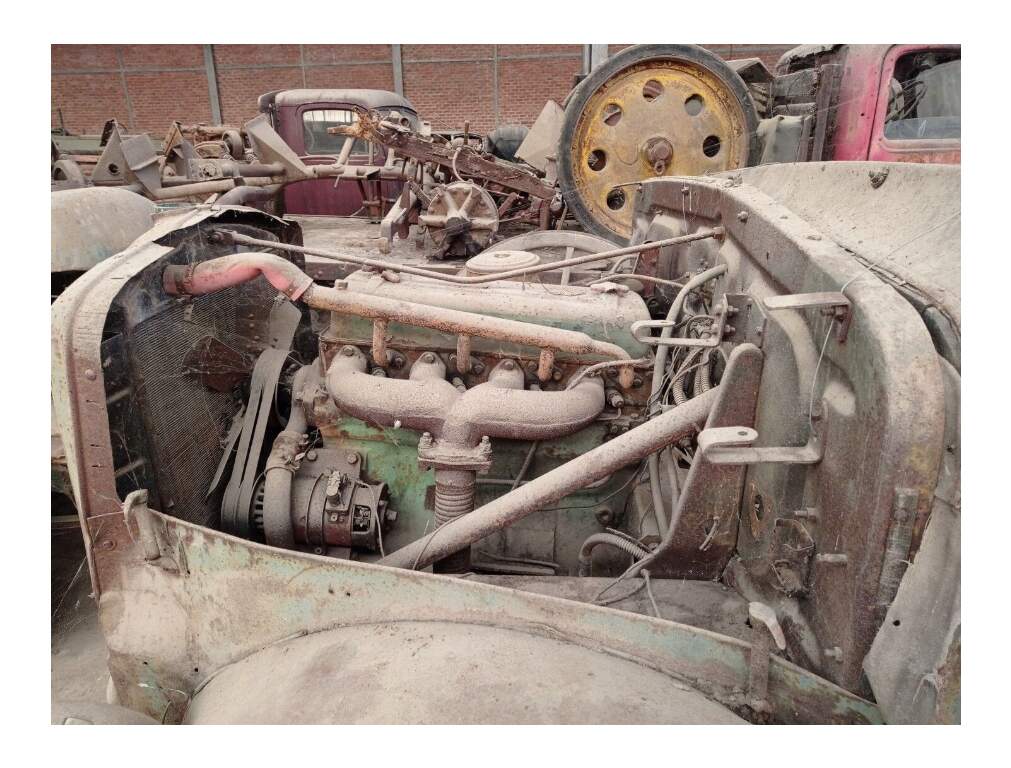
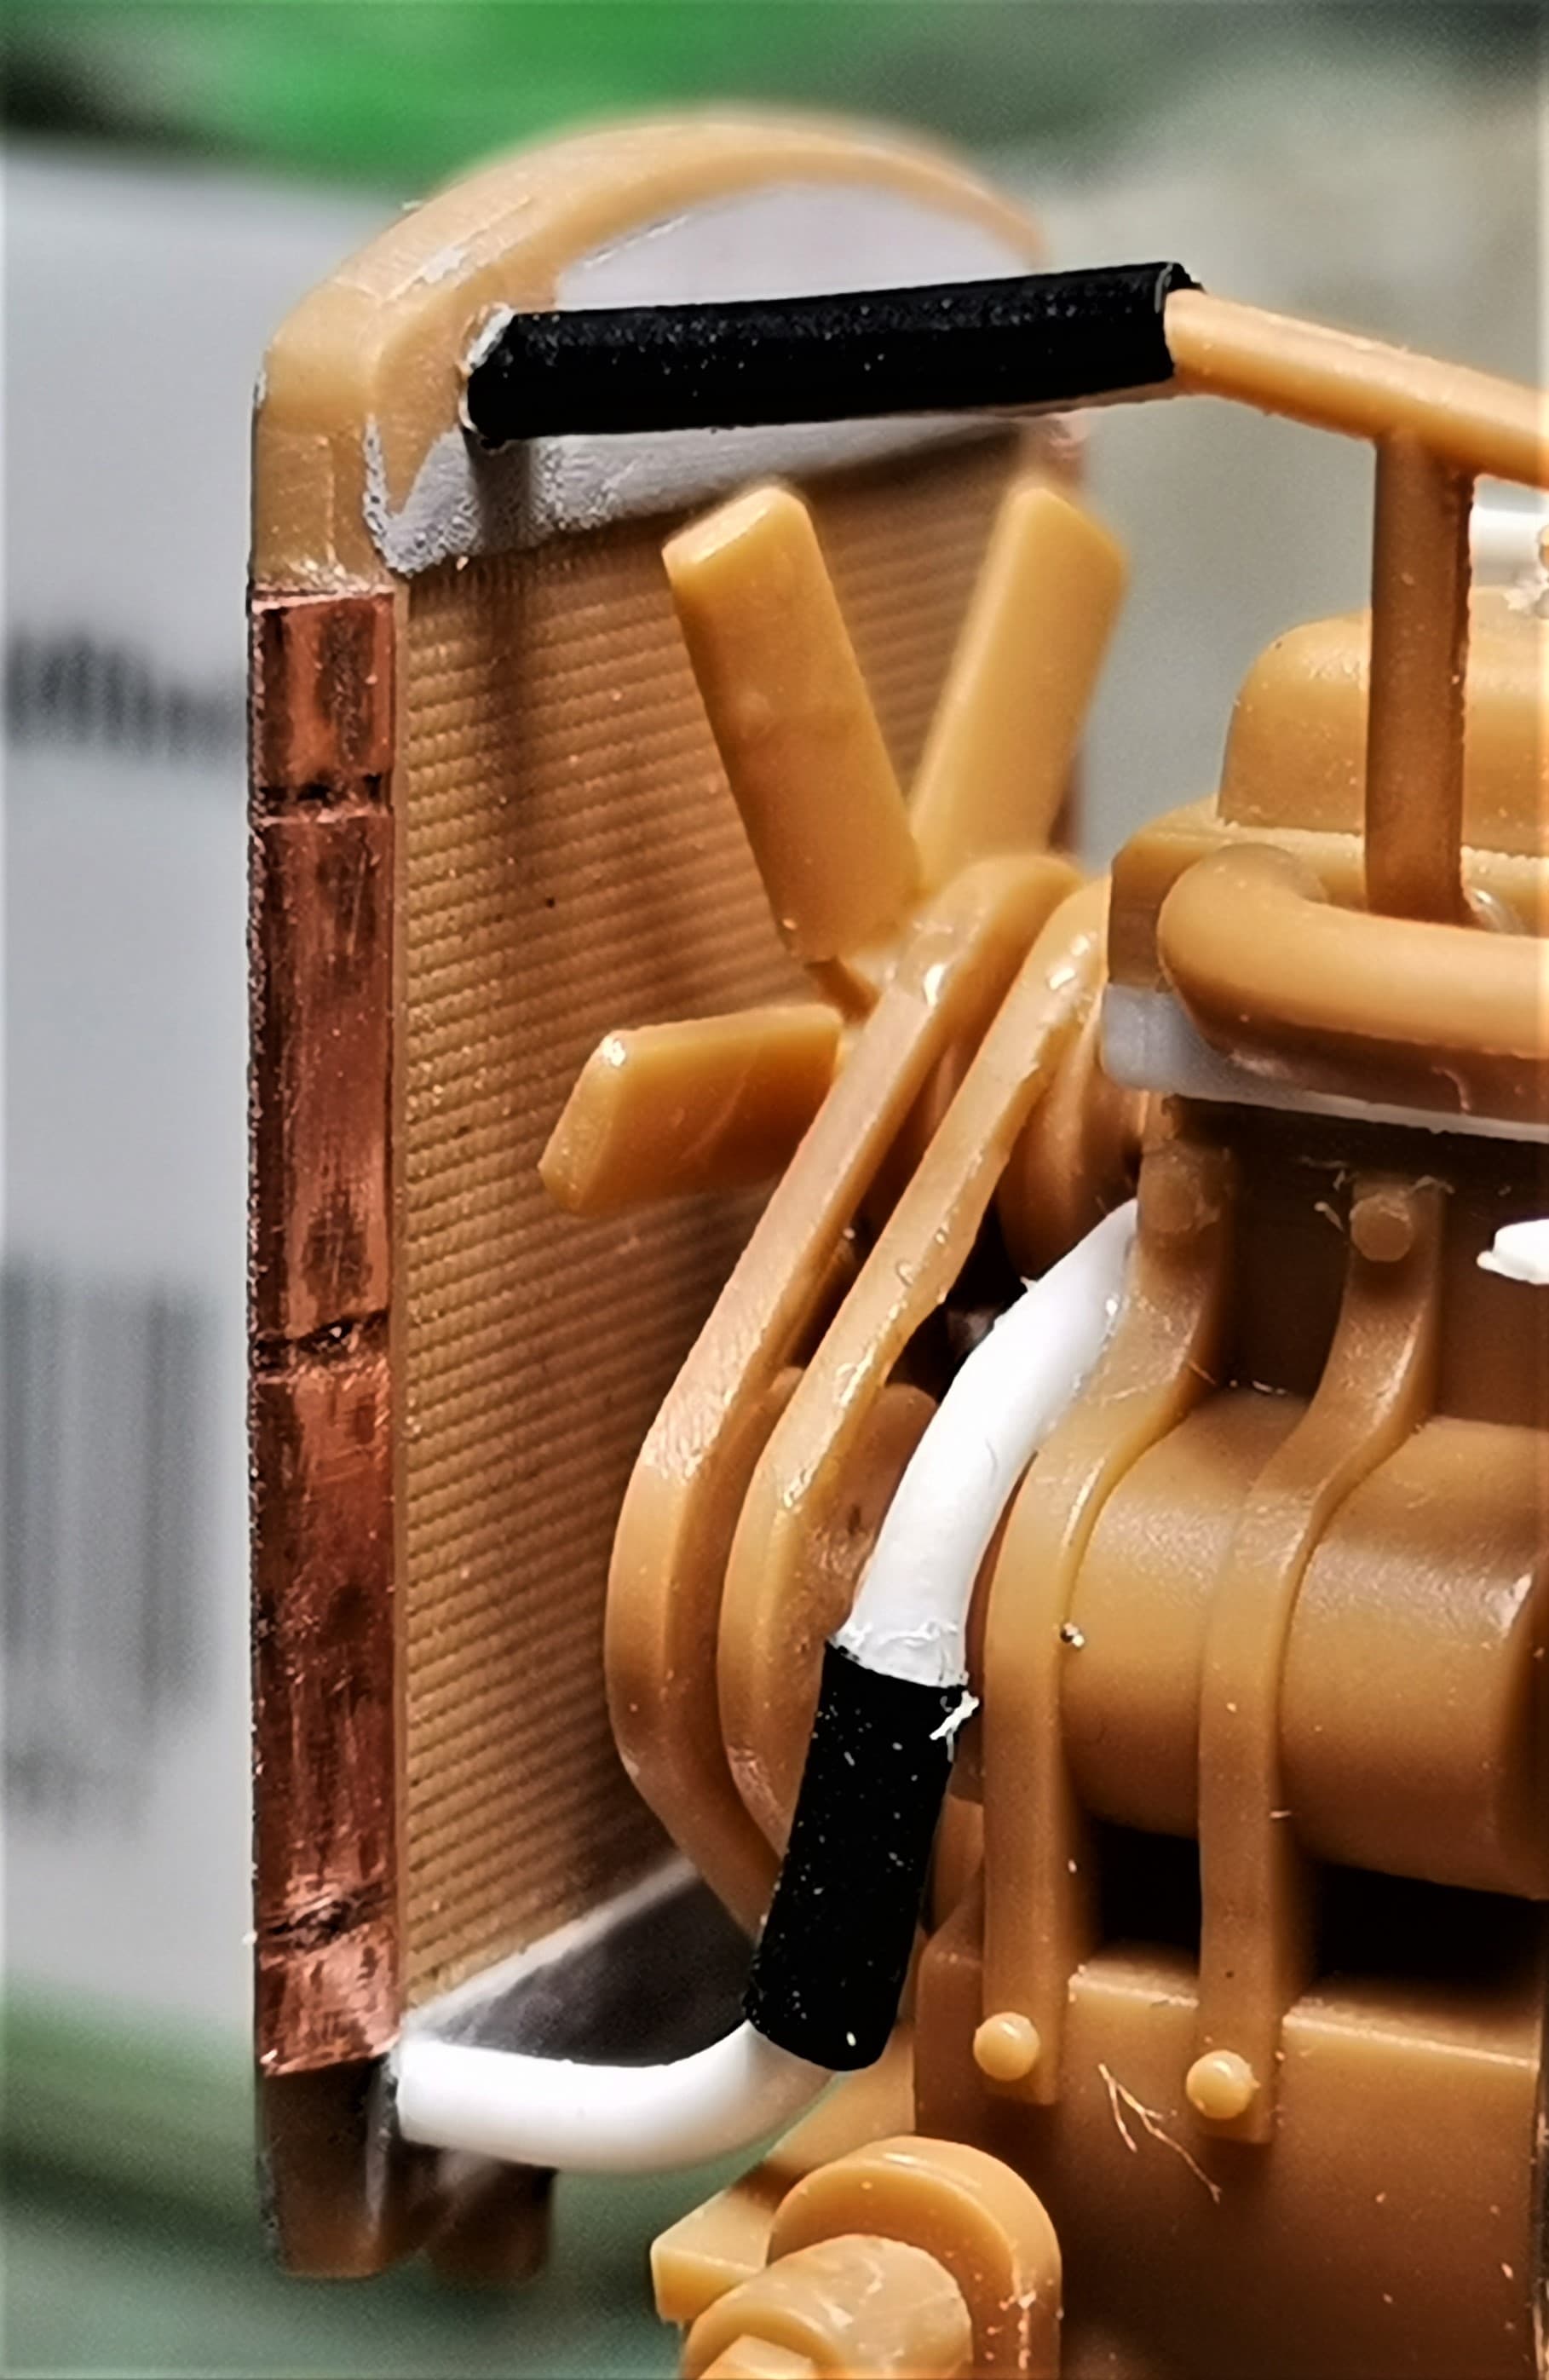
I’ve added some styrene top and bottom on both rad sides(these strips covered the nasty pin marks) and draw, cut, burnished and bent some copper sheet:
Cheers,
Angel
6 Likes
Ryan,
Why don’t you use the raised pin marks as supports for some lines(fuel, brake, oil or air).Select a wire ot styrene rod of suitable gauge, add some glue to pin marks and glue the “line” on top of them.
Transfer the deffect into effect ![]()
BTW, having a set of modelling chisels is a must!
Cheers,
Angel
7 Likes