Looking good. More info on detailing the crane. I followed this and got great results.
3 Likes
Gino, thats excellent. I remember looking at that when it was first put on the site but totally forgot about it. Its perfect for the amount of detailing I want to add, so will get cracking with that tomorrow … thanks for the reminder link … much appreciated mate ![]()
![]()
1 Like
That’s cool! ![]()
![]()
—mike
That is a great link going back to the crane and how you can improve it, however, I was going to look at other references and I found a bit of an error, both with the Italeri instructions and how Michael assembled the hydraulic rams.
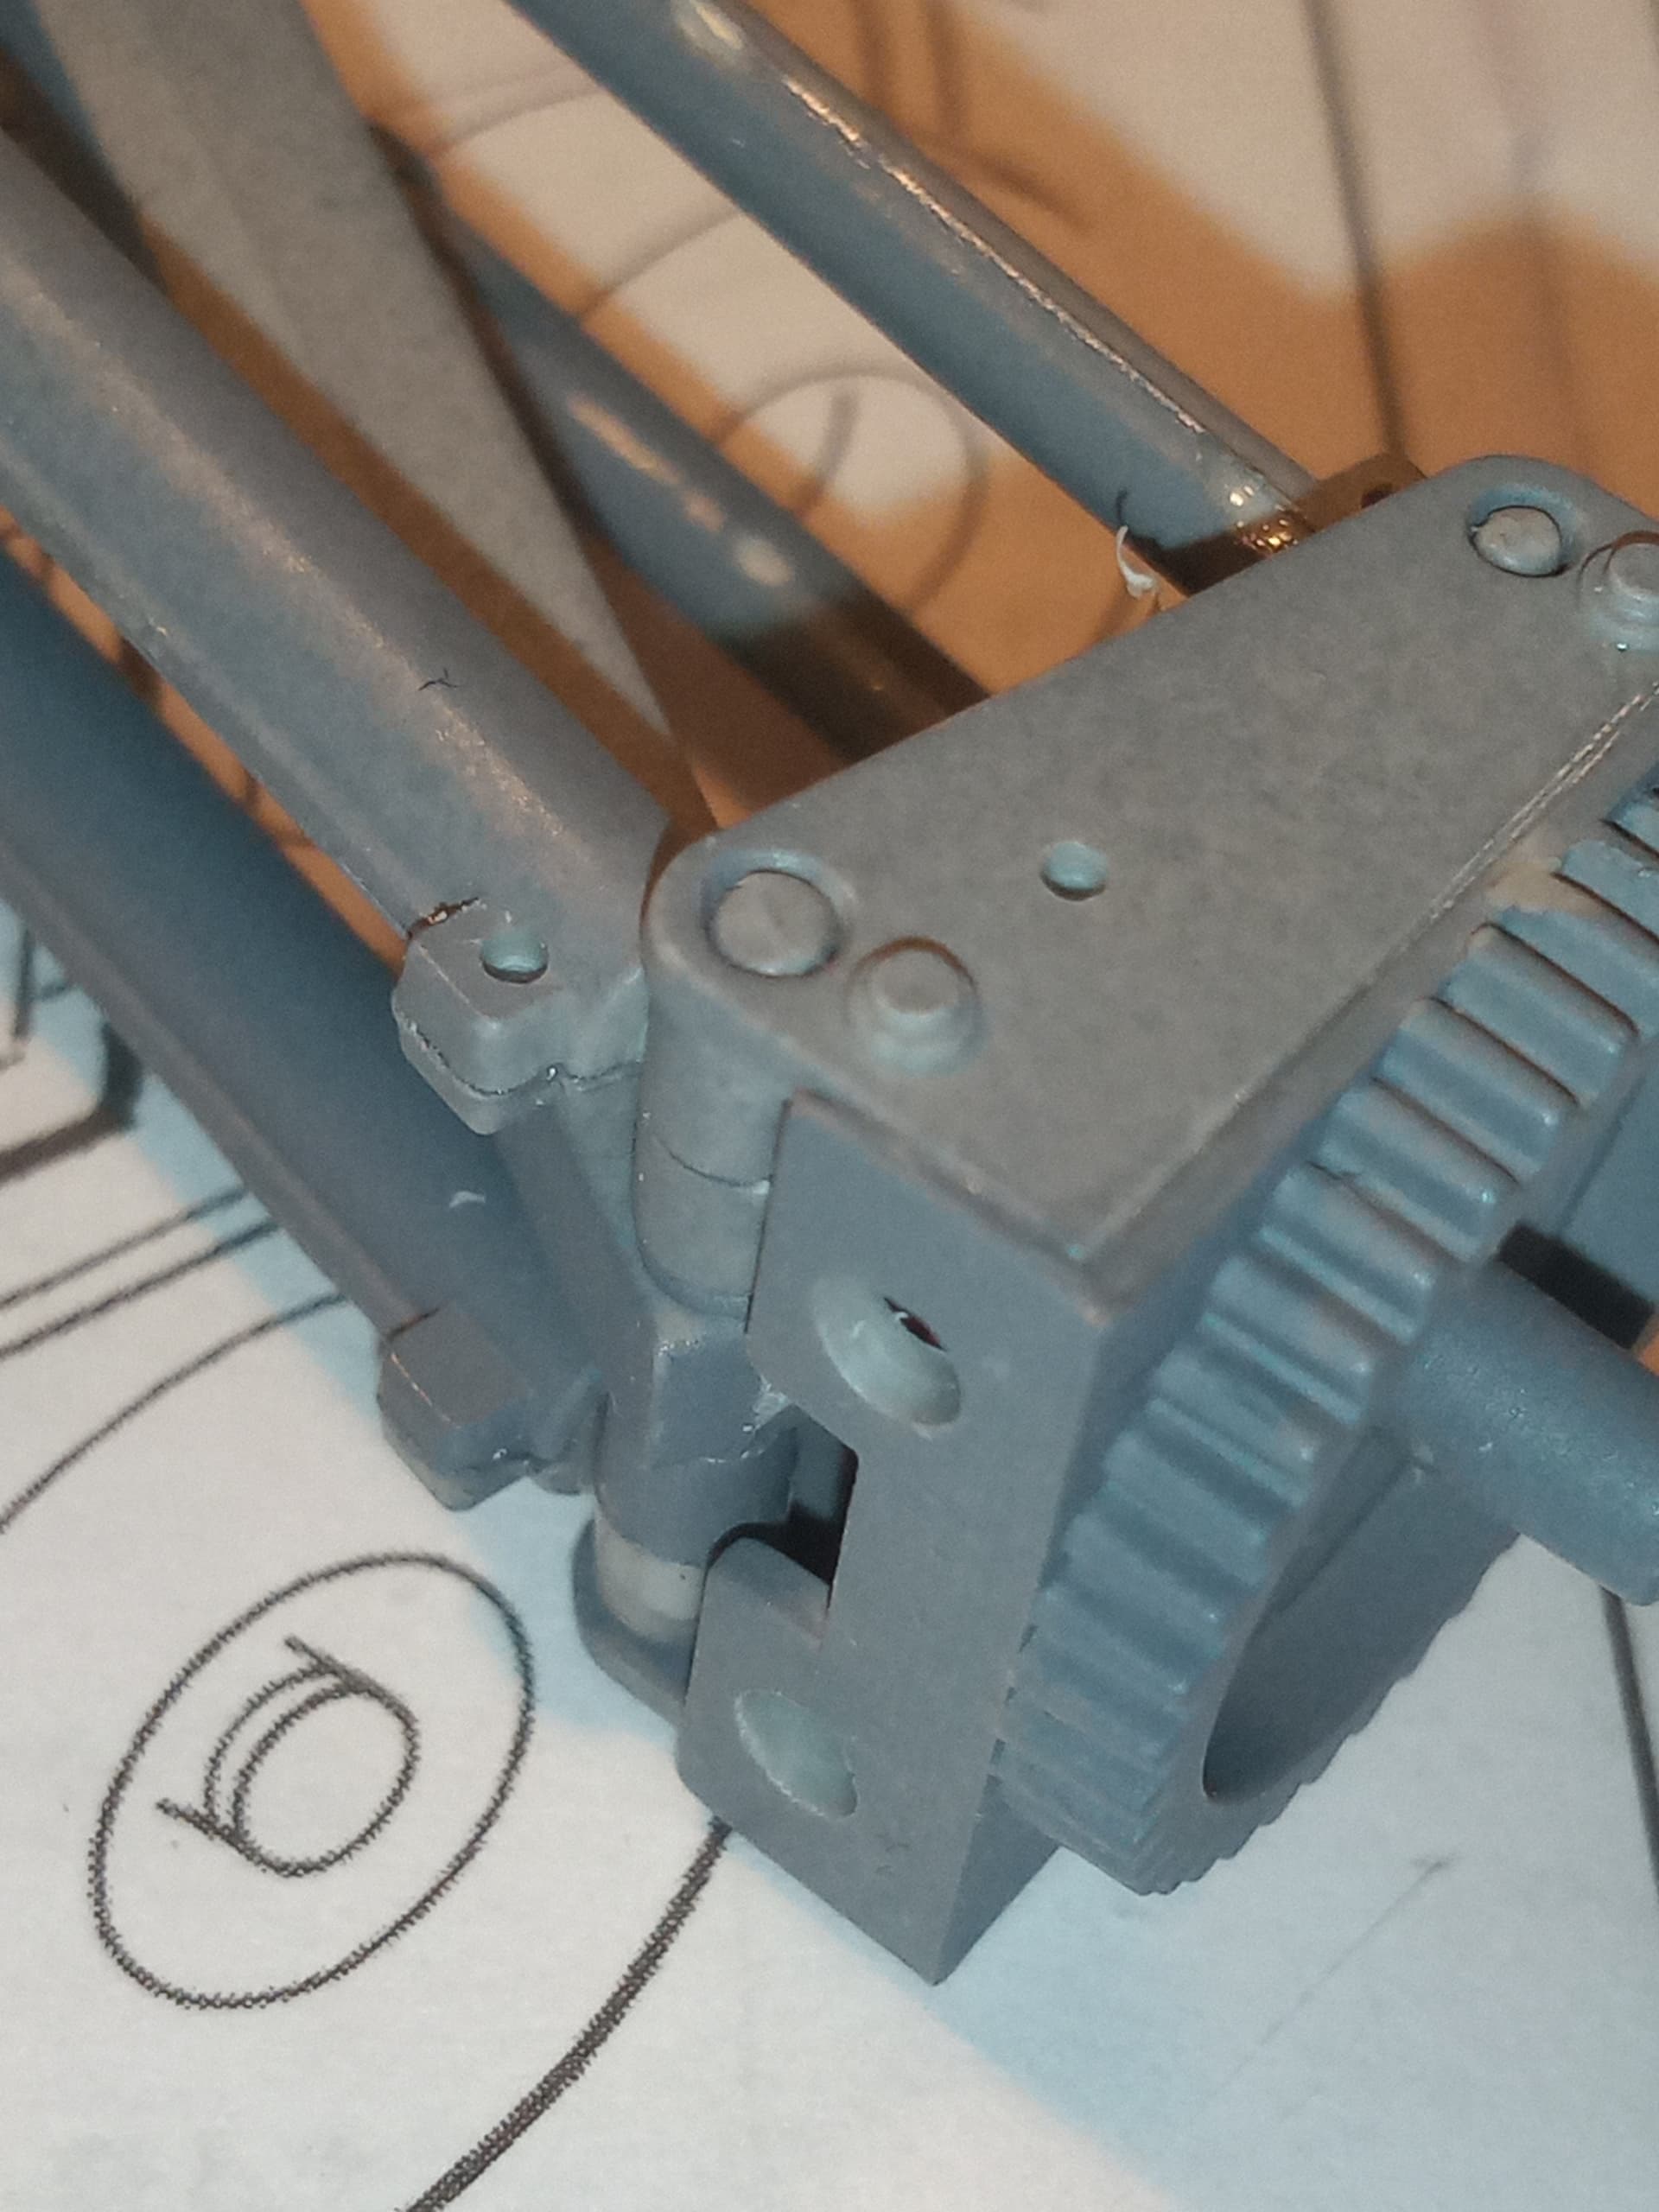
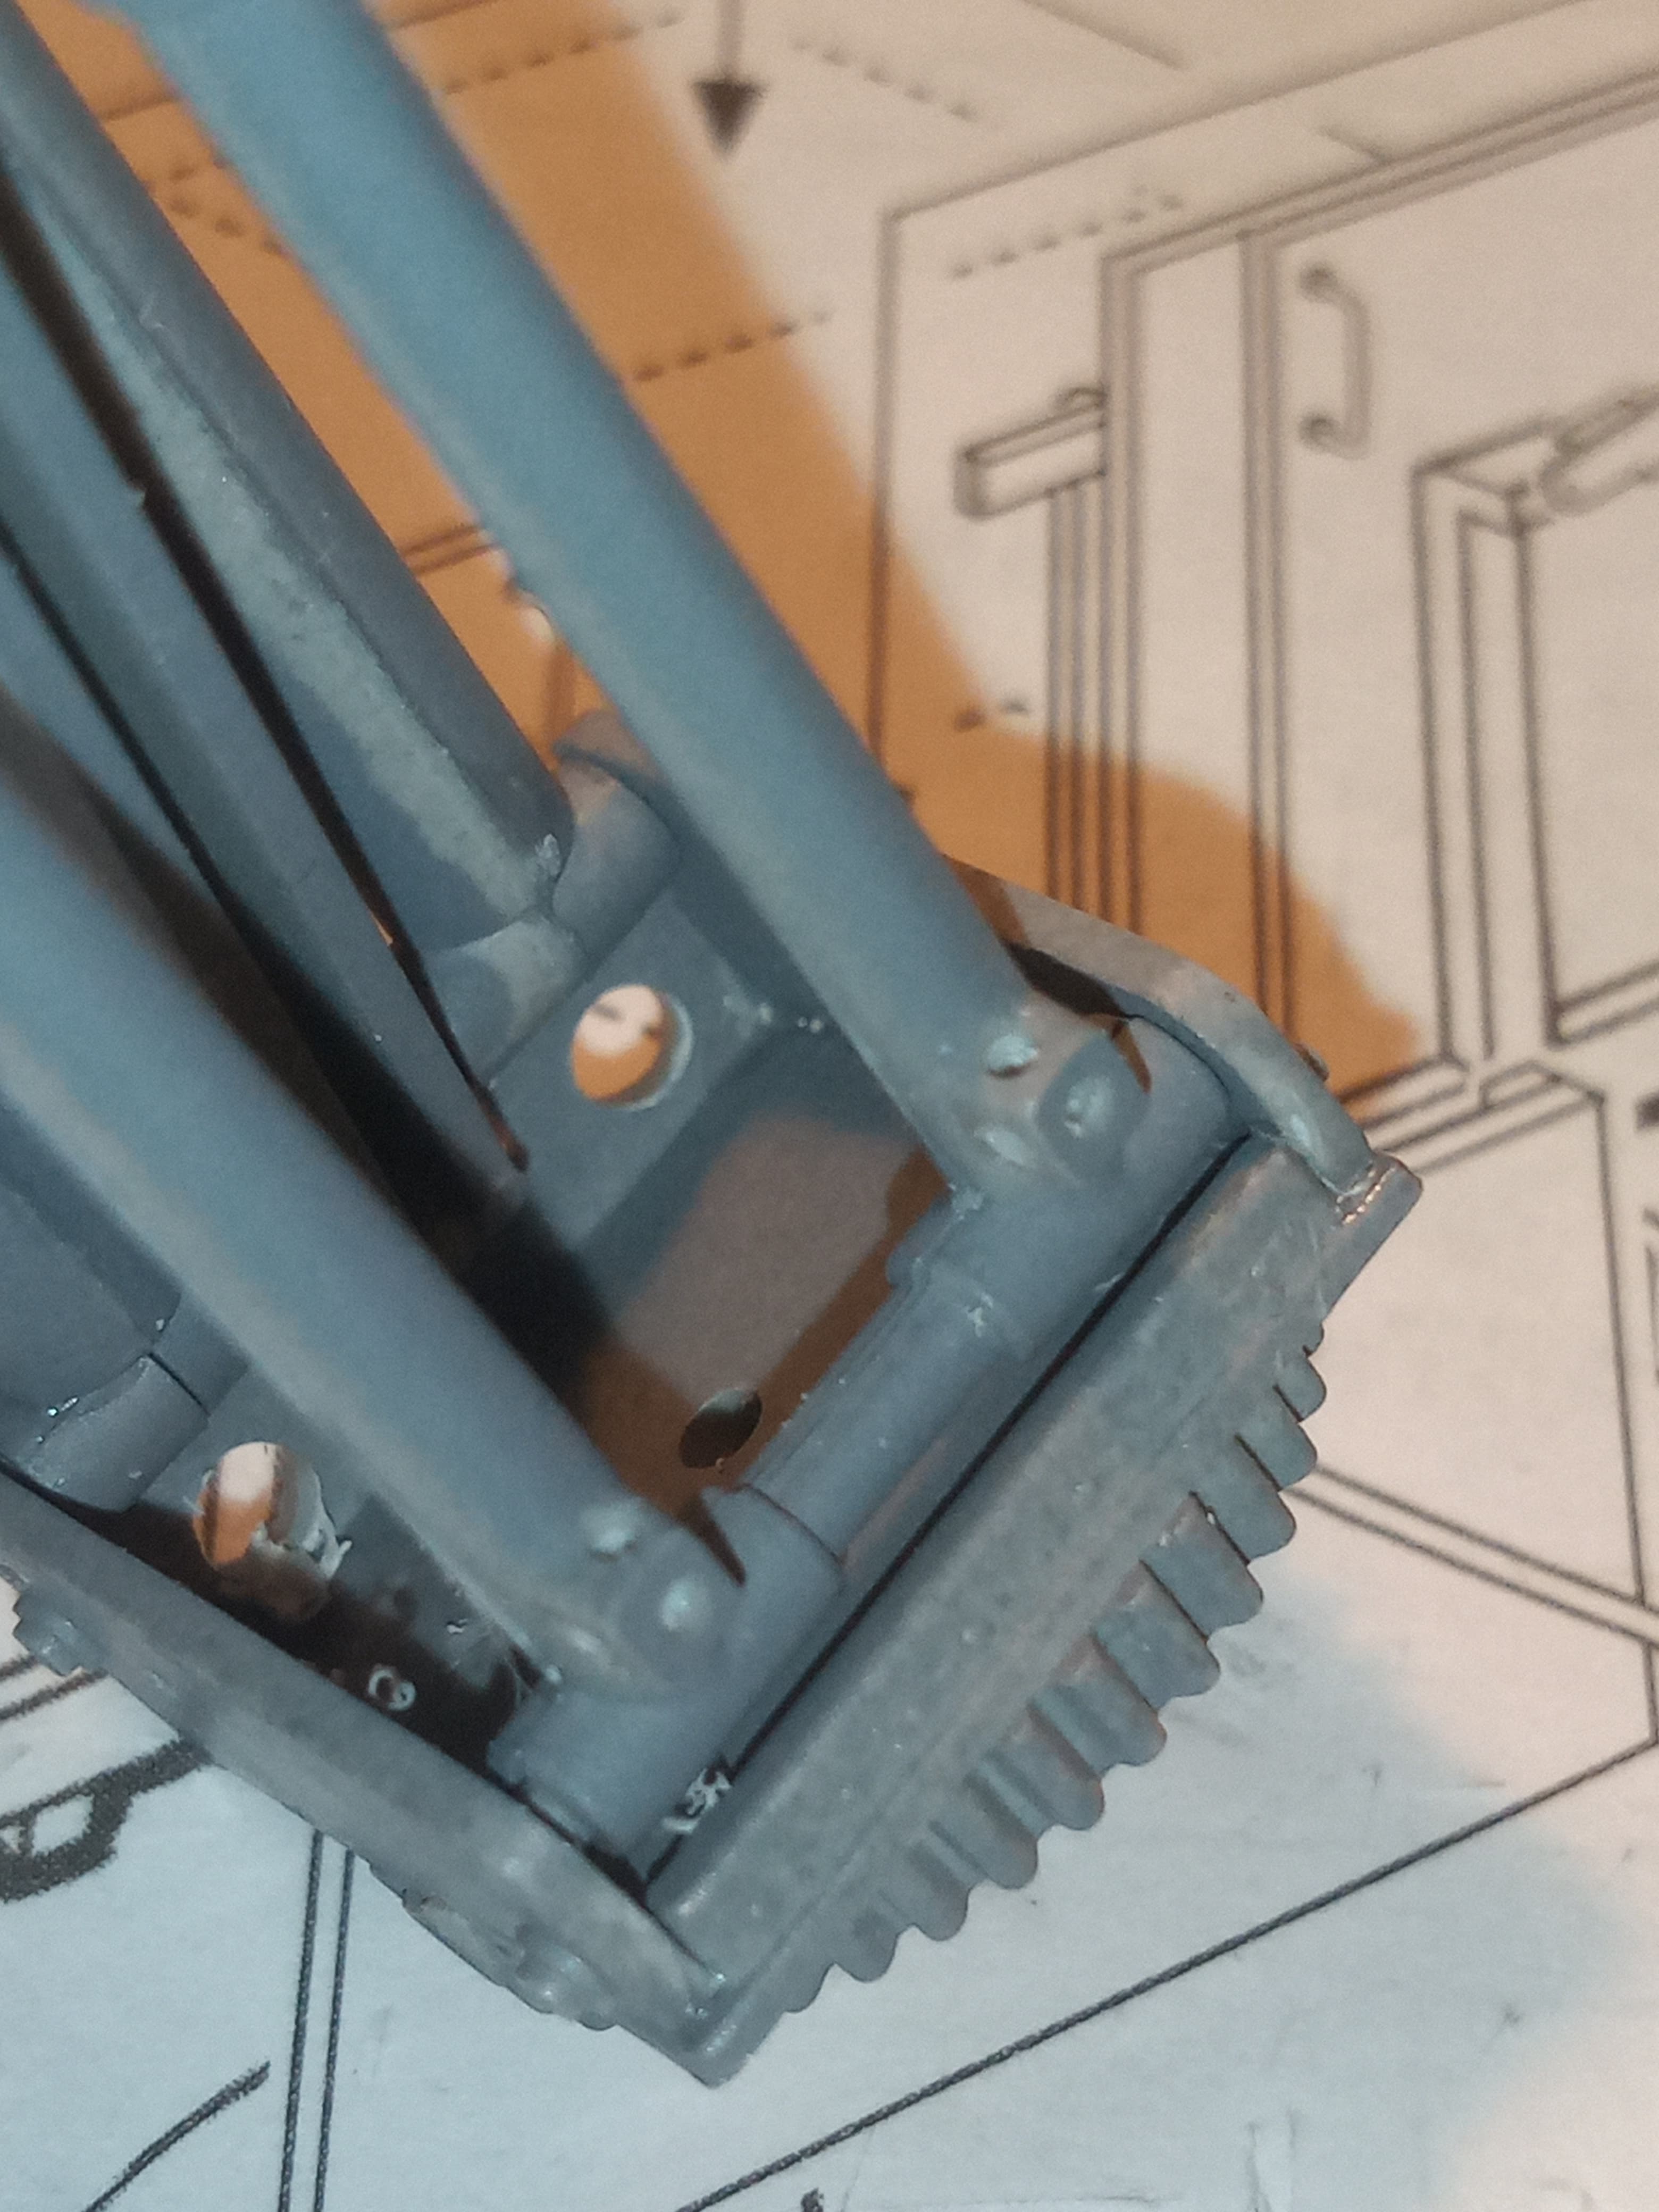
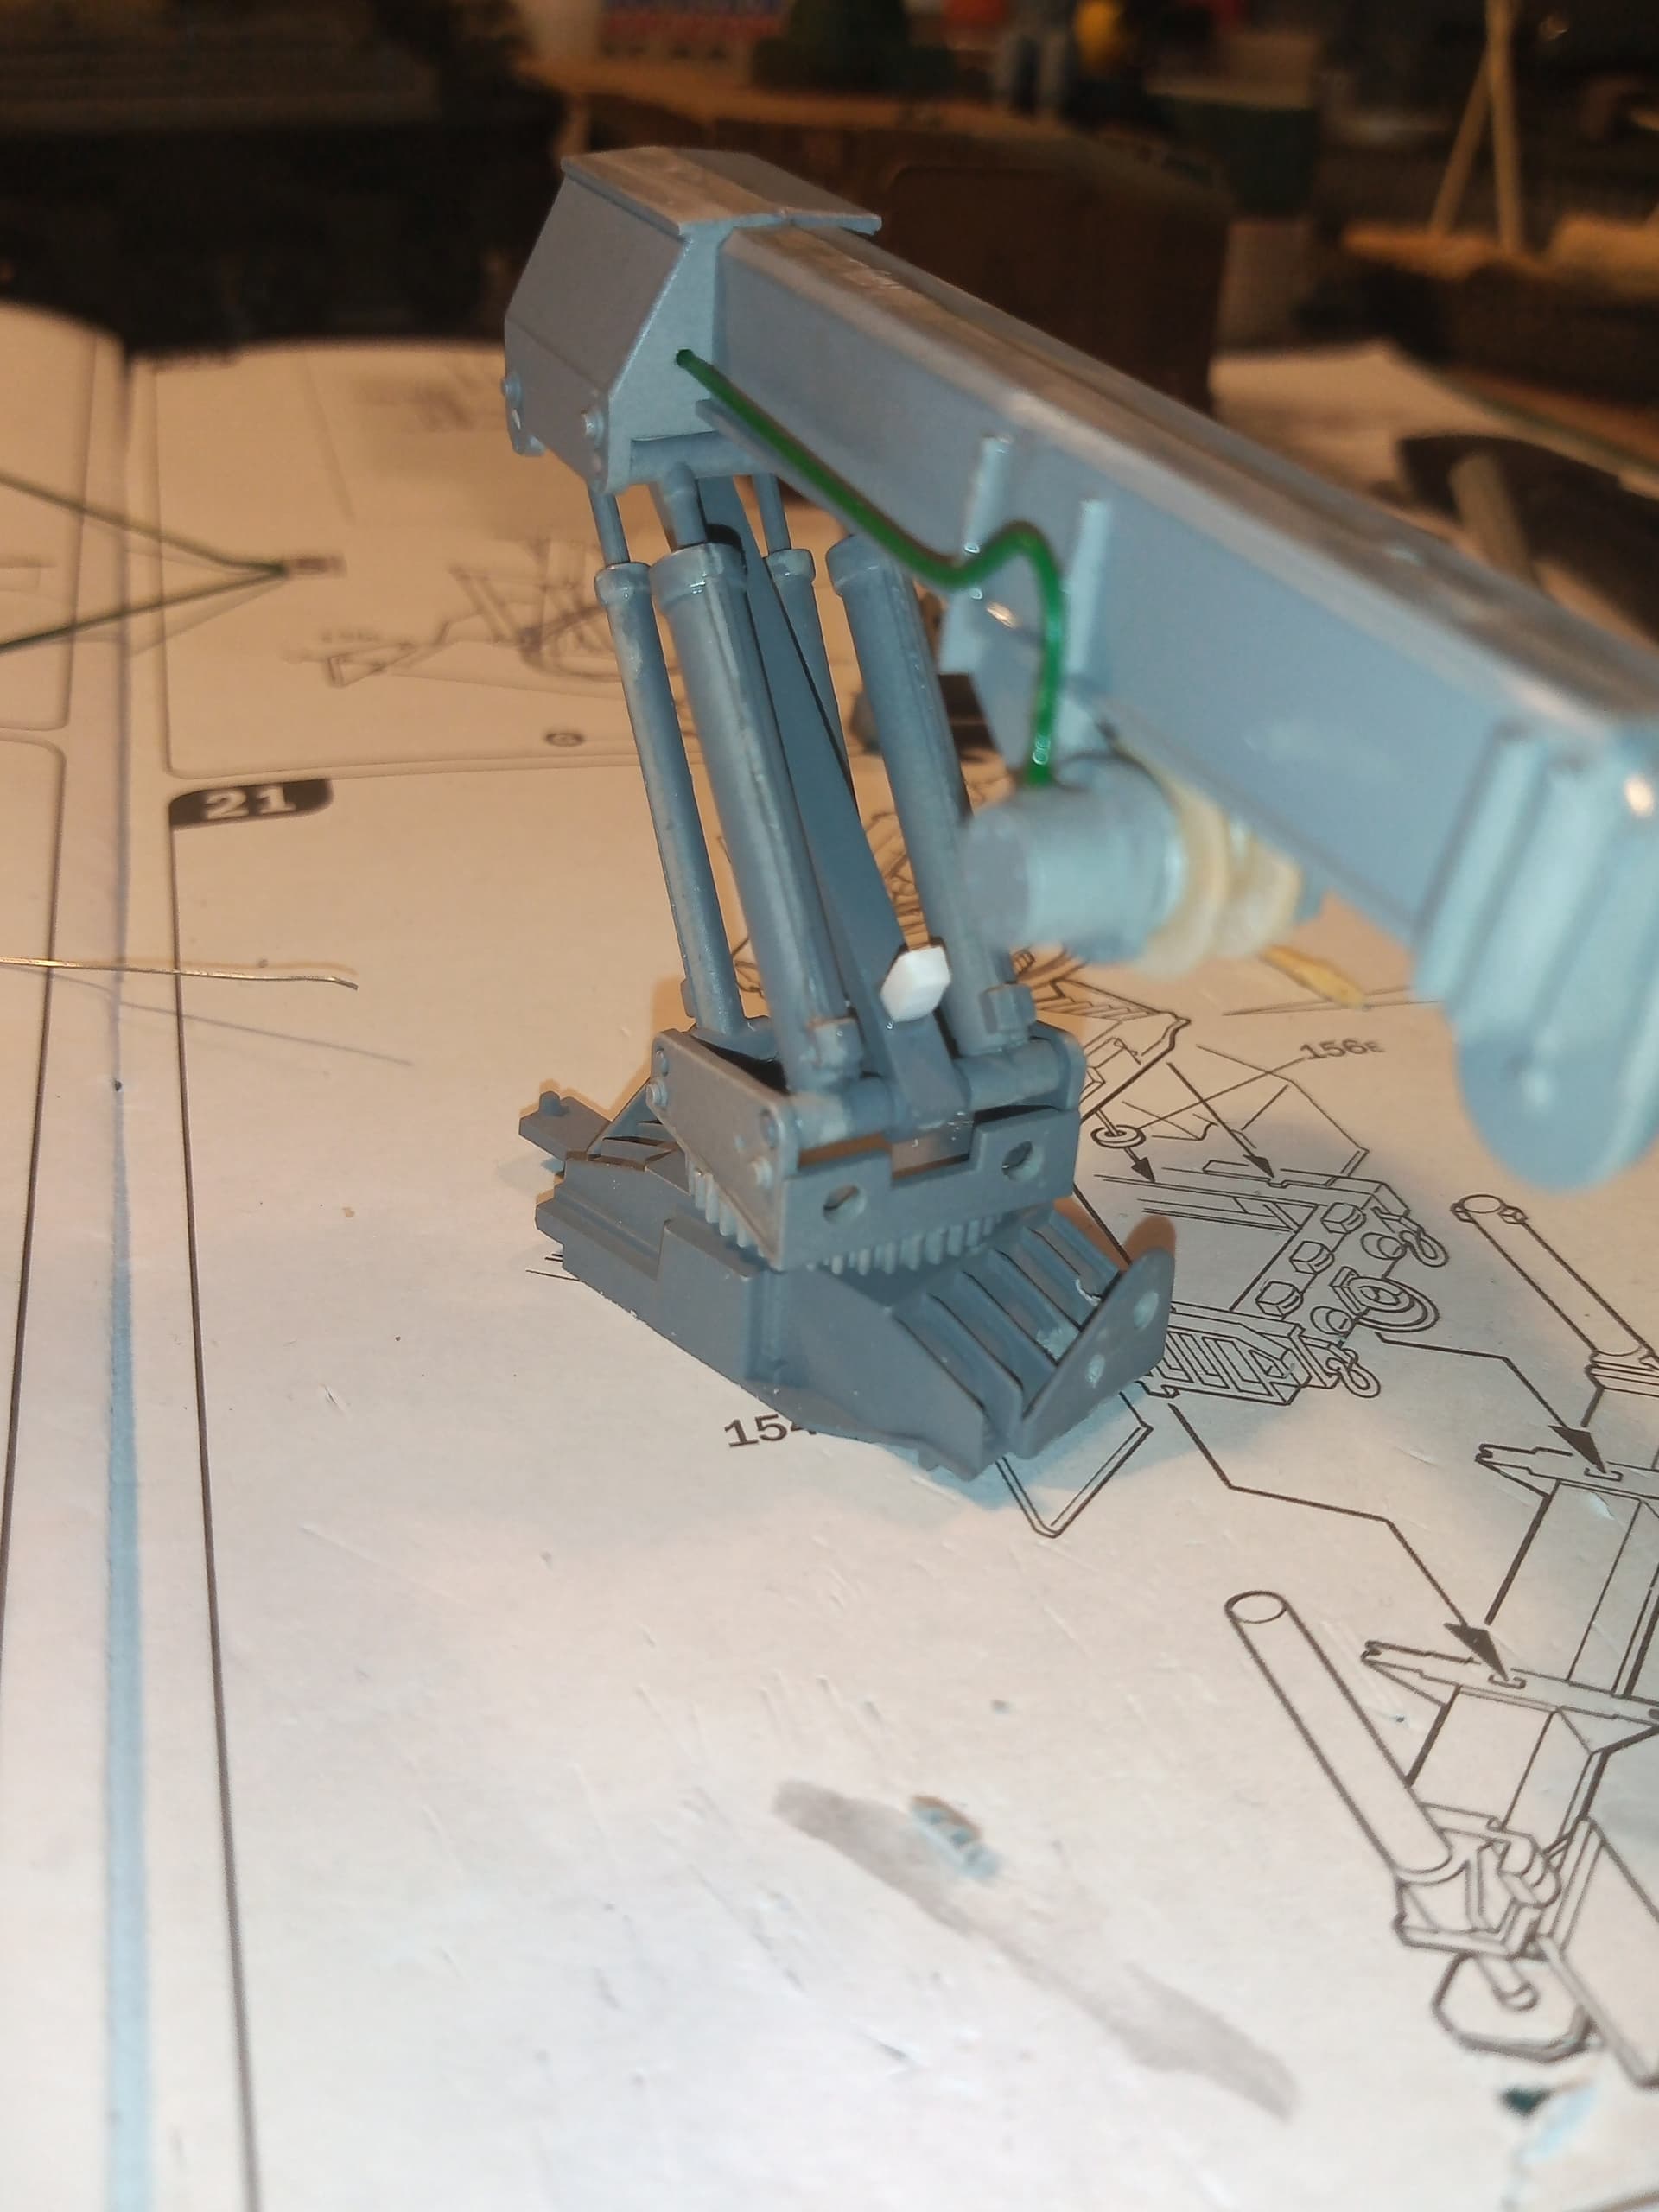
On this image from the link you can see the hydraulic blocks on both rams face one way. The one circled in red should actually face the other way.
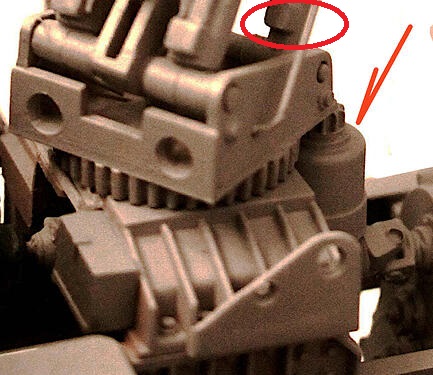
as you can see from a walkaround image from the web and for discussion only. Again, both the blocks on the smaller rams circled in red actually face outward.

I feel into the trap and assembled mine wrong, as the initial diagram on the instructions is right, but further ones all have the block showing in the wrong direction, but it was an easy fix thankfully and its all ok now.
I also decided to remove the cable drum, cut it up and scratch build another which will allow me to show some cable actually wrapped around it
I also built up the left hand end of the drum with 3mm masking tape which was then set with superglue to make the kit part the correct size.
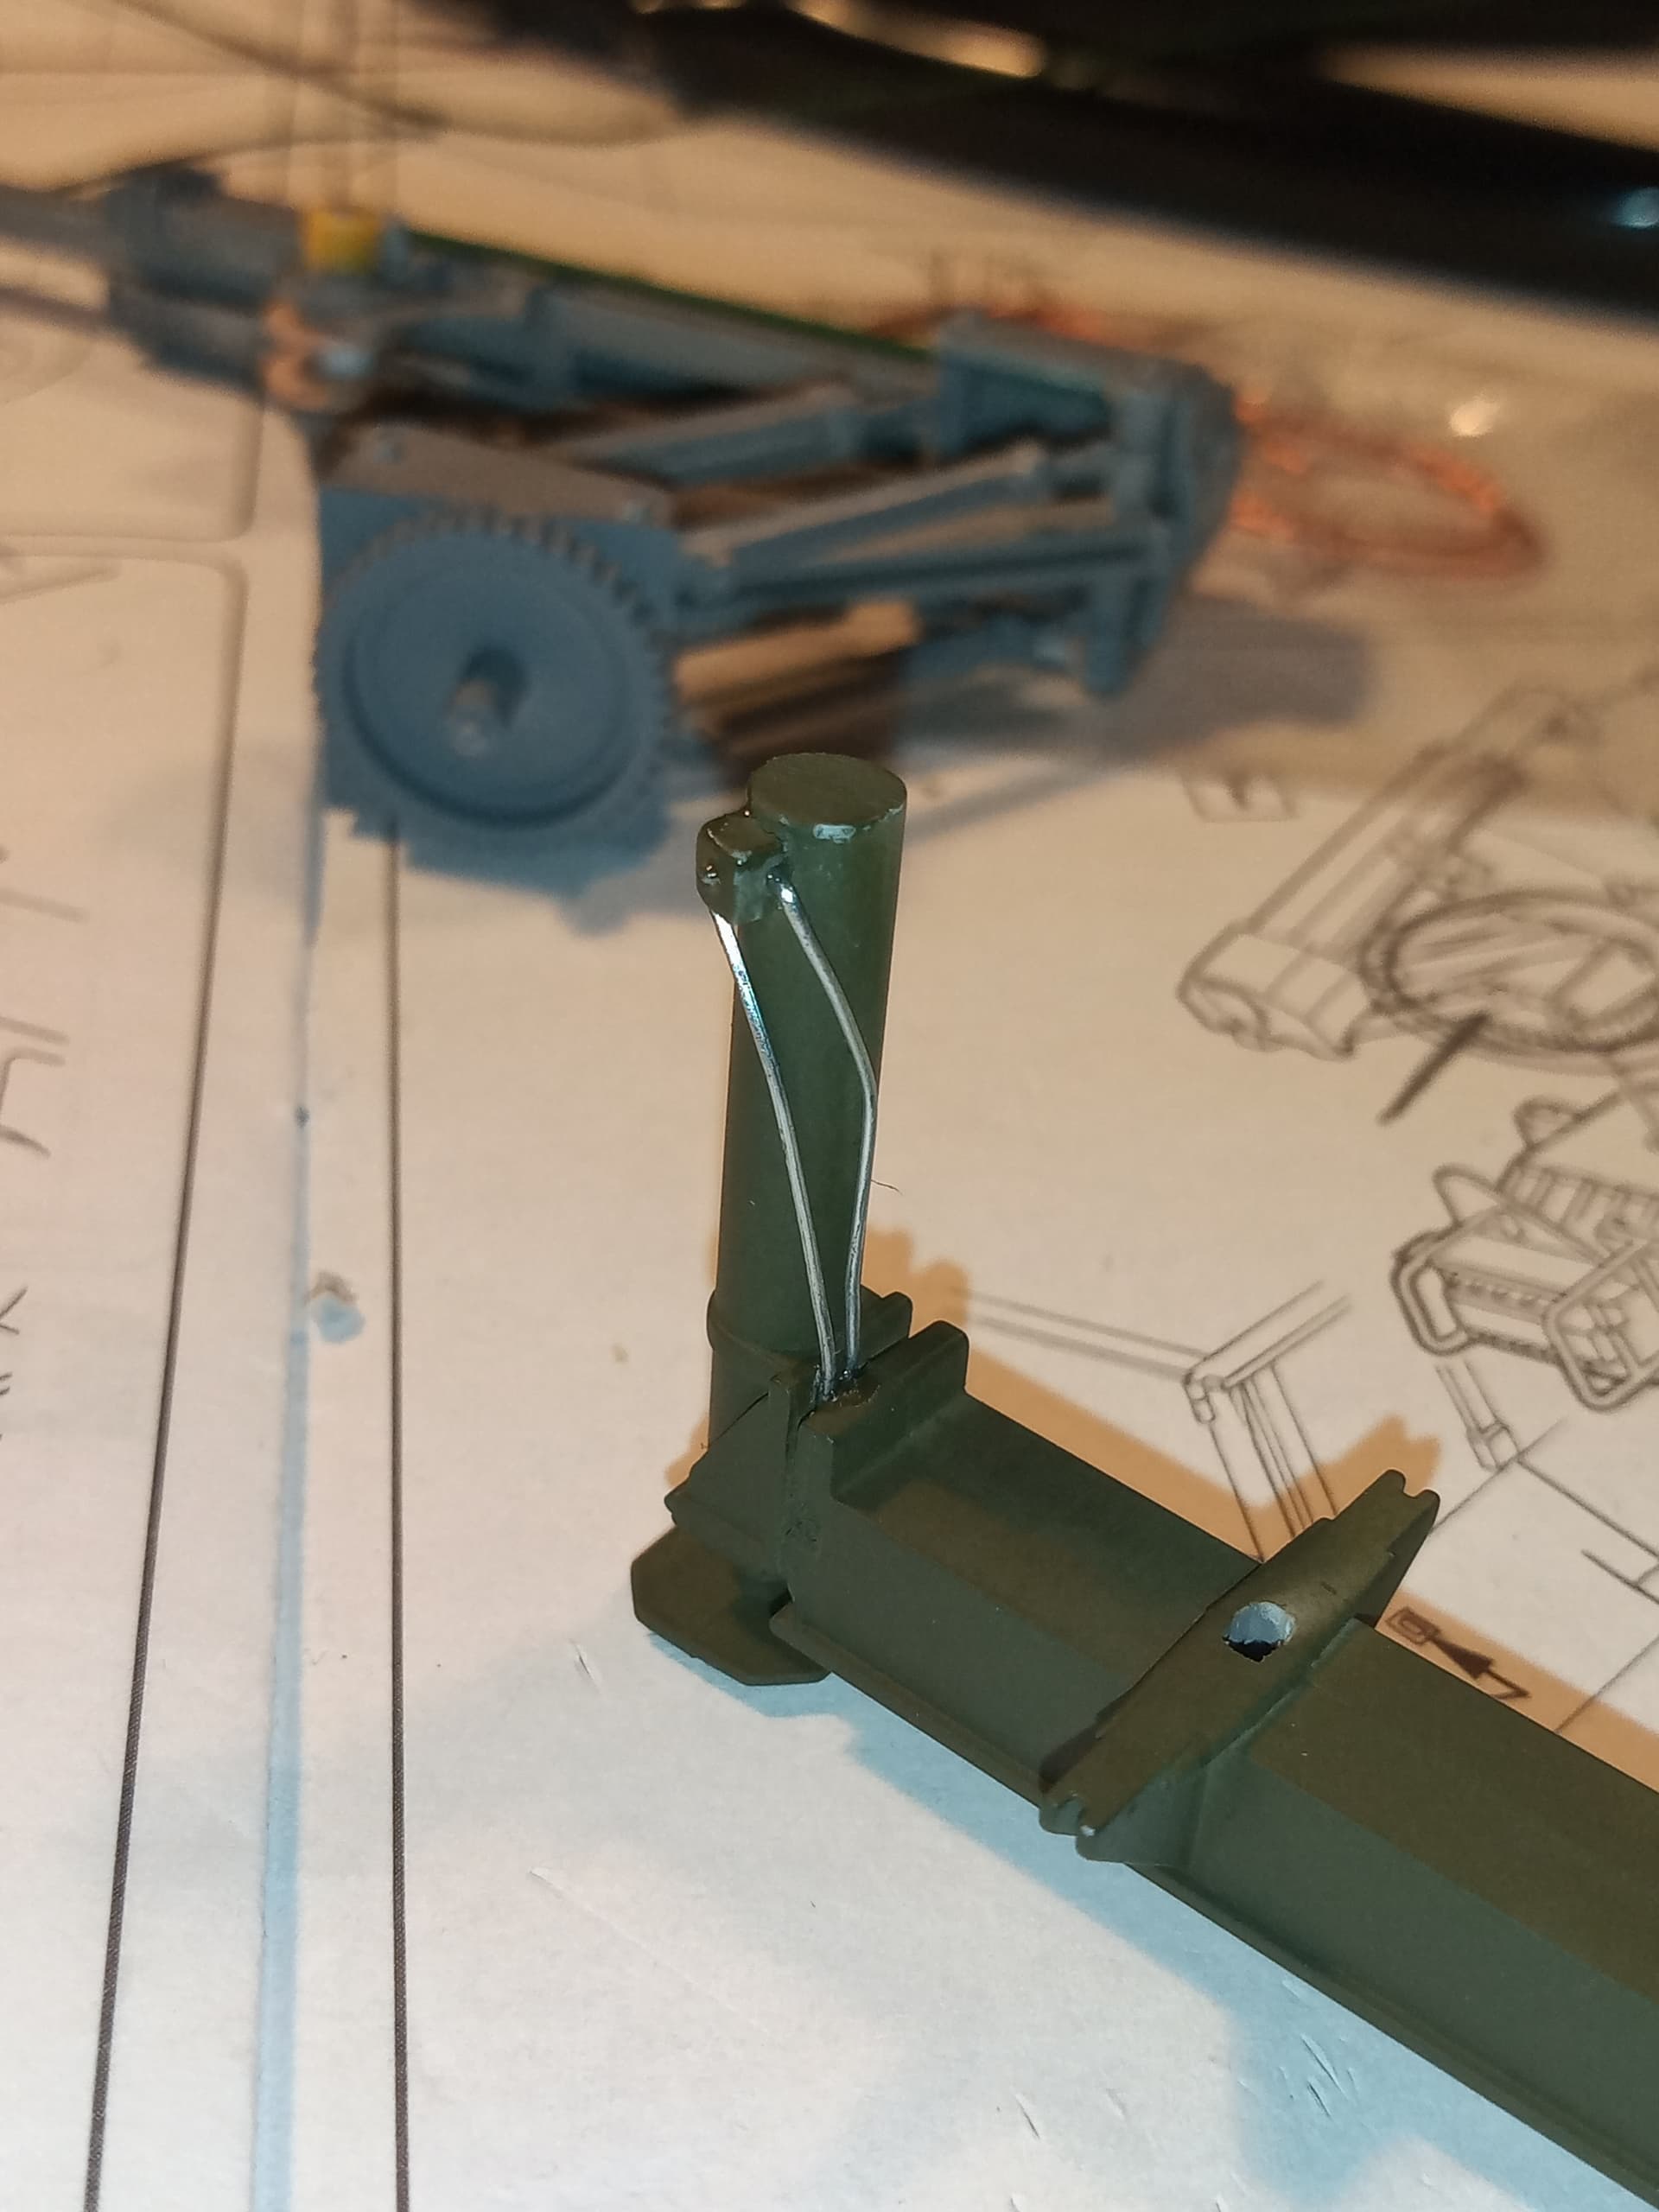
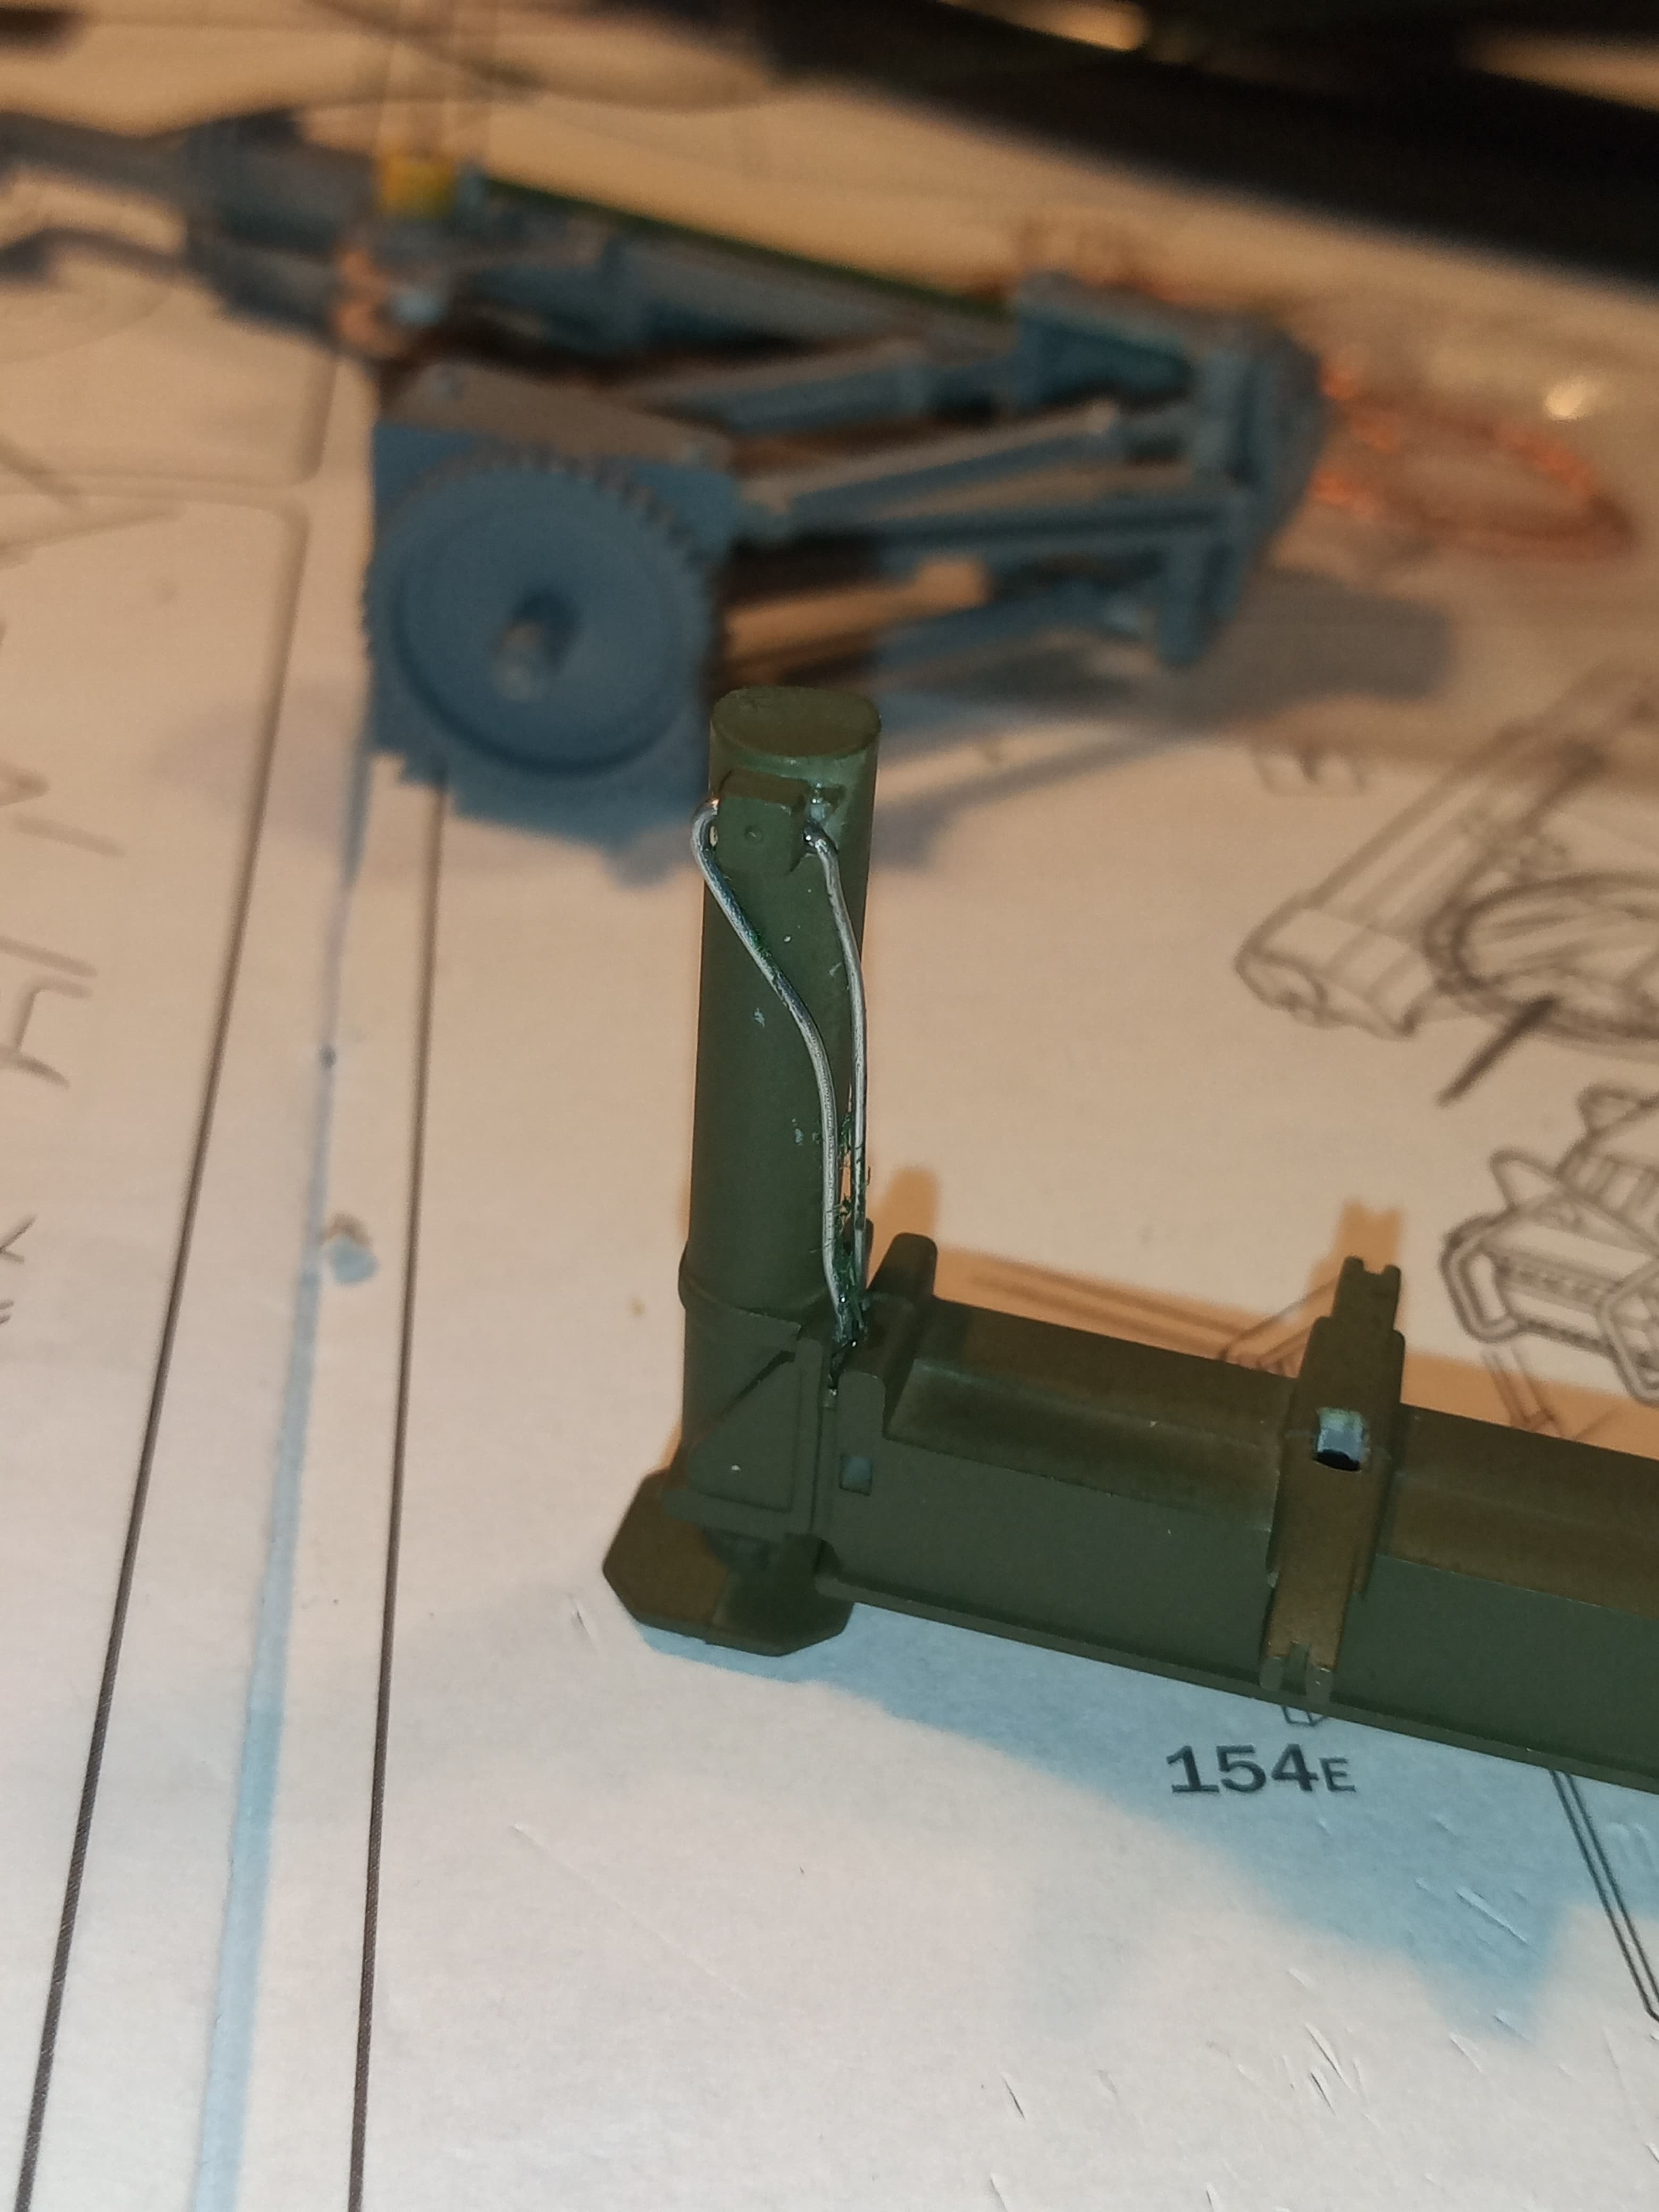
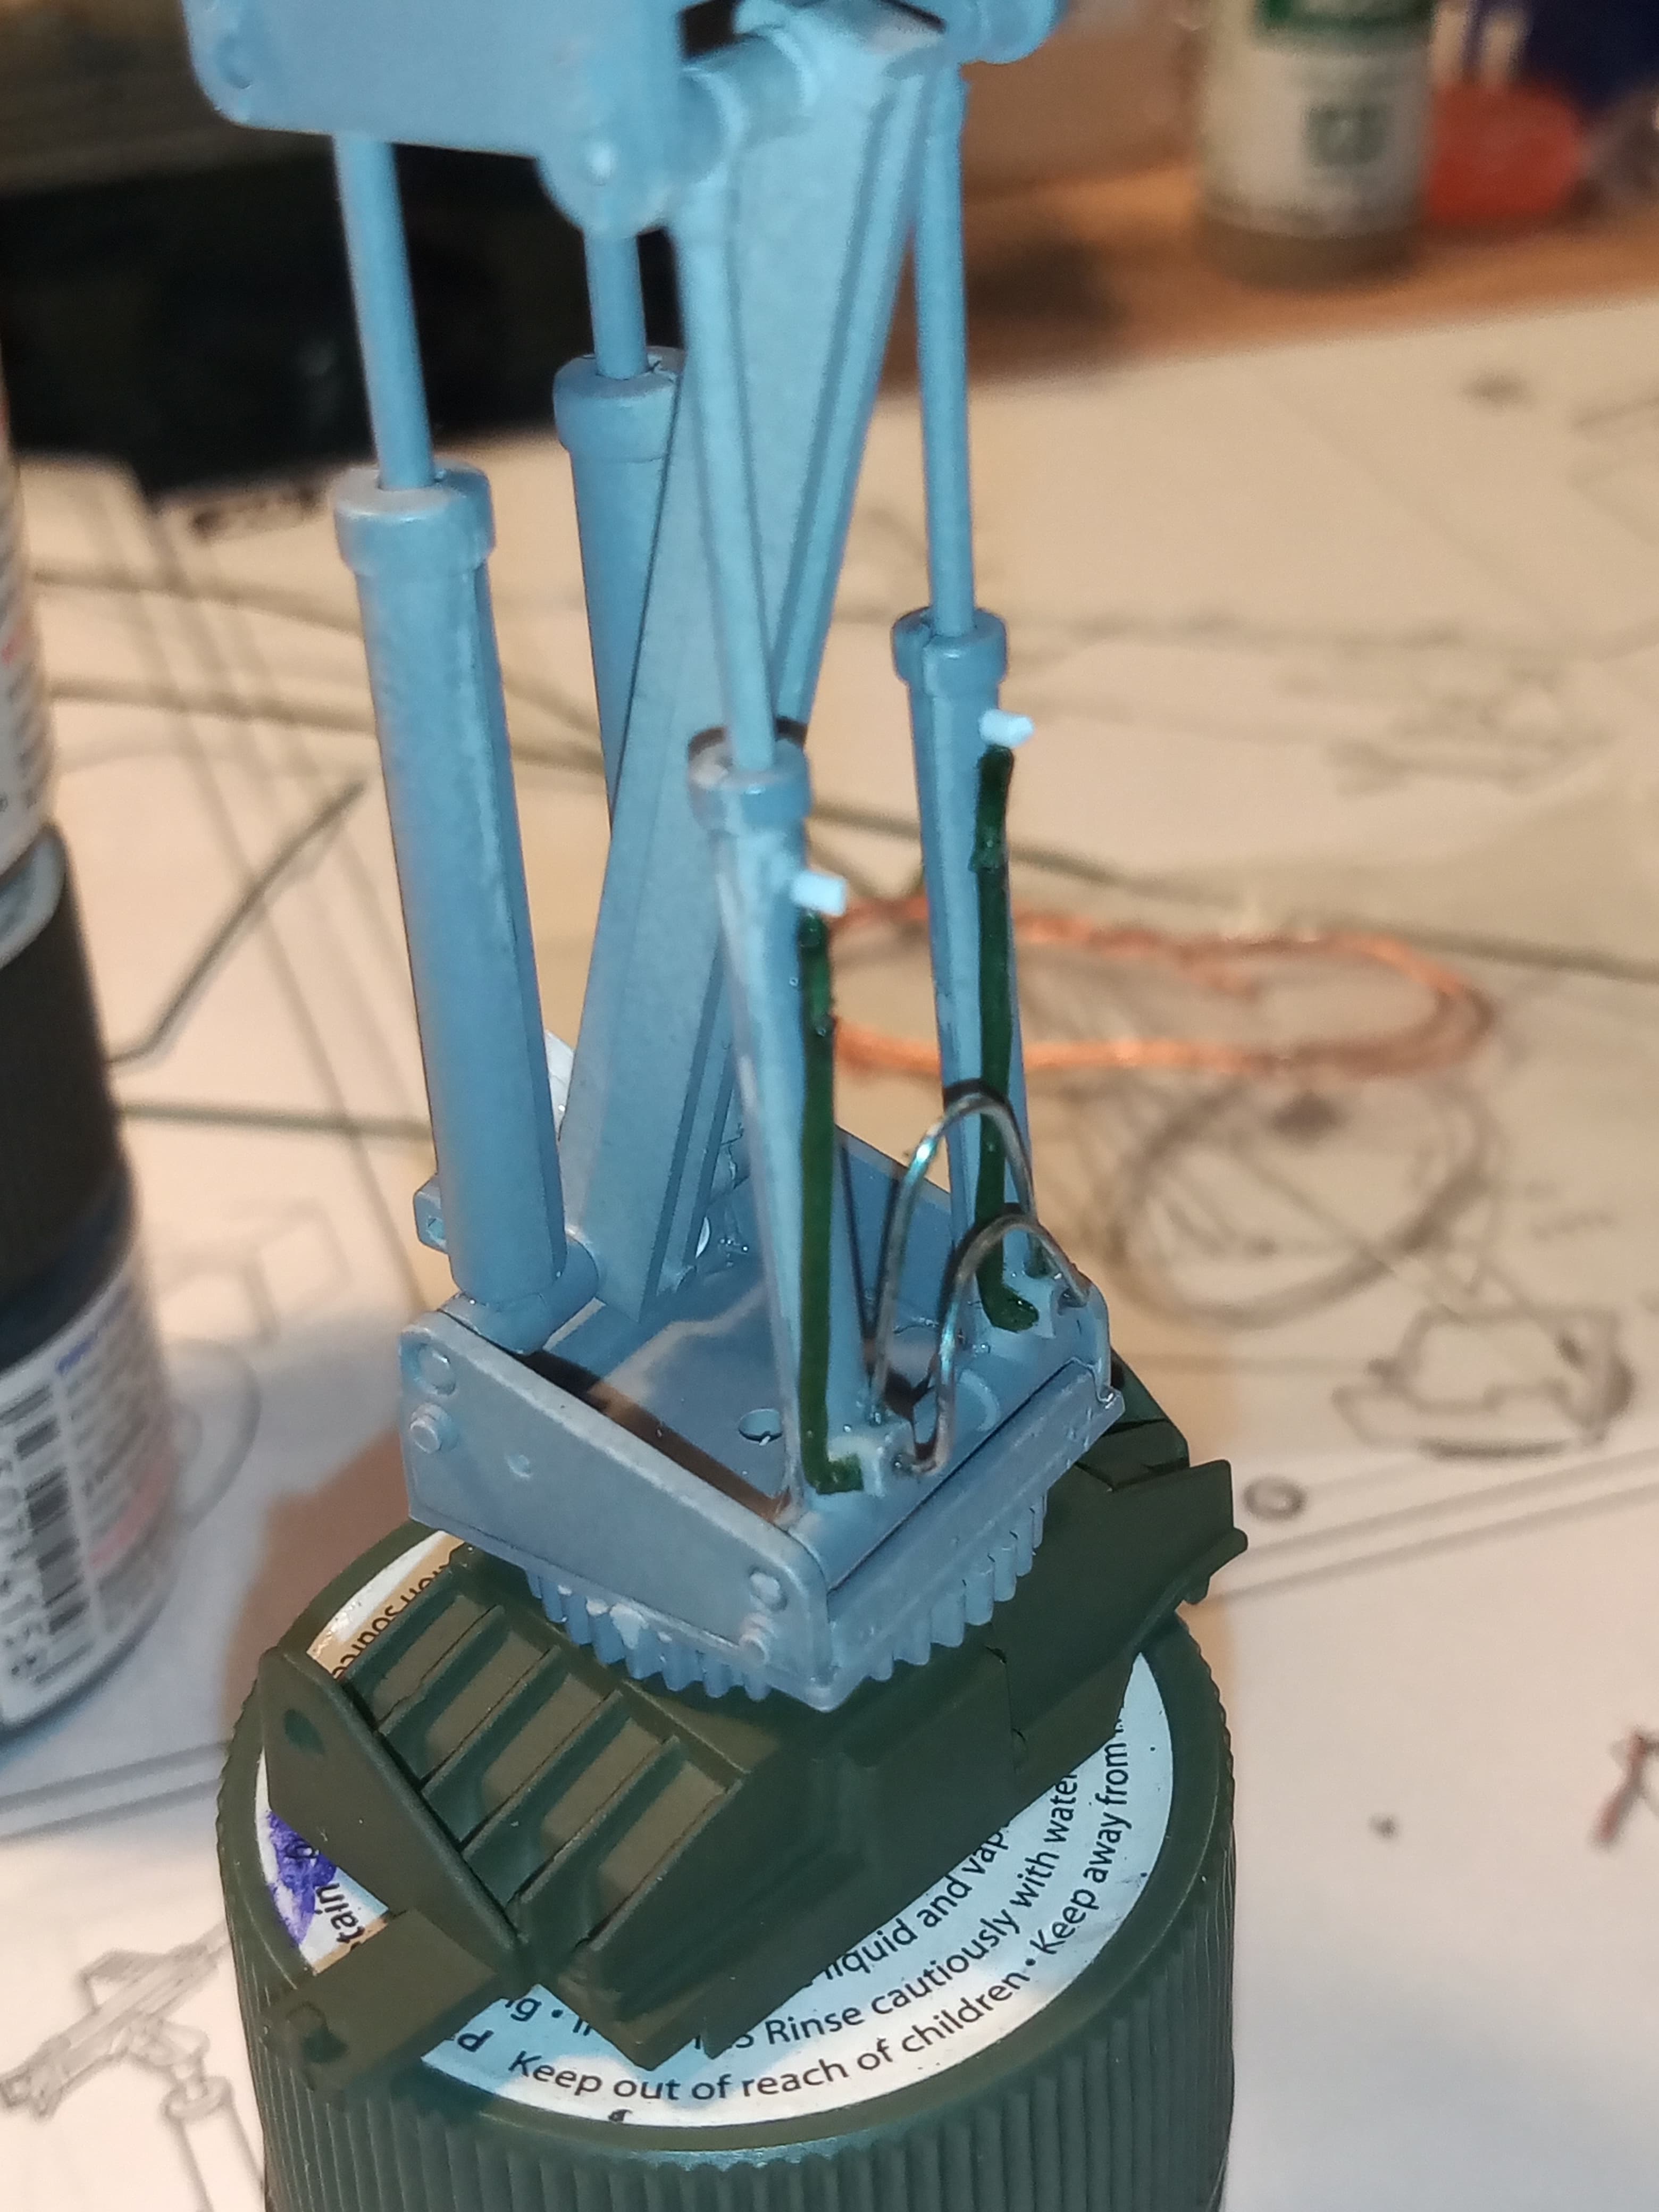
I have also spent a long time drilling out the various holes for hydraulic cable lines to go into. So far it’s 27 holes drilled.
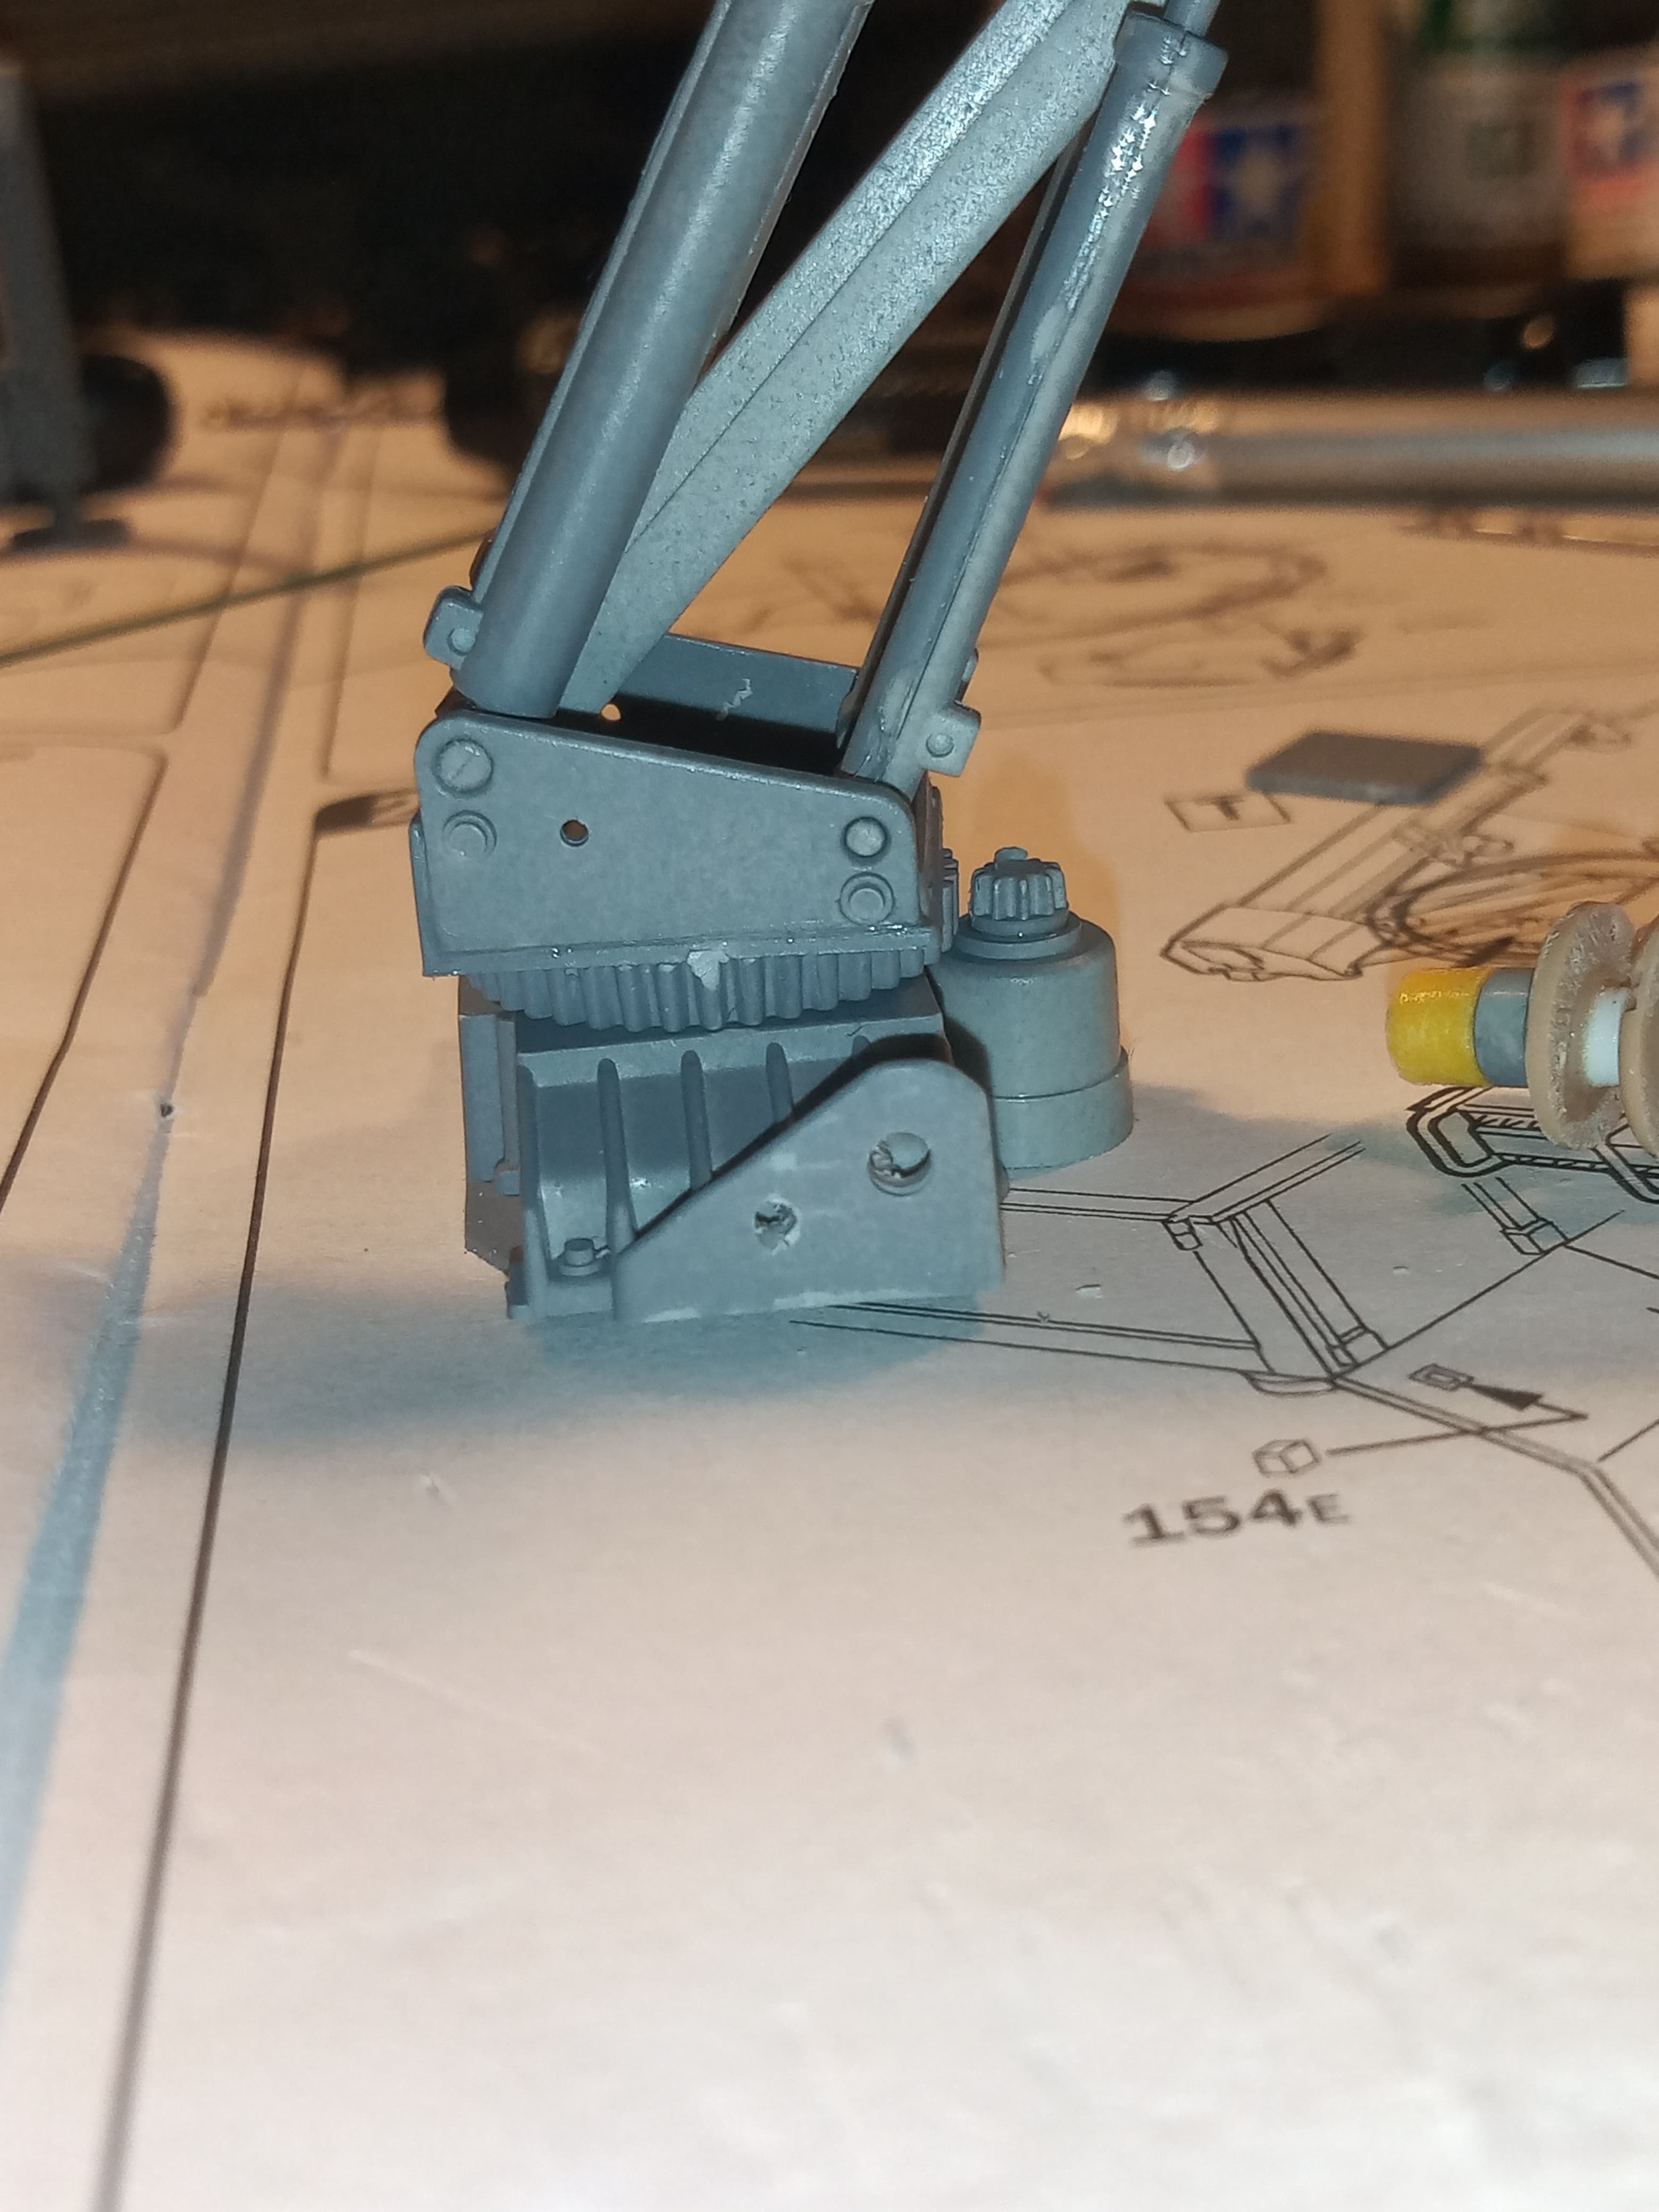
The rams on the support legs.
And the crane assembly, various areas and others still to do.
Adding to the crane detail will take a bit longer than initially thought lol…
5 Likes
As one should. ![]()
Thank you Gino for that link. My HEMTT is sitting off to the side waiting for me to get motivated for more PE. I haven’t come close to the back end of it yet, but that detailing article will most certainly come in handy.
Two sets of PE and a long way to go.
You’re a wealth of information Gino, thank you.
Mike
5 Likes
Is that the Italeri one as well Mike ? just go slow doing the rams on the crane if it is.
There are some decent walkarounds of the crane on PrimePortal ![]()
It is the Italeri kit. The PE is Eduard’s - interior and exterior.
Mike
1 Like
I think if I get another one, the PE would be another must have. It really adds to the kit. It looks great.
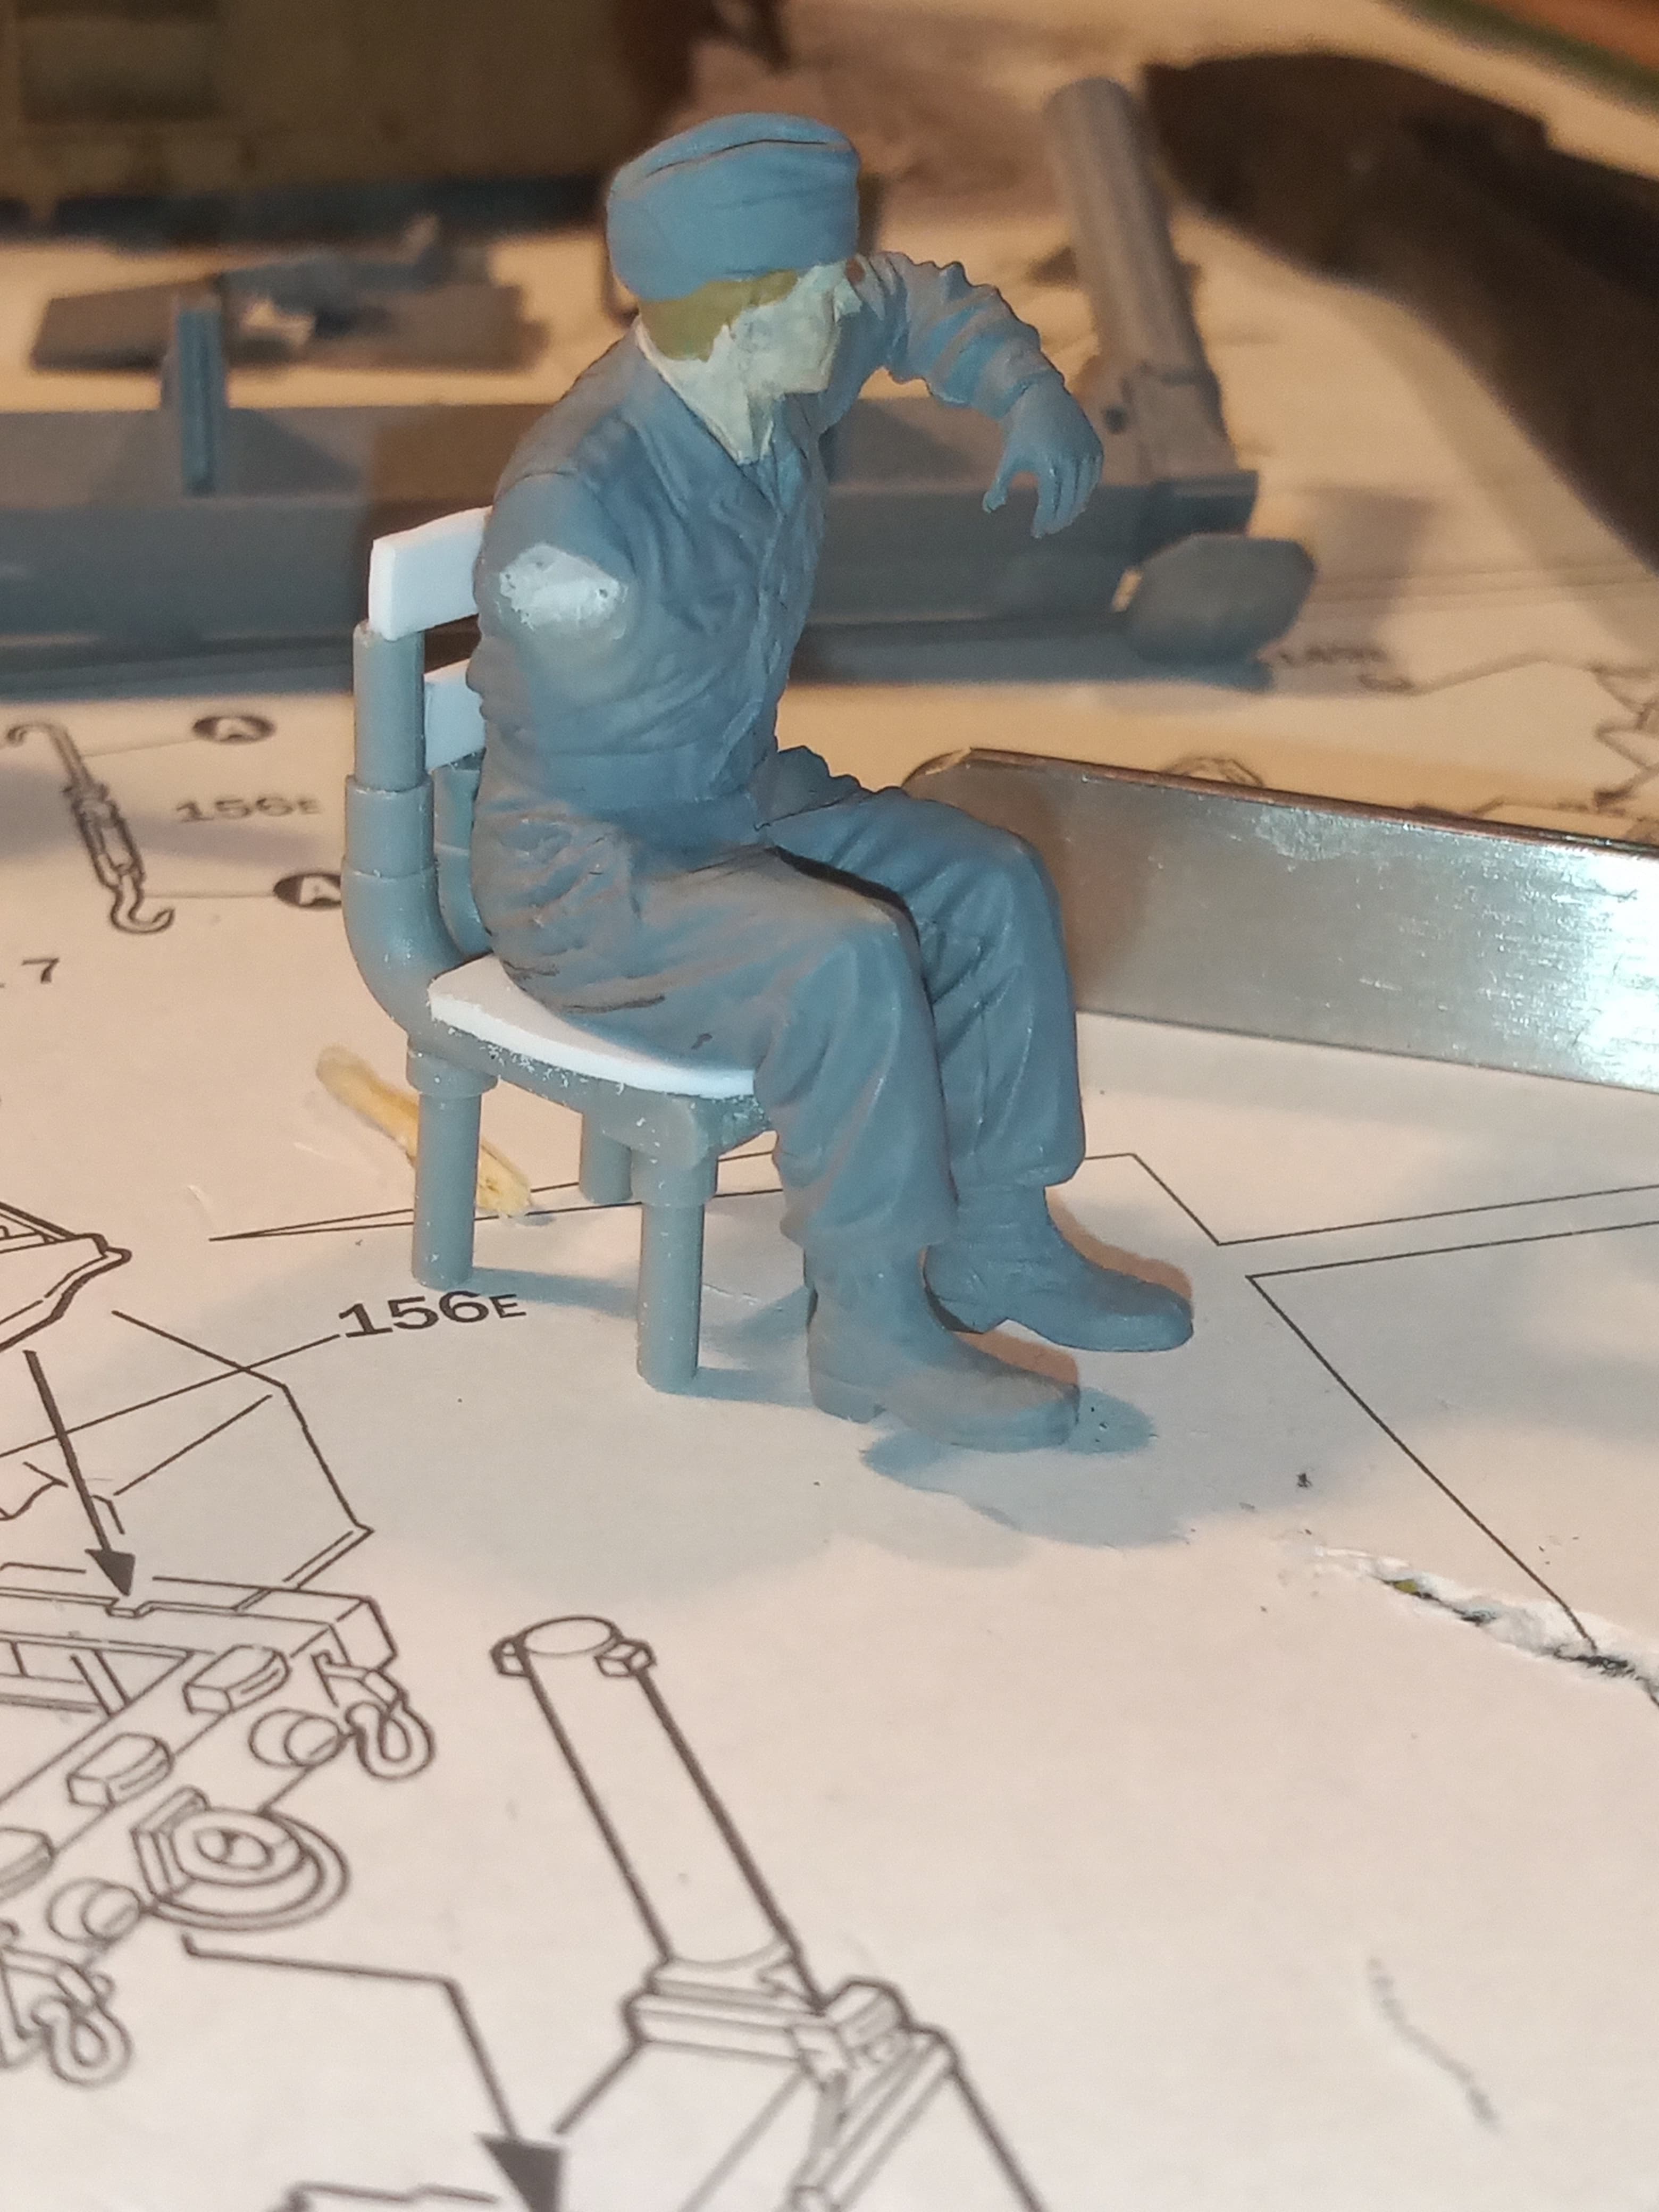
Some work on the crane detailing and the work table chair is finished.
Chair…
And Wolfgang testing it.
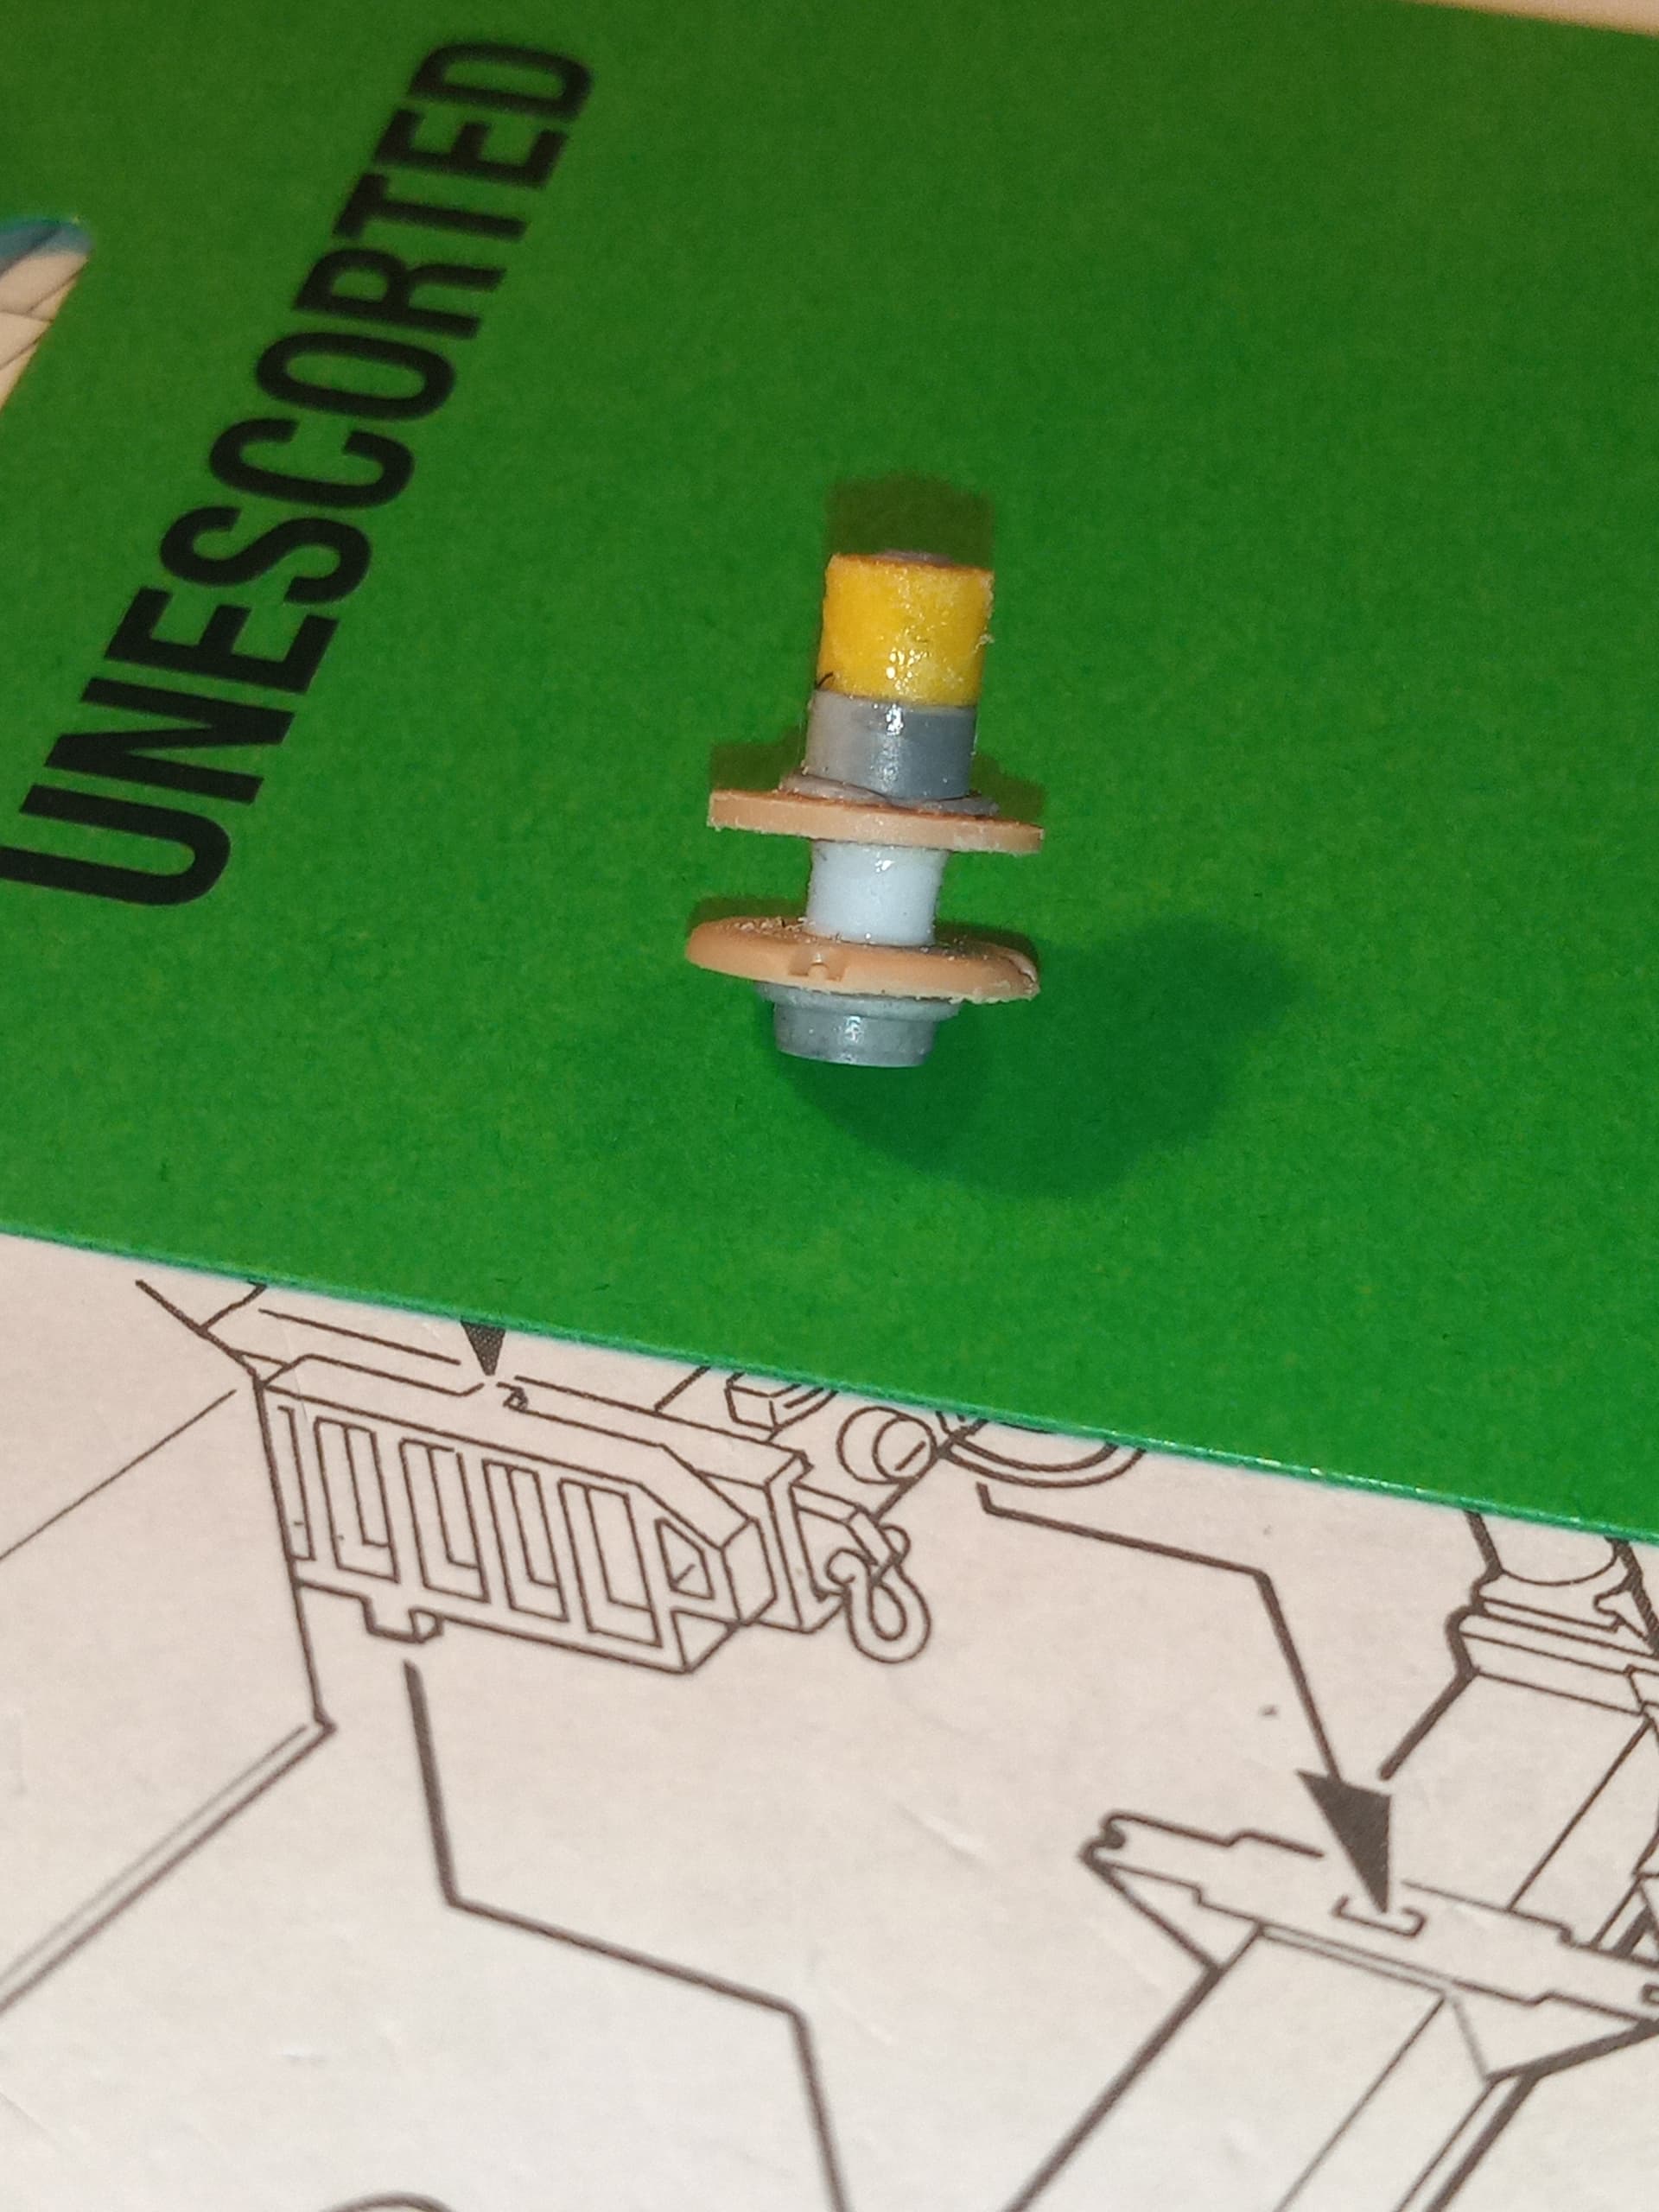
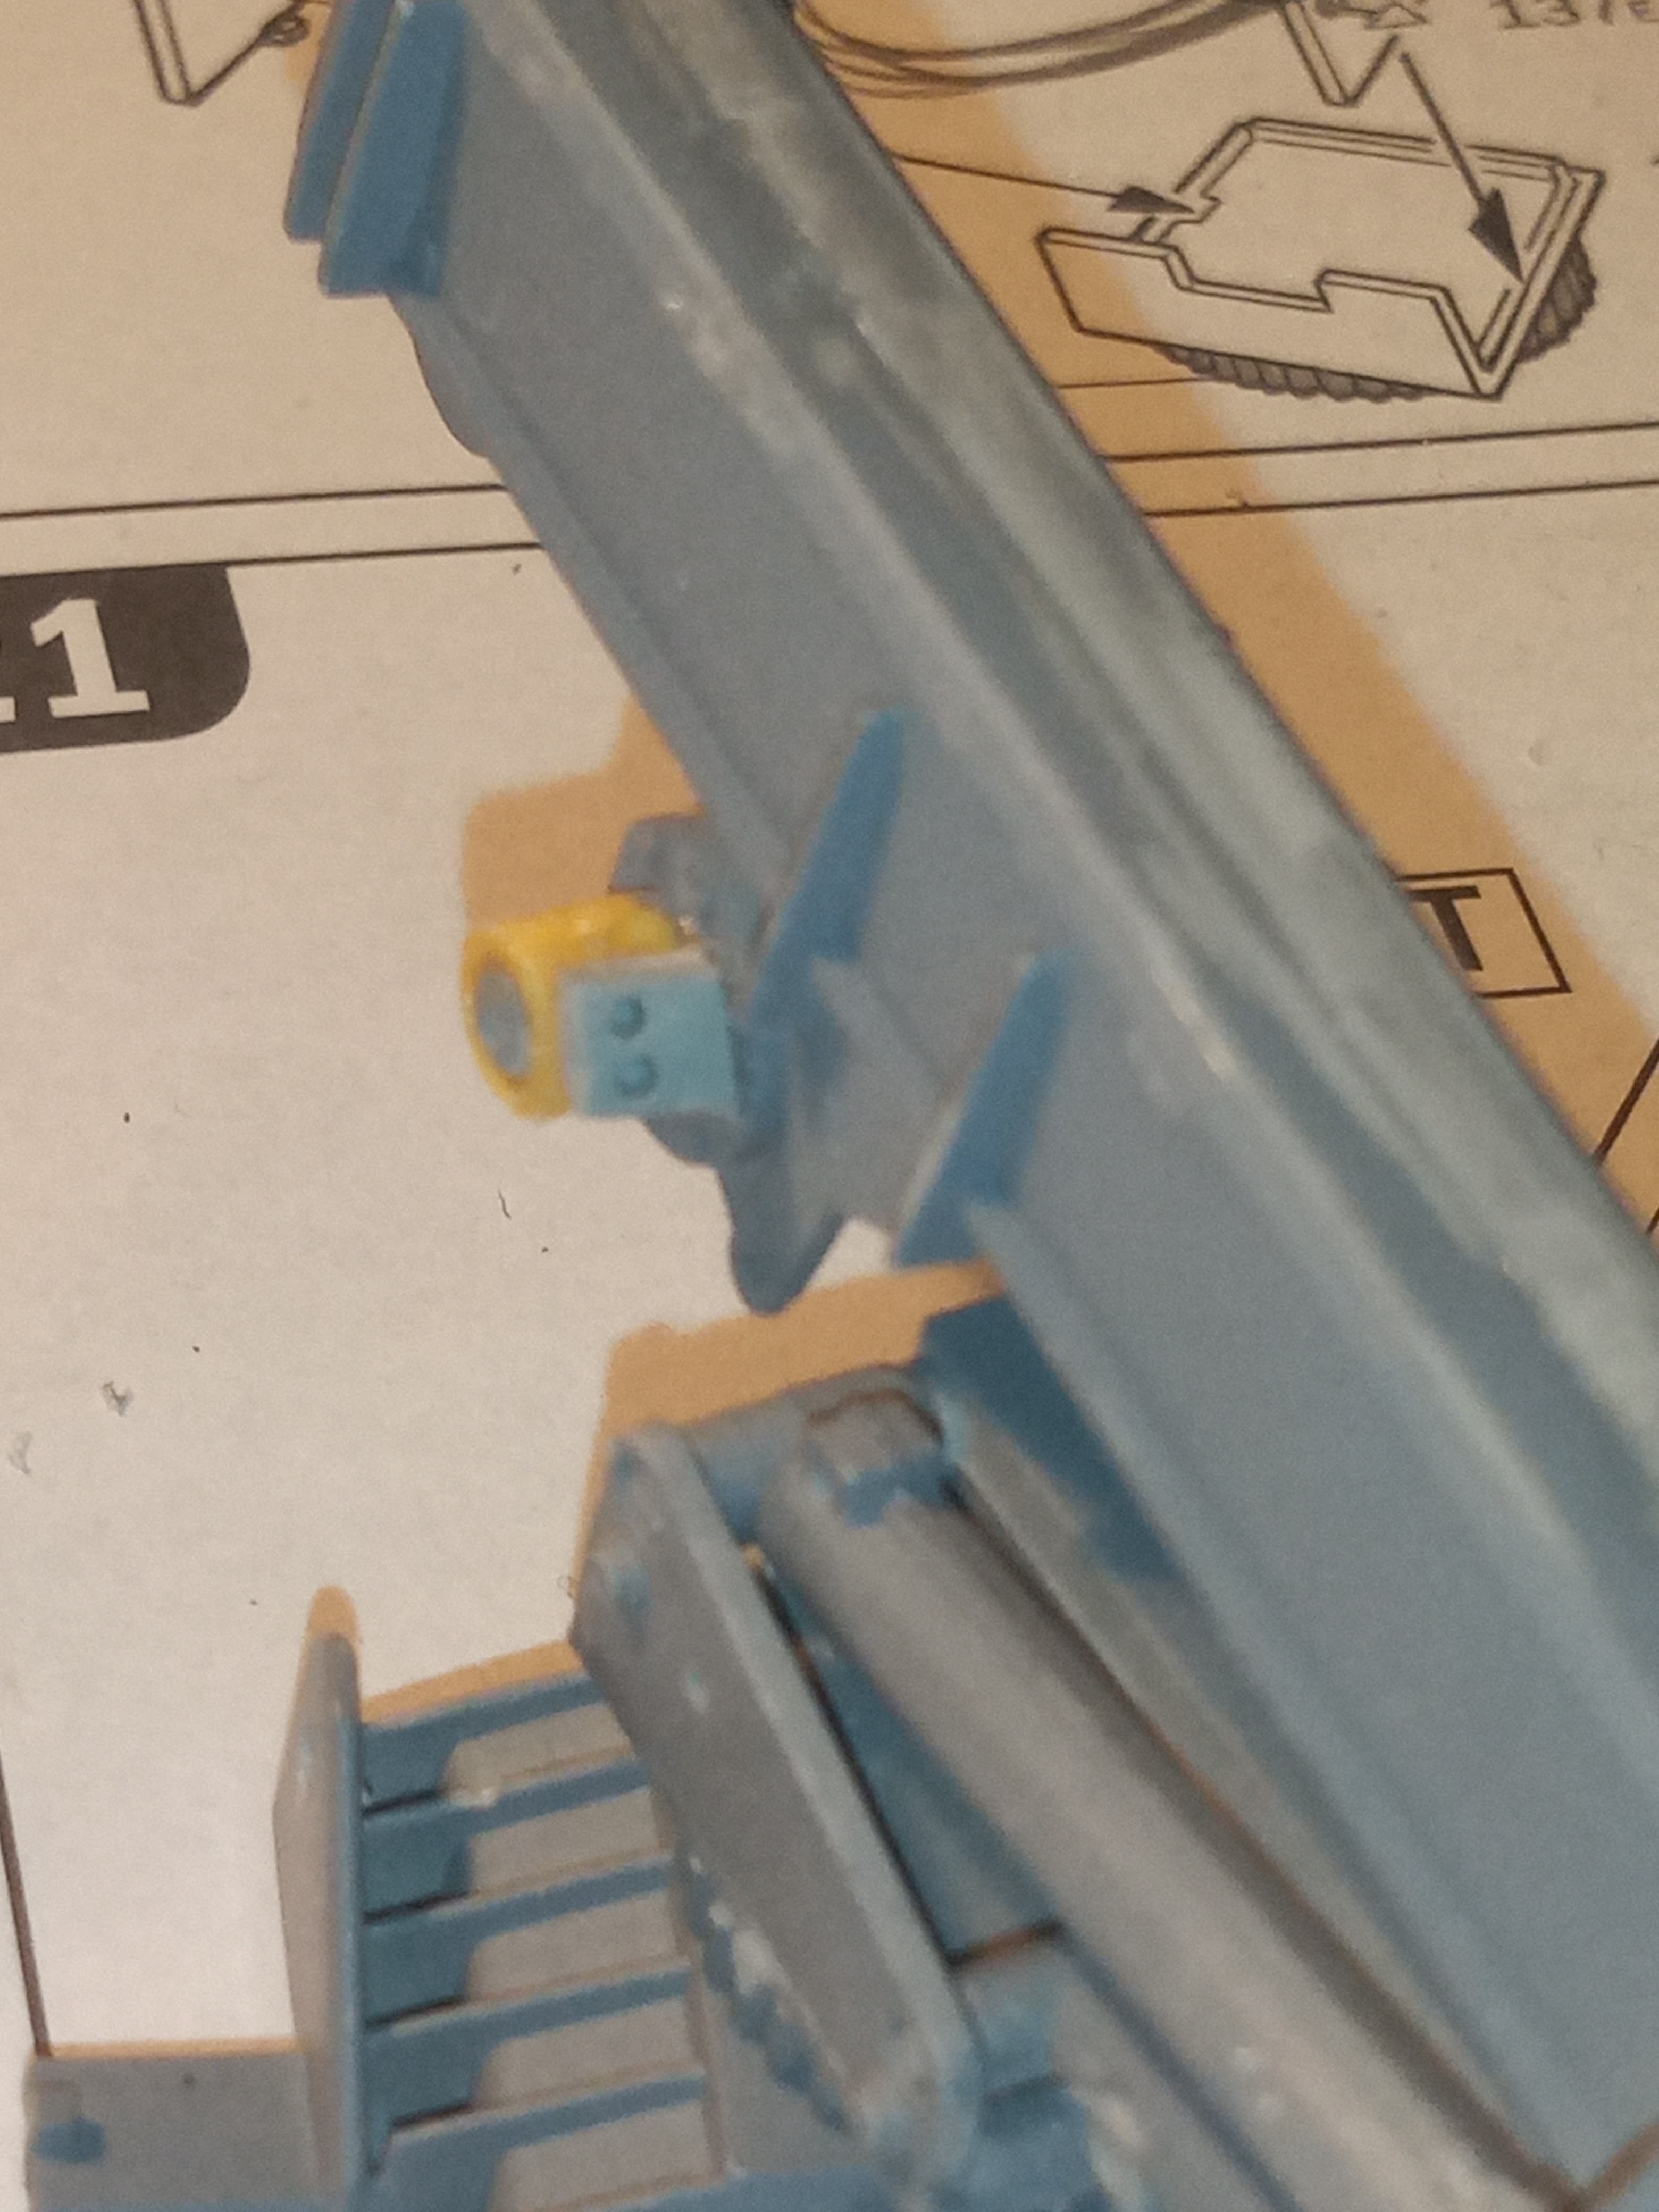
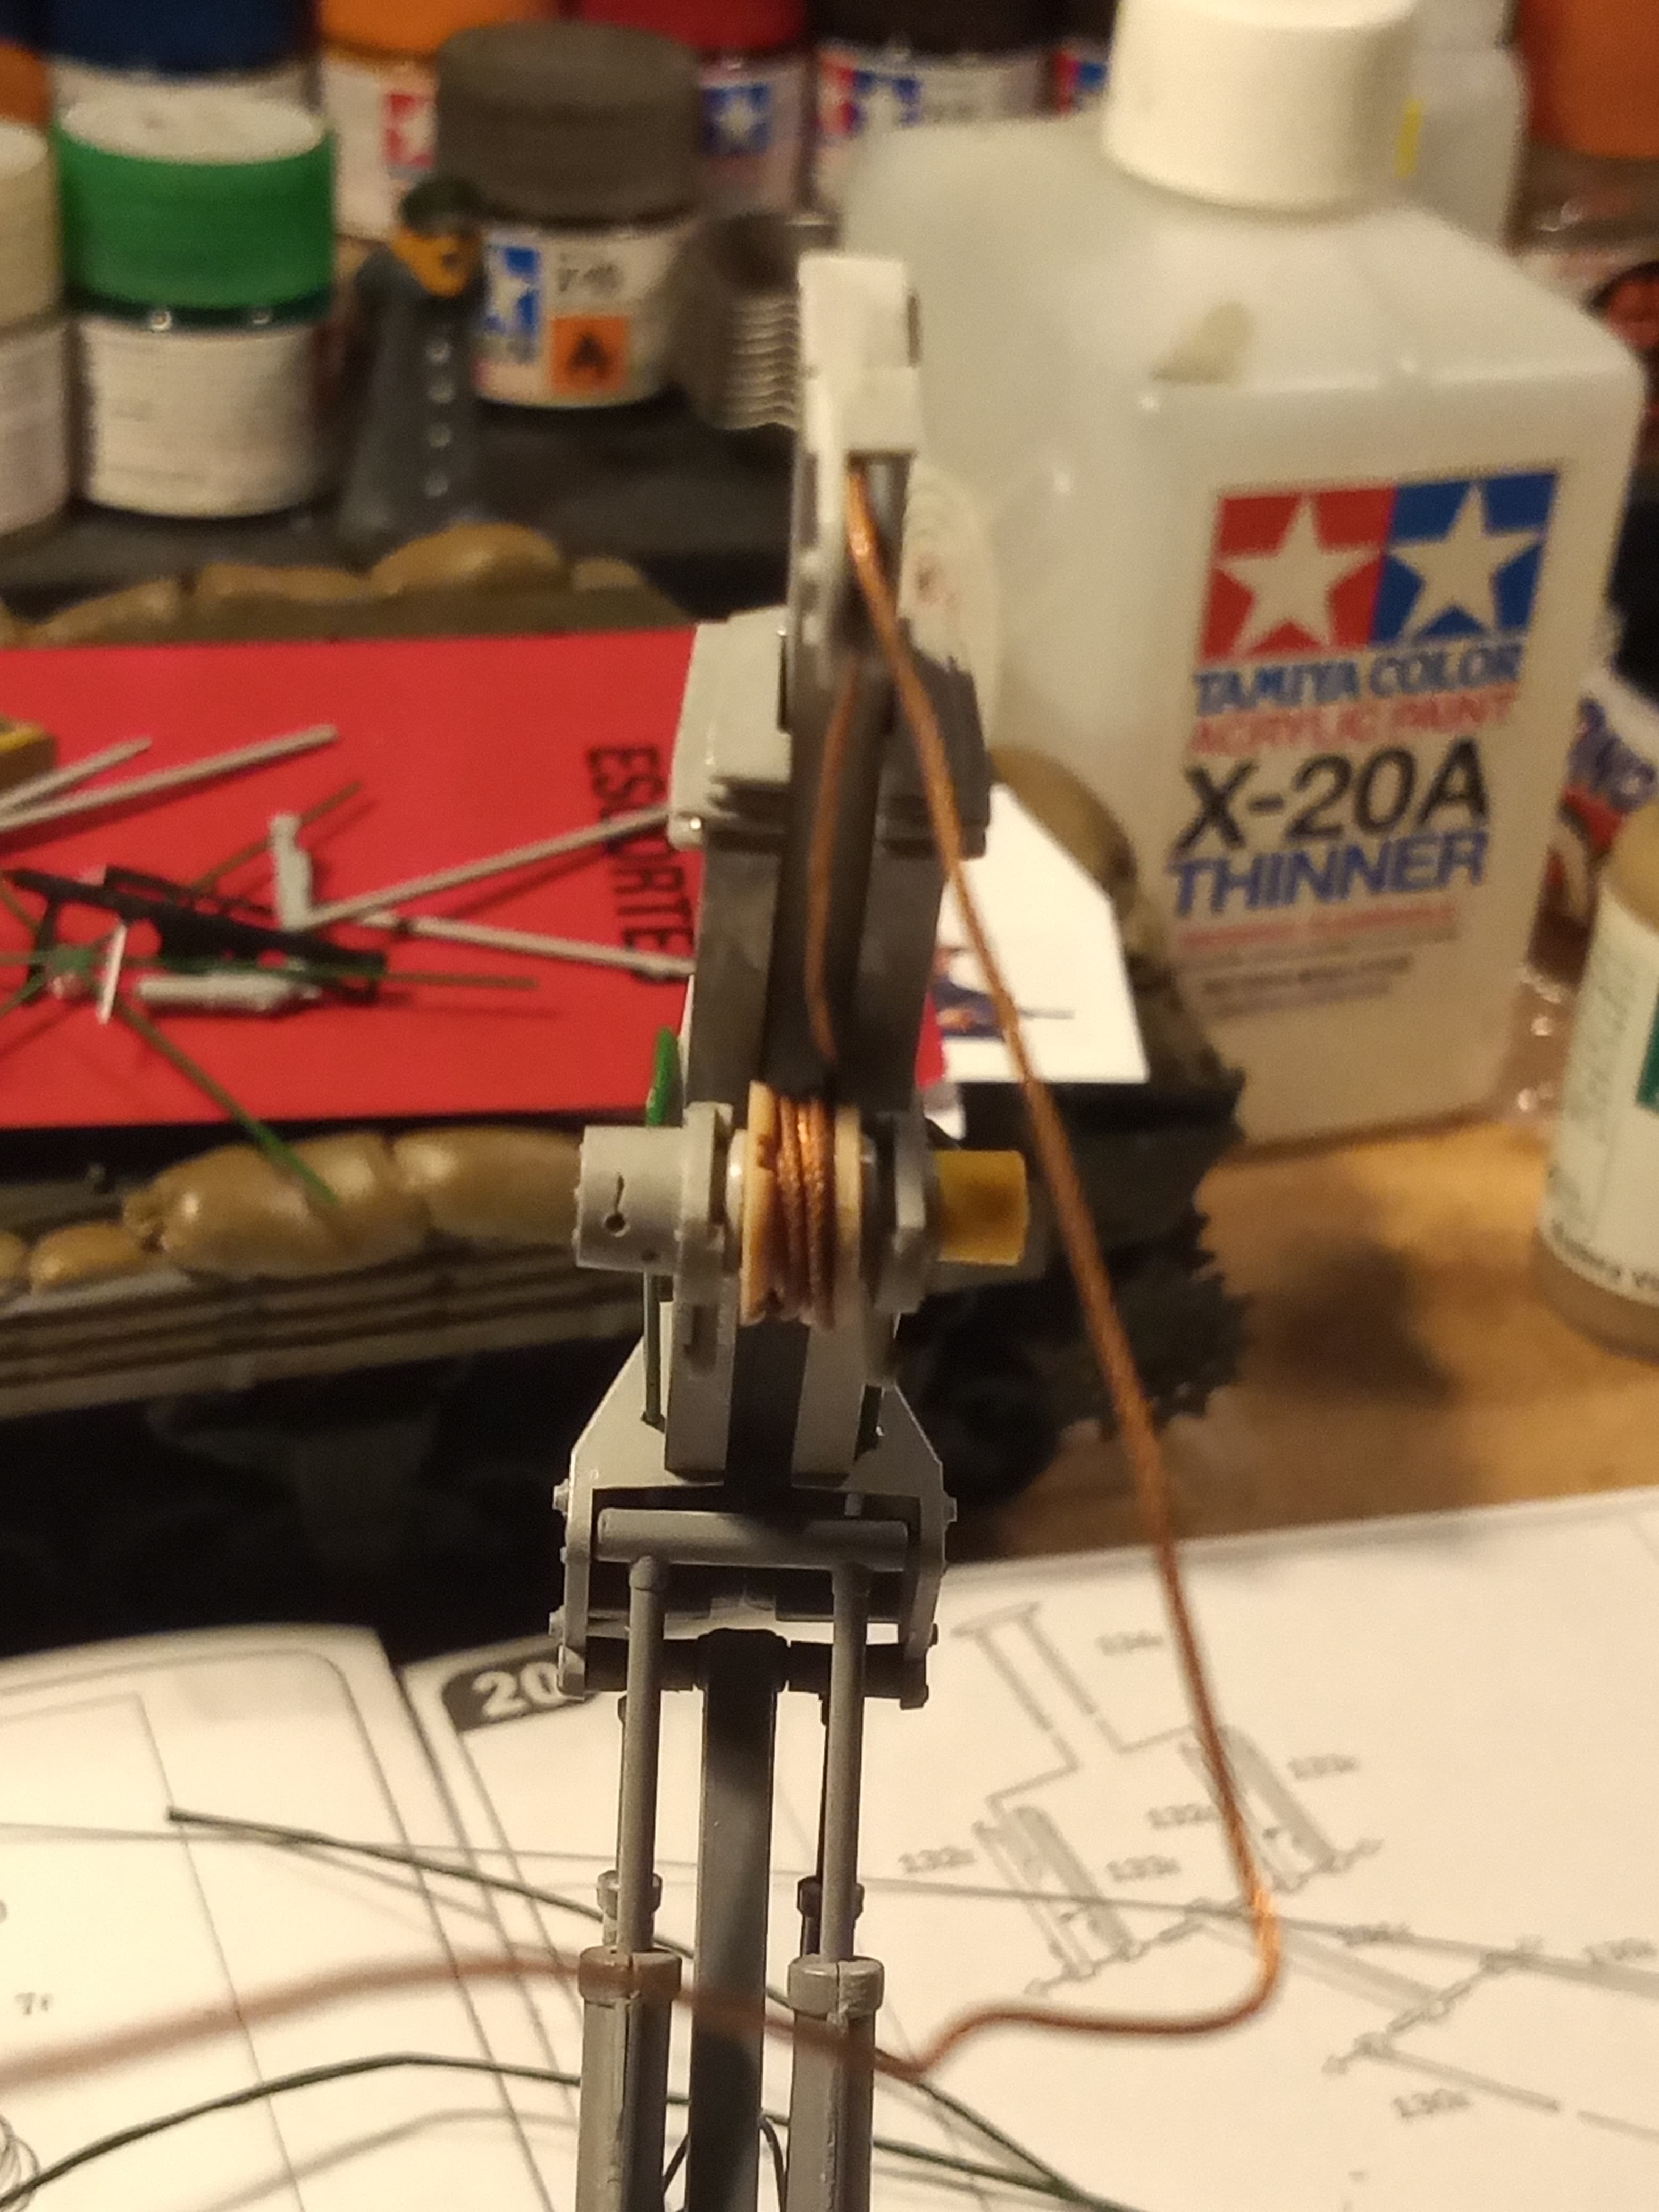
Hydraulic junction box on the left hand end of the cable drum.
First of the many hydraulic lines.
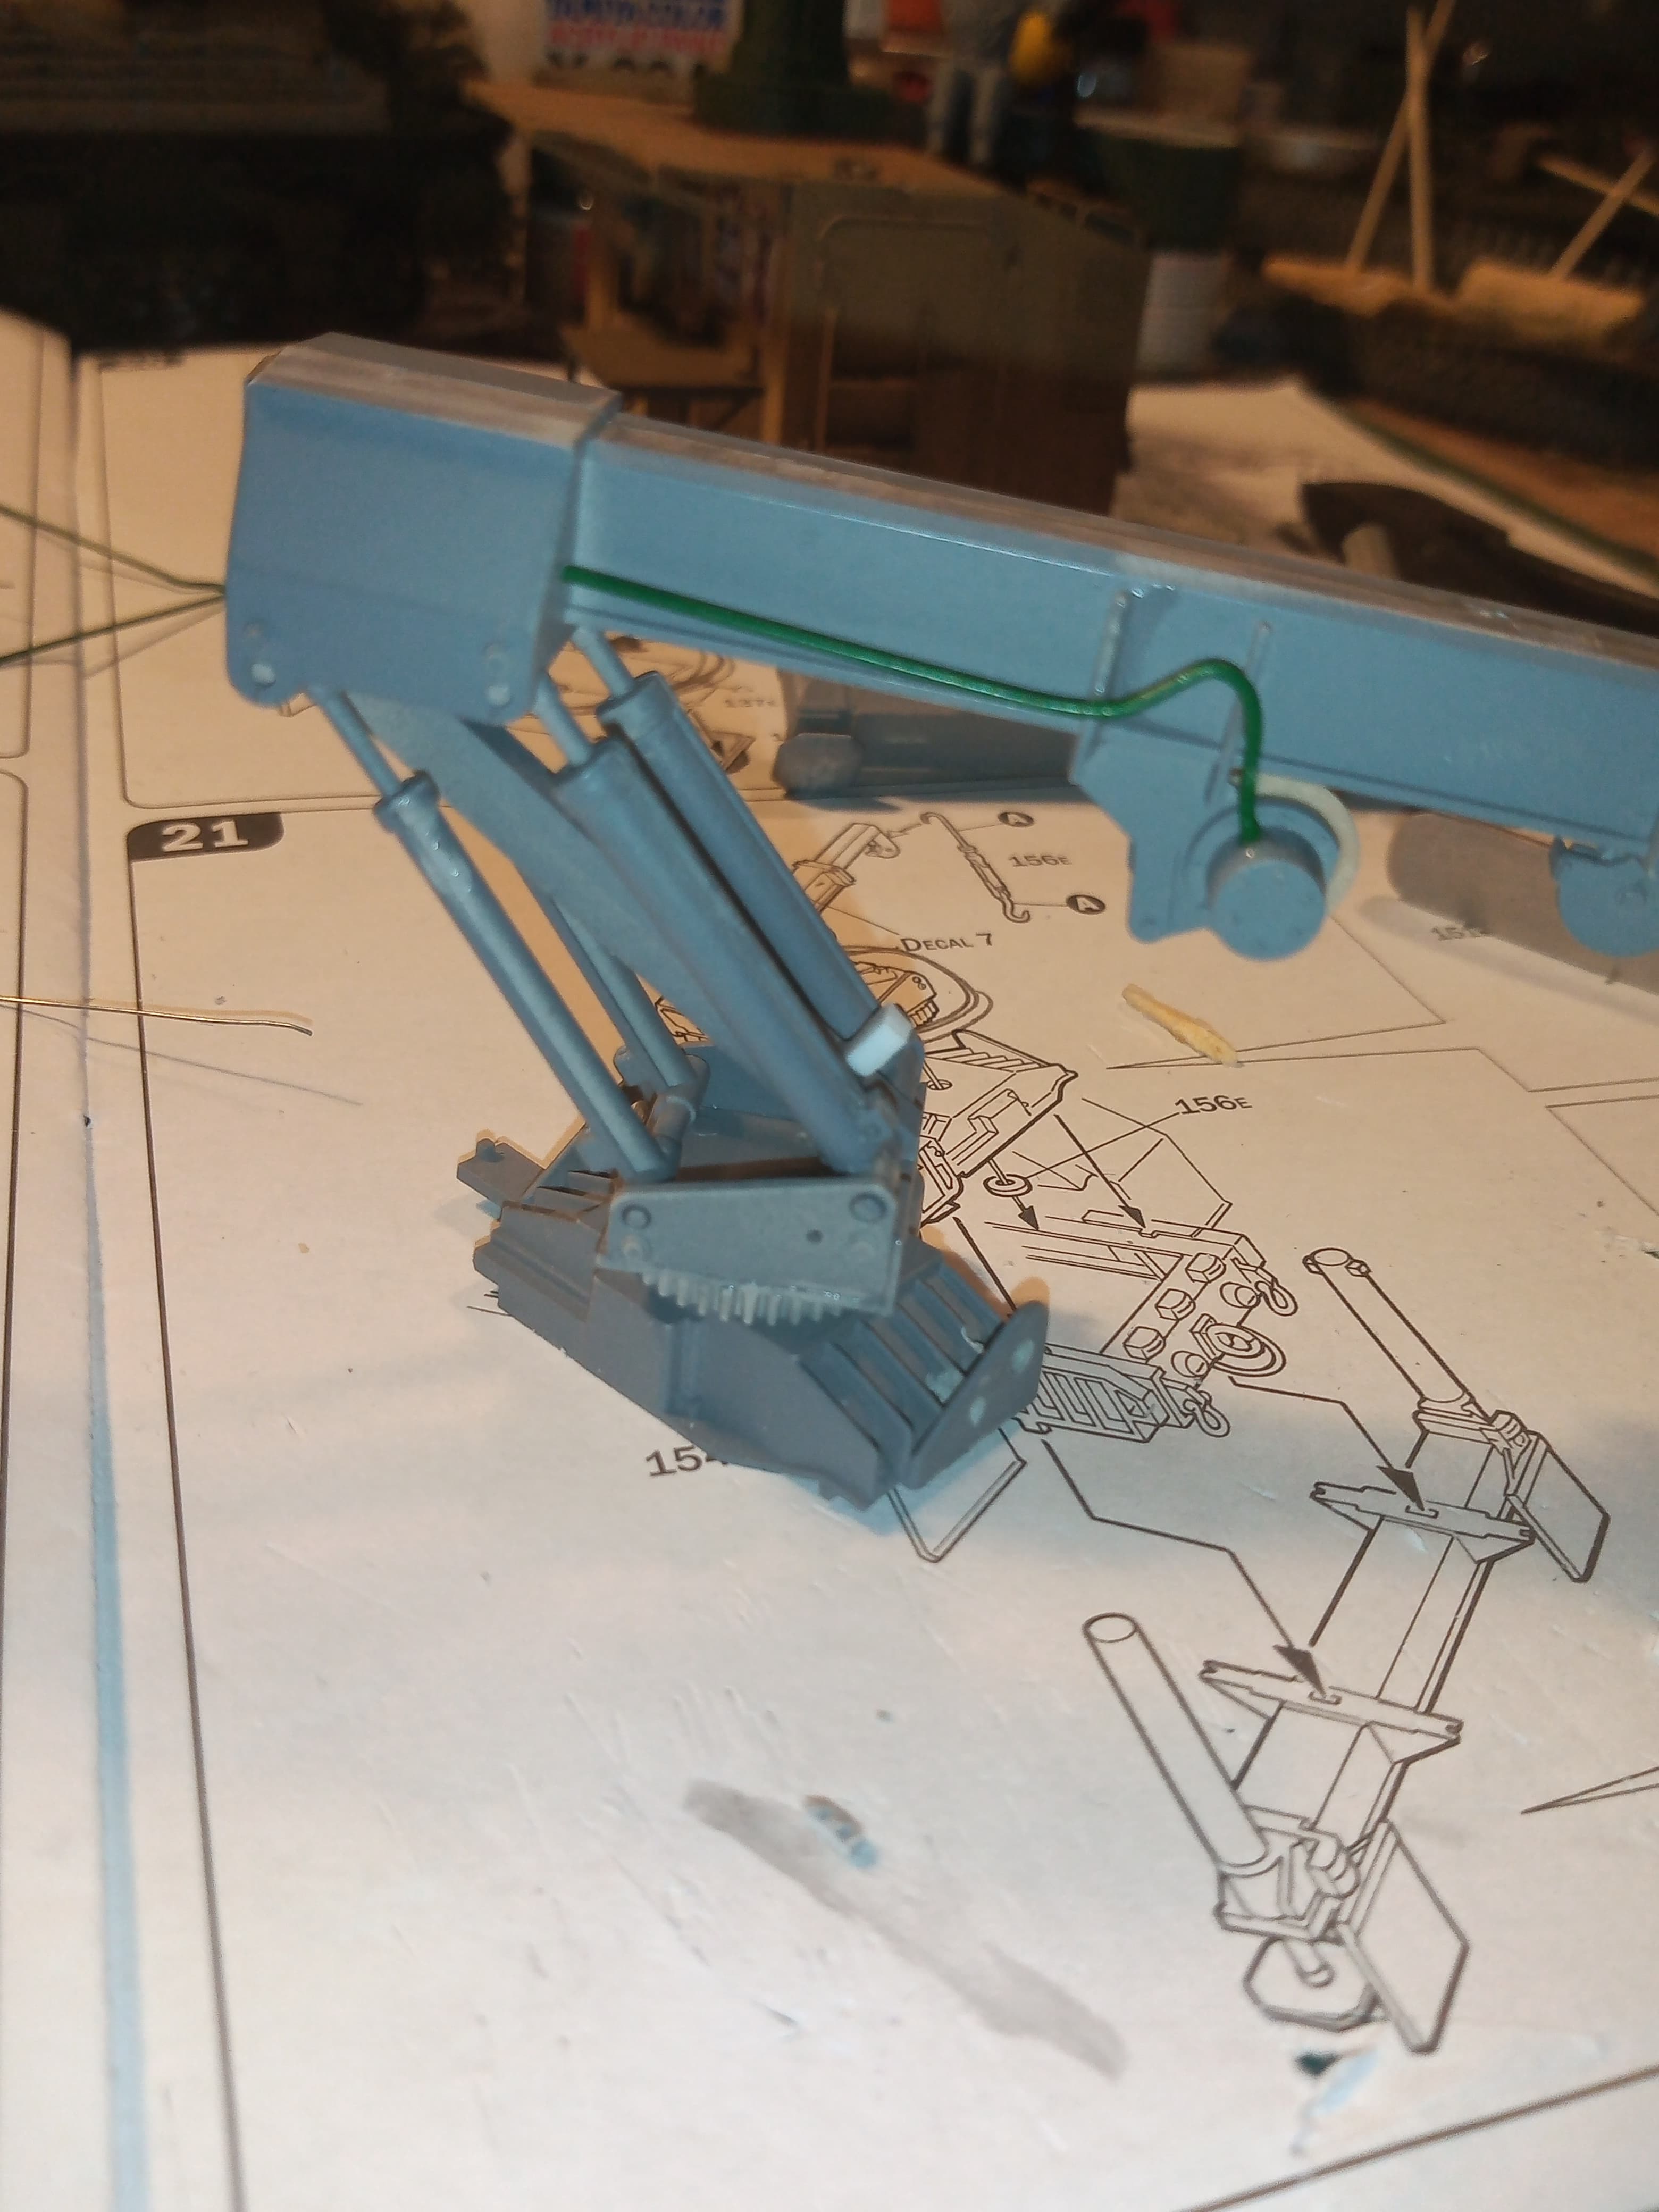
And the centre white block on the middle beam.
Have ordered some more florist wire in 0.45mm gauge. The 2 types I have are 0.71 & 0.32mm and they are just a bit over and under scale for some bits …so hopefully the new stuff will look better for the smaller pipe work.
6 Likes
Hold on to your butt seat Wolfgang… “torsion bars LOSE!” ![]()
Good to see your progress with the hydraulic lines. I’m planning on something similar over in the other campaign. Thank’s for the info.
—mike ![]()
3 Likes
@Johnnych01 your work on the hydraulics looks nice. Good to see you could sort out the hydraulic blocks - I’ll bet if will look great as you pull it together
Cheers
Nick
2 Likes
Why do you use florist wire? Is it easy to bend and will it resist breaking?
I just used lead wire on a project and found that it bent easily enough but was brittle and broke if bent too sharply.
Paul
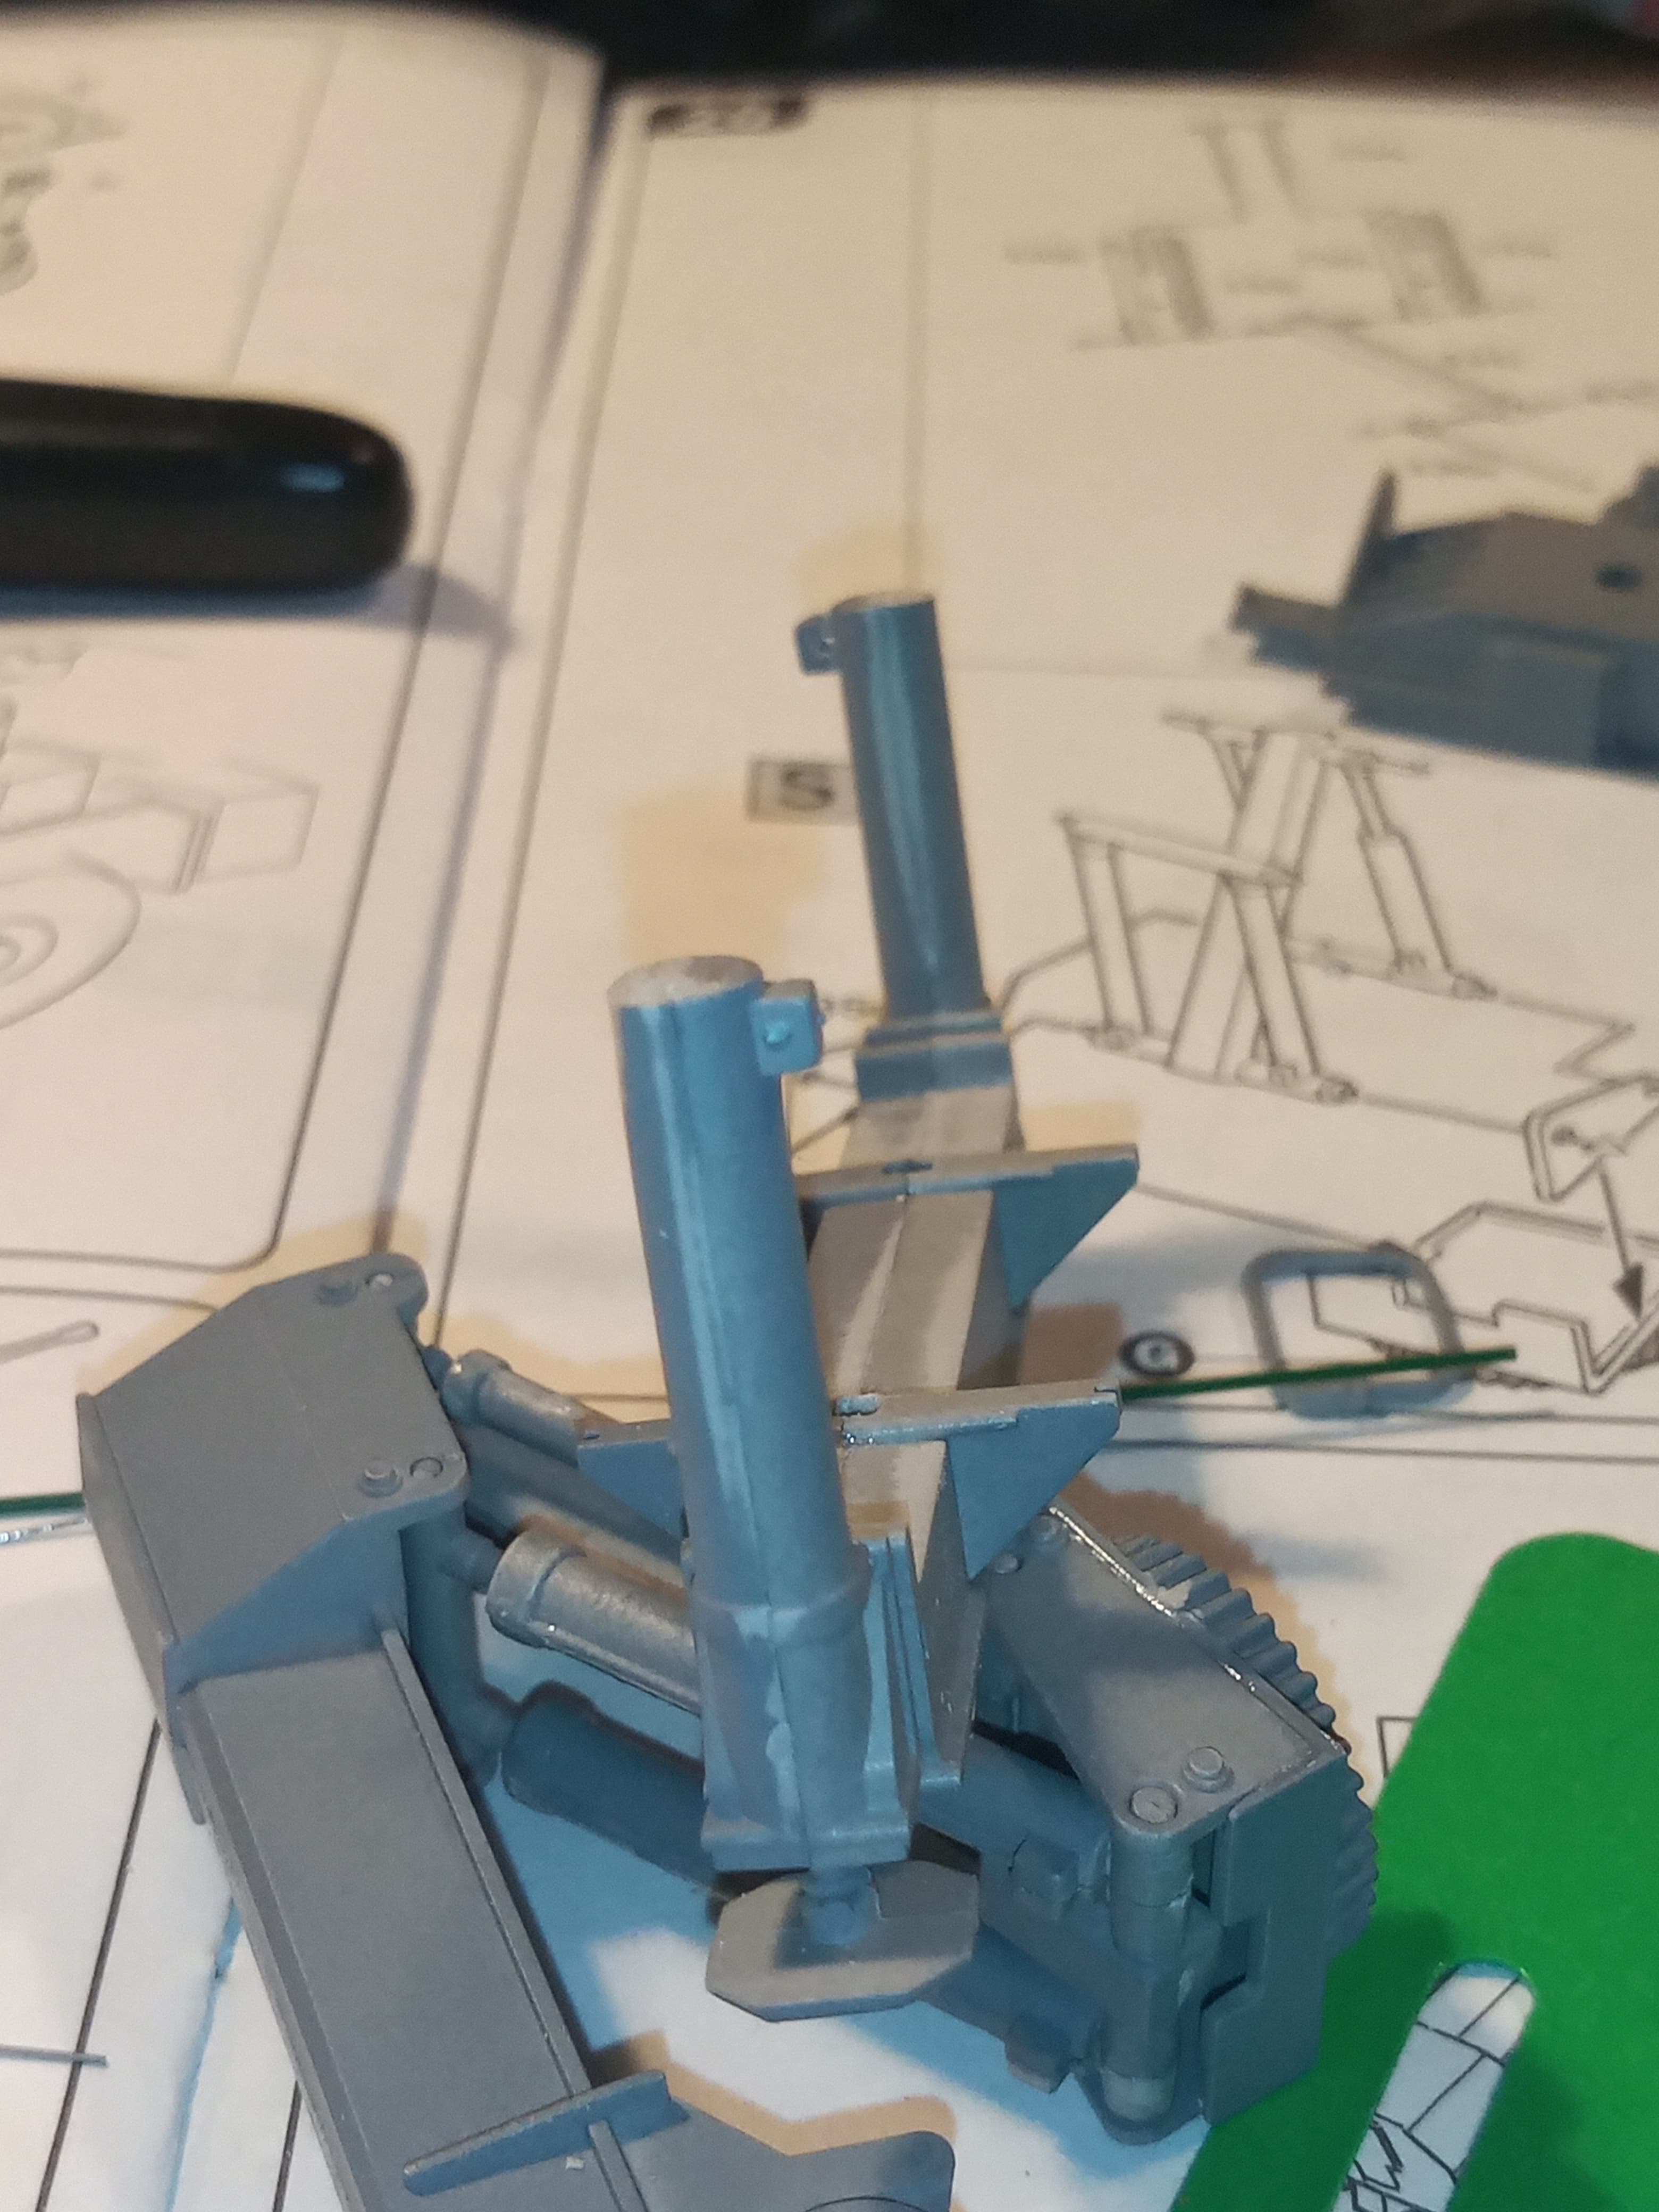
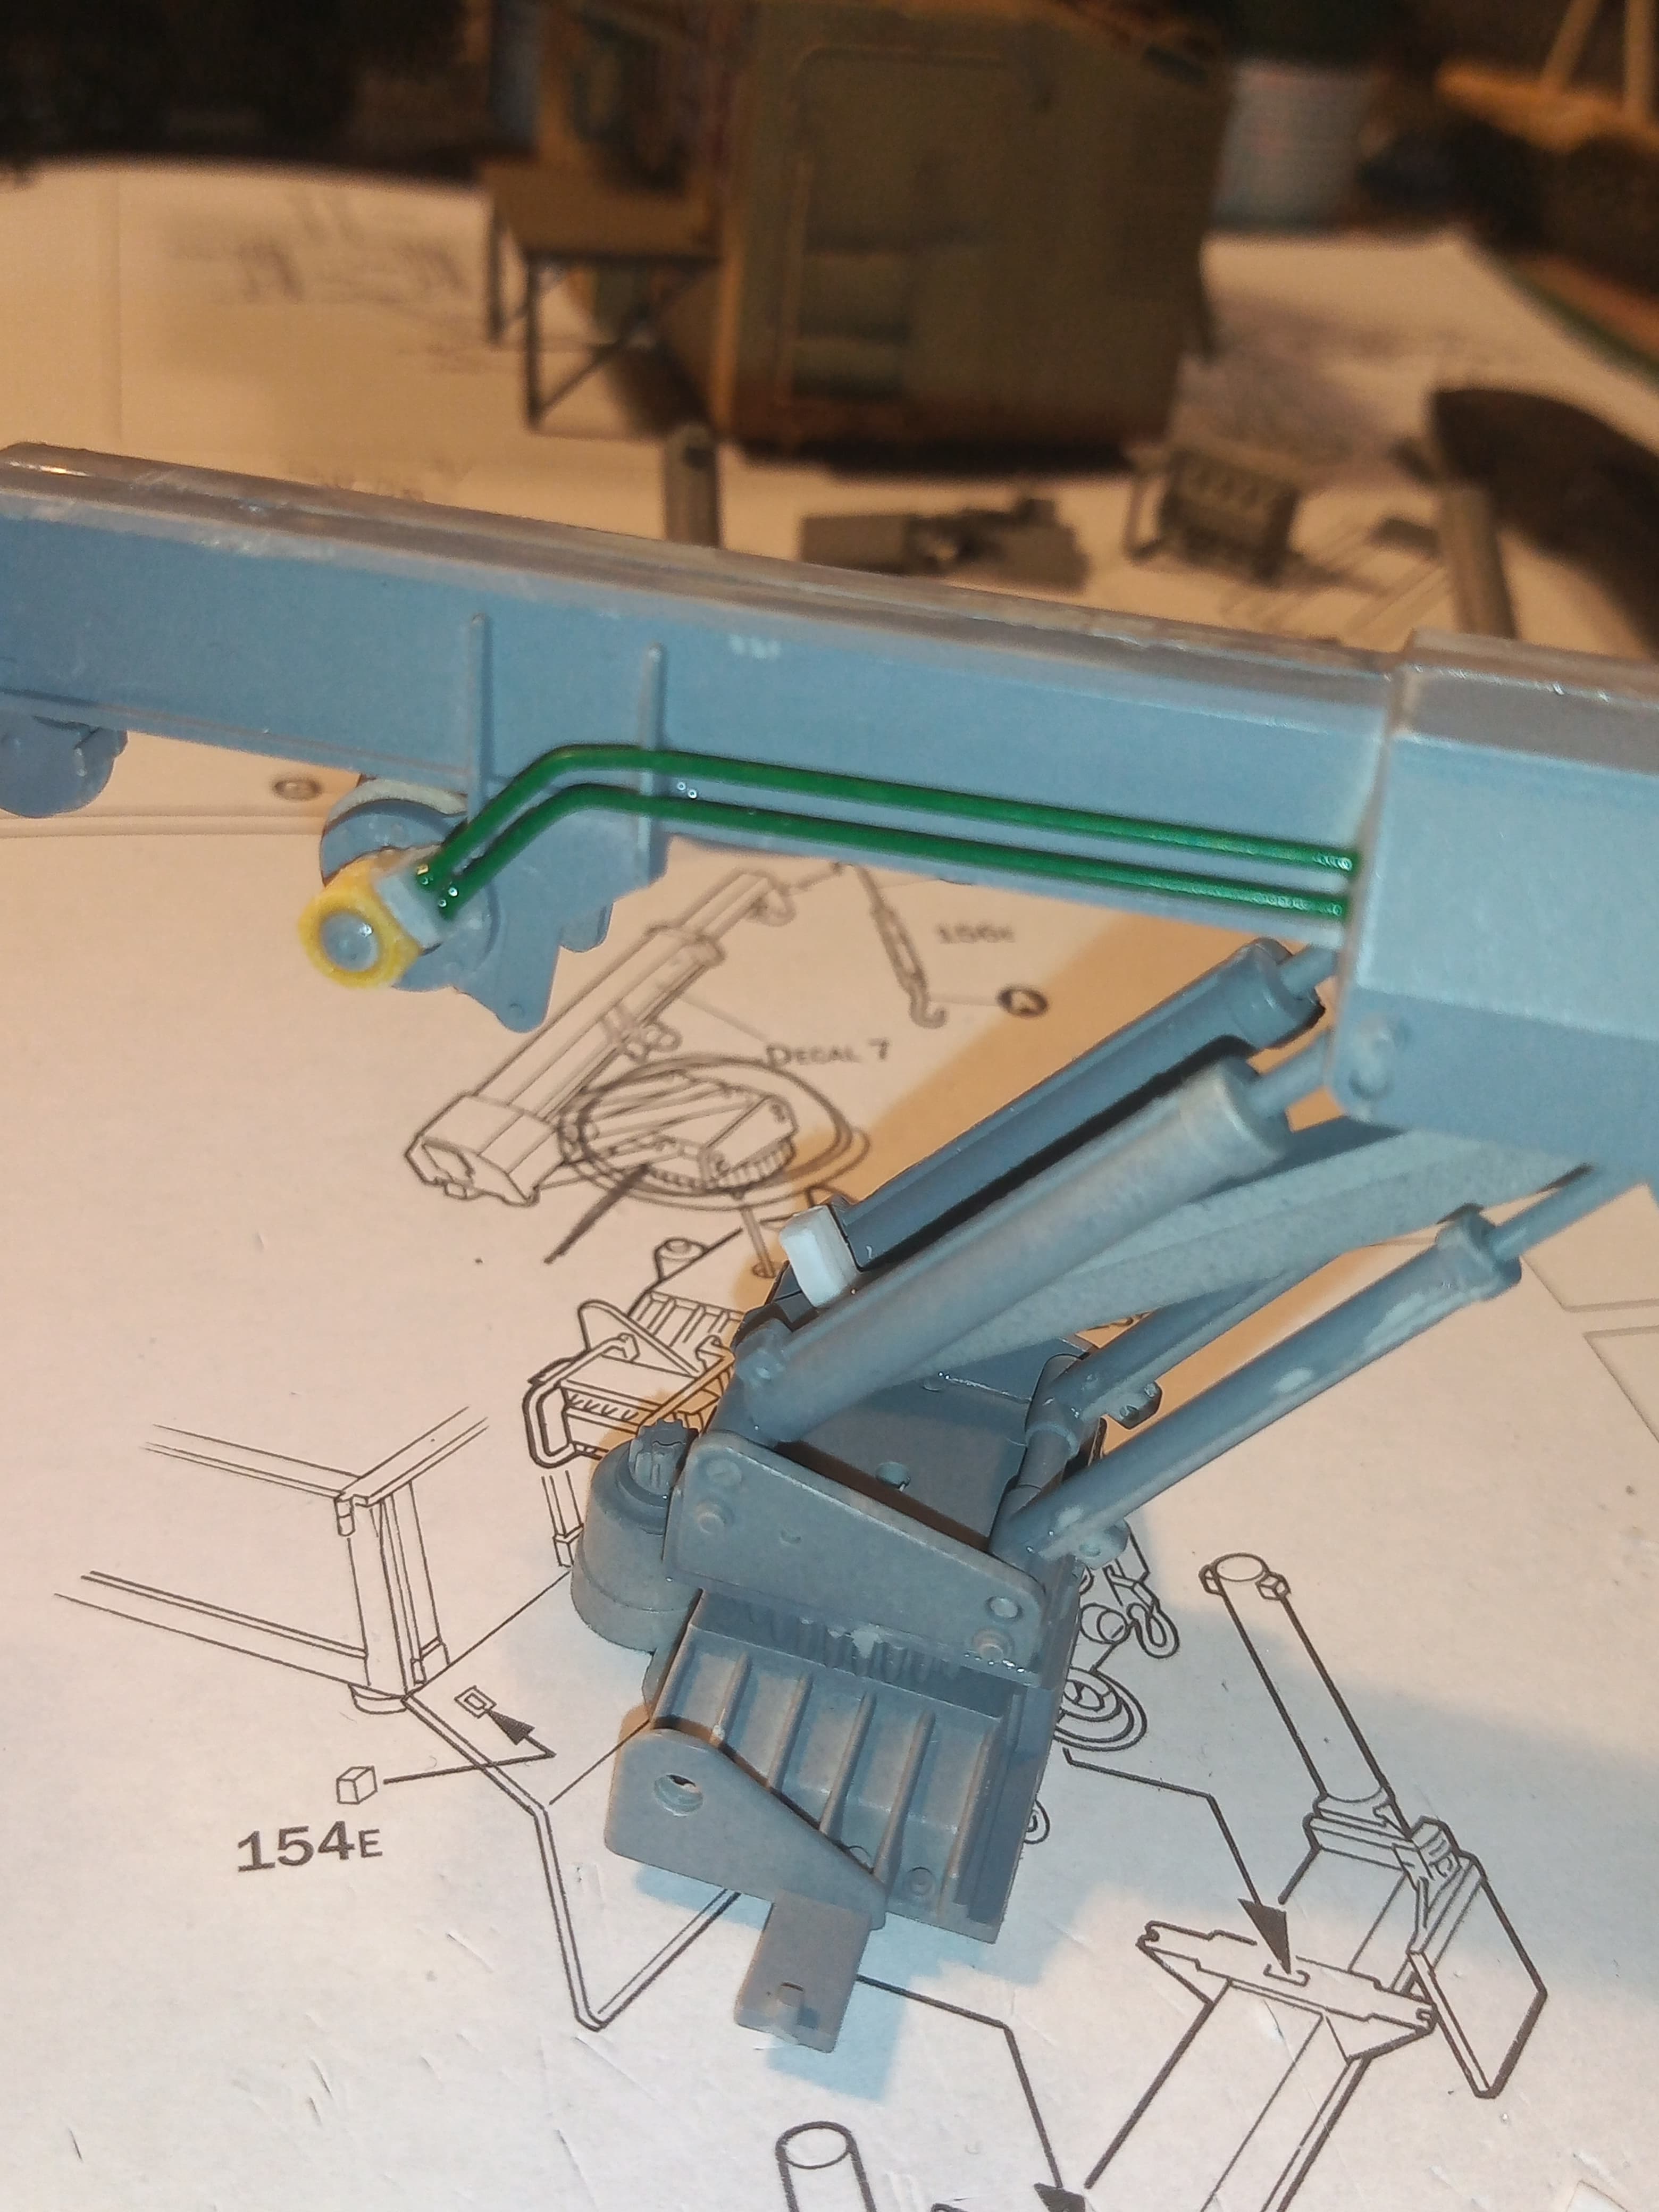
Looking back at the lines on the main boom… I need to add a few little mounts for the lines each side …
The new .45mm wire arrived today so made a start on the ram lines.
Did the extension support rams first
Then started on the small rams on the main body of the crane

Found some suitable cable for the cable drum.
I think it’s from an old Panther.
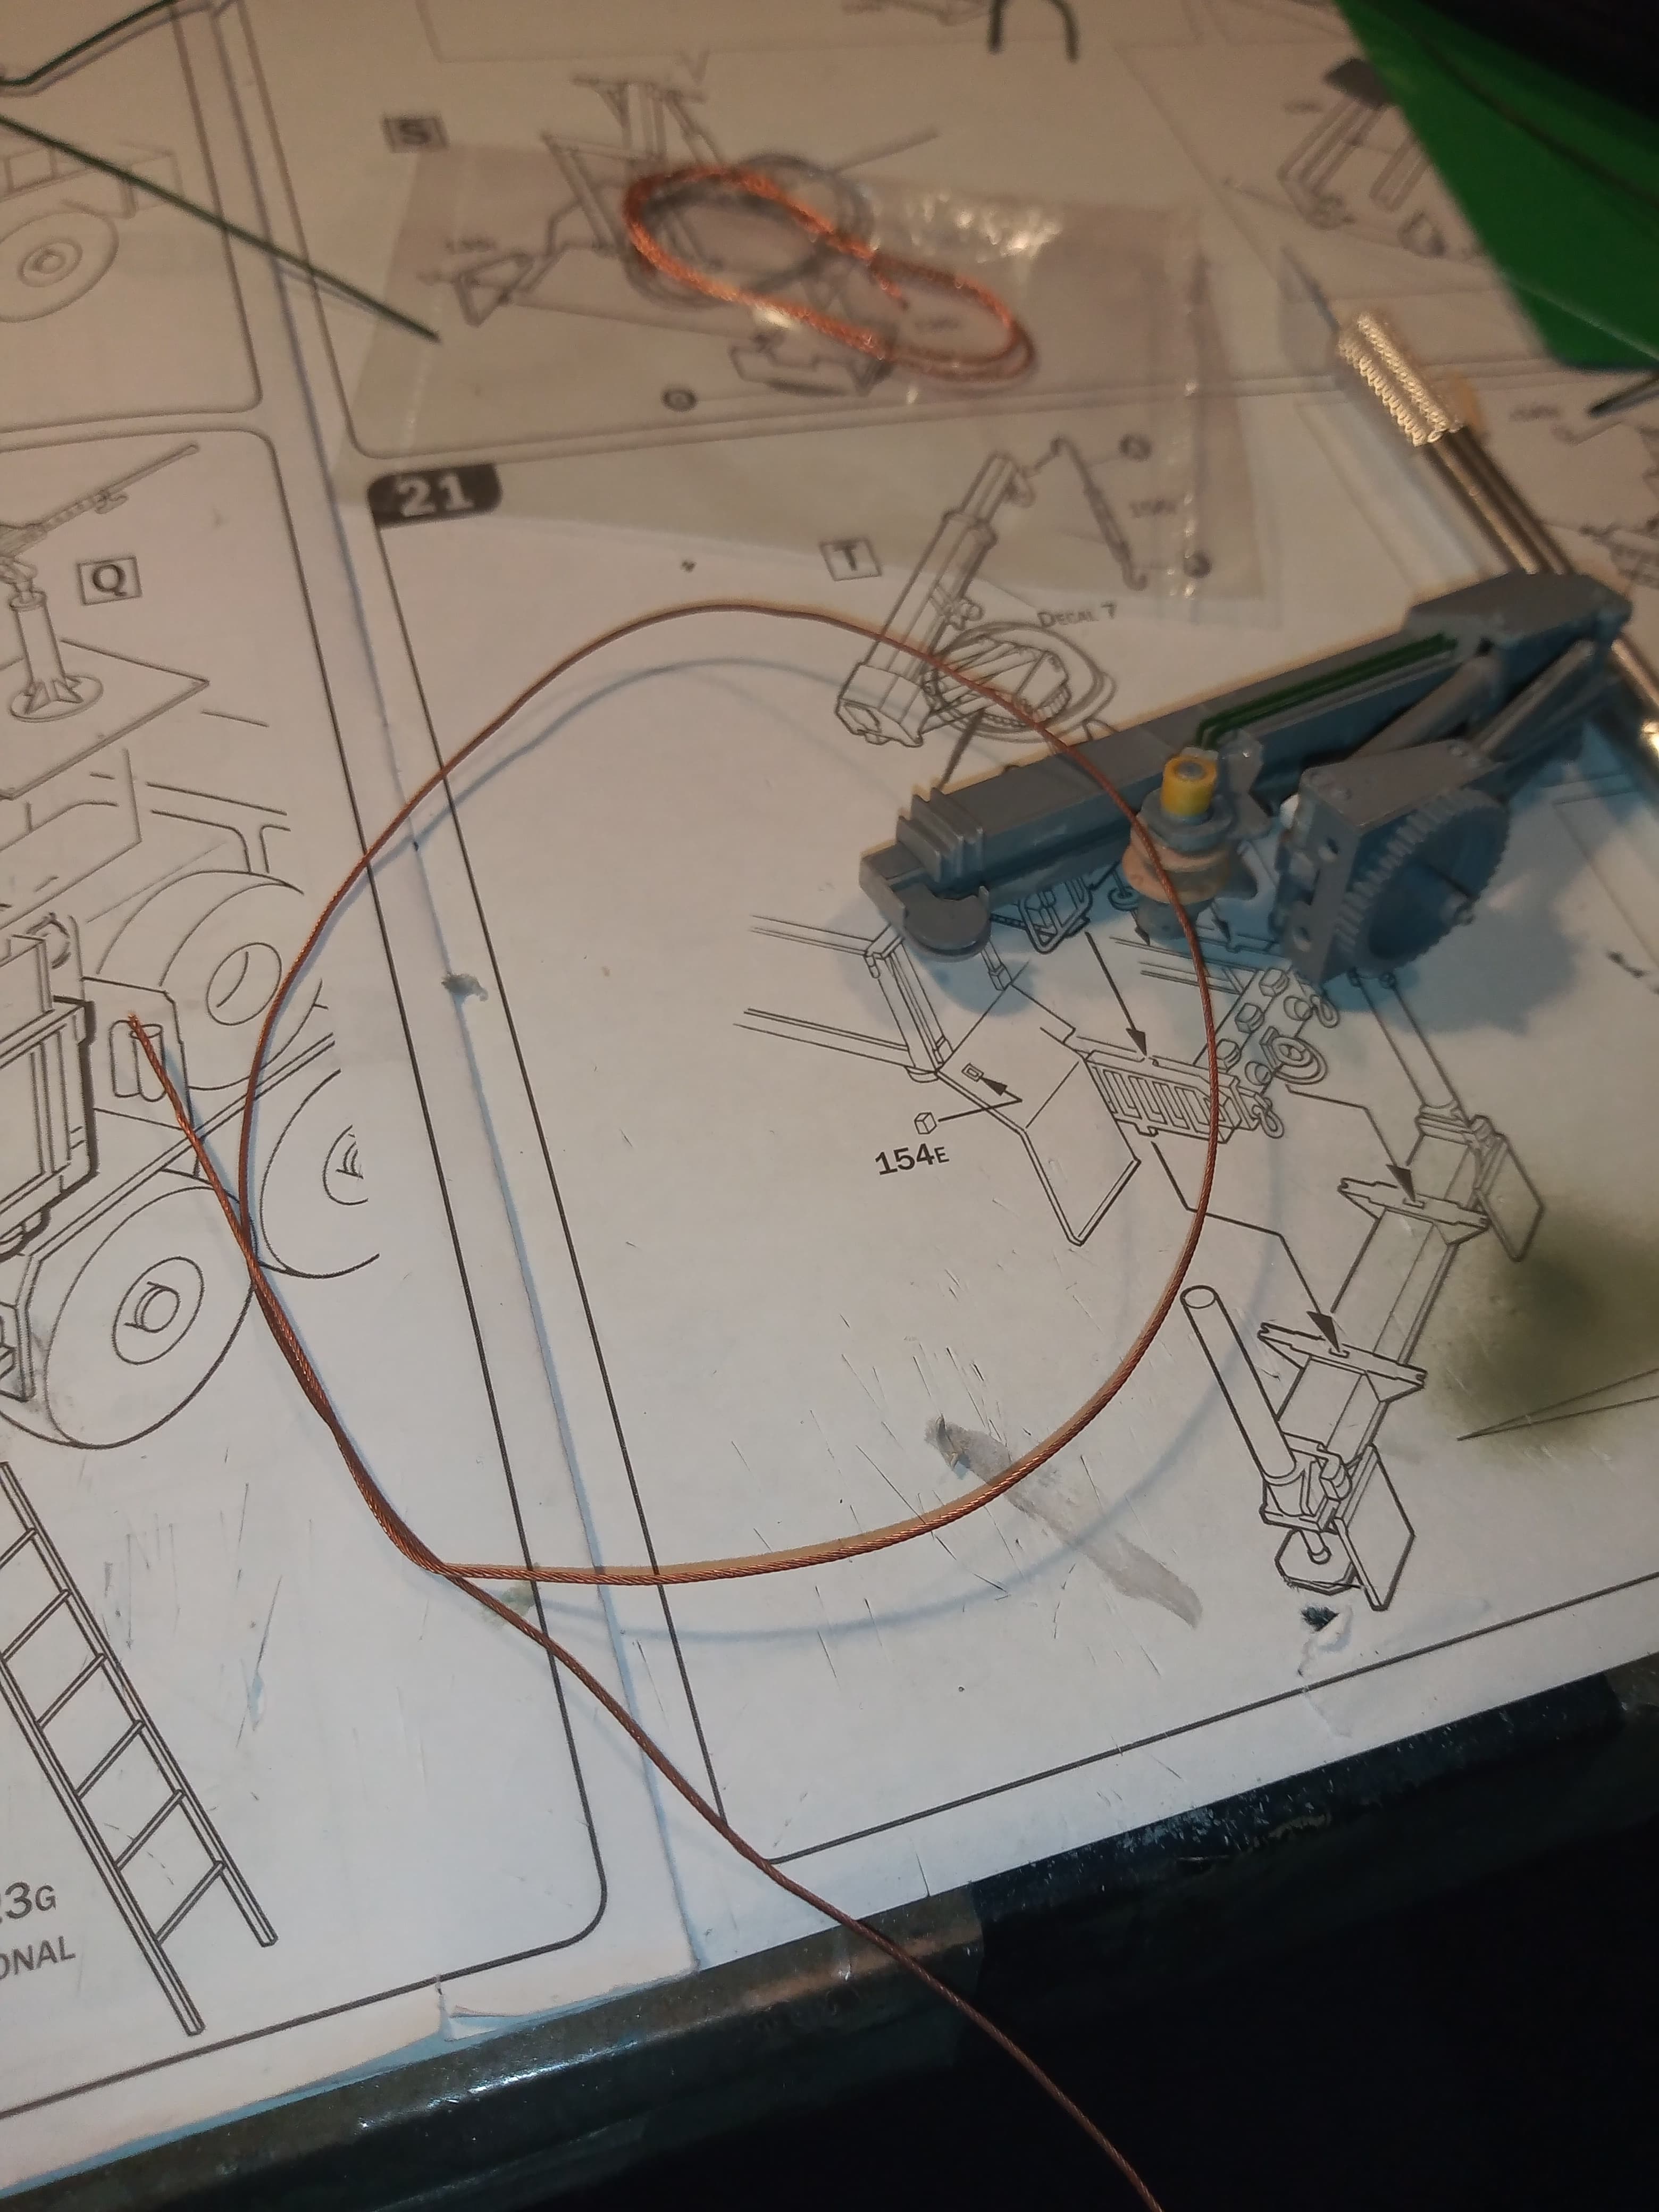
And wrapped around the drum.
And fed through the front pulley
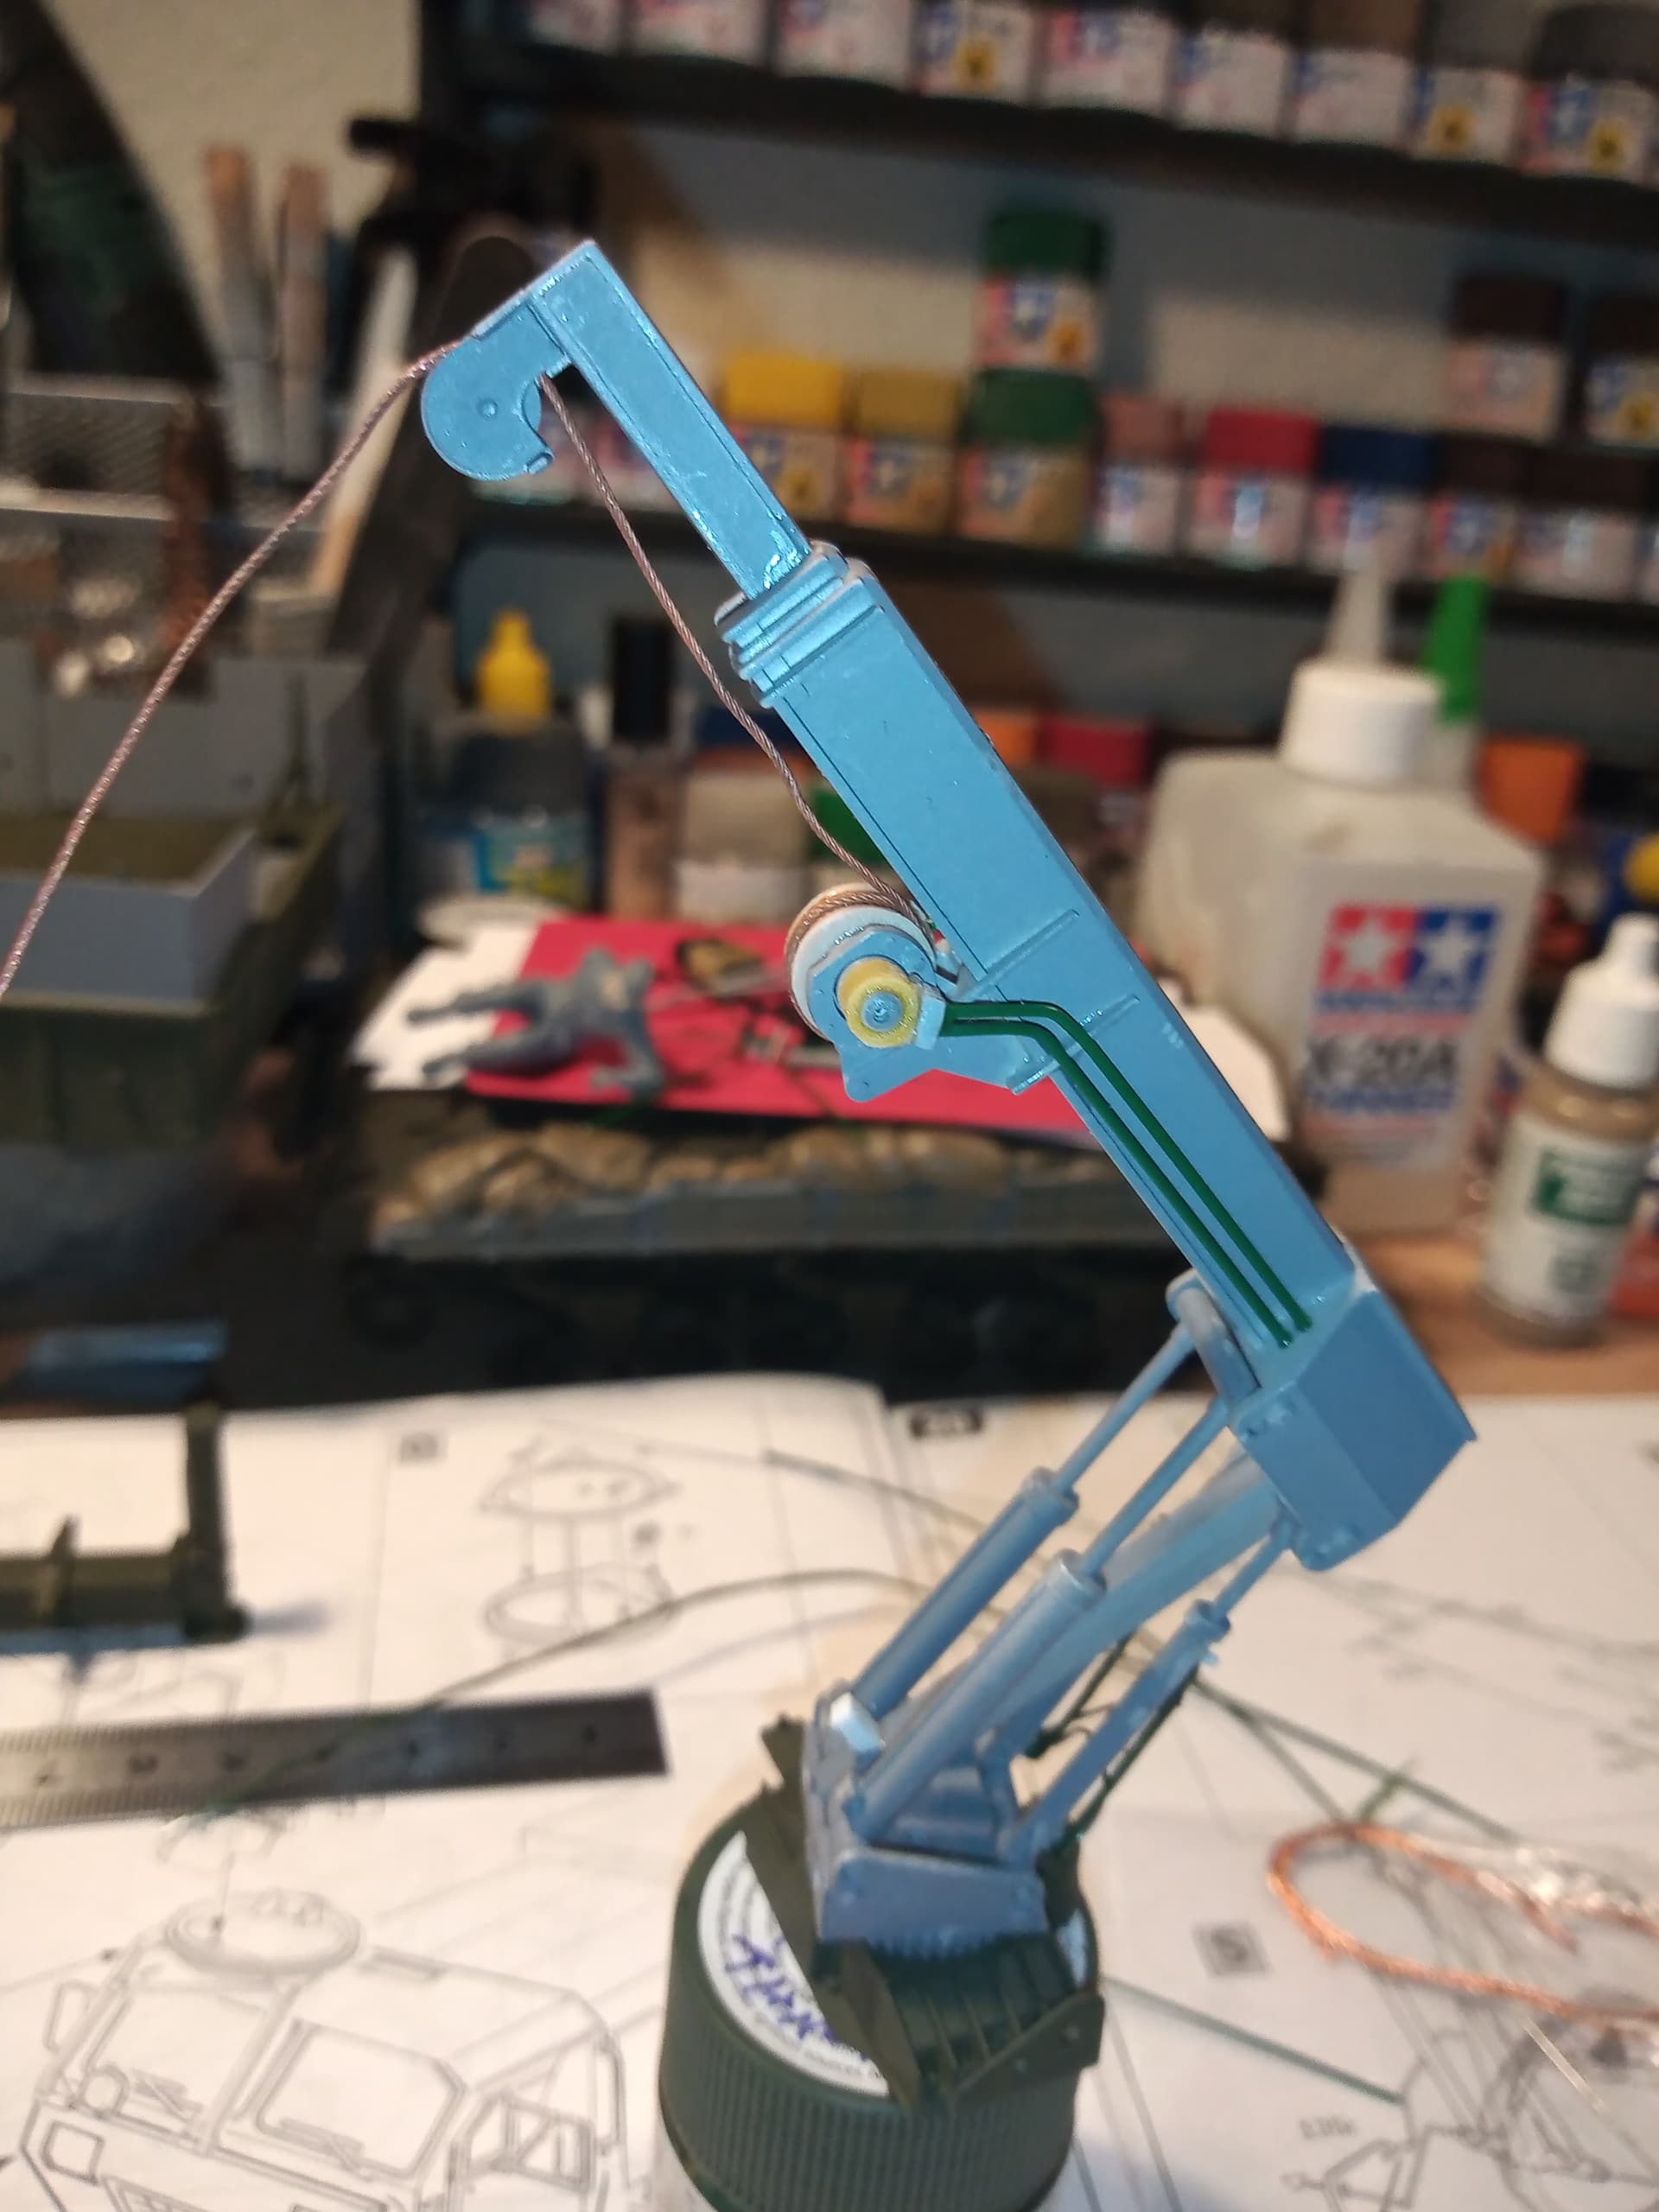
I will cut away the plastic length on the kit hook assembly and marry that up with the real cable
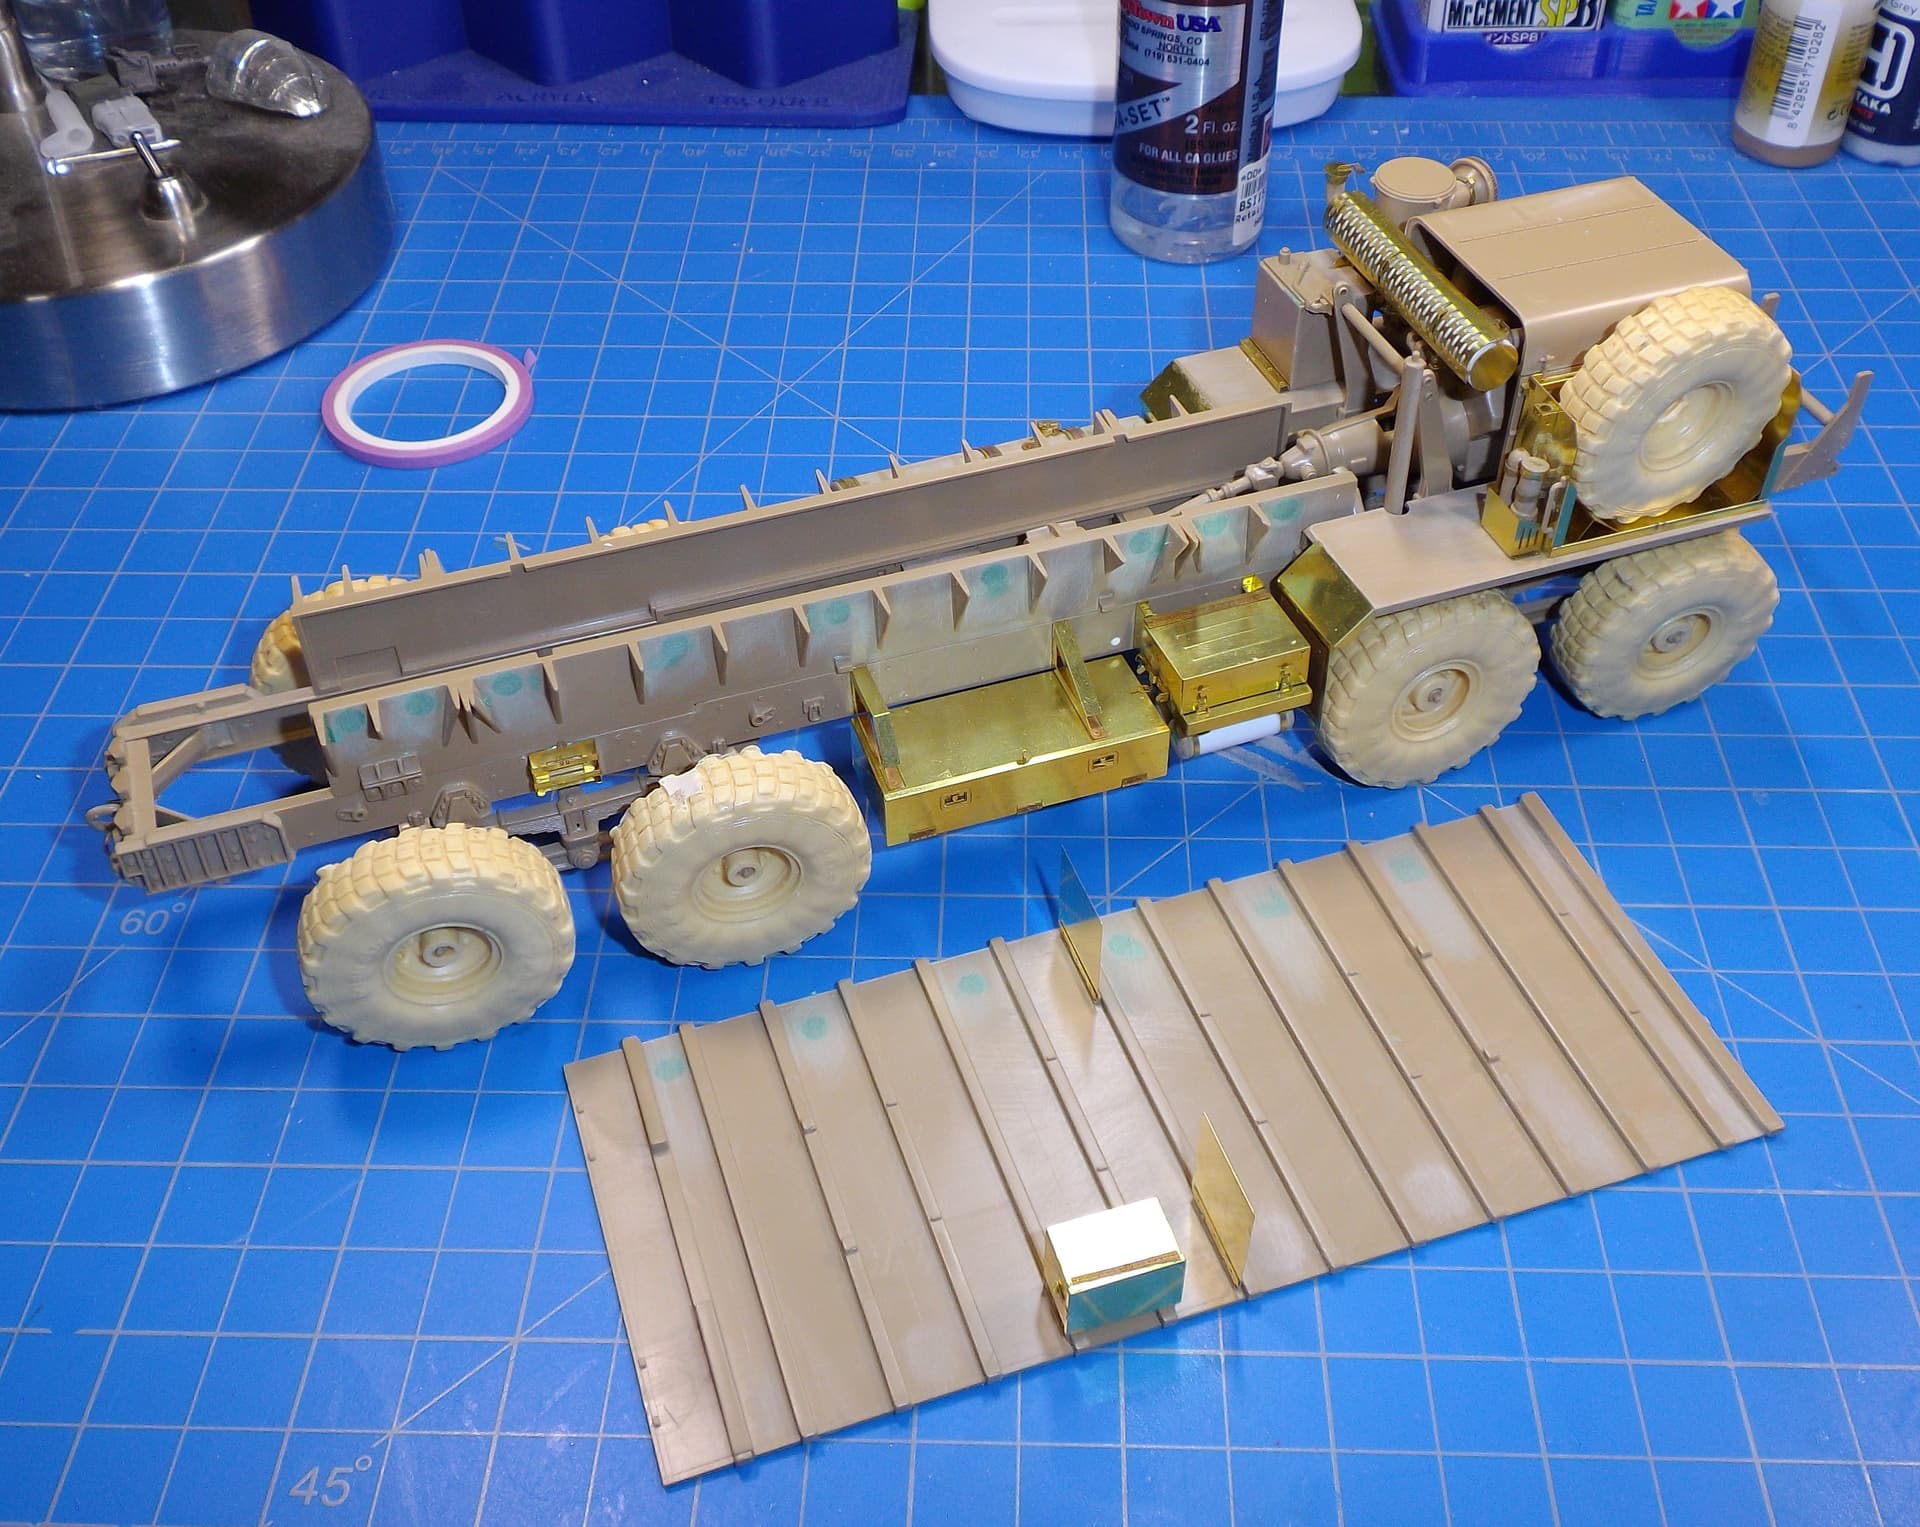
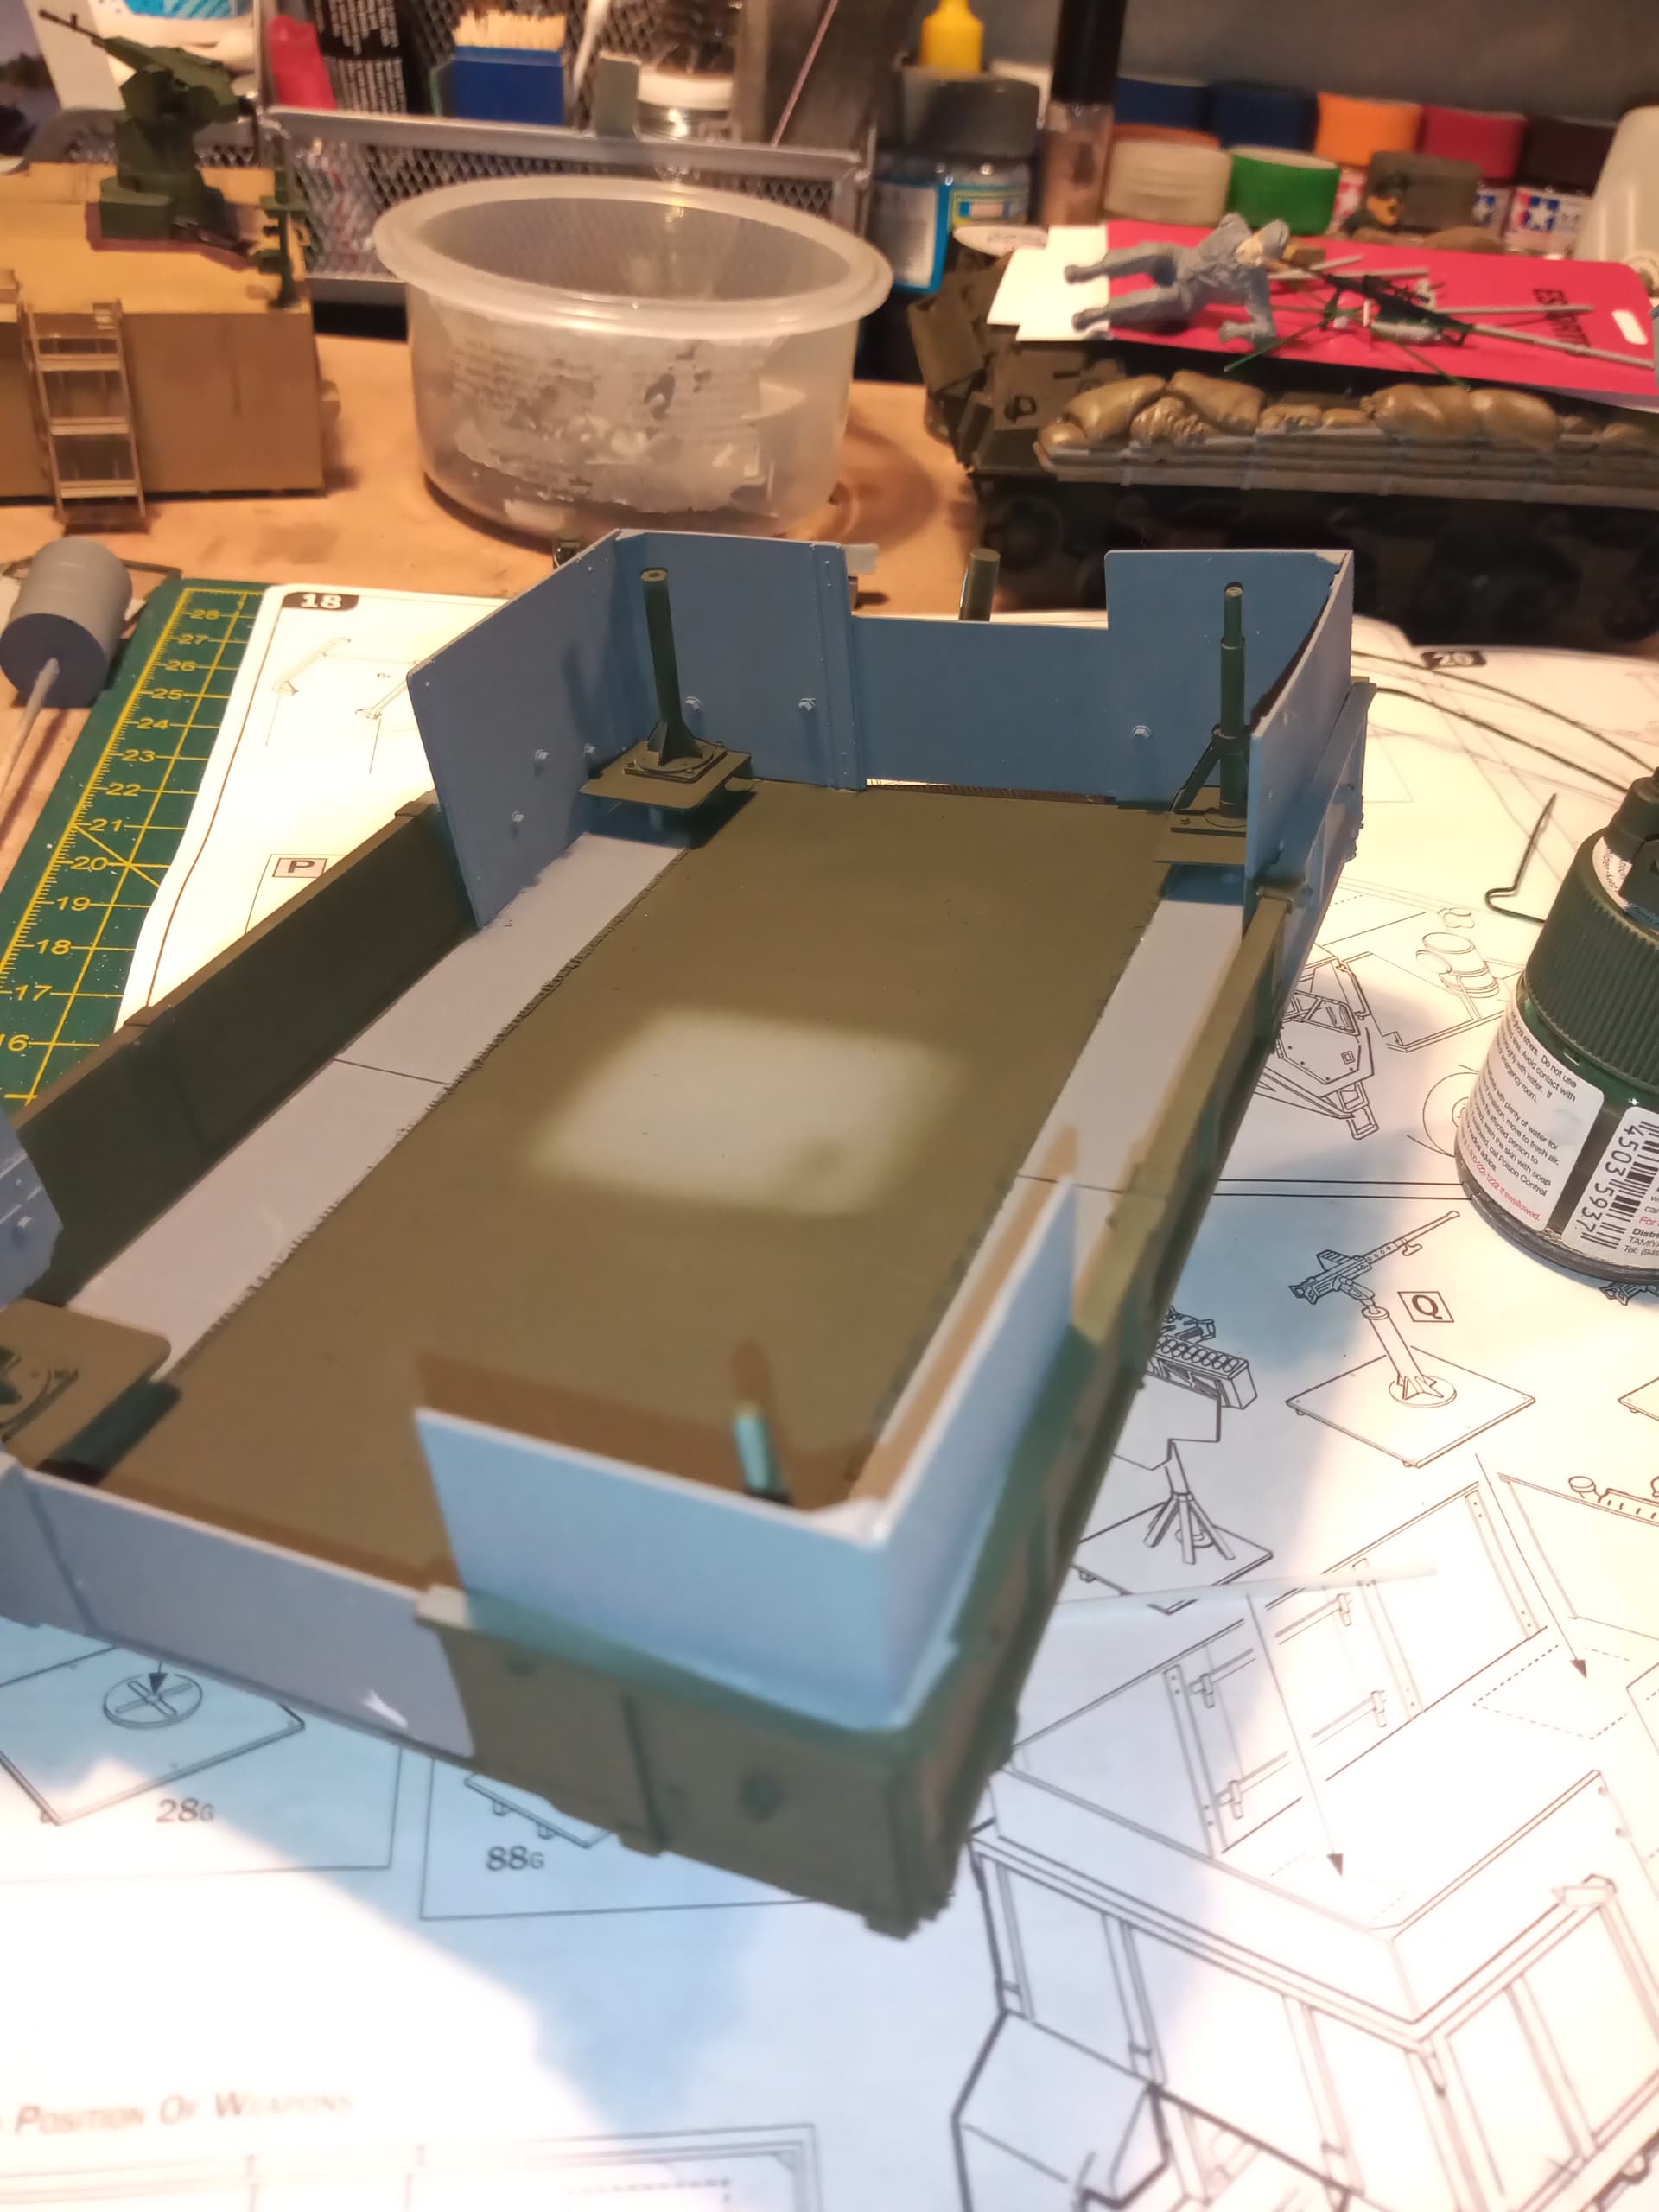
Also got a base coat of forest green on the cargo bed and some side panels… Everything grey will either be red primer or CARC sand … I may even go crazy and do one panel 3 tone cam…
7 Likes
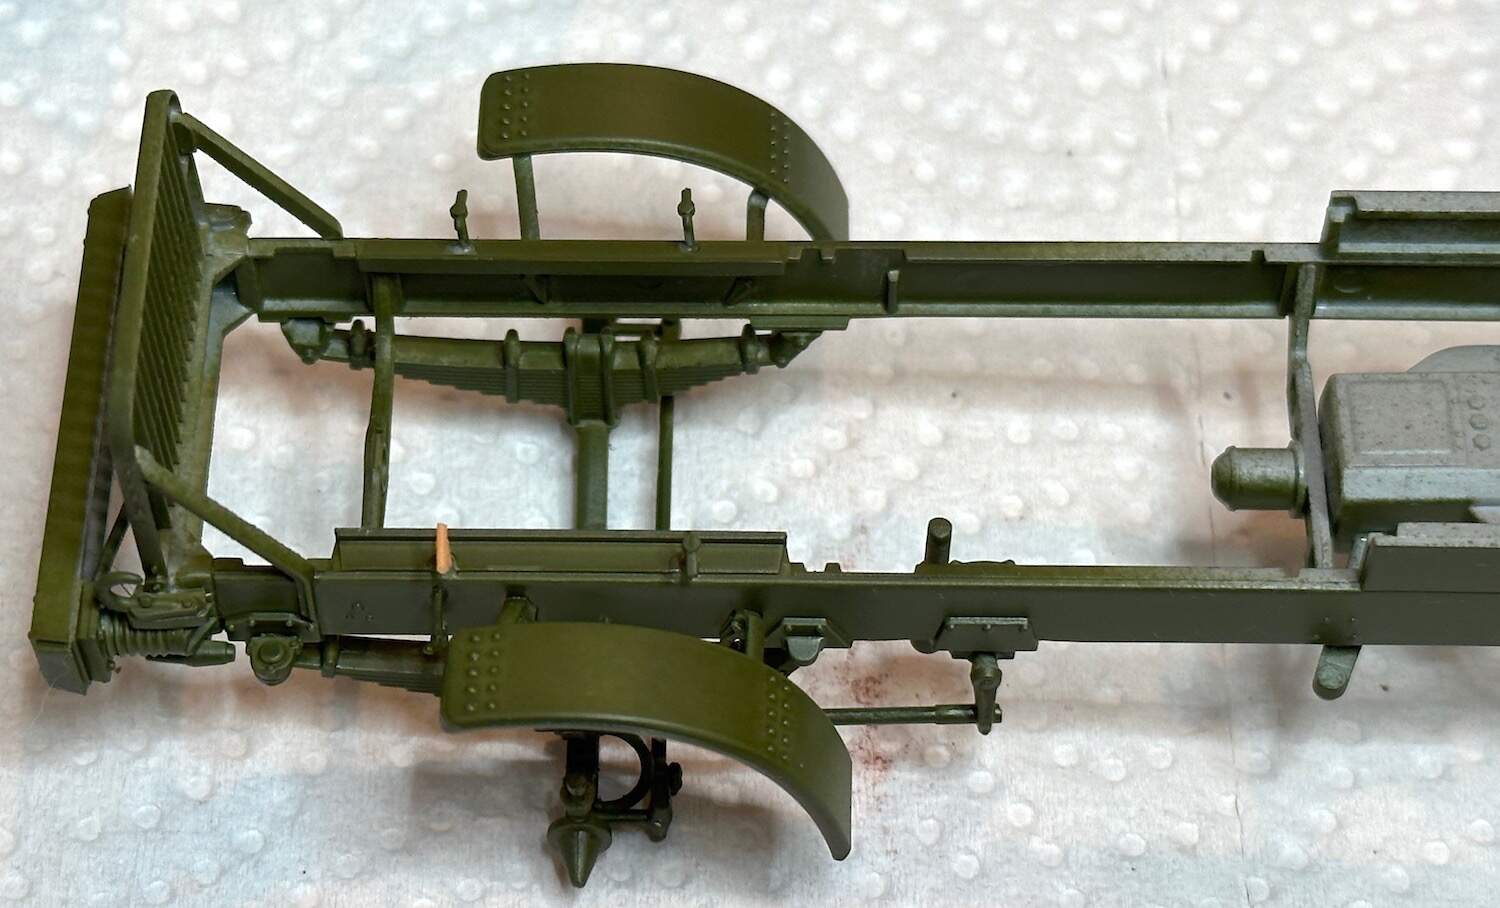
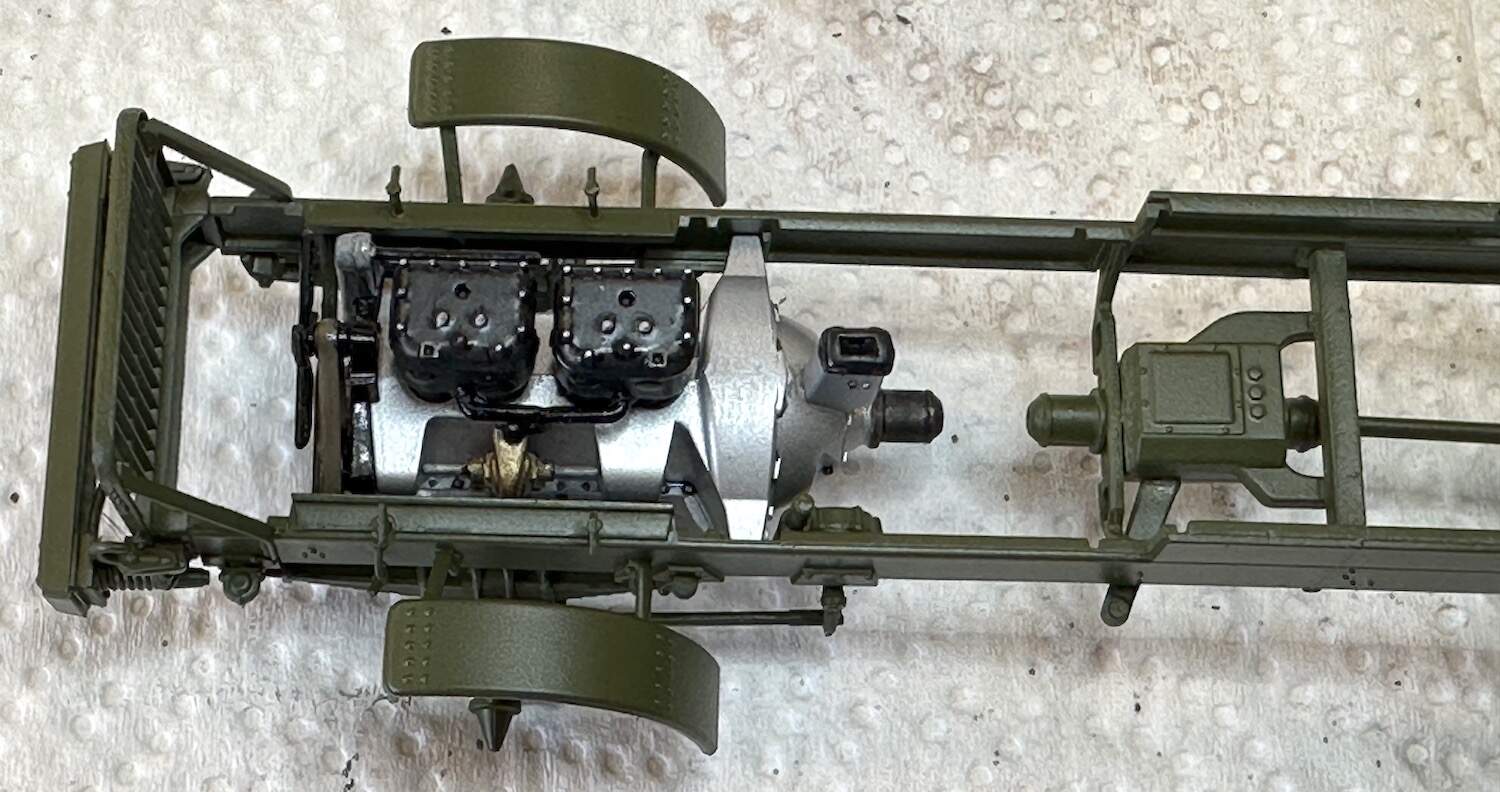
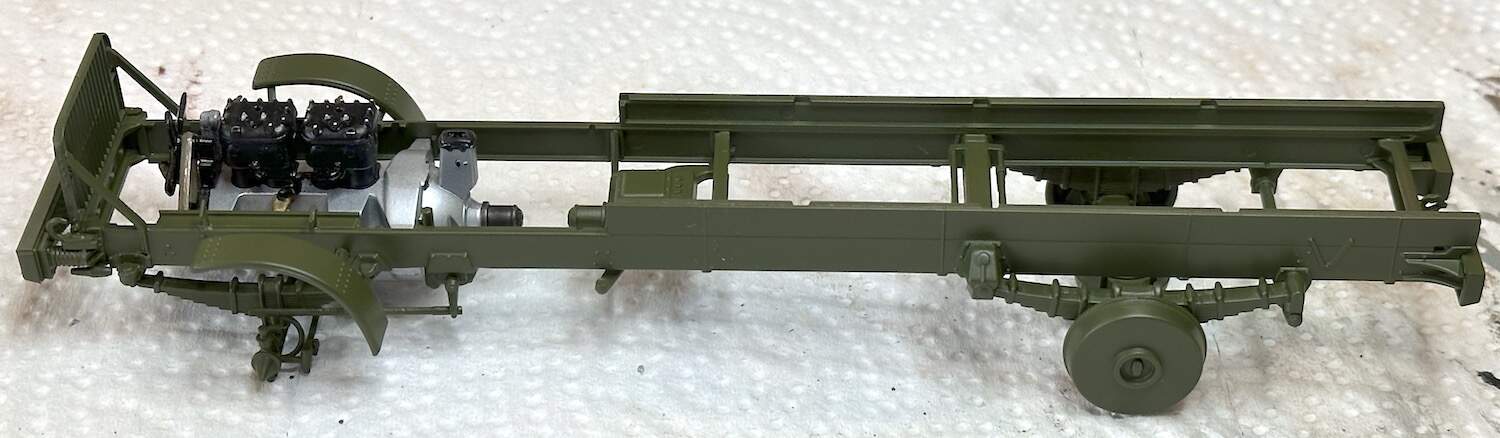
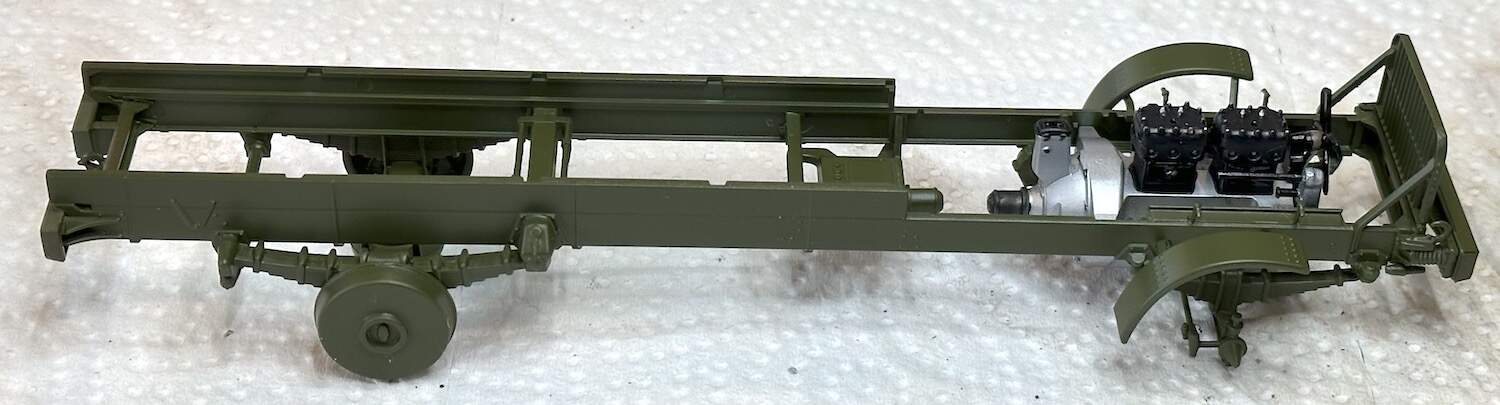
I got a bit more progress made on the ICM Liberty truck. My reference material did not agree with the kit instructions and so I followed the old photos which match my person experience with some of these old motors. The crankcase, clutch housing & transmission case were made of cast aluminum. The cylinders were cast of iron in pairs and probably painted black.
This model motor is of a later simpler version. The earlier one had a dual ignition system, both magneto & coil & points. It would have had two spark plugs per cylinder and a generator for an electrical system which was deleted in the later models. I thought about correcting all of this and decided to spend the time elsewhere. This motor will not often be viewed . . .
While I was painting the chassis one of the hood latches disappeared. I made a replacement out of scrap bits laying on the work table. As a pal from New Zealand says “A blind man riding by on a horse wouldn’t notice the difference.”
The pictures show a trial fit of the motor to the chassis. The fit of the kit parts has been very good but sometimes things do need a bit of adjustment.

Paul
8 Likes
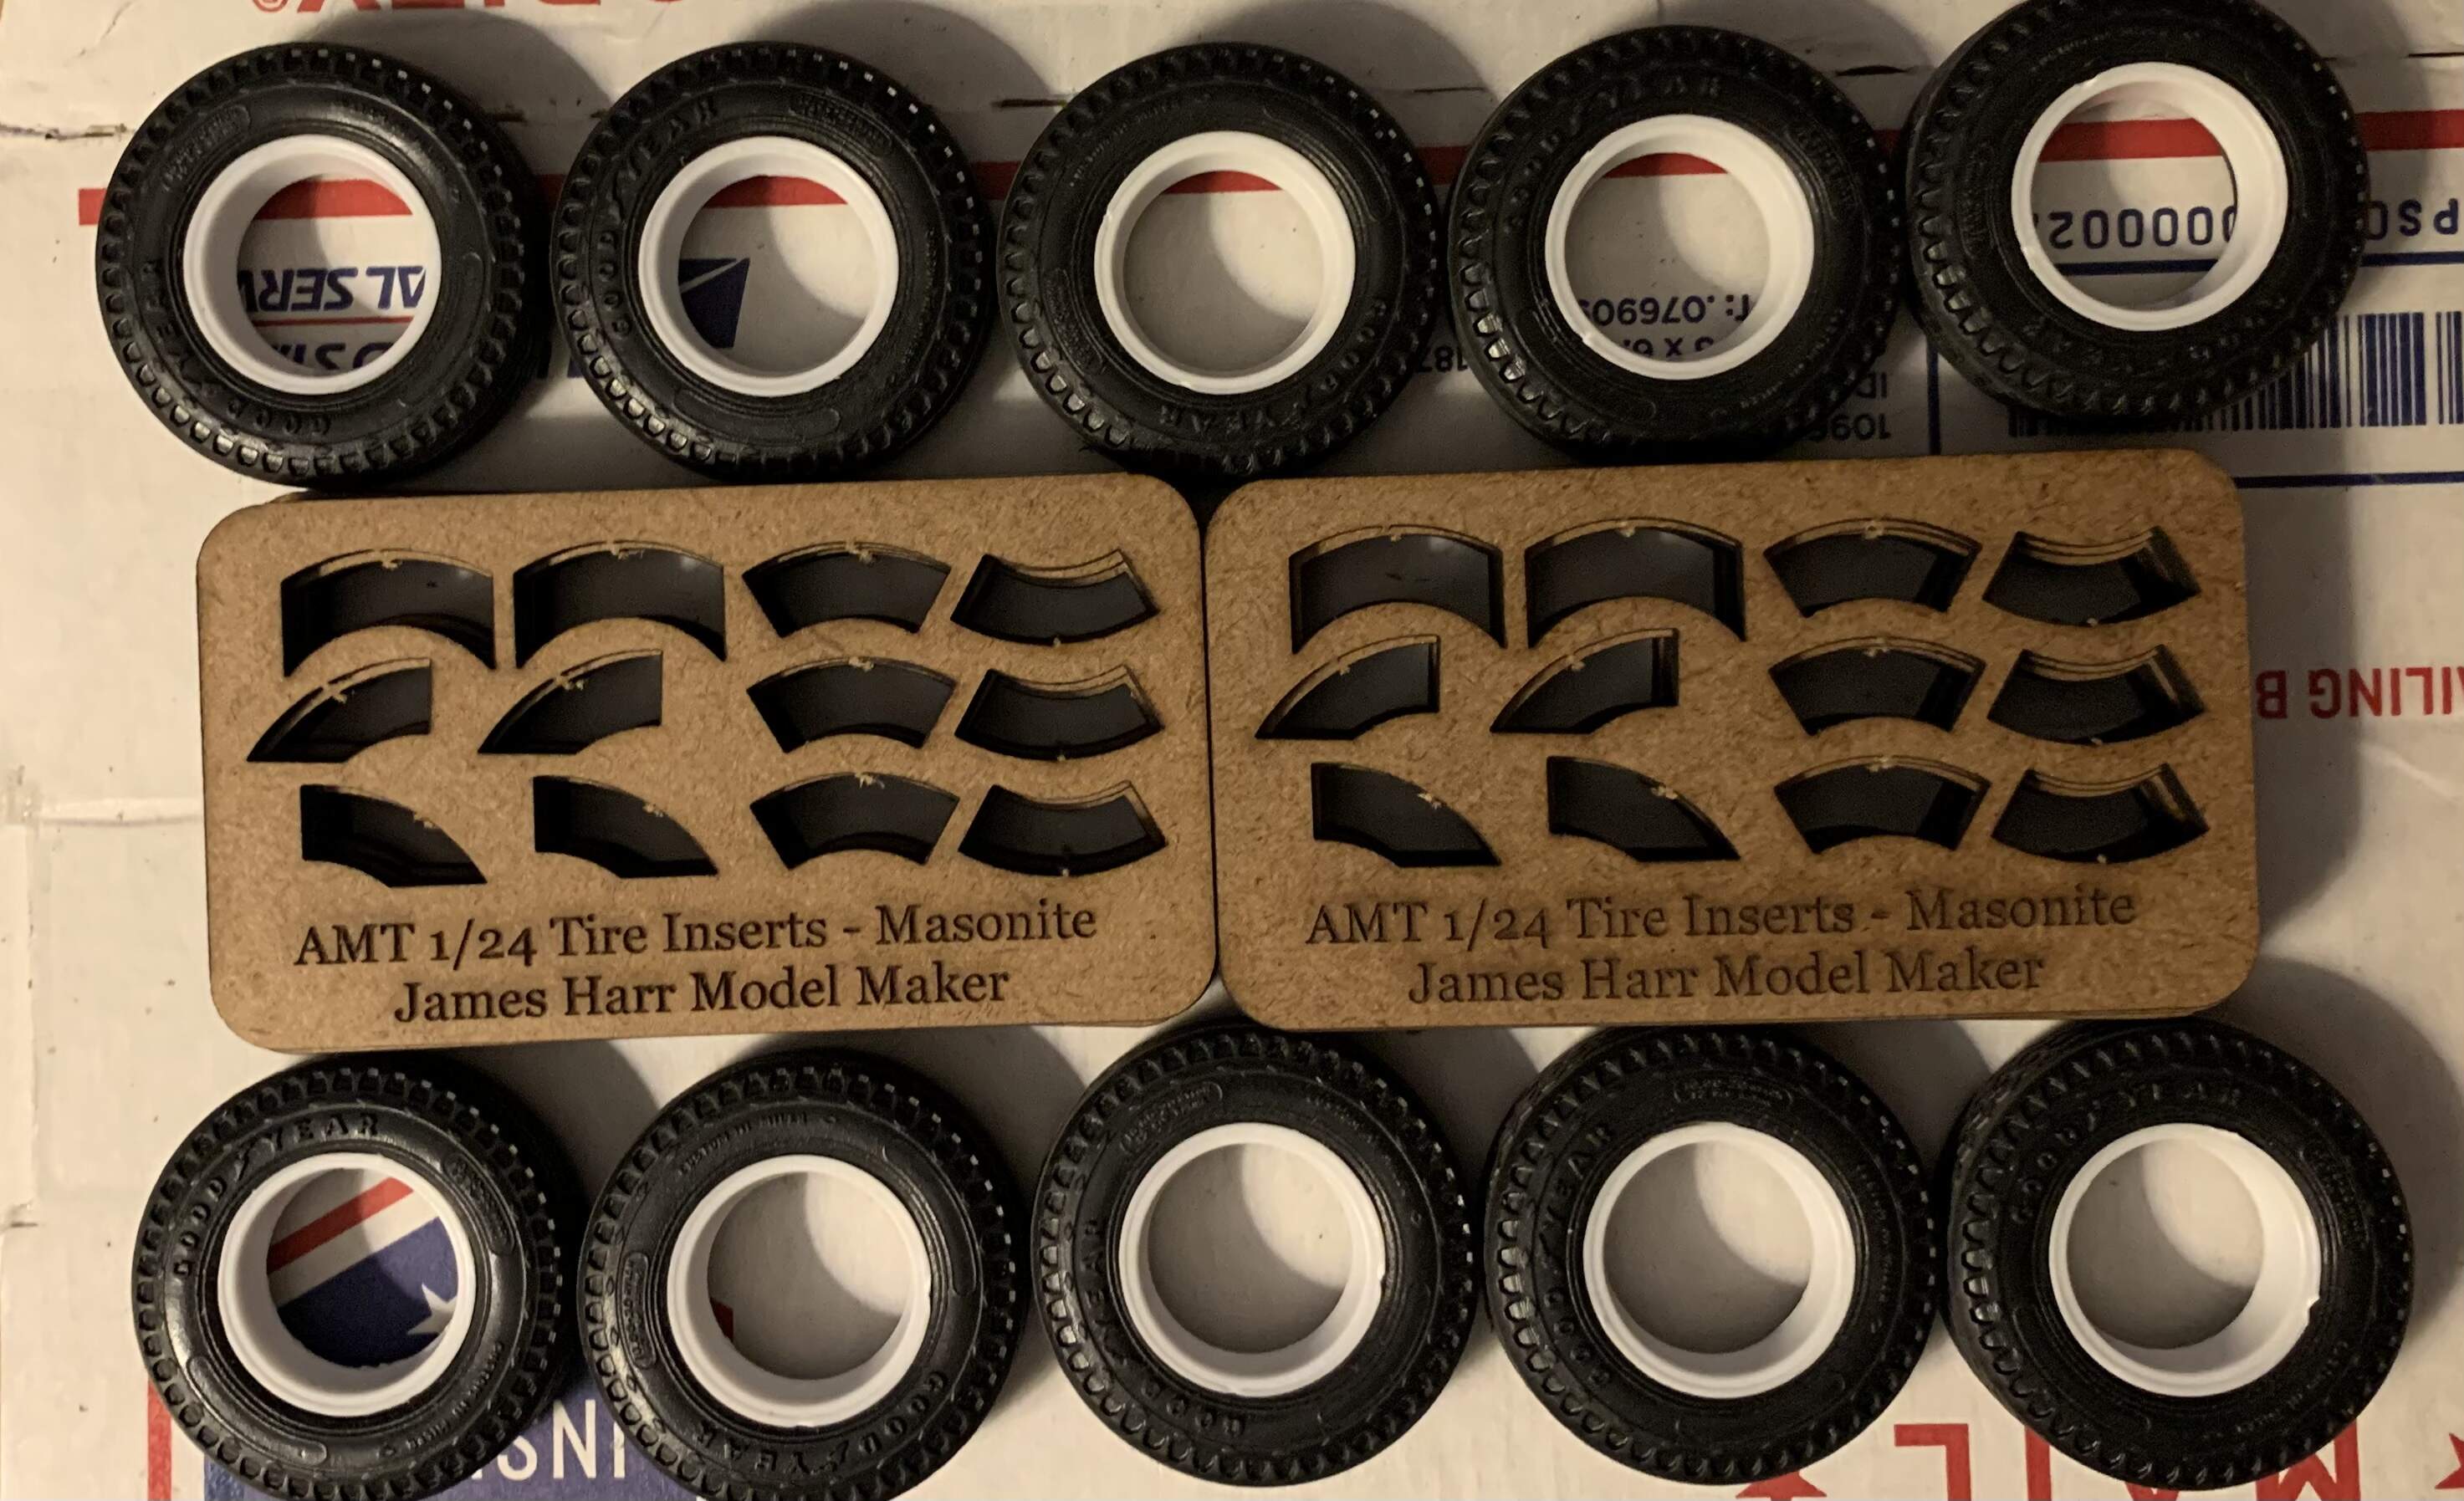
With assistance from James, my tires will be staying on the rims. All the main bits are in the wheels.
8 Likes
Wow those look great Ryan! Glad it worked out!!!
Jimbo
3 Likes
I love when a good plan is executed well. A great idea that looks even better.
1 Like
Tyres look very good Ryan. The inserts made a big difference. And a great idea from James as well.
1 Like
Still need to add the cardboard inserts for added bulkiness and support but I think the idea is a success. ![]()
![]()
Cannot thank you enough for the help
1 Like