Convoy!

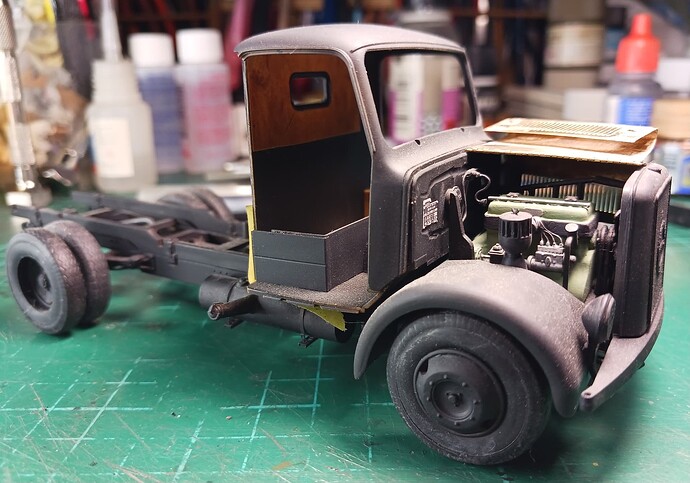
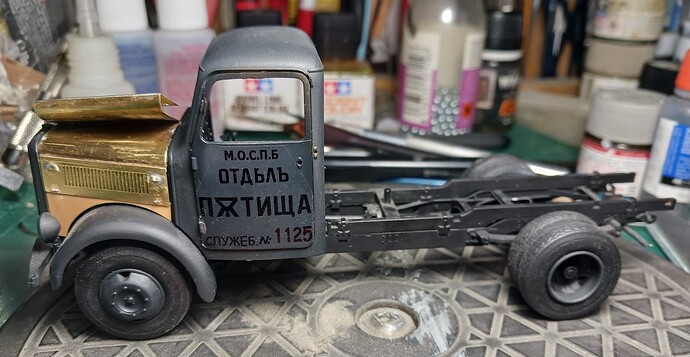
After a long hiatus, I restarted the Magirus S330 build.

Soldered the engine hood(bonnet), using some DIY parts and a set by Vmodels:

Tried it out:

Decals are on, but need Microsol treatment.

I have some slack in truck sub-assemblies, so more adjustments are needed.

Cheers,
Angel

12 Likes

That PE work looks great Angel, very neat mate :+1:

1 Like

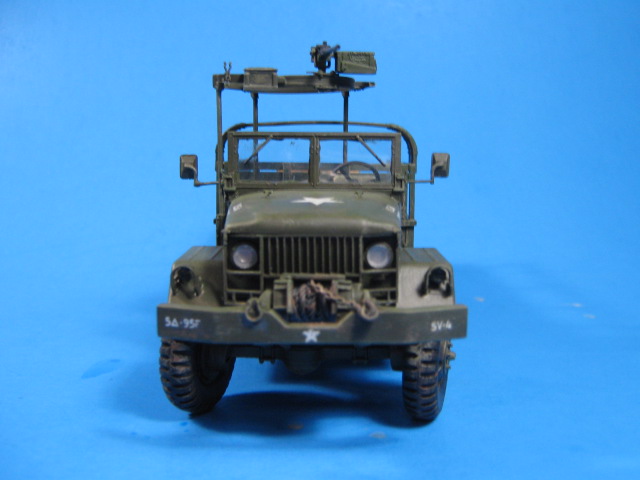
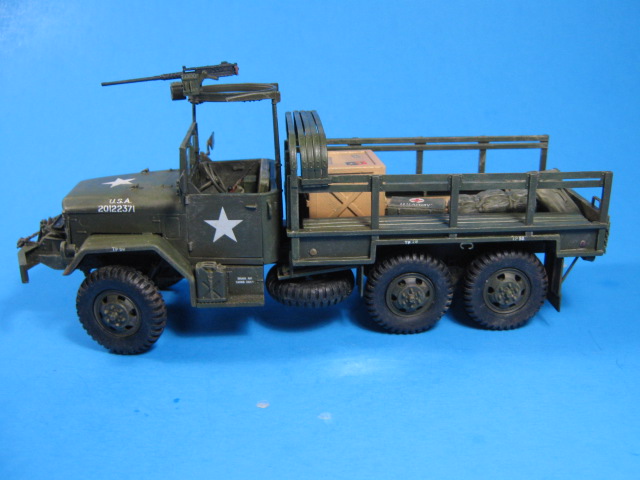
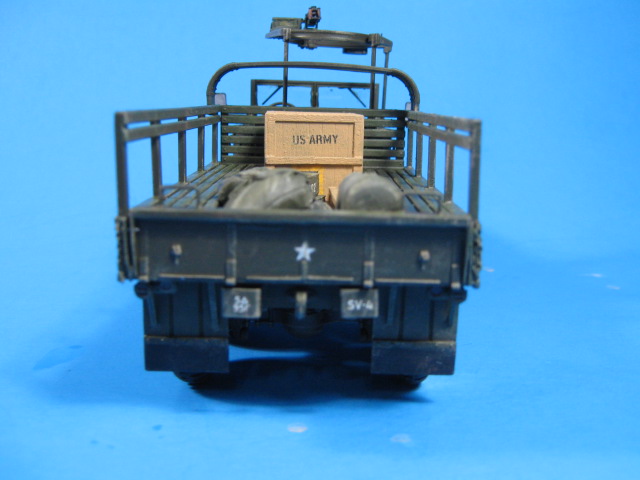
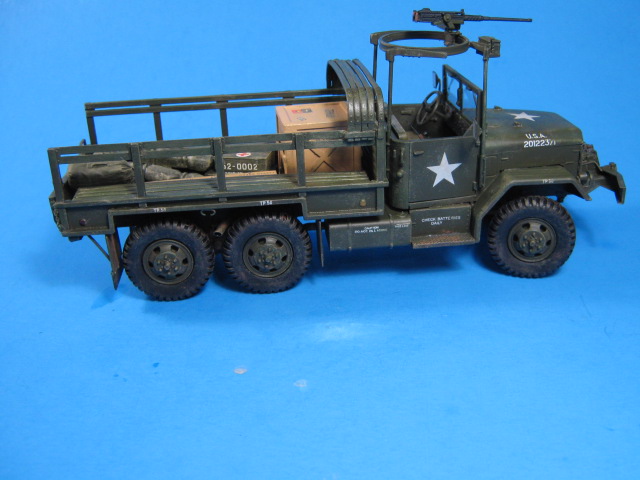
Here is a truck I recently finished up. It is a 1950s M34 2 1/2 ton truck, the predecessor to the ubiquitous M35 “Deuce and a Half”. I used the AFV Club M35 frame and cab, the Revell M34 bed parts, and larger AFV Club M59 Long Tom tires.

IMG_2720
IMG_2722
IMG_2723
IMG_2719

You can see the whole build here:

I really like how it turned out. The Revell bed is not bad at all and can be brought up to current standards with a little bit of work. Mated to the AFV Club frame and cab, and larger tires really brings this one to life. I think it makes a very nice M34.

12 Likes

Hi Gino, :+1:

Great build, Gino! Something out of the ordinary.

Thanks for sharing :slightly_smiling_face:

Hello gents,

As the Convoy is still moving I’ll add this:

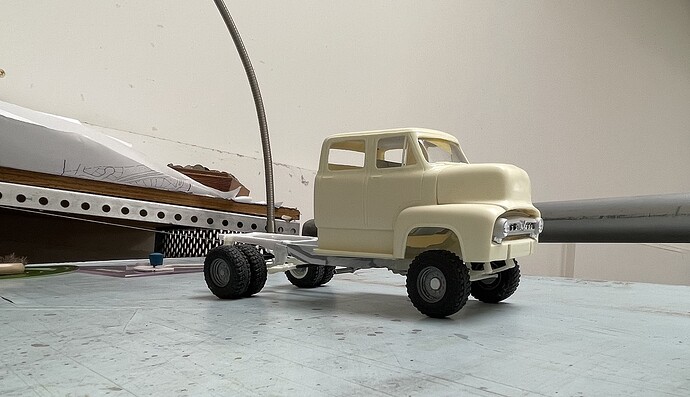
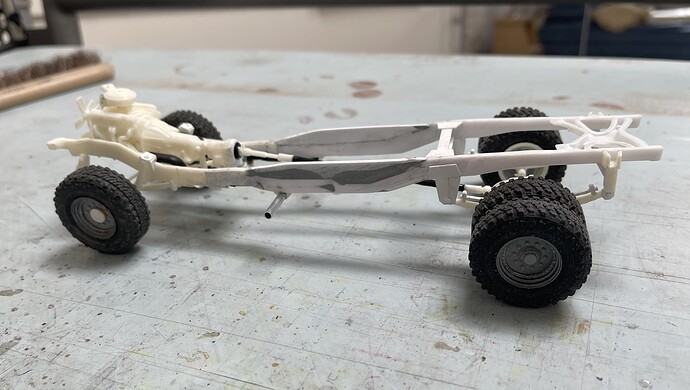
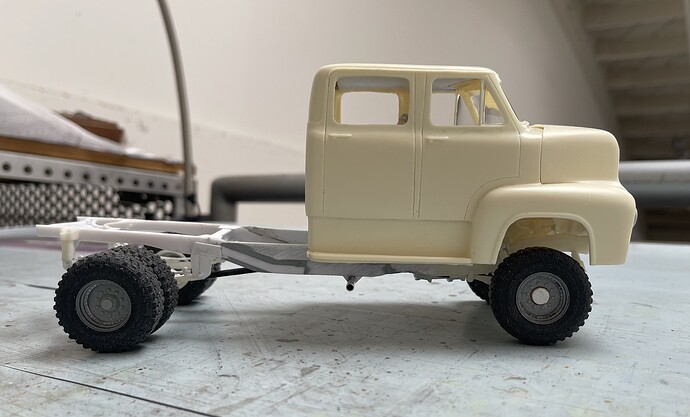
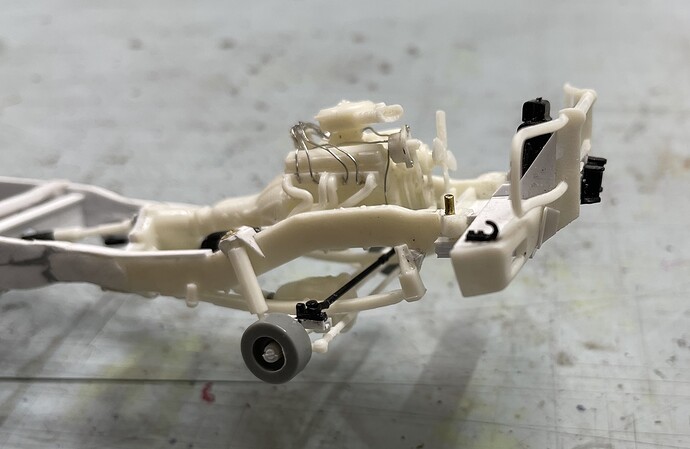
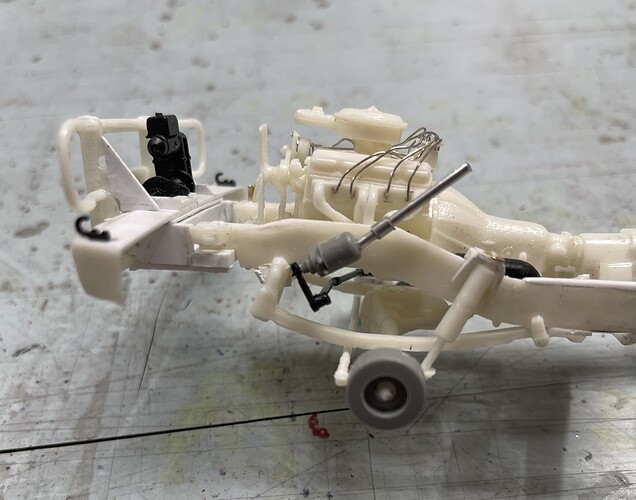
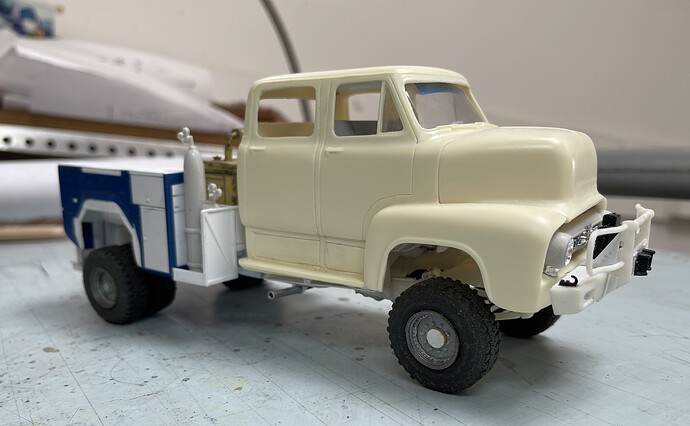
This is something of a junkbox special. The cab is from Jimmy Flintstone, but the rest from remnants and scraps, making it a crew cab 4x4. The front of the chassis is from an old MPC GMC, the rear just a leftover, maybe another Chevy? Wheels and axles are made of cut up parts from several kits. The transfer case was missing the back half, so it’s now cut, carved, and sanded evergreen.

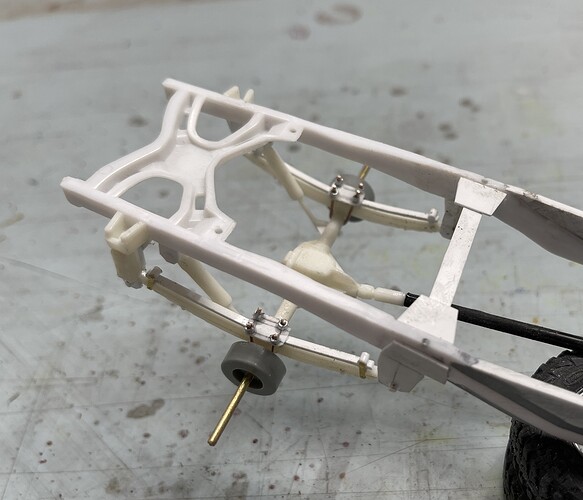
The driveshaft is part sprue and remnant parts, and as you can see the rear suspension includes parts and styrene. The front axle looks like a Dana 44, and the rear a Dana 60 or 80. The engine is a small block Chevy:

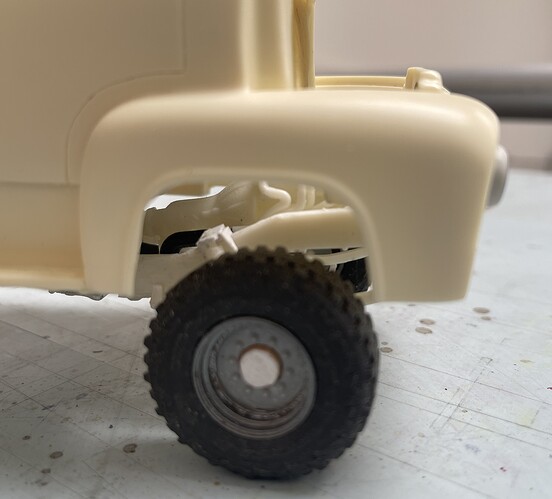
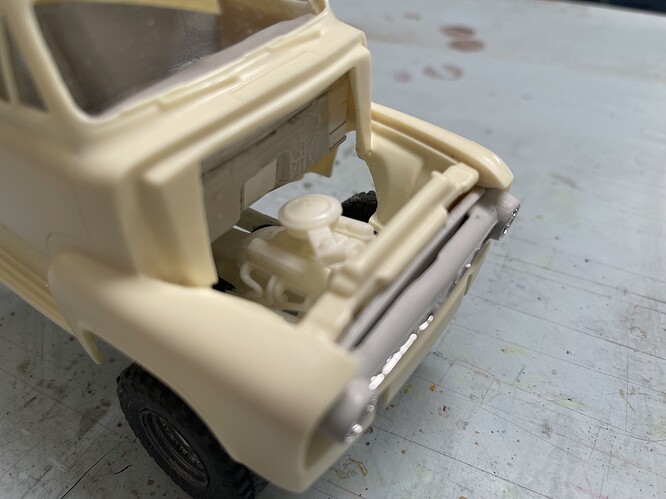
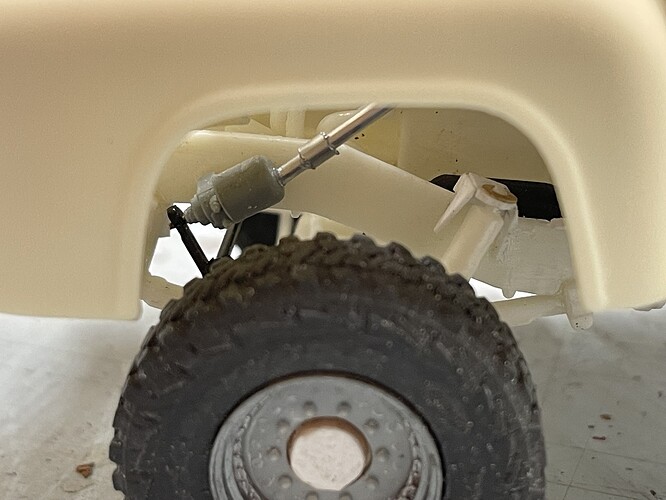
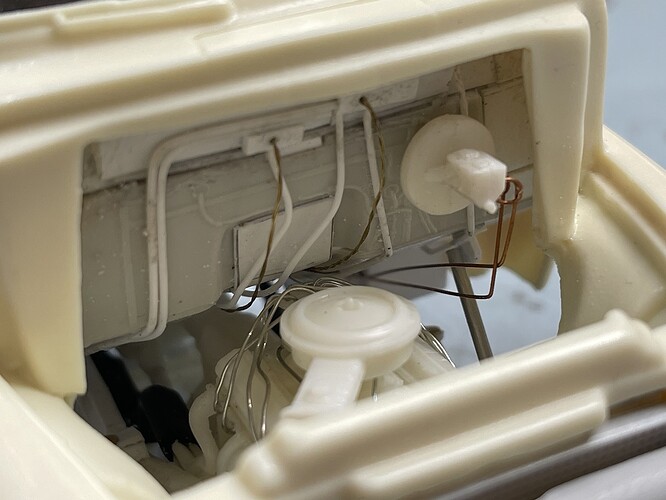
You can see the headers through the fender well. It’s funny that the parts for this old engine are not well made, but, they are all there - even a fuel pump. As it will be so obvious, I’ll likely add a distributor and some wires. It goes between the air cleaner and firewall.

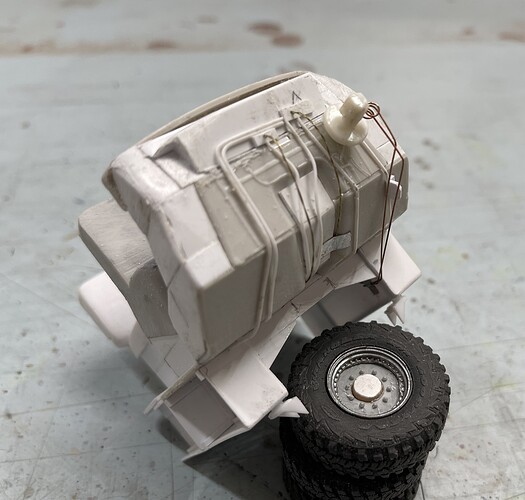
Still a way to go. I might add some wires to the firewall, and will add some more body panels under the cab. The big gap between the running boards and body is for tool boxes, so I’ll add some seam lines to the outside to suggest doors, and box in the inside.

I think the bed will be a service body of some kind, not sure just yet.

The resin cab is pretty nice, but to build this up, you need to figure out how it sits on a chassis, and how to fit the interior, which was fun to figure out -

Cheers
Nick

8 Likes

That’s seriously cool - can’t wait to see it take shape!

2 Likes

Another masterclass approaching … cant wait :+1:

2 Likes

Small block Chevy, GMC scraps, doesn’t matter about the rest, I’m in already :sunglasses:

Cheers, D

2 Likes

HI Guys,

Glad to hear you are ok with this one! @barkingdigger ha - yes, it’s so ugly it might be cool! :smile:

@Johnnych01, well - time will tell!! :sweat_smile: So far, I’ve stuck with the junkbox - NO new kits or parts! Cobbling this together has been quite a challenge -

@AussieReg, Hi D, like you, I am fundamentally a Chevy fan, so naturally, a 1953 Ford body sitting on and powered by GM parts! :smile:

A few progress shots:

Having most of the base parts reasonably handy has been great - but, getting them to work together, less great - the front drag link and pitman arm is from the rear suspension of a 1:20 scale F1 car! I don’t know what kit the steering box is from.

As you can see by the various colors here, well, quite a hodge podge of kit and evergreen, but it’s coming together. The challenge here was in getting the height, slope and shape of the firewall to work. What you can’t really see/tell from this picture is that the firewall has a lip, that sits below and holds the front windshield up, while the curved back side of the dashboard holds the windshield in place. Too many words - bottom line is it was tricky to make work.

While I don’t know if this will be visible, in went some rear helper springs and U bolts, and shocks - again from multiple kits, wire, and styrene.

While still in need of some clean up most of it works together -

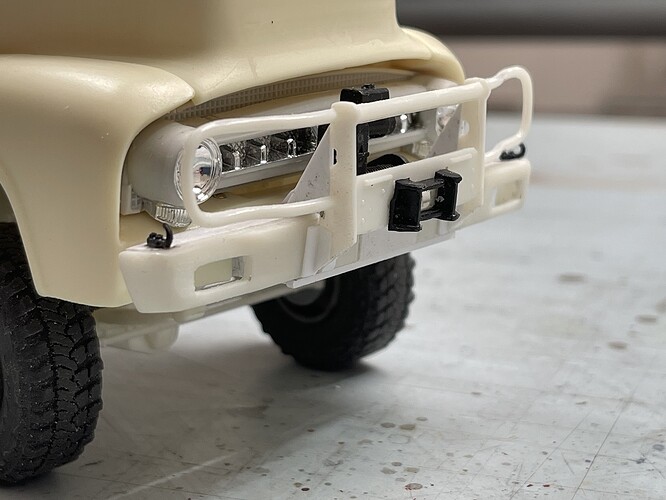
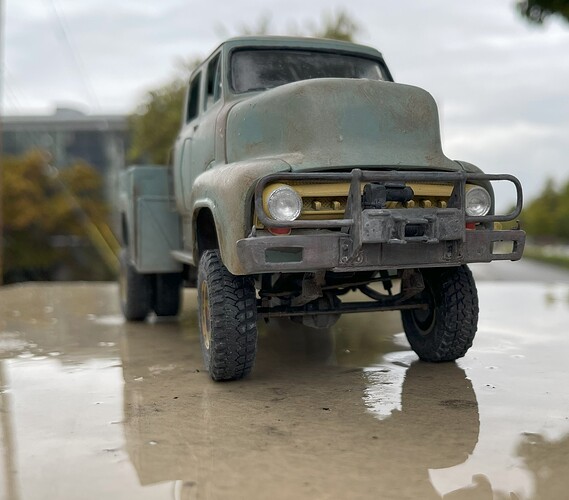
It’s funny, getting this front bumper and winch to work right took a long long time. It wouldn’t sit level, wasn’t parallel to the body, wouldn’t attach to the frame…I’m, glad this part is done!, almost, still needs some bolt heads, but nothing major. I might add some D rings to the bumper - not sure tho

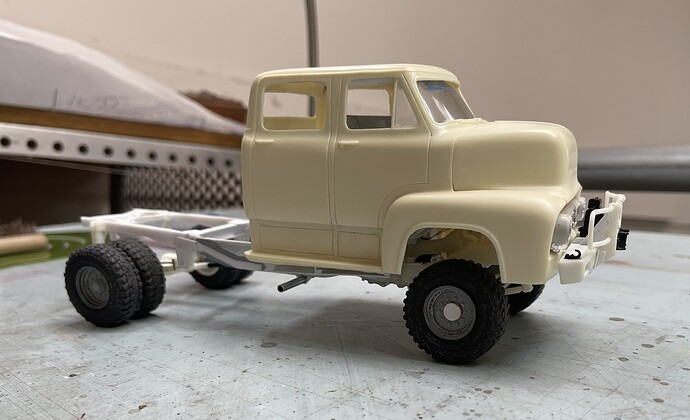
And how it all sits together. I carved some tool box door seams into the resin, but am still looking for some handles - maybe just bent metal rods? not sure yet -

OK, cheers and happy model building -

Nick

8 Likes

I know the body is a whole piece, so that’s fair enough. But that chassis and engine and then all the cables, wiring, ancillary bits … It blows my mind… I would have no clue where to begin …words literally fail me !! :+1::+1:

3 Likes

Nick,
I always look forward to seeing what your imagination cobbles-up next — usually very “uplifting!” :arrow_up: :hammer_and_wrench:

—mike

3 Likes

Nick,

Great work as usual. :+1::+1:

2 Likes

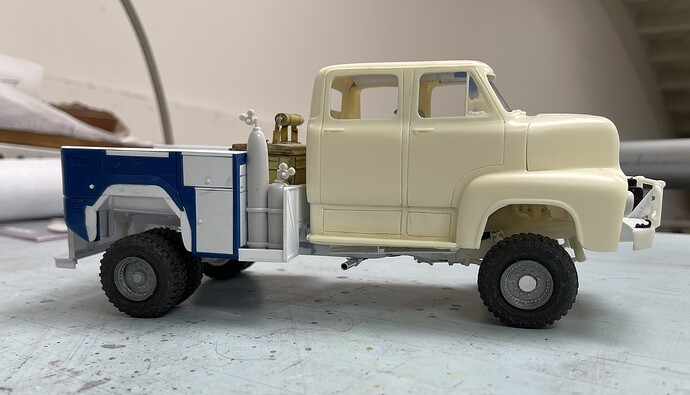
One day I’ll work out how you always manage to totally sell me on the mechanicals…”looks right because it IS right” would be the obvious reason. I’d happily frame images 3, 4, 5, 6 on the wall & call them Art.

4 Likes

That looks like some serious detailing, lovely, just lovely…

1 Like

You know Tim, if you own enough barely running trucks over the years…! :smile: you figure out how they work and what the parts look like! :smile: Repair or replace that “faulty” carburetor frequently enough! :smile:

Years ago, my friends and I all owned pickups, and always hoped they would be something better than they were. Instead, well, they were usually not much better - misaligned U-joints/pinions/yokes, always dysfunctional carburetors, broken differentials, cracked exhaust manifolds, transfer cases that almost transferred, on going efforts to improve the suspension :thinking: :smile: :smile: and if you were really unlucky, rusted out body parts, oh, and we were all broke! The good ol’ days! :smile:

Which of course meant, we did plenty of damage to our rigs while earnestly trying to fix them!! :smile: :smile: And yes, our bed mounted tool boxes were loaded with wrenches, hammers, pliers, wire, tape, extra parts, essentially all we owned, because at any moment, the trucks were bound to break down!! :smile: and they did!

And now, I have a reliable car :neutral_face: / :smiley: which I’ve owned for a long time (an ex insisted “we” needed a car…she pointed out that people in cities don’t need trucks, and specifically we didn’t). Said car sounds pretty cool, has some fancy big rims, is pretty fast, and is reliable, which I have to say, has been great. I never work on it - ever! not a tool to be seen in my hands! :smile:

But, I still really like the idea of working on them!!

Hence, model building!! a substitute for the real thing! :smile:

Happy model building!
Cheers
Nick

6 Likes

Yep you’re perfectly qualified as a practical mechanic, that explains everything. Makes me smile remembering a famous breakdown of the family car when I was a kid. Waiting some considerable time for roadside assistance Mum muttered “Unbelievable, Dad’s a Professor of Mechanical Engineering & he doesn’t have a clue what’s wrong with the car”. To be fair his specialty was military-grade gas turbines, but her point was still kinda valid as the hours went by.

Talking of reliability, I seem to recall our cars are similar vintage – mine a 22 y.o. Toyota Avalon, 3litre comfy lounge suite on wheels & in all that time just a new timing belt & radiator after 190K kms. Zero rust, thirsty of course, but always game to outrun highway patrols.

If I miss another opportunity Happy Xmas/New Year Nick, & happy miniature model building to you too :beers:

2 Likes

Hi model builders,

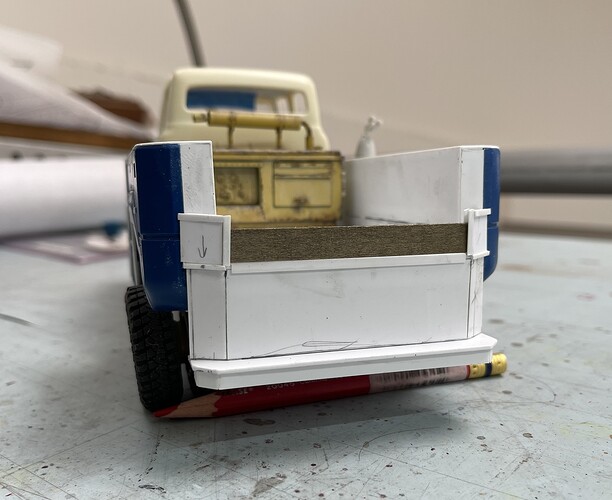
I have made progress on and largely finished the bed.

@Johnnych01, you’ll like this - the bed is made up of evergreen and the lower body parts of a Scania tractor. I mention this, because of your comment above. My sense is that if you decided to go for a project like this, you probably could - the idea being most truck chassis/suspension have a few common pieces, same with beds, engines etc.

While I like to eventually add lots of detail, the first tasks usually focuses on what seem to be easy steps, but I usually struggle with them: Getting the frame straight and level, locating body connection points, and keeping axles perpendicular to the chassis. It’s worth the struggle to get these fundamentals done right, even if you have to tear them apart a few times in doing so :smile:

Like anything with some practice, you can work these up to look ok. Or, unhappily, you can usually see pretty quickly if it doesn’t! And, once you’ve built a few things that don’t look right, it gets easier to take out the saw or knife and rework whatever didn’t turn out as hoped and get it fixed.

I think getting axles centered where you want them relative to the wheel opening and one another is real headache. In addition to getting all four or six tires sitting on the ground, getting them to look correct inside wheel wells can be pretty frustrating, but essential - if they are wrong, well, everyone can tell!

Funny thing is no matter how much time you might spend getting things lined up, you can tell immediately if it’s wrong!

OK, on we go:

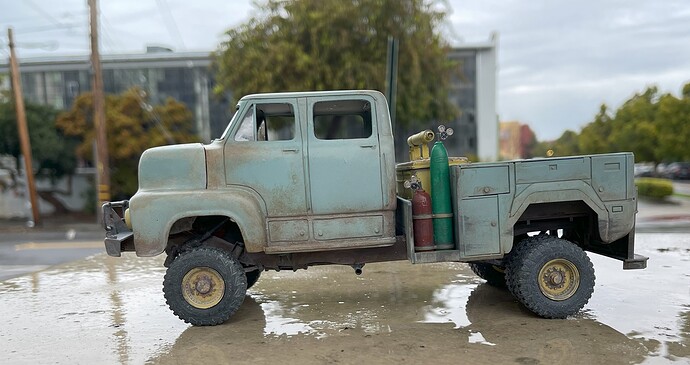
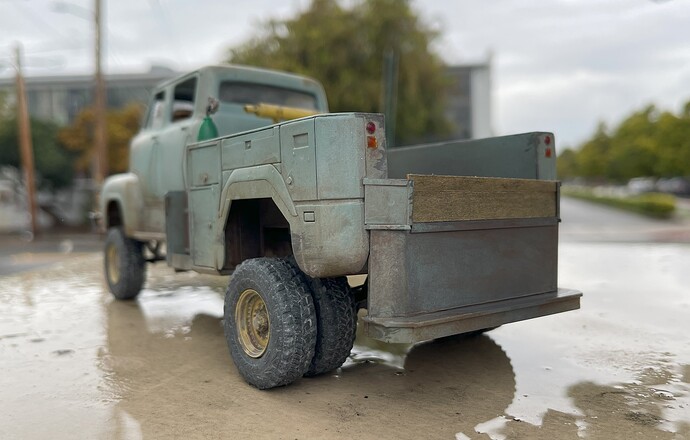
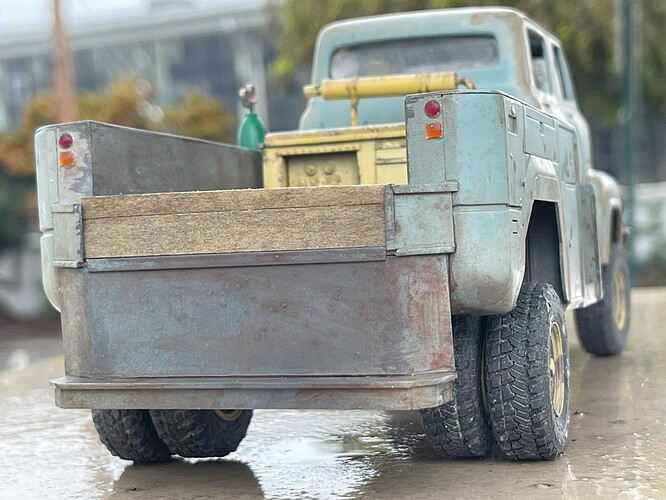
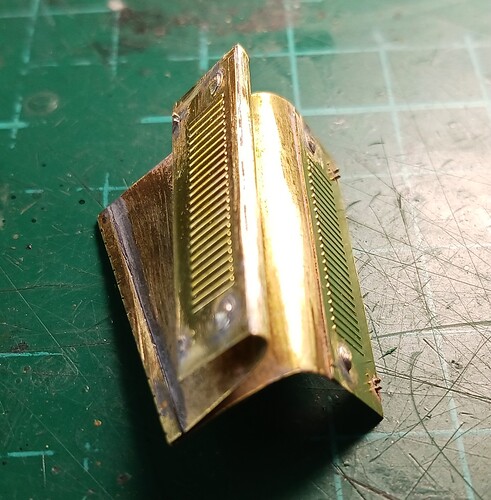
I decided to make this into a welder’s rig. It was going to have a service body, so why not specialize it a bit? You can barely tell in these picture, but the ends of these parts, wrap inward, which reminded me of the sweeping curves on the cab. I have built service bodies before and it is slow going, so thought this might be easier - well, it wasn’t, and took a long time to built, but now that it’s done, I like it.

Thanks for having a look -

Cheers
Nick
7 Likes

Nick, that’s stunning! Keep it coming!

1 Like

@barkingdigger thanks!

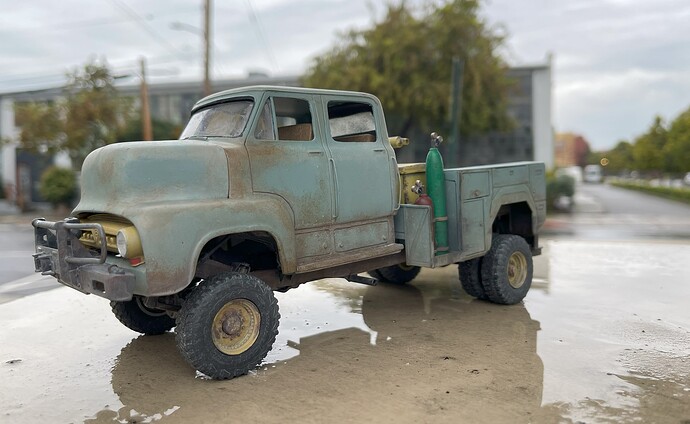
Like a dummy, I accidently posted the final images in the What did you do in your workshop section! Shoot - so, here they are - sorry for doing that! I’ll add some I didn’t show there:

For such an ugly old dog, I like this rig!

Also, as it appears we still have some time in this group build, I’ll try and squeeze in another. I’m getting parts pulled together, but the project I have in mind, will be a lot of work - might not be able to finish it in time, but as this is a hobby and not work, I’m ok with that!!

Cheers
Nick -
14 Likes