The USAF does have engineering units, my guess they where deployed else where in the region and stateside (the old rule of fighting two wars). You know things had to be bad that the USA gave the USAF two tanks, not M9 Ace’s, D9’s or something else to fill possible bomb craters.
1 Like
Green is the new black. Very nice mottling Rory.
In Soviet Russian, you can have any color you want, so long as it’s green ![]()
2 Likes
And calling my T-62 complete. Pain in the bum to build with all the typical Trumpeter issues but she came out looking very nice in the end.
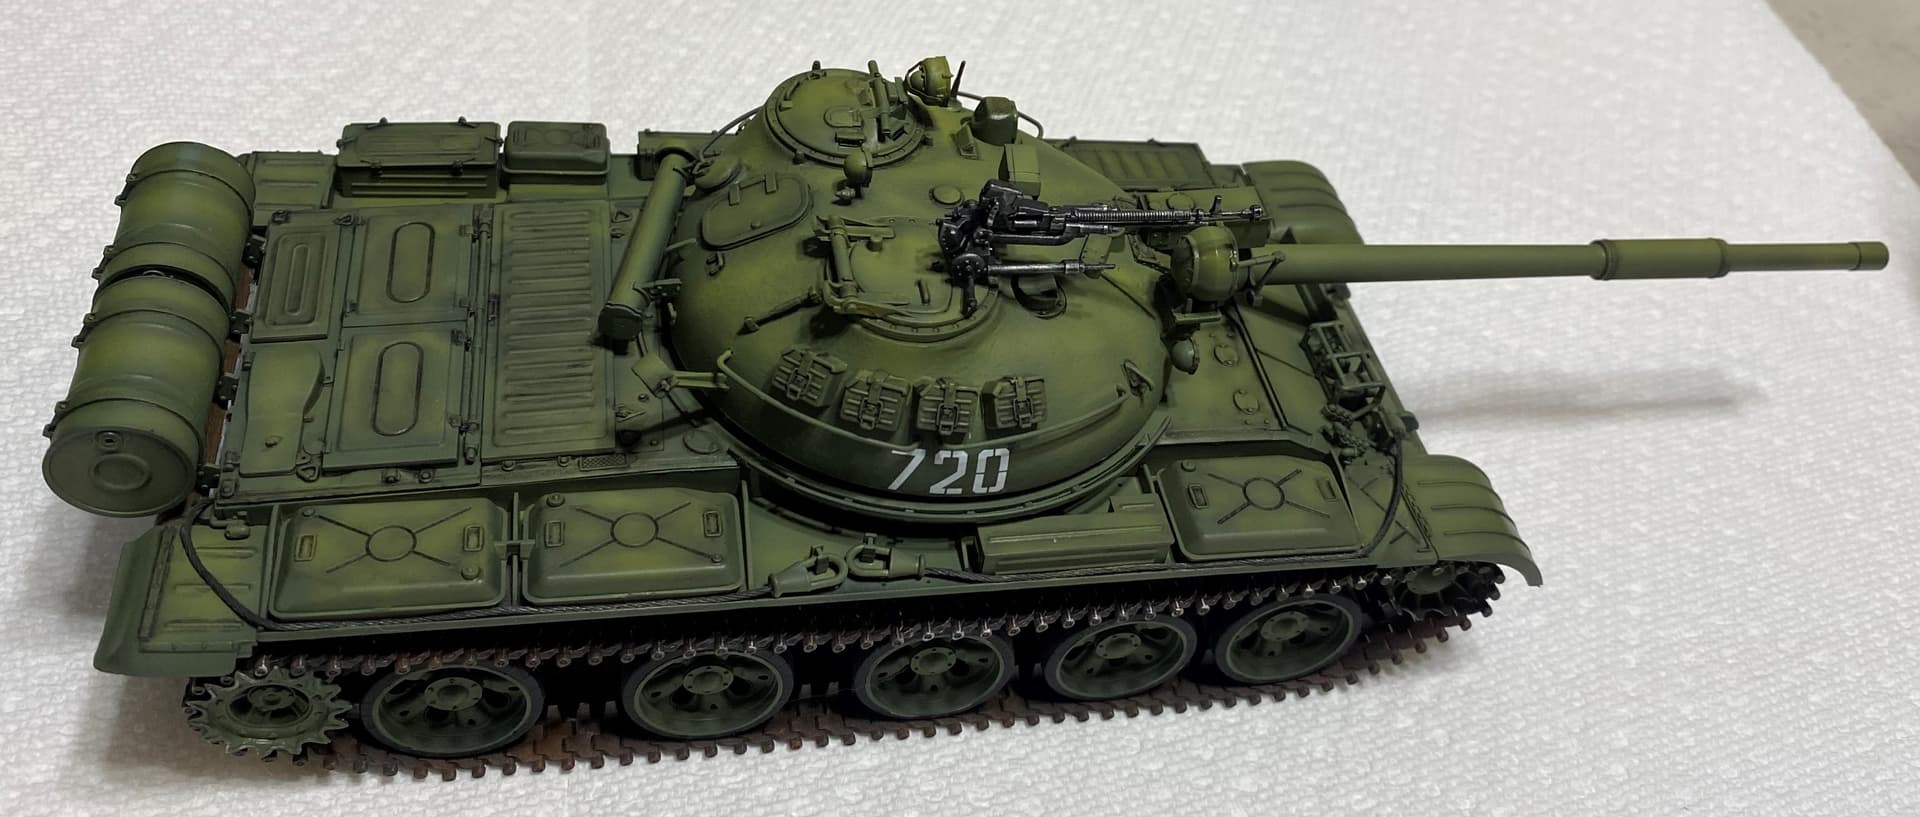
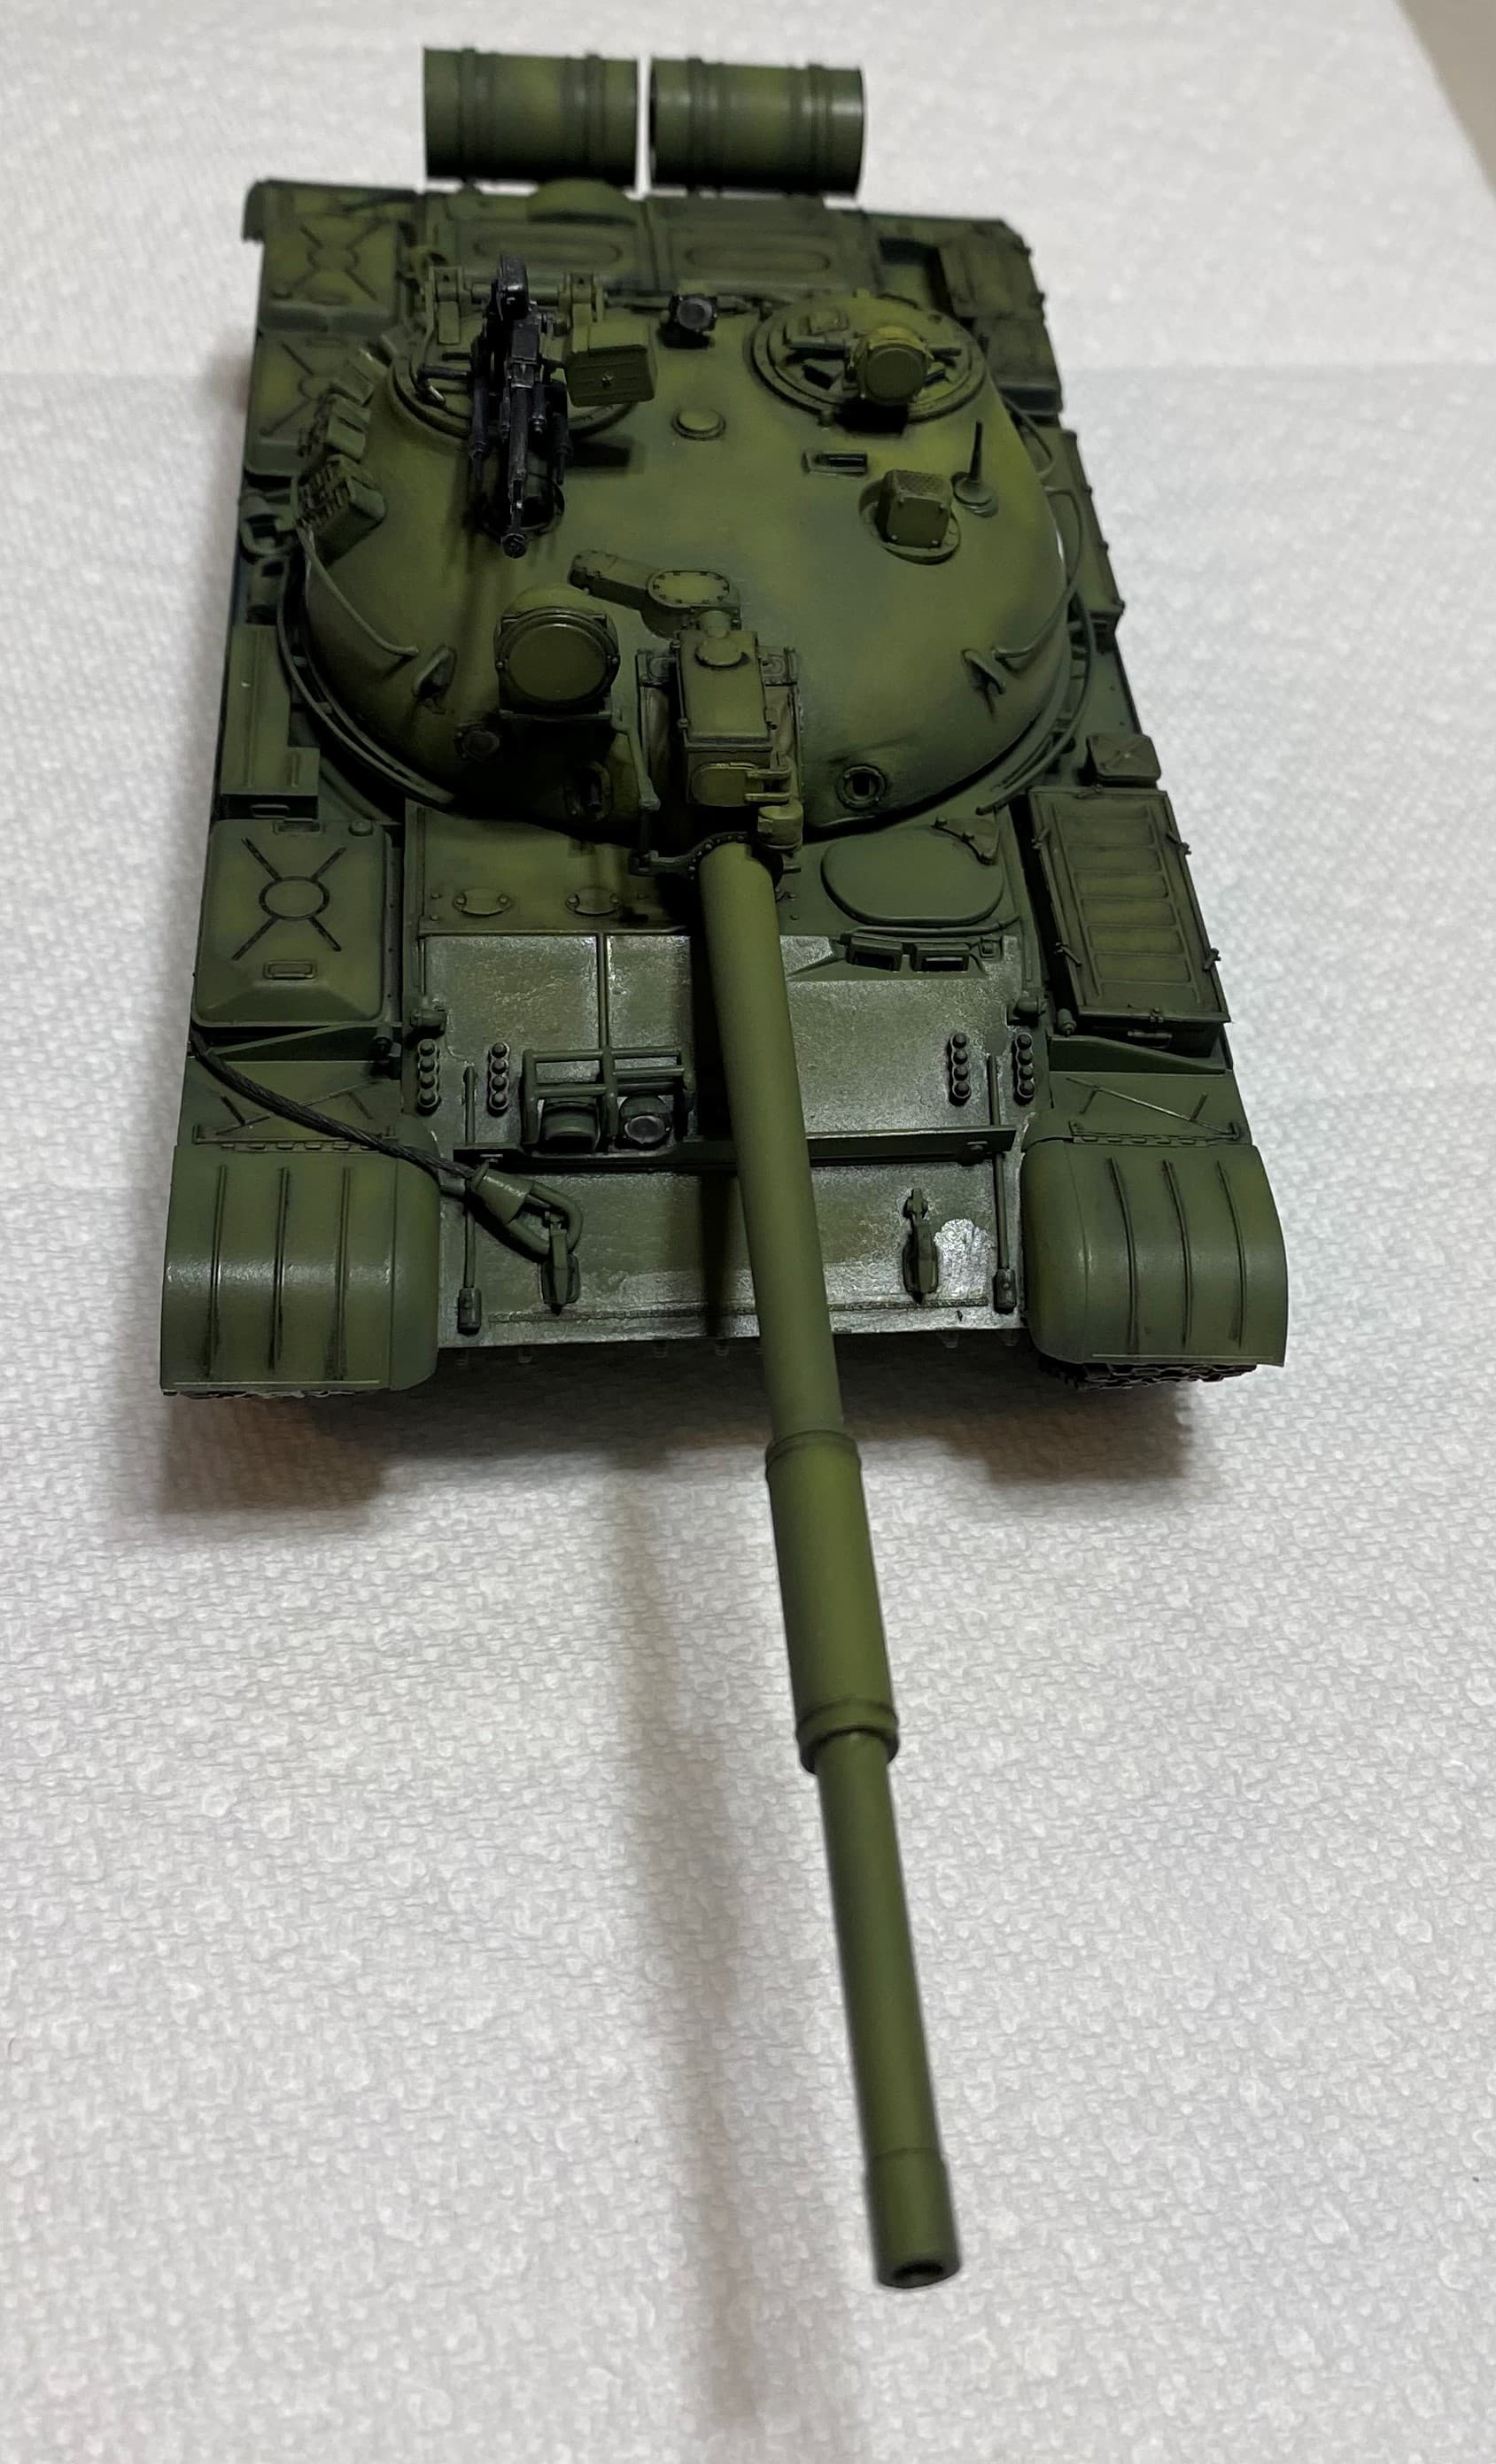
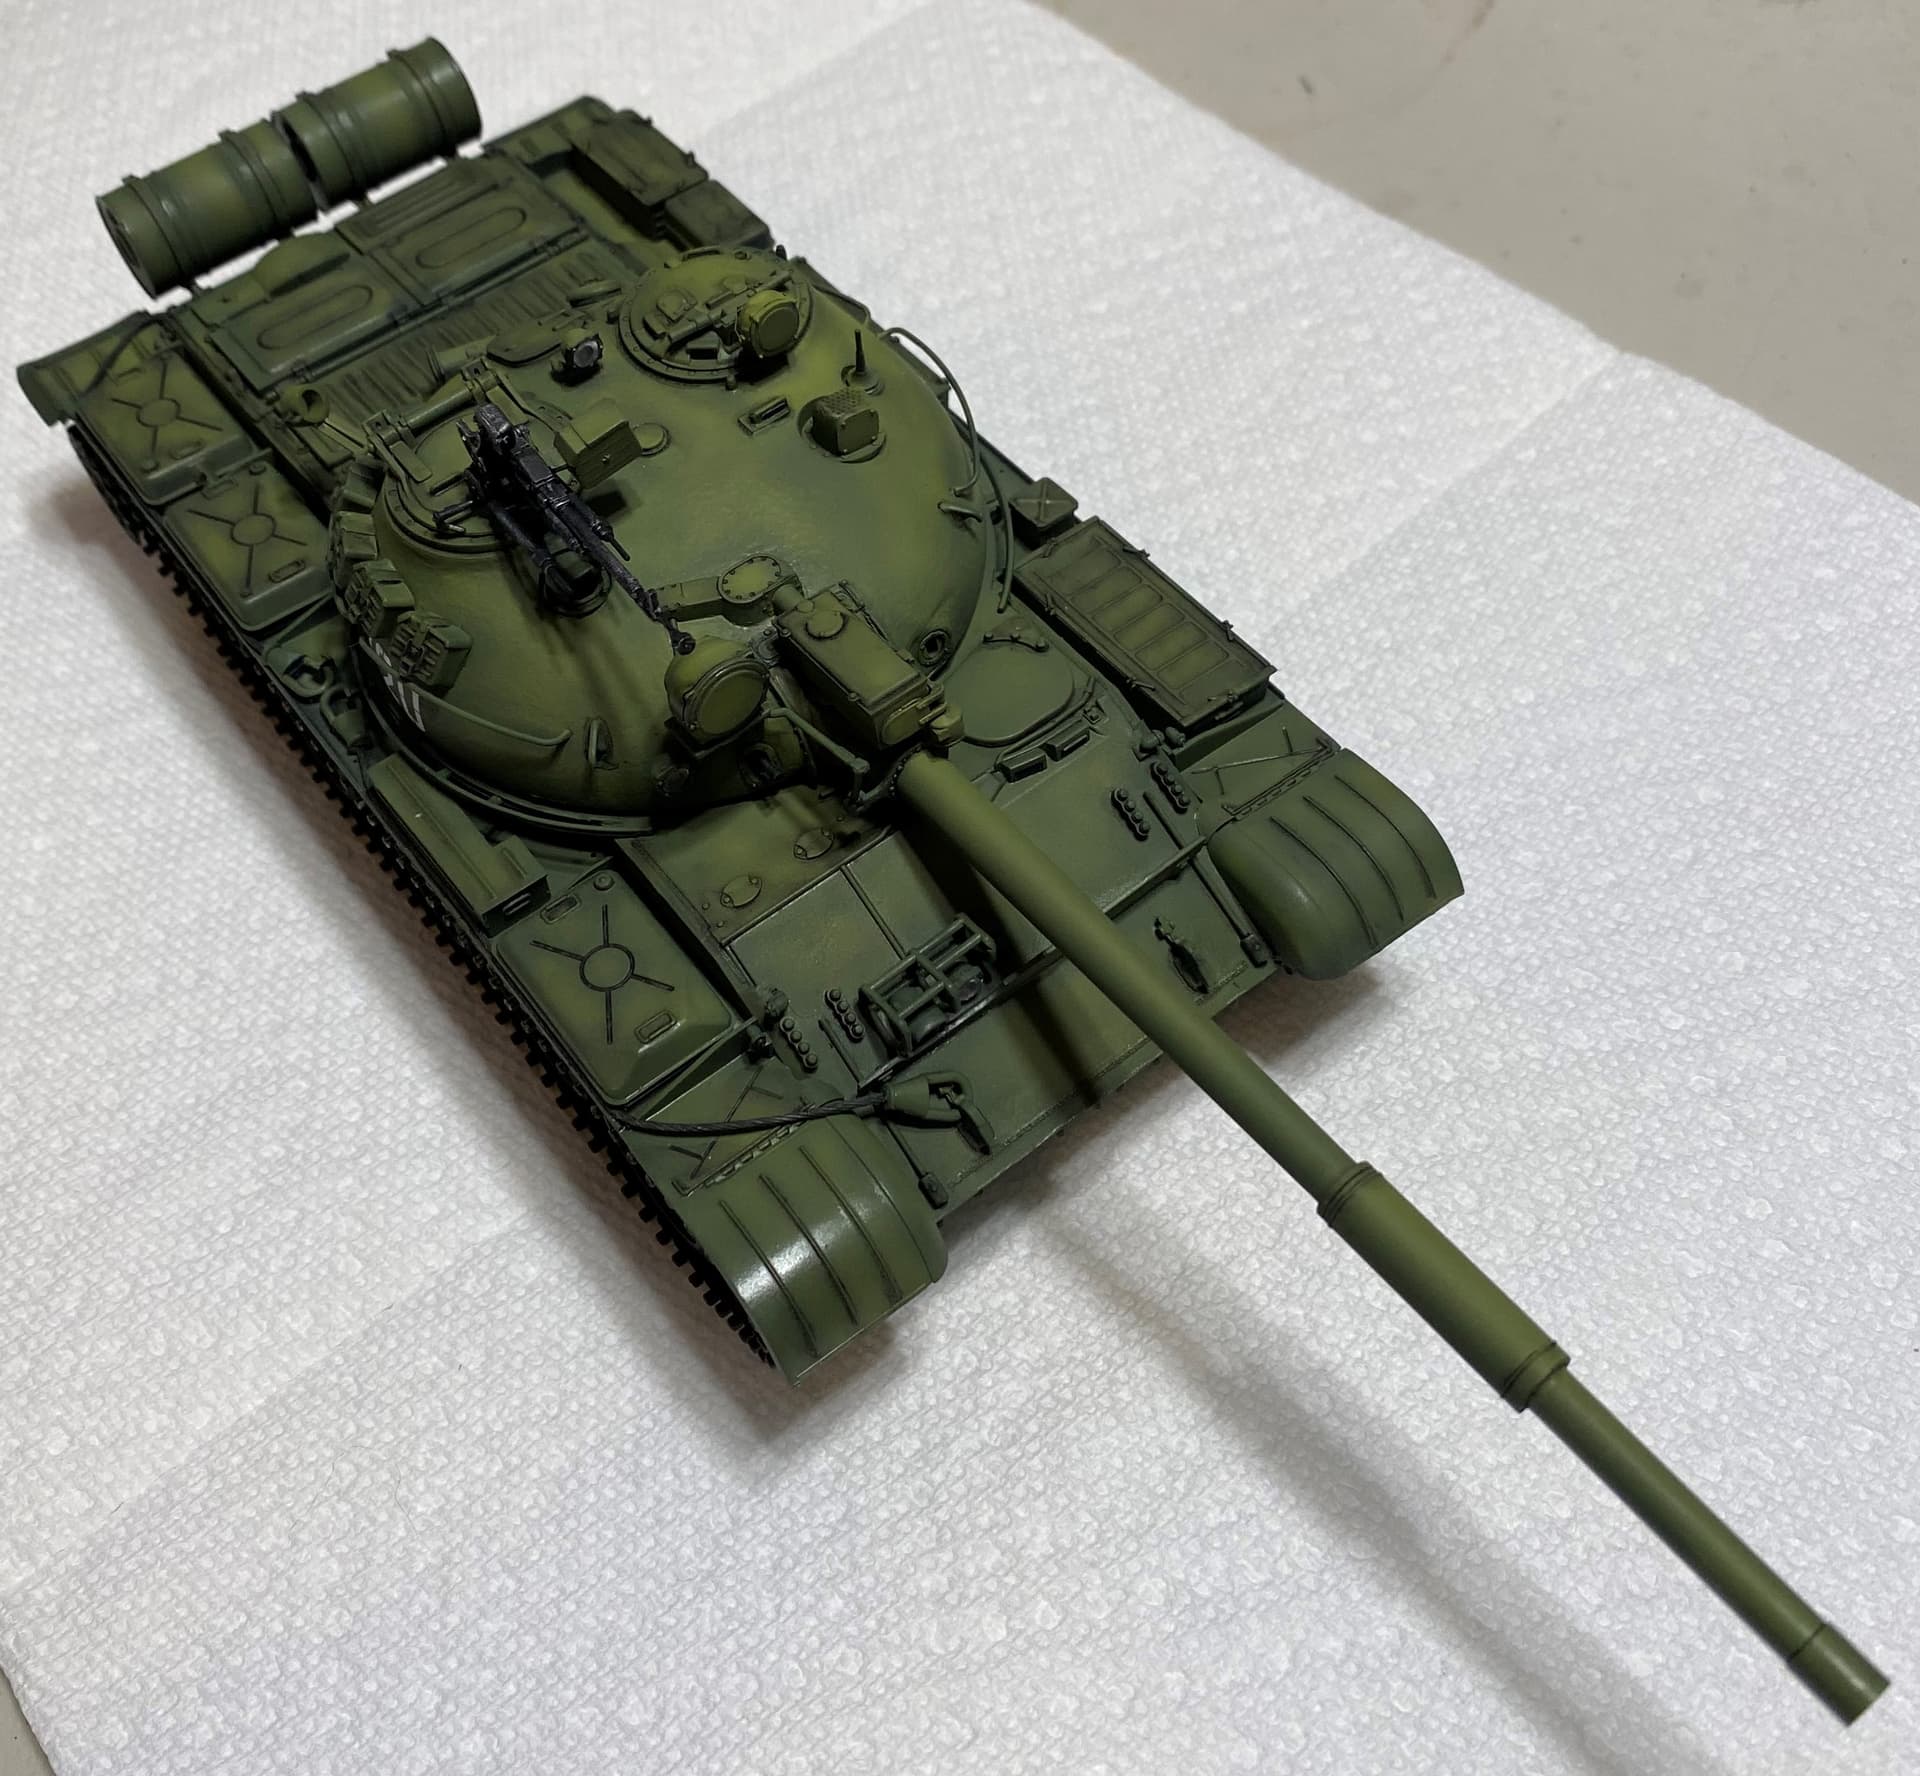
Depending on time I may very well do another curvy tank as I still have several in the stash 
9 Likes
Wow, quick work Rory. It looks fantastic.
Great looking T-62!
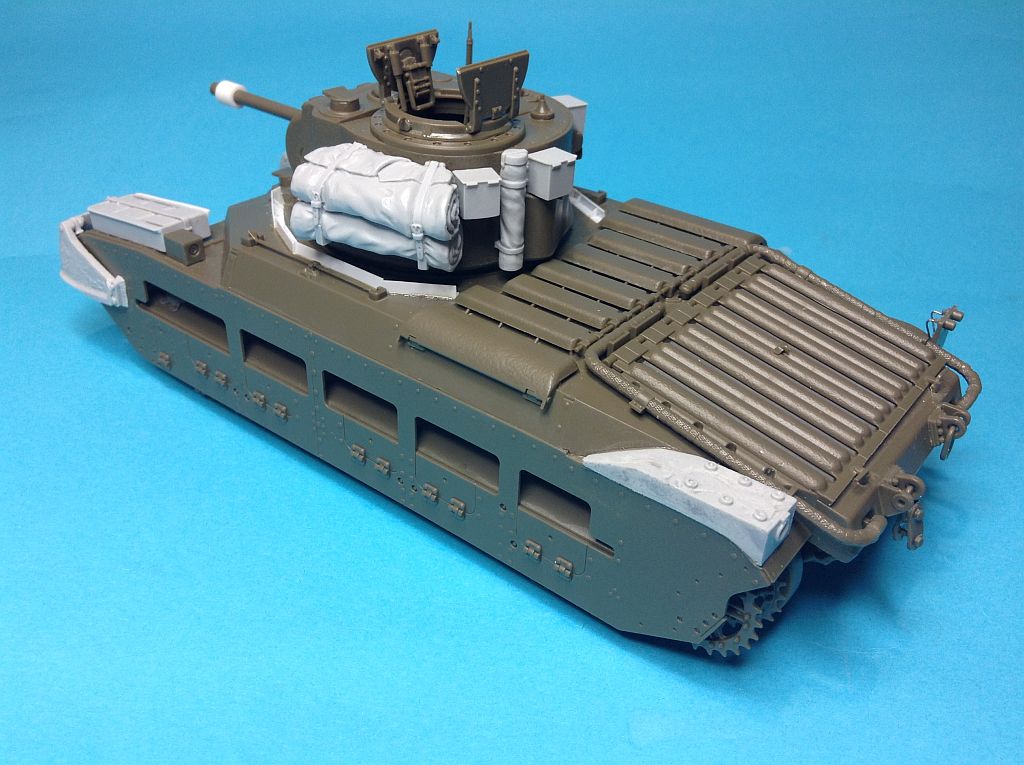
Time to show some progress. Hopping around on builds at the moment, but this was Tamiya simplicity and getting it this stage took no time at all. I am doing mine as an Australian Frog Flame Tank. Closest version for that is Tamiya’s Russian Matilda.
Got carried away with the turret and added the wrong cupola for the Frog. That has to come off now… 
4 Likes
Okay, had a fair amount of free time and got out the sticky stick…
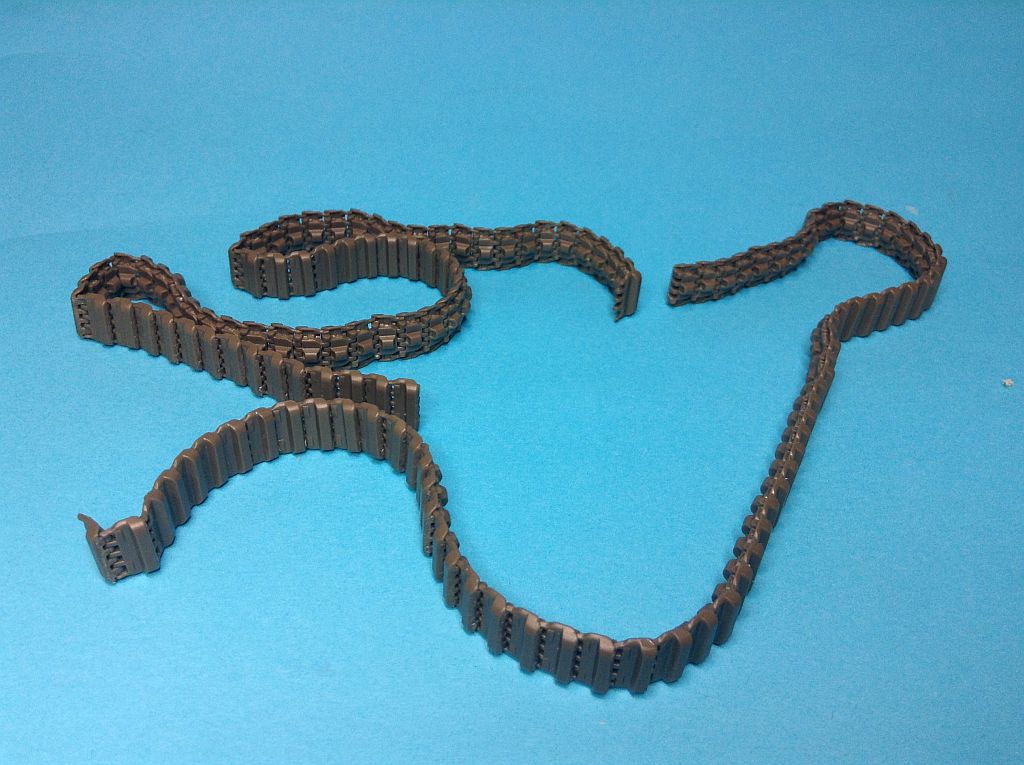
Tracks assembled. Kit’s workable ones. A bit of clean up required but worth the effort. The guide horns are not hollow, but you can’t really see that when fitted:
Fillet added to the sponson - the usual Tamiya must do fix:
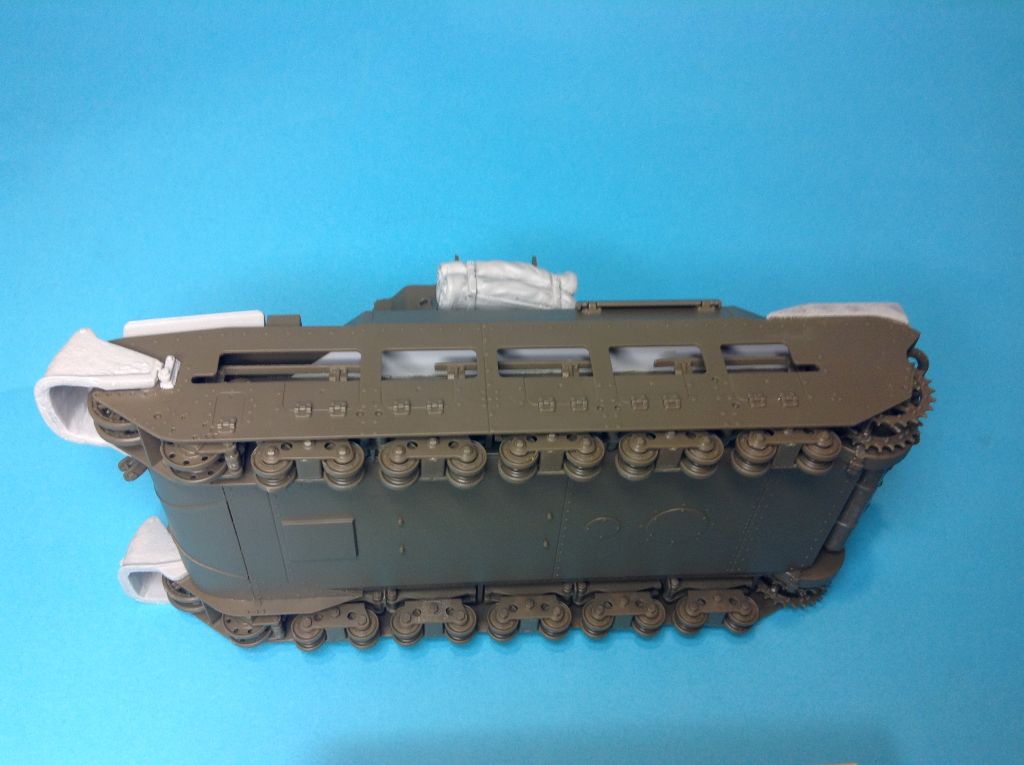
And the rest all dry fit for the most part - a testament to Tamiya engineering. Note the extra curvy bits added to the barrel and the ‘Straight Curves’ of the turret collar:
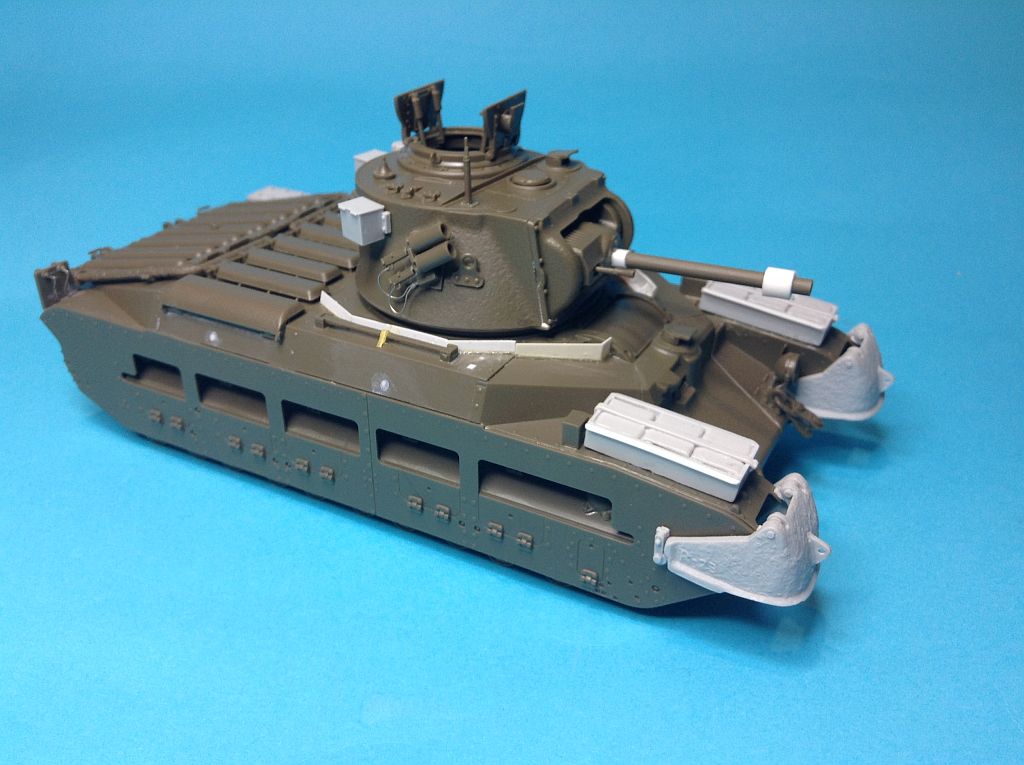
Was a little disappointed with the Firestorm conversion kit. The POW can racks on the front are the same mould and lack the flange on both sides which I had to add. The also have one can turned around - for visual appeal I suppose - but no reference pic shows anything but the same way up.
The turret collar was way too short with the front bits behind the driver hatch not roughly half way forward as pics show, and if you fit it like they say to, the side bits far too close to the turret (you cant turn it as a the manlet corner fouls on it. So a little scratch building to make ones that fit in the places where they should, was needed:
3 Likes
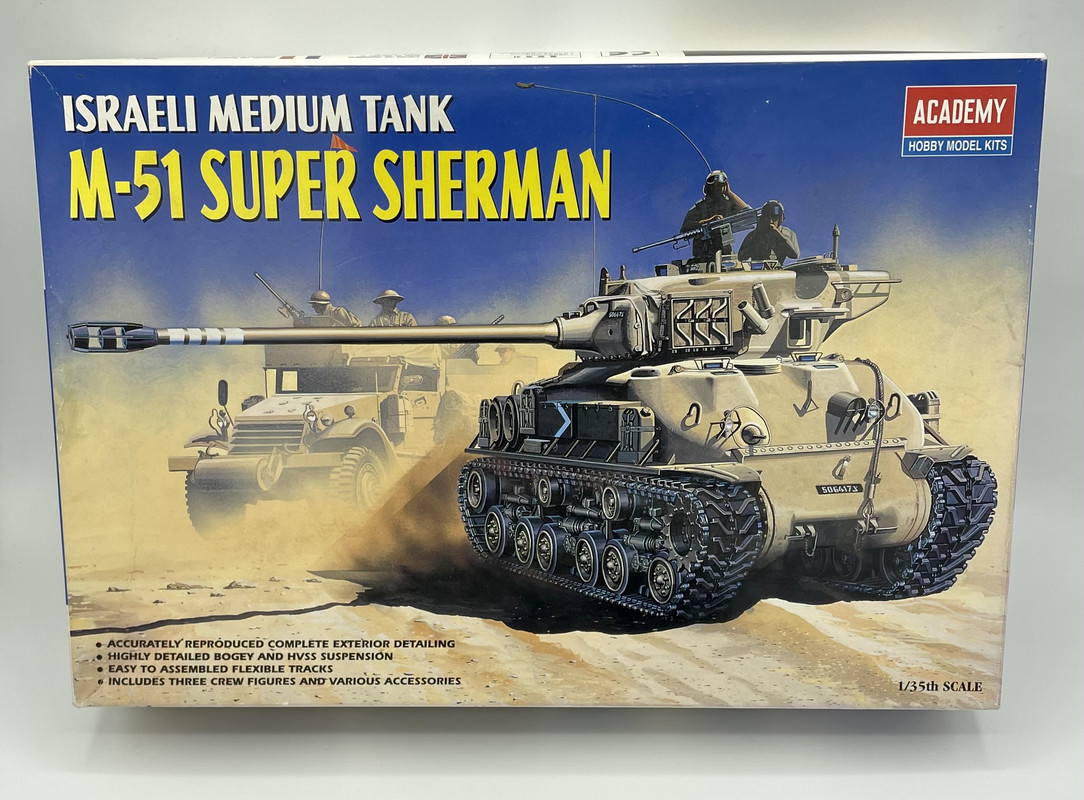
Yikes! this is half over! No worries though. I’ll be starting mine in the next few days. Changing from an M48 to a M51 Sherman though…
I’ll be using the Academy kit OOB, aside from some stowage using whatever I have onhand.
4 Likes
And we’re off!
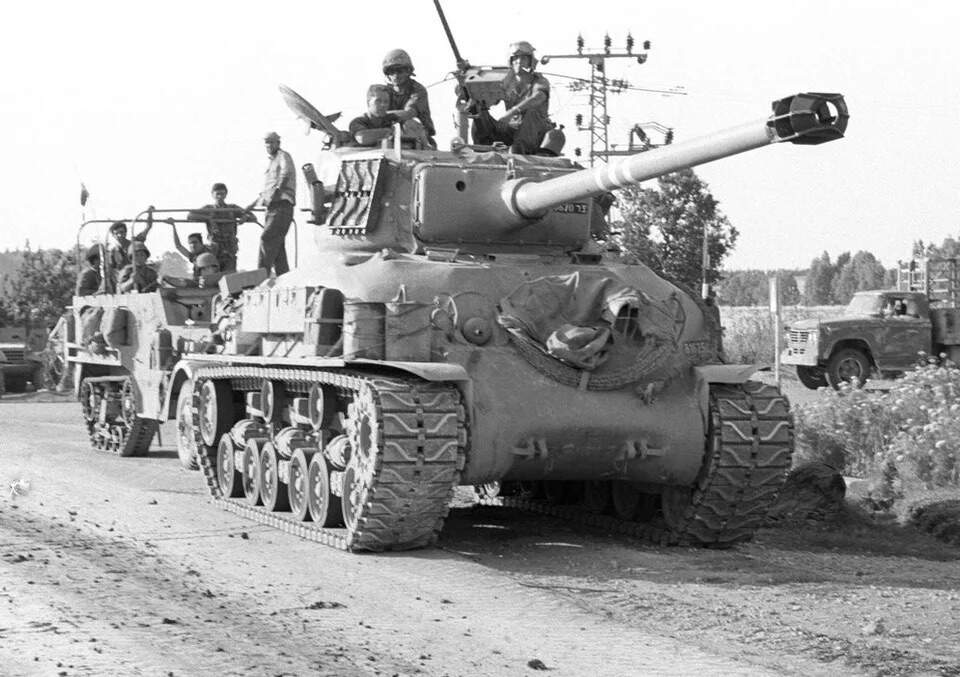
A new year, a new project is begun. I’m building Academy’s 1/35 M51 Sherman. For those not familiar with the type, this was probably the ultimate development of any Sherman. The Israelis started with 76mm gunned M4A1E8s, replaced the gas radial engine with a Cummins Diesel engine, then modified the turret to accept a French made 105mm main gun. These tanks saw combat in IDF hands in the 1967 and 1973 wars where they faced off against T-54/55s, T-62s, M47s/M48s, and Centurions among other types. And these upgunned Shermans were able to give better than they got and help win the battles.
Anyways, this is Academy’s 90’s vintage kit that I’ll be building OOB, except for adding some stowage.
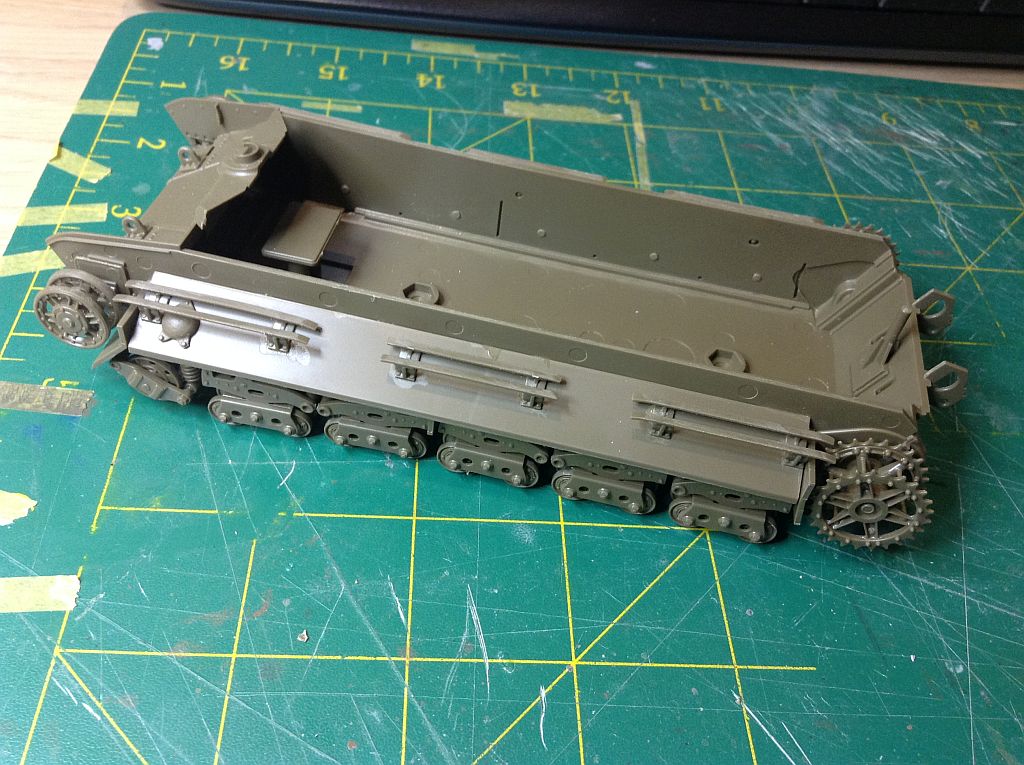
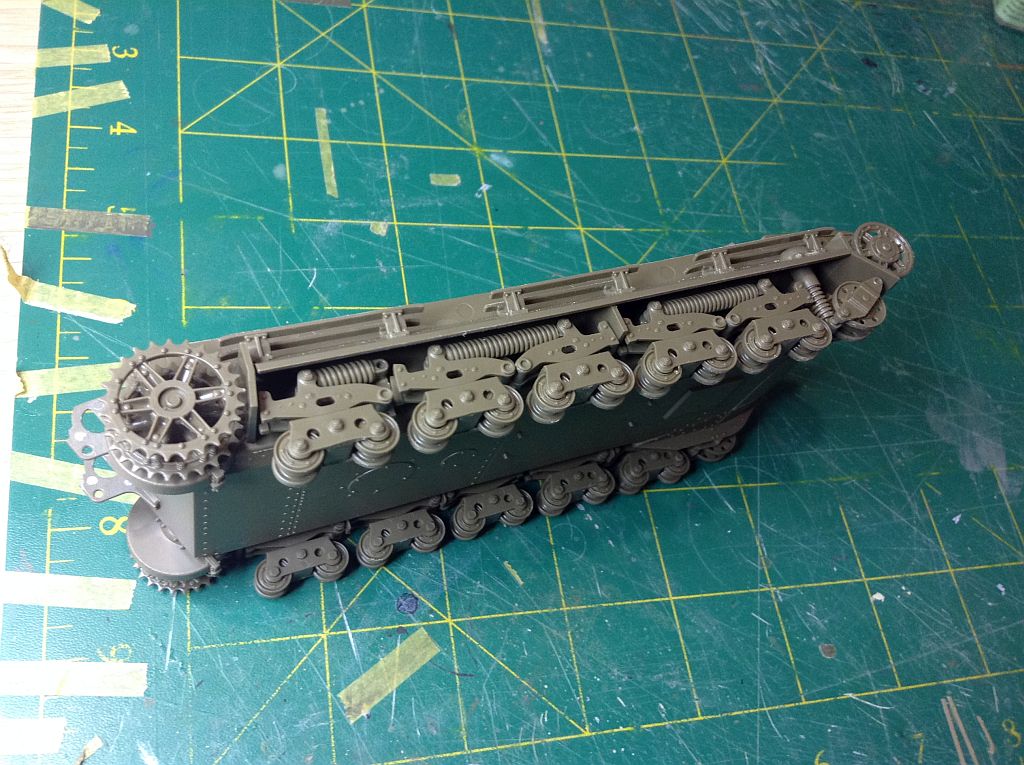
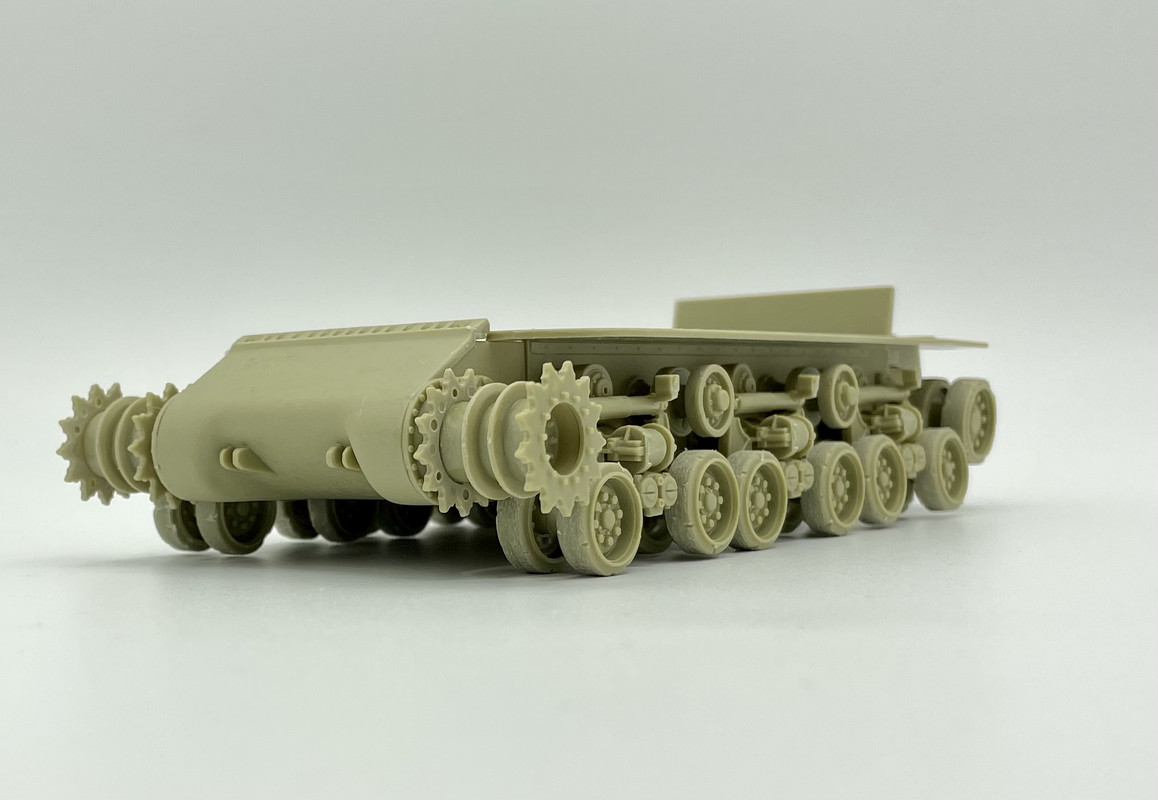
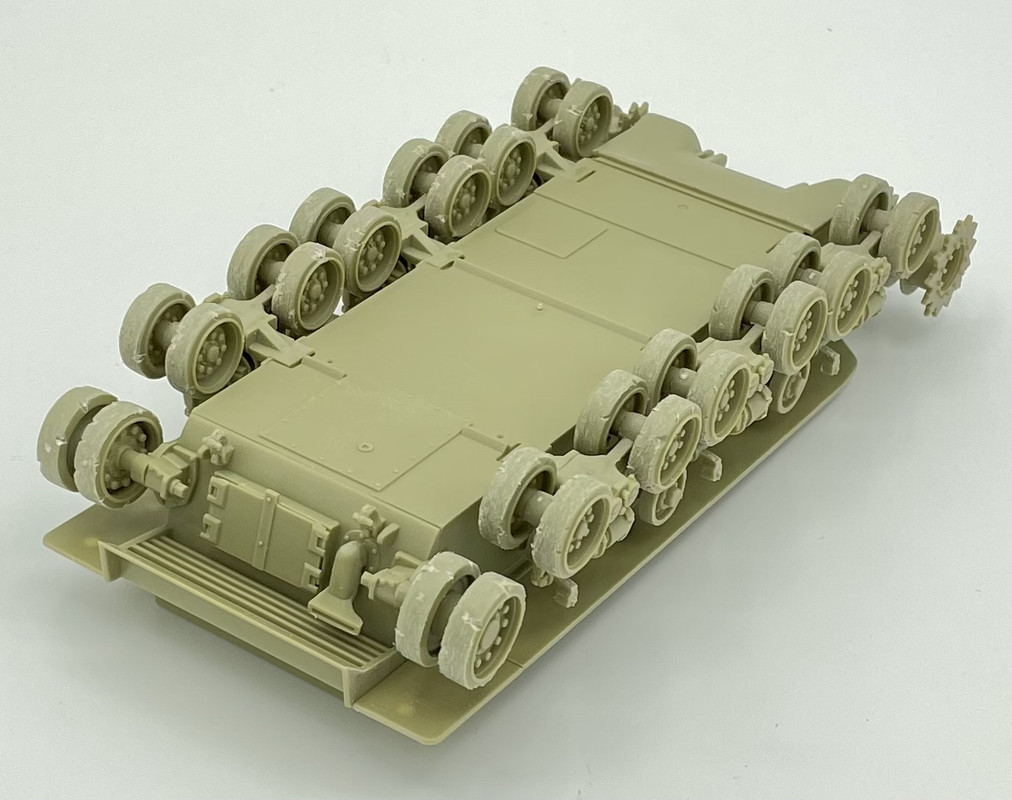
Today I completed the first couple of steps, assembling the HVSS suspension, and adding the return rollers to the lower hull sides
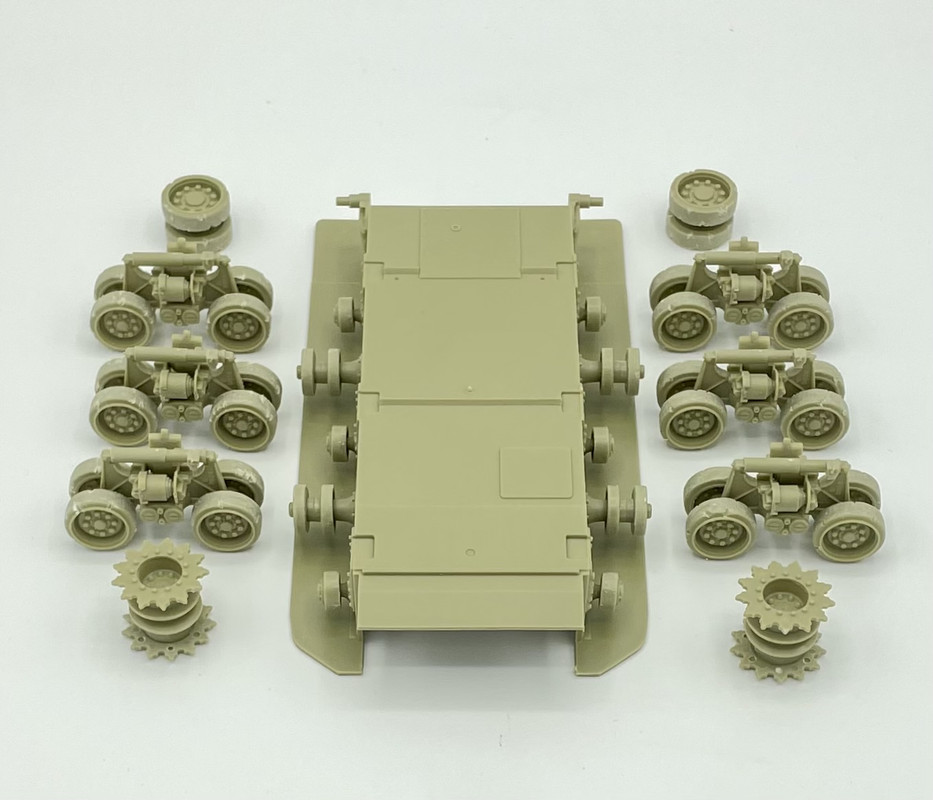
the biggest time killer was mold seam line clean up, and dinging up the idler and road wheel tires…

Hopefully this should move along at a quick pace now…
3 Likes
Looking nice, Carlos. Really a unique version of the Sherman.
Looking forward to see the wheels dinged up with some paint on them. I very rarely use this technique, but I guess it is more prevalent on modern tanks that survive more than a few months at the front.
I will be doing an early Sherman for this campaign as well.
As I have some of these waiting to be build for my IDF diorama, I will be happy to watch this one as an example 
Thanks guys!
@SGTJKJ, yeah, in rocky desert areas, I remember road wheels and track pads getting all chewed up. I think most other terrain types are not so destructive on those areas.
@bwilt, yes, I’m looking forward to your diorama! From what you wrote, I picture the West Bank or Golan areas where the Sherman was exactly what was needed to win the day.
1 Like
Today was a good couple of sessions at the bench.
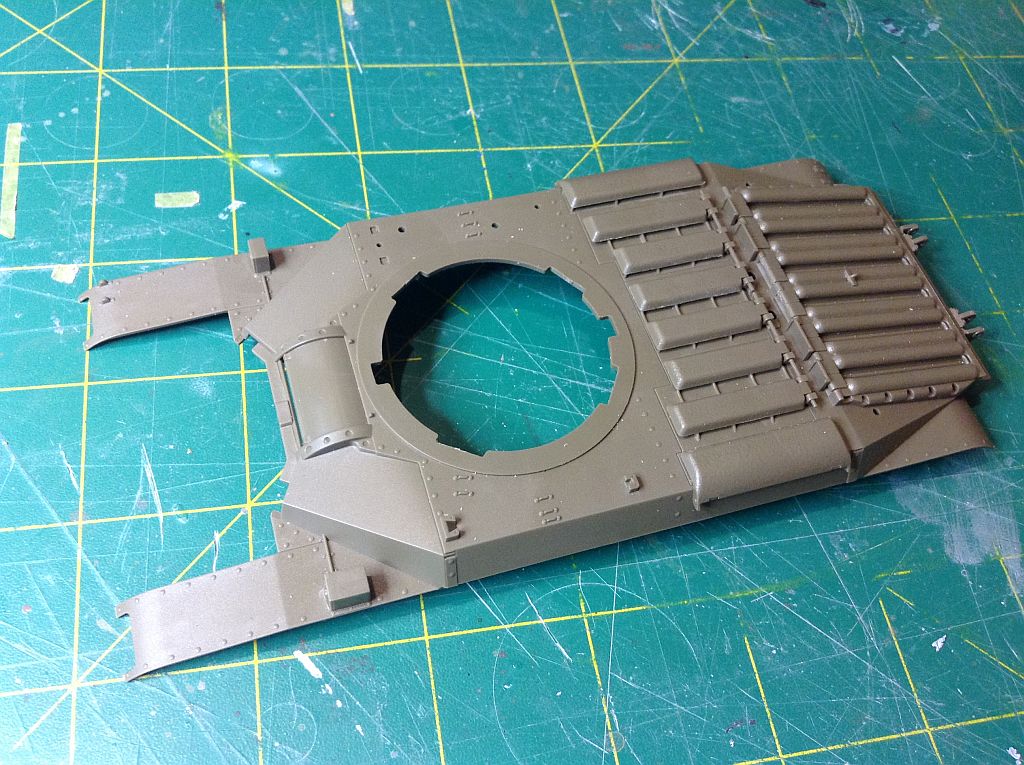
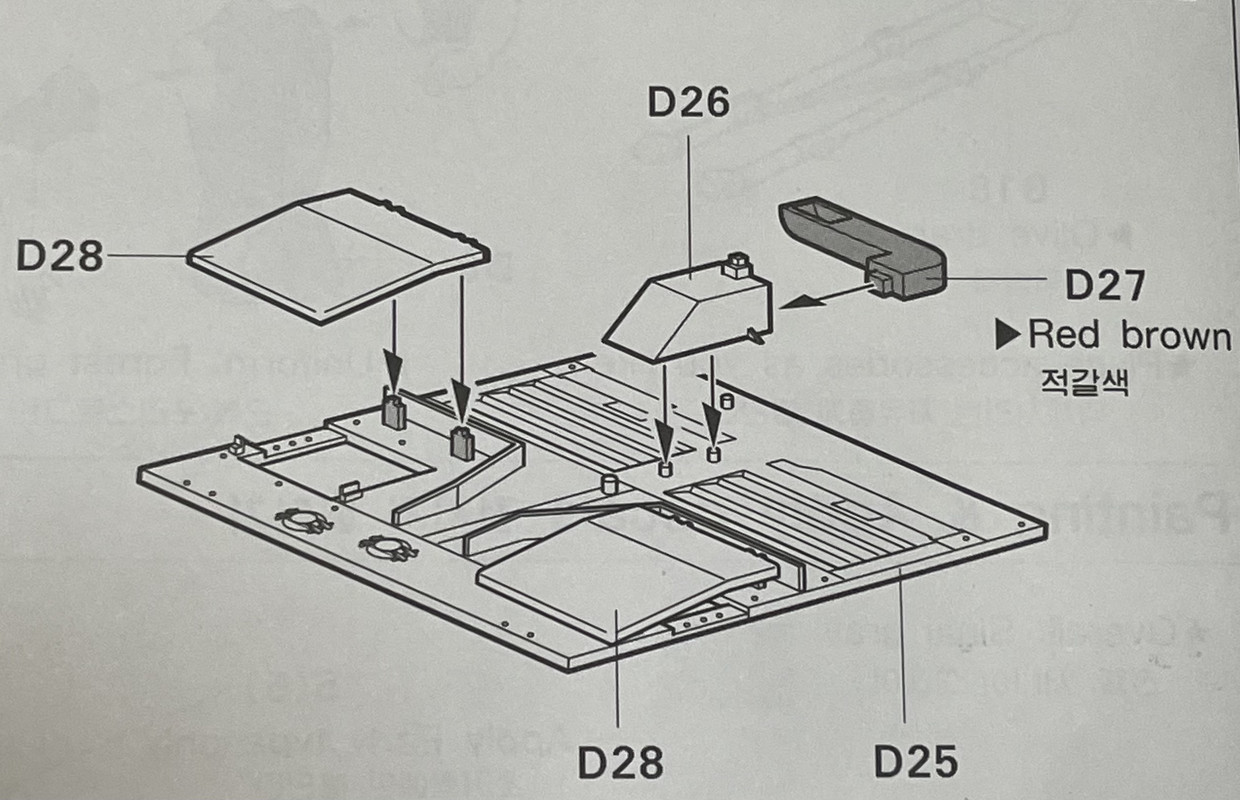
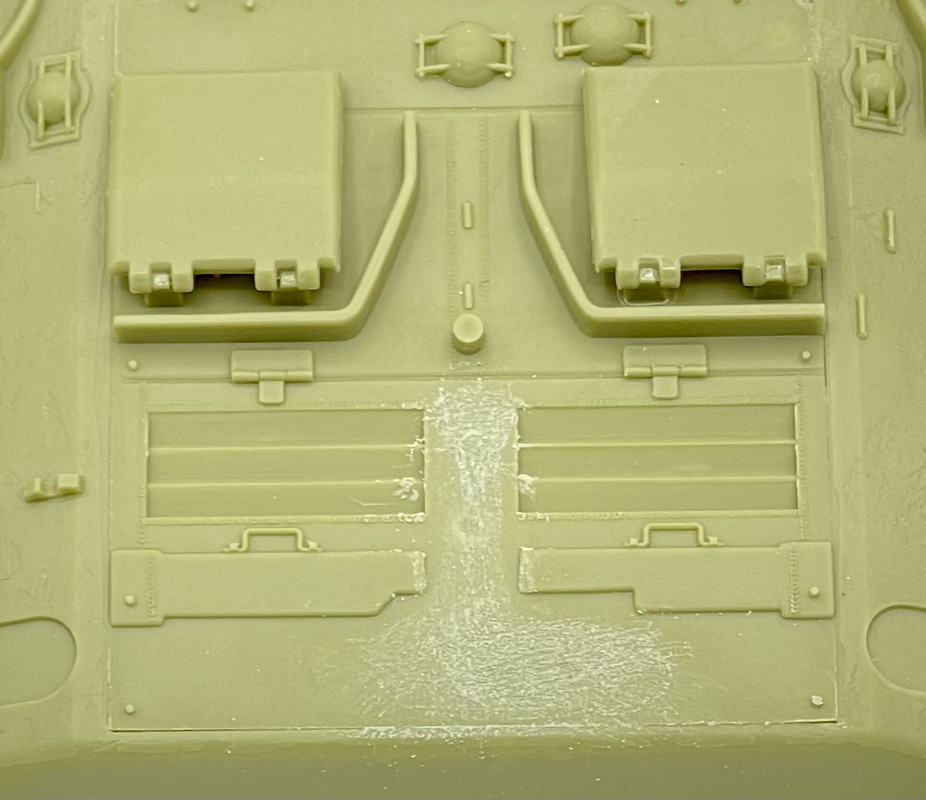
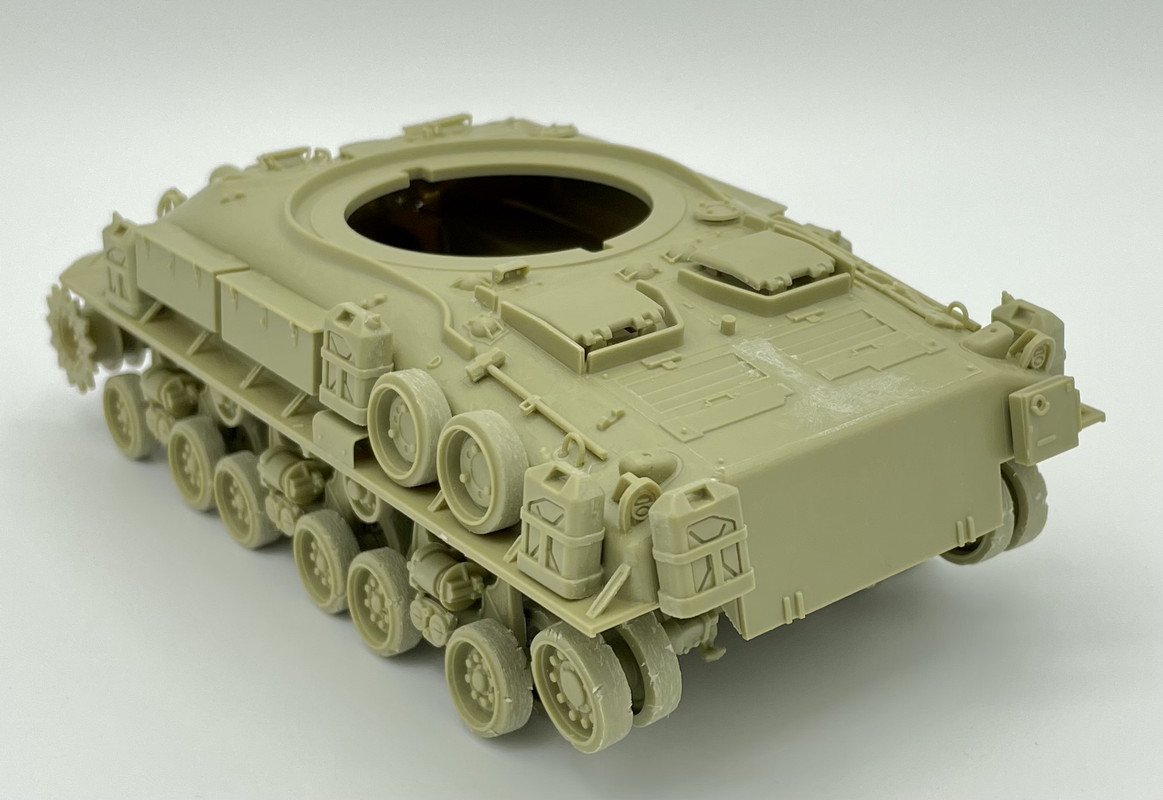
In the morning I added the HVSS Bogie assemblies to the lower hull, as well as assembling and adding the rear hull plate, and transmission cover to the front.
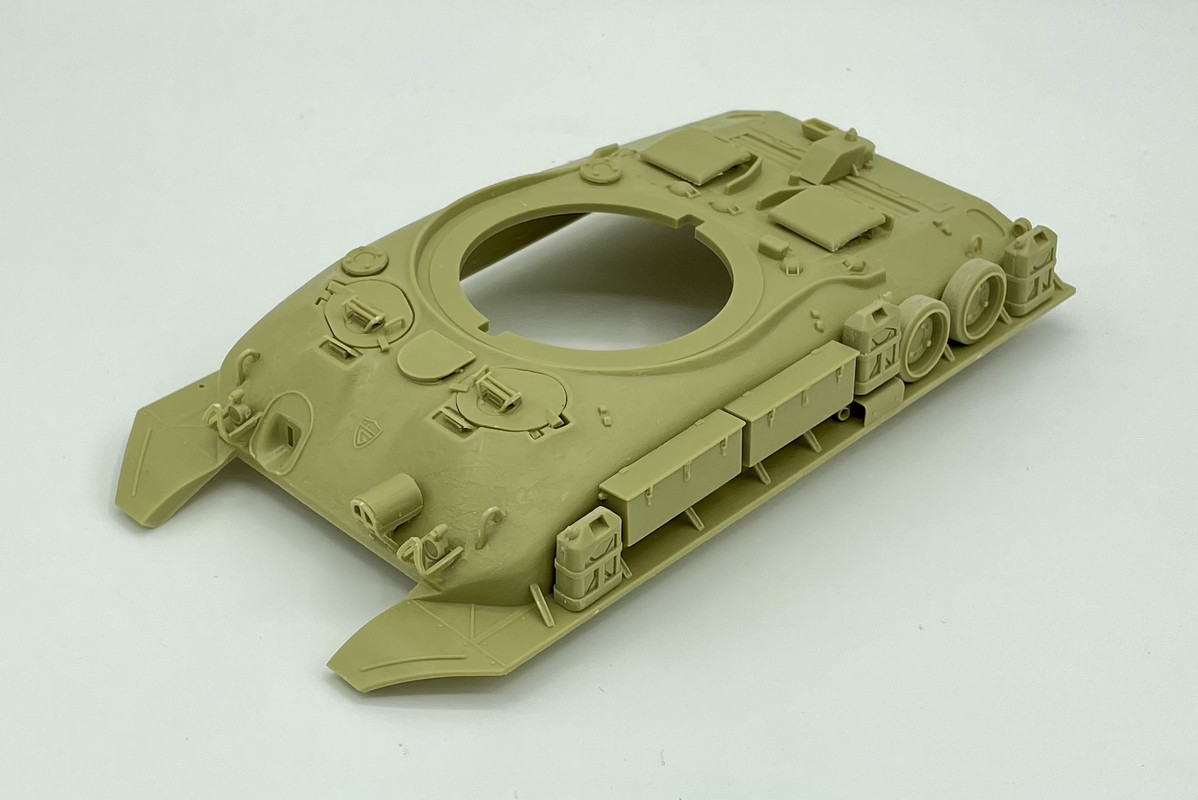
then in the afternoon I began working on the upper hull. I added the accessories to the left side and glacis, as well as building the engine deck and front hull hatches
Tomorrow I’ll try to get the rest of the upper hull wrapped up…
2 Likes
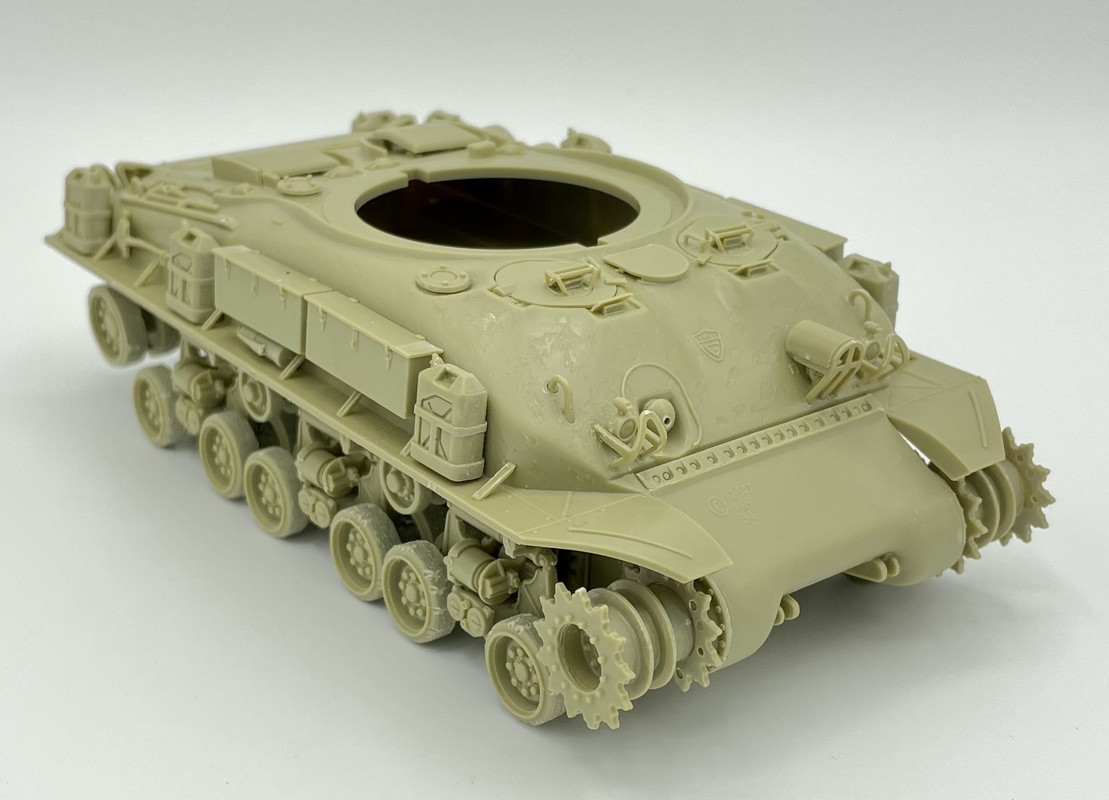
Todays update starts with a fix of yesterday’s session. The kit has two different exhaust options, but doesn’t fully explain them, only that one is “early”.
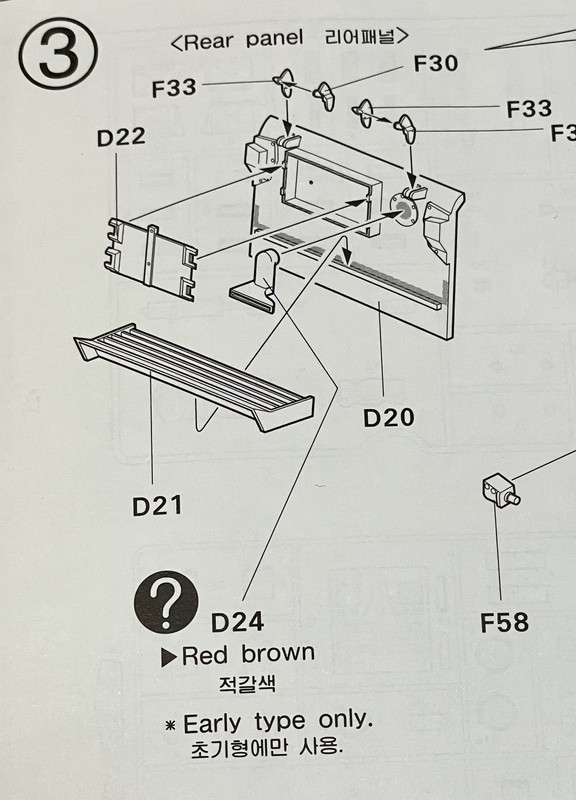
While doing image searches last night I came across info that,1, they are not both attached at the same time, and 2, that only the early rear type was in use during the 1967 and 1973 wars. The top engine deck exhaust was not installed until 1975. So first thing today I took off that part and cleaned up the attachment marks.
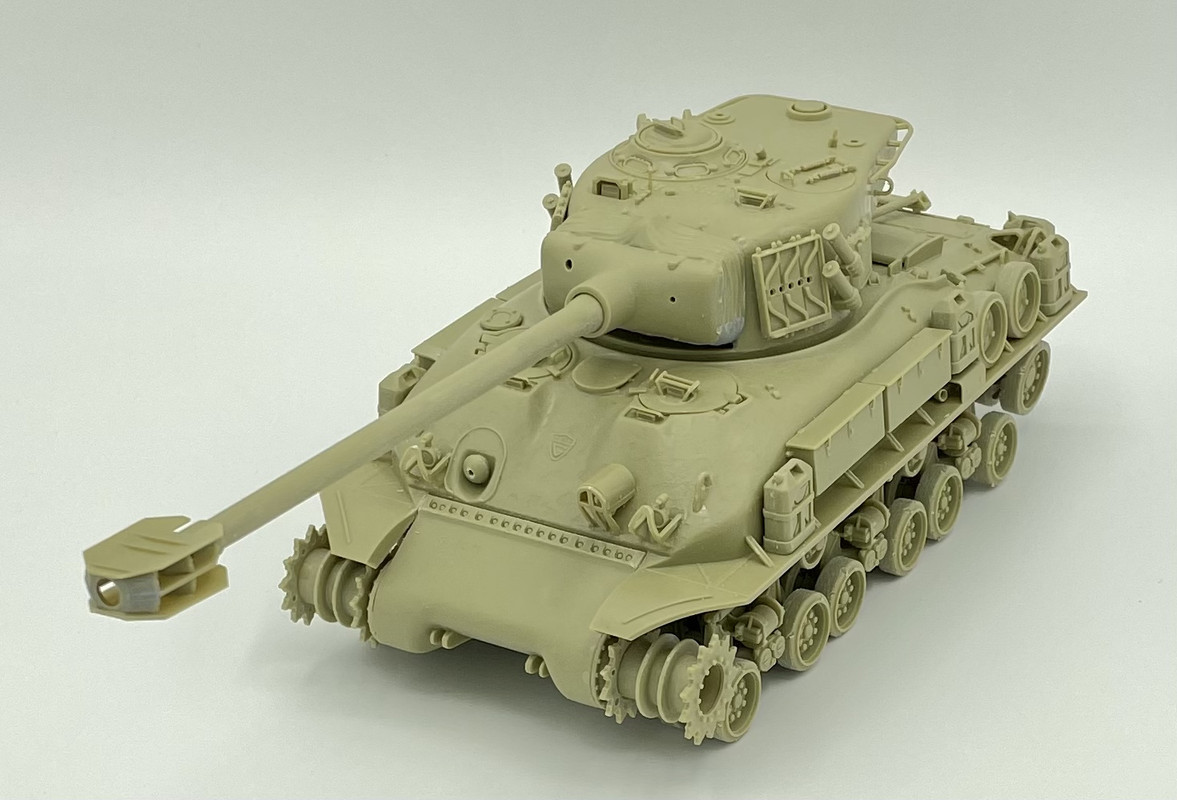
Then I finished up the rear area and right side upper hull accessories
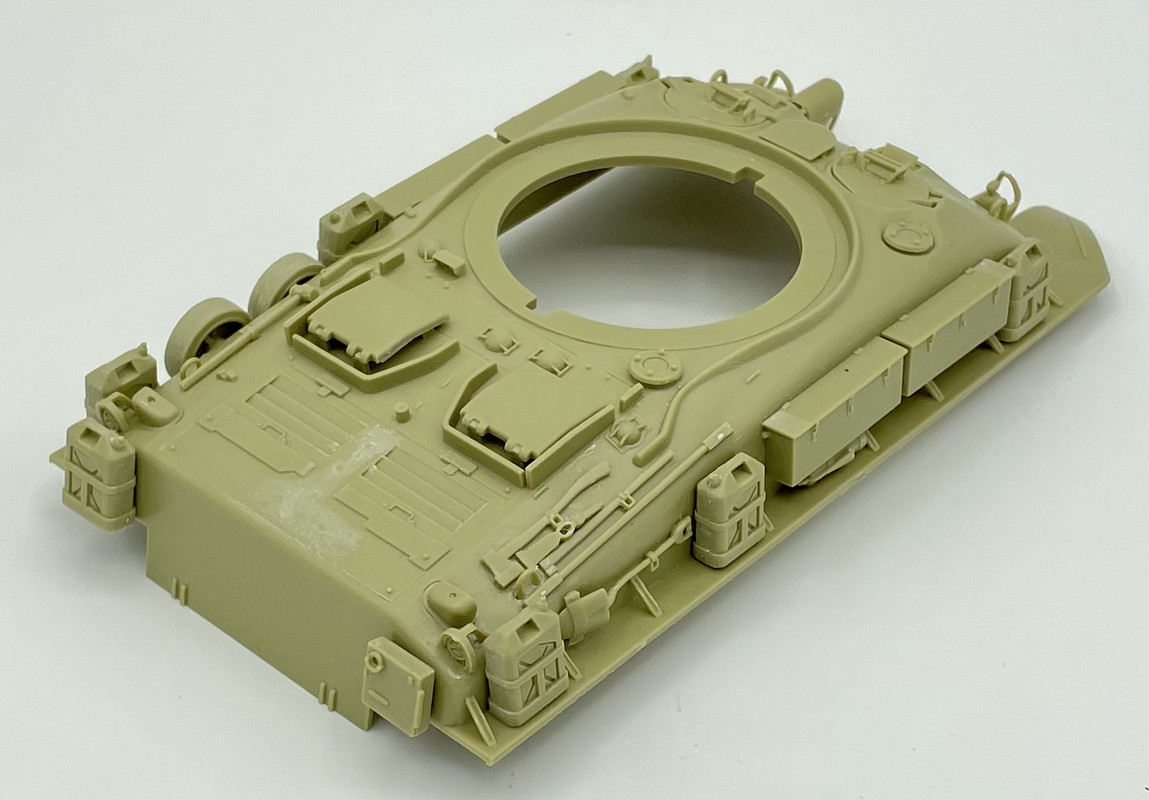
Then I had to try test fitting the upper hull onto the lower hull
One other bit of info that I turned up last night was that between the ‘67 and ‘73 wars, the bow machine guns were removed from last M51s, so I cut the barrel off, and drilled out the mantlet.
Next stage, the turret…
5 Likes
Two days progress for this report:
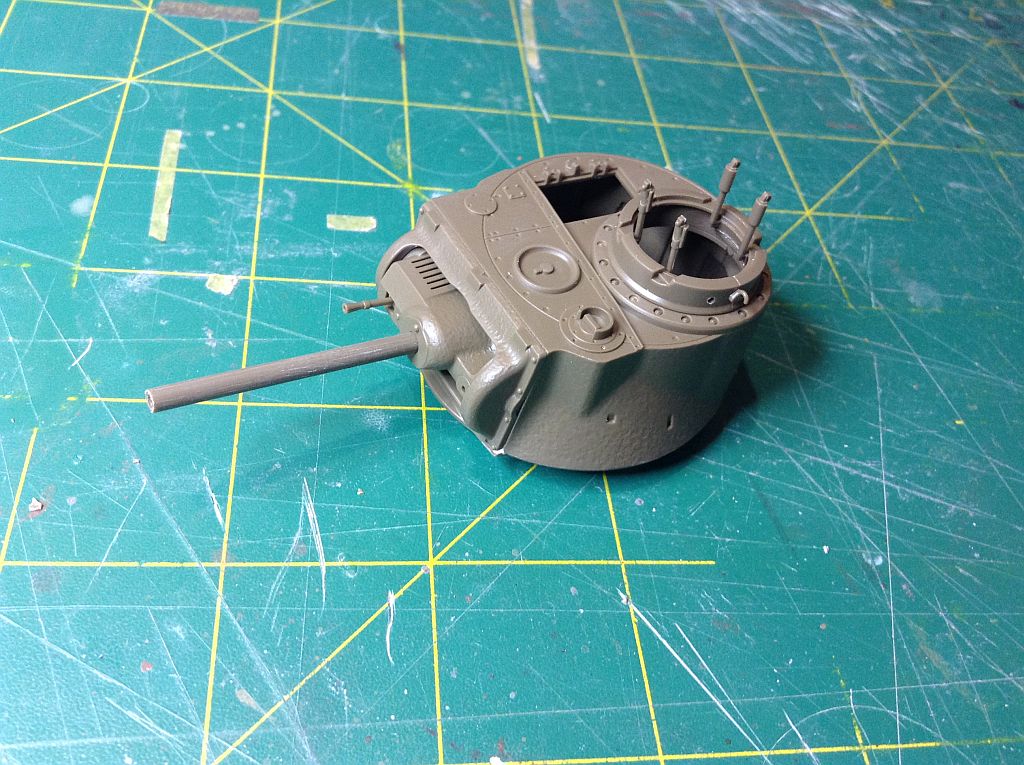
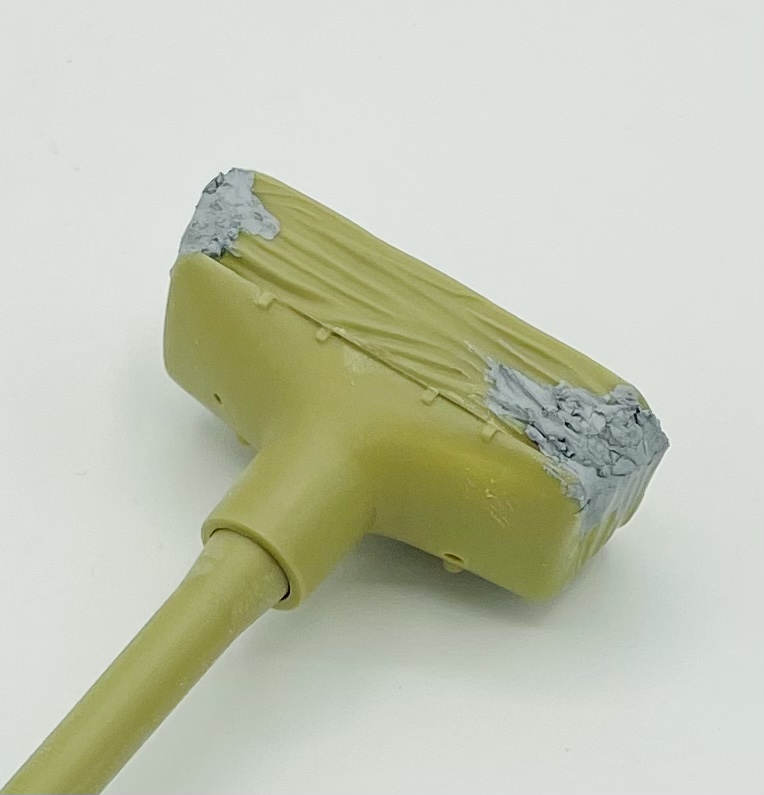
On Friday, I started assembling the turret, but ran into a speed bump fairly quickly. The lower portion of the mantlet dust cover was not as wide as the upper potion. After gluing those two parts together, I had to add putty then allow it time to dry overnite before sanding and adding fold contours with needle files. And since I didn’t want to add all of the easily broken off external turret fittings before adding the mantlet, I stopped at this point.
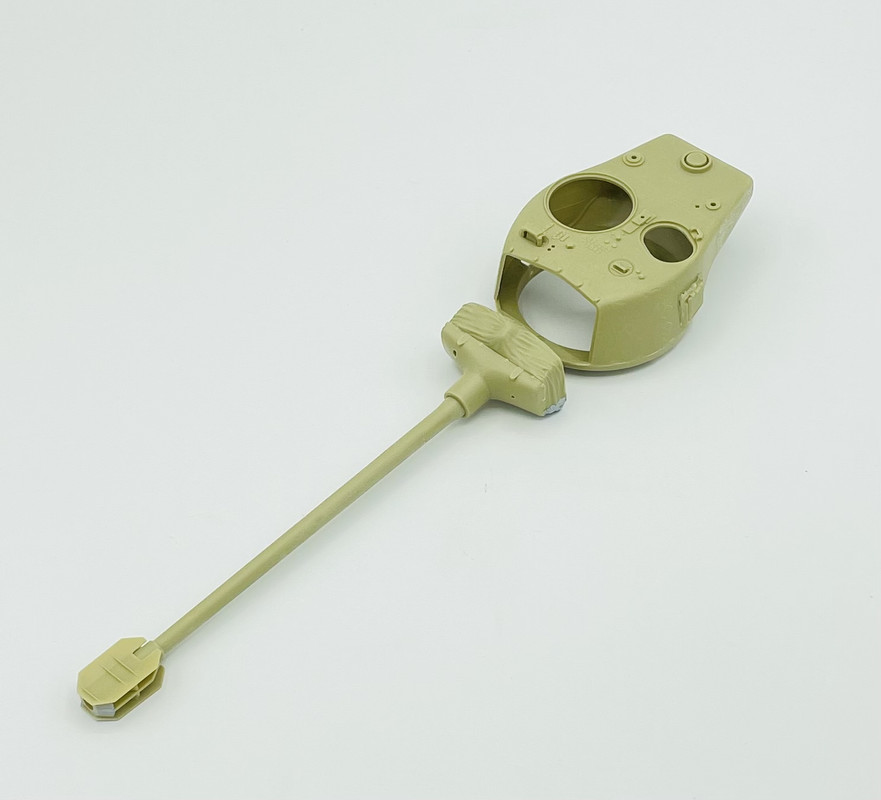
Saturday was smooth sailing on picking up where I left off. With the help of online reference photos for more accurate placement, I added all of the remaining turret parts, aside from the antenna bases and the TC’s .50 cal. MG.
Then I set everything up for a couple of progress photos
I just have a last few small bits to add, then I can start painting.
6 Likes
Nice progress, and thanks for the warning about that mantlet cover, must remember that for when I start with mine.
@bwilt, thanks Bert. This is a good solid basic kit, but that mantlet cover is a big bone up on Academy’s part.
Here is a good link with photos and details on the type and variations of configuration.
https://tanks-encyclopedia.com/coldwar/israel/m51_sherman.php
1 Like
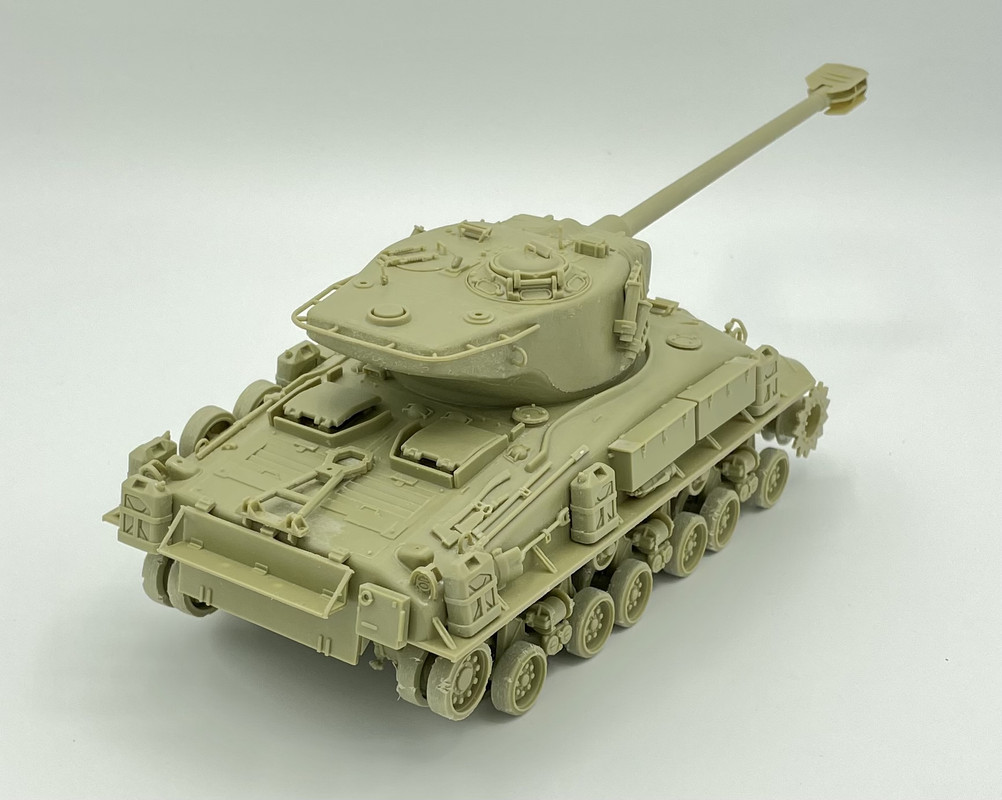
Over the past couple of days I’ve been working on small details. The crew figures, and the TC’s .50 cal.
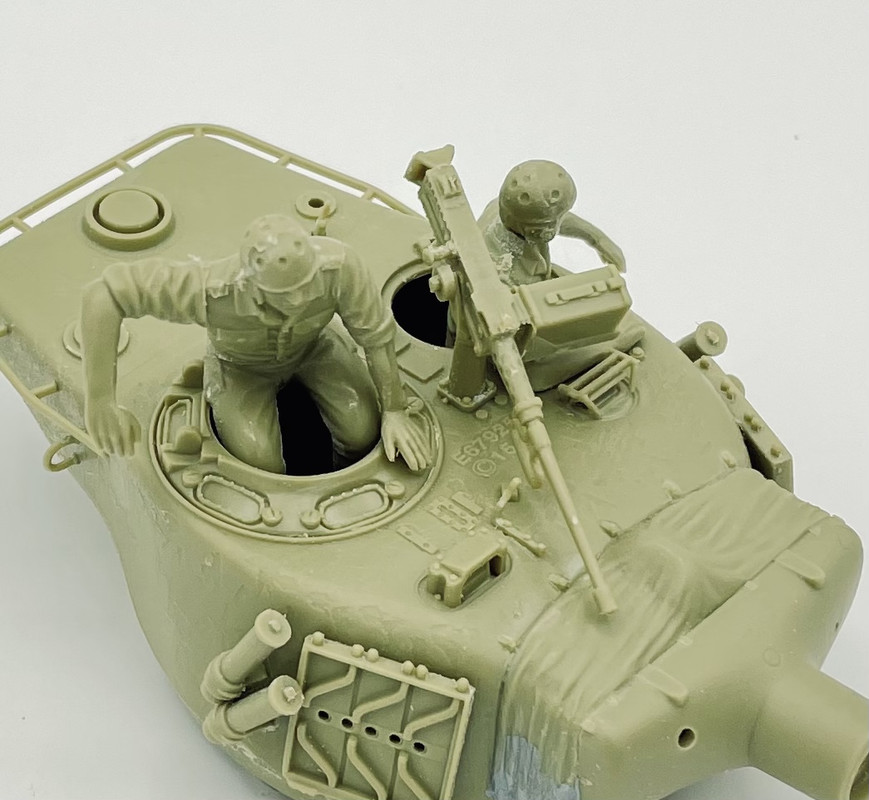
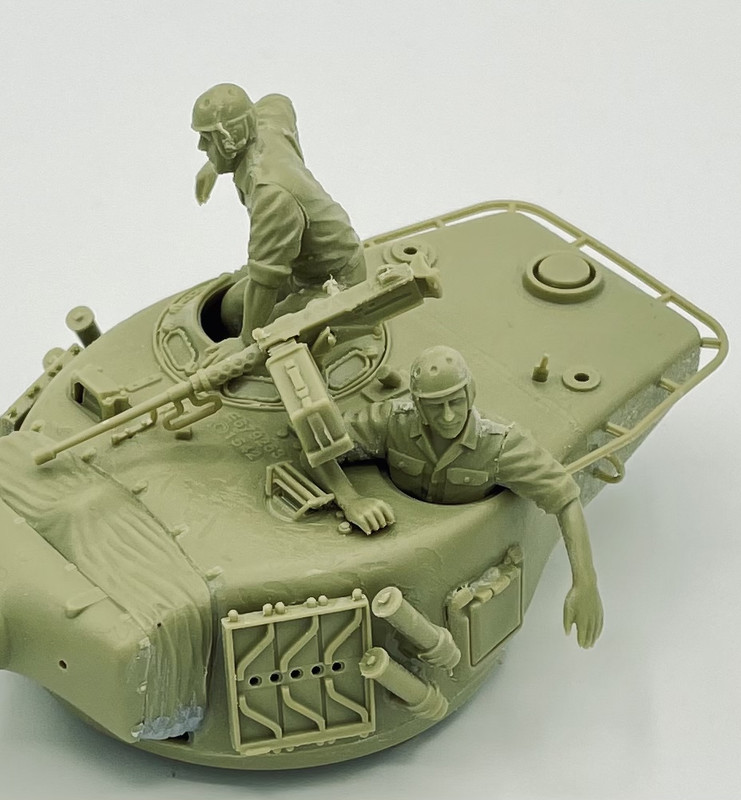
I also drilled out and added the antenna bases after these photos were taken. I’ll glue the hatches into the open position after the base colors are applied.
5 Likes
That is a very nice looking crew!!